
| 
| |
|
|
This page contains historical photos of Ontario's King's Highway 11 dating from 1950 to 1959. All photographs displayed on
this page were taken by the Ontario Ministry of Transportation, unless specifically noted otherwise. Historical photographs are arranged in approximate chronological
order. Click on any thumbnail to see a larger image!
Please note that all photographs displayed on this
website are protected by copyright. These photographs must not be reproduced, published,
electronically stored or copied, distributed, or posted onto other websites without
my written permission. If you want to use photos from this website, please
email me first for permission. Thank-you!
|
|---|
|
Page 3: Historical King's Highway 11 Photographs (1950 to 1959)
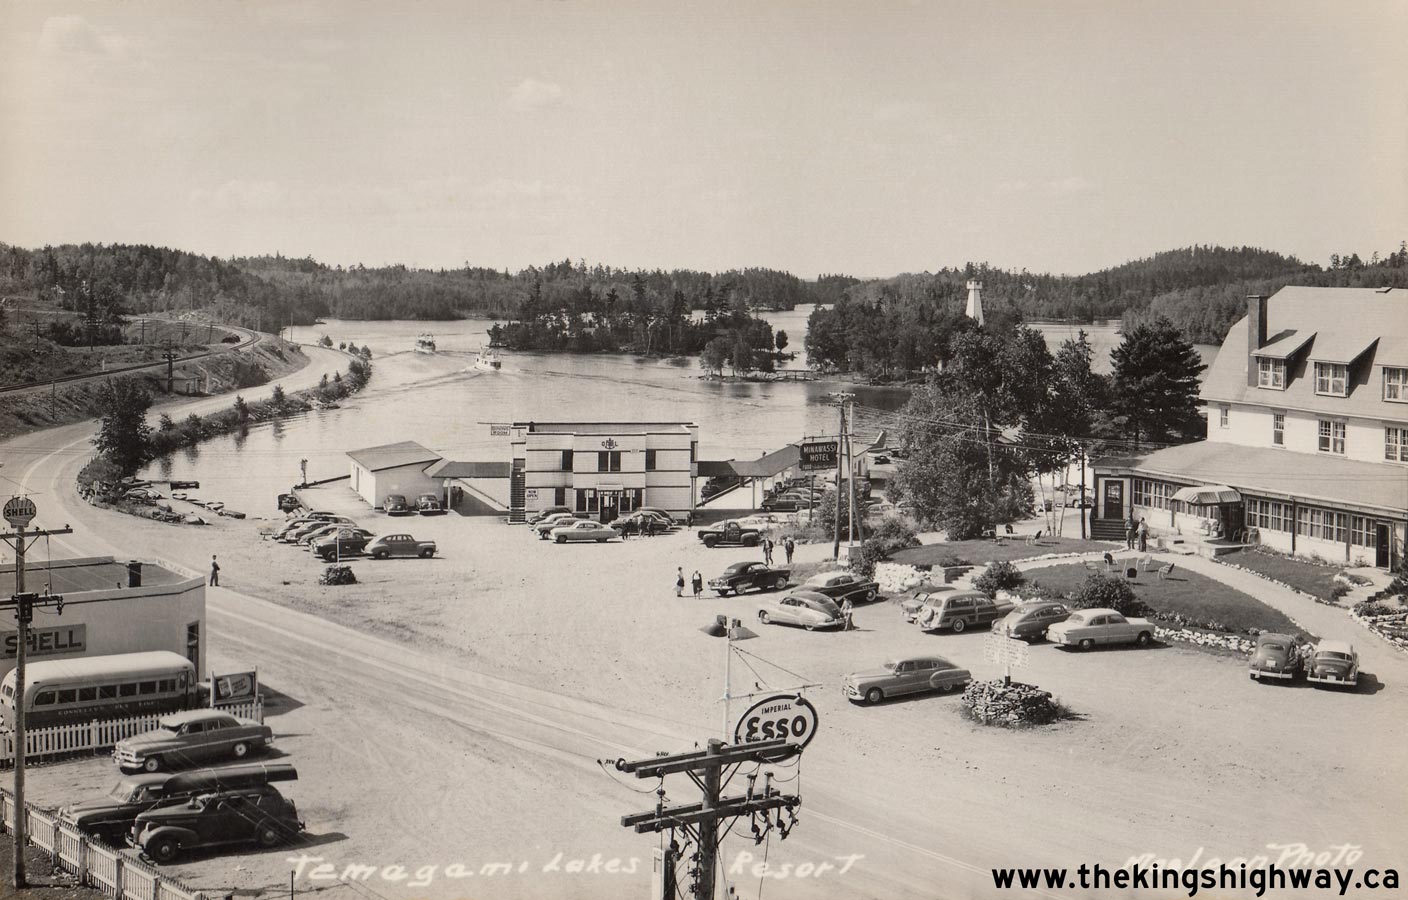
Above - Circa 1950 postcard view of Hwy 11 at Temagami, facing south towards North Bay. See an
Enlarged Photo Here. (Photo courtesy of Alex MacLean - MacLean Photo) 
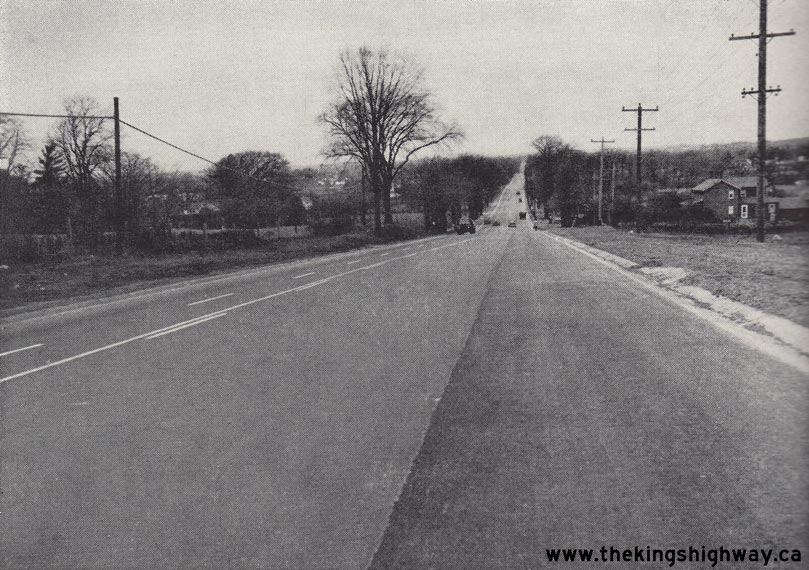
Left - Widening of Hwy 11 underway south of Thornhill, facing north. Photo taken on June 21, 1950. (Photo courtesy of Ontario Ministry of Transportation - © King's Printer for Ontario, 1950) Right - Completed highway widening on Hwy 11 south of Thornhill. Photo taken on November 7, 1950. (Photo courtesy of Ontario Ministry of Transportation - © King's Printer for Ontario, 1950) 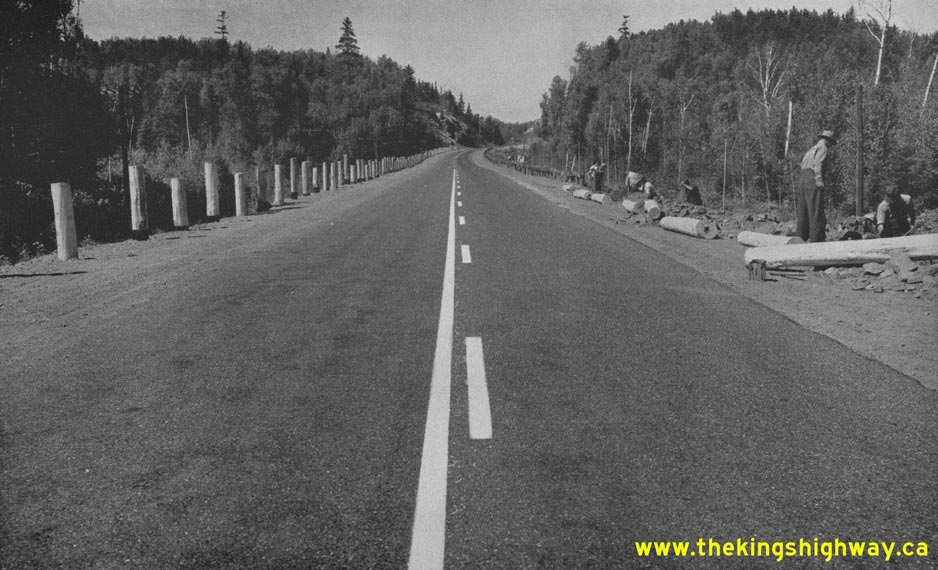
Above - Department of Highways of Ontario (DHO) crew replacing an old log guide rail with steel cable guide rail on Hwy 11 near Temagami. Log guide rails were
commonly used to delineate roadside hazards along Northern and Central Ontario's Highways in the 1930s and 1940s, since the timber was readily available nearby and
the guide rails required few manufactured parts for assembly. They were phased out in the 1950s, since they did not offer motorists much protection in the event
that their vehicle left the roadway. See an Enlarged Photo Here. Photograph taken on September
7, 1950. (Photo courtesy of Ontario Ministry of Transportation - © King's Printer for Ontario, 1950) 
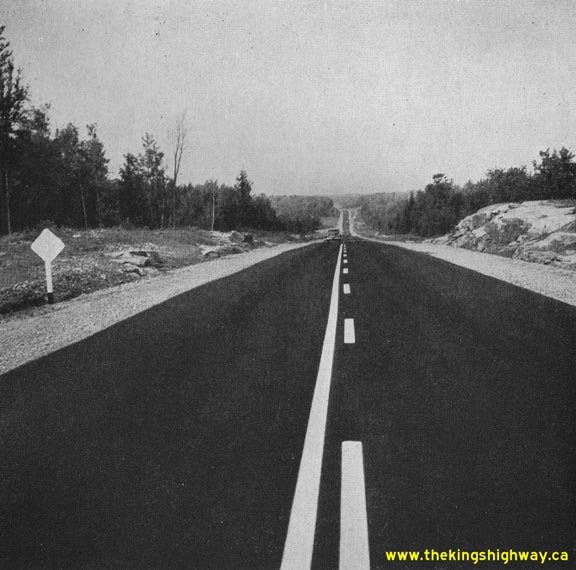
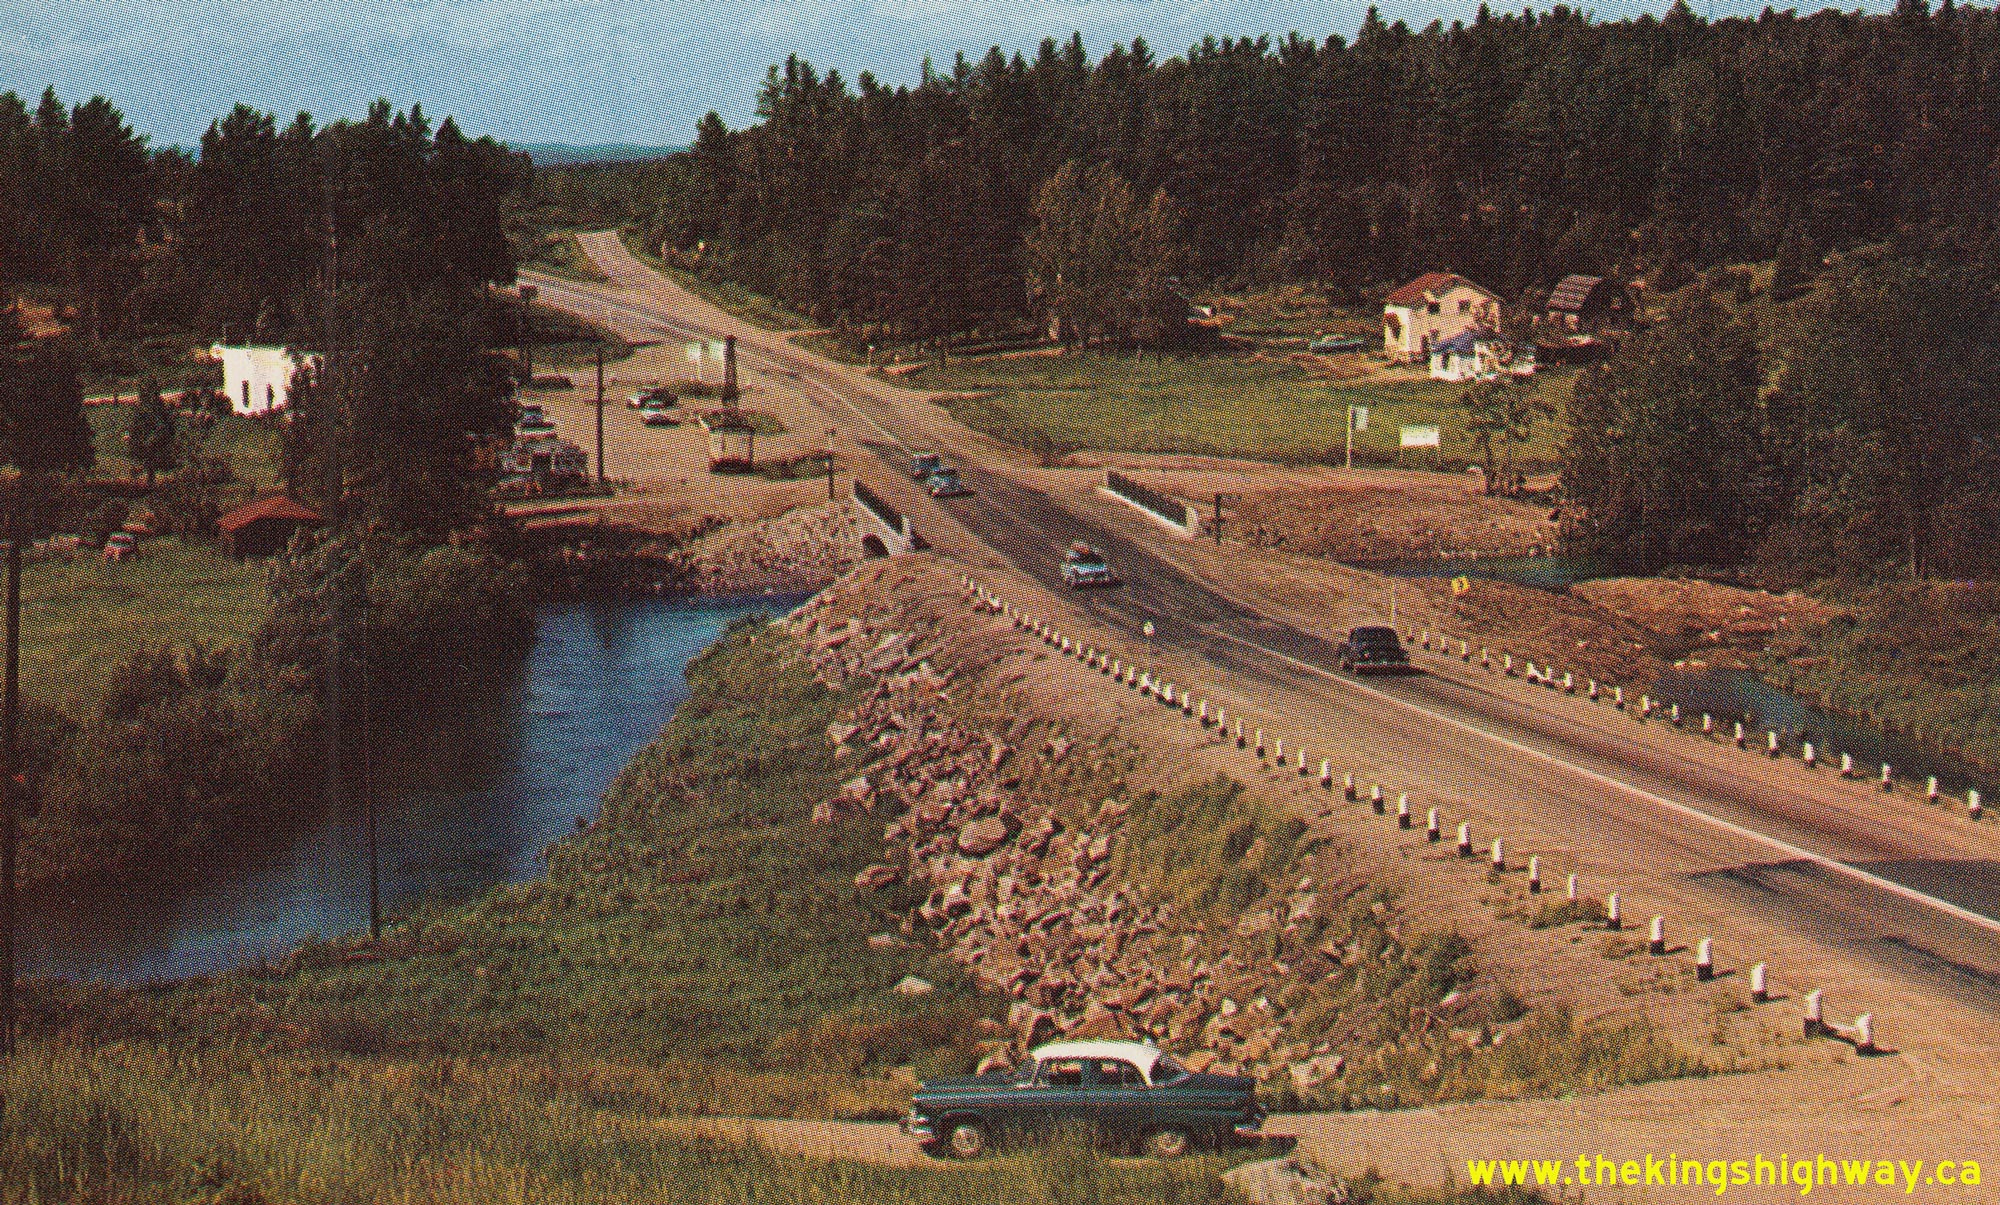
Above - Newly-completed Hwy 11 Diversion between Gravenhurst and Bracebridge showing new zone markings, 1/2 mile north of Airport Road. This was one of several
major highway improvement projects carried out along the Hwy 11 corridor through Muskoka in the late 1940s and early 1950s. See an
Enlarged Photo Here. Photograph taken on September 8, 1950. (Photo courtesy of Ontario Ministry of Transportation - © King's Printer for Ontario, 1950) 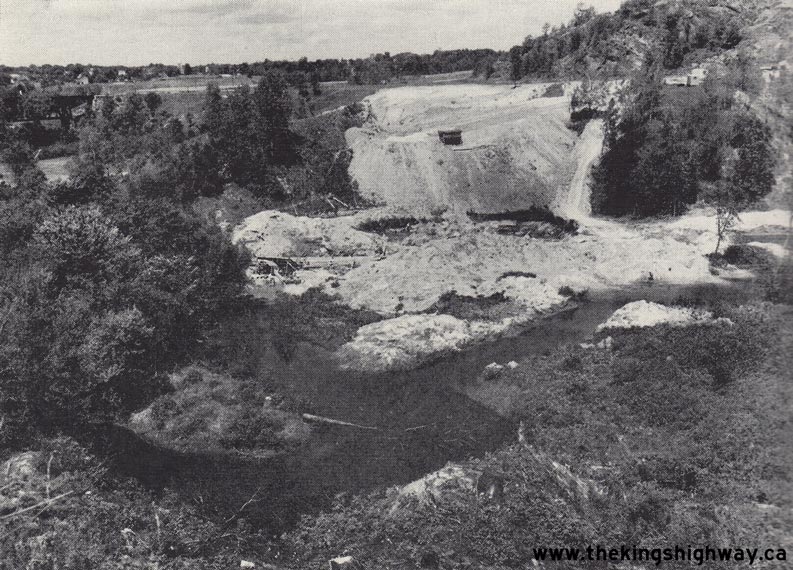
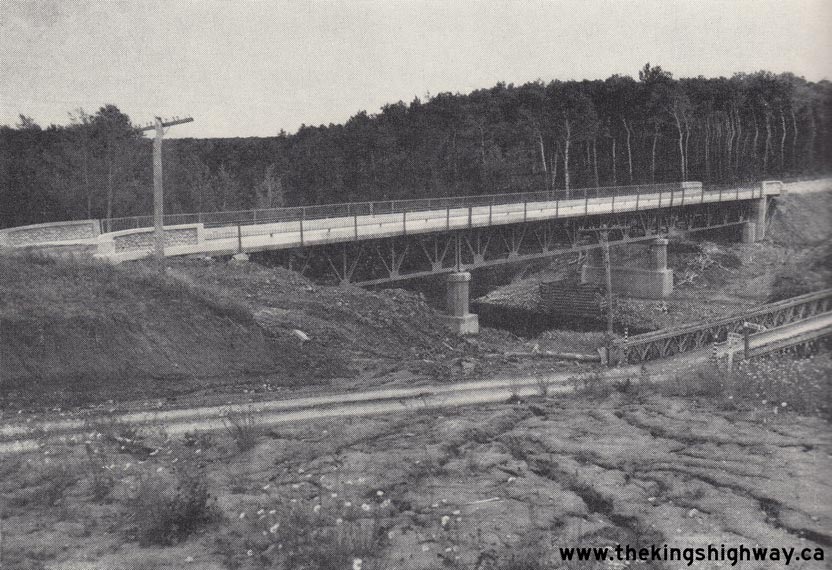
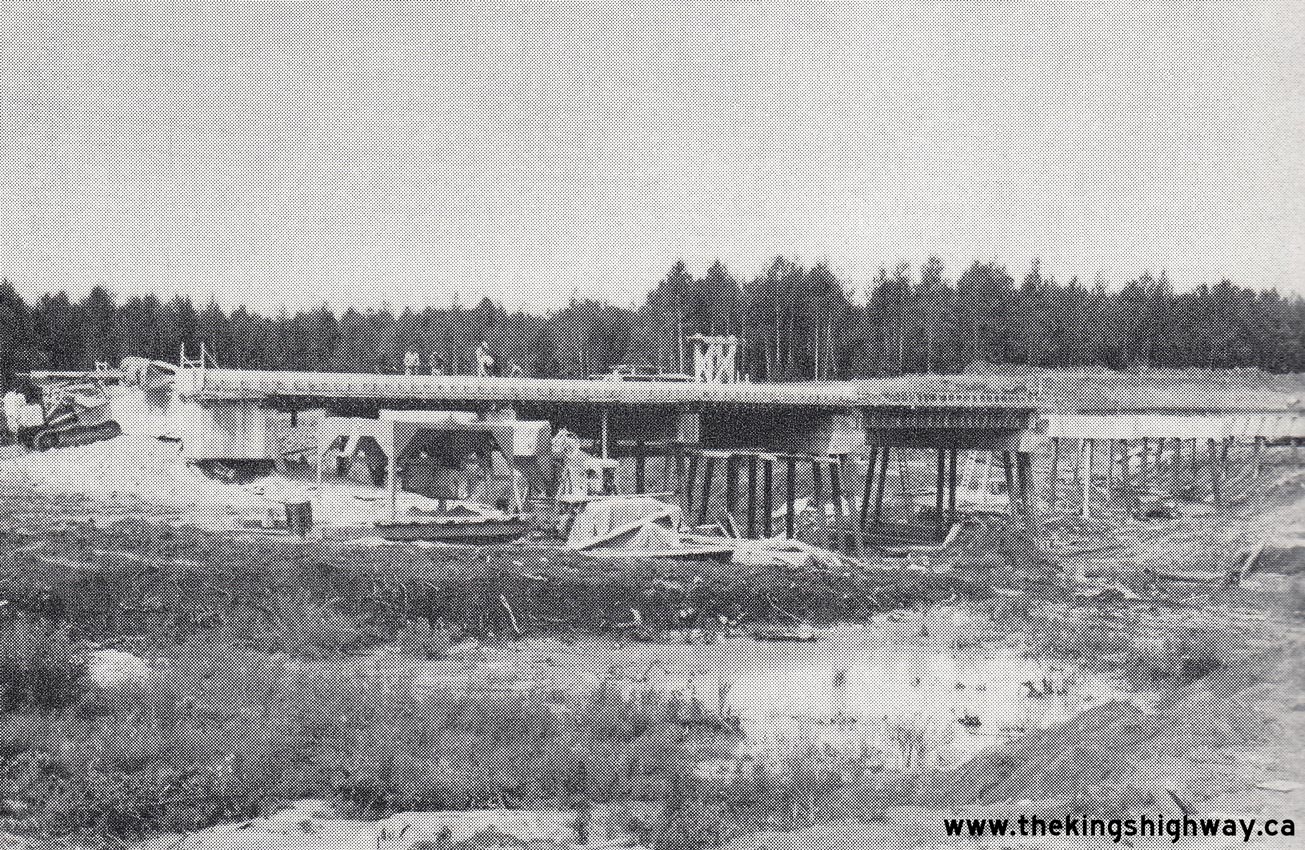
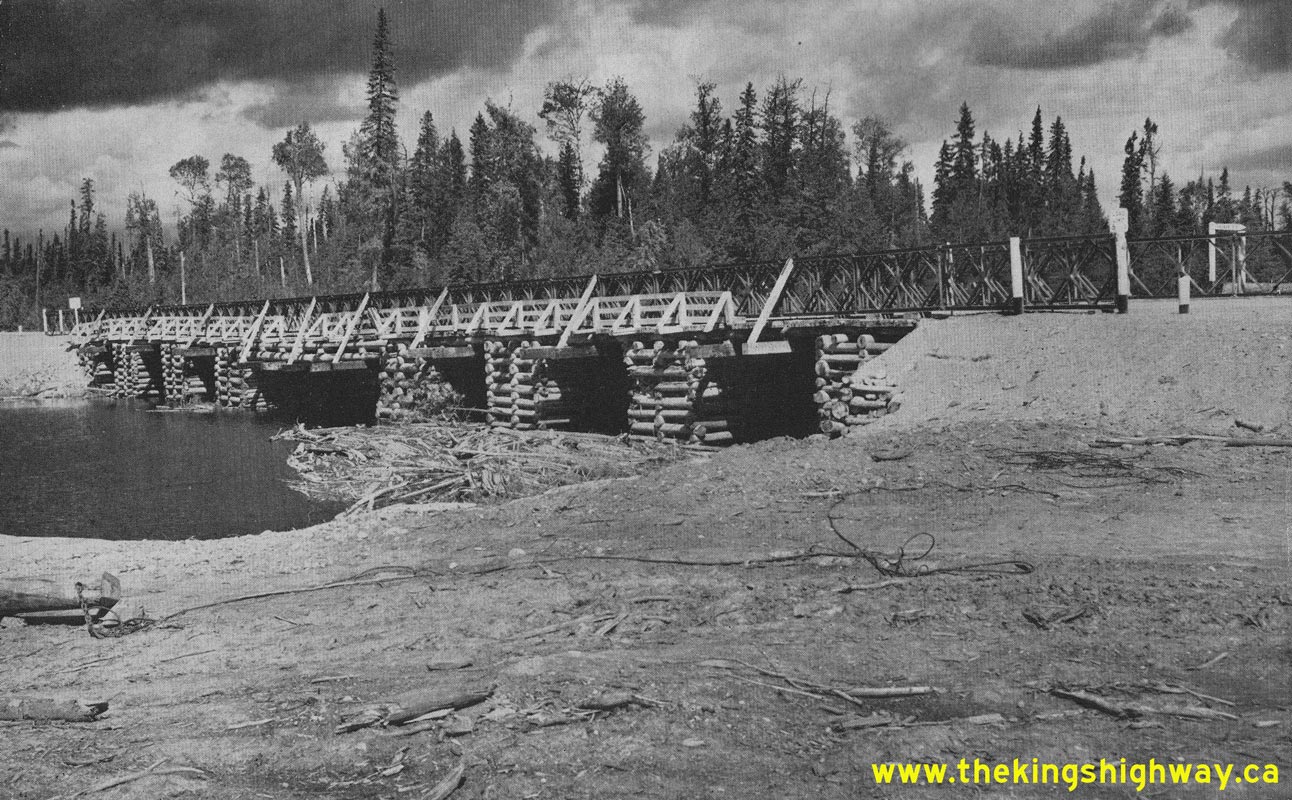
Left - Construction of a relocated Hwy 11 alignment south of Bracebridge at Sharpe's Creek. Photo taken on August 10, 1950. (Photo courtesy of Ontario Ministry of Transportation - © King's Printer for Ontario, 1950) Right - Newly-constructed Buskegon River Bridge on Hwy 11, 10 miles west of Cochrane. Photo taken on August 17, 1950. (Photo courtesy of Ontario Ministry of Transportation - © King's Printer for Ontario, 1950) 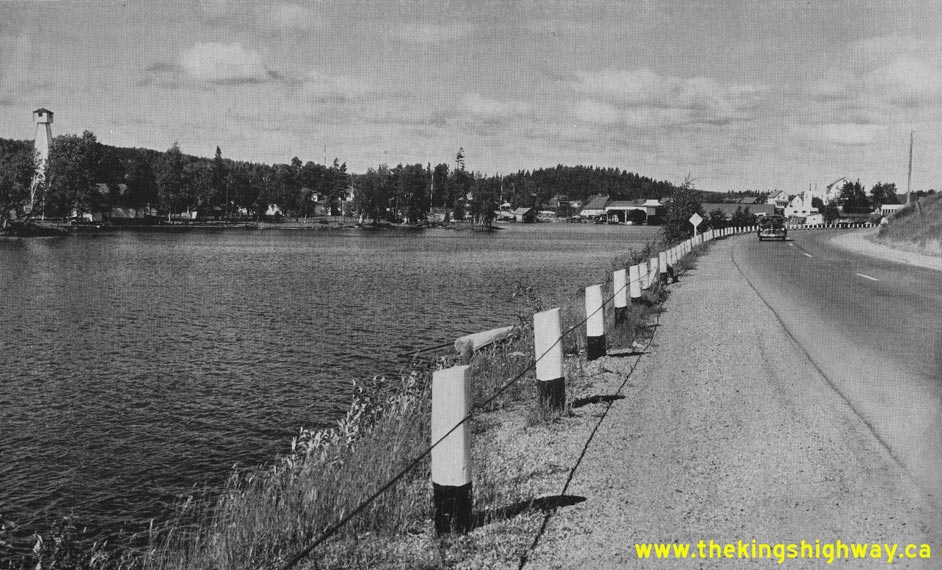
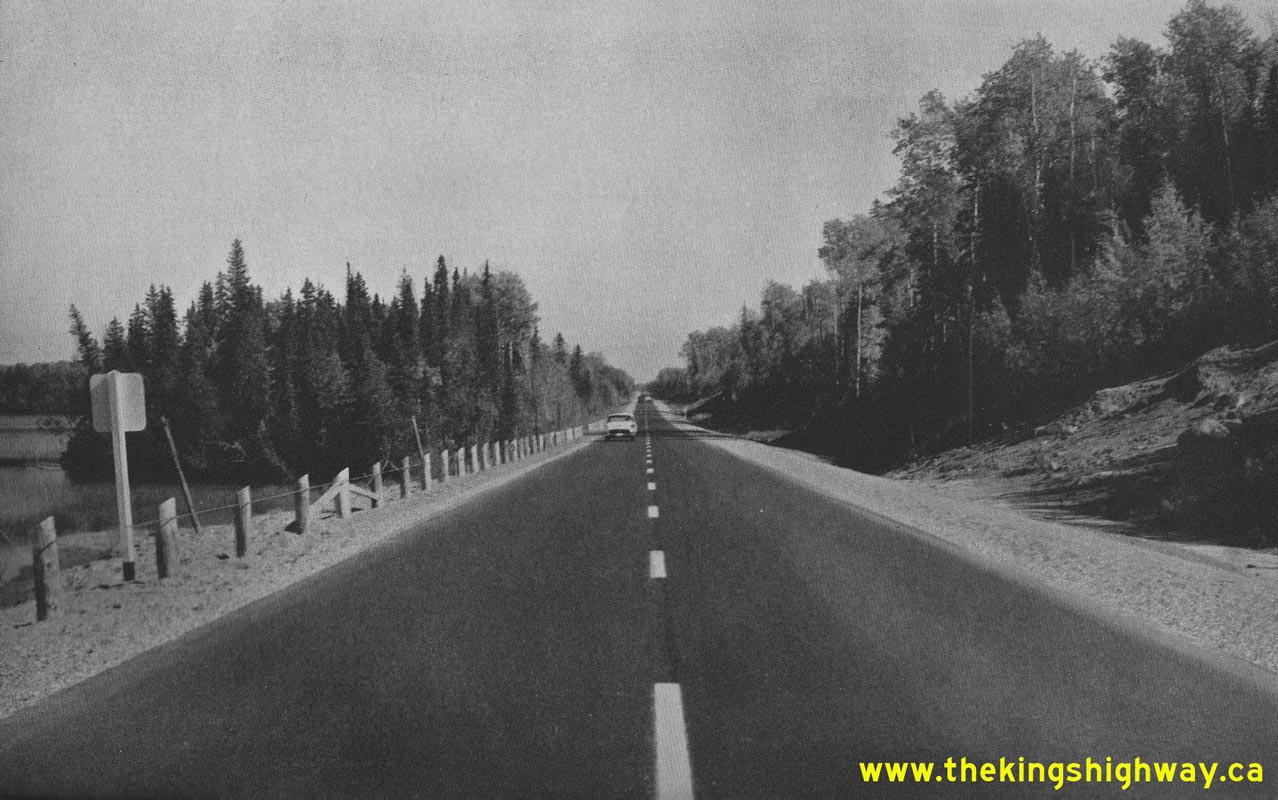
Above - Approaching Temagami on Hwy 11 in 1951, facing north. See an
Enlarged Photo Here. Photo taken on August 9, 1951. (Photo courtesy of Ontario Ministry of Transportation - © King's Printer for Ontario, 1951) 

Left - New White Clay River Bridge in 1951, 12 miles north of Kenogami Lake. Photo taken on August 10, 1951. (Photo courtesy of Ontario Ministry of Transportation - © King's Printer for Ontario, 1951) Right - Zone striping on Hwy 11, 1 1/2 miles south of the Hwy 101 Junction in Matheson. Photo taken on August 10, 1951. (Photo courtesy of Ontario Ministry of Transportation - © King's Printer for Ontario, 1951) 
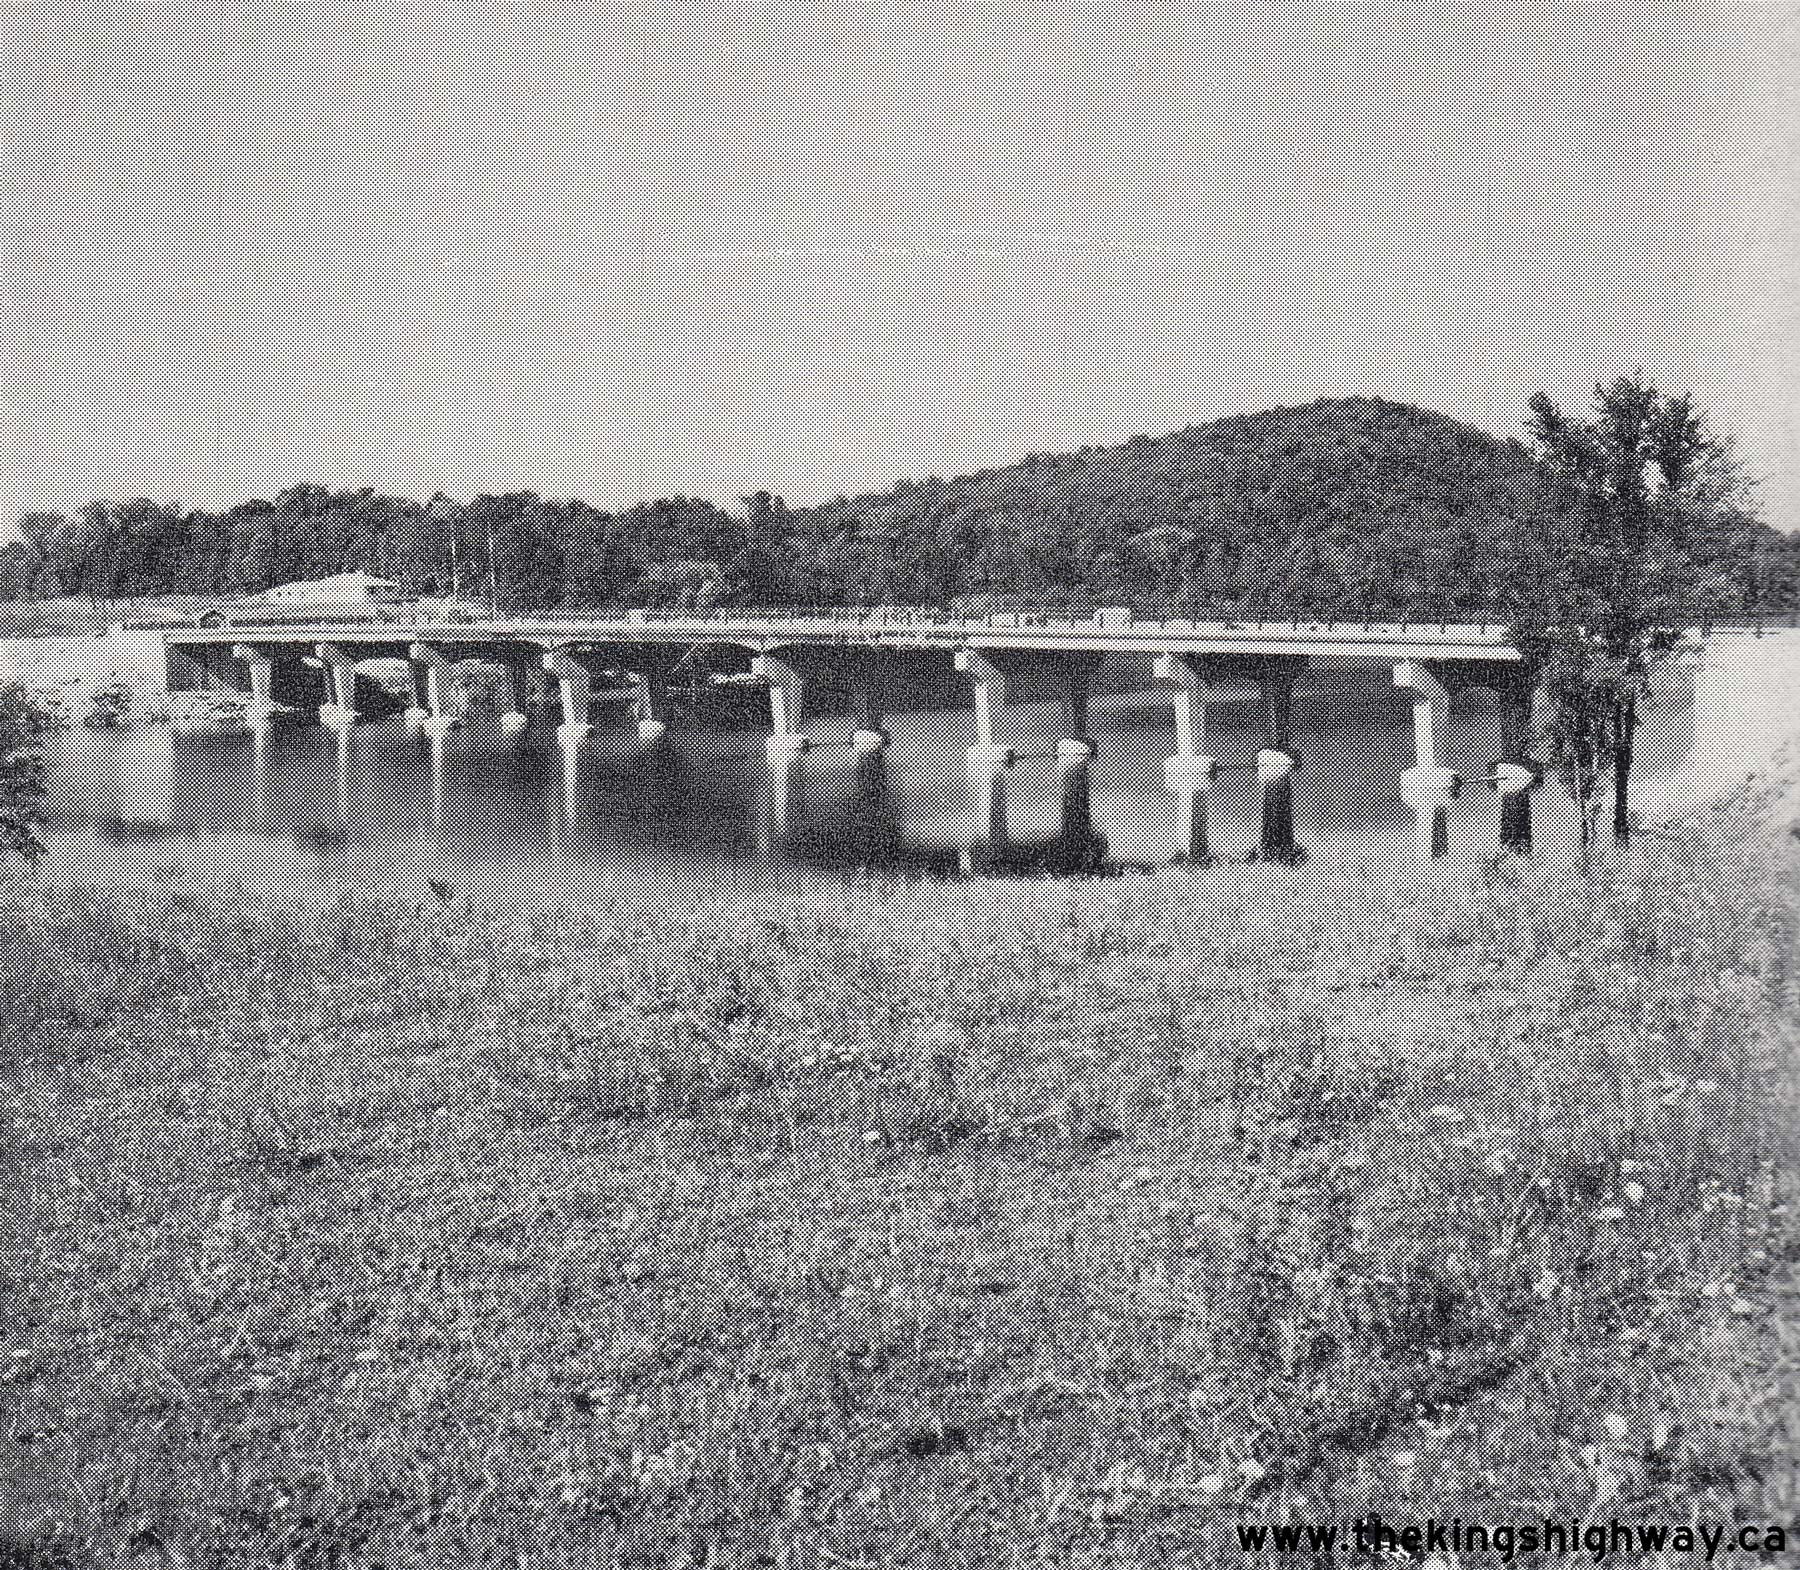
Above - Completed Buskegon River Bridge in 1951, 10 miles west of Cochrane. Photo taken on August 13, 1951. (Photo courtesy of Ontario Ministry of Transportation - © King's Printer for Ontario, 1951) 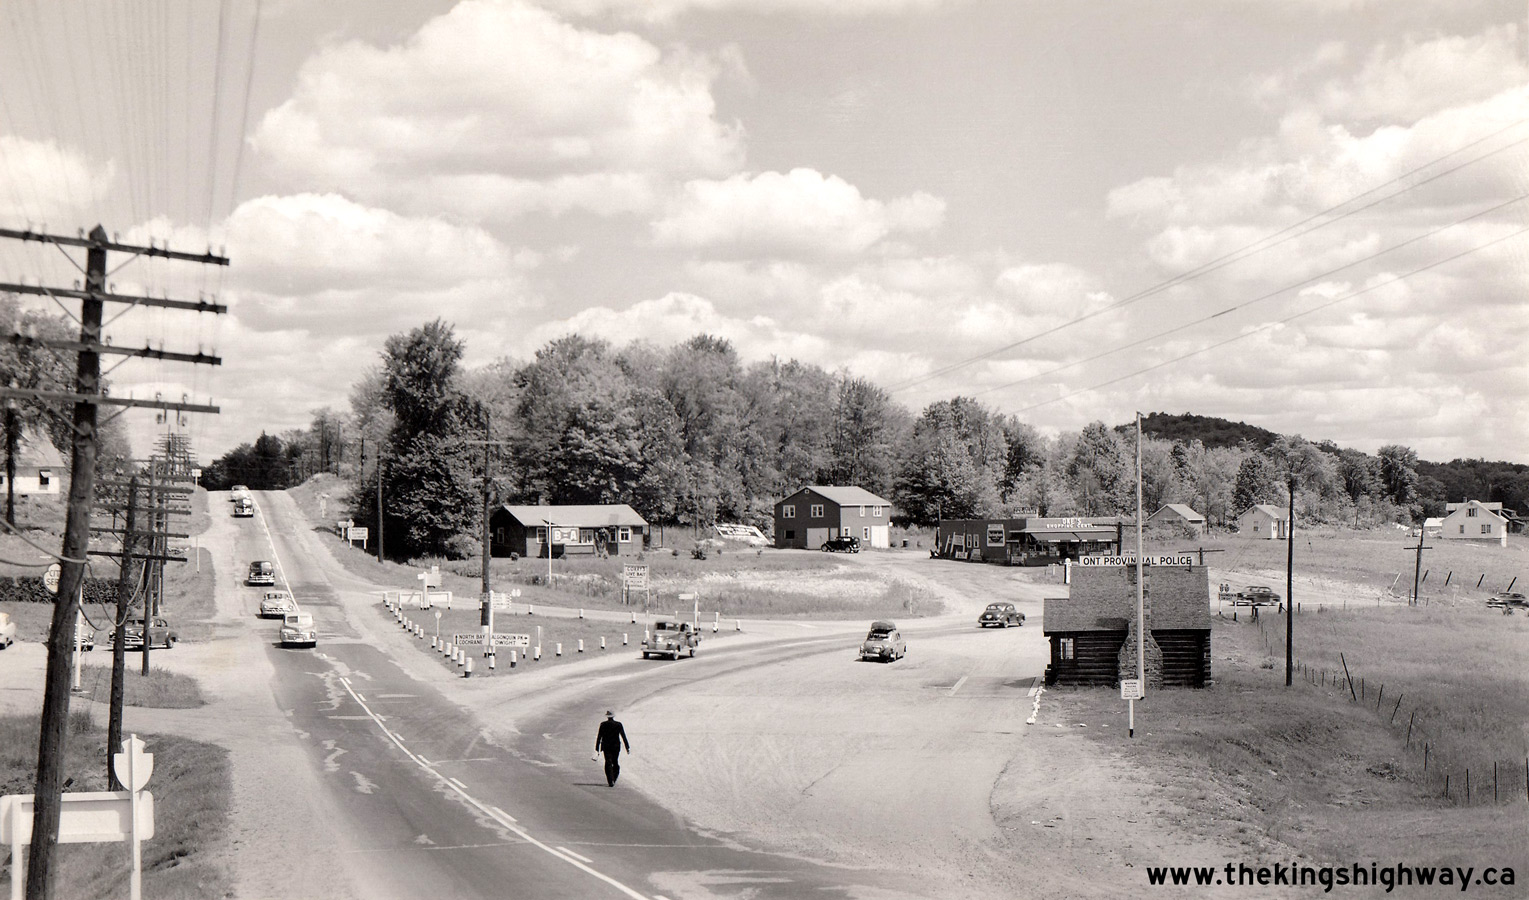
Above - Circa 1952 postcard view of the Hwy 35 & Hwy 60 Junction on Hwy 11 at the northern entrance to Huntsville, facing north towards North Bay. As
originally constructed in the 1930s, this highway junction was in a directional "Y" intersection configuration, with two separate curved roadways uniting Hwy 35 &
Hwy 60 together with Hwy 11. At one time, Hwy 35 and Hwy 60 both reached their western terminus in Huntsville. The overlapped route of Hwy 35 & Hwy 60 between
Huntsville and Dwight was discontinued in 1966, after which time the route became known as Hwy 60 only. This highway junction, located at today's King William Street
(Muskoka Road 3) and Hwy 60, was bypassed in the late 1950s when Hwy 11 was relocated out onto a new bypass route across Vernon Lake Narrows. This photo also shows an
interesting overlap of old "totem pole" fingerboard directional sign assemblies which were used up until the late 1940s and the new large enhanced guide signs with
selected key destinations painted in much larger letter sizes for improved visibility. It was common practice in the 1950s to install additional King's Highway route
markers directly above the reassurance destination signs beyond major highway junctions, so that motorists could easily confirm that they were on the correct highway.
Careful observers may also note that the northbound destination guide sign beyond the highway junction lists Sudbury as a control city, along with North Bay and
Cochrane. Prior to the completion of the Trans-Canada Highway at the French River in 1953, Hwy 69 came to a dead-end about 50 miles north of Parry Sound. There was no
direct highway link between Parry Sound and Sudbury until that time. Accordingly, all traffic from Southern Ontario bound for Sudbury had to access the city on Hwy 11
via Huntsville and Hwy 17 via North Bay and Sturgeon Falls. See an Enlarged Photo Here. Photo
taken circa 1952. (Photo courtesy of Annabelle Studio) 
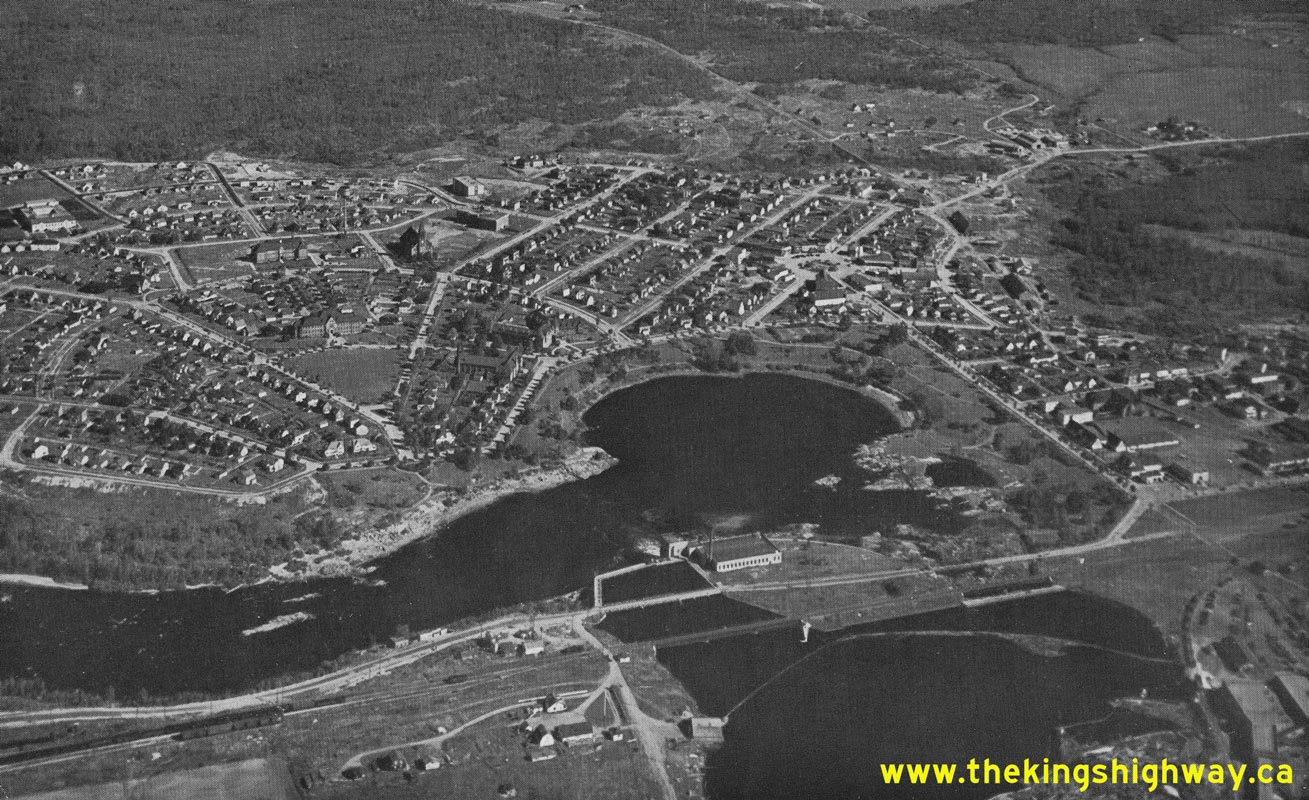
Above - Aerial view of Gravenhurst in 1952, facing south from Lake Muskoka. In this photo, Hwy 69 can be seen entering town at right from Bala, while Hwy 11 can be seen
approaching Gravenhurst from Orillia in the distance. The photo also shows the first Gravenhurst Bypass which was built in the late 1940s along the shores of Gull
Lake at left. Once the bypass was completed in 1948, through traffic on Hwy 11 could bypass the downtown area and also avoid two at-grade railway crossings along
Hwy 11's original route. See an Enlarged Photo Here. Photo taken in 1952. (Photo © Archives of Ontario - Series RG-65-35, Photo #I-0019278) 
Above - Aerial view of Hwy 11 at Kapuskasing in 1952. See an Enlarged Photo Here. (Photo courtesy of Ontario Ministry of Transportation - © King's Printer for Ontario, 1952) 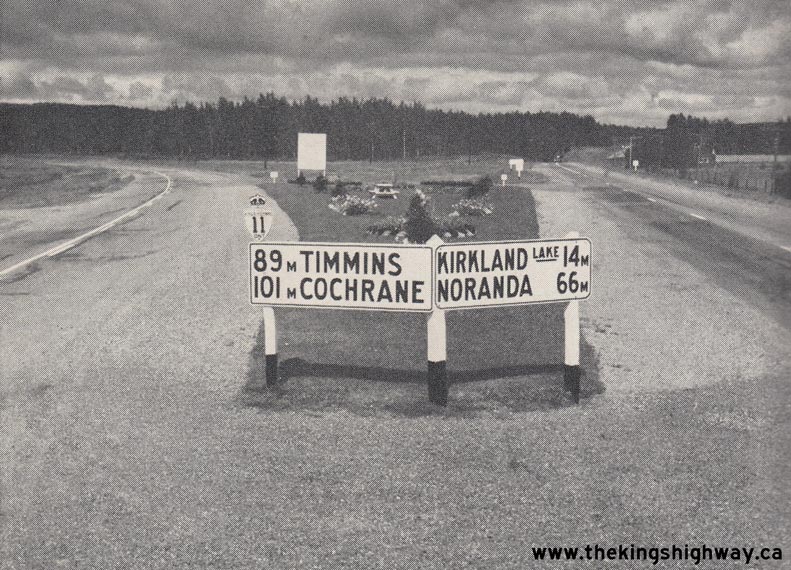
Left - Junction of the Round Lake Cutoff (Hwy 11) and Hwy 112 near Tarzwell in 1952. As originally assumed in 1937, the route of Hwy 11 followed the highway to
the right of this "Y" Junction. In the late 1930s, a program was initiated to reduce the highway distance between North Bay and Cochrane by constructing diversions
along Hwy 11 at key locations. A new highway diversion known as the Round Lake Cutoff was completed from Tarzwell to Kenogami in 1941. The route of Hwy 11 was signed
along this new diversion, as can be seen in this photo at left. Unfortunately, the bypassed section of Hwy 11 at right also retained the Hwy 11 route number.
Motorists arriving at this "Y" Junction from the south were understandably confused, when they saw the route of Hwy 11 forking into two separate highways in front of
them. In what was an apparent acknowledgement of this problem, note that the DHO had already removed the Hwy 11 shield over the Kirkland Lake sign at right even
before this photo was taken in 1952. The problem was ultimately resolved in 1953, when the old north-south section of Hwy 11 leading into Kirkland Lake was given an
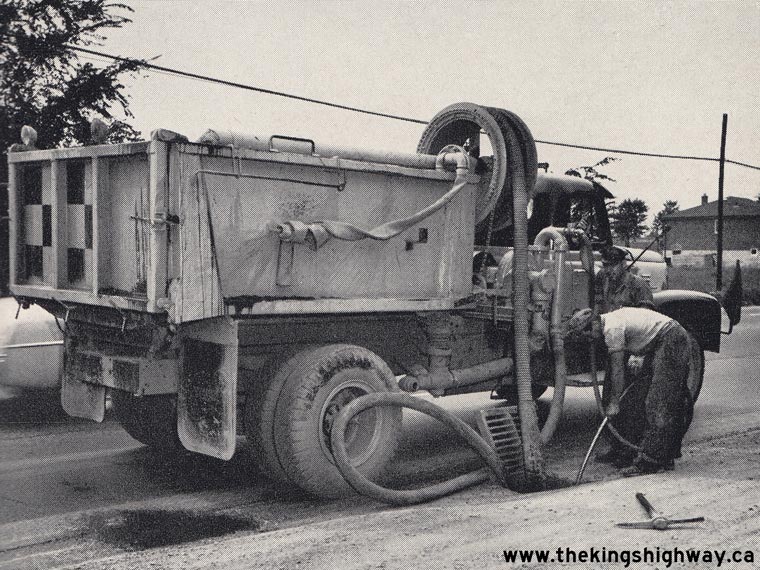
entirely new King's Highway route number, thus creating Hwy 112. Photo taken on September 4, 1952. (Photo courtesy of Ontario Ministry of Transportation - © King's Printer for Ontario, 1952) Right - Catch basin clean-out by a Department of Highways' Maintenance Crew on Hwy 11 south of Thornhill. Photo taken on August 20, 1952. (Photo courtesy of Ontario Ministry of Transportation - © King's Printer for Ontario, 1952) 
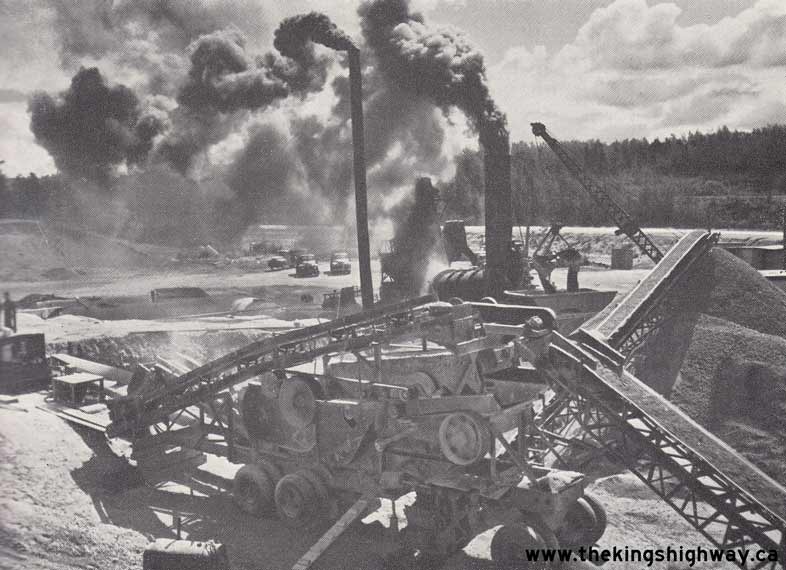
Left - New Watabeag River Bridge on Hwy 11, 3 1/2 miles north of Matheson. Photo taken on September 7, 1952. (Photo courtesy of Ontario Ministry of Transportation - © King's Printer for Ontario, 1952) Right - Department of Highways' Asphalt Plant on Hwy 11 near Jellicoe in 1953. Paving Northern Ontario's Highways presented a unique engineering problem - how do you deliver hot-mix asphalt to remote road construction projects at the correct temperature? With no commercial suppliers in the area, the DHO had to establish its own asphalt production plant to surface Hwy 11 and other secondary roads in the Geraldton-Jellicoe area during the 1950s. Photo taken on August 17, 1953. (Photo courtesy of Ontario Ministry of Transportation - © King's Printer for Ontario, 1953) 
Above - View of the "Swastika Wye" at the Hwy 66 & Hwy 112 Junction between Kirkland Lake and Swastika in 1953, facing west. This was one of three
directional "Y" junctions built on the King 's Highways in the Kirkland Lake area - the other two examples were located at nearby Kenogami Lake and Tarzwell. Until
the Wye was rebuilt as a conventional T-intersection in 1956-1957, Hwy 66 forked into two routes approaching this junction. The left fork pointed south towards New Liskeard and North Bay while the right fork led to Timmins and Cochrane. At the time this photo was taken in 1953, Hwy 66 reached its official western
terminus at this highway junction. Although unsigned at the junction, the "north-south" highway route through the Swastika Wye was considered to be a part of Hwy 11
and was illustrated as such on Official Road Maps up until 1953. Historically, the highway route
numbering in the Kirkland Lake area was very confusing, as there were two different routes for Hwy 11 between Tarzwell and Kenogami Lake. The "through" route of
Hwy 11 followed the Round Lake Diversion between Tarzwell and Kenogami Lake, which was a newer cut-off highway constructed during the opening years of World War II.
Conversely, the original 1937 route of Hwy 11 went up to Kenogami Lake via Dane and Swastika. The confusing route numbering situation was resolved late in 1953, when
the highway between Tarzwell and the Swastika Wye was renumbered as Hwy 112, while the highway between the Swastika Wye and the Kenogami Wye was renumbered as a
westerly extension of Hwy 66. Note the cemetery chapel on the far side of the Wye, which still stands beside the Hwy 66 & Hwy 112 Junction today. Photo
taken on August 12, 1953. (Photo courtesy of Ontario Ministry of Transportation - © King's Printer for Ontario, 1953) 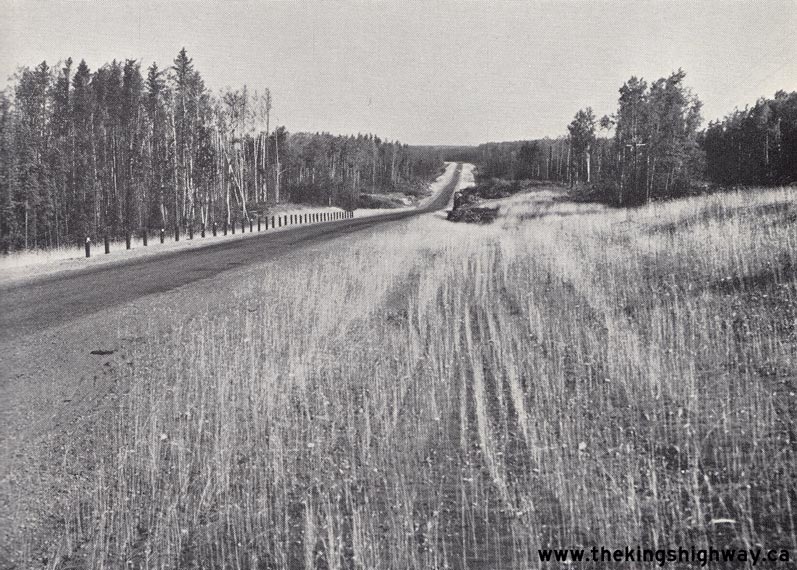

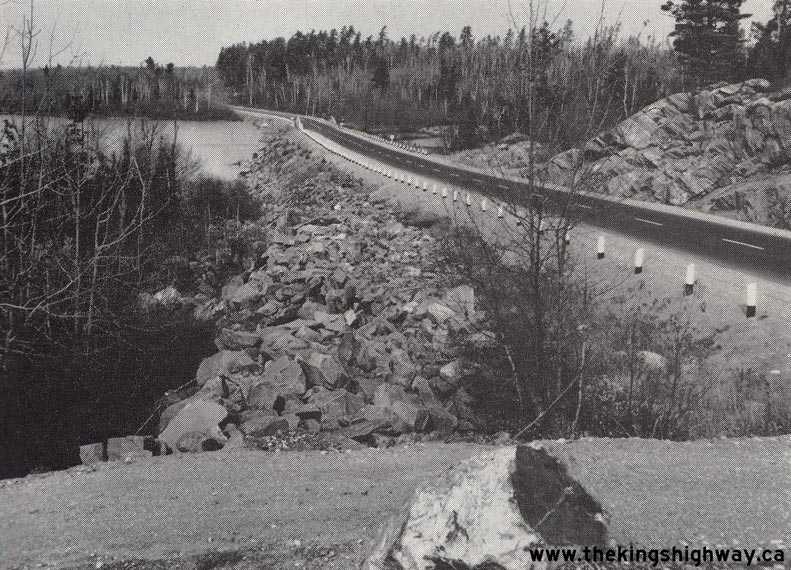
Left - Grass seeded slope on an earth cut along Hwy 11, 2 1/2 miles north of Kenogami. Photo taken on August 12, 1953. (Photo courtesy of Ontario Ministry of Transportation - © King's Printer for Ontario, 1953) Right - Earth cut on a new alignment of Hwy 11 near Matheson (1953) (Photo courtesy of Ontario Ministry of Transportation - © King's Printer for Ontario, 1953) 
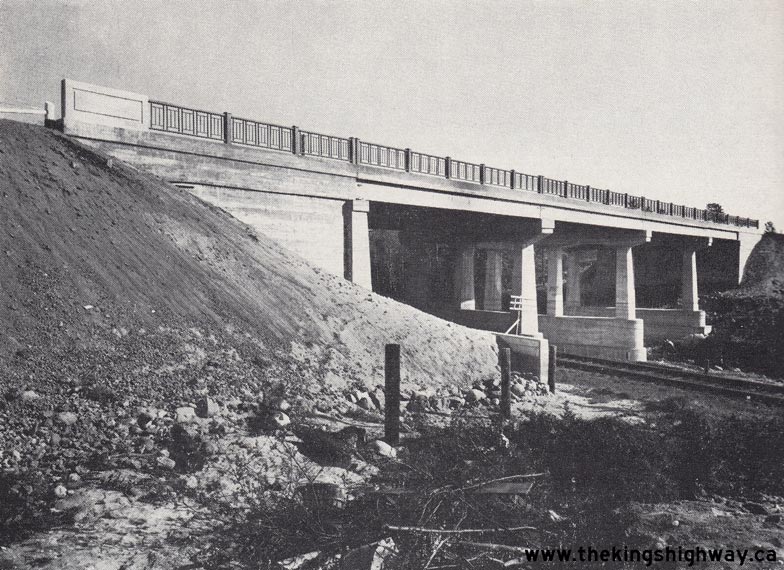
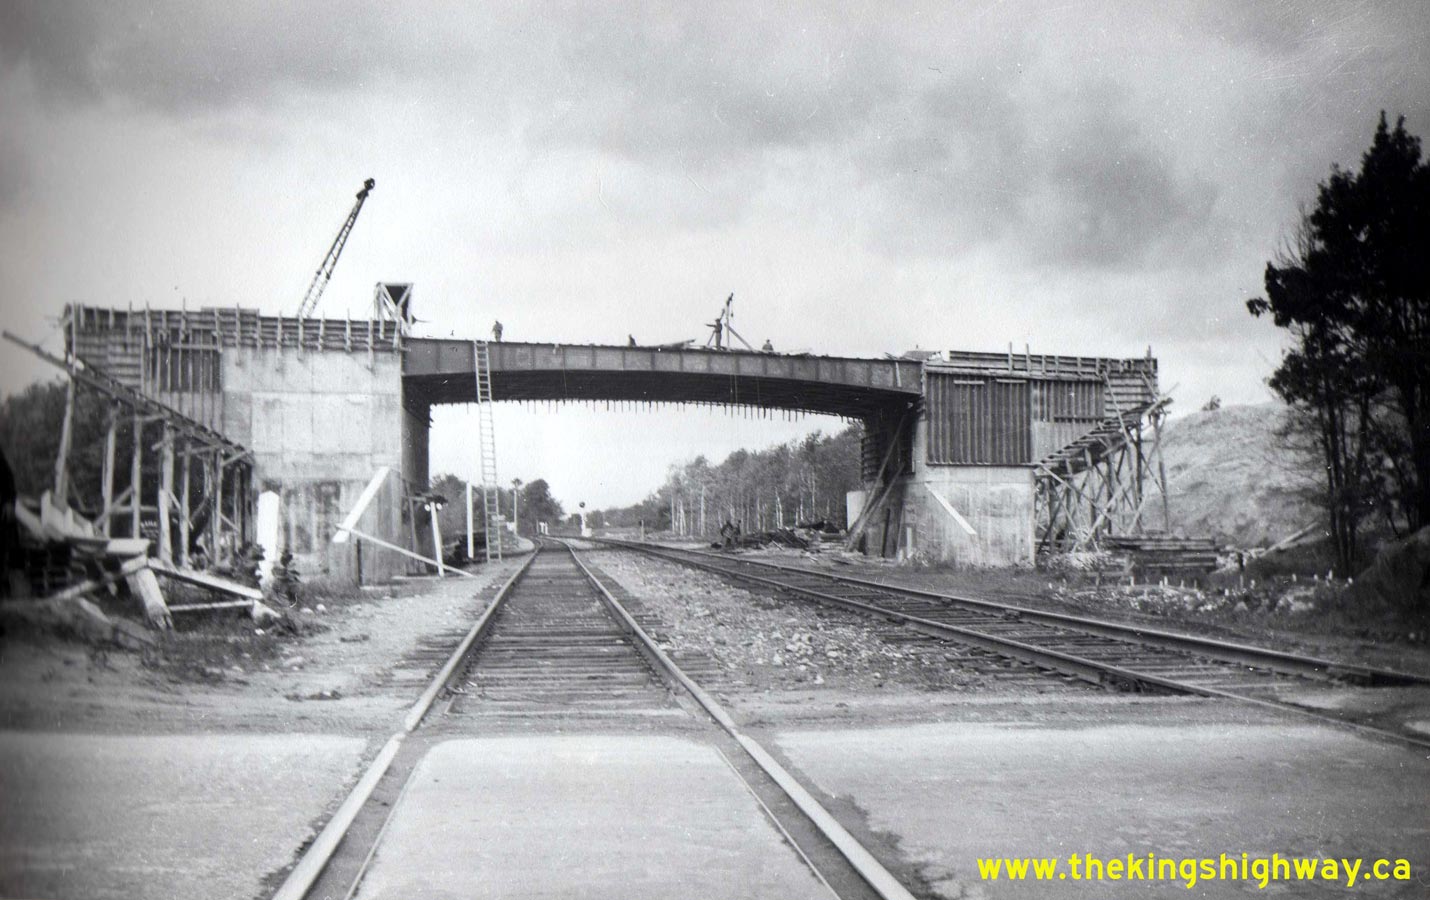
Left - Sign marking the height of land between the Atlantic and Arctic Watershed on Hwy 11, 9 miles north of Kenogami. Photo taken on August 12, 1953. (Photo courtesy of Ontario Ministry of Transportation - © King's Printer for Ontario, 1953) Right - New grade-separated crossing of the Canadian Pacific Railway (CPR) on the North Bay Bypass (Hwy 11) near Nipissing Junction. Photo taken on October 22, 1953. (Photo courtesy of Ontario Ministry of Transportation - © King's Printer for Ontario, 1953) 

Left - Mulch pavement and new steel beam guide rail installation on the North Bay Bypass (Hwy 11) facing north towards Hwy 17. This was one of the earliest
installations of steel beam guide rail in Ontario. Photo taken on August 8, 1953. (Photo courtesy of Ontario Ministry of Transportation - © King's Printer for Ontario, 1953) Right - Roadside Park and landscaped rest area on Hwy 11 in Cochrane. Photo taken on August 13, 1953. (Photo courtesy of Ontario Ministry of Transportation - © King's Printer for Ontario, 1953) 

Left - Kabinakagami River Bridge on Hwy 11 west of Hearst. Photo taken on August 16, 1953. (Photo courtesy of Ontario Ministry of Transportation - © King's Printer for Ontario, 1953) Right - Construction of the Canadian National Railway (CNR) Overhead on the Orillia Bypass. Photo taken on October 23, 1953. (Photo courtesy of Ontario Ministry of Transportation - © King's Printer for Ontario, 1953) 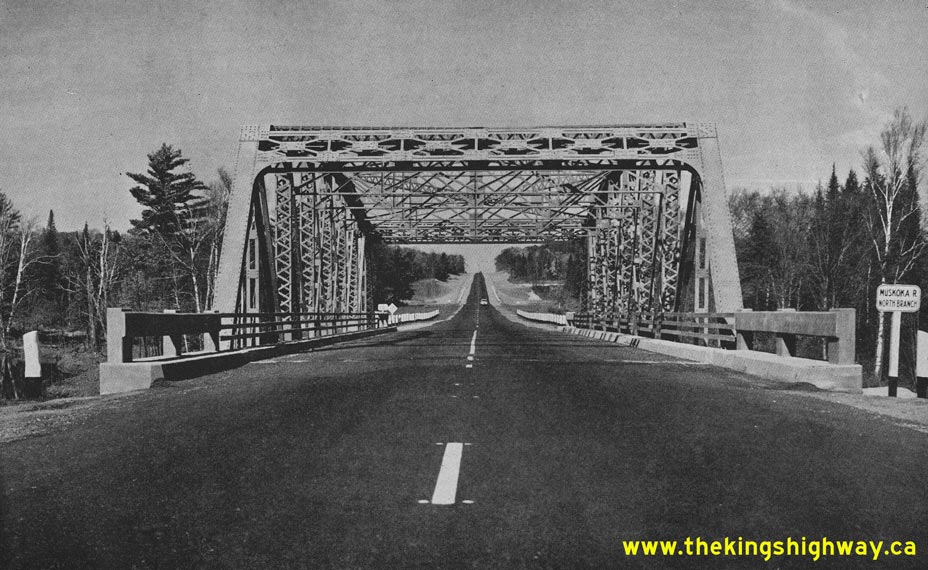
Left - Muskoka River Bridge (North Branch) on the Bracebridge Bypass, shown shortly after it was completed in 1953. Photograph taken on October 20,
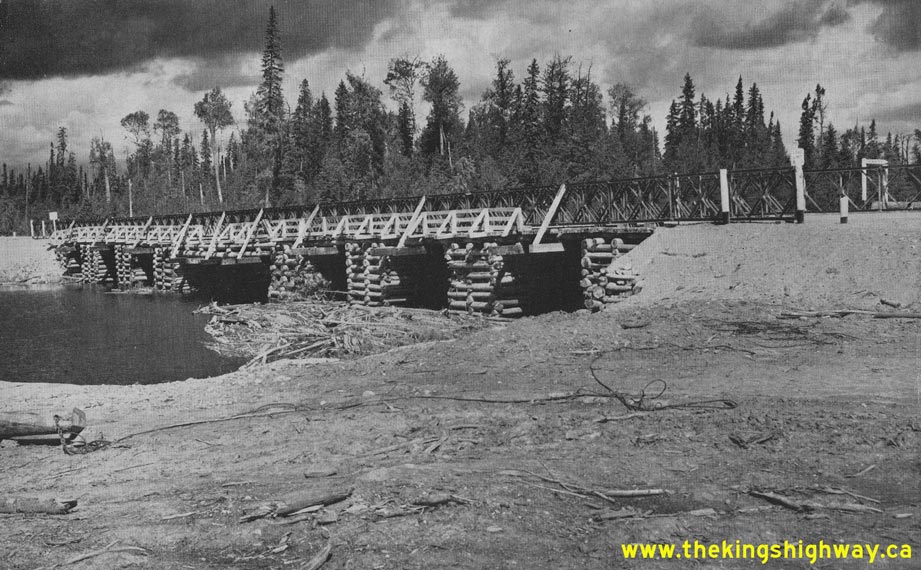
1953. See an Enlarged Photo Here. (Photo courtesy of Ontario Ministry of Transportation - © King's Printer for Ontario, 1953) Right - Shekak River Bridge on Hwy 11, 30 miles west of Hearst. Note that a Bailey Bridge was installed across the original timber beam and timber crib structure, which was constructed in 1941. Photo taken on August 16, 1953. See an Enlarged Photo Here. (Photo courtesy of Ontario Ministry of Transportation - © King's Printer for Ontario, 1953) 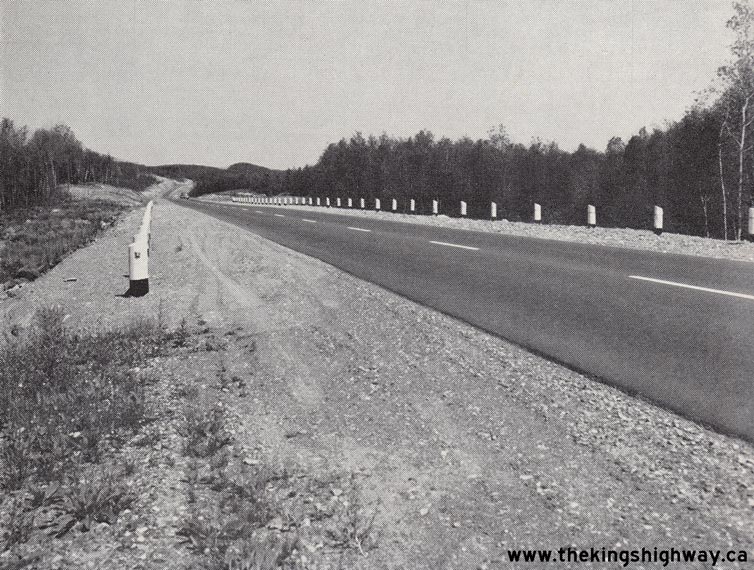
Left - New pavement and zone striping on Hwy 11, 1/2 mile north of Latchford. Photo taken on August 11, 1953. (Photo courtesy of Ontario Ministry of Transportation - © King's Printer for Ontario, 1953) Right - Facing north along Hwy 11 approaching the Marten River Bridge, showing new pavement and zone striping. Photo taken on October 22, 1954. (Photo courtesy of Ontario Ministry of Transportation - © King's Printer for Ontario, 1954) 
Above - Completed Canadian National Railway (CNR) Overhead on the Orillia Bypass. Photo taken on July 6, 1954. (Photo courtesy of Ontario Ministry of Transportation - © King's Printer for Ontario, 1954) 
Left - Callander Bay Lookout on Hwy 11 south of North Bay (1954) (Photo courtesy of Ontario Ministry of Transportation - © King's Printer for Ontario, 1954) Right - View of the new Bracebridge Bypass on Hwy 11 (1954) (Photo courtesy of Ontario Ministry of Transportation - © King's Printer for Ontario, 1954) 
Above - Construction of the Canadian National Railway (CNR) Overhead on the new Hwy 11 Bypass at Washago in 1954. See an
Enlarged Photo Here. (Photo courtesy of Ontario Ministry of Transportation - © King's Printer for Ontario, 2012) 

Left - Construction of the Trent-Severn Waterway Overhead on the Hwy 11 Washago Bypass in 1954. The new Washago Bridge replaced an old swing bridge that opened
to allow marine traffic to pass on the Trent-Severn Waterway below. Until it was bypassed, the old Washago Swing Bridge was one of the worst congestion points on
Hwy 11 north of Toronto, particularly in the peak summer months. The new high-level bridge seen here completely eliminated this traffic bottleneck. Photo taken in
October 1954. (Photo courtesy of Ontario Ministry of Transportation - © King's Printer for Ontario, 2012) Right - Completed Canadian National Railway (CNR) Overhead on the Hwy 11 Washago Bypass. Photo taken on February 7, 1955. (Photo courtesy of Ontario Ministry of Transportation - © King's Printer for Ontario, 2012) 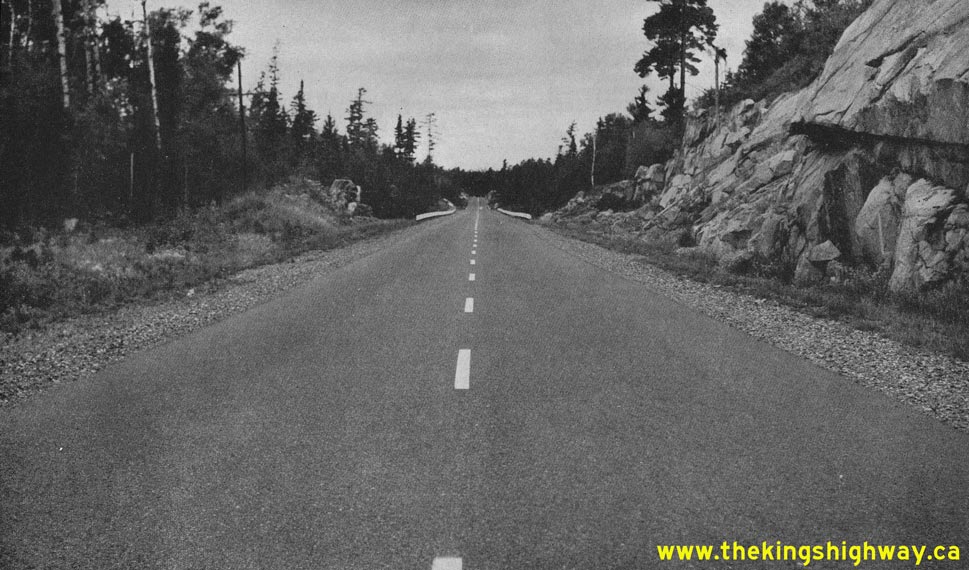

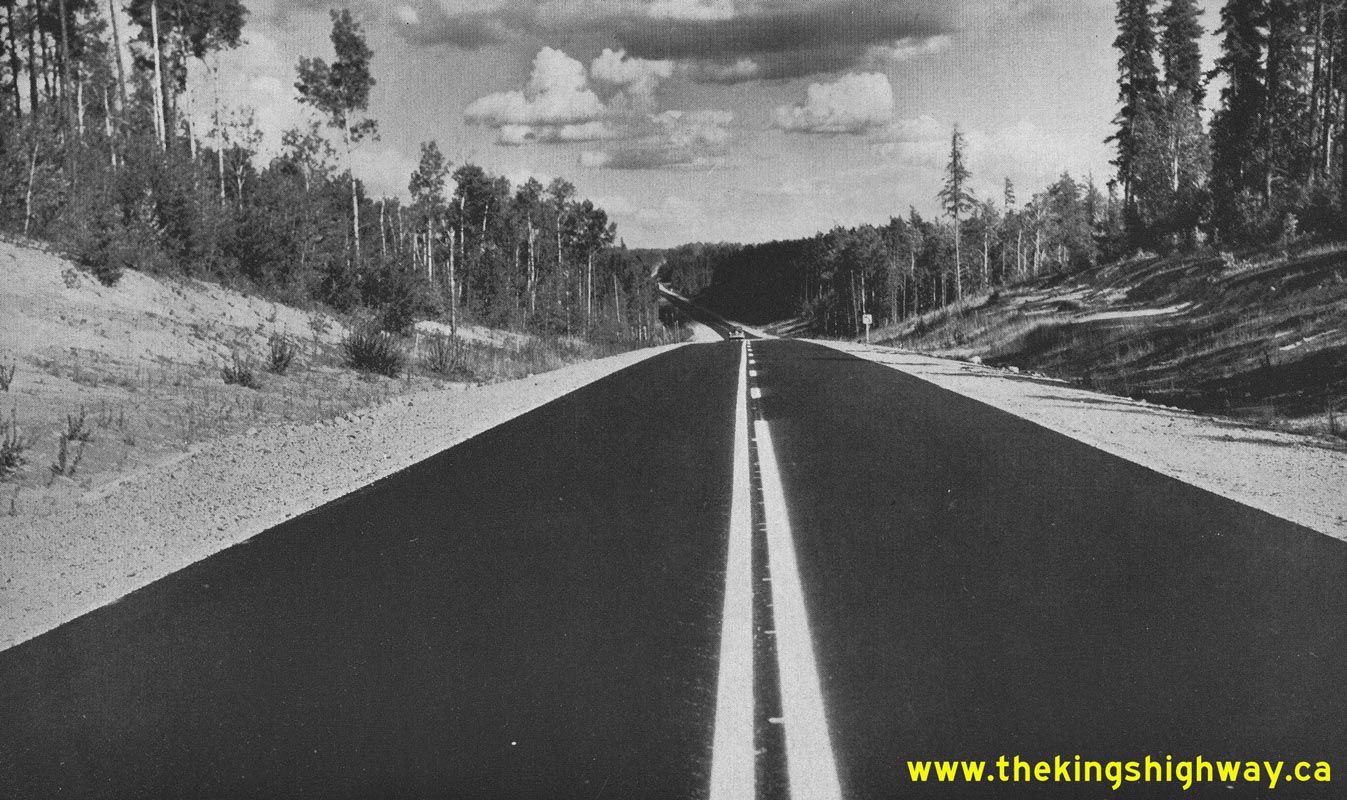
Left - Jumping Caribou Lake Diversion on Hwy 11 south of Temagami in 1955. This major highway relocation project was completed in 1940, bypassing a winding
section of the original Ferguson Highway. See an Enlarged Photo Here. Photo taken on
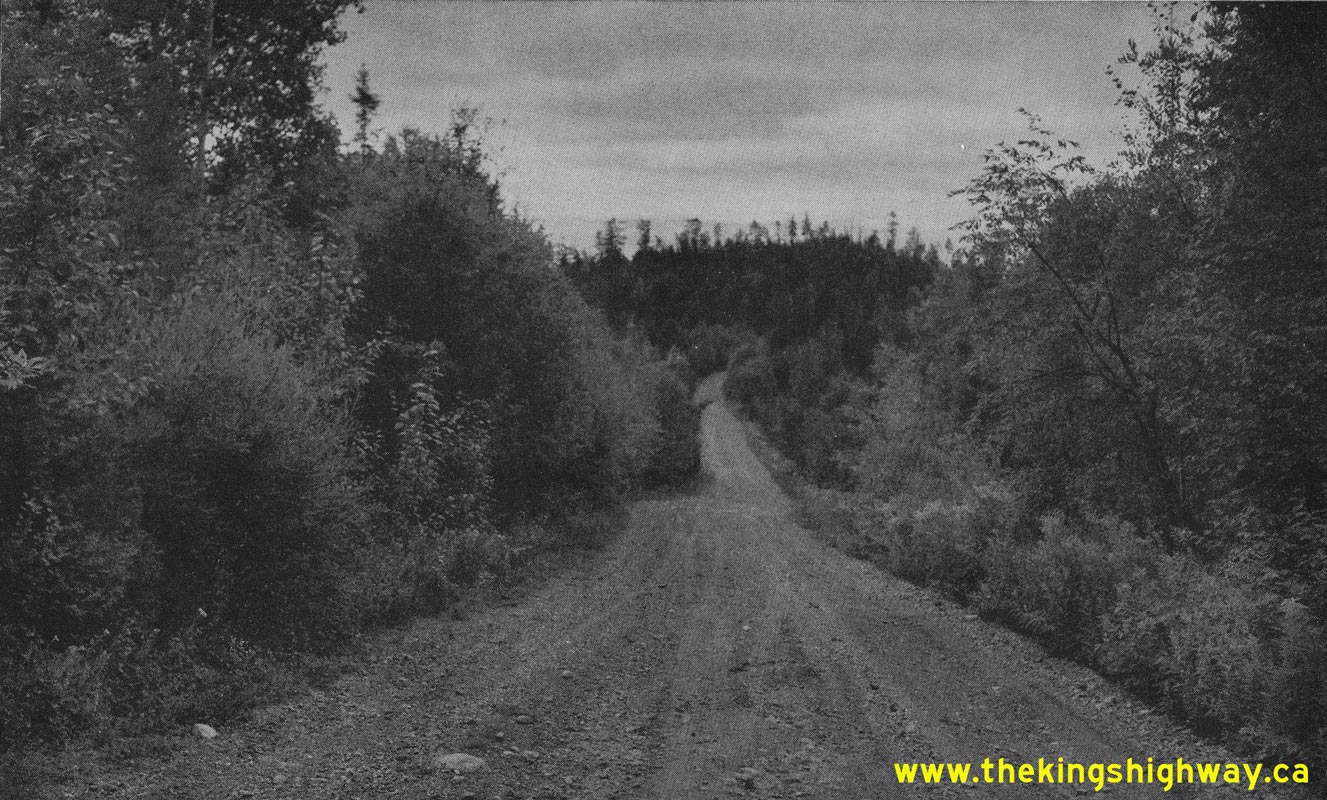
September 1, 1955. (Photo courtesy of Ontario Ministry of Transportation - © King's Printer for Ontario, 1955) Right - View of the pre-1940 alignment of the Ferguson Highway (Hwy 11) south of Temagami in 1955. When the Jumping Caribou Lake Diversion was completed in 1940, it bypassed an 18 km section of winding road with steep grades that typified the original Ferguson Highway. The original highway seen here is now known as Wilson Lake Road. See an Enlarged Photo Here. Photo taken on September 1, 1955. (Photo courtesy of Ontario Ministry of Transportation - © King's Printer for Ontario, 1955) 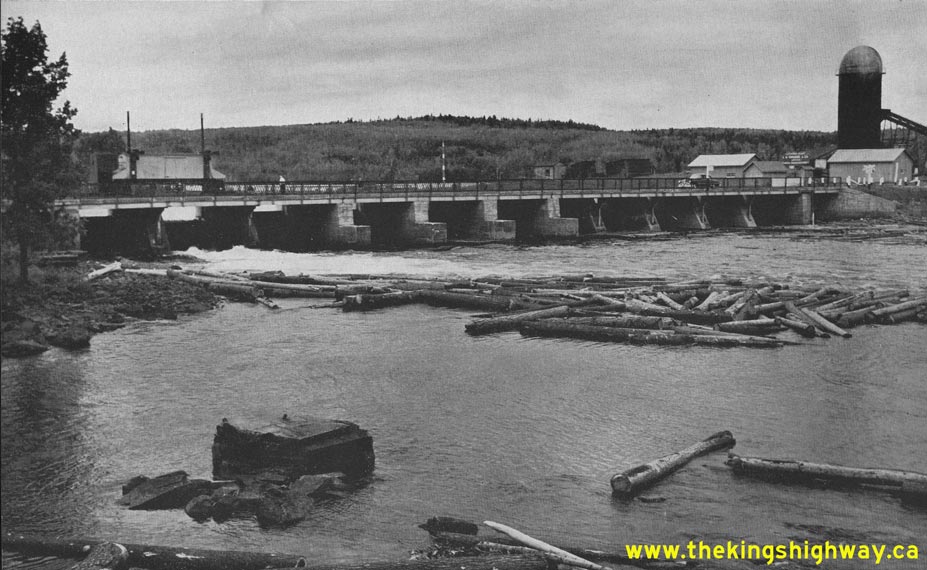
Above - Hwy 11 at the Montreal River in Latchford in 1955. Until the current Montreal River Bridge was completed in 1960, all traffic crossed over the Montreal
River on the Latchford Dam. See an Enlarged Photo Here. Photo taken on September 1, 1955. (Photo courtesy of Ontario Ministry of Transportation - © King's Printer for Ontario, 1955) 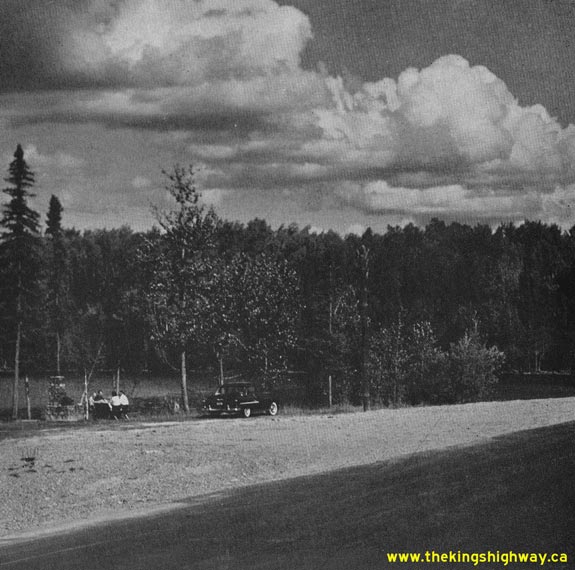
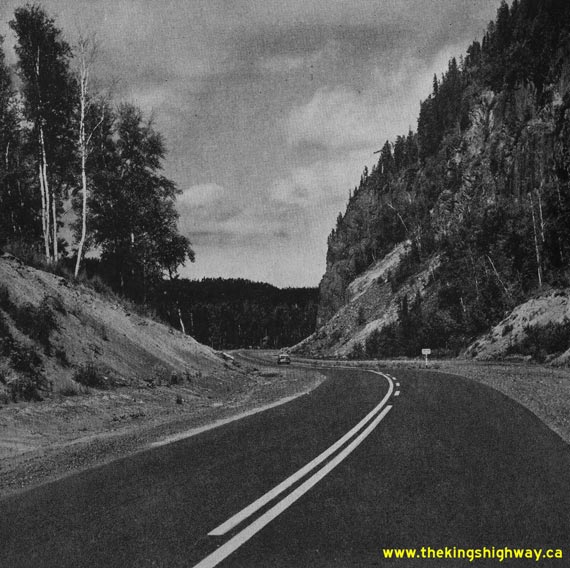
Left - Department of Highways' Roadside Park at Klotz Lake east of Longlac. Photo taken on September 4, 1955. (Photo courtesy of Ontario Ministry of Transportation - © King's Printer for Ontario, 1955) Right - Facing north along Hwy 11 near the Palisades of Pijitawabik near Beardmore. Photo taken on September 5, 1955. (Photo courtesy of Ontario Ministry of Transportation - © King's Printer for Ontario, 1955) 
Above - Facing east along Hwy 11 near Klotz Lake between Hearst and Geraldton, showing new asphalt pavement in 1955. See an
Enlarged Photo Here. (Photo courtesy of Ontario Ministry of Transportation - © King's Printer for Ontario, 1955) 
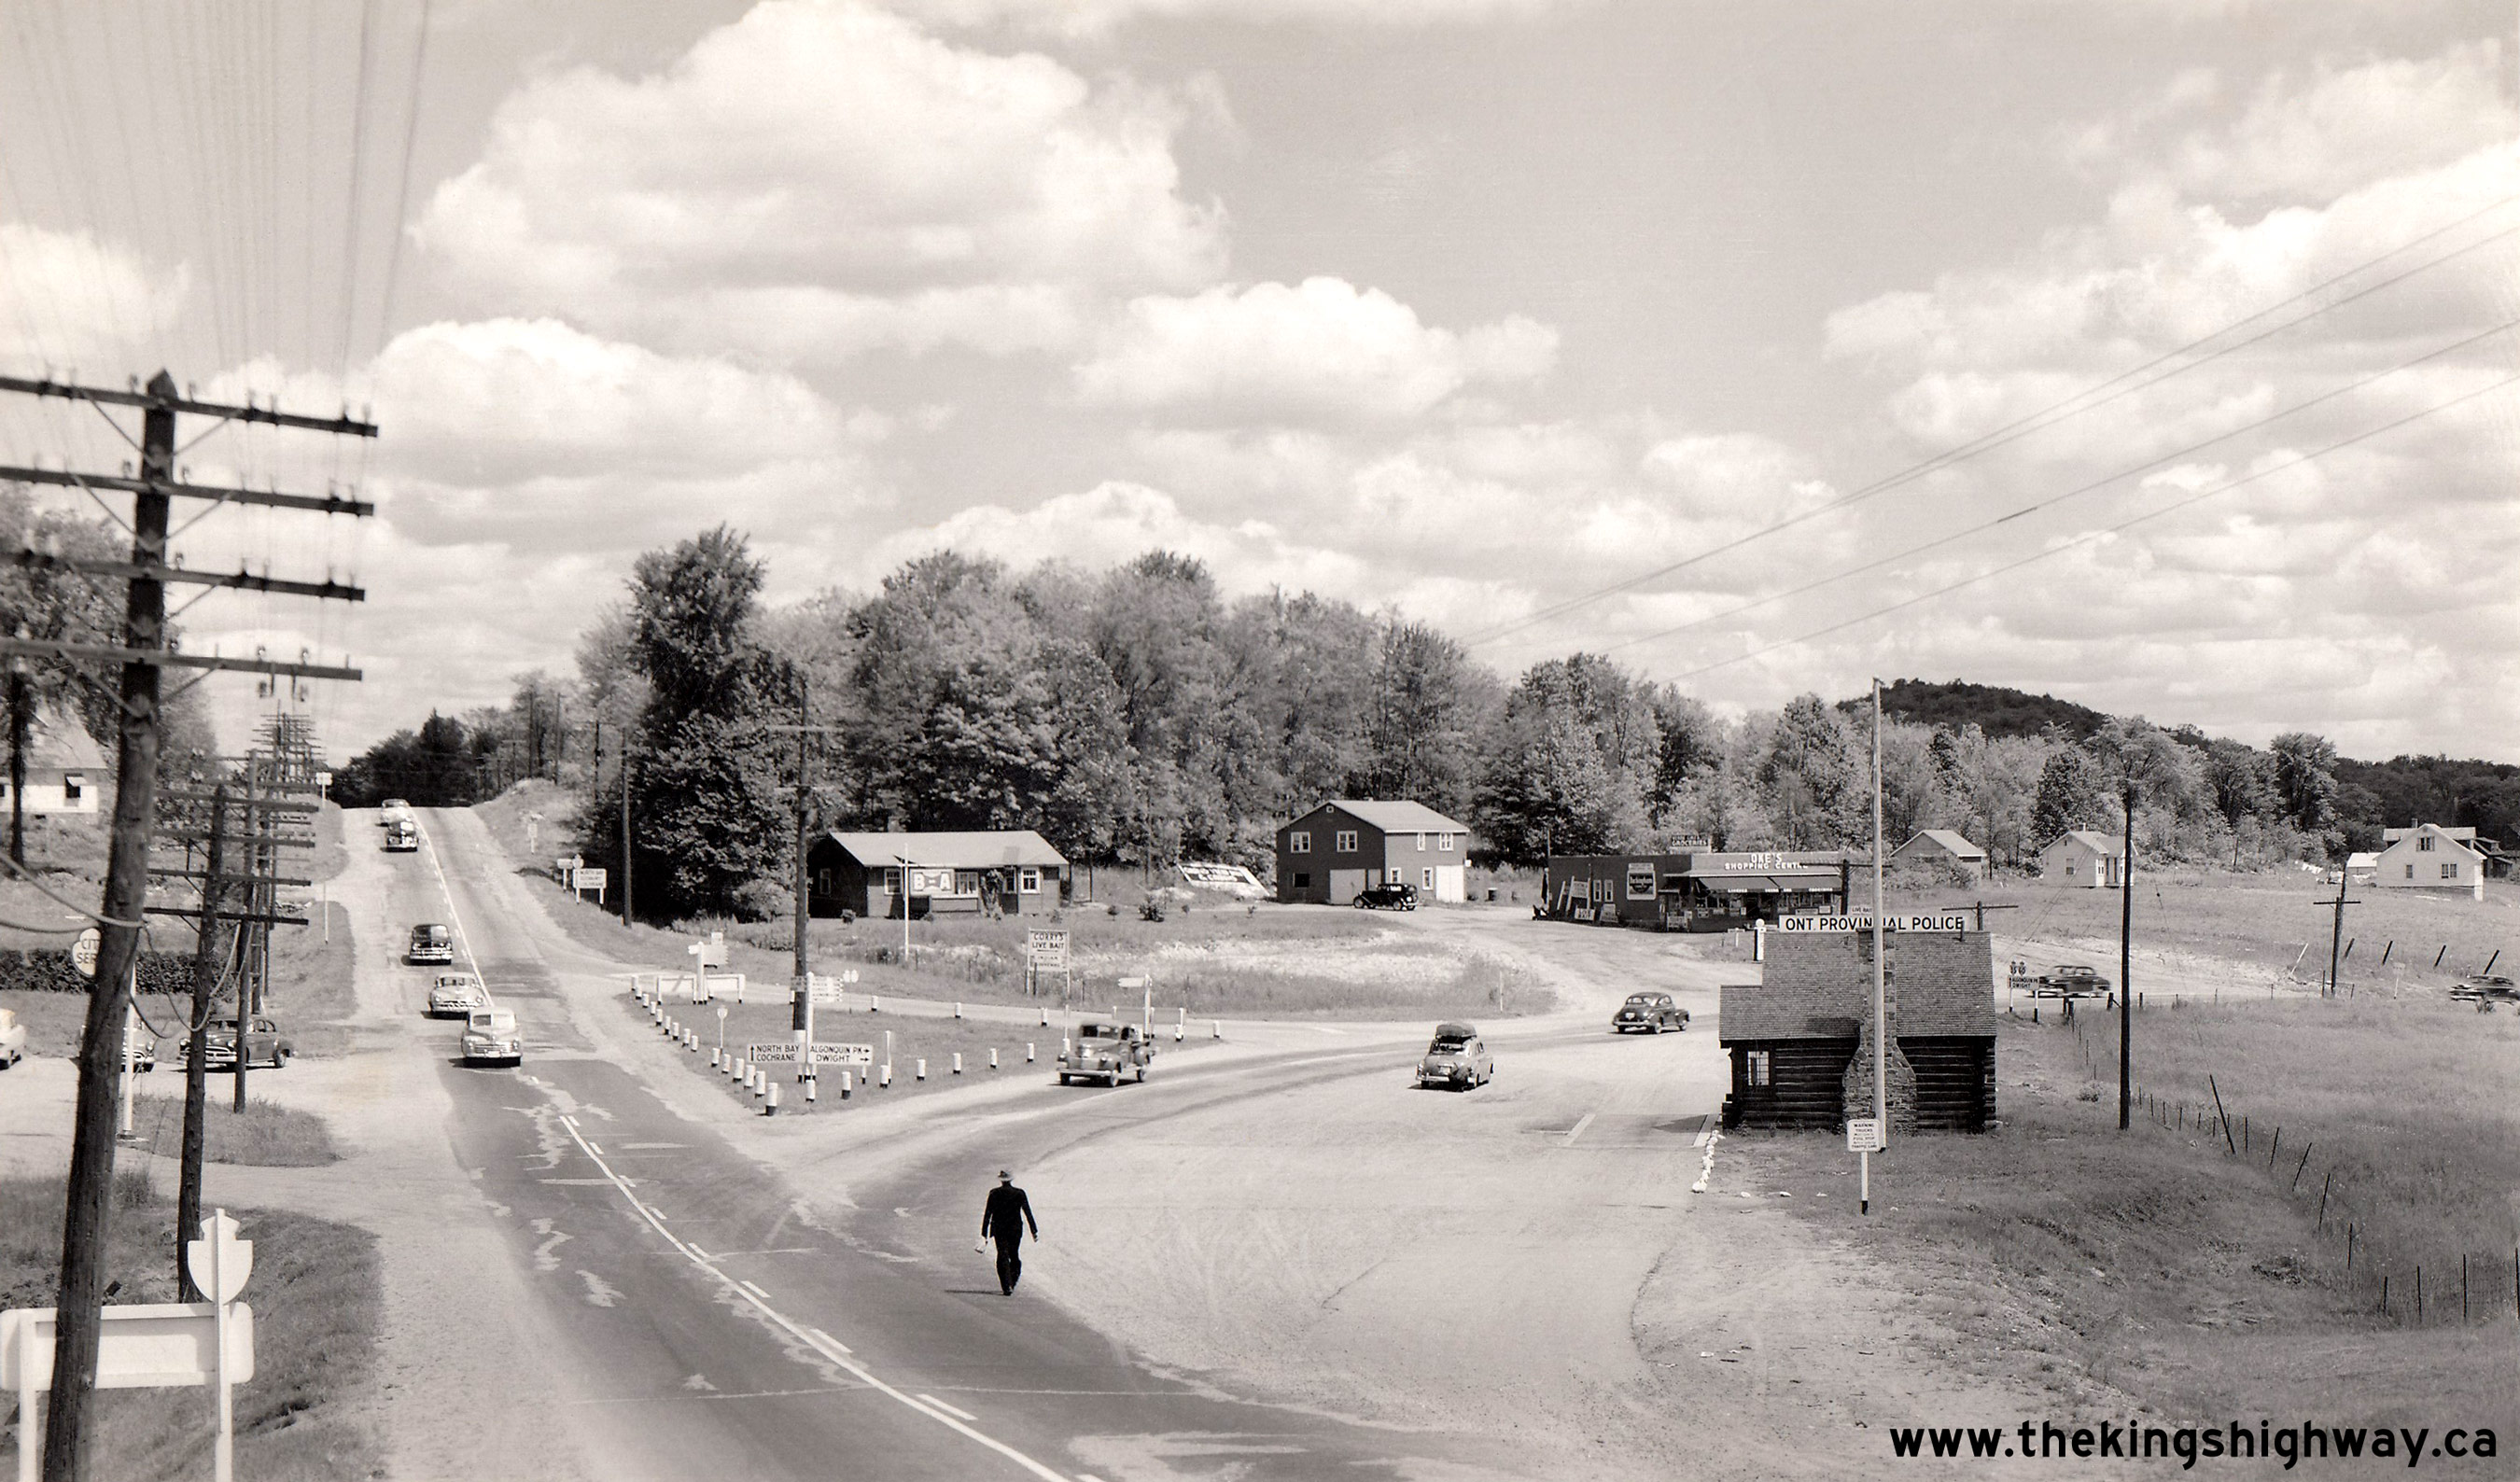
Above - Circa 1955 postcard view of the Hwy 35 & Hwy 60 Junction on Hwy 11 at the northern entrance to Huntsville, facing north towards North Bay. Until
the early 1970s, it wasn't possible to reach Hwy 60 directly from the Huntsville Bypass (the relocated route of Hwy 11). This highway junction was extensively
reconfigured in 1973, when Hwy 60 was extended west from Old Hwy 11 out to the Huntsville Bypass. Both highways were realigned approaching this junction so that the
two roads intersected closer to a right angle. Significant re-grading also took place to improve the vertical grades approaching the intersection from the north.
Click here to see a 2006 View of the Hwy 60 Junction on Old Hwy 11 (now known as Muskoka Road 3)
in Huntsville. See an Enlarged Photo Here. Photo taken circa 1955. (Photo courtesy of Newt Winger) 
Above - Circa 1955 postcard view of the Welcome Arch on Old Hwy 11 & Hwy 69 (later known as Hwy 169) at the southern entrance to Gravenhurst. See an
Enlarged Photo Here. (Photo courtesy of Henry Fry) 

Left - Postcard view of Hwy 11 approaching Callander, 9 miles south of North Bay (ca. 1955) (Photo courtesy of William Forder) Right - Postcard view of Hwy 11 near Marten River (ca. 1955) (Photo courtesy of Newt Winger) 
Above - Hwy 11 at the Mattagami River in Smooth Rock Falls in 1955. Traffic on Hwy 11 crossed the Mattagami River on the Smooth Rock Falls Dam until 1956, when
a new temporary bridge was completed over the Mattagami River by the Department of Highways. The current bridge over the Mattagami River at Smooth Rock Falls was
officially opened to traffic on September 23, 1958. Photo taken in 1955. (Photo courtesy of Ontario Ministry of Transportation - © King's Printer for Ontario, 1955) 
Above - New cloverleaf interchange at Hwy 11 (Yonge Street) and Hwy 401 in Toronto. When the first phase of the Toronto Bypass (Hwy 401) opened to traffic in
1952, it ended at Yonge Street at a badly-skewed at-grade intersection. The new Yonge Street underpass and eight-ramp cloverleaf interchange was completed in 1953,
although it didn't fully open to traffic until April, 1955. That month, the Hwy 401 extension from Yonge Street easterly to Bayview Avenue was completed and opened to
traffic, which necessitated the full opening of the Hwy 11 (Yonge Street) Cloverleaf. See an
Enlarged Photo Here. Photo taken on November 4, 1955. (Photo courtesy of Ontario Ministry of Transportation - © King's Printer for Ontario, 1955) 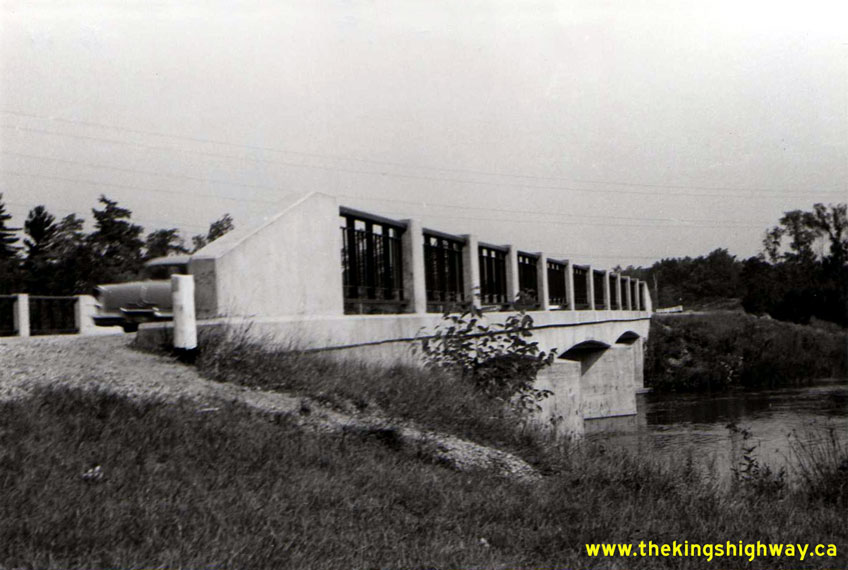
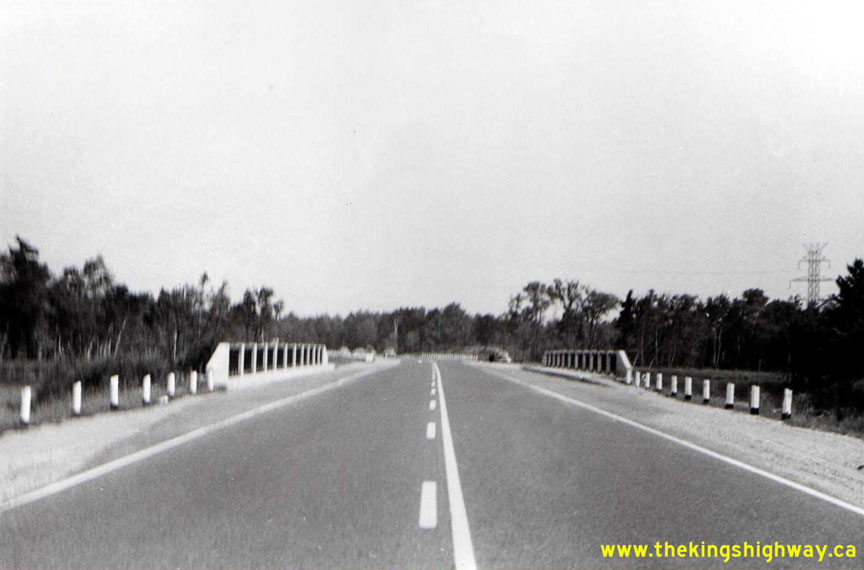
Left - Severn River West Branch (Green River) Bridge on the Hwy 11 Washago Bypass. Photo taken on September 6, 1956. (Photo courtesy of Ontario Ministry of Transportation - © King's Printer for Ontario, 2012) Right - Facing north along Hwy 11 towards Gravenhurst at the Severn River West Branch (Green River) Bridge on the Washago Bypass. Photo taken on September 6, 1956. (Photo courtesy of Ontario Ministry of Transportation - © King's Printer for Ontario, 2012) 
Above - Temporary Bailey Bridge over the Mattagami River in Smooth Rock Falls, shown shortly after completion in 1956. Traffic on Hwy 11 crossed the Mattagami
River Bailey Bridge up until the current Smooth Rock Falls Bridge was officially opened to traffic in 1958. Photo taken on September 24, 1956. (Photo courtesy of Ontario Ministry of Transportation - © King's Printer for Ontario, 1956) 
Above - Newly-surfaced section of Hwy 11 near Klotz Lake east of Longlac, Contract #1955-163. See an
Enlarged Photo Here. Photo taken on September 26, 1956. (Photo courtesy of Ontario Ministry of Transportation - © King's Printer for Ontario, 1956) 
Above - Facing east along Hwy 71 (today's Hwy 11) from Pinewood, showing granular base being compacted, Contract #1955-211. See an
Enlarged Photo Here. Photo taken on October 4, 1956. (Photo courtesy of Ontario Ministry of Transportation - © King's Printer for Ontario, 1956) 
Above - Completed DHO Day Labour Project for the placement of cold-mix mulch pavement along Hwy 11, 2 1/2 miles north of Trout Creek. Photo taken on October
16, 1956. (Photo courtesy of Ontario Ministry of Transportation - © King's Printer for Ontario, 1956) 

Left - Circa 1957 postcard view of Hwy 11 approaching the new Wasi River Bridge, located about 2 miles south of Callander. This bridge is located on a
section of Hwy 11 which was bypassed during the construction of the four-lane Callander Bypass in the 1980s. The Wasi River Bridge on Old Hwy 11 can be found just
south of the Hwy 94 & Hwy 654 Junction near Callander. See an Enlarged Photo Here. (Photo courtesy of William R. Forder) Right - Circa 1957 aerial postcard view of the Severn River Bridge on Hwy 11 & Hwy 69 (later Hwy 169) between Washago and Gravenhurst. This three-span steel truss structure was completed by the DHO in 1931. The bridge was replaced when Hwy 11 was expanded from two to four lanes in 1966. See an Enlarged Photo Here. (Photo courtesy of the Peterborough Postcard Company) 
Above - Hwy 11 & Hwy 17 route markers on the North Bay Bypass. Photo taken circa 1957. (Photo courtesy of North Magazine - Donated by Eric Vettoretti) 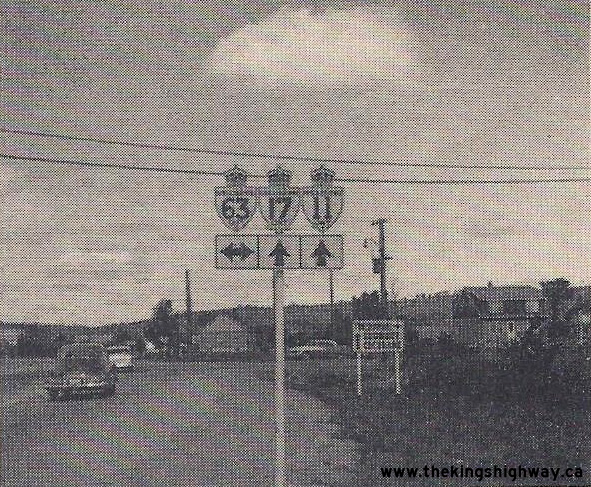

Left - Route marker assembly approaching the Hwy 63 Junction on the North Bay Bypass (Hwy 11 & Hwy 17). Photo taken circa 1957. (Photo courtesy of North Magazine - Donated by Eric Vettoretti) Right - Route marker assembly approaching Fisher Street on the North Bay Bypass (Hwy 11 & Hwy 17). Photo taken circa 1957. (Photo courtesy of North Magazine - Donated by Eric Vettoretti) 
Above - Circa 1957 postcard view of Muskoka Road (Old Hwy 11 & Hwy 69) in Downtown Gravenhurst. See an
Enlarged Photo Here. (Photo courtesy of Fry's Photo Shoppe, Gravenhurst) 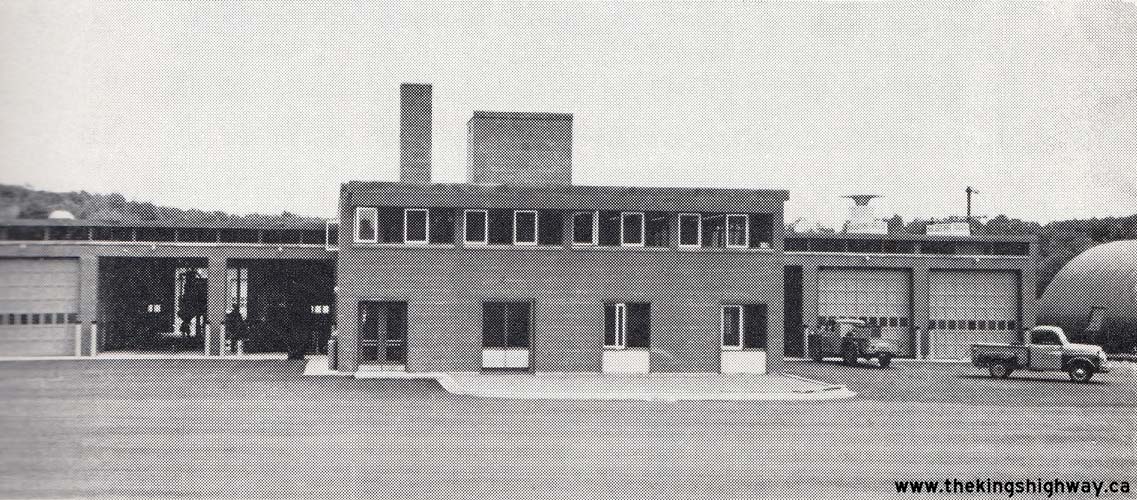
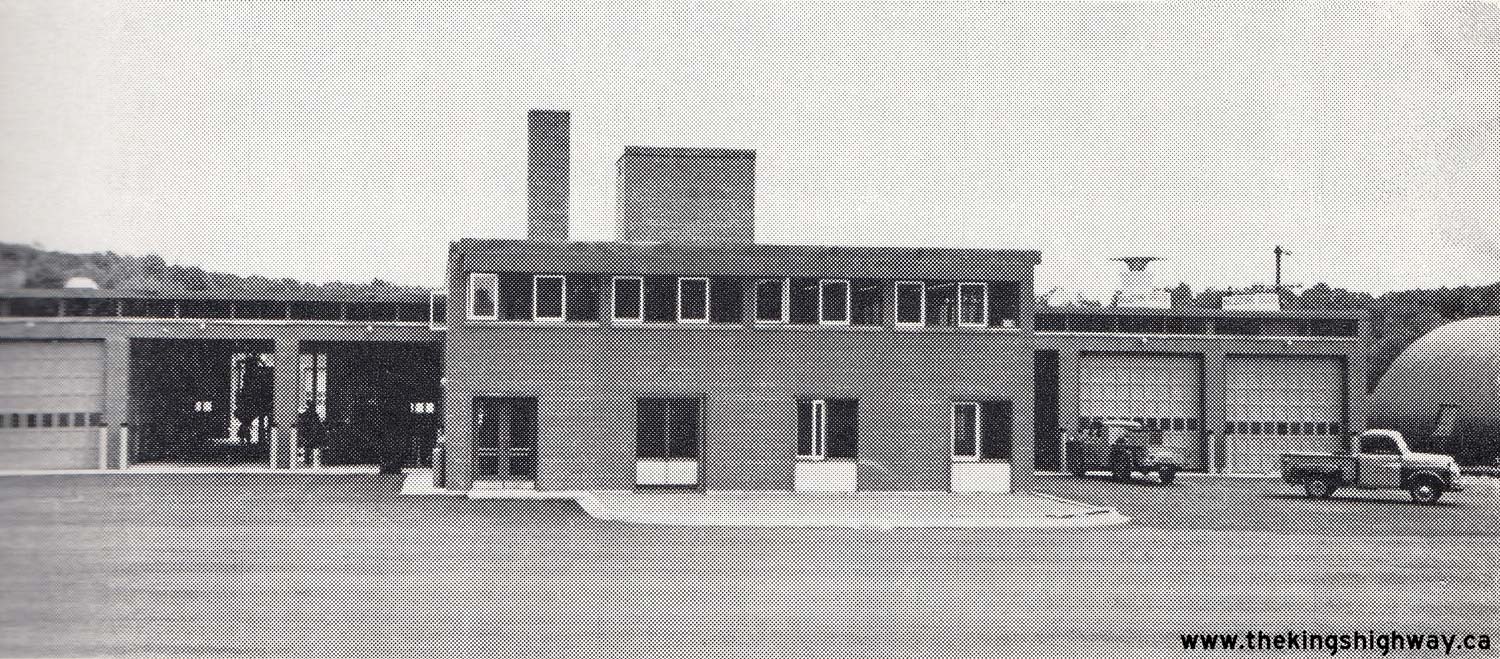
Above - New DHO District #11 Garage on Main Street (Hwy 11) in Huntsville. See an
Enlarged Photo Here. Photo taken on August 20, 1957. (Photo courtesy of Ontario Ministry of Transportation - © King's Printer for Ontario, 1957) 
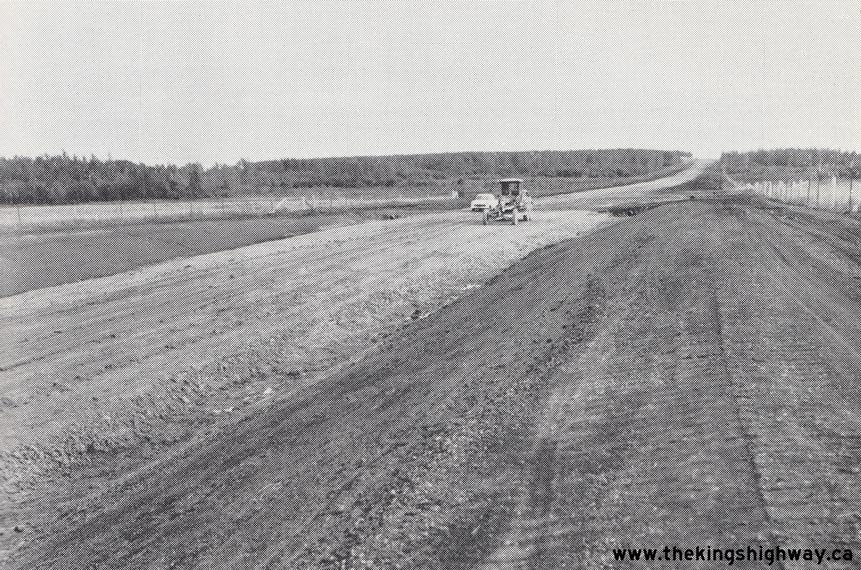
Left - Facing north along a new alignment of Hwy 11 (Emsdale Diversion) about 4 miles north of Novar, Contract #1956-86. Photo taken on August 21, 1957. (Photo courtesy of Ontario Ministry of Transportation - © King's Printer for Ontario, 1957) Right - Grading progress on the Monteith Diversion on Hwy 11 between Matheson and Porquis Junction, Contract #1956-40. Photo taken on September 12, 1957. (Photo courtesy of Ontario Ministry of Transportation - © King's Printer for Ontario, 1957) 
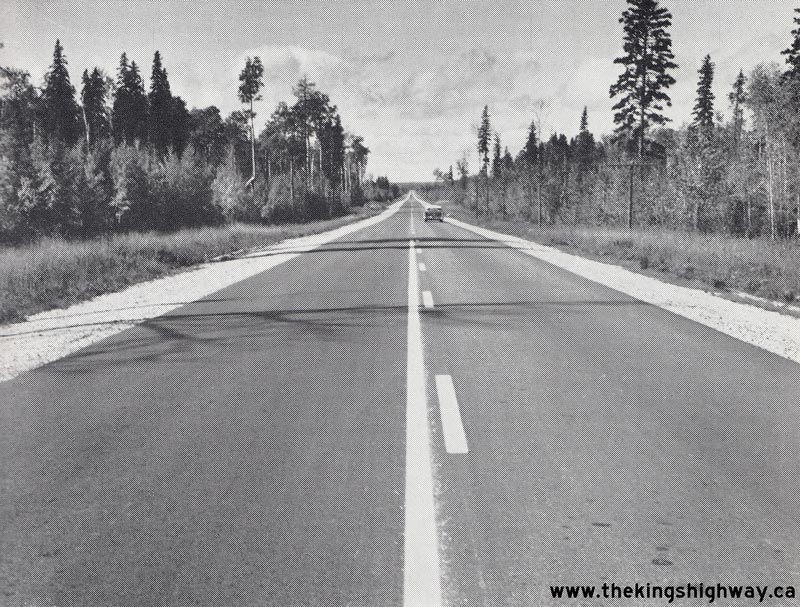
Left - Early construction work on the Mattagami River Bridge at Smooth Rock Falls. Photo taken on September 17, 1957. (Photo courtesy of Ontario Ministry of Transportation - © King's Printer for Ontario, 1957) Right - Newly-paved section of Hwy 11, 30 miles west of Hearst. Photo taken on September 20, 1957. (Photo courtesy of Ontario Ministry of Transportation - © King's Printer for Ontario, 1957) 

Left - Facing south along Hwy 11 near the Hwy 64 Junction at Marten River. Photo taken on September 7, 1957. (Photo courtesy of Ontario Ministry of Transportation - © King's Printer for Ontario, 1957) Right - Hwy 11 at Lake Helen, north of Nipigon (1958) (Photo courtesy of Ontario Ministry of Transportation - © King's Printer for Ontario, 1958) 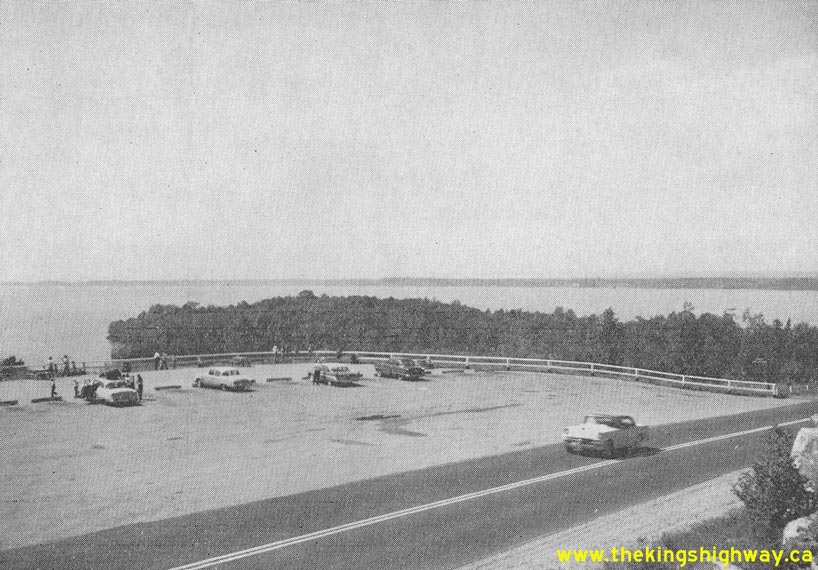

Left - Callander Bay Lookout on Hwy 11 south of North Bay (1958) (Photo courtesy of Ontario Ministry of Transportation - © King's Printer for Ontario, 1958) Right - Hwy 401 and Hwy 11 (Yonge Street) Cloverleaf in Toronto, facing north towards Richmond Hill in 1958. When the Yonge Street Interchange was first completed on Hwy 401 in 1953, it was a full eight-ramp cloverleaf. This interchange was completely reconfigured when this section of Hwy 401 was widened in 1966-1967. The full cloverleaf interchange seen here was replaced by a partial cloverleaf interchange with a directional ramp to serve the heavy eastbound Hwy 401 to northbound Hwy 11 movement. Note the Toronto Transit Commission (TTC) bus loop situated within the cloverleaf interchange. Photo taken on July 9, 1958. (Photo courtesy of Ontario Ministry of Transportation - © King's Printer for Ontario, 1958) 
Left - Overhead guide signs at the Hwy 11 & Hwy 11B Junction between Callander and North Bay in 1958. This overhead sign was installed at the southern end
of the North Bay Bypass, where motorists were presented with the choice of either bypassing North Bay or following the old route of Hwy 11 (the Hwy 11B Business Route)
through Downtown North Bay. It is believed that this was the very first overhead sign structure built by the Department of Highways in Northern Ontario. See an
Enlarged Photo Here. Photo taken on October 10, 1958. (Photo courtesy of Ontario Ministry of Transportation - © King's Printer for Ontario, 1958) Right - Wicklow River Bridge under construction on Hwy 11 south of Cochrane in 1959, Contract #1958-14. See an Enlarged Photo Here. Photo taken on August 15, 1959. (Photo courtesy of Ontario Ministry of Transportation - © King's Printer for Ontario, 1959) 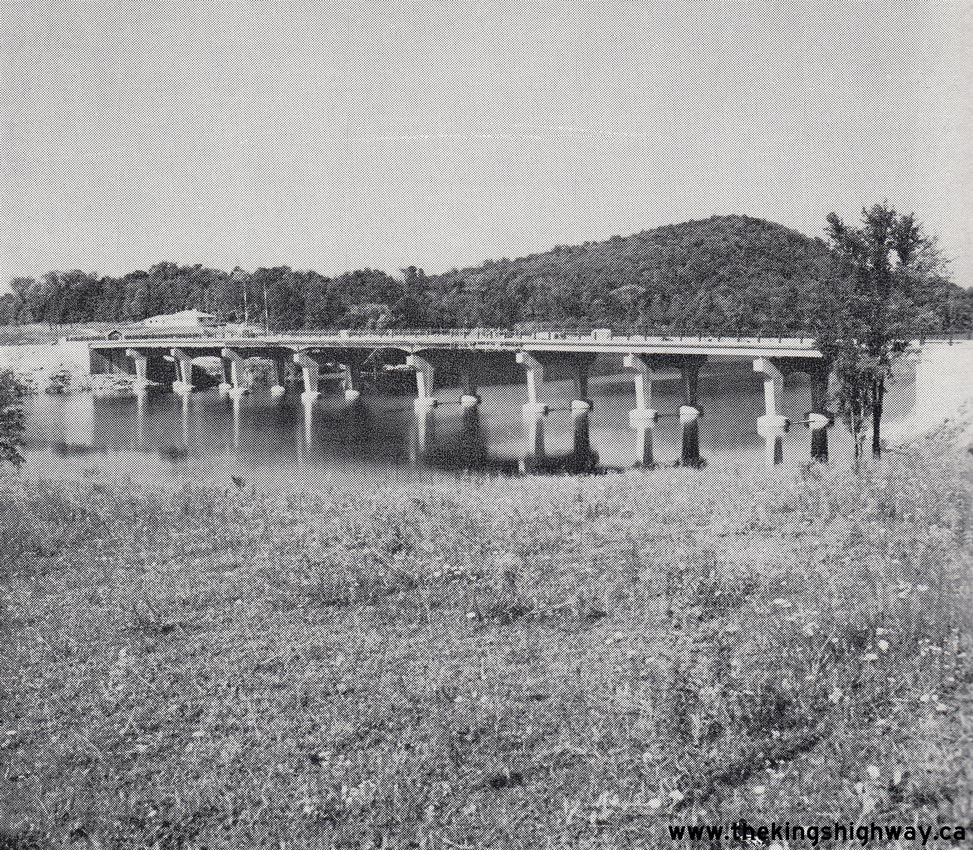
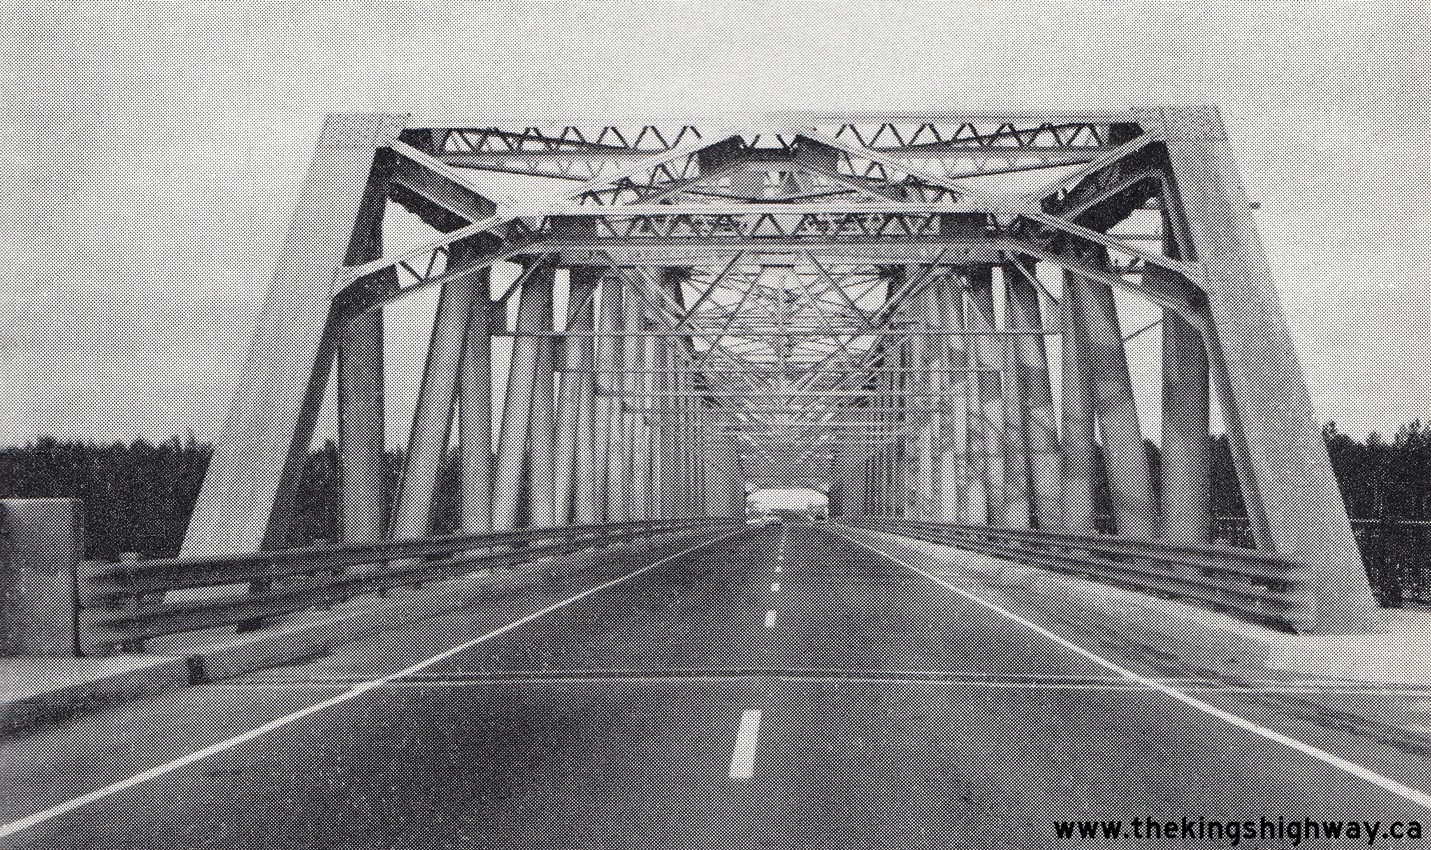
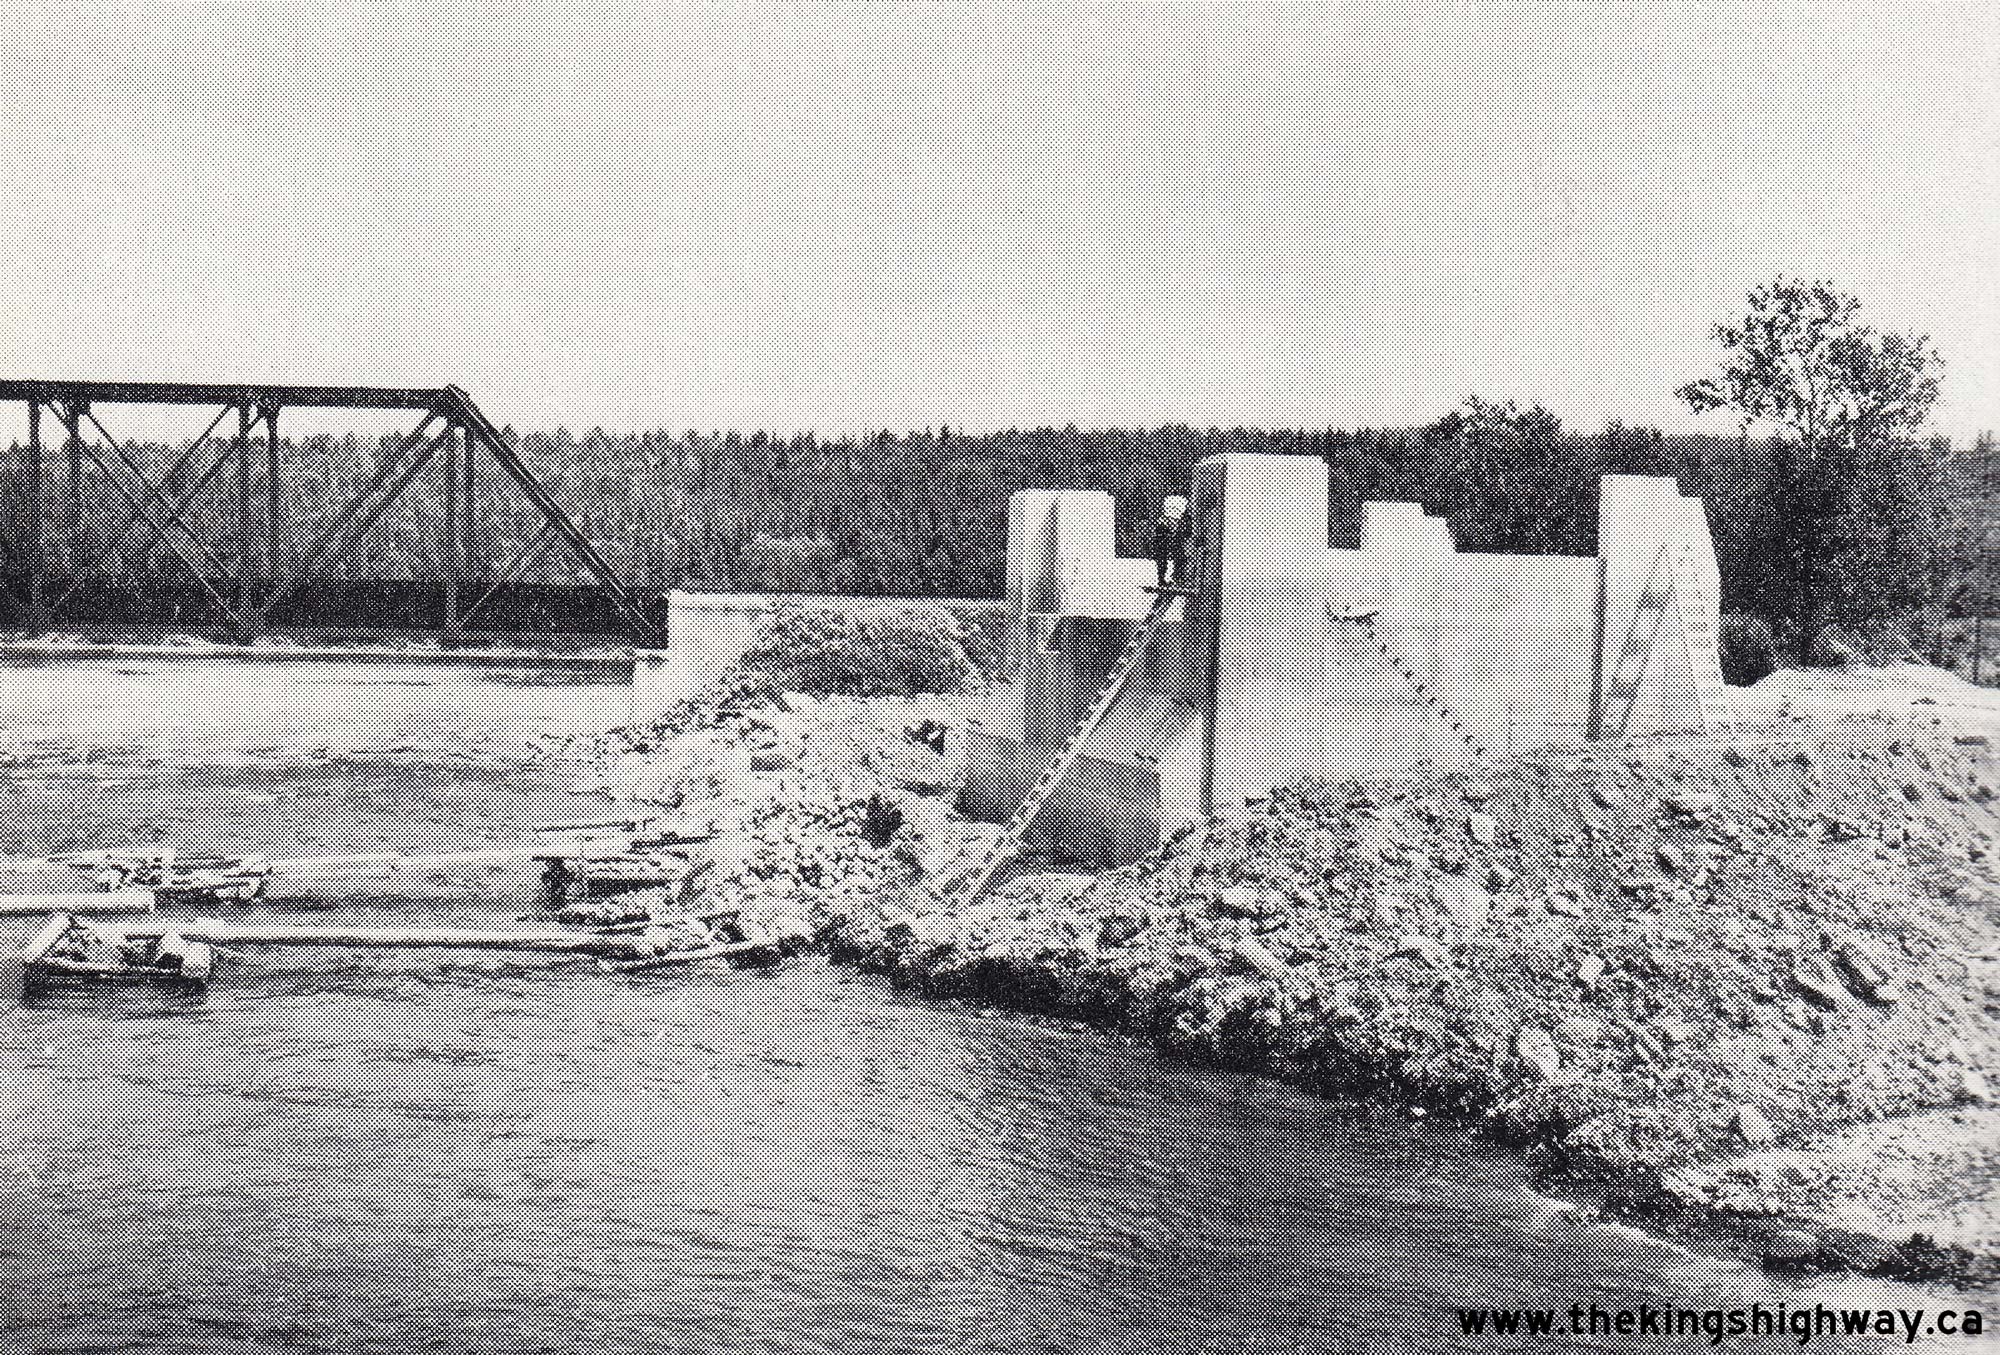
Above - Completed Vernon Narrows Bridge on the new Huntsville Bypass in 1959, Contract #1957-32. See an
Enlarged Photo Here. (Photo courtesy of Ontario Ministry of Transportation - © King's Printer for Ontario, 1959) 
Above - Completed grading approaching the future Crown Hill Overpass near Barrie in 1959, Contract #1959-46. This view of the future interchange at Hwy 400
and the Hwy 400 Extension is facing southeast towards Barrie. See an Enlarged Photo Here.
Photo taken on July 10, 1959. (Photo courtesy of Ontario Ministry of Transportation - © King's Printer for Ontario, 1959) 
Above - Aerial view of the Hwy 401 and Hwy 11 (Yonge Street) Cloverleaf in Toronto, facing south in 1959. This aerial photo of the Yonge Street Interchange at
rush hour clearly demonstrates the problem with this interchange design when traffic volumes are heavy and the opposing loop ramps are placed too close together. A
red traffic signal on Yonge Street north of Hwy 401 has caused northbound traffic to queue right through the cloverleaf interchange and onto the eastbound loop ramp
exiting from the freeway. The queue has also blocked access to the opposing loop ramp from northbound Hwy 11 to westbound Hwy 401. When the interchange was rebuilt
in 1966-1967, a two-lane directional ramp was constructed to remove the bottleneck caused by the heavy eastbound Hwy 401 to northbound Hwy 11 movement. (Photo courtesy of Ontario Ministry of Transportation - © King's Printer for Ontario, 1959) 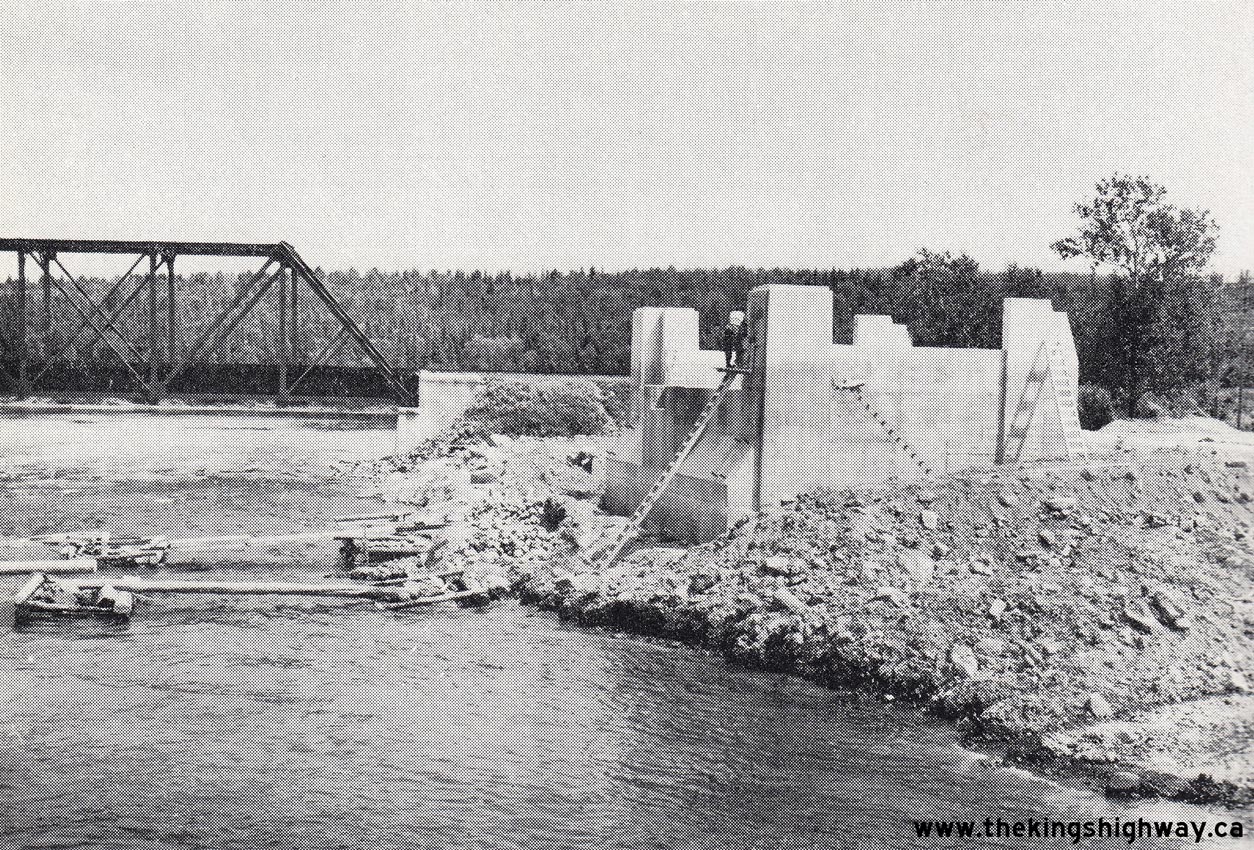

Left - Completed south abutment of the new Montreal River Bridge on Hwy 11 in Latchford. See an
Enlarged Photo Here. Photo taken on August 7, 1959. (Photo courtesy of Ontario Ministry of Transportation - © King's Printer for Ontario, 1959) Right - Montreal River Bridge under construction on Hwy 11 in Latchford, Contract #1958-645. See an Enlarged Photo Here. Photo taken on August 7, 1959. (Photo courtesy of Ontario Ministry of Transportation - © King's Printer for Ontario, 1959) 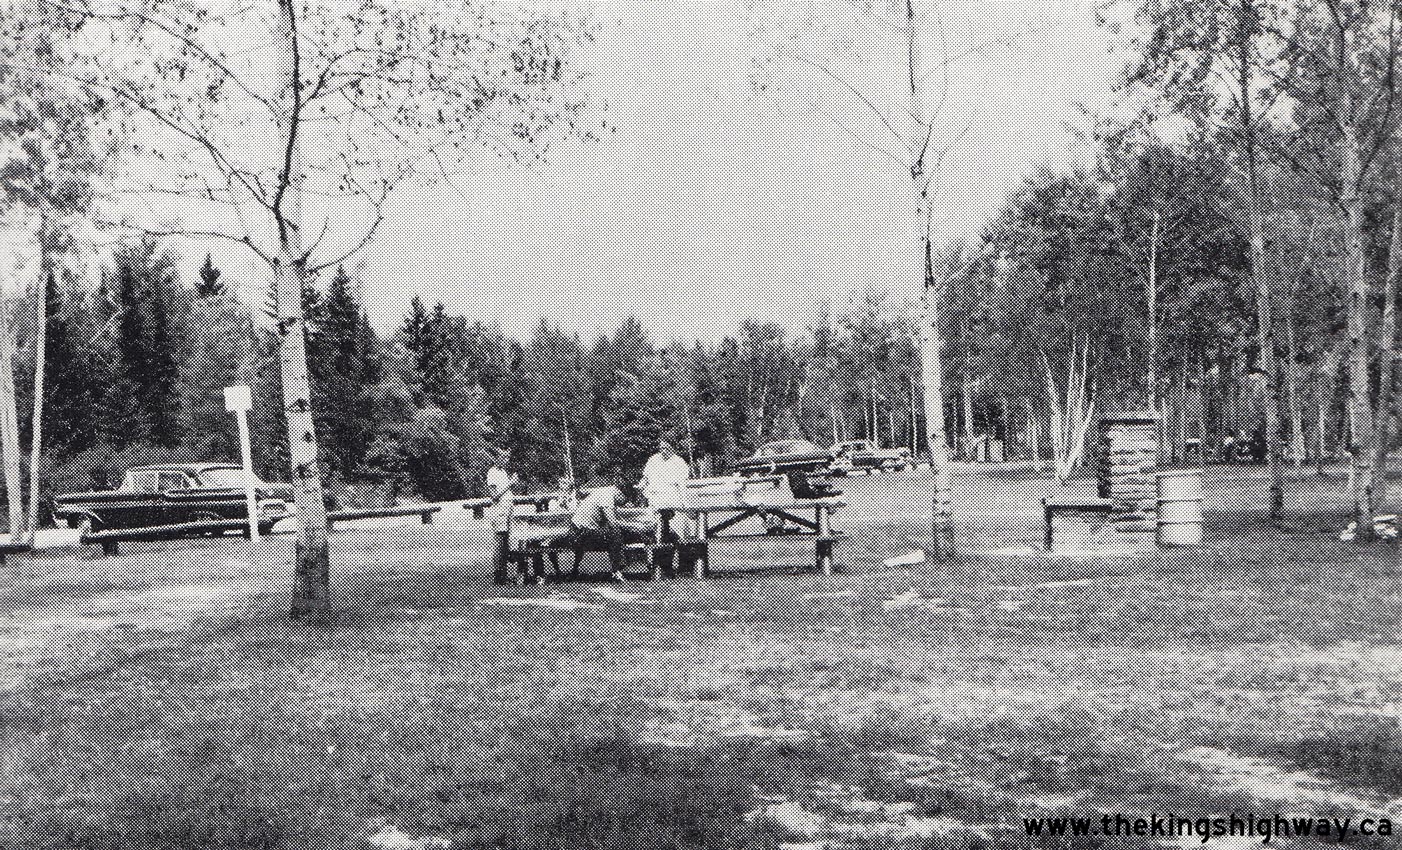
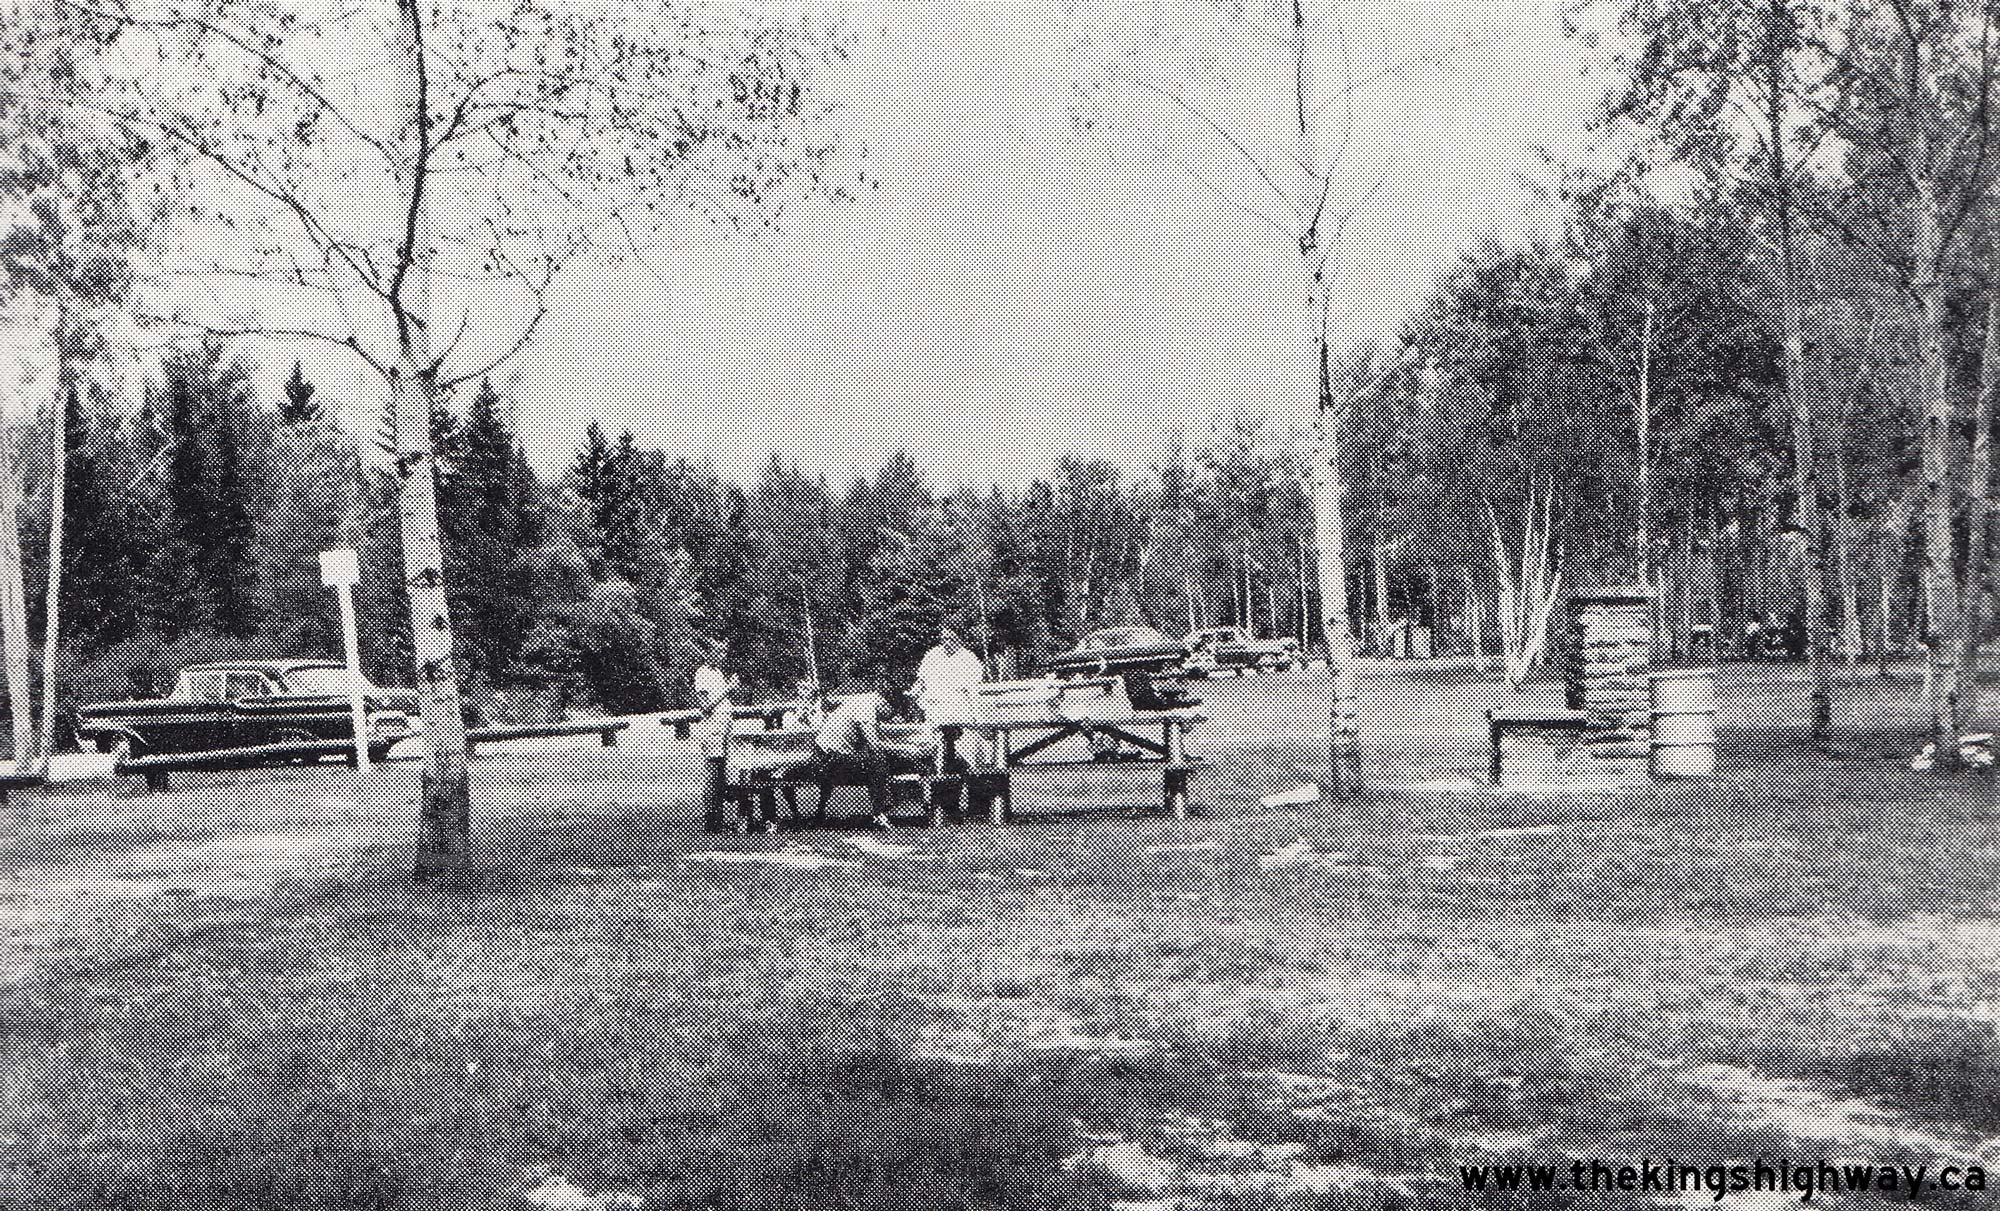
Above - DHO Roadside Park on Hwy 11 at Aidie Creek north of Englehart in 1959. See an
Enlarged Photo Here. Photo taken on August 10, 1959. (Photo courtesy of Ontario Ministry of Transportation - © King's Printer for Ontario, 1959) 
Above - Roadside diversion and overpass construction at the junction of Hwy 400 and the future Hwy 400 Extension between Barrie and Crown Hill, Contract
#1958-648. Roadside diversions such as this were commonly-used along Ontario's early freeways during the construction of cast-in-place concrete bridges over existing
routes. In many instances, it was more economical to construct a roadside diversion than it was to try and accommodate traffic directly through the bridge
construction site. See an Enlarged Photo Here. Photo taken on August 12, 1959. (Photo courtesy of Ontario Ministry of Transportation - © King's Printer for Ontario, 1959) 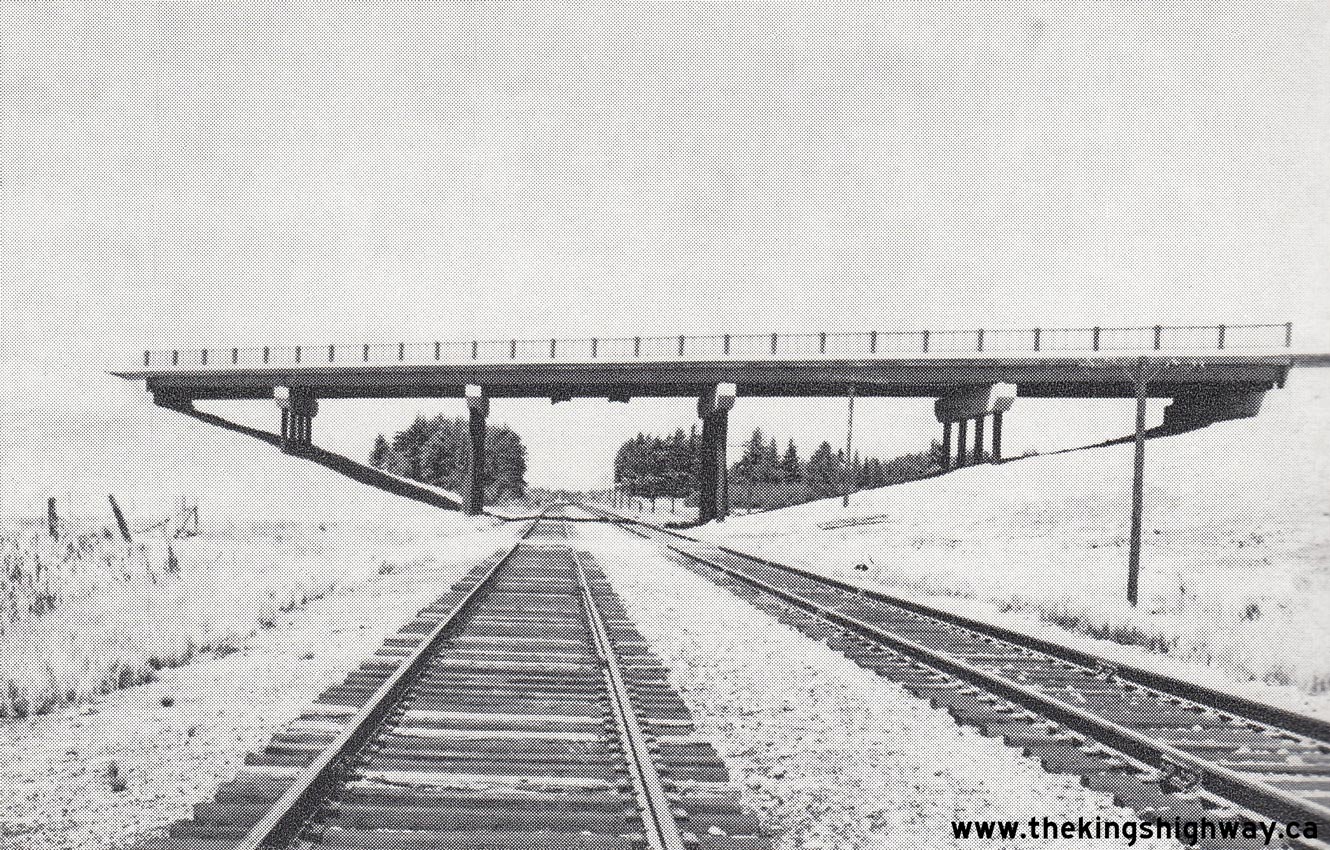

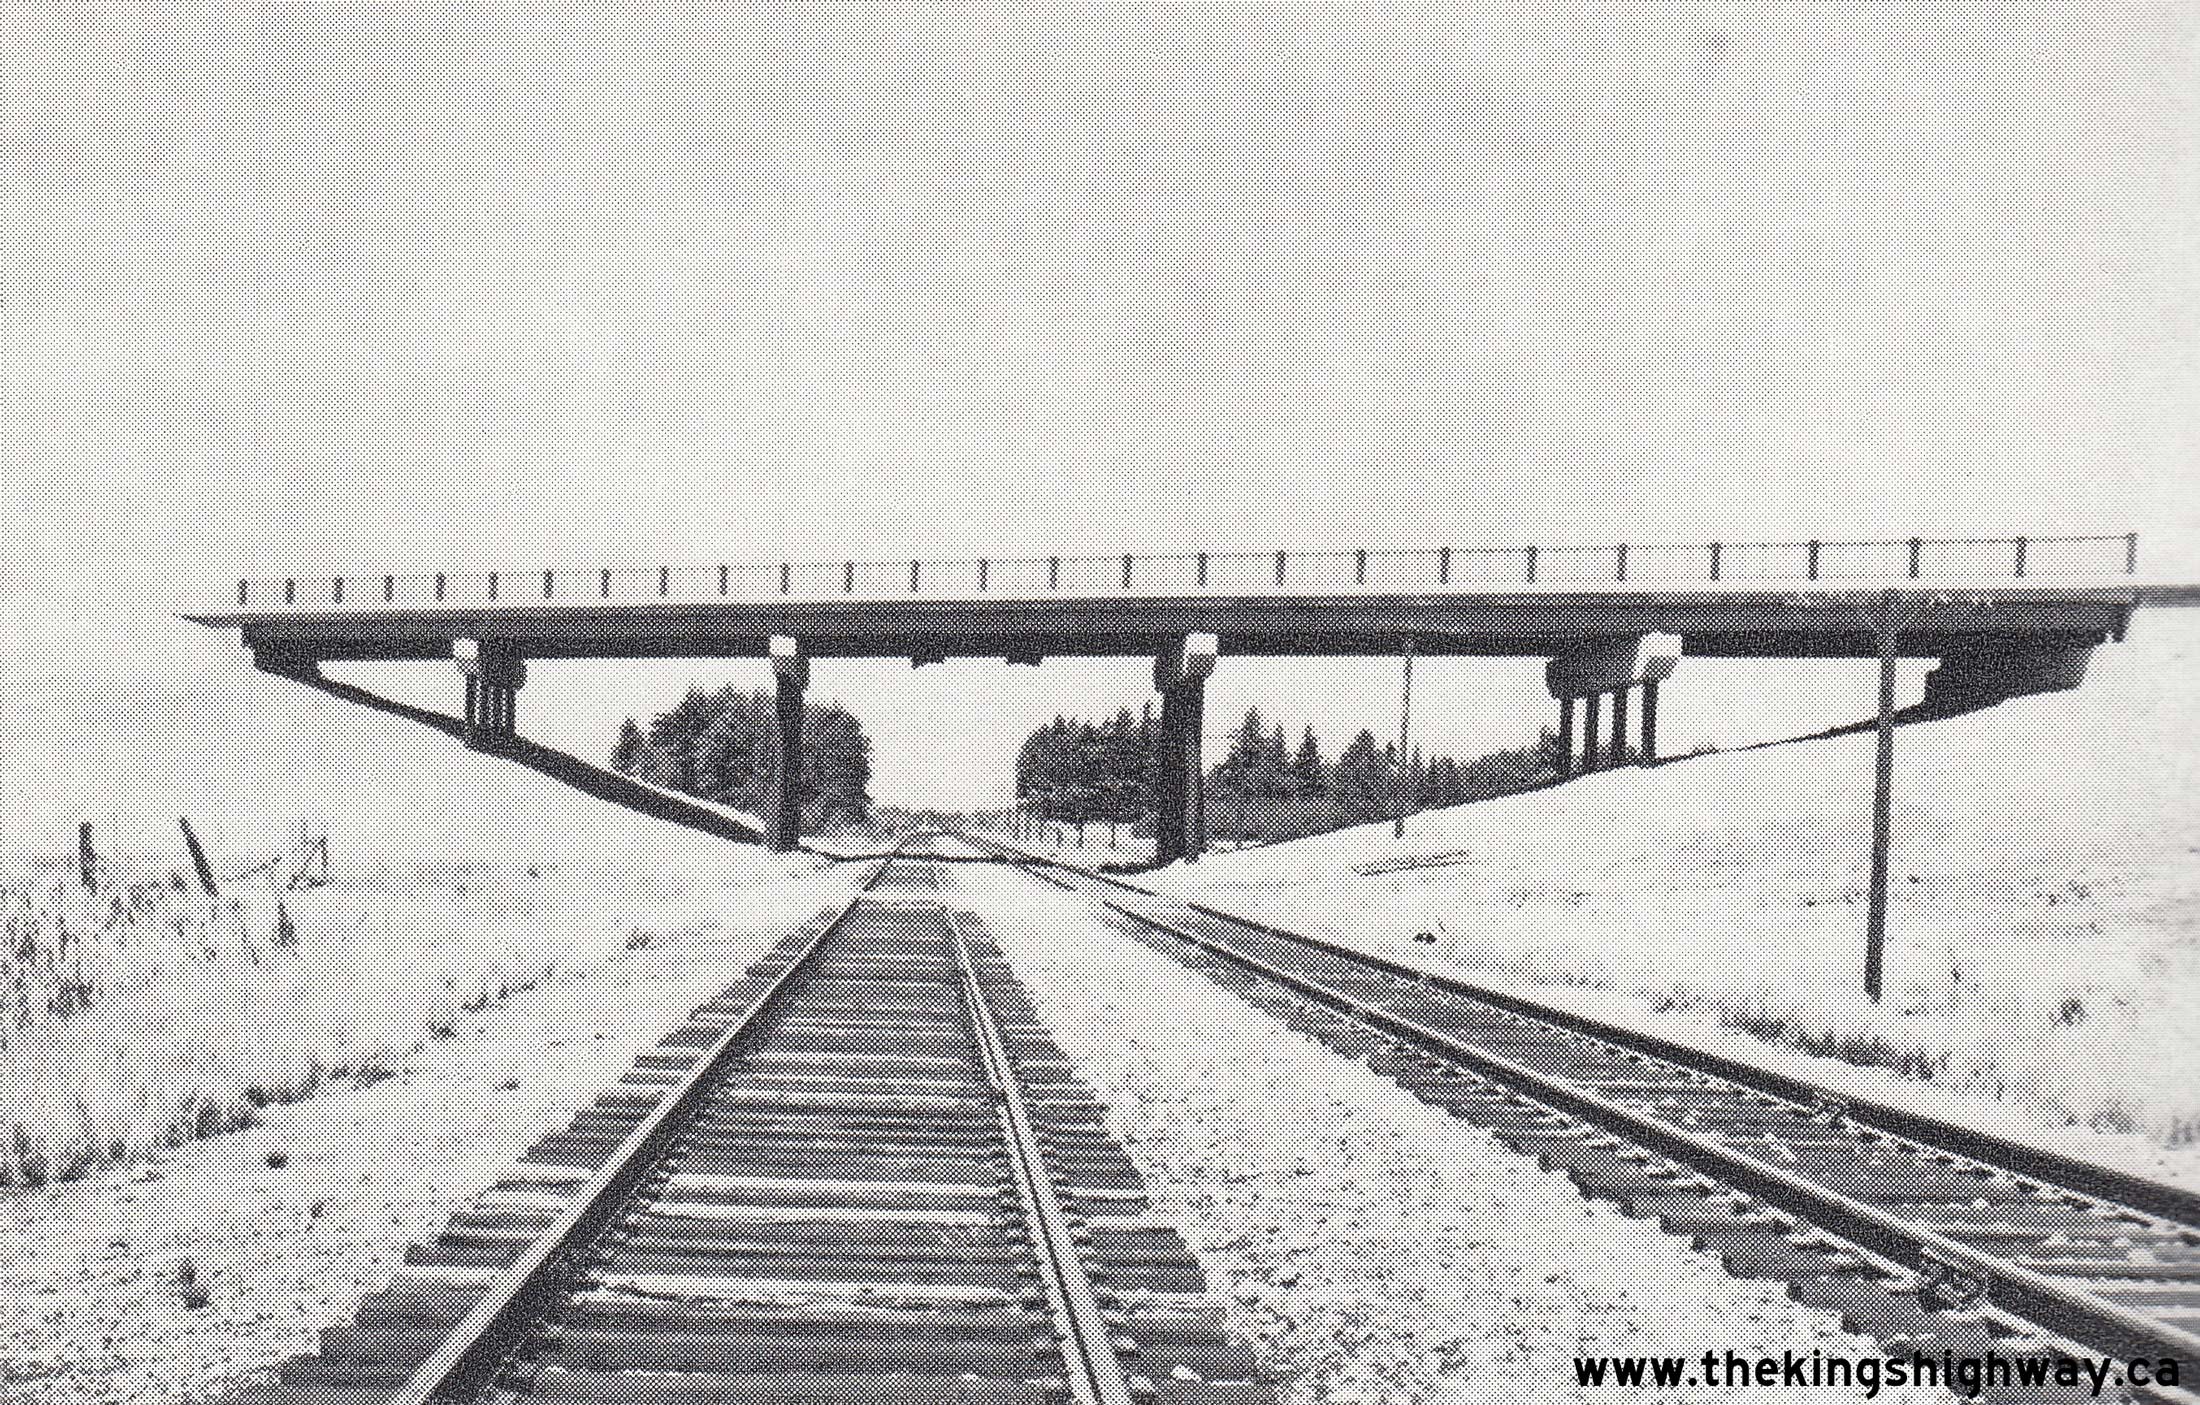
Left - Canadian National Railway (CNR) Overhead on the new Callander Bypass (Hwy 11) near North Bay, Contract #1958-17. This was the more northerly of the two
grade separations built along the first (1959) Callander Bypass. The railway through Callander was abandoned during the 1970s and the railway overhead on Hwy 11 seen
here was subsequently demolished. This grade separation was originally located about 1 km north of the Hwy 94 Junction in Callander, although there is no trace
anymore that a bridge ever existed there. See an Enlarged Photo Here. Photo taken on August
12, 1959. (Photo courtesy of Ontario Ministry of Transportation - © King's Printer for Ontario, 1959) Right - Postcard view of the Vernon Narrows Bridge on the new Huntsville Bypass, shortly before being opened to traffic (1959) (Photo courtesy of Ernie Dollimore) 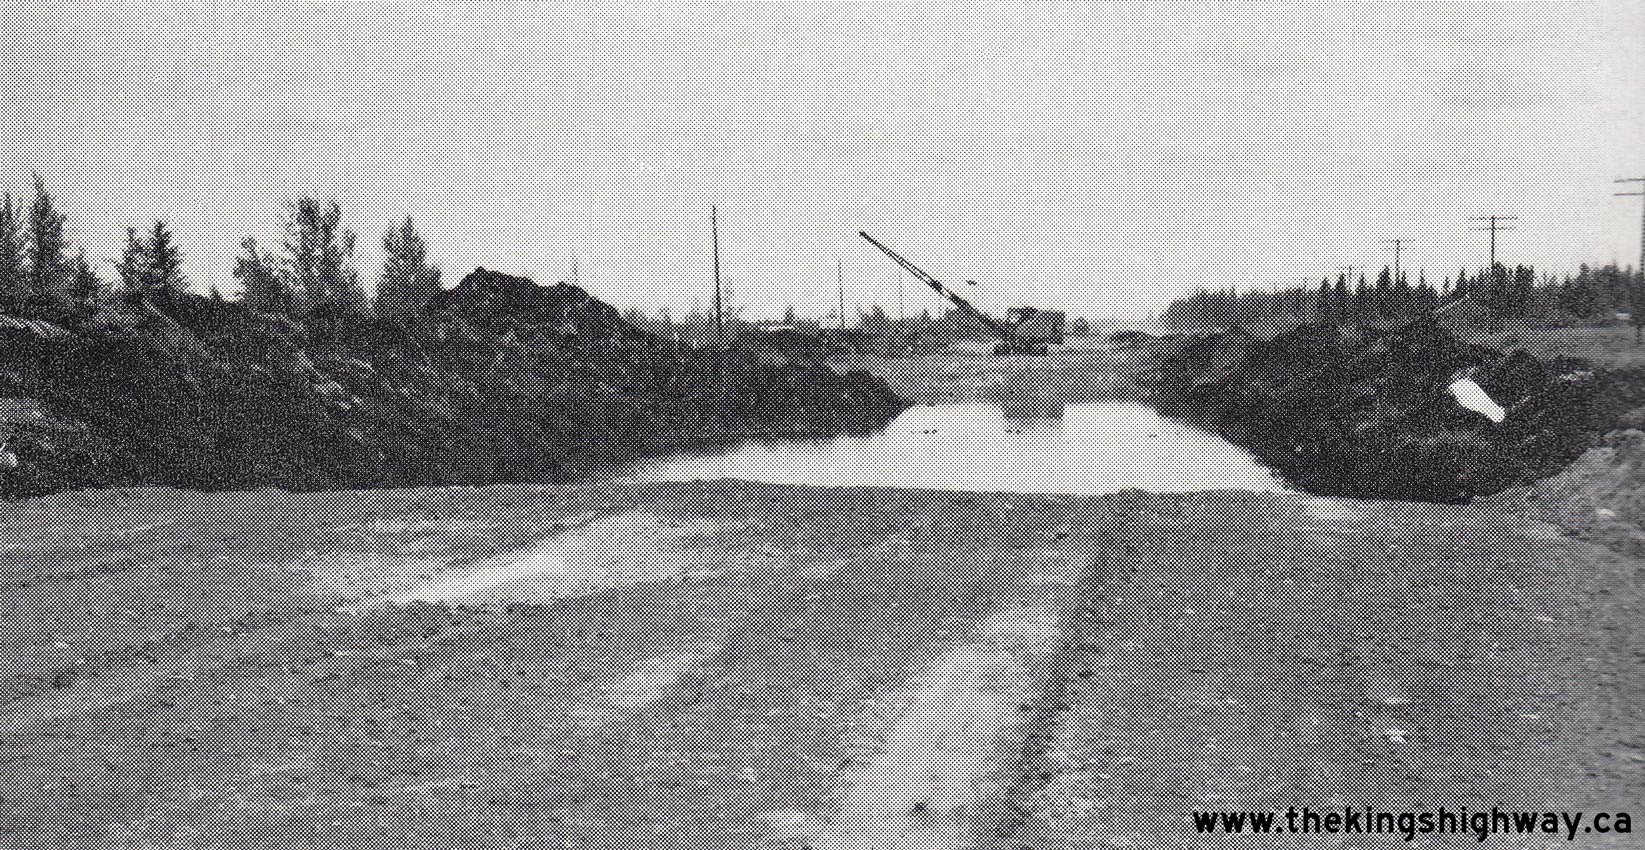
Above - Muskeg excavation for a revision of Hwy 11 near Driftwood west of Cochrane in 1959, Contract #1957-87. Although motorists may take Northern Ontario's
major routes like Hwy 11 and Hwy 17 for granted today, an incredible amount of construction work was actually necessary in order to build these highways. As can be
seen in this photo, the depth of muskeg removal required in order to place appropriate sub-grade and granular base for Hwy 11 at this location was very significant.
See an Enlarged Photo Here. . Photo taken on August 15, 1959. (Photo courtesy of Ontario Ministry of Transportation - © King's Printer for Ontario, 1959) 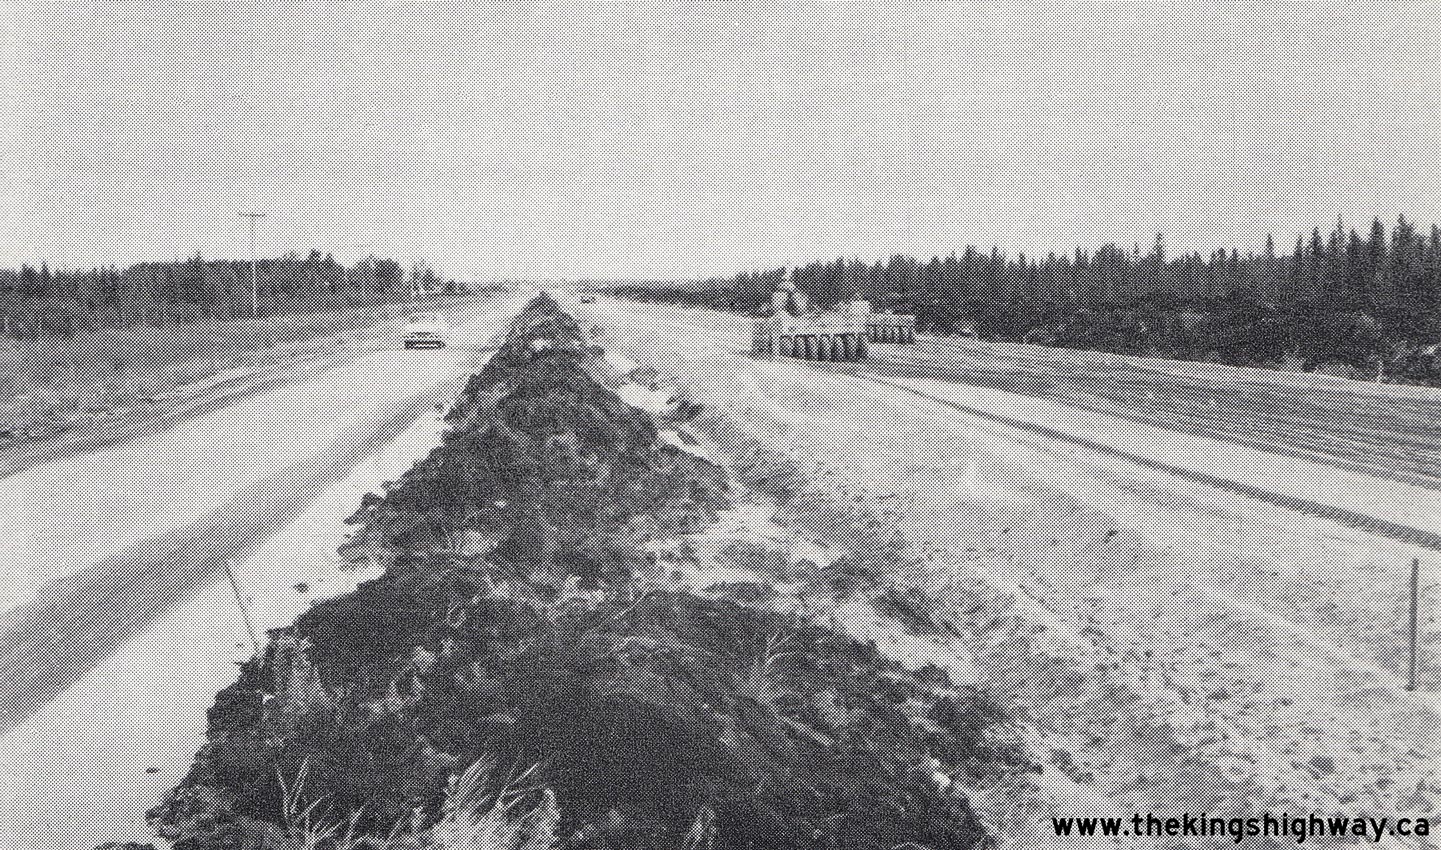
Left - Construction of a revision of Hwy 11 directly beside the original highway south of Cochrane in 1959, Contract #1958-14. See an
Enlarged Photo Here. Photo taken on August 15, 1959. (Photo courtesy of Ontario Ministry of Transportation - © King's Printer for Ontario, 1959) Right - Looking through the completed Mattagami River Bridge on Hwy 11 at Smooth Rock Falls in 1959, Contract #1956-36. See an Enlarged Photo Here. Photo taken on August 17, 1959. (Photo courtesy of Ontario Ministry of Transportation - © King's Printer for Ontario, 1959) 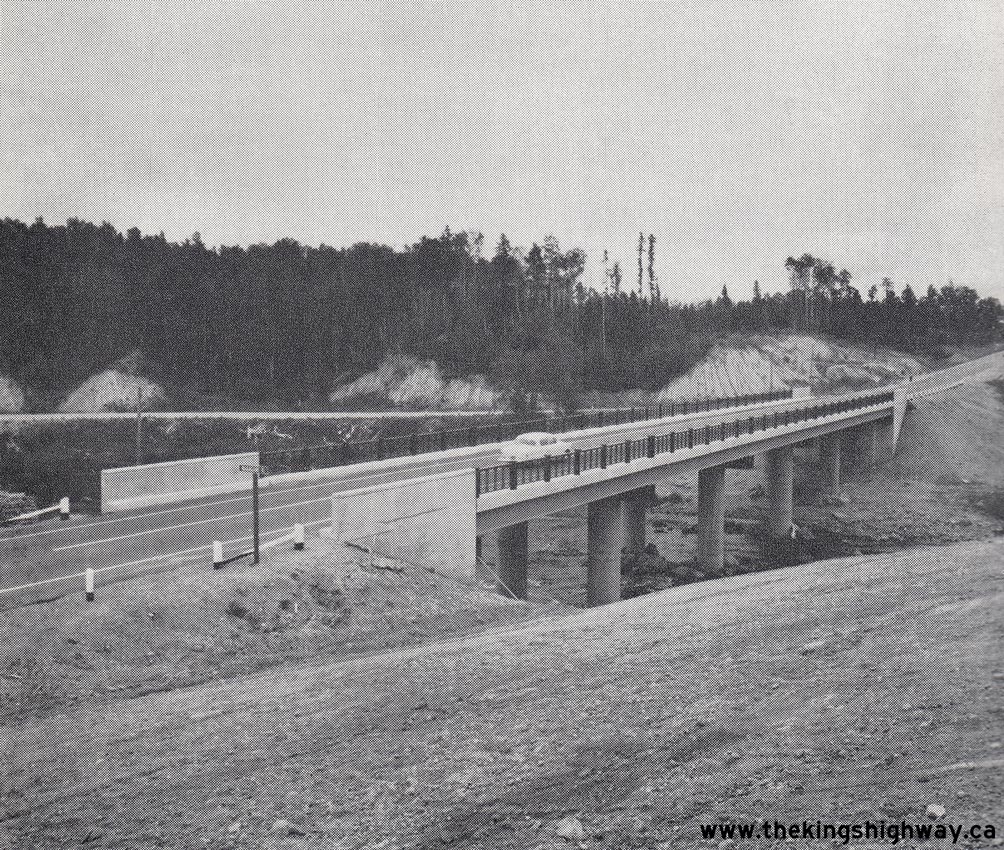
Above - Completed Nagagami River Bridge on Hwy 11 west of Hearst in 1959, Contract #1956-144. See an
Enlarged Photo Here. (Photo courtesy of Ontario Ministry of Transportation - © King's Printer for Ontario, 1959) 
Above - View from the Rainy River Ferry Landing at the end of Hwy 71 (later Hwy 11) in 1959. In this photo, the ferry is carrying westbound traffic from Canada
towards the United States. Note the new piers for the Rainy River International Bridge under construction in the background. Up until the completion of the new bridge
between Rainy River, Ontario and Baudette, Minnesota in 1960, motorists had to utilize a ferry service to travel between Canada and the United States. The old ferry
landing was located on Water Street, immediately upstream of the Rainy River International Bridge. Ferry service was discontinued in 1960, once the new bridge opened to
traffic. See an Enlarged Photo Here. Photo taken on September 6, 1959. (Photo courtesy of Ontario Ministry of Transportation - © King's Printer for Ontario, 1959) 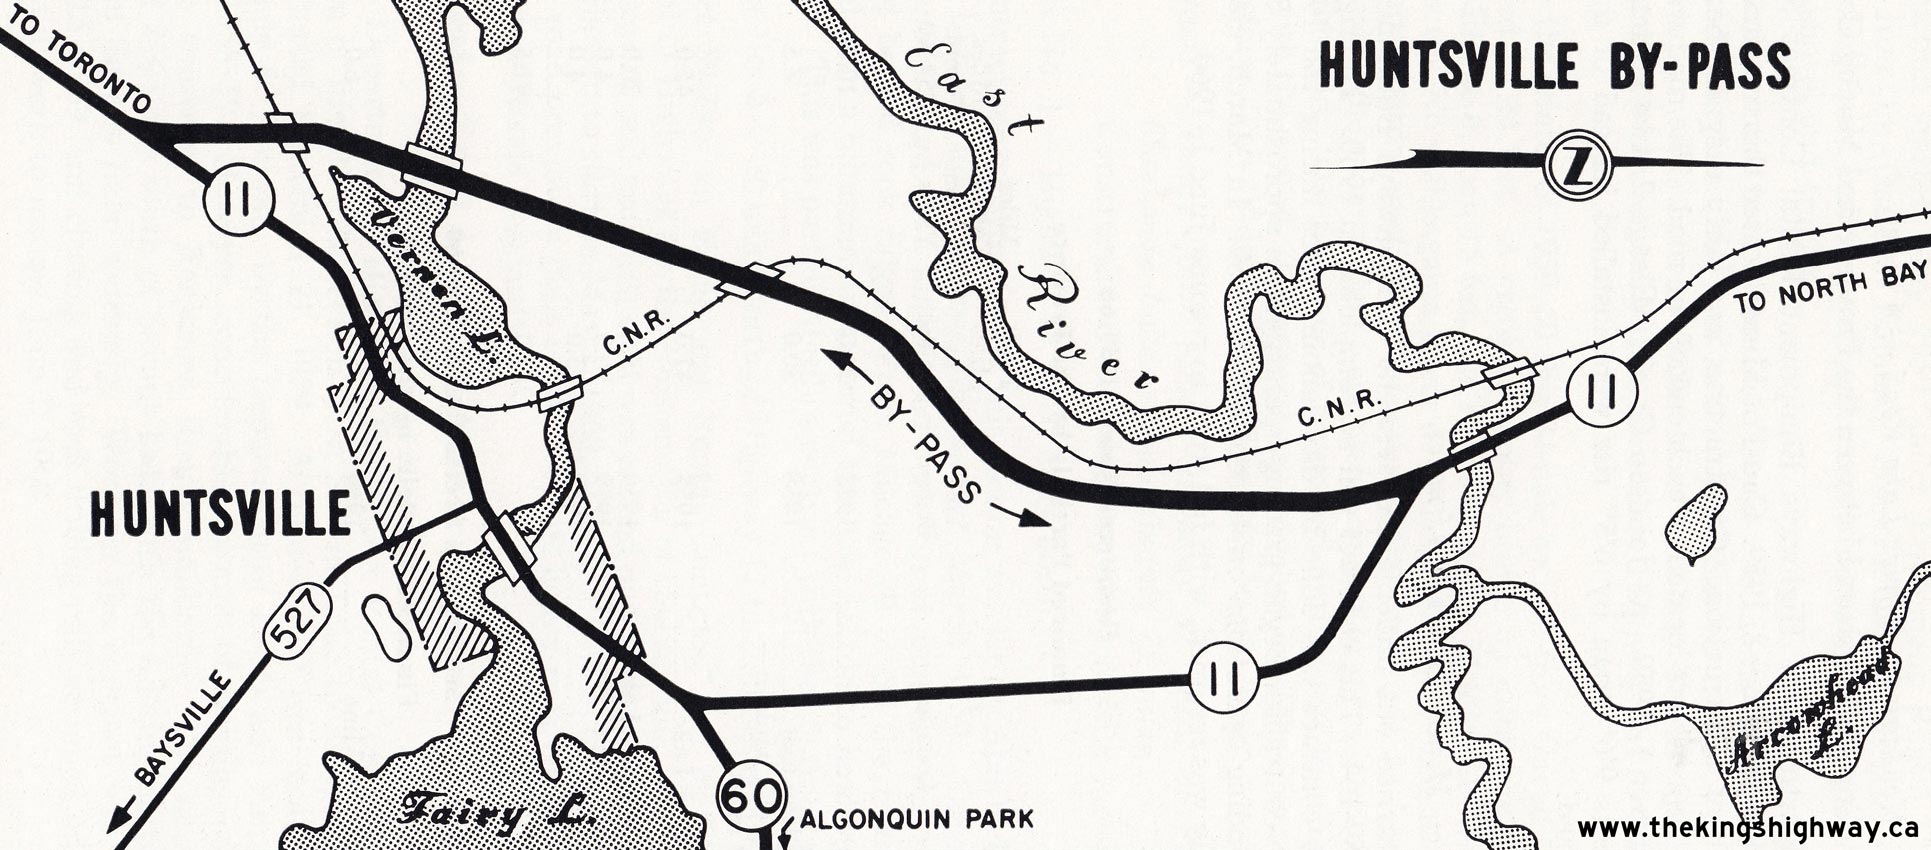
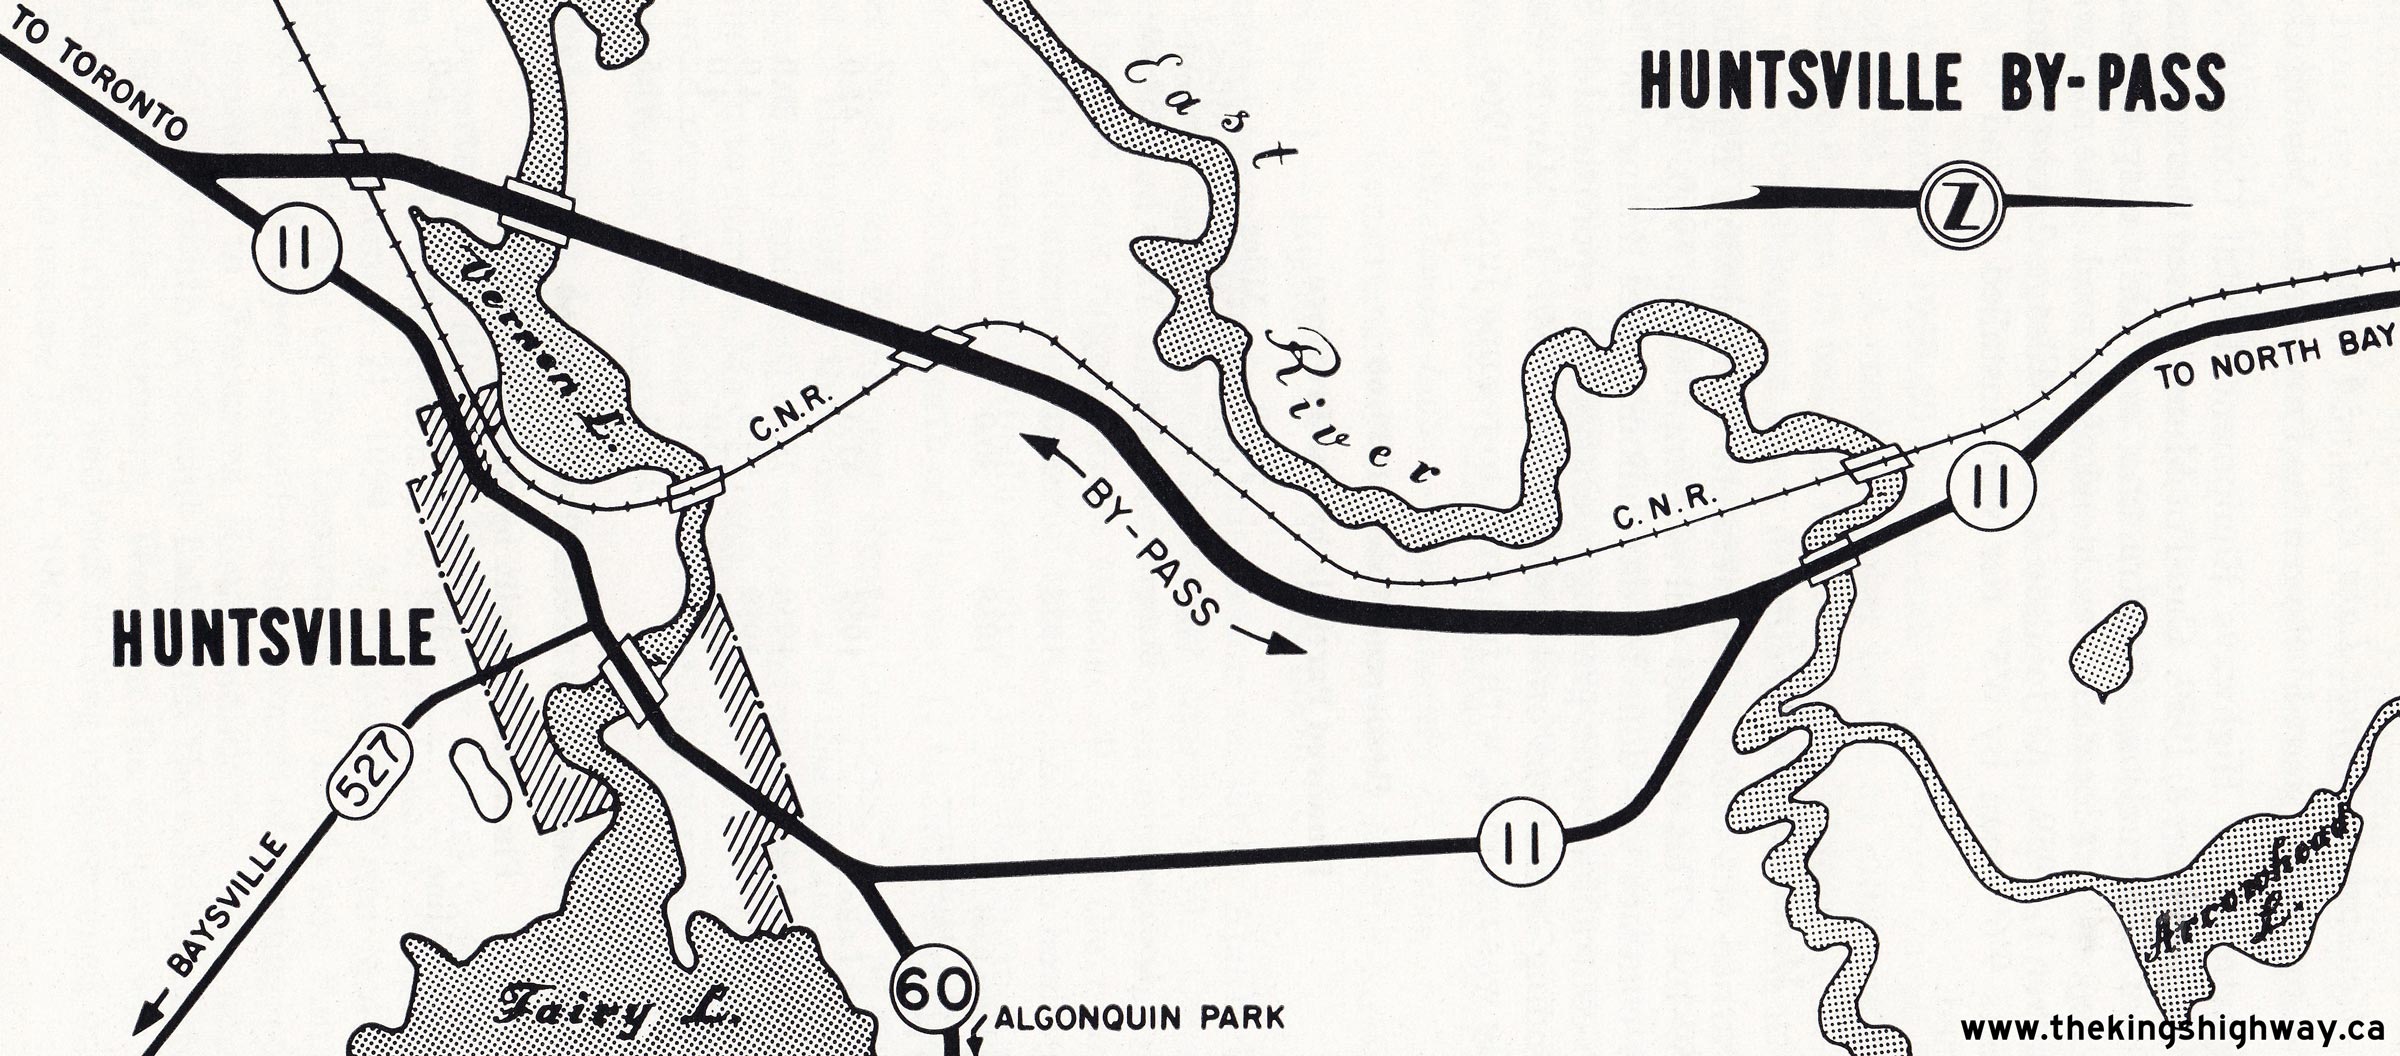
Above - DHO plan from 1959 showing the route of the new Huntsville Bypass on Hwy 11. The new bypass officially opened to traffic on November 27, 1959. See an
Enlarged Photo Here. (Photo courtesy of Ontario Ministry of Transportation - © King's Printer for Ontario, 1959)
Continue to King's Highway 11 Historical Photos from 1960 to 1969
|
|---|
Links to Adjacent King's Highway Photograph Pages:
Back to Hwy 11 - Historical Photos (1940 to 1949)
Hwy 11 Photo Index
On to Hwy 11 - Historical Photos (1960 to 1969)
Back to King's Highway 10 Photos /
King's Highway 11 History /
On to King's Highway 12 Photos
Ontario Highway History - Main Menu / Back to List of Highways Website contents, photos & text © 2002-2026, Cameron
Bevers (Webmaster) - All Rights Reserved / Contact Me
|
|---|