
| 
| |
|
|
This page contains present day photos (Year 2000 to date) of Ontario's King's Highway 11, arranged by location from Orillia
northerly to Gravenhurst. All photographs displayed on this page were taken by the Webmaster (Cameron Bevers), unless specifically noted otherwise. Click on any
thumbnail to see a larger image!
Please note that all photographs displayed on this
website are protected by copyright. These photographs must not be reproduced, published,
electronically stored or copied, distributed, or posted onto other websites without
my written permission. If you want to use photos from this website, please
email me first for permission. Thank-you!
|
|---|
|
Page 9: Present Day King's Highway 11 Photographs (Orillia to Gravenhurst)


Left - Laclie Street (Former Hwy 11B) Underpass on Hwy 11 north of Orillia. Structure completed in 1957. This interchange marks the northern end of the Orillia
Bypass, where the newer 1950s alignment of Hwy 11 ties into the original alignment of the highway. (Photograph taken on June 3, 2005 - © Cameron Bevers) Right - Former CNR Grade Separation on Hwy 11 north of the Laclie Street Interchange near Orillia. This is one of several abandoned railway structures in the Orillia area. (Photograph taken on June 3, 2005 - © Cameron Bevers) 

Left - Orillia CNR Grade Separation on Hwy 11. The original concrete rigid frame structure was completed in 1953, and was designed to accommodate a four-lane
undivided highway. The bridge was widened slightly in 1979 to accommodate the construction of a centre median barrier to convert Hwy 11 into a four-lane divided
highway. (Photograph taken on June 3, 2005 - © Cameron Bevers) Right - Former CPR Grade Separation on Hwy 11 north of the Laclie Street Interchange near Orillia. This abandoned railway structure lies immediately north of the CNR grade separation seen above. Both the CNR and CPR lines leading into Orillia have been abandoned over the past 30 years. Their right-of-ways were converted into recreational trails. (Photograph taken on June 3, 2005 - © Cameron Bevers) 

Left - The former CPR Grade Separation north of Orillia is actually a very complex structure, comprised of four different bridges all built at different times.
The original 1930s structure was only designed to carry a two lane roadway, and was subsequently widened in the 1950s and again in the 1970s as traffic volumes on
Hwy 11 increased. Accordingly, this interesting bridge provides us with some insight about the growing importance of Hwy 11 in the provincial highway system as the
years have progressed. (Photograph taken on June 3, 2005 - © Cameron Bevers) Right - The oldest span (centre left) was completed in 1931. It carries the northbound Hwy 11 lanes. The span at centre right was completed in 1957, and carries the centre median and most of the southbound lanes. Two additional structures were built on each side of the bridge in 1979 to accommodate the present divided expressway. The northbound 1979 span (just visible at extreme left) carries the northbound shoulder, while the southbound 1979 span (at right) carries part of the outermost southbound lane and the southbound shoulder. (Photograph taken on June 3, 2005 - © Cameron Bevers) 

Left - The skewed crossing of the highway at the railway line resulted in this complex V-shaped pier underneath the original 1931 span of the Orillia CPR Grade
Separation. (Photograph taken on June 3, 2005 - © Cameron Bevers) Right - Comparison of the piers of the original 1931 span (left) and 1957 span (right) at the Orillia CPR Grade Separation. (Photograph taken on June 3, 2005 - © Cameron Bevers) 

Left - Eastern side of the Orillia CPR Grade Separation on Hwy 11 north of the Laclie Street Interchange. (Photograph taken on June 3, 2005 - © Cameron Bevers) Right - Staggered transverse support beam underneath the original span of the Orillia CPR Grade Separation. The 1931 span in this structure is the most complex and by far the most interesting in terms of its design. (Photograph taken on June 3, 2005 - © Cameron Bevers) 

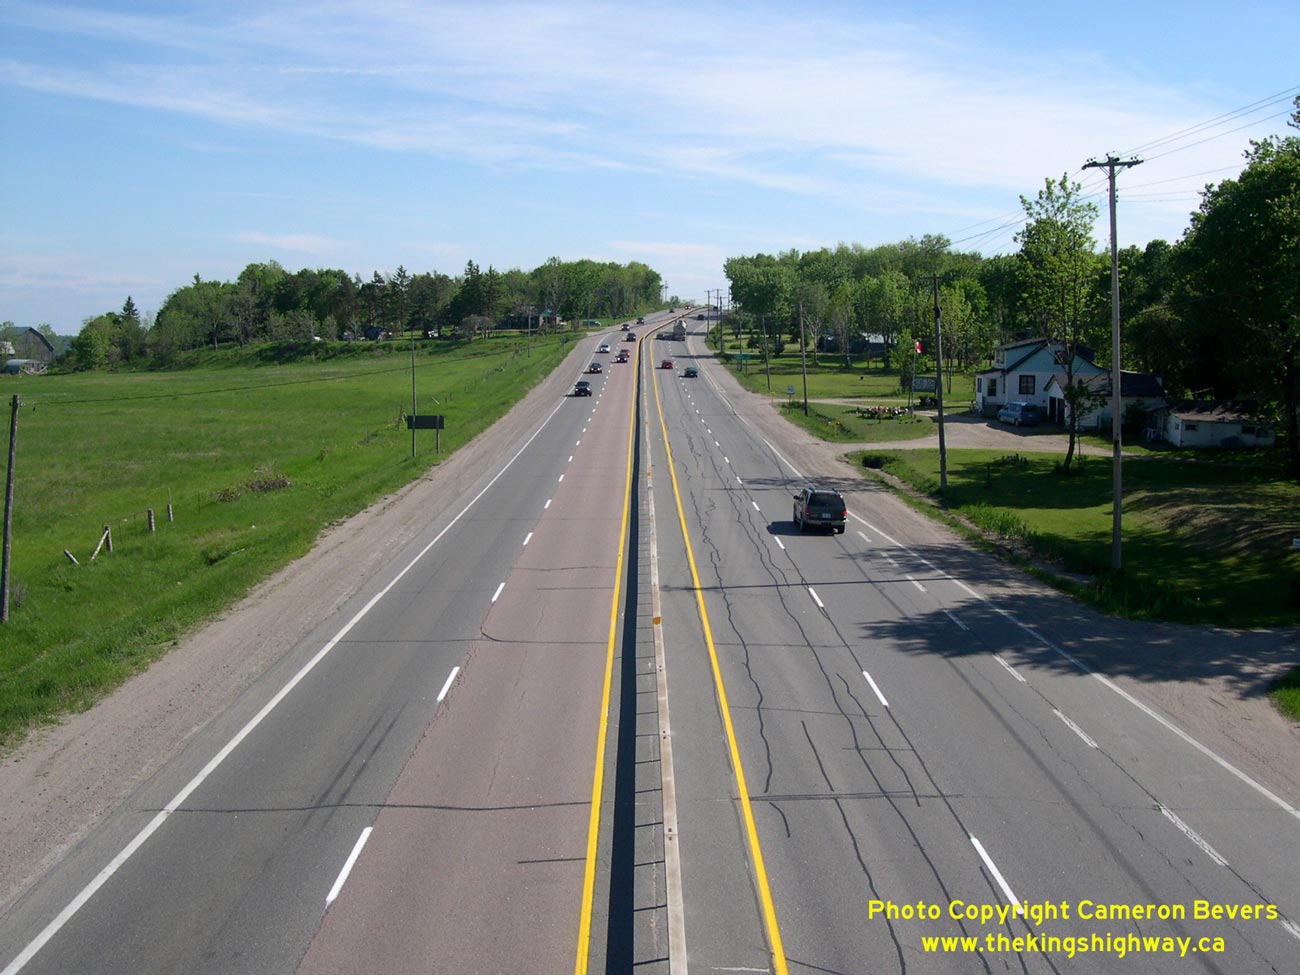
Left - Facing south towards Orillia along Hwy 11 from Telford Line Overpass. This section of Hwy 11 is known as a "RIRO" Expressway (Right-in, Right-out). This
type of roadway operates in a similar fashion to a traditional freeway, except for the fact that the road is not completely controlled-access. Local access is
permitted from adjacent properties along much of Hwy 11 from Barrie to Gravenhurst, although access is only provided for right-turning vehicles. Left turns are
prohibited. All intersecting roads are either grade-separated or connected by on/off ramps as seen on a normal freeway. Note the driveways to adjacent properties at
right. See an Enlarged Photo here. (Photograph taken on June 3, 2005 - © Cameron Bevers) Right - Facing north towards Gravenhurst from Telford Line Overpass. Note the ramps linking Telford Line to Hwy 11 in the background. Apart from the rather obvious (and unfortunate) presence of driveways and other forms of local access along this highway, the operation is similar to that of a traditional freeway. See an Enlarged Photo here. (Photograph taken on June 3, 2005 - © Cameron Bevers) 

Left - Eastern side of the Trent-Severn Waterway Bridge on Hwy 11 south of Washago. This high-level structure was originally completed in 1954 as a two-lane
structure. It was widened in 1965 to accommodate the present four-lane highway. (Photograph taken on June 4, 2005 - © Cameron Bevers) Right - Close-up of the original embossed concrete parapet wall on the northbound (1954) Hwy 11 structure across the Trent-Severn Waterway. (Photograph taken on June 4, 2005 - © Cameron Bevers) 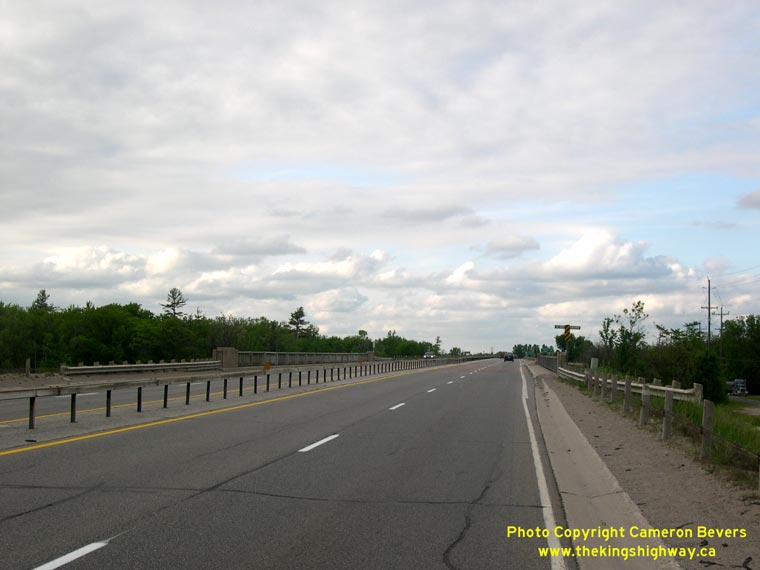

Left - Facing north along Hwy 11 towards Gravenhurst at the Trent-Severn Waterway Bridge near Washago. (Photograph taken on June 4, 2005 - © Cameron Bevers) Right - Site of the former Washago Swing Bridge over the Trent-Severn Waterway. This opening bridge created large traffic tie-ups on Hwy 11 until it was bypassed by the current high-level bridge in the mid-1950s. Before it was removed from service, the Washago Swing Bridge was one of the most serious traffic bottlenecks in Ontario. (Photograph taken on June 4, 2005 - © Cameron Bevers) 

Left - Facing north along an abandoned Hwy 11 alignment at the site of former Trent-Severn Waterway Swing Bridge at Washago. The former swing bridge was
removed from service when the Washago Bypass was completed and opened to traffic in 1955. The current high-level bridge which carries today's Hwy 11 can be seen at
left. (Photograph taken on June 4, 2005 - © Cameron Bevers) Right - Western side of the Trent-Severn Waterway Bridge, showing the newer southbound Hwy 11 structure built in 1965. (Photograph taken on June 4, 2005 - © Cameron Bevers) 

Left - Structure identification number and date stamp (1965) on the Southbound Hwy 11 Structure over the Trent-Severn Waterway. The streamlined embossed
concrete parapet walls of the original 1954 northbound Hwy 11 structure were thoughtfully replicated on the widened 1965 southbound Hwy 11 structure. (Photograph taken on June 4, 2005 - © Cameron Bevers) Right - Facing south along a former Hwy 11 alignment south of the Hwy 169 Interchange at Washago. This old highway alignment (Bond Road) was bypassed in 1955 by the new high-level Trent-Severn Waterway Bridge and the Washago Bypass. An old 1930s-era Department of Highways Bridge still stands on the old highway route. The bridge spans a former outlet of the Green River that was severed during construction of the Washago Bypass. (Photograph taken on June 4, 2005 - © Cameron Bevers) 

Left - Facing north towards the Old Washago Bridge on the former Hwy 11 alignment (Bond Road) south of the Hwy 169 Interchange. (Photograph taken on June 4, 2005 - © Cameron Bevers) Right - Old Washago Bridge on the former Hwy 11 alignment (Bond Road). This short concrete rigid frame structure was completed in 1934. (Photograph taken on June 4, 2005 - © Cameron Bevers) 

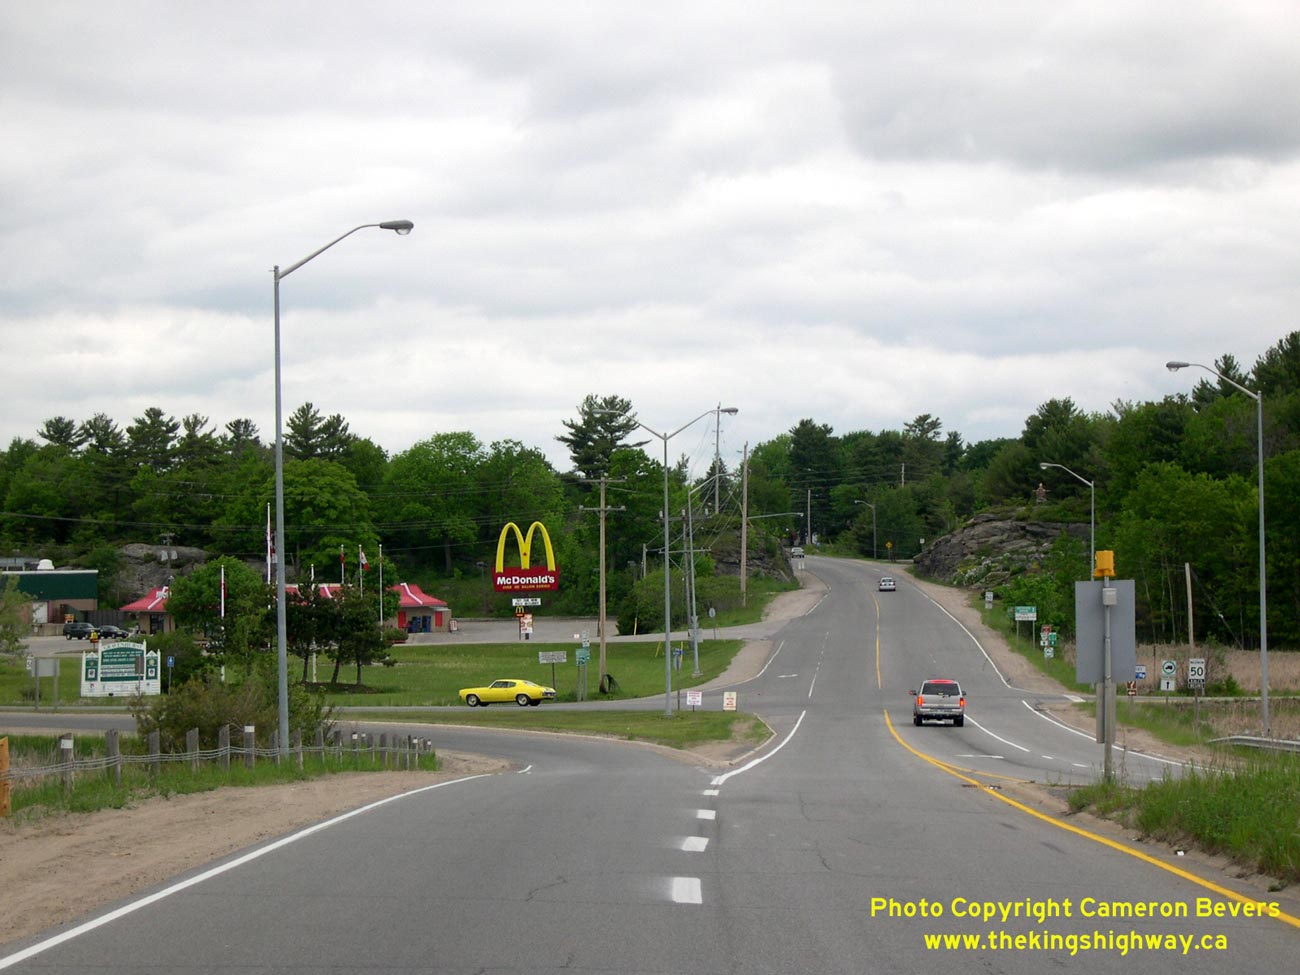
Left - Facing south along Hwy 169 from Muskoka Street in Washago towards the Severn River West Branch (Green River) Bridge. See an
Enlarged Photo Here. (Photograph taken on August 6, 2016 - © Cameron Bevers) Right - Facing north along Hwy 169 at Muskoka Street in Washago. Historically, Muskoka Street was part of Hwy 11 & Hwy 69. Up until 1955, Hwy 69 turned right onto Muskoka Street and followed a concurrent route with Hwy 11 to Gravenhurst. Once the Washago Bypass opened to traffic in 1955, Hwy 69 continued straight ahead to join with the relocated route of Hwy 11 a short distance west of town. See an Enlarged Photo Here. (Photograph taken on August 6, 2016 - © Cameron Bevers) 
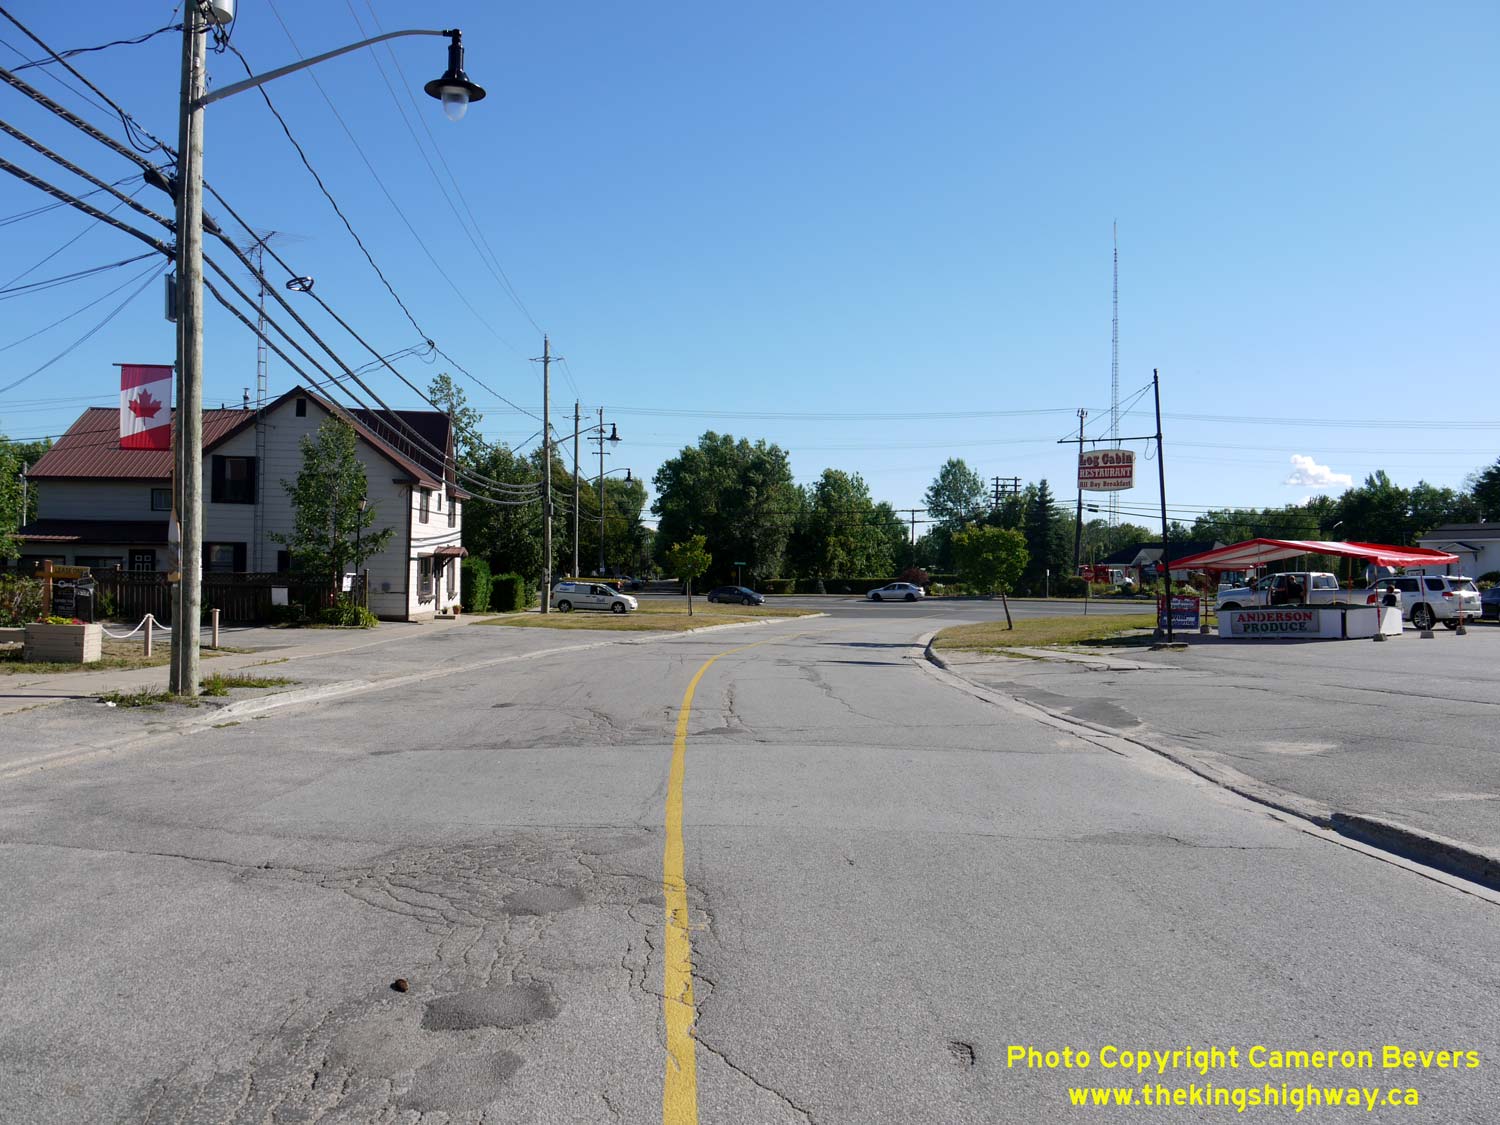
Left - The angled orientation of this vintage diner sign relative to Washago's Muskoka Street reflects an obvious desire by a previous proprietor to capture
the attention of motorists cruising through Washago along Hwy 11 on their way between Orillia and Gravenhurst. At one time, the Hwy 11 connection passed through the
grassed area in the foreground. Subsequent street improvements realigned Muskoka Street to meet Hwy 169 closer to a right-angle, as seen today. See an
Enlarged Photo Here. (Photograph taken on August 6, 2016 - © Cameron Bevers) Right - Approaching the Hwy 169 Junction on Muskoka Street (Old Hwy 11 & Hwy 69), facing south. Prior to the completion of the Washago Bypass in 1955, Hwy 69 and Hwy 11 parted ways at this intersection. The route of Hwy 11 turned to the right just beyond the diner sign and continued south towards Orillia, while Hwy 69 curved to the left and headed south towards Brechin. See an Enlarged Photo Here. (Photograph taken on August 6, 2016 - © Cameron Bevers) 

Left - Facing north along Muskoka Street from Hwy 169 in Washago. The large grassed areas to the left and right of the present-day intersection are where the
original routes of Hwy 11 & Hwy 69 would have been located. This intersection was rebuilt after the Washago Bypass opened to traffic in the mid-1950s, in
reflection of the fact that through traffic no longer needed to follow Washago's Muskoka Street. See an
Enlarged Photo Here. (Photograph taken on August 6, 2016 - © Cameron Bevers) Right - Sign for the appropriately-named Muskoka Street on southbound Hwy 169 in Washago. Prior to 1955, all traffic bound for Muskoka from Southern Ontario had to pass along Washago's main street, as there was no direct highway linking Port Severn and Parry Sound at that time. The Trans-Canada Highway north of Port Severn didn't open to traffic until 1958. See an Enlarged Photo Here. (Photograph taken on August 6, 2016 - © Cameron Bevers) 

Left - Facing south along Hwy 169 at the former site of the Canadian National Railway (CNR) crossing on Hwy 11. At one time, the highway curved in the opposite
direction, as Hwy 11 headed south out of Washago towards Orillia. The old route of Hwy 11 curved in from the right, where the yellow-and-black curve chevron sign
appears today. After the Washago Bypass was opened to traffic in 1955, the CNR crossing on Old Hwy 11 was closed off to traffic. The route of Hwy 69 was then
realigned and extended out to the new Hwy 11 Bypass, including the construction of the new highway curve seen here. See an
Enlarged Photo Here. (Photograph taken on August 6, 2016 - © Cameron Bevers) Right - Approaching Washago on Hwy 169 near the Hwy 11 Interchange, facing south. This short connection between Old Hwy 11 and the Washago Bypass (Hwy 11 New) was built in the mid-1950s. The Washago Connector was numbered as Hwy 69 up until 1976, when it was renumbered as Hwy 169. See an Enlarged Photo Here. (Photograph taken on August 6, 2016 - © Cameron Bevers) 

Left - Hwy 169 South Overpass on Hwy 11 at Washago. Up until 1998, Hwy 169 ran concurrently with Hwy 11 between Washago and Gravenhurst. As a result,
there are actually two interchanges for Hwy 169 along Hwy 11, situated about 18 km apart. The Hwy 169 Interchange located at Washago is the southernmost of
the two junctions. (Photograph taken on June 6, 2009 - © Cameron Bevers) Right - The ramps of the Hwy 169 South Interchange are in a modified "B-Trumpet" configuration, with the loop ramp to Hwy 169 South lying downstream of the overpass. This interchange is situated on a small island at the convergence of the Green and Severn Rivers. The adjacent rivers created considerable space constraints when the interchange was being designed. Accordingly, the layout and ramp geometry of this interchange had to be configured to fit within these natural barriers. See an Enlarged Photo here. (Photograph taken on June 6, 2009 - © Cameron Bevers) 

Left - The loop ramp from Hwy 11 South to Hwy 169 South has a 30 km/h advisory speed. The design of "B" loop ramps for traffic exiting a freeway
is normally discouraged in Ontario, because of the potential for traffic to enter the ramp from the freeway at a speed that exceeds the design speed of
the loop ramp. However, in this particular case, the interchange design options were limited by the natural constraints of the adjacent river and
surrounding topography. (Photograph taken on June 6, 2009 - © Cameron Bevers) Right - Looking underneath the Hwy 169 South Overpass on Hwy 11 at Washago. The bridge deck has been superelevated to compensate for the reduced radius of the ramps to and from Hwy 11 South. Structure completed in 1984. (Photograph taken on June 6, 2009 - © Cameron Bevers) 

Left - Date stamp (1984) and structure identification number on the Hwy 169 South Overpass. (Photograph taken on June 6, 2009 - © Cameron Bevers) Right - Northern side of the Hwy 169 South Overpass on Hwy 11 at Washago. (Photograph taken on June 6, 2009 - © Cameron Bevers) 

Left - Facing north along Hwy 11 towards Gravenhurst from the Hwy 169 South Overpass at Washago. See an
Enlarged Photo here. (Photograph taken on June 6, 2009 - © Cameron Bevers) Right - Facing south along Hwy 11 towards Orillia from the Hwy 169 South Overpass at Washago. Note the two "buttonhook" on and off ramps which join Hwy 169 to Hwy 11 North on the left in the distant background. See an Enlarged Photo here. (Photograph taken on June 6, 2009 - © Cameron Bevers) 

Left - Facing east across the Hwy 169 South Overpass on Hwy 11 at Washago. Prior to 1984, Hwy 169 South and Hwy 11 met at an at-grade intersection. (Photograph taken on June 6, 2009 - © Cameron Bevers) Right - Severn River Bridge on Hwy 11 north of Washago. Structure completed in 1966. (Photograph taken on August 26, 2006 - © Cameron Bevers) 

Left - Structure identification number and date stamp (1966) on the Severn River Bridge north of Washago. (Photograph taken on August 26, 2006 - © Cameron Bevers) Right - Eastern side of the Severn River Bridge on Hwy 11. This four-lane structure is one of only two provincial highway bridges crossing the Severn River. The other bridge is located on Hwy 400 (Formerly Hwy 69) at Port Severn. These two highways (Hwy 400 and Hwy 11) form the primary highway routes between Southern and Northern Ontario. (Photograph taken on August 26, 2006 - © Cameron Bevers) 

Left - Western side of the Severn River Bridge on Hwy 11. The current Severn River Bridge is a two-span steel plate girder structure. This bridge replaced a
three-span steel pony truss structure that had been built across the Severn River in 1931. When Hwy 11 was widened to four lanes at Severn Bridge in the 1960s, the
Department of Highways was forced into replacing the 1931 structure. The overhead trusses of the 1931 structure couldn't accommodate the width of the proposed
four-lane highway. (Photograph taken on August 26, 2006 - © Cameron Bevers) Right - View of Hwy 11 at Severn Bridge, facing south towards Washago. See an Enlarged Photo here. (Photograph taken on August 26, 2006 - © Cameron Bevers) 

Left - Facing north along Hwy 11 towards the Southwood Road Interchange at Severn Bridge. See an
Enlarged Photo here. (Photograph taken on August 26, 2006 - © Cameron Bevers) Right - Southwood Road Underpass on Hwy 11 at Severn Bridge, facing east. Structure completed in 1984. (Photograph taken on June 6, 2009 - © Cameron Bevers) 

Left - Eastern side of the Southwood Road Underpass on Hwy 11 at Severn Bridge. (Photograph taken on June 6, 2009 - © Cameron Bevers) Right - Structure identification number and date stamp (1984) on the Southwood Road Underpass on Hwy 11 at Severn Bridge. (Photograph taken on June 6, 2009 - © Cameron Bevers) 

Left - Facing south along Hwy 11 towards Severn Bridge from the Southwood Road Interchange. The large rock cut immediately north of the Severn River Bridge
was constructed during a highway improvement project on Hwy 11 in 1948. Up until the 1940s, Hwy 11 used to curve onto today's Cowbell Lane as it passed through Severn
Bridge. Many sections of Hwy 11 between Severn Bridge and Gravenhurst were rebuilt and relocated onto improved alignments in 1947-1948. See an
Enlarged Photo here. (Photograph taken on June 6, 2009 - © Cameron Bevers) Right - Facing north along Hwy 11 towards Gravenhurst from the Southwood Road Interchange at Severn Bridge. See an Enlarged Photo here. (Photograph taken on June 6, 2009 - © Cameron Bevers) 

Left - Facing south along Hwy 11 towards Washago from the Sparrow Lake Route "D" Overpass. (Photograph taken on June 17, 2005 - © Cameron Bevers) Right - Facing north along Hwy 11 towards Gravenhurst and the South Kahshe River Bridge from the Sparrow Lake Route "D" Overpass. The section of Hwy 11 between Washago and Gravenhurst is one of the most interesting sections along the entire highway. This is one of several sweeping reverse curves along Hwy 11 in this area. See an Enlarged Photo here. (Photograph taken on June 17, 2005 - © Cameron Bevers) 

Left - Bypassed section of Hwy 11 south of Gravenhurst approaching the abandoned South Kahshe River Bridge. (Photograph taken on June 17, 2006 - © Cameron Bevers) Right - Abandoned South Kahshe River Bridge on a former Hwy 11 alignment south of Gravenhurst. (Photograph taken on June 17, 2006 - © Cameron Bevers) 

Left - Close-up of the concrete handrail on the South Kahshe River Bridge south of Gravenhurst. (Photograph taken on June 17, 2006 - © Cameron Bevers) Right - Abandoned section of Hwy 11 just north of the South Kahshe River Bridge. The abandoned alignment comes out at the top of a rock cut on the present highway. (Photograph taken on June 17, 2006 - © Cameron Bevers) 

Left - Time is slowly taking its toll on this abandoned Hwy 11 structure over the South Kahshe River south of Gravenhurst. The concrete handrails are starting
to break away from the bridge deck, and trees are growing up through parts of the structure. (Photograph taken on June 17, 2006 - © Cameron Bevers) Right - Almost 70 years has passed since this bridge last carried Hwy 11 traffic. In 1947-1948, this part of Hwy 11 was relocated further to the west as a result of a reconstruction project carried out between Severn River and Gravenhurst. The abandoned bridge now sits at the end of a private driveway off of Hwy 11. (Photograph taken on June 17, 2006 - © Cameron Bevers) 

Left - Eastern side of South Kahshe River Bridge. This concrete beam structure was built by the Department of Northern Development in the 1920s,
long before the Department of Highways assumed the original Ferguson Highway from Severn River to Hearst as an extension of King's Highway 11 in 1937. (Photograph taken on June 17, 2006 - © Cameron Bevers) Right - View of the superstructure of the South Kahshe River Bridge. Note the widened span and pier at left, which was reconstructed in the mid-1930s, just prior to the transfer of the Ferguson Highway from the Department of Northern Development to the Department of Highways. The fact that this structure was widened so long ago gives us some insight of the early importance of the Ferguson Highway on the development of the Muskoka District and other regions of Northern Ontario. (Photograph taken on June 17, 2006 - © Cameron Bevers) 

Left - Not surprisingly, the older 1920s concrete handrail on the eastern side of the South Kahshe River Bridge is showing greater signs of age. The western
concrete handrail, constructed when the bridge was widened in the mid-1930s has fared somewhat better. (Photograph taken on June 17, 2006 - © Cameron Bevers) Right - The western concrete handrail, constructed in the 1930s, is gracefully curved to complement a horizontal curve in the old highway just beyond the bridge. (Photograph taken on June 17, 2006 - © Cameron Bevers) 

Left - Roadside park on Hwy 11 at Kahshe River, between Washago and Gravenhurst. This small park is operated by the Ministry of Transportation of Ontario (MTO)
and has been serving motorists on Hwy 11 since 1948. Situated under the tall pines of the beautiful Kahshe Lake area of Muskoka, this roadside park features about a
half-dozen picnic tables, toilets, litter bins, and an access point to the Kahshe River, which flows westerly from Kahshe Lake to nearby Sparrow Lake. The park at
Kahshe River is only accessible from Southbound Hwy 11. Northbound Hwy 11 traffic wishing to access the park must turn around at the Kahshe Lake Overpass, located
about 1 km to the north. (Photograph taken on July 21, 2012 - © Cameron Bevers) Right - Ontario heritage plaque marking the commencement of the Muskoka Road in 1858. Parts of present-day Hwy 11 still follow this historic 19th Century colonization road, which was built to open up settlement in the northern parts of Ontario. The Muskoka Road was one of many colonization roads opened up in the 1850s and 1860s across Ontario. (Photograph taken on July 21, 2012 - © Cameron Bevers) 

Left - View of the Kahshe River from the MTO roadside park on Hwy 11 south of Gravenhurst. (Photograph taken on July 21, 2012 - © Cameron Bevers) Right - The Kahshe River Bridge on Hwy 11 is a two-cell concrete rigid frame box culvert with closed footings. Structure completed in 1948. (Photograph taken on July 21, 2012 - © Cameron Bevers) 

Left - Facing south along Hwy 11 towards the Kahshe River Bridge between Washago and Gravenhurst. See an
Enlarged Photo here. (Photograph taken on May 24, 2013 - © Cameron Bevers) Right - Hwy 11 at the Kahshe Lake Overpass, facing south towards Washago. (Photograph taken on May 24, 2013 - © Cameron Bevers) 

Left - Facing north along Hwy 11 from the Kahshe Lake Overpass between Washago and Gravenhurst. See an
Enlarged Photo here. (Photograph taken on May 24, 2013 - © Cameron Bevers) Right - Facing east across the Kahshe Lake Overpass on Hwy 11 near Gravenhurst. This bridge was recently converted to semi-integral abutments, a process by which the steel expansion joints are removed from the structure. This process has been used extensively by MTO in recent years in an effort to reduce the maintenance costs and extend the service life of the province's bridges. (Photograph taken on May 24, 2013 - © Cameron Bevers) 

Left - Kahshe Lake Overpass on Hwy 11 between Washago and Gravenhurst. The completion of the Kahshe Lake Overpass in 1985 removed a hazardous at-grade
intersection on Hwy 11 at Kilworthy Road and South Kahshe Lake Road. The overpass was completed as part of multi-year program to convert Hwy 11 into a divided highway
between Barrie and Gravenhurst. At-grade intersections along the highway were replaced by grade separations and interchanges spaced about 5 km apart. (Photograph taken on May 24, 2013 - © Cameron Bevers) Right - Structure identification number and date stamp (1985) on the Kahshe Lake Overpass on Hwy 11 south of Gravenhurst. (Photograph taken on May 24, 2013 - © Cameron Bevers) 

Left - Guide signs and a 1980s-era King's Highway 11 sign at the Kahshe Lake Overpass on Hwy 11 between Washago and Gravenhurst. (Photograph taken on May 24, 2013 - © Cameron Bevers) Right - Facing south along Hwy 11 towards Washago at Beaver Creek Hill. See an Enlarged Photo here. (Photograph taken on June 17, 2006 - © Cameron Bevers) 

Left - Facing north along Hwy 11 towards Gravenhurst at Beaver Creek Hill. This scenic reverse curve on Hwy 11 passes through a particularly rugged valley.
Compare this 2006 photo with the circa 1960 photo, taken from the same location when Hwy 11
was only a two-lane highway. See an Enlarged Photo here. (Photograph taken on June 17, 2006 - © Cameron Bevers) Right - Facing south along Hwy 11 towards Washago between the Kahshe Lake Overpass and the Sedore Road Interchange south of Gravenhurst. See an Enlarged Photo here. (Photograph taken on May 24, 2013 - © Cameron Bevers) 

Left - Facing north along Hwy 11 towards Gravenhurst between the Kahshe Lake Overpass and the Sedore Road Interchange. See an
Enlarged Photo here. (Photograph taken on May 24, 2013 - © Cameron Bevers) Right - Approaching the Sedore Road Interchange on Hwy 11 between Washago and Gravenhurst, facing north. See an Enlarged Photo here. (Photograph taken on May 24, 2013 - © Cameron Bevers) 

Left - Facing north along Hwy 11 towards Gravenhurst at the Sedore Road Overpass. See an
Enlarged Photo here. (Photograph taken on May 24, 2013 - © Cameron Bevers) Right - Exit sign for the Sedore Road Interchange on Hwy 11 south of Gravenhurst. Note the sign marking the turn-around for Hwy 11 South. (Photograph taken on May 24, 2013 - © Cameron Bevers) 

Left - Hwy 11 at the Sedore Road Overpass, facing south towards Washago. See an
Enlarged Photo here. (Photograph taken on May 24, 2013 - © Cameron Bevers) Right - Facing north along Hwy 11 towards Gravenhurst from the Sedore Road Overpass. The section of Hwy 11 between Kahshe Lake and Gravenhurst was widened from two lanes into a four-lane undivided highway in 1966-1967. During the 1980s, a median barrier was installed and interchanges constructed along the highway. See an Enlarged Photo here. (Photograph taken on May 24, 2013 - © Cameron Bevers) 

Left - Facing north along Hwy 11 towards Gravenhurst from the Sedore Road Interchange. Note the old alignment of Hwy 11 (Beaver Ridge Road) which can be seen
climbing the hill at right. This was one of several sections of the original route of Hwy 11 that were bypassed during an extensive highway relocation and improvement
project that was carried out in 1947-1948. See an Enlarged Photo here. (Photograph taken on May 24, 2013 - © Cameron Bevers) Right - Sedore Road intersects a former alignment of Hwy 11 (Beaver Ridge Road) just a short distance east of the present-day Hwy 11. Prior to the construction of the Sedore Road Interchange in 1985, Beaver Ridge Road intersected with Hwy 11 at-grade. (Photograph taken on May 24, 2013 - © Cameron Bevers) 

Left - Sedore Road Overpass on Hwy 11 between Washago and Gravenhurst. Structure completed in 1985. (Photograph taken on May 24, 2013 - © Cameron Bevers) Right - Facing east across the Sedore Road Overpass on Hwy 11 south of Gravenhurst. Like the nearby Kahshe Lake Overpass located a short distance to the south, the Sedore Road Overpass was also converted to semi-integral abutments during a recent bridge rehabilitation contract. (Photograph taken on May 24, 2013 - © Cameron Bevers) 

Left - Structure identification number and date stamp (1985) on the Sedore Road Overpass on Hwy 11 south of Gravenhurst. (Photograph taken on May 24, 2013 - © Cameron Bevers) Right - These Hwy 11 trailblazer signs at the Sedore Road Interchange likely date from the time of the interchange's construction in the 1980s. (Photograph taken on May 24, 2013 - © Cameron Bevers) 

Left - Guide signs at the Sedore Road Interchange on Hwy 11 between Washago and Gravenhurst. (Photograph taken on May 24, 2013 - © Cameron Bevers) Right - Facing south along Beaver Ridge Road (Old Hwy 11) south of Gravenhurst. Traffic can be seen on the current Hwy 11 alignment in the background. (Photograph taken on May 24, 2013 - © Cameron Bevers) 

Left - This well-designed horizontal curve is a tell-tale sign that this was once a former Hwy 11 alignment. The original highway alignment (Beaver Ridge Road)
was bypassed in the late 1940s, during an extensive reconstruction and relocation of Hwy 11 between Washago and Gravenhurst. Many curves and hills along the original
route of the highway were bypassed. The revised 1948 alignment of Hwy 11 was ultimately used in the construction of the current four-lane highway during the 1960s. (Photograph taken on May 24, 2013 - © Cameron Bevers) Right - Former alignment of Hwy 11 (Beaver Ridge Road) south of Gravenhurst, facing south. (Photograph taken on May 24, 2013 - © Cameron Bevers) 

Left - The former alignment of Hwy 11 (Beaver Ridge Road) re-emerges at the present-day expressway a short distance south of Gravenhurst. (Photograph taken on May 24, 2013 - © Cameron Bevers) Right - Facing south along Hwy 11 towards Washago approaching the Sedore Road Interchange. The completion of the expressway upgrades to Hwy 11 in 1986 wrapped up a decade of improvements to the highway corridor. Work had begun in 1976 at Crown Hill to construct a continuous median barrier along the two previously undivided four-lane highway sections between Barrie and Gravenhurst. Only the Orillia Bypass was originally built as a four-lane divided highway. See an Enlarged Photo here. (Photograph taken on May 24, 2013 - © Cameron Bevers) 

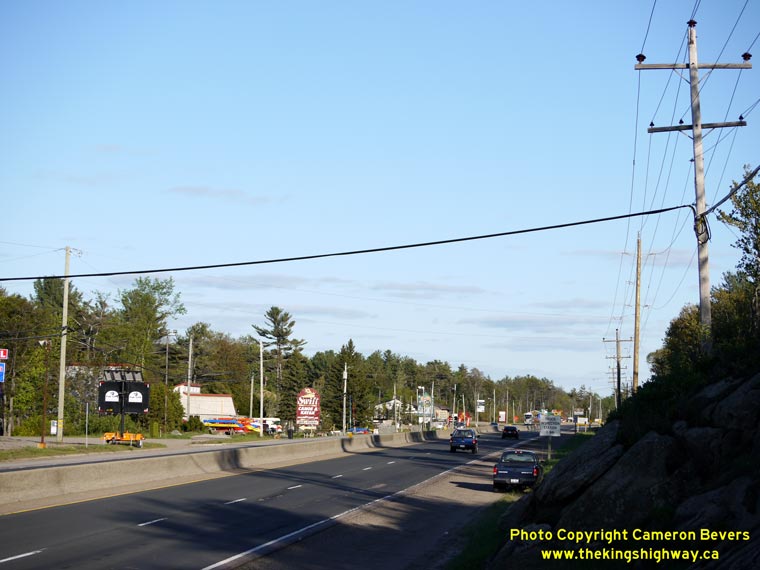
Left - Hwy 11 between the Sedore Road Interchange and the Gravenhurst Truck Scales, facing north towards Gravenhurst. The section of Hwy 11 south of
Gravenhurst is one of the province's most interesting highways, due in part to the intensity of the roadside development that exists here. The Ontario Ministry of
Transportation carefully controls roadside development along Ontario provincial highways, so it is very unusual to see this type of development occur along a
four-lane divided highway. This busy highway has attracted roadside businesses to set up ever since motor tourism in Northern Ontario began to increase in popularity
during the 1930s. Accordingly, many of the businesses have existed here long before Hwy 11 was converted into a divided highway - in fact, some businesses along the
corridor date back to the days when Hwy 11 was only a two-lane undivided highway. As a result, businesses along Hwy 11 have generally been allowed to retain their
existing driveway accesses onto Hwy 11, despite the fact that the highway has now been upgraded into a limited-access expressway. See an
Enlarged Photo here. (Photograph taken on May 24, 2013 - © Cameron Bevers) Right - Gravenhurst Truck Scales on Southbound Hwy 11, between the Hwy 169 North Interchange and the Sedore Road Interchange. (Photograph taken on May 24, 2013 - © Cameron Bevers) 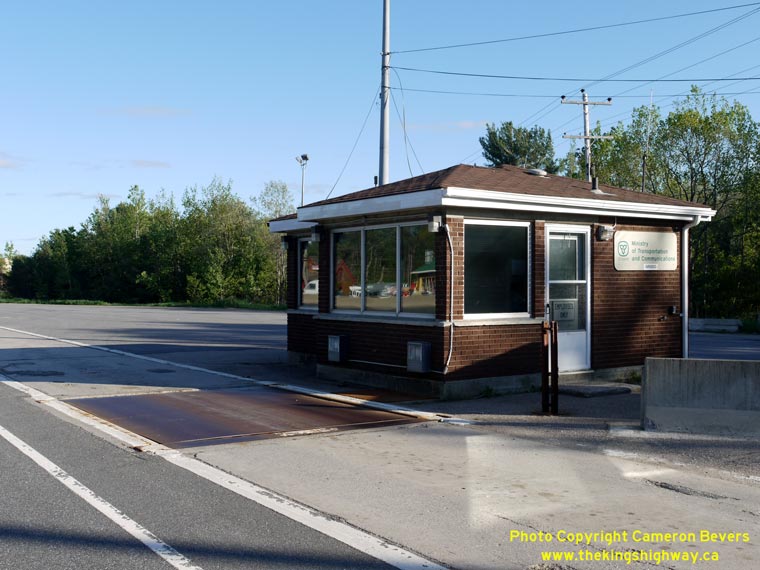

Left - Scale house on Southbound Hwy 11 near Gravenhurst. The original 1940s-era scale house was reconstructed when Hwy 11 was widened to four lanes in
1966-1967. Note the old sign on the side of the scale house, indicating the "Ministry of Transportation and Communications". The ministry's functions were reorganized
in the late 1980s, when remote telephone communications development was reassigned to another ministry. The name was changed to the Ministry of Transportation
(Ontario), commonly abbreviated as MTO. (Photograph taken on May 24, 2013 - © Cameron Bevers) Right - Gravenhurst Truck Scales on Southbound Hwy 11. Due to the divided highway here, only southbound truck traffic must enter the scales. (Photograph taken on May 24, 2013 - © Cameron Bevers) 
Left - An externally illuminated sign at the Gravenhurst Truck Scales. Signs such as this one are becoming very rare in Ontario. The reflective sheeting used
on modern traffic signs has removed the need to use floodlights and other external lighting appurtenances to illuminate signs, since vehicle headlights already
accomplish this. (Photograph taken on May 24, 2013 - © Cameron Bevers) Right - Facing south along Hwy 11 towards the Gravenhurst Truck Scales, about 2 km south of Gravenhurst. The section of Hwy 11 between Sedore Road and the Hwy 169 North Interchange has virtually uninterrupted roadside development. Only rock outcroppings such as the one seen in the foreground have discouraged the construction of buildings beside the highway. Although one would never guess by looking at this "city-along-the-highway", the areas to the east and west of Hwy 11 are sparsely populated. See an Enlarged Photo here. (Photograph taken on May 24, 2013 - © Cameron Bevers) 

Left - Pre-advance overhead guide sign for the Hwy 169 North (Bethune Drive) Interchange at Gravenhurst on Northbound Hwy 11. Due to the unusual left-hand
exit ramp at this interchange, this extra overhead sign was placed 2 km in advance of the interchange. The Hwy 169 North Interchange is very well signed, when
compared to other interchanges along Hwy 11 between Barrie and North Bay. (Photograph taken on June 17, 2006 - © Cameron Bevers) Right - A setting sun and windswept pines form a pleasant backdrop for this overhead pre-advance guide sign on Northbound Hwy 11 approaching the Hwy 169 North (Bethune Drive) Interchange in Gravenhurst. Coincidentally, the Hwy 169 North Interchange is exactly 169 km from Toronto, so it is numbered as Exit #169. See an Enlarged Photo here. (Photograph taken on May 24, 2013 - © Cameron Bevers) 

Left - Facing south along Hwy 11 between the Hwy 169 North (Bethune Drive) Interchange and the Gravenhurst Truck Scales. See an
Enlarged Photo here. (Photograph taken on May 24, 2013 - © Cameron Bevers) Right - View of Hwy 11 facing north towards Gravenhurst. The Hwy 169 North (Bethune Drive) Interchange lies just around this curve. See an Enlarged Photo here. (Photograph taken on May 24, 2013 - © Cameron Bevers) 

Left - Facing south along Hwy 11 near the Hwy 169 North (Bethune Drive) Interchange in Gravenhurst. From this point southerly to the Severn River, the Hwy 11
corridor essentially forms the only major through route in the area. Although two Muskoka District Roads pass through the area to the east and west (Southwood Road
and Houseys Rapids Road), they are local roads which are not designed to carry heavy long-distance through traffic. (Photograph taken on May 24, 2013 - © Cameron Bevers) Right - A lone Hwy 11 route marker south of Gravenhurst. Up until 1998, Hwy 11 shared a concurrent route with Hwy 169 between Washago and Gravenhurst. The overlapped routing between Washago and Gravenhurst had existed in one form or another since 1937, when the Department of Highways took over responsibility for many of the trunk highways in Muskoka District. Originally, the concurrent designation between Gravenhurst and Washago was shared between Hwy 11 and Hwy 69, until the latter route was renumbered as Hwy 169 in 1976. (Photograph taken on May 24, 2013 - © Cameron Bevers) 

Left - Approaching the Hwy 169 North (Bethune Drive) Interchange on Hwy 11 in Gravenhurst, facing north. This interchange was constructed as part of the second
Gravenhurst Bypass across Gull Lake Narrows in 1969-1970. The project involved the construction of two new interchanges at Gravenhurst's north and south entrances.
See an Enlarged Photo here. (Photograph taken on May 24, 2013 - © Cameron Bevers) Right - Overhead diagrammatic sign for the upcoming Hwy 169 North Interchange on Hwy 11. Compare this photo to the one below which I took in 2006, in which there were two smaller signs positioned here. Until recently, this diagrammatic sign was mounted onto the overhead sign support structure right at the exit ramp. See an Enlarged Photo here. (Photograph taken on May 24, 2013 - © Cameron Bevers) 

Left - This large arched truss sign gantry south of Gravenhurst carries a secondary exit sign for the Hwy 169 North (Bethune Drive) Interchange on Northbound
Hwy 11. These two signs were relocated onto the turn-off overhead sign structure after this photo was taken. This is an older Aluminum Tapered Leg (ATL) overhead sign
support structure, commonly referred to by MTO as a "Type 1" gantry. These stylish arched truss sign support structures were used on Ontario's freeways from the mid
1960s until the late 1980s, but are quickly being phased out and replaced by new overhead sign support structures of different designs. See an
Enlarged Photo here. (Photograph taken on June 30, 2006 - © Cameron Bevers) Right - Hwy 169 North (Bethune Drive) Interchange on Hwy 11 in Gravenhurst, facing north. This unusual semi-directional interchange features a left-hand exit ramp from Northbound Hwy 11 to Hwy 169. Left-hand exit ramps are very rare in Ontario. This was one of only a handful of left-hand exit ramps ever built by the province. The construction of left-hand exit ramps is generally discouraged today, because motorists do not normally expect an exit ramp to appear on the left side of the highway. See an Enlarged Photo here. (Photograph taken on May 24, 2013 - © Cameron Bevers) 

Left - View of the Hwy 169 North (Bethune Drive) Interchange on Hwy 11 in Gravenhurst in 2006. Note that the overhead diagrammatic guide sign was in place at
that time. The sign was moved back about 400 metres to the advance overhead sign support structure after this photo was taken. See an
Enlarged Photo here. (Photograph taken on June 30, 2006 - © Cameron Bevers) Right - Close-up of the diagrammatic overhead guide sign on Northbound Hwy 11 at the Hwy 169 North (Bethune Drive) Interchange in Gravenhurst in 2006. (Photograph taken on June 30, 2006 - © Cameron Bevers) 

Left - Close-up of the overhead guide signs for the Northbound Hwy 11 at the Hwy 169 North (Bethune Drive) Interchange in Gravenhurst as they appear today. (Photograph taken on May 24, 2013 - © Cameron Bevers) Right - Gravenhurst Flyover at the Hwy 169 North (Bethune Drive) Interchange on Hwy 11. Structure completed in 1969. This ramp carries traffic from Northbound Hwy 11 to Northbound Hwy 169. It is one of two interchanges serving Gravenhurst. (Photograph taken on May 24, 2013 - © Cameron Bevers) 

Left - Structure identification number and date stamp (1969) on the Gravenhurst Flyover on Hwy 11 at the Hwy 169 North (Bethune Drive) Interchange. (Photograph taken on May 24, 2013 - © Cameron Bevers) Right - Gravenhurst Flyover on Hwy 11 at the Hwy 169 North (Bethune Drive) Interchange, facing south. (Photograph taken on May 24, 2013 - © Cameron Bevers) 

Left - The southbound lanes of Hwy 11 pass below the Gravenhurst Flyover at Hwy 169 North (Bethune Drive). This fascinating interchange is incredibly
compact. It is not a full interchange, however. Traffic cannot access Hwy 11 North from Hwy 169 (Bethune Drive). See an
Enlarged Photo here. (Photograph taken on May 24, 2013 - © Cameron Bevers) Right - Southbound lanes of Hwy 11 as seen from the Gravenhurst Flyover. The ramp from Southbound Hwy 169 can be seen entering Hwy 11 from the right in the background. (Photograph taken on May 24, 2013 - © Cameron Bevers) 

Left - Western side of the Gravenhurst Flyover at the Hwy 11 and Hwy 169 North (Bethune Drive) Interchange. (Photograph taken on May 24, 2013 - © Cameron Bevers) Right - Facing south from the Gravenhurst Flyover. Note the left-hand exit ramp from Northbound Hwy 11. This unusual interchange was one of two interchanges built along the second Gravenhurst Bypass in 1969-1970. The other interchange lay 6 km to the north at Bethune Drive (Former Hwy 11B). This was also a semi-directional interchange, but was eventually rebuilt as a complete interchange in 1998-1999 in order to provide a connection to adjacent Doe Lake Road. With the removal of the North Gravenhurst Interchange in the late 1990s, the Hwy 169 North (Bethune Drive) Interchange is now the oldest interchange along Hwy 11 north of Orillia. (Photograph taken on May 24, 2013 - © Cameron Bevers) 

Left - Facing north along Hwy 11 towards Bracebridge from the Gravenhurst Flyover at the Hwy 169 North (Bethune Drive) Interchange. The completion of the second
Gravenhurst Bypass across Gull Lake Narrows in 1970 removed a serious traffic bottleneck on Hwy 11, by completing a four-lane controlled-access bypass around the
town. Gravenhurst's first bypass (today's Bethune Drive) was built in 1948-1949 as a two-lane highway. Unfortunately, steps were not taken to limit roadside
development along Bethune Drive, so the first bypass quickly became another busy urban street, reducing its effectiveness as a through route for Hwy 11 traffic. See an
Enlarged Photo here. (Photograph taken on May 24, 2013 - © Cameron Bevers) Right - Eastern side of the Gravenhurst Flyover at the Hwy 11 and Hwy 169 North (Bethune Drive) Interchange. (Photograph taken on May 24, 2013 - © Cameron Bevers) 

Left - Bethune Drive (Hwy 169) comes to an end at the Hwy 11 Interchange in Gravenhurst. Until the late 1990s, Hwy 11 and Hwy 169 shared a concurrent route
for 18 km between Gravenhurst and Washago. The overlapped routing along Hwy 11 was discontinued when Hwy 169 was transferred to the County of Simcoe and the District
Municipality of Muskoka in 1998. The Gravenhurst Flyover can be seen at left. (Photograph taken on May 24, 2013 - © Cameron Bevers) Right - Facing north along Hwy 169 from the Hwy 11 Interchange at Gravenhurst. This intersection was reconfigured in 2008 in order to address the problem of the predominant left turn movement from the Gravenhurst Flyover to Muskoka Road South (Muskoka Road 18). During peak holiday seasons, queuing from this left turn lane would occasionally back up across the Gravenhurst Flyover to a location where motorists would not expect to encounter stopped vehicles. By realigning the road to better serve this predominant movement, this problem has essentially been resolved. See an Enlarged Photo here. (Photograph taken on May 24, 2013 - © Cameron Bevers) 
Above - Facing north along Hwy 169 from the Hwy 11 Interchange at Gravenhurst in 2005, before reconstruction. Until recently, Bethune Drive (Hwy 169 North) was
the through road at the intersection, while Muskoka Road South (Muskoka Road 18) was a left turn movement. The intersection as it appears here remained more or less
unmodified from the time the first Gravenhurst Bypass opened in 1948 until 2008. Click
here to see a photo of this junction as it appeared in 1949. See an
Enlarged Photo here. (Photograph taken on June 4, 2005 - © Cameron Bevers)
Continue on to King's Highway 11 Photos: Old Route via Gravenhurst, Bracebridge and Port
Sydney Continue on to King's Highway 11 Photos: Gravenhurst to Huntsville |
|---|
Links to Adjacent King's Highway Photograph Pages:
Back to King's Highway 10 Photos /
King's Highway 11 History /
On to King's Highway 12 Photos
Ontario Highway History - Main Menu / Back to List of Highways Website contents, photos & text © 2002-2026, Cameron
Bevers (Webmaster) - All Rights Reserved / Contact Me
|
|---|