
| 
| |
|
|
This page contains historical photos of Ontario's King's Highway 169 dating from 1936 to 1999. Please note that Highway 169 was
known as Highway 69 prior to 1976. All photographs displayed on this page were taken by the Ontario Ministry of Transportation, unless specifically noted otherwise.
Historical photographs are arranged in approximate chronological order. Click on any thumbnail to see a larger image!
Please note that all photographs displayed on this
website are protected by copyright. These photographs must not be reproduced, published,
electronically stored or copied, distributed, or posted onto other websites without
my written permission. If you want to use photos from this website, please
email me first for permission. Thank-you!
|
|---|
|
Page 1: Historical King's Highway 169 Photographs

Above - New junction of Hwy 11 & Hwy 69 (later known as Hwy 169) south of Gravenhurst in 1949. This photo shows the new junction of Hwy 11 and Hwy 69 on
the first Gravenhurst Bypass, which opened to traffic in 1948. The original junction of these two highways was located in Downtown Gravenhurst, at Muskoka Road and
Bay Street. The newly-built highway junction seen here was revised slightly in the ensuing years, but can still be found today just north of the current Hwy 11
Interchange, adjacent to the Gravenhurst McDonald's restaurant. Click here to see a 2005 view of
this intersection. See an Enlarged Photo Here. Photo taken on June 9, 1949. (Photo © Archives of Ontario - Series RG-14-162-5-121, Photo #327) 
Above - Circa 1955 postcard view of the Welcome Arch on Hwy 11B & Hwy 69 (later known as Hwy 169) in Gravenhurst. See an
Enlarged Photo Here. (Photo courtesy of Henry Fry) 
Above - Circa 1957 aerial postcard view of the Severn River Bridge on Hwy 11 & Hwy 69 (later known as Hwy 169) between Washago and Gravenhurst. This
three-span steel truss structure was completed by the DHO in 1931. The bridge was replaced when Hwy 11 was expanded from two to four lanes in 1966. See an
Enlarged Photo Here. (Photo courtesy of the Peterborough Postcard Company) 
Above - Photo of the original plaque commemorating the opening of the Peace Bridge on Hwy 69 (later known as Hwy 169) in Washago. In 1927, the former County of
Ontario built a small bridge over the Washago Mill Race. Although small, Washago's Peace Bridge has a very interesting history to tell. As the story goes, two
neighbours named A.W. Grigg and John Agnew lived beside one another adjacent to the Washago Mill Race. The two men had a bitter dispute over a trivial matter back in
1905 and refused to speak to one another for 22 years. The two men eventually agreed to bury the proverbial hatchet and rekindle their friendship spoiled by the
dispute, by mutually agreeing to open the County of Ontario's new bridge together at the official opening ceremony in 1927. Reportedly, the name "Peace Bridge" was
inspired by the truce between the two men and was borrowed from the well-known International Peace Bridge between Fort Erie and Buffalo, which was being constructed
that same year. The name Peace Bridge seemed very fitting, as the notorious quarrel between A.W. Grigg and John Agnew was widely known in the Washago area. The two
men remained friends for the rest of their days. The Peace Bridge still stands in Washago today on Simcoe Road 169, but the plaque shown in this 1959 photo has since
been replaced with a newer replica. See an Enlarged Photo Here. Photo taken on August 12,
1959. (Photo courtesy of Ontario Ministry of Transportation - © King's Printer for Ontario, 1959) 
Above - Autumn colours along Hwy 69 (later known as Hwy 169) north of the Hwy 118 Junction at Glen Orchard in 1963. This photo was featured on the front cover
of the 1966 Edition of the Official Ontario Road Map. See an Enlarged Photo Here. Photo taken
in September 1963. (Photo courtesy of Ontario Ministry of Transportation - © King's Printer for Ontario, 1963) 
Above - Completed Bala Diversion on Hwy 69 (later known as Hwy 169) in 1965, facing north from the Hwy 660 Junction (today's Muskoka Road 38). The new Hwy 69
Diversion in Bala included a new railway subway and bridge over the Moon River. The diversion bypassed the original route of Hwy 69 through Bala, which had a very
poor alignment and a narrow single-lane railway subway with limited vertical clearance. The old railway subway at Bala restricted transport truck movements in this
part of Ontario for many years. By the 1960s, the subway also began to cause significant traffic delays as motorists often had to wait their turn to squeeze through
it. The new diversion seen here greatly improved traffic flow through Bala. See an
Enlarged Photo Here. Photo taken in 1965. (Photo courtesy of Henry Fry) 

Left - Reconstruction of Hwy 69 (later known as Hwy 169) north of Gravenhurst, Contract #1967-65. See an
Enlarged Photo Here. Photo taken in 1967. (Photo courtesy of Ontario Ministry of Transportation - © King's Printer for Ontario, 1967) Right - Hot mix asphalt paving operations on Hwy 69 (later known as Hwy 169) north of Gravenhurst, Contract #1968-86 (1968) (Photo courtesy of Ontario Ministry of Transportation - © King's Printer for Ontario, 1968) 
Above - Facing north along Hwy 11 & Hwy 169 at the Green River Bridge (Severn River, West Branch) near Washago. See an
Enlarged Photo Here. Photo taken on September 28, 1977. (Photo courtesy of Ontario Ministry of Transportation - © King's Printer for Ontario, 2020) 
Above - Green River Bridge (Severn River, West Branch) on Hwy 11 & Hwy 169 near Washago. See an
Enlarged Photo Here. Photo taken on September 28, 1977. (Photo courtesy of Ontario Ministry of Transportation - © King's Printer for Ontario, 2020) 

Left - Facing north along Hwy 11 & Hwy 169 at the Severn River Bridge between Washago and Gravenhurst. See an
Enlarged Photo Here. Photo taken on September 28, 1977. (Photo courtesy of Ontario Ministry of Transportation - © King's Printer for Ontario, 2020) Right - Severn River Bridge on Hwy 11 & Hwy 169 between Washago and Gravenhurst. See an Enlarged Photo Here. Photo taken on September 28, 1977. (Photo courtesy of Ontario Ministry of Transportation - © King's Printer for Ontario, 2020) 

Left - Facing north along Hwy 11 towards the new Hwy 169 Interchange in Washago (August 14, 1984) (Photo courtesy of Ontario Ministry of Transportation - © King's Printer for Ontario, 2011) Right - Newly-completed Hwy 169 Overpass on Hwy 11 in Washago (August 14, 1984) (Photo courtesy of Ontario Ministry of Transportation - © King's Printer for Ontario, 2011) 

Left - Southern side of the new Hwy 169 Overpass in Washago. Note that the box-beam median barrier on Hwy 11 has not been installed yet. (August 14, 1984) (Photo courtesy of Ontario Ministry of Transportation - © King's Printer for Ontario, 2011) Right - Bridge-mounted overhead guide sign marking the Hwy 169 Interchange on Hwy 11 in Washago (August 14, 1984) (Photo courtesy of Ontario Ministry of Transportation - © King's Printer for Ontario, 2011) 

Left - Northern side of the Hwy 169 Overpass on Hwy 11 in Washago (May 22, 1985) (Photo courtesy of Ontario Ministry of Transportation - © King's Printer for Ontario, 2011) Right - Approaching the Hwy 169 Interchange on Hwy 11 in Washago, facing south (June, 1986) (Photo courtesy of Ontario Ministry of Transportation - © King's Printer for Ontario, 2011) 

Left - Facing west across the Hwy 169 Overpass on Hwy 11 in Washago (June, 1986) (Photo courtesy of Ontario Ministry of Transportation - © King's Printer for Ontario, 2011) Right - Facing north along Hwy 11 towards the Hwy 169 Interchange from the Washago Railway Overhead (September 29, 1988) (Photo courtesy of Ontario Ministry of Transportation - © King's Printer for Ontario, 2011) 
Above - Dual Hwy 11 & Hwy 169 route markers between Washago and Gravenhurst. See an
Enlarged Photo Here. (Photograph taken on June 23, 1995 - © Roger Fox) 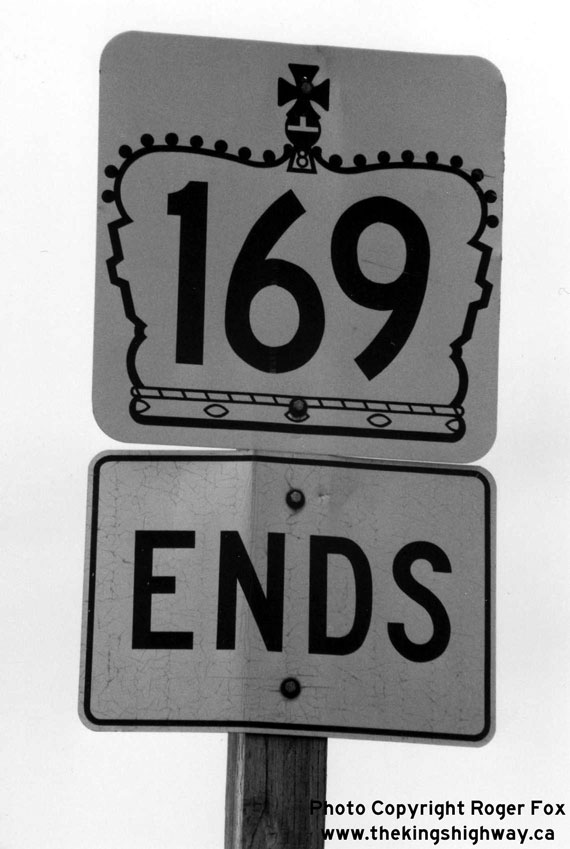
Above - Sign marking the end of Hwy 169 at the Hwy 12 Junction near Brechin. See an
Enlarged Photo Here. (Photograph taken on June 23, 1995 - © Roger Fox)
Continue on to King's Highway 169 Present Day Photos: Hwy 12 to Washago
|
|---|
Links to Adjacent King's Highway Photograph Pages:
Back to King's Highway 148 Photos /
King's Highway 169 History /
On to King's Highway 400 Photos
Ontario Highway History - Main Menu / Back to List of Highways Website contents, photos & text © 2002-2026, Cameron
Bevers (Webmaster) - All Rights Reserved / Contact Me
|
|---|