
| 
| |
|
|
This page contains present day photos (Year 2000 to date) of Ontario's King's Highway 17, arranged by location from Deep River
westerly to Mattawa. All photographs displayed on this page were taken by the Webmaster (Cameron Bevers), unless specifically noted otherwise. Click on any
thumbnail to see a larger image!
Please note that all photographs displayed on this
website are protected by copyright. These photographs must not be reproduced, published,
electronically stored or copied, distributed, or posted onto other websites without
my written permission. If you want to use photos from this website, please
email me first for permission. Thank-you!
|
|---|
|
Page 13: Present Day King's Highway 17 Photographs (Deep River to Mattawa)


Left - View of Hwy 17 at Rolphton, facing west towards Mattawa. See an
Enlarged Photo Here. (Photograph taken on May 21, 2011 - © Cameron Bevers) Right - Approaching the Hwy 635 Junction at Rolphton, facing west. Until Hwy 635 was transferred to Renfrew County during the 1997-1998 provincial highway downloads, this was the only provincial highway junction along Hwy 17 between Pembroke and Mattawa. At one time, this intersection was controlled by traffic signals. As the construction of the hydro dam progressed, traffic signals had to be installed at this intersection to manage construction traffic entering and exiting the construction site. The traffic signals were installed during 1948, but were subsequently removed once construction had ceased. See an Enlarged Photo Here. (Photograph taken on May 21, 2011 - © Cameron Bevers) 

Left - Guide signs marking the Hwy 635 Junction on Hwy 17 at Rolphton. Before it was downloaded to Renfrew County in the 1990s, Hwy 635 was a short
provincially-maintained Secondary Highway which led to the inter-provincial bridge to Rapides-des-Joachims, located on the Quebec side of the Ottawa River. See an
Enlarged Photo Here. (Photograph taken on May 21, 2011 - © Cameron Bevers) Right - Distance guide sign on eastbound Hwy 17, facing east from the Hwy 635 Junction at Rolphton. See an Enlarged Photo Here. (Photograph taken on May 21, 2011 - © Cameron Bevers) 

Left - The Hwy 17 Junction at Rolphton marks the southern terminus of Hwy 635. See an
Enlarged Photo Here. (Photograph taken on May 21, 2011 - © Cameron Bevers) Right - Facing north along Hwy 635 towards Rapides-des-Joachims from the Hwy 17 Junction at Rolphton. See an Enlarged Photo Here. (Photograph taken on May 21, 2011 - © Cameron Bevers) 

Left - Approaching the Hwy 635 Junction on Hwy 17, facing east towards Deep River. See an
Enlarged Photo Here. (Photograph taken on May 21, 2011 - © Cameron Bevers) Right - Facing west along Hwy 17 from the Hwy 635 Junction at Rolphton. See an Enlarged Photo Here. (Photograph taken on May 21, 2011 - © Cameron Bevers) 

Left - Distance guide sign on Hwy 17, facing west from the Hwy 635 Junction at Rolphton. See an
Enlarged Photo Here. (Photograph taken on May 21, 2011 - © Cameron Bevers) Right - Facing east along Hwy 17 towards the Hwy 635 Junction at Rolphton. See an Enlarged Photo Here. (Photograph taken on May 21, 2011 - © Cameron Bevers) 

Left - Hwy 17 at Colton Lake, facing west towards Mackey. (Photograph taken on May 21, 2011 - © Cameron Bevers) Right - Hwy 17 at Colton Lake, facing east towards Rolphton. See an Enlarged Photo Here. (Photograph taken on May 21, 2011 - © Cameron Bevers) 

Left - An abandoned bridge built by the Department of Northern Development spans Colton Creek on a former Hwy 17 alignment between Rolphton and Mackey. (Photograph taken on May 21, 2011 - © Cameron Bevers) Right - The abandoned bridge over Colton Creek was likely constructed in the late 1920s or early 1930s. It was bypassed by a new Hwy 17 alignment in the late 1940s, during the construction of the nearby Des Joachim Hydroelectric Power Development. (Photograph taken on May 21, 2011 - © Cameron Bevers) 

Left - Facing west along Hwy 17 near the Town of Laurentian Hills' east limits, at Colton Creek. (Photograph taken on May 21, 2011 - © Cameron Bevers) Right - Hwy 17 at Harvey Creek, facing west towards Mackey. (Photograph taken on May 21, 2011 - © Cameron Bevers) 

Left - Approaching Mackey on Hwy 17, facing east towards Rolphton. (Photograph taken on May 21, 2011 - © Cameron Bevers) Right - Facing east across the Findlay Creek Causeway on Hwy 17, just east of Mackey. The water level on the Ottawa River was raised substantially following the completion of the Des Joachim Hydroelectric Power Development, flooding many low-lying areas. Small creeks leading into the Ottawa River suddenly became lakes of their own accord as a result of the Des Joachim Hydroelectric Development. See an Enlarged Photo Here. (Photograph taken on May 21, 2011 - © Cameron Bevers) 

Left - Facing east along Hwy 17 towards the Findlay Creek Causeway near Mackey. See an
Enlarged Photo Here. (Photograph taken on May 21, 2011 - © Cameron Bevers) Right - Des Joachim Diversion on Hwy 17, near Driftwood Provincial Park. The Des Joachim Hydroelectric Power Development resulted in the relocation of nearly 20 km of Hwy 17 between Mackey and Bissett Creek onto higher ground. This massive highway diversion was completed and opened to traffic in 1948. The original highway alignment, which closely followed the Ottawa River, was abandoned after traffic was diverted onto the new highway. The original route of Hwy 17 was then flooded behind the Des Joachim Dam when the generating station went into service in 1950. See an Enlarged Photo Here. (Photograph taken on May 21, 2011 - © Cameron Bevers) 

Left - Eastern side of the Stonecliffe Railway Subway on Hwy 17. Structure completed in 1948. (Photograph taken on May 21, 2011 - © Cameron Bevers) Right - The Stonecliffe Railway Subway is a simple steel plate girder structure. (Photograph taken on May 21, 2011 - © Cameron Bevers) 
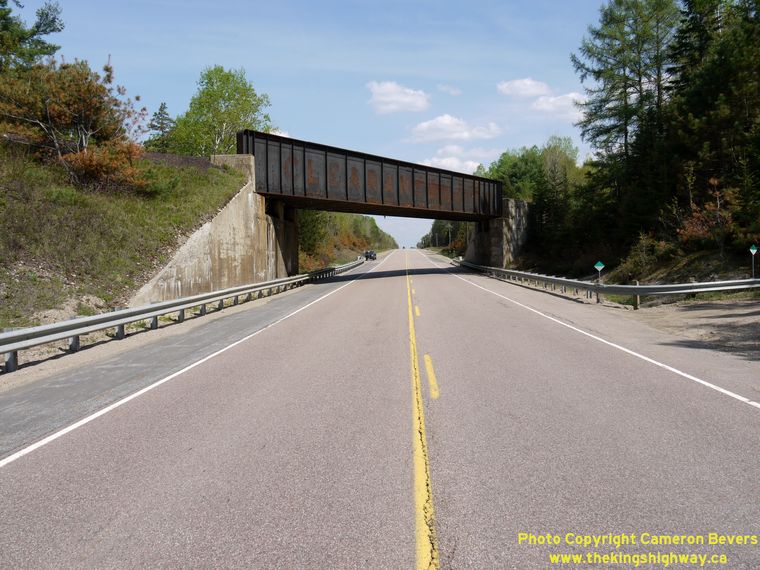
Left - Traces of a painted message stating "CLEARANCE 15 FT." are still visible on the Stonecliffe Subway. (Photograph taken on May 21, 2011 - © Cameron Bevers) Right - Western side of the Stonecliffe Railway Subway on Hwy 17. (Photograph taken on May 21, 2011 - © Cameron Bevers) 

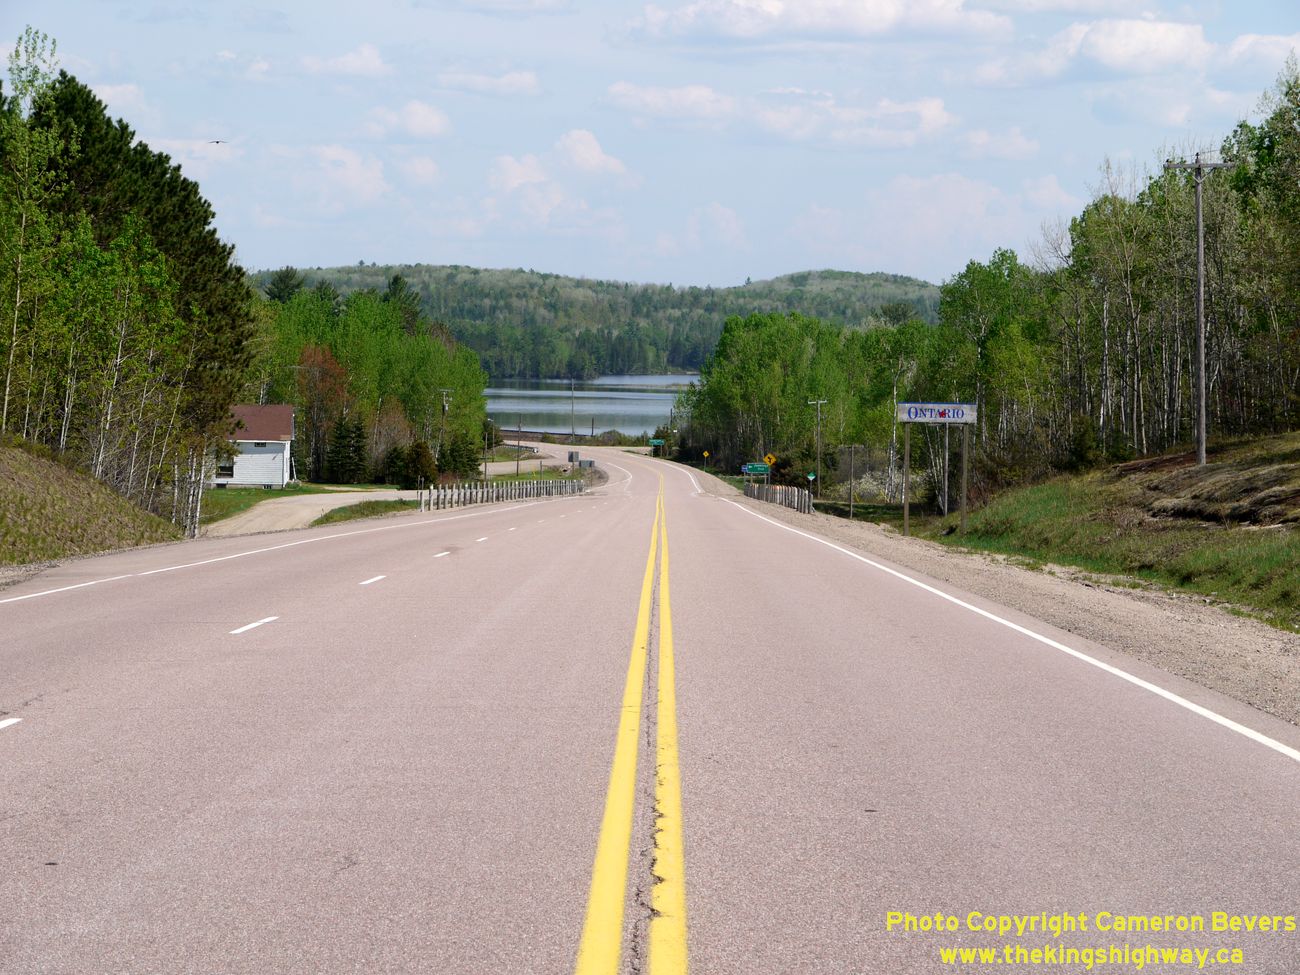
Left - Approaching Stonecliffe on Hwy 17, facing west towards Mattawa. Stonecliffe is one of only a handful of small communities situated along Hwy 17 between
Deep River and Mattawa. (Photograph taken on May 21, 2011 - © Cameron Bevers) Right - Hwy 17 at Stonecliffe, facing east towards Rolphton. See an Enlarged Photo Here. (Photograph taken on May 21, 2011 - © Cameron Bevers) 

Left - Facing east along Hwy 17 approaching Stonecliffe. (Photograph taken on May 21, 2011 - © Cameron Bevers) Right - The original route of Hwy 17 passed directly through Stonecliffe. (Photograph taken on May 21, 2011 - © Cameron Bevers) 

Left - Facing west along Hwy 17 from Stonecliffe towards Grants Creek. See an
Enlarged Photo Here. (Photograph taken on May 21, 2011 - © Cameron Bevers) Right - Hwy 17 descends a substantial grade approaching Grants Creek and Stonecliffe. This is one of many dramatic vistas which greet motorists traveling on Hwy 17 along the Ottawa River between Mattawa and Deep River. See an Enlarged Photo Here. (Photograph taken on May 21, 2011 - © Cameron Bevers) 

Left - Abandoned section of Hwy 17 between Stonecliffe and Bissett Creek. Part of the bypassed highway is submerged in water. (Photograph taken on May 21, 2011 - © Cameron Bevers) Right - This former Hwy 17 alignment was bypassed by a new highway decades ago. (Photograph taken on May 21, 2011 - © Cameron Bevers) 

Left - Approaching the Bissett Creek Railway Subway on Hwy 17, facing west towards Mattawa. (Photograph taken on May 21, 2011 - © Cameron Bevers) Right - Abandoned curve on Hwy 17 approaching the Bissett Creek Bridge. (Photograph taken on May 21, 2011 - © Cameron Bevers) 

Left - Facing west along Hwy 17 towards the Bissett Creek Bridge. The highway crosses this creek directly underneath the Bissett Creek Railway Subway. (Photograph taken on May 21, 2011 - © Cameron Bevers) Right - The Bissett Creek Bridge was ingeniously squeezed through an opening in the Bissett Creek Railway Subway, creating the appearance of a multi-level structure. (Photograph taken on May 21, 2011 - © Cameron Bevers) 

Left - The Bissett Creek Railway Subway was originally built to span only the adjacent Bissett Creek. However, during the construction of the Trans-Canada
Highway in the early 1930s, the highway was built below one of the spans, in order to provide a grade separation between the road and railway. (Photograph taken on May 21, 2011 - © Cameron Bevers) Right - Bissett Creek Bridge on Hwy 17, facing east towards Stonecliffe. (Photograph taken on May 21, 2011 - © Cameron Bevers) 

Left - The Bissett Creek Bridge was built in 1995, replacing an earlier bridge that had been constructed at this location in 1962. See an
Enlarged Photo Here. (Photograph taken on May 21, 2011 - © Cameron Bevers) Right - Facing west along Hwy 17 towards Mattawa from the Bissett Creek Bridge. (Photograph taken on May 21, 2011 - © Cameron Bevers) 

Left - View of Hwy 17 at Bissett Creek, facing west towards Mattawa. See an
Enlarged Photo Here. (Photograph taken on May 21, 2011 - © Cameron Bevers) Right - Hwy 17 approaching Bissett Bay, between Stonecliffe and Deux-Rivieres. See an Enlarged Photo Here. (Photograph taken on May 21, 2011 - © Cameron Bevers) 

Left - Facing west towards the Mattawa Railway Subway on Hwy 17 east of Mattawa. (Photograph taken on June 4, 2006 - © Cameron Bevers) Right - Eastern side of the Mattawa Railway Subway on Hwy 17. Structure completed in 1932. (Photograph taken on June 4, 2006 - © Cameron Bevers) 

Left - Date stamp (1932) on the Mattawa Railway Subway on Hwy 17. (Photograph taken on June 4, 2006 - © Cameron Bevers) Right - Western side of the Mattawa Railway Subway on Hwy 17. (Photograph taken on June 4, 2006 - © Cameron Bevers) 

Left - Green guide sign on westbound Hwy 17 in Mattawa approaching the Hwy 533 Junction. In Downtown Mattawa, Hwy 17 abruptly turns left on its route west
towards North Bay. The through road at the junction in Mattawa is Hwy 533, which leads north to join Hwy 63 about half-way between North Bay and Eldee. See an
Enlarged Photo Here. (Photograph taken on June 4, 2006 - © Cameron Bevers) Right - Facing east along Hwy 17 towards Deep River from the Hwy 533 Junction in Mattawa. See an Enlarged Photo Here. (Photograph taken on July 19, 2012 - © Cameron Bevers) 
Above - View of the Mattawa Railway Overhead on Hwy 17. This railway passes directly underneath the Hwy 17 & Hwy 533 Junction. See an
Enlarged Photo Here. (Photograph taken on June 4, 2006 - © Cameron Bevers) 

Left - Southern side of the Mattawa Railway Overhead at the Hwy 17 & Hwy 533 Junction. See an
Enlarged Photo Here. (Photograph taken on June 4, 2006 - © Cameron Bevers) Right - Date stamp (1969) on the Mattawa Railway Overhead at the Hwy 17 & Hwy 533 Junction. See an Enlarged Photo Here. (Photograph taken on June 4, 2006 - © Cameron Bevers) 

Left - Eastern approach to the Hwy 17 & Hwy 533 Junction in Mattawa in 2006, prior to reconstruction. A modern roundabout was constructed at this location
in 2011. See an Enlarged Photo Here. (Photograph taken on June 4, 2006 - © Cameron Bevers) Right - View of the new Mattawa Roundabout in 2012, facing west. Westbound Hwy 17 traffic bound for North Bay must circulate through the roundabout and take the second exit. The first roundabout exit is Hwy 533 which leads into Downtown Mattawa. Careful observers will note that there is a small external truck apron provided on this approach to allow for slight off-tracking by larger trucks. Although internal truck aprons around the central island are seen at most roundabouts, external truck aprons are rare. External truck aprons are not normally used on provincial highway roundabouts, but were necessary here due to the compact nature of this particular roundabout. In this case, the roundabout's diameter was constrained by the dimensions of the railway overhead structure lying below it. See an Enlarged Photo Here. (Photograph taken on July 19, 2012 - © Cameron Bevers) 

Left - Approaching the new Mattawa Roundabout at the Hwy 17 & Hwy 533 Junction in 2012, facing west. See an
Enlarged Photo Here. (Photograph taken on July 19, 2012 - © Cameron Bevers) Right - Green guide sign on westbound Hwy 17 illustrating the upcoming roundabout at the Hwy 533 Junction in Mattawa. See an Enlarged Photo Here. (Photograph taken on July 19, 2012 - © Cameron Bevers) 

Left - Western approach to the Hwy 17 & Hwy 533 Junction in Mattawa in 2006, prior to reconstruction. The new Mattawa Roundabout, which replaced this
conventional T-intersection, was completed and opened to traffic in November 2011. See an
Enlarged Photo Here. (Photograph taken on June 4, 2006 - © Cameron Bevers) Right - Facing east along Hwy 17 approaching the new Mattawa Roundabout at the Hwy 533 Junction in 2012. See an Enlarged Photo Here. (Photograph taken on July 19, 2012 - © Cameron Bevers) 

Left - Green guide sign on eastbound Hwy 17 illustrating the upcoming roundabout at the Hwy 533 Junction in Mattawa. See an
Enlarged Photo Here. (Photograph taken on July 19, 2012 - © Cameron Bevers) Right - Facing west along Hwy 17 towards North Bay from the Hwy 533 Junction in Mattawa. See an Enlarged Photo Here. (Photograph taken on July 19, 2012 - © Cameron Bevers) 

Left - Facing east towards the Hwy 533 Junction along Hwy 17 in Mattawa in 2006, prior to the intersection's reconstruction. See an
Enlarged Photo Here. (Photograph taken on June 4, 2006 - © Cameron Bevers) Right - Guide sign marking the exit to Hwy 17 East at the Mattawa Roundabout. See an Enlarged Photo Here. (Photograph taken on July 19, 2012 - © Cameron Bevers) 

Left - Facing west along Hwy 17 towards North Bay from the Hwy 533 Junction in Mattawa in 2006, prior to reconstruction. See an
Enlarged Photo Here. (Photograph taken on June 4, 2006 - © Cameron Bevers) Right - View of the Mattawa Roundabout at the Junction of Hwy 17 & Hwy 533 in Mattawa in 2012, facing west. See an Enlarged Photo Here. (Photograph taken on July 19, 2012 - © Cameron Bevers) 

Left - Junction of Hwy 17 & Hwy 533 in Mattawa in 2006, facing east. The unfortunate location of the railway overhead below the highway junction has
resulted in poor intersection geometry and restricted sight lines at this junction. The old intersection was replaced with a modern roundabout in 2011, which has
helped to slow vehicles down while navigating through this highway junction. See an
Enlarged Photo Here. (Photograph taken on June 4, 2006 - © Cameron Bevers) Right - View of the new Mattawa Roundabout at the Junction of Hwy 17 & Hwy 533 in Mattawa in 2012, facing east. See an Enlarged Photo Here. (Photograph taken on July 19, 2012 - © Cameron Bevers) 

Left - Southern terminus of Hwy 533 at the Hwy 17 Junction in Mattawa in 2006, before reconstruction. See an
Enlarged Photo Here. (Photograph taken on June 4, 2006 - © Cameron Bevers) Right - Green guide sign marking the exit to Hwy 533 at the Mattawa Roundabout. See an Enlarged Photo Here. (Photograph taken on July 19, 2012 - © Cameron Bevers) 

Left - View of Hwy 533 (Main Street) in Downtown Mattawa, facing north from the Mattawa Roundabout at Hwy 17. See an
Enlarged Photo Here. (Photograph taken on July 19, 2012 - © Cameron Bevers) Right - Approaching the southern terminus of Hwy 533 at the Mattawa Roundabout (Hwy 17 Junction). See an Enlarged Photo Here. (Photograph taken on July 19, 2012 - © Cameron Bevers)
Continue on to King's Highway 17 Photos: Mattawa to North Bay
|
|---|
Links to Adjacent King's Highway Photograph Pages:
Back to King's Highway 16 Photos /
King's Highway 17 History /
On to King's Highway 18 Photos
Ontario Highway History - Main Menu / Back to List of Highways Website contents, photos & text © 2002-2026, Cameron
Bevers (Webmaster) - All Rights Reserved / Contact Me
|
|---|