
| 
| |
|
|
This page contains present day photos (Year 2000 to date) of Ontario's King's Highway 17, arranged by location from Sault Ste.
Marie northerly to Harmony Beach. All photographs displayed on this page were taken by the Webmaster (Cameron Bevers), unless specifically noted otherwise. Click on any
thumbnail to see a larger image!
Please note that all photographs displayed on this
website are protected by copyright. These photographs must not be reproduced, published,
electronically stored or copied, distributed, or posted onto other websites without
my written permission. If you want to use photos from this website, please
email me first for permission. Thank-you!
|
|---|
|
Page 25: Present Day King's Highway 17 Photographs (Sault Ste. Marie to Harmony Beach)
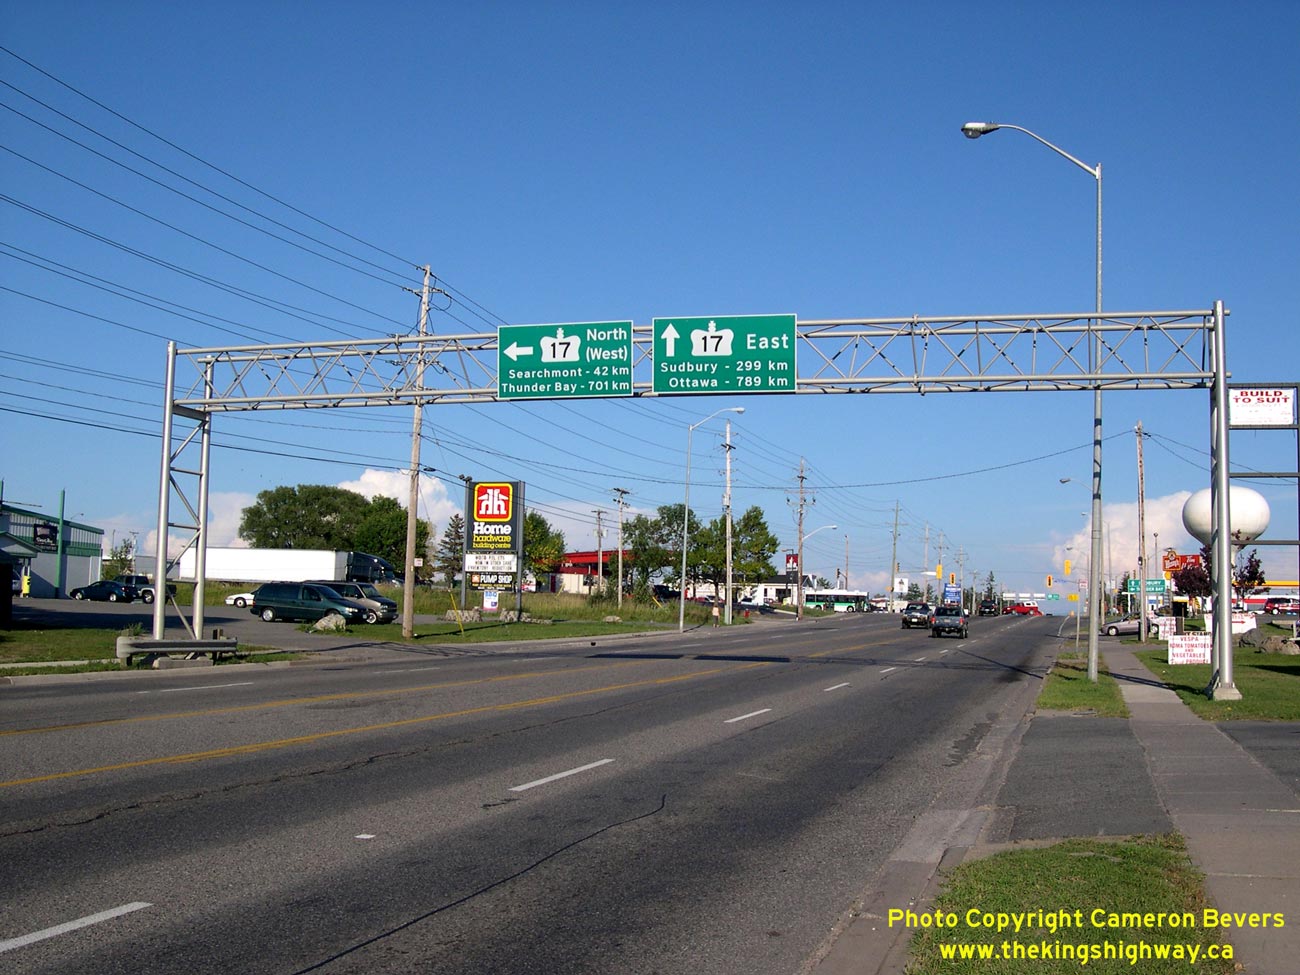
Left - Overhead guide signs approaching the junction of Hwy 17, Hwy 17B and Hwy 550 in Sault Ste. Marie. Between this highway junction and the Hwy 614 Junction
in the White River area, Hwy 17 is signed by MTO as a north-south route. This overhead sign was installed by the City of Sault Ste. Marie and refers to Hwy 17 North,
with "West" in brackets. This was done to provide additional guidance to motorists, since it may not be obvious to drivers that they actually have to turn north on
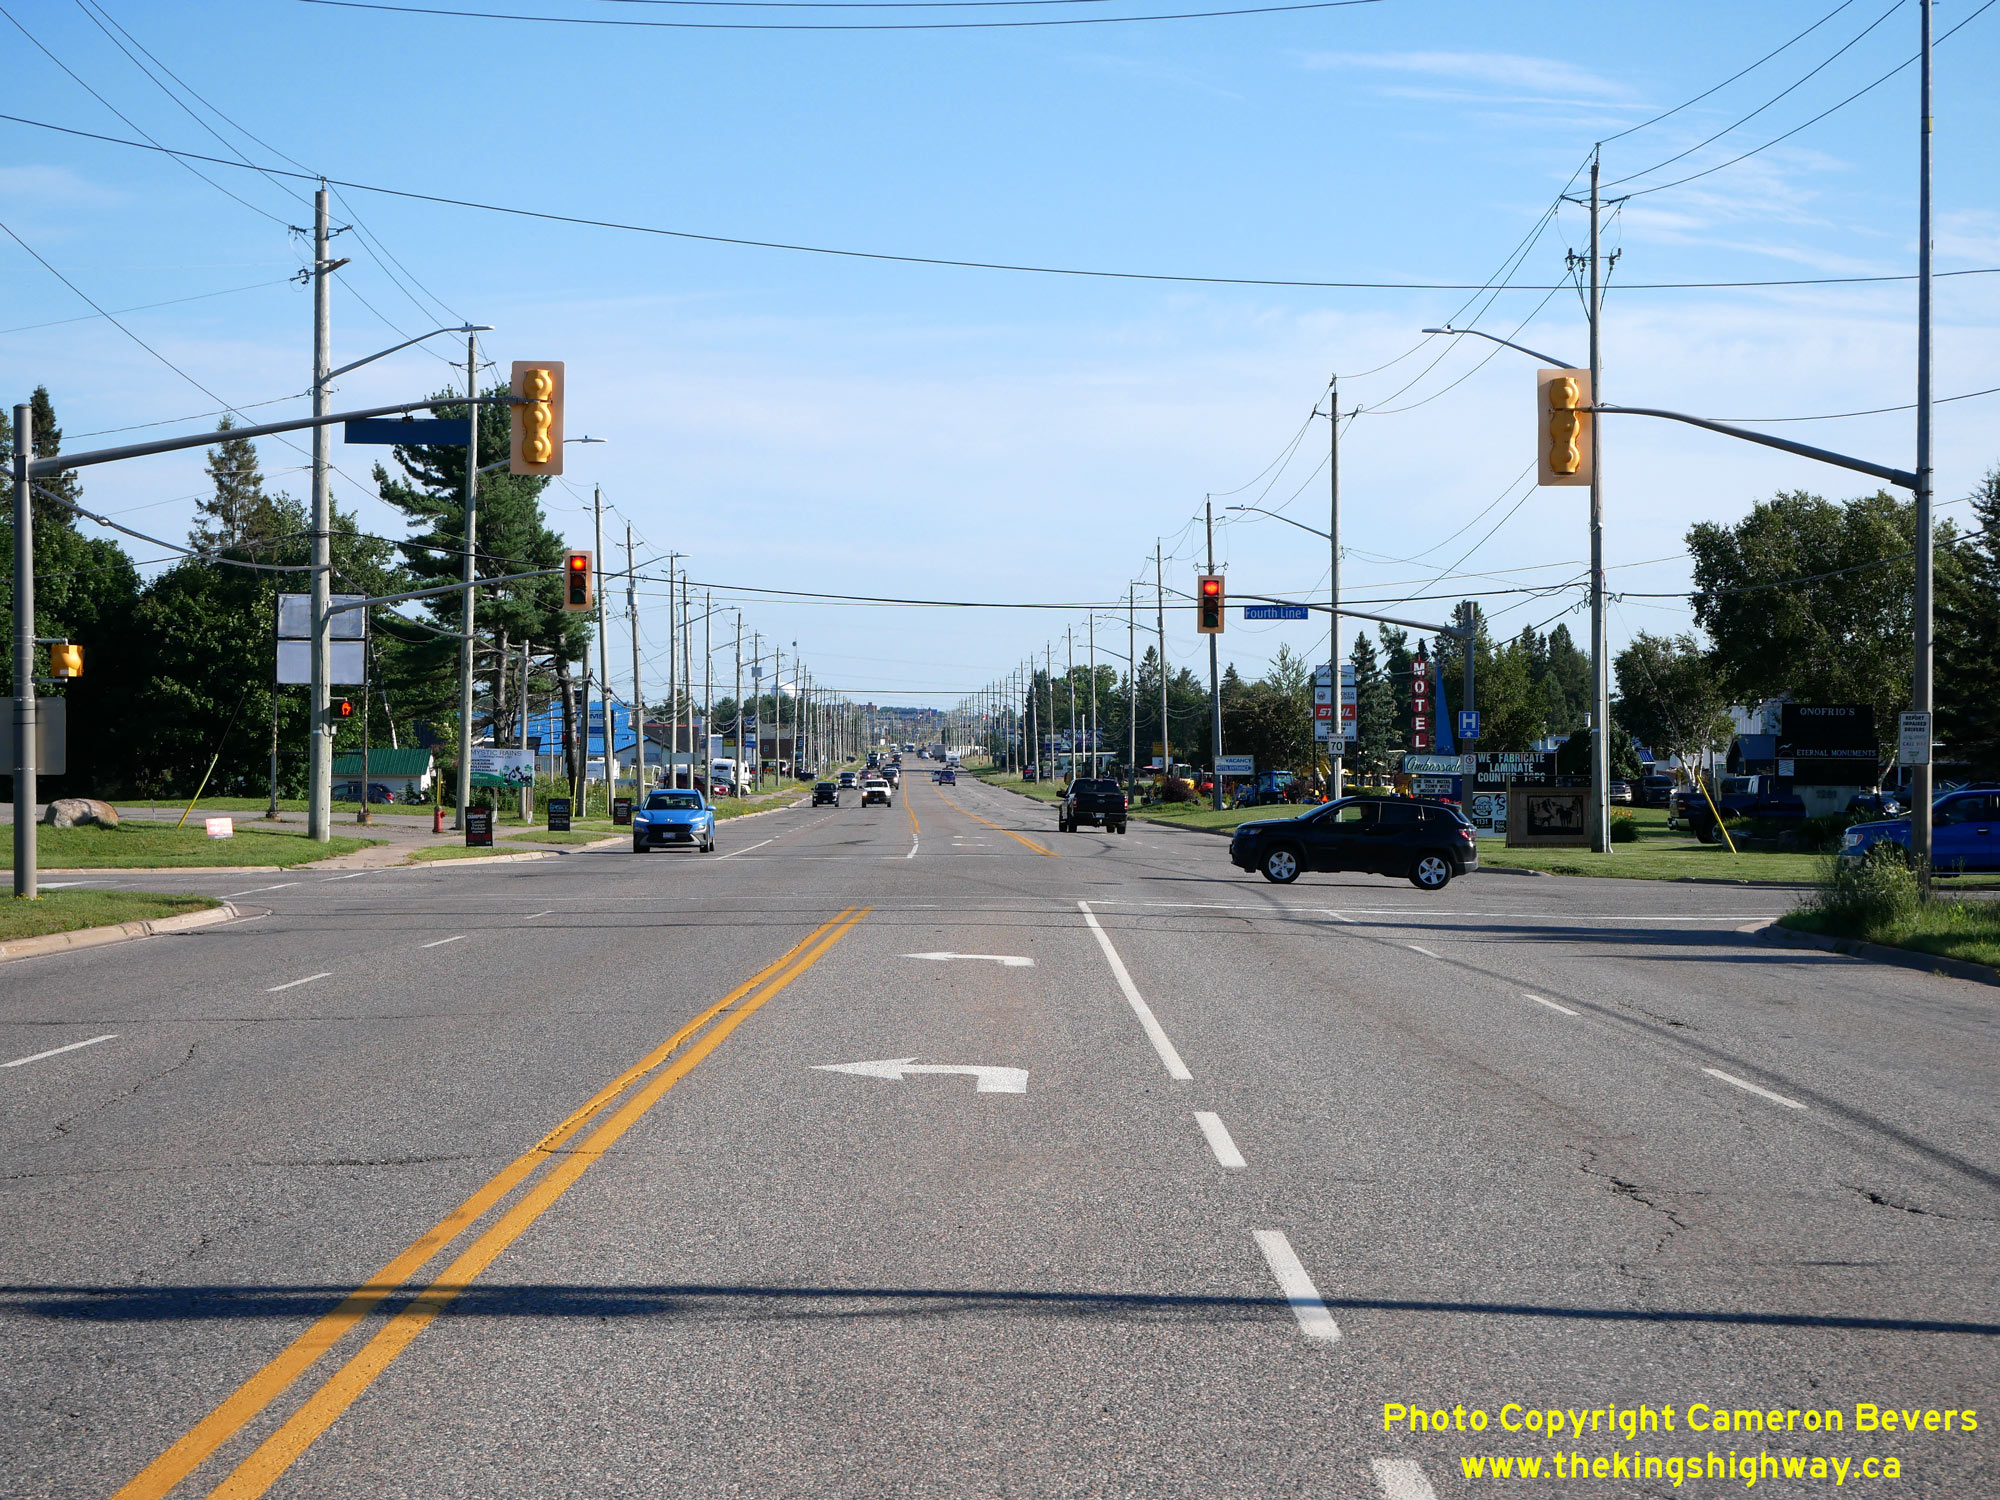
Hwy 17 at Sault Ste. Marie in order to proceed west. See an Enlarged Photo Here. (Photograph taken on September 5, 2006 - © Cameron Bevers)  Right - View of the Great Northern Road (Hwy 17) in Sault Ste. Marie, facing south from Fourth Line. Within this part of the city, Hwy 17 has a five-lane
cross-section, with the centre lane reserved for left-turning vehicles. Commercial strips such as this often have competing traffic movements, so these two-way
centre left turn lanes can better manage traffic at the various commercial accesses and reduce the conflict points with through traffic. See an
Enlarged Photo Here. Right - View of the Great Northern Road (Hwy 17) in Sault Ste. Marie, facing south from Fourth Line. Within this part of the city, Hwy 17 has a five-lane
cross-section, with the centre lane reserved for left-turning vehicles. Commercial strips such as this often have competing traffic movements, so these two-way
centre left turn lanes can better manage traffic at the various commercial accesses and reduce the conflict points with through traffic. See an
Enlarged Photo Here.(Photograph taken on July 28, 2023 - © Cameron Bevers) 
 Left - Overhead signs on Hwy 17 at the northern entrance to Sault Ste. Marie's urbanized area. Within Sault Ste. Marie's city limits, Hwy 17 is administered by
the municipality under a Municipal Connecting Link agreement with the province. Provincial jurisdiction over Hwy 17 begins at the northern city limits, which are
located about 9 km north of the Hwy 550 Junction. Historically, this section of Hwy 17 was under provincial administration from the time the highway was first assumed
in 1937 up until 1966. See an Enlarged Photo Here. Left - Overhead signs on Hwy 17 at the northern entrance to Sault Ste. Marie's urbanized area. Within Sault Ste. Marie's city limits, Hwy 17 is administered by
the municipality under a Municipal Connecting Link agreement with the province. Provincial jurisdiction over Hwy 17 begins at the northern city limits, which are
located about 9 km north of the Hwy 550 Junction. Historically, this section of Hwy 17 was under provincial administration from the time the highway was first assumed
in 1937 up until 1966. See an Enlarged Photo Here.(Photograph taken on July 28, 2023 - © Cameron Bevers) Right - Facing north along Hwy 17 from the northern entrance to Sault Ste. Marie's urbanized area at Fourth Line. Here, the highway narrows and the five-lane
cross-section ends. However, a second northbound lane continues along Hwy 17 as a passing lane. North of Fourth Line, Hwy 17 ascends a long grade northerly towards
Heyden. See an Enlarged Photo Here.(Photograph taken on July 28, 2023 - © Cameron Bevers) 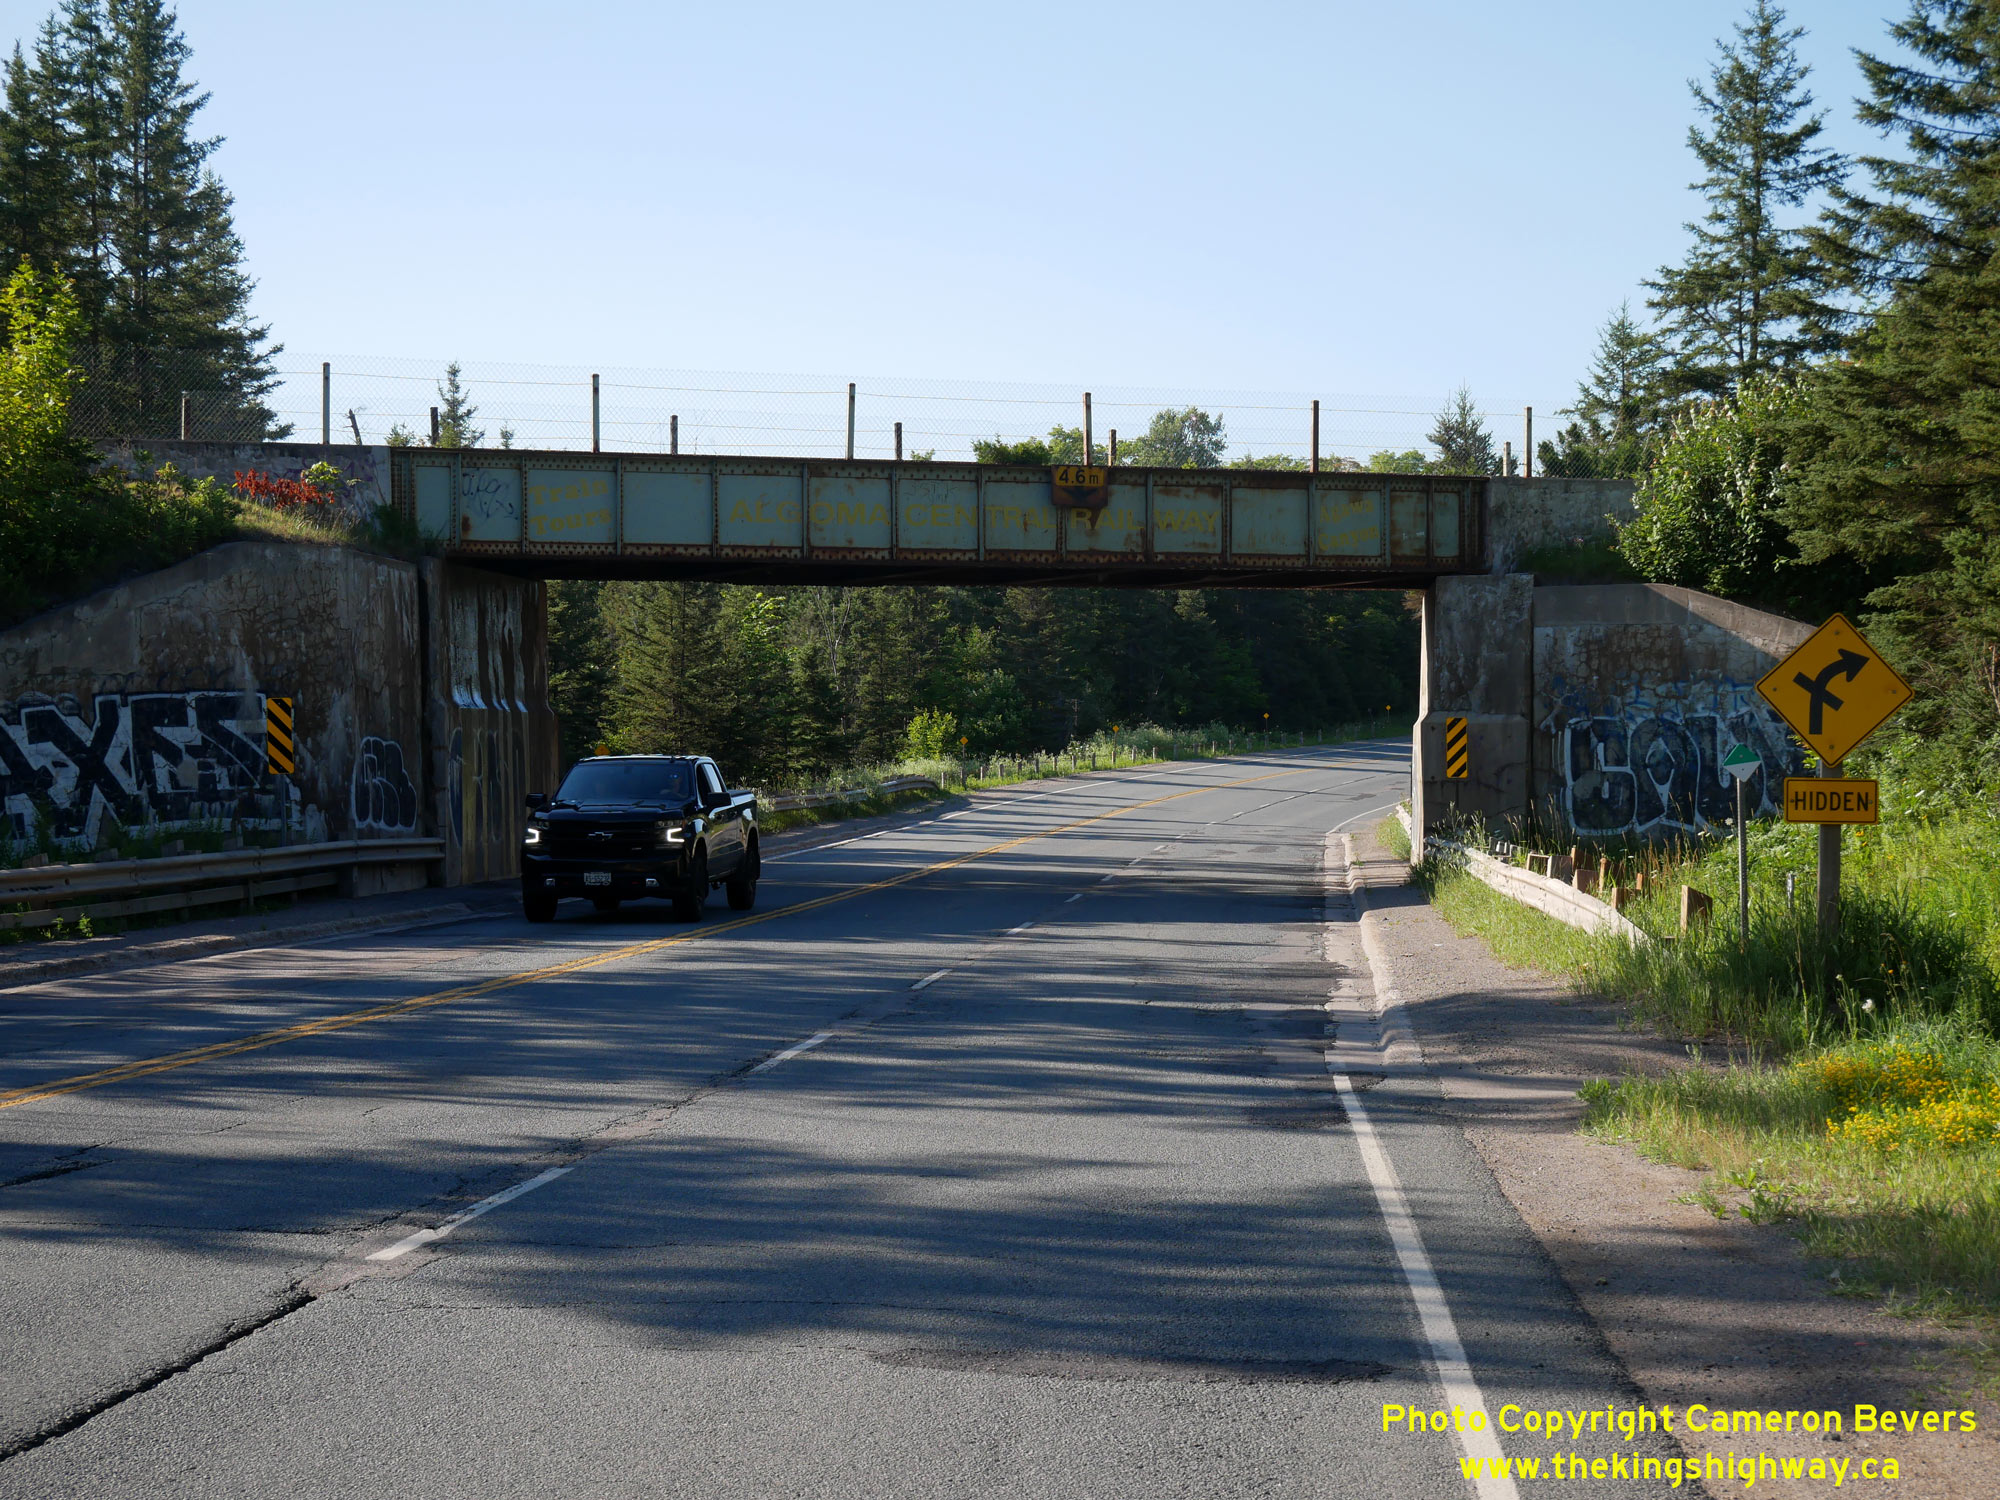
 Left - Southern side of the Algoma Central Railway Subway (Site #38-85) on Hwy 17 in Sault Ste. Marie, located about 4 km north of the Hwy 550 & Hwy 17B
Junction. This single-span steel plate girder structure was completed in 1960. This grade separation and highway diversion bypassed an at-grade railway crossing on
the original route of Hwy 17. See an Enlarged Photo Here. Left - Southern side of the Algoma Central Railway Subway (Site #38-85) on Hwy 17 in Sault Ste. Marie, located about 4 km north of the Hwy 550 & Hwy 17B
Junction. This single-span steel plate girder structure was completed in 1960. This grade separation and highway diversion bypassed an at-grade railway crossing on
the original route of Hwy 17. See an Enlarged Photo Here.(Photograph taken on July 28, 2023 - © Cameron Bevers) Right - Facing south along Hwy 17 through the Algoma Central Railway Subway. Construction began on this railway grade separation in the late 1950s along a new
diversion of Hwy 17 at Odena. More than 2 km of the original route of Hwy 17 was bypassed by the Odena Diversion, which featured this grade separation and a
significantly improved highway grade. Two contracts were awarded in August 1959 for the construction of the railway subway and completion of the diversion at Odena.
The structural steel required for the railway grade separation was tendered under Contract #1959-72, while grading of the diversion and concrete work for the Odena
Subway were tendered under Contract #1959-159. The new highway diversion and subway at Odena were both completed in 1960. See an
Enlarged Photo Here.(Photograph taken on July 28, 2023 - © Cameron Bevers) 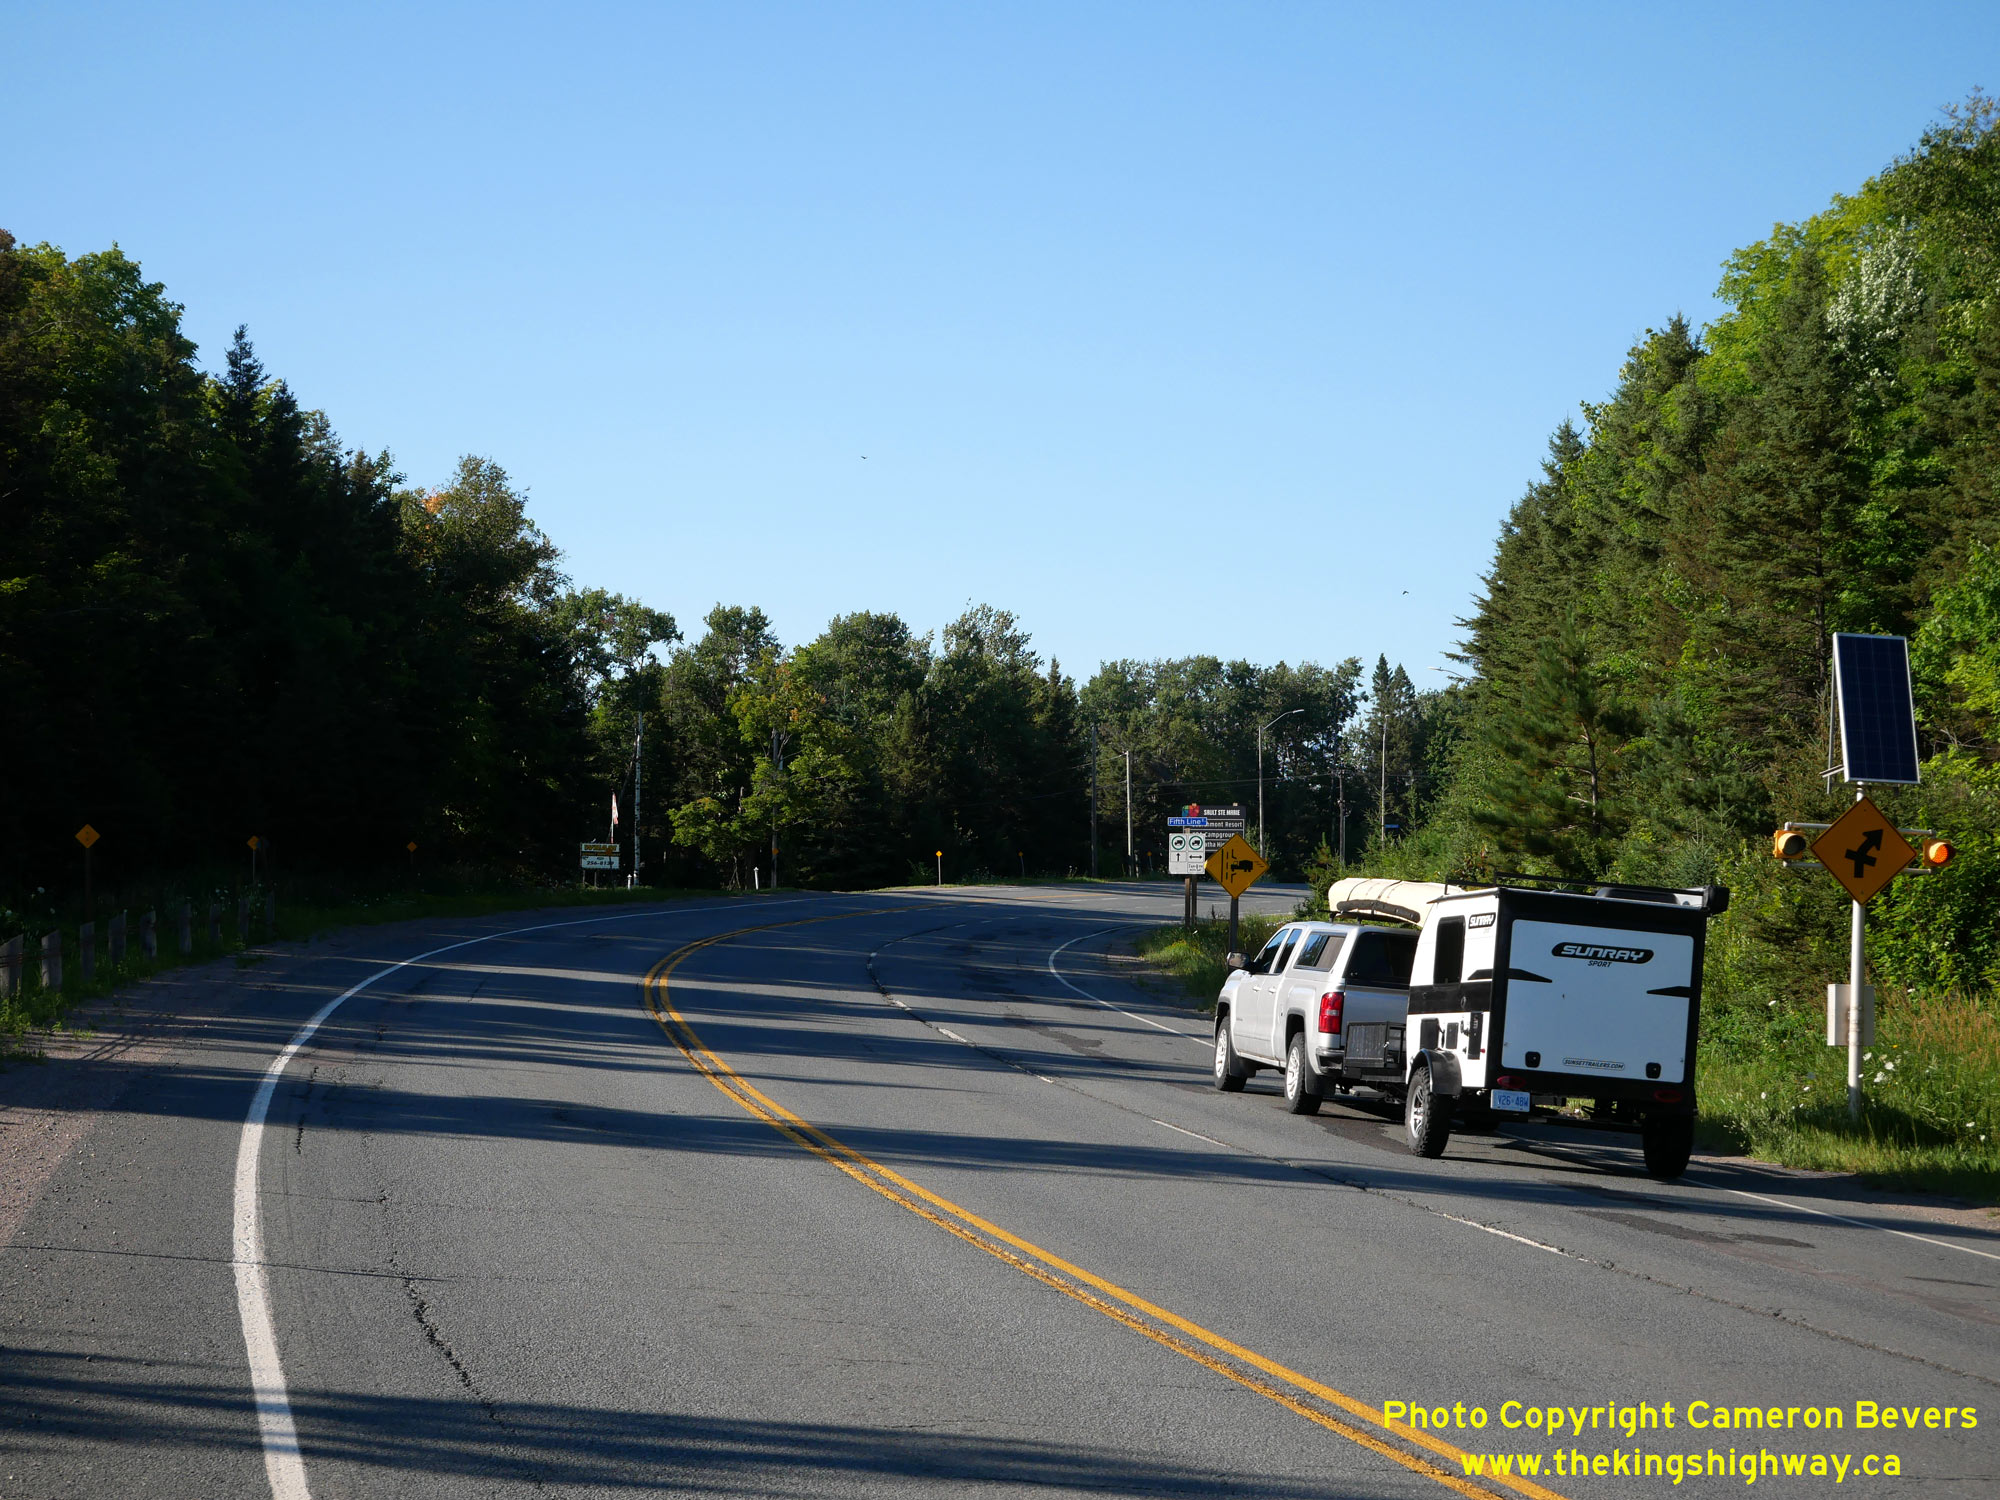
 Left - Facing north along the Odena Diversion (Hwy 17) from the Algoma Central Railway Subway. This section of Hwy 17 features a continuous northbound passing
lane, since the highway climbs a long uphill grade north of Sault Ste. Marie's urban area. See an
Enlarged Photo Here. Left - Facing north along the Odena Diversion (Hwy 17) from the Algoma Central Railway Subway. This section of Hwy 17 features a continuous northbound passing
lane, since the highway climbs a long uphill grade north of Sault Ste. Marie's urban area. See an
Enlarged Photo Here.(Photograph taken on July 28, 2023 - © Cameron Bevers) Right - View of Old Hwy 17 at Odena, facing south. This bypassed section of Hwy 17 comes to an end just ahead. A large earth cut was excavated here in
1959-1960, in order to grade-separate Hwy 17 from the Algoma Central Railway. In the background, the current route of Hwy 17 can be seen continuing south towards
Sault Ste. Marie's urban area. See an Enlarged Photo Here.(Photograph taken on July 28, 2023 - © Cameron Bevers) 
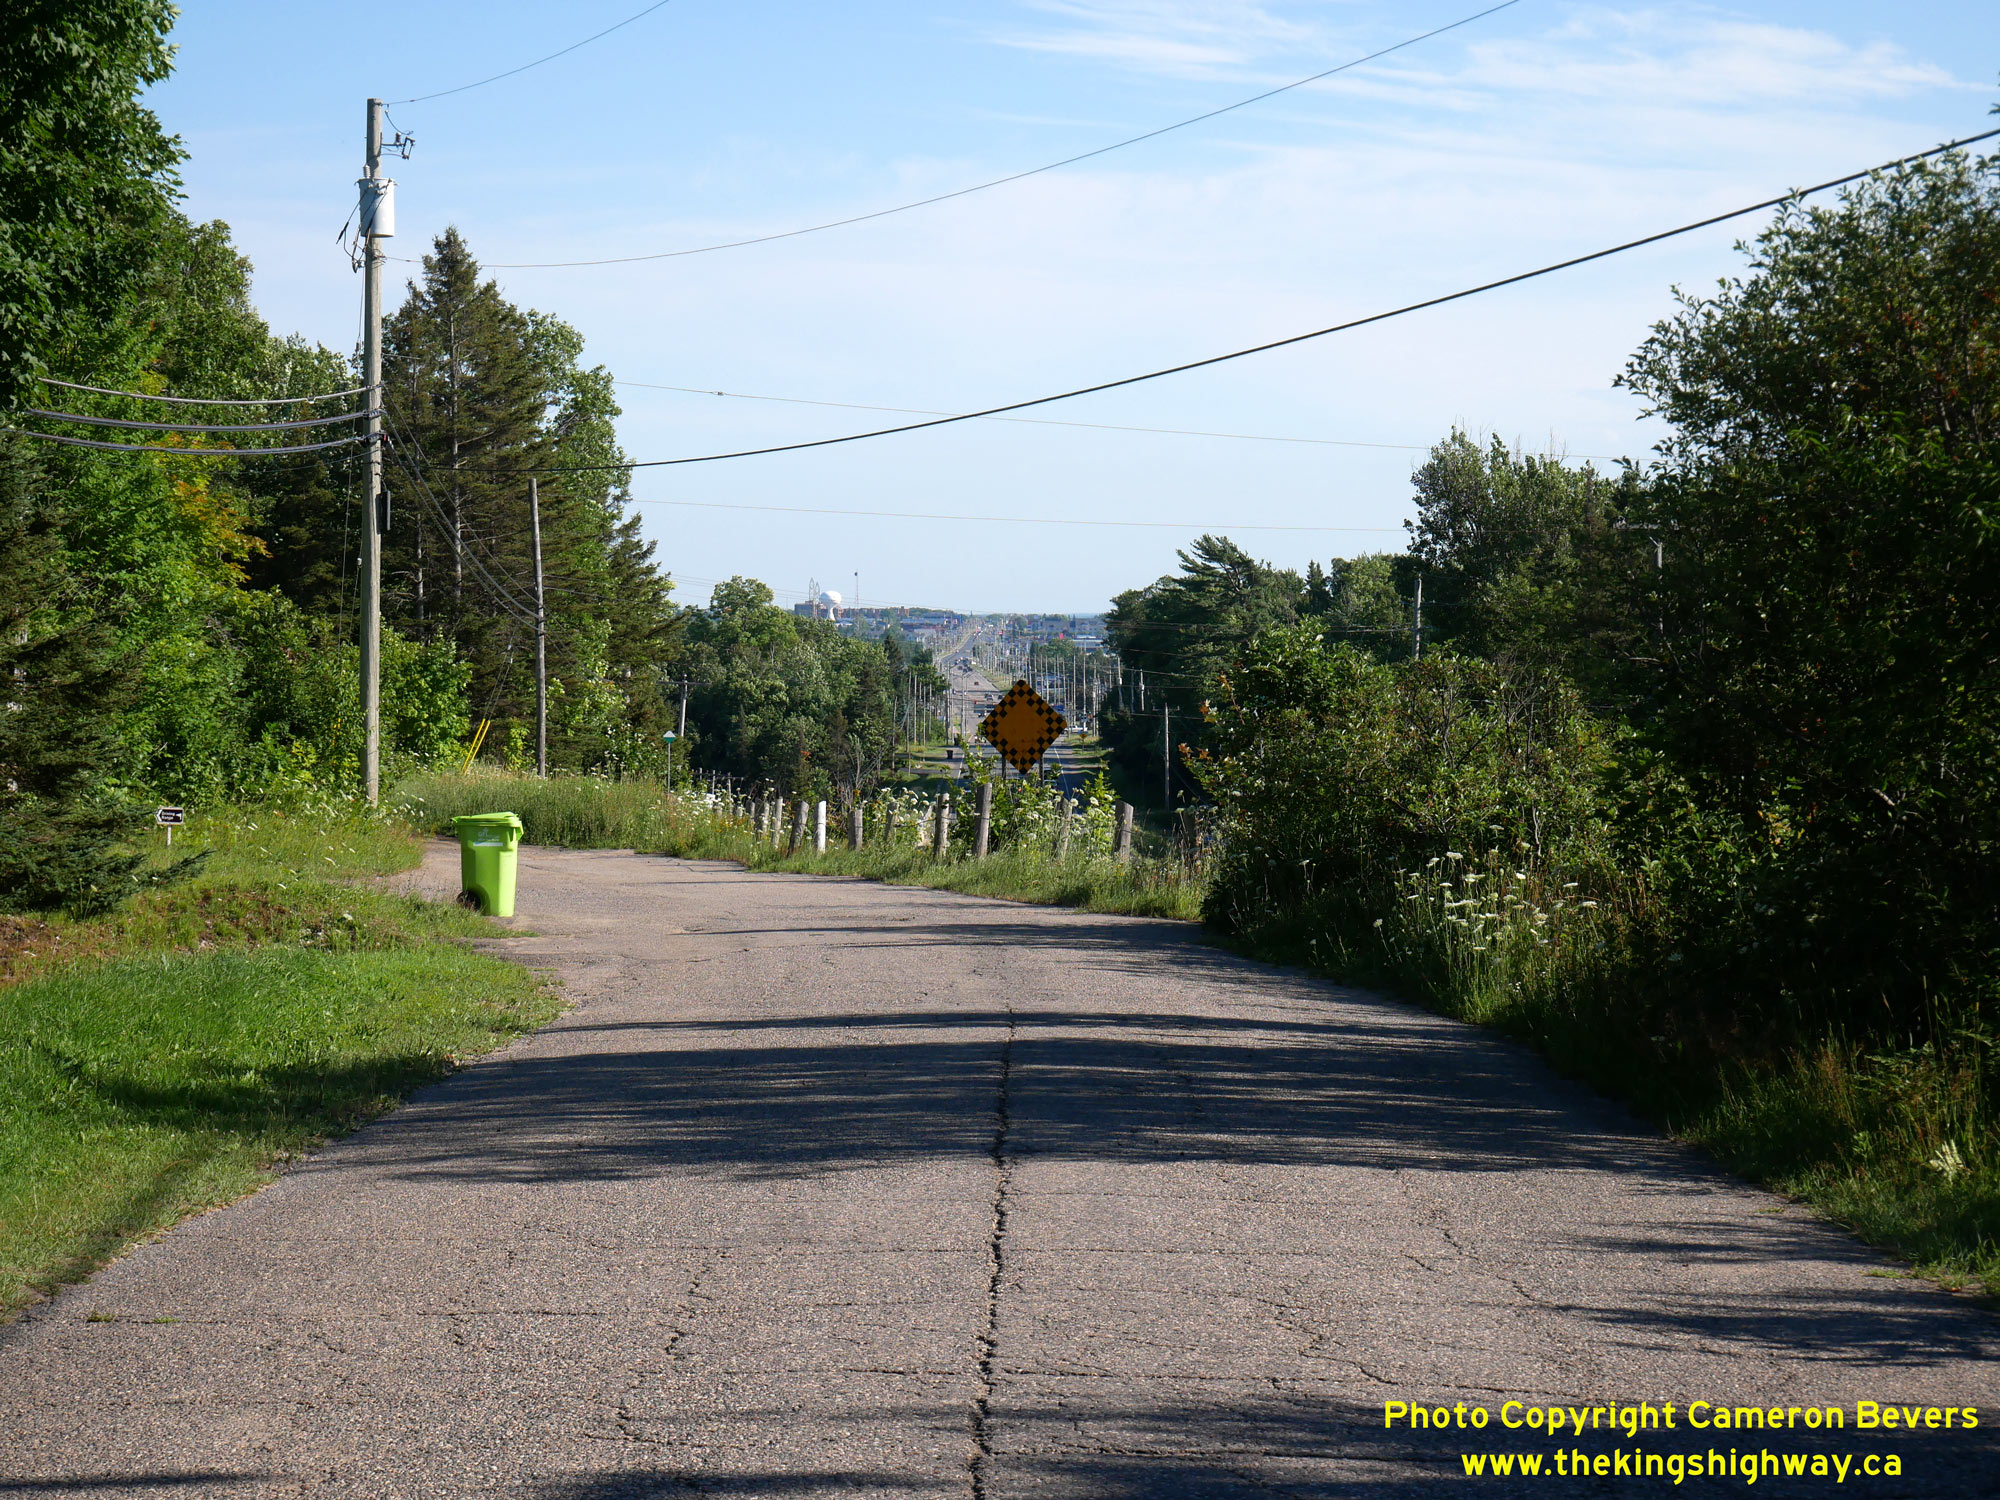
 Left - A checkerboard sign marks the end of Old Hwy 17 at Odena. The relocated route of Hwy 17 lies several metres below the old highway. Prior to the
construction of this earth cut on the approach to the railway subway, Hwy 17 would have climbed a severe uphill grade on its original route departing from Sault Ste.
Marie. The Odena Diversion reduced the severity of the highway gradient, making the ascent towards Heyden more gradual. See an
Enlarged Photo Here. Left - A checkerboard sign marks the end of Old Hwy 17 at Odena. The relocated route of Hwy 17 lies several metres below the old highway. Prior to the
construction of this earth cut on the approach to the railway subway, Hwy 17 would have climbed a severe uphill grade on its original route departing from Sault Ste.
Marie. The Odena Diversion reduced the severity of the highway gradient, making the ascent towards Heyden more gradual. See an
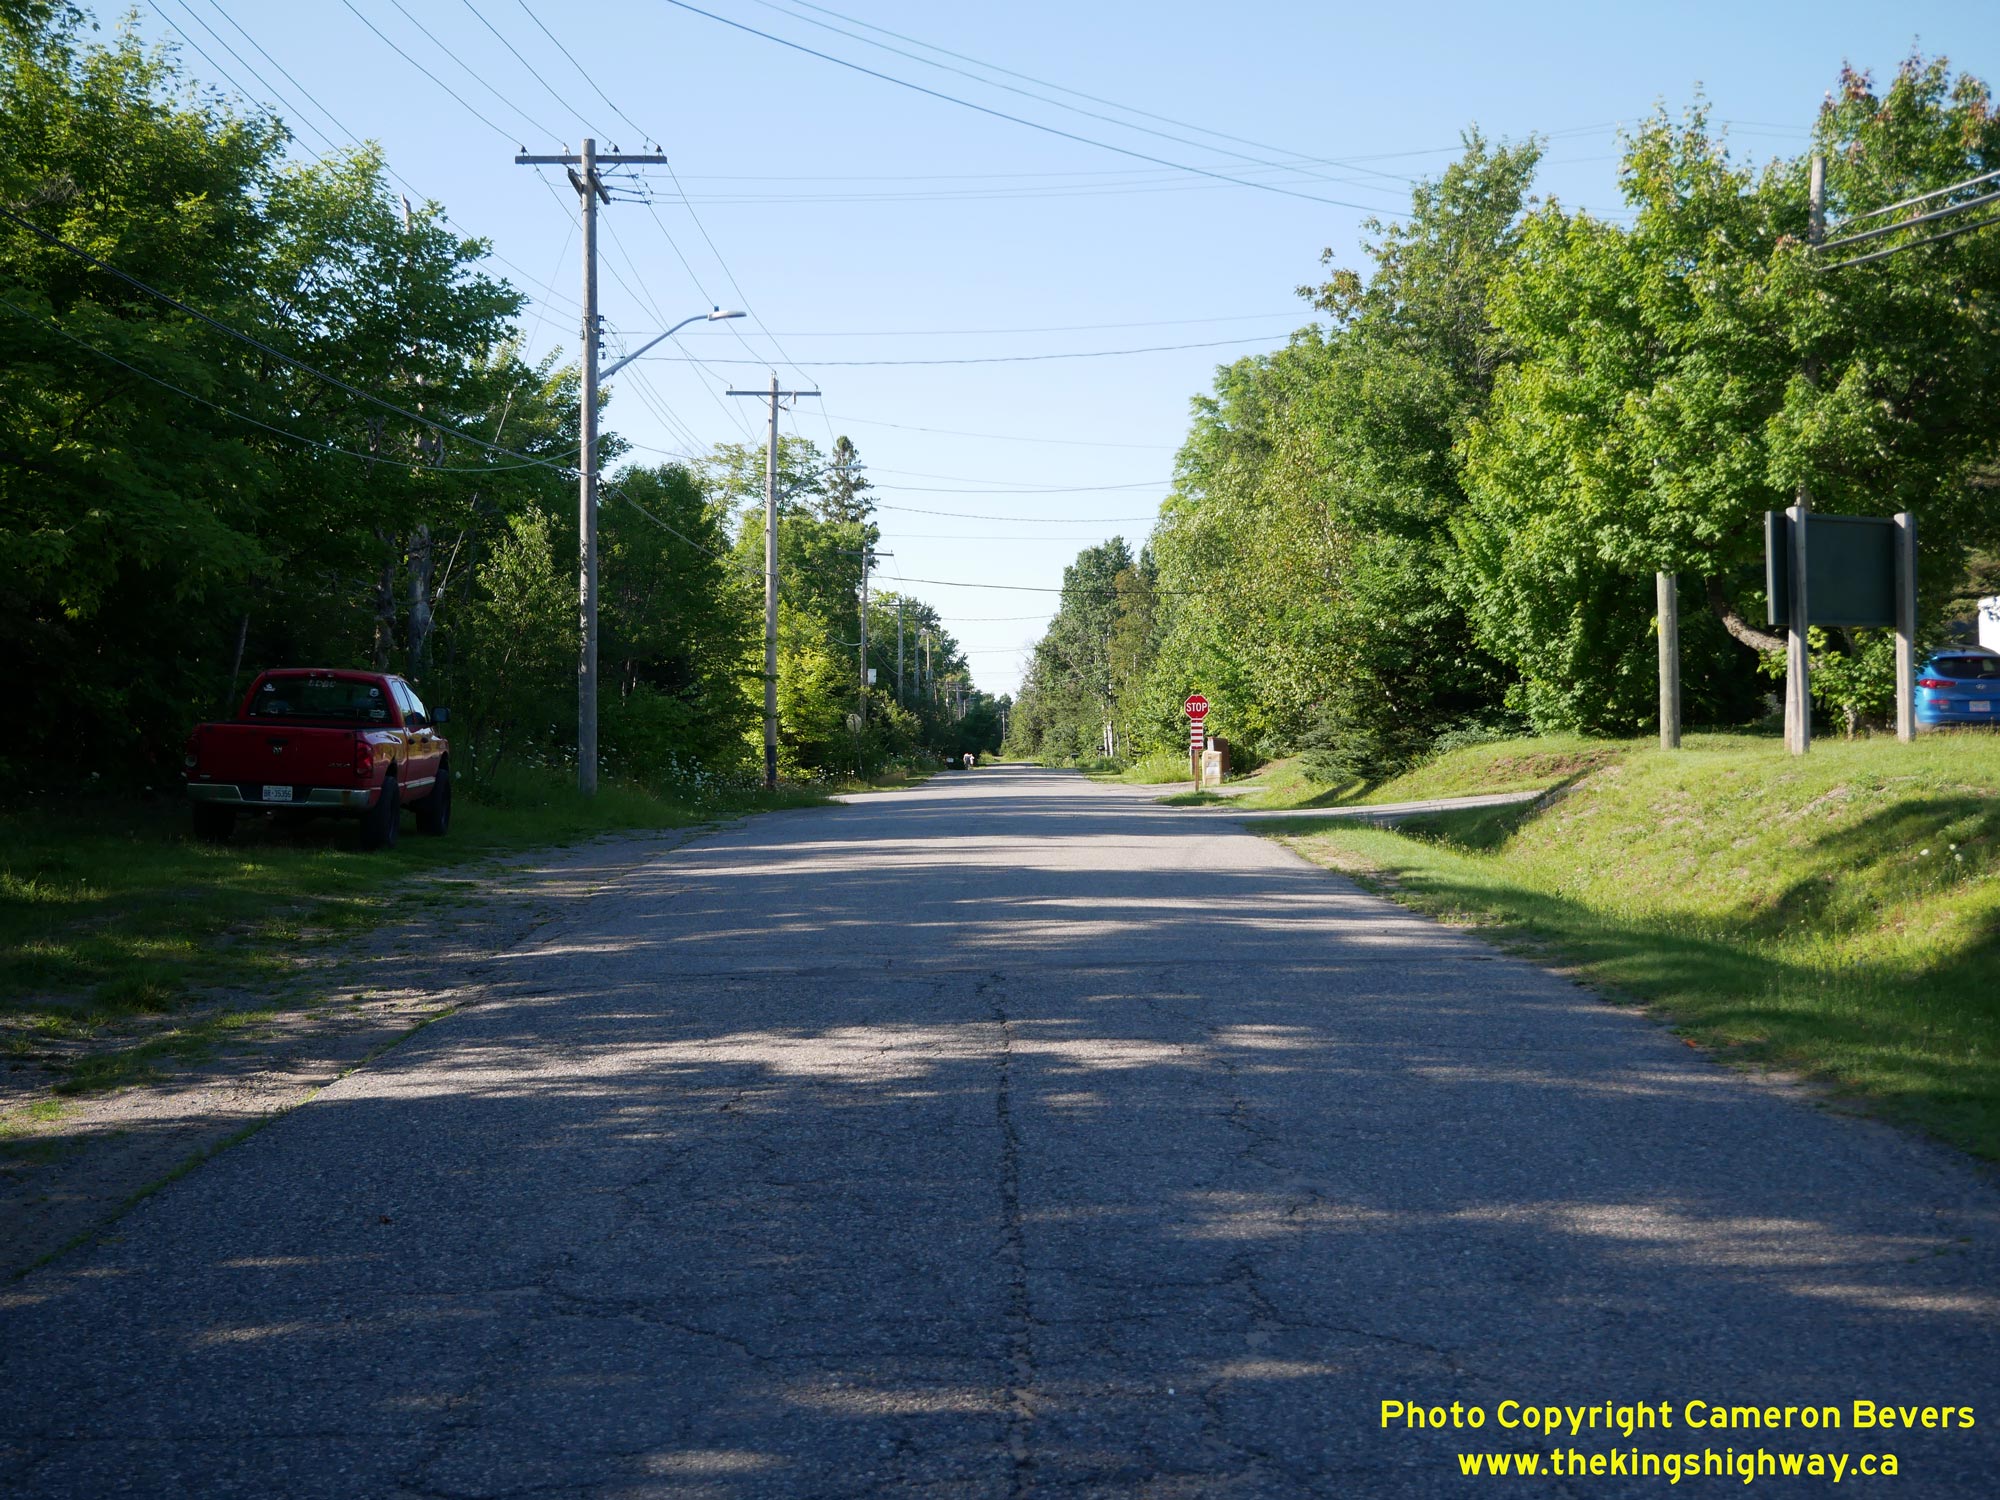
Enlarged Photo Here.(Photograph taken on July 28, 2023 - © Cameron Bevers) Right - Bypassed section of Hwy 17 at Odena, facing north. The original highway crossed the Algoma Central Railway about 400 metres ahead. Following the
completion of the grade separation on the relocated route of Hwy 17 (the Odena Diversion) in 1960, the old level railway crossing was removed. Consequently, Old
Hwy 17 comes to a dead end just before the railway tracks, and is no longer a through road today. Jurisdiction over this bypassed section of Hwy 17 at Odena was
transferred from the province to the Township of Tarentorus, effective April 1, 1962. This township was amalgamated with a few others to form an expanded City of
Sault Ste. Marie in the mid-1960s. See an Enlarged Photo Here.(Photograph taken on July 28, 2023 - © Cameron Bevers) 
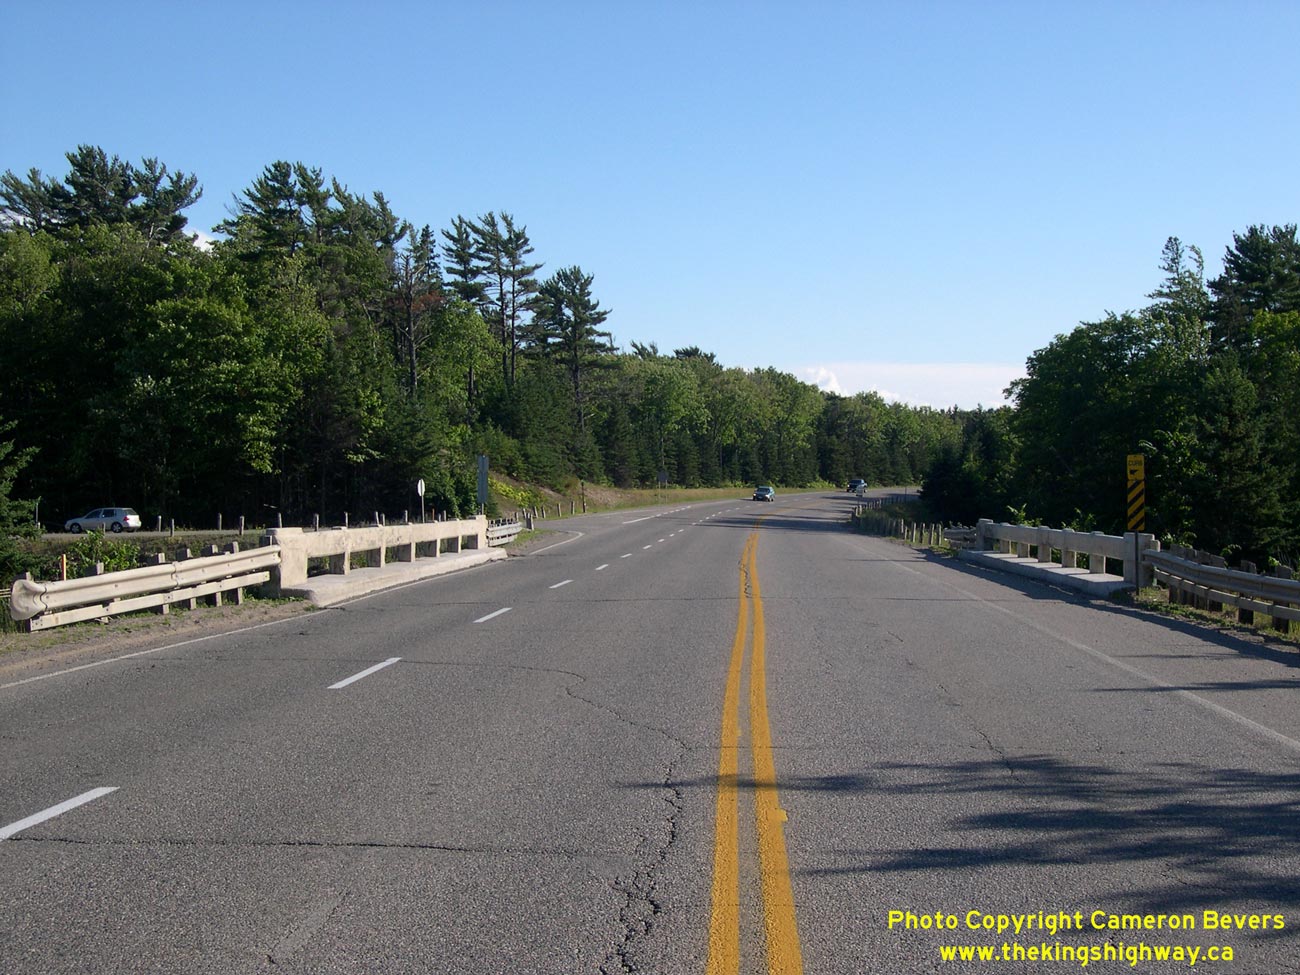
Left - Facing north along Hwy 17 towards the Root River Bridge in Sault Ste. Marie. This is the second of four crossings of the Root River along Hwy 17 north
of Sault Ste. Marie. This bridge is known as Root River Bridge #2 (Site #38-84), with the other bridge crossings numbered sequentially from south to north. See an
Enlarged Photo Here. (Photograph taken on July 15, 2007 - © Cameron Bevers) Right - Facing south along Hwy 17 towards Sault Ste. Marie at Root River Bridge #2. See an Enlarged Photo Here. (Photograph taken on July 15, 2007 - © Cameron Bevers) 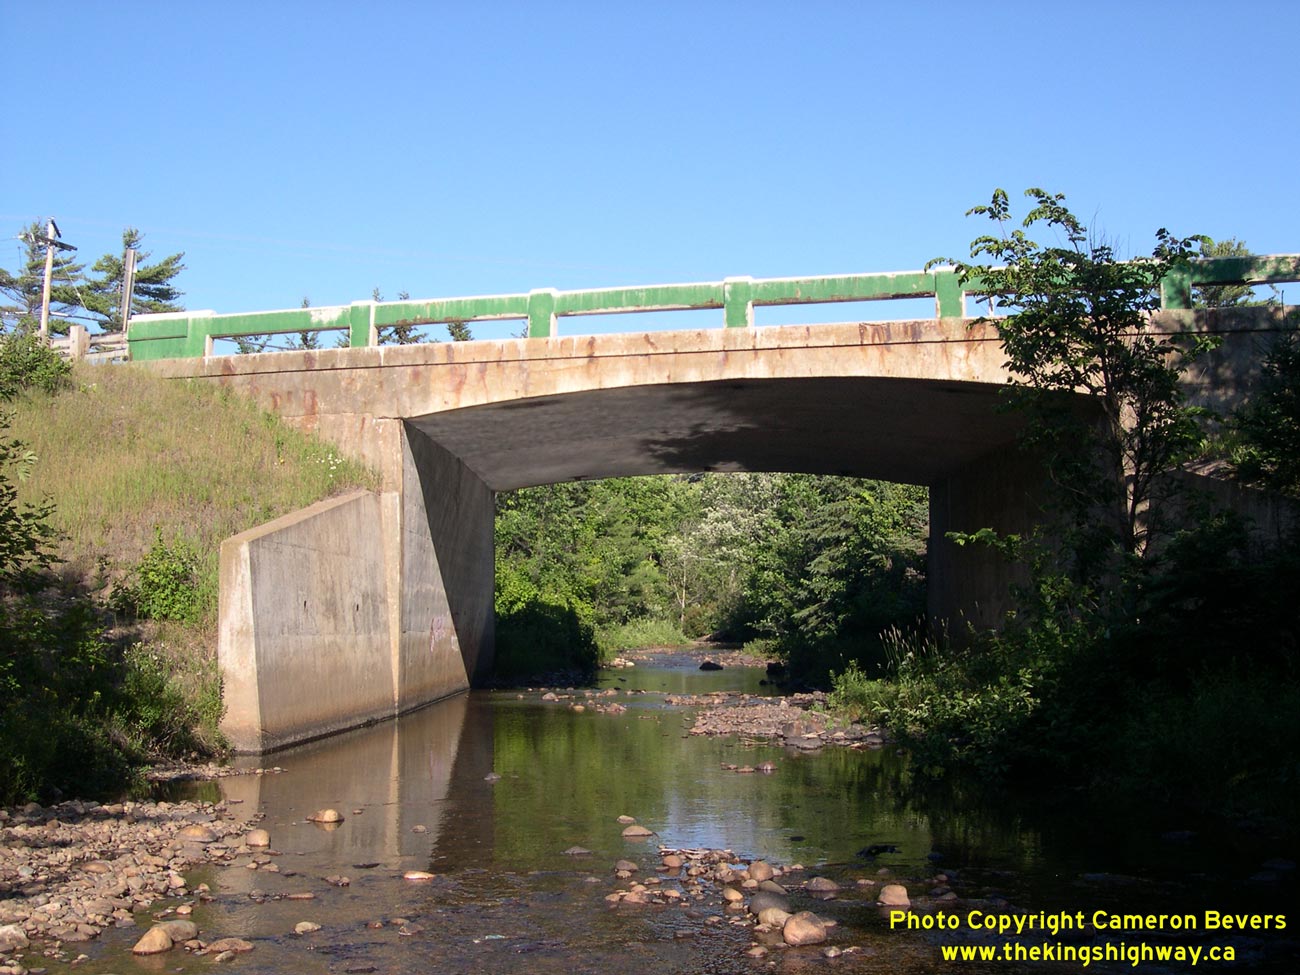
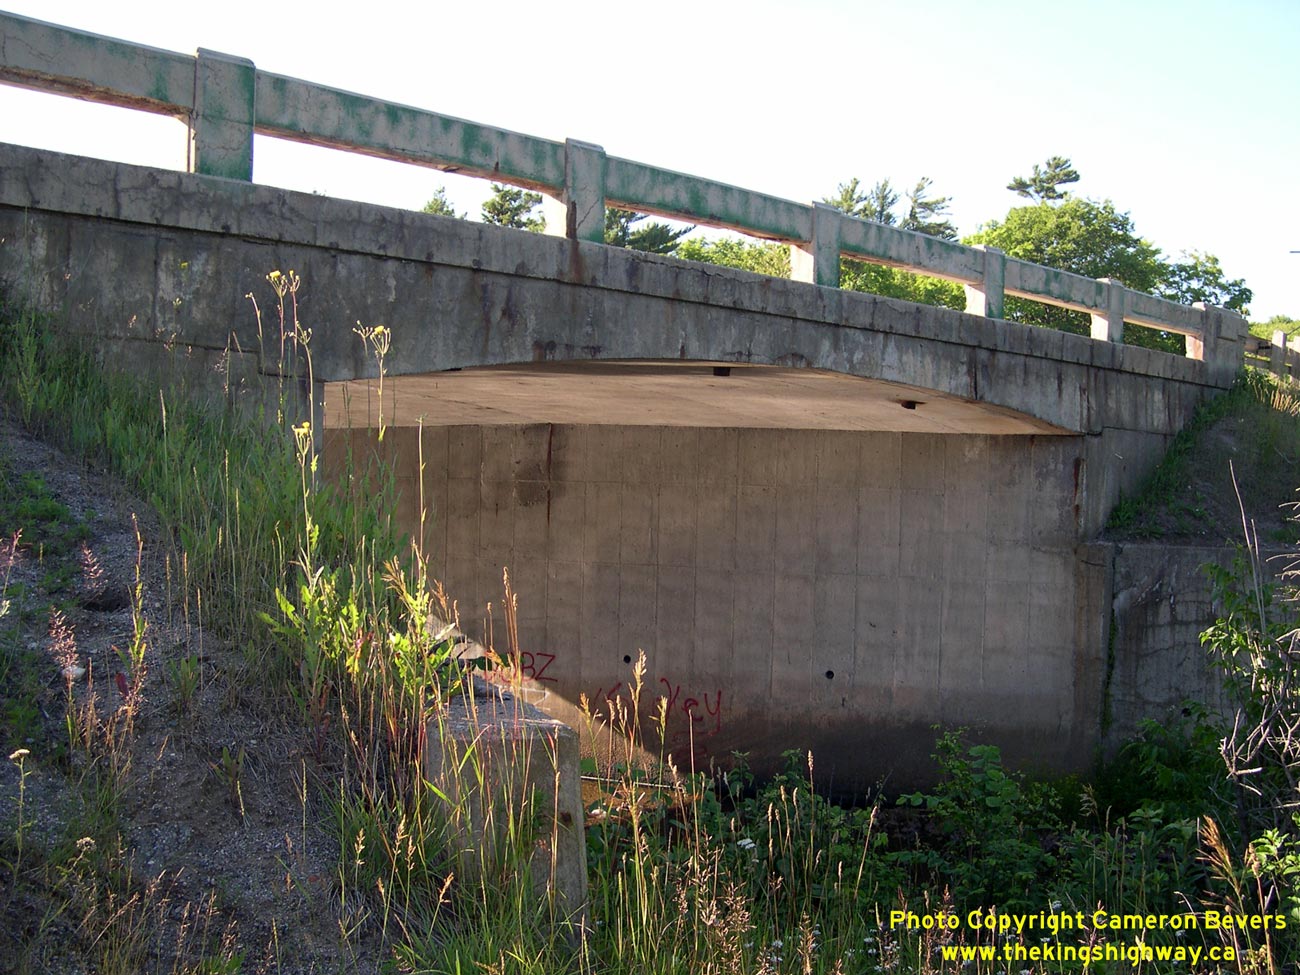
Left - Western side of Root River Bridge #2 on Hwy 17. This single-span concrete rigid frame structure was built under Contract #1959-159 and was completed in
1960. See an Enlarged Photo Here. (Photograph taken on July 15, 2007 - © Cameron Bevers) Right - Eastern side of Root River Bridge #2 on Hwy 17 in Sault Ste. Marie. This bridge features the concrete bar-and-post handrail design, which was commonly used on provincial highway bridges built in the 1950s and early 1960s. See an Enlarged Photo Here. (Photograph taken on July 15, 2007 - © Cameron Bevers) 

Left - The handrails of Root River Bridge #2 were originally painted green. However, the green paint has worn off over the years in some places. See an
Enlarged Photo Here. (Photograph taken on July 15, 2007 - © Cameron Bevers) Right - Distance guide sign facing northbound traffic on Hwy 17 at the Sault Ste. Marie city limits. Apart from a handful of small beach communities north of
the city, there are no other towns located along Hwy 17 until Wawa, which lies over 200 km to the north. Even more distant is Thunder Bay, which lies on the other
side of Lake Superior about 690 km to the west. See an Enlarged Photo Here.(Photograph taken on July 28, 2023 - © Cameron Bevers) 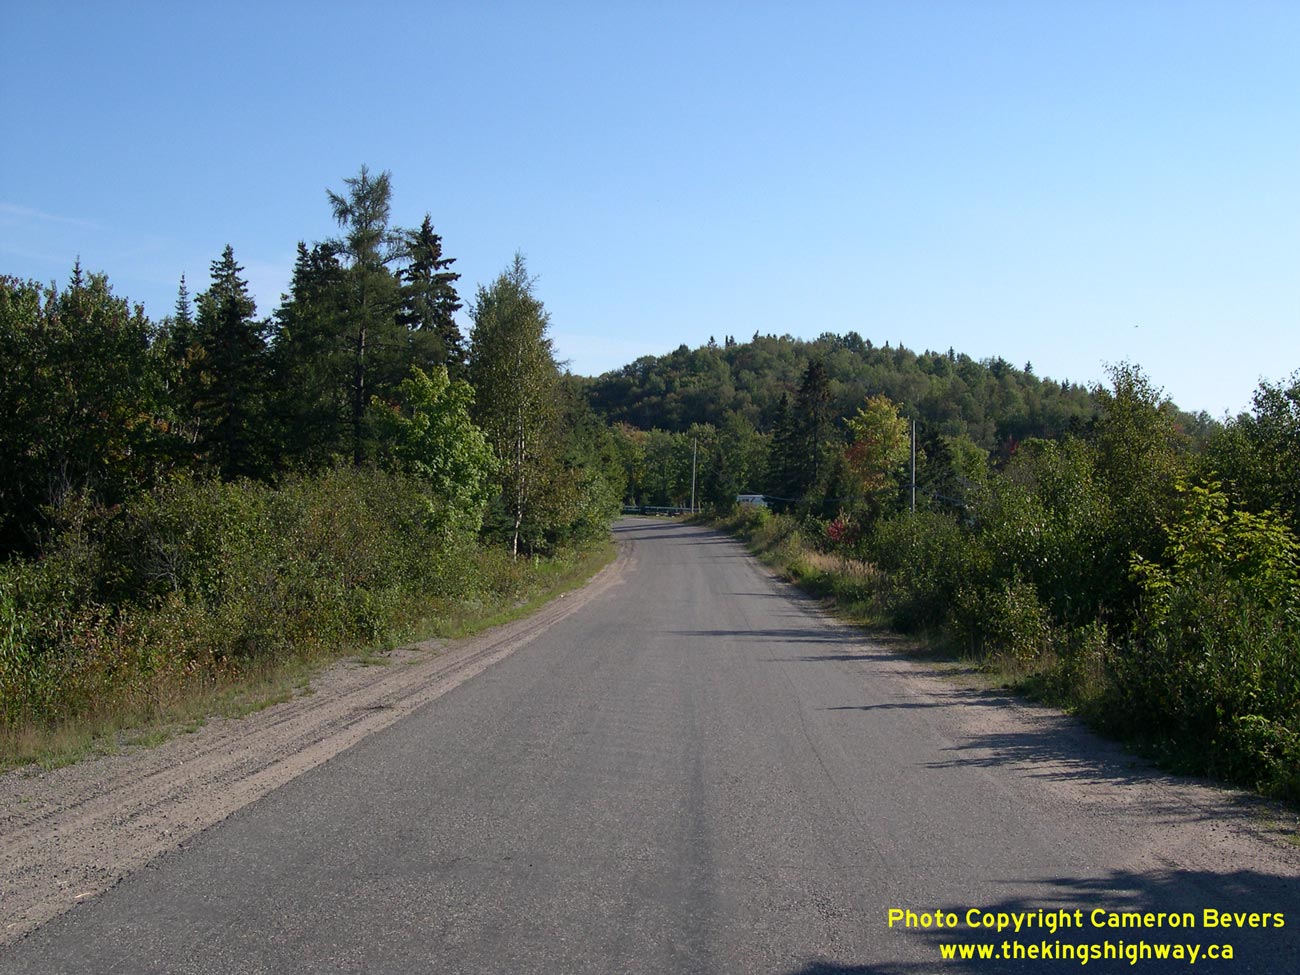
Left - This bypassed former alignment of Hwy 17 (MacIntyre Road) lies between Sault Ste. Marie and Heyden. This was one of several original sections of Hwy 17
left behind after the new Trans-Canada Highway route of Hwy 17 was built. MacIntyre Road is still a provincial highway today (Hwy 7045). Like most of Ontario's
"7000-series" highways, the route number is merely used for accounting and inventory purposes and is not posted on signs along the highway. See an
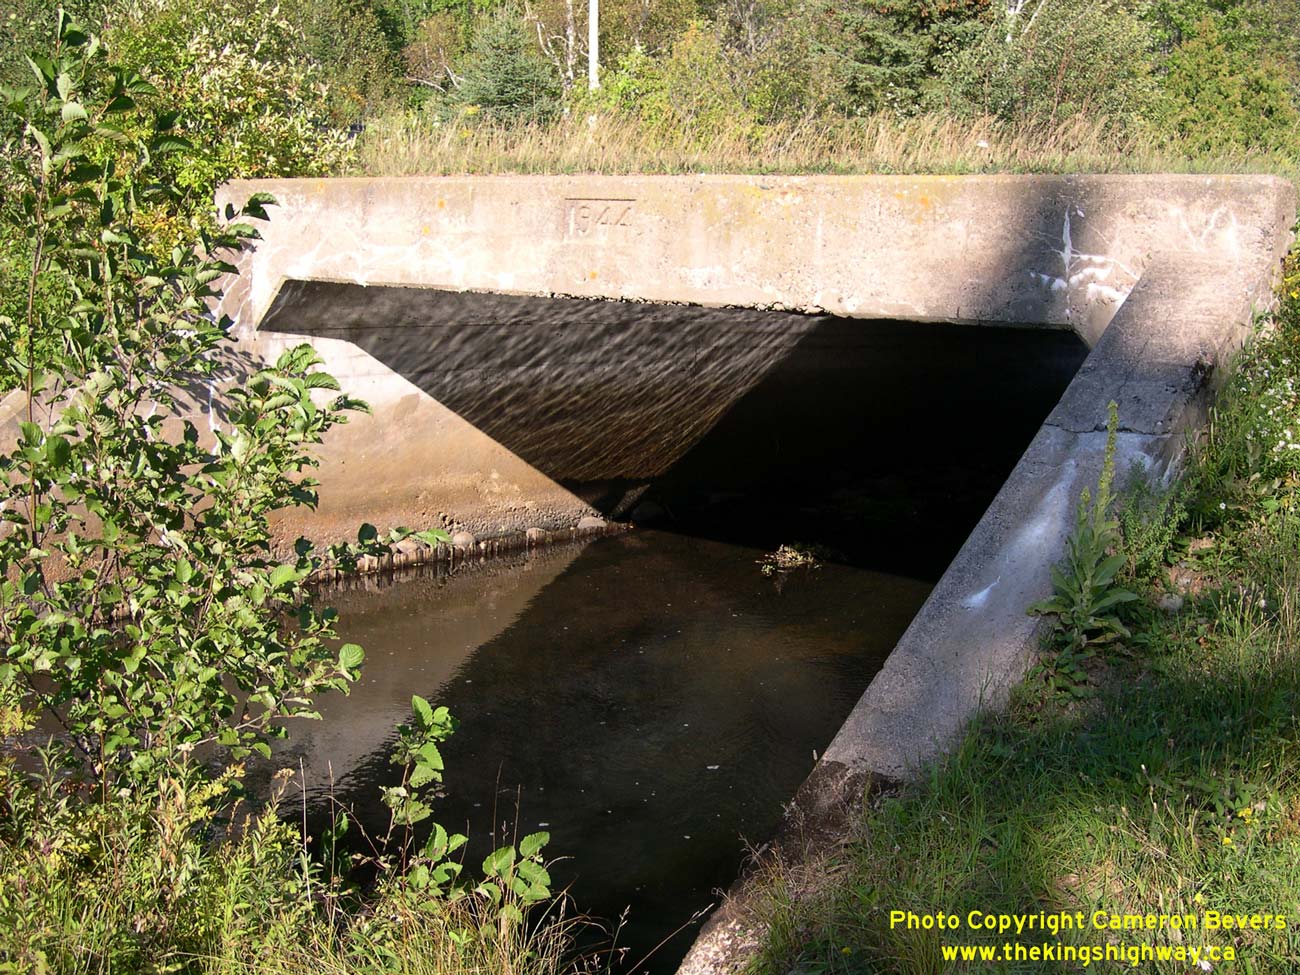
Enlarged Photo Here. (Photograph taken on September 5, 2006 - © Cameron Bevers) Right - Root River Culvert on Old Hwy 17 (MacIntyre Road) near Heyden. This single-span concrete structure was completed in 1944. This was one of two concrete culverts built across the Root River near Heyden under Contract #1944-07. See an Enlarged Photo Here. (Photograph taken on September 5, 2006 - © Cameron Bevers) 
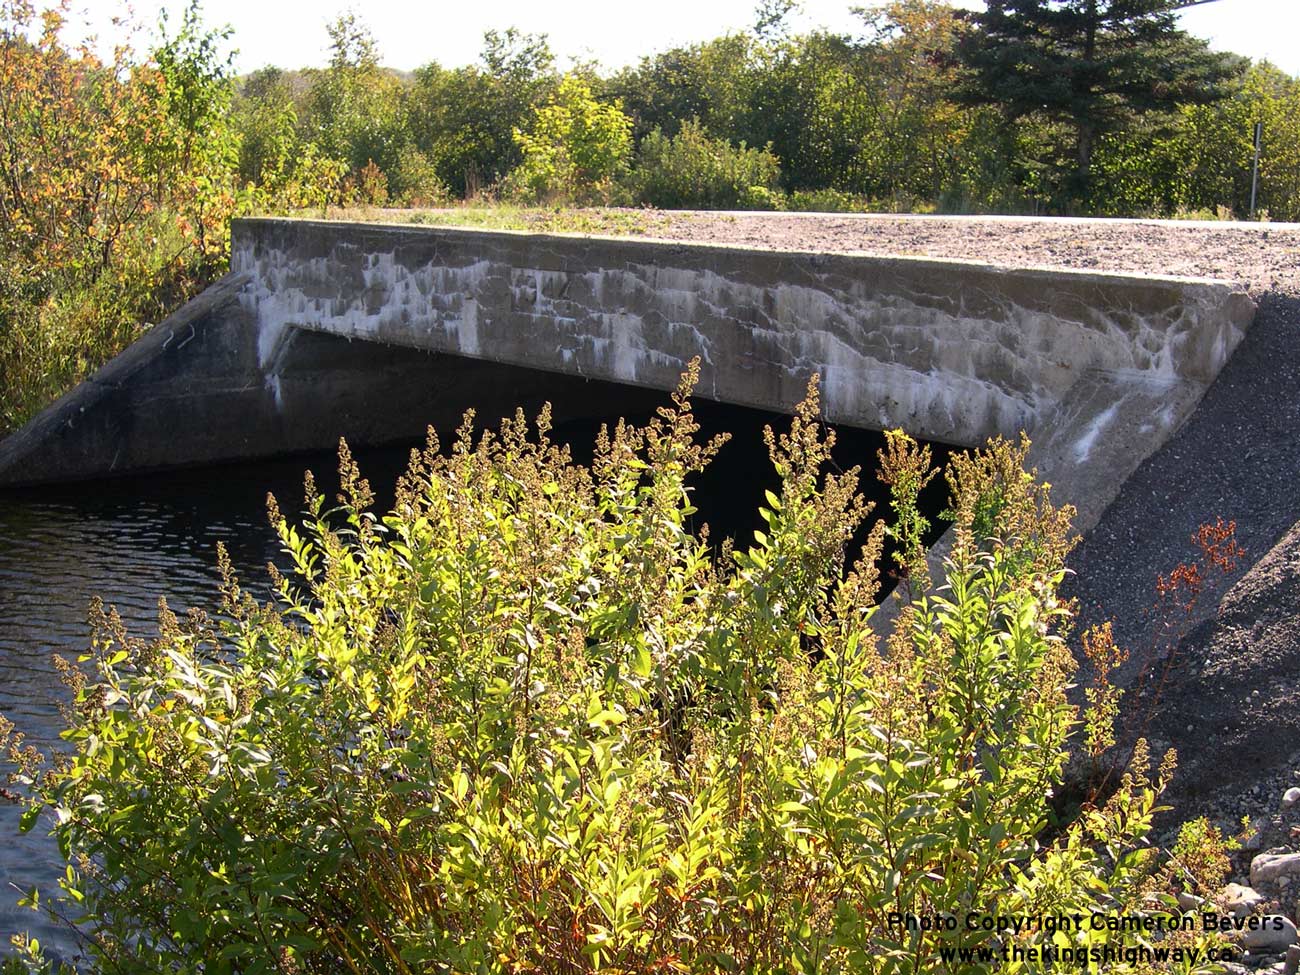
Left - Close-up of the 1944 date stamp on the Root River Culvert on Old Hwy 17 (MacIntyre Road). See an
Enlarged Photo Here. (Photograph taken on September 5, 2006 - © Cameron Bevers) Right - Eastern side of the Root River Culvert on Old Hwy 17 (MacIntyre Road) near Heyden. See an Enlarged Photo Here. (Photograph taken on September 5, 2006 - © Cameron Bevers) 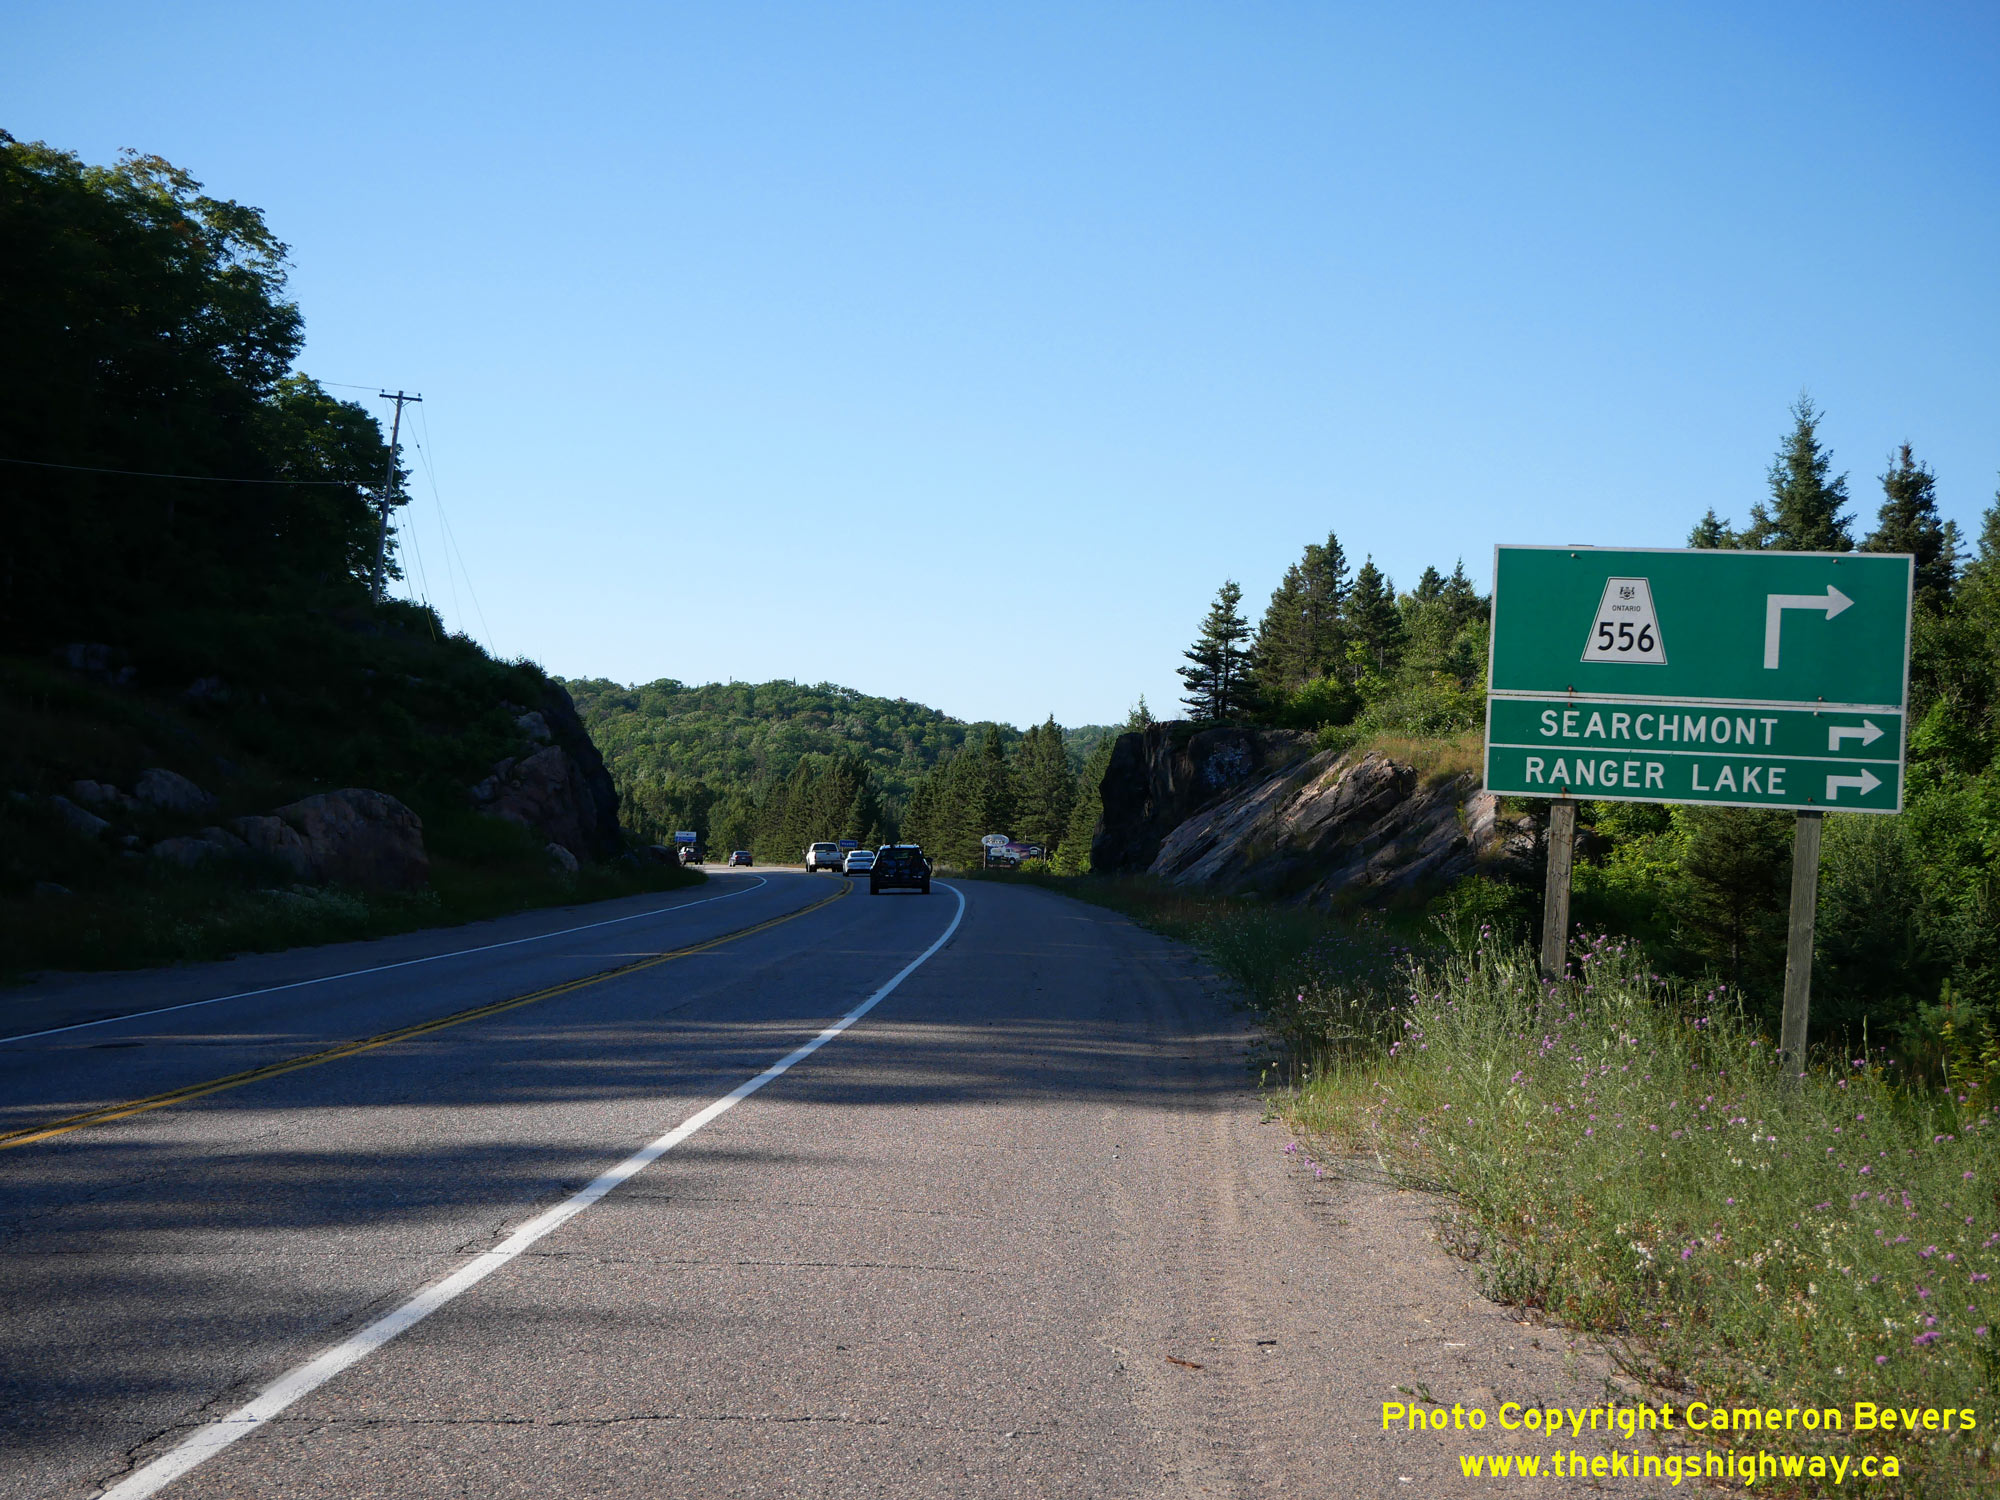
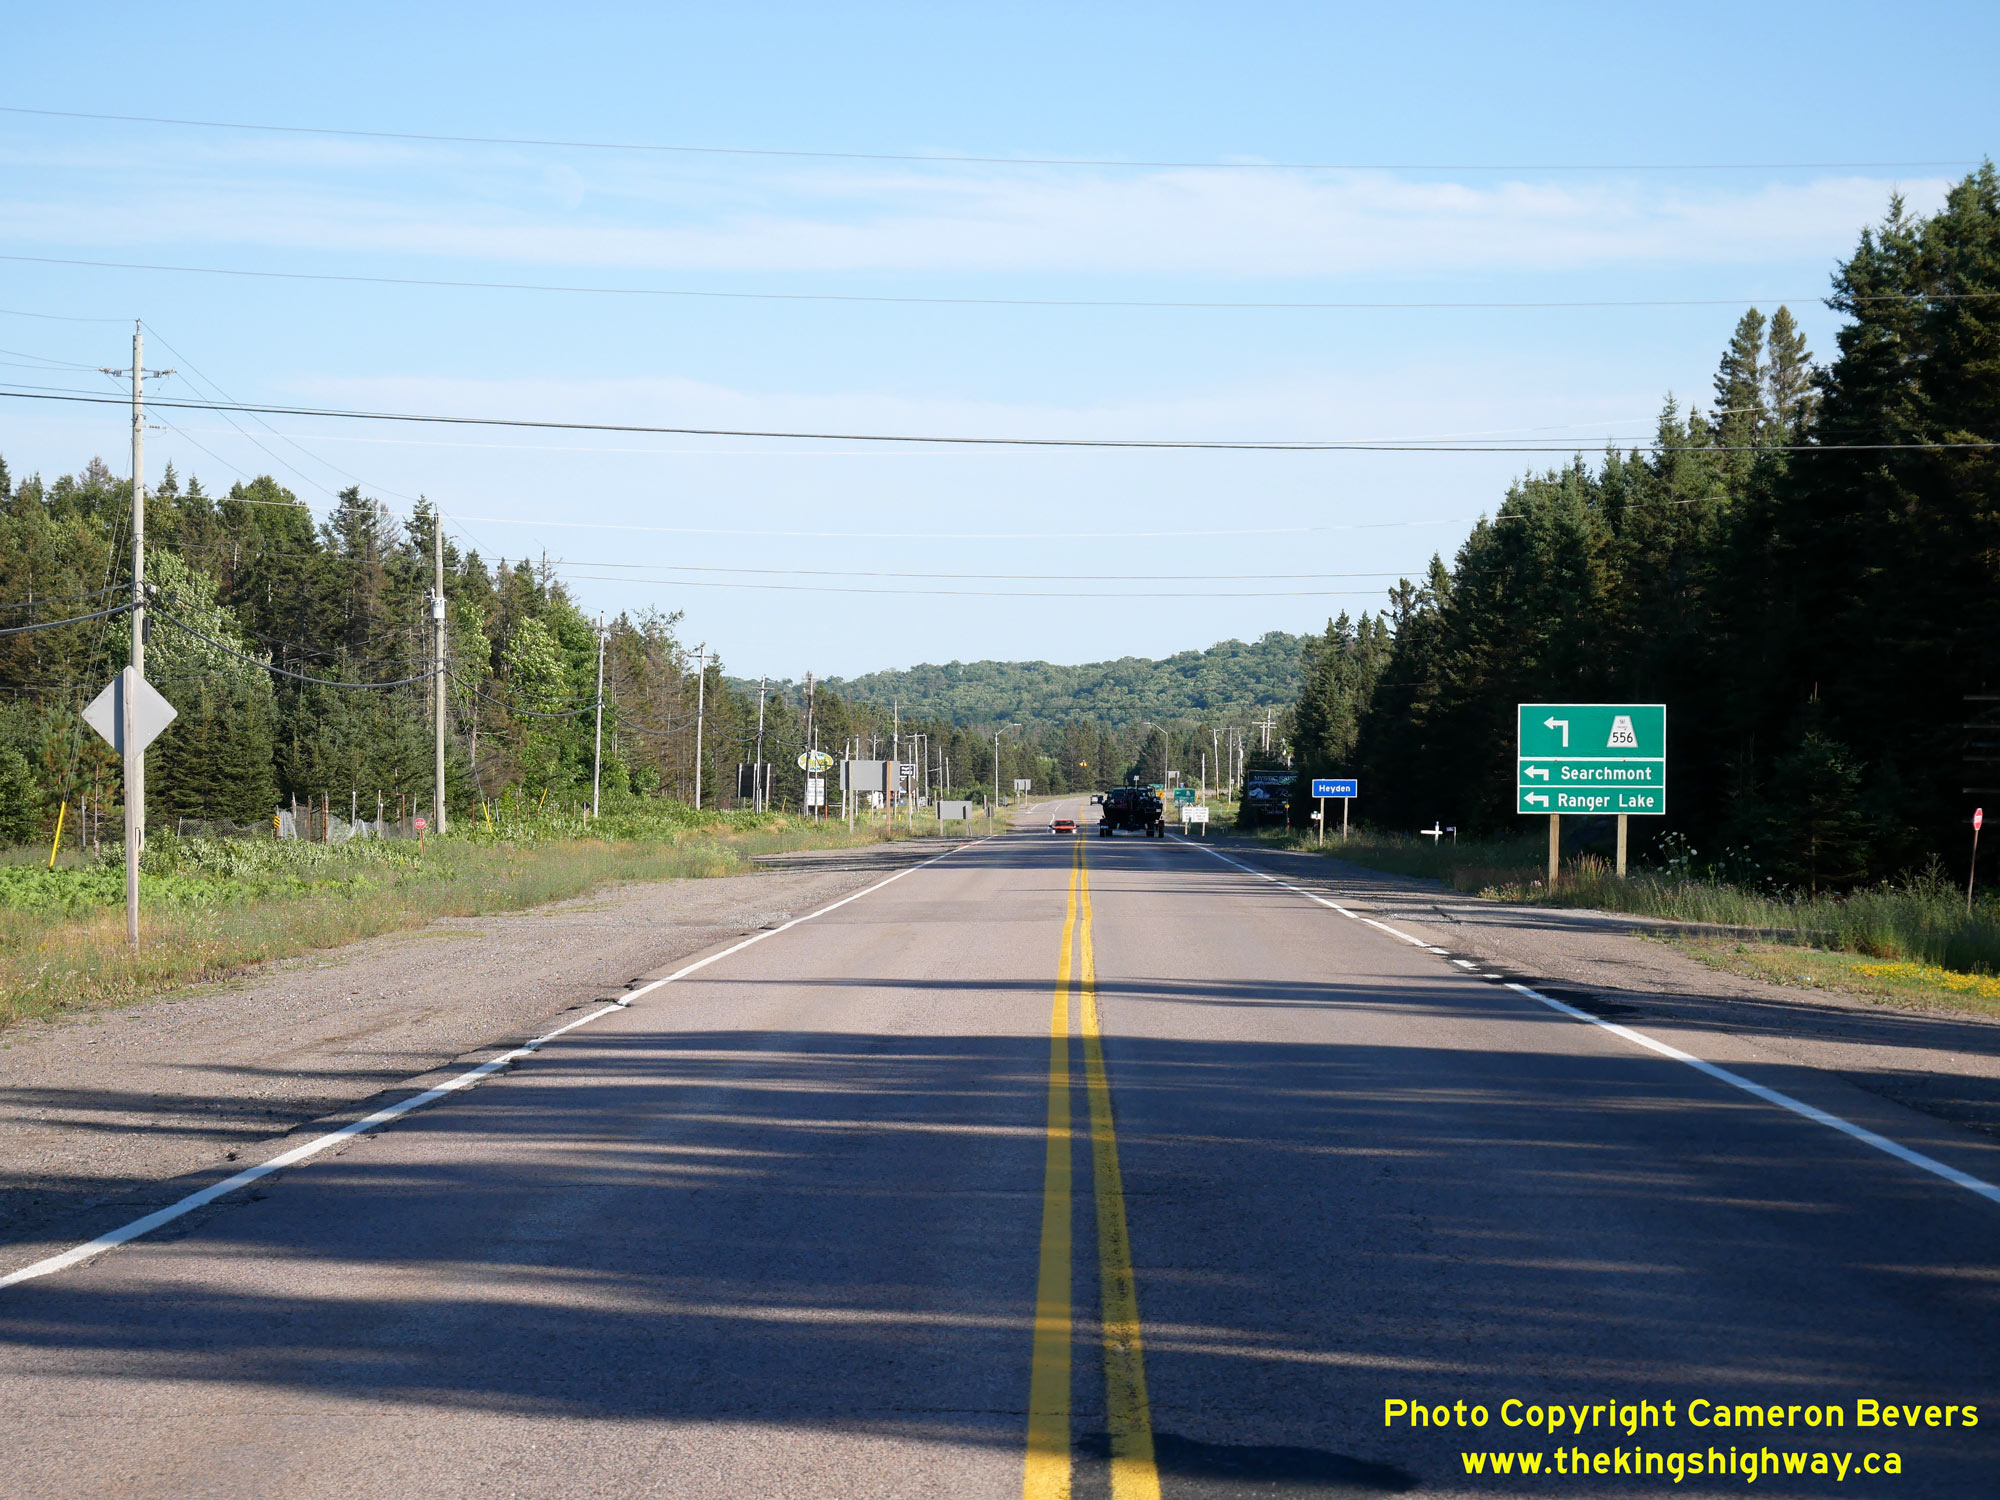
 Left - Green guide sign marking the upcoming Hwy 556 Junction on northbound Hwy 17. See an
Enlarged Photo Here. Left - Green guide sign marking the upcoming Hwy 556 Junction on northbound Hwy 17. See an
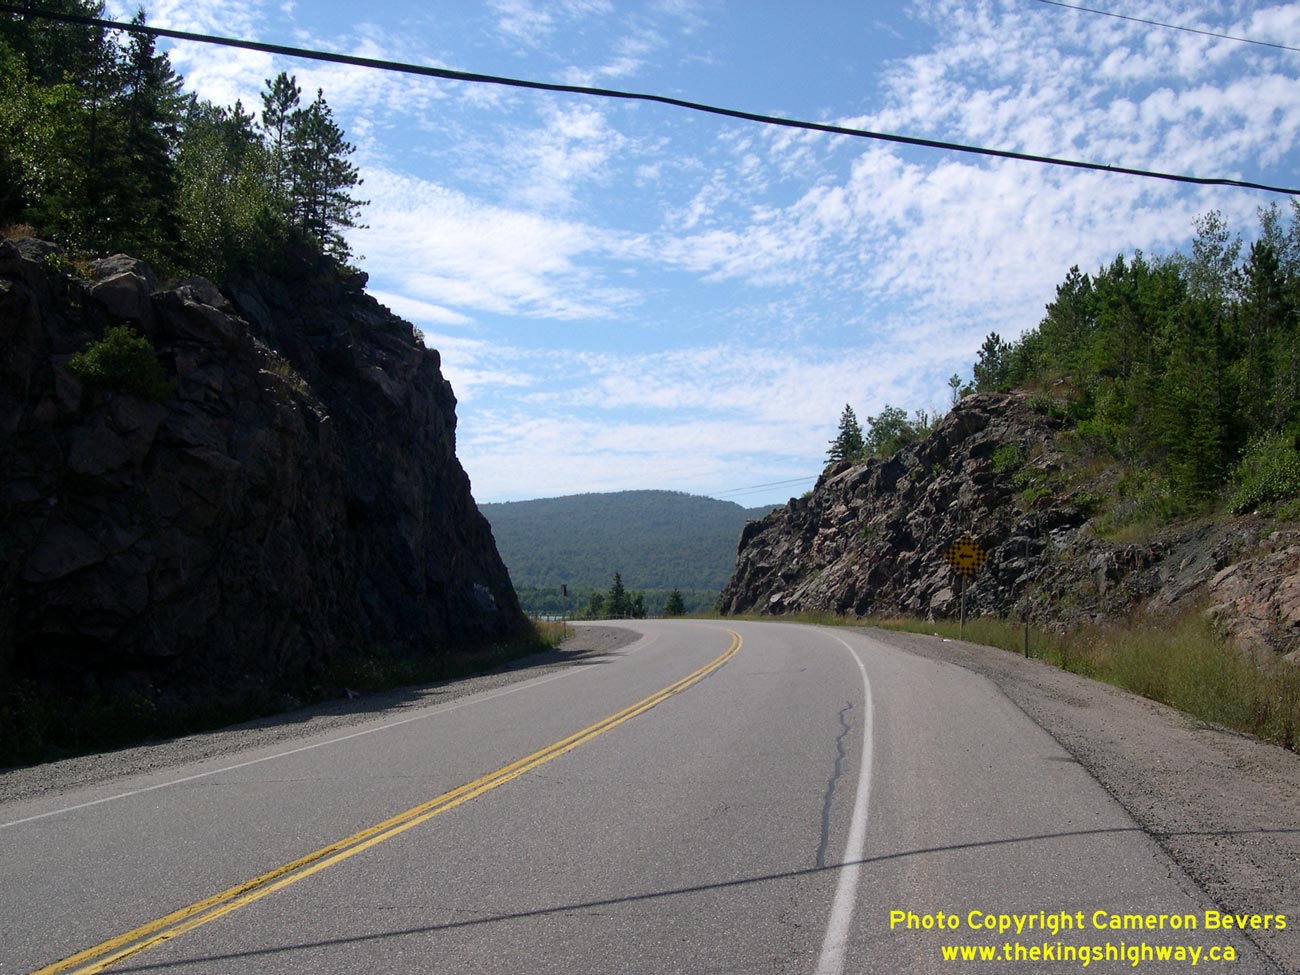
Enlarged Photo Here.(Photograph taken on July 28, 2023 - © Cameron Bevers) Right - Just south of Heyden, Hwy 17 passes through a small rock cut. At left, the original 1937 route of Hwy 17 can be seen. As part of the construction of
the Trans-Canada Highway, many older sections of Hwy 17 were upgraded to improve the highway's geometry, with some sections of the original highway such as this
example bypassed altogether and abandoned. The new alignment of Hwy 17 at right was opened to traffic in 1960. See an
Enlarged Photo Here.(Photograph taken on July 28, 2023 - © Cameron Bevers) 
 Left - Blue-and-white hamlet sign for Heyden on northbound Hwy 17. This small community is situated at the Hwy 556 Junction on Hwy 17, about 18 km north of
Downtown Sault Ste. Marie. Note the abandoned section of pavement at right, which marks the location of the original Hwy 17. See an
Enlarged Photo Here. Left - Blue-and-white hamlet sign for Heyden on northbound Hwy 17. This small community is situated at the Hwy 556 Junction on Hwy 17, about 18 km north of
Downtown Sault Ste. Marie. Note the abandoned section of pavement at right, which marks the location of the original Hwy 17. See an
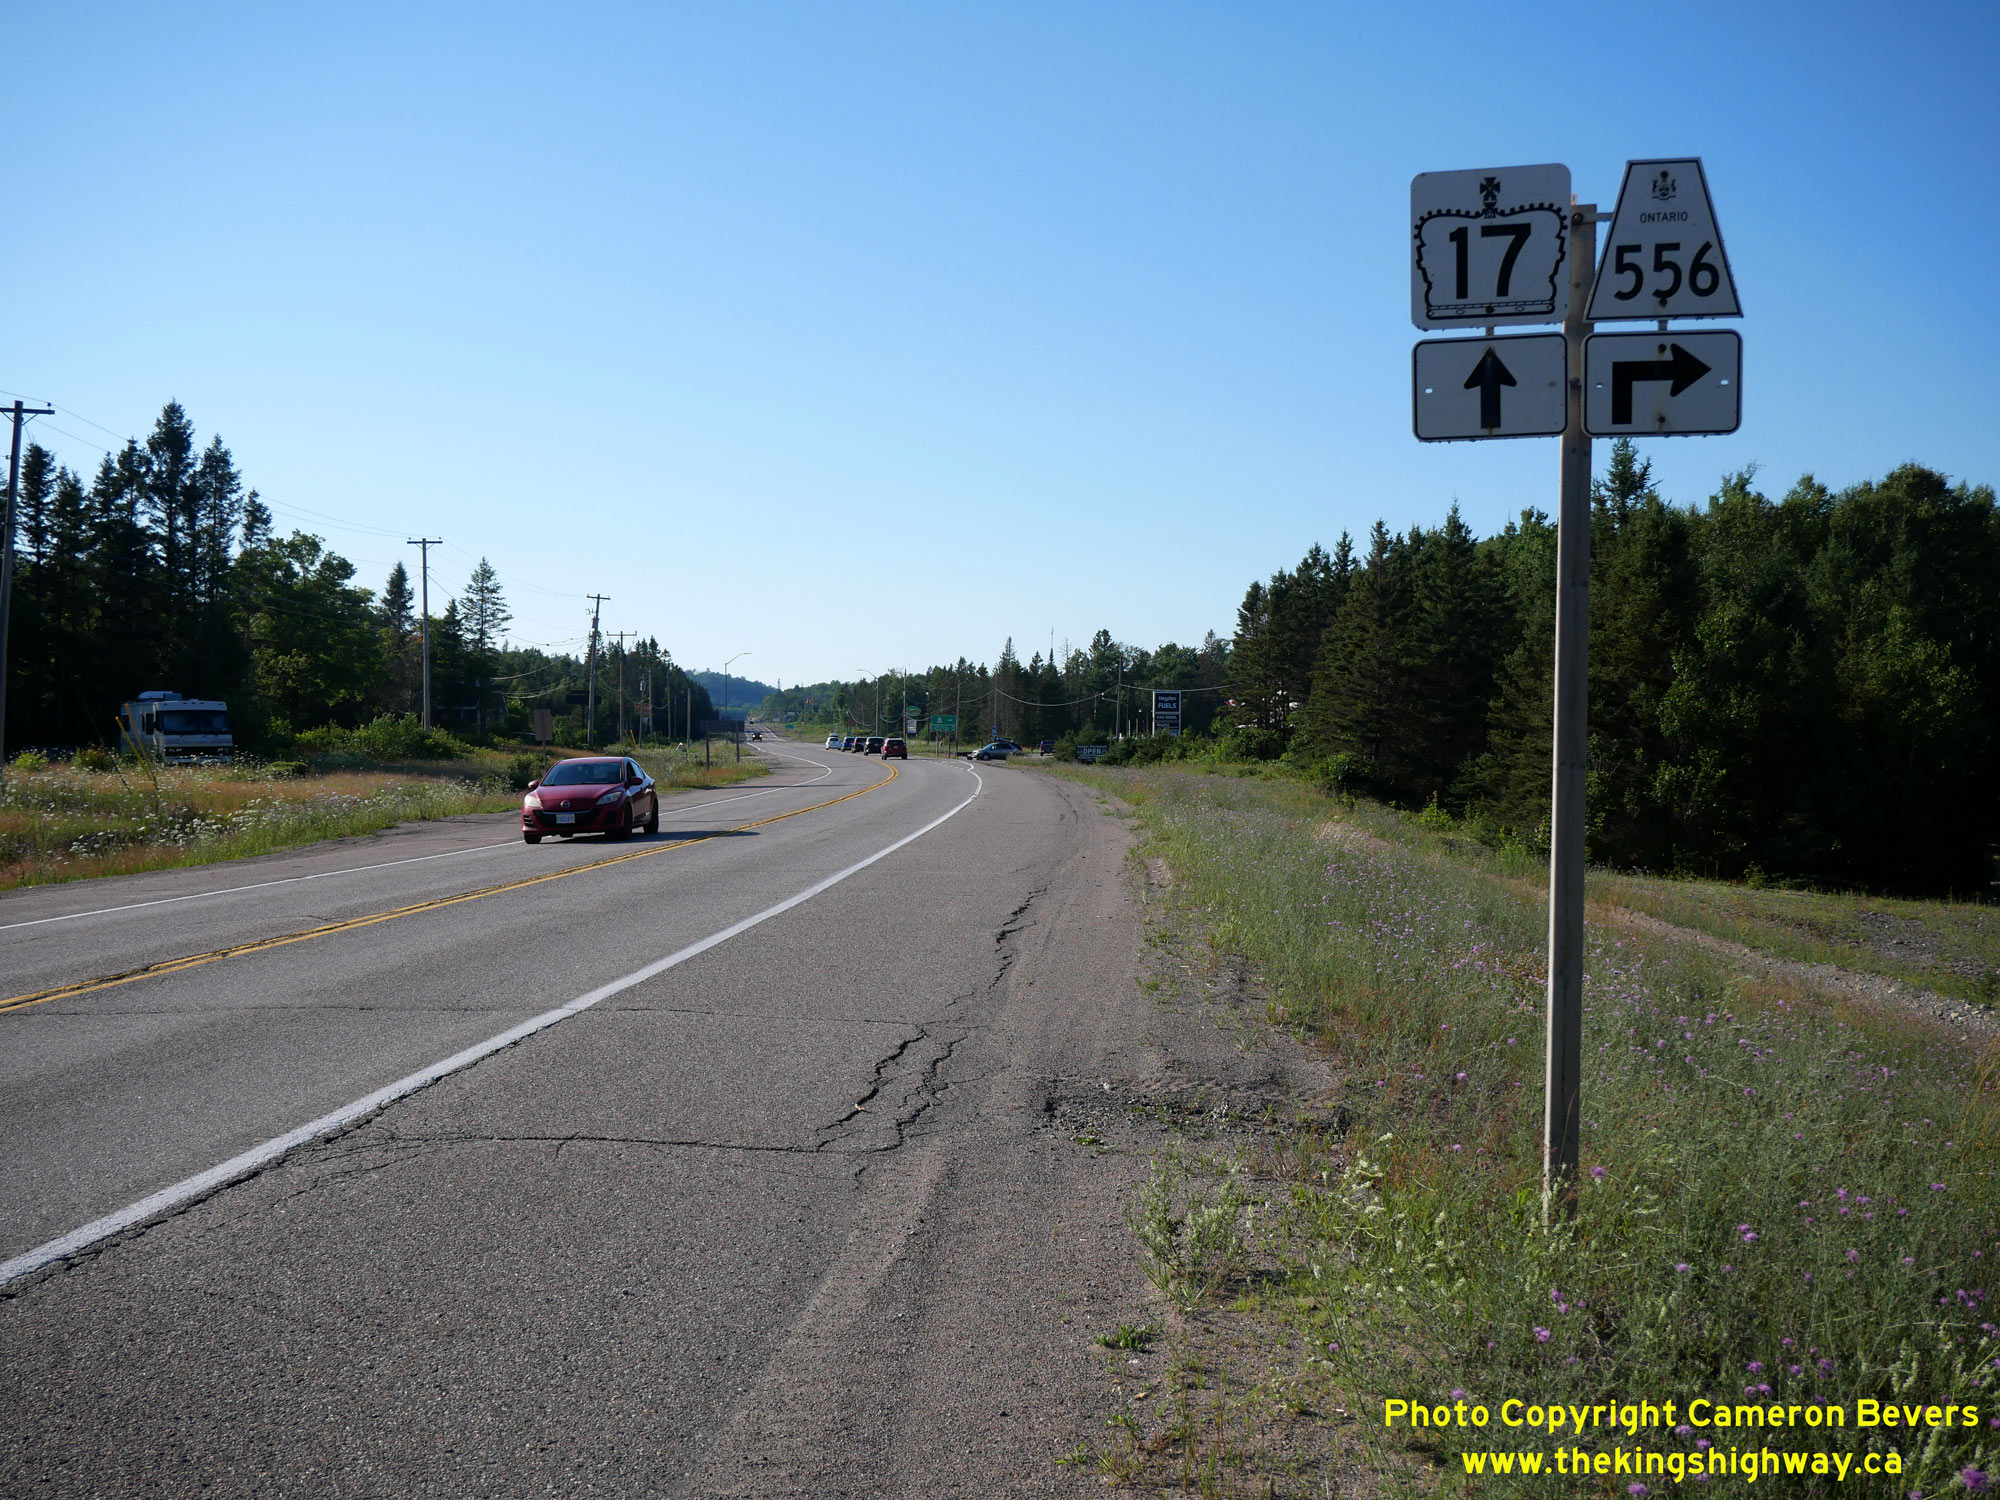
Enlarged Photo Here.(Photograph taken on July 28, 2023 - © Cameron Bevers) Right - Junction sign assembly for Hwy 556 on northbound Hwy 17 at Heyden. Interestingly, the section of Hwy 556 between Heyden and Island Lake was originally
a part of Hwy 17. A new highway diversion was completed from Heyden to north of Goulais River in 1960, which bypassed a roughly 18 km section of Hwy 17. This new
diversion of Hwy 17 between Heyden and Goulais River also bypassed an at-grade railway crossing on the original route of Hwy 17 at Heyden, which had very poor
approach geometry. See an Enlarged Photo Here.(Photograph taken on July 28, 2023 - © Cameron Bevers) 
 Left - Distance guide sign on southbound Hwy 17 near the Hwy 556 Junction at Heyden. The rugged Lake Superior shoreline offers countless recreational
opportunities for those who want to explore one of Ontario's wildest frontiers. Despite frequent travel to the Lake Superior area over the past two decades, I still
find new hidden gems around this "inland ocean" on every single trip! See an Enlarged Photo Here. Left - Distance guide sign on southbound Hwy 17 near the Hwy 556 Junction at Heyden. The rugged Lake Superior shoreline offers countless recreational
opportunities for those who want to explore one of Ontario's wildest frontiers. Despite frequent travel to the Lake Superior area over the past two decades, I still
find new hidden gems around this "inland ocean" on every single trip! See an Enlarged Photo Here.(Photograph taken on July 28, 2023 - © Cameron Bevers) Right - Facing north along Hwy 17 approaching the Hwy 556 Junction at Heyden. The gas station at this highway junction offers motorists one of the few
opportunities to fuel up along Hwy 17. Services are very infrequent along Hwy 17 north of Sault Ste. Marie, with only a handful of gas stations scattered along the
southern end of the highway between Heyden and Pancake Bay. North of Pancake Bay, there are no services along Hwy 17 for almost 150 km. See an
Enlarged Photo Here.(Photograph taken on July 28, 2023 - © Cameron Bevers) 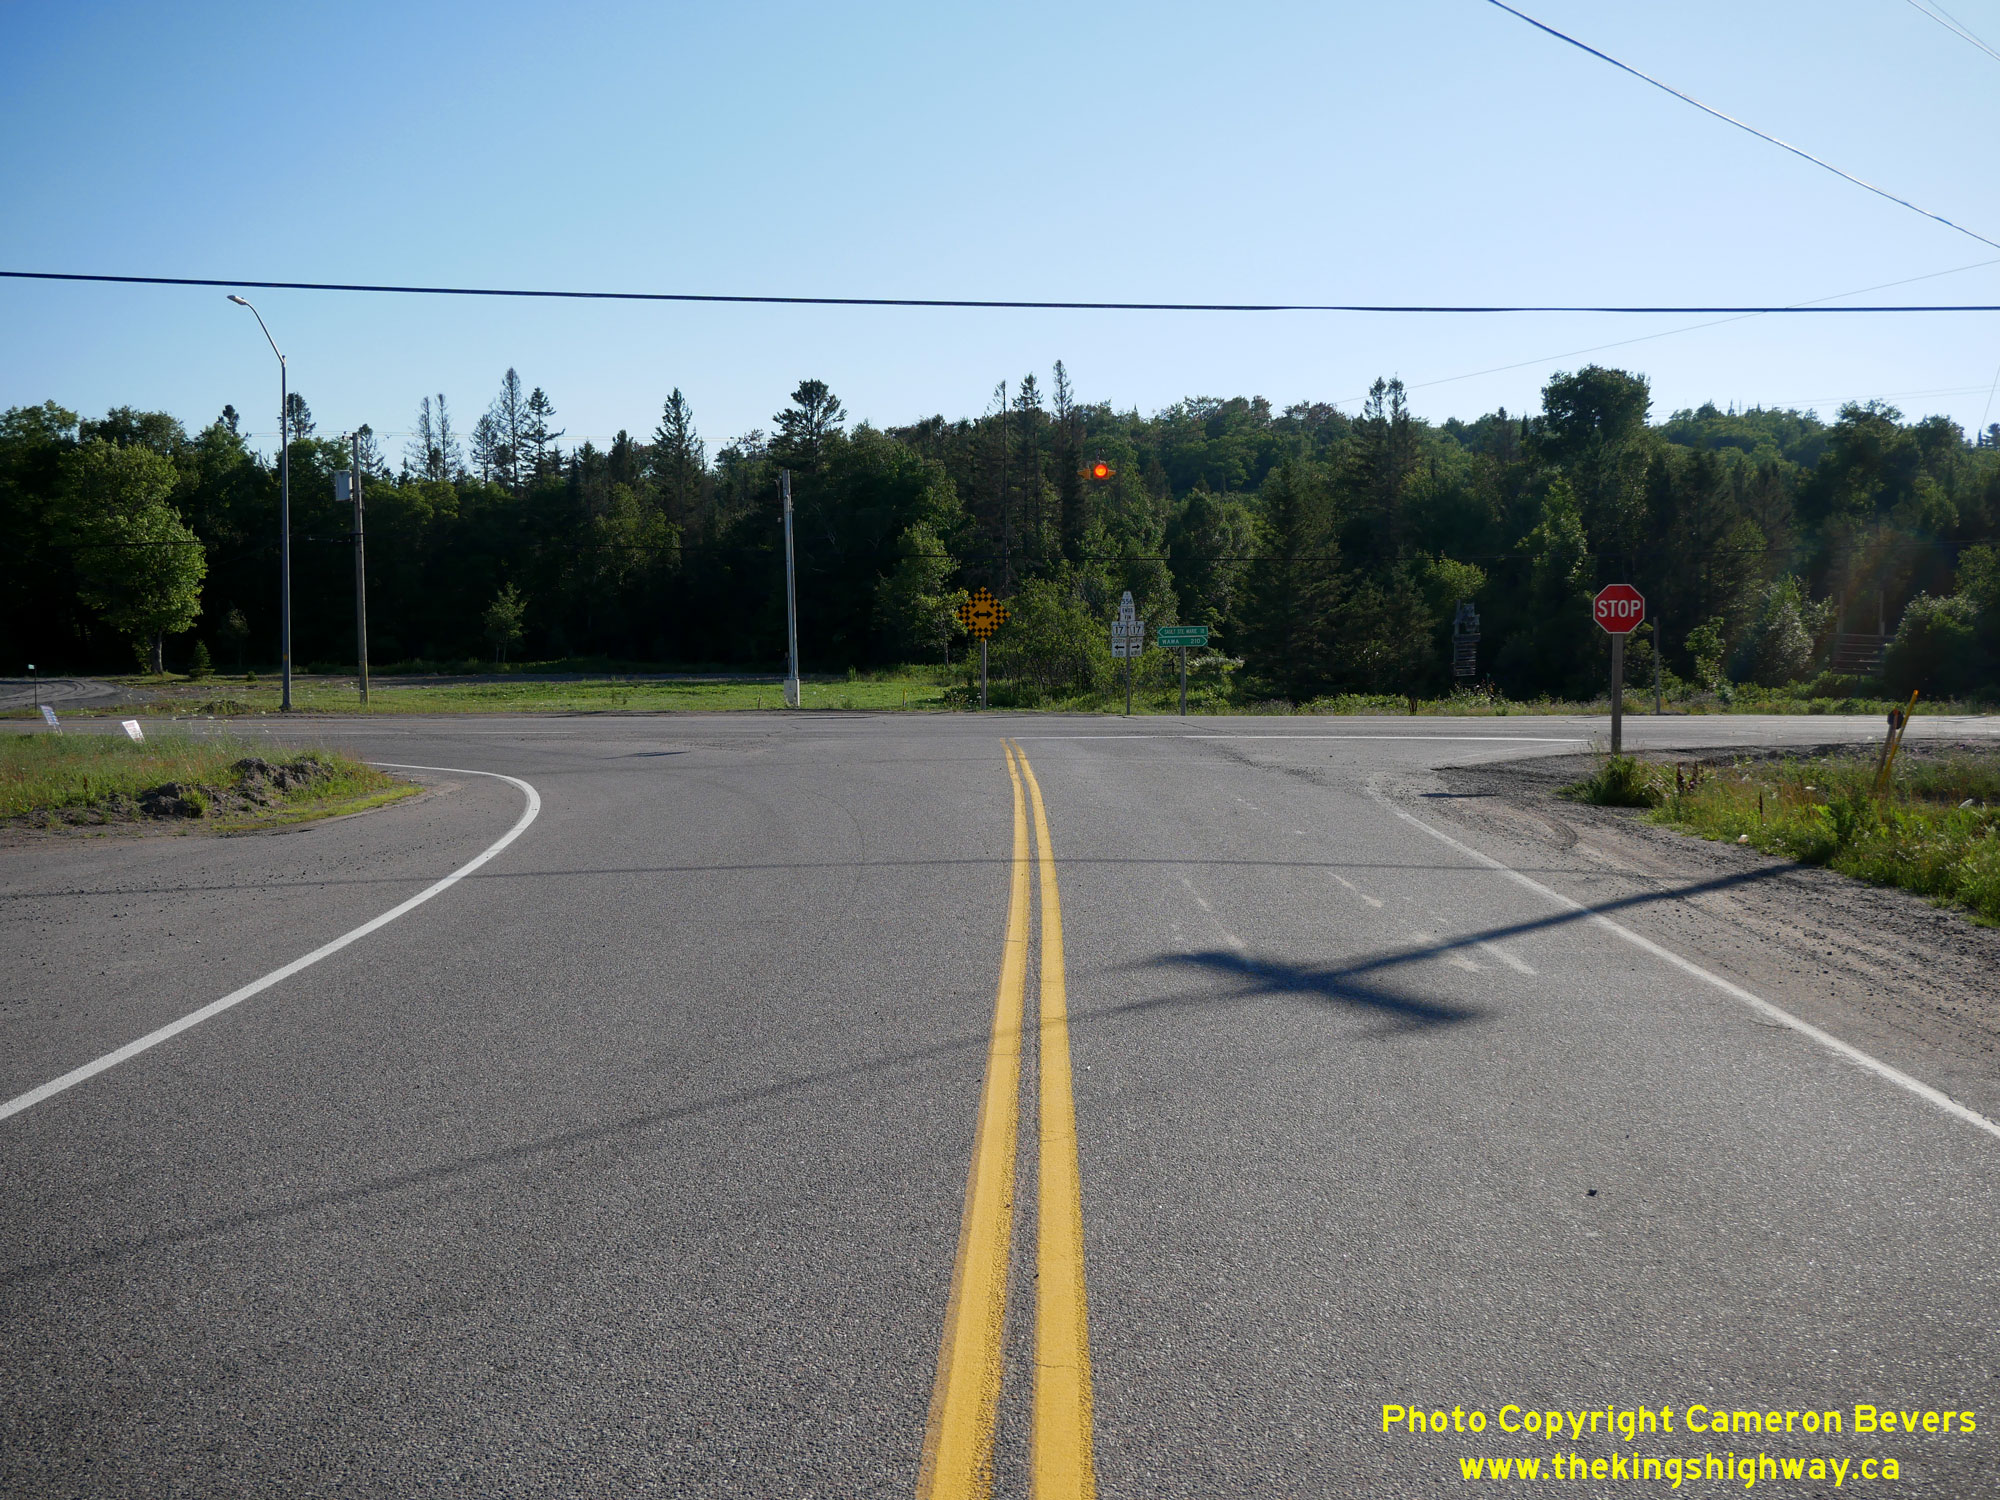
 Left - Western terminus of Hwy 556 at the Hwy 17 Junction at Heyden. This is one of only three provincial highway junctions along Hwy 17 between Sault Ste.
Marie and Wawa. The other two intermediate highway junctions are located at Goulais River (Hwy 552) and Batchawana Bay (Hwy 563). See an
Enlarged Photo Here. Left - Western terminus of Hwy 556 at the Hwy 17 Junction at Heyden. This is one of only three provincial highway junctions along Hwy 17 between Sault Ste.
Marie and Wawa. The other two intermediate highway junctions are located at Goulais River (Hwy 552) and Batchawana Bay (Hwy 563). See an
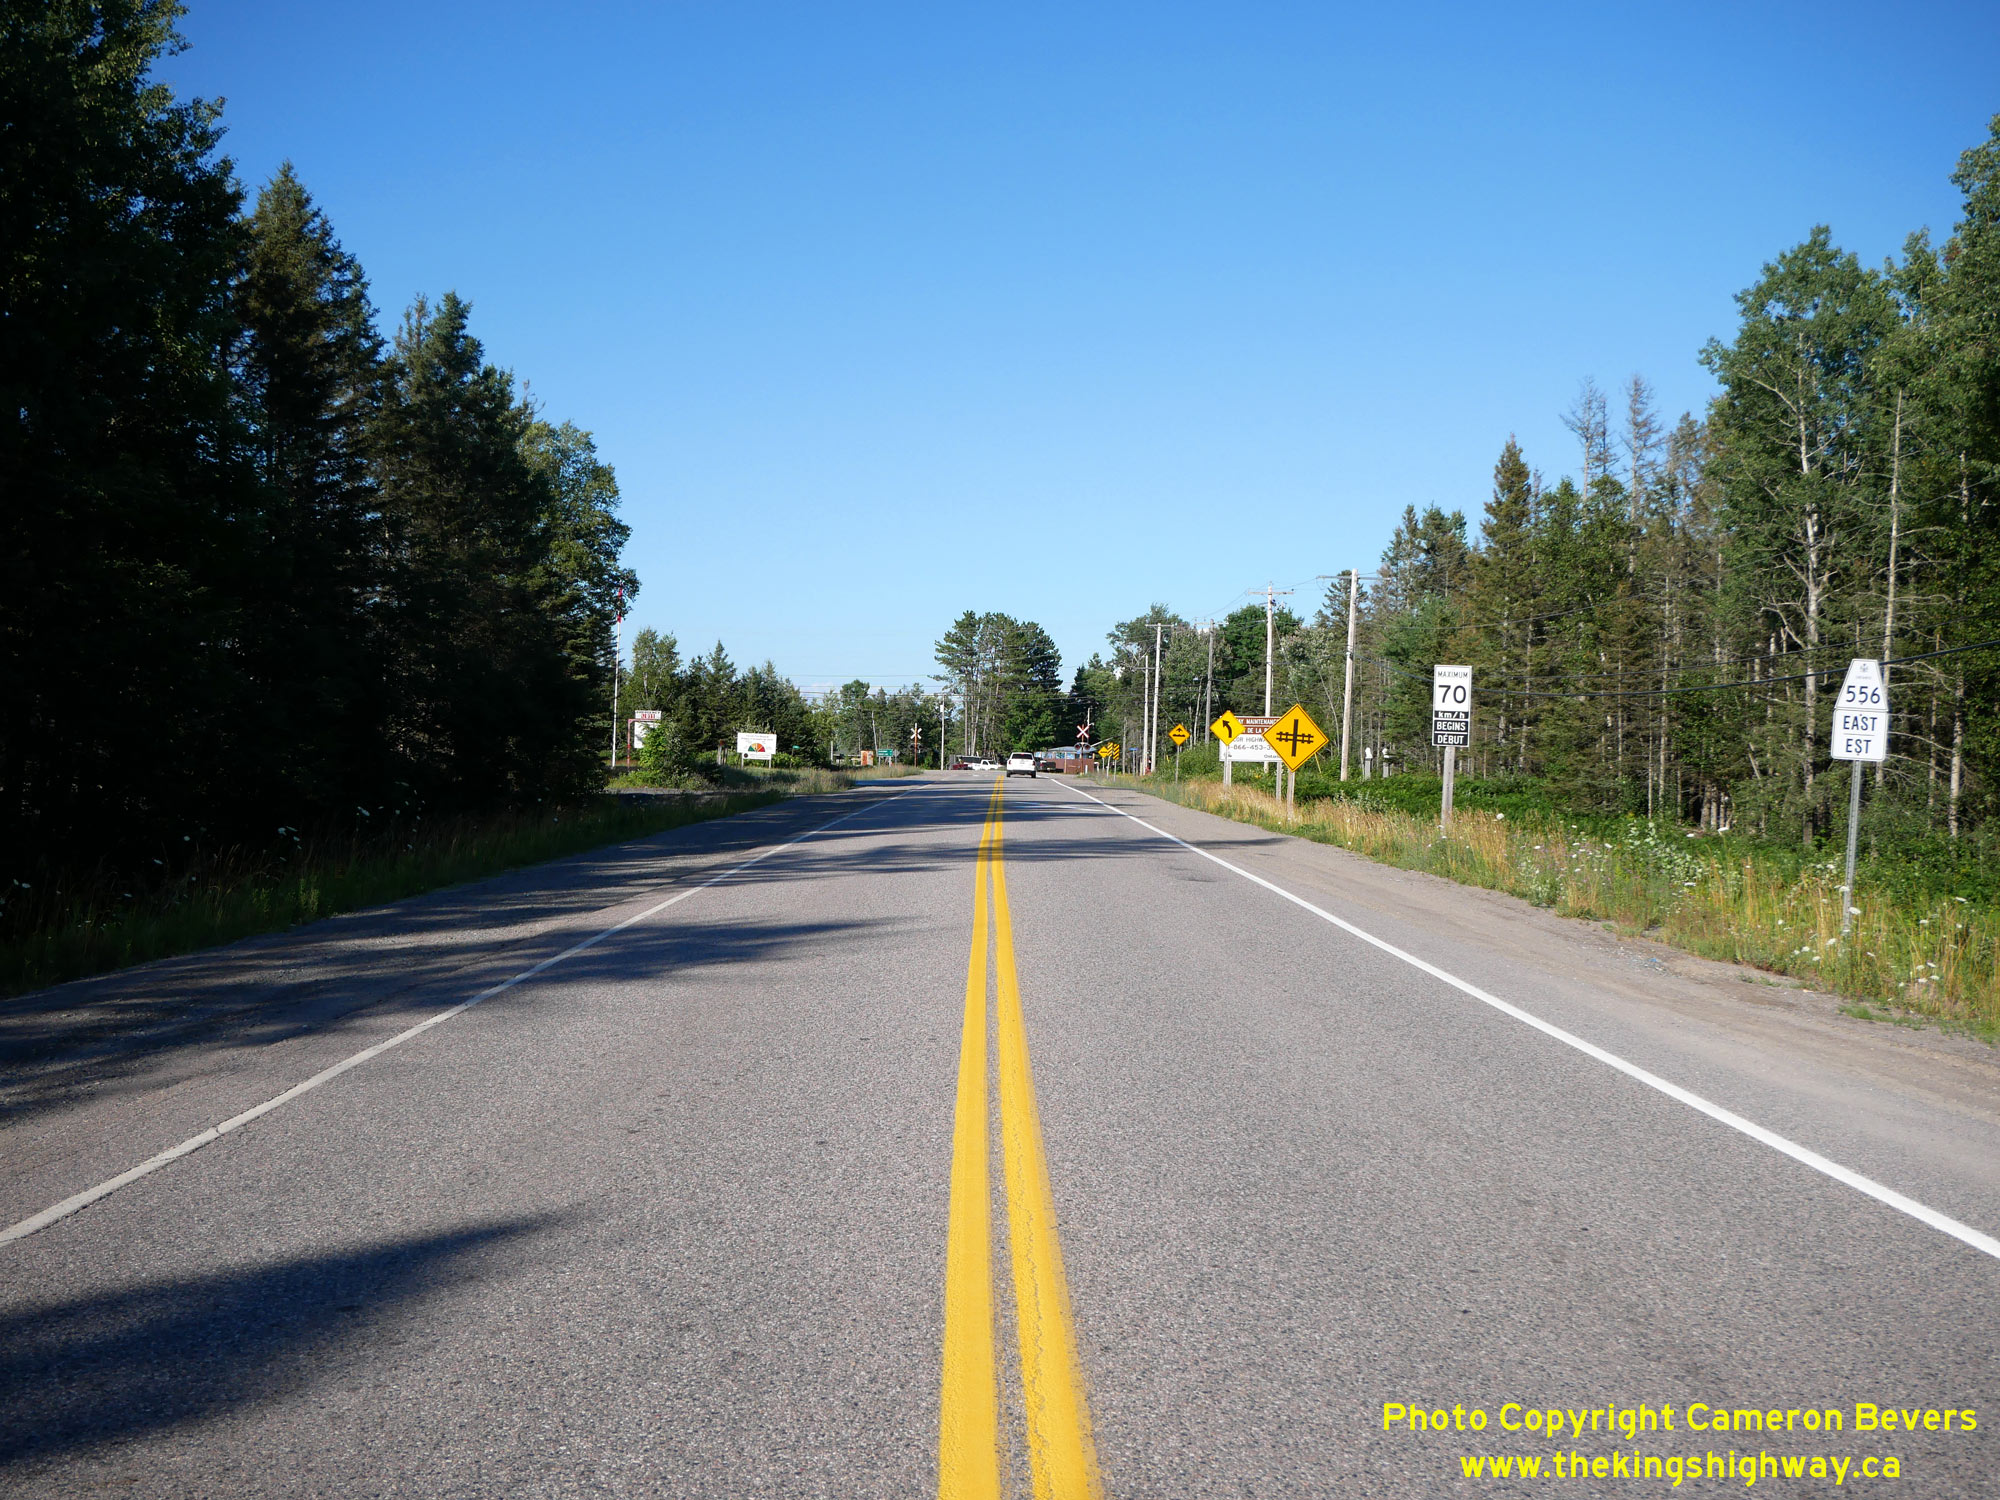
Enlarged Photo Here.(Photograph taken on July 28, 2023 - © Cameron Bevers) Right - Facing east along Hwy 556 from the Hwy 17 Junction at Heyden. With a total length of almost 110 km, Hwy 556 is among Ontario's longest Secondary
Highways. The highway provides access to the communities of Island Lake, Searchmont and Ranger Lake, and also provides a connection through to Hwy 129 south of Aubrey
Falls. See an Enlarged Photo Here.(Photograph taken on July 28, 2023 - © Cameron Bevers) 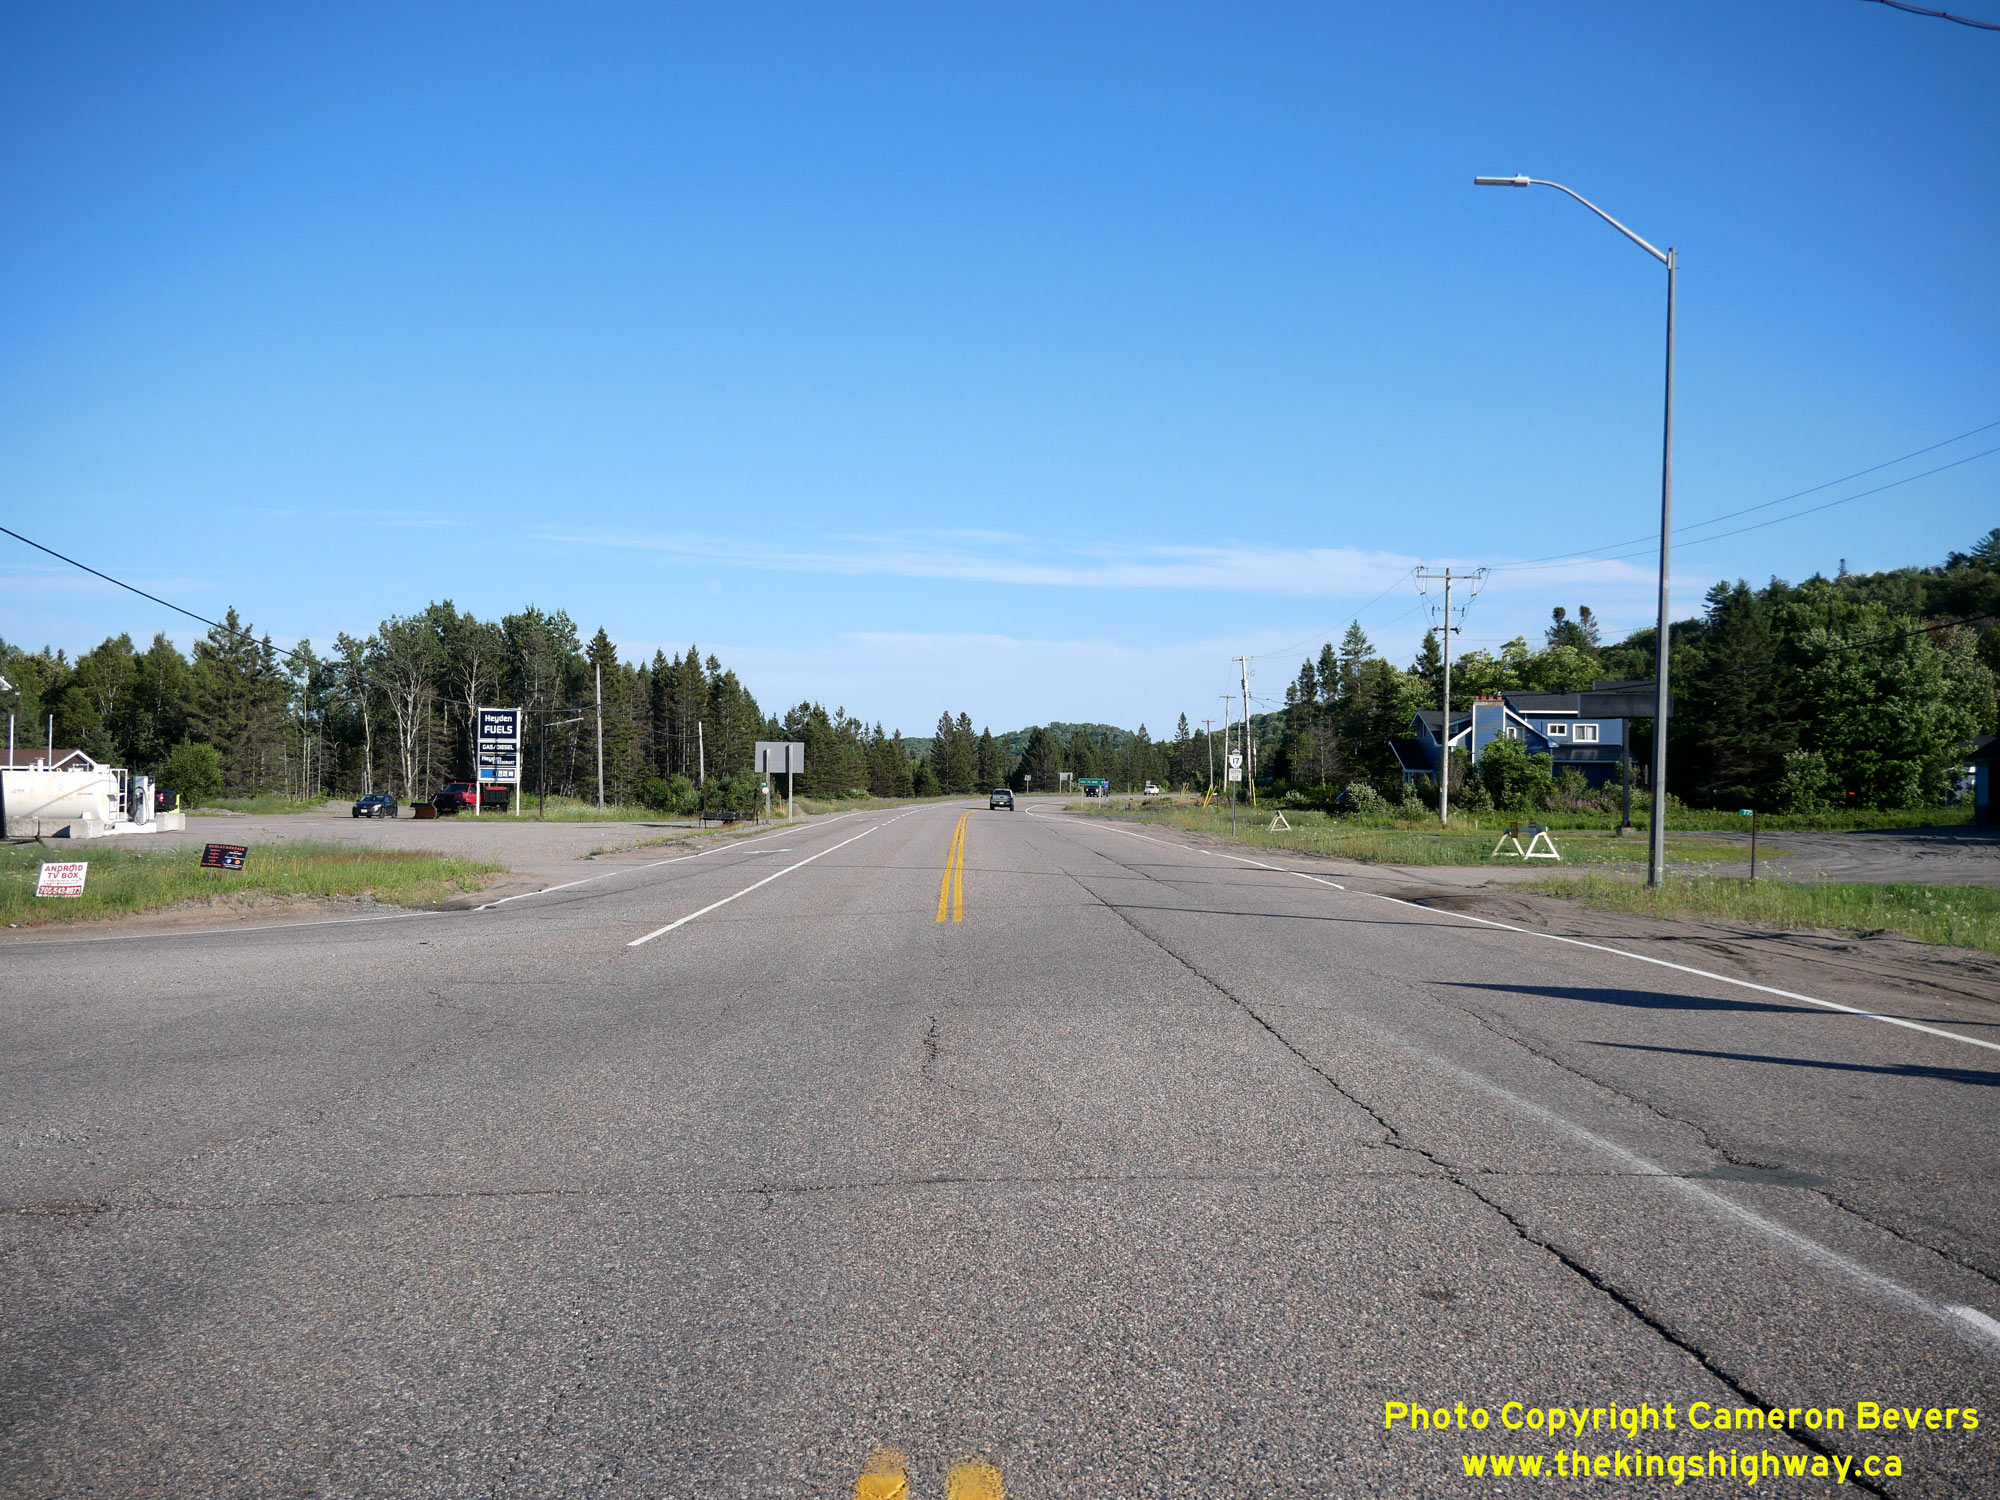
 Left - Facing south along Hwy 17 towards Sault Ste. Marie from the Hwy 556 Junction at Heyden. See an
Enlarged Photo Here. Left - Facing south along Hwy 17 towards Sault Ste. Marie from the Hwy 556 Junction at Heyden. See an
Enlarged Photo Here.(Photograph taken on July 28, 2023 - © Cameron Bevers) Right - View of Hwy 17 at Heyden, facing north towards Wawa from the Hwy 556 Junction. This section of Hwy 17 is actually a diversion of the original highway.
Construction began on the Heyden-Goulais River Diversion during the Summer of 1958 under Contract #1958-169. Paving of the new Hwy 17 Diversion took place under
Contract #1960-123. The new diversion was opened to traffic on a base course asphalt in 1960, with final top-course pavement completed along the diversion in 1961.
See an Enlarged Photo Here.(Photograph taken on July 28, 2023 - © Cameron Bevers) 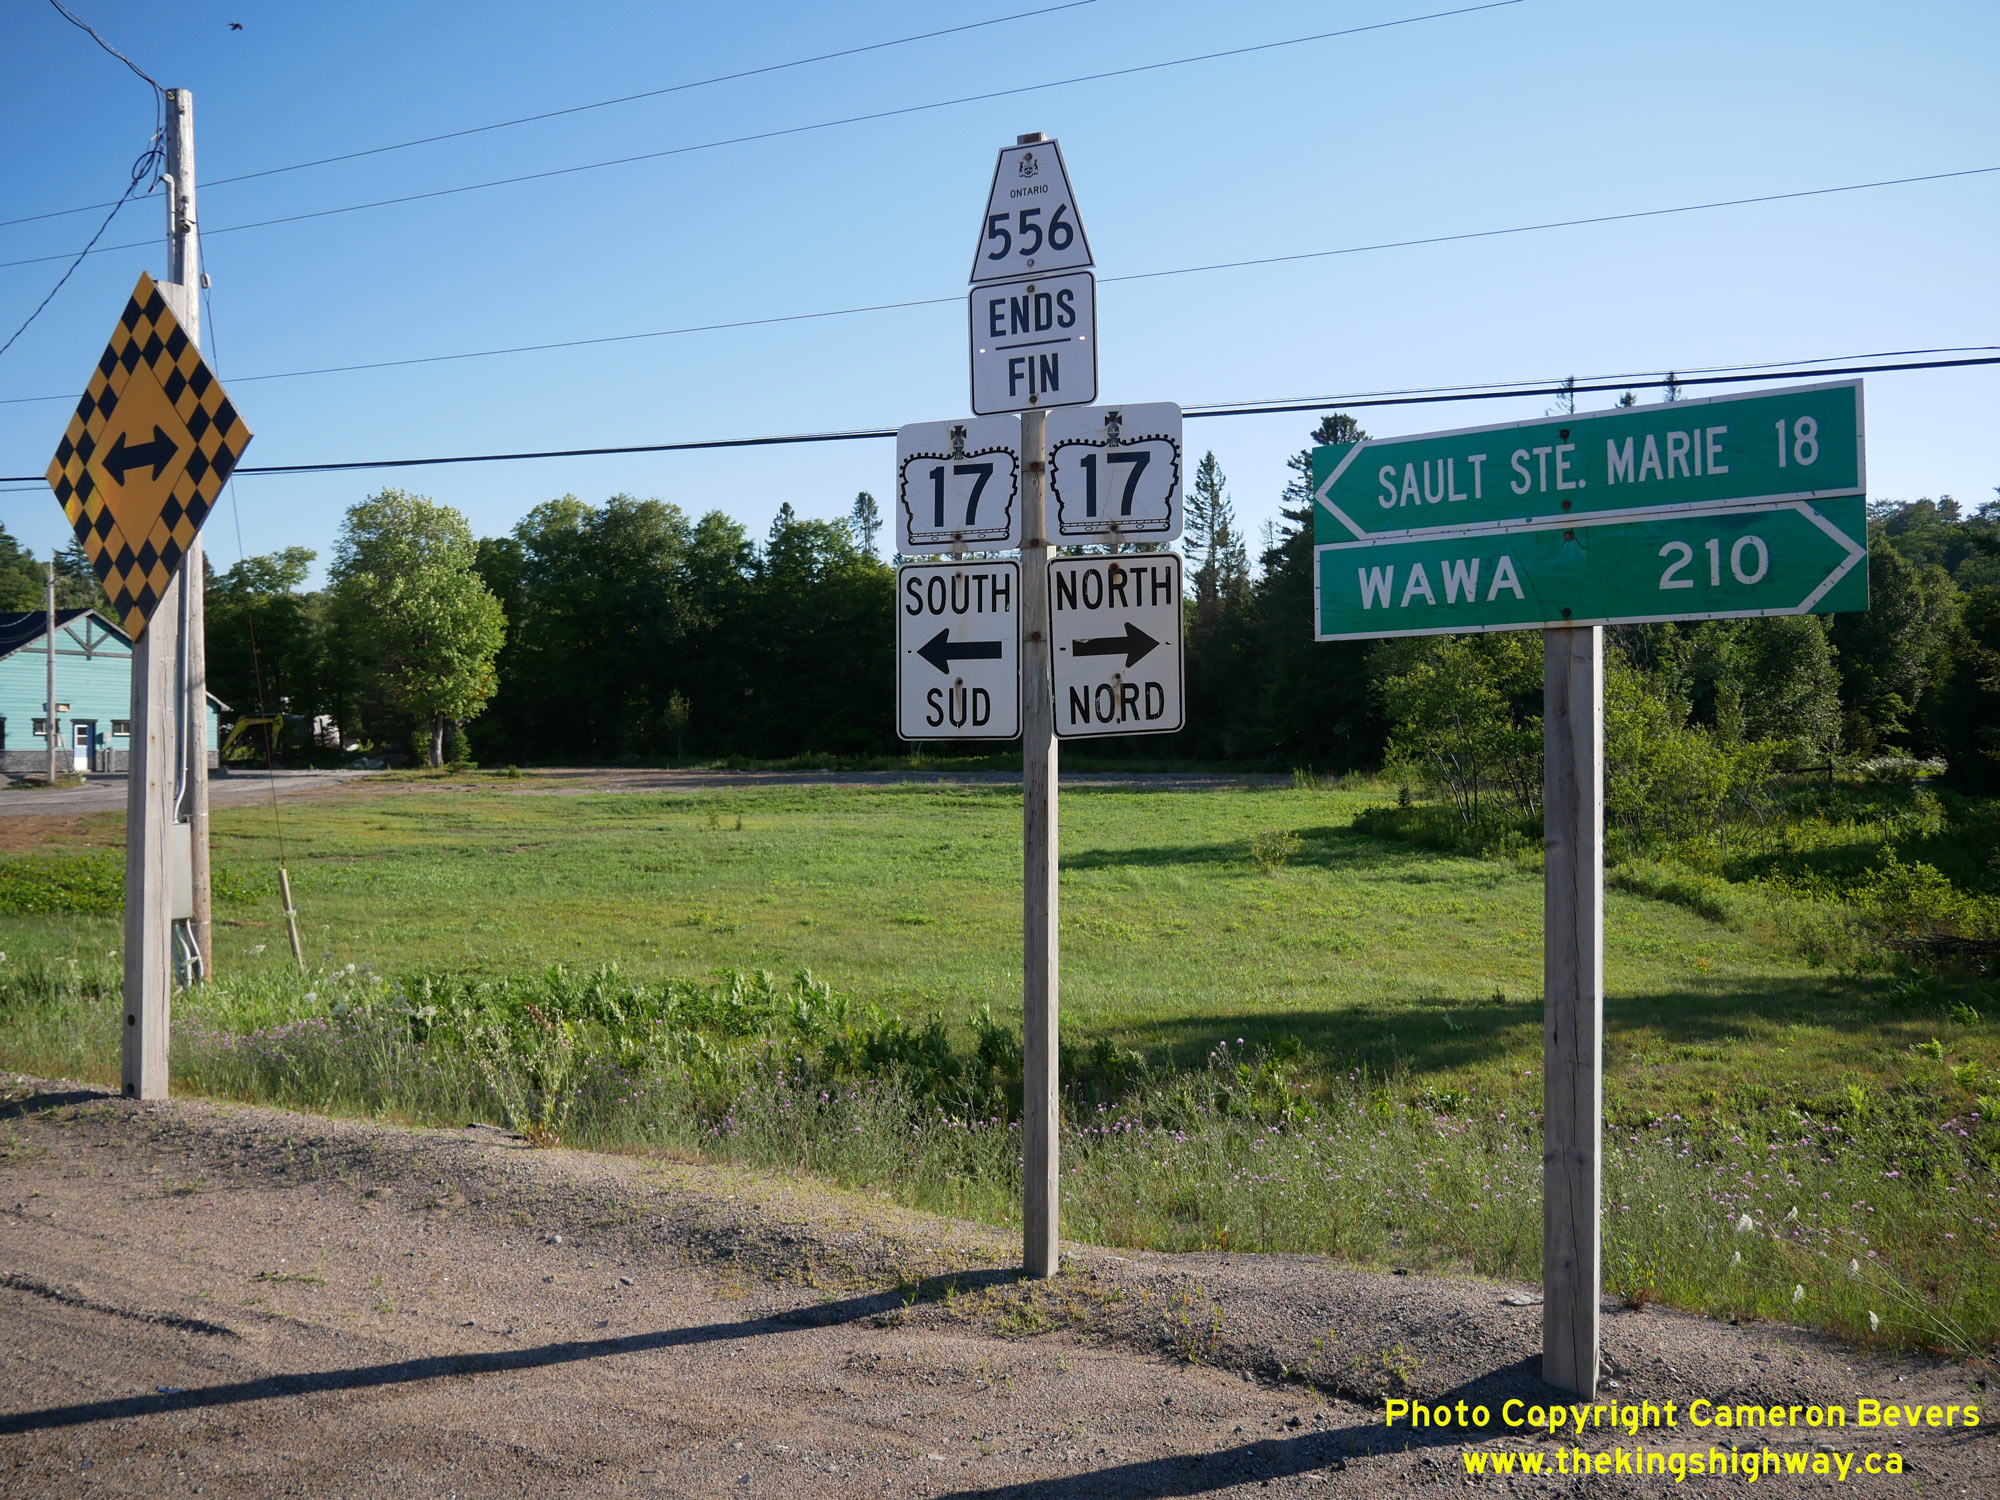
 Left - Fingerboard guide signs and junction sign assembly at the Hwy 17 & Hwy 556 Junction. See an
Enlarged Photo Here. Left - Fingerboard guide signs and junction sign assembly at the Hwy 17 & Hwy 556 Junction. See an
Enlarged Photo Here.(Photograph taken on July 28, 2023 - © Cameron Bevers) Right - Approaching the Hwy 556 Junction on Hwy 17 at Heyden, facing south towards Sault Ste. Marie. The Heyden-Goulais River Diversion comes to an end in the
background, where Hwy 17 curves to the right. At that point, the Hwy 17 reconnects back to the original 1937 route of Hwy 17 after travelling on a new alignment for
about 13 km. The diversion shortened the highway distance between Sault Ste. Marie and Batchawana Bay by about 5 km. See an
Enlarged Photo Here.(Photograph taken on July 28, 2023 - © Cameron Bevers) 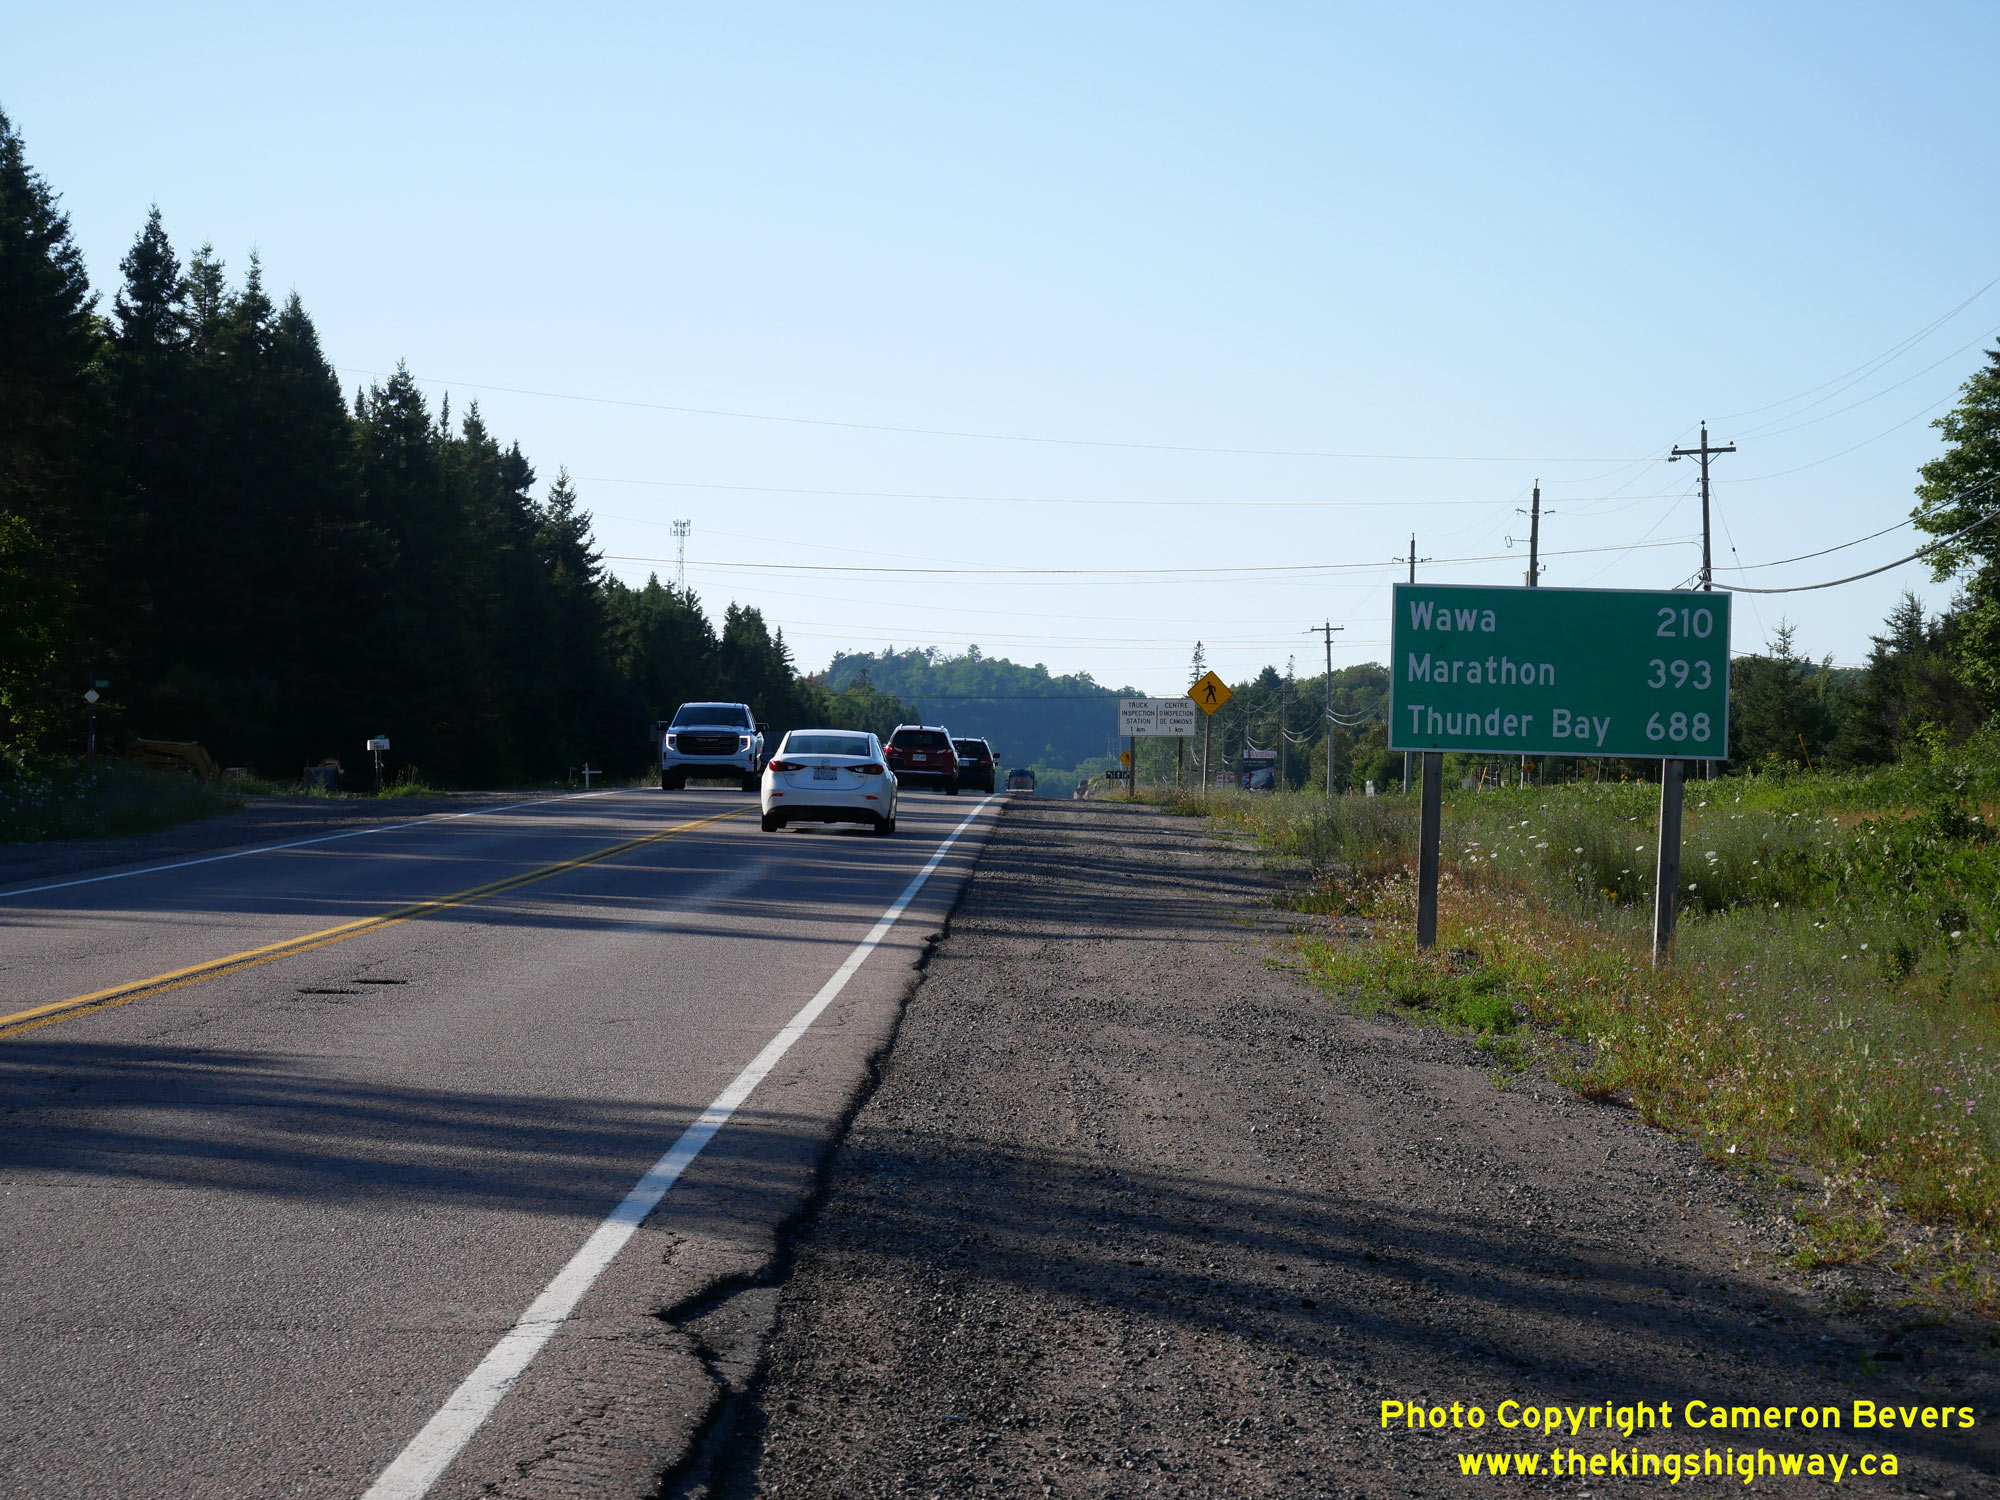
 Left - Distance guide sign on northbound Hwy 17 near the Hwy 556 Junction at Heyden. See an
Enlarged Photo Here. Left - Distance guide sign on northbound Hwy 17 near the Hwy 556 Junction at Heyden. See an
Enlarged Photo Here.(Photograph taken on July 28, 2023 - © Cameron Bevers) Right - Approaching Heyden on Hwy 17, facing south towards the Hwy 556 Junction. See an
Enlarged Photo Here.(Photograph taken on July 28, 2023 - © Cameron Bevers) 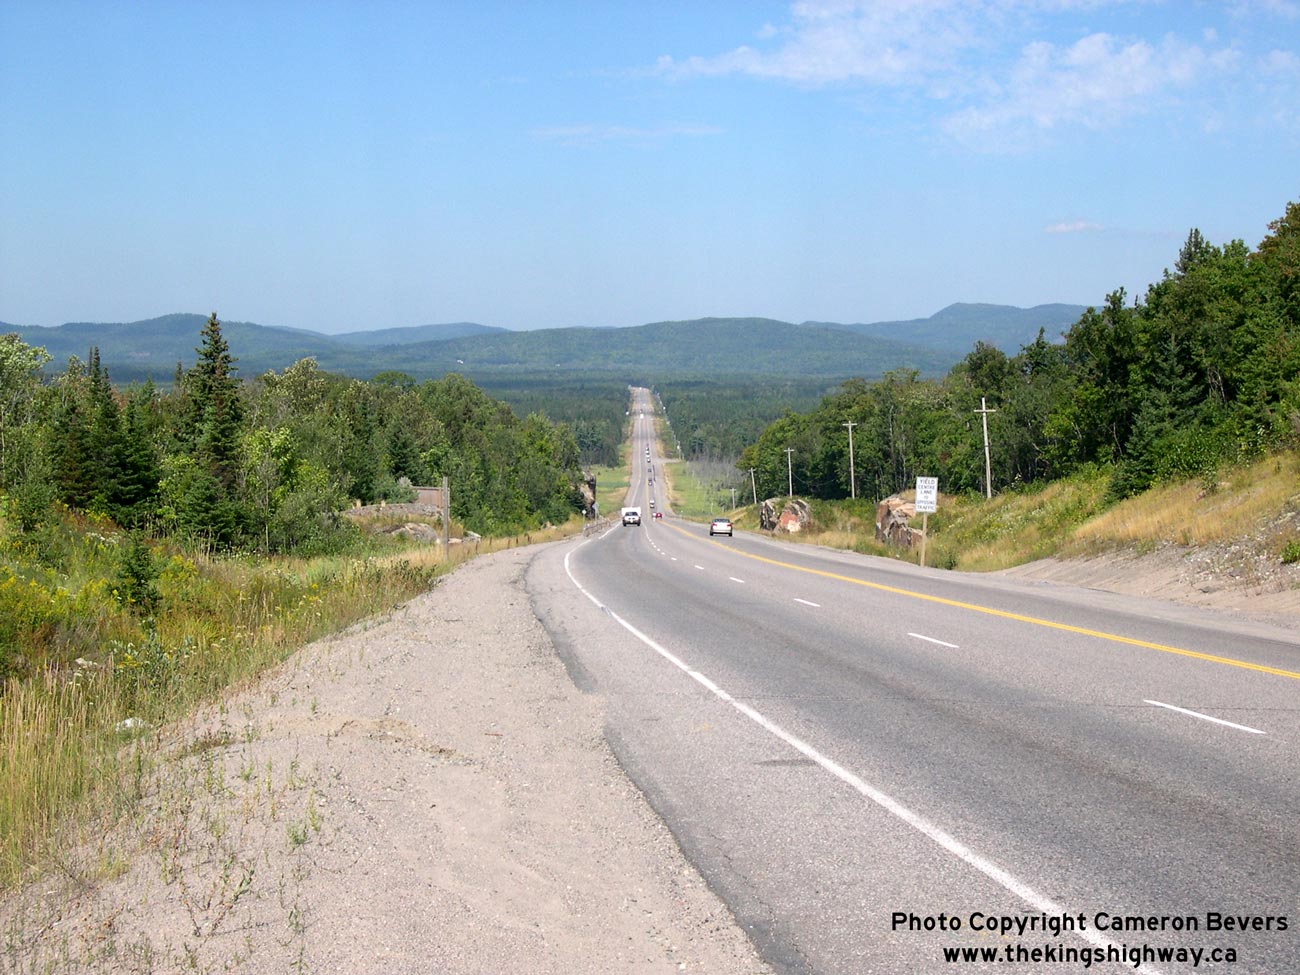
Left - Facing north along Hwy 17 between Heyden and Goulais River, north of Sault Ste. Marie. See an
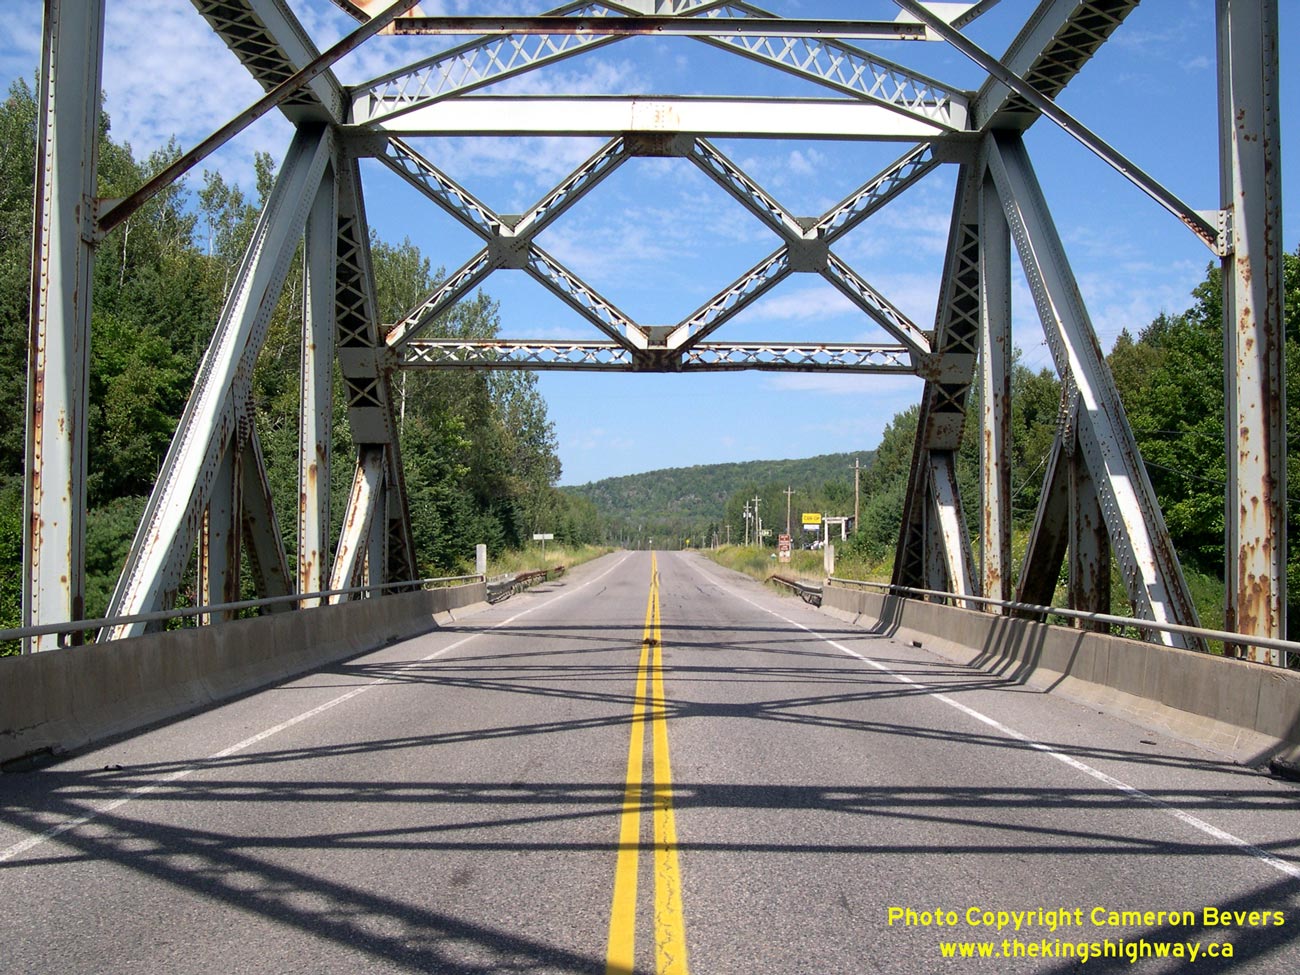
Enlarged Photo Here. (Photograph taken on September 1, 2008 - © Cameron Bevers) Right - Facing north along Hwy 17 at the Goulais River Bridge (Site #38-34), north of Sault Ste. Marie. See an Enlarged Photo Here. (Photograph taken on September 1, 2008 - © Cameron Bevers) 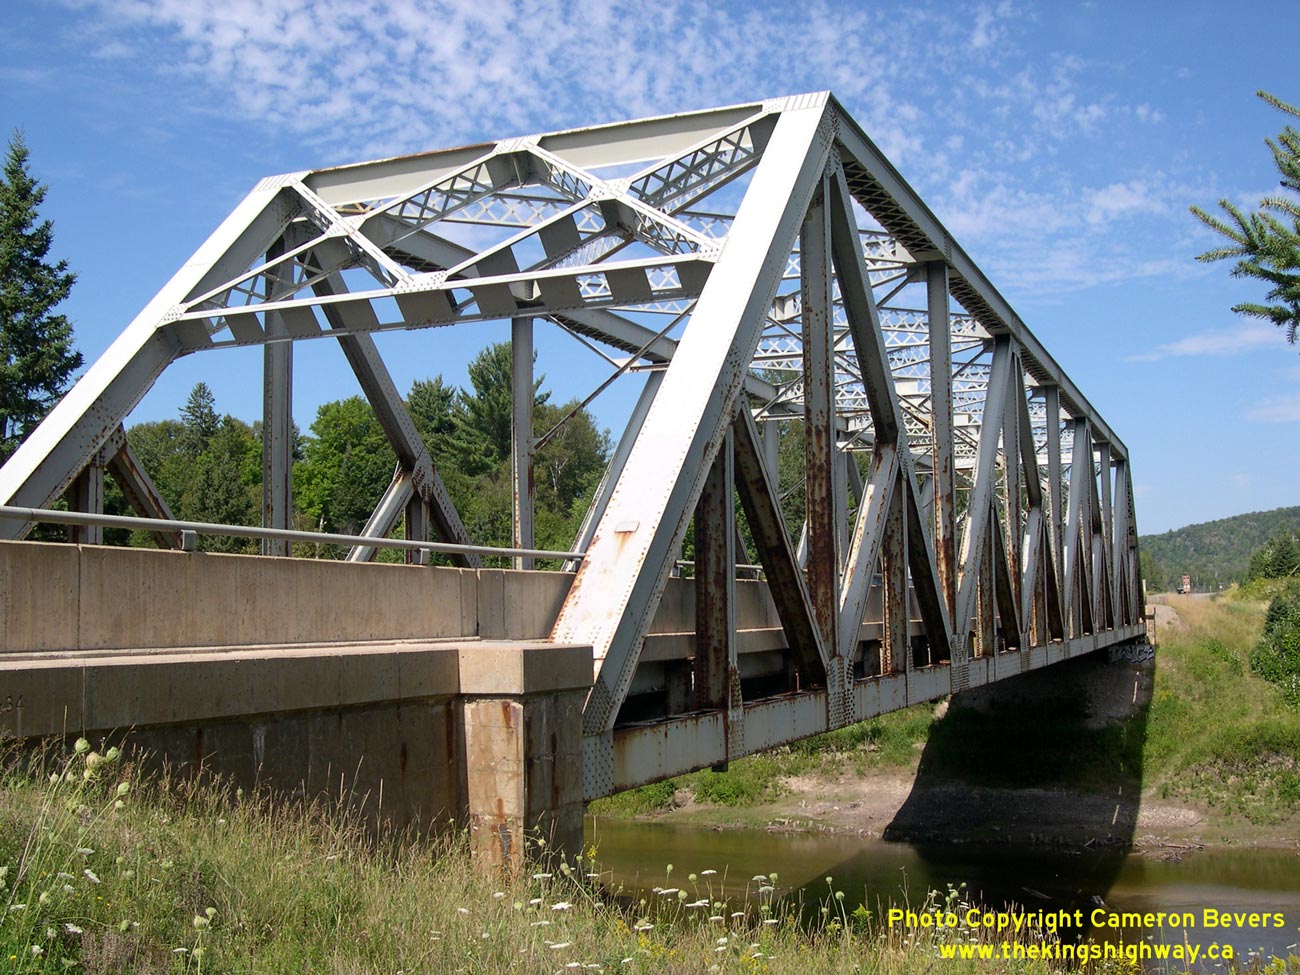
Left - Goulais River Bridge on Hwy 17 north of Sault Ste. Marie. This single-span steel through truss structure was built under Contracts #1958-177 (structural
steel) and #1958-263 (concrete substructure and approaches). This bridge was completed and opened to traffic in September 1960, along with the rest of the
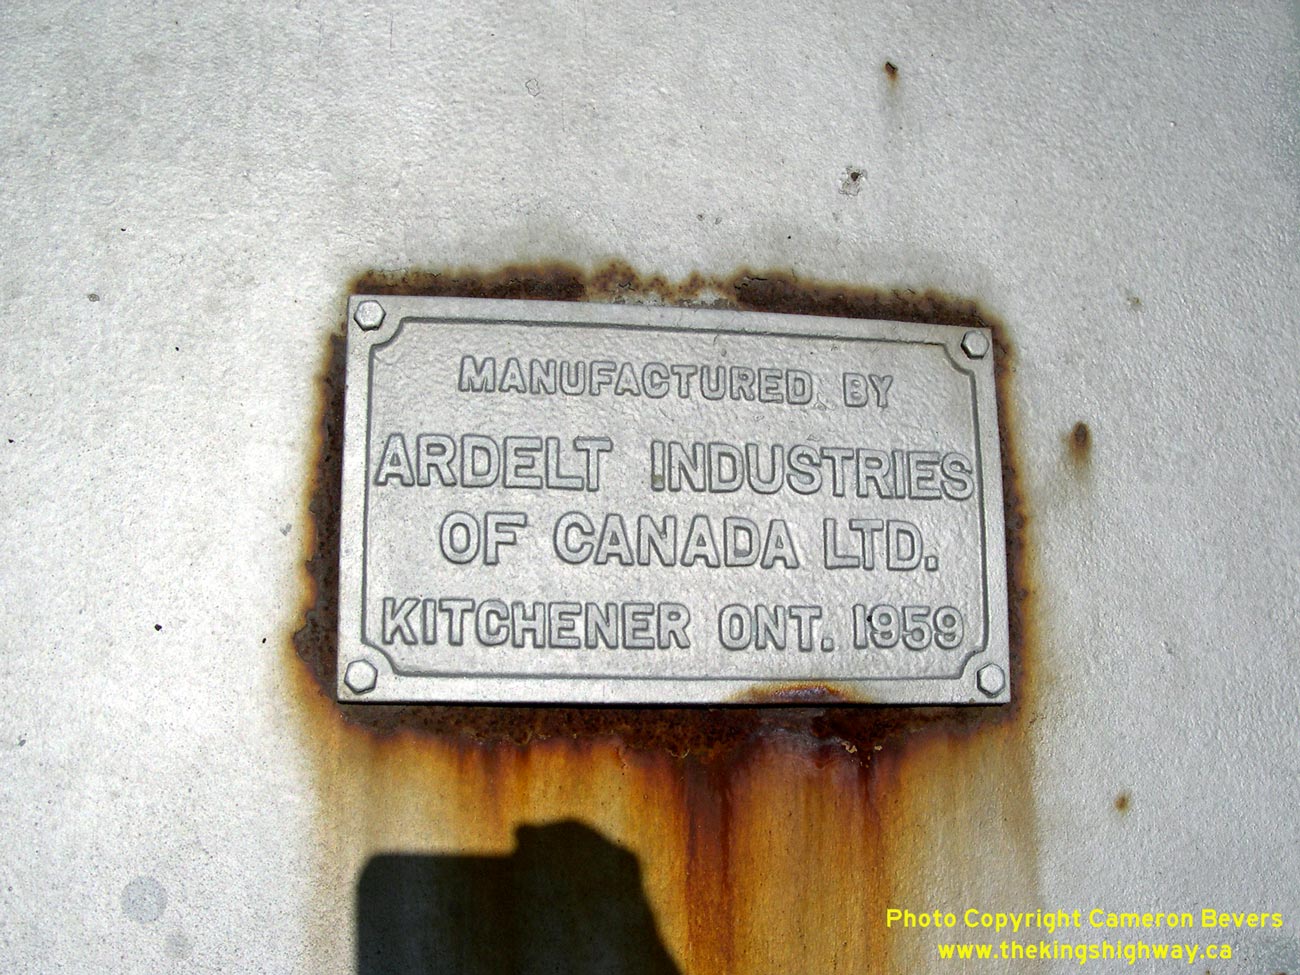
Heyden-Goulais River Diversion. See an Enlarged Photo Here. (Photograph taken on September 1, 2008 - © Cameron Bevers) Right - Bridge manufacturer's plaque on the Goulais River Bridge on Hwy 17. To my knowledge, this is the only steel truss bridge manufactured by Ardelt Industries Ltd. on a King's Highway. The Goulais River Bridge was part of a major highway realignment project, which saw about 12 km of Hwy 17 relocated north of Heyden. See an Enlarged Photo Here. (Photograph taken on September 1, 2008 - © Cameron Bevers) 
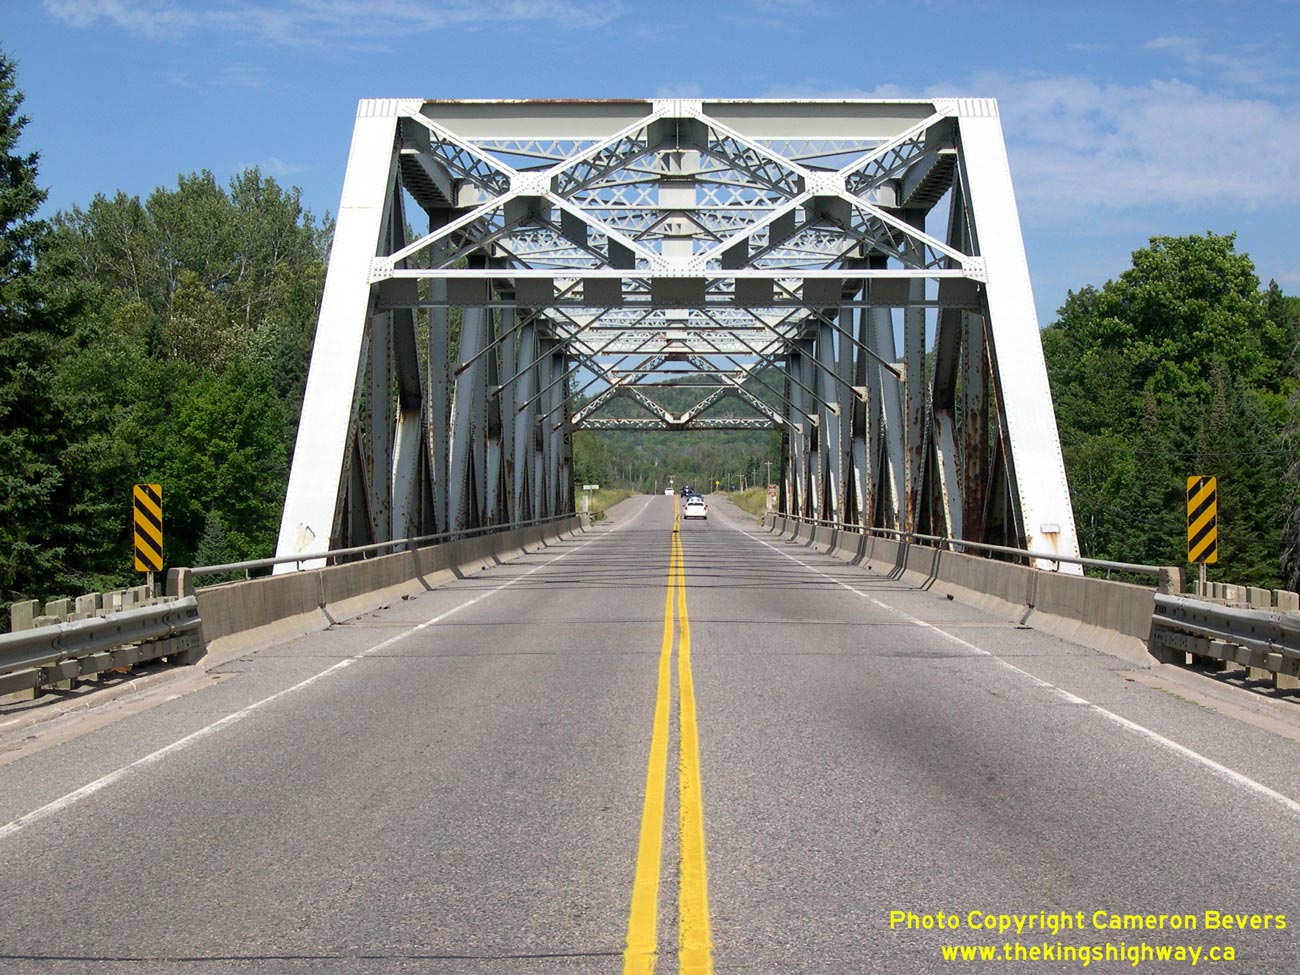
Left - Facing south along Hwy 17 towards Sault Ste. Marie at the Goulais River Bridge. See an
Enlarged Photo Here. (Photograph taken on September 1, 2008 - © Cameron Bevers) Right - Facing north along Hwy 17 through the Goulais River Bridge. Since this steel through truss bridge was completed relatively recently, there is no height restriction at the bridge entrance. As trucks were allowed to travel with progressively higher loads on Ontario's highways, low bridge clearances became a collision hazard which doomed many of Ontario's earlier through truss bridges. See an Enlarged Photo Here. (Photograph taken on September 1, 2008 - © Cameron Bevers) 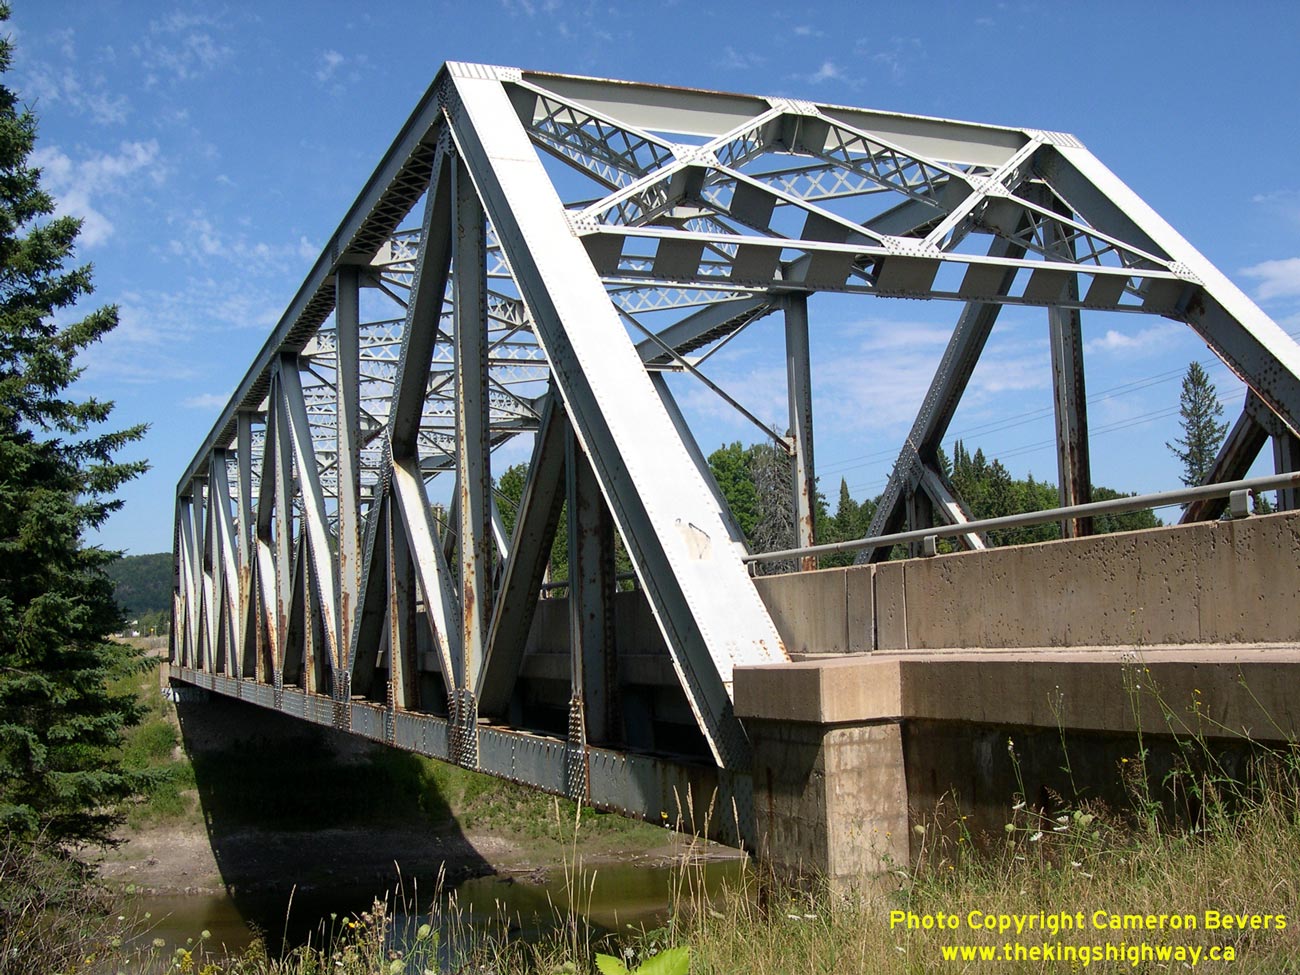
Left - Western side of the Goulais River Bridge on Hwy 17, north of Sault Ste. Marie. See an
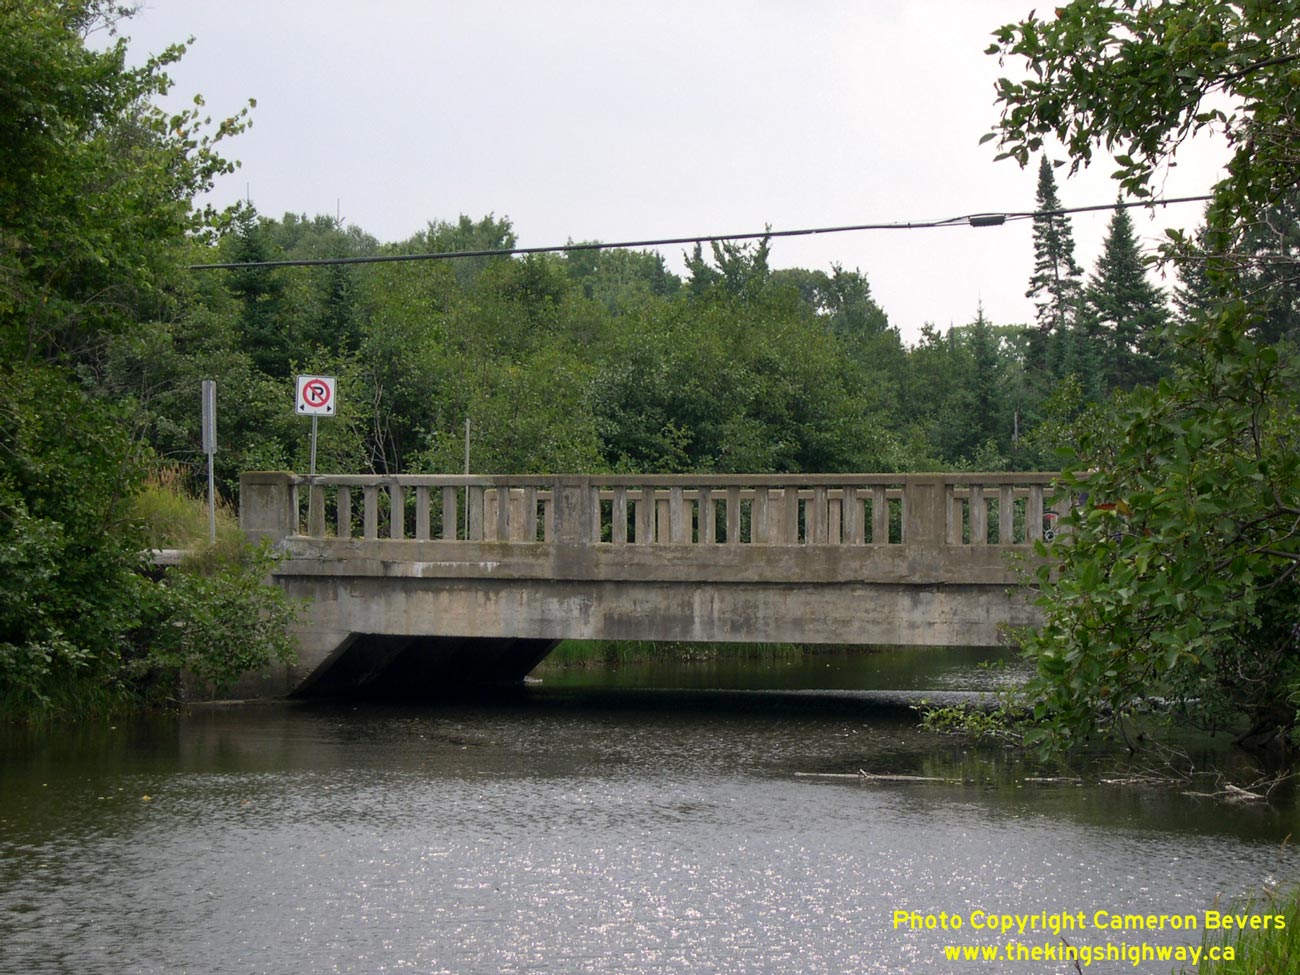
Enlarged Photo Here. (Photograph taken on September 1, 2008 - © Cameron Bevers) Right - Stokely Creek Bridge on Old Hwy 17 (Havilland Shores Road). This section of Hwy 17 was bypassed during a highway relocation project about 65 years ago. See an Enlarged Photo Here. (Photograph taken on September 6, 2004 - © Cameron Bevers) 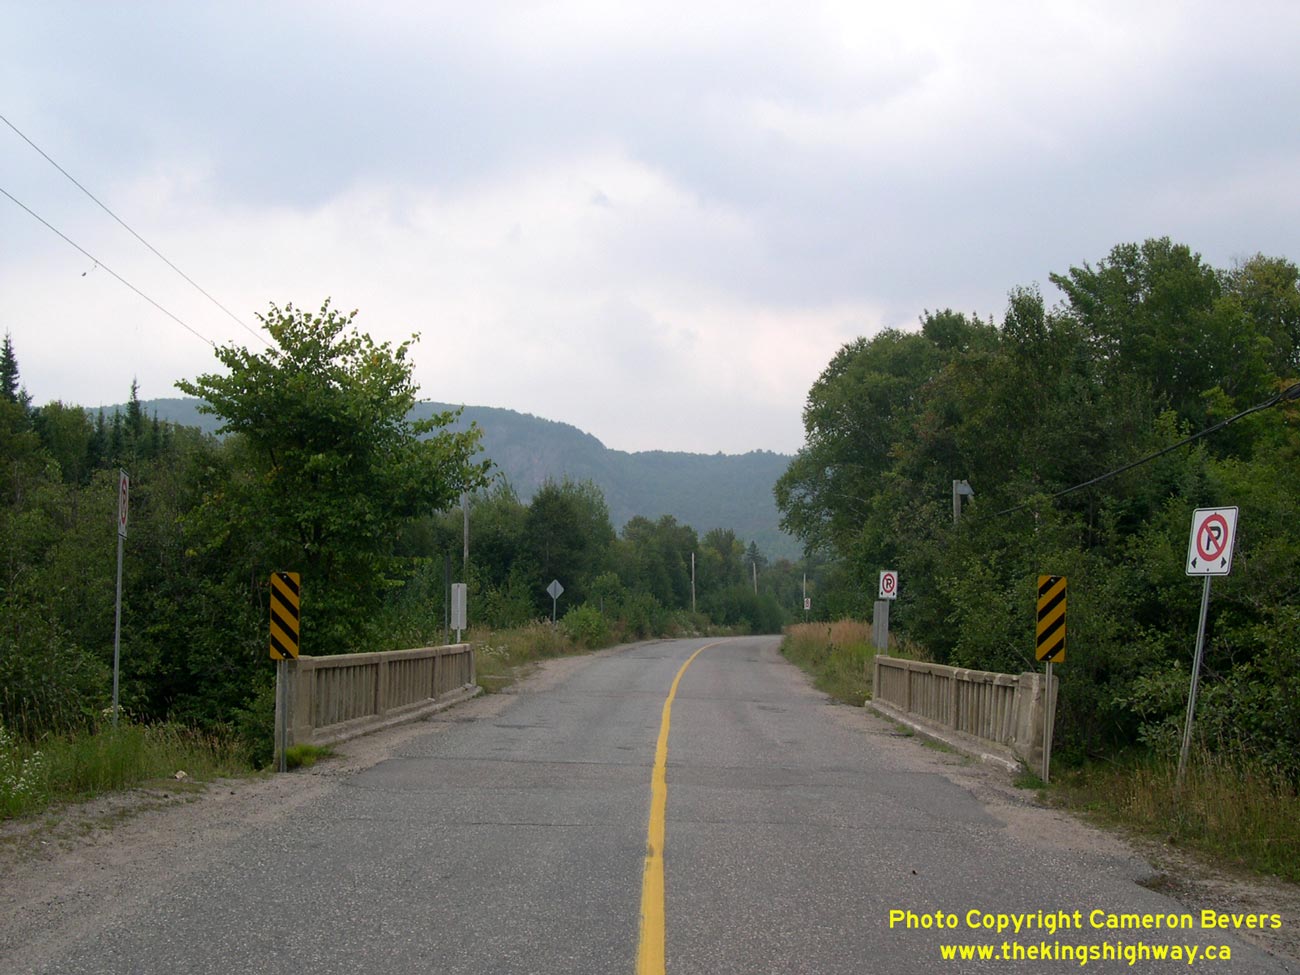
Left - Facing south along Old Hwy 17 (Havilland Shores Road) at the Stokely Creek Bridge north of Sault Ste. Marie. See an
Enlarged Photo Here. (Photograph taken on September 6, 2004 - © Cameron Bevers) Right - The Stokely Creek Bridge was built in the mid-1930s by the Department of Northern Development, just before the road between Sault Ste. Marie and Batchawana Bay was taken over by the Department of Highways and designated as Hwy 17. See an Enlarged Photo Here. (Photograph taken on September 6, 2004 - © Cameron Bevers) 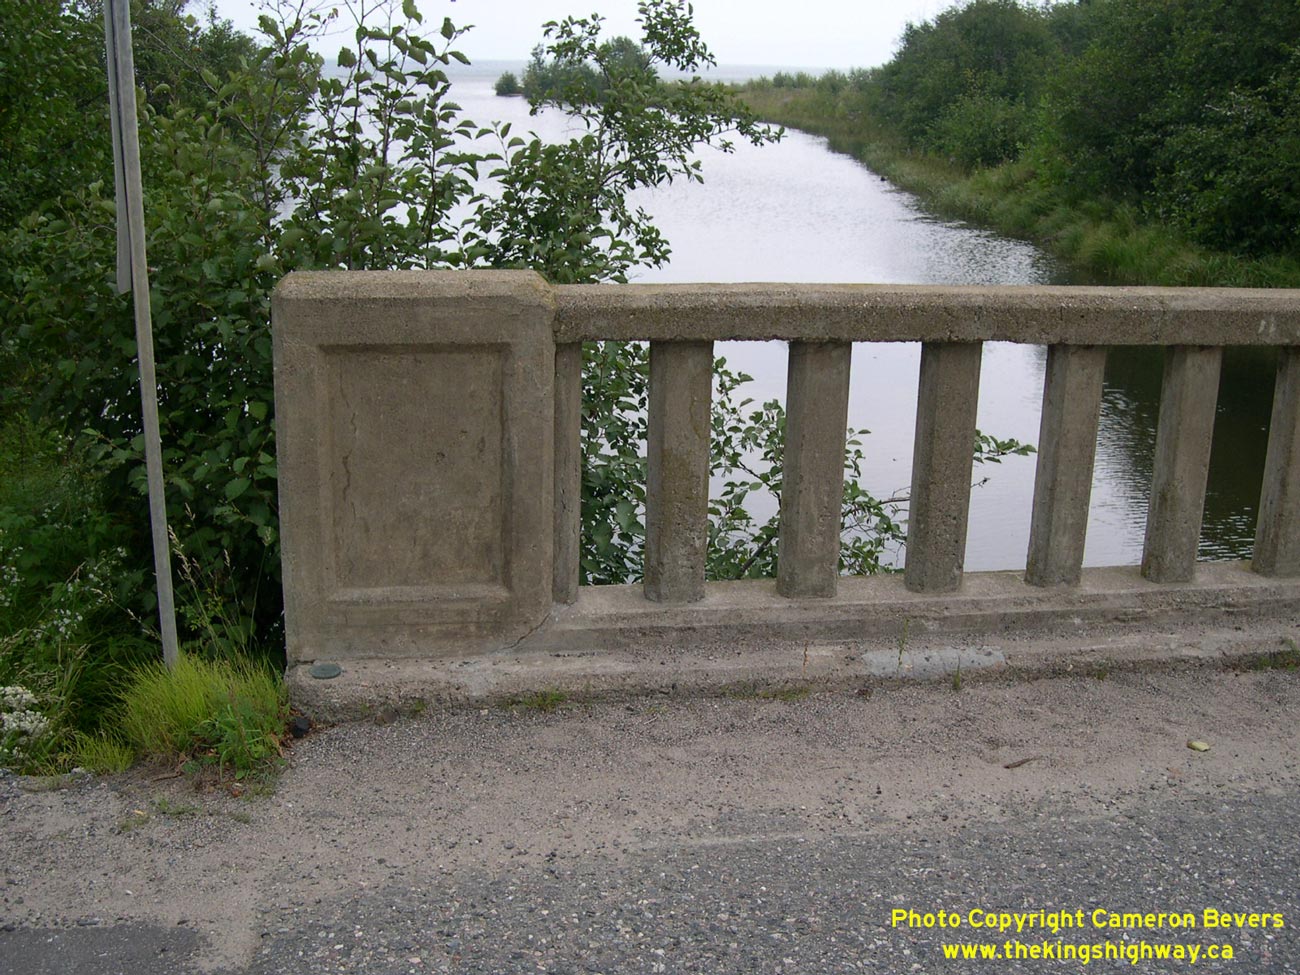
Left - Considering its age, the Stokely Creek Bridge on Old Hwy 17 (Havilland Shores Road) has preserved remarkably well. This simple bridge design was used
extensively during the construction of Northern Development Trunk Roads in the 1930s. See an
Enlarged Photo Here. (Photograph taken on September 6, 2004 - © Cameron Bevers) Right - Facing north along Hwy 17 towards Harmony Beach at the Havilland Bay Causeway. This newer diversion bypassed the original 1930s alignment of Hwy 17, which hugged the shoreline at the base of the cliff off to the right of this photo. The new causeway eliminated several sharp curves on the original highway's route. See an Enlarged Photo Here. (Photograph taken on September 1, 2008 - © Cameron Bevers) 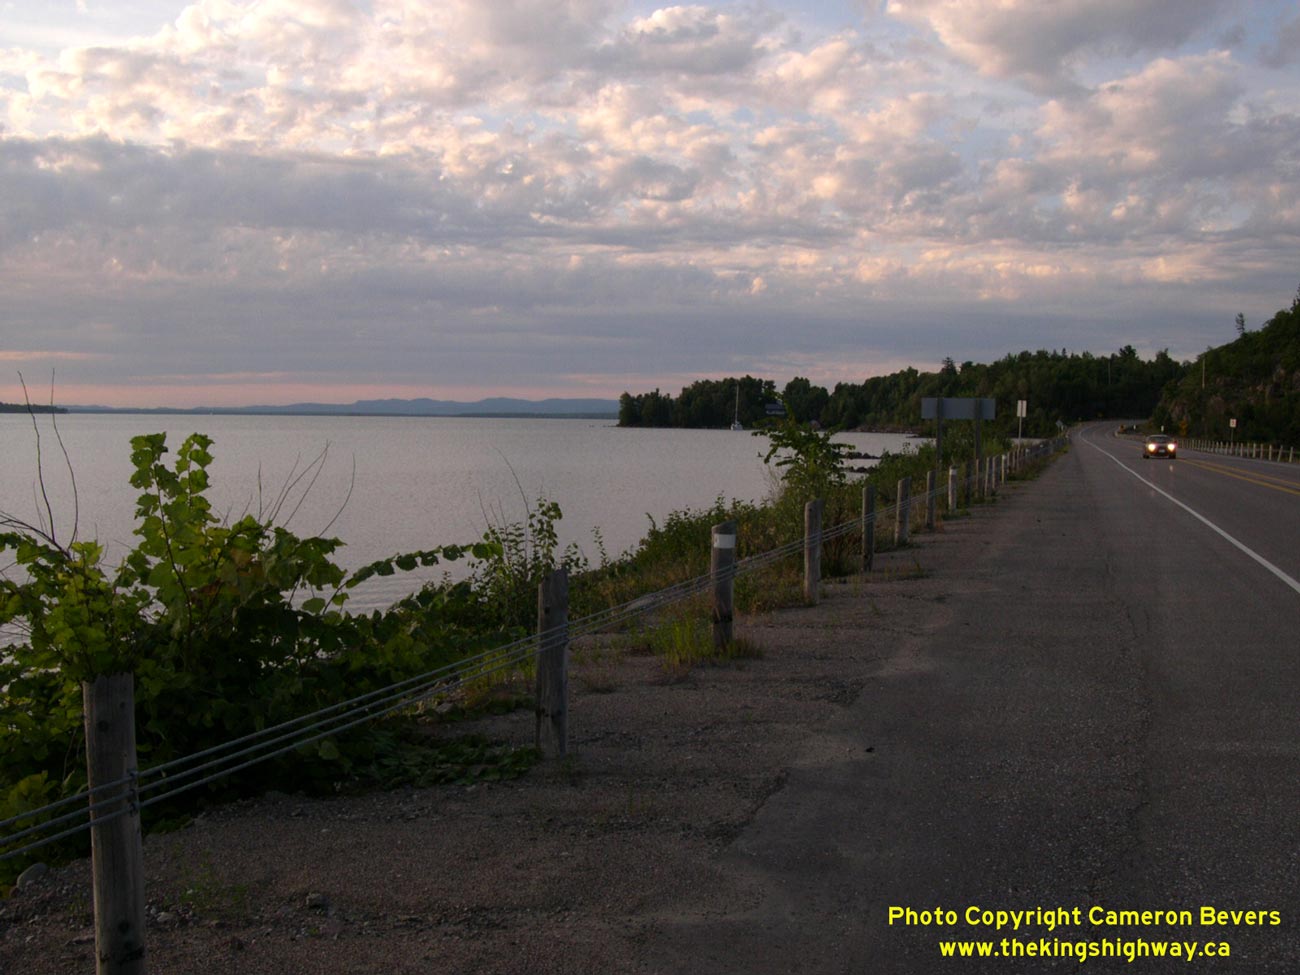
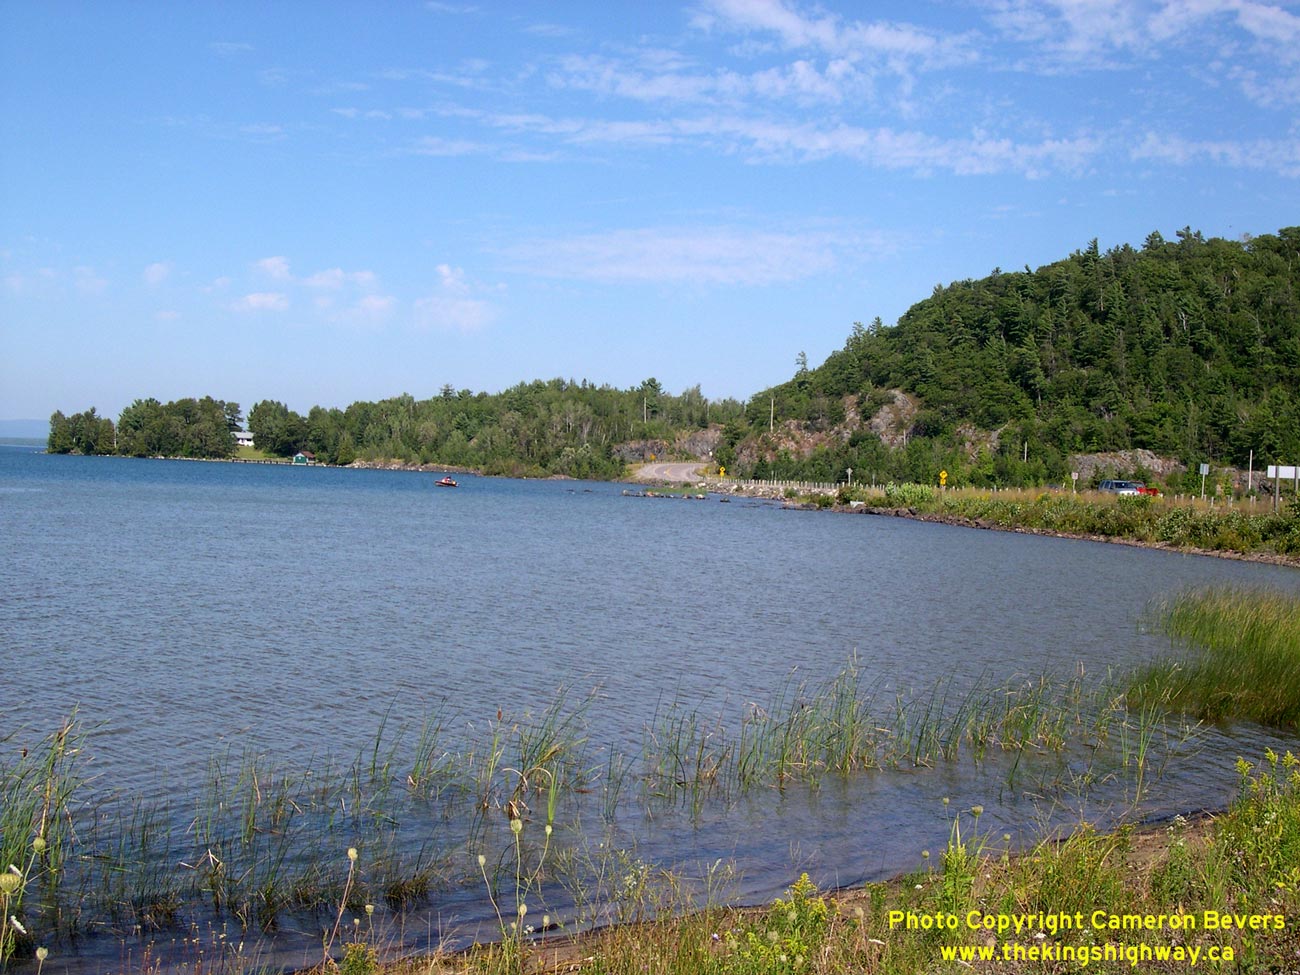
Left - Dusk over the Havilland Bay Causeway, north of Sault Ste. Marie. See an
Enlarged Photo Here. (Photograph taken on August 30, 2003 - © Cameron Bevers) Right - Havilland Bay Causeway on Hwy 17, facing north towards Harmony Beach. See an Enlarged Photo Here. (Photograph taken on September 1, 2008 - © Cameron Bevers) 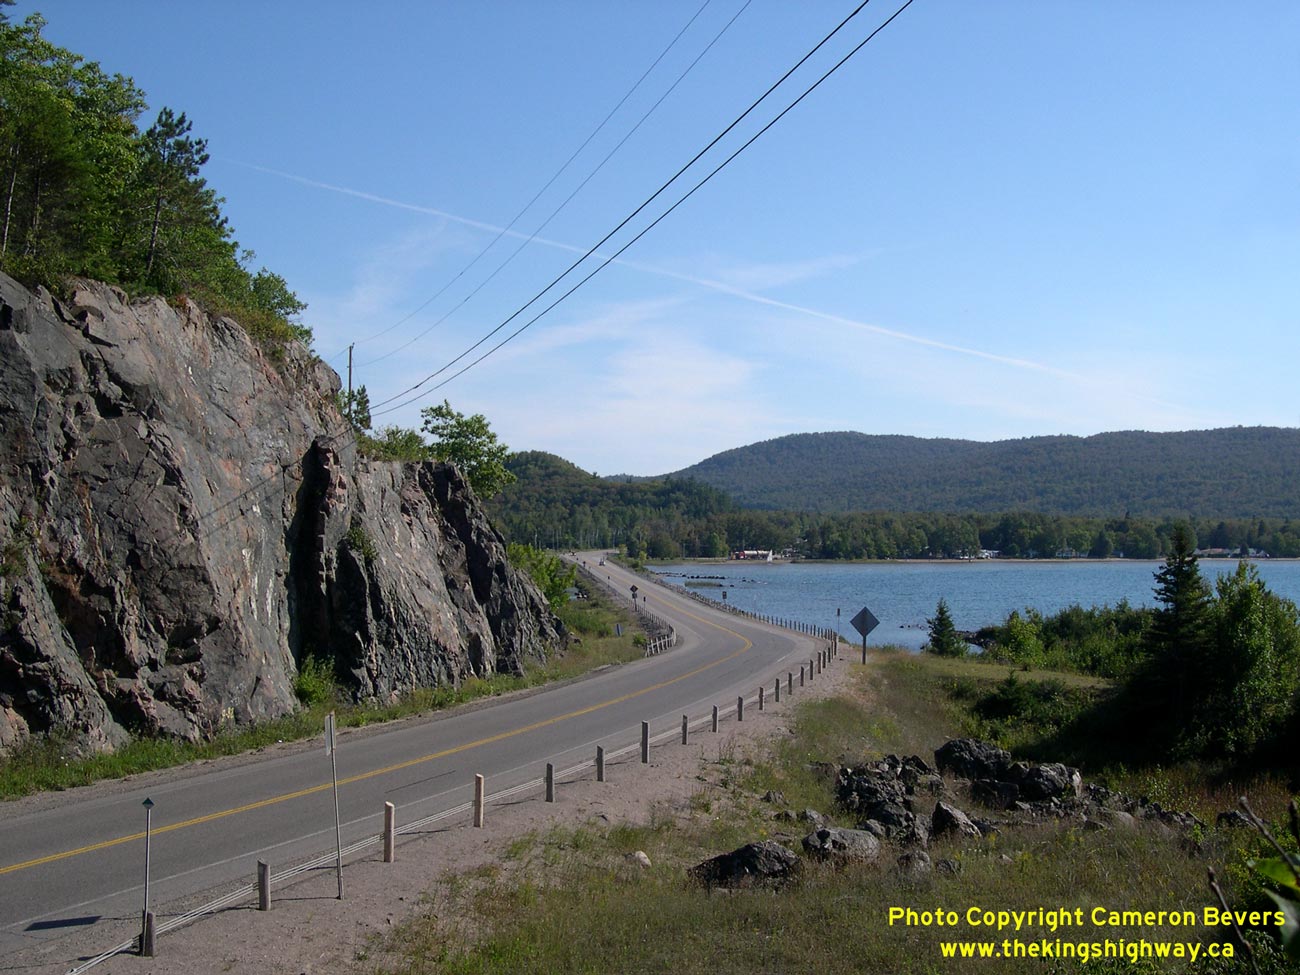
Left - Facing south along Hwy 17 across the Havilland Bay Causeway, north of Sault Ste. Marie. Traces of the original 1930s alignment of Hwy 17 can be seen
departing to the right from the curve in the current highway. Originally, the highway followed the shoreline, but a new route for Hwy 17 was later blasted through the
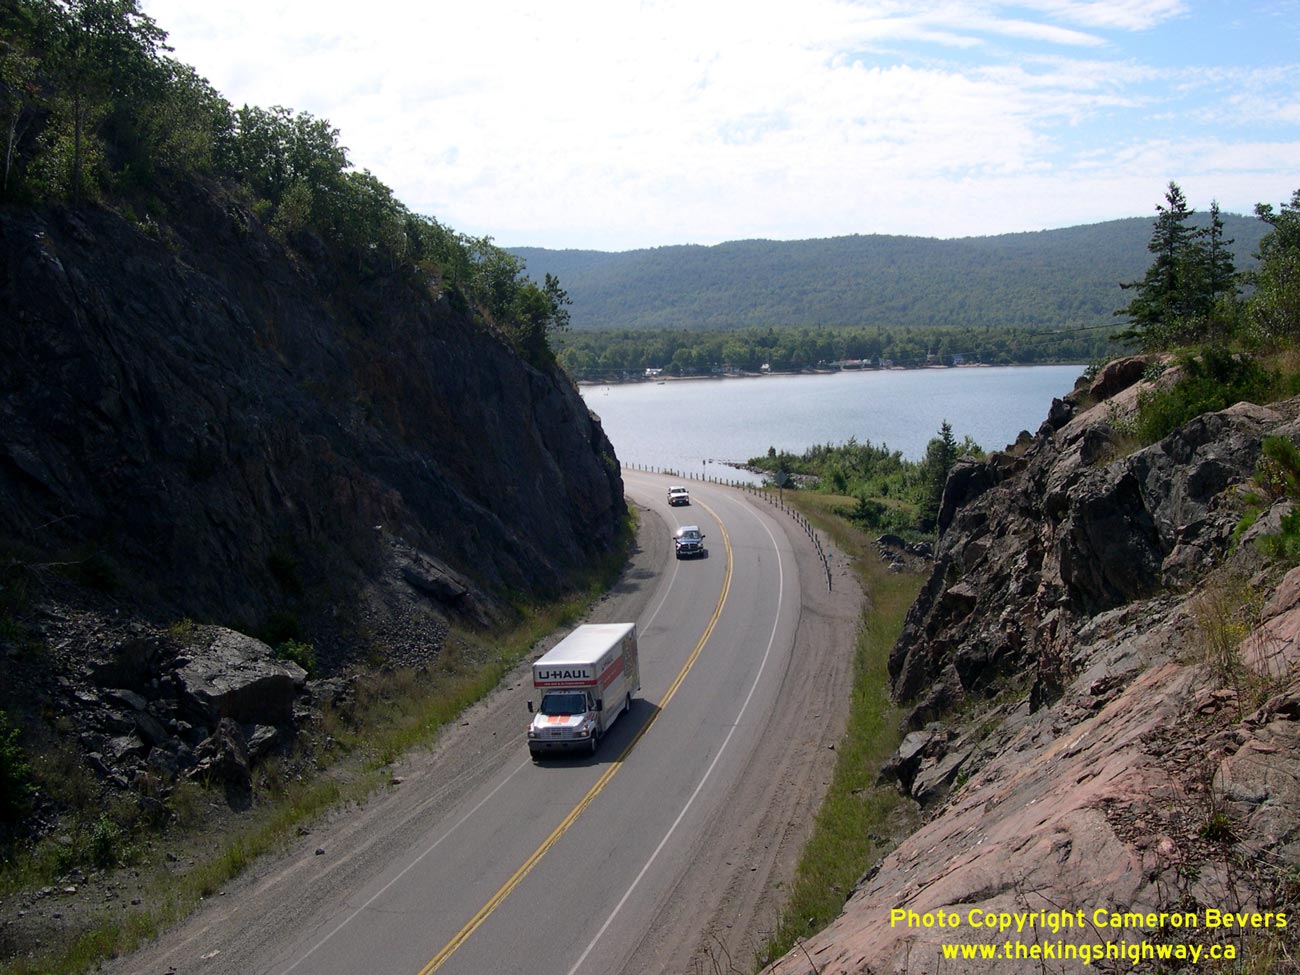
rocky outcrop beside Havilland Bay. See an Enlarged Photo Here. (Photograph taken on September 5, 2006 - © Cameron Bevers) Right - View of Hwy 17 from the top of the Havilland Bay Rock Cut, facing south towards Sault Ste. Marie. See an Enlarged Photo Here. (Photograph taken on September 1, 2008 - © Cameron Bevers) 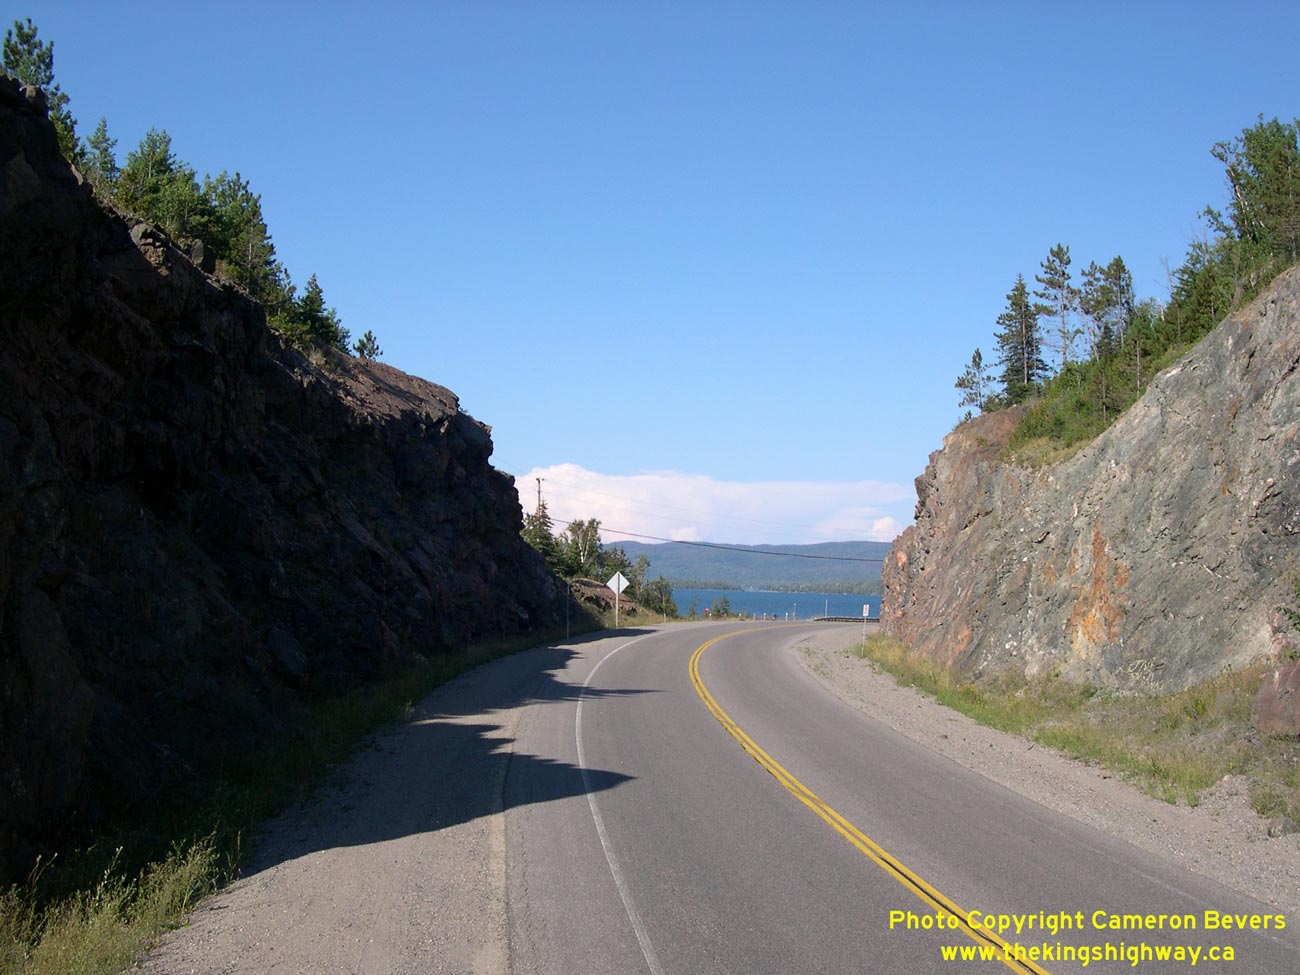
Left - Looking north along Hwy 17 through the rock cut at Havilland Bay. See an
Enlarged Photo Here. (Photograph taken on September 5, 2006 - © Cameron Bevers) Right - Looking south along Hwy 17 through the rock cut Havilland Bay. See an Enlarged Photo Here. (Photograph taken on September 1, 2008 - © Cameron Bevers) 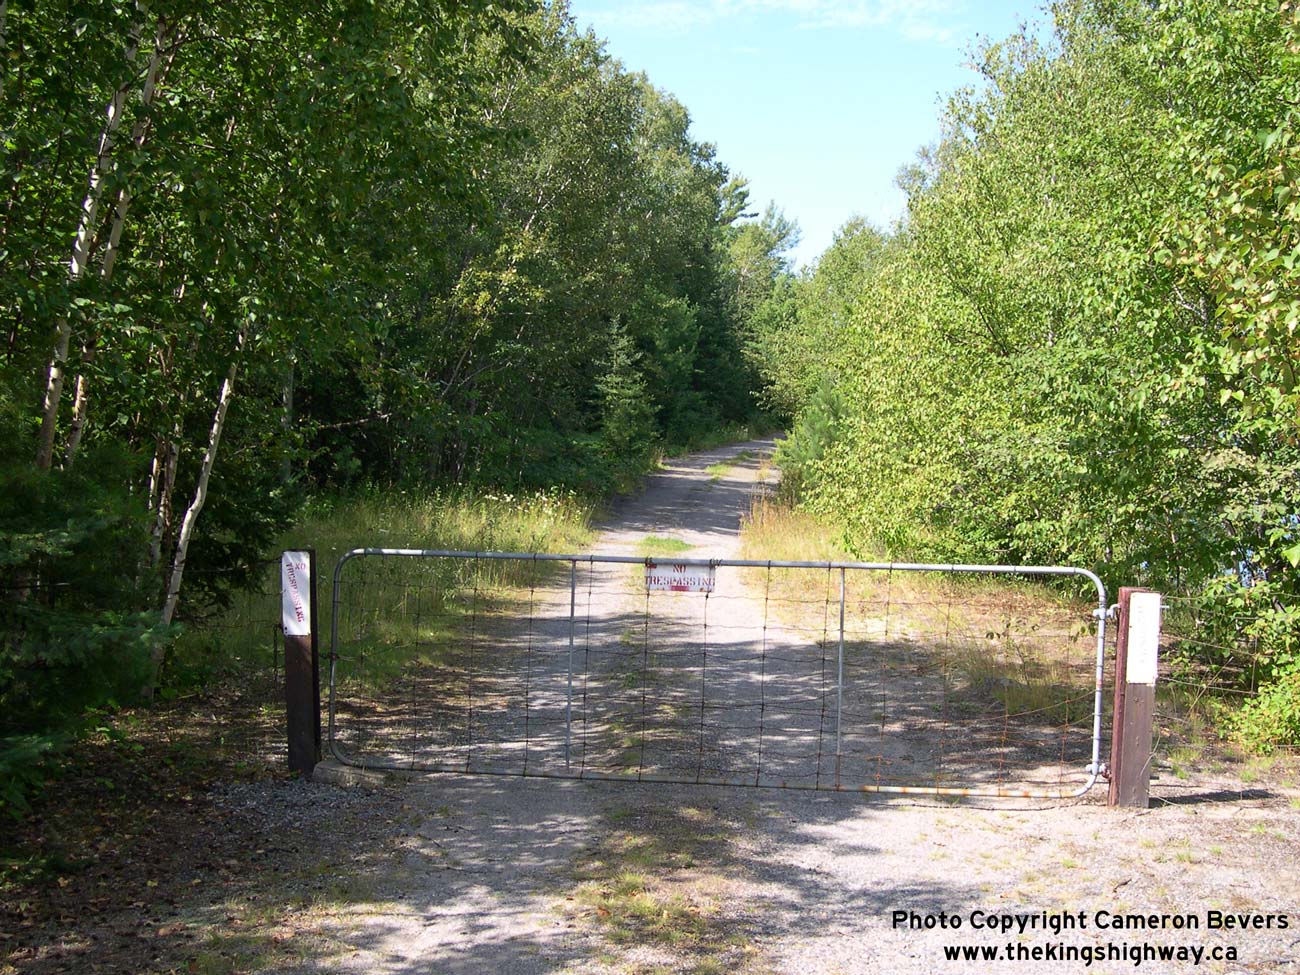
Left - The old 1930s route of Hwy 17 re-emerges from the woods on the north side of the Havilland Bay Rock Cut. The old alignment of Hwy 17 is now a private
road, which serves a number of homes that were built along the original highway out on the point. See an
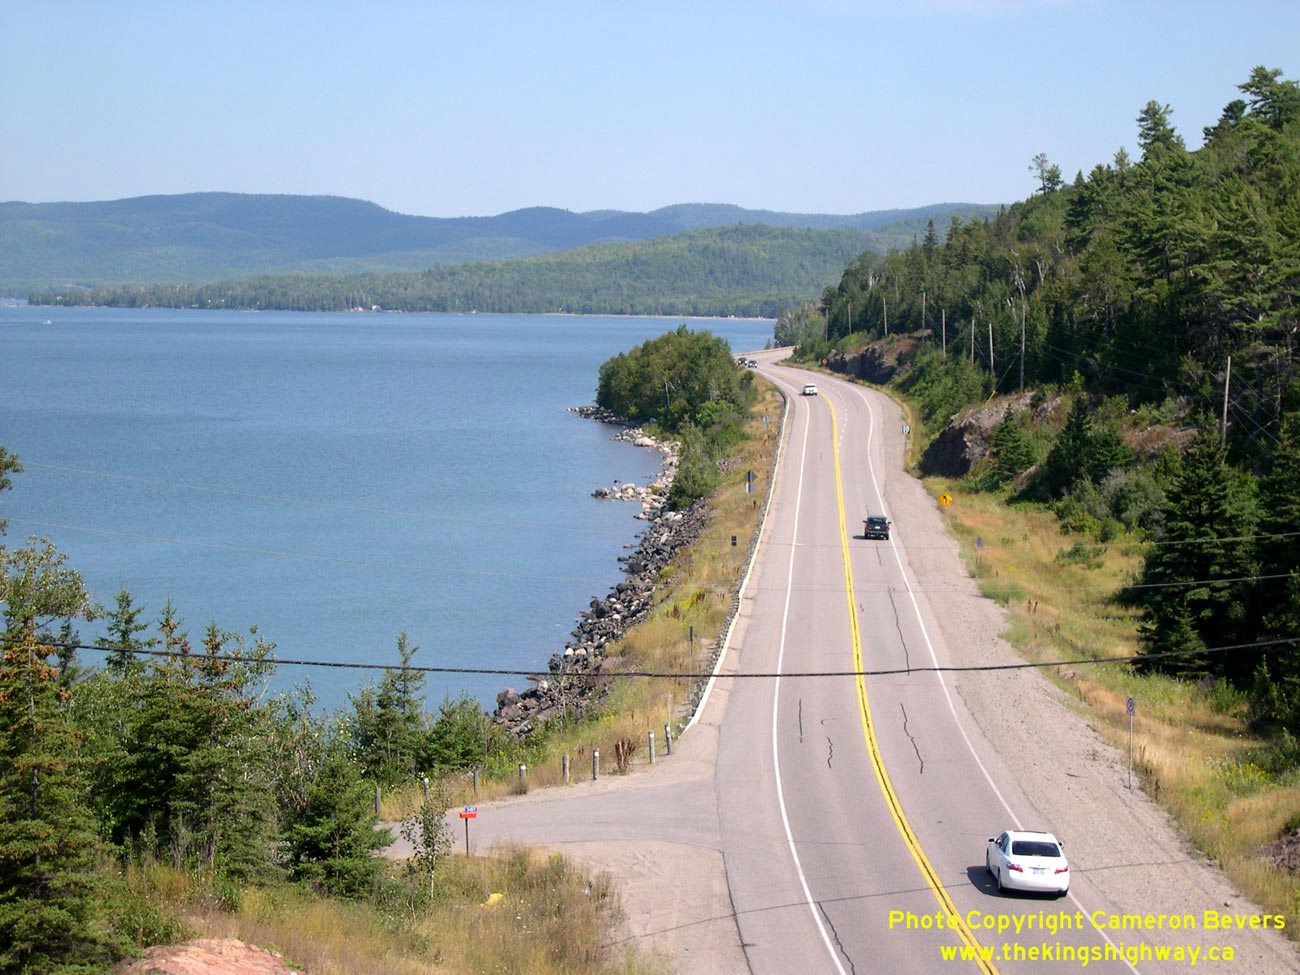
Enlarged Photo Here. (Photograph taken on September 1, 2008 - © Cameron Bevers) Right - View of Hwy 17 from the top of the Havilland Bay Rock Cut, facing north towards Harmony Beach. The notably mountainous terrain along the Lake Superior shoreline north of Sault Ste. Marie surprises many first-time visitors to the area, who are more accustomed to seeing the comparatively subdued shoreline terrain of Lake Huron, Lake Erie and Lake Ontario. See an Enlarged Photo Here. (Photograph taken on September 1, 2008 - © Cameron Bevers) 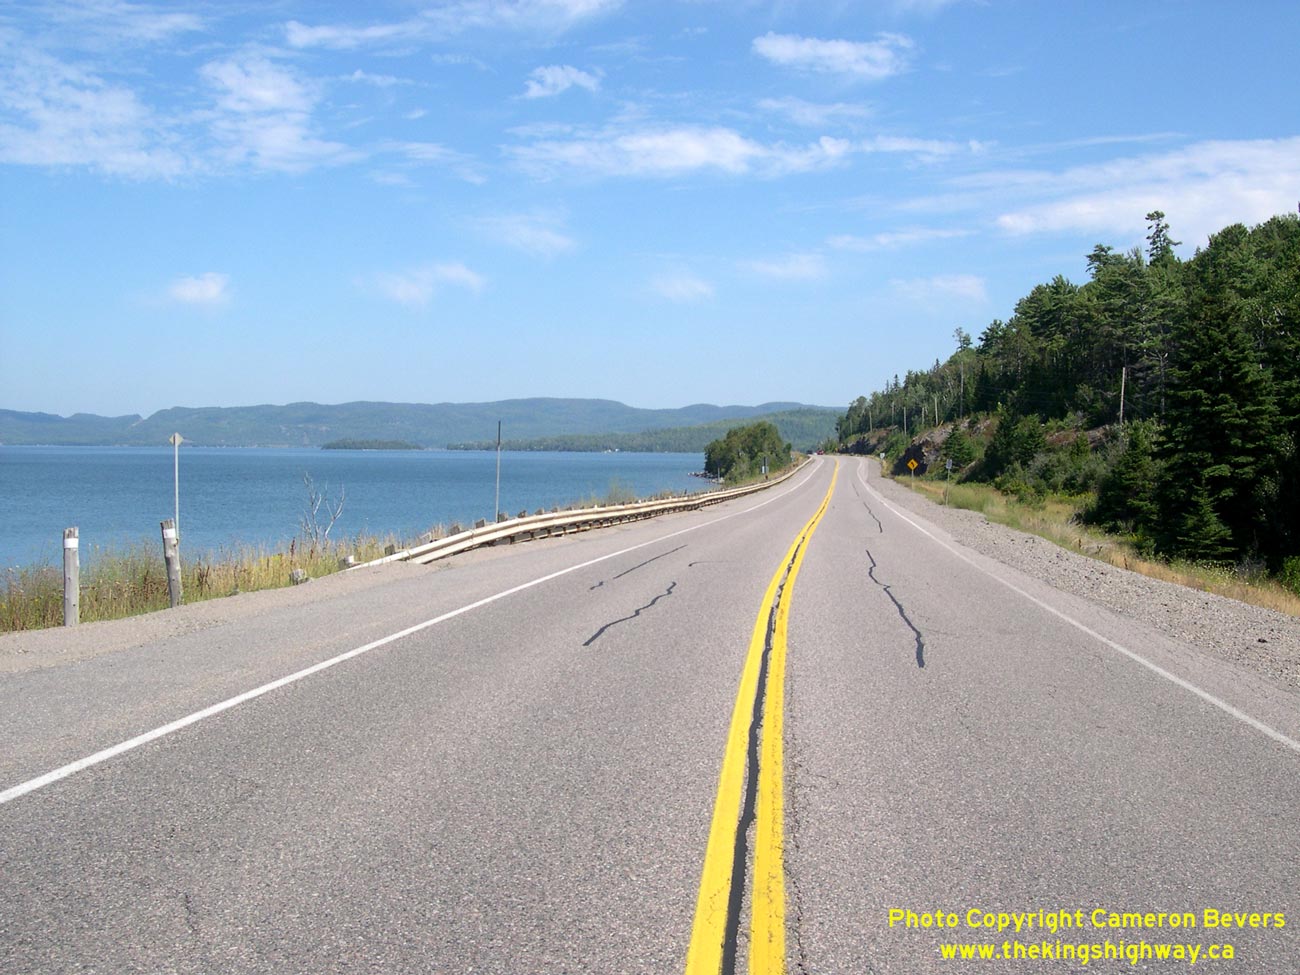
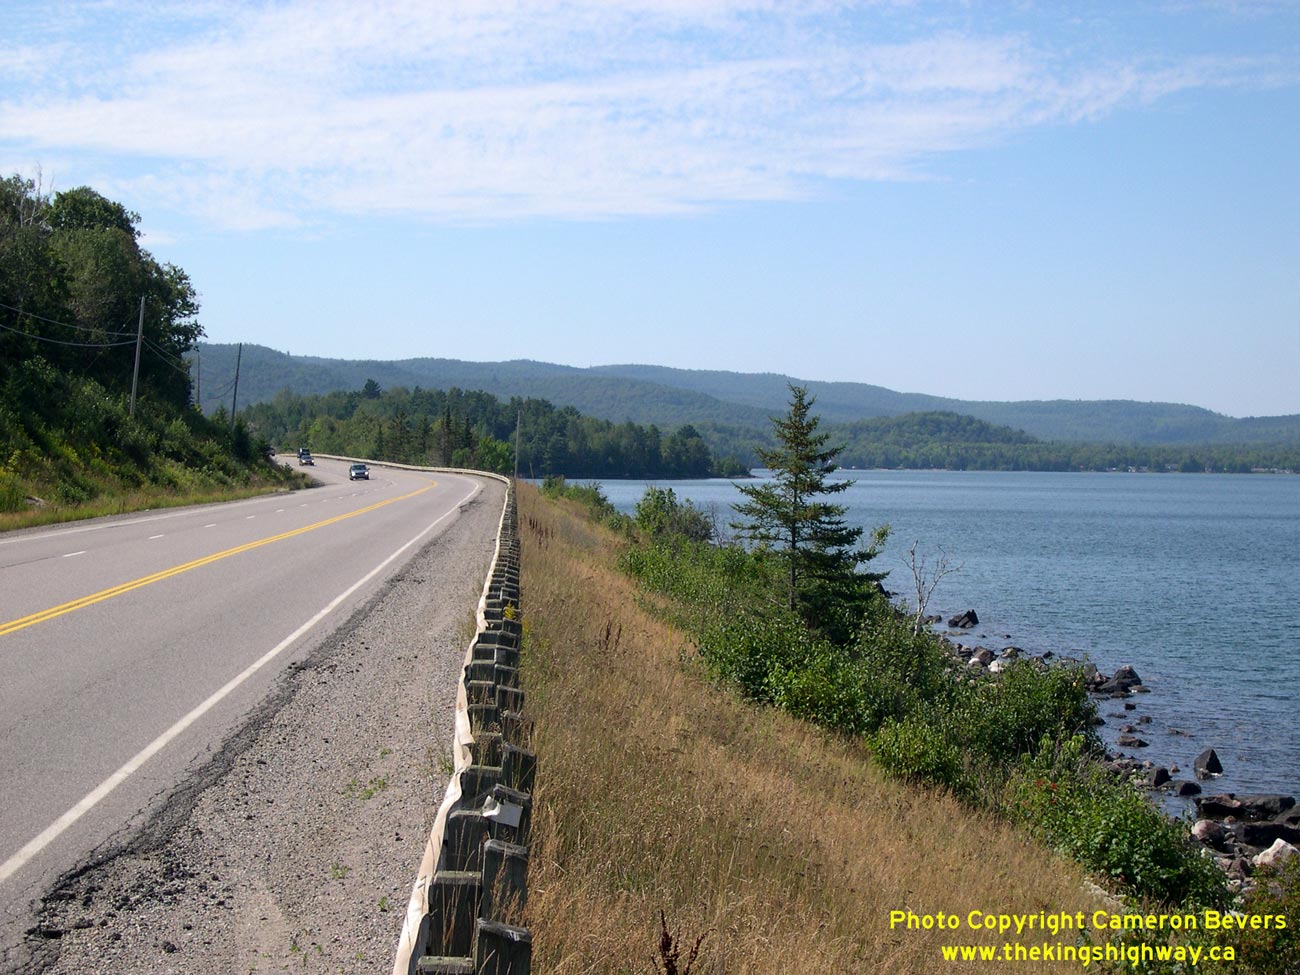
Left - Facing north along Hwy 17 between Havilland Bay and Harmony Beach. See an
Enlarged Photo Here. (Photograph taken on September 1, 2008 - © Cameron Bevers) Right - View of Havilland Bay from Hwy 17 north of Sault Ste. Marie. See an Enlarged Photo Here. (Photograph taken on September 1, 2008 - © Cameron Bevers) 
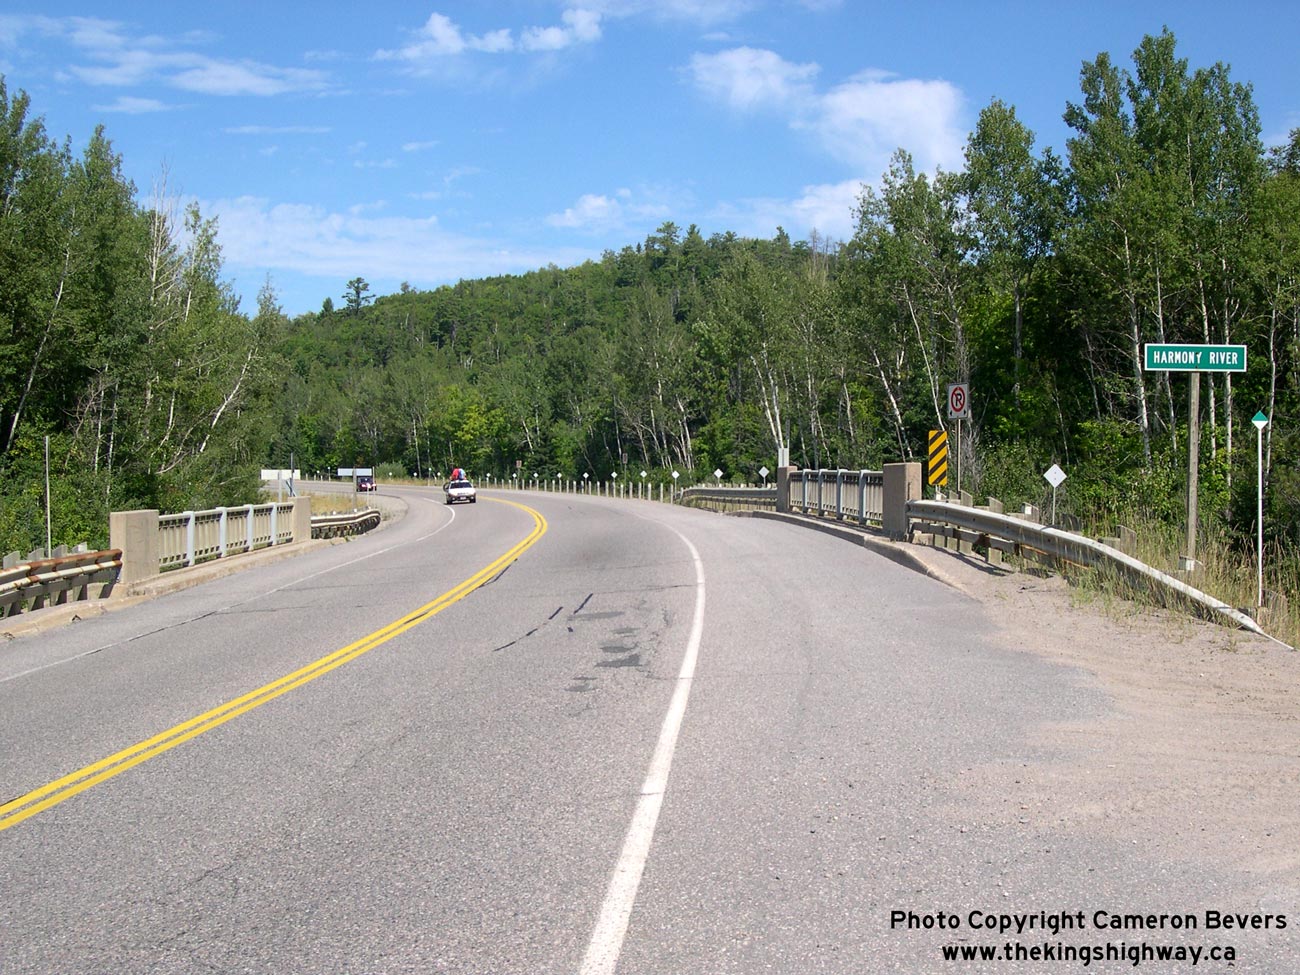
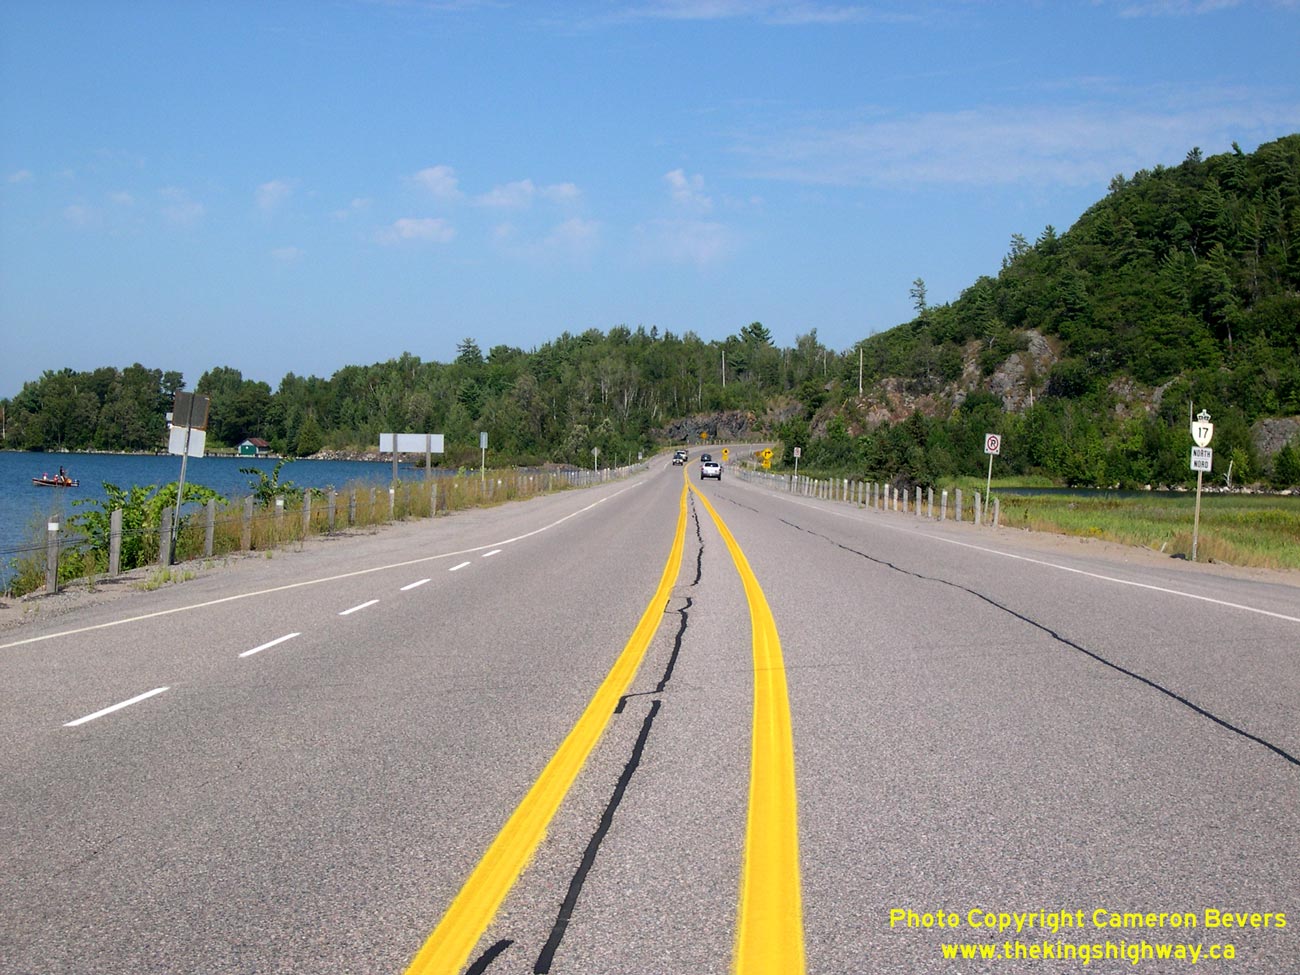
Left - Facing north along Hwy 17 between Havilland Bay and Harmony Beach, north of Sault Ste. Marie. The spectacular shoreline highway from Sault Ste. Marie to
Nipigon has many scenic vistas to offer. See an Enlarged Photo Here. (Photograph taken on September 5, 2006 - © Cameron Bevers) Right - Facing north along Hwy 17 at the Harmony River Bridge. This bridge is actually a multi-celled concrete culvert, which was completed in 1962. See an Enlarged Photo Here. (Photograph taken on September 1, 2008 - © Cameron Bevers) 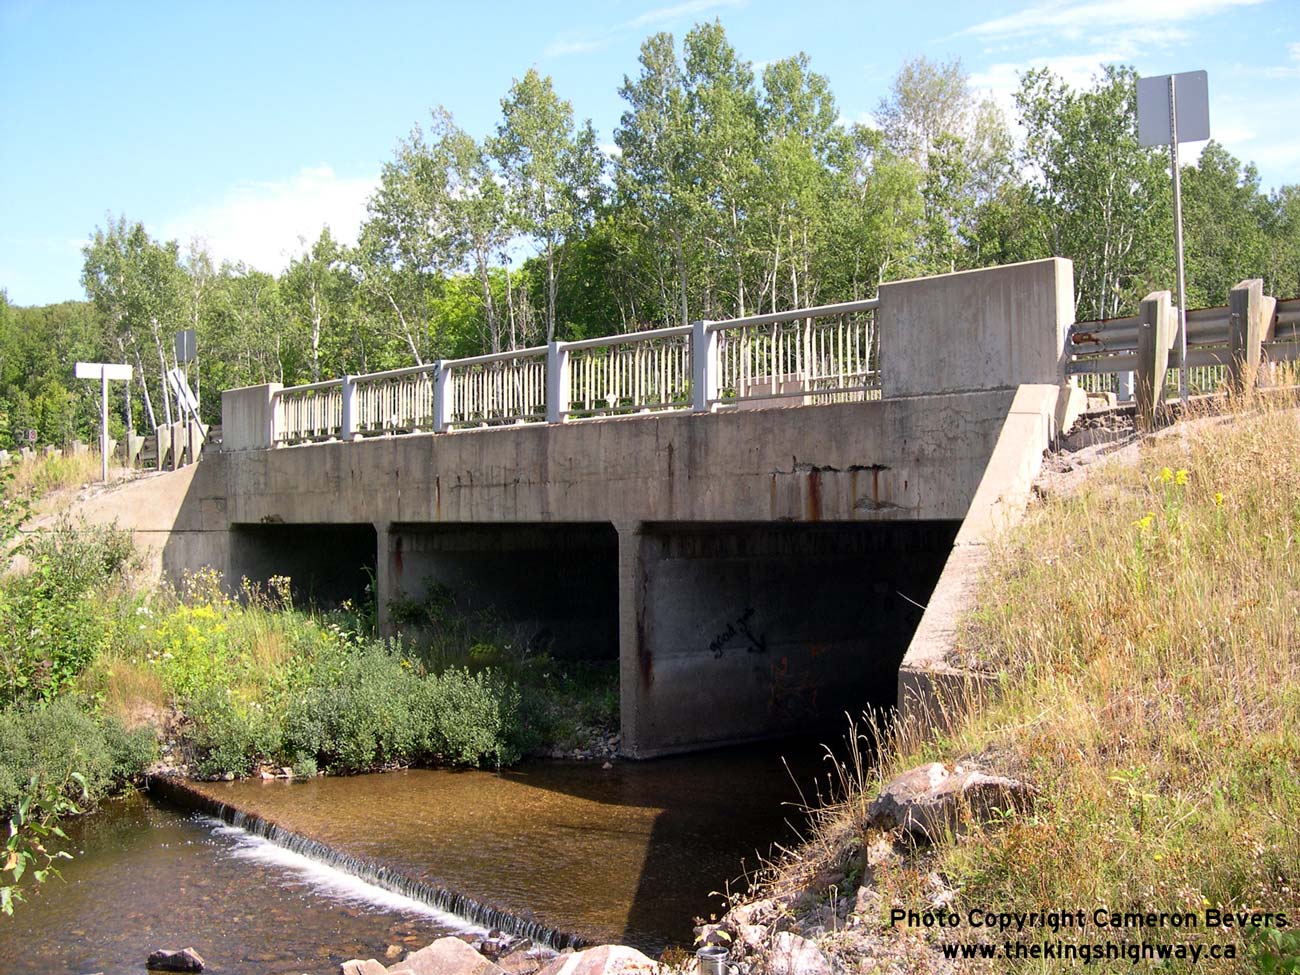

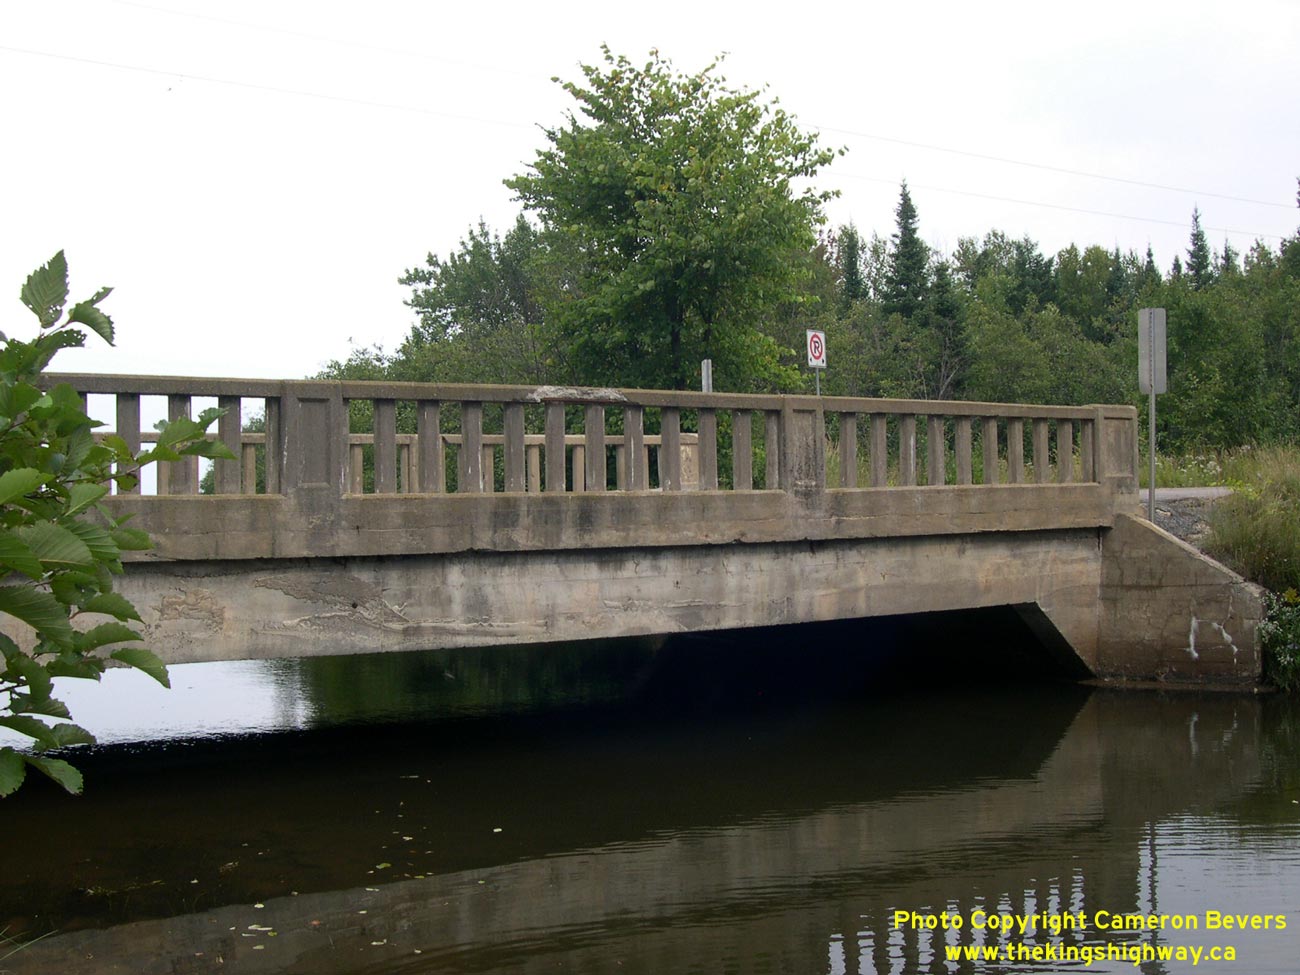
Left - Western side of the Harmony River Bridge on Hwy 17. This structure carries a diversion of Hwy 17 around the community of Harmony Beach. The former
alignment of Hwy 17 runs directly through the small beach community. See an Enlarged Photo Here. (Photograph taken on September 1, 2008 - © Cameron Bevers) Right - Facing south along Hwy 17 at the Harmony River Bridge. The Harmony Beach Diversion was constructed in the early 1960s under Contract #1961-99 to allow high-speed through traffic to bypass the winding route of Hwy 17 through Harmony Beach. See an Enlarged Photo Here. (Photograph taken on September 1, 2008 - © Cameron Bevers) 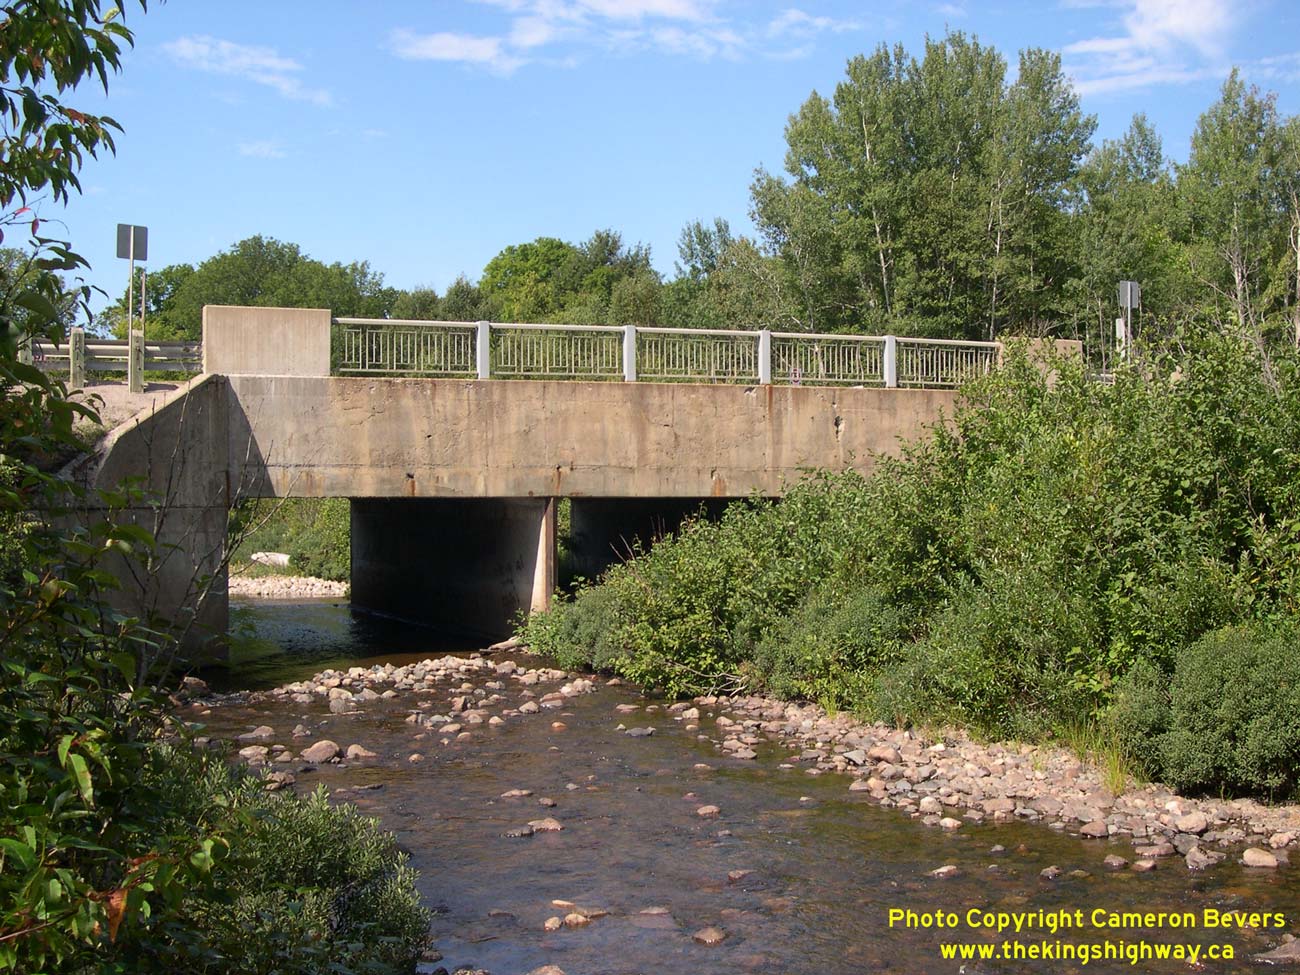
Left - Eastern side of the Harmony River Bridge on Hwy 17. This three-cell concrete box culvert was constructed under Contract #1961-99 and was completed in
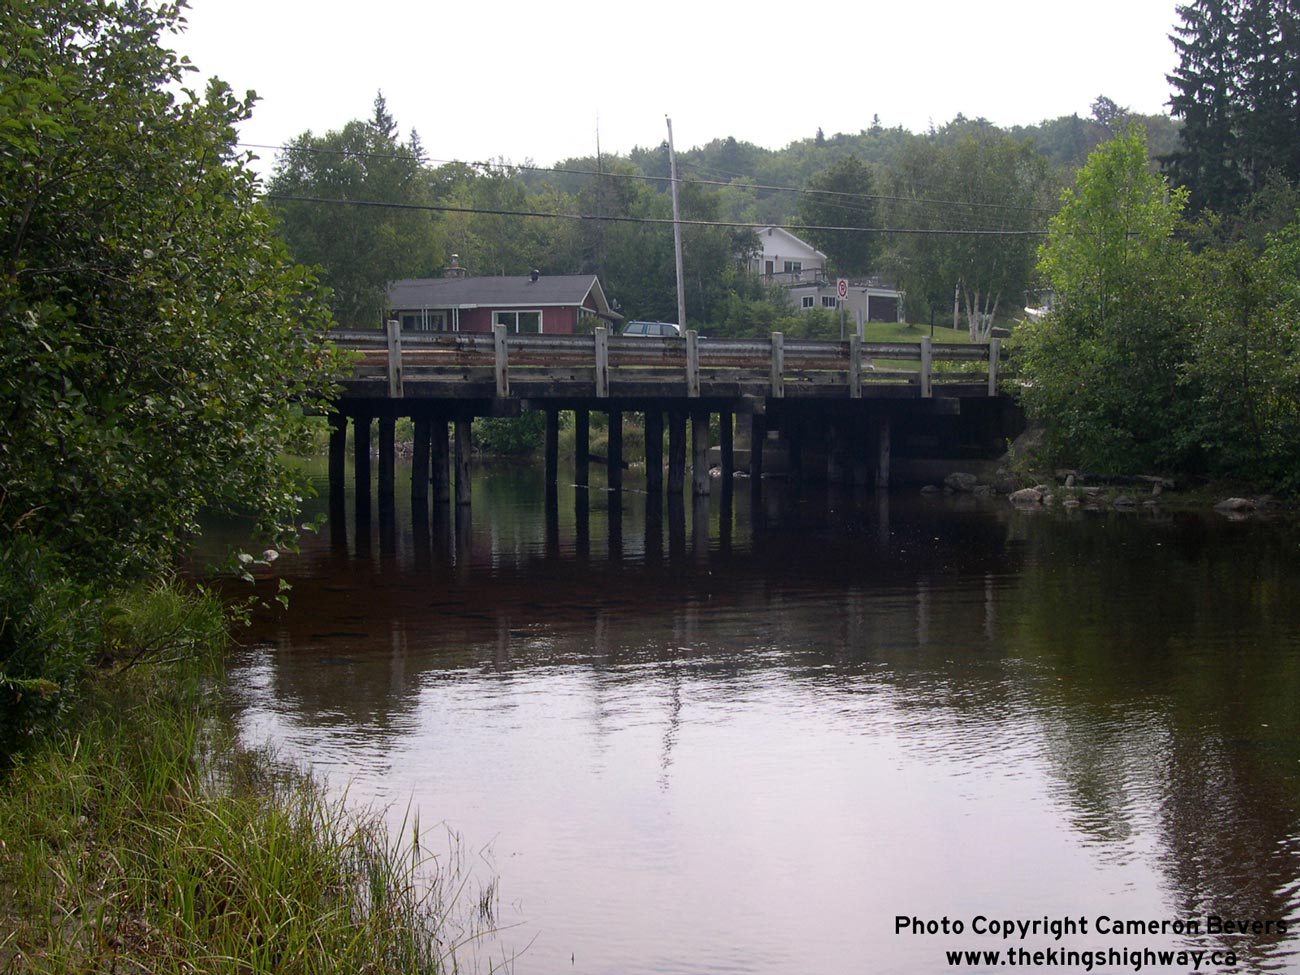
1962. See an Enlarged Photo Here. (Photograph taken on September 1, 2008 - © Cameron Bevers) Right - Harmony River Bridge on Old Hwy 17 (Harmony Beach Road). This timber trestle structure was completed in 1950. See an Enlarged Photo Here. (Photograph taken on September 6, 2004 - © Cameron Bevers) 
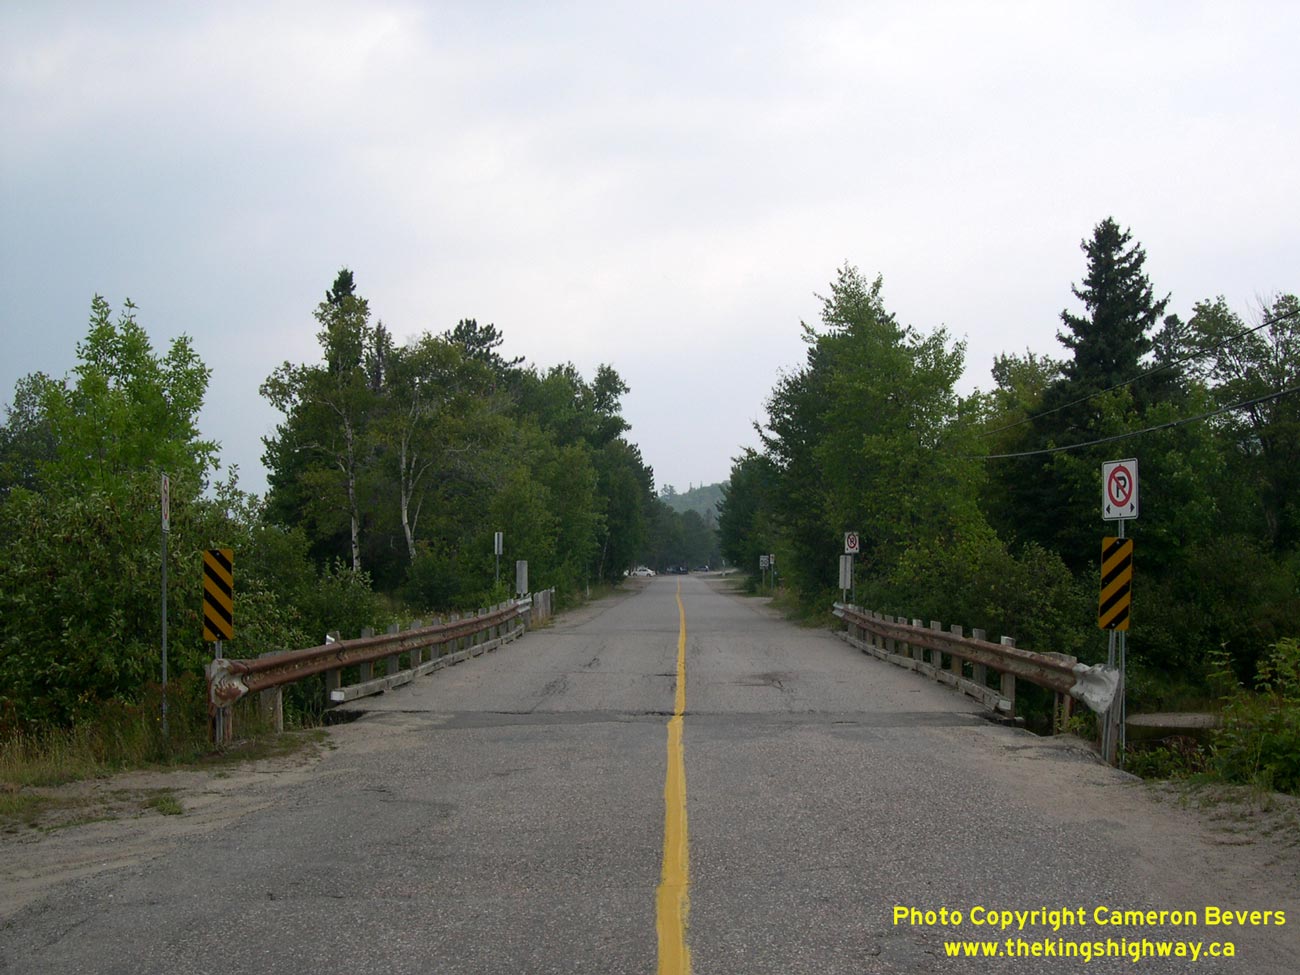
Left - Facing south across the Harmony River Bridge on Old Hwy 17 (Harmony Beach Road). See an
Enlarged Photo Here. (Photograph taken on September 6, 2004 - © Cameron Bevers) Right - Facing north across the Harmony River Bridge on Old Hwy 17 (Harmony Beach Road). See an Enlarged Photo Here. (Photograph taken on September 6, 2004 - © Cameron Bevers)
Continue on to King's Highway 17 Photos: Harmony Beach to Mamainse Harbour
|
|---|
Links to Adjacent King's Highway Photograph Pages:
Back to Hwy 17 - Hwy 548 to Sault Ste. Marie
Hwy 17 Photo Index
On to Hwy 17 - Harmony Beach to Mamainse Harbour
Back to King's Highway 16 Photos /
King's Highway 17 History /
On to King's Highway 18 Photos
Ontario Highway History - Main Menu / Back to List of Highways Website contents, photos & text © 2002-2026, Cameron
Bevers (Webmaster) - All Rights Reserved / Contact Me
|
|---|