
| 
| |
|
|
This page contains present day photos (Year 2000 to date) of Ontario's King's Highway 4, arranged by location from London
northerly to Walkerton. All photographs displayed on this page were taken by the Webmaster (Cameron Bevers), unless specifically noted otherwise. Click on any
thumbnail to see a larger image!
Please note that all photographs displayed on this
website are protected by copyright. These photographs must not be reproduced, published,
electronically stored or copied, distributed, or posted onto other websites without
my written permission. If you want to use photos from this website, please
email me first for permission. Thank-you!
|
|---|
|
Page 3: Present Day King's Highway 4 Photographs (London to Walkerton)


Left - Facing north along Hwy 4 towards Elginfield, approaching the end of the four-lane highway section. From London to a point just north of Arva, Hwy 4 is
an undivided four-lane highway. See an Enlarged Photo Here. (Photograph taken on September 16, 2012 - © Cameron Bevers) Right - Facing south along Hwy 4 towards London at the end of the four-lane highway section. The community of Arva lies just over the hill in the background. Once surrounded entirely by open country, Arva is being slowly enveloped into the suburban fringes of nearby London. Much of London's growth over the past two decades has been centred around Hwy 4 and Fanshawe Park Road (Hwy 22). See an Enlarged Photo Here. (Photograph taken on September 16, 2012 - © Cameron Bevers) 

Left - Facing south along Hwy 4 towards London at Eight Mile Road. See an
Enlarged Photo Here. (Photograph taken on September 16, 2012 - © Cameron Bevers) Right - Facing south along Hwy 4 towards London, just south of Elginfield. The large earth cut here suggests that there was once a steep hill on Hwy 4 approaching Elginfield. During the 1950s and 1960s, many troublesome grades on Ontario's highways were flattened out using cut and fill construction methods. See an Enlarged Photo Here. (Photograph taken on September 16, 2012 - © Cameron Bevers) 

Left - Approaching Elginfield on Hwy 4, facing north. Although there isn't much of a town situated at Elginfield, the junction is particularly noteworthy
because three of Southwestern Ontario's King's Highways meet here. The routes of Hwy 4 and Hwy 7 meet at the main intersection at Elginfield, while Hwy 23
connects to Hwy 7 immediately to the east of Elginfield. Many of Southwestern Ontario's towns and cities can be reached via one of these three provincial highways,
which makes Elginfield a rather strategic highway junction. See an Enlarged Photo Here. (Photograph taken on September 16, 2012 - © Cameron Bevers) Right - Facing north along a former alignment of Hwy 4 (St. James Drive) north of Lucan. See an Enlarged Photo Here. (Photograph taken on May 24, 2010 - © Cameron Bevers) 

Left - Abandoned section of Hwy 4 north of Lucan, approaching the Little Ausable River Bridge. This section of Hwy 4 was bypassed as part of a highway
reconstruction project in 1969-1970, when a new highway diversion was constructed at the Little Ausable River. The current alignment of Hwy 4 can be seen ascending
the hill at right. Part of the old Hwy 4 alignment was kept open to traffic to provide access to a small group of houses on the north side of the river. This section
of former Hwy 4 is now known as St. James Drive. See an Enlarged Photo Here. (Photograph taken on May 24, 2010 - © Cameron Bevers) Right - Approaching the Little Ausable River on Hwy 4, facing south towards Lucan. This long, sweeping curve on Hwy 4 is particularly photogenic. This diversion was completed in 1970, in order to bypass the old Hwy 4 bridge over the Little Ausable River. The old bridge, which was built by the Department of Public Highways in 1930, was a three-span concrete bridge. The main span of the old bridge was a 100 foot concrete bowstring arch. The old bridge had steep grades on the approaches and a very sharp curve just to the north of the structure. The old Hwy 4 bridge was removed after the new bridge was completed. See an Enlarged Photo Here. (Photograph taken on May 24, 2010 - © Cameron Bevers) 

Left - Little Ausable River Bridge on Hwy 4 north of Lucan. This three-span concrete girder structure was completed in 1969. See an
Enlarged Photo Here. (Photograph taken on May 24, 2010 - © Cameron Bevers) Right - Structure identification number and date stamp (1969) on the Little Ausable River Bridge. In a strange coincidence, the MTO Site Number (19-69) actually matches the year of construction. Although the bridge number "69" was assigned randomly, provincial highway bridges located within Middlesex County are always assigned a "19" prefix by MTO. See an Enlarged Photo Here. (Photograph taken on May 24, 2010 - © Cameron Bevers) 

Left - Main Street (Hwy 4) in Downtown Exeter, facing north from Anne Street. See an
Enlarged Photo Here. (Photograph taken on May 17, 2009 - © Cameron Bevers) Right - Facing north along Main Street (Hwy 4) from James Street in Downtown Exeter. See an Enlarged Photo Here. (Photograph taken on May 17, 2009 - © Cameron Bevers) 

Left - Ausable River Bridge on Main Street (Hwy 4) in Exeter. This two-span concrete rigid frame structure was completed in 1941. See an
Enlarged Photo Here. (Photograph taken on May 17, 2009 - © Cameron Bevers) Right - Facing north along Main Street (Hwy 4) across the Ausable River Bridge in Exeter. See an Enlarged Photo Here. (Photograph taken on May 17, 2009 - © Cameron Bevers) 

Left - Facing south along Main Street (Hwy 4) across the Ausable River Bridge in Exeter. See an
Enlarged Photo Here. (Photograph taken on May 17, 2009 - © Cameron Bevers) Right - The sidewalk on the eastern side of the Ausable River Bridge was added decades after the bridge was completed. See an Enlarged Photo Here. (Photograph taken on May 17, 2009 - © Cameron Bevers) 

Left - Western side of the Ausable River Bridge on Main Street (Hwy 4) in Exeter. See an
Enlarged Photo Here. (Photograph taken on May 17, 2009 - © Cameron Bevers) Right - The sidewalk on the western side of the Ausable River Bridge is part of the original 1941 structure. However, the steel handrail seen here is not original. This handrail was replaced during a bridge rehabilitation project carried out many years ago. See an Enlarged Photo Here. (Photograph taken on May 17, 2009 - © Cameron Bevers) 

Left - View of Main Street (Hwy 4) in Exeter facing north towards the Hwy 83 Junction. See an
Enlarged Photo Here. (Photograph taken on May 17, 2009 - © Cameron Bevers) Right - Facing south along Main Street (Hwy 4) in Exeter, south of the Hwy 83 Junction. See an Enlarged Photo Here. (Photograph taken on May 17, 2009 - © Cameron Bevers) 

Left - Facing north along Main Street (Hwy 4) approaching the Hwy 83 Junction in Exeter. See an
Enlarged Photo Here. (Photograph taken on May 17, 2009 - © Cameron Bevers) Right - Facing south along Main Street (Hwy 4) in Exeter from the Hwy 83 Junction. See an Enlarged Photo Here. (Photograph taken on May 17, 2009 - © Cameron Bevers) 

Left - Destination guide sign on westbound Hwy 83 in Exeter, approaching the Hwy 4 Junction. See an
Enlarged Photo Here. (Photograph taken on May 17, 2009 - © Cameron Bevers) Right - Facing east along Hwy 83 towards the Hwy 4 Junction in Exeter. See an Enlarged Photo Here. (Photograph taken on May 17, 2009 - © Cameron Bevers) 

Left - Sign assembly marking the Hwy 83 Junction on Hwy 4 in Exeter. The routes of Hwy 4 & Hwy 83 have met at this junction ever since Hwy 83 was first
established as a King's Highway in 1938. The entire route of Hwy 83 was turned over to Huron County in 1997, during the highway downloading spree. This former King's
Highway is now maintained by Huron County. See an Enlarged Photo Here. (Photograph taken on May 17, 2009 - © Cameron Bevers) Right - Sign assembly in Exeter marking the Hwy 4 Junction on westbound Hwy 83. See an Enlarged Photo Here. (Photograph taken on May 17, 2009 - © Cameron Bevers) 

Left - Facing west along Hwy 83 towards Grand Bend from the Hwy 4 Junction in Exeter. See an
Enlarged Photo Here. (Photograph taken on May 17, 2009 - © Cameron Bevers) Right - Facing east along Hwy 83 towards Russeldale from the Hwy 4 Junction in Exeter. See an Enlarged Photo Here. (Photograph taken on May 17, 2009 - © Cameron Bevers) 

Left - Facing north along Hwy 4 from the Hwy 83 Junction in Exeter. See an
Enlarged Photo Here. (Photograph taken on May 17, 2009 - © Cameron Bevers) Right - Facing south along Hwy 4 at the northern entrance to Exeter. See an Enlarged Photo Here. (Photograph taken on May 17, 2009 - © Cameron Bevers) 

Left - Facing north along Hwy 4 towards Clinton from the northern entrance to Exeter. See an
Enlarged Photo Here. (Photograph taken on May 17, 2009 - © Cameron Bevers) Right - Facing north along Hwy 4 towards Clinton at the Bannockburn River Bridge at Kippen. See an Enlarged Photo Here. (Photograph taken on October 21, 2007 - © Cameron Bevers) 
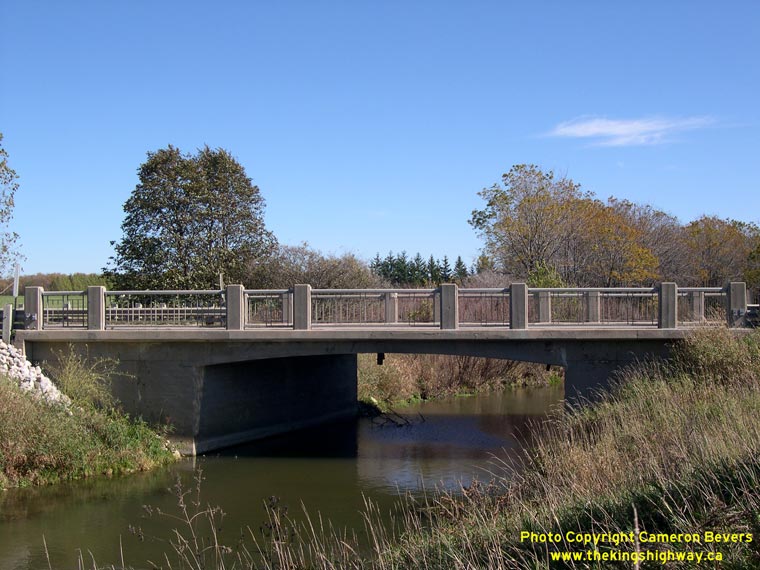
Left - Facing south along Hwy 4 towards Hensall at the Bannockburn River Bridge at Kippen. See an
Enlarged Photo Here. (Photograph taken on October 21, 2007 - © Cameron Bevers) Right - Western side of the Bannockburn River Bridge on Hwy 4. This single span concrete rigid frame structure was completed in 1947. See an Enlarged Photo Here. (Photograph taken on October 21, 2007 - © Cameron Bevers) 

Left - Eastern side of the Bannockburn River Bridge on Hwy 4 at Kippen. See an
Enlarged Photo Here. (Photograph taken on October 21, 2007 - © Cameron Bevers) Right - Deck view of the Bannockburn River Bridge on Hwy 4 at Kippen. See an Enlarged Photo Here. (Photograph taken on October 21, 2007 - © Cameron Bevers) 

Left - Close-up of the concrete and steel handrail design on the Bannockburn River Bridge at Kippen. See an
Enlarged Photo Here. (Photograph taken on October 21, 2007 - © Cameron Bevers) Right - Facing north along Hwy 4 approaching the Bayfield River Bridge in Clinton. See an Enlarged Photo Here. (Photograph taken on October 21, 2007 - © Cameron Bevers) 

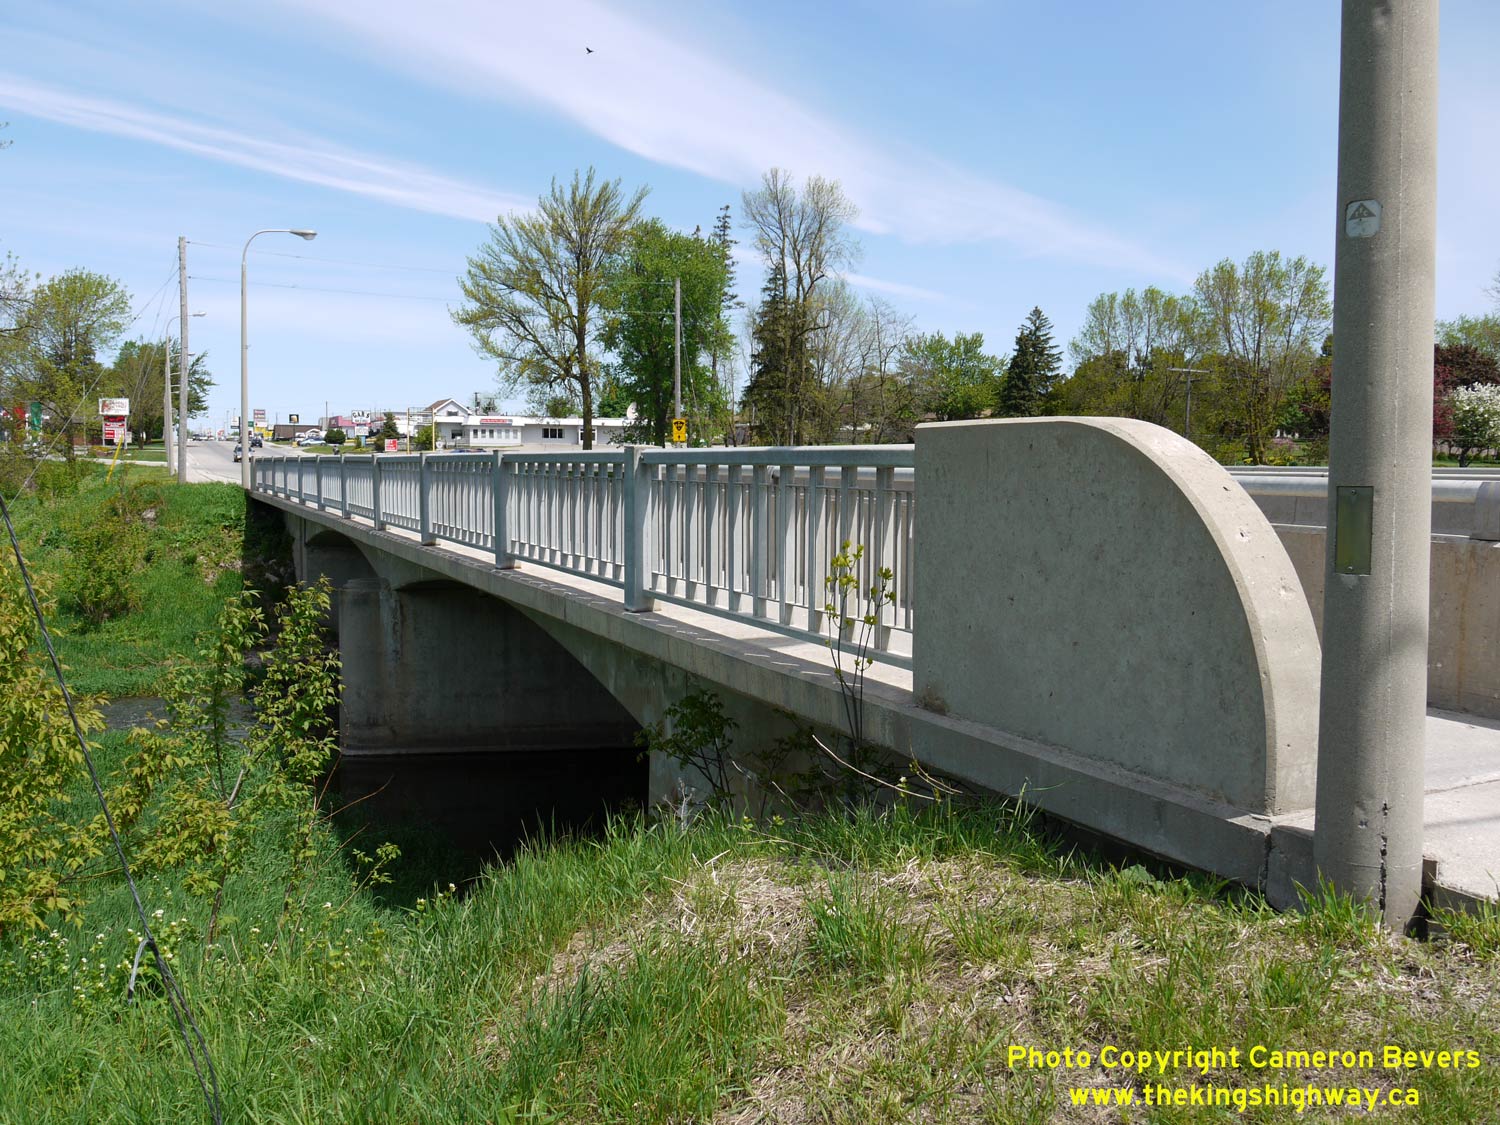
Left - Facing north across the Bayfield River Bridge on Hwy 4 in Clinton. See an
Enlarged Photo Here. (Photograph taken on October 21, 2007 - © Cameron Bevers) Right - Western side of the Bayfield River Bridge on Hwy 4 in Clinton. This two-span concrete "T" girder structure was completed in 1931. See an Enlarged Photo Here. (Photograph taken on October 21, 2007 - © Cameron Bevers) 

Left - Concrete superstructure of the Bayfield River Bridge on Hwy 4 in Clinton. The impressions of the planks used for the original formwork can still be seen
in the concrete deck and girders. Unlike the prefabricated concrete girders used in bridges today, the girders of the Bayfield River Bridge were cast-in-place.
Concrete "T" girder structures such as this example were fairly common on Ontario's King's Highways up until the 1950s, after which time prefabricated concrete
girders became the preferred method of construction. See an Enlarged Photo Here. (Photograph taken on October 21, 2007 - © Cameron Bevers) Right - As was typical of Ontario highway bridges built in the 1930s, only one sidewalk was constructed on the Bayfield River Bridge. The sidewalk is cantilevered off of one of the "T" girders and is supported by a series of perpendicular flanges. See an Enlarged Photo Here. (Photograph taken on October 21, 2007 - © Cameron Bevers) 

Left - Eastern side of the Bayfield River Bridge on Hwy 4 in Clinton. See an
Enlarged Photo Here. (Photograph taken on October 21, 2007 - © Cameron Bevers) Right - Centre pier of the Bayfield River Bridge on Hwy 4 in Clinton. The upstream end of the pier was angled and constructed with a special steel nose, in order to deflect debris in the river away from the pier. See an Enlarged Photo Here. (Photograph taken on October 21, 2007 - © Cameron Bevers) 

Left - Facing south along Victoria Street (Hwy 4) from the Hwy 8 Junction in Clinton. See an
Enlarged Photo Here. (Photograph taken on May 24, 2010 - © Cameron Bevers) Right - Approaching Hwy 8 (Huron Street & Ontario Street) on Victoria Street (Hwy 4) in Clinton facing north. See an Enlarged Photo Here. (Photograph taken on May 24, 2010 - © Cameron Bevers) 

Left - A narrow raised median island was built along Victoria Street (Hwy 4) in Downtown Clinton, to prevent left turns off of Isaac Street. Note the strange
"Keep Right" sign on the median island. See an Enlarged Photo Here. (Photograph taken on May 24, 2010 - © Cameron Bevers) Right - Junction of Hwy 4 & Hwy 8 in Downtown Clinton. From here, Hwy 8 follows Huron Street west to Goderich or Ontario Street east to Stratford. The route of Hwy 4 continues straight ahead via Albert Street towards Wingham. As a result of the mass highway downloading of 1997-1998, the portion of Hwy 4 lying north of Clinton is no longer maintained by the province. The highway is now maintained by Huron County between Clinton and the Wingham area. See an Enlarged Photo Here. (Photograph taken on May 24, 2010 - © Cameron Bevers) 

Left - Facing west along Ontario Street (Hwy 8) at Hwy 4 (Victoria Street & Albert Street) in Downtown Clinton. The route of Hwy 8 continues straight ahead
towards Goderich via Huron Street. See an Enlarged Photo Here. (Photograph taken on May 24, 2010 - © Cameron Bevers) Right - Approaching the junction of Hwy 4 & Hwy 8 in Downtown Clinton, facing south. The route of Hwy 4 bends to the left just beyond the intersection and continues south towards London via Victoria Street. See an Enlarged Photo Here. (Photograph taken on May 24, 2010 - © Cameron Bevers) 

Left - Facing north along Albert Street (Hwy 4) from the Hwy 8 Junction in Downtown Clinton. See an
Enlarged Photo Here. (Photograph taken on May 24, 2010 - © Cameron Bevers) Right - Facing east along Huron Street (Hwy 8) approaching the Hwy 4 Junction in Downtown Clinton. The routes of Hwy 4 & Hwy 8 have met at this intersection since 1927, the year in which Hwy 4 was extended from Elginfield northerly to Clinton. See an Enlarged Photo Here. (Photograph taken on May 24, 2010 - © Cameron Bevers) 

Left - Facing west towards Goderich along Huron Street (Hwy 8) from the Hwy 4 Junction in Downtown Clinton. See an
Enlarged Photo Here. (Photograph taken on May 24, 2010 - © Cameron Bevers) Right - Facing east along Ontario Street (Hwy 8) towards Stratford from the Hwy 4 Junction in Downtown Clinton. See an Enlarged Photo Here. (Photograph taken on May 24, 2010 - © Cameron Bevers) 

Left - Western side of the Londesborough Bridge on Hwy 4. This beautiful open spandrel concrete arch structure was one of the finest bridges
built in Southwestern Ontario during the 1930s. Only a handful of these open spandrel concrete arch bridges still exist on Ontario's highways. (Photograph taken on May 24, 2003 - © Cameron Bevers) Right - Close-up of western side of the Londesborough Bridge on Hwy 4, showing the stylish concrete arch superstructure. (Photograph taken on May 24, 2003 - © Cameron Bevers) 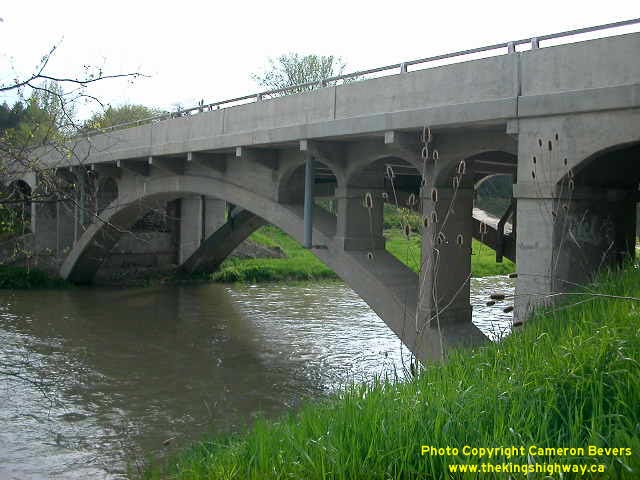

Left - Eastern side of the Londesborough Bridge on Hwy 4. Structure completed in 1933. (Photograph taken on May 24, 2003 - © Cameron Bevers) Right - View of the arches underneath the deck of the Londesborough Bridge on Hwy 4. (Photograph taken on May 24, 2003 - © Cameron Bevers) 

Left - Facing north along Hwy 4 towards Wingham at the Belgrave Creek Bridge. See an
Enlarged Photo Here. (Photograph taken on June 25, 2005 - © Cameron Bevers) Right - Western side of the Belgrave Creek Bridge on Hwy 4. This single-span concrete rigid frame structure was completed in 1932. See an Enlarged Photo Here. (Photograph taken on June 25, 2005 - © Cameron Bevers) 

Left - Inscription on the curb on the Belgrave Creek Bridge on Hwy 4 - "THE KING'S HIGHWAY 1932". See an
Enlarged Photo Here. (Photograph taken on June 25, 2005 - © Cameron Bevers) Right - Facing south along Hwy 4 towards Clinton at the Belgrave Creek Bridge. See an Enlarged Photo Here. (Photograph taken on June 25, 2005 - © Cameron Bevers) 

Left - Eastern side of the Belgrave Creek Bridge on Hwy 4, between Clinton and Wingham. See an
Enlarged Photo Here. (Photograph taken on June 25, 2005 - © Cameron Bevers) Right - Close-up of the concrete handrail on the Belgrave Creek Bridge on Hwy 4. This was the typical handrail design used on concrete bridges built on provincial highways by the Department of Highways of Ontario (DHO) in the 1920s and early 1930s. See an Enlarged Photo Here. (Photograph taken on June 25, 2005 - © Cameron Bevers) 

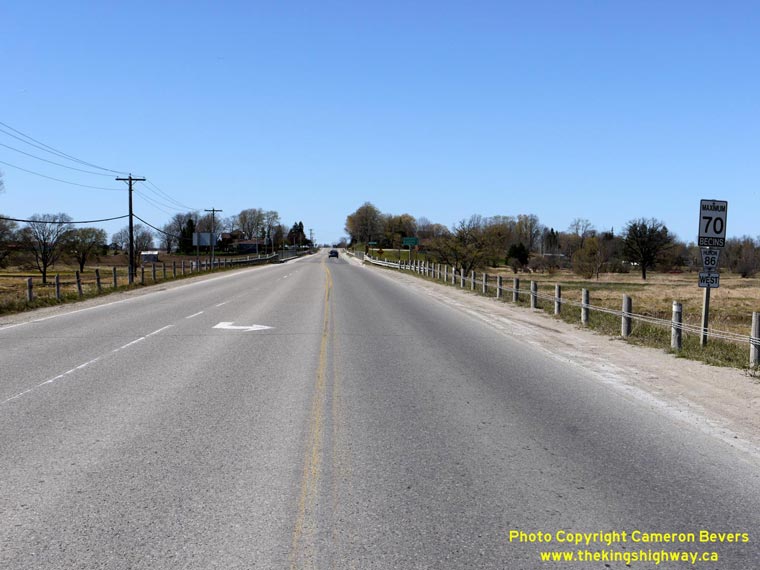
Left - Facing east along the Wingham Bypass (Hwy 86) towards Listowel from the Hwy 4 Junction in Wingham. See an
Enlarged Photo Here. (Photograph taken on April 7, 2012 - © Cameron Bevers) Right - Approaching the Hwy 4 Junction on Hwy 86 in Wingham, facing west. See an Enlarged Photo Here. (Photograph taken on April 7, 2012 - © Cameron Bevers) 

Left - Junction of Hwy 4 & Hwy 86 in Wingham, facing west. When Hwy 86 was first established as a King's Highway in 1937, the route of Hwy 4 & Hwy 86
met in Downtown Wingham at Josephine Street and Victoria Street. In the late 1960s, a new bypass was constructed around the south side of Wingham. As a result of the
construction of the new Wingham Bypass, the route of Hwy 86 was relocated onto a new straighter alignment. Since 1967, the routes of Hwy 4 & Hwy 86 have met at
this intersection just south of Wingham. See an Enlarged Photo Here. (Photograph taken on April 7, 2012 - © Cameron Bevers) Right - Facing north along Hwy 4 towards the Hwy 86 (Wingham Bypass) Junction in Wingham. Downtown Wingham can be seen on the hill in the background. The original 1937 junction of Hwy 4 & Hwy 86 lies about 550 metres to the north at Victoria Street. See an Enlarged Photo Here. (Photograph taken on April 7, 2012 - © Cameron Bevers) 
Left - Facing south along Hwy 4 towards Clinton from the Hwy 86 Junction in Wingham. See an
Enlarged Photo Here. (Photograph taken on April 7, 2012 - © Cameron Bevers) Right - Facing west along the Wingham Bypass (Hwy 86) towards Lucknow from the Hwy 4 Junction. The Wingham Bypass was completed in 1967. The new route bypassed the very awkward 1937 route of Hwy 86 through Downtown Wingham, which proved to be very difficult for trucks to negotiate. See an Enlarged Photo Here. (Photograph taken on April 7, 2012 - © Cameron Bevers) 

Left - Junction of Hwy 4 & Hwy 86 in Wingham, facing east towards Listowel. See an
Enlarged Photo Here. (Photograph taken on April 7, 2012 - © Cameron Bevers) Right - Facing north along Hwy 4 towards Downtown Wingham from the Hwy 86 Junction. See an Enlarged Photo Here. (Photograph taken on April 7, 2012 - © Cameron Bevers) 

Left - Approaching the junction of Hwy 4 & Hwy 86 in Wingham, facing south. See an
Enlarged Photo Here. (Photograph taken on April 7, 2012 - © Cameron Bevers) Right - Facing north along Josephine Street (Hwy 4) from Victoria Street (Old Hwy 86) in Downtown Wingham. See an Enlarged Photo Here. (Photograph taken on April 7, 2012 - © Cameron Bevers) 

Left - Facing north along Josephine Street (Hwy 4) from John Street in Downtown Wingham. See an
Enlarged Photo Here. (Photograph taken on April 7, 2012 - © Cameron Bevers) Right - Facing south along Josephine Street (Hwy 4) towards John Street in Downtown Wingham. Wingham's Victorian Era town hall and historic post office face each other on Josephine Street. See an Enlarged Photo Here. (Photograph taken on April 7, 2012 - © Cameron Bevers) 

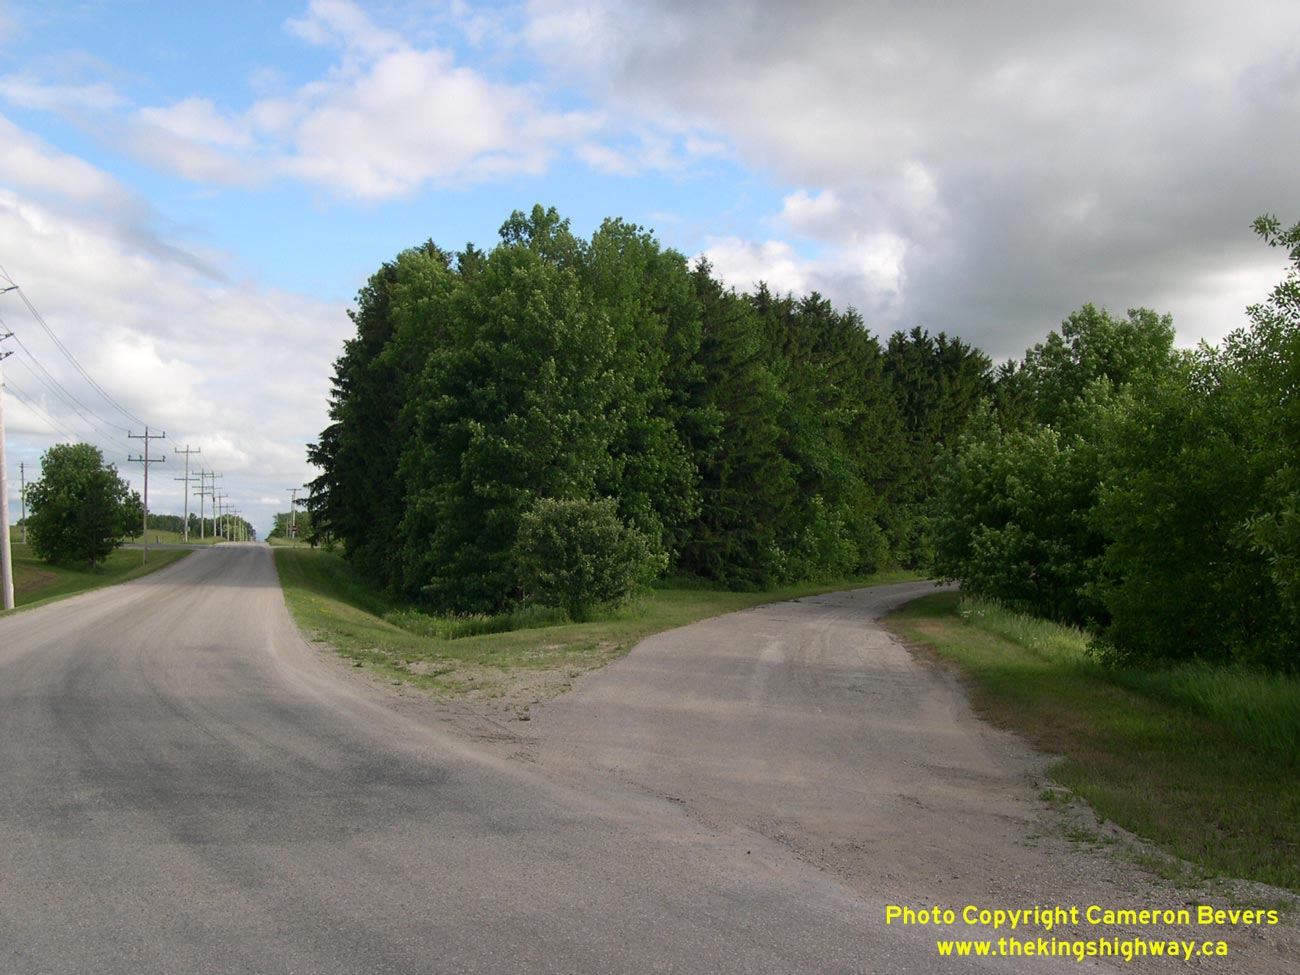
Left - Facing north along Josephine Street (Hwy 4) towards Patrick Street in Downtown Wingham. See an
Enlarged Photo Here. (Photograph taken on April 7, 2012 - © Cameron Bevers) Right - Abandoned curve (at left) on a former alignment of Hwy 4 north of Wingham. See an Enlarged Photo Here. (Photograph taken on June 18, 2005 - © Cameron Bevers) 

Left - Abandoned Hwy 4 alignment (at right) on a curve about 7 km north of Wingham. See an
Enlarged Photo Here. (Photograph taken on June 18, 2005 - © Cameron Bevers) Right - The old white centre line paint is still visible on this abandoned curve north of Wingham. See an Enlarged Photo Here. (Photograph taken on June 18, 2005 - © Cameron Bevers)
Continue on to King's Highway 4 Photos: Walkerton to Singhampton
|
|---|
Links to Adjacent King's Highway Photograph Pages:
Back to King's Highway 3 Photos /
King's Highway 4 History /
On to King's Highway 5 Photos
Ontario Highway History - Main Menu / Back to List of Highways Website contents, photos & text © 2002-2026, Cameron
Bevers (Webmaster) - All Rights Reserved / Contact Me
|
|---|