
| 
| |
|
|
This page contains present day photos (Year 2000 to date) of Ontario's King's Highway 4, arranged by location from Walkerton
easterly to Singhampton. All photographs displayed on this page were taken by the Webmaster (Cameron Bevers), unless specifically noted otherwise. Click on any
thumbnail to see a larger image!
Please note that all photographs displayed on this
website are protected by copyright. These photographs must not be reproduced, published,
electronically stored or copied, distributed, or posted onto other websites without
my written permission. If you want to use photos from this website, please
email me first for permission. Thank-you!
|
|---|
|
Page 4: Present Day King's Highway 4 Photographs (Walkerton to Singhampton)


Left - Approaching the Yonge Street Junction on Hwy 9 (Formerly Hwy 4 & Hwy 9) in Walkerton, facing east. Until the late 1990s, Hwy 4 & Hwy 9 shared a
brief concurrent route west of Walkerton. All provincially-owned sections of Hwy 4 lying north of Clinton were downloaded to various municipal governments in 1998.
The concurrent route of Hwy 4 & Hwy 9 was discontinued at that time, when the highway leading west from Walkerton was simply renumbered as
Hwy 9. The overlapped route of Hwy 4 & Hwy 9 west of Walkerton had existed since 1930, when Hwy 4 was initially extended north to Walkerton as part of an
ambitious highway construction campaign in Southern Ontario. Prior to its removal, this was one of the longest-standing overlapped highway routes in the province,
lasting just under 68 years. Bruce County now maintains the rural sections of Hwy 4 in the Walkerton area, while the Ministry of Transportation continues to retain
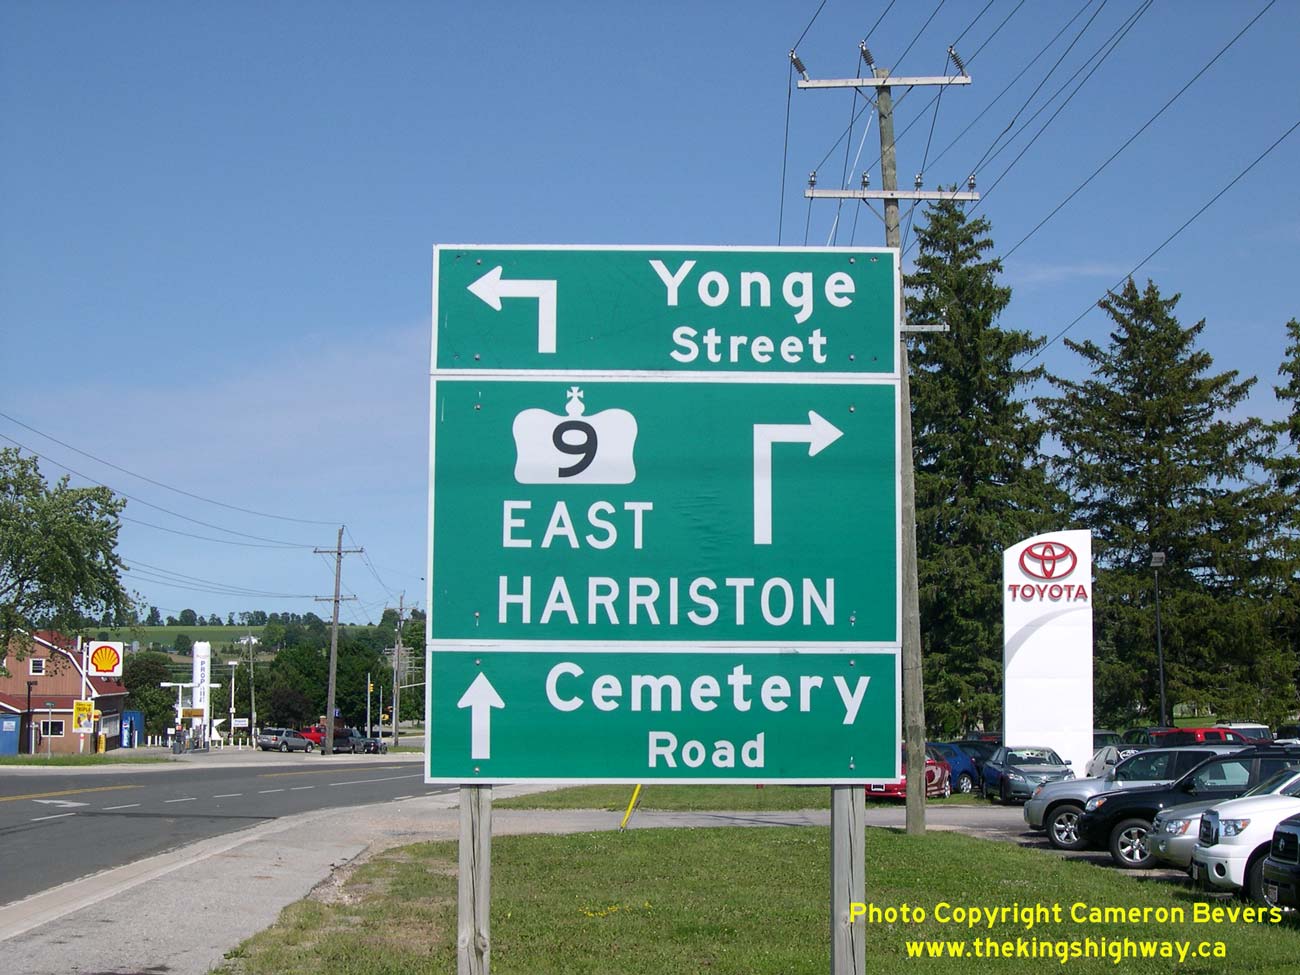
provincial jurisdiction over Hwy 9 through Bruce County. See an Enlarged Photo here. (Photograph taken on July 1, 2008 - © Cameron Bevers) Right - Guide signs marking the upcoming junction of Hwy 9 and Yonge Street in Walkerton. From this junction, Hwy 9 turns right and continues east towards Harriston. See an Enlarged Photo here. (Photograph taken on July 1, 2008 - © Cameron Bevers) 

Left - Facing east along Hwy 9 (Formerly Hwy 4 & Hwy 9) at the Yonge Street Junction in Walkerton. At this intersection, Hwy 9 turns right and continues
east towards Harriston, as it has since the route was first established as a provincial highway in 1920. Prior to 1998, this intersection marked the eastern terminus
of the overlapped routing of Hwy 4 & Hwy 9. Until the northern section of Hwy 4 was downloaded in the late 1990s, Hwy 4 turned left at this intersection and
briefly headed north into Downtown Walkerton via Yonge Street and Jackson Street. At the intersection of Durham Street in Downtown Walkerton, Hwy 4 turned right and
resumed its route easterly towards Hanover and Flesherton. The route of Hwy 4 ultimately ended 81 km to the east at the Hwy 24 Junction in Singhampton. See an
Enlarged Photo here. (Photograph taken on July 1, 2008 - © Cameron Bevers) Right - Historically, the Hwy 4 & Hwy 9 Junction in Walkerton used to be a directional "Y" junction. When approaching Walkerton on Eastbound Hwy 4 & Hwy 9 from Kincardine, one leg of the "Y" turned south towards Harriston while the other leg turned north towards Downtown Walkerton. During the 1960s, intersection improvements were carried out at the Hwy 4 & Hwy 9 Junction. As a result of these improvements, the junction was redesigned so that Eastbound Hwy 4 & Hwy 9 entering Walkerton from Kincardine joined Yonge Street at a right angle. These improvements obliterated the south leg of the "Y", heading to Harriston. However, the north leg of the "Y" heading to Downtown Walkerton was bypassed, and became a municipal street known as Circle Drive. Remnants of the original "Y" (Circle Drive) can be seen curving away from the main highway at left. See an Enlarged Photo here. (Photograph taken on July 1, 2008 - © Cameron Bevers) 

Left - Facing east along Circle Drive in Walkerton. Note the long superelevated curve joining Hwy 9 and Yonge Street (Formerly Hwy 4) together. This curve was
clearly designed to move fast, long-distance highway traffic. Today, Circle Drive is a quiet back street. Directional "Y" intersections such as this one used to be
very common on Ontario's King's Highways. However, they were all removed or bypassed over the years, as was the case here. See an
Enlarged Photo here. (Photograph taken on July 1, 2008 - © Cameron Bevers) Right - Facing west along Circle Drive in Walkerton. This road once formed one half of a directional "Y" intersection at the Hwy 4 & Hwy 9 Junction. See an Enlarged Photo here. (Photograph taken on July 1, 2008 - © Cameron Bevers) 

Left - Guide signs at the junction of Hwy 9 and Yonge Street in Walkerton, facing east. Prior to the extensive provincial highway downloading of 1997-1998,
Hwy 4 turned left onto Yonge Street at this intersection and headed into Downtown Walkerton. Today, the former route of Hwy 4 through Walkerton is just known by its
municipal street names (Yonge Street, Jackson Street and Durham Street). It is no longer a provincial highway. See an
Enlarged Photo here. (Photograph taken on October 12, 2012 - © Cameron Bevers) Right - Facing west along Hwy 9 towards the Yonge Street (Formerly Hwy 4 East) Junction in Walkerton. See an Enlarged Photo here. (Photograph taken on October 12, 2012 - © Cameron Bevers) 

Left - Distance guide sign on Eastbound Hwy 9, facing east from the Yonge Street (Formerly Hwy 4 East) Junction in Walkerton. See an
Enlarged Photo here. (Photograph taken on October 12, 2012 - © Cameron Bevers) Right - Guide sign on Westbound Hwy 9, facing west towards the Yonge Street Junction in Walkerton. At this intersection, Hwy 9 turns left and continues on its route west towards Kincardine, where it ends at Hwy 21. Before the time of the mass provincial highway downloading in 1997-1998, Hwy 4 also used to pass through this intersection. Up until 1998, Hwy 4 East continued straight ahead via Yonge Street. Hwy 4 West was signed concurrently with Hwy 9 for 13 km from this junction to another highway junction north of Teeswater, where Hwy 4 parted ways with Hwy 9 and turned south towards Wingham. See an Enlarged Photo here. (Photograph taken on October 12, 2012 - © Cameron Bevers) 

Left - Junction of Hwy 9 & Yonge Street, facing north towards Downtown Walkerton. At this intersection, Hwy 9 turns left and continues west towards
Kincardine. See an Enlarged Photo here. (Photograph taken on October 12, 2012 - © Cameron Bevers) Right - Facing west along Hwy 9 (Formerly Hwy 4 & Hwy 9) towards Kincardine from the Yonge Street Junction in Walkerton. Although it isn't clear in the photo, the restaurant at right is known as "Mel's 4 & 9 Diner" - an obvious reference to the long-standing junction of these two important highways. See an Enlarged Photo here. (Photograph taken on October 12, 2012 - © Cameron Bevers) 

Left - Guide sign marking the Hwy 9 West turn-off to Kincardine. Walkerton's Yonge Street (Former Hwy 4 East) lies directly ahead. See an
Enlarged Photo here. (Photograph taken on October 12, 2012 - © Cameron Bevers) Right - Junction route marker crown signs approaching the Hwy 9 Junction on Southbound Yonge Street (Hwy 4) in Walkerton. Up until 1998, Hwy 4 turned right at this intersection, where it began its short concurrent route along Hwy 9. The two highways parted ways again 13 km to the west, where Hwy 4 turned south towards Teeswater and Wingham, while Hwy 9 continued west towards Kincardine. The tiny yellow "CL" sign at right marks the end of the provincially-owned leg of this intersection. The Ministry of Transportation (MTO) normally controls all legs of the approaches to a signalized intersection located on a provincial highway. See an Enlarged Photo here. (Photograph taken on October 12, 2012 - © Cameron Bevers) 

Left - Facing south along Yonge Street (Hwy 4) towards the Hwy 9 Junction in Walkerton. See an
Enlarged Photo here. (Photograph taken on October 12, 2012 - © Cameron Bevers) Right - Facing north along Yonge Street (Hwy 4) towards Downtown Walkerton from the Hwy 9 Junction. See an Enlarged Photo here. (Photograph taken on October 12, 2012 - © Cameron Bevers) 

Left - Saugeen River Bridge on Durham Street (Hwy 4) in Walkerton. This interesting concrete "T" beam girder structure was completed in 1937. It features
three main arched spans with a cantilevered approach span on each end. Many cantilevered end bridges were constructed on Ontario's King's Highways during the late
1930s, as bridge designers with the Department of Highways experimented with various new bridge construction techniques. See an
Enlarged Photo here. (Photograph taken on April 24, 2004 - © Cameron Bevers) Right - Facing east along Durham Street (Hwy 4) across the Saugeen River Bridge in Walkerton. See an Enlarged Photo here. (Photograph taken on April 24, 2004 - © Cameron Bevers) 

Left - Close-up of the steel and concrete handrail design on the Saugeen River Bridge on Durham Street (Hwy 4) in Walkerton. Note the embossed concrete
stanchions, which were a commonly-used decorative embellishment on Department of Highways' designed bridges built in 1935-1937. Sadly, many of the original examples
constructed by the Department of Highways were rebuilt or widened over the decades. Only one other bridge with these design features still exists today. The other
surviving example was built in 1936 on Hwy 8 (now Niagara Road 81) over 20 Mile Creek near Beamsville. See an
Enlarged Photo here. (Photograph taken on April 24, 2004 - © Cameron Bevers) Right - Northern side of the Saugeen River Bridge on Durham Street (Hwy 4) in Walkerton. See an Enlarged Photo here. (Photograph taken on April 24, 2004 - © Cameron Bevers) 

Left - Facing west along Durham Street (Hwy 4) across the Saugeen River Bridge in Walkerton. See an
Enlarged Photo here. (Photograph taken on April 24, 2004 - © Cameron Bevers) Right - Saugeen River Bridge on 10th Street (Hwy 4) in Hanover, facing east. See an Enlarged Photo here. (Photograph taken on July 1, 2008 - © Cameron Bevers) 

Left - Southern side of the Saugeen River Bridge on 10th Street (Hwy 4) in Hanover. Structure completed in 1960. See an
Enlarged Photo here. (Photograph taken on July 1, 2008 - © Cameron Bevers) Right - Saugeen River Bridge on 10th Street (Hwy 4) in Hanover, facing west towards Walkerton. See an Enlarged Photo here. (Photograph taken on July 1, 2008 - © Cameron Bevers) 

Left - Steel handrail design of the Saugeen River Bridge on 10th Street (Hwy 4) in Hanover. See an
Enlarged Photo here. (Photograph taken on July 1, 2008 - © Cameron Bevers) Right - Hanover Canadian National Railway (CNR) Overhead on 10th Street (Hwy 4), facing west towards Walkerton. See an Enlarged Photo here. (Photograph taken on July 1, 2008 - © Cameron Bevers) 

Left - Northern side of the Hanover Canadian National Railway (CNR) Overhead on 10th Street
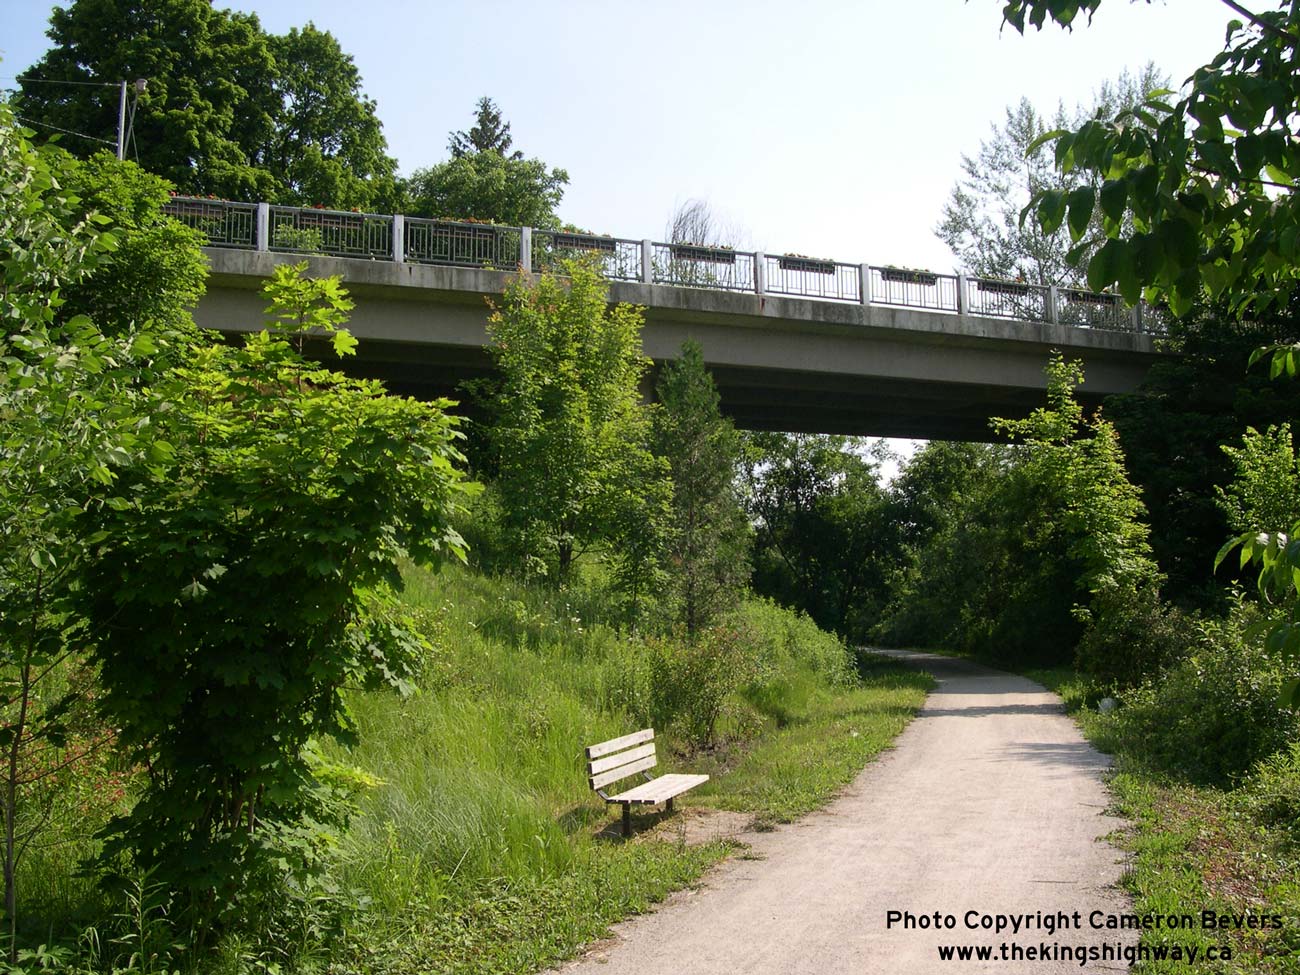
(Hwy 4) in Hanover. Structure completed in 1960. The railway tracks were abandoned decades ago. The former railway right-of-way has been converted into a recreational
trail. See an Enlarged Photo here. (Photograph taken on July 1, 2008 - © Cameron Bevers) Right - Facing east across the Hanover Canadian National Railway (CNR) Overhead on 10th Street (Hwy 4) in Hanover. See an Enlarged Photo here. (Photograph taken on July 1, 2008 - © Cameron Bevers) 

Left - Facing west along Hwy 4 towards Hanover across the Camp Creek Bridge at Allan Park. See an
Enlarged Photo here. (Photograph taken on May 16, 2004 - © Cameron Bevers) Right - Camp Creek Bridge on Hwy 4 at Allan Park, facing east towards Durham. See an Enlarged Photo here. (Photograph taken on May 16, 2004 - © Cameron Bevers) 

Left - Close-up of the steel and embossed concrete handrail design on the Allan Park Bridge on Hwy 4. See an
Enlarged Photo here. (Photograph taken on May 16, 2004 - © Cameron Bevers) Right - Bridge over Camp Creek on Hwy 4 at Allan Park, east of Hanover. This single span concrete rigid frame structure was completed in 1934. See an Enlarged Photo here. (Photograph taken on May 16, 2004 - © Cameron Bevers) 
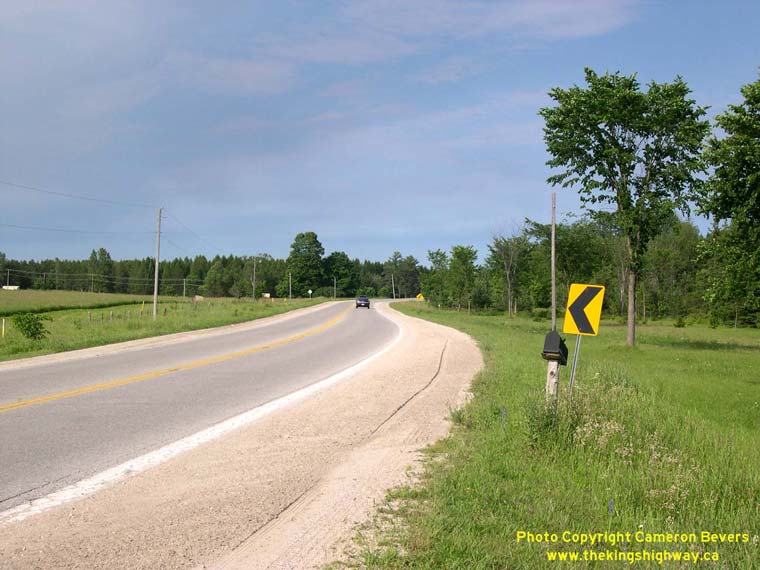
Left - A former alignment of Hwy 4 (Hutton Hill Road) departs from the current route of Hwy 4 between Hanover and Durham. This former section of Hwy 4 was
bypassed in the late 1940s, eliminating two steep grades and two former at-grade railway crossings. Traces of one of railway crossings is visible in the foreground.
The graded railway roadbed can be seen approaching the crossing from the left. However, the railway tracks themselves were removed many years ago. See an
Enlarged Photo here. (Photograph taken on July 1, 2008 - © Cameron Bevers) Right - This diversion of Hwy 4 was completed in 1947 in an effort to improve the highway alignment between Hanover and Durham. The new highway diversion was just under one mile in length, bypassing two at-grade railway crossings and steep grades on the original highway's alignment. See an Enlarged Photo here. (Photograph taken on July 1, 2008 - © Cameron Bevers) 

Left - Former alignment of Hwy 4 (Hutton Hill Road), facing east towards Durham. The old alignment joins the current route of Hwy 4 at the bottom of this grade.
See an Enlarged Photo here. (Photograph taken on July 1, 2008 - © Cameron Bevers) Right - Northern side of the Saugeen River Bridge on Hwy 4 west of Durham. See an Enlarged Photo here. (Photograph taken on October 12, 2012 - © Cameron Bevers) 

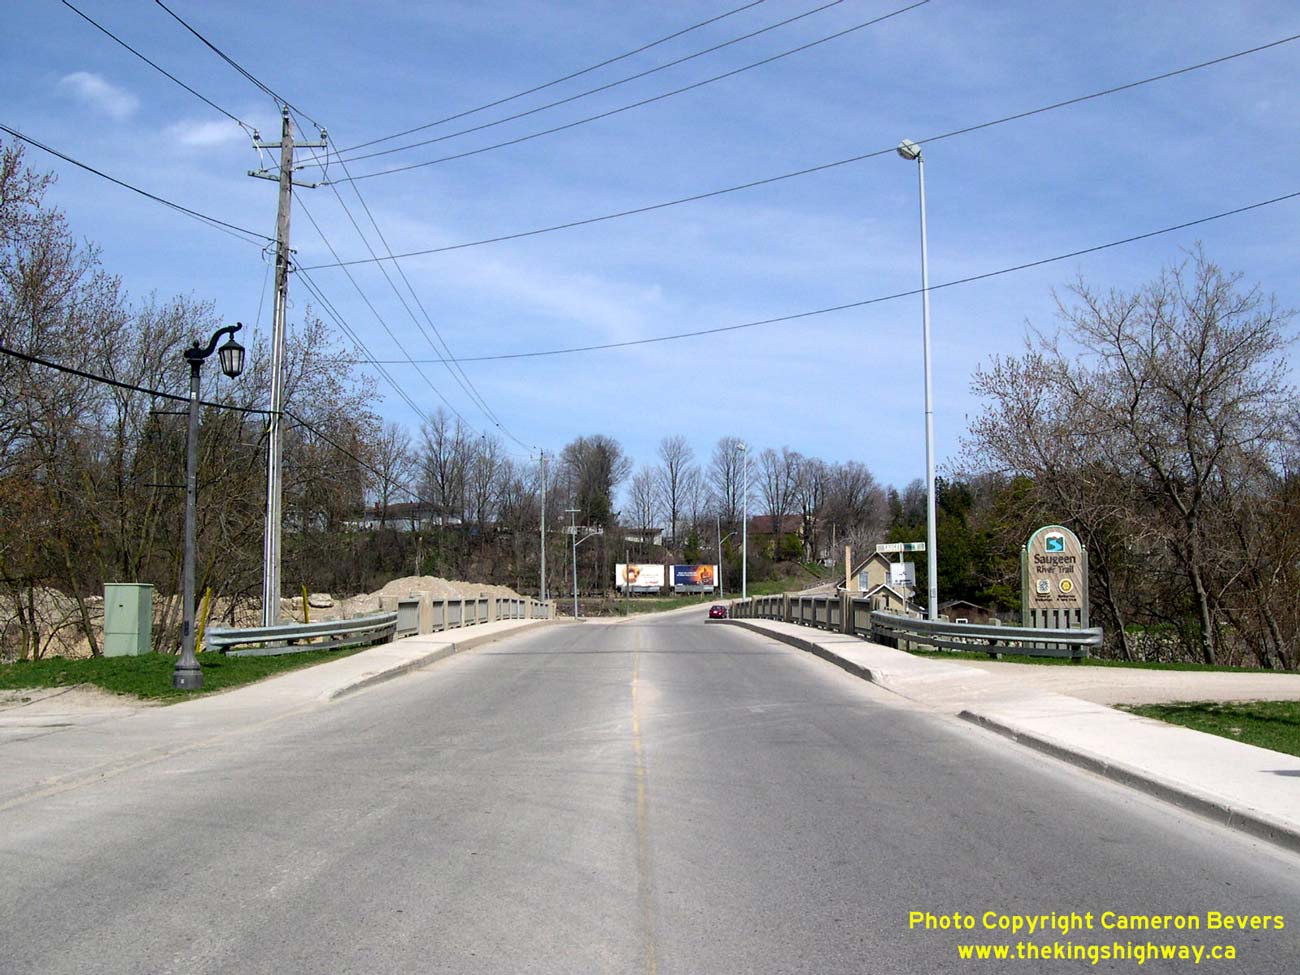
Left - Facing west along Hwy 4 at the Saugeen River Bridge west of Durham. See an
Enlarged Photo here. (Photograph taken on October 12, 2012 - © Cameron Bevers) Right - Southern side of the Saugeen River Bridge on Hwy 4 west of Durham. This single span steel beam structure was completed in 1965. See an Enlarged Photo here. (Photograph taken on October 12, 2012 - © Cameron Bevers) 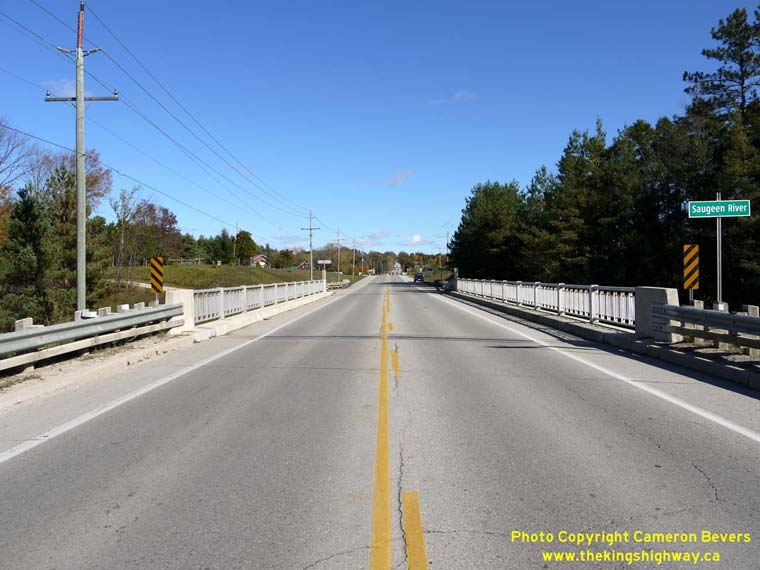

Left - Facing east along Hwy 4 towards Durham at the Saugeen River Bridge. See an
Enlarged Photo here. (Photograph taken on October 12, 2012 - © Cameron Bevers) Right - Steel handrail design of the Saugeen River Bridge on Hwy 4 west of Durham. See an Enlarged Photo here. (Photograph taken on October 12, 2012 - © Cameron Bevers) 

Left - Facing east along Hwy 4 approaching Durham. See an
Enlarged Photo here. (Photograph taken on October 12, 2012 - © Cameron Bevers) Right - Facing west along Hwy 4 towards Hanover from Durham Road (Grey Road 27) in Durham. See an Enlarged Photo here. (Photograph taken on October 12, 2012 - © Cameron Bevers) 

Left - Hwy 4 at Durham Road (Grey Road 27) in Durham, facing east. When Hwy 4A (later Hwy 4) was first established as a provincial route in 1927, the highway
climbed the hill at left (Durham Road) and ended at Hwy 6 (Garafraxa Street) immediately north of Downtown Durham. When Hwy 4 was extended east from Durham to
Flesherton in 1937, Hwy 4 was routed concurrently with Hwy 6 for a short distance between Durham Road and Lambton Street through Downtown Durham. At Lambton Street,
Hwy 4 turned off of Garafraxa Street and continued east towards Flesherton. In 1950, the route of Hwy 4 through Durham was changed when Lambton Street was extended
west from Garafraxa Street across a newly-built bridge over the Saugeen River. The new bridge allowed traffic on Hwy 4 to bypass Garafraxa Street altogether, by
eliminating the awkward jog in the highway's alignment. The overlapped routing of Hwy 4 & Hwy 6 along Garafraxa Street was discontinued once the new Hwy 4
route was built. This long curve diverted long distance through traffic away from the original route of Hwy 4 (Durham Road) and onto the new route (Bruce Street and
Lambton Street). See an Enlarged Photo here. (Photograph taken on October 12, 2012 - © Cameron Bevers) Right - Northern side of the Saugeen River Bridge on Lambton Street (Hwy 4) in Downtown Durham. This single span concrete rigid frame structure was built as part of a larger highway diversion project through Durham is 1950. See an Enlarged Photo here. (Photograph taken on July 1, 2008 - © Cameron Bevers) 

Left - Facing east along Lambton Street (Hwy 4) at the Saugeen River Bridge in Downtown Durham. Structure completed in 1950. See an
Enlarged Photo here. (Photograph taken on July 1, 2008 - © Cameron Bevers) Right - Steel handrail design of the Saugeen River Bridge on Lambton Street (Hwy 4) in Downtown Durham. See an Enlarged Photo here. (Photograph taken on July 1, 2008 - © Cameron Bevers) 

Left - Facing south along Hwy 6 towards the Hwy 4 Junction in Downtown Durham. Compare the present day photograph shown above with this
historic 1950 postcard view of the same location. See an
Enlarged Photo here. (Photograph taken on July 1, 2008 - © Cameron Bevers) Right - Facing east along Hwy 4 towards Flesherton at Priceville. See an Enlarged Photo here. (Photograph taken on October 12, 2012 - © Cameron Bevers) 

Left - Junction sign assembly on northbound Hwy 10 approaching the Hwy 4 Junction in Downtown Flesherton. See an
Enlarged Photo here. (Photograph taken on October 12, 2012 - © Cameron Bevers) Right - Approaching the Hwy 4 Junction on Toronto Street (Hwy 10) in Flesherton, facing north. See an Enlarged Photo here. (Photograph taken on October 12, 2012 - © Cameron Bevers) 

Left - Junction of Hwy 10 & Hwy 4 in Downtown Flesherton, facing north towards Owen Sound. From this junction, motorists can continue north along Hwy 10
to Owen Sound, turn left and head west along Hwy 4 to Durham or turn right and head east along Hwy 4 to Singhampton. See an
Enlarged Photo here. (Photograph taken on October 12, 2012 - © Cameron Bevers) Right - Facing east along Durham Street (Hwy 4) towards the Hwy 10 Junction in Downtown Flesherton. From 1934 up until the mid-1970s, Hwy 4 ended at this highway junction. However, in 1975, the Ministry of Transportation and Communications (MTC) assumed jurisdiction over the county road from Flesherton to Singhampton as an extension of Hwy 4. The highway has since reverted back to the county. Jurisdiction over the entire route of Hwy 4 through Grey County was transferred from the province to the municipal tier in 1998. See an Enlarged Photo here. (Photograph taken on October 12, 2012 - © Cameron Bevers) 

Left - Facing south along Sydenham Street (Hwy 10) at the Hwy 4 Junction in Downtown Flesherton. See an
Enlarged Photo here. (Photograph taken on October 12, 2012 - © Cameron Bevers) Right - Approaching the Hwy 10 & Hwy 4 Junction in Downtown Flesherton, facing south towards Shelburne. Compare this present-day view of the highway junction with this circa 1955 Postcard View, taken from roughly the same location. See an Enlarged Photo here. (Photograph taken on October 12, 2012 - © Cameron Bevers) 

Left - Collingwood Street (Hwy 4), facing east towards Singhampton from the Hwy 10 Junction in Downtown Flesherton. See an
Enlarged Photo here. (Photograph taken on October 12, 2012 - © Cameron Bevers) Right - Facing north along Hwy 10 towards Owen Sound from the Hwy 4 Junction in Downtown Flesherton. See an Enlarged Photo here. (Photograph taken on October 12, 2012 - © Cameron Bevers) 

Left - Facing south along Hwy 24 towards Shelburne from the Hwy 4 Junction at Singhampton. (Photograph taken on March 13, 2005 - © Cameron Bevers) Right - Emergency road closure sign on Hwy 24 at Singhampton. The portion of Hwy 24 from Singhampton to Shelburne is one of Ontario's most notorious highways during the winter months. The highway is frequently closed from Hwy 4 at Singhampton to Hwy 89 in Shelburne due to blowing snow and poor visibility. During emergency winter road closures, the red warning beacons flash to advise motorists that they are not permitted to use the highway. (Photograph taken on March 13, 2005 - © Cameron Bevers)
More King's Highway 4 Photographs Coming Soon!
|
|---|
Links to Adjacent King's Highway Photograph Pages:
Back to King's Highway 3 Photos /
King's Highway 4 History /
On to King's Highway 5 Photos
Ontario Highway History - Main Menu / Back to List of Highways Website contents, photos & text © 2002-2026, Cameron
Bevers (Webmaster) - All Rights Reserved / Contact Me
|
|---|