
| 
| |
|
|
This page contains present day photos (Year 2000 to date) of Ontario's King's Highway 7, arranged by location from Havelock
easterly to Madoc. All photographs displayed on this page were taken by the Webmaster (Cameron Bevers), unless specifically noted otherwise. Click on any thumbnail
to see a larger image!
Please note that all photographs displayed on this
website are protected by copyright. These photographs must not be reproduced, published,
electronically stored or copied, distributed, or posted onto other websites without
my written permission. If you want to use photos from this website, please
email me first for permission. Thank-you!
|
|---|
|
Page 16: Present Day King's Highway 7 Photographs (Havelock to Madoc)


Left - Approaching Havelock on Hwy 7, facing west. Like many other former incorporated villages and towns situated along Hwy 7, Havelock has been amalgamated
with its surrounding townships to form a larger municipality. Today, Havelock is part of the Township of Havelock-Belmont-Metheun. Prior to amalgamation, the Village
of Havelock had a population of approximately 1,300 residents. See an Enlarged Photo Here. (Photograph taken on August 25, 2012 - © Cameron Bevers) Right - Facing east along Hwy 7 towards Marmora from the eastern entrance to Havelock. See an Enlarged Photo Here. (Photograph taken on August 25, 2012 - © Cameron Bevers) 

Left - Facing east along Hwy 7 about 1 km east of Havelock. The section of Hwy 7 between Havelock and Marmora was first acquired by the Department of Public
Highways of Ontario (DPHO) as a new King's Highway in September 1930. It was to form part of a proposed highway link between Peterborough and Perth which was
constructed during the early 1930s. See an Enlarged Photo Here. (Photograph taken on August 25, 2012 - © Cameron Bevers) Right - View of Hwy 7 about 1 km east of Havelock, facing west. The completion of Hwy 7 between Peterborough and Perth in 1932 opened up a second highway route which linked Central Ontario and Eastern Ontario. Prior to that time, the only provincial highway which connected these two widely-separated regions of the province was Hwy 2, which generally followed Lake Ontario's shoreline east of Toronto. When Trans-Canada Highway Routes were being planned out across Ontario during the 1950s, this section of Hwy 7 was incorporated into the Central Ontario Route of the Trans-Canada Highway. See an Enlarged Photo Here. (Photograph taken on August 25, 2012 - © Cameron Bevers) 

Left - Approaching 7th Line on Hwy 7 east of Havelock, facing east. With few exceptions, Hwy 7 is a two-lane highway between the Peterborough area and Carleton
Place. In recent decades, several passing lanes and truck climbing lanes have been built along Hwy 7 to allow for greater passing opportunities. See an
Enlarged Photo Here. (Photograph taken on August 25, 2012 - © Cameron Bevers) Right - View of Hwy 7 about 3 km east of Havelock at 6th Line, facing east towards Marmora. Note the close proximity of the highway to the old church at right, which now serves as a community hall. When various roads were being assumed to form Ontario's Provincial Highway System, they were acquired by the province on an "as-is condition" basis. The standard surveyed road allowance used in most parts of Ontario in the 19th Century was 1 chain (or 66 feet), but many municipalities at that time did not require any building setbacks from the side of the road allowance. Accordingly, some historical buildings such as this one sit more or less on the highway's property line today. For the construction of any new developments adjacent to a provincially-operated highway today, the Ministry of Transportation typically requires a 14-metre (46-foot) minimum setback from the highway's right-of-way. This is done to improve roadside safety and also to protect for any corridor improvements which may be required in the future. See an Enlarged Photo Here. (Photograph taken on August 25, 2012 - © Cameron Bevers) 

Left - At-grade railway crossing on Hwy 7 about 4 km east of Havelock, facing east. This industrial spur line once led to a large quarry located along the
north side of Hwy 7. The railway line was abandoned and the rails lifted soon after this photo was taken in 2012. See an
Enlarged Photo Here. (Photograph taken on August 25, 2012 - © Cameron Bevers) Right - Facing west along Hwy 7 towards the at-grade railway crossing east of Havelock. This was one of two industrial spur lines which crossed Hwy 7 in the Havelock area. The other crossing is still an active line today. It crosses Hwy 7 immediately west of the Hwy 30 Junction in Havelock. See an Enlarged Photo Here. (Photograph taken on August 25, 2012 - © Cameron Bevers) 

Left - Facing east along Hwy 7 about 5 km east of Havelock, approaching the Peterborough County Road 50 Junction. Exposed limestone bedrock starts to appear
along some sections of Hwy 7 in the Havelock and Marmora area. By the time Hwy 7 reaches the Moira River east of Marmora, Hwy 7 crosses over into the Canadian Shield,
where exposed granite bedrock is frequently seen. See an Enlarged Photo Here. (Photograph taken on August 25, 2012 - © Cameron Bevers) Right - View of Hwy 7 at Peterborough County Road 50, facing west towards Havelock. This county road extends south into neighbouring Northumberland County and connects to Hwy 30 in Campbellford. Although it isn't signed as a destination, westbound traffic on Hwy 7 heading southerly to Campbellford can shorten their journey rather significantly by using Peterborough County Road 50 rather than using the route offered by Hwy 7 and Hwy 30 via Havelock to reach Campbellford. See an Enlarged Photo Here. (Photograph taken on September 27, 2020 - © Cameron Bevers) 

Left - An early autumn view of eastbound traffic on Hwy 7 near 3rd Line, facing west towards Havelock. See an
Enlarged Photo Here. (Photograph taken on September 27, 2020 - © Cameron Bevers) Right - Facing east along Hwy 7 approaching 2nd Line, about 8 km west of Marmora. Today's route of Hwy 7 between the eastern approach to Havelock and the Peterborough-Hastings County Boundary almost exactly follows the highway's original route established back in 1930. This area was one of the exceptions - a short diversion was built at this location in 1934 in order to bypass a hazardous series of curves along the original highway. See an Enlarged Photo Here. (Photograph taken on August 25, 2012 - © Cameron Bevers) 

Left - Facing east along Hwy 7 towards Marmora at 2nd Line. The former Township of Belmont noted on this highway guide sign is now part of a new municipality
formed out of an amalgamation. It is now part of the much larger Township of Havelock-Belmont-Metheun. See an
Enlarged Photo Here. (Photograph taken on August 25, 2012 - © Cameron Bevers) Right - Hwy 7 passes through this tall stand of majestic white pines as the highway curves its way east towards Marmora. The white pine commonly grows in the "Near North" lake regions of Ontario. These large windswept trees are often viewed as being symbolic of the wild ruggedness of Ontario's spectacular "cottage country". See an Enlarged Photo Here. (Photograph taken on August 25, 2012 - © Cameron Bevers) 

Left - Facing east along Hwy 7 approaching the Peterborough-Hastings County Boundary at Terrace Road & First Road. The highway crosses the county boundary
line about 11 km east of Havelock and about 4 km west of Marmora. See an Enlarged Photo Here. (Photograph taken on August 25, 2012 - © Cameron Bevers) Right - Peterborough County municipal boundary sign along westbound Hwy 7 between Havelock and Marmora. See an Enlarged Photo Here. (Photograph taken on September 27, 2020 - © Cameron Bevers) 

Left - Facing east along Hwy 7 at the Peterborough-Hastings County Boundary. The road ahead is actually a diversion of the original 1930 route of Hwy 7. Prior
to the completion of this diversion in 1932, Hwy 7 turned right onto First Road and then followed Boyd Road on its route easterly towards Marmora. Following the
completion of the new diversion ahead, jurisdiction over the old highway reverted back to the municipality in September 1932. See an
Enlarged Photo Here. (Photograph taken on August 17, 2008 - © Cameron Bevers) Right - A newer municipal boundary sign for Hastings County, with the county's logo and slogan included. Previously, the Hastings County Boundary was simply marked by a plain blue-and-white guide sign which read "COUNTY HASTINGS". Historically, the word "of" was omitted on these county and district boundary signs, although newer signs produced in recent years have the word "of" included. See an Enlarged Photo Here. (Photograph taken on September 27, 2020 - © Cameron Bevers) 

Left - Facing west along Hwy 7 towards Havelock approaching the Peterborough-Hastings County
Boundary. As originally established in 1930, Hwy 7 approached this intersection from the south (at left) via First Road. The route of Hwy 7 then turned west and
resumed its route westerly towards Havelock. This awkward turn in the original highway's route was eliminated in the early 1930s by the construction of a new
diversion. See an Enlarged Photo Here. (Photograph taken on August 26, 2012 - © Cameron Bevers) Right - Facing west along Hwy 7 towards Havelock on the Marmora West Diversion. Constructed in 1931-1932, this was the first of a three-part diversion constructed between the Peterborough-Hastings County Boundary and the western entrance to Marmora. The first mile of this diversion was completed in 1932 under Contract #1931-38, which included this revised highway grade seen here. The new highway diversion bypassed several steep hills and sharp turns on the original 1930 route of Hwy 7 between Havelock and Marmora. Today, the former route of Hwy 7 is known as Boyd Road. Two additional diversions were built along Hwy 7 west of Marmora in 1933-1934. See an Enlarged Photo Here. (Photograph taken on September 27, 2020 - © Cameron Bevers) 

Left - View of Hwy 7 along the Marmora West Diversion, about 3 km west of Marmora. The new diversion west of Marmora marginally shortened the highway distance
between Havelock and Marmora by about 1/2 mile, but the new highway had a more direct and substantially improved alignment. See an
Enlarged Photo Here. (Photograph taken on August 25, 2012 - © Cameron Bevers) Right - A substantial rock cut had to be excavated during the 1930s in order to construct the Marmora West Diversion. Since most sections of Hwy 7 through Central and Eastern Ontario were built as part of a large Depression-era unemployment relief project, the rock cuts along this highway were primarily excavated by hand in order to maximize the number of people employed in construction of the new highway. As Hwy 7 traffic races through these rock cuts today, few probably realize the magnitude of the back-breaking manual work carried out by unemployment relief labourers during the Great Depression of the 1930s to build the highway we know today. Although it was taken on a different section of Hwy 7 east of Madoc, this Historical 1932 Photo shows the construction of a highway rock cut along Hwy 7 by manual labourers from that period. See an Enlarged Photo Here. (Photograph taken on August 25, 2012 - © Cameron Bevers) 

Left - Facing west along Hwy 7 about 1 km west of Marmora. The Marmora West Diversion starts before the intersection just ahead. Careful observers will note
that the hydro pole line along the northern side of the highway can be seen curving off into the woods at left. The hydro pole line follows a bypassed loop of the
original Hwy 7 route (Eady Lane), which no longer connects to Hwy 7 at the loop's eastern end due to small rock cut along the highway. Jurisdiction over the old
loop of Hwy 7 reverted back to the municipality in July 1935. Today, Old Hwy 7 (Eady Lane) is a non-maintained road allowance. See an
Enlarged Photo Here. (Photograph taken on September 27, 2020 - © Cameron Bevers) Right - Distance guide sign on westbound Hwy 7 departing from Marmora. See an Enlarged Photo Here. (Photograph taken on September 27, 2020 - © Cameron Bevers) 

Left - Facing east along Hwy 7 approaching Marmora. At the western entrance to Marmora, a new rock cut was built during the Winter of 1933-1934 in order to
improve the highway's alignment on the approach into town. The original route of Hwy 7 that was assumed between Havelock and Marmora in 1930 followed Norwood Road
into town, which can be seen at right intersecting with Hwy 7. See an Enlarged Photo Here. (Photograph taken on September 27, 2020 - © Cameron Bevers) Right - Facing west along Hwy 7 from the top of the Marmora Hill in 2005, prior to reconstruction and widening. See an Enlarged Photo Here. (Photograph taken on July 24, 2005 - © Cameron Bevers) 

Left - Rock cut on Hwy 7 at the western entrance to Marmora in 2005, prior to reconstruction and widening. Under Contract #2007-4027, Hwy 7 was reconstructed
and widened on the western approach to Marmora. This widening included additional excavation within this cut. See an
Enlarged Photo Here. (Photograph taken on July 24, 2005 - © Cameron Bevers) Right - Facing east down the Marmora Hill on Hwy 7 in 2020, following reconstruction in 2007-2008. As part of the reconstruction work, full-width paved shoulders were built, along with new runs of concrete curb and gutter to better control highway drainage within the cut. Prior to the completion of the Marmora Hill Rock Cut in 1934, Hwy 7 traffic entered Marmora via Crowe Valley Court located just ahead at the base of the cut. Although it is a dead-end street today, Crowe Valley Court once formed part of the route of Hwy 7 from Marmora westerly to Havelock. See an Enlarged Photo Here. (Photograph taken on September 27, 2020 - © Cameron Bevers) 

Left - Facing east along Hwy 7 towards the Hwy 14 Junction through the Marmora Hill Cut in 2005, prior to reconstruction and widening. A westbound truck
climbing lane is provided along Hwy 7 at the Marmora Hill Cut, due to the grade. Originally, highway drainage was simply conveyed down the cut via shallow roadside
ditches parallel to the pavement. See an Enlarged Photo Here. (Photograph taken on July 24, 2005 - © Cameron Bevers) Right - Reconstructed and widened Marmora Hill Cut on Hwy 7, facing east towards the Hwy 14 Junction in Marmora. The new cut at Marmora Hill provided a wider pavement surface, full-width paved shoulders and improved highway illumination and drainage. Due to the shallow bedrock through the cut, it was not possible to economically construct a storm sewer system, so the curb catch basins still drain outwards into roadside ditches as they did prior to reconstruction. See an Enlarged Photo Here. (Photograph taken on September 27, 2020 - © Cameron Bevers) 

Left - Facing west along Hwy 7 towards Havelock at the Marmora Hill Cut in 2005, prior to reconstruction and widening. See an
Enlarged Photo Here. (Photograph taken on July 24, 2005 - © Cameron Bevers) Right - Reconstructed and widened Marmora Hill Cut on Hwy 7 after reconstruction, facing west towards Havelock. See an Enlarged Photo Here. (Photograph taken on September 27, 2020 - © Cameron Bevers) 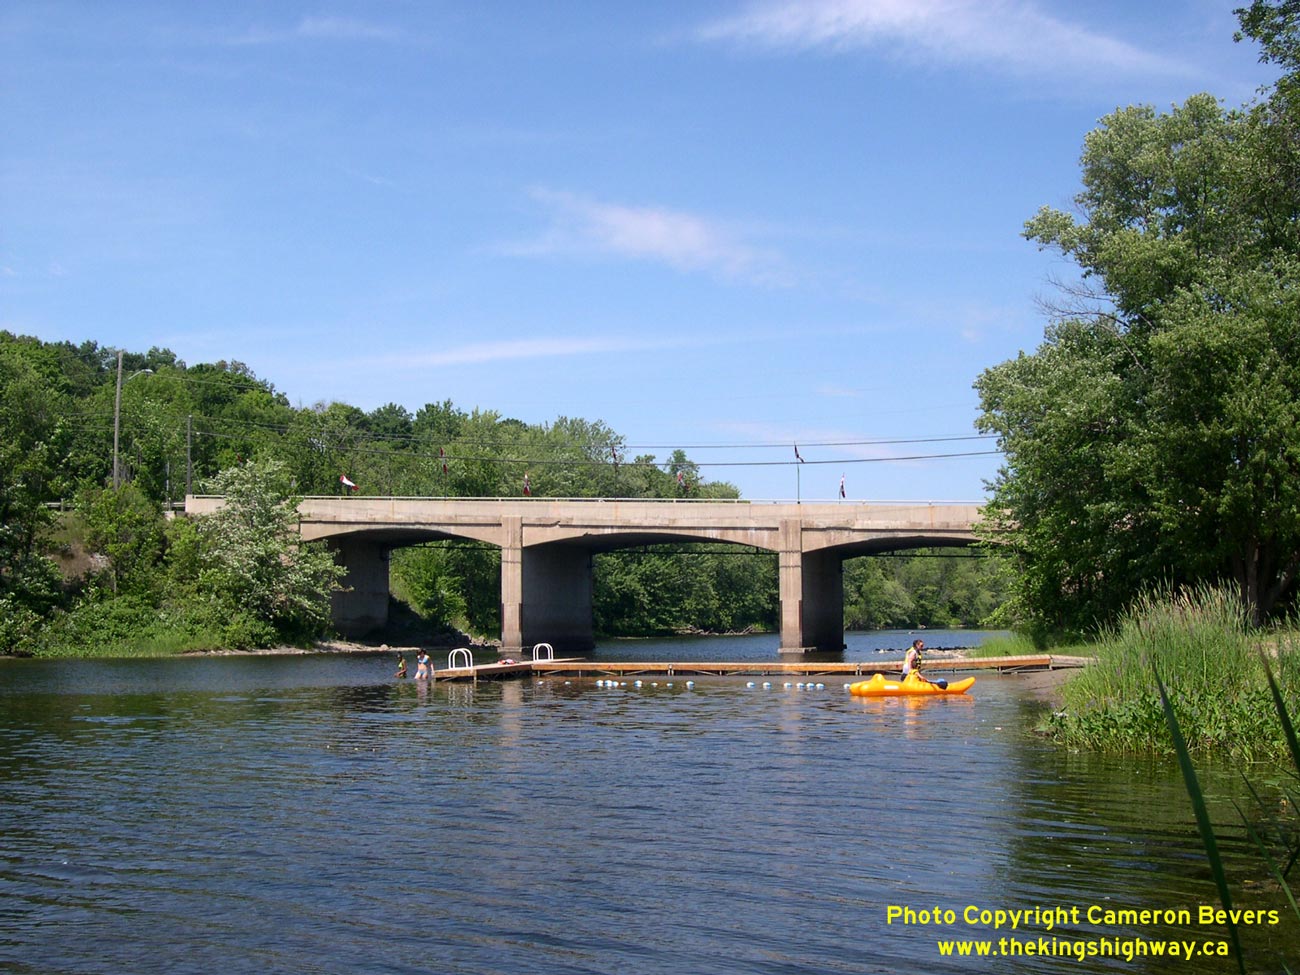

Left - Crowe River Bridge (Site #11-44) on Hwy 7 in Marmora. This structure was built under Contract #1933-49 and was completed in 1934. See an
Enlarged Photo Here. (Photograph taken on July 24, 2005 - © Cameron Bevers) Right - The Crowe River Bridge at Marmora was the first triple-span concrete rigid frame bridge built on Ontario's King's Highway System. This bridge design saw rapid adoption and use by the Department of Highways of Ontario (DHO) during the 1930s, as it was a practical method of constructing bridges which could withstand the ever-increasing loads of traffic on the highway system. A key advantage of this bridge design is that it is relatively straightforward to widen the bridge if additional deck width is ever needed in the future. By comparison, overhead through and pony truss bridge designs have fixed dimensions once built and are very challenging to retrofit or modify. By the end of the 1930s, the concrete rigid frame bridge was one of the most commonly used bridge designs employed by the DHO for short and medium-length bridges. See an Enlarged Photo Here. (Photograph taken on July 24, 2005 - © Cameron Bevers) 

Left - Facing west along Hwy 7 at the Crowe River Bridge in Marmora. At the time this photo was taken in 2005, the bridge was undergoing some minor
rehabilitation work. The bridge's asphalt wearing surface and waterproofing membrane had been removed, which exposed the bridge's original concrete deck underneath.
See an Enlarged Photo Here. (Photograph taken on July 24, 2005 - © Cameron Bevers) Right - View of the Crowe River Bridge on Hwy 7 in Marmora, facing east towards the Hwy 14 Junction. See an Enlarged Photo Here. (Photograph taken on July 24, 2005 - © Cameron Bevers) 

Left - A vintage 1940s car travels westbound on Hwy 7 across the rehabilitated Crowe River Bridge in Marmora. See an
Enlarged Photo Here. (Photograph taken on September 27, 2020 - © Cameron Bevers) Right - Older destination guide sign on westbound Hwy 7 approaching the Hwy 14 Junction. This former King's Highway begins at Hwy 7 in Marmora and heads southeasterly towards Belleville via Stirling. Jurisdiction over Hwy 14 was transferred from the province over to the municipal tier in 1996. See an Enlarged Photo Here. (Photograph taken on August 26, 2012 - © Cameron Bevers) 

Left - View of Hwy 7 about 1 km east of Marmora, facing east towards Madoc. This straightened section of highway was one of many improvements carried out
along Hwy 7 in the Marmora area during the 1930s. In November 1933, about 18 miles of new grading work was tendered for construction by the DHO along Hwy 7 from west
of Marmora to east of Madoc under Contracts #1933-31, #1933-32 and #1933-33. The resulting highway link between Marmora and Madoc was much more direct and had
improved geometry. Until recent decades, Hwy 7 crossed the Canadian National Railway (CNR) line to Bancroft at the bottom of this grade. See an
Enlarged Photo Here. (Photograph taken on August 17, 2008 - © Cameron Bevers) Right - Moira River Bridge (Site #11-45) on Hwy 7, located about 11 km west of Madoc. This single-span concrete arch structure was completed in 1934. See an Enlarged Photo Here. (Photograph taken on May 23, 2005 - © Cameron Bevers) 

Left - Southern side of the Moira River Bridge on Hwy 7 near Madoc. See an
Enlarged Photo Here. (Photograph taken on May 23, 2005 - © Cameron Bevers) Right - The Moira River Bridge is an open-spandrel concrete arch structure with a span length of 80 feet (24.4 metres). While there are many open-spandrel concrete arch bridges in Ontario, there are very few that have such a low vertical profile. The apex of the arch is less than 3 metres above the river. See an Enlarged Photo Here. (Photograph taken on May 23, 2005 - © Cameron Bevers) 

Left - Looking through the open spandrel of the Moira River Bridge on Hwy 7. The roadway deck was replaced as part of a rehabilitation of the bridge in the
early 2000s, but the concrete arch superstructure is mostly original and unmodified. See an
Enlarged Photo Here. (Photograph taken on May 23, 2005 - © Cameron Bevers) Right - View of Hwy 7 about 1 km west of Madoc. The Former Hwy 7B Junction (St. Lawrence Street) can be seen connecting to Hwy 7 beyond the reverse curve. See an Enlarged Photo Here. (Photograph taken on August 17, 2008 - © Cameron Bevers) 

Left - Junction sign assembly at the western end of St. Lawrence Street (Former Hwy 7B) at the Madoc Bypass (Hwy 7). The nearby route of Hwy 62 is signed using
a green-and-white trailblazer route marker from this intersection via Hwy 7 East. The Madoc Bypass was constructed in the 1960s in order to carry through traffic on
Hwy 7 around the village centre. An improved junction between Hwy 7 and Hwy 62 was also constructed as part of the Madoc Bypass. See an
Enlarged Photo Here. (Photograph taken on August 26, 2012 - © Cameron Bevers) Right - Facing west along Hwy 7 towards Marmora from the Former Hwy 7B Junction (St. Lawrence Street) west of Madoc. See an Enlarged Photo Here. (Photograph taken on August 26, 2012 - © Cameron Bevers) 

Left - Facing east along Hwy 7 at the start of the Madoc Bypass approaching the Former Hwy 7B Junction. Prior to the completion of the Madoc Bypass in the
1960s, Hwy 7 traffic entered into Madoc via St. Lawrence Street. To the right of the green guide sign, a rock cut marks the old location of Hwy 7 approaching Madoc.
As part of the construction of the Madoc Bypass, this short section of Hwy 7 west of Madoc was abandoned entirely. St. Lawrence Street (Former Hwy 7B) was realigned
so that it intersected with the Madoc Bypass closer to a right angle. See an Enlarged Photo Here. (Photograph taken on August 26, 2012 - © Cameron Bevers) Right - Old rock cut on a former alignment of Hwy 7 approaching Madoc. This section of Hwy 7 was abandoned as a result of the construction of the Madoc Bypass. See an Enlarged Photo Here. (Photograph taken on August 26, 2012 - © Cameron Bevers) 

Left - Abandoned section of Hwy 7 at the western end of the Madoc Bypass. This old highway pavement last carried through traffic back in 1967. See an
Enlarged Photo Here. (Photograph taken on August 26, 2012 - © Cameron Bevers) Right - Junction of Hwy 7 and Former Hwy 7B (St. Lawrence Street) at the western entrance to Madoc. As was typical for bypassed sections of highway during that era, the old route of Hwy 7 via St. Lawrence Street was signed as Hwy 7B for a short period after the Madoc Bypass opened to traffic. See an Enlarged Photo Here. (Photograph taken on August 26, 2012 - © Cameron Bevers) 

Left - Facing east along St. Lawrence Street (Former Hwy 7B) from the Madoc Bypass. St. Lawrence Street served as the route of Hwy 7 from the mid-1930s up
until the late 1960s, when it was replaced by the new Madoc Bypass. The former route of Hwy 7 through Madoc was briefly signed as Hwy 7B during the late 1960s.
Jurisdiction over Hwy 7B was transferred from the province to the County of Hastings in July 1969. For many years, Old Hwy 7B was part of Hastings County Road 23. See
an Enlarged Photo Here. (Photograph taken on August 26, 2012 - © Cameron Bevers) Right - View of Hwy 7 at the Former Hwy 7B Junction (St. Lawrence Street) west of Madoc, facing west towards Marmora. See an Enlarged Photo Here. (Photograph taken on August 26, 2012 - © Cameron Bevers) 
Above - Facing east along the Madoc Bypass (Hwy 7) from the Former Hwy 7B Junction (St. Lawrence Street). Construction of the 4.5 km Madoc Bypass commenced in
1965, with final paving and tie-ins with Old Hwy 7 constructed under Contract #1966-167. The Madoc Bypass was opened to traffic on September 18, 1967. See an
Enlarged Photo Here. (Photograph taken on August 26, 2012 - © Cameron Bevers)
Continue on to King's Highway 7 Photos: Madoc to Kaladar
|
|---|
Links to Adjacent King's Highway Photograph Pages:
Back to King's Highway 6 Photos /
King's Highway 7 History /
On to King's Highway 8 Photos
Ontario Highway History - Main Menu / Back to List of Highways Website contents, photos & text © 2002-2026, Cameron
Bevers (Webmaster) - All Rights Reserved / Contact Me
|
|---|