
| 
| |
|
|
This page contains historical and present day photos of Ontario's King's Highway 90. All photographs displayed on
this page were taken by the Webmaster (Cameron Bevers), unless specifically noted otherwise. Historical photographs are arranged in approximate chronological order,
while present day photographs (Year 2000 to date) are arranged by location from west to east. Click on any thumbnail to see a larger image!
Please note that all photographs displayed on this
website are protected by copyright. These photographs must not be reproduced, published,
electronically stored or copied, distributed, or posted onto other websites without
my written permission. If you want to use photos from this website, please
email me first for permission. Thank-you!
|
|---|
|
Historical King's Highway 90 Photographs

Above - Facing south along Hwy 400 from the Dunlop Street (Hwy 90) Overpass in Barrie in 1963. Compare the 1963 photo of Hwy 400 shown above with this
Present Day Photo, which I took from the Hwy 90 Overpass in 2007. See
an Enlarged Photo Here. (Photo courtesy of Ontario Ministry of Transportation - © King's Printer for Ontario, 1963) 
Above - Circa 1965 postcard view of Dunlop Street in Downtown Barrie at the Junction of Hwy 11, Hwy 27 & Hwy 90. See an
Enlarged Photo Here. (Photo courtesy of Stewart Wholesale Co. Ltd.) 
Above - Hwy 90 (Dunlop Street) Overpass on Hwy 400 in Barrie. See an
Enlarged Photo Here. Photo taken in March 1965. (Photo courtesy of Ontario Ministry of Transportation - © King's Printer for Ontario, 2019) 
Above - Aerial view of the Hwy 400 and Hwy 90 (Dunlop Street) Interchange in Barrie (1974) (Photo courtesy of Ontario Ministry of Transportation - © King's Printer for Ontario, 2010) 
Above - Facing north along Hwy 400 at the Hwy 90 (Dunlop Street) Interchange in Barrie in 1975. See an
Enlarged Photo Here. Photo taken on October 8, 1975. (Photo courtesy of Ontario Ministry of Transportation - © King's Printer for Ontario, 2014) 
Above - Facing south along Hwy 400 from the Hwy 90 Overpass (Dunlop Street) in Barrie in 1985. This interesting photo shows one of the earliest uses of a
portable concrete Temporary Construction Barrier (TCB) on an Ontario freeway. Although ubiquitous in construction zones on today's freeways, the portable TCB was a
relatively new innovation at the time this photo was taken in the mid-1980s. These barriers provided improved protection of construction workers and equipment from
freeway traffic inadvertently encroaching into a closed lane or shoulder. More as a general comment, but it always surprises me looking at highway photos from
yesteryear just how old the vehicle fleets were on the road compared to today. Vehicles dating from the 1960s can still be seen out on the road in this 1985 photo.
Today, it just isn't that common to see 20-year-old vehicles out on the highways - a true testament to how durable older cars once were, and how disposable they have
since become. See an Enlarged Photo Here. Photo taken in 1985. (Photo courtesy of Ontario Ministry of Transportation - © King's Printer for Ontario, 2024) 

Left - The use of other new traffic control features were also captured within the photos of this construction zone at the Hwy 90 Overpass in Barrie in 1985.
A blocker or "crash" truck and an electronic arrow board (Temporary Conditions Traffic Control Device #12, or "TC-12") were both employed within this construction
zone. Earlier blocker trucks were fully loaded up to ensure that an errant vehicle would hit the blocker truck and come to a stop before entering a closed lane within
a construction zone. While blocker trucks were very effective in preventing errant vehicles from encroaching into a construction zone and endangering workers, freeway
traffic vehicle occupants unfortunately did not fare very well when the blocker truck was struck from behind. Newer blocker trucks have energy attenuation devices
mounted to the rear of the truck which are designed to collapse and crush on impact, thereby slowing errant vehicles far less abruptly. See an
Enlarged Photo Here. Photo taken in 1985. (Photo courtesy of Ontario Ministry of Transportation - © King's Printer for Ontario, 2024) Right - Construction crew carrying out concrete deck repairs on the Hwy 90 (Dunlop Street) Overpass on Hwy 400 in Barrie, Contract #1985-20. See an Enlarged Photo Here. Photo taken in 1985. (Photo courtesy of Ontario Ministry of Transportation - © King's Printer for Ontario, 2024) 

Left - Completed rehabilitation of the northern side (westbound lane) of the Hwy 90 Overpass on Hwy 400, showing the resurfaced bridge deck and reconstructed
sidewalk. Not only were portable concrete TCBs used on the freeway below, but they were also used to protect the construction zone from traffic on Hwy 90, which was
taken down to an alternating single lane of traffic during Contract #1985-20. See an
Enlarged Photo Here. Photo taken in 1985. (Photo courtesy of Ontario Ministry of Transportation - © King's Printer for Ontario, 2024) Right - Milled asphalt on the southern side of the deck of the Hwy 90 (Dunlop Street) Overpass on Hwy 400, Contract #1985-20. See an Enlarged Photo Here. Photo taken in 1985. (Photo courtesy of Ontario Ministry of Transportation - © King's Printer for Ontario, 2024) 

Left - Work crew assembling formwork for a new concrete sidewalk on the Hwy 90 (Dunlop Street) Overpass on Hwy 400, Contract #1985-20. See an
Enlarged Photo Here. Photo taken in 1985. (Photo courtesy of Ontario Ministry of Transportation - © King's Printer for Ontario, 2024) Right - Repainting of the Hwy 90 (Dunlop Street) Overpass on Hwy 400, Contract #1985-20. The yellow paint seen on portions of the steel girders in this photo was actually a base primer coat and not the bridge's original colour. Following the base primer coat application, the bridge's steel girders were painted grey. See an Enlarged Photo Here. Photo taken in 1985. (Photo courtesy of Ontario Ministry of Transportation - © King's Printer for Ontario, 2024) 

Left - A construction worker removes surface rust from the steel girders of the Hwy 90 (Dunlop Street) Overpass on Hwy 400. Once the steel girders have been
stripped of surface rust, a new base primer coat will be applied and the bridge painted to its final colours. See an
Enlarged Photo Here. Photo taken in 1985. (Photo courtesy of Ontario Ministry of Transportation - © King's Printer for Ontario, 2024) Right - Comparison of the rehabilitated versus original steel girders of the Hwy 90 (Dunlop Street) Overpass on Hwy 400. Older steel bridges required periodic painting to protect the steel from deterioration. Newer steel bridges in Ontario are usually built using a weathering steel, which is designed to develop a thin layer of surface oxidation once exposed to the elements. In turn, this oxidation layer protects the steel underneath. Bridges of this design do not require ongoing paint maintenance, but they do look perpetually rusty. See an Enlarged Photo Here. Photo taken in 1985. (Photo courtesy of Ontario Ministry of Transportation - © King's Printer for Ontario, 2024) 

Left - Painting progress during the rehabilitation of the Hwy 90 (Dunlop Street) Overpass on Hwy 400, Contract #1985-20. See an
Enlarged Photo Here. Photo taken in 1985. (Photo courtesy of Ontario Ministry of Transportation - © King's Printer for Ontario, 2024) Right - Completed deck rehabilitation of the Hwy 90 (Dunlop Street) Overpass, constructed under Contract #1985-20. This view is facing east along Dunlop Street from Hwy 400 towards Downtown Barrie. See an Enlarged Photo Here. Photo taken in 1985. (Photo courtesy of Ontario Ministry of Transportation - © King's Printer for Ontario, 2024) 

Left - Facing west along Hwy 90 (Dunlop Street) at the Hwy 400 Interchange in Barrie, showing the completed rehabilitation of the bridge. See an
Enlarged Photo Here. Photo taken in 1985. (Photo courtesy of Ontario Ministry of Transportation - © King's Printer for Ontario, 2024) Right - Southern side of the Hwy 90 (Dunlop Street) Overpass on Hwy 400, facing east towards Downtown Barrie in 1985. Note the freeway exit guide sign in the background for Hwy 90 to Angus. This aluminum extruded sign was installed along Hwy 400 on February 28, 1973. It replaced a much smaller plywood exit sign which were commonly used on early Ontario freeways. Historically, Hwy 90 was only signed westerly from its interchange with Hwy 400, as the eastern leg of Hwy 90 (Dunlop Street) did not cater to through traffic and came to an end only a few blocks to the east in Downtown Barrie. The first (eastbound) exit ramp at this interchange was merely signed as Dunlop Street, with no indication that the street was also known as Hwy 90. See an Enlarged Photo Here. Photo taken in 1985. (Photo courtesy of Ontario Ministry of Transportation - © King's Printer for Ontario, 2024) |
|---|
|
Present Day King's Highway 90 Photographs


Left - Facing east towards Barrie at the Nottawasaga River Bridge on Hwy 90. See an
Enlarged Photo Here. (Photograph taken on June 5, 2005 - © Cameron Bevers) Right - Facing west along Hwy 90 towards Angus at the Nottawasaga River Bridge. See an Enlarged Photo Here. (Photograph taken on June 5, 2005 - © Cameron Bevers) 

Left - South side of the Nottawasaga River Bridge on Hwy 90. Structure completed in 1959. See an
Enlarged Photo Here. (Photograph taken on June 5, 2005 - © Cameron Bevers) Right - Close-up of the unusual elongated Pratt truss design of the Nottawasaga River Bridge on Hwy 90. See an Enlarged Photo Here. (Photograph taken on June 5, 2005 - © Cameron Bevers) 

Left - Dunlop Street (Hwy 90) Interchange on Hwy 400 in Barrie, facing north. See an
Enlarged Photo Here. (Photograph taken on August 2, 2007 - © Cameron Bevers) Right - Dunlop Street (Hwy 90) Overpass on Hwy 400 in Barrie. This interesting two-span steel rigid frame structure was completed in 1955, as part of a much larger project to provide a direct interchange access to Downtown Barrie. Ultimately, this new interchange served as the new route for Hwy 90 approaching Barrie. Up until 1959, Hwy 90 followed Tiffin Street on its route between Barrie and Angus, but the highway was eventually rerouted via Dunlop Street so that it connected directly with Hwy 400. See an Enlarged Photo Here. (Photograph taken on June 30, 2007 - © Cameron Bevers) 

Left - Facing south along Hwy 400 from the Dunlop Street (Hwy 90) Overpass in Barrie. Compare the present-day photo above with this
1963 Historical Photo, before Hwy 400 was widened to six lanes through Barrie. See an
Enlarged Photo Here. (Photograph taken on June 30, 2007 - © Cameron Bevers) Right - Northern side of the Dunlop Street (Hwy 90) Overpass on Hwy 400 in Barrie. See an Enlarged Photo Here. 

Left - Facing east along Dunlop Street (Hwy 90) towards the overpass across Hwy 400. Several stands of trees were planted within the Dunlop Street Interchange
when it was built in the 1950s. As a result, this is one of the more photogenic interchanges along Hwy 400 between Toronto and Barrie. See an
Enlarged Photo Here. (Photograph taken on June 30, 2007 - © Cameron Bevers) Right - Close-up of the original steel balustrades on the Dunlop Street Overpass. The Dunlop Street Bridge is the oldest structure along Hwy 400 in the Barrie area that still retains its original steel railings. All of the other structures in the area have either been rehabilitated or widened, except for the Anne Street Overpass, which is newer. See an Enlarged Photo Here. (Photograph taken on June 30, 2007 - © Cameron Bevers) 

Left - Facing west along Dunlop Street (Hwy 90) across the overpass at Hwy 400. See an
Enlarged Photo Here. (Photograph taken on June 30, 2007 - © Cameron Bevers) Right - Facing north along Hwy 400 from the Dunlop Street (Hwy 90) Overpass in Barrie. See an Enlarged Photo Here. (Photograph taken on June 30, 2007 - © Cameron Bevers) 

Left - The ramps for the Hwy 400 & Hwy 90 Interchange are in a "Parclo B" configuration, meaning that the loop ramps are on the downstream side of the
grade separation. This ramp configuration is seldom used on Ontario freeways. However, given the angle at which these two highways cross, this ramp configuration was
far more practical than the standard "Parclo A" configuration. See an Enlarged Photo Here. (Photograph taken on June 30, 2007 - © Cameron Bevers) Right - Facing east along Hwy 90 from the Hwy 400 Interchange. One of the biggest drawbacks of a "Parclo B" is that the loop ramps carrying exiting traffic from the freeway merges with the surface street just before the entrance ramp departs the surface street on the same side. As a result, there is a greater risk of wrong-way movements on the exit ramps, since drivers may turn off the surface street too early and inadvertently end up going the wrong way down the freeway. The MTO has recently installed oversized "Do Not Enter" signs at the loop exit ramp terminals, to reduce the likelihood of an inattentive driver from entering the freeway in the wrong direction. See an Enlarged Photo Here. (Photograph taken on June 30, 2007 - © Cameron Bevers) 
Above - Facing east along Dunlop Street (Hwy 90) across the overpass at Hwy 400. See an
Enlarged Photo Here. (Photograph taken on June 30, 2007 - © Cameron Bevers) 
Above - Junction crown sign for Hwy 90 at the Hwy 11 & Hwy 27 Junction at Bradford Street and Dunlop Street in Downtown Barrie. See an
Enlarged Photo Here. (Photograph taken on June 30, 2007 - © Cameron Bevers) 
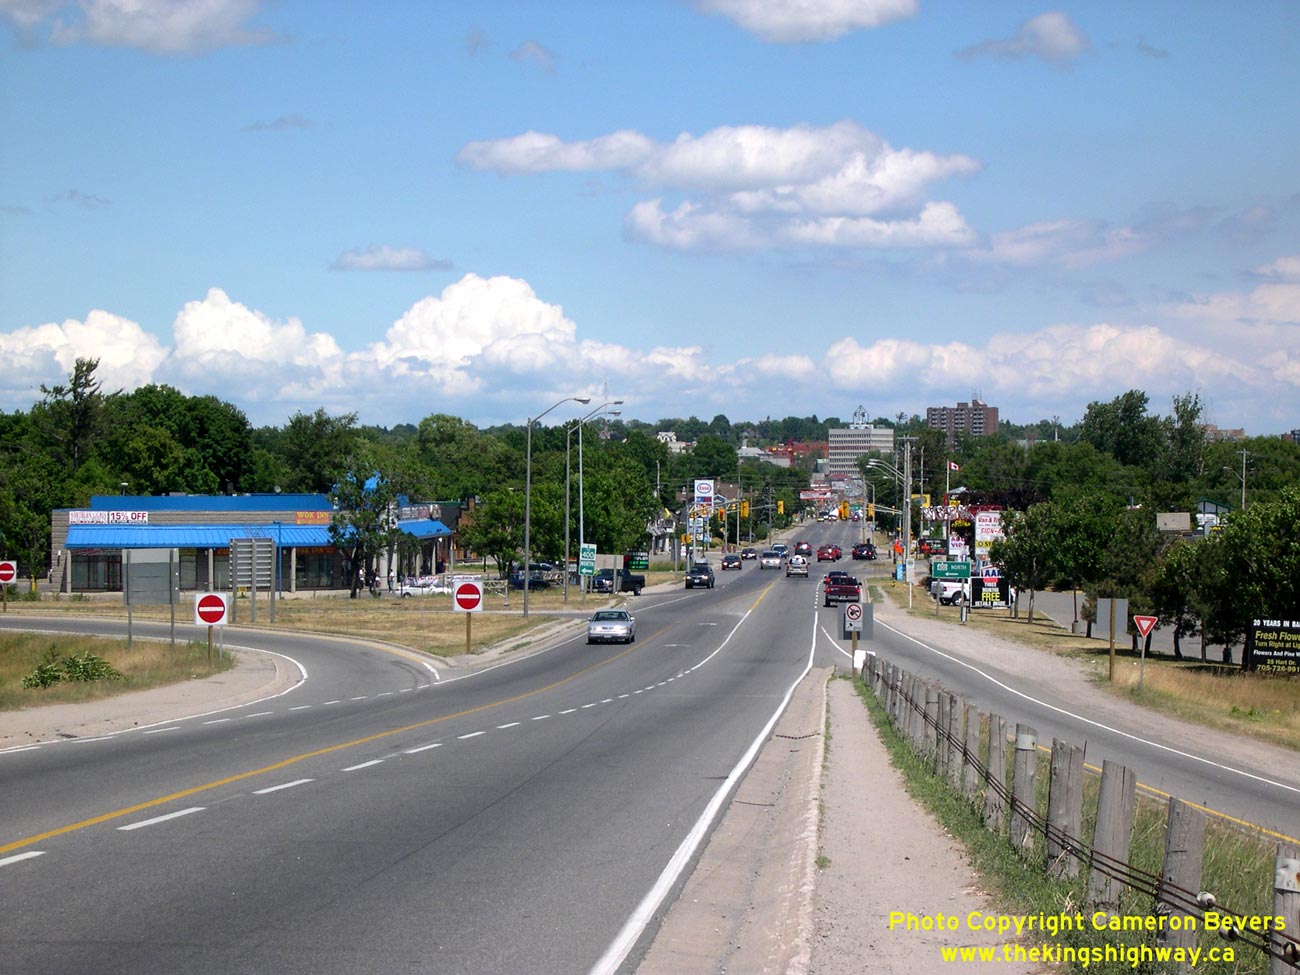
Above - Facing north along Bradford Street (Hwy 11 & Hwy 27) approaching the Hwy 90 Junction at Dunlop Street in Downtown Barrie. At this intersection,
Hwy 90 turns left and proceeds west towards Angus via Dunlop Street, while Hwy 11 & Hwy 27 turn right and follow Dunlop Street. See an
Enlarged Photo Here. (Photograph taken on June 30, 2007 - © Cameron Bevers)
More King's Highway 90 Photographs Coming Soon!
|
|---|
Links to Adjacent King's Highway Photograph Pages:
Back to King's Highway 89 Photos /
King's Highway 90 History /
On to King's Highway 91 Photos
Ontario Highway History - Main Menu / Back to List of Highways Website contents, photos & text © 2002-2026, Cameron
Bevers (Webmaster) - All Rights Reserved / Contact Me
|
|---|