
| 
| |
|
|
This page contains historical and present day photos of Ontario's King's Highway 18. All photographs displayed on this page were taken by the Webmaster (Cameron
Bevers), unless specifically noted otherwise. Historical photographs are arranged in approximate chronological order, while present day photographs (Year 2000 to
date) are arranged by location from north to east. Click on any thumbnail to see a larger image!
Please note that all photographs displayed on this
website are protected by copyright. These photographs must not be reproduced, published,
electronically stored or copied, distributed, or posted onto other websites without
my written permission. If you want to use photos from this website, please
email me first for permission. Thank-you!
|
|---|
|
Historical King's Highway 18 Photographs

Above - View of the Ambassador Bridge at the end of Hwy 3 in Windsor, as seen from Hwy 18 (Riverside Drive). This International Bridge links Canada and the
United States across the Detroit River. Unlike most of the crossings between Canada and the United States located within Ontario, the Ambassador Bridge is privately
owned and operated. The Ambassador Bridge has been open to traffic since 1929. See an
Enlarged Photo Here. Photo taken September 23, 1949. (Photo courtesy of Ontario Ministry of Transportation - © King's Printer for Ontario, 1949) 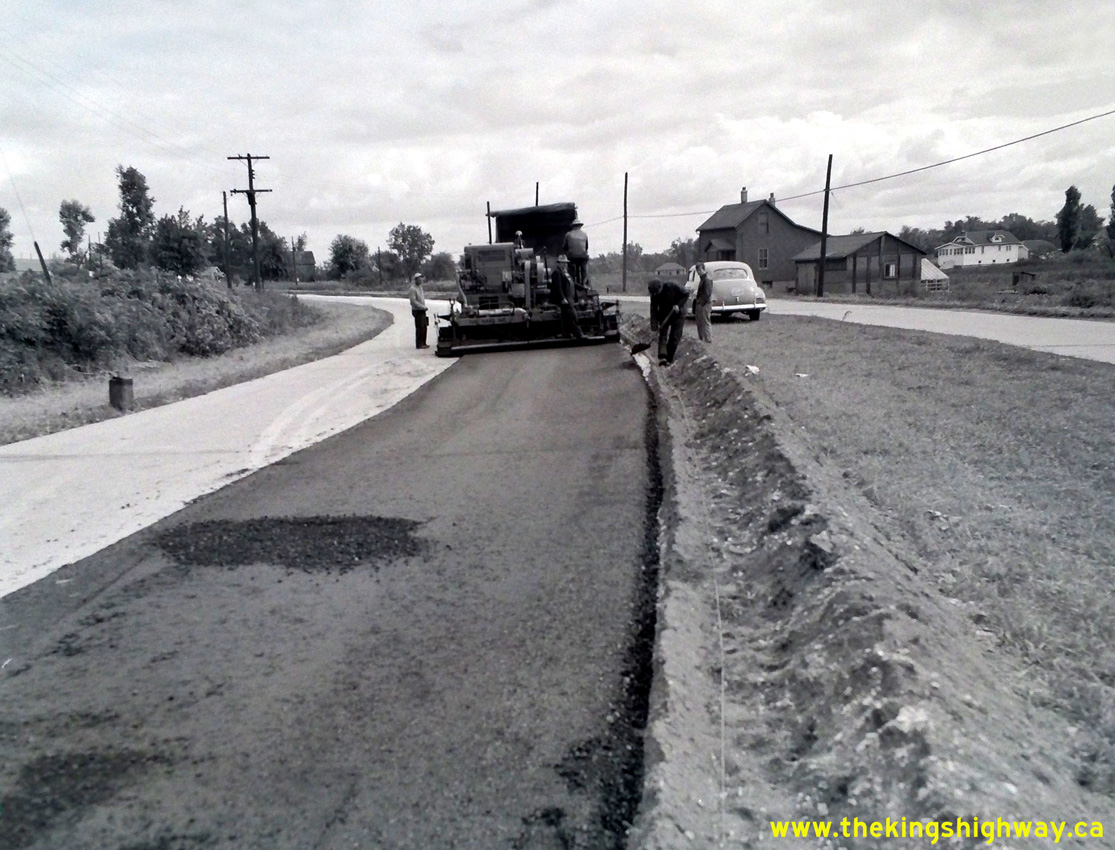
Above - Resurfacing of an old concrete section of Hwy 18 north of LaSalle in 1949. The concrete dual highway between LaSalle and Windsor was resurfaced with
hot-mix asphalt under Contract #1949-386, along with the remainder of Hwy 18 from LaSalle to Amherstburg. Altogether, Hwy 18 was resurfaced for a distance of about
12 1/2 miles under this contract. See an Enlarged Photo Here. Photo taken September 23, 1949. (Photo courtesy of Ontario Ministry of Transportation - © King's Printer for Ontario, 1949) 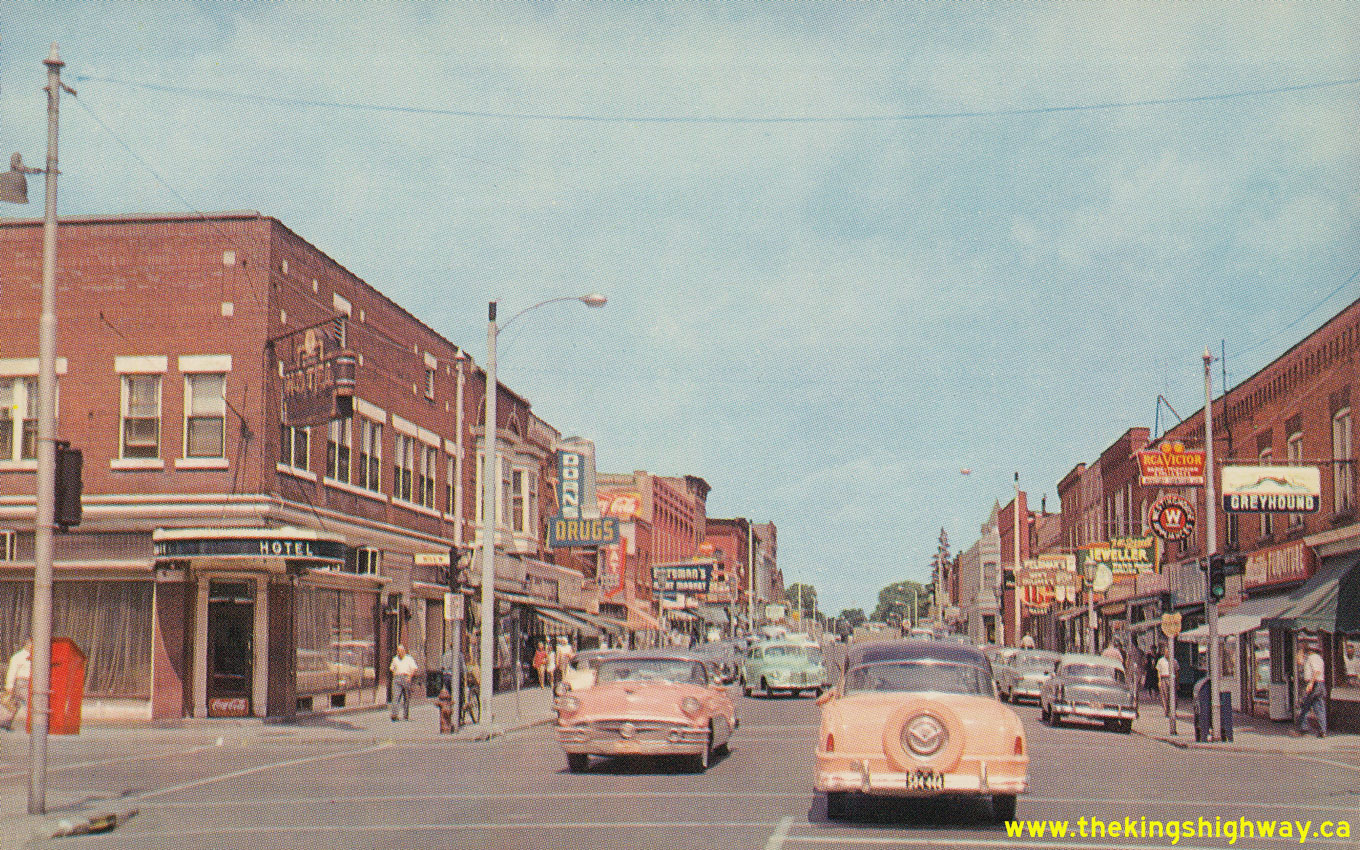

Left - Circa 1957 postcard view of Erie Street (Hwy 18) in Downtown Leamington, facing north towards Talbot Street (Hwy 3). See an
Enlarged Photo Here. (Photo courtesy of Sigal Brothers Ltd, Windsor) Right - Circa 1960 postcard view of Talbot Street (Hwy 3) facing west at Erie Street (Hwy 18) in Downtown Leamington. See an Enlarged Photo Here. (Photo courtesy of Sigal Brothers Ltd, Windsor) 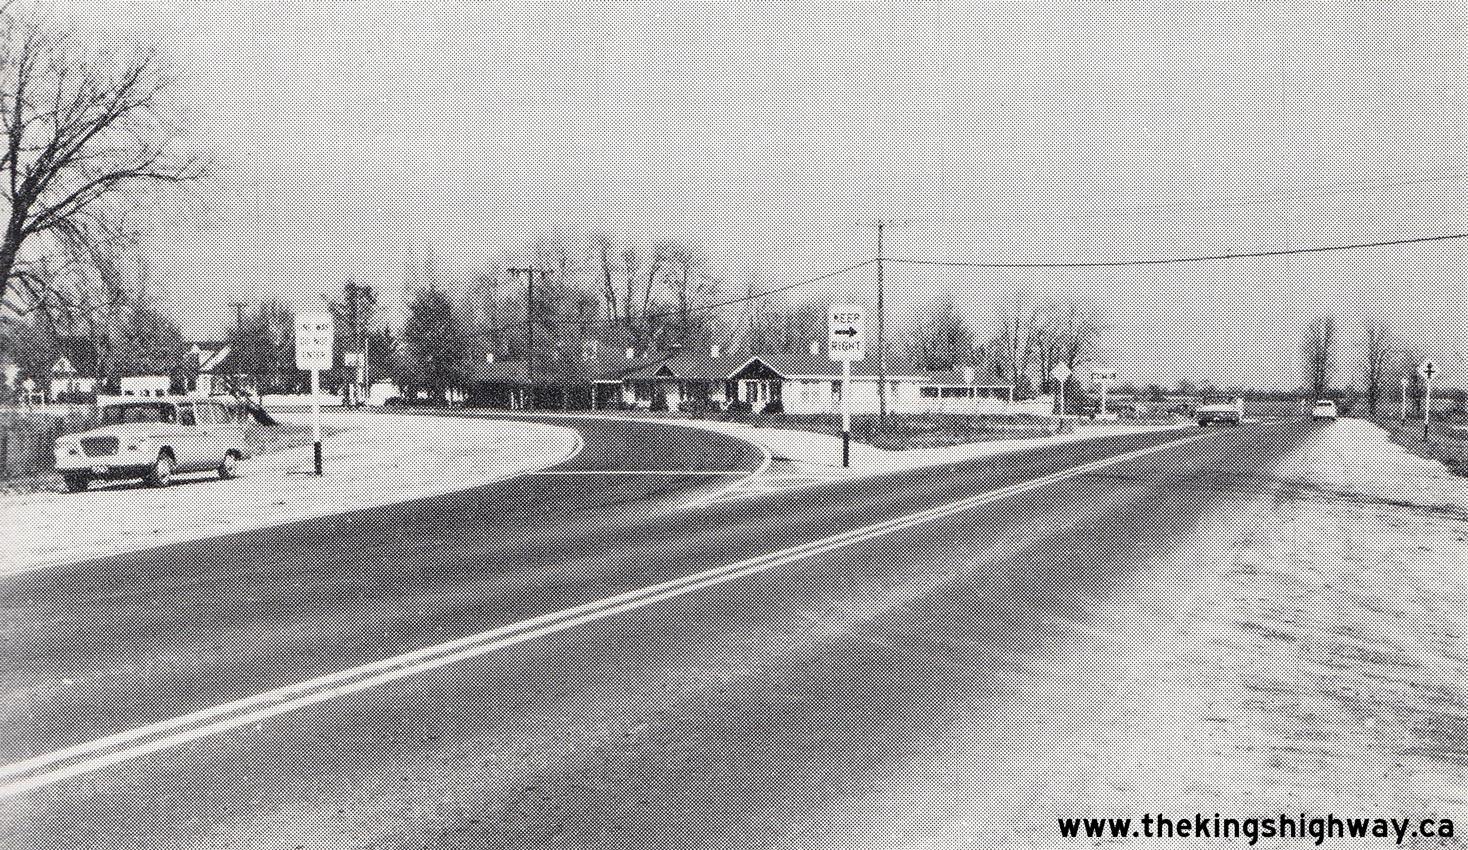
Above - Facing north from the Hwy 18B Junction along the completed Amherstburg Diversion (Hwy 18), Contract #1958-242. A new bypass was built around Downtown
Amherstburg in 1958-1959, in order to expedite the movement of through traffic on Hwy 18. The old route of Hwy 18 through Amherstburg's Town Centre was known as
Hwy 18B between 1959 and 1970. See an Enlarged Photo Here. Photo taken on November 10, 1959. (Photo courtesy of Ontario Ministry of Transportation - © King's Printer for Ontario, 1959) 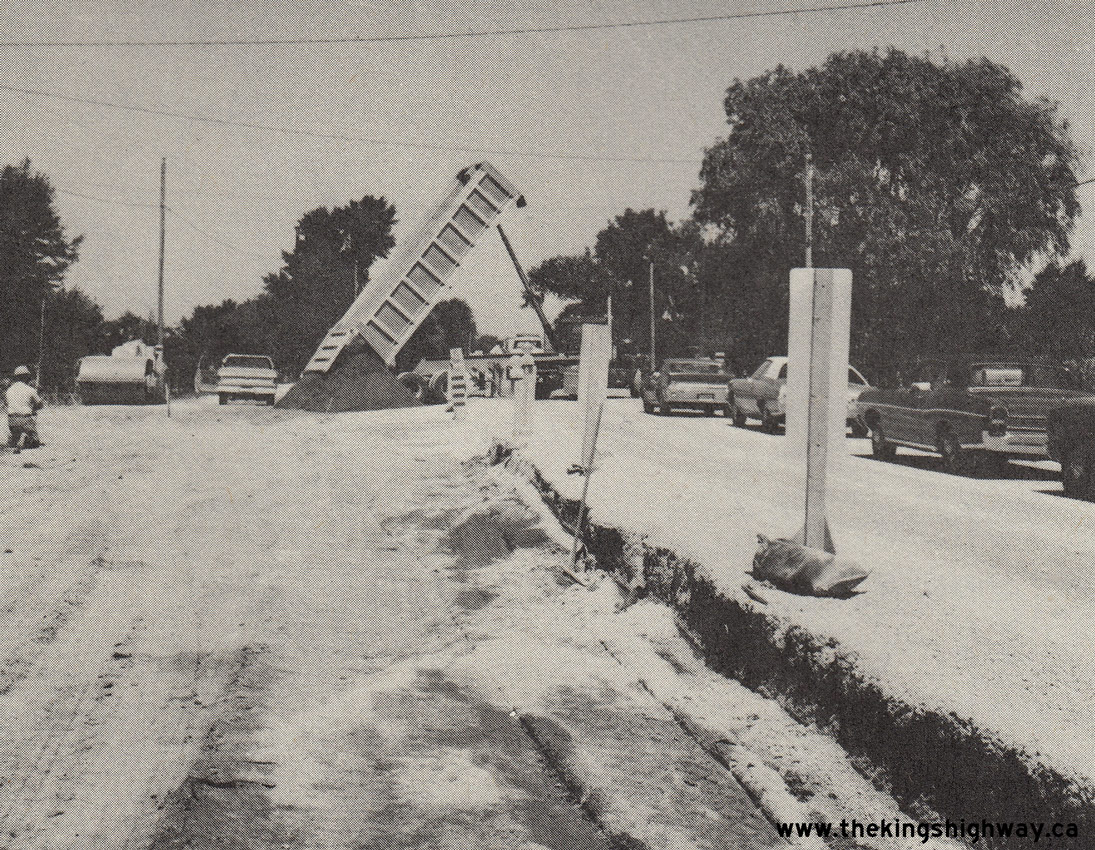
Above - Reconstruction of Hwy 18 near the Canard River Bridge north of Amherstburg, Contract #1972-210. See an
Enlarged Photo Here. Photo taken in 1973. (Photo courtesy of Ontario Ministry of Transportation - © King's Printer for Ontario, 1973) 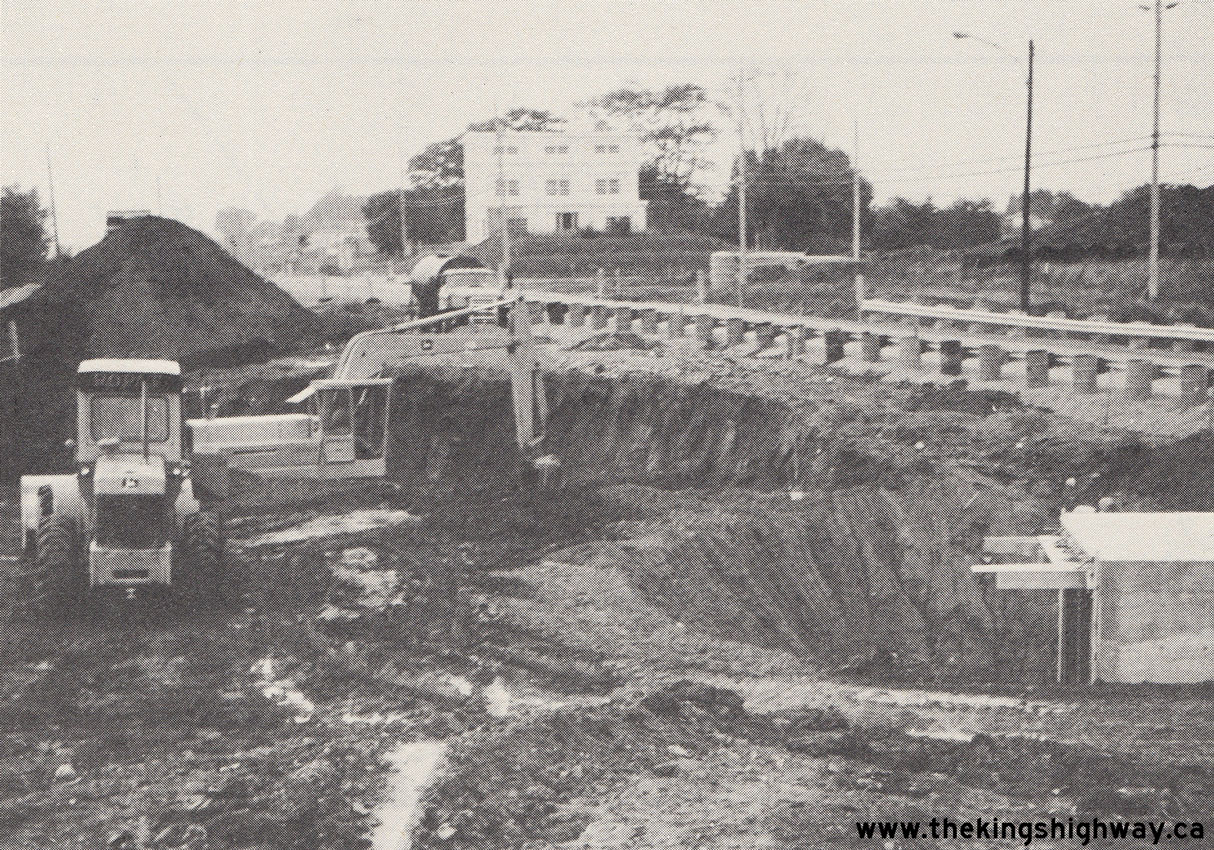
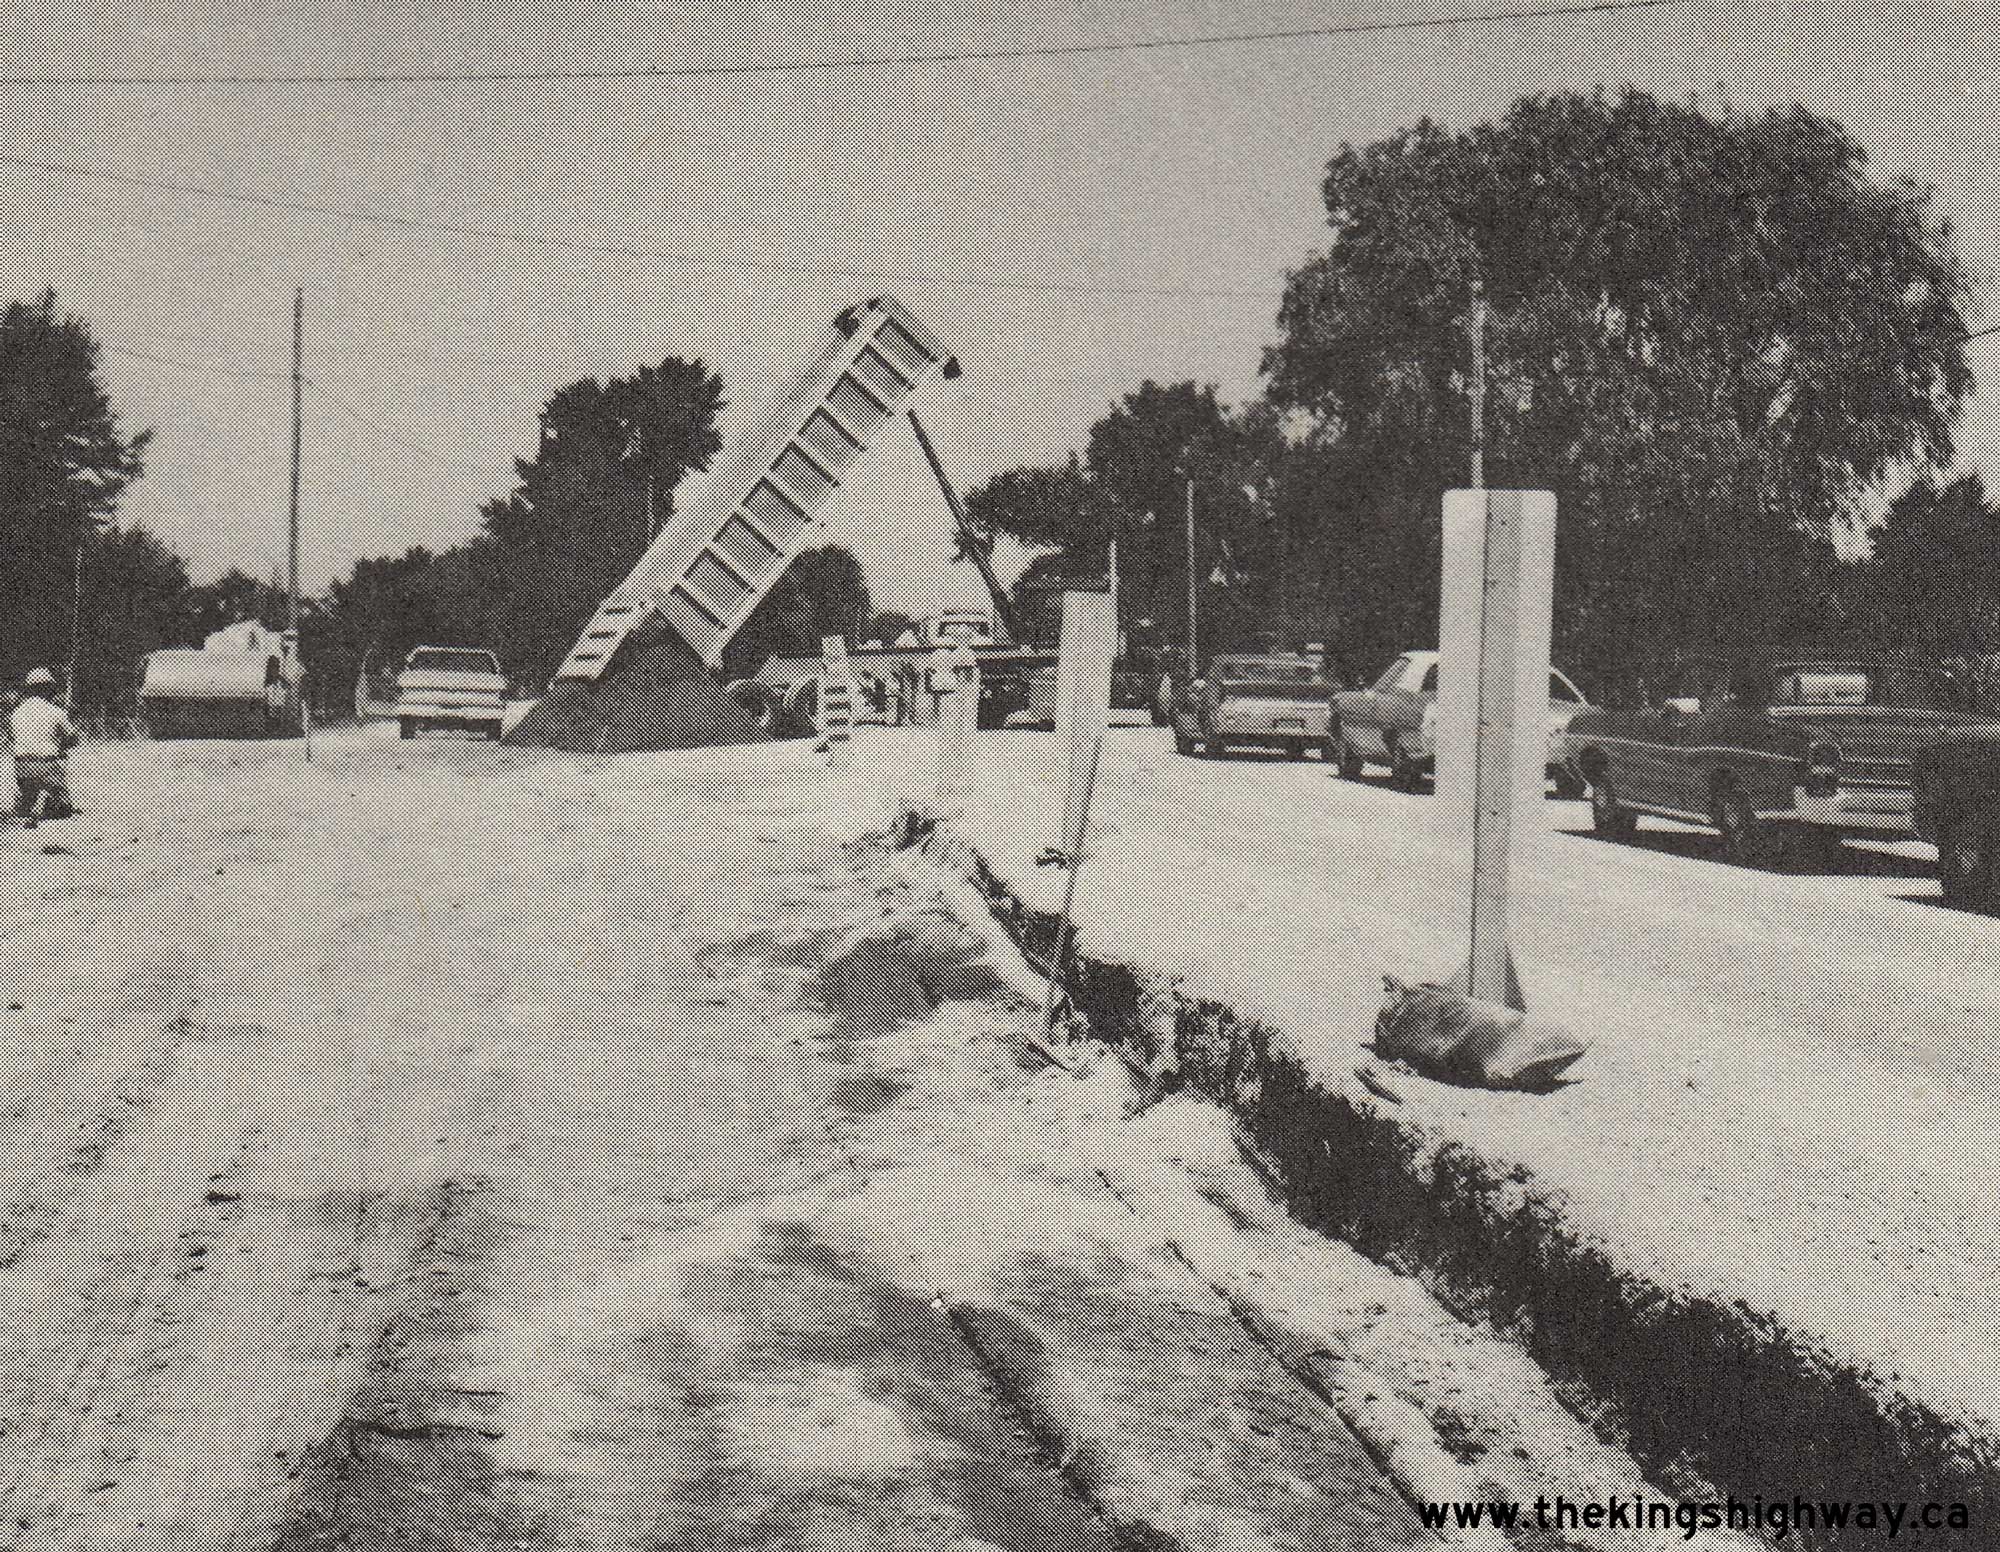
Left - Reconstruction and widening of Hwy 18 in Amherstburg to four lanes in 1977, under Contract #1977-17. Under this contract, a disused railway grade
separation over the Pennsylvania Central Railway was removed. The aging railway overhead was built in 1926 and was only wide enough to support a two-lane pavement on
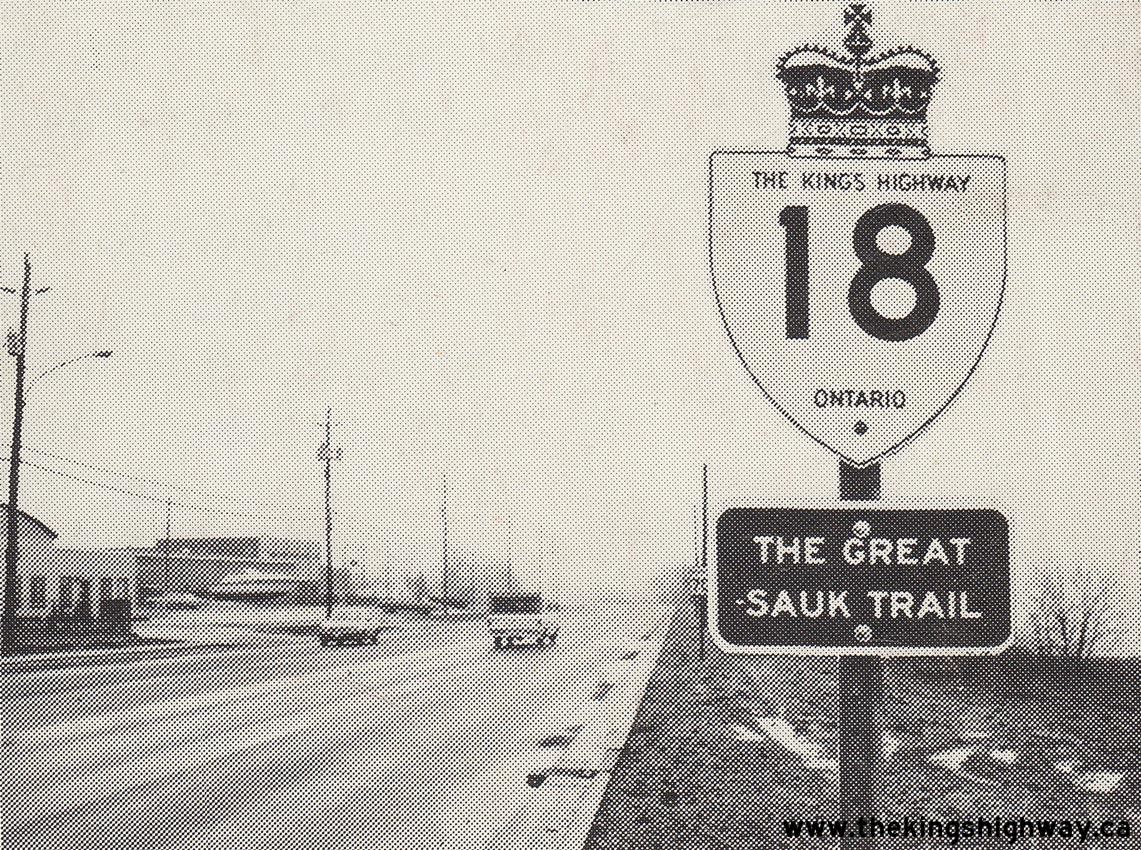
Hwy 18 over the structure. See an Enlarged Photo Here. Photo taken in 1977. (Photo courtesy of Ontario Ministry of Transportation - © King's Printer for Ontario, 1977) Right - Commemorative Great Sauk Trail sign on Hwy 18 near Amherstburg. These signs were placed along Hwy 18 to mark the historic route of the Great Sauk Trail, which was an early path used by indigenous communities to reach this area of Canada from Illinois. For several decades following the American Revolution, the Sauk and Fox Indigenous Communities met with British officials at Fort Malden each year to exchange gifts in recognition of their allegiance with the British, particularly after the War of 1812. The practice was discontinued by the British in the late 1830s and the Sauk Trail fell into disuse. However, the current route of Hwy 18 approximates the route of this historical trail. Reportedly, this was also the reason that Hwy 18 was signed as a "Heritage Highway". See an Enlarged Photo Here. Photo taken in 1986. (Photo courtesy of Ontario Ministry of Transportation - © King's Printer for Ontario, 1986) |
|---|
|
Present Day King's Highway 18 Photographs

Above - Old 1930s-era divided portion of Hwy 18 (Ojibway Parkway) near the E.C. Row Expressway Junction in Windsor. See an
Enlarged Photo Here. (Photograph taken on November 8, 2003 - © Cameron Bevers) 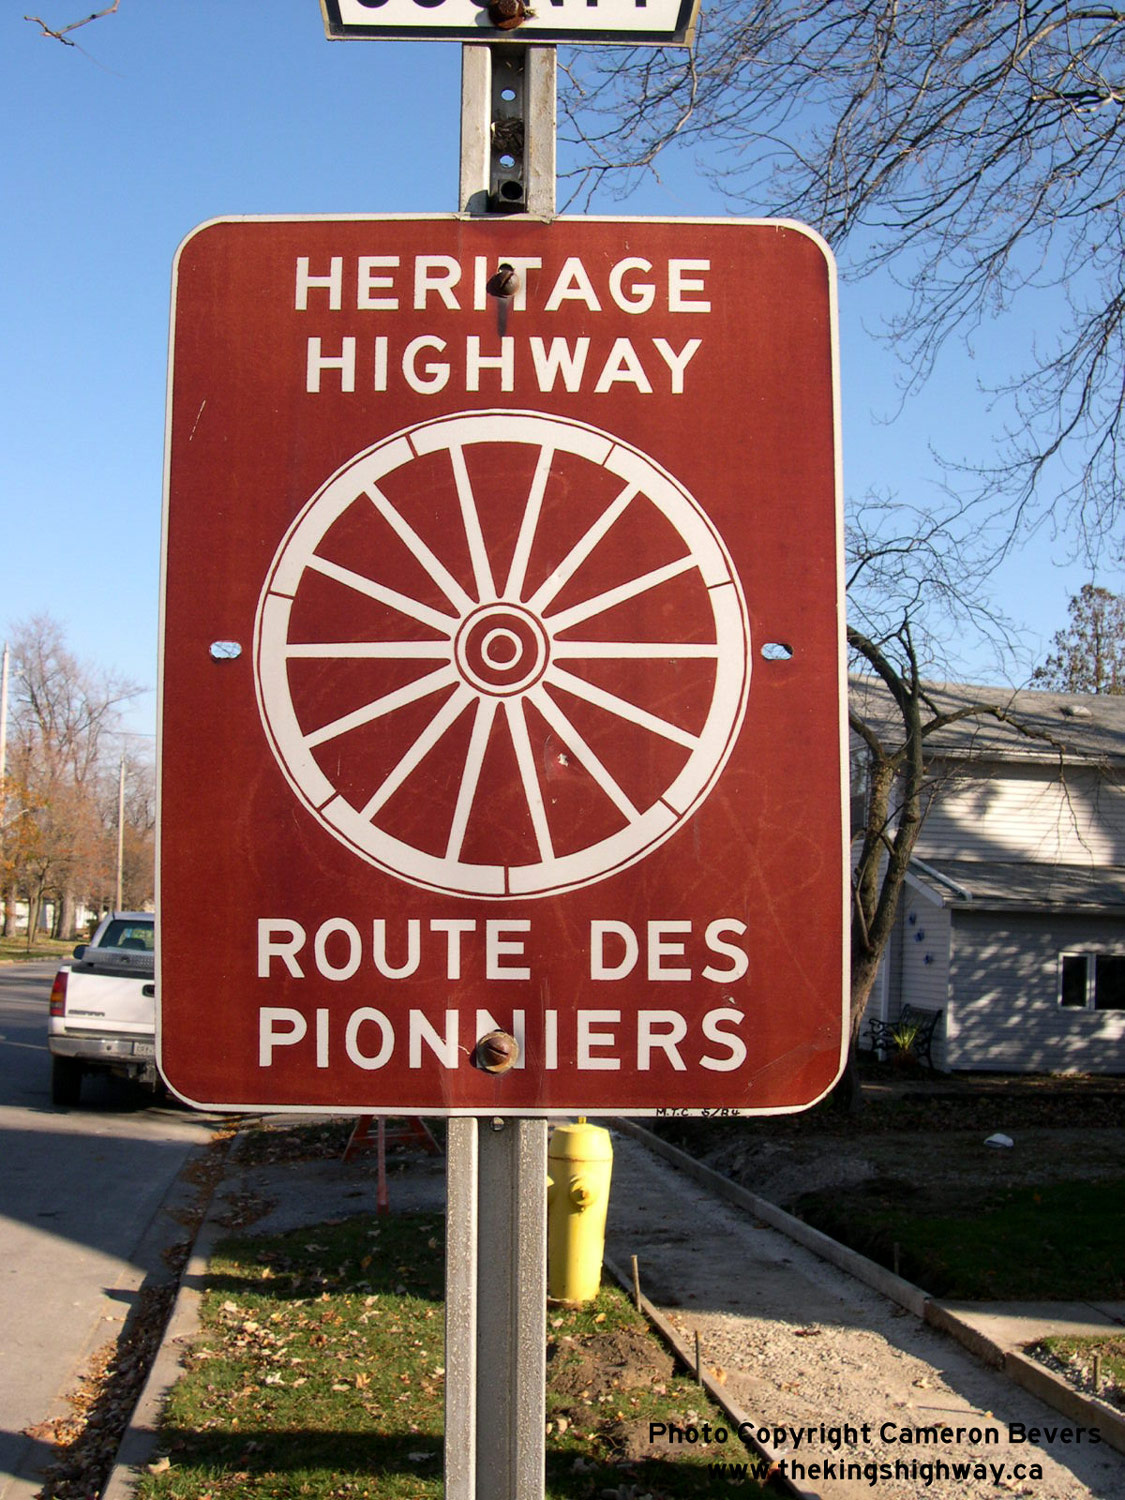
Left - Old Heritage Highway tourist route sign on Hwy 18 near Windsor. See an
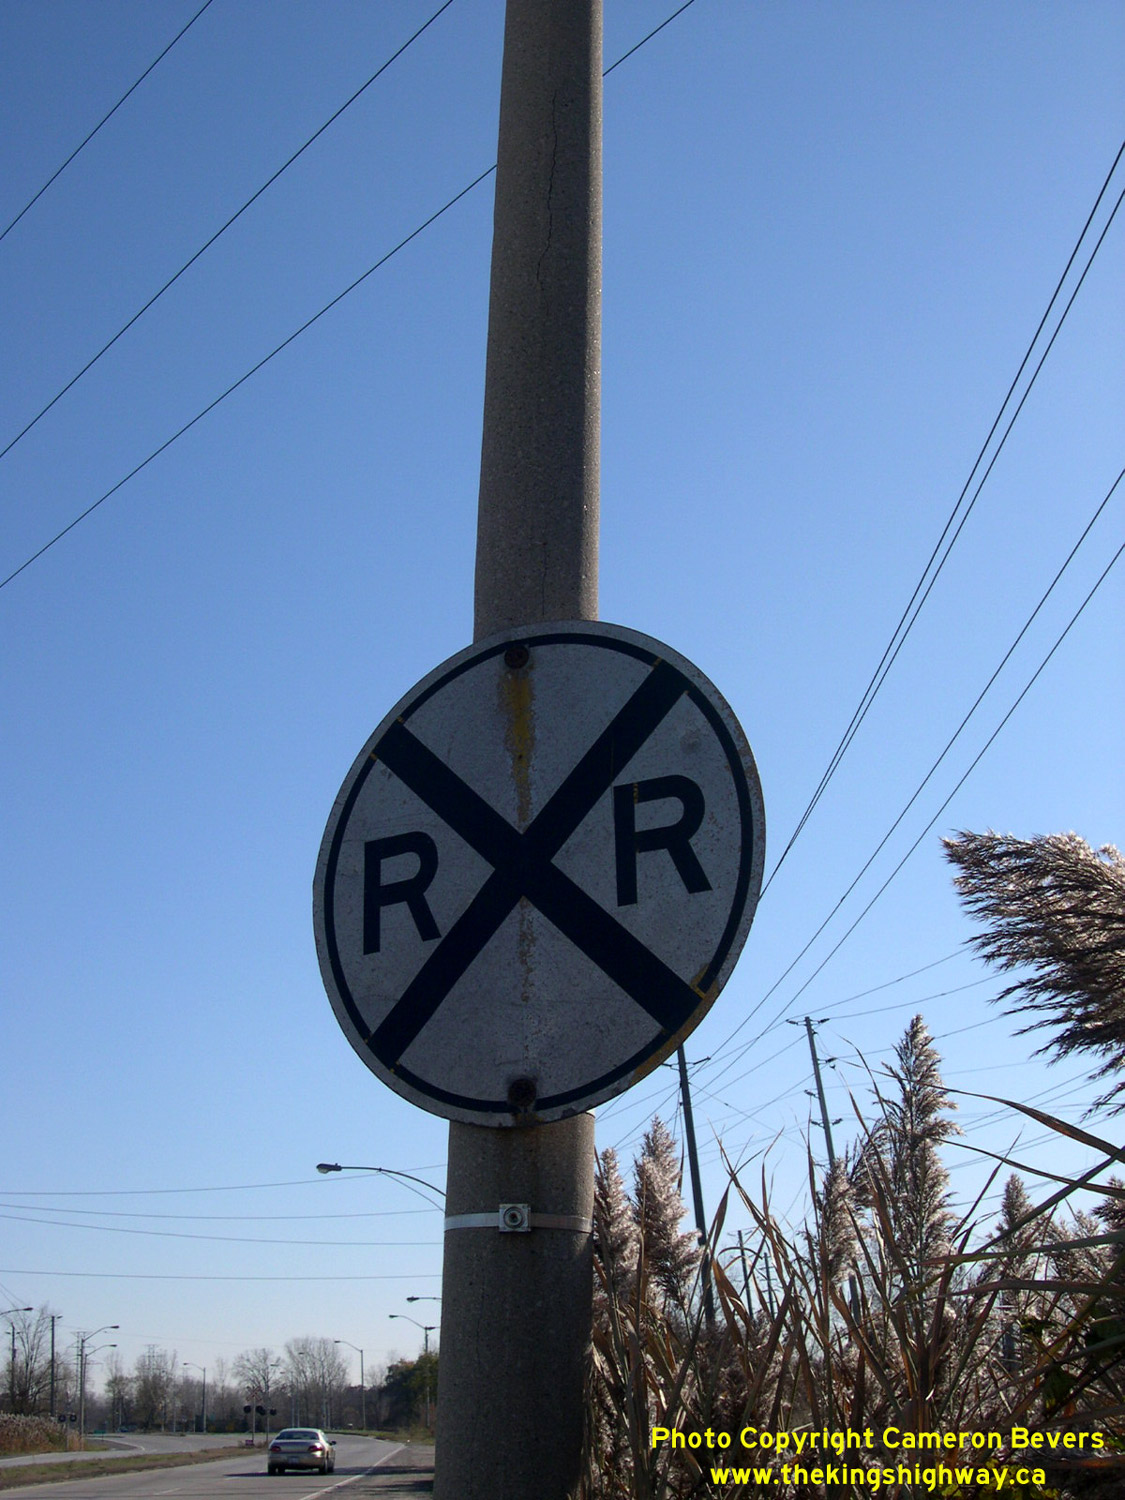
Enlarged Photo Here. (Photograph taken on November 8, 2003 - © Cameron Bevers) Right - Old circular "RR" railway crossing sign on Hwy 18 in Windsor. Circular "RR" signs such as this one were phased out in the 1970s, when they were replaced with the diagrammatic diamond-shaped railway crossing signs seen today. Somehow, this obsolete sign has lasted through the past few decades. See an Enlarged Photo Here. (Photograph taken on November 8, 2003 - © Cameron Bevers) 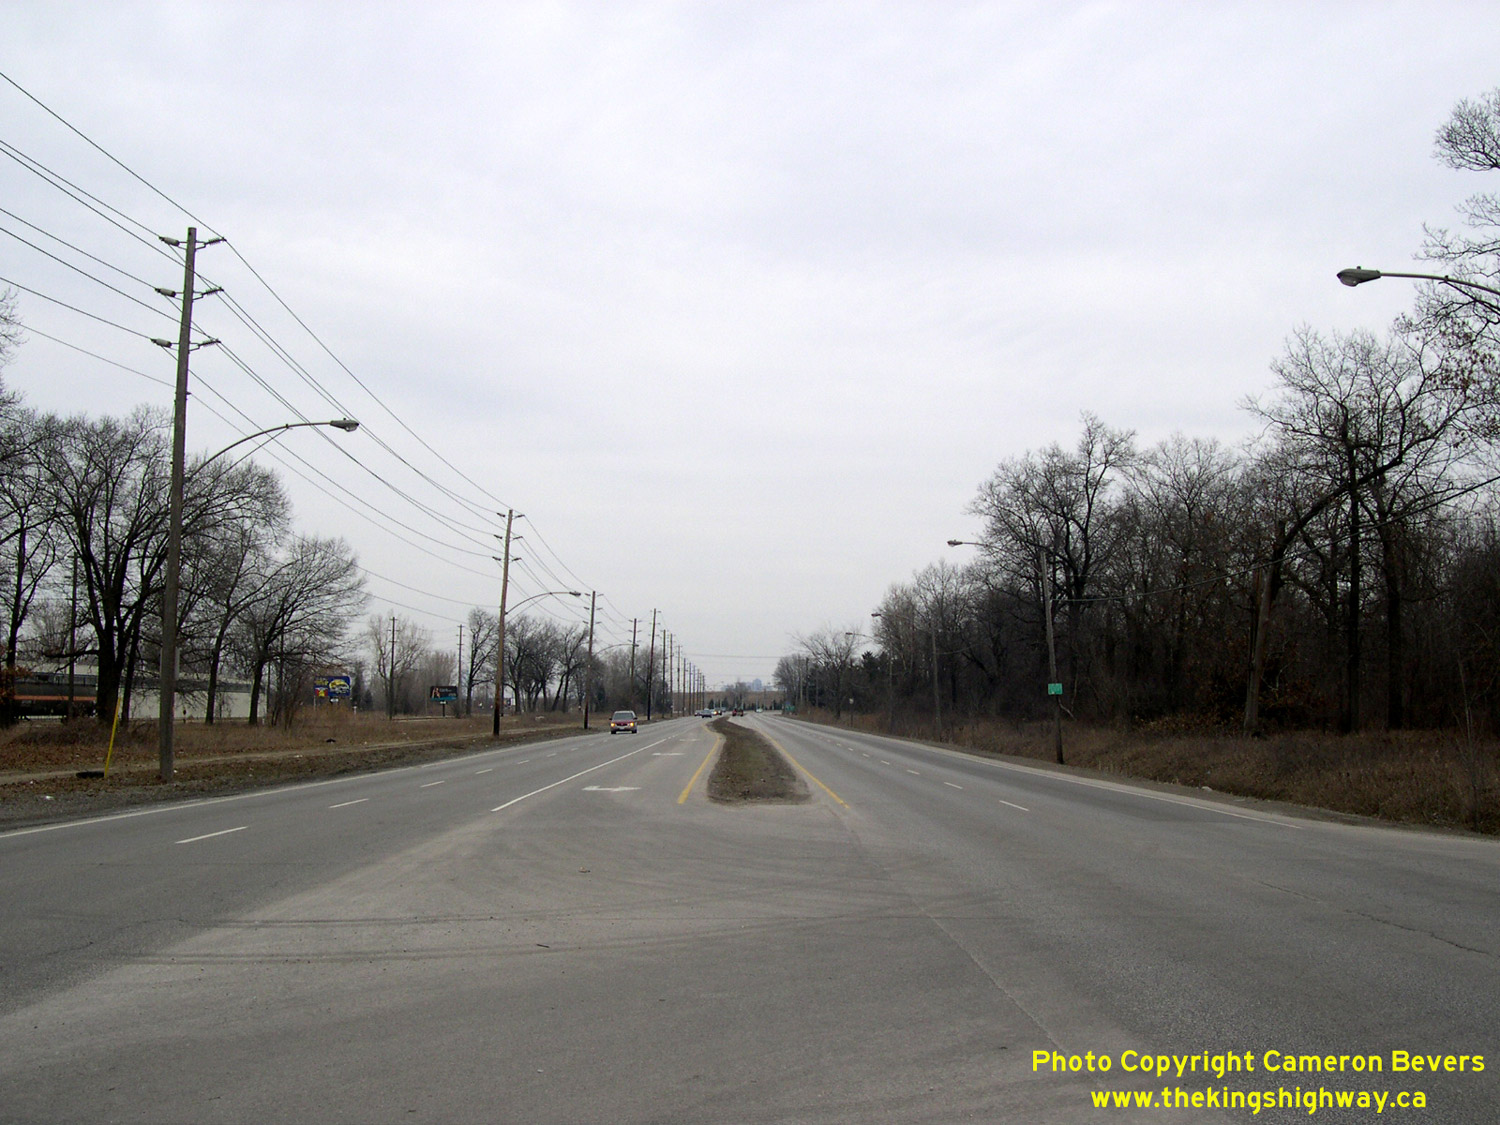
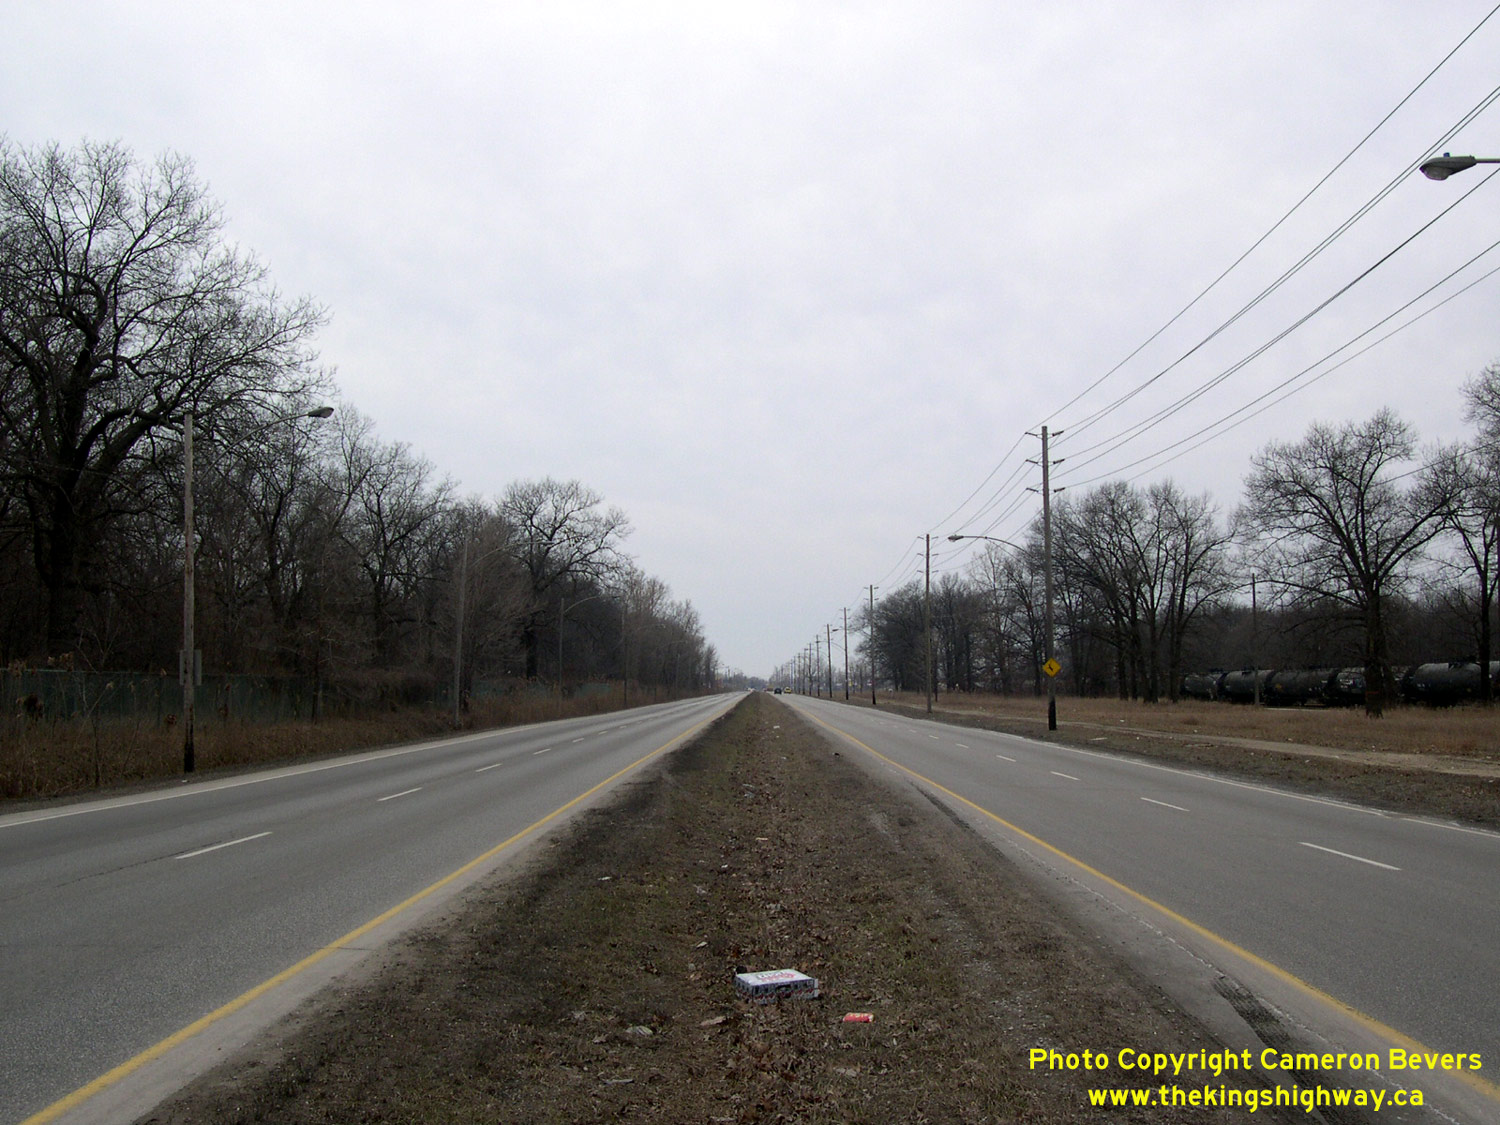
Left - Facing north along Hwy 18 (Ojibway Parkway) near Broadway Boulevard in Windsor. See an
Enlarged Photo Here. (Photograph taken on March 27, 2005 - © Cameron Bevers) Right - Ojibway Parkway (Hwy 18), facing south towards LaSalle. This four-lane divided highway was one of the first highways of this type built in the province. The original two-lane highway between Windsor and LaSalle was twinned in the 1930s. A new carriageway was built beside the existing highway to carry opposing traffic. The narrow depressed grass median between the carriageways has not changed much since the highway was reconstructed over 85 years ago. See an Enlarged Photo Here. (Photograph taken on March 27, 2005 - © Cameron Bevers) 
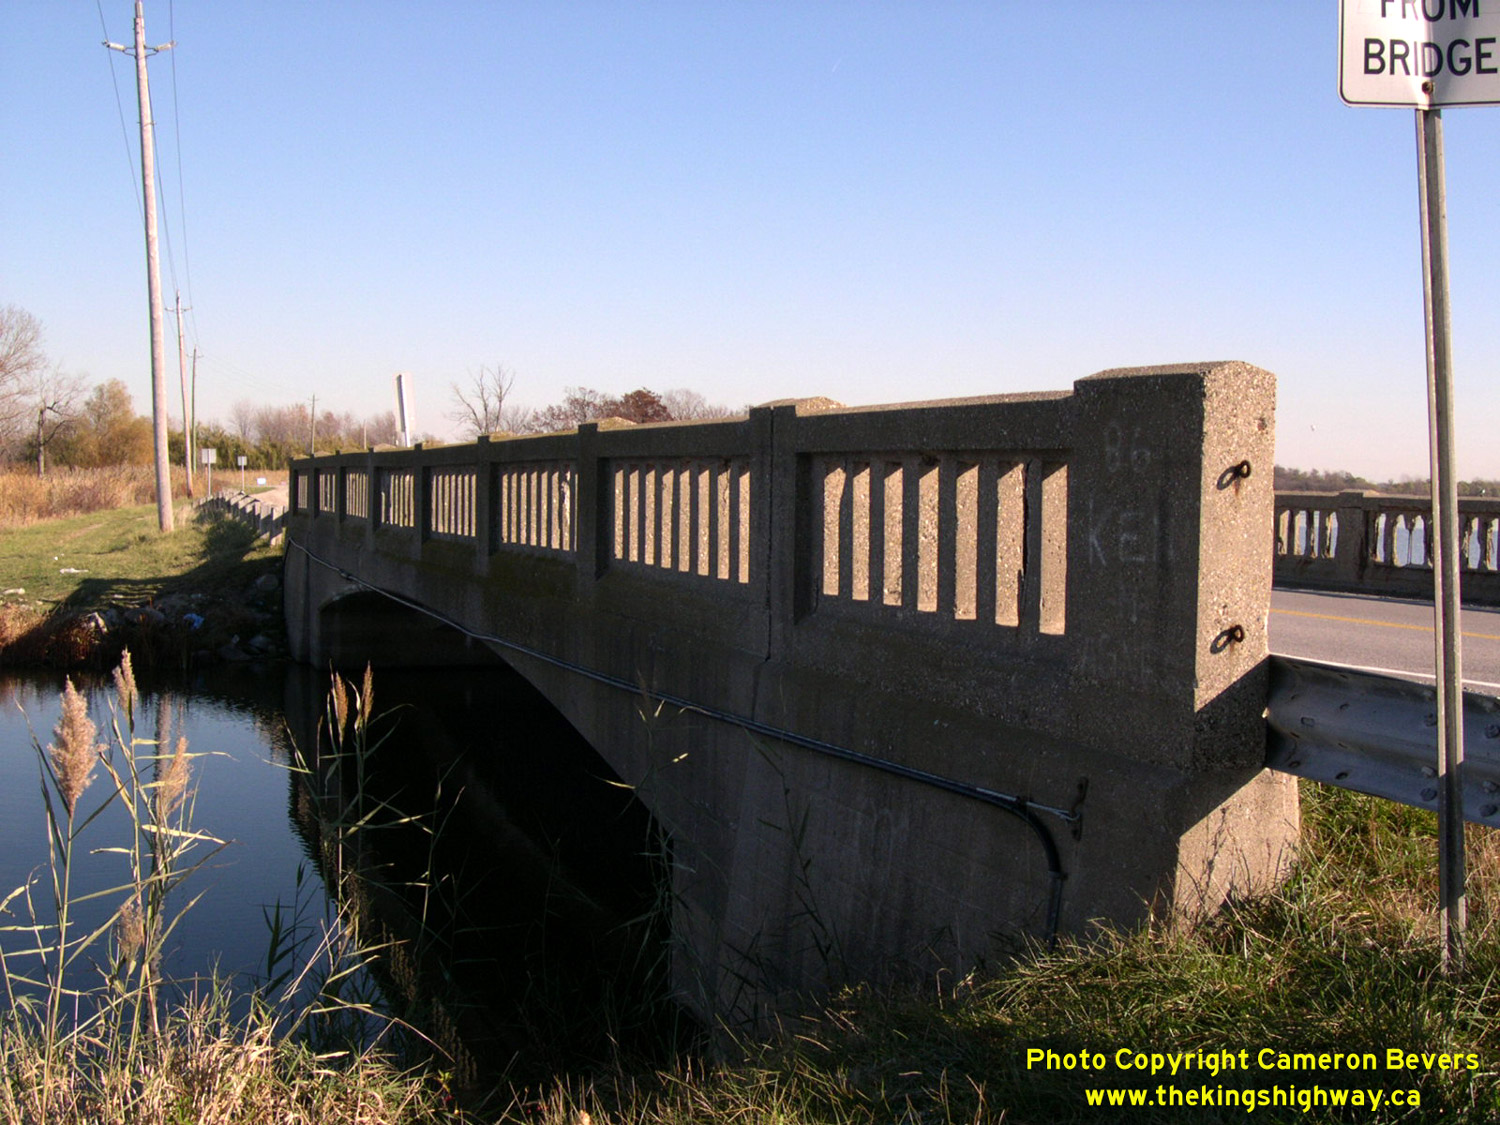
Left - Facing east towards the Big Creek Bridge on Hwy 18 between Amherstburg and Malden Centre. See an
Enlarged Photo Here. (Photograph taken on November 8, 2003 - © Cameron Bevers) Right - Northern side of the Big Creek Bridge on Hwy 18. This single-span concrete rigid frame structure was completed in 1932, under Contract #1932-10. See an Enlarged Photo Here. (Photograph taken on November 8, 2003 - © Cameron Bevers) 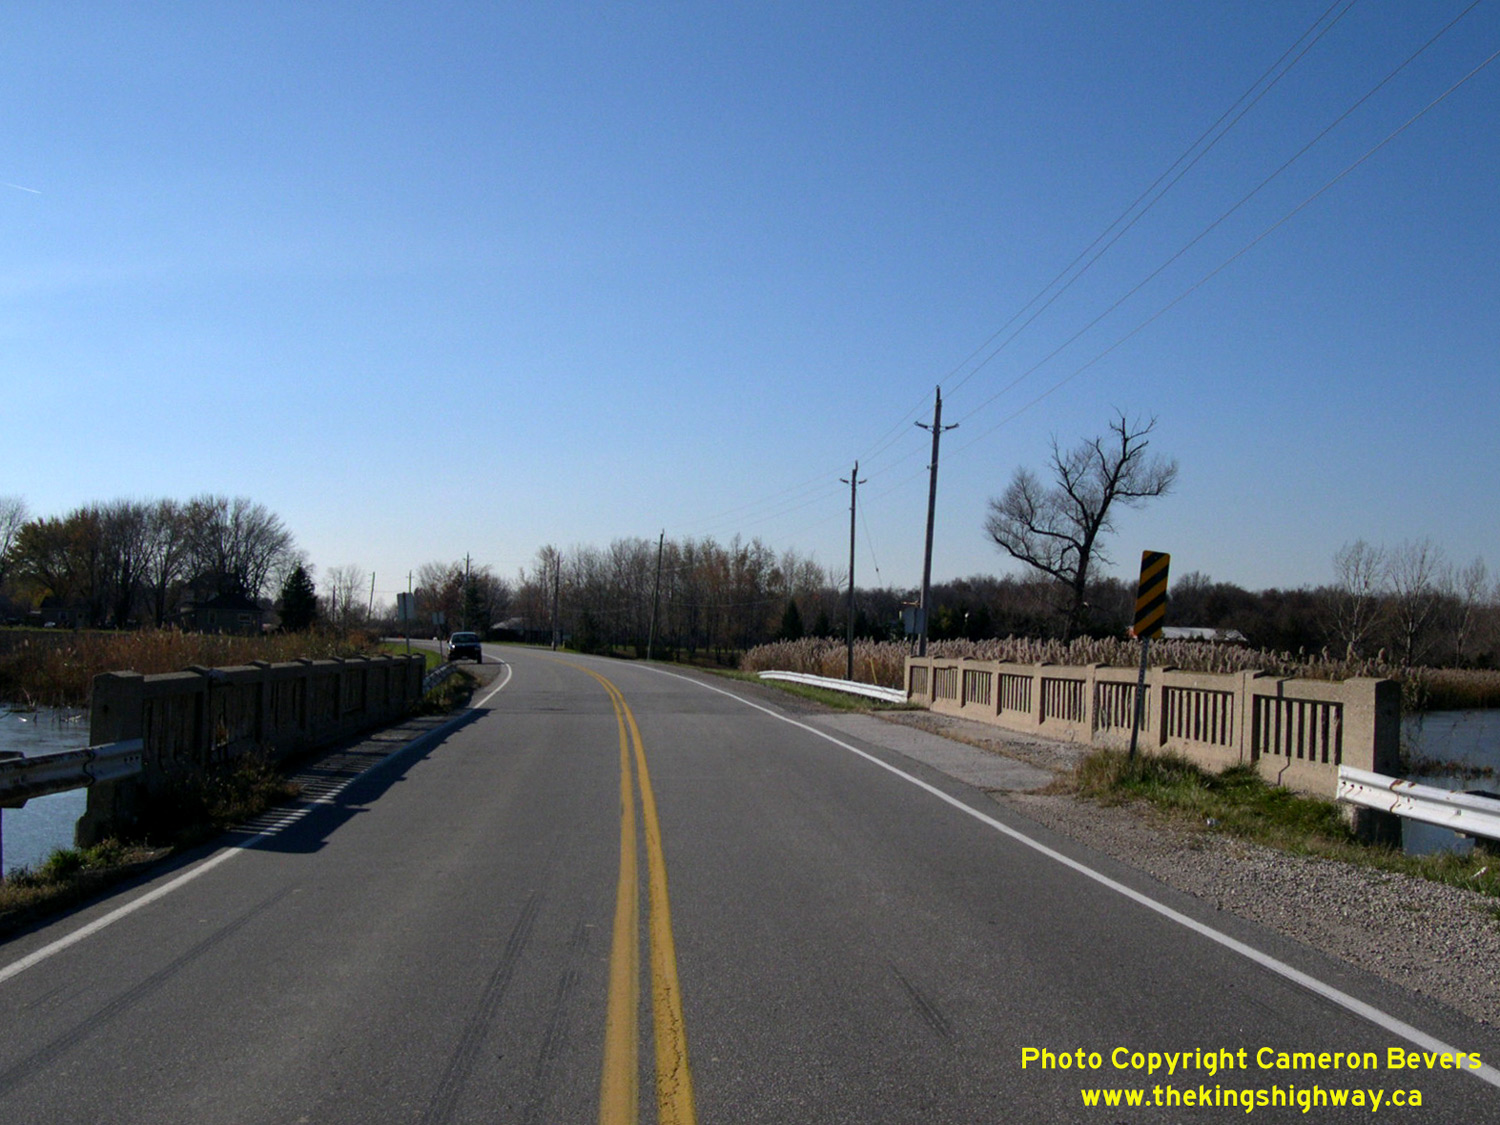
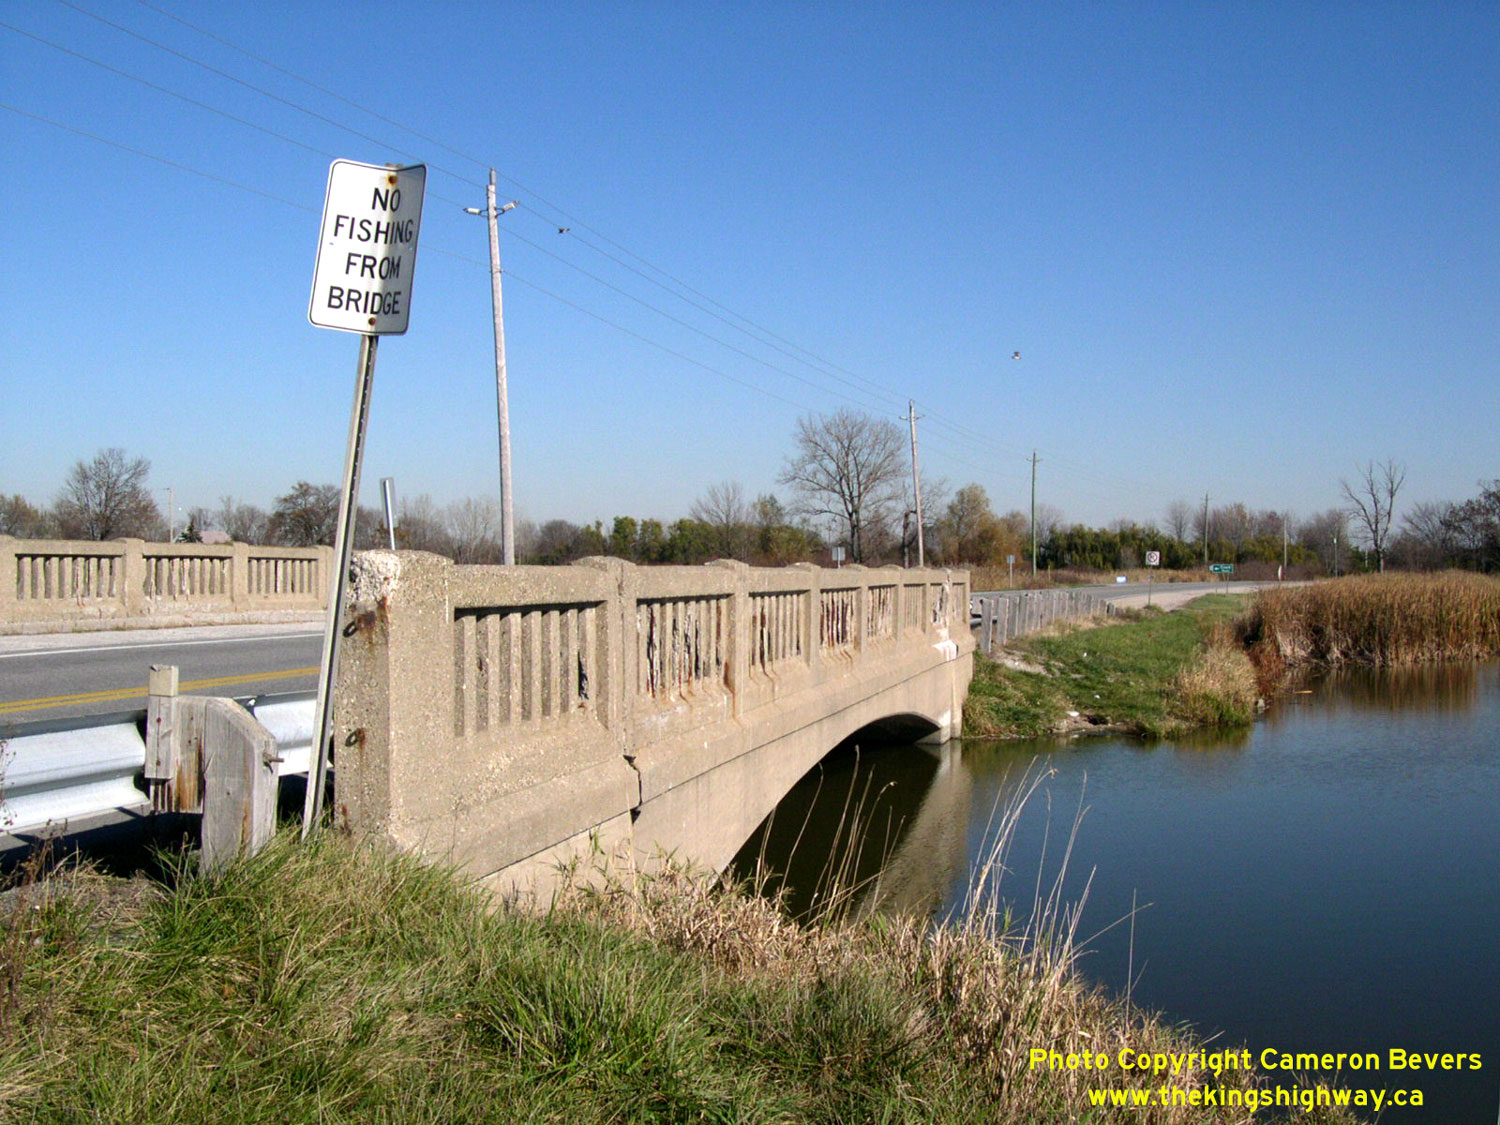
Left - Facing west along Hwy 18 towards Amherstburg at the Big Creek Bridge. See an
Enlarged Photo Here. (Photograph taken on November 8, 2003 - © Cameron Bevers) Right - Southern side of the Big Creek Bridge on Hwy 18 between Amherstburg and Malden Centre. See an Enlarged Photo Here. (Photograph taken on November 8, 2003 - © Cameron Bevers) 

Left - Facing west along Hwy 18 towards Amherstburg from the Former Hwy 18A Junction at Malden Centre. Like many King's Highways in Southwestern Ontario,
jurisdiction over the entire route of Hwy 18 was transferred or "downloaded" from the province to the municipal tier in the late 1990s. This former King's Highway was
transferred to the County of Essex in 1998 and is officially known as Essex Road 20 today. The section of Hwy 18 seen in this photo is actually a diversion built in
the 1930s to bypass two 90-degree turns in the original highway's route. See an
Enlarged Photo Here. (Photograph taken on August 2, 2019 - © Cameron Bevers) Right - Approaching the Former Hwy 18A Junction at Malden Centre, facing east along Hwy 18 towards Harrow. Up until the late 1970s, Hwy 18A formed an alternate route to Hwy 18 along the Lake Erie shoreline via Colchester. After provincial jurisdiction over Hwy 18A ended in 1978, the former highway became known as Essex Road 50. See an Enlarged Photo Here. (Photograph taken on August 2, 2019 - © Cameron Bevers) 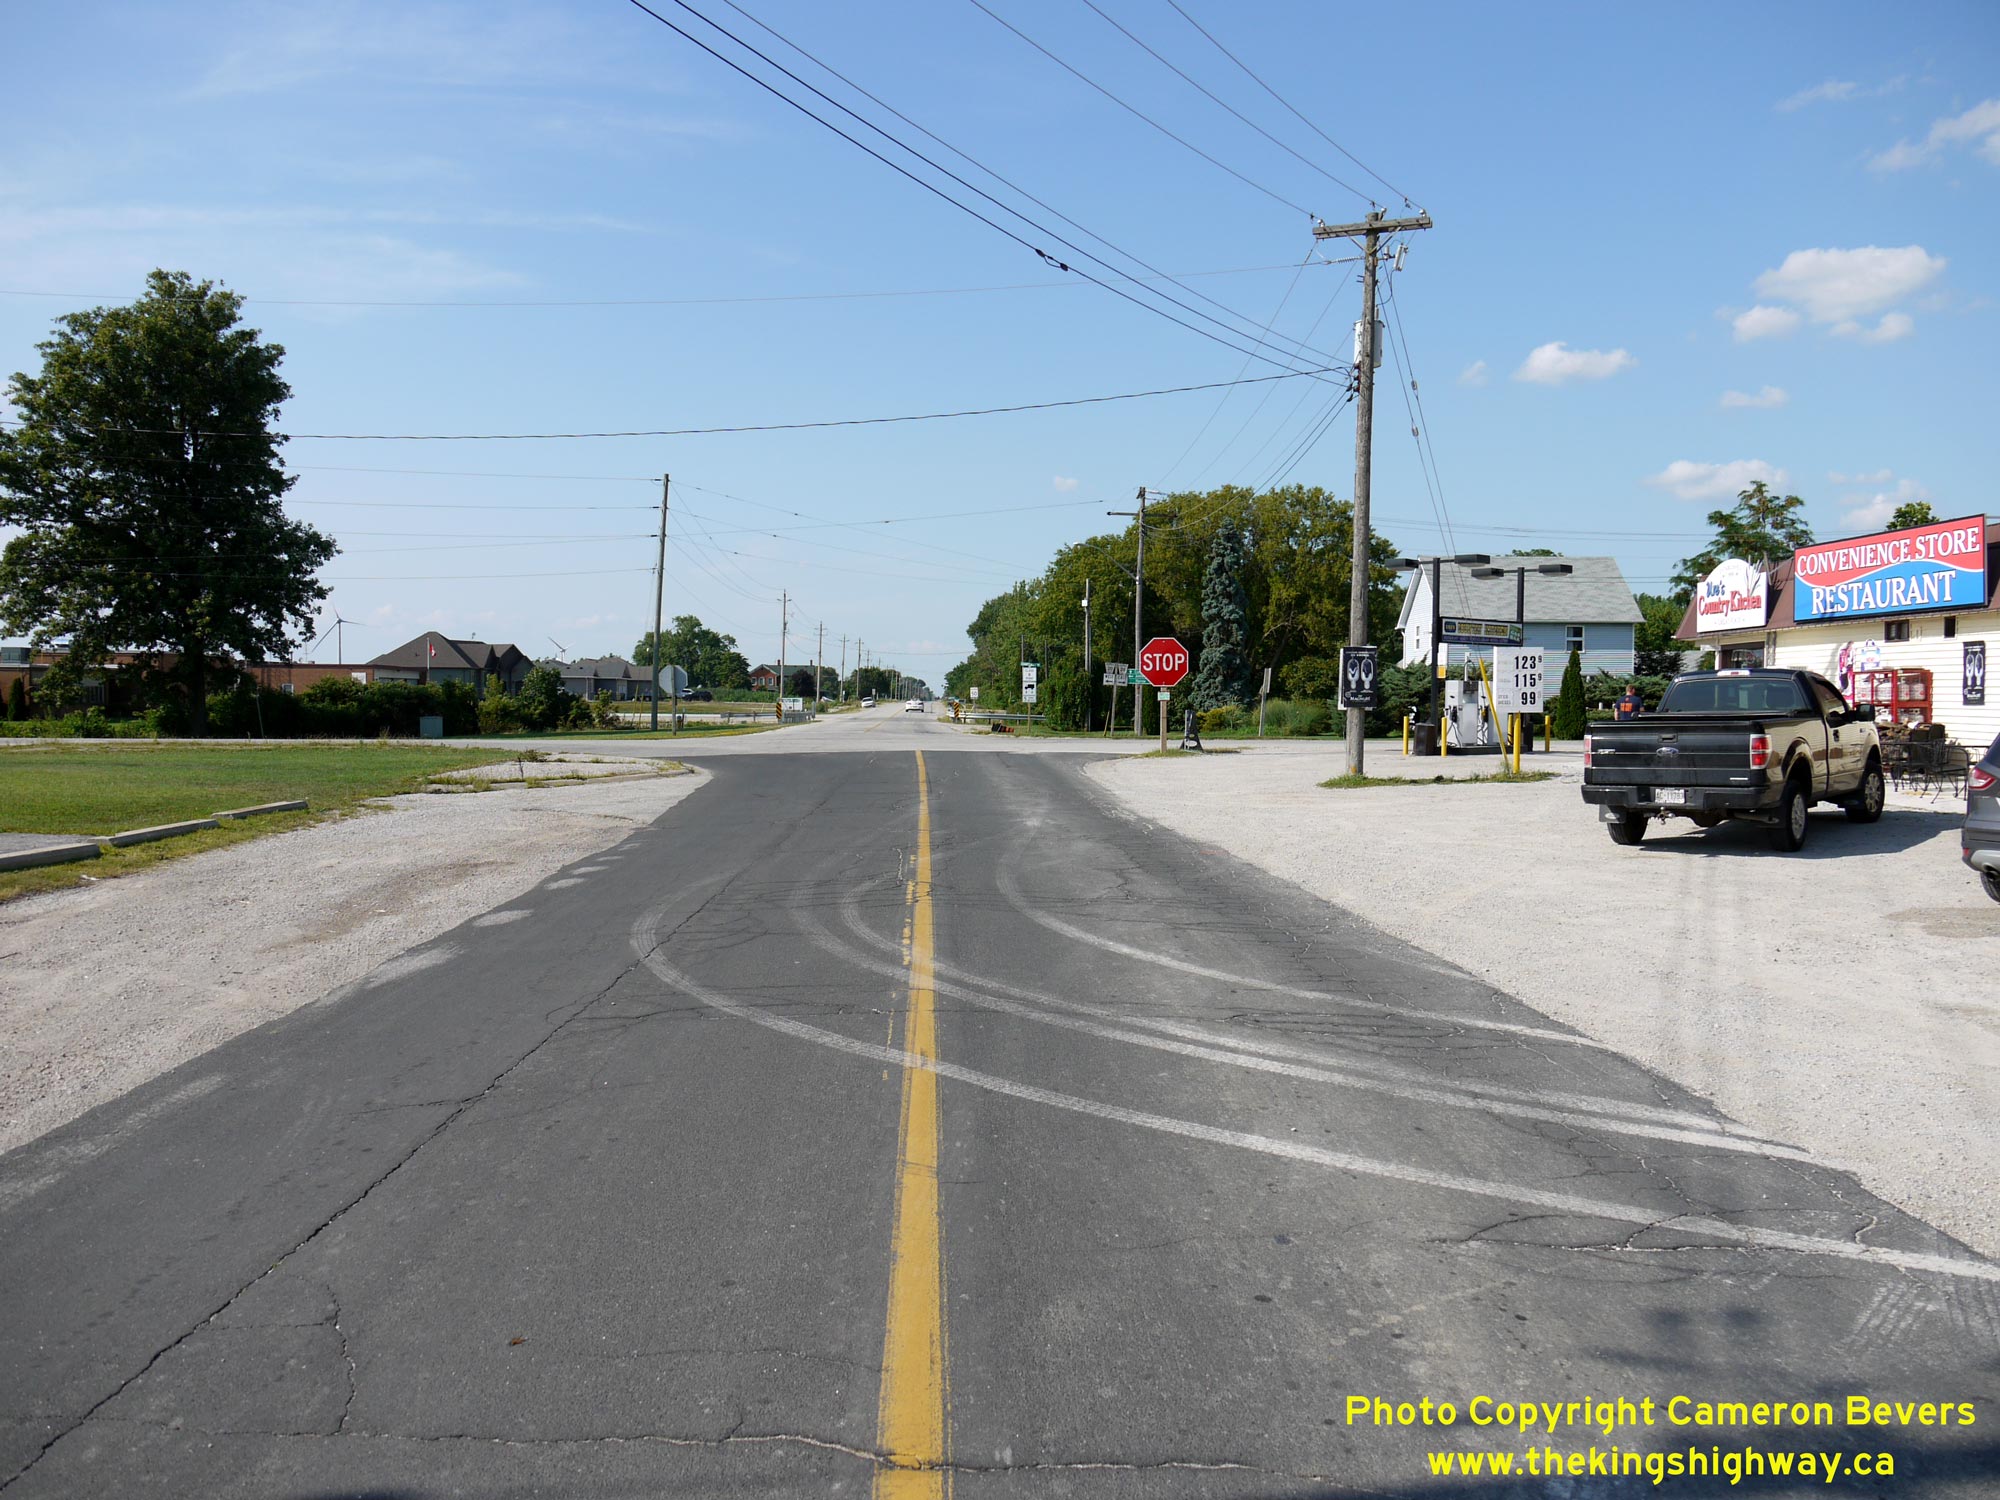
Left - Approaching the western terminus of Former Hwy 18A at the Hwy 18 Junction at Malden Centre. Up until the late 1970s, Hwy 18A formed a loop from Malden
Centre easterly to Kingsville via Colchester, with Hwy 18A connecting back to Hwy 18 at both ends of the loop. See an
Enlarged Photo Here. (Photograph taken on August 2, 2019 - © Cameron Bevers) Right - Facing east along Former Hwy 18A towards Colchester from the Hwy 18 Junction at Malden Centre. This route was first assumed by the Department of Highways of Ontario (DHO) as a King's Highway in April 1938. The route remained in the provincial highway system for just over 40 years, but ownership of the highway was eventually transferred over to the County of Essex in July 1978. Former Hwy 18A is officially known as Essex Road 50 today. This former King's Highway is rather noteworthy, in that it was Canada's southernmost provincial highway at the time of its existence. See an Enlarged Photo Here. (Photograph taken on August 2, 2019 - © Cameron Bevers) 

Left - Junction sign assembly at the Hwy 18 & Former Hwy 18A Junction at Malden Centre. The old Hwy 18 provincial crown route markers were replaced with
newer Essex County Road 20 "flowerpot" route markers in the 1990s. Unfortunately, Essex County already had a rather lengthy County Road 18 in their road system and
was therefore forced to change the old Hwy 18 designation to something different once the county took over the highway in 1998. When Hwy 18 was first assumed as a
King's Highway in 1931, the route of Hwy 18 actually turned and followed Concession Road 6 northerly for a short distance before it resumed its route west towards
Amherstburg. This old loop of Hwy 18 was bypassed by a new highway diversion from Malden Centre westerly in 1932. There is no longer any trace of the bypassed former
east-west portion of Hwy 18 lying between the highway diversion and Concession Road 6. Jurisdiction over the old loop of Hwy 18 at Malden Centre reverted to the
Township of Malden in October 1932. See an Enlarged Photo Here. (Photograph taken on August 2, 2019 - © Cameron Bevers) Right - Facing west along Hwy 18 towards Amherstburg at Malden Centre, approaching the Former Hwy 18A Junction. See an Enlarged Photo Here. (Photograph taken on August 2, 2019 - © Cameron Bevers) 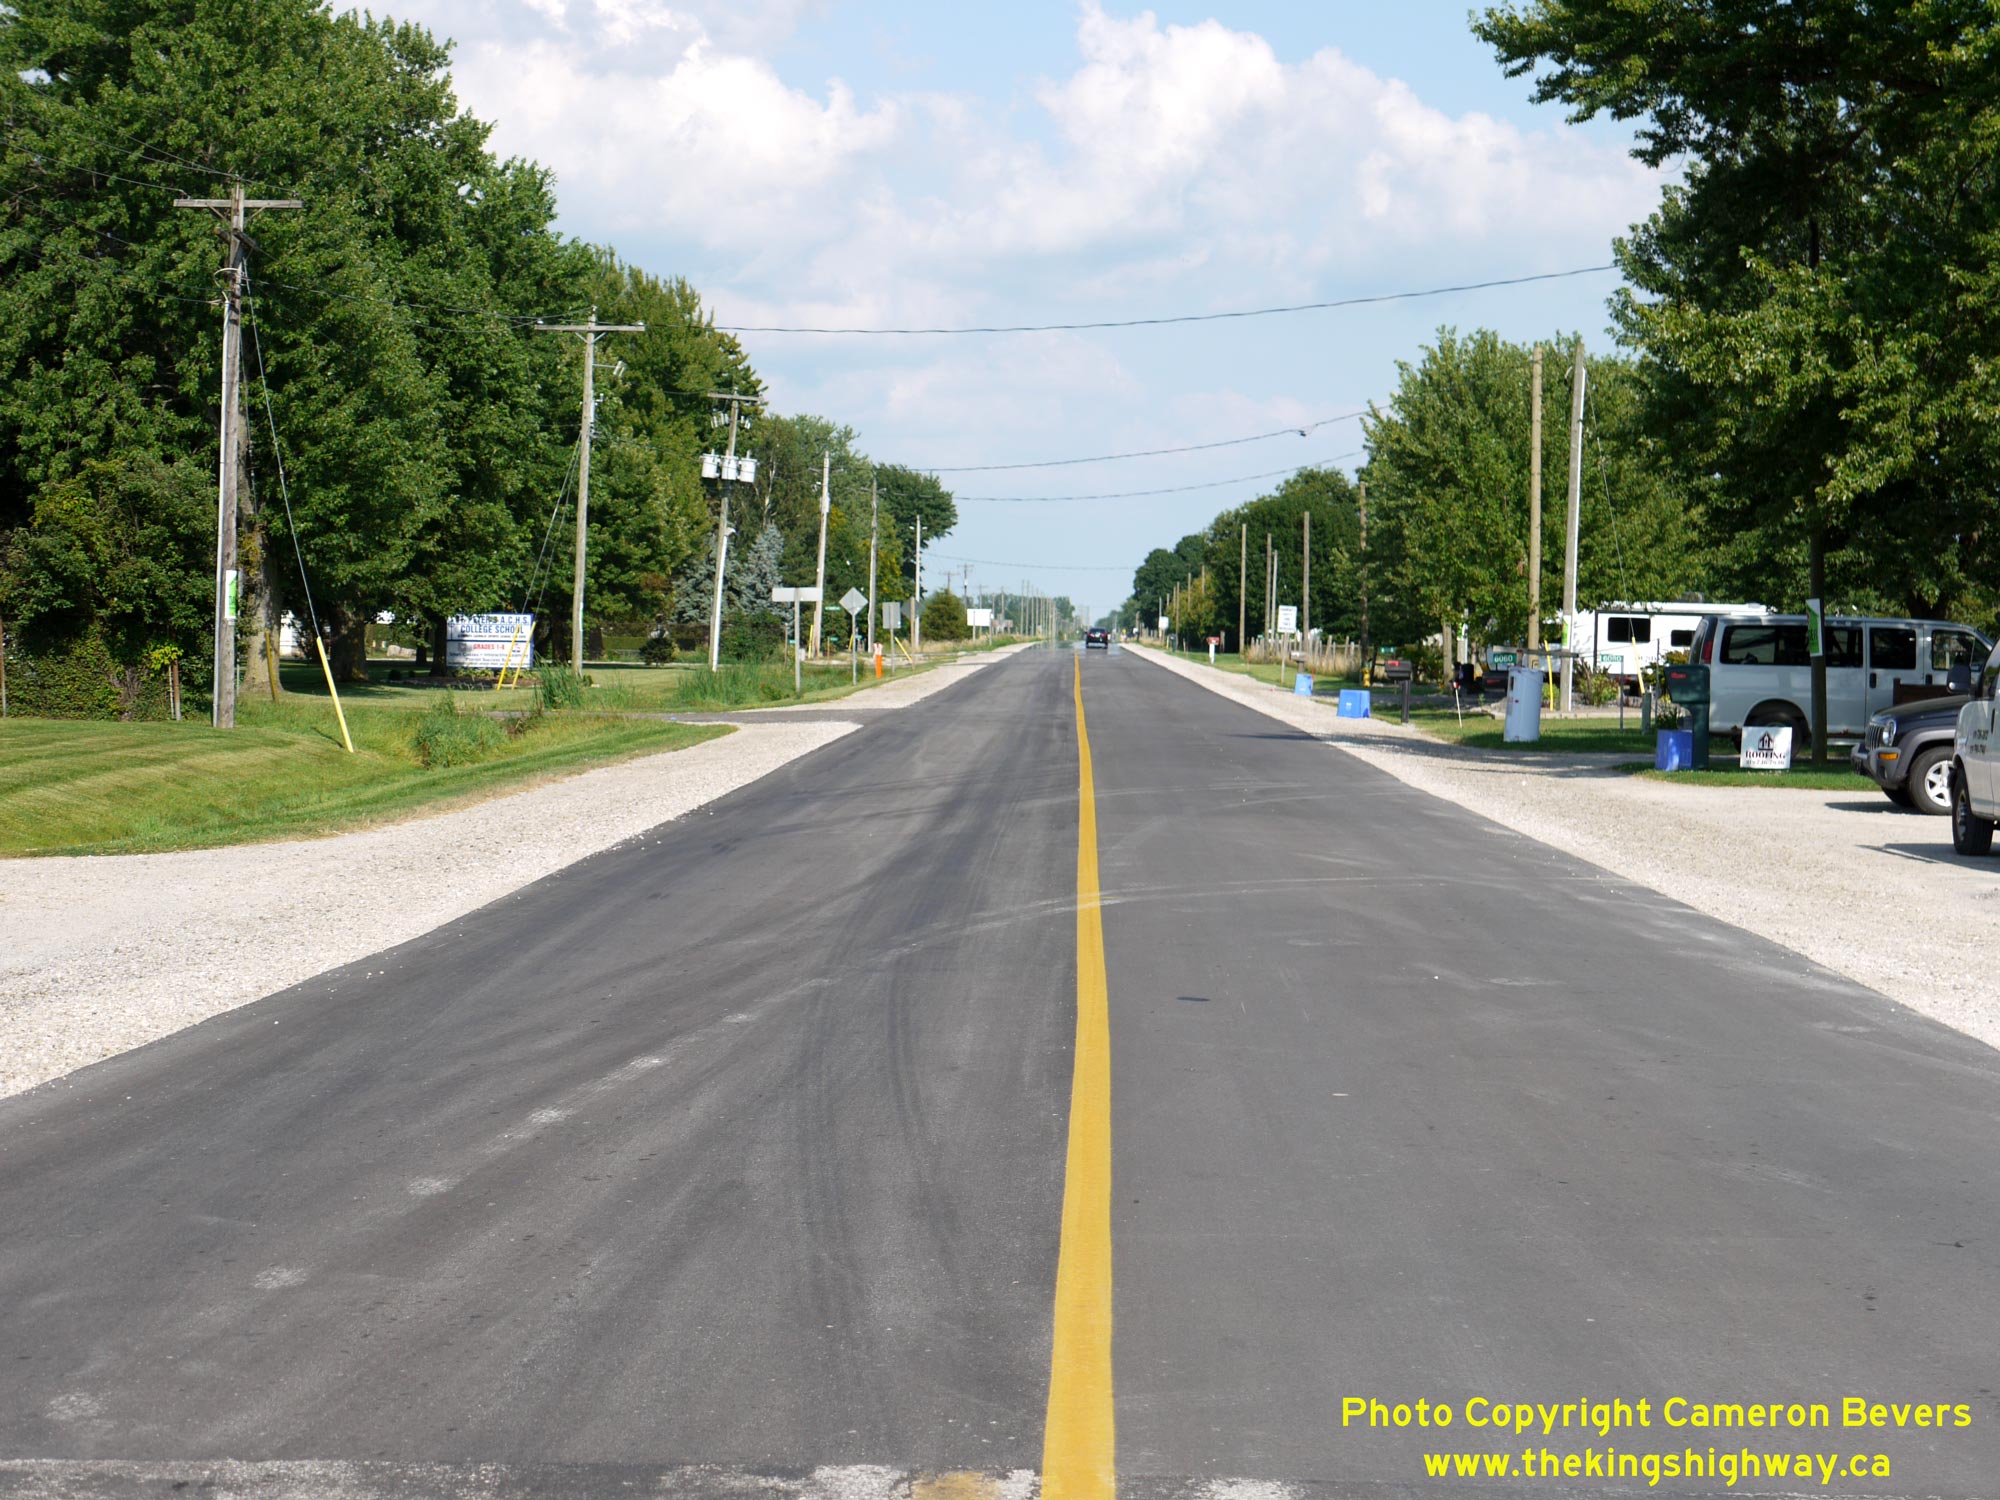

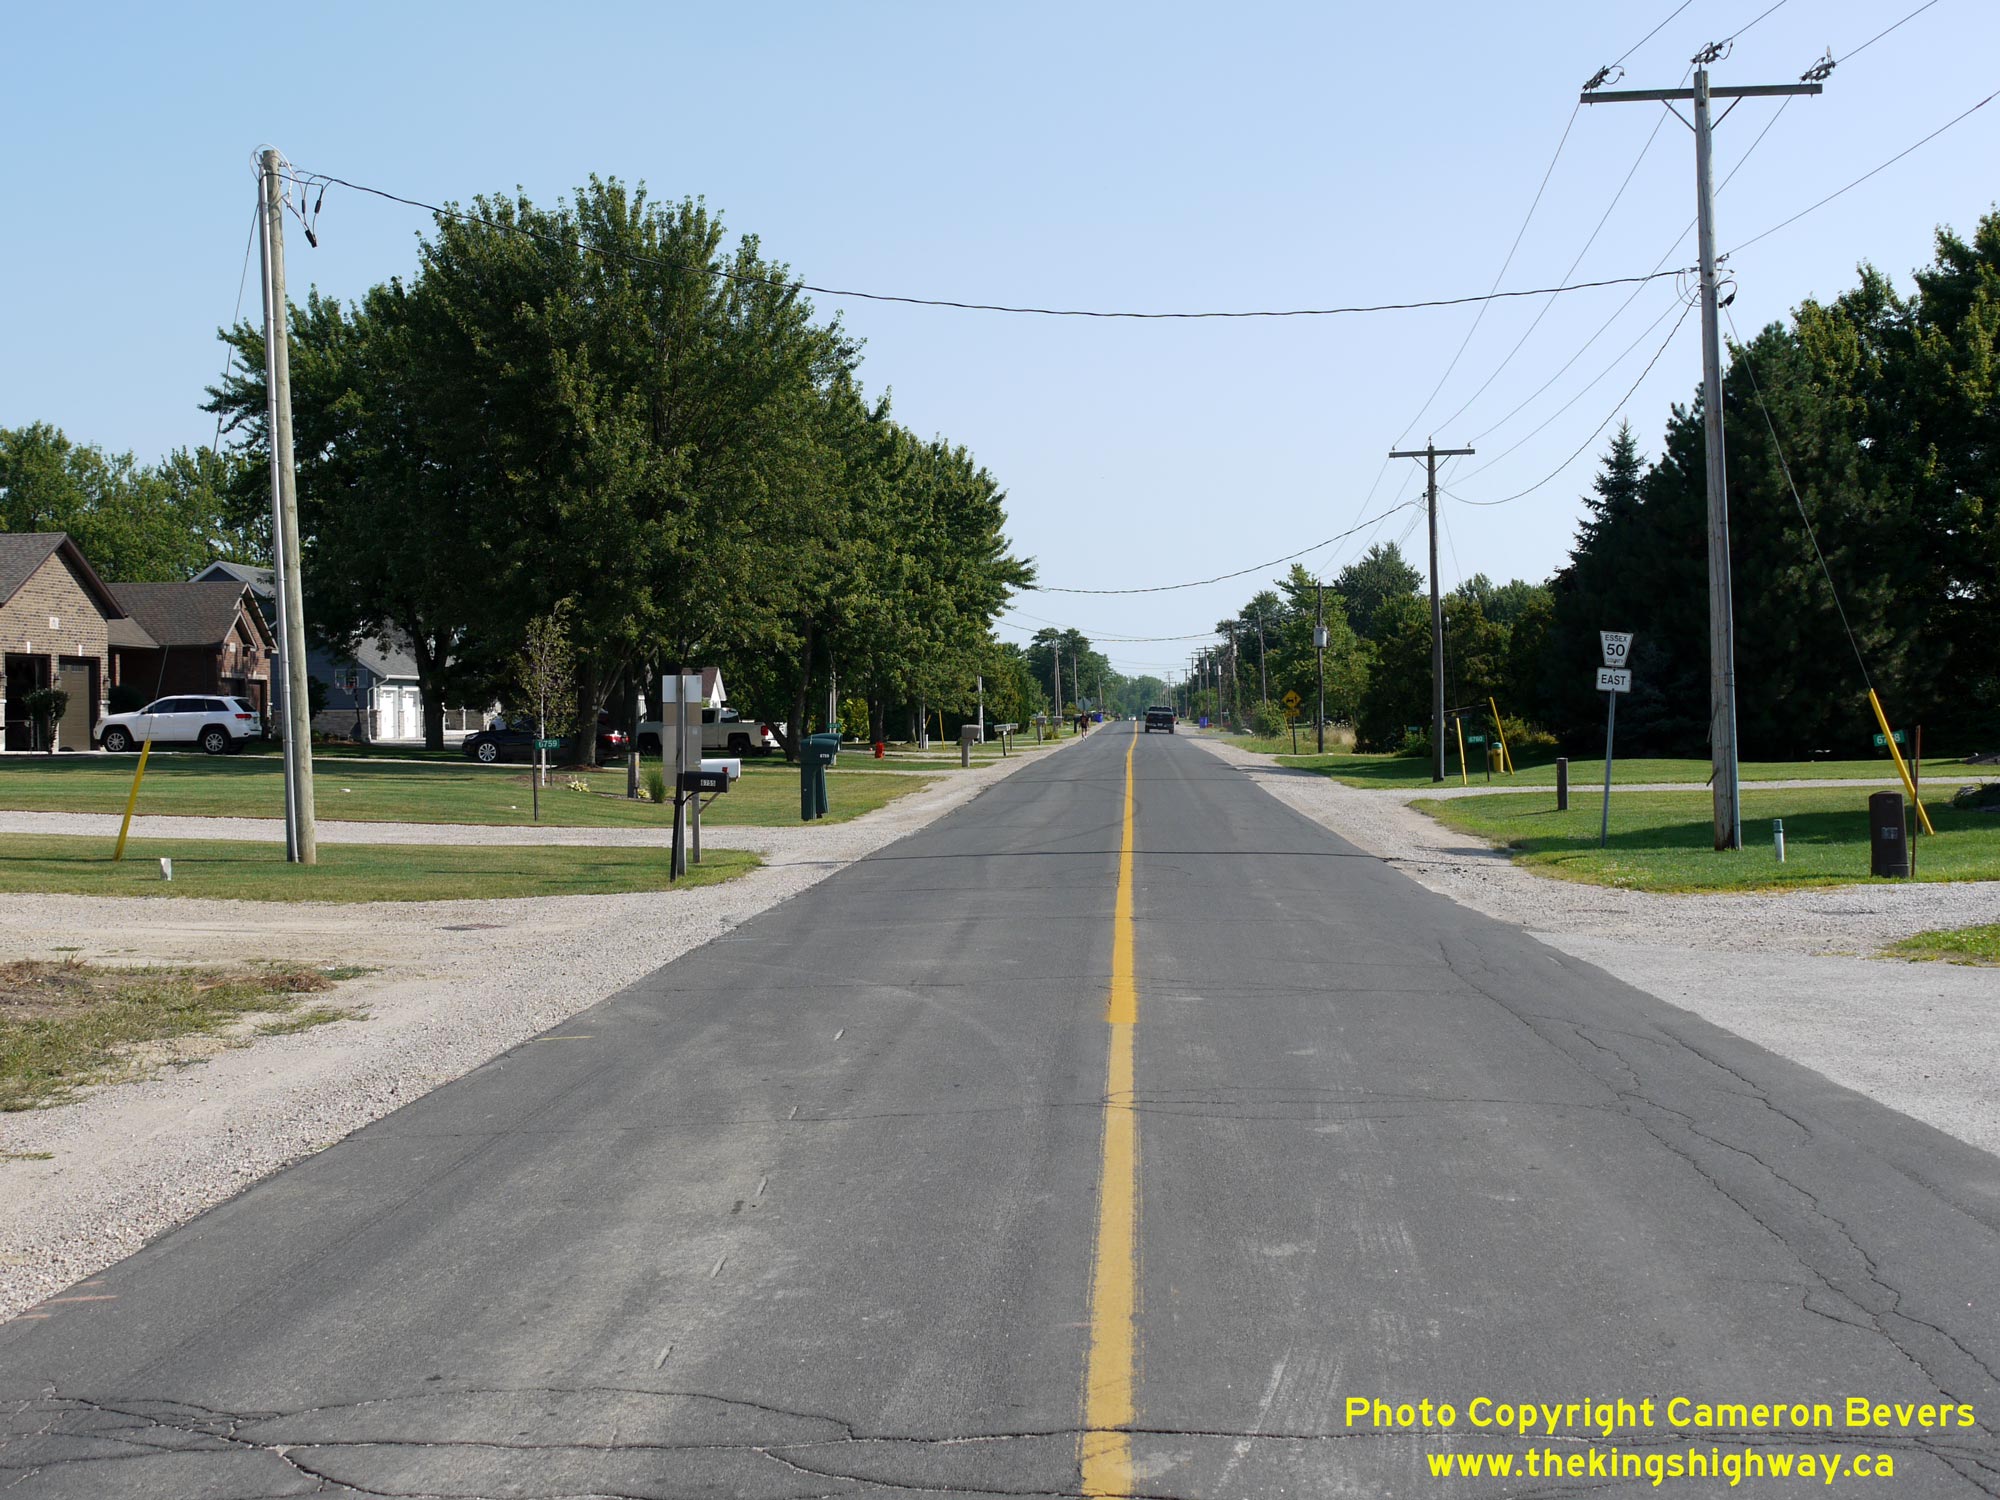
Left - Facing east along Hwy 18 towards Harrow from the Former Hwy 18A Junction at Malden Centre. During the 1930s, this section of Hwy 18 was abuzz with
activity. The province assumed jurisdiction over the road in December 1931, and immediately commenced an extensive Depression-era unemployment relief project. At the
height of construction activities in 1932, more than 2,000 people found temporary employment building this highway between Amherstburg and Kingsville. This section of
Hwy 18 has been recently resurfaced by Essex County. Unlike many other King's Highways in Southwestern Ontario which were originally constructed with a concrete
surface, this section of Hwy 18 has always been surfaced with asphalt. In 1936, a bituminous penetration macadam pavement was constructed for a distance of about 7
miles between Malden Centre and Harrow under Contract #1936-37. This paving contract completed paving operations along Hwy 18, as it closed the final gap in the
pavement between Windsor and Leamington. See an Enlarged Photo Here. (Photograph taken on August 2, 2019 - © Cameron Bevers) Right - Approaching Malden Centre on Hwy 18, facing west. Although the sign is broken, traffic is guided to the Holiday Beach Conservation Area via Essex Road 50 (Former Hwy 18A). Years ago, Holiday Beach Park was operated by the Ontario Department of Lands and Forests as a Provincial Park. However, the local conservation authority has operated Holiday Beach Park since the 1980s. See an Enlarged Photo Here. (Photograph taken on August 2, 2019 - © Cameron Bevers) 

Left - Facing east along Hwy 18 towards Harrow from Malden Centre. Essex County is pancake-flat, with no perceptible change to Hwy 18's vertical profile for
many miles. Drainage in the area is managed by a system of carefully-designed municipal drains and roadside ditches. See an
Enlarged Photo Here. (Photograph taken on August 2, 2019 - © Cameron Bevers) Right - Blue-and-white Town of Amherstburg municipal boundary sign on westbound Hwy 18. This a fairly large municipality, geographically speaking. Amherstburg's Town Centre lies about 14 km ahead via Hwy 18. Under Contract #1932-08, about 20 miles of grading were completed along Hwy 18 between Amherstburg and Kingsville, including this superelevated curved diversion. The diversion was constructed in order to eliminate a 90-degree turn in the original route of Hwy 18 at the nearby corners. See an Enlarged Photo Here. (Photograph taken on August 2, 2019 - © Cameron Bevers) 

Left - Blue-and-white Town of Essex municipal boundary sign on eastbound Hwy 18. Although it is marked rather oddly, the sign does correctly indicate with an
arrow that the Town of Essex lies only to the left of the highway. At this point, Hwy 18 briefly straddles the boundary line between the Towns of Essex and Amherstburg. See an
Enlarged Photo Here. (Photograph taken on August 2, 2019 - © Cameron Bevers) Right - Approaching Harrow on Hwy 18, facing east at Roseborough Road. This intersection marked the former western limits of the Town of Harrow. A Municipal Connecting Link was established for the non-assumed section of Hwy 18 which passed through the Town of Harrow's municipal limits. As a result of amalgamation, Harrow is now part of the Town of Essex. See an Enlarged Photo Here. (Photograph taken on August 2, 2019 - © Cameron Bevers) 

Left - Facing west along Hwy 18 towards Malden Centre from the western entrance to Harrow at Roseborough Road. Historically, provincial jurisdiction over
Hwy 18 resumed at this intersection. Apart from Controlled-Access Highways, it is rather uncommon for the province to assume jurisdiction over sections of a King's
Highway which pass through the incorporated limits of cities, towns and villages. See an
Enlarged Photo Here. (Photograph taken on August 2, 2019 - © Cameron Bevers) Right - View of King Street (Hwy 18) in Harrow, facing east towards Queen Street. See an Enlarged Photo Here. (Photograph taken on August 2, 2019 - © Cameron Bevers) 

Left - Distance guide sign on westbound Hwy 18 near the eastern junction of Former Hwy 18A in Kingsville. See an
Enlarged Photo Here. (Photograph taken on August 2, 2019 - © Cameron Bevers) Right - Facing west along Hwy 18 towards Harrow from the western entrance to Kingsville. Concrete pavement was laid between Kingsville and Harrow in 1934, under Contract #1934-15. This construction work completed a paved highway link between Harrow and Leamington. See an Enlarged Photo Here. (Photograph taken on August 2, 2019 - © Cameron Bevers) 

Left - Approaching the eastern junction of Former Hwy 18A on Hwy 18, facing east towards Kingsville's Town Centre. See an
Enlarged Photo Here. (Photograph taken on August 2, 2019 - © Cameron Bevers) Right - Facing west along Former Hwy 18A (Essex Road 50) towards Colchester from the Hwy 18 Junction in Kingsville. Former Hwy 18A is a very interesting and leisurely highway route which is well worth the detour if one has the time to explore. See an Enlarged Photo Here. (Photograph taken on August 2, 2019 - © Cameron Bevers) 

Left - These ancient fingerboard guide signs at the Hwy 18 & Former Hwy 18A Junction in Kingsville have probably been on the highway since the 1970s. As
with all highway junctions along this route, guide signs have been updated to remove the old Hwy 18 provincial crown signs. They have been replaced by County Road 20
"flowerpot" route markers. See an Enlarged Photo Here. (Photograph taken on August 2, 2019 - © Cameron Bevers) Right - Facing west along Hwy 18 towards Harrow from the eastern junction of Former Hwy 18A in Kingsville. Although it is several miles longer and a lot slower than taking Hwy 18 between Kingsville and Malden Centre, Former Hwy 18A will also bring motorists to Malden Centre on a route which is much more pleasant and scenic than continuing through via Hwy 18. See an Enlarged Photo Here. (Photograph taken on August 2, 2019 - © Cameron Bevers) 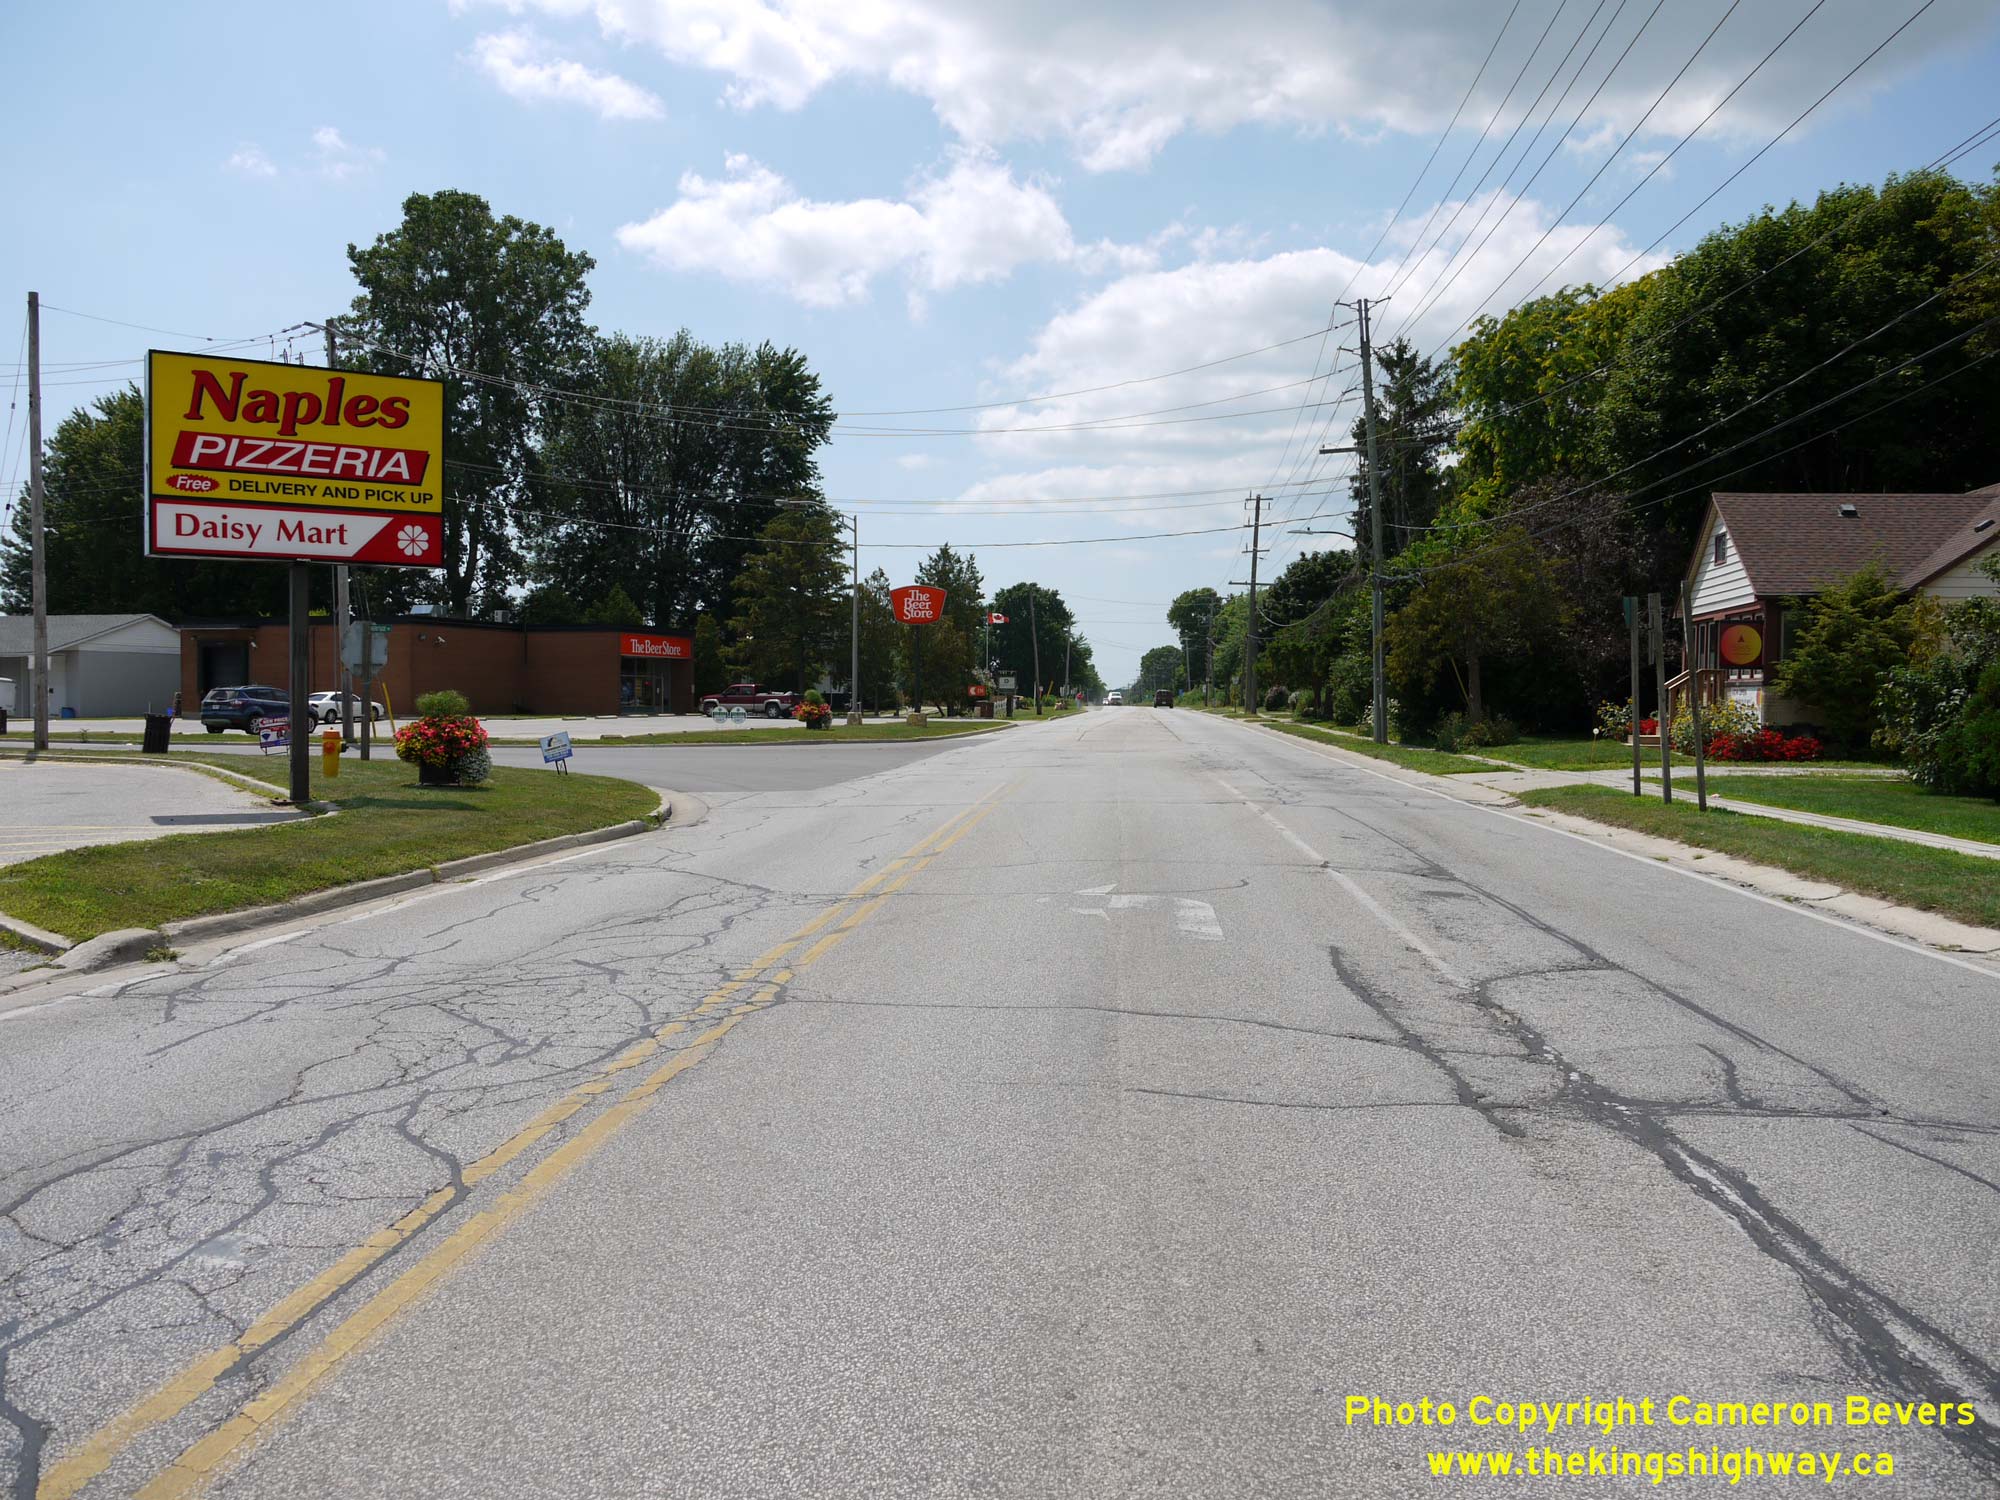

Left - Approaching the Former Hwy 18A Junction in Kingsville on Hwy 18, facing west towards Harrow. This is actually a relocated highway junction between
Hwy 18 & Hwy 18A. When it was first established in 1938, Hwy 18A ended near Downtown Kingsville at the intersection of Main Street (Hwy 18) and Queen Street.
Hwy 18A was rerouted via Malott Side Road along the western edge of Kingsville during 1961, where it met Hwy 18 at this relocated highway junction. See an
Enlarged Photo Here. (Photograph taken on August 2, 2019 - © Cameron Bevers) Right - Eastern terminus of Former Hwy 18A at the Hwy 18 Junction in Kingsville. This junction lies along Hwy 18 at the western entrance to Kingsville, so motorists must turn right at this junction onto Hwy 18 in order to access Kingsville's Town Centre. Motorists turning left will quickly leave Kingsville and return back towards Harrow and Malden Centre. See an Enlarged Photo Here. (Photograph taken on August 2, 2019 - © Cameron Bevers) 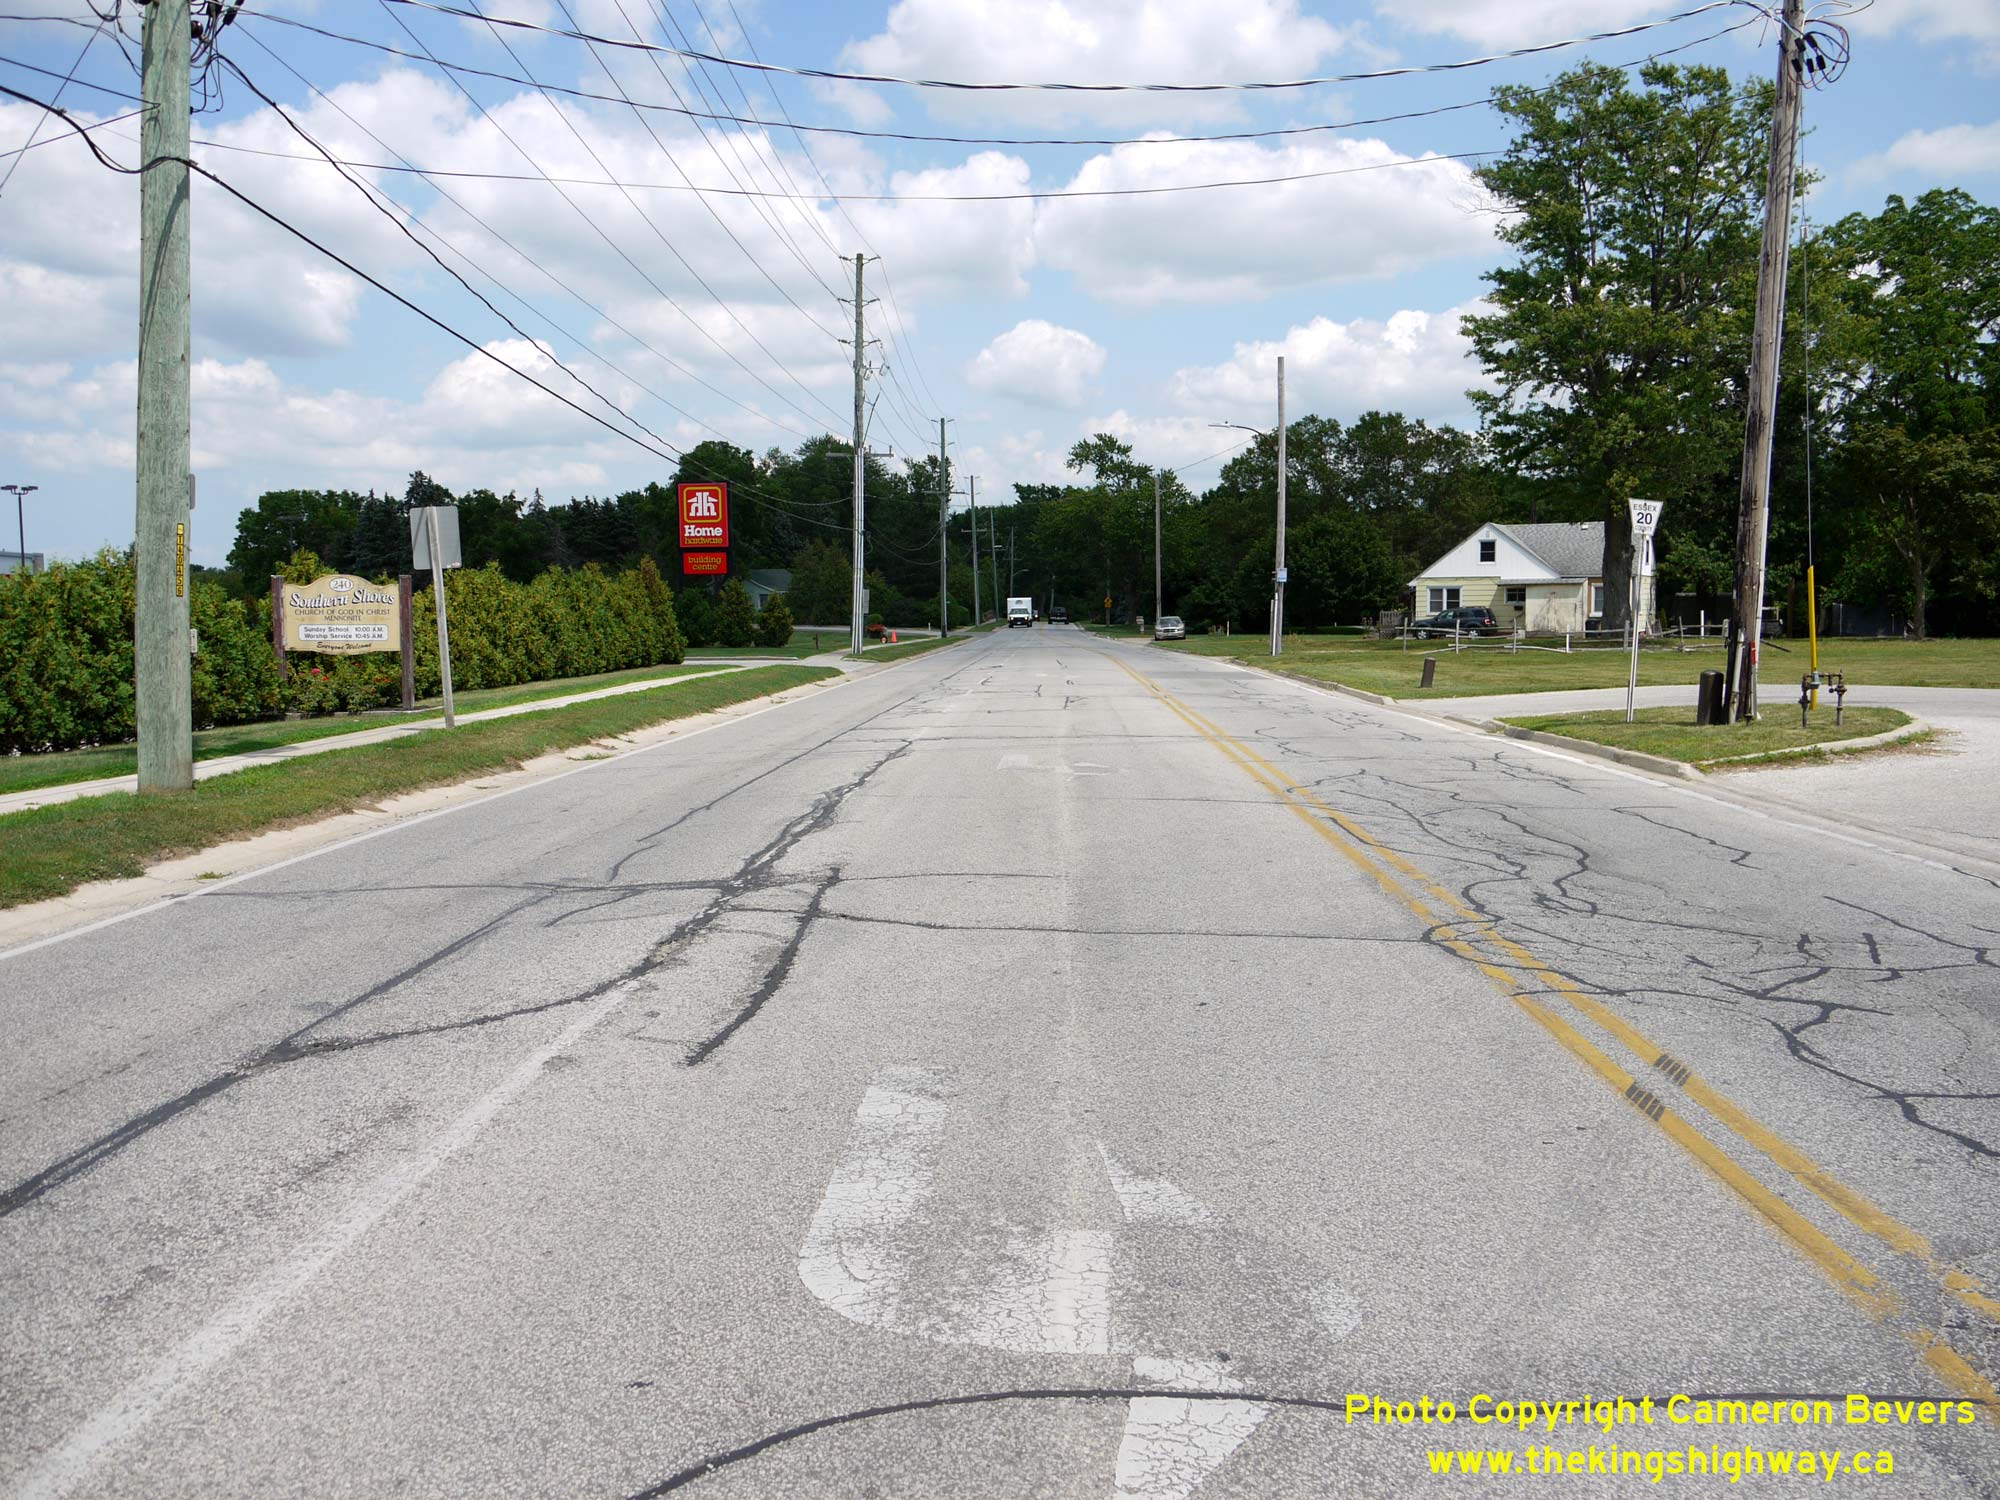

Left - Approaching Kingsville from the Former Hwy 18A Junction at the western entrance to town. From 1938 until 1961, Hwy 18A intersected with Hwy 18
approximately 1/2 mile east of here at the intersection of Main Street & Queen Street. See an
Enlarged Photo Here. (Photograph taken on August 2, 2019 - © Cameron Bevers) Right - View of Main Street (Hwy 18) in Downtown Kingsville, facing east at Division Street. Kingsville's Town Centre is well worth a stop and an explore, as it has many historical buildings, several of which date back to the Victorian era. See an Enlarged Photo Here. (Photograph taken on August 2, 2019 - © Cameron Bevers) 

Left - Facing west along Main Street (Hwy 18) from Division Street in Downtown Kingsville. See an
Enlarged Photo Here. (Photograph taken on August 2, 2019 - © Cameron Bevers) Right - Hwy 18 in Downtown Kingsville, facing west towards Division Street. About 1 1/2 miles (2.5 km) of Hwy 18 through Kingsville was designated as a Municipal Connecting Link and was therefore not under provincial jurisdiction even prior to the 1990s. See an Enlarged Photo Here. (Photograph taken on August 2, 2019 - © Cameron Bevers) 

Left - View of Main Street (Hwy 18) in Downtown Kingsville, facing east towards Leamington. The brightly-coloured King's Hotel (known today as the Grove Hotel)
can be seen across the street at left, which is housed in a historical Victorian-era building which was built in 1854. While most towns in Ontario did have a 19th
Century downtown stagecoach hotel such as this one, relatively few of these buildings have survived to the present day. Fewer yet are still being used as hotels. See
an Enlarged Photo Here. (Photograph taken on August 2, 2019 - © Cameron Bevers) Right - View of Main Street (Hwy 18) facing west from Remark Drive. Kingsville's municipal street layout isn't conducive for carrying heavy traffic, so both local traffic and longer-distance through traffic compete for space along Kingsville's busy Main Street. See an Enlarged Photo Here. (Photograph taken on August 2, 2019 - © Cameron Bevers) 

Left - Facing east along Hwy 18 at Remark Drive, approaching Kingsville's highway commercial district. Most of the shopping located outside of Downtown
Kingsville can be found where Hwy 18 enters the urbanized area from the east. See an
Enlarged Photo Here. (Photograph taken on August 2, 2019 - © Cameron Bevers) Right - Eastern entrance to Kingsville's urbanized area on Hwy 18, facing west towards the Kingsville Town Centre. See an Enlarged Photo Here. (Photograph taken on August 2, 2019 - © Cameron Bevers) 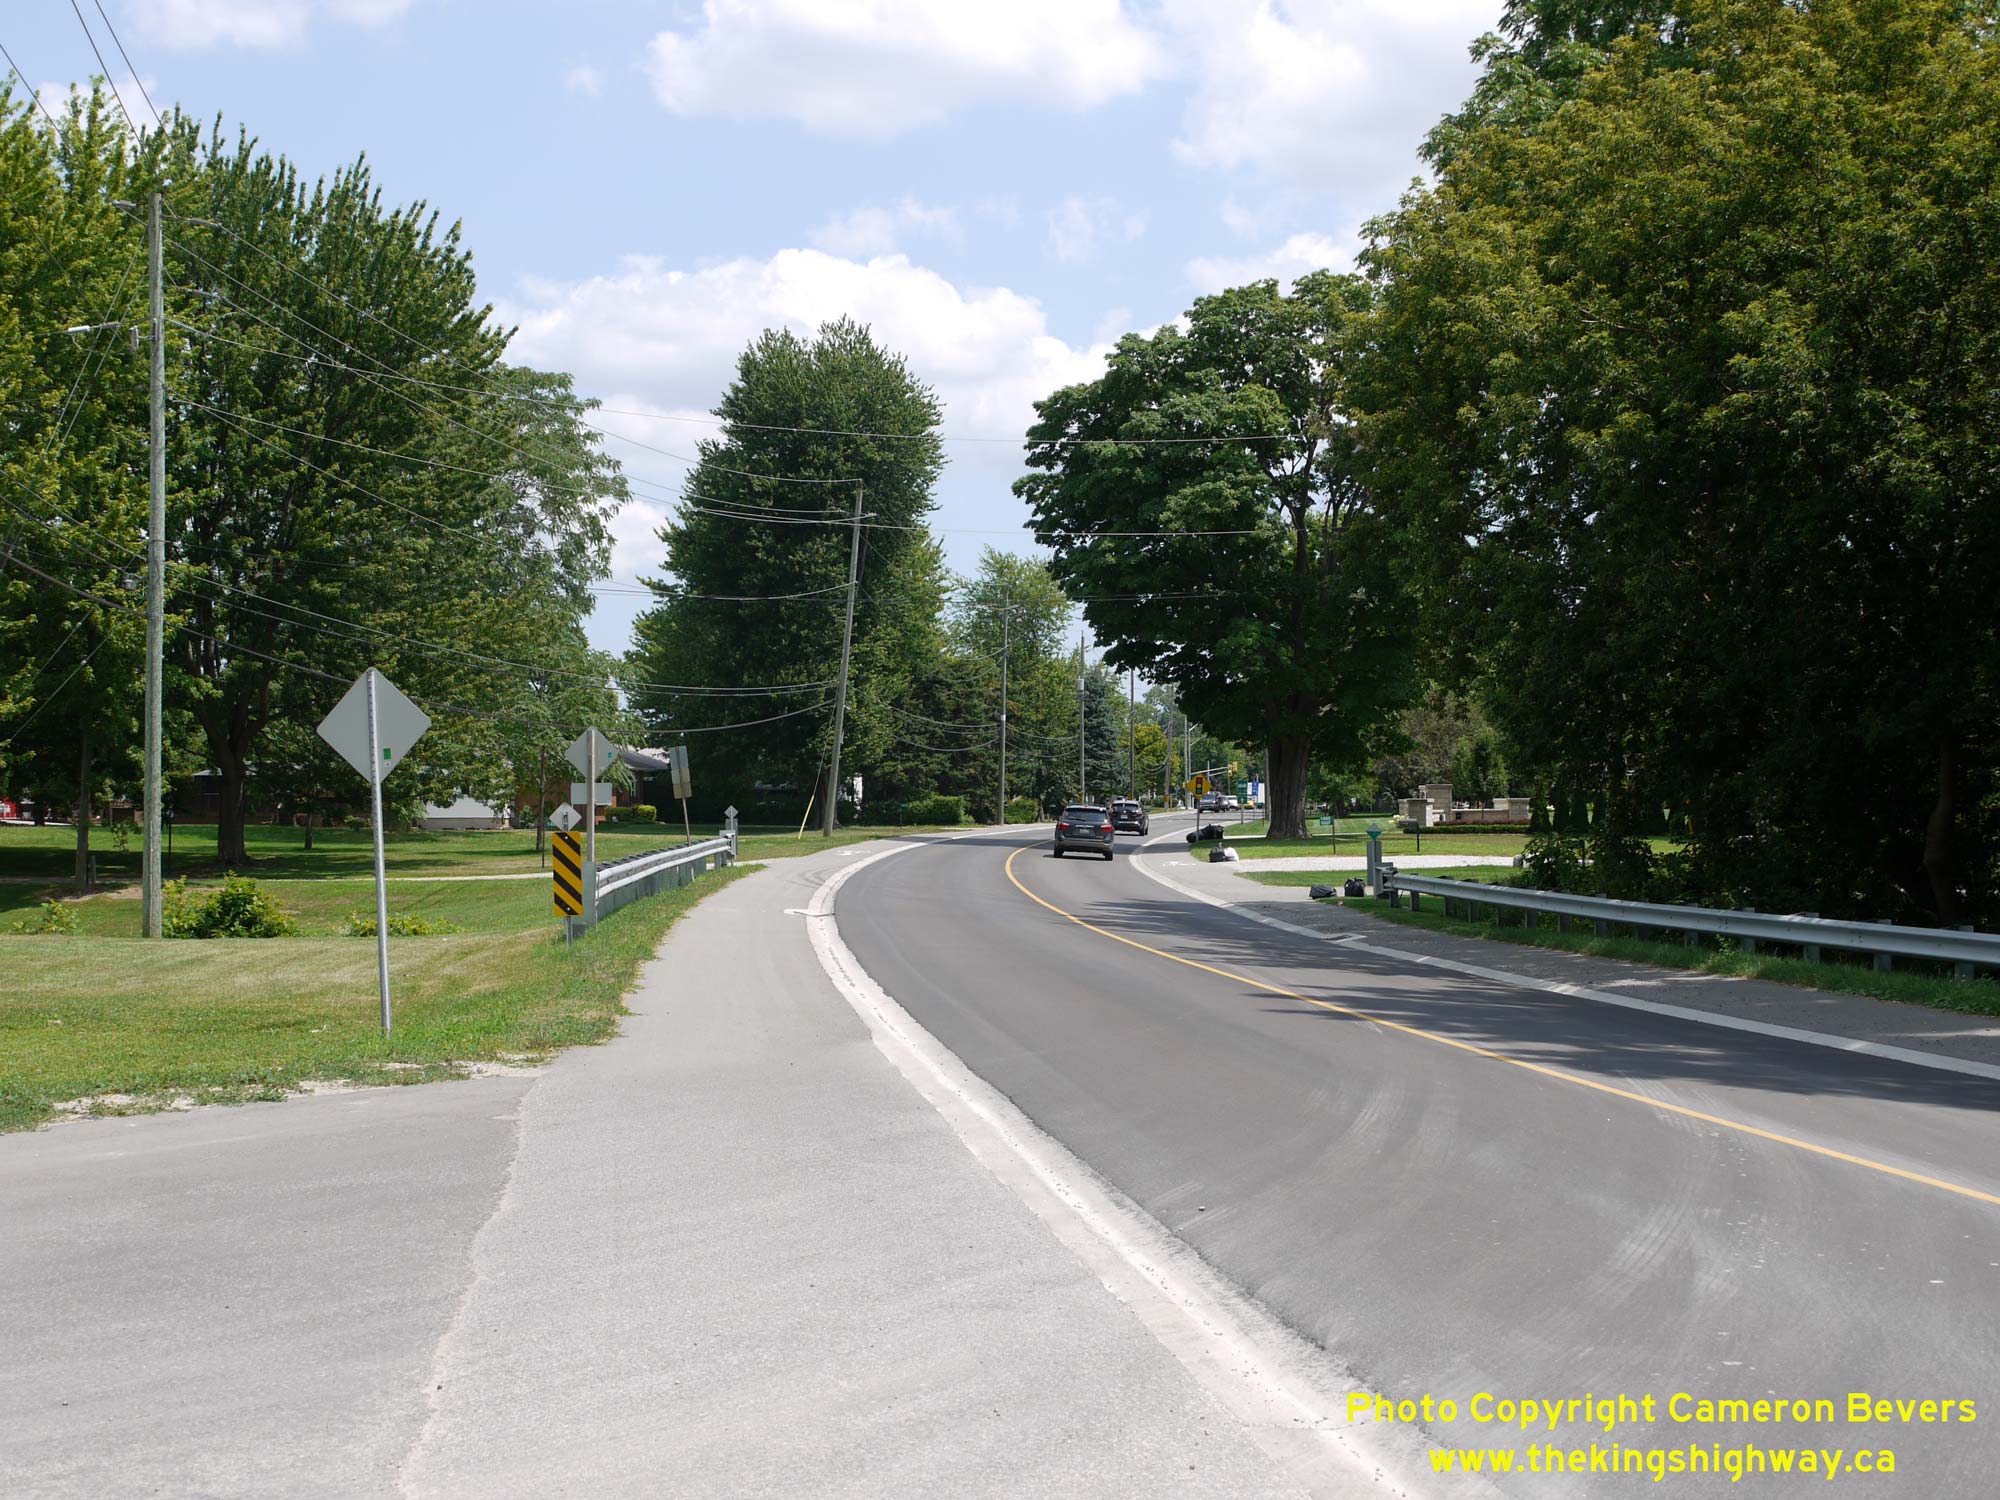
Left - View of Hwy 18 approaching Union Avenue in Kingsville. Concrete curb-and-gutter was built along both sides of Hwy 18 for a substantial distance between
Kingsville and Leamington during a highway reconstruction project carried out in the early 1960s, under Contract #1962-191. As a result, the highway has no shoulders
for a distance of several kilometres west of Leamington. More recently, the County of Essex has constructed a paved apron behind the curb as a multi-use path. See an
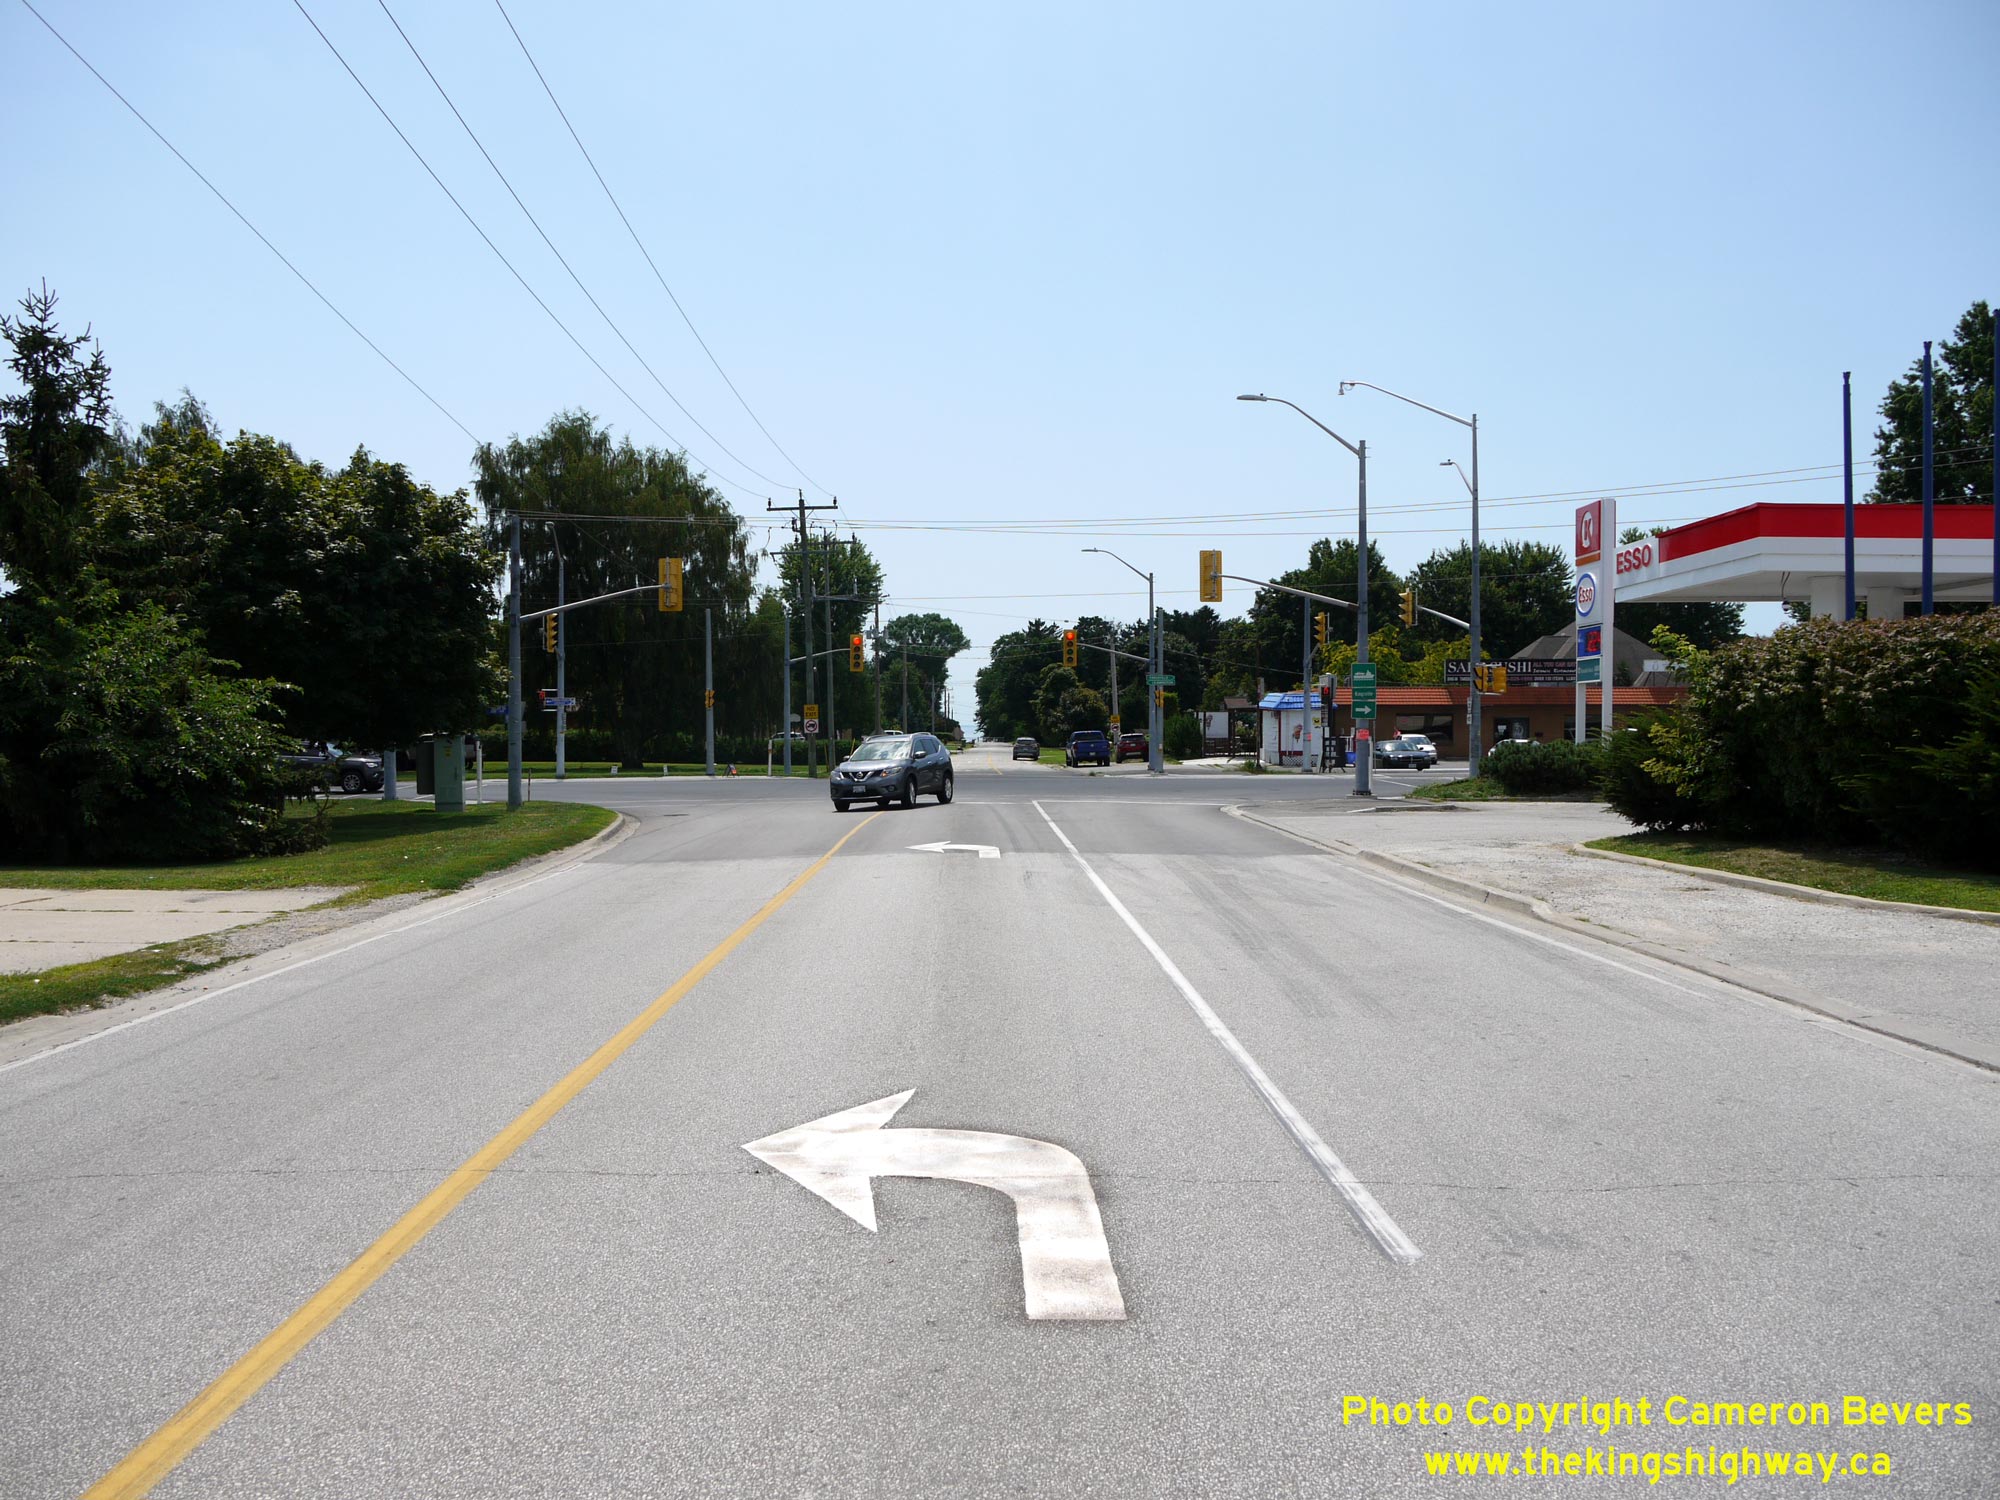
Enlarged Photo Here. (Photograph taken on August 2, 2019 - © Cameron Bevers) Right - Facing west along Hwy 18 towards Kingsville from the intersection of Union Avenue (Essex Road 45). Although it is no longer a King's Highway today, Union Avenue has been a part of the provincial highway system in years' past, as it served as a strategic cutoff route for Hwy 18 traffic to bypass Leamington. See an Enlarged Photo Here. (Photograph taken on August 2, 2019 - © Cameron Bevers) 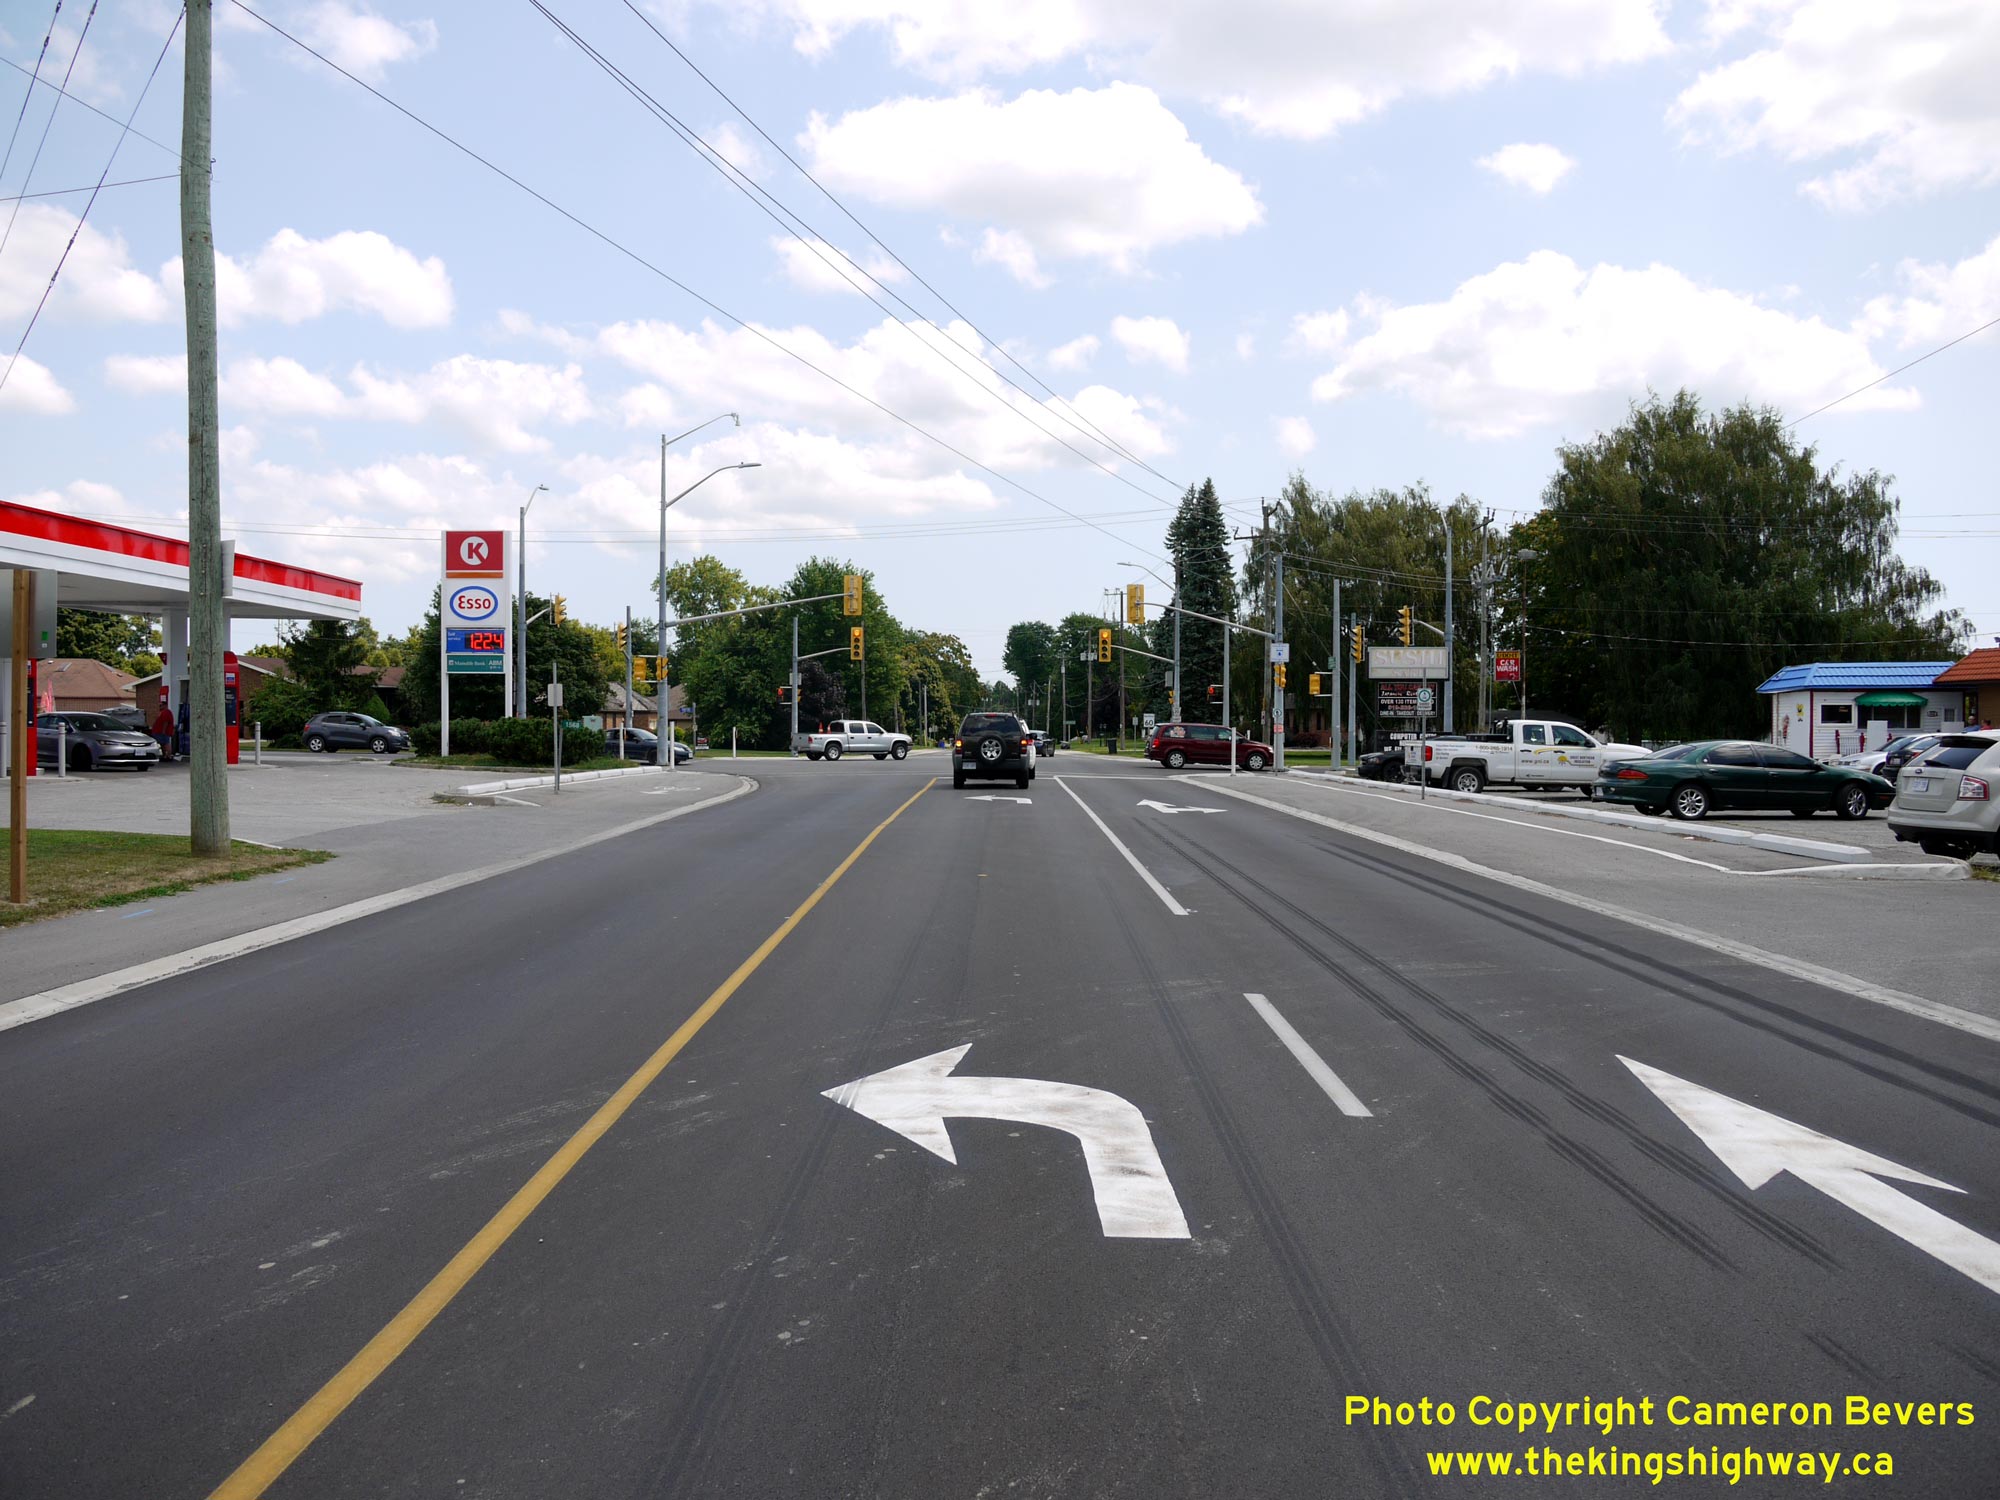
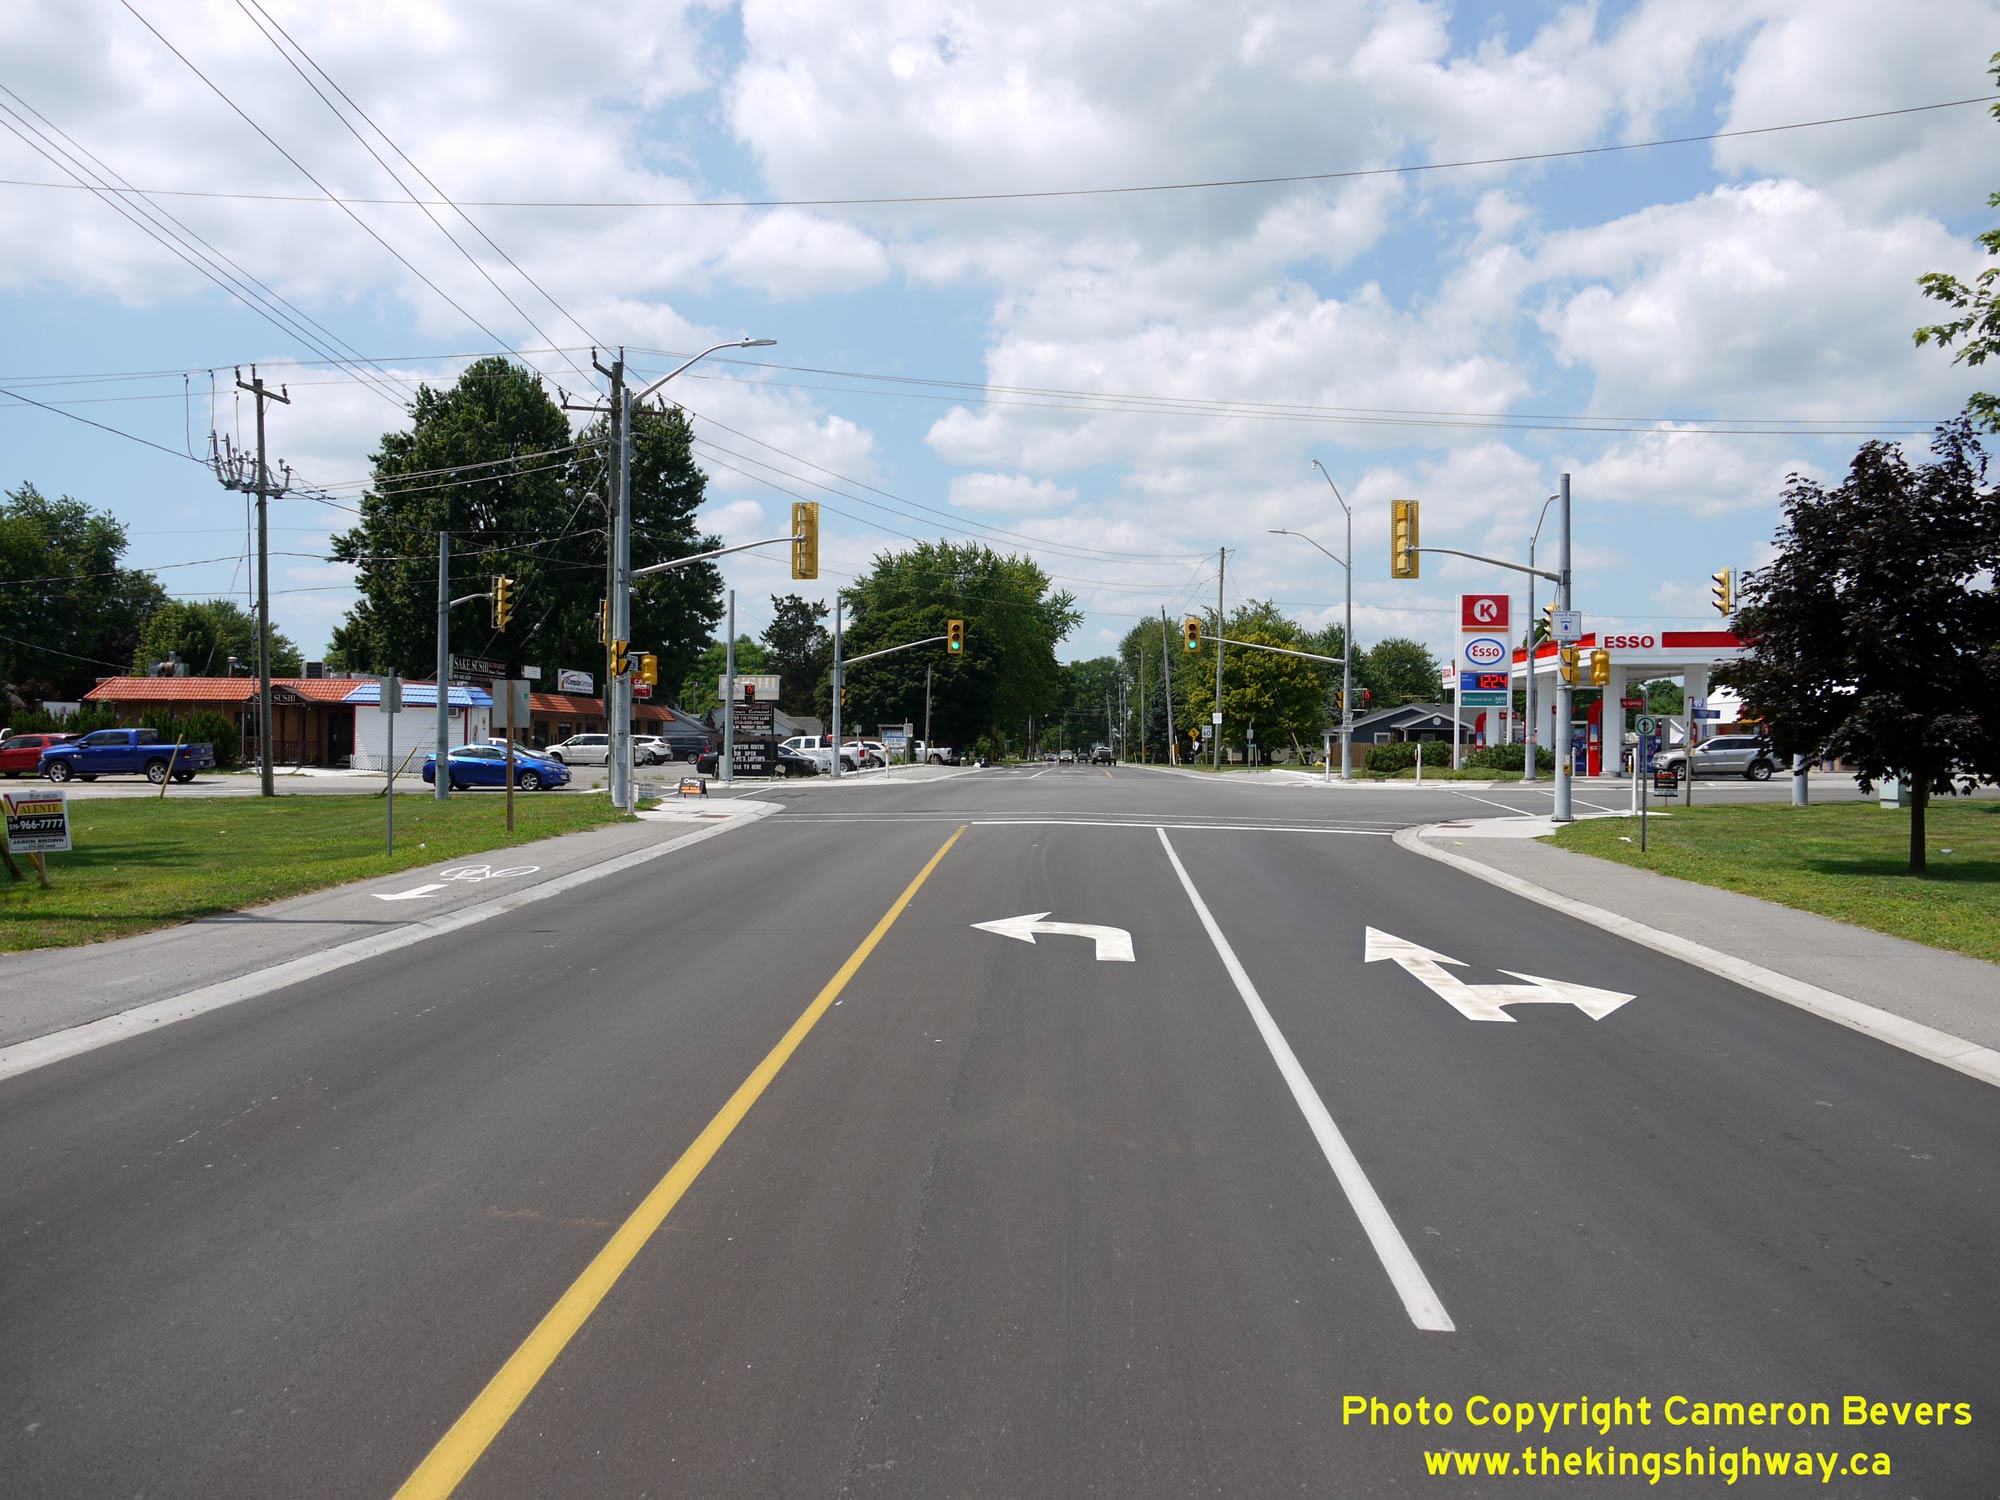
Left - Approaching the intersection of Union Avenue on Hwy 18 in Kingsville, facing east towards Leamington. Over the years, Union Avenue has been known by
several different King's Highway route numbers. In August 1937, Union Avenue was acquired by the DHO as a short King's Highway which connected Hwy 18 to Hwy 3 at
Ruthven. Originally, this highway to Ruthven was numbered as Hwy 18B, but the designation was changed to Hwy 107 in 1953. More recently, Hwy 18 was temporarily
rerouted via Union Avenue up to Ruthven during 1997, when the easternmost section of Hwy 18 from Union Avenue to the Town of Leamington's western limits was
downloaded to the County of Essex. See an Enlarged Photo Here. (Photograph taken on August 2, 2019 - © Cameron Bevers) Right - Southern terminus of Former Hwy 107 (Union Avenue) at the Hwy 18 Junction between Leamington and Kingsville. Union Avenue's most recent role in the provincial highway system was in 1997, when it was reassumed as a King's Highway in order to form a temporary route for Hwy 18 around Leamington. Jurisdiction over a 6 km section of Hwy 18 from Union Avenue to Forest Avenue in Leamington was transferred to the County of Essex in March 1997. For the balance of 1997, Hwy 18 was rerouted along Union Avenue from this intersection up to Hwy 3 (today's Essex Road 34) at Ruthven. On January 1, 1998, the entire route of Hwy 18 was transferred from the province to the County of Essex, including the temporary Union Avenue route of Hwy 18. See an Enlarged Photo Here. (Photograph taken on August 2, 2019 - © Cameron Bevers) 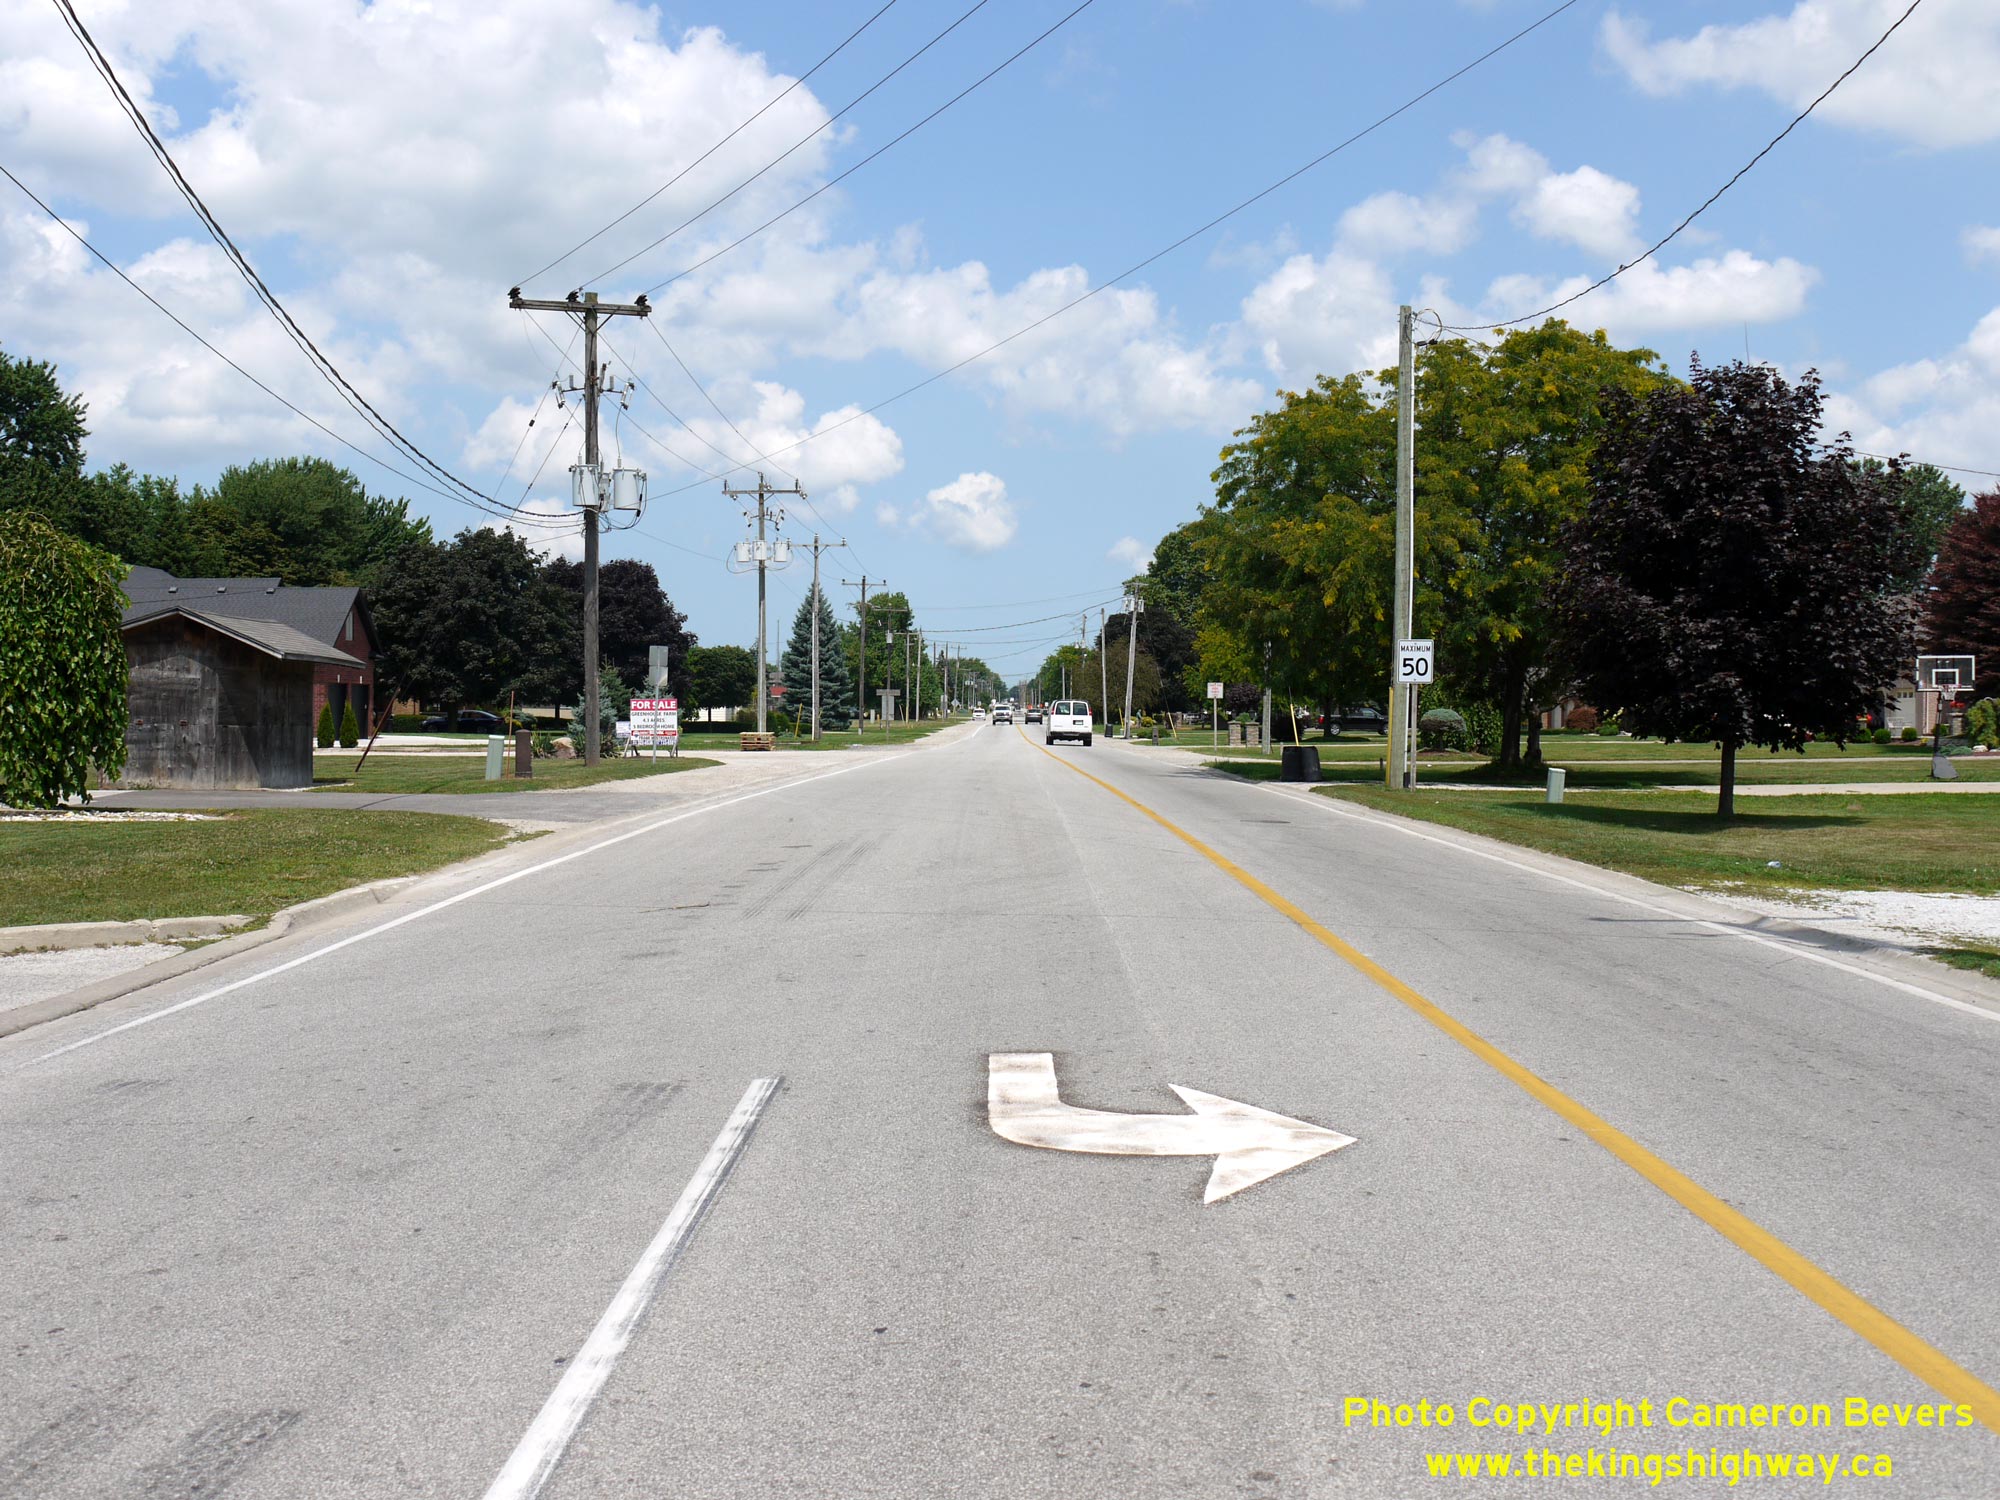
Left - Facing north along Former Hwy 107 (Union Avenue) from the Hwy 18 Junction between Leamington and Kingsville. The tiny route of Hwy 107 came to an end at
Hwy 3 (today's Essex Road 34) in nearby Ruthven. This was one of the shortest King's Highways to ever exist in Ontario, with a length of just under one mile. Although
Hwy 107 was decommissioned as a King's Highway and transferred to the County of Essex in June 1970, the road was briefly reassumed as a King's Highway in 1997 to
serve as a temporary route of Hwy 18 around the western side of Leamington. The temporary route proved to be rather short-lived. Jurisdiction over this section of
Hwy 18 was transferred to the County of Essex on January 1, 1998, along with all other provincially-maintained sections of Hwy 18 lying between Windsor and Ruthven.
See an Enlarged Photo Here. (Photograph taken on August 2, 2019 - © Cameron Bevers) Right - Junction of Hwy 18 and Union Avenue (Former Hwy 107) between Kingsville and Leamington, facing west. See an Enlarged Photo Here. (Photograph taken on August 2, 2019 - © Cameron Bevers) 

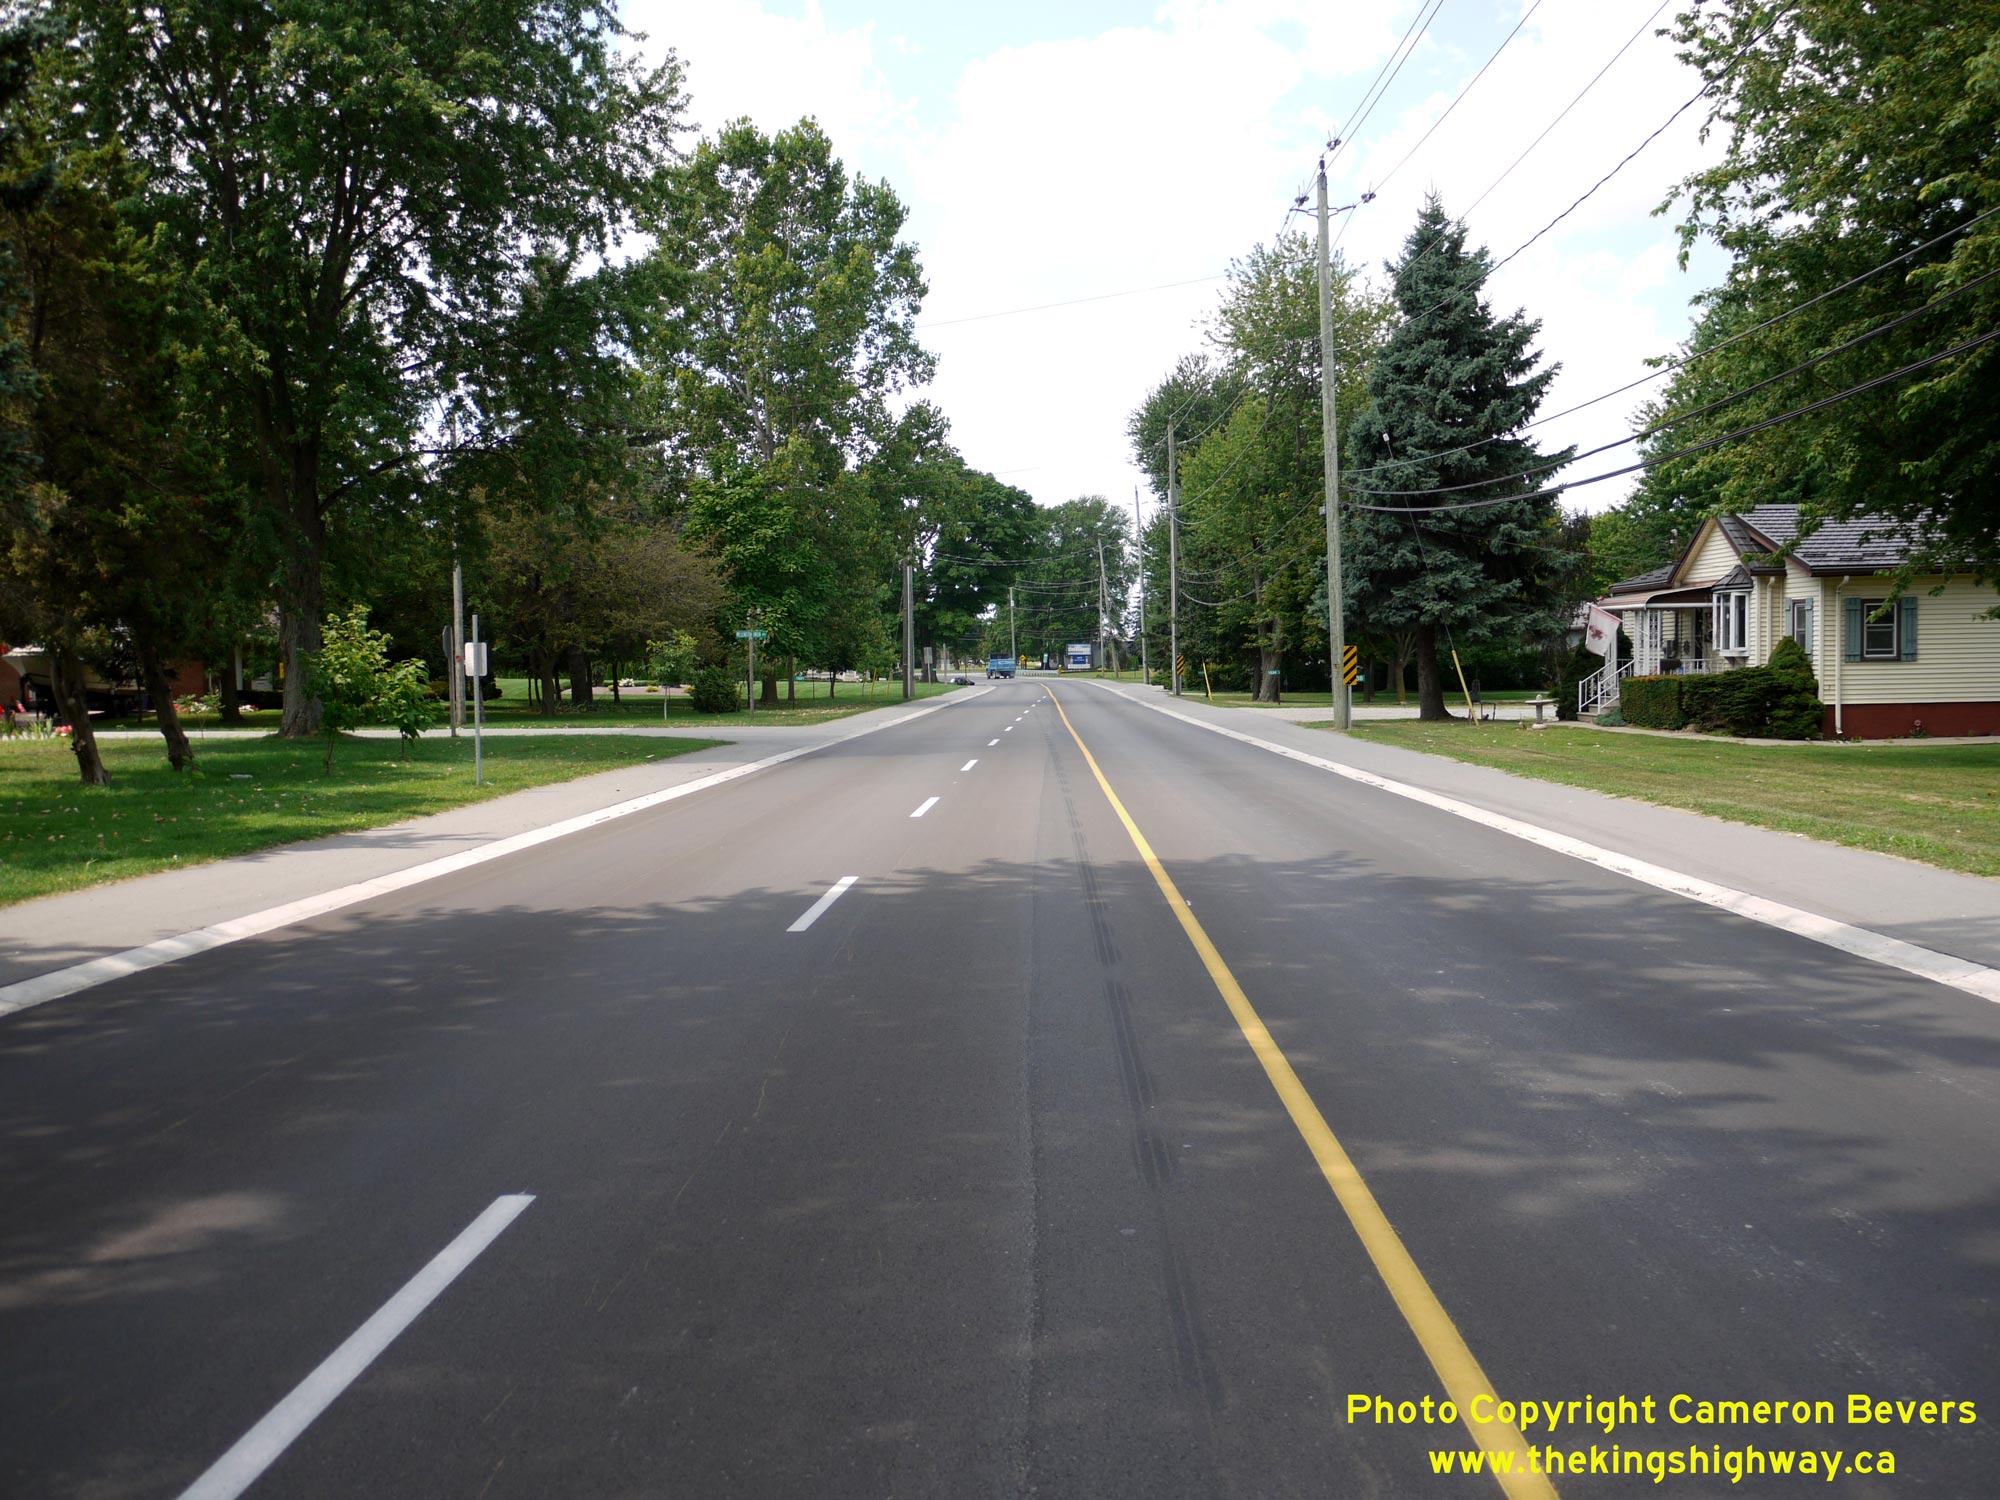
Left - Facing east along Hwy 18 towards Leamington from Union Avenue (Former Hwy 107). See an
Enlarged Photo Here. (Photograph taken on August 2, 2019 - © Cameron Bevers) Right - Blue-and-white municipal boundary sign on westbound Hwy 18 entering the Town of Kingsville. The present day municipality is significantly larger than the old Town of Kingsville. In 1999, the old Town of Kingsville was amalgamated with the surrounding Townships of North and South Gosfield in order to create the enlarged municipality which is in existence today. Kingsville is also notable in that it is Canada's southernmost incorporated town. The southwestern tip of the municipality dips below the 42nd Parallel, which is equivalent in latitude to the northern extremities of the State of California. See an Enlarged Photo Here. (Photograph taken on August 2, 2019 - © Cameron Bevers) 

Left - Facing east along Hwy 18 at the Kingsville-Leamington municipal boundary. Like Kingsville, the present day Municipality of Leamington was created out of
a municipal restructuring exercise during the 1990s. The old Town of Leamington and the surrounding Township of Mersea were amalgamated to form the enlarged
Municipality of Leamington in 1999. See an Enlarged Photo Here. (Photograph taken on August 2, 2019 - © Cameron Bevers) Right - Distance guide sign on westbound Seacliff Drive (Hwy 18) departing from the urbanized limits of Leamington. See an Enlarged Photo Here. (Photograph taken on August 2, 2019 - © Cameron Bevers) 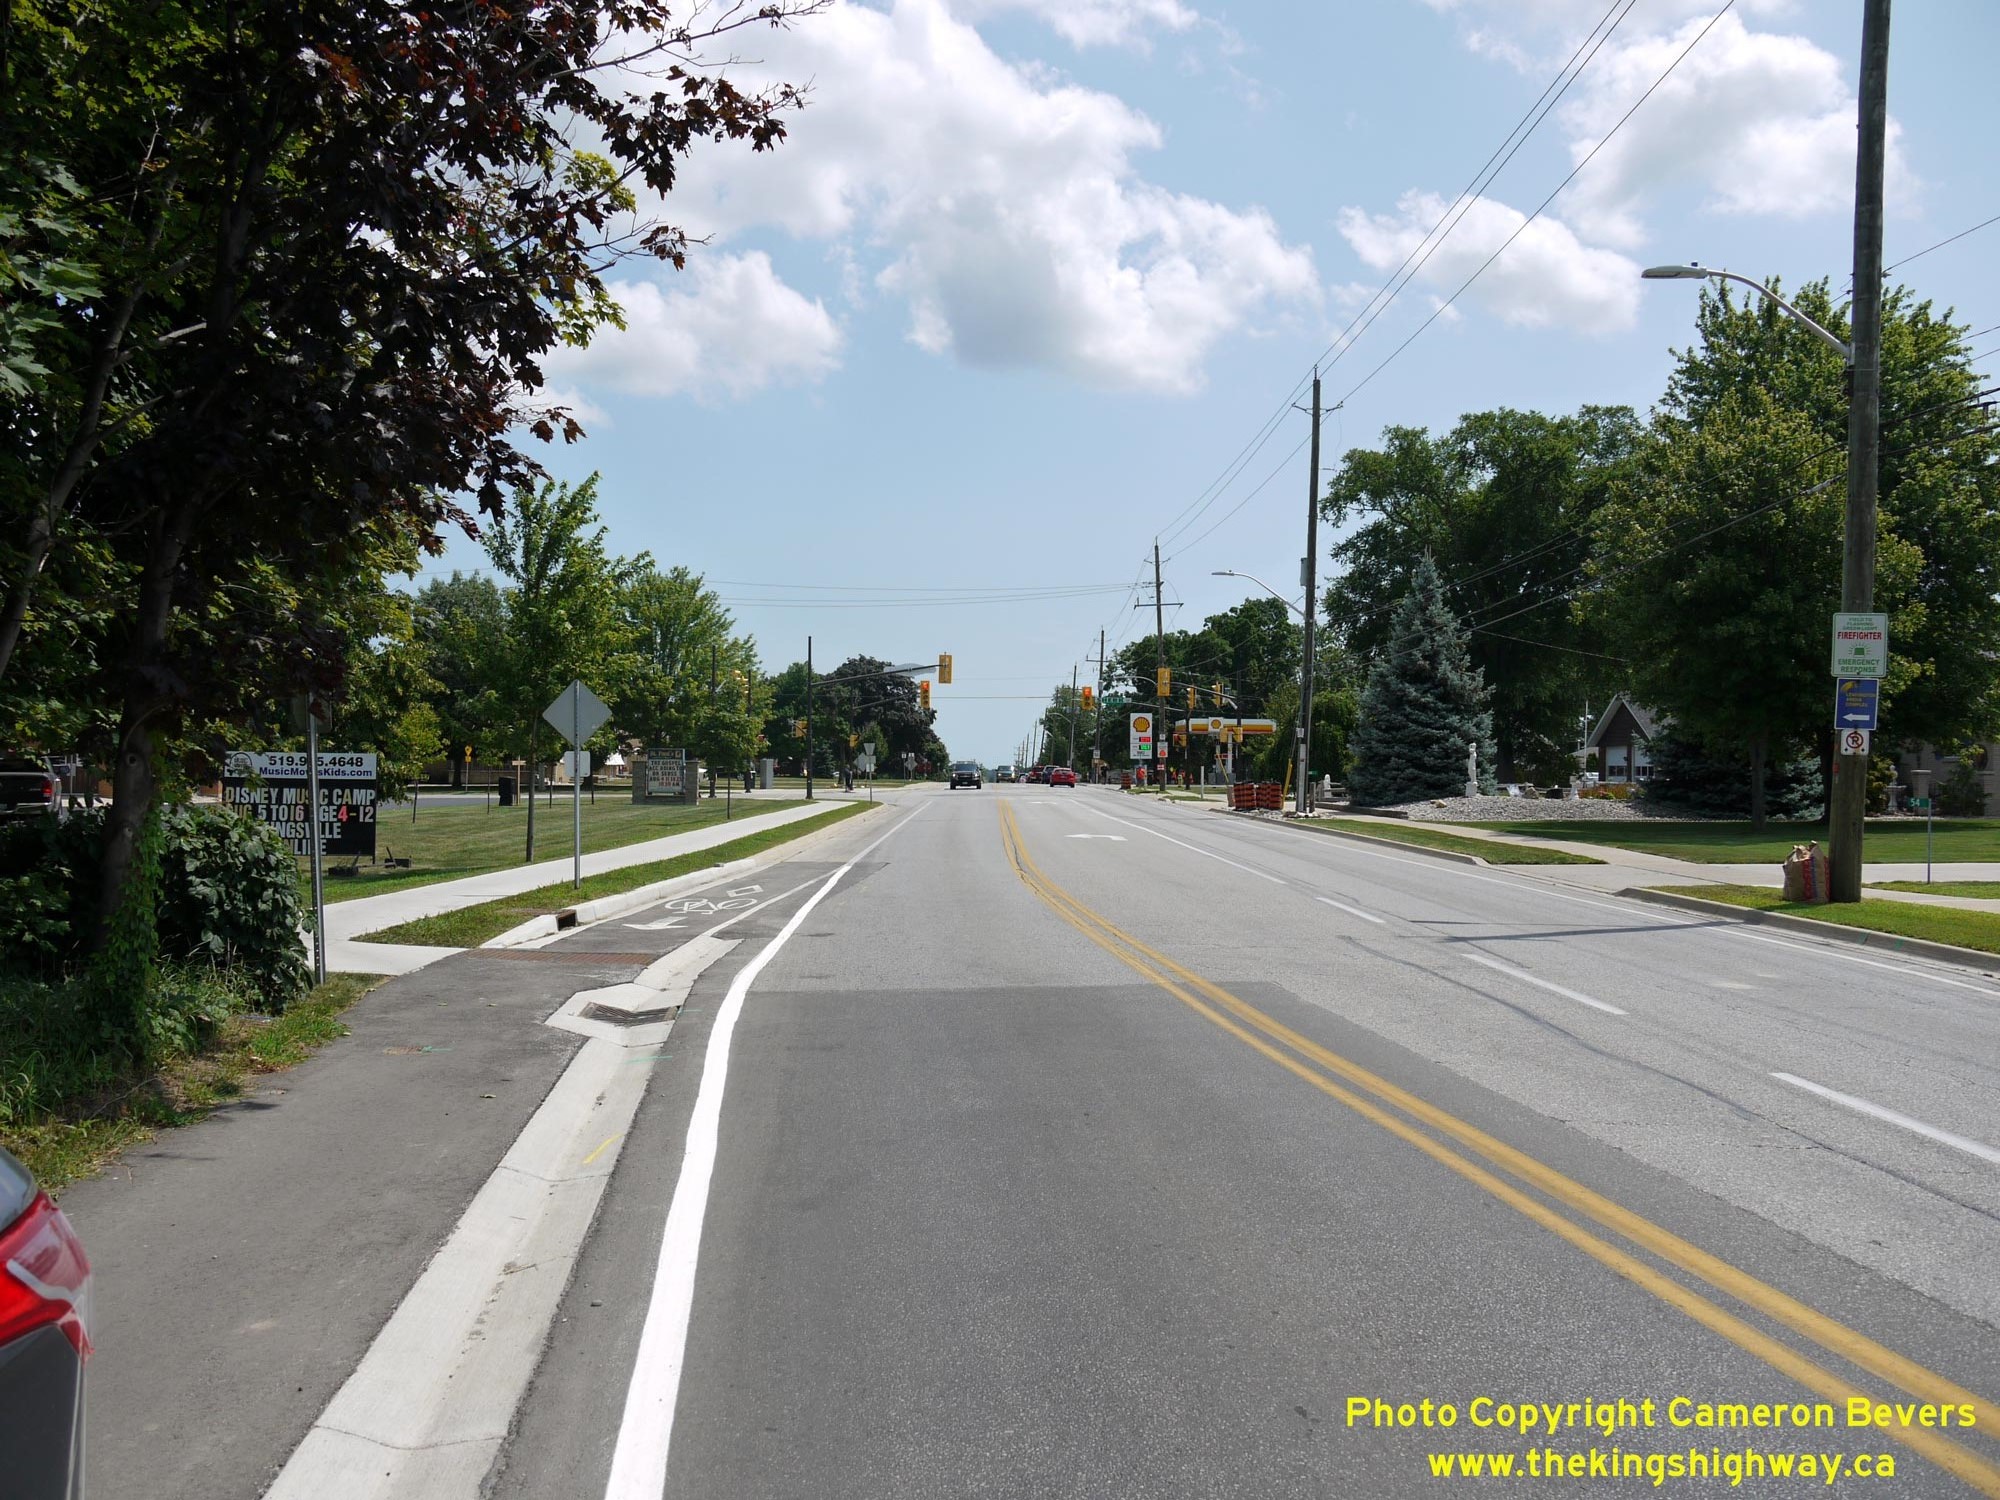
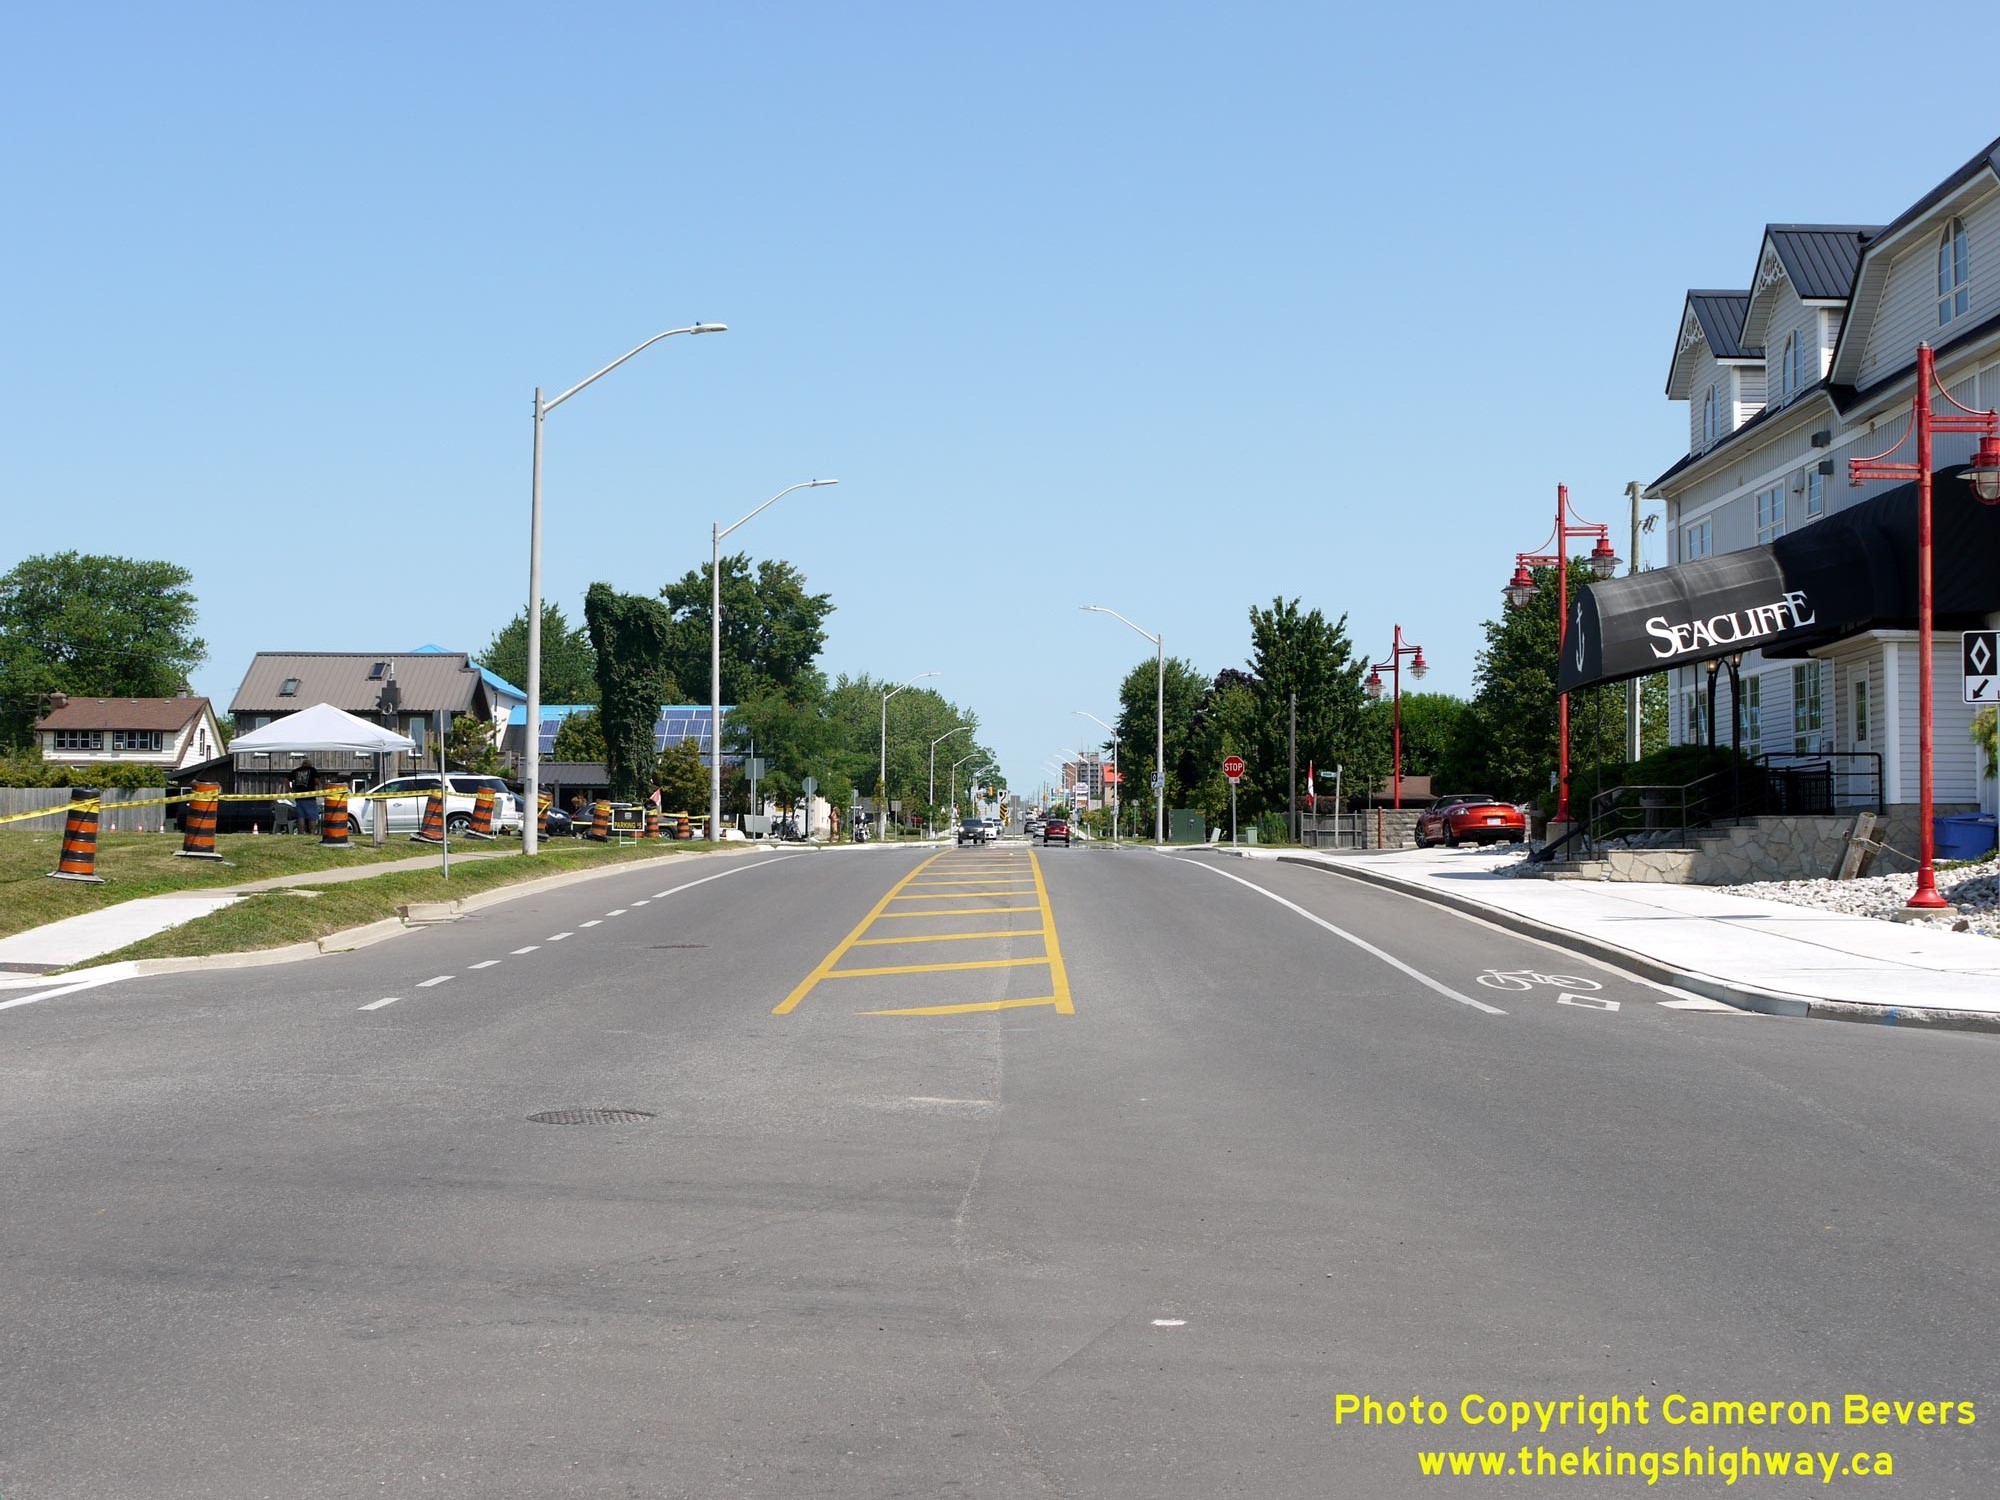
Left - Facing east along Hwy 18 (Seacliff Drive) approaching Leamington's urbanized area at Sherk Street. Originally, Hwy 18 entered the western limits of the
former Town of Leamington near Forest Avenue. Today, the municipal limits of Leamington extend about 3 km further west along Hwy 18 from the old town boundary. See an
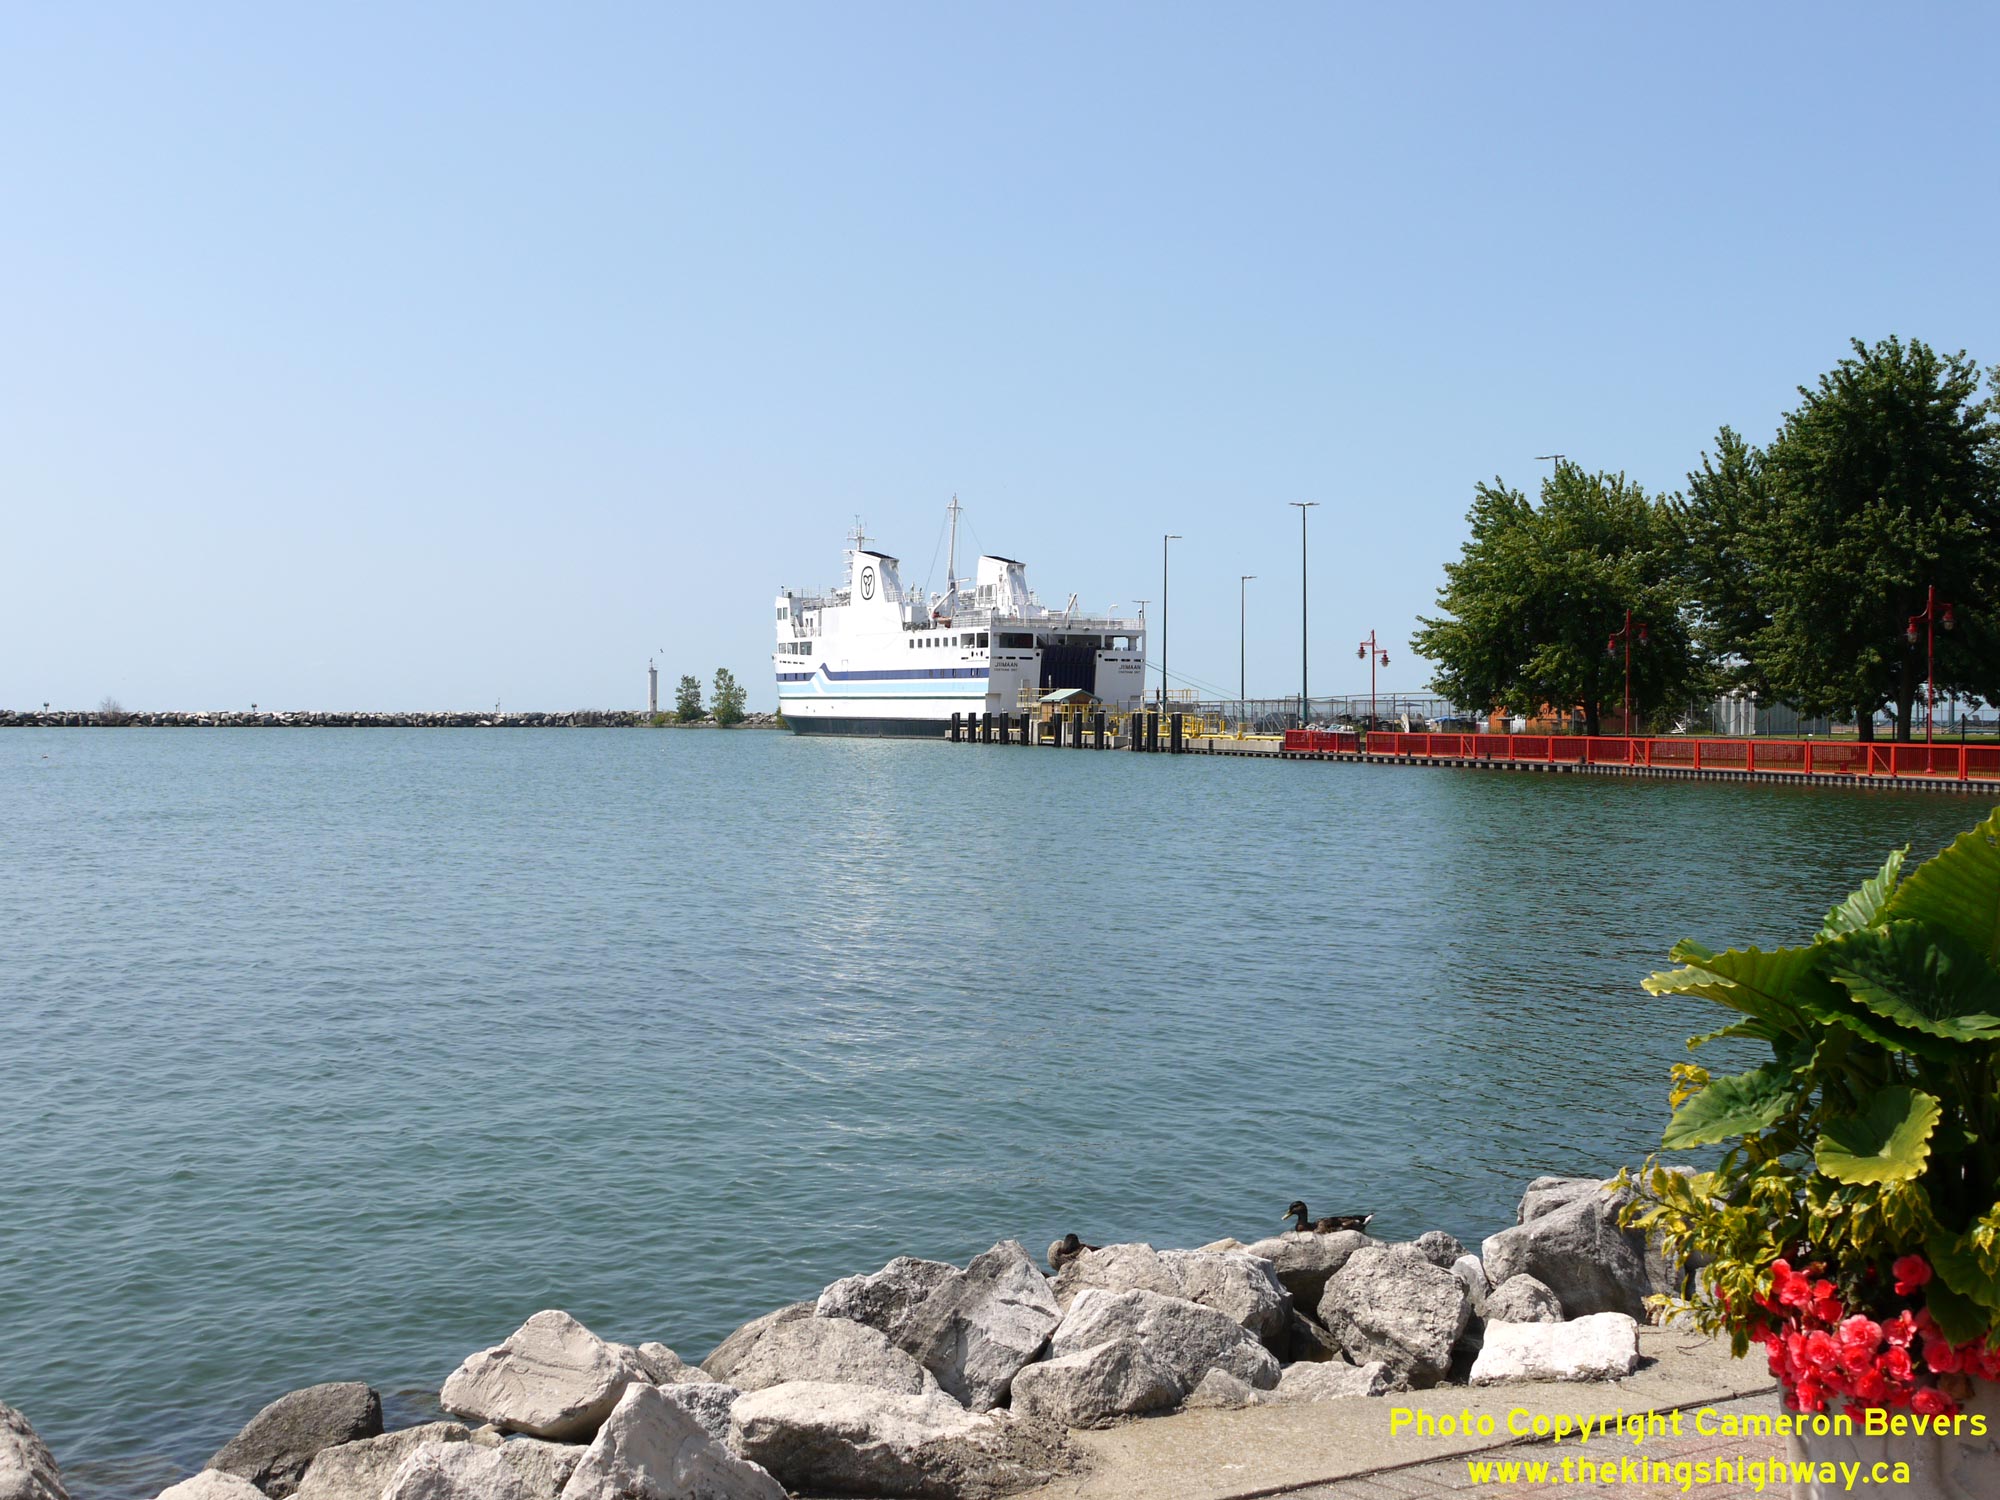
Enlarged Photo Here. (Photograph taken on August 2, 2019 - © Cameron Bevers) Right - View of the Pelee Island Ferry "Jiimaan" docked at the Leamington Ferry Terminal. A ferry service is operated to Pelee Island from both the Leamington and Kingsville Ferry Terminals on the mainland. Both ferries are operated by the Owen Sound Transportation Company, which is a provincial agency of the Government of Ontario. See an Enlarged Photo Here. (Photograph taken on August 2, 2019 - © Cameron Bevers) 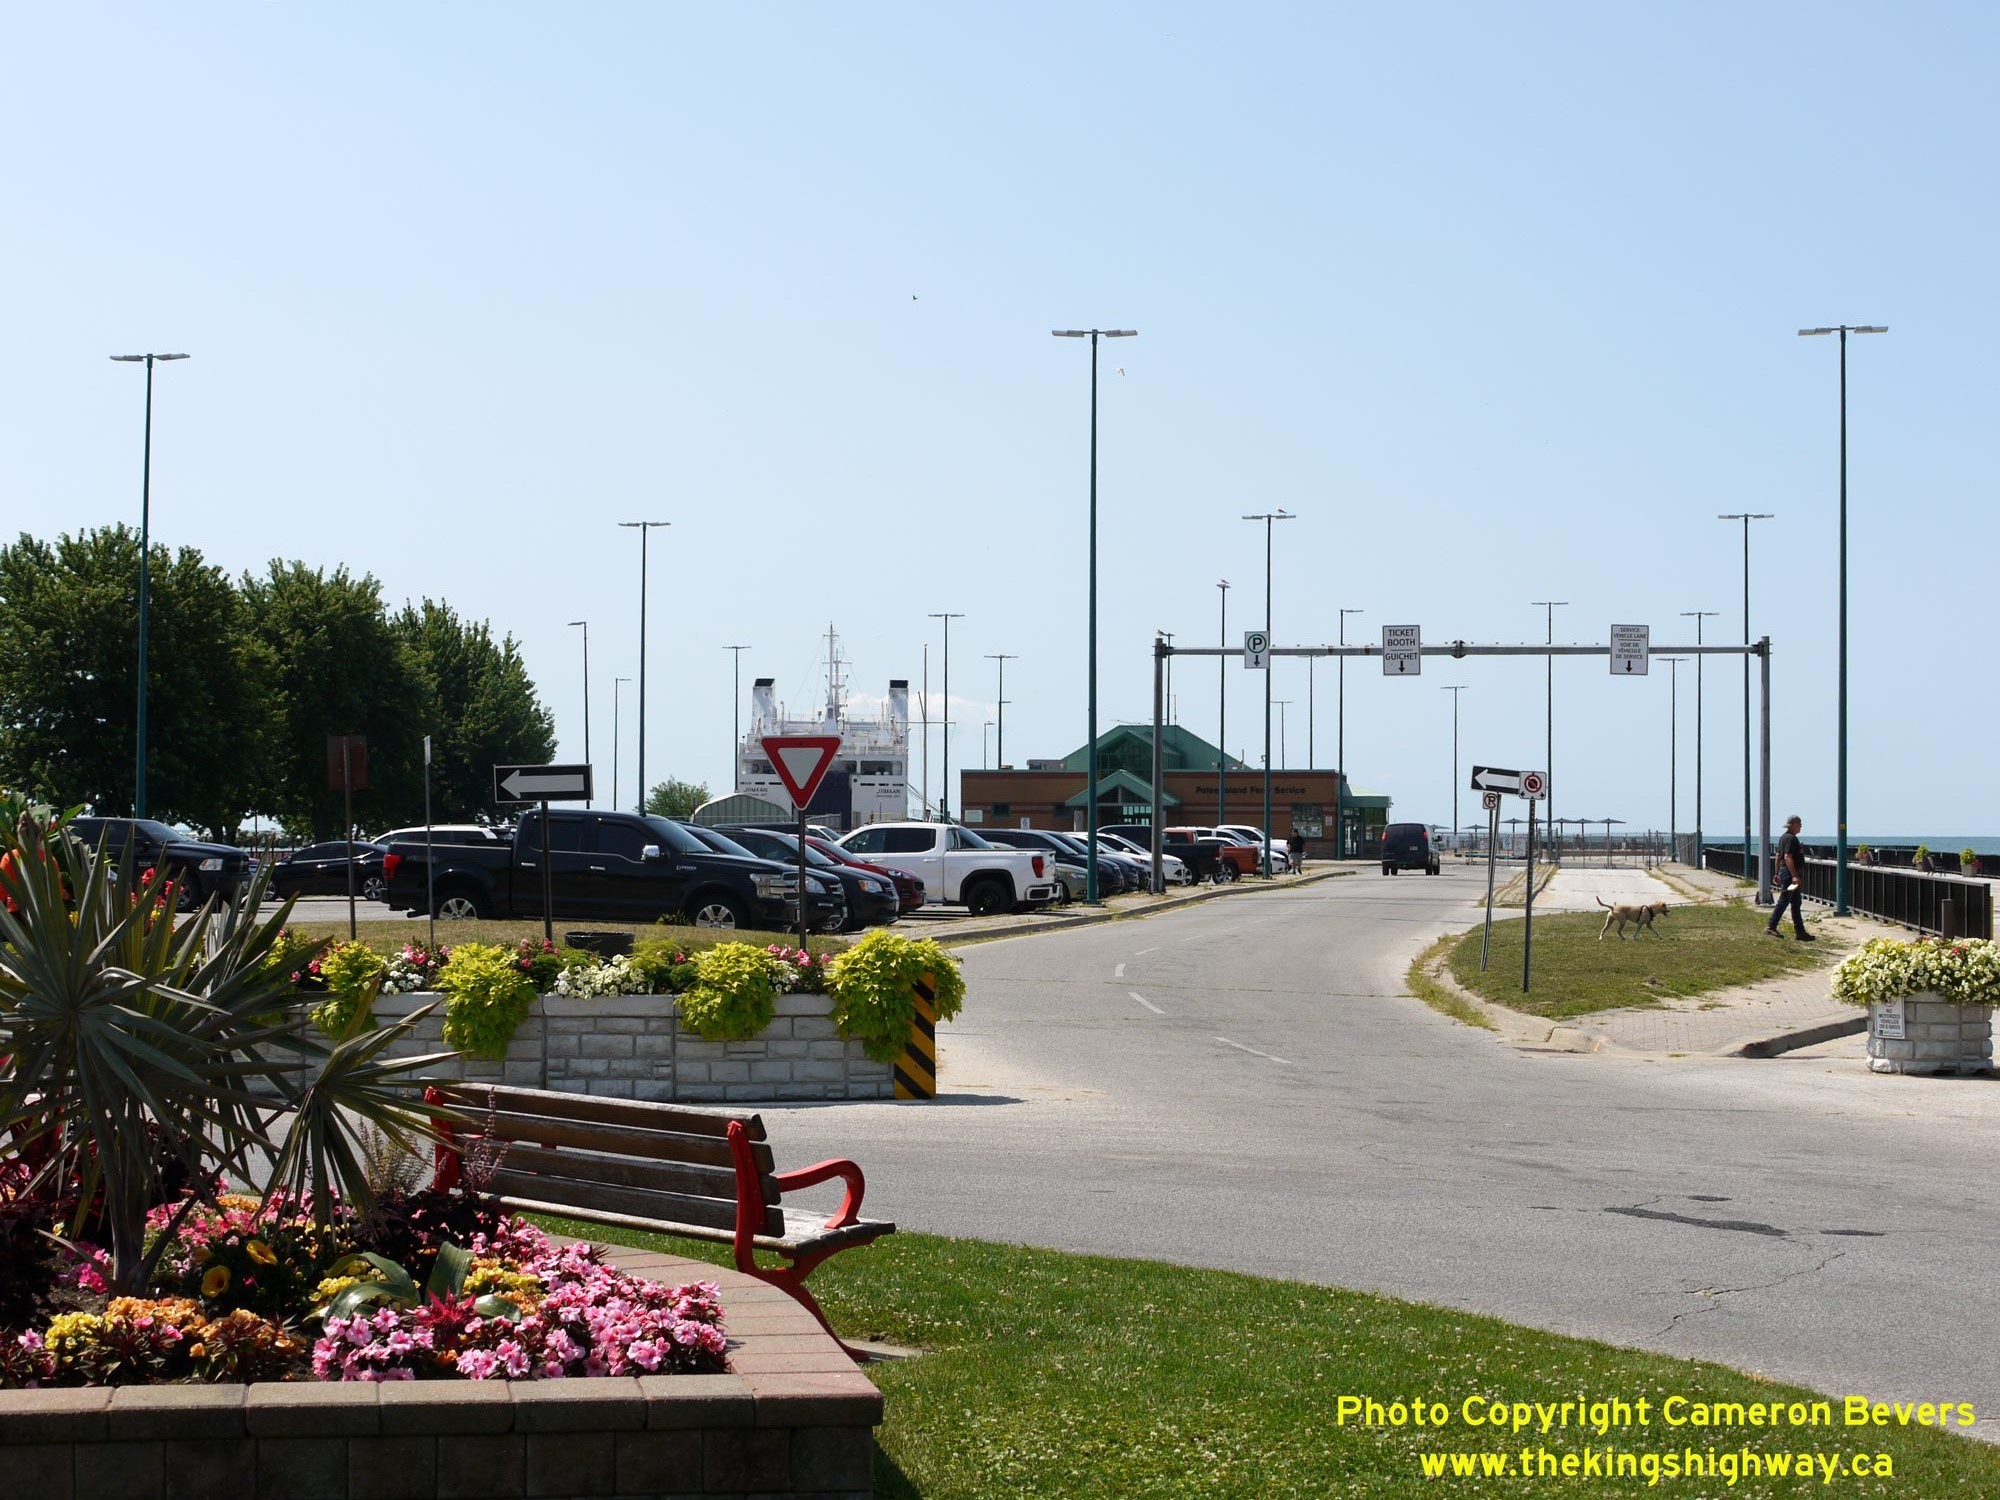
Left - Entrance to the Leamington Ferry Terminal from Erie Street. See an
Enlarged Photo Here. (Photograph taken on August 2, 2019 - © Cameron Bevers) Right - Facing north along Erie Street from Foster Avenue in Leamington. The section of Erie Street from Seacliff Drive (Hwy 18) to the Leamington Ferry Dock almost became a King's Highway during the 1930s. In 1934, plans were prepared by the DHO to assume jurisdiction over a 1/3-mile section of Erie Street from Hwy 18 southerly to the ferry dock as a new King's Highway. For reasons which may never be known, the proposal to assume Erie Street as a King's Highway was ultimately abandoned. No highway number was ever assigned to this short route. See an Enlarged Photo Here. (Photograph taken on August 2, 2019 - © Cameron Bevers) 

Left - View of Erie Street, facing south towards the Leamington Ferry Terminal from Hwy 18 (Seacliff Drive) in Leamington. See an
Enlarged Photo Here. (Photograph taken on August 2, 2019 - © Cameron Bevers) Right - Approaching the intersection of Erie Street and Seacliff Drive in Leamington, facing north. At this intersection, Hwy 18 enters from the west (left) from Kingsville and turns north onto Erie Street (straight ahead). Had the southern leg of Erie Street been assumed as a King's Highway as envisioned in the 1930s, that proposed King's Highway would have come to an end at this intersection - only 1/3rd of a mile after it began at the Leamington Ferry Dock. See an Enlarged Photo Here. (Photograph taken on August 2, 2019 - © Cameron Bevers) 

Left - Facing west along Seacliff Drive (Hwy 18) from Erie Street. Historically, provincial jurisdiction over Hwy 18 ended at the intersection of Forest Avenue
and Seacliff Drive, which lies just ahead at the crest of this hill. The balance of the route of Hwy 18 through Leamington via Seacliff Drive and Erie Street was
designated as a Municipal Connecting Link. See an Enlarged Photo Here. (Photograph taken on August 2, 2019 - © Cameron Bevers) Right - Junction sign assembly at the intersection of Seacliff Drive and Erie Street in Leamington. Up until 1997, Hwy 18 turned left at this intersection and followed Erie Street north where the highway came to an end at Hwy 3 (Talbot Street) in Leamington's Town Centre. Traffic is guided by trailblazer route markers to Hwy 3, Hwy 77 and Hwy 401 from this intersection. Trucks are encouraged to continue straight through on Seacliff Drive to the Leamington Bypass, while all other traffic is directed to follow Erie Street through Downtown Leamington. See an Enlarged Photo Here. (Photograph taken on August 2, 2019 - © Cameron Bevers) 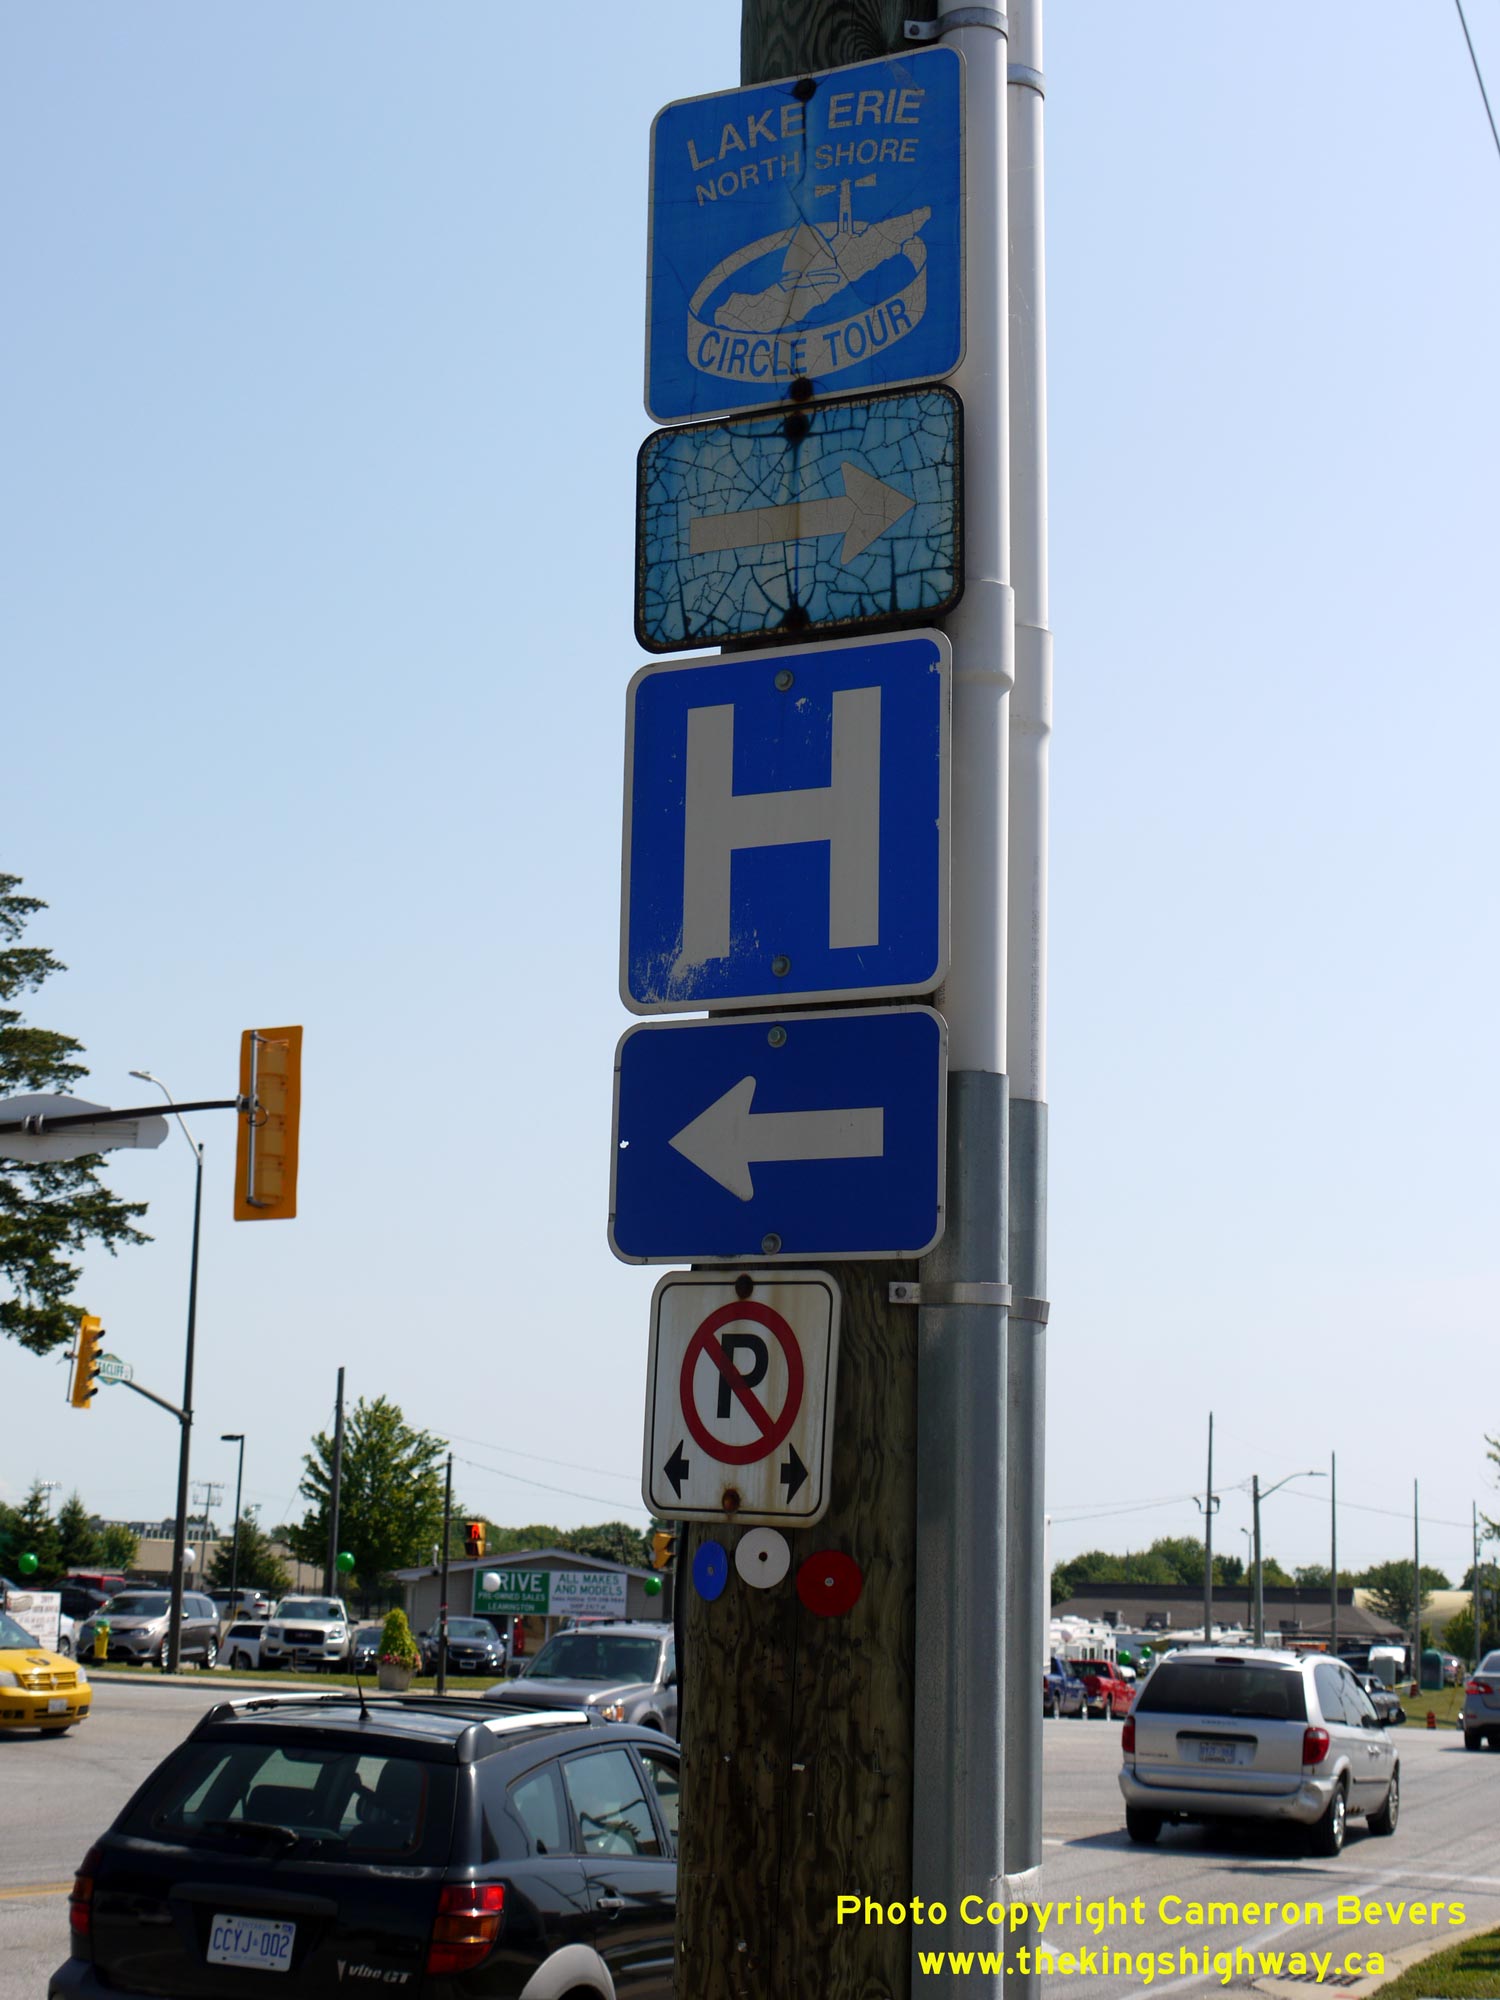
Above - An old Lake Erie Circle Tour sign on Hwy 18 (Seacliff Drive) in Leamington. See an
Enlarged Photo Here. (Photograph taken on August 2, 2019 - © Cameron Bevers) 
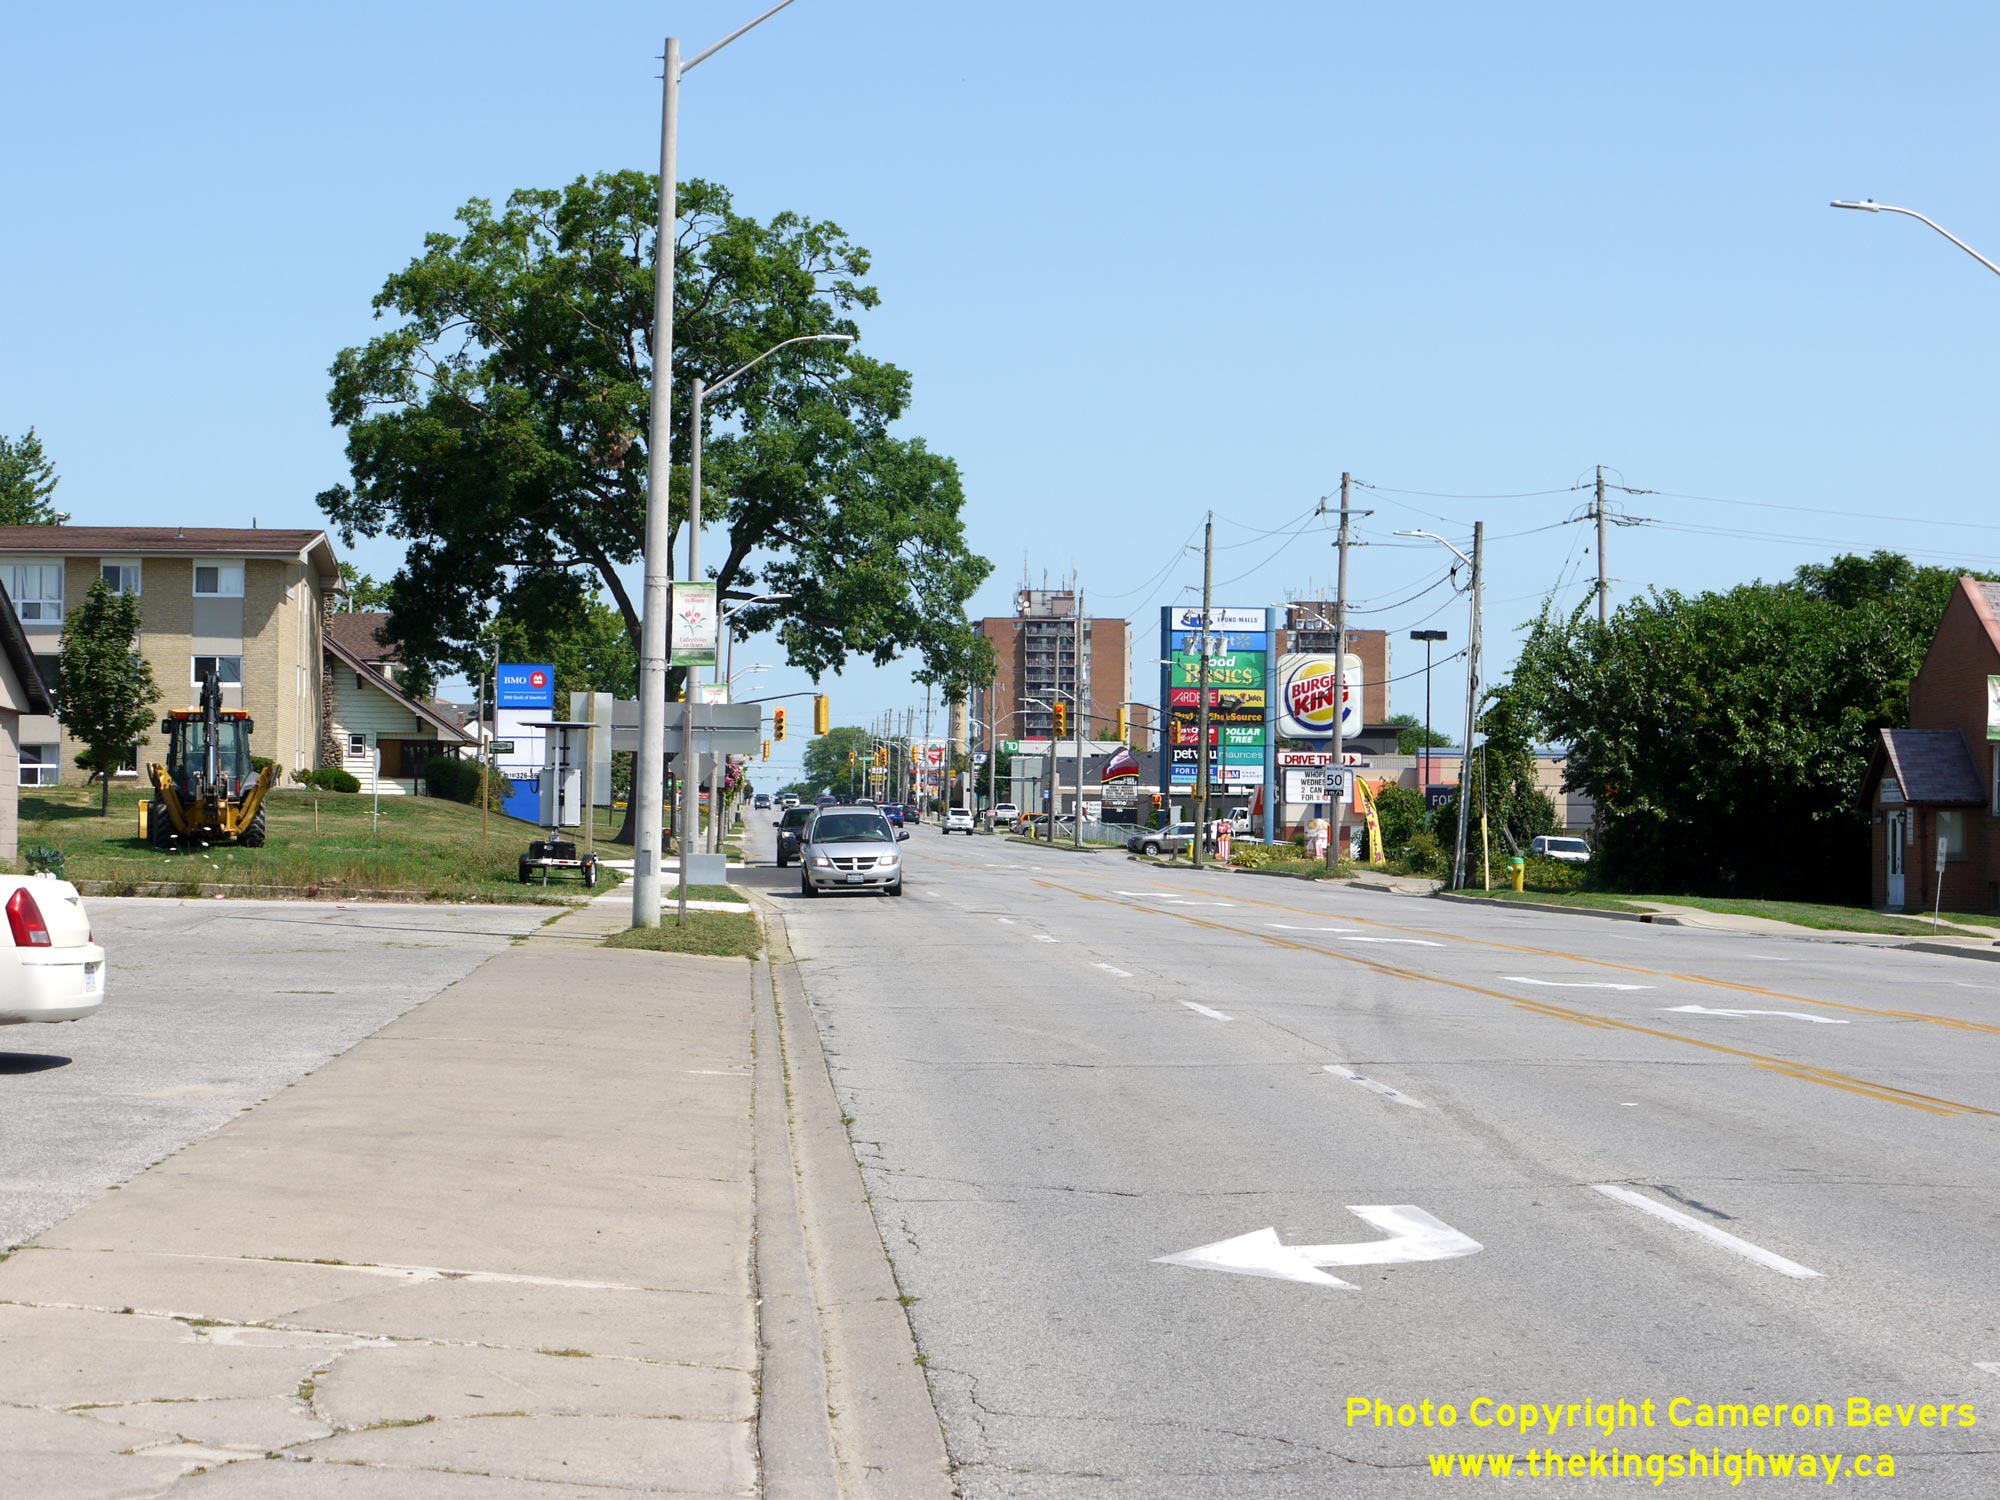
Left - View of the intersection of Seacliff Drive and Erie Street in Leamington, facing west. Up until 1997, Hwy 18 entered Leamington on Seacliff Drive from
Kingsville to the west and turned north onto Erie Street at this intersection, while westbound Hwy 18 traffic bound for Kingsville and Harrow would have turned right
from Erie Street onto Seacliff Drive. The southern leg of Erie Street at left was the street that was once proposed for assumption as a new King's Highway in the
1930s, which never materialized. See an Enlarged Photo Here. (Photograph taken on August 2, 2019 - © Cameron Bevers) Right - Facing north along Erie Street (Hwy 18) from Seacliff Drive in Leamington. See an Enlarged Photo Here. (Photograph taken on August 2, 2019 - © Cameron Bevers) 

Left - View of Erie Street (Hwy 18) facing north at the Highbury-Canco Plant's Overheads. This sprawling industrial complex spans both sides of Erie Street,
and boasts no fewer than three overhead structures across Erie Street which unite the eastern and western sides of the plant together. There are two overhead
pedestrian walkways between the two buildings and a third overhead structure which carries the plant's utility infrastructure. This plant makes numerous commercial
food items, but its most famous product is Heinz Ketchup. See an Enlarged Photo Here. (Photograph taken on August 2, 2019 - © Cameron Bevers) Right - Facing south along Hwy 18 (Erie Street) approaching Oak Street in Leamington. The Heinz-branded smokestack of the Highbury-Canco Plant is a prominent Leamington landmark. Leamington is often called the "Tomato Capital of Canada", with tomatoes being a common produce grown at local farms. See an Enlarged Photo Here. (Photograph taken on August 2, 2019 - © Cameron Bevers) 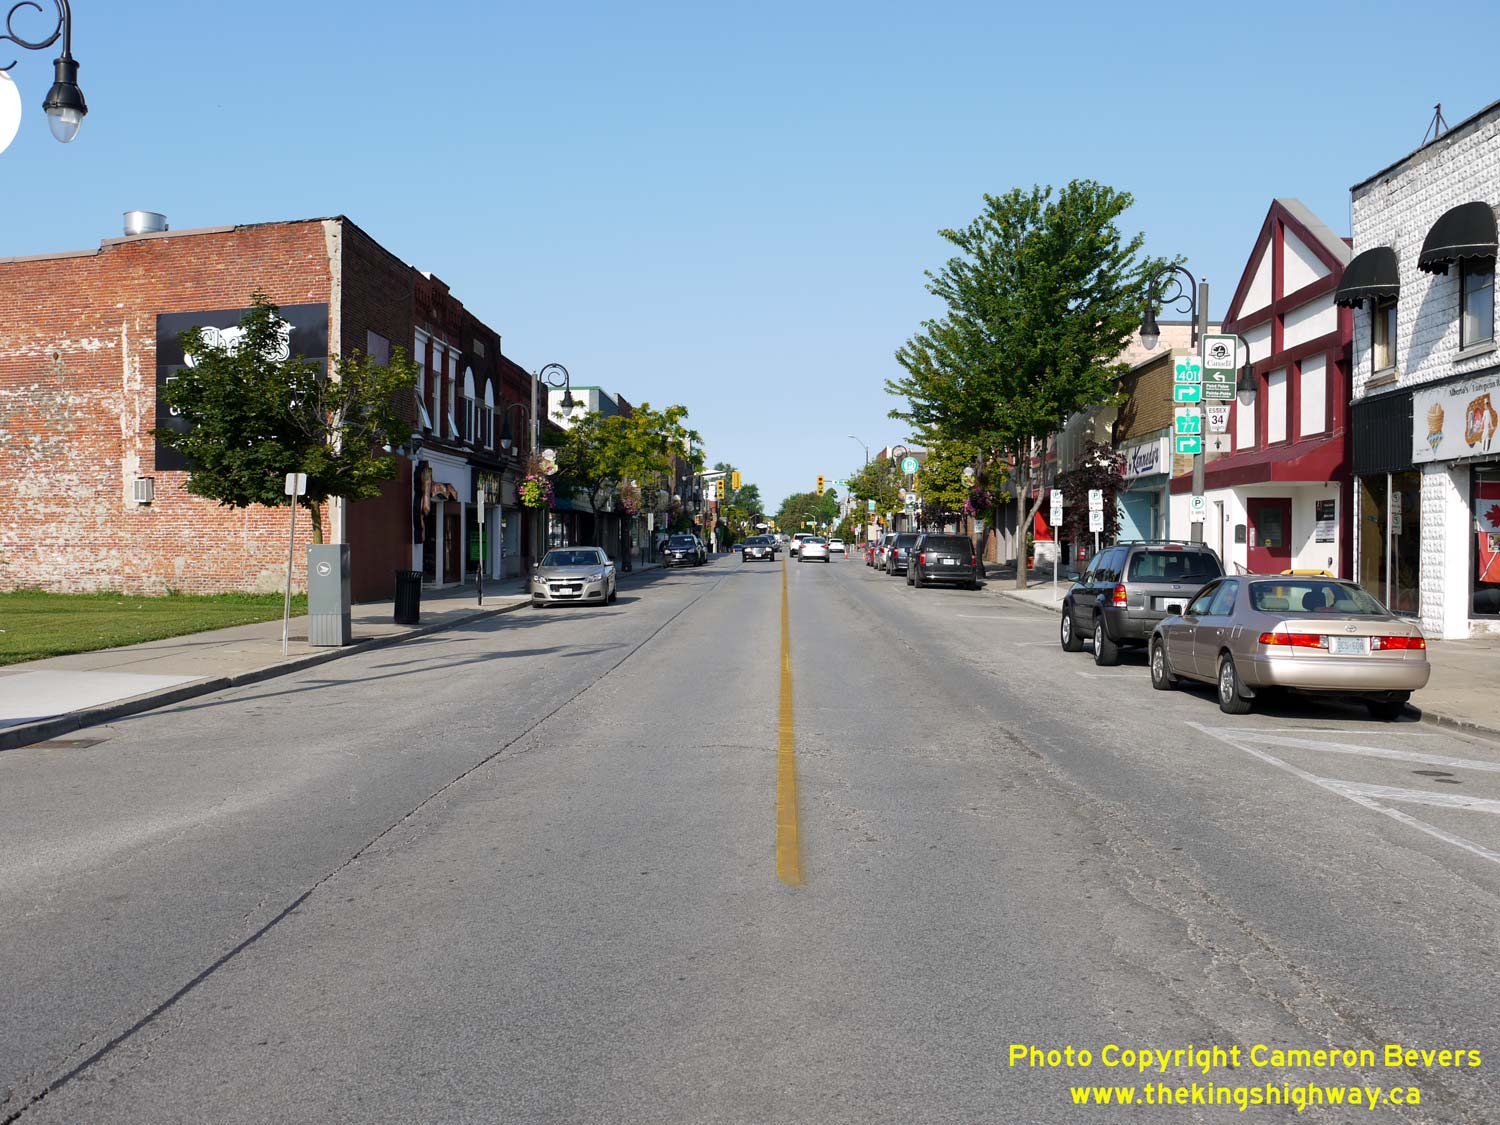

Left - Facing west along Talbot Street (Old Hwy 3) towards the Hwy 18 & Hwy 77 Junction at Erie Street in Downtown Leamington. See an
Enlarged Photo Here. (Photograph taken on August 2, 2019 - © Cameron Bevers) Right - Junction sign assembly facing westbound traffic at Talbot Street & Erie Street. Old Hwy 3 (now Essex Road 34) continues straight ahead, while at right, Hwy 77 heads north towards Hwy 401 via Erie Street. The route of Hwy 77 through Downtown Leamington has always been under municipal jurisdiction. Today, provincial jurisdiction over Hwy 77 begins at the Leamington Bypass (Hwy 3) at the northern entrance to Leamington's urbanized area. Although it is no longer signed today, the former route of Hwy 18 began at this intersection and headed south via Erie Street. See an Enlarged Photo Here. (Photograph taken on August 2, 2019 - © Cameron Bevers) 

Left - Facing east along Talbot Street (Old Hwy 3) from the Hwy 18 & Hwy 77 Junction at Erie Street in Downtown Leamington. See an
Enlarged Photo Here. (Photograph taken on August 2, 2019 - © Cameron Bevers) Right - Approaching the historical terminus of Hwy 18 at Erie Street & Talbot Street in Downtown Leamington, facing north. Erie Street continues north beyond the traffic signals towards Hwy 401 as Hwy 77, while Talbot Street (Old Hwy 3) crosses Erie Street at the traffic signals. See an Enlarged Photo Here. (Photograph taken on August 2, 2019 - © Cameron Bevers) 

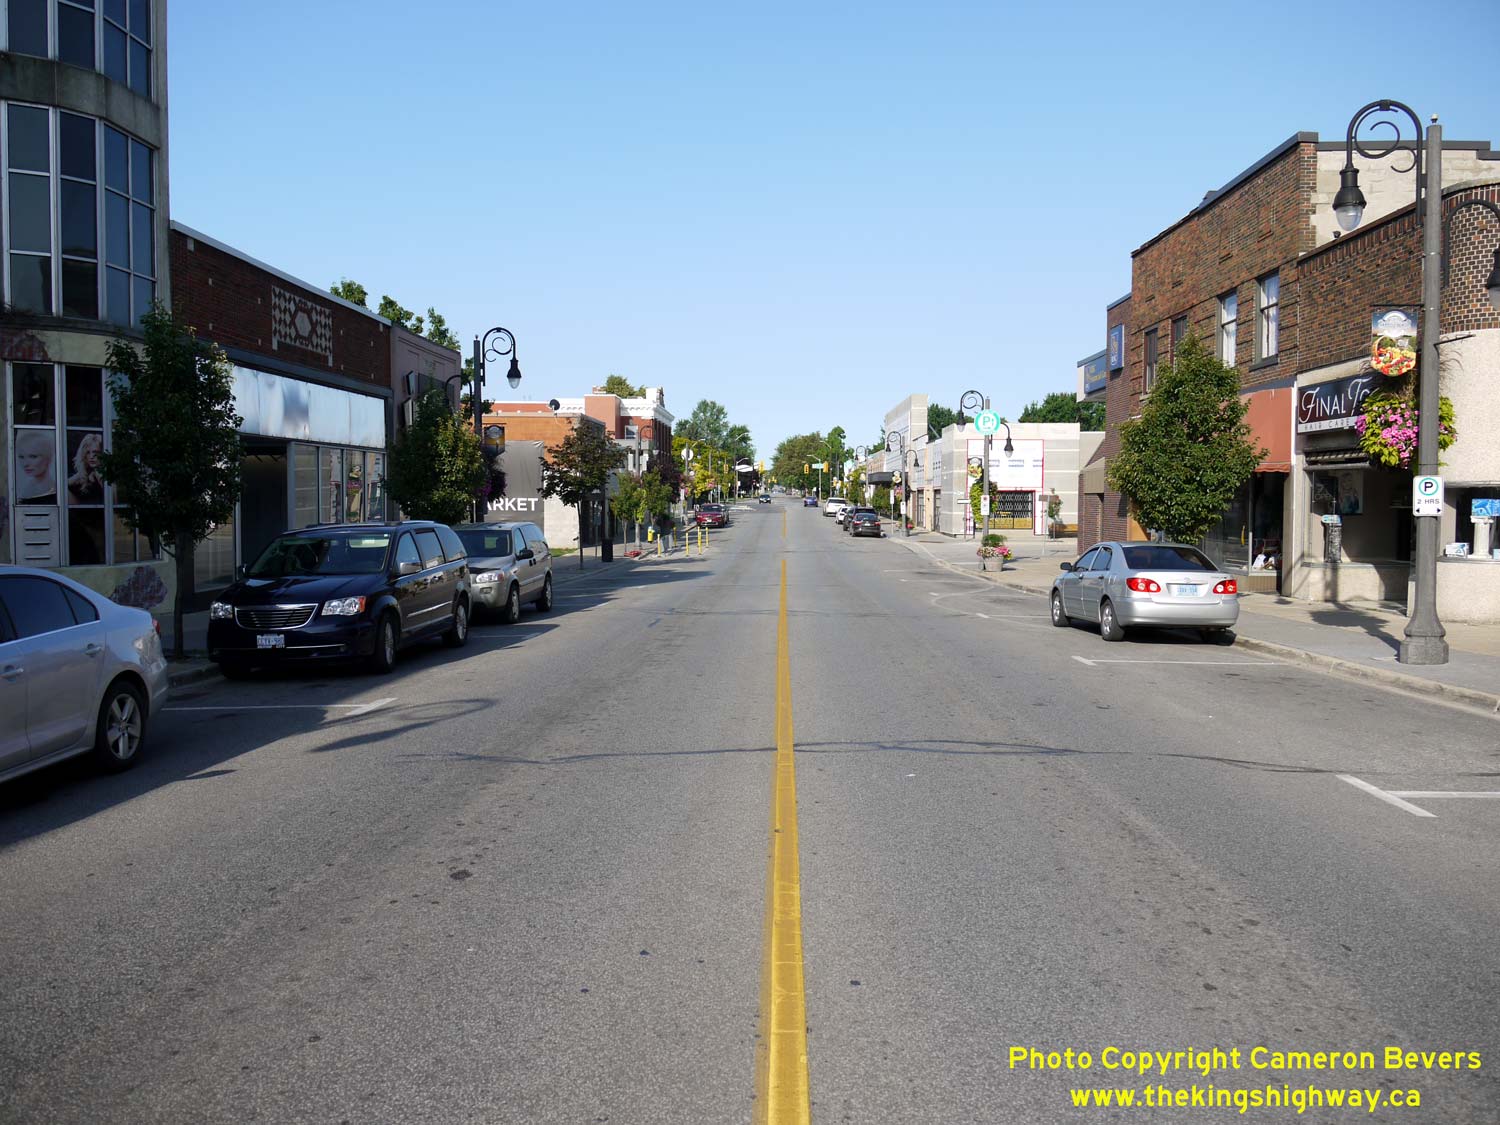
Left - Facing south along Erie Street (Hwy 18) from Talbot Street in Downtown Leamington. Up until the 1990s, Hwy 18 began at Talbot Street (Old Hwy 3) and
continued south through Leamington along Erie Street. At Seacliff Drive, Hwy 18 turned west towards Kingsville and Amherstburg. See an
Enlarged Photo Here. (Photograph taken on August 2, 2019 - © Cameron Bevers) Right - Junction sign assembly facing northbound traffic on Erie Street (Hwy 18). Green-and-white trailblazer route markers at Talbot Street (Old Hwy 3) direct traffic northbound along Erie Street to reach Hwy 77 & Hwy 401. The signs which once marked the historical terminus of Hwy 18 at this intersection were removed long ago. See an Enlarged Photo Here. (Photograph taken on August 2, 2019 - © Cameron Bevers) 

Left - Facing south along Erie Street (Hwy 77) approaching Talbot Street (Old Hwy 3) in Downtown Leamington. Up until 2000, Hwy 77 reached its southern
terminus at the traffic signals. Erie Street continues straight ahead towards the Pelee Island Ferry Dock. Historically, this intersection also marked the beginning
of Hwy 18, which continued west towards Kingsville and Amherstburg after a brief southerly jaunt via Erie Street. See an
Enlarged Photo Here. (Photograph taken on August 2, 2019 - © Cameron Bevers) Right - Junction sign assembly facing southbound traffic at Erie Street & Talbot Street. Old Hwy 3 (Talbot Street) through Leamington is now known as Essex Road 34. The former route of Hwy 18 via southbound Erie Street is no longer signed at this intersection, leaving no evidence that this street was once a King's Highway. There is also no remaining evidence that Hwy 77 ended at this intersection prior to 2000. See an Enlarged Photo Here. (Photograph taken on August 2, 2019 - © Cameron Bevers) 

Left - Facing north along Hwy 77 (Erie Street) from Talbot Street (Old Hwy 3) in Downtown Leamington. See an
Enlarged Photo Here. (Photograph taken on August 2, 2019 - © Cameron Bevers) Right - View of Talbot Street (Old Hwy 3) approaching Erie Street (Hwy 18 & Hwy 77) in Downtown Leamington, facing east. See an Enlarged Photo Here. (Photograph taken on August 2, 2019 - © Cameron Bevers) 
Left - Junction of Old Hwy 3, Hwy 18 & Hwy 77 (Talbot Street & Erie Street) in Downtown Leamington, facing northeast. See an
Enlarged Photo Here. (Photograph taken on August 2, 2019 - © Cameron Bevers) Right - Facing west along Talbot Street (Old Hwy 3) from the Hwy 18 & Hwy 77 Junction at Erie Street in Downtown Leamington. See an Enlarged Photo Here. (Photograph taken on August 2, 2019 - © Cameron Bevers)
More King's Highway 18 Photographs Coming Soon!
|
|---|
Links to Adjacent King's Highway Photograph Pages:
Back to King's Highway 17 Photos /
King's Highway 18 History /
On to King's Highway 19 Photos
Ontario Highway History - Main Menu / Back to List of Highways Website contents, photos & text © 2002-2026, Cameron
Bevers (Webmaster) - All Rights Reserved / Contact Me
|
|---|