
| 
| |
|
|
This page contains historical photos of Ontario's King's Highway 6 dating from 1900 to 1959. All photographs displayed on
this page were taken by the Ontario Ministry of Transportation, unless specifically noted otherwise. Historical photographs are arranged in approximate chronological
order. Click on any thumbnail to see a larger image!
Please note that all photographs displayed on this
website are protected by copyright. These photographs must not be reproduced, published,
electronically stored or copied, distributed, or posted onto other websites without
my written permission. If you want to use photos from this website, please
email me first for permission. Thank-you!
|
|---|
|
Page 1: Historical King's Highway 6 Photographs (1900-1959)


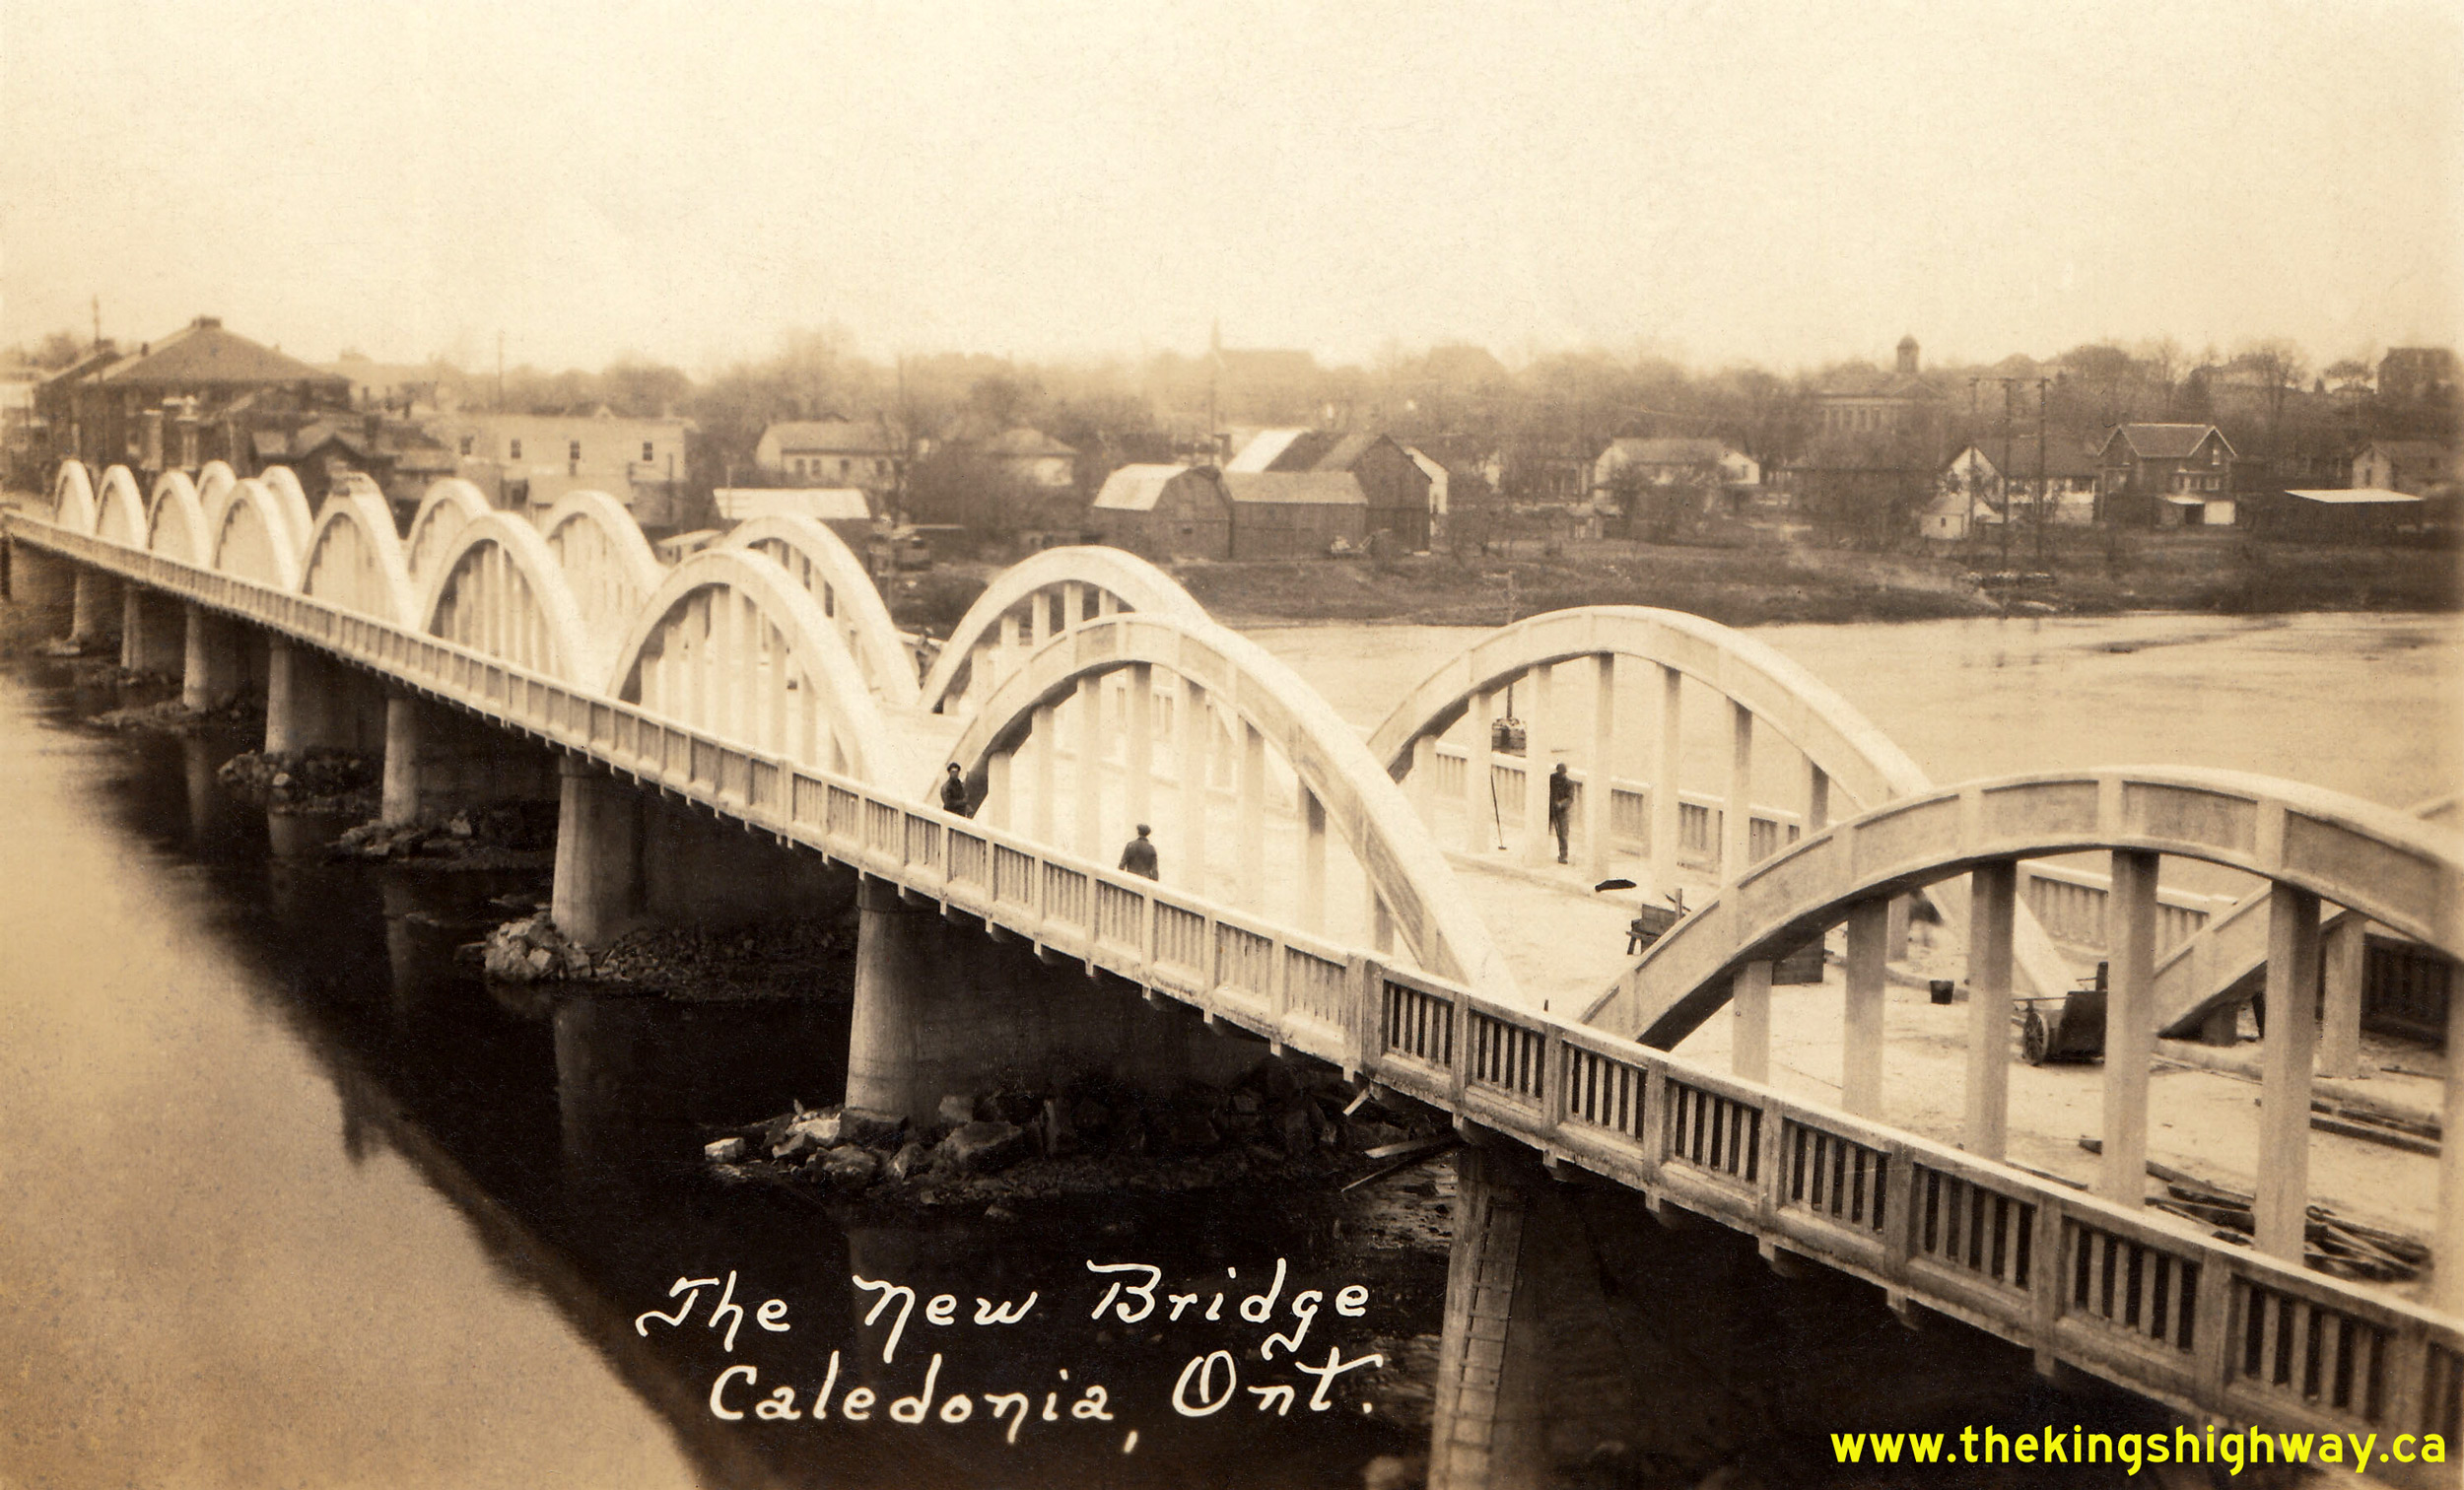
Left - Circa 1909 postcard view of the steel bowstring arch bridge over the Grand River in Caledonia, facing north. This steel arch bridge carried traffic on
the Hamilton-Jarvis Highway (later known as Hwy 6) up until 1925, when the bridge failed under the weight of heavy traffic. The old steel bridge was subsequently
demolished and replaced by a nine-span concrete bowstring arch structure. The new Caledonia Bridge was completed in 1927. Photo taken circa 1909. (Photo from Cameron Bevers' historical photograph collection - Original photographer unknown) Right - Circa 1912 postcard view of the high-level bridge over the Desjardins Canal on the Hamilton Northwest Entrance Highway (later known as Hwy 2 & Hwy 6). This bridge was replaced by the T.B. McQuesten High-Level Bridge in 1932, which is still in service today. See an Enlarged Photo Here. Photo taken circa 1912. (Photo courtesy of the International Stationery Company, Picton) 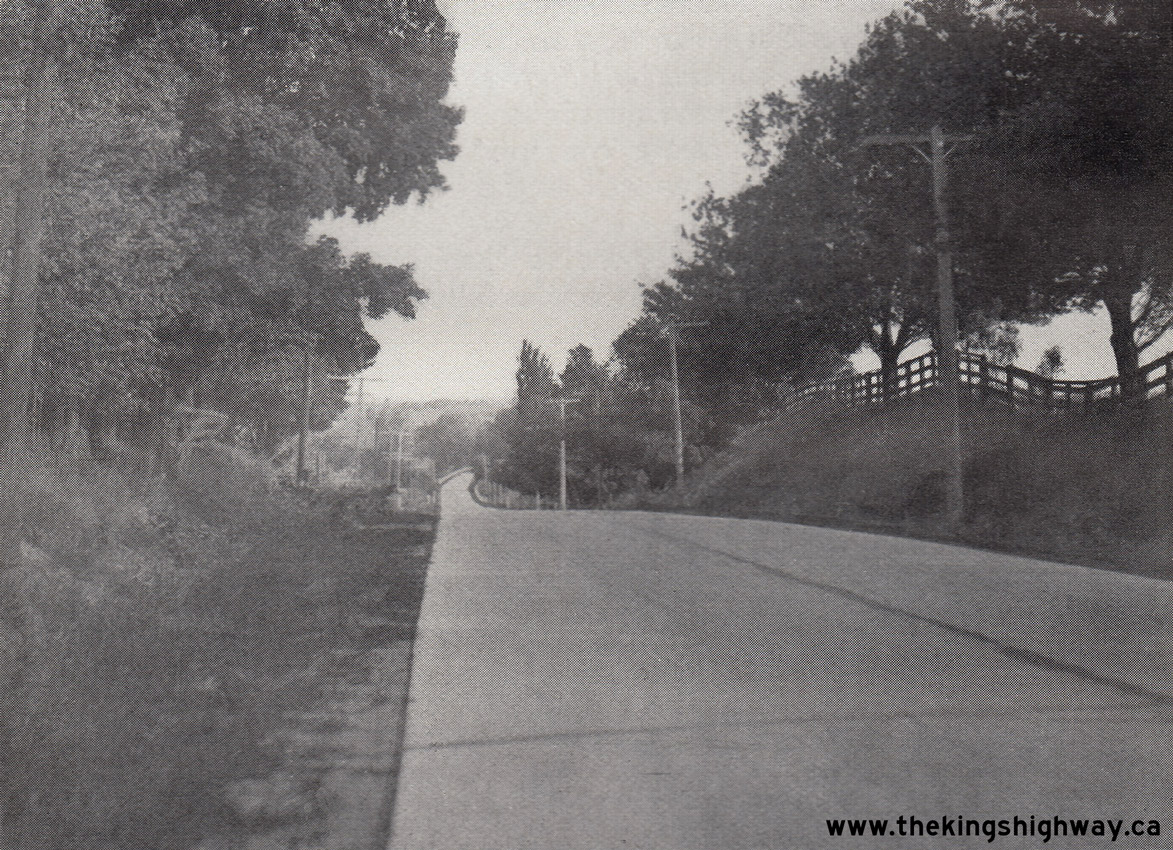
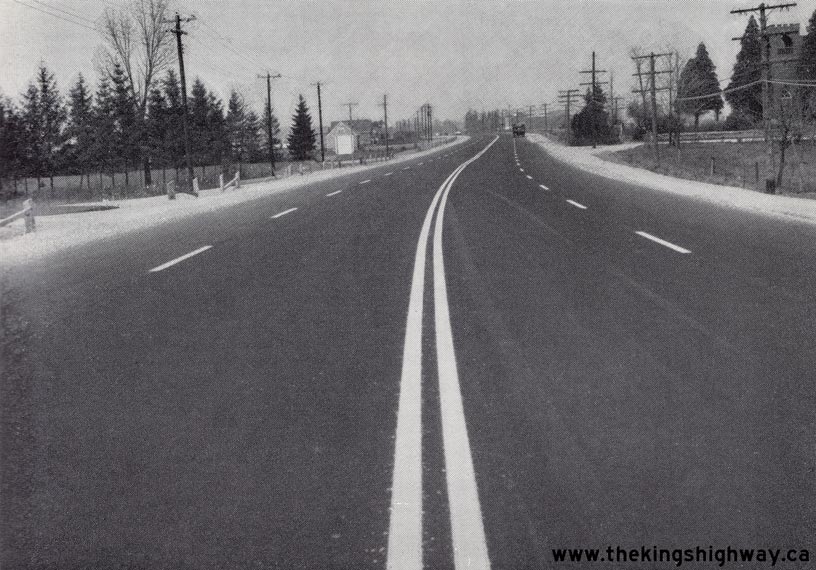
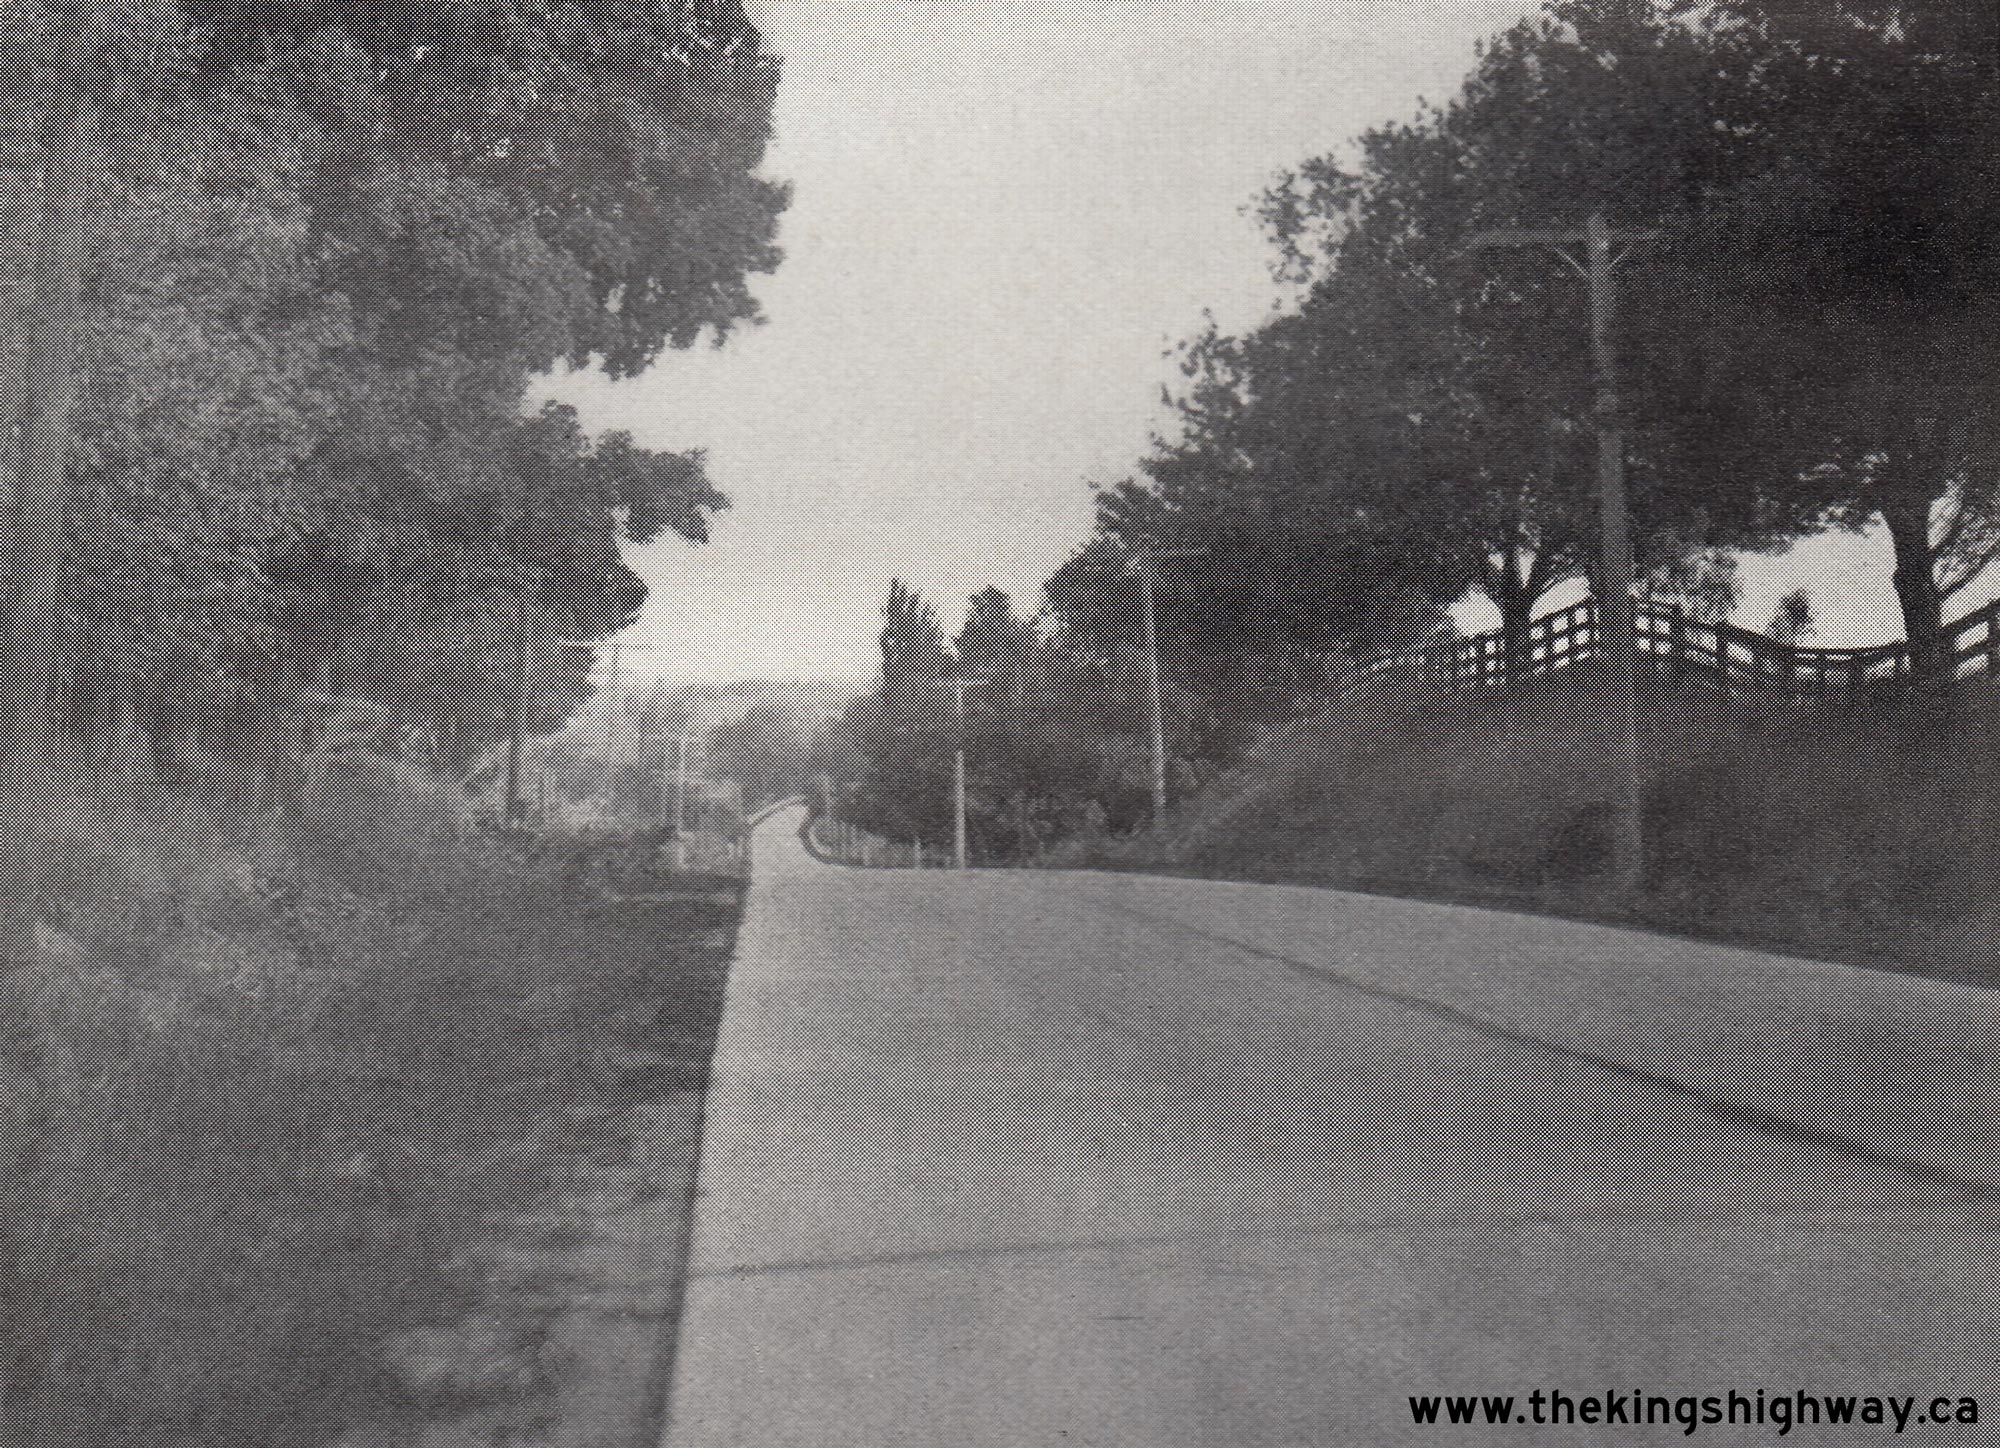
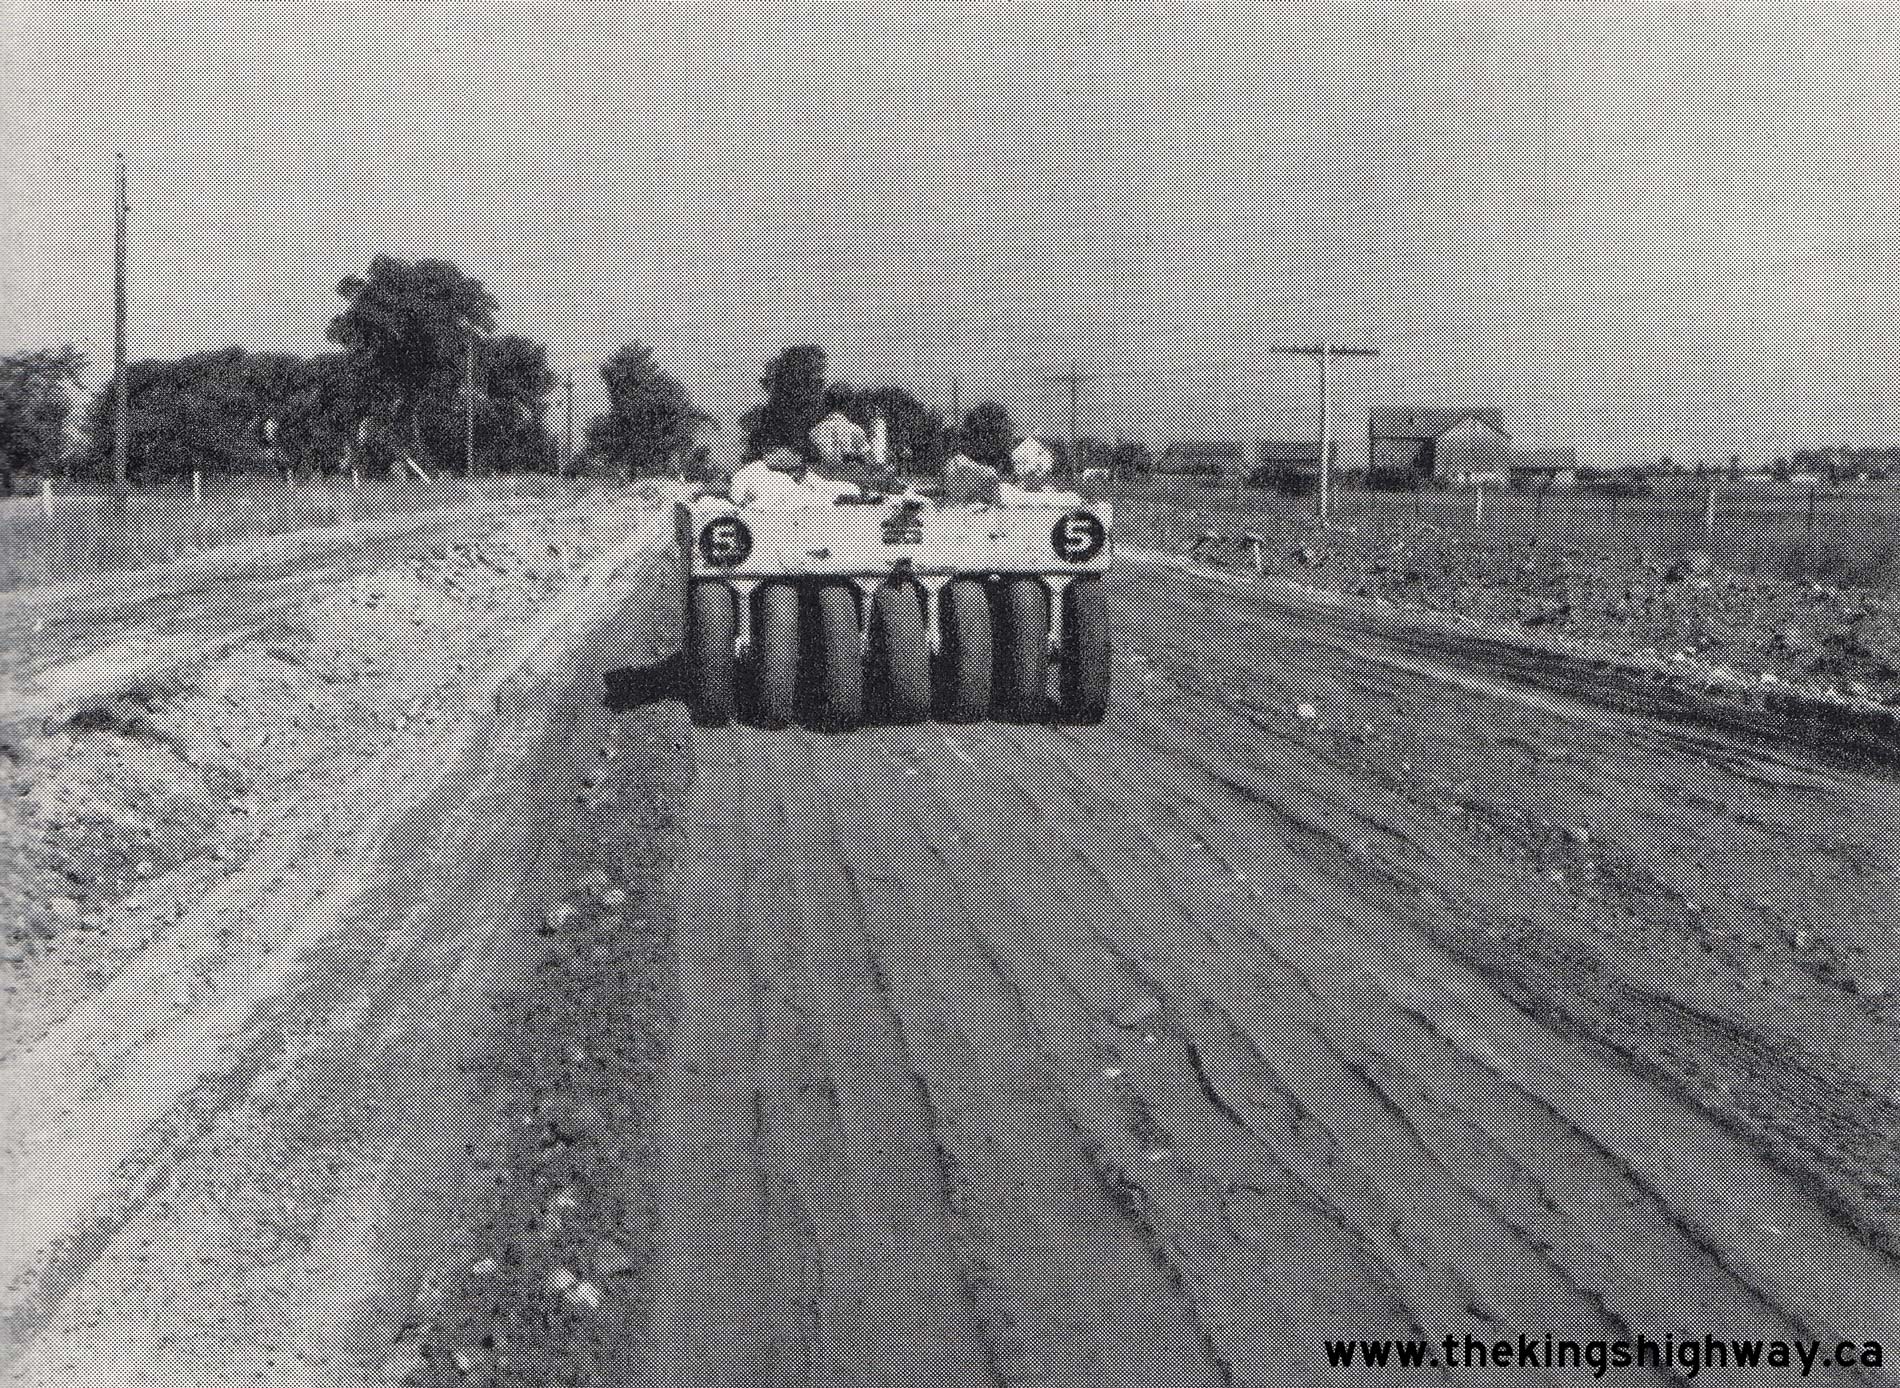
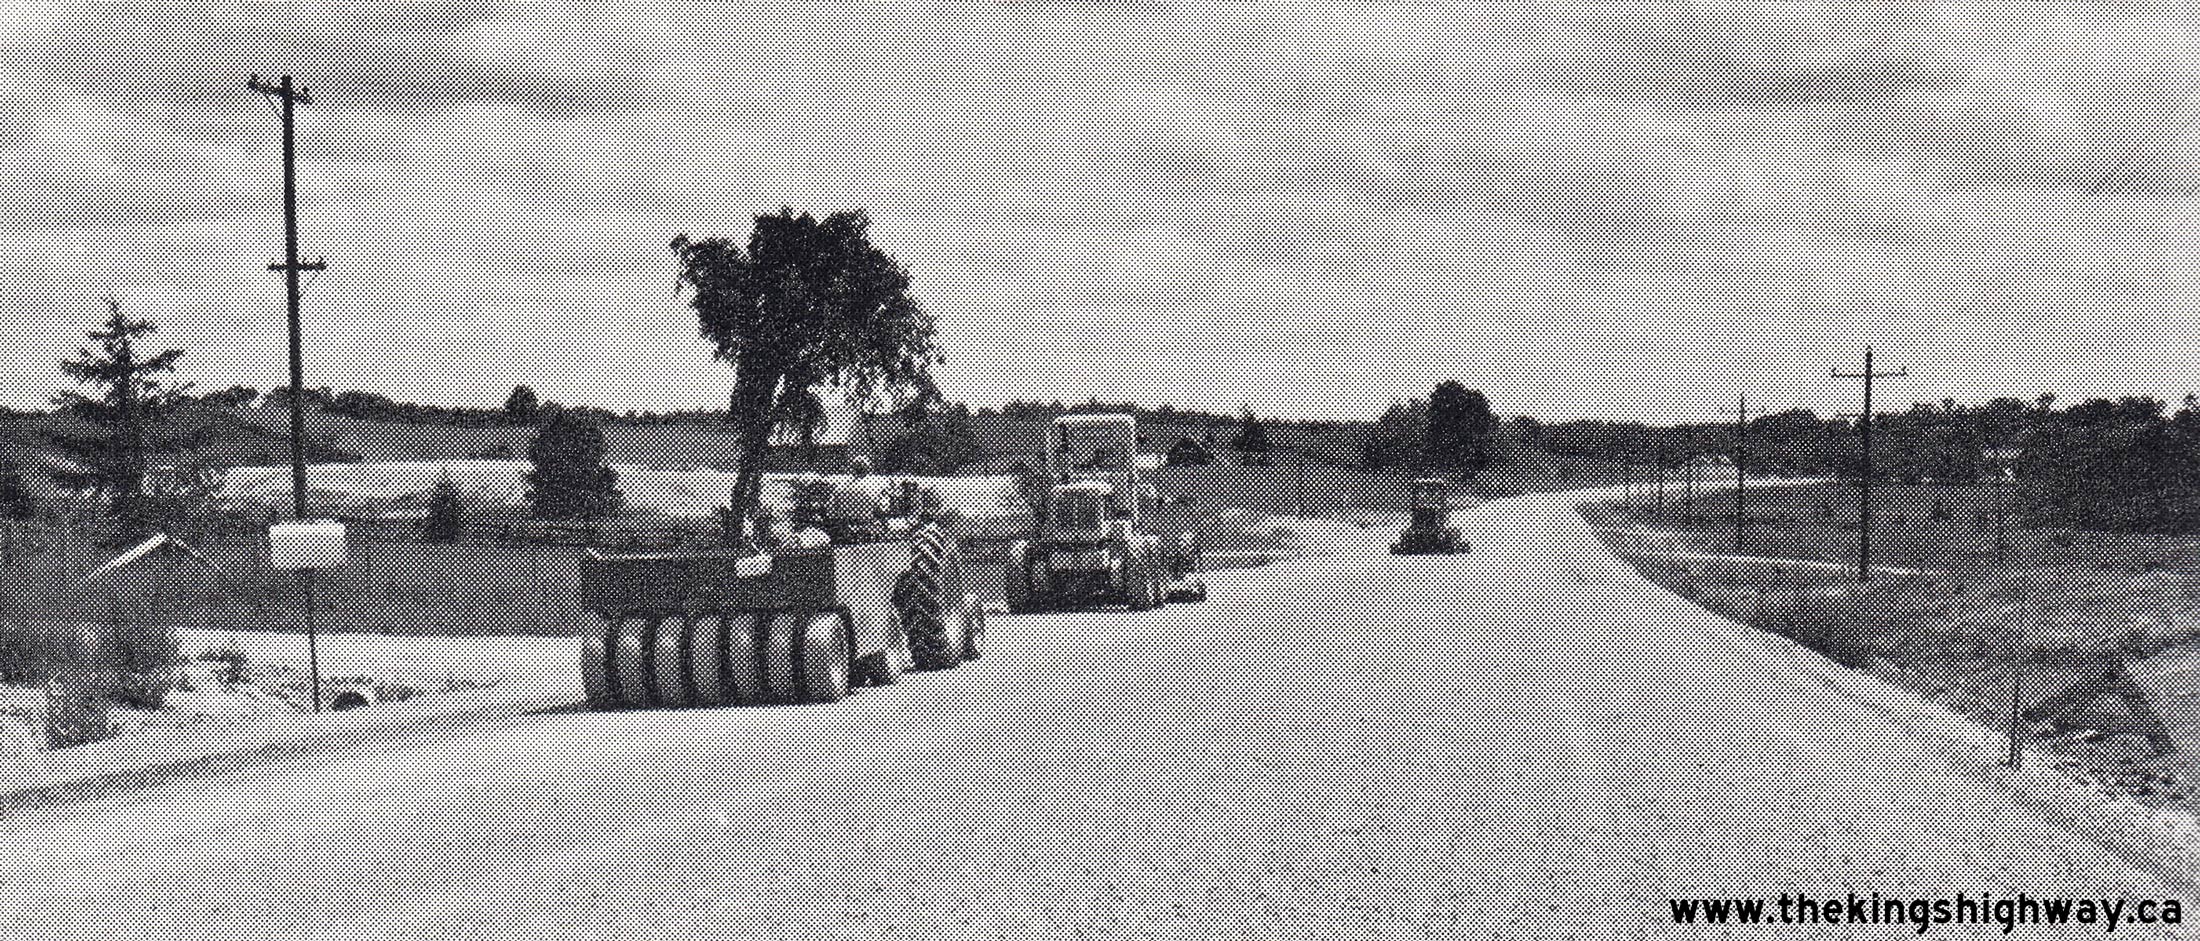
Above - New concrete pavement on Hwy 6 north of Puslinch, Contract #1162. Once this section of concrete pavement was constructed north of Puslinch in 1925,
a paved highway link was completed between Hamilton and Guelph. Previously, there was a break in the pavement along Hwy 6 in the Puslinch and Aberfoyle area, where a
gravel section extended for a distance of 7 1/2 miles. See an Enlarged Photo Here. Photo taken
in 1925. (Photo courtesy of Ontario Ministry of Transportation - © King's Printer for Ontario, 1925) 
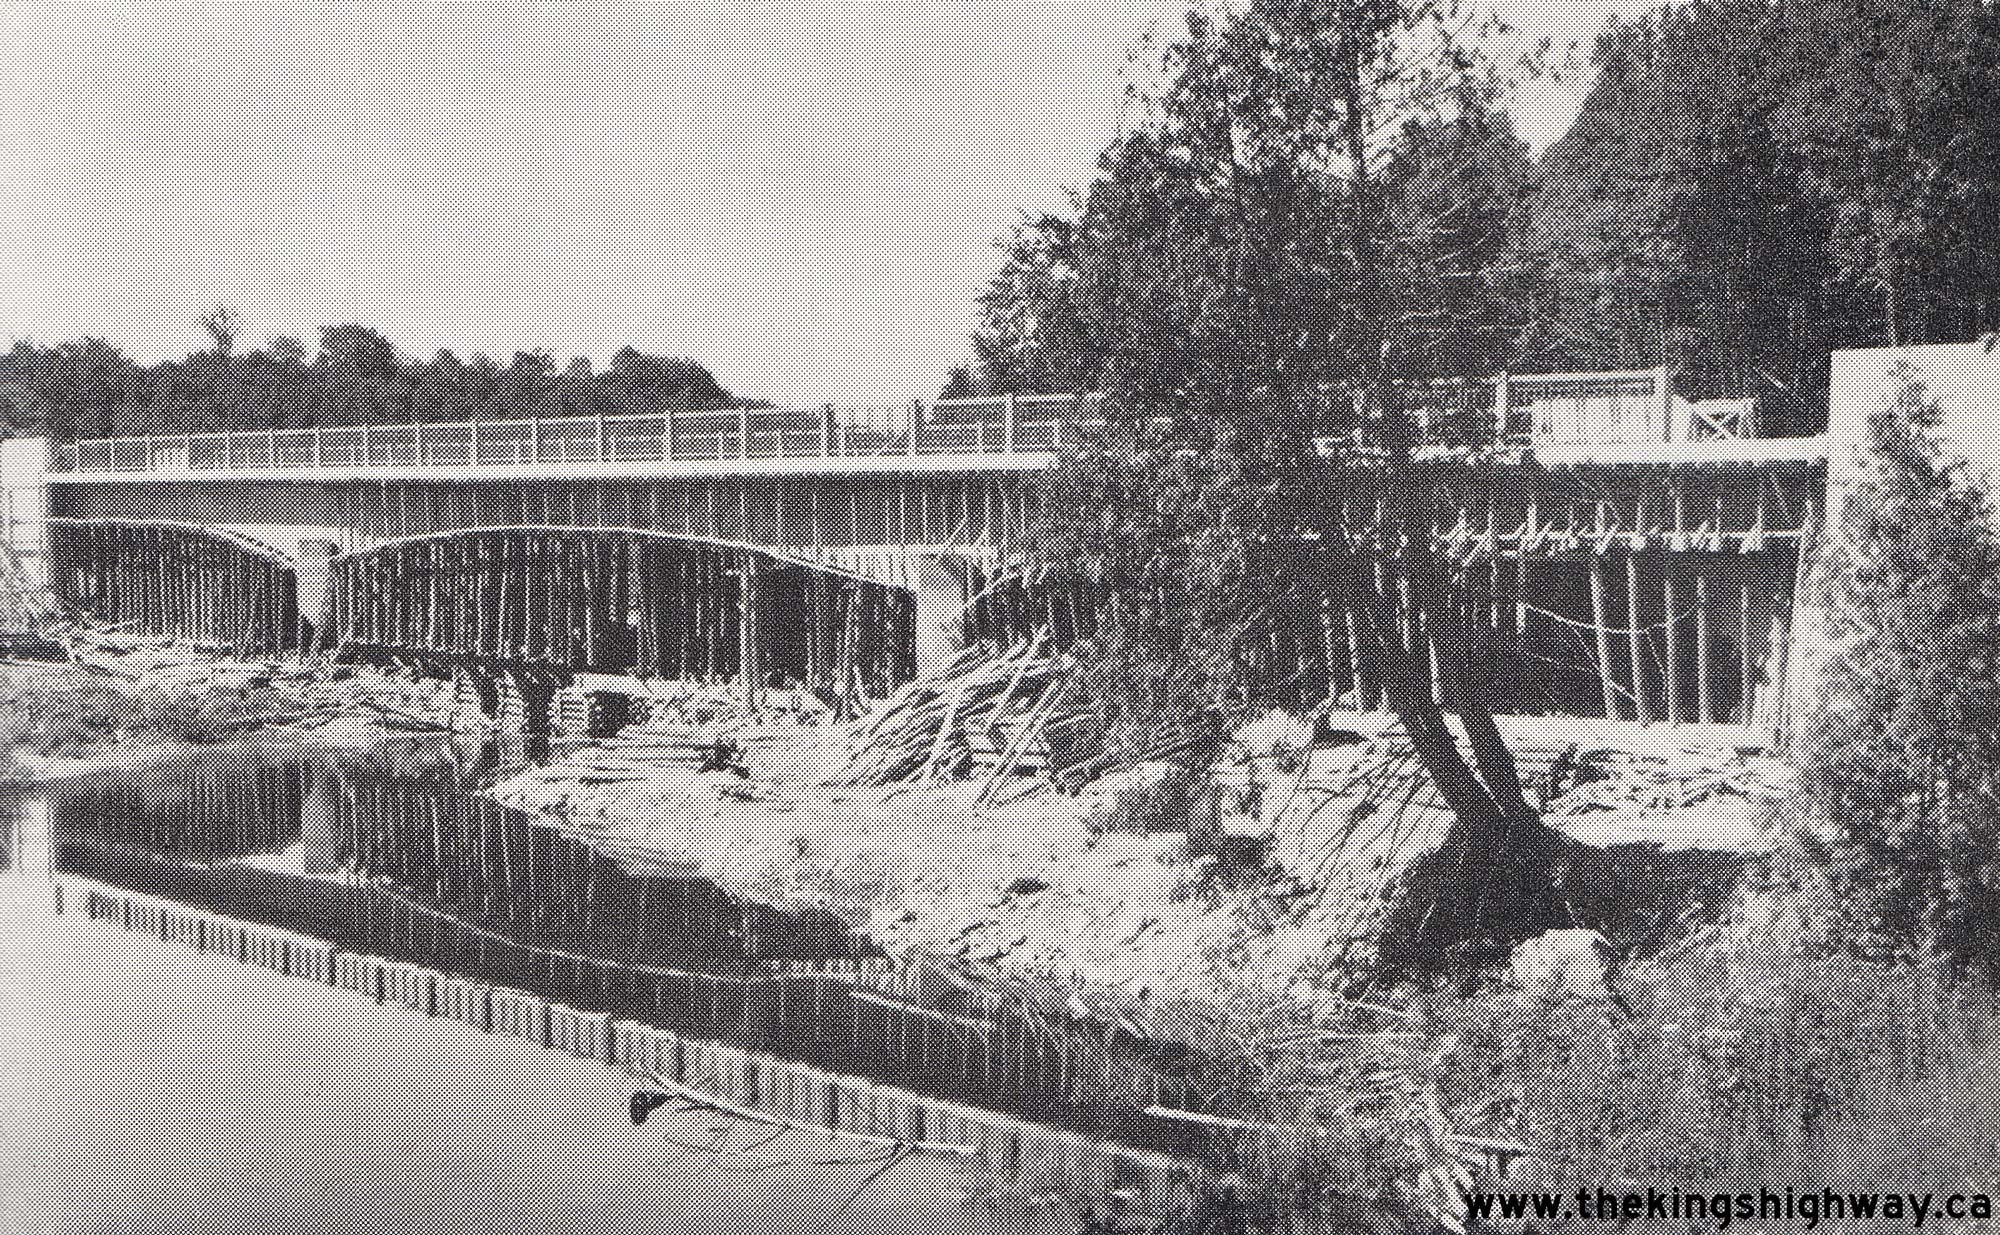
Above - Construction crews applying the finishing touches to the new concrete bowstring arch bridge over the Grand River in Caledonia, Contract #1927-55. This
concrete bowstring arch bridge replaced a steel bowstring arch bridge, which carried traffic on the Hamilton-Jarvis Highway up until the mid-1920s. The old bridge was
not designed to accommodate heavy traffic loads and the structure ultimately failed in 1925. The old steel bridge was demolished and replaced by the new nine-span
concrete bowstring arch structure seen here. Interestingly, the original contract tender invited alternative construction material bids - both concrete or steel
bridge designs were considered acceptable. The contract for the new Caledonia Bridge was awarded in May 1927, with a concrete structure design selected. The new
bridge was officially opened to traffic by the Department of Public Highways of Ontario (DPHO) on November 19, 1927. The concrete bridge seen here is still in service
today. See an Enlarged Photo Here. Photo taken in 1927. (Photo from Cameron Bevers' historical photograph collection - Original photographer unknown) 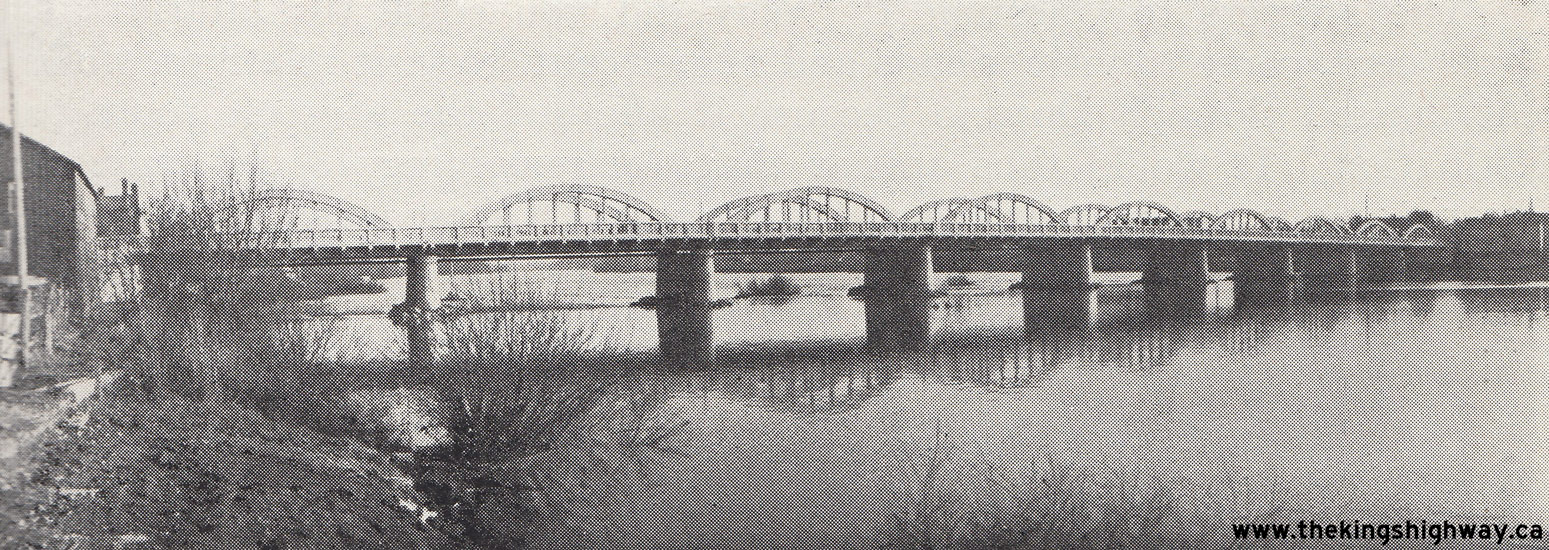
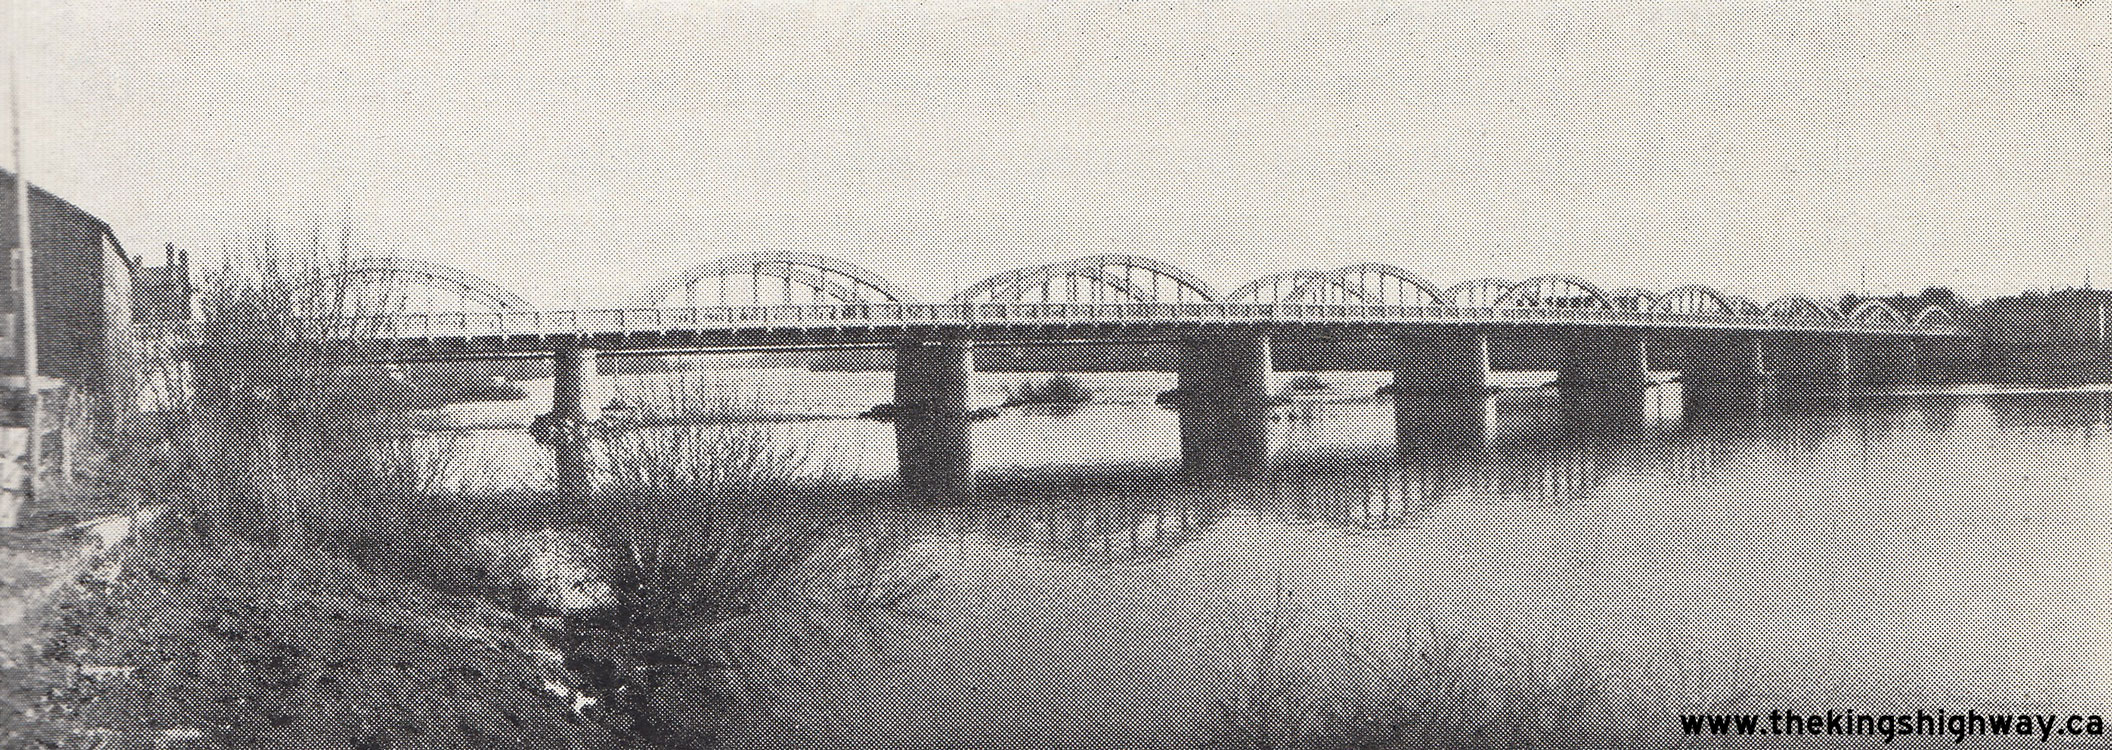
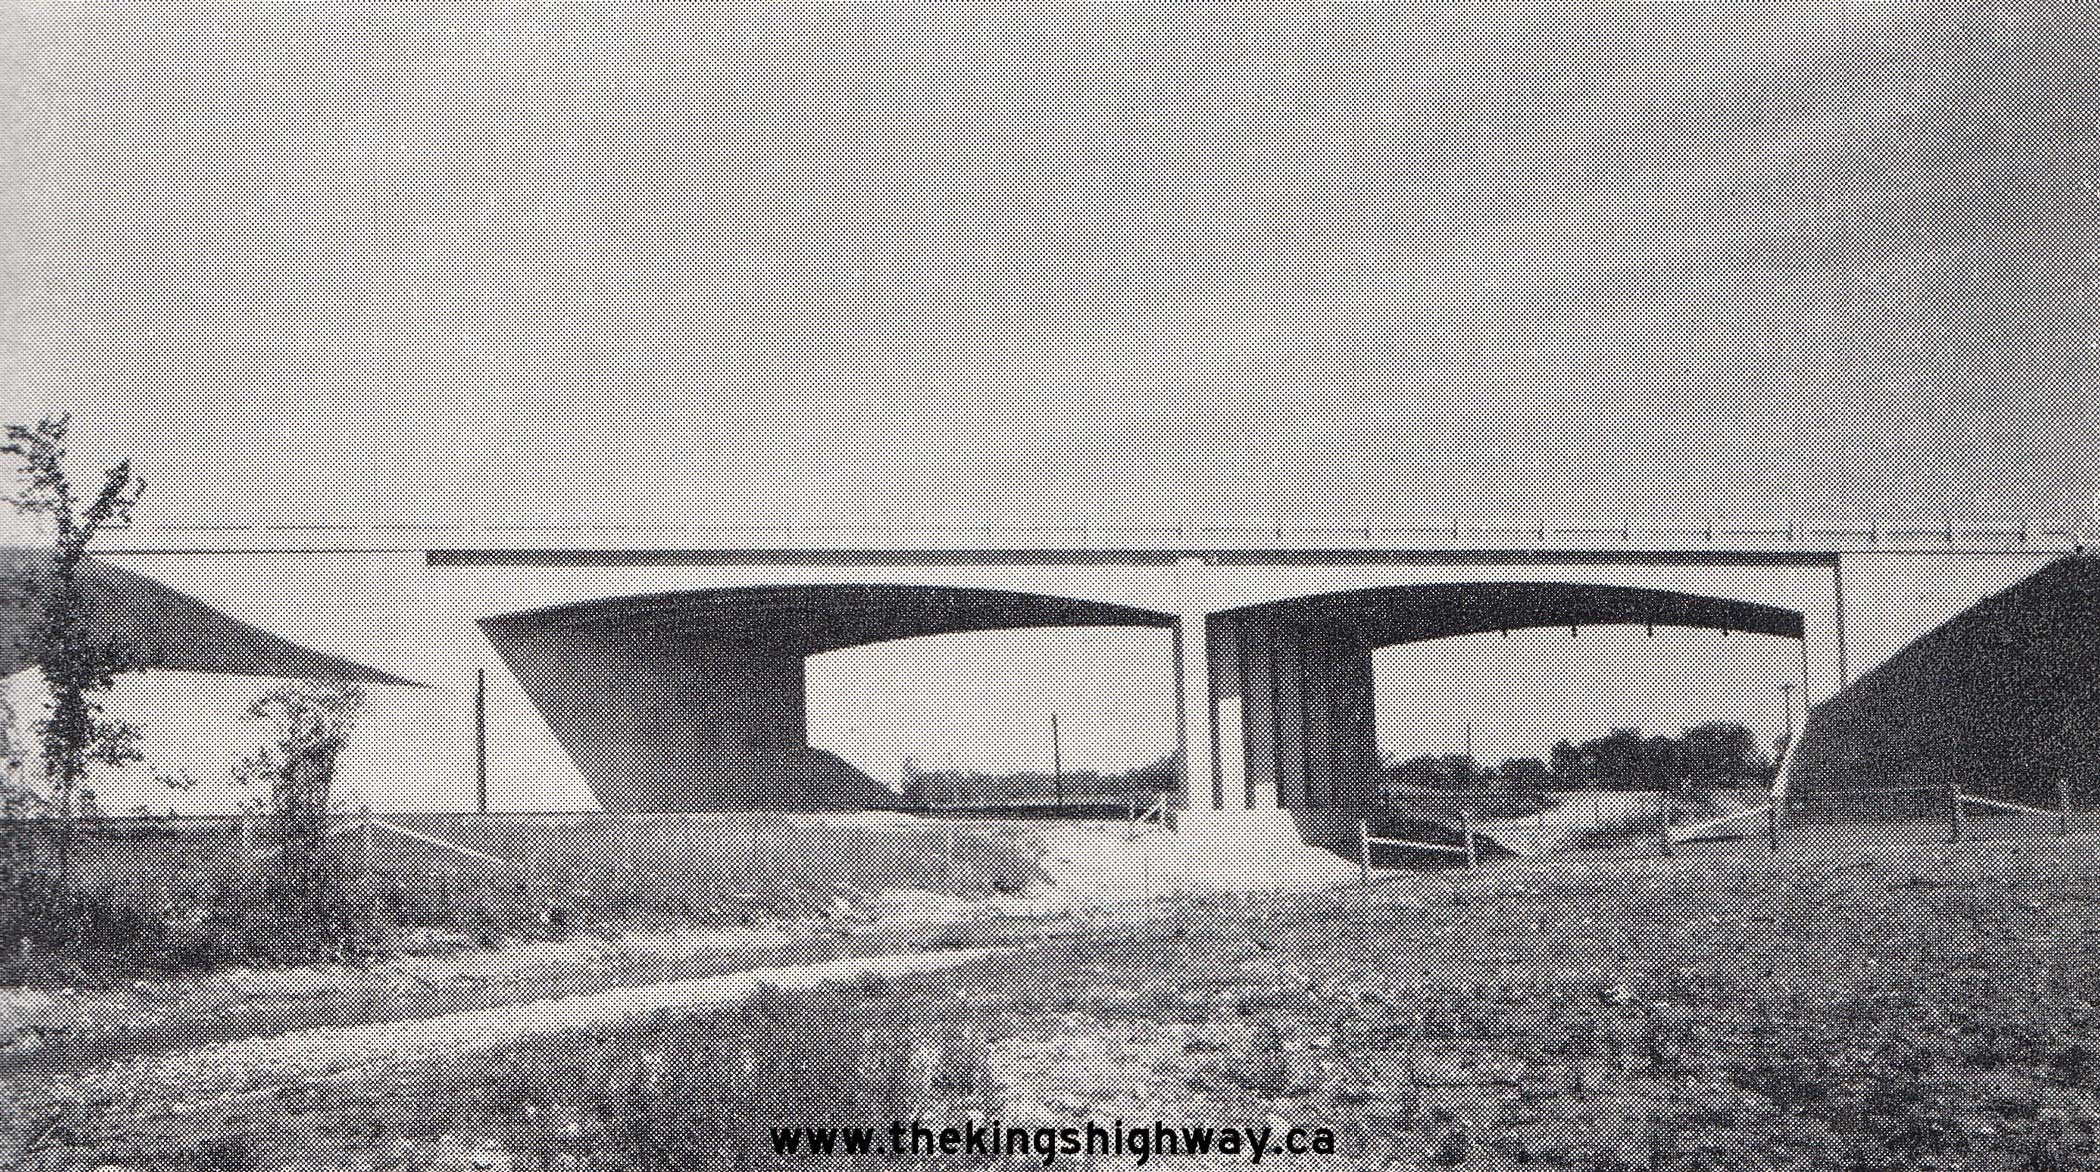
Above - Completed Grand River Bridge on Hwy 6 at Caledonia in 1927, facing southeast. At a total length of 653 feet, 4 inches (199.1 metres), the Caledonia
Bridge was the longest concrete bowstring arch bridge ever built by the DPHO. This attractive bridge design was unfortunately made obsolete by the early 1930s, when
new bridge designs were introduced which eliminated the need for an overhead truss for shorter spans. See an
Enlarged Photo Here. Photo taken in 1927. (Photo courtesy of Ontario Ministry of Transportation - © King's Printer for Ontario, 1927) 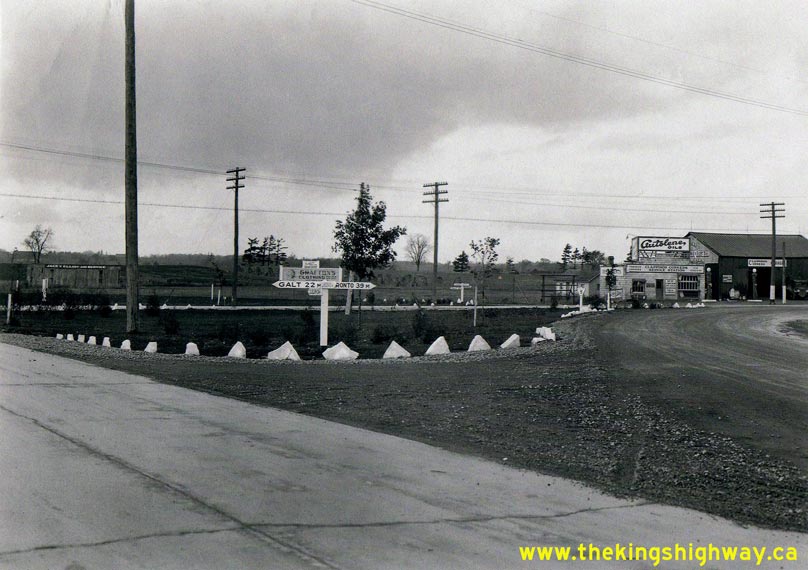
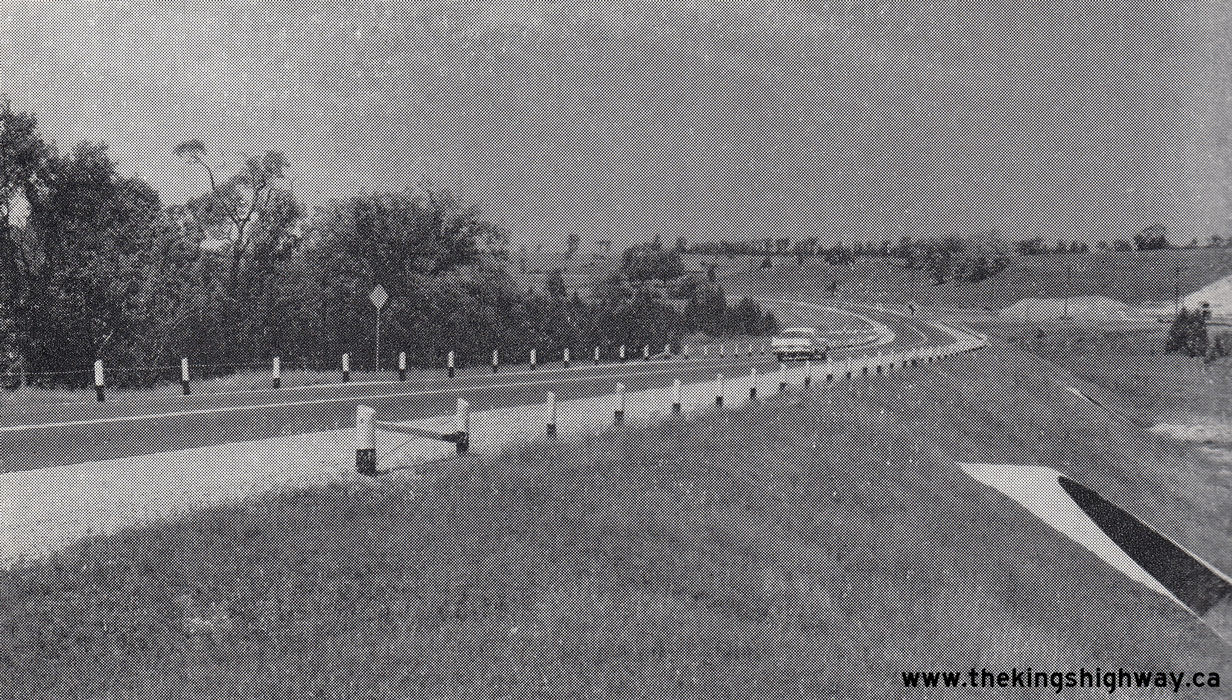
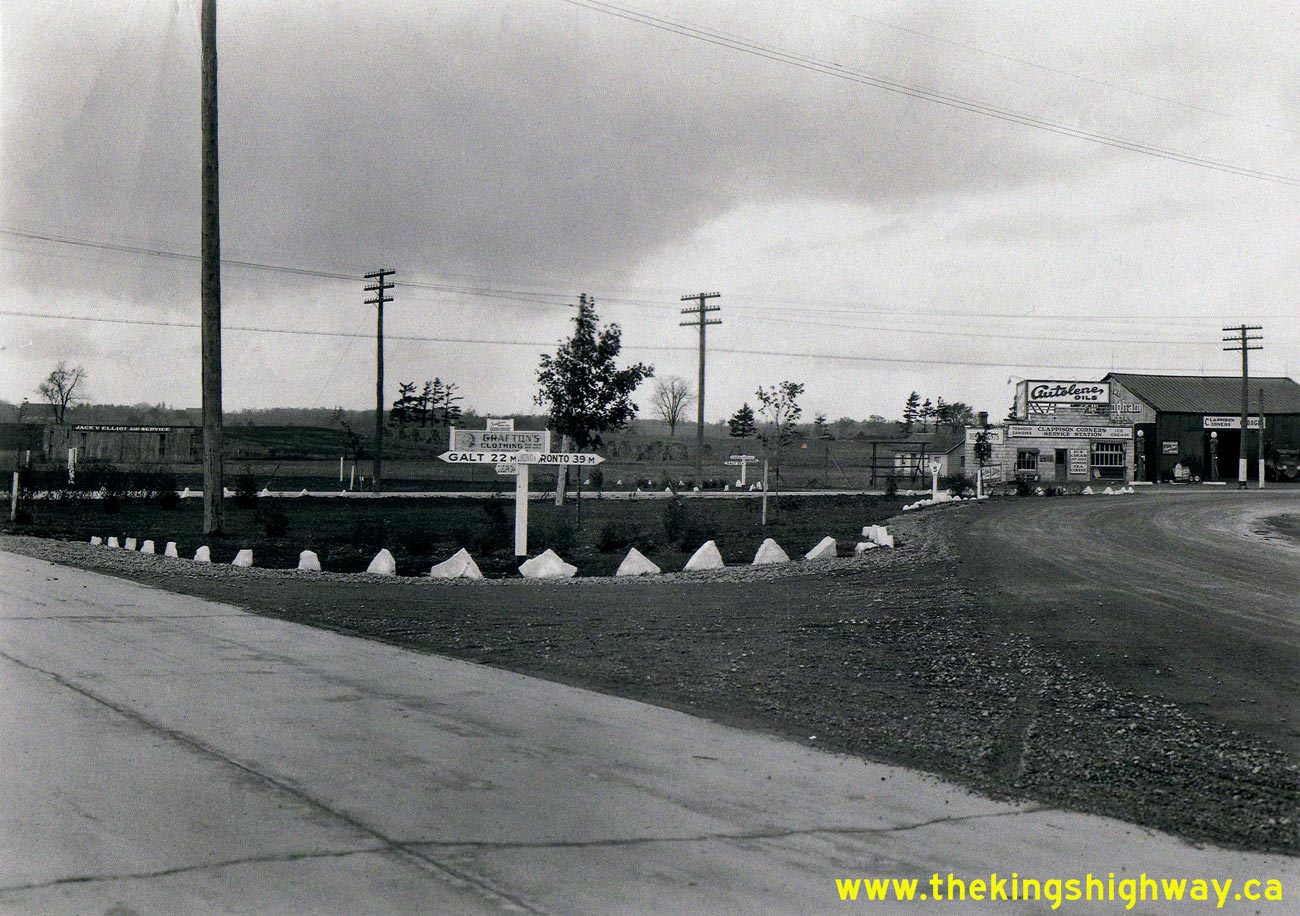
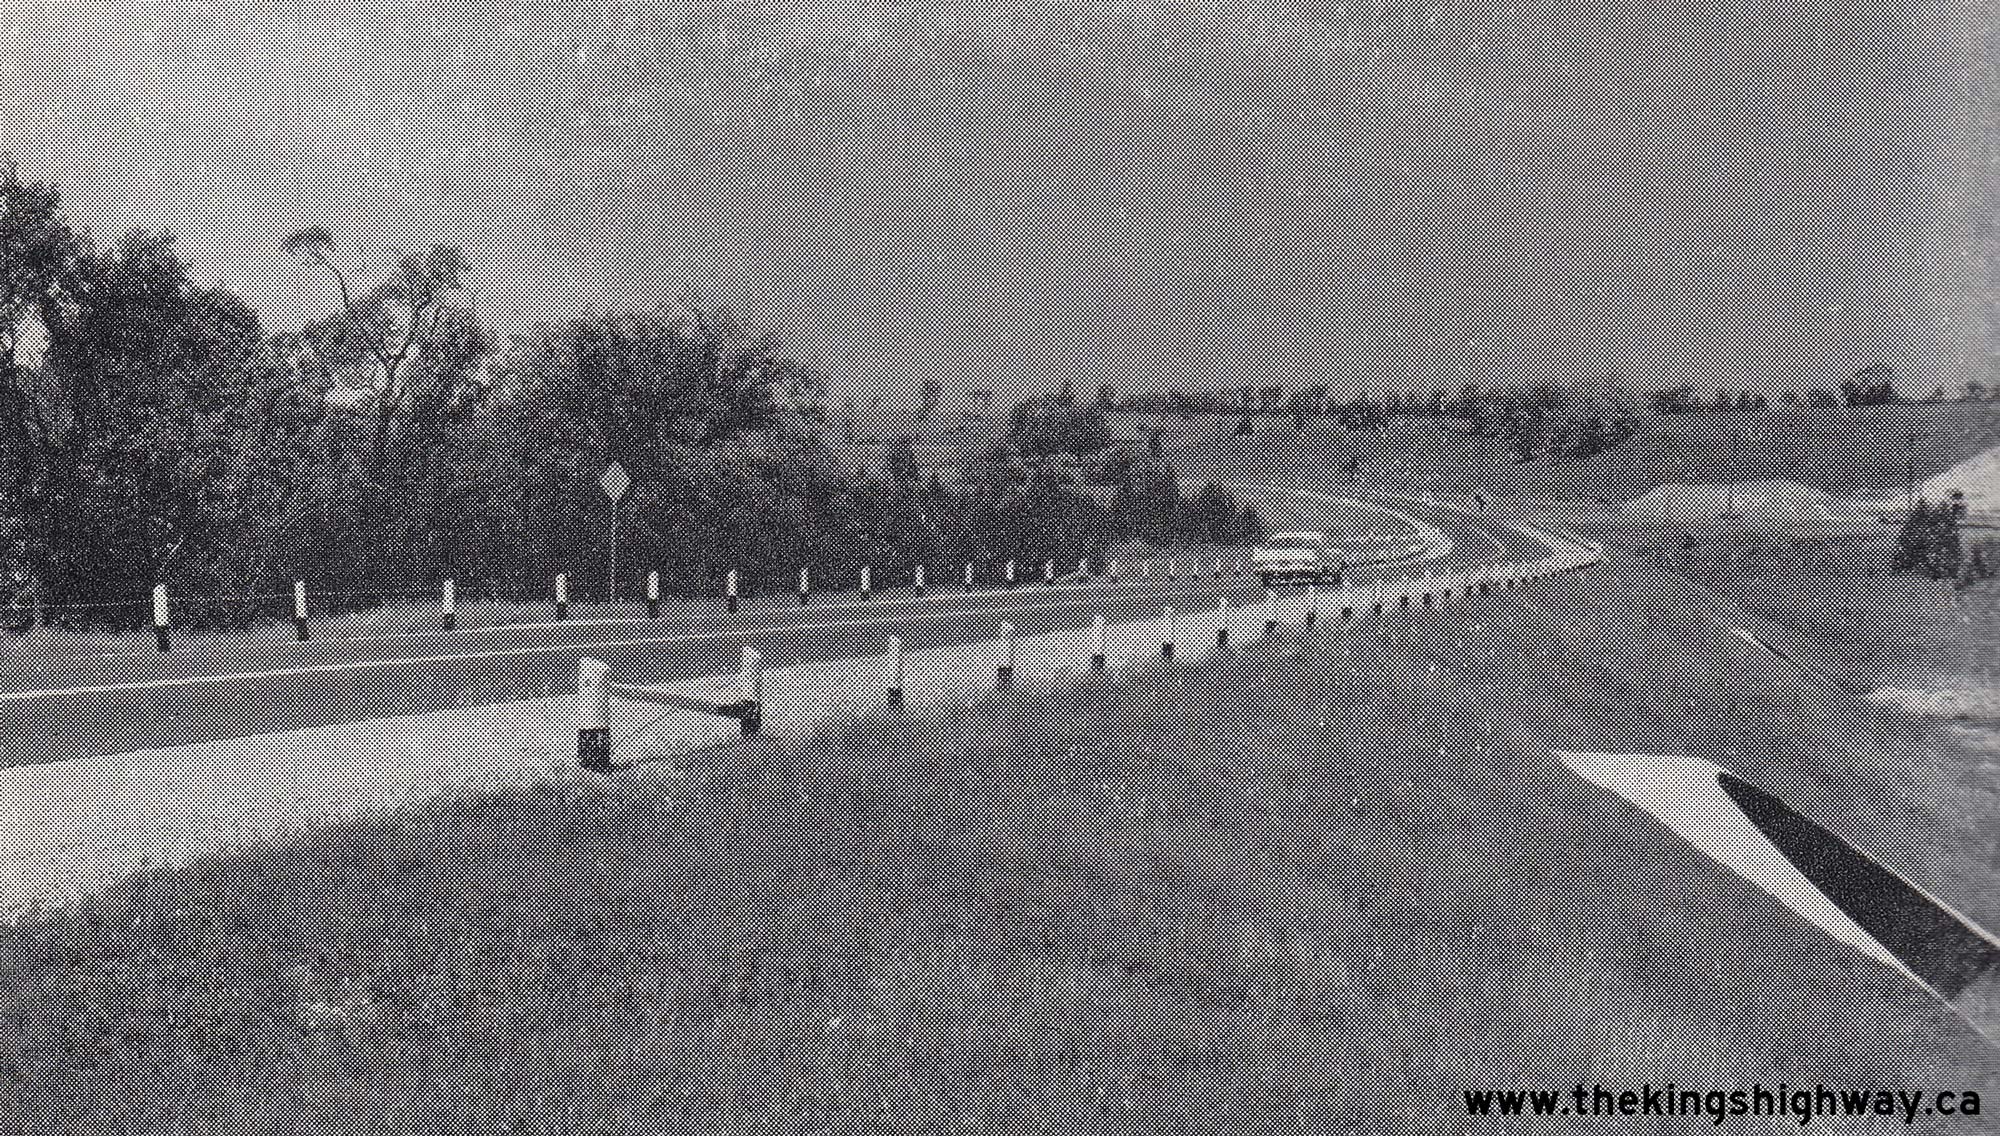
Above - Circa 1930 view of the fingerboard direction signs at the Hwy 5 & Hwy 6 Junction at Clappison's Corners. This photo of Clappison's Corners shows
the intersection as it appeared circa 1930. Originally, the Hwy 5 & Hwy 6 Junction was more of a directional "Y" intersection than a proper crossroads. The "Y"
favoured the predominant movement between Hamilton and Toronto, as most traffic turned east towards Toronto along Hwy 5 after ascending the Clappison Cut on Hwy 6
from Hamilton. The completion of the new Middle Road Highway (Queen Elizabeth Way) between Toronto and Burlington in 1937 dramatically changed traffic patterns in
this area. Since most long-distance through traffic began using the new superhighway, the intersection at Clappison's Corners no longer served the prevailing traffic
patterns. Accordingly, the Hwy 5 & Hwy 6 Junction was fully rebuilt in 1951, creating a more conventional four-leg intersection. See an
Enlarged Photo Here. Photo taken circa 1930. (Photo © Archives of Ontario - Series RG-14-162-2-27, Box B984, Photo #19) 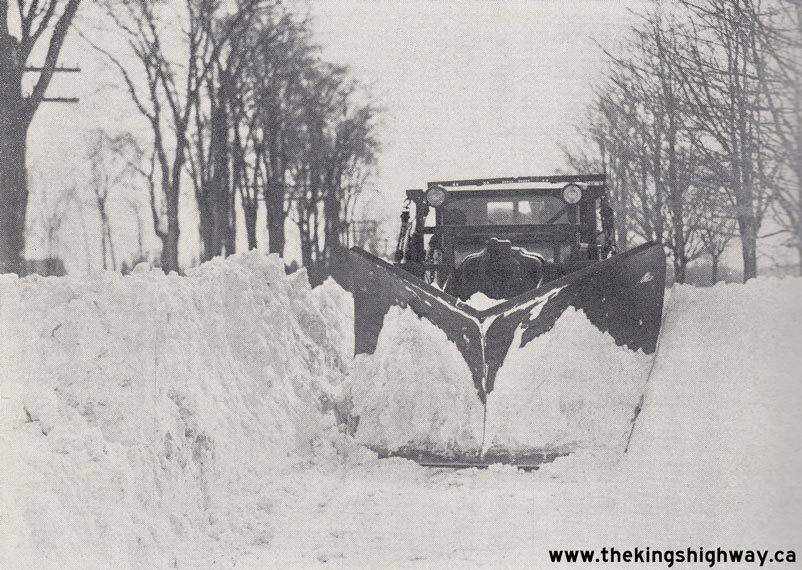
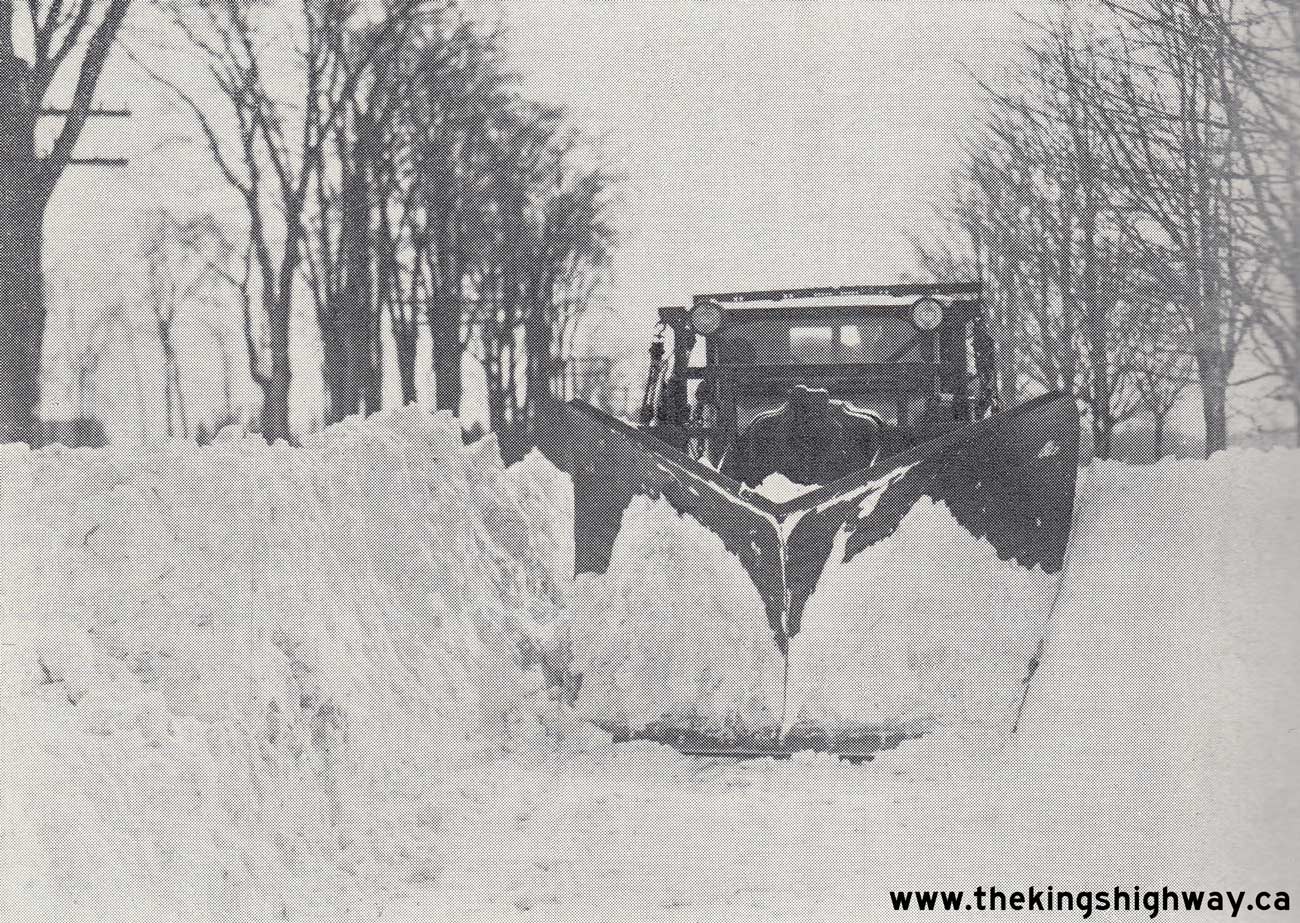
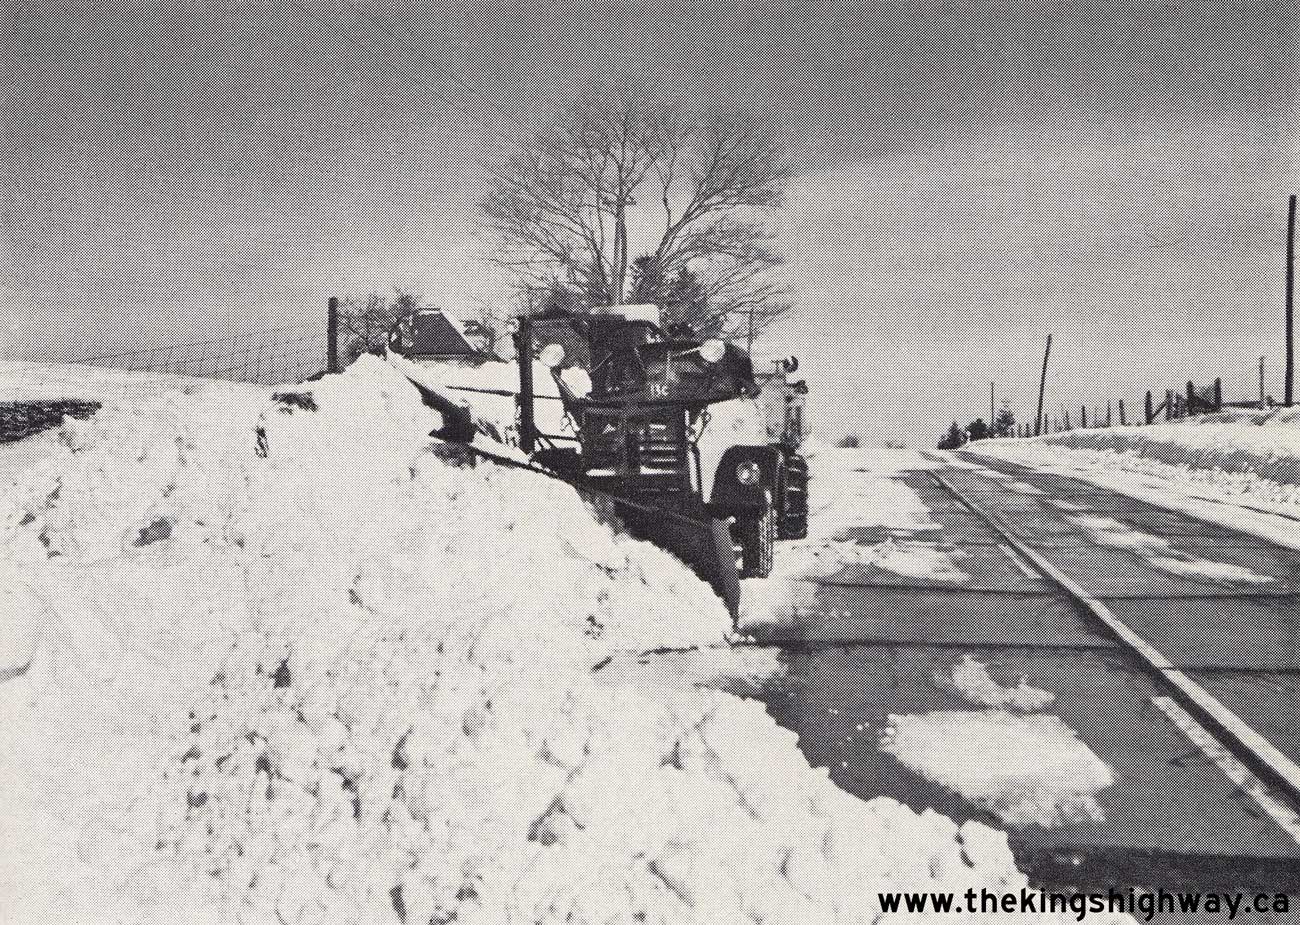
Above - Snowplowing operations on Hwy 6 north of Fergus in 1932. See an
Enlarged Photo Here. (Photo courtesy of Ontario Ministry of Transportation - © King's Printer for Ontario, 1932) 
Above - Aerial view of the new traffic circle, high-level bridge and park at the Northwest Entrance to Hamilton in 1932. The reconstruction of the Northwest
Entrance to Hamilton resulted in a new route of Hwy 2 through the city. Until 1932, Hwy 2 continued straight into Downtown Hamilton across the high-level bridge
concurrently with Hwy 6. When Longwood Road was extended from Westdale out to this location in the early 1930s, it created a scenic alternate route beside Cootes
Paradise for through traffic to follow, which bypassed Downtown Hamilton altogether. In 1932, Hwy 2 was rerouted onto Longwood Road. A new traffic circle was built at
the junction of Hwy 2 and Hwy 6 in conjunction with the new high-level bridge construction. This traffic circle remained in service for more than 30 years, handling
every vehicle entering or leaving Hamilton on Hwy 2 & Hwy 6. During construction of Hwy 403 between Burlington and Hamilton in 1963, the old Longwood Road
connection to Hwy 6 (at right) was closed off and the traffic circle was subsequently removed. The route of Hwy 2 was then restored to its pre-1932 route via York
Boulevard and Dundurn Street. See an Enlarged Photo Here. Photo taken in 1932. (Photo courtesy of Canadian Airmaps Ltd.) 
Above - Postcard view of the Espanola-Little Current Trunk Road (Hwy 68, later known as Hwy 6) near West River in 1935. See an
Enlarged Photo Here. (Photo courtesy of N. Cummings, Massey) 

Left - Department of Highways of Ontario (DHO) ferry arriving at the Little Current Ferry Dock on Hwy 68 (later known as Hwy 6) in 1940. While Manitoulin Island is connected by a
highway bridge today, the island was once only accessible by highway traffic via a ferry service. In 1944, construction began on retrofits to the Little Current
Railway Swing Bridge so that Hwy 68 traffic could cross the North Channel to Manitoulin Island whenever the swing bridge was not being used by railway traffic. The
road link via the Little Current Swing Bridge was opened to Hwy 68 traffic on November 28, 1945. That day, the DHO ferry "Jaqueline" made its final crossing of the
North Channel, which separated Manitoulin Island from the contiguous section of Hwy 68 leading north to Espanola. See an
Enlarged Photo Here. Photo taken on September 13, 1940. (Photo © Archives of Ontario - RG-14-162-3, Cont. A1354, Photo #3017S) Right - Facing north towards the Little Current Swing Bridge across the North Channel on Hwy 68 (later known as Hwy 6) in 1945. This railway bridge was retrofitted by the DHO in 1944-1945 to allow for highway traffic to cross the structure whenever the bridge was not in use by railway traffic. Since the narrow bridge could only accommodate one direction of highway traffic at a time, traffic signals were installed at each end of the structure to alternate the right-of-way between northbound and southbound traffic on Hwy 68. A DHO ferry service which ran between the mainland and Manitoulin Island was discontinued once Hwy 68 was extended into the Town of Little Current. It is believed that this photo of Hwy 68 was taken immediately after the retrofitted railway bridge was officially opened to traffic on November 28, 1945. See an Enlarged Photo Here. (Photo courtesy of Ontario Ministry of Transportation - © King's Printer for Ontario, 1945) 
Above - Monument on Hwy 68 (later known as Hwy 6) at McGregor Bay, commemorating the visit of U.S. President Franklin Delano Roosevelt in 1943. The new monument was unveiled by the
DHO in June 1946, almost three years after the President's visit to Ontario, prior to his attendance at the Quebec Conference. See an
Enlarged Photo Here. Photo taken on June 16, 1946. (Photo courtesy of Ontario Ministry of Transportation - © King's Printer for Ontario, 1946) 
Above - Facing north along Hwy 68 (later known as Hwy 6) towards Tower Hill north of Whitefish Falls in 1946. See an
Enlarged Photo Here. (Photo from Cameron Bevers' historical photograph collection - Original photographer unknown) 
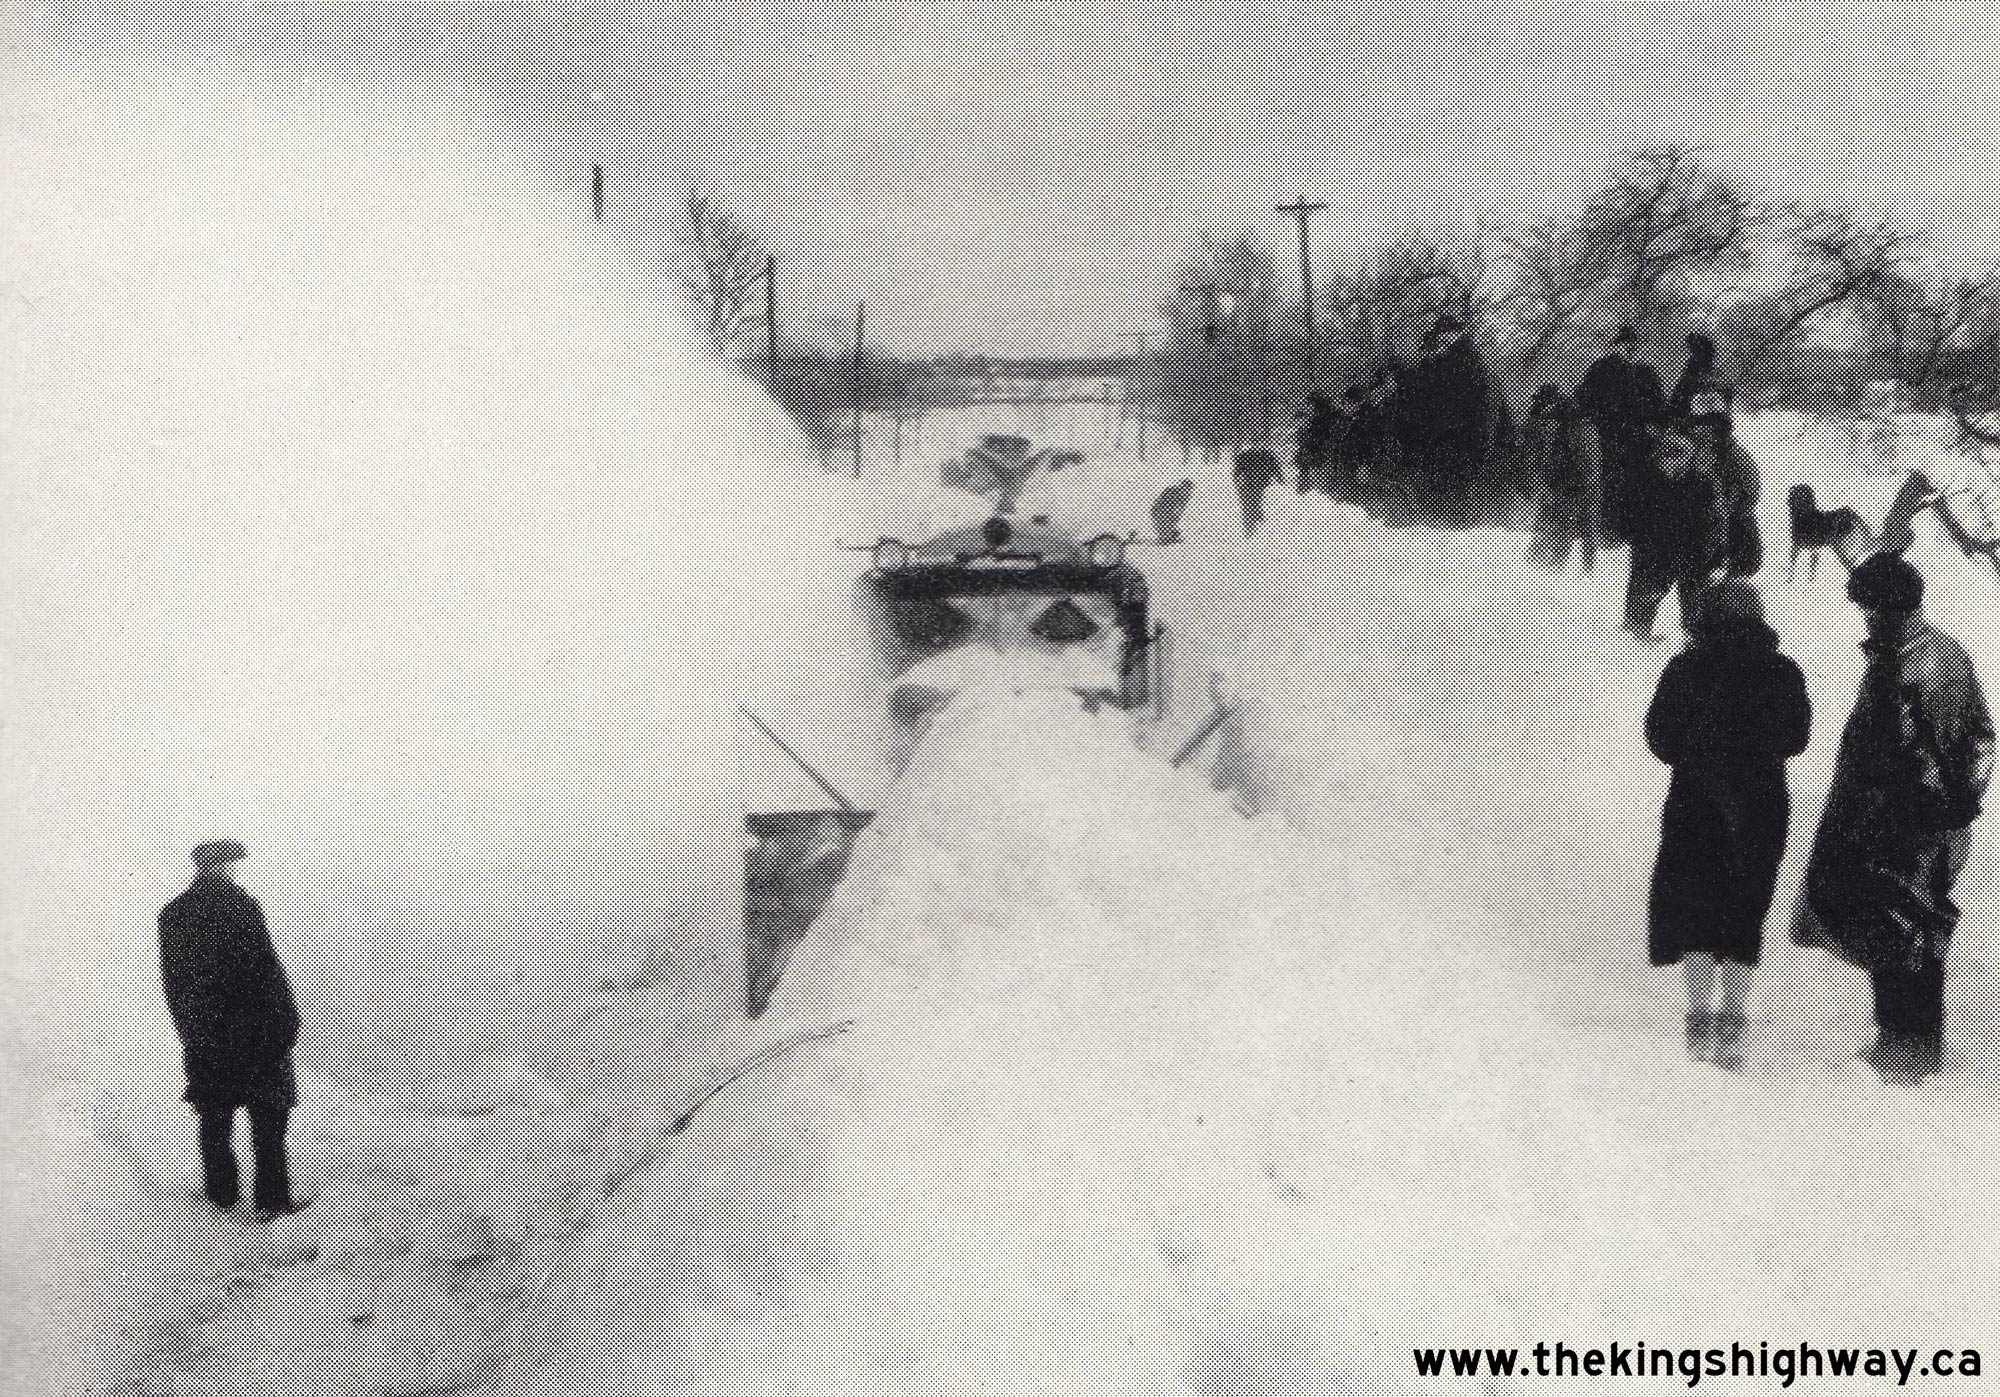
Left - Residents welcome the arrival of a DHO snowblower clearing a blocked section of Hwy 6 north of Fergus after a winter
snowstorm. The DHO's snow-clearing fleet was severely taxed during the Winter of 1946-47, when Ontario experienced very heavy snowfalls. Unfortunately, this unusually
severe winter came at a time when finding replacement parts to keep snow-clearing equipment running and out on the highways was a difficult task, due to persistent
Post-War material shortages. Accordingly, many of Ontario's King's Highways were closed for days at a time during that winter, cutting off access to many towns and
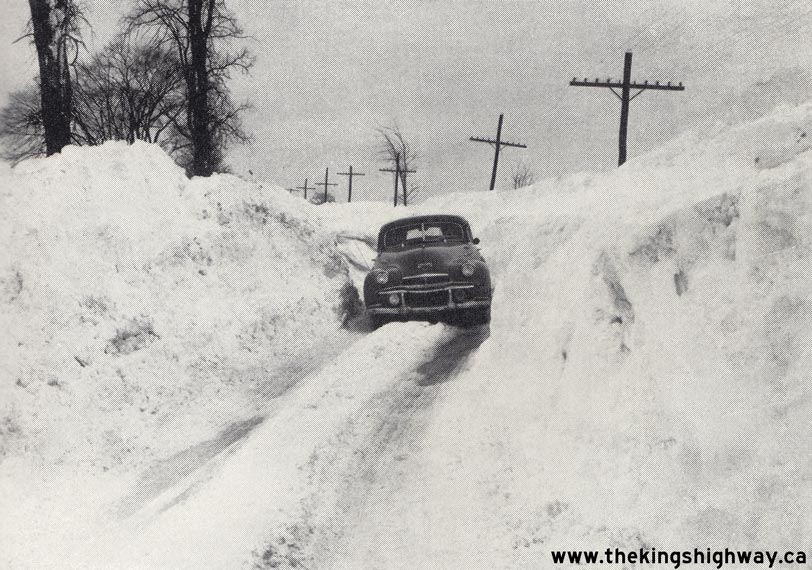
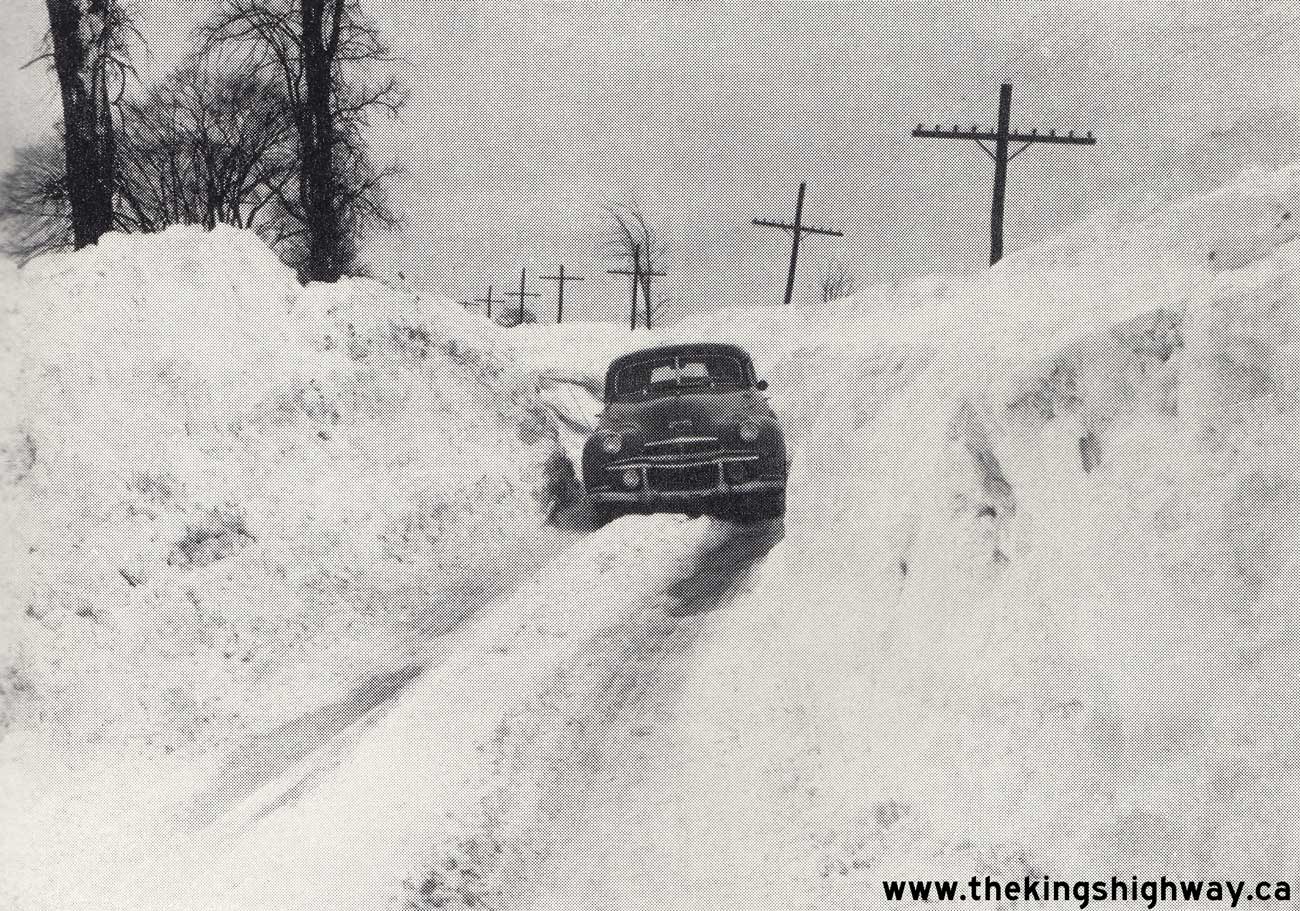
villages in the process. See an Enlarged Photo Here. Photo taken on February 13, 1947. (Photo courtesy of Ontario Ministry of Transportation - © King's Printer for Ontario, 1947) Right - Single-lane traffic on Hwy 6 near Owen Sound following a major winter snowstorm in 1947. By the late 1940s, all King's Highways were kept open for winter travel. However, as this photo clearly illustrates, one could only expect a single traffic lane to be cleared following significant storms. Motorists who had the misfortune of encountering an oncoming vehicle would often have to reverse a considerable distance to allow opposing traffic to pass. As a result, winter travel on Ontario's early highways was not a straightforward task. Fortunately, the DHO made significant Post-War investments in better snow-clearing equipment and facilities, making scenes like this one increasingly uncommon by the early 1950s. See an Enlarged Photo Here. Photo taken on March 10, 1947. (Photo courtesy of Ontario Ministry of Transportation - © King's Printer for Ontario, 1947) 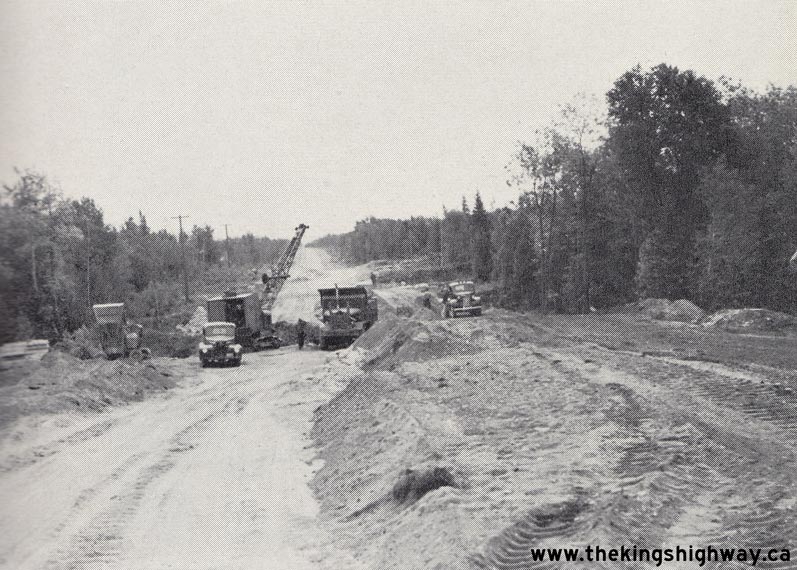
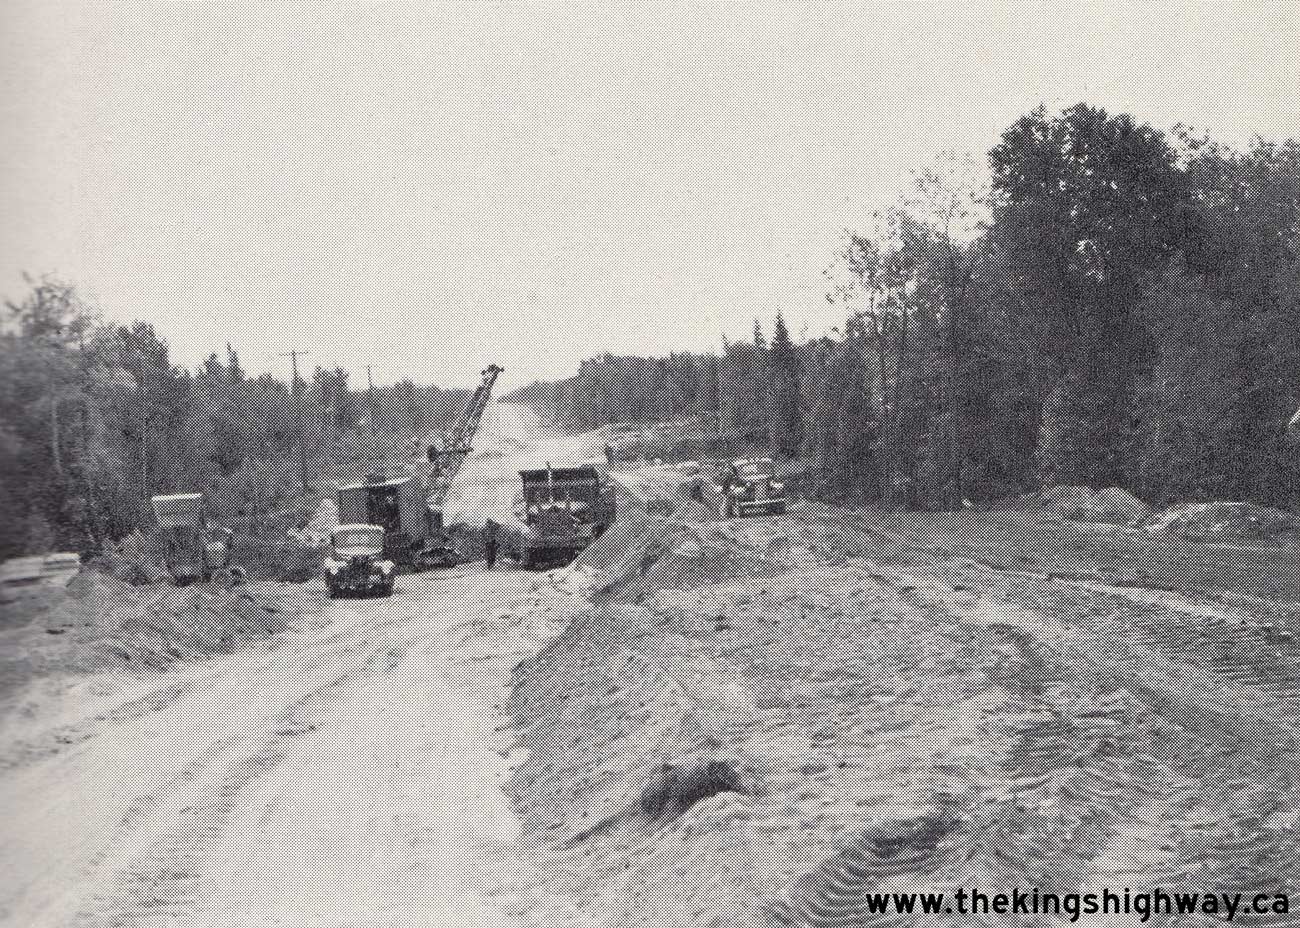
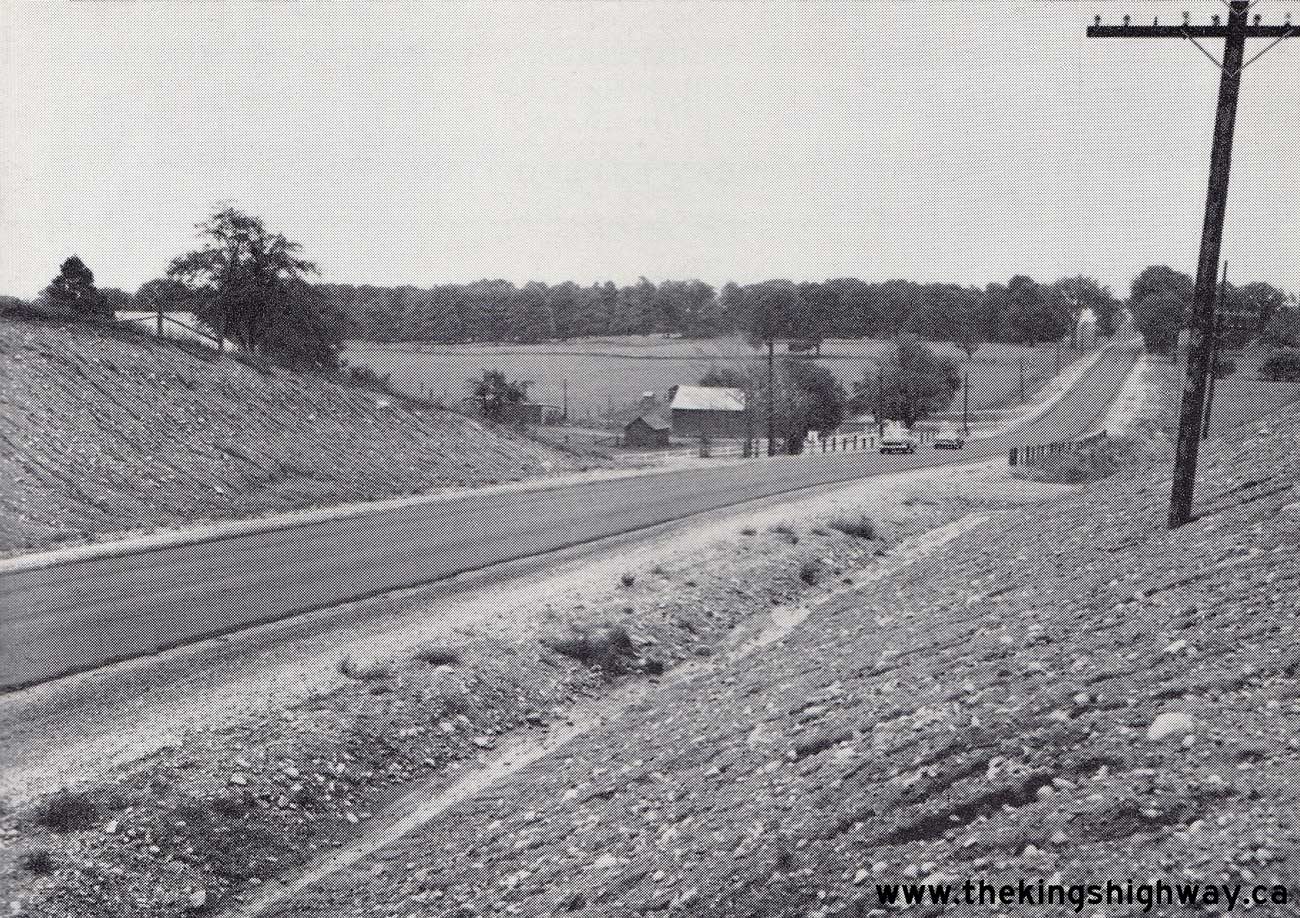
Left - Reconstruction of Hwy 6, 5 miles south of Tobermory in 1948. Prior to reconstruction, the section of Hwy 6 from Wiarton to Tobermory was one of
Ontario's narrowest highways, with many sharp curves and steep grades. Improvements carried out between the late 1940s and early 1960s converted this winding back road
into a comfortable, all-season paved highway. See an Enlarged Photo Here. Photo taken on
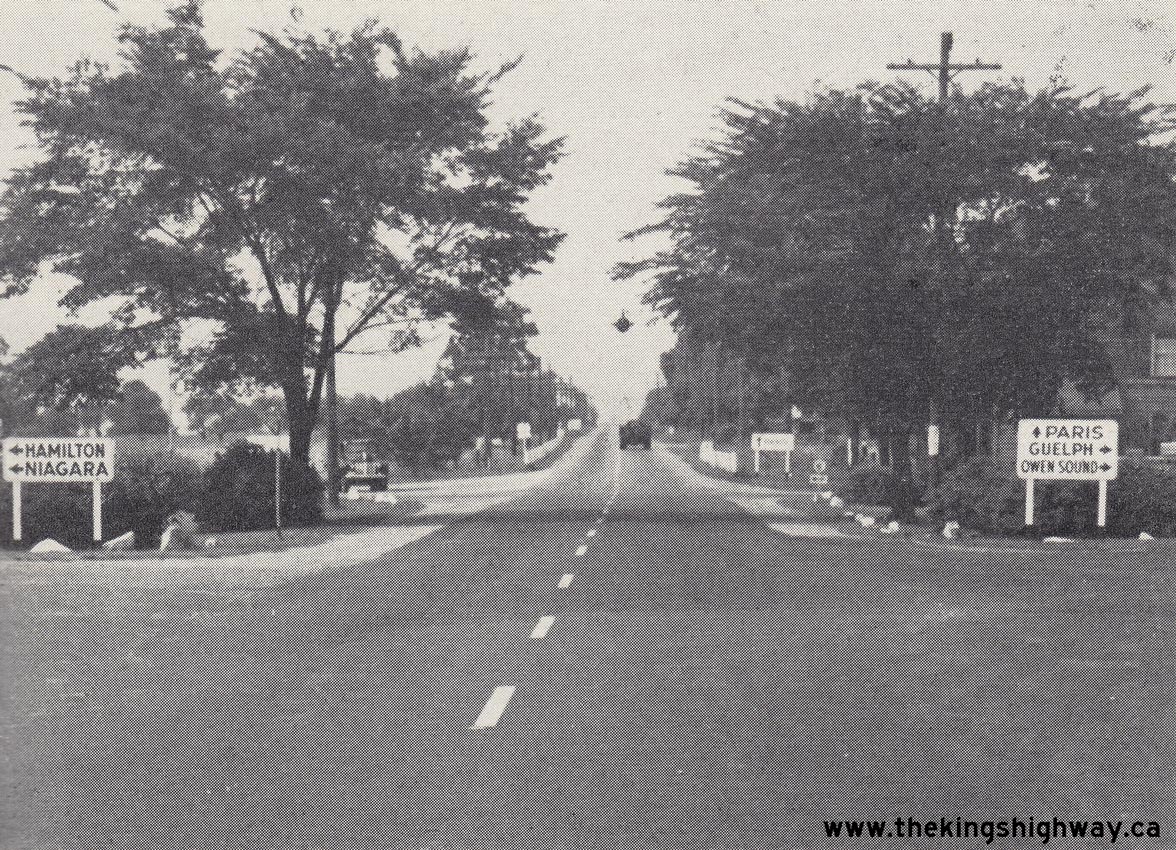
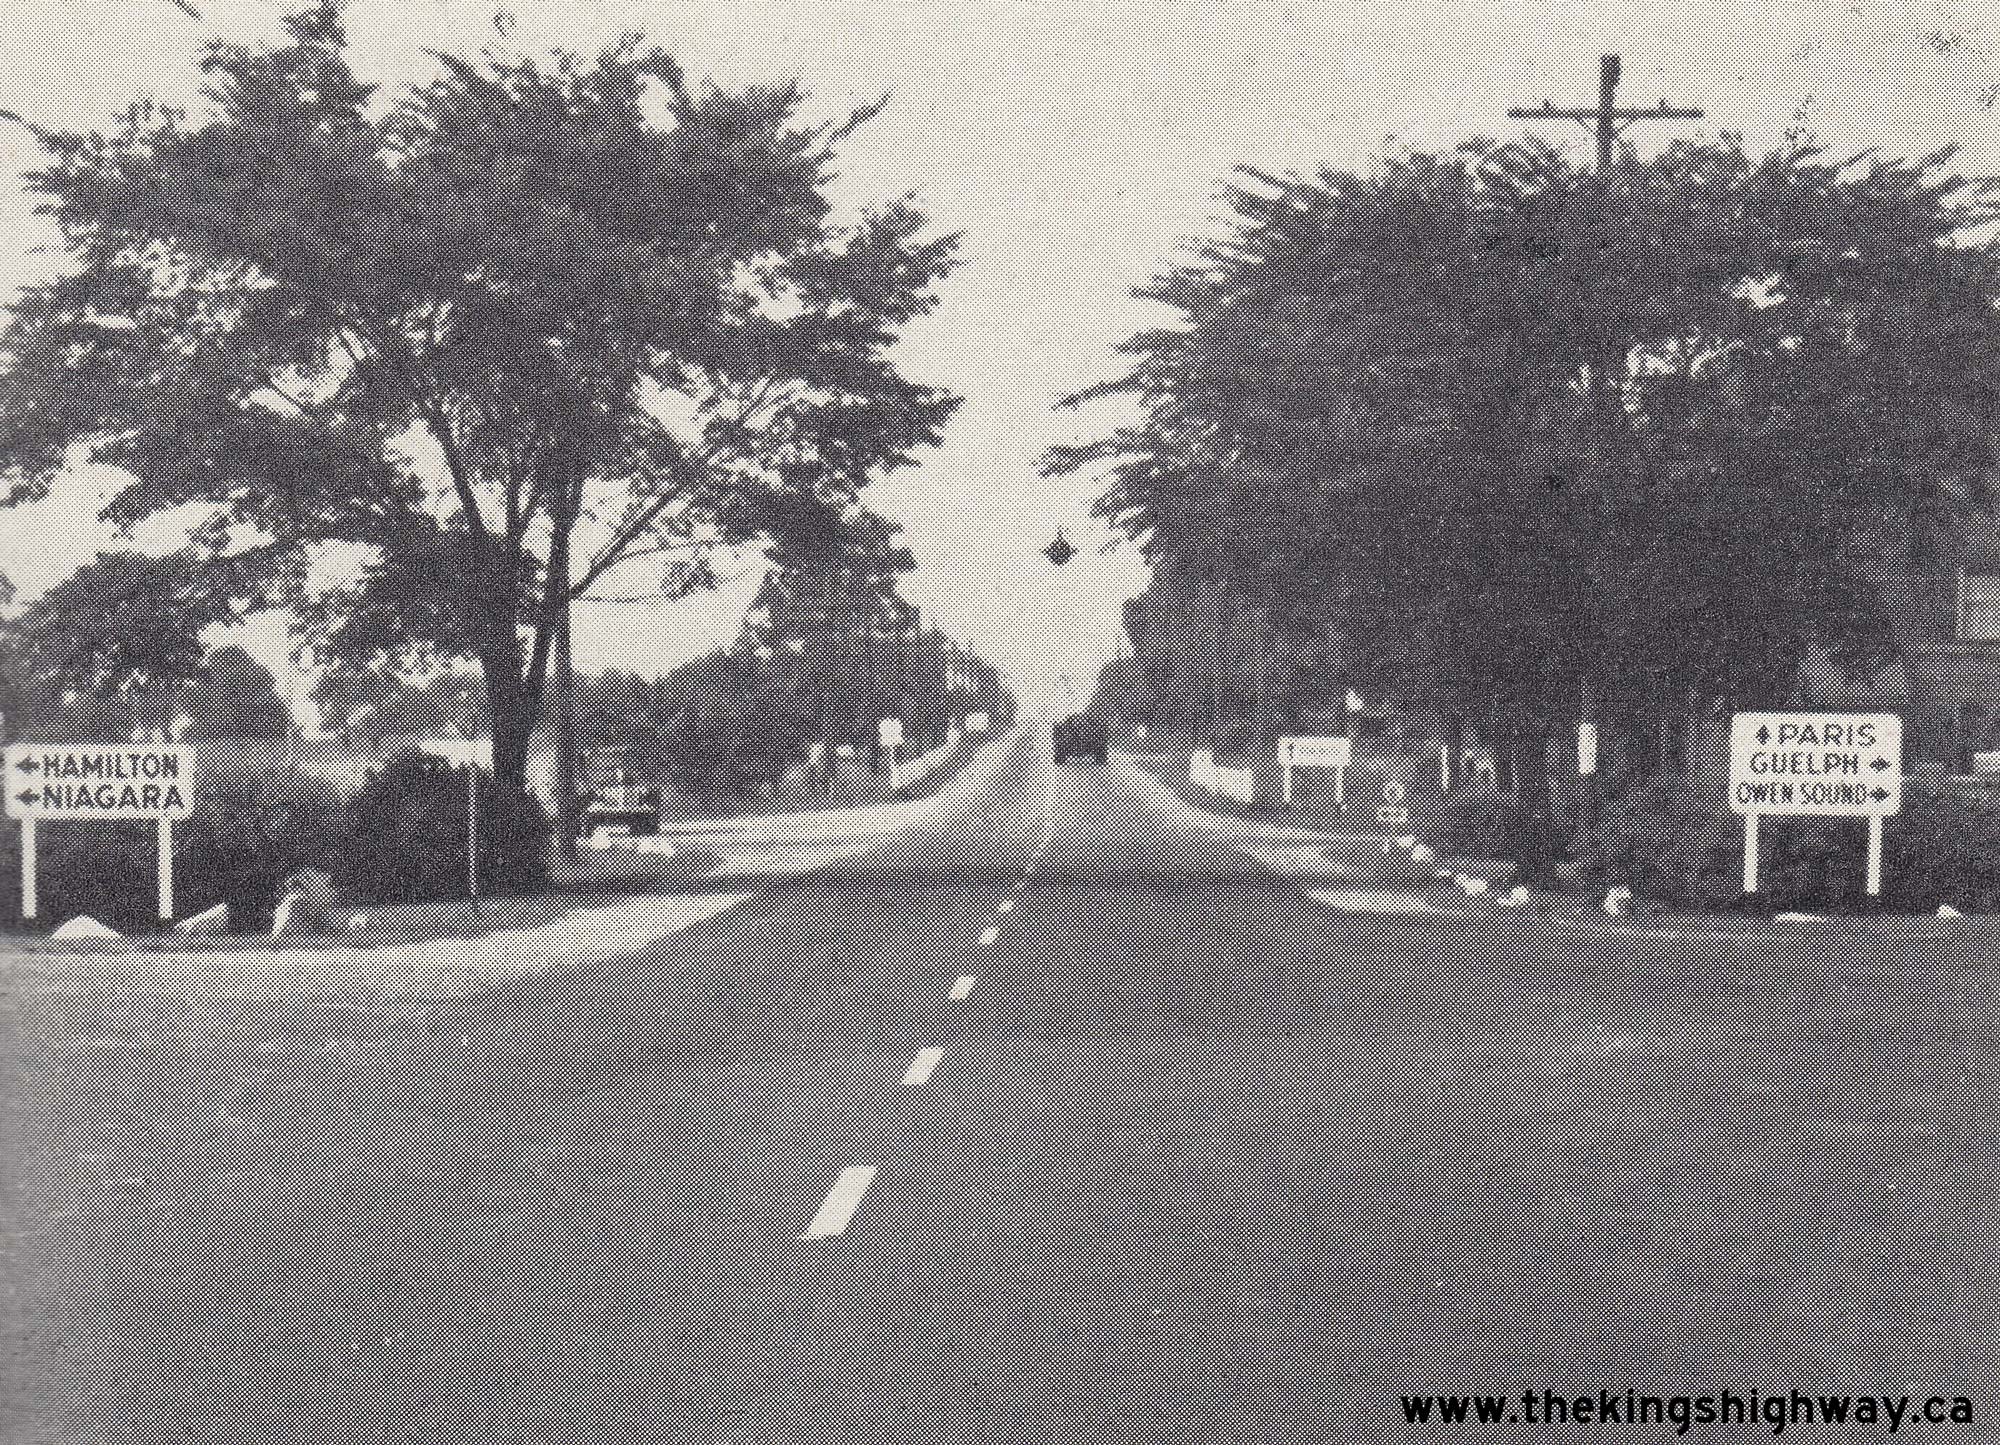
June 21, 1948. (Photo courtesy of Ontario Ministry of Transportation - © King's Printer for Ontario, 1948) Right - Junction of Hwy 5 & Hwy 6 at Clappison's Corners in 1948, facing west. Note the new large-size destination guide signs approaching the junction. Once only seen along the Queen Elizabeth Way, these types of destination guide signs were introduced at all major highway junctions beginning in the late 1940s. Previously, Ontario's highway junctions were marked with so-called "totem pole" signposts, where small fingerboard signs pointed the way to various destinations. The small text on these fingerboard signs was very difficult to read at a distance and the number of destinations signed at highway junctions often exceeded the amount of information a motorist could process at critical highway decision points. The development of these larger-sized signs allowed motorists to see highway junctions well in advance and plan their route accordingly. It proved to be a significant step by the DHO to improve traffic safety at major highway junctions. It is also interesting to note that Hwy 5 is actually the "through highway" at this junction. Traffic on Hwy 6 had to stop and yield the right-of-way to traffic on Hwy 5. At the time, Hwy 5 was actually the busier of the two highways, a trend which has reversed rather dramatically since World War II. See an Enlarged Photo Here. Photo taken on July 21, 1948. (Photo courtesy of Ontario Ministry of Transportation - © King's Printer for Ontario, 1948) 
Above - Circa 1950 postcard view of Hwy 4 & Hwy 6 in Downtown Durham. This interesting postcard photograph shows the overlapped route of Hwy 4 & Hwy 6
through Downtown Durham. This short concurrent route of Hwy 4 & Hwy 6 was discontinued in the early 1950s when a new Hwy 4 alignment was constructed at the
western entrance to Durham. Double-shield King's Highway sign assemblies are visible along the street in the background. Compare the historic postcard view shown
above with this 2008 Photograph which I took from roughly the same location. See an
Enlarged Photo Here. Photo taken circa 1950. (Photo from Cameron Bevers' historical photograph collection - Original photographer unknown) 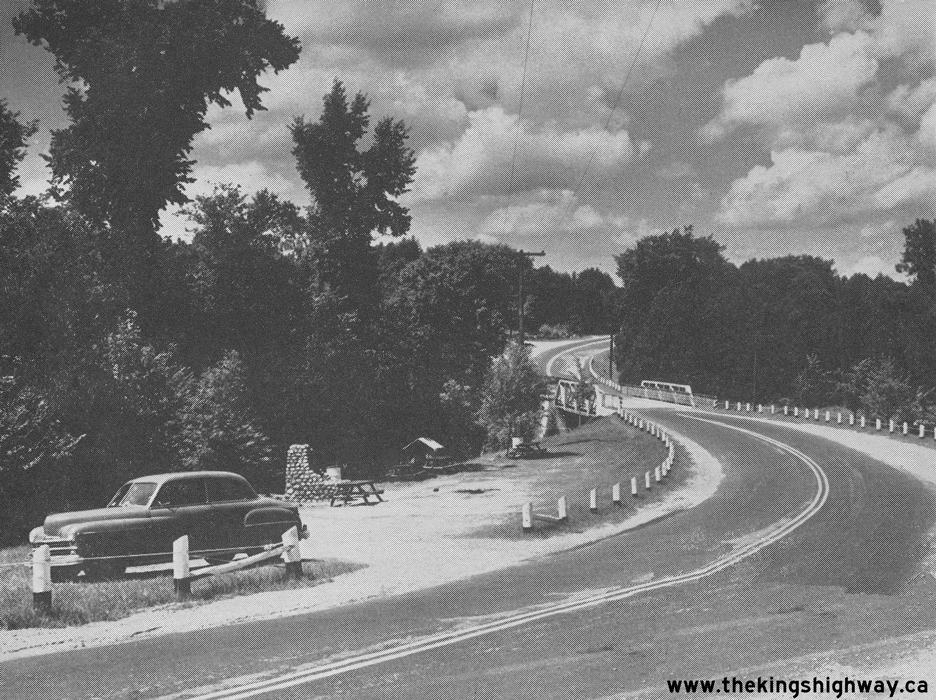

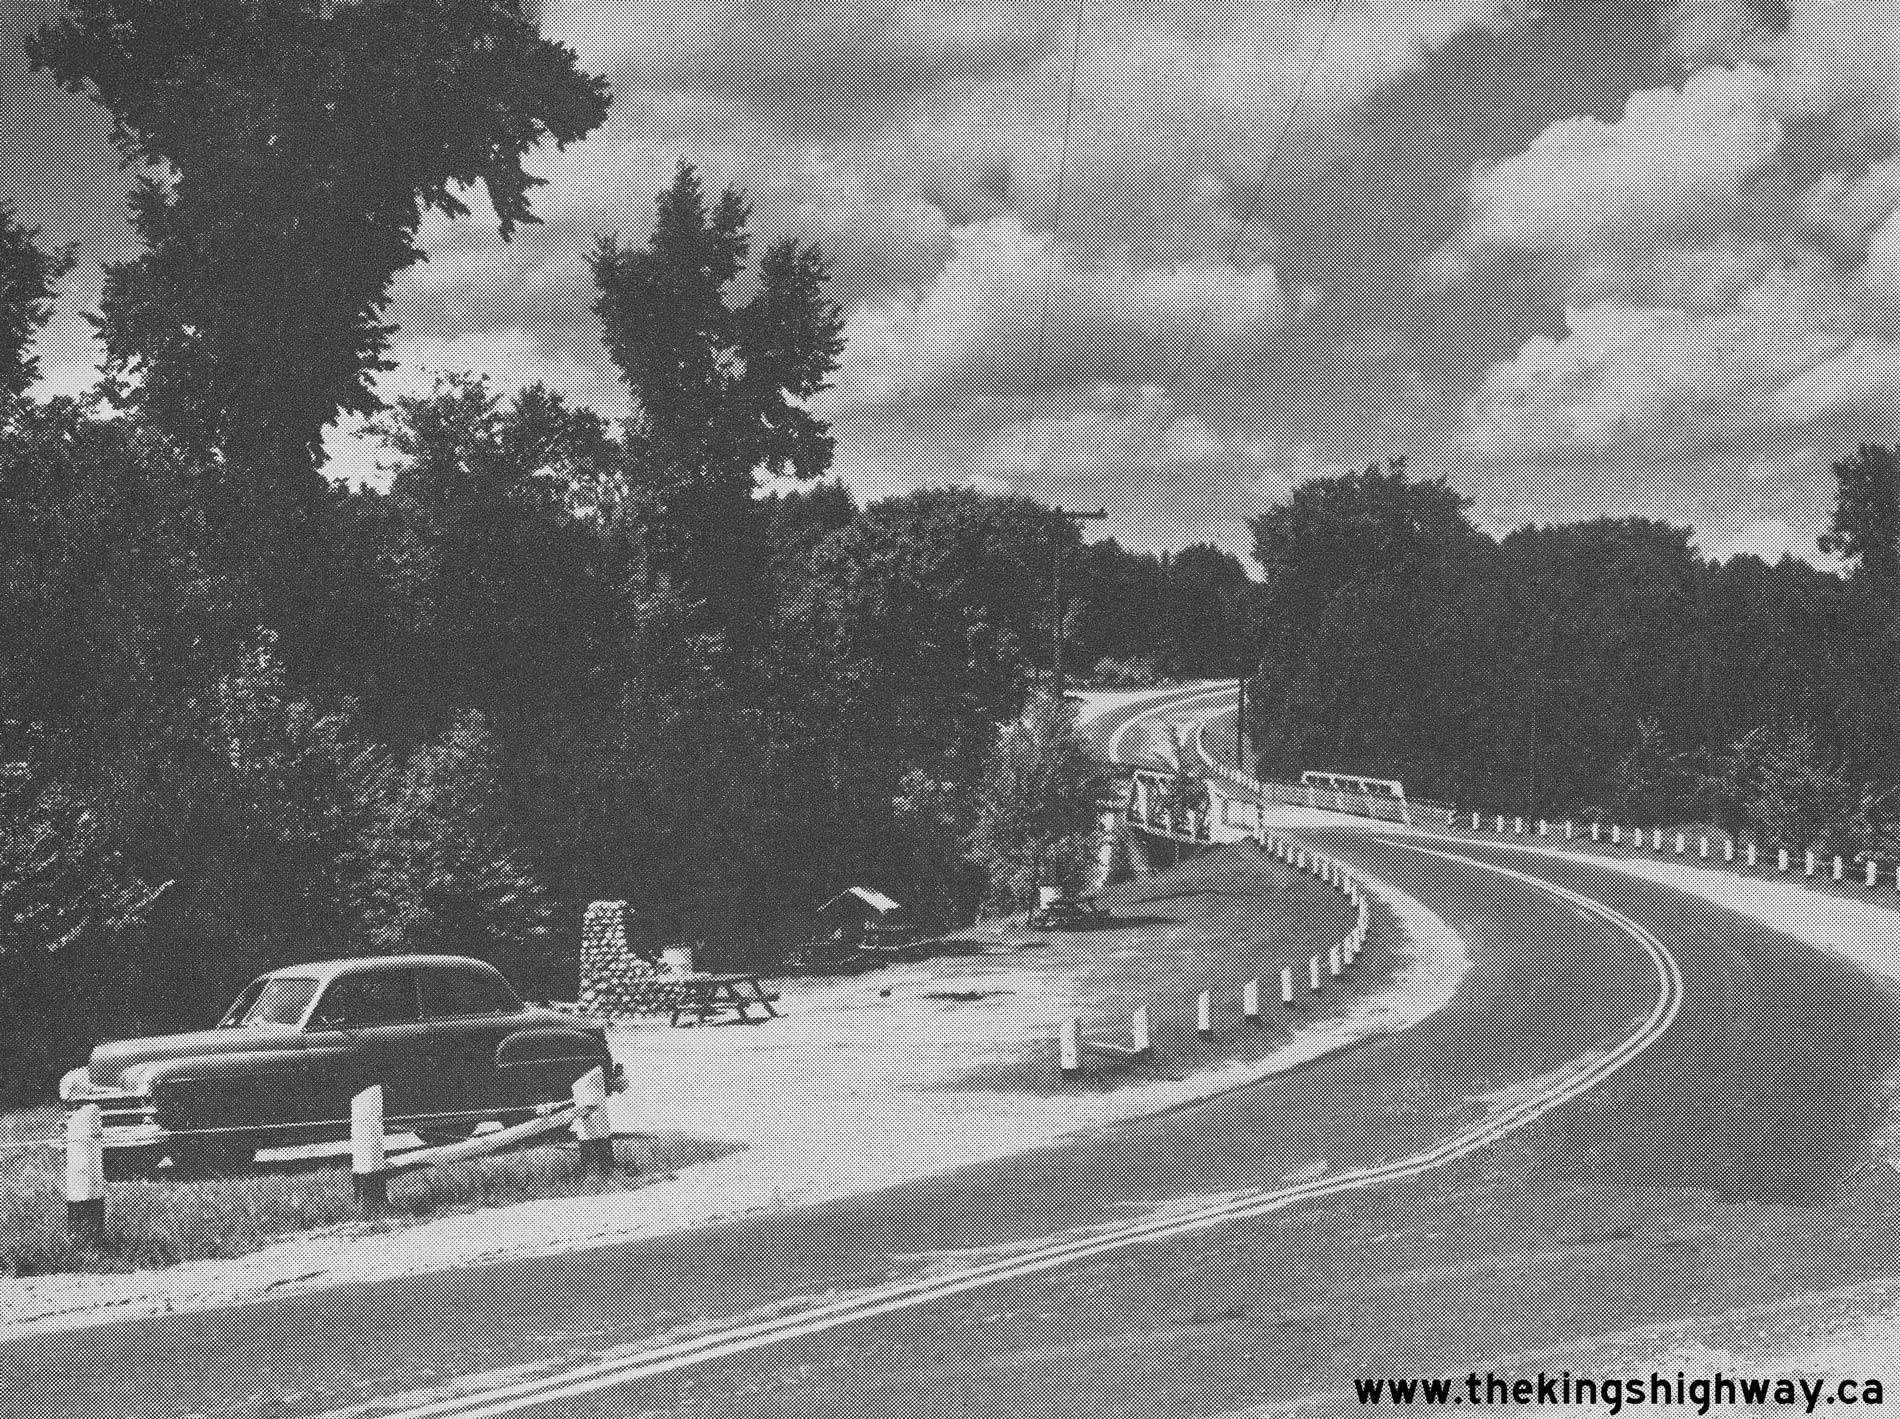
Left - Circa 1950 view of the DHO Roadside Park on Hwy 6 at the Rocky Saugeen River north of Durham. This photo shows the original alignment of Hwy 6
approaching the Rocky Saugeen River before it was bypassed by the current highway alignment in the late 1950s. The sweeping reverse curve and narrow steel truss
bridge were both removed from the highway as a result of the realignment, although the small roadside park along the riverbank is still in service to this day. See an
Enlarged Photo Here. Photo taken circa 1950. (Photo courtesy of Owen Sound Sun-Times) Right - Hwy 68 (later known as Hwy 6) at Tower Hill north of Whitefish Falls. See an Enlarged Photo Here. Photo taken on September 2, 1950. (Photo courtesy of Ontario Ministry of Transportation - © King's Printer for Ontario, 1950) 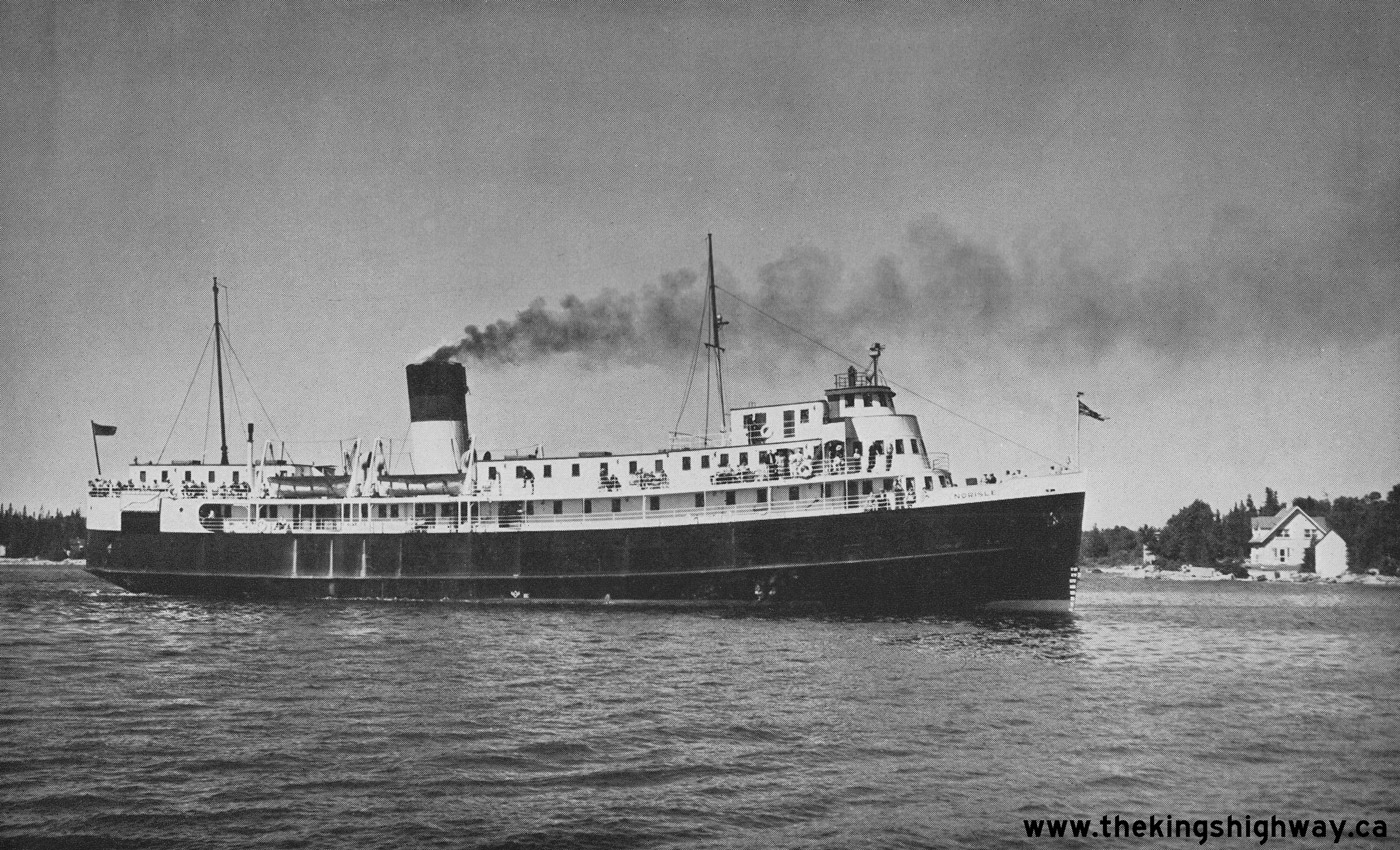
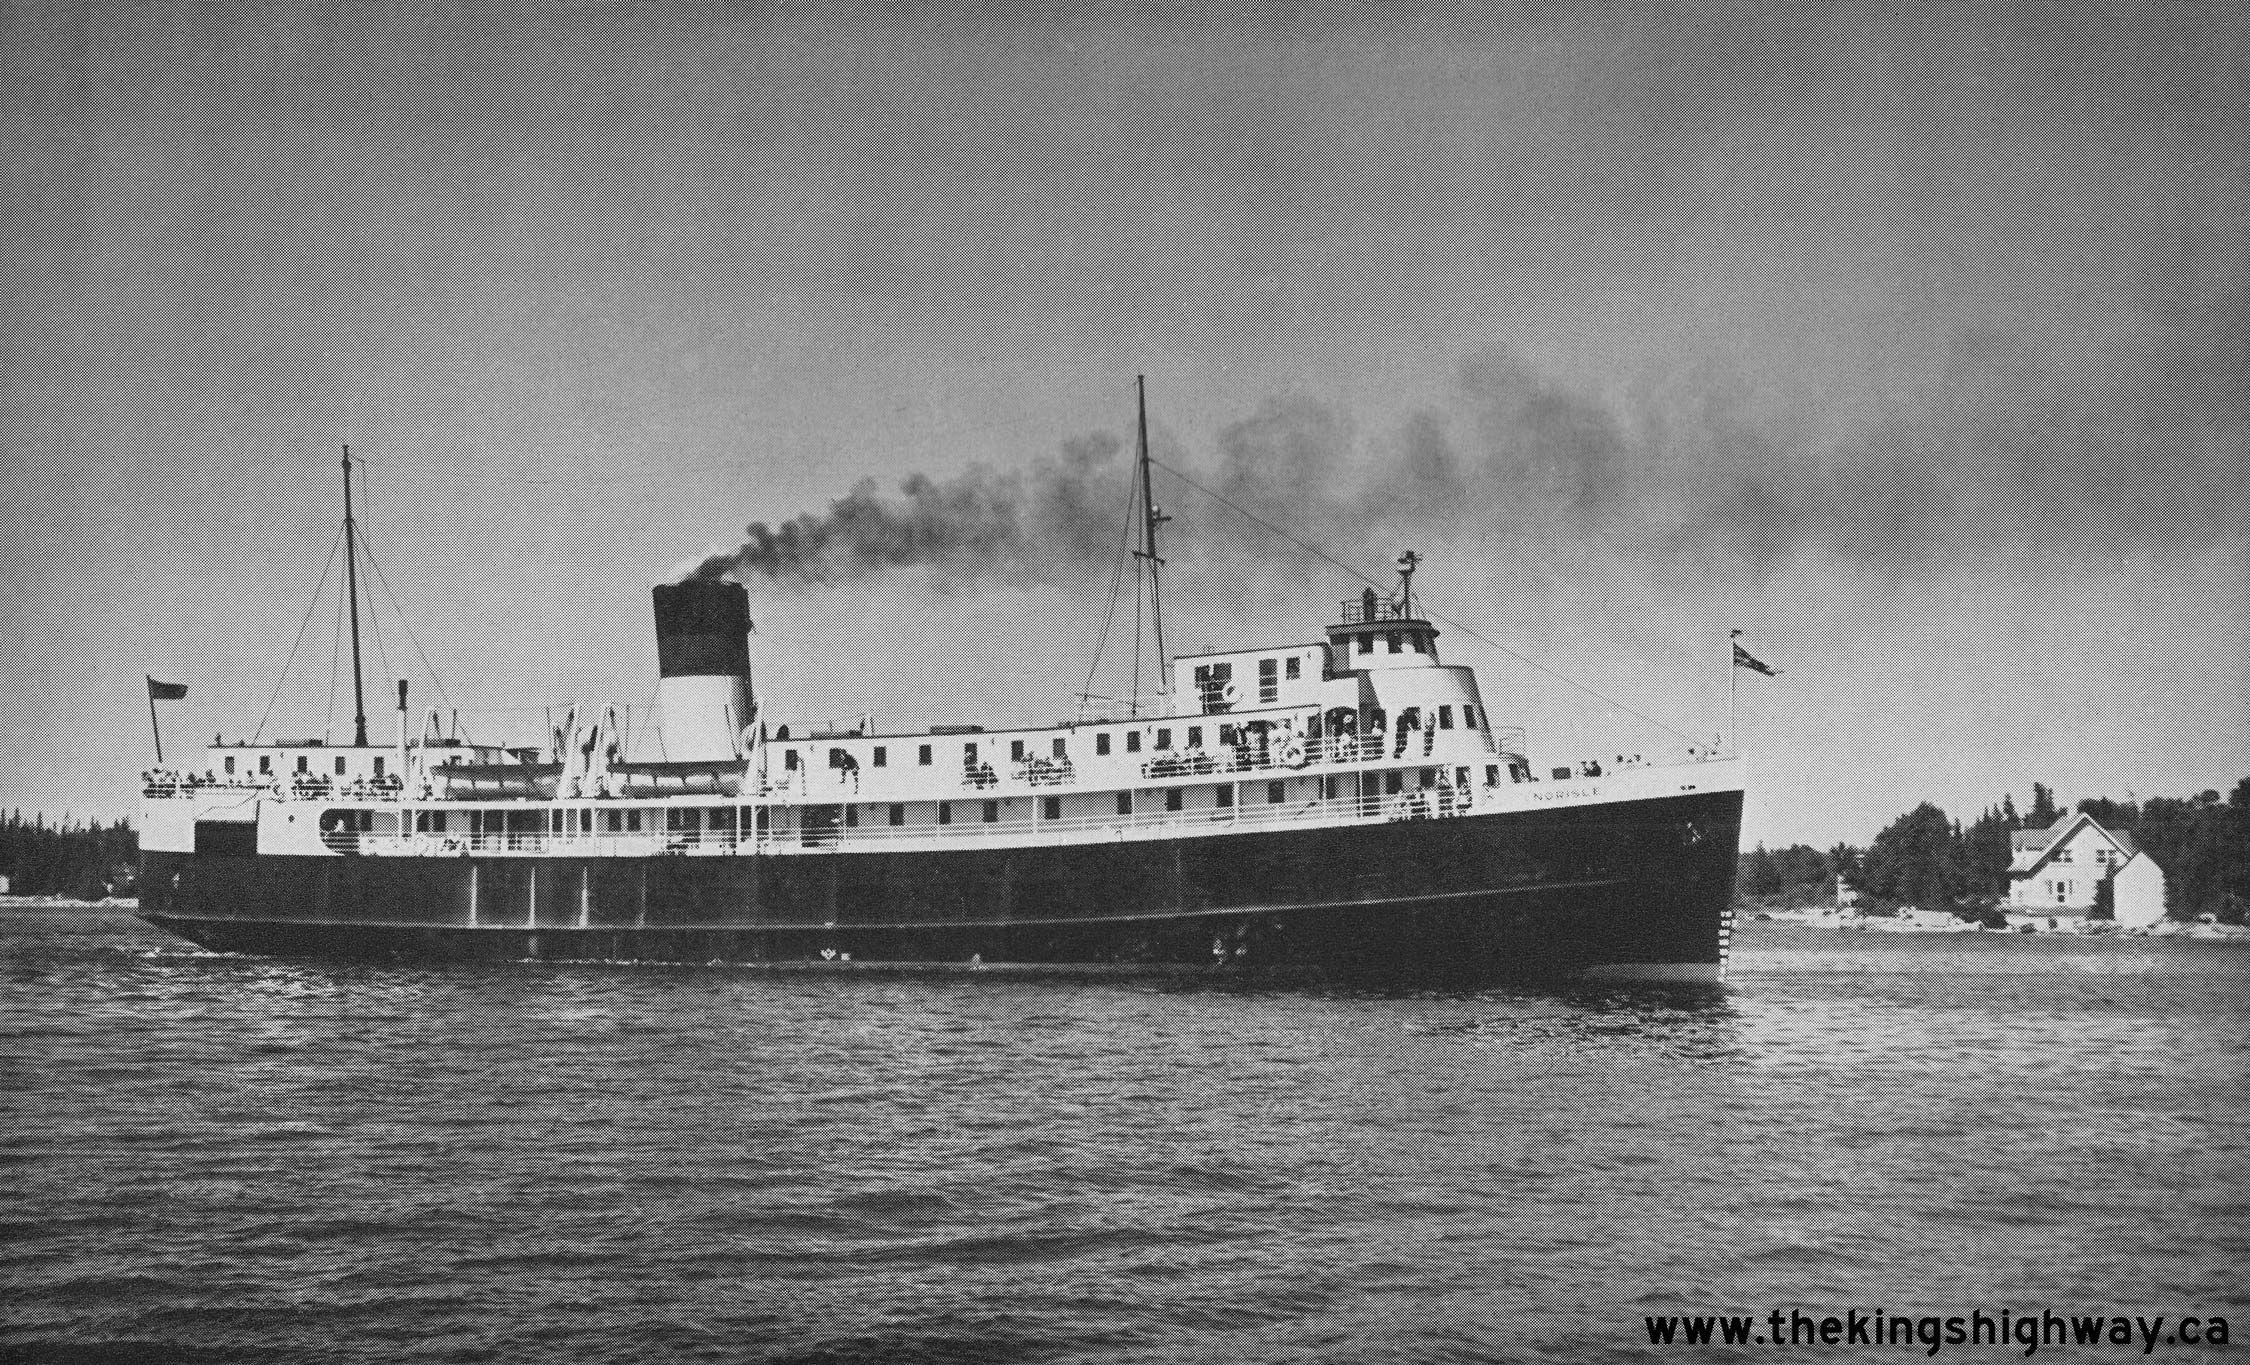
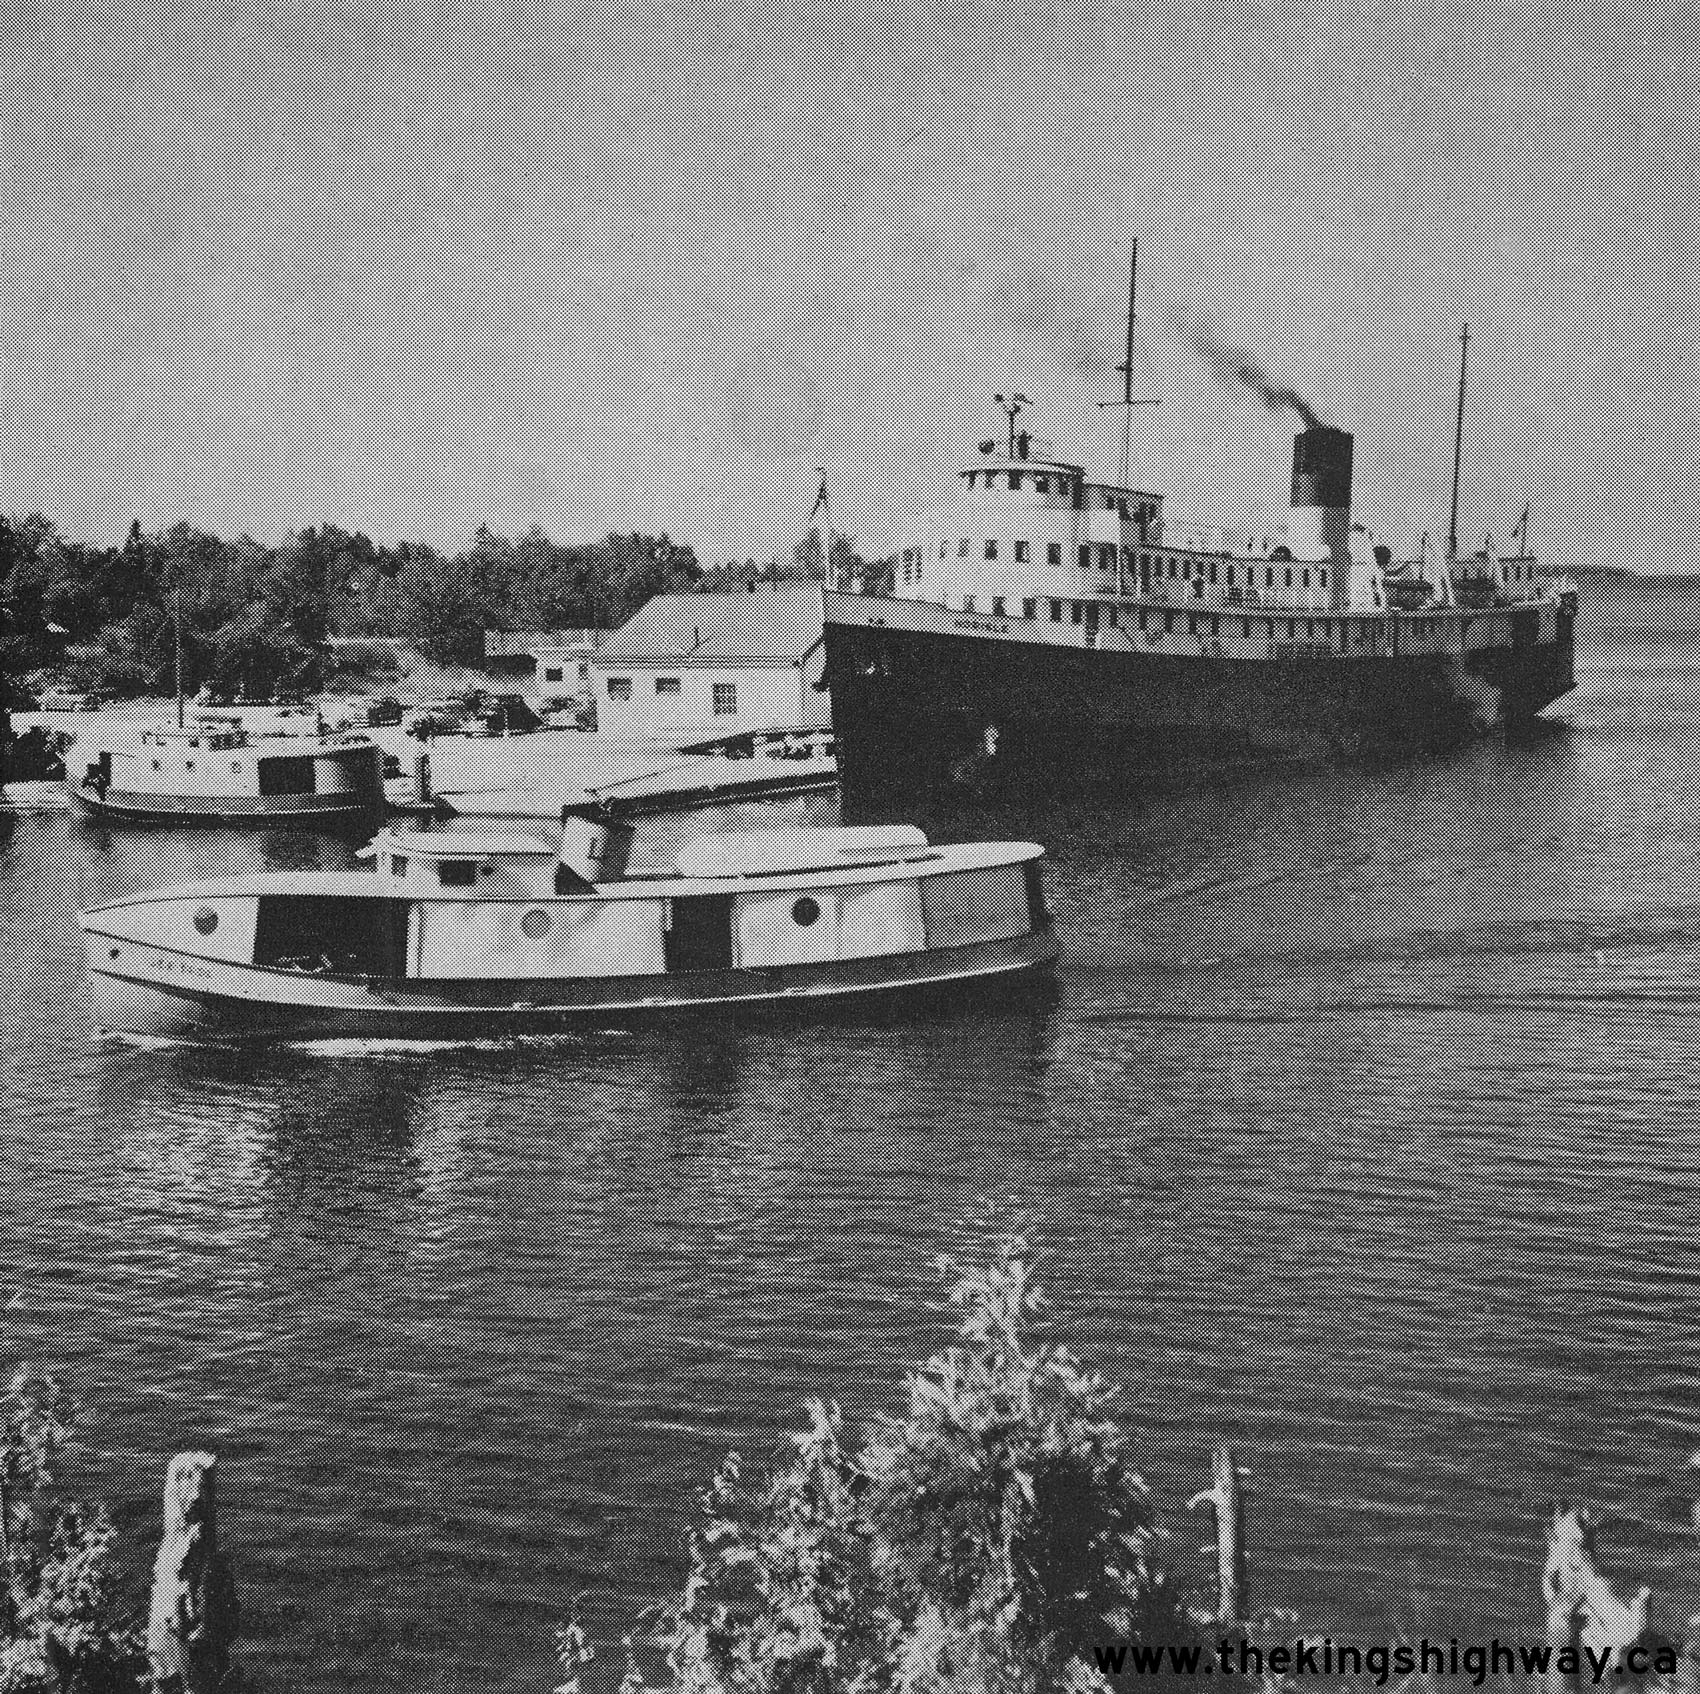
Above - Steamer ferry "SS Norisle" en route in 1951 between the ferry dock at the end of Hwy 6 in Tobermory and the ferry dock at South Baymouth, located on
Manitoulin Island. Launched in Collingwood in 1946, the Norisle was the first steamship built by the Collingwood Shipyards for civilian use after World War II. The
ferry began service for the 1947 Season, with a capacity of approximately 200 walk-on passengers and approximately 50 cars. The ferry service was operated by the Owen
Sound Transportation Company up until 1974, when it taken out of service and replaced by an even larger ferry (the Chi-Cheemaun), which still operates along this
ferry route today. The Norisle was decommissioned from ferry service in the Fall of 1974 and was subsequently transported to Manitowaning in the Summer of 1975. The
steamship has remained there ever since. See an Enlarged Photo Here. Photo taken in 1951. (Photo courtesy of Ontario Ministry of Transportation - © King's Printer for Ontario, 1951) 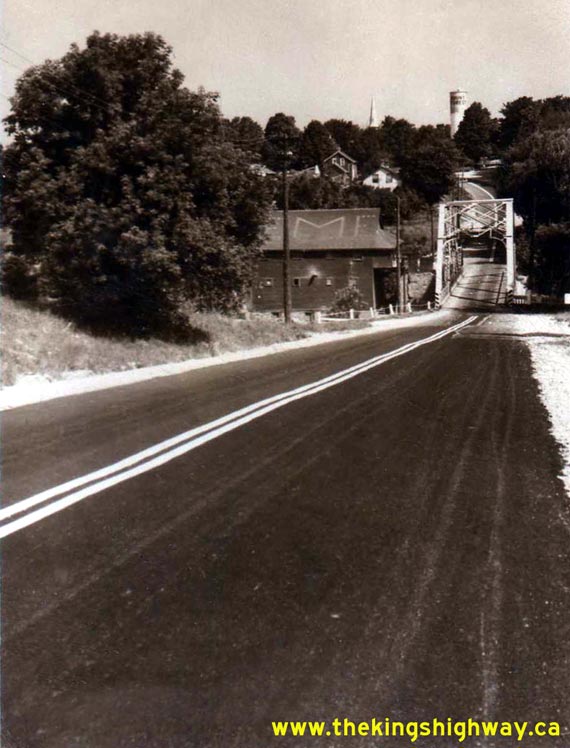
Above - Facing north along Hwy 6 approaching the South Saugeen River Bridge in Mount Forest in 1952. This photograph shows the old South Saugeen River
Bridge on Hwy 6, approximately 10 years before the bridge was replaced with the current Hwy 6 structure in 1961. The old steel through truss bridge only had a single
traffic lane, meaning that vehicles could only cross in one direction at a time. What makes this photo particularly interesting is that there is no guidance provided
to motorists, in terms of who actually has the right-of-way at the bridge. Single-lane bridges such as this one on Hwy 6 were surprisingly common on rural King's
Highways in Southern Ontario until the 1960s, when most of these narrow bridges were replaced with modern structures with two traffic lanes. Compare the historic view
shown above with this 2005 Photo which I took from a point just south of the current
Hwy 6 bridge. See an Enlarged Photo Here. Photo taken in 1952. (Photo from Cameron Bevers' historical photograph collection - Original photographer unknown) 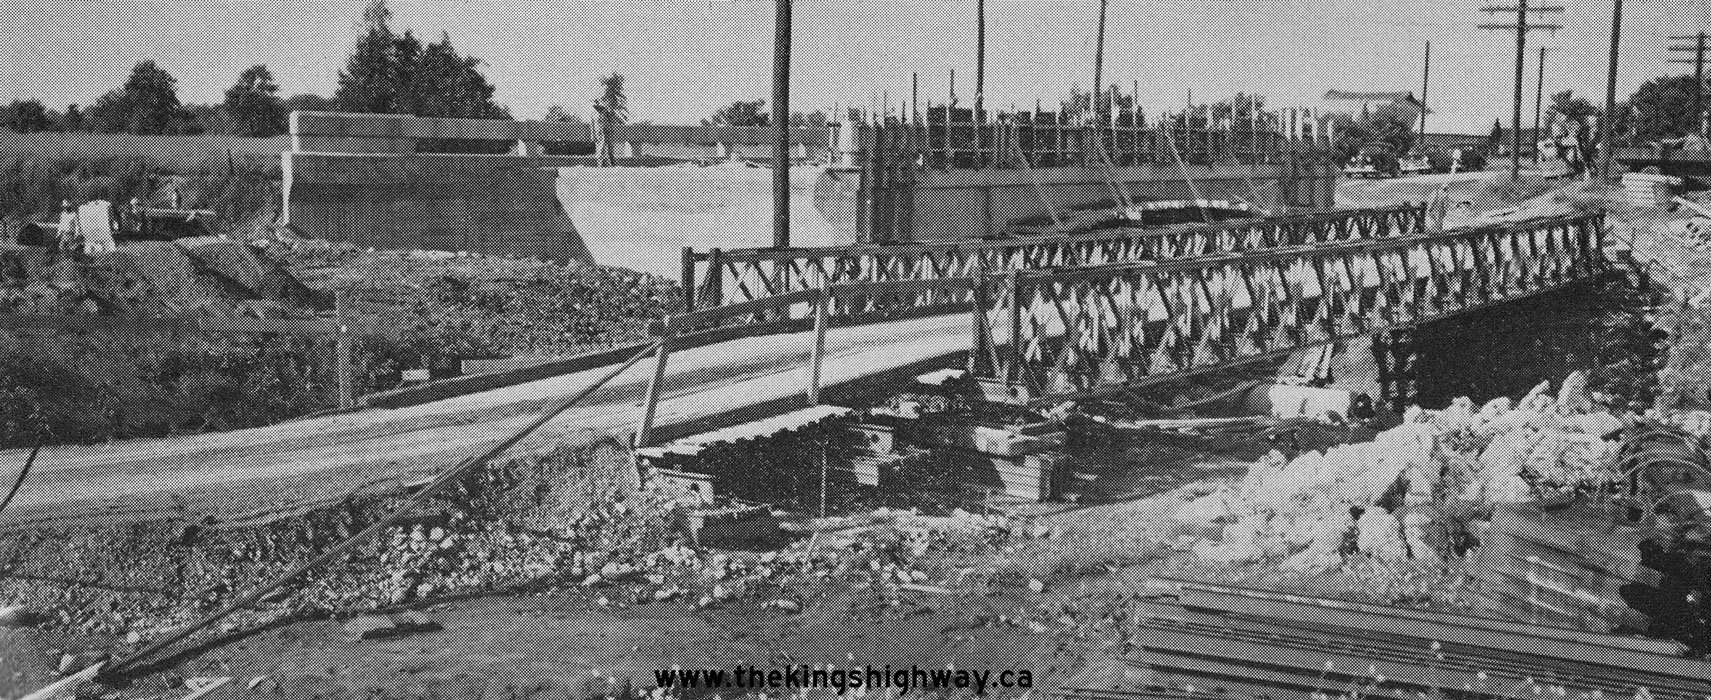
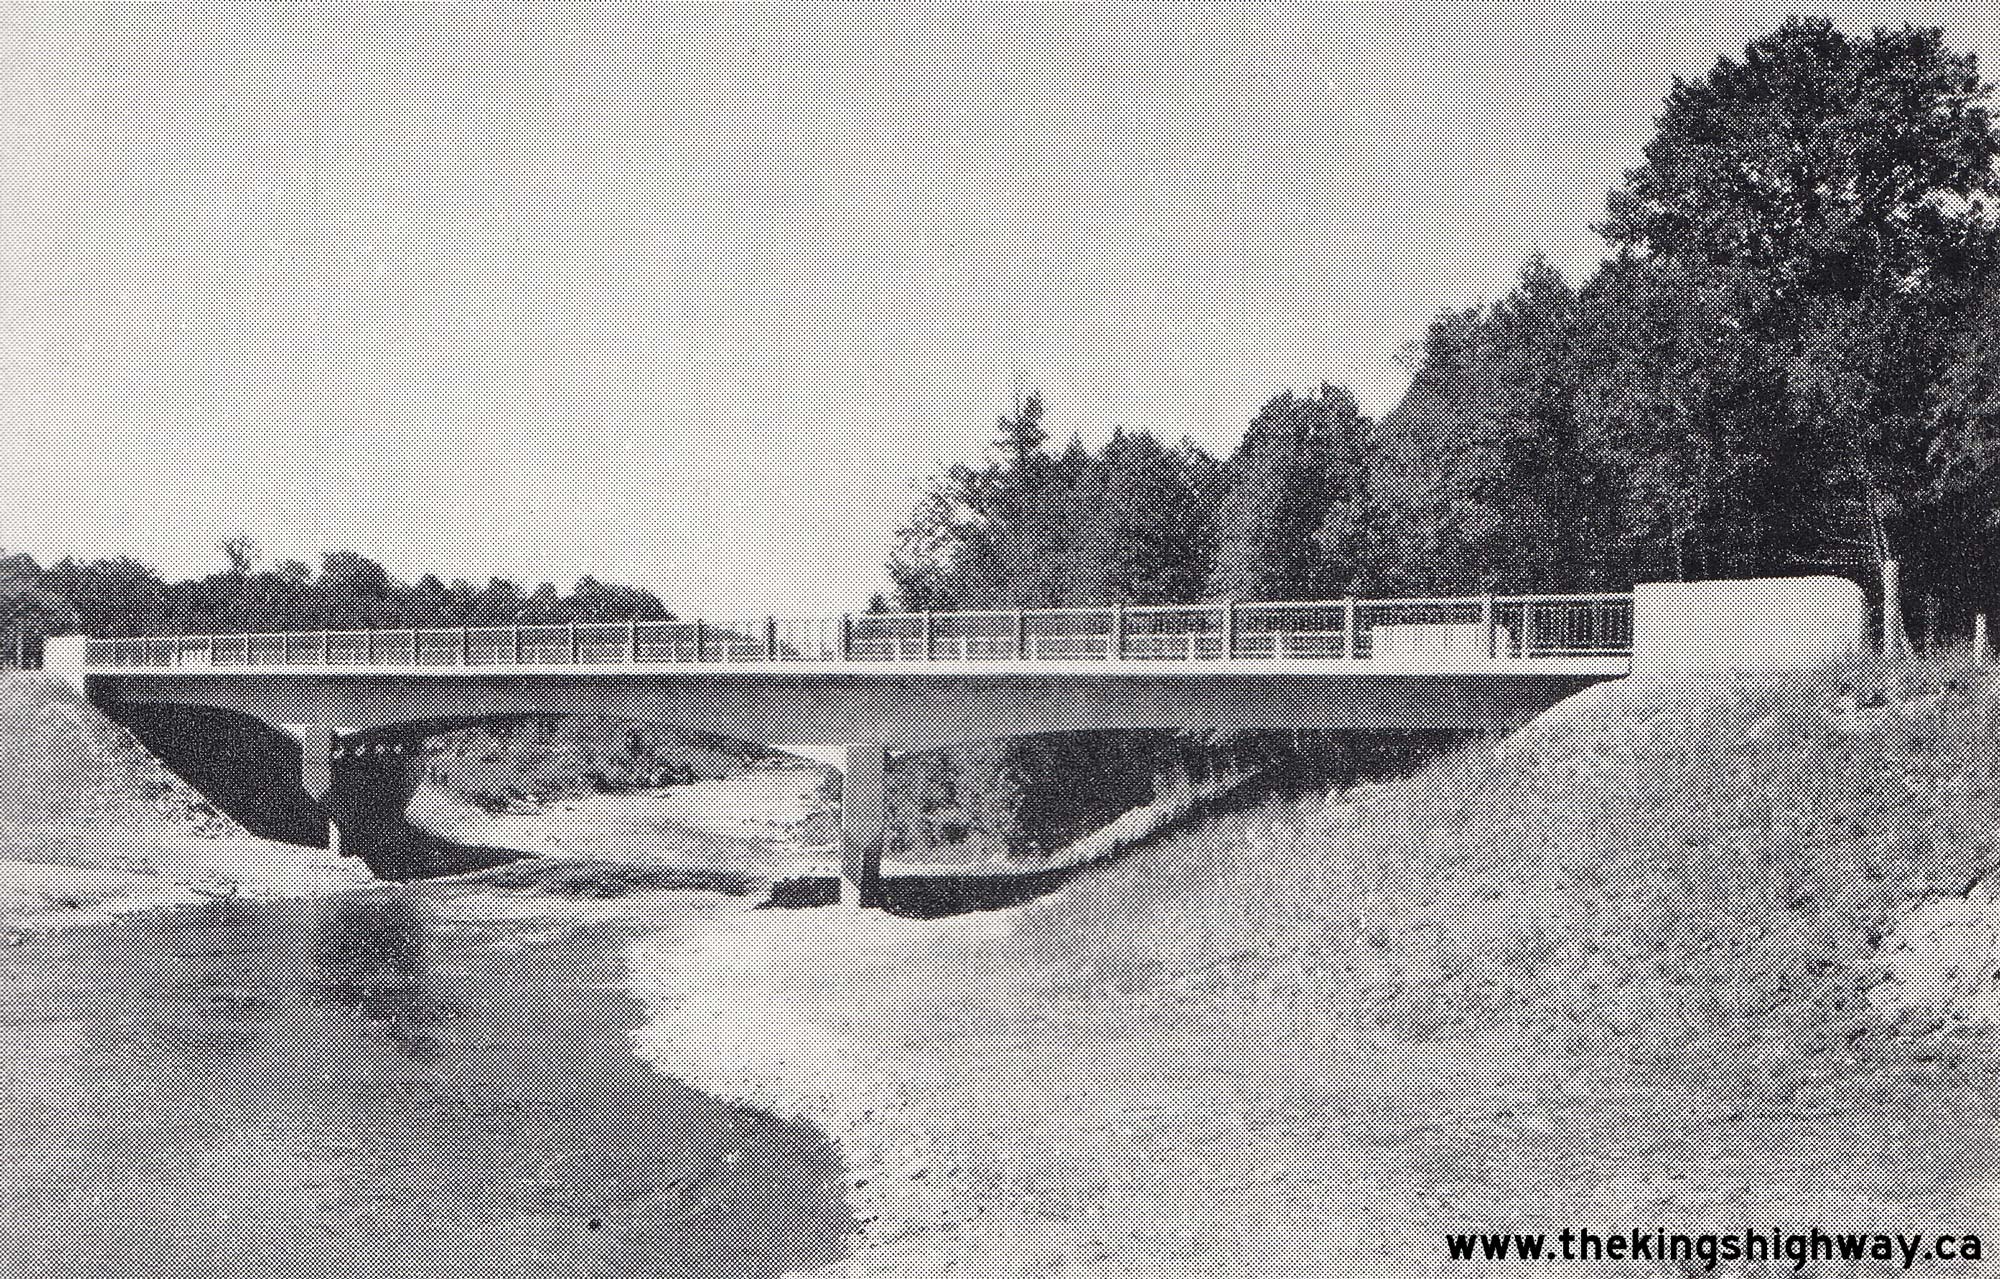
Above - Construction of the new Smokey Creek Bridge on Hwy 6 near Kenilworth, Contract #1952-54. See an
Enlarged Photo Here. Photo taken in 1952. (Photo courtesy of Ontario Ministry of Transportation - © King's Printer for Ontario, 1952) 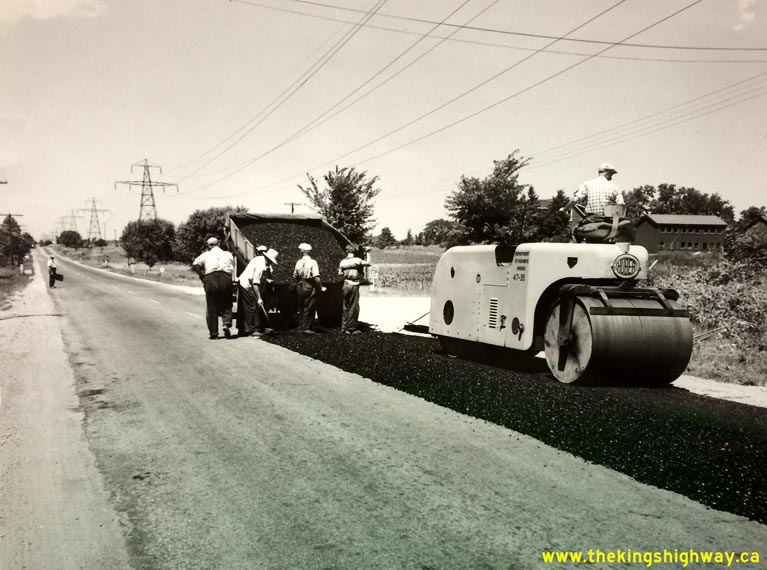
Above - Construction crew at work laying new asphalt on Hwy 6, six miles north of Clappison's Corners near Freelton. See an
Enlarged Photo Here. Photo taken on August 1, 1952. (Photo courtesy of Ontario Ministry of Transportation - © King's Printer for Ontario, 1952) 

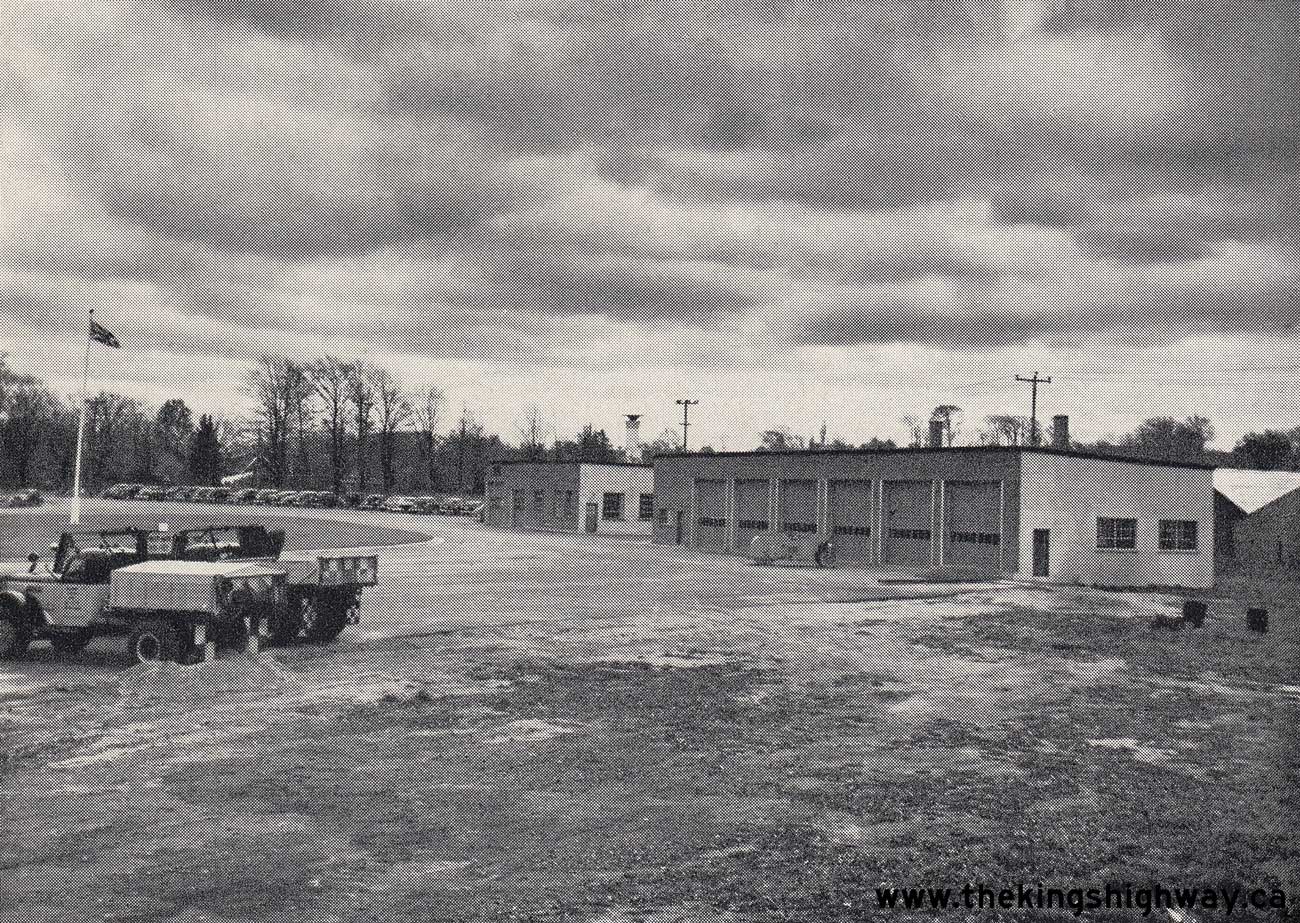
Left - View of the Owen Sound District Garage and Paint Shop (DHO District #5). See an
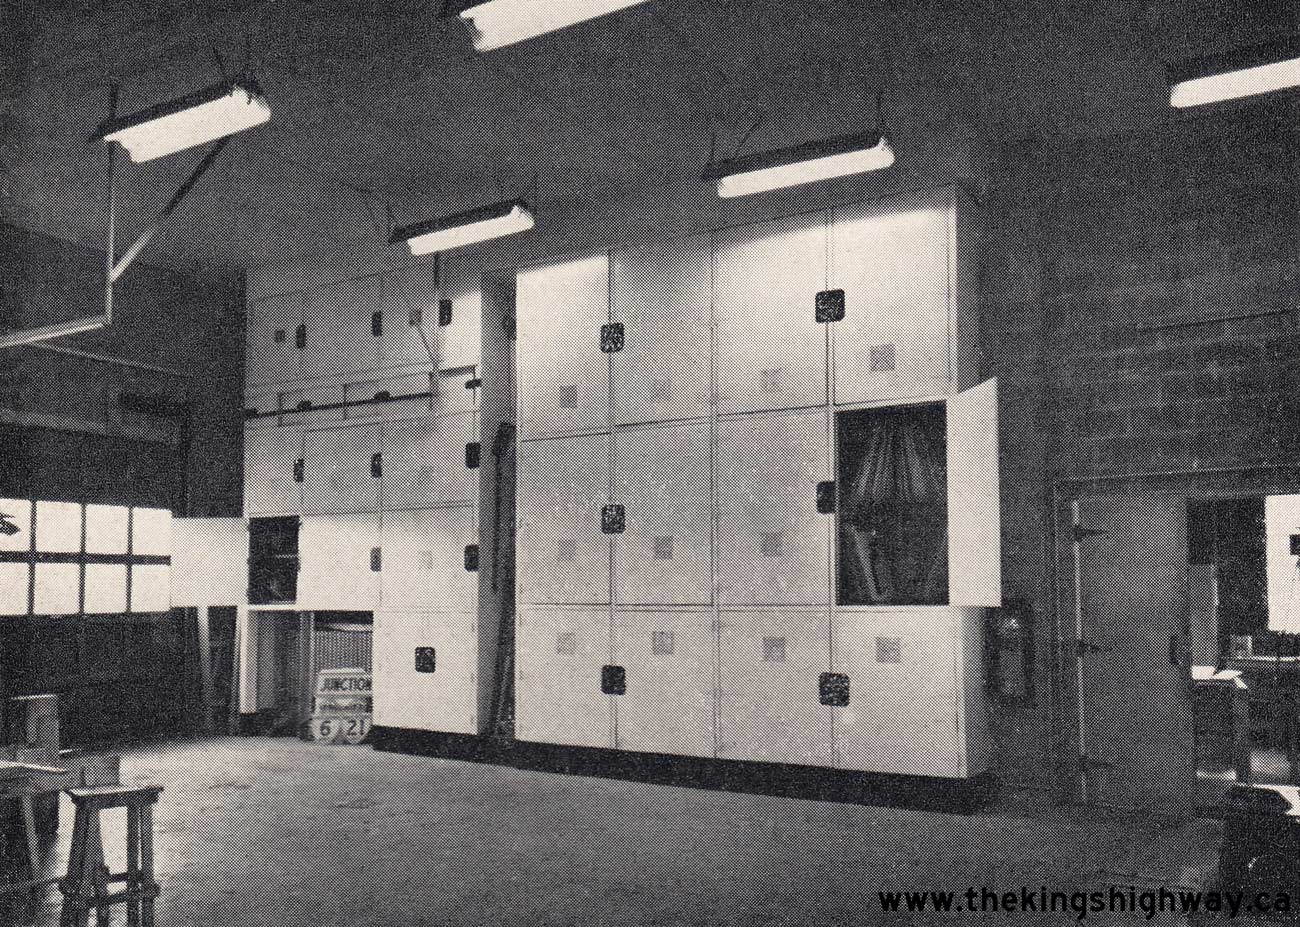
Enlarged Photo Here. Photo taken on October 29, 1952. (Photo courtesy of Ontario Ministry of Transportation - © King's Printer for Ontario, 1952) Right - Highway sign storage room at the Owen Sound District Garage in 1952. Note the "Junction" sign for Hwy 6 & Hwy 21 leaning against the wall. Despite the widespread downloading of Ontario's King's Highways in the 1990s, the overlapped route of Hwy 6 & Hwy 21 still remains intact today between Springmount and Owen Sound. See an Enlarged Photo Here. Photo taken on October 29, 1952. (Photo courtesy of Ontario Ministry of Transportation - © King's Printer for Ontario, 1952) 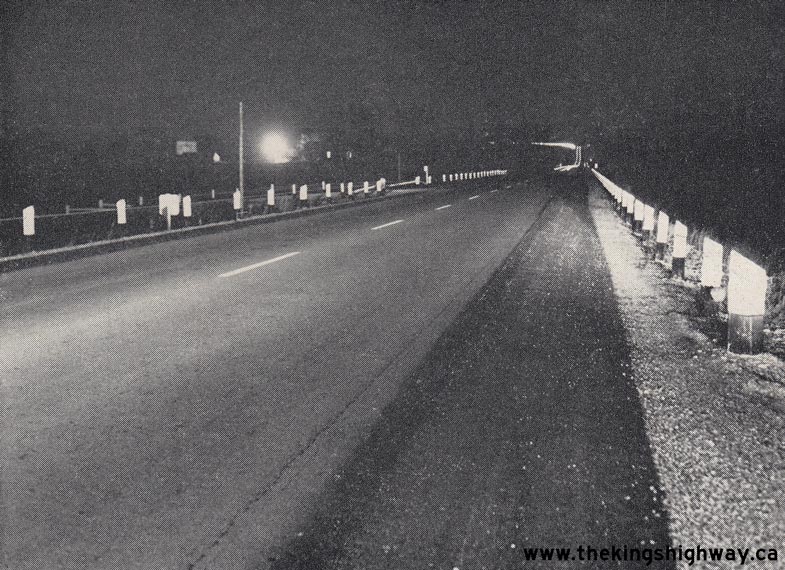
Left - Night view of Hwy 6 at the north entrance to Arthur, showing new reflective guide posts. See an
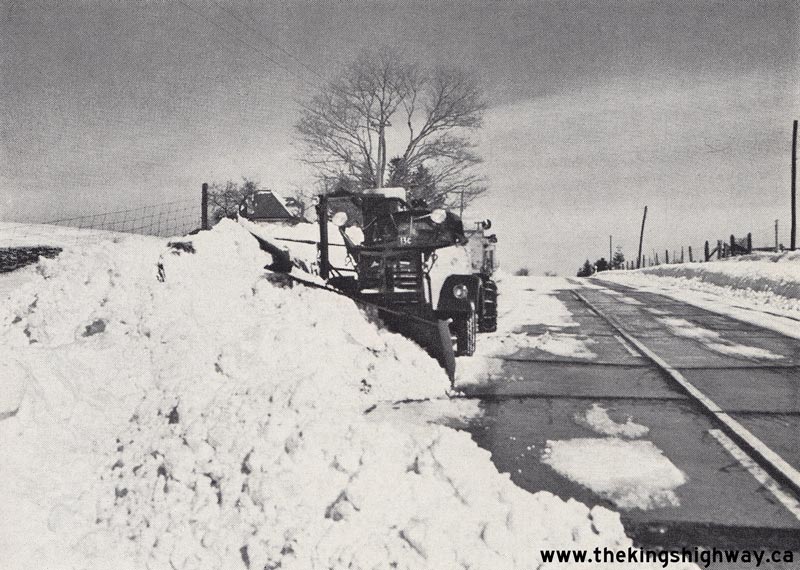
Enlarged Photo Here. Photo taken on October 30, 1952. (Photo courtesy of Ontario Ministry of Transportation - © King's Printer for Ontario, 1952) Right - One-way snowplough clearing a section of Hwy 6 north of Mount Forest. See an Enlarged Photo Here. Photo taken in 1953. (Photo courtesy of Ontario Ministry of Transportation - © King's Printer for Ontario, 1953) 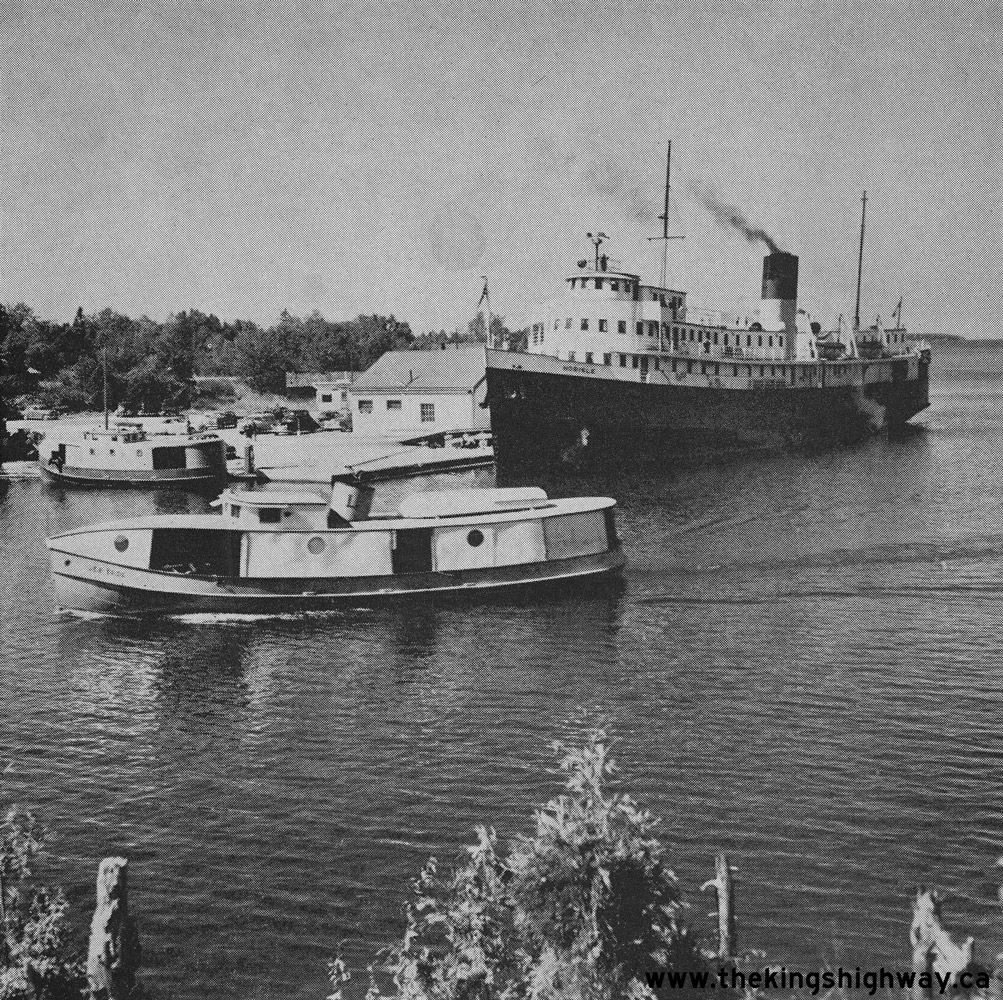
Above - View of Tobermory Harbour at the northern terminus of Hwy 6. Across the harbour, the SS Norisle steamship ferry is docked and taking on passengers.
Unlike the current Chi-Cheemaun ferry, the Norisle loaded vehicular traffic through an access door in the ship's side rather than through the ship's bow and stern.
Note the wooden vehicle access ramp situated in front of the white building. See an
Enlarged Photo Here. Photo taken on
September 17, 1953. (Photo courtesy of Ontario Ministry of Transportation - © King's Printer for Ontario, 1953) 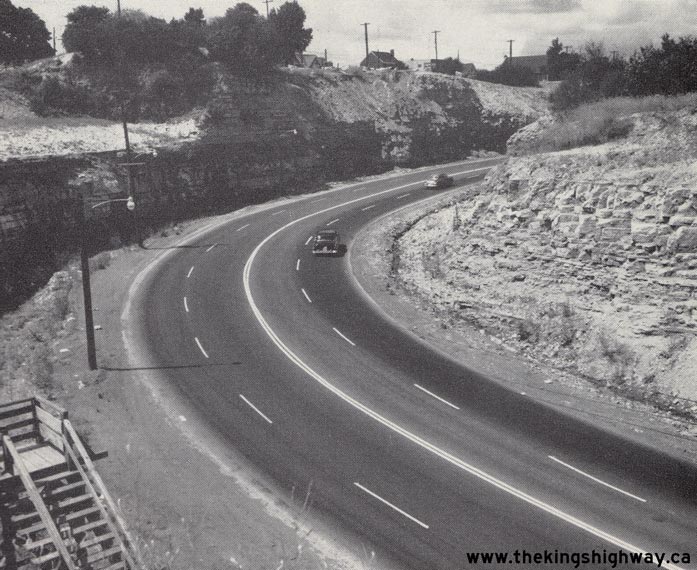
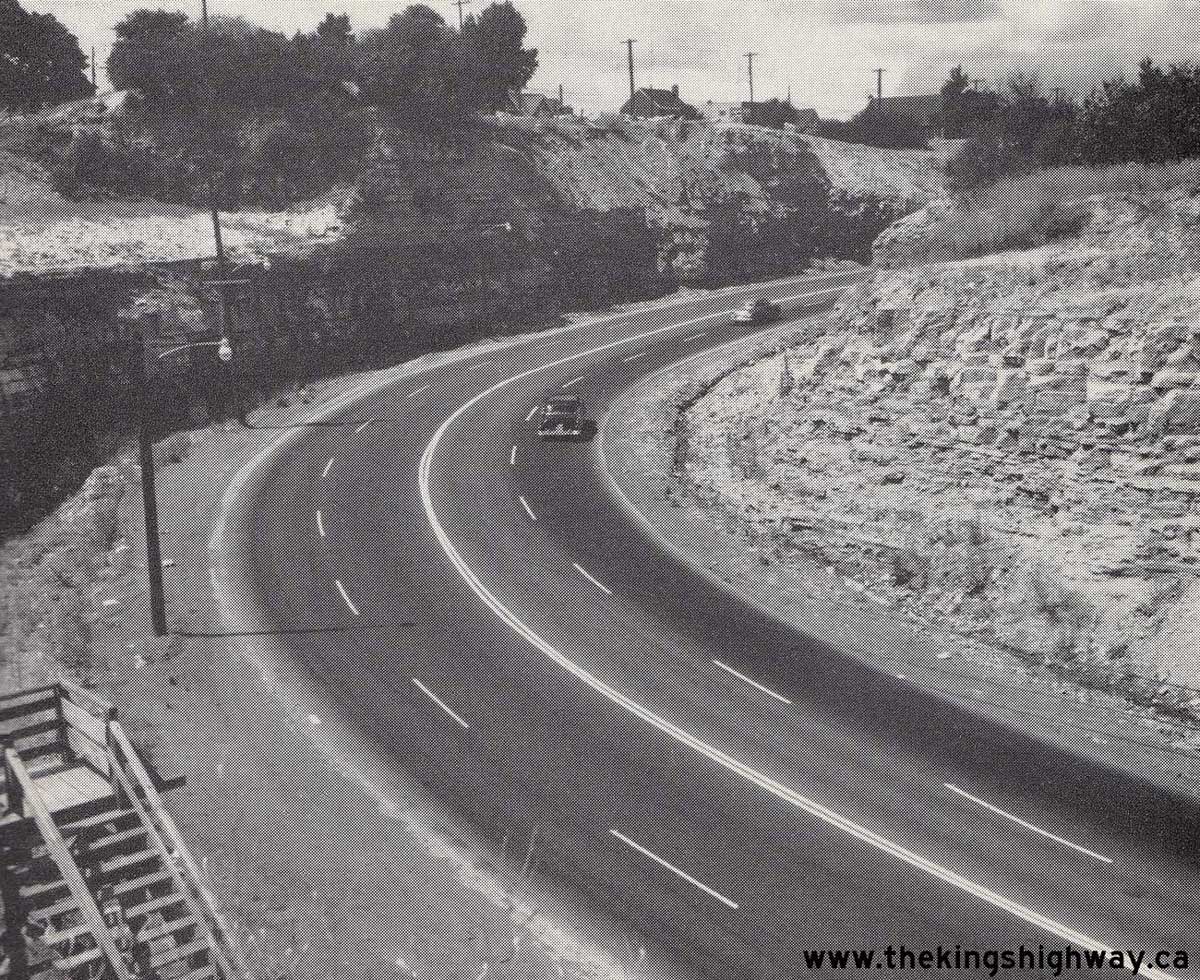
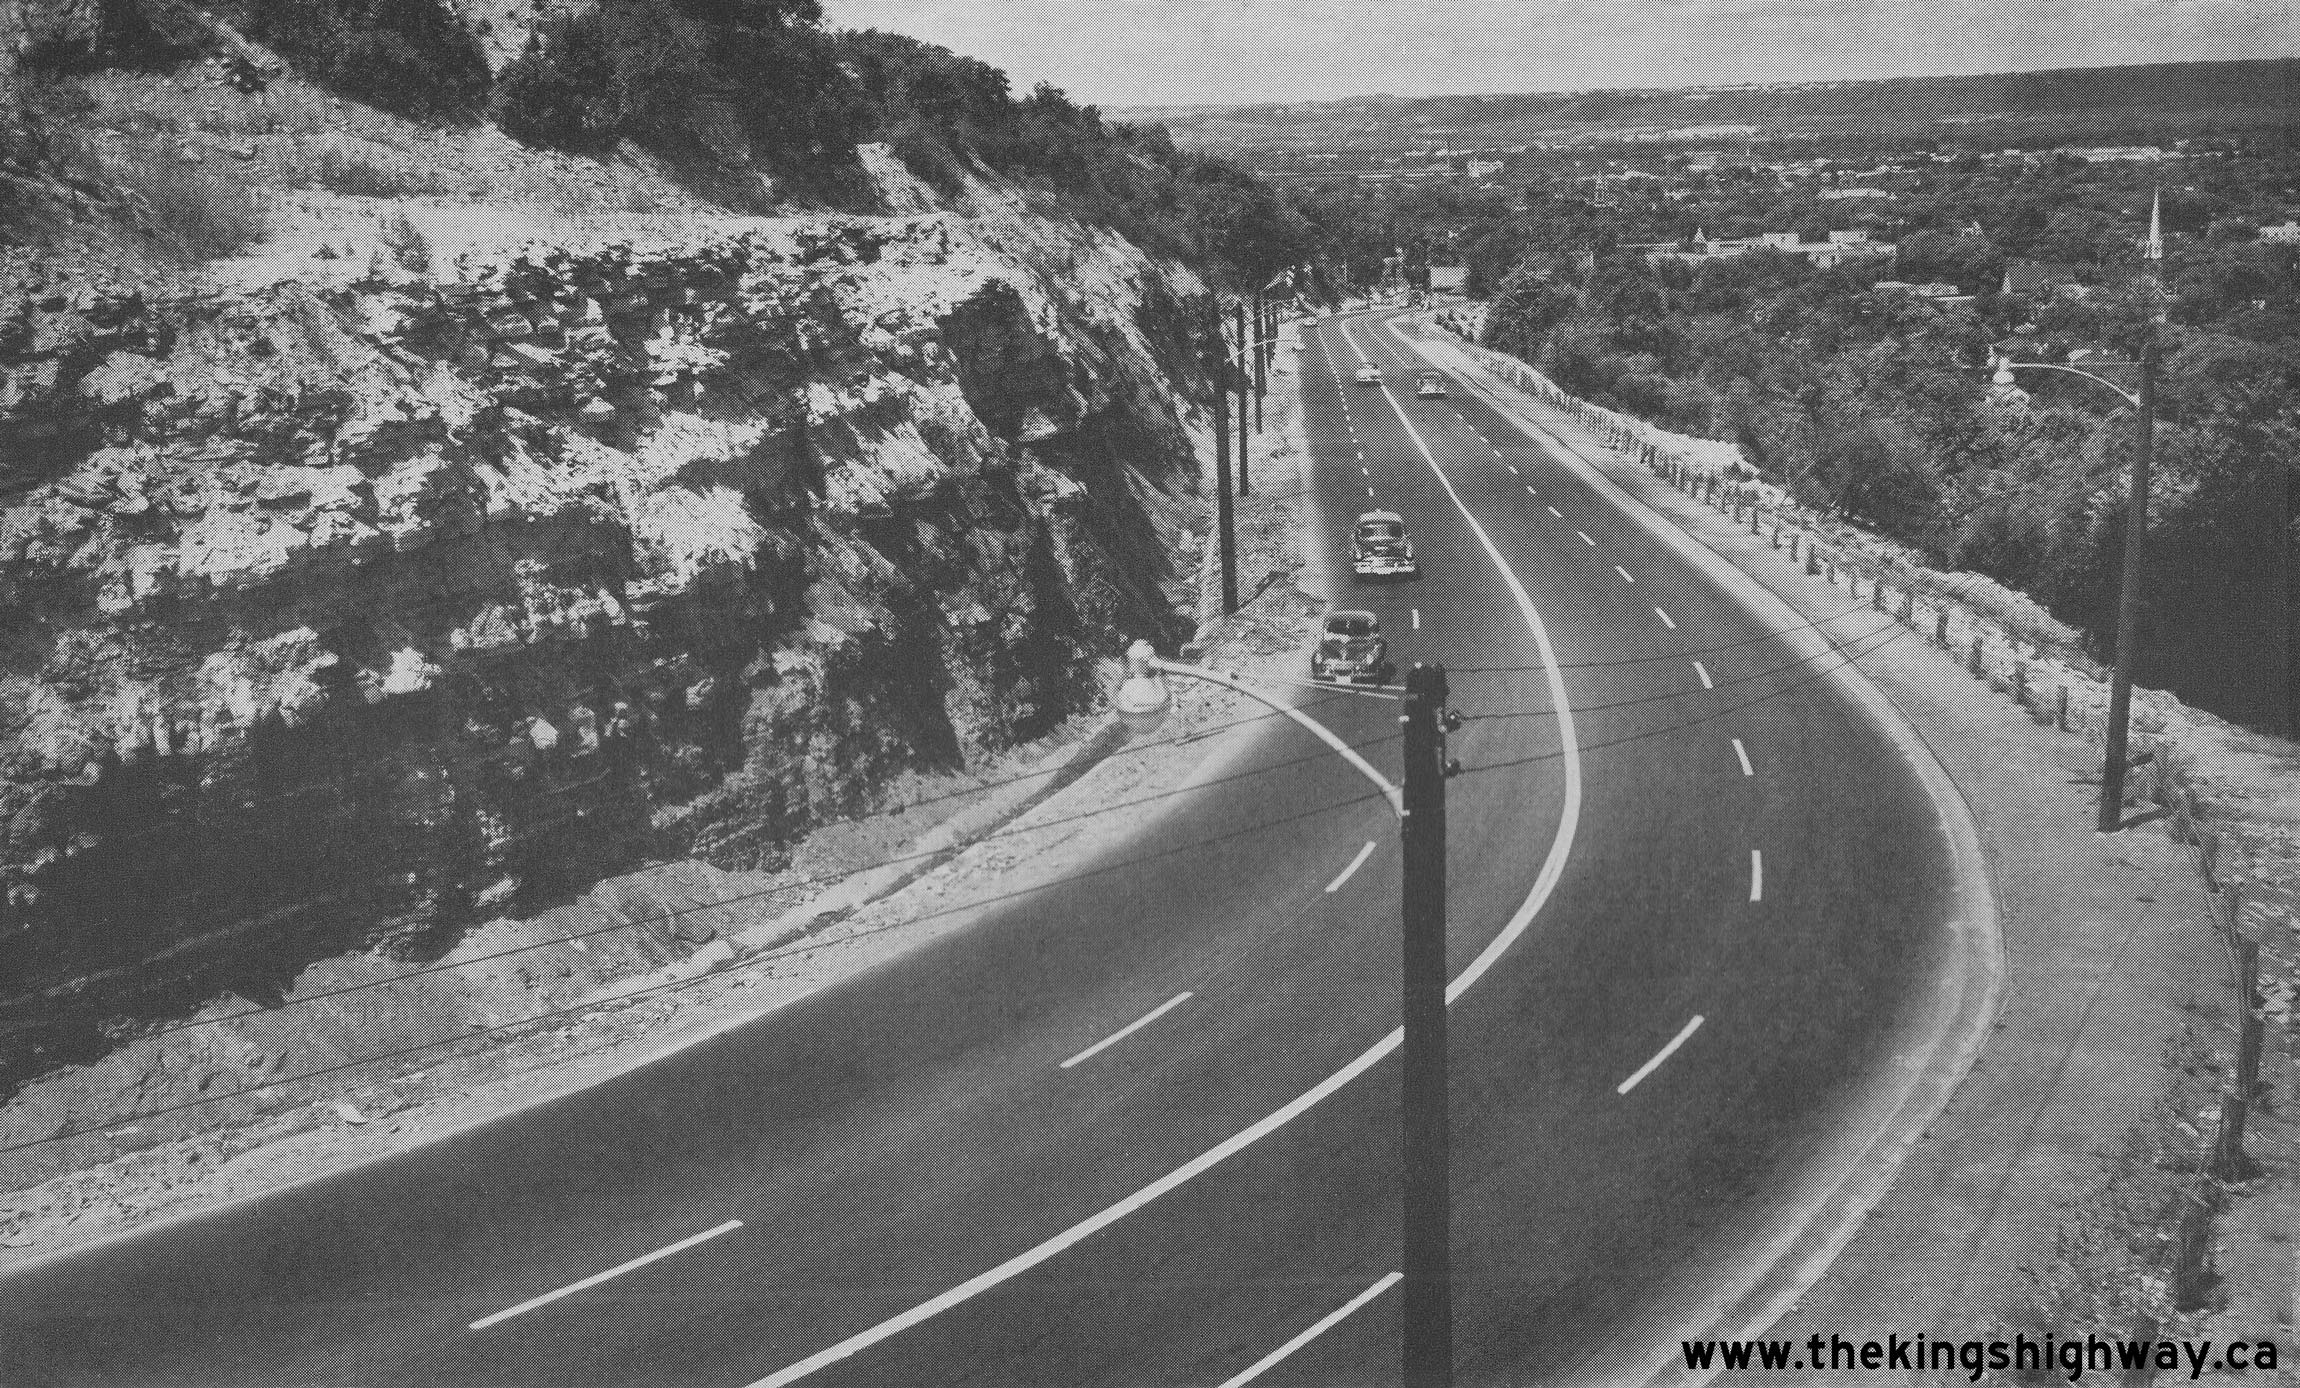
Above - Looking south through the Jolley Cut on Hwy 6 in Hamilton. See an
Enlarged Photo Here. Photo taken on August 5, 1954. (Photo courtesy of Ontario Ministry of Transportation - © King's Printer for Ontario, 1954) 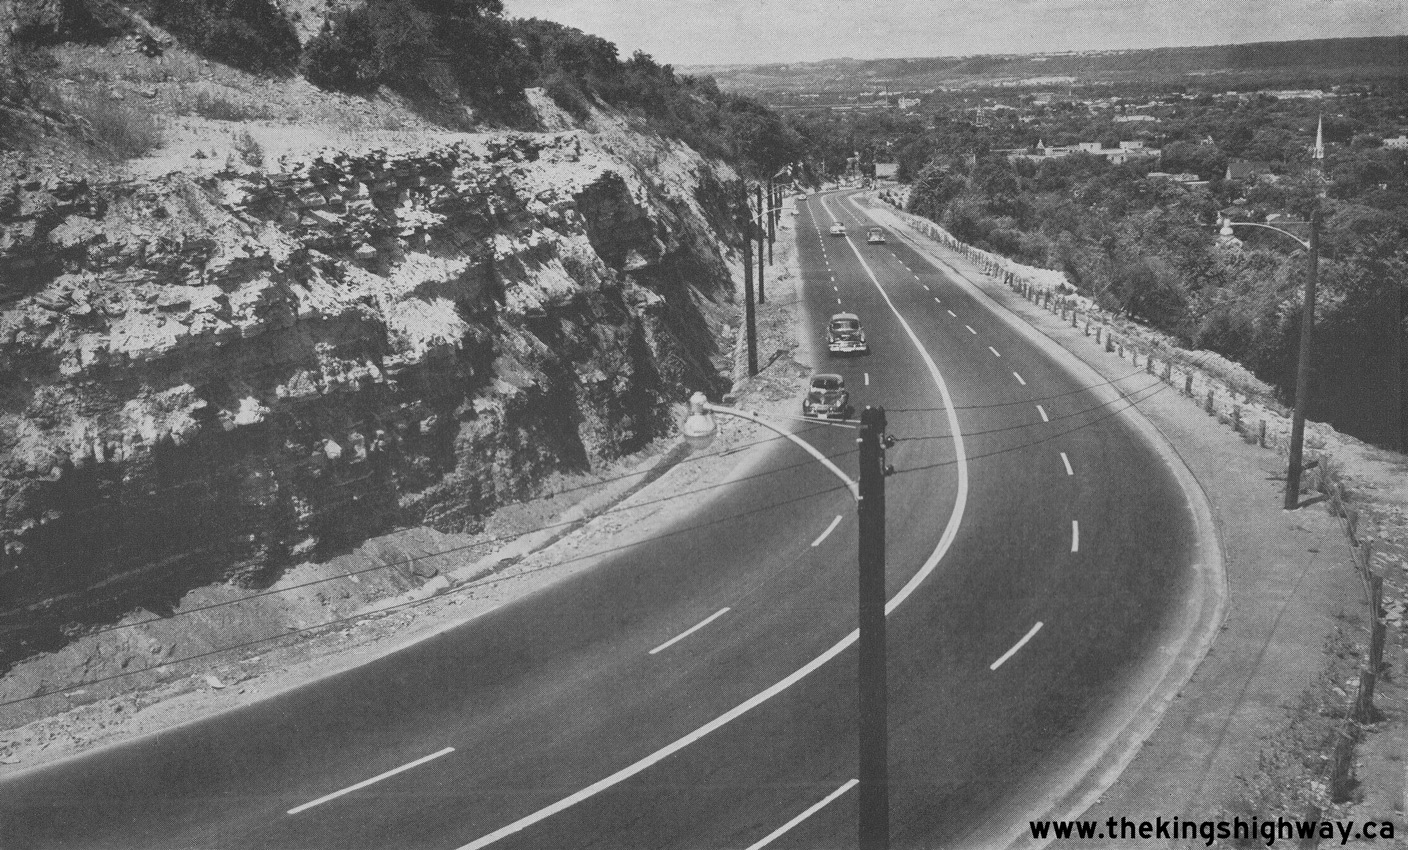

Left - Looking down the Jolley Cut on Hwy 6 in Hamilton in 1954. Until the 1970s, Hwy 6 followed Arkledun Avenue and part of the Jolley Cut south out of
Downtown Hamilton. The adjacent Claremont Access was constructed in the 1970s to entirely bypass the Jolley Cut in order to address ongoing capacity problems on
Hwy 6. Despite being bypassed by a new highway grade, the Jolley Cut is still an important arterial road in Hamilton today. See an
Enlarged Photo Here. Photo taken on August 5, 1954. (Photo courtesy of Ontario Ministry of Transportation - © King's Printer for Ontario, 1954) Right - Facing north along Wyndham Street (Hwy 6, Hwy 7 & Hwy 24) from Carden Street in Guelph in 1955. See an Enlarged Photo Here. (Photo courtesy of L. F. Charter) 

Left - Facing south along Hwy 2 & Hwy 6 (York Boulevard) at the Hamilton Northwest Entrance Bridge #3. This high-level structure was situated between
Hamilton and Aldershot. Prior to the construction of Hwy 403 in the 1960s, all traffic approaching Downtown Hamilton from Toronto and Burlington passed across this
bridge. The two-lane structure seen here was replaced in the 1970s with a new four-lane structure. See an
Enlarged Photo Here. Photo taken on July 16, 1955. (Photo courtesy of Ontario Ministry of Transportation - © King's Printer for Ontario, 2022) Right - Hamilton Northwest Entrance Bridge #3 on Hwy 2 & Hwy 6 (York Boulevard), facing north towards Aldershot. This large steel deck truss structure was originally constructed by the DPHO in 1922. See an Enlarged Photo Here. Photo taken on July 16, 1955. (Photo courtesy of Ontario Ministry of Transportation - © King's Printer for Ontario, 2022) 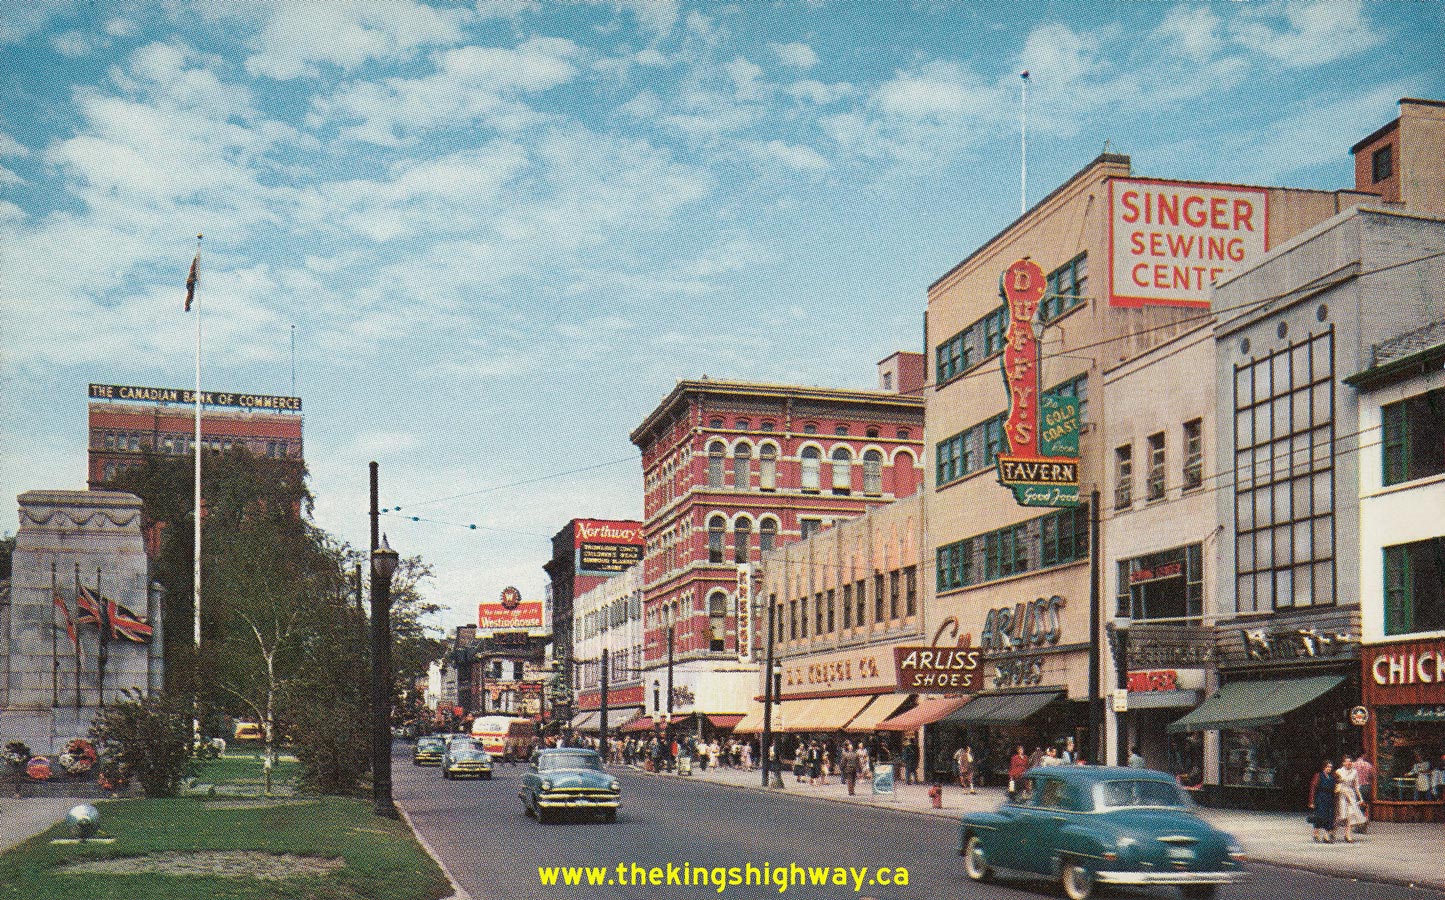
Above - Circa 1955 postcard view of King Street in Downtown Hamilton, facing west from John Street at Gore Park. This interesting photo shows King Street
carrying two-way traffic just before a new one-way street system was introduced through the city centre. It should be noted that King Street was not signed as Hwy 6
& Hwy 8 until after the street was converted to carry only westbound traffic in October 1956. Previous to the one-way street conversion, all Hwy 8 traffic was
routed along nearby Main Street. Compare this photo to the one at the bottom of this page taken from the same location in 1959, which shows King Street carrying
one-way traffic only. In the distant background, note the Westinghouse Canada advertising sign with the digital clock below it, indicating that this photo was taken
at 12:10 pm. While digital clocks are of course very common in our modern world, they were exceptionally rare when this photo was taken in the mid-1950s. This
interesting horologic feature not only symbolized Westinghouse's industrial expansion brought on by a booming Post-War market for consumer electronics and appliances,
but also highlighted Hamilton as Ontario's leading centre of industry, innovation and technology during that era. See an
Enlarged Photo Here. Photo taken circa 1955. (Photo courtesy of Royal Specialty Sales, Toronto) 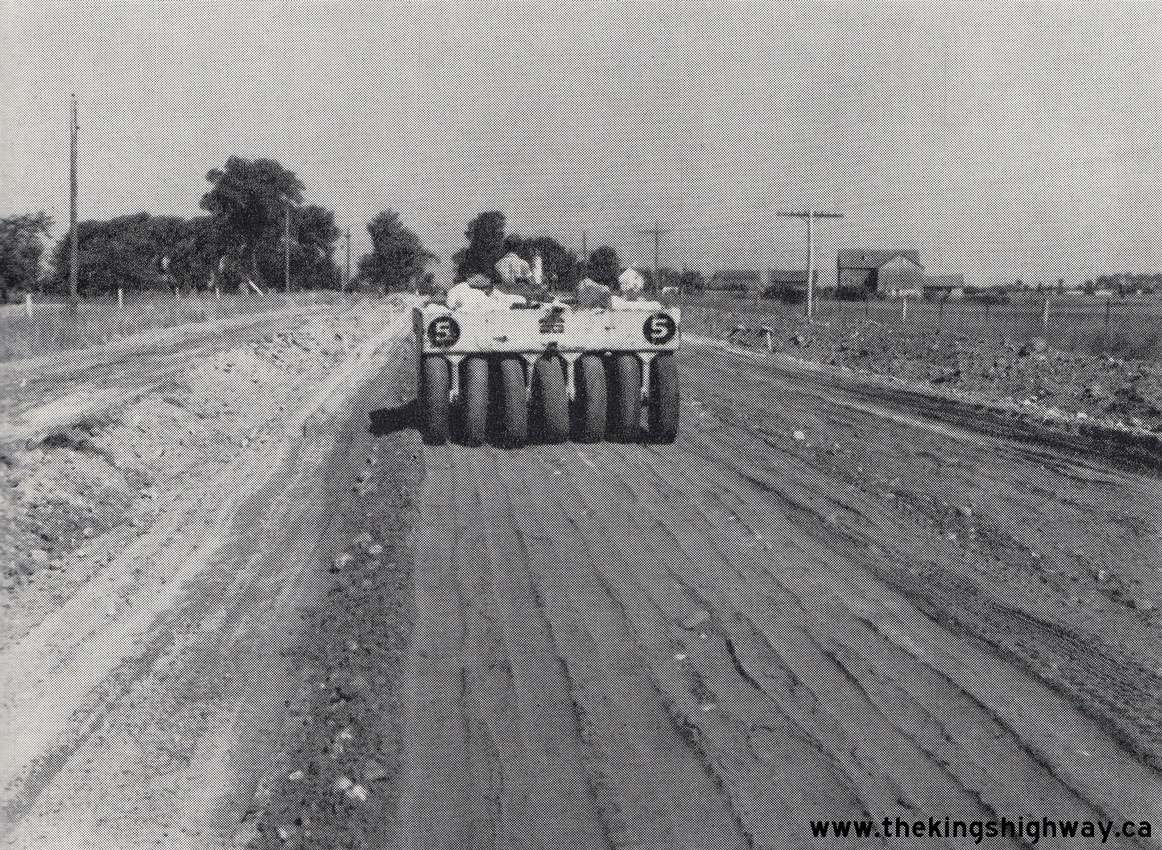

Left - Grading operations underway on Hwy 6 using a "wobbly-wheel" compactor, 3 miles south of Mount Forest, Contract #1954-75. See an
Enlarged Photo Here. Photo taken on July 22, 1955. (Photo courtesy of Ontario Ministry of Transportation - © King's Printer for Ontario, 1955) Right - New mulch pavement surface on the Springmount-Hepworth County Road, one mile north of Shallow Lake in 1956. This Suburban County Road near Owen Sound was later assumed by the DHO as King's Highway 70 in 1965. The route of Hwy 70 became Hwy 6 during a route renumbering which took place in this area in 1997. See an Enlarged Photo Here. Photo taken on August 30, 1956. (Photo courtesy of Ontario Ministry of Transportation - © King's Printer for Ontario, 1956) 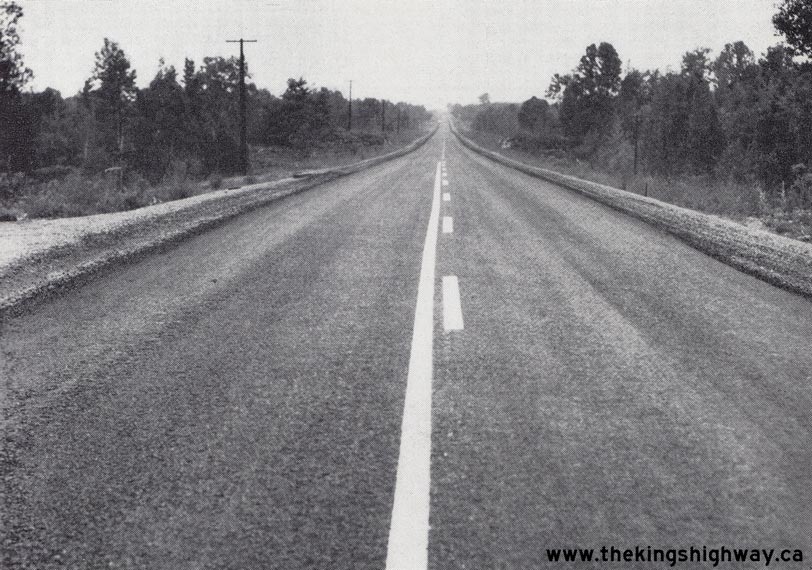
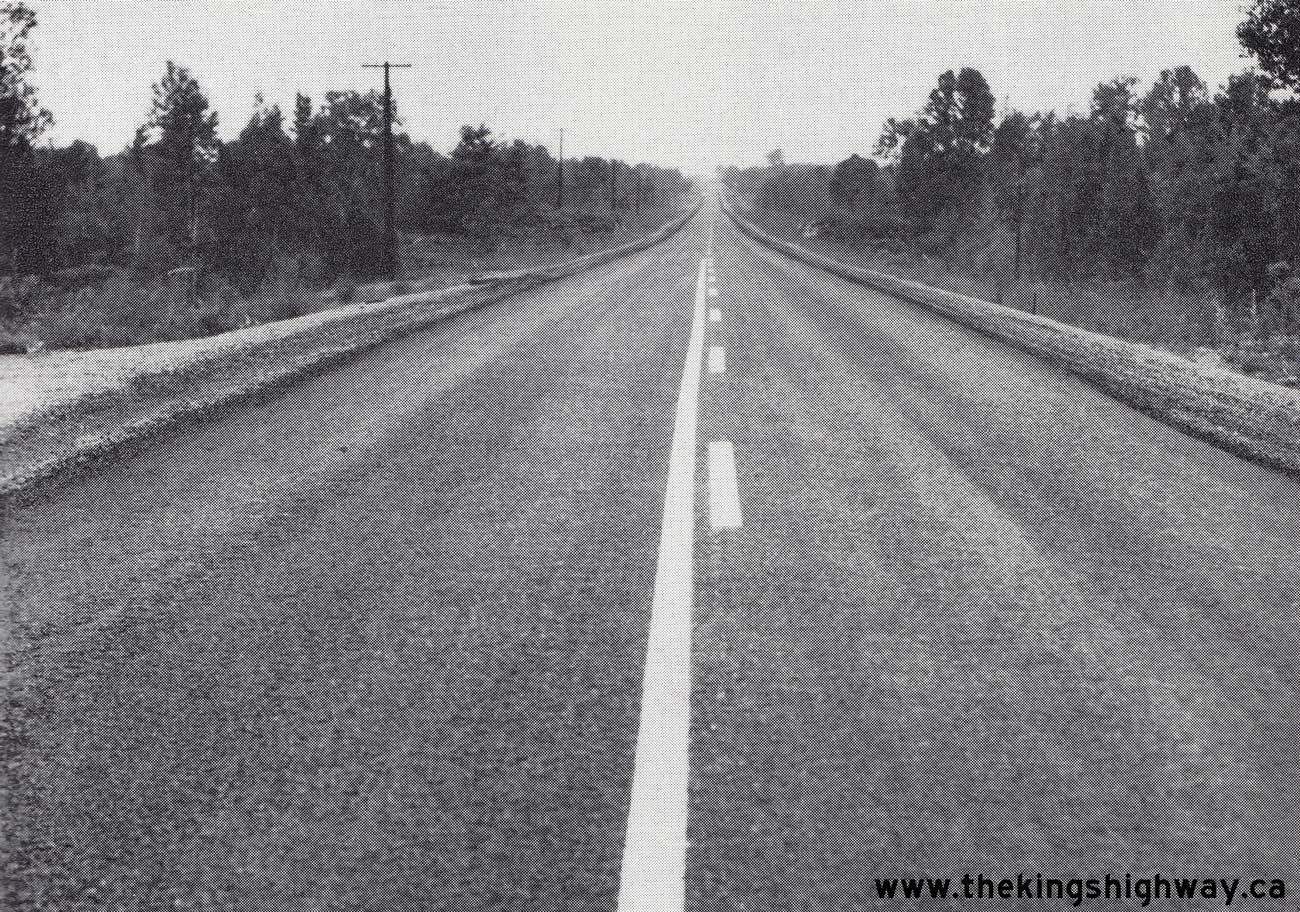
Left - Grading and mulch pavement on Hwy 6, 18 miles south of Tobermory. See an
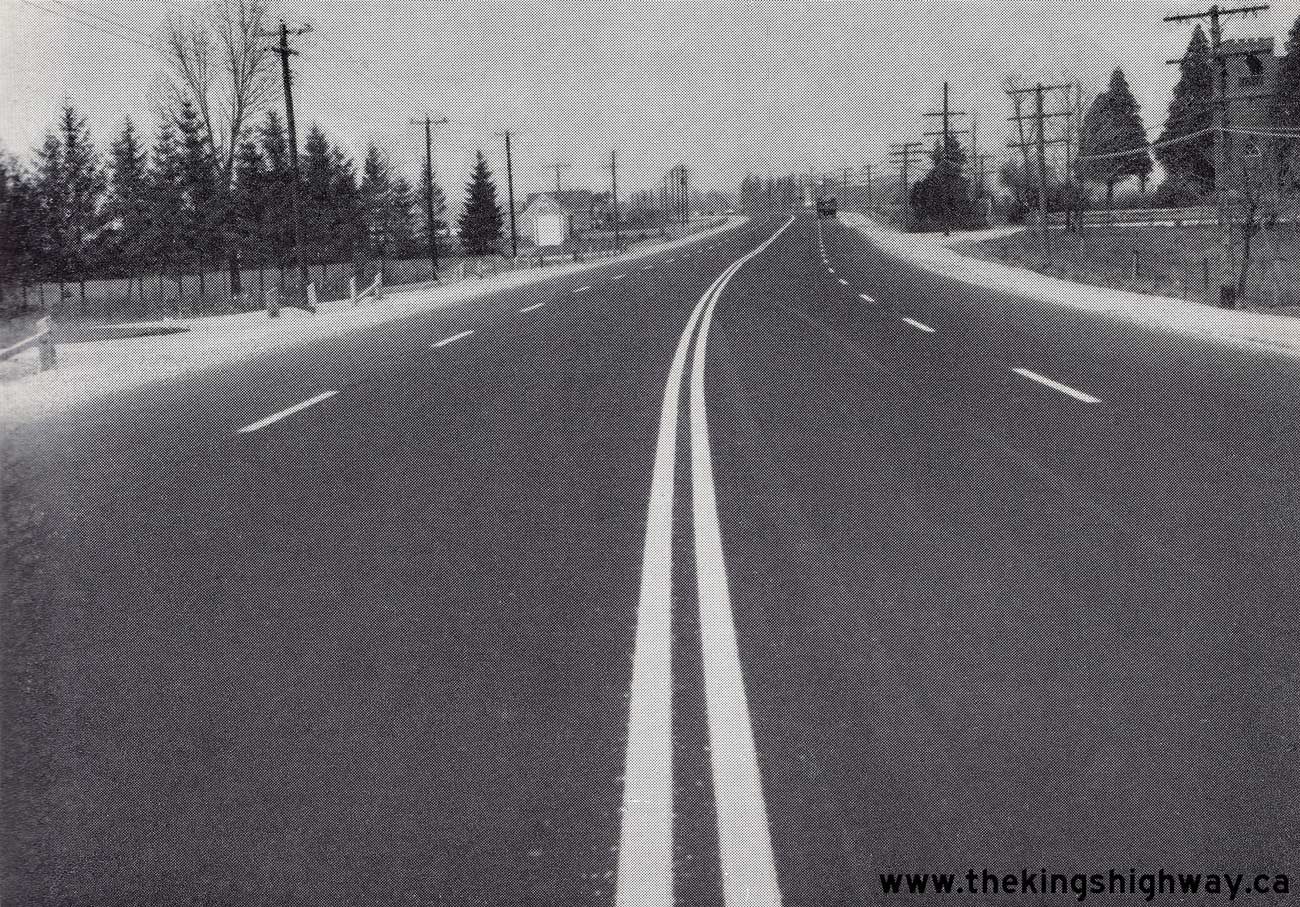
Enlarged Photo Here. Photo taken on August 30, 1956. (Photo courtesy of Ontario Ministry of Transportation - © King's Printer for Ontario, 1956) Right - Newly-constructed four-lane section of Hwy 6, facing north from Mount Hope towards Hamilton. See an Enlarged Photo Here. Photo taken on October 31, 1956. (Photo courtesy of Ontario Ministry of Transportation - © King's Printer for Ontario, 1956) 
Above - Completed grading project on Hwy 68 (later known as Hwy 6), 1 1/2 miles south of Sheguiandah. See an
Enlarged Photo Here. Photo taken in 1956. (Photo courtesy of Ontario Ministry of Transportation - © King's Printer for Ontario, 1956) 

Left - Early construction on the new Spanish River Bridge on Hwy 68 (later known as Hwy 6) in Espanola in 1958. In this photo, the north concrete bridge abutment was still being
cast. See an Enlarged Photo Here. Photo taken in 1958. (Photo courtesy of Ontario Ministry of Transportation - © King's Printer for Ontario, 1958) Right - Facing north along Hwy 68 (later known as Hwy 6) towards Little Current at the new arch culvert over Sheguiandah Creek in 1958. See an Enlarged Photo Here. Photo taken in 1958. (Photo courtesy of Ontario Ministry of Transportation - © King's Printer for Ontario, 1958) 
Above - Compacting granular base on a reconstructed section of Hwy 6 near Owen Sound in 1958. See an
Enlarged Photo Here. Photo taken in 1958. (Photo courtesy of Ontario Ministry of Transportation - © King's Printer for Ontario, 1958) 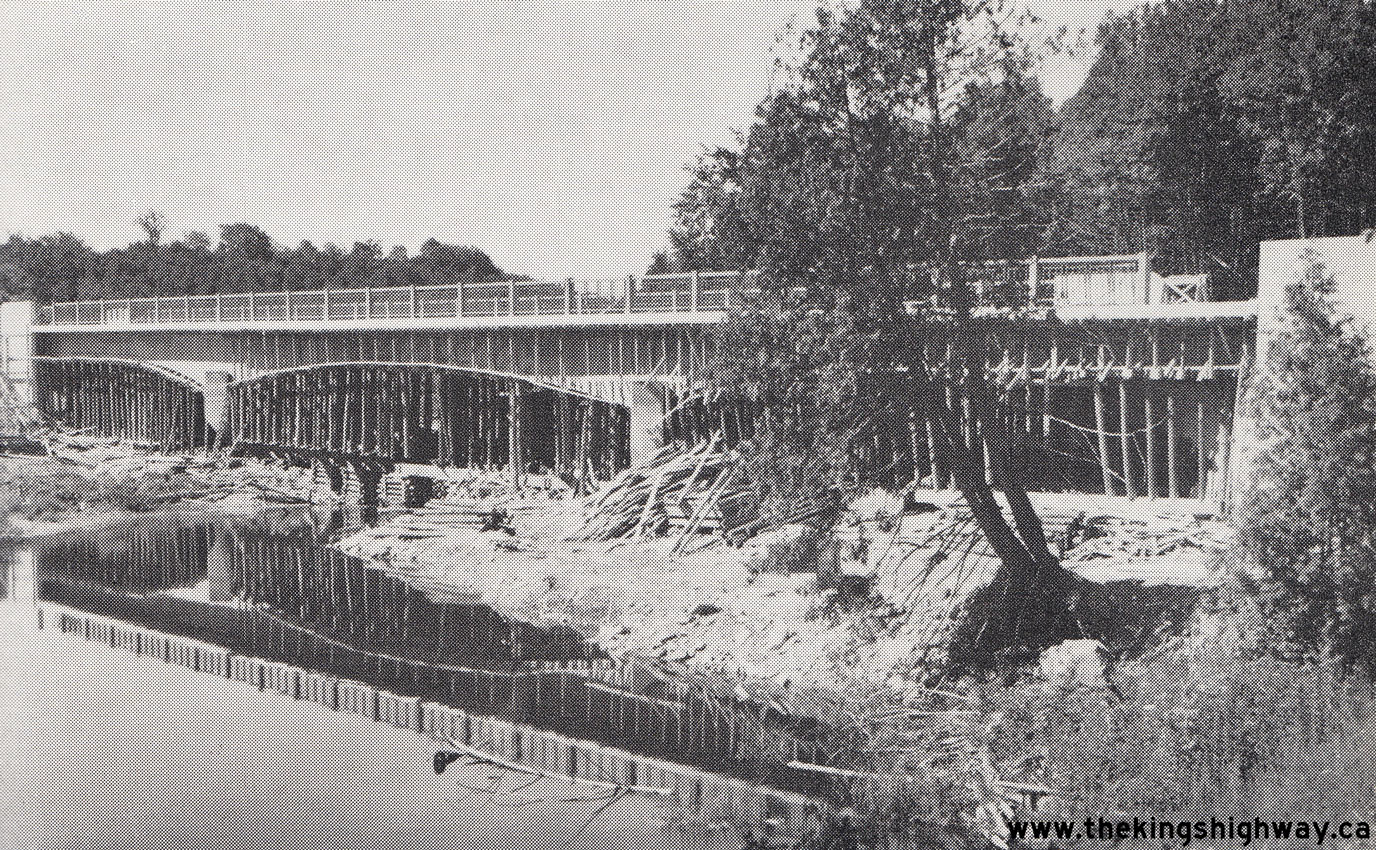

Left - New bridge under construction in 1958 over the Rocky Saugeen River on Hwy 6 north of Durham, Contract #1957-144. See an
Enlarged Photo Here. (Photo courtesy of Ontario Ministry of Transportation - © King's Printer for Ontario, 1958) Right - Circa 1958 postcard view of Hwy 6 & Hwy 10 (2nd Avenue) in Downtown Owen Sound, facing north. See an Enlarged Photo Here. Photo taken circa 1958. (Photo courtesy of Canadian Postcard Company Ltd, Toronto) 

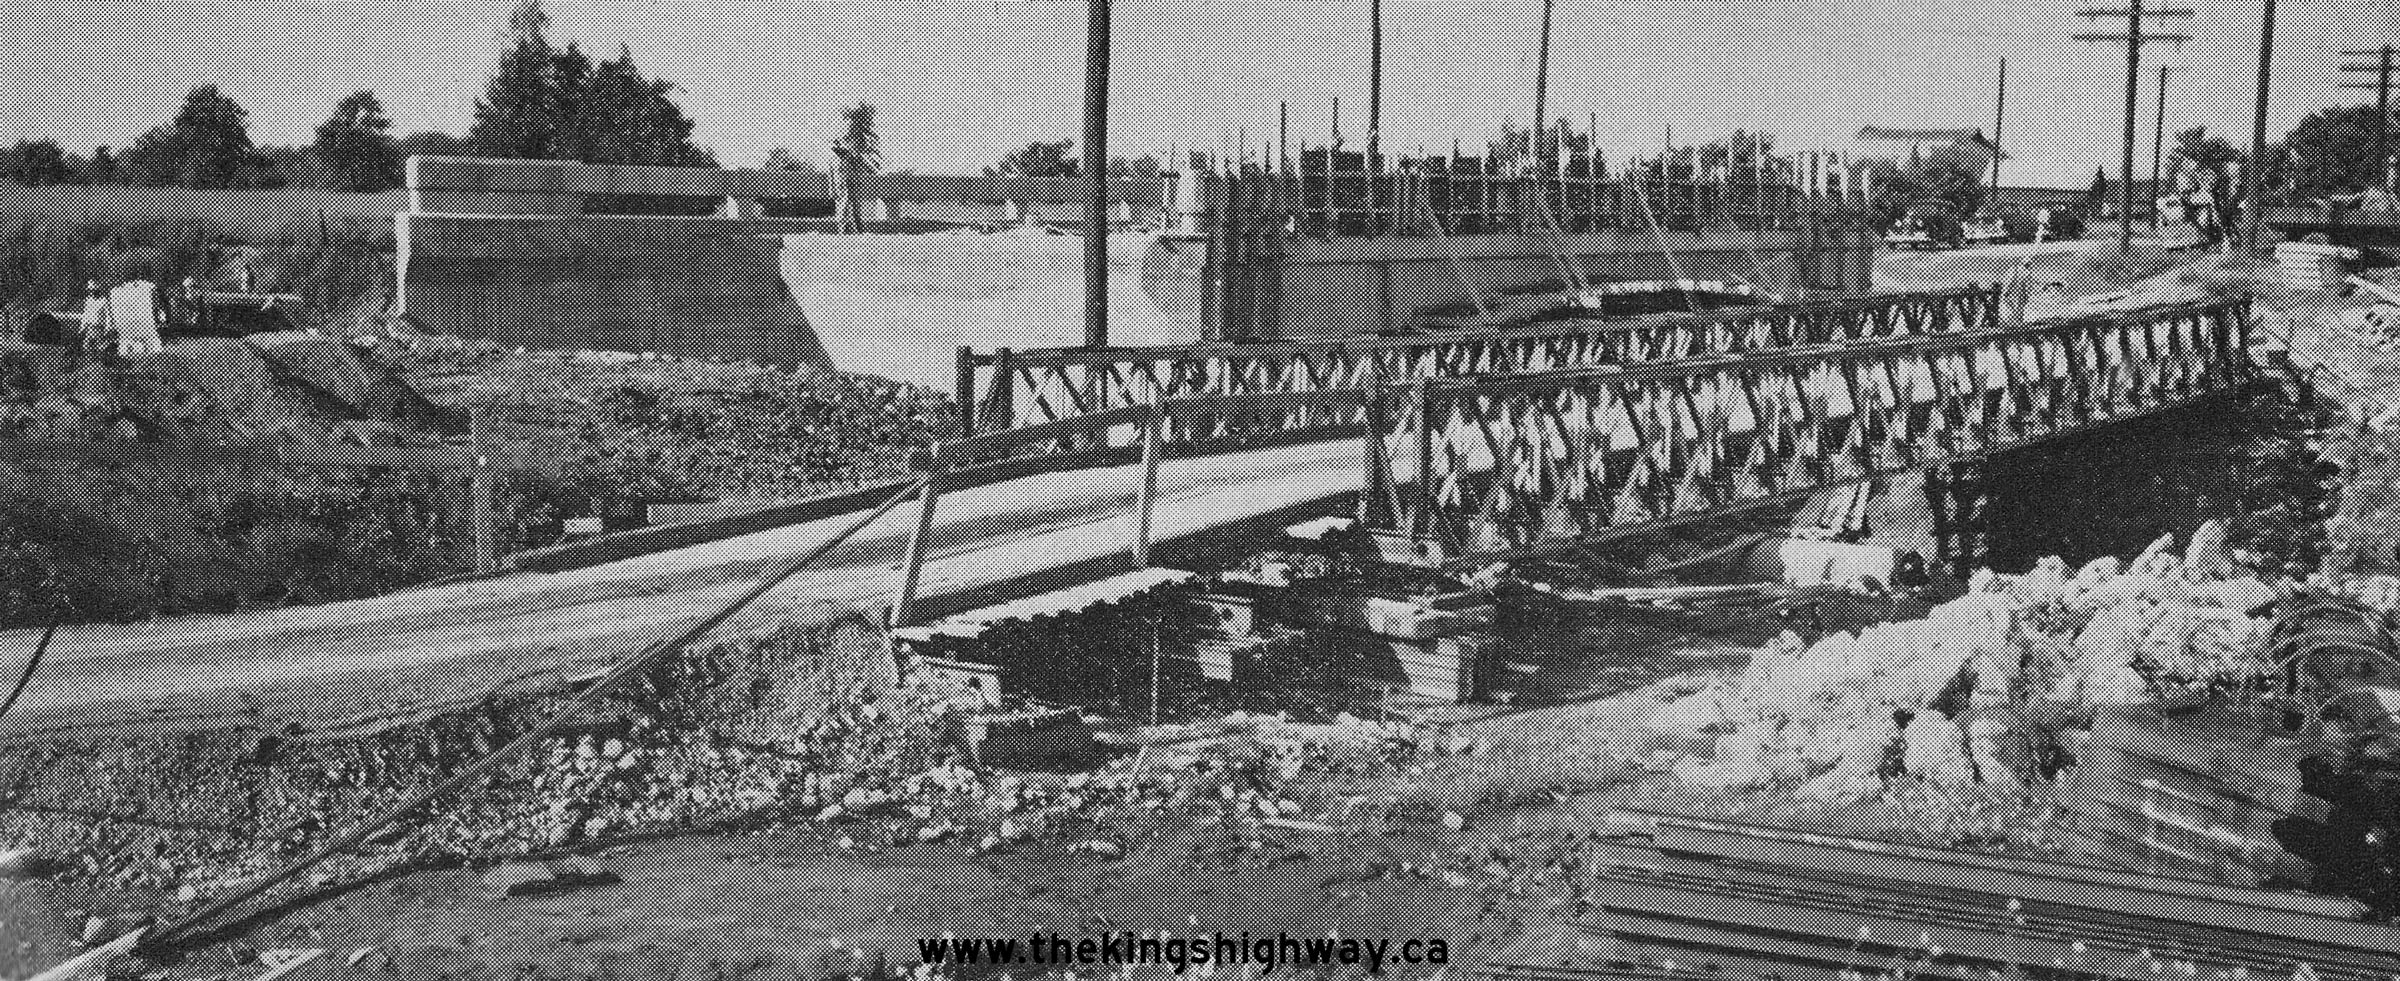
Left - Construction of the new Spanish River Bridge on Hwy 68 (later known as Hwy 6) in Espanola in 1958. Note the temporary Bailey Bridge at left, which carried traffic throughout
the construction project. In this photo, the steel deck truss construction can be seen progressing from the southern end of the bridge. The new Spanish River Bridge
opened to traffic in 1960, after three years of construction. See an Enlarged Photo Here.
Photo taken in 1958. (Photo courtesy of Ontario Ministry of Transportation - © King's Printer for Ontario, 1958) Right - Completed grading on a realignment of Hwy 68 (later known as Hwy 6) at Loon Lake 4 miles south of Espanola, Contract #1958-30. See an Enlarged Photo Here. Photo taken in 1959. (Photo courtesy of Ontario Ministry of Transportation - © King's Printer for Ontario, 1959) 

Left - Construction progress on the new Spanish River Bridge on Hwy 68 (later known as Hwy 6) in Espanola, Contract #1957-283. See an
Enlarged Photo Here. Photo taken in 1959. (Photo courtesy of Ontario Ministry of Transportation - © King's Printer for Ontario, 1959) Right - Heavy grading and excavation for a new rock cut on a realignment of Hwy 68 (later known as Hwy 6) south of Espanola, Contract #1959-90. See an Enlarged Photo Here. Photo taken in 1959. (Photo courtesy of Ontario Ministry of Transportation - © King's Printer for Ontario, 1959) 
Above - Rock excavation for a realignment of Hwy 68 (later known as Hwy 6) south of Espanola, Contract #1959-90. See an
Enlarged Photo Here. Photo taken in 1959. (Photo courtesy of Ontario Ministry of Transportation - © King's Printer for Ontario, 1959) 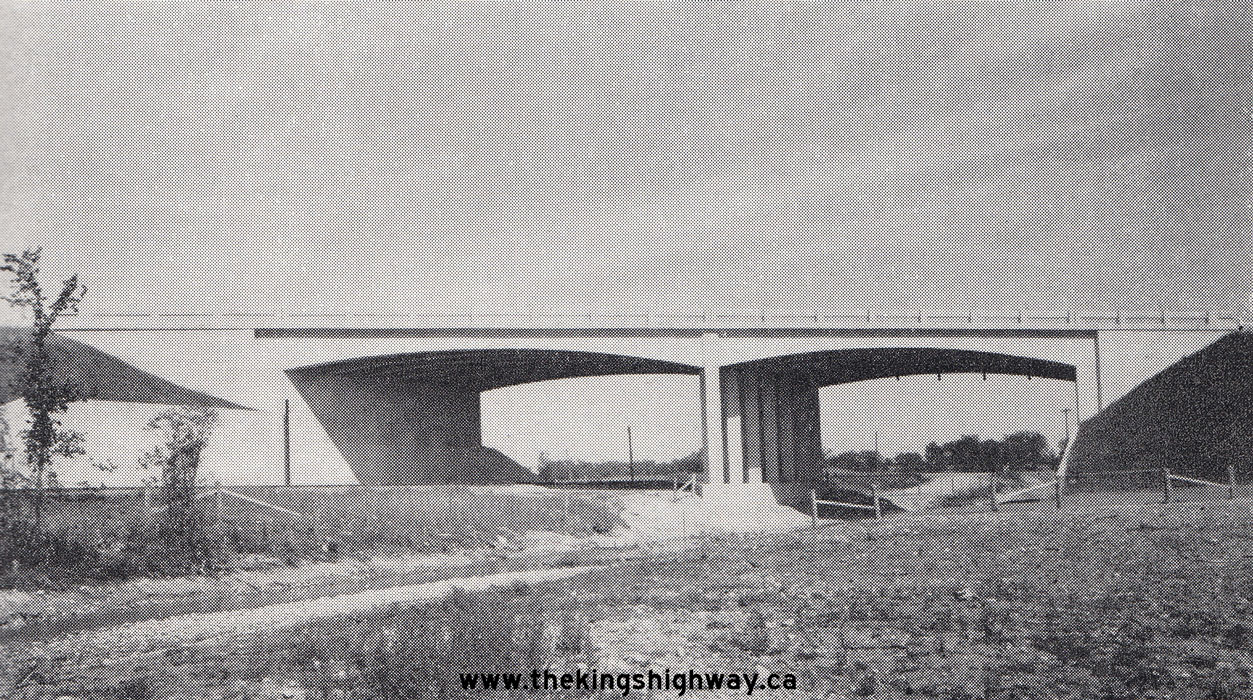
Left - Completed Bell's Creek Overhead on Hwy 6 south of Mount Forest in 1959, Contract #1957-59. This interesting structure spanned both Bell's Creek as well
as the adjacent Canadian Pacific Railway (CPR). See an Enlarged Photo Here. Photo taken in 1959. (Photo courtesy of Ontario Ministry of Transportation - © King's Printer for Ontario, 1959) Right - Completed Orchardville Diversion on Hwy 6 north of Mount Forest in 1959, facing north from the Beatty Saugeen River Culvert, Contract #1958-202. See an Enlarged Photo Here. Photo taken in 1959. (Photo courtesy of Ontario Ministry of Transportation - © King's Printer for Ontario, 1959) 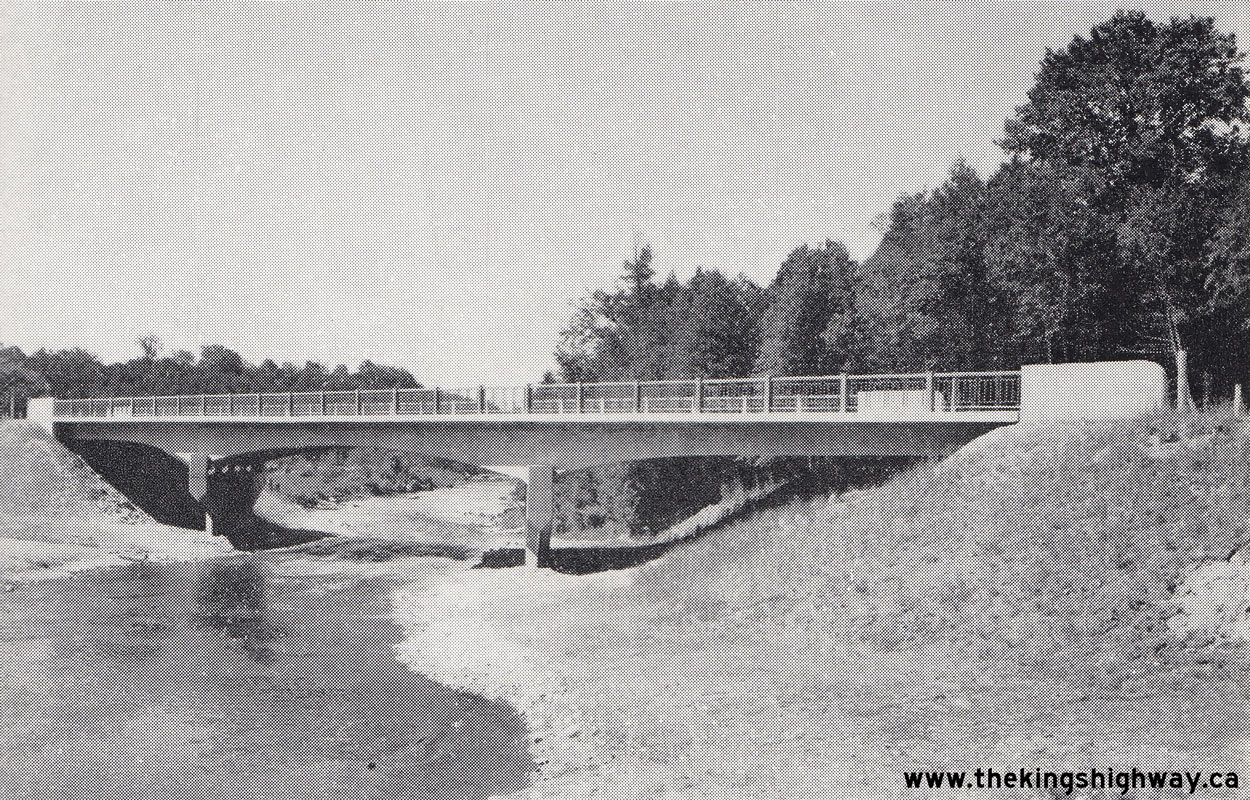
Above - Completed Rocky Saugeen River Bridge on Hwy 6 north of Durham, Contract #1957-144. See an
Enlarged Photo Here. Photo taken in 1959. (Photo courtesy of Ontario Ministry of Transportation - © King's Printer for Ontario, 1959) 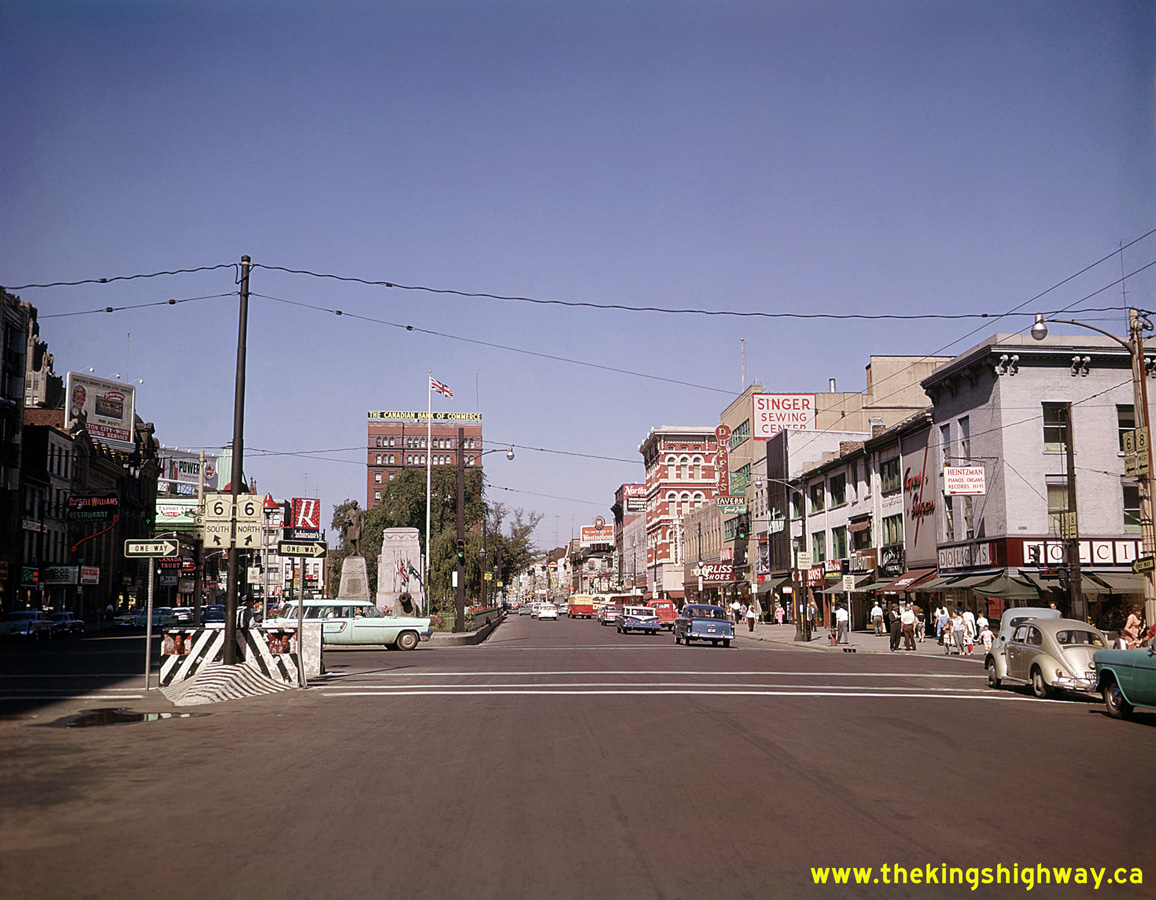
Above - View of King Street (Hwy 6 & Hwy 8) in Downtown Hamilton, facing west from John Street towards Gore Park. This 1959 photo shows the new one-way
street system introduced through Downtown Hamilton in October 1956, with all King Street traffic travelling westbound only. From John Street westerly to Dundurn
Street, Hwy 6 North and Hwy 8 West were signed concurrently via King Street, while Hwy 6 South and Hwy 8 East were signed via adjacent Main Street. This 1959 photo
shows a number of obsolete Canadian company names on storefront signs and advertising billboards, including an advertising sign for the old Robinson's Department
Store chain at left, a Canada Trust Branch, Supertest Petroleum and most notably, the Canadian Bank of Commerce building in the background. This bank merged with the
Imperial Bank of Canada in 1961 to form the Canadian Imperial Bank of Commerce (CIBC). This photo also offers a clearer view of the aforementioned Westinghouse Canada
advertising sign with its digital clock below it, indicating that this photo was taken at 11:11 am. See an
Enlarged Photo Here. Photo taken in 1959. (Photo © Archives of Ontario - Series RG-65-35, Photo #I-0005705)
Continue to King's Highway 6 Historical Photos from 1960 to 1969
|
|---|
Links to Adjacent King's Highway Photograph Pages:
Back to King's Highway 5 Photos /
King's Highway 6 History /
On to King's Highway 7 Photos
Ontario Highway History - Main Menu / Back to List of Highways Website contents, photos & text © 2002-2026, Cameron
Bevers (Webmaster) - All Rights Reserved / Contact Me
|
|---|