
| 
| |
|
|
This page contains historical and present day photos of Ontario's King's Highway 83. All photographs displayed on this page
were taken by the Webmaster (Cameron Bevers), unless specifically noted otherwise. Historical photographs are arranged in approximate chronological order, while
present day photographs (Year 2000 to date) are arranged by location from east to west. Click on any thumbnail to see a larger image!
Please note that all photographs displayed on this
website are protected by copyright. These photographs must not be reproduced, published,
electronically stored or copied, distributed, or posted onto other websites without
my written permission. If you want to use photos from this website, please
email me first for permission. Thank-you!
|
|---|
|
Historical King's Highway 83 Photographs

Above - Widened roadway platform along Hwy 83, 5 miles east of Exeter in 1954. Many of Ontario's King's Highways only had a 66-foot road right-of-way when they
were first assumed. Over the years, the right-of-way was expanded to 100 feet, which allowed for the accommodation of a highway with adequate shoulder and lane widths,
proper roadside drainage ditches and a safe setback for any roadside utility poles. This photo shows the narrow original route of Hwy 83 at right along with the
newly-widened roadway platform at left. Photo taken on August 19, 1954. (Photo courtesy of Ontario Ministry of Transportation - © King's Printer for Ontario, 1954) 
Above - Hwy 83 and Hwy 23 King's Highway route markers at Russeldale in 1996. See an
Enlarged Photo Here. (Photo courtesy of Roger Fox - © 1996) |
|---|
|
Present Day King's Highway 83 Photographs


Left - Facing south along Hwy 23 approaching the Hwy 83 Junction (now Perth Line 20) at Russeldale. The small community of Russeldale was bypassed by a small diversion around the
western side of the community in 1939, in order to eliminate two turns in the original route of Hwy 23. See an Enlarged Photo Here. (Photograph taken on May 17, 2009 - © Cameron Bevers) Right - Facing north along Hwy 23 towards Mitchell from the Hwy 83 Junction at Russeldale. The original alignment of Hwy 23 through Russeldale can be seen approaching the current route of the highway in the background at right. See an Enlarged Photo Here. (Photograph taken on May 17, 2009 - © Cameron Bevers) 

Left - Facing south towards the junction of Hwy 23 & Hwy 83 at Russeldale. Before the Russeldale Diversion was built in 1939, the two highways met near the
hydro pole just to the right of the centre of this photograph. The diversion was built to remove two turns in the original route of Hwy 23 at Russeldale. See an
Enlarged Photo Here. (Photograph taken on May 17, 2009 - © Cameron Bevers) Right - Facing west along Hwy 83 from the Hwy 23 Junction at Russeldale. The entire route of Hwy 83 was downloaded from the province to the Counties of Perth and Huron in 1997. While Huron County decided to number its downloaded section of Hwy 83 as Huron Road 83, Perth elected to number their downloaded section of Hwy 83 as Perth Line 20. See an Enlarged Photo Here. (Photograph taken on May 17, 2009 - © Cameron Bevers) 

Left - Eastern terminus of Hwy 83 at the Hwy 23 Junction at Russeldale. See an
Enlarged Photo Here. (Photograph taken on May 17, 2009 - © Cameron Bevers) Right - Approaching the Hwy 83 Junction on northbound Hwy 23 at Russeldale. See an Enlarged Photo Here. (Photograph taken on May 17, 2009 - © Cameron Bevers) 

Left - The construction of the Russeldale Diversion in 1939 established Hwy 23 as the through highway at this junction. However, it left behind a badly-skewed
intersection at Hwy 23, Hwy 83 and Perth Line 20. The intersection was realigned several decades ago, so that the highways intersected at right angles. See an
Enlarged Photo Here. (Photograph taken on May 17, 2009 - © Cameron Bevers) Right - Facing south along Hwy 23 towards London from the Hwy 83 Junction south of Mitchell. See an Enlarged Photo Here. (Photograph taken on May 17, 2009 - © Cameron Bevers) 

Left - Junction assembly and destination guide signs at the Hwy 23 & Hwy 83 Junction at Russeldale, south of Mitchell. See an
Enlarged Photo Here. (Photograph taken on May 17, 2009 - © Cameron Bevers) Right - Facing west along Perth Line 20 approaching the Hwy 23 & Hwy 83 Junction at Russeldale. This section of Perth Line 20 was in fact the original route of Hwy 23 up until the completion of the Russeldale Diversion in 1939. Although the original highway alignment was graded out and is no longer visible, Hwy 23 used to turn left about 80 metres beyond the present-day intersection. See an Enlarged Photo Here. (Photograph taken on May 17, 2009 - © Cameron Bevers) 

Left - Facing east along Hwy 83 towards Russeldale at the Flat Creek Bridge. See an
Enlarged Photo Here. (Photograph taken on October 7, 2006 - © Cameron Bevers) Right - Northern side of the Flat Creek Bridge on Hwy 83. This single span concrete rigid frame structure was completed in 1949. See an Enlarged Photo Here. (Photograph taken on October 7, 2006 - © Cameron Bevers) 

Left - Gardiner's Grove on Hwy 83 was once the site of a Ministry of Transportation Roadside Park and Picnic Area. See an
Enlarged Photo Here. (Photograph taken on October 7, 2006 - © Cameron Bevers) Right - The former entrance to this abandoned picnic area lies behind the orange fence. See an Enlarged Photo Here. (Photograph taken on October 7, 2006 - © Cameron Bevers) 

Left - The Gardiner's Grove Picnic Area was closed in the 1990s, but traces of the old roadways through the park are still faintly visible. See an
Enlarged Photo Here. (Photograph taken on October 7, 2006 - © Cameron Bevers) Right - Sign commemorating the planting of Gardiner's Grove in 1937. See an Enlarged Photo Here. (Photograph taken on October 7, 2006 - © Cameron Bevers) 

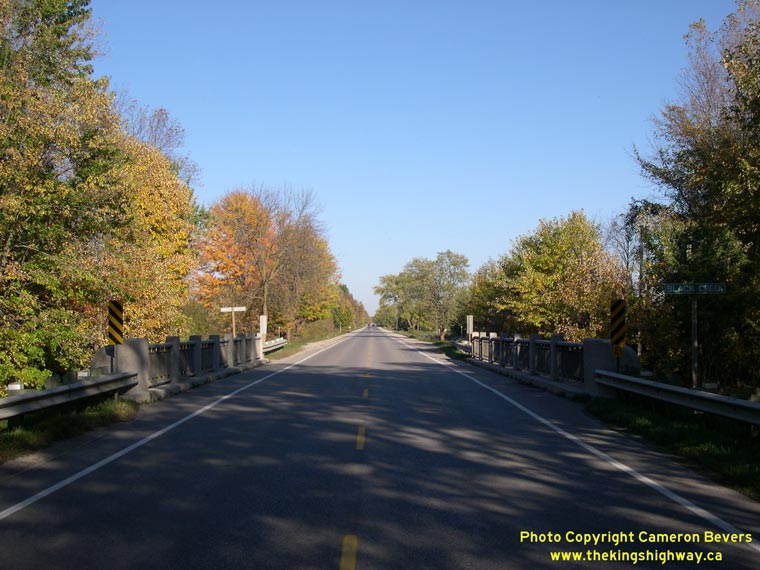
Left - Facing east along Hwy 83 towards Russeldale at the Ausable River Bridge east of Exeter. See an
Enlarged Photo Here. (Photograph taken on October 7, 2006 - © Cameron Bevers) Right - Southern side of the Ausable River Bridge on Hwy 83. This single span concrete rigid frame structure was completed in 1938. See an Enlarged Photo Here. (Photograph taken on October 7, 2006 - © Cameron Bevers) 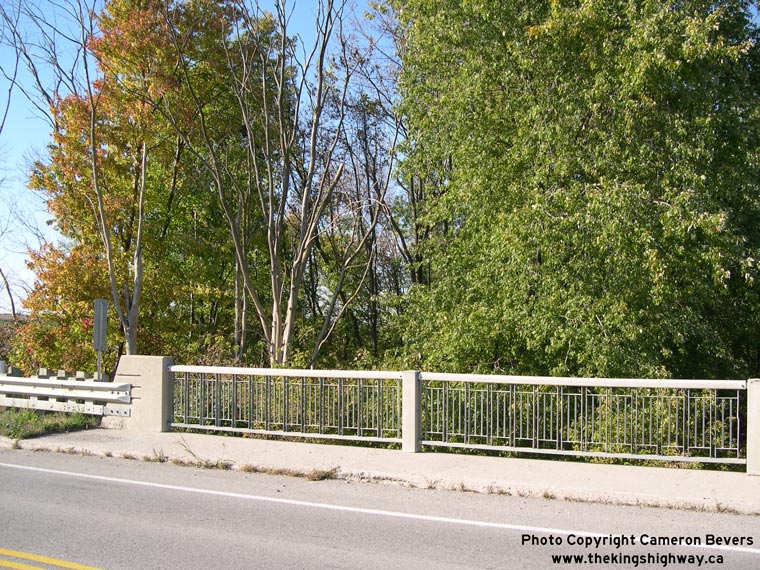

Left - Close-up of the steel and concrete handrail design on the Ausable River Bridge on Hwy 83. The original handrails of this structure were replaced during
a recent bridge rehabilitation project, but are at least somewhat similar to the original design. All too often, older steel bridge handrails are replaced with ugly
concrete barriers, which seriously detract from the bridge's overall aesthetic and historic appeal. See an
Enlarged Photo Here. (Photograph taken on October 7, 2006 - © Cameron Bevers) Right - Northern side of the Ausable River Bridge on Hwy 83 east of Exeter. At a length of 65 feet (20 metres), this bridge was one of the longest concrete rigid frame structures built in Ontario during the 1930s. See an Enlarged Photo Here. (Photograph taken on October 7, 2006 - © Cameron Bevers) 

Left - Facing north along Main Street (Hwy 4) approaching the Hwy 83 Junction in Exeter. See an
Enlarged Photo Here. (Photograph taken on May 17, 2009 - © Cameron Bevers) Right - Facing south along Main Street (Hwy 4) in Exeter from the Hwy 83 Junction. See an Enlarged Photo Here. (Photograph taken on May 17, 2009 - © Cameron Bevers) 

Left - Destination guide sign on westbound Hwy 83 in Exeter, approaching the Hwy 4 Junction. See an
Enlarged Photo Here. (Photograph taken on May 17, 2009 - © Cameron Bevers) Right - Facing east along Hwy 83 towards the Hwy 4 Junction in Exeter. See an Enlarged Photo Here. (Photograph taken on May 17, 2009 - © Cameron Bevers) 

Left - Sign assembly marking the Hwy 83 Junction on Hwy 4 in Exeter. The routes of Hwy 4 & Hwy 83 have met at this junction ever since Hwy 83 was first
established as a King's Highway in 1938. The entire route of Hwy 83 was turned over to Huron County in 1997, during the highway downloading spree. This former King's
Highway is now maintained by Huron County. See an Enlarged Photo Here. (Photograph taken on May 17, 2009 - © Cameron Bevers) Right - Sign assembly in Exeter marking the Hwy 4 Junction on westbound Hwy 83. See an Enlarged Photo Here. (Photograph taken on May 17, 2009 - © Cameron Bevers) 

Left - Facing west along Hwy 83 towards Grand Bend from the Hwy 4 Junction in Exeter. See an
Enlarged Photo Here. (Photograph taken on May 17, 2009 - © Cameron Bevers) Right - Facing east along Hwy 83 towards Russeldale from the Hwy 4 Junction in Exeter. See an Enlarged Photo Here. (Photograph taken on May 17, 2009 - © Cameron Bevers) 

Left - Facing north along Hwy 4 from the Hwy 83 Junction in Exeter. See an
Enlarged Photo Here. (Photograph taken on May 17, 2009 - © Cameron Bevers) Right - Facing east along Hwy 83 between Exeter and Dashwood. See an Enlarged Photo Here. (Photograph taken on May 17, 2009 - © Cameron Bevers) 

Left - Facing east along Hwy 83 towards Exeter at the Ausable River Bridge. See an
Enlarged Photo Here. (Photograph taken on October 7, 2006 - © Cameron Bevers) Right - Northern side of the Ausable River steel truss bridge on Hwy 83. Structure completed in 1949. See an Enlarged Photo Here. (Photograph taken on October 7, 2006 - © Cameron Bevers) 

Left - The Ausable River Bridge on Hwy 83 west of Exeter is a Warren type steel truss bridge. See an
Enlarged Photo Here. (Photograph taken on October 7, 2006 - © Cameron Bevers) Right - Southern side of the Ausable River Bridge on Hwy 83 west of Exeter. See an Enlarged Photo Here. (Photograph taken on October 7, 2006 - © Cameron Bevers) 

Left - Facing west along Hwy 83 towards Grand Bend at the Ausable River Bridge. See an
Enlarged Photo Here. (Photograph taken on October 7, 2006 - © Cameron Bevers) Right - Bridge manufacturer's plaque on the Ausable River Bridge on Hwy 83 west of Exeter. Note that the manufacturing date was 1947, two years before the bridge was opened to traffic. This situation was common in Ontario in the late 1940s, as post-war shortages of materials and labour often resulted in construction project delays. See an Enlarged Photo Here. (Photograph taken on October 7, 2006 - © Cameron Bevers) 
Left - Northern side of the Ausable River Bridge on Hwy 83 west of Exeter. See an
Enlarged Photo Here. (Photograph taken on October 7, 2006 - © Cameron Bevers) Right - Facing east along Hwy 83 towards Exeter at the Black River Bridge. See an Enlarged Photo Here. (Photograph taken on October 7, 2006 - © Cameron Bevers) 

Left - Steel and concrete handrail design of the Black River Bridge on Hwy 83 west of Exeter. See an
Enlarged Photo Here. (Photograph taken on October 7, 2006 - © Cameron Bevers) Right - Southern side of the Black River Bridge. This single span concrete rigid frame structure was completed in 1948. See an Enlarged Photo Here. (Photograph taken on October 7, 2006 - © Cameron Bevers) 

Left - A 1947-dated catch basin cover on the Black River Bridge on Hwy 83. See an
Enlarged Photo Here. (Photograph taken on October 7, 2006 - © Cameron Bevers) Right - Northern side of the Black River Bridge on Hwy 83 west of Exeter. See an Enlarged Photo Here. (Photograph taken on October 7, 2006 - © Cameron Bevers) 
Above - Stylish curved concrete handrail of the Black River Bridge on Hwy 83 near Exeter. See an
Enlarged Photo Here. (Photograph taken on October 7, 2006 - © Cameron Bevers) 
Above - Close-up of the curved concrete handrail of the Black River Bridge on Hwy 83 west of Exeter. Modest decorative features such as this are so simple to
incorporate into bridge designs, yet they seldom are these days. It is very unfortunate that the style and imagination that went into bridge design in the first half
of the 20th Century were carelessly tossed aside over the past five decades in the interest of uniformity, minimalism and gratuitous economy. See an
Enlarged Photo Here. (Photograph taken on October 7, 2006 - © Cameron Bevers)
More King's Highway 83 Photographs Coming Soon!
|
|---|
Links to Adjacent King's Highway Photograph Pages:
Back to King's Highway 82 Photos /
King's Highway 83 History /
Back to King's Highway 84 Photos
Ontario Highway History - Main Menu / Back to List of Highways Website contents, photos & text © 2002-2026, Cameron
Bevers (Webmaster) - All Rights Reserved / Contact Me
|
|---|