
| 
| |
|
|
This page contains photographs of British Columbia's Highway 3A arranged by location from Balfour westerly to Nelson. All
photographs displayed on this page were taken by the Webmaster (Cameron Bevers). To view photos of other British Columbia Highways, please select a highway number
listed on the British Columbia Photograph Index Page. Click on any thumbnail to see a larger
image!
Please note that all photographs displayed on this website are protected by copyright. These photographs must not be
reproduced, published, electronically stored or copied, distributed, or posted onto other websites without my written permission. If you want to use photos from this
website, please email me first for permission. Thank-you!
|
|---|
|
Page 2: BC Highway 3A Photographs: Balfour to Nelson


Left - The Kootenay Lake Ferry is seen departing from the Balfour Ferry Terminal. This ferry links the otherwise discontinuous eastern section of Hwy 3A
between Creston and Kootenay Bay together. The Kootenay Lake Ferry links Balfour to another ferry terminal on Hwy 3A across the lake at Kootenay Bay. See an
Enlarged Photo Here. (Photograph taken on June 5, 2017 - © Cameron Bevers) Right - View of the Balfour Ferry Dock on Hwy 3A. This ferry service between Balfour and Kootenay Bay is offered free of charge by British Columbia's Ministry of Transportation, since the ferry service provides a critical link in the provincial highway system. However, at one time, fares were collected from ferry patrons. Fare collection on the ferry was discontinued in 1963, once a new highway route was punched through Kootenay Pass between Creston and Selmo. The small white building in the foreground was presumably used at one time as a fare collector's booth. See an Enlarged Photo Here. (Photograph taken on June 5, 2017 - © Cameron Bevers) 

Left - The Balfour Ferry Dock extends a fair distance out into Kootenay Lake, on a pier constructed mostly of timber bents. See an
Enlarged Photo Here. (Photograph taken on June 5, 2017 - © Cameron Bevers) Right - The M.V. Osprey 2000 Ferry is loaded with Hwy 3A traffic just prior to departure from Balfour. With the high peaks of the Nelson Range visible in the background, it's fairly obvious why ferry transportation was substituted for highway construction in this part of BC. Until a highway was constructed through Kootenay Pass west of Creston in the early 1960s, all east-west highway transportation in the southern portion of BC had to use the Kootenay Lake Ferry to pass through the mountains. See an Enlarged Photo Here. (Photograph taken on June 5, 2017 - © Cameron Bevers) 

Left - Sign on Hwy 3A at the Balfour Ferry Terminal showing the schedule for the Kootenay Lake Ferry. The route of Hwy 3A crosses Kootenay Lake via the ferry
crossing. The ferry dock at Balfour lies part-way between Creston and Nelson. The ferry offers crossings throughout the day from 6:30 am to 9:40 pm, departing from
Balfour Ferry Terminal at roughly 1 hour, 40 minute intervals. The ferry crossing takes about 40 minutes. See an
Enlarged Photo Here. (Photograph taken on June 5, 2017 - © Cameron Bevers) Right - View of the Kootenay Lake Ferry Staging Area from the Hwy 3A & Hwy 31 Junction in Balfour. Vehicles line up and wait for the ferry loading to begin. See an Enlarged Photo Here. (Photograph taken on June 5, 2017 - © Cameron Bevers) 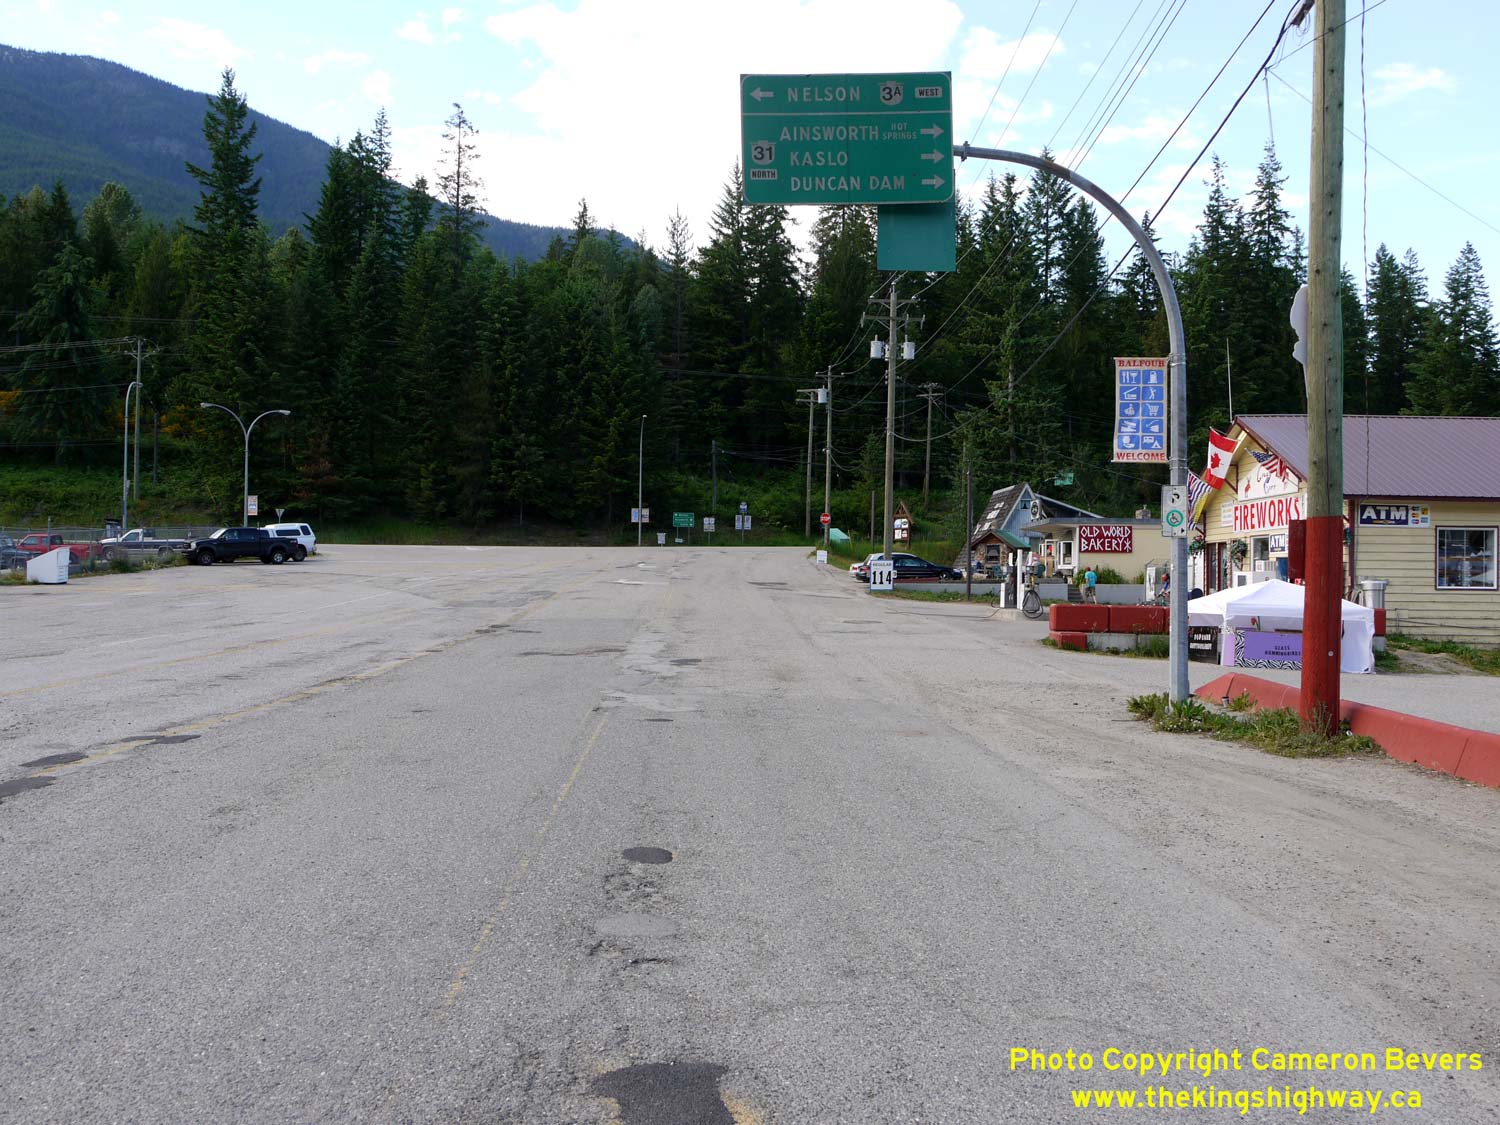

Left - Overhead guide sign at the Balfour Ferry Terminal. Hwy 3A intersects with Hwy 31 immediately after the exit from the ferry. See an
Enlarged Photo Here. (Photograph taken on June 5, 2017 - © Cameron Bevers) Right - Junction signs at the Hwy 3A & Hwy 31 Junction at the exit from the Balfour Ferry Terminal. At the junction, Hwy 3A turns left and resumes its route west towards Nelson and Castlegar, while Hwy 31 turns right and heads north towards Kaslo. Ultimately, Hwy 31 connects to Hwy 23 at Galena Bay south of Revelstoke. See an Enlarged Photo Here. (Photograph taken on June 5, 2017 - © Cameron Bevers) 

Left - Facing north along Hwy 31 towards Kaslo from the Hwy 3A Junction in Balfour. See an
Enlarged Photo Here. (Photograph taken on June 5, 2017 - © Cameron Bevers) Right - Junction signs approaching the Hwy 3A Junction on southbound Hwy 31 in Balfour. At the junction, Hwy 3A West continues ahead towards Nelson, while Hwy 3A East turns left into the Balfour Ferry Dock. Although it isn't indicated on any signs, Hwy 31 ends at this junction. See an Enlarged Photo Here. (Photograph taken on June 5, 2017 - © Cameron Bevers) 

Left - Approaching the Hwy 3A Junction on southbound Hwy 31 in Balfour. See an
Enlarged Photo Here. (Photograph taken on June 5, 2017 - © Cameron Bevers) Right - After travelling almost 175 km south from Galena Bay, Hwy 31 reaches its southern terminus in Balfour at the Hwy 3A Junction. See an Enlarged Photo Here. (Photograph taken on June 5, 2017 - © Cameron Bevers) 

Left - Overhead guide sign on southbound Hwy 31 at the Hwy 3A Junction. See an
Enlarged Photo Here. (Photograph taken on June 5, 2017 - © Cameron Bevers) Right - Hwy 3A approaches the turn-off to the Balfour Ferry Terminal. From here, traffic can either turn right and take the Kootenay Lake Ferry and Hwy 3A East towards Creston or continue straight ahead and head north towards Kaslo via Hwy 31. See an Enlarged Photo Here. (Photograph taken on June 5, 2017 - © Cameron Bevers) 

Left - Facing west along Hwy 3A from the Hwy 31 Junction in Balfour. See an
Enlarged Photo Here. (Photograph taken on June 5, 2017 - © Cameron Bevers) Right - Overhead guide sign on eastbound Hwy 3A at the Hwy 31 Junction. See an Enlarged Photo Here. (Photograph taken on June 5, 2017 - © Cameron Bevers) 

Left - Junction assembly approaching the Hwy 3A & Hwy 31 Junction in Balfour, facing east. See an
Enlarged Photo Here. (Photograph taken on June 5, 2017 - © Cameron Bevers) Right - Facing east along Hwy 3A in Balfour, approaching the Hwy 31 Junction. See an Enlarged Photo Here. (Photograph taken on June 5, 2017 - © Cameron Bevers) 

Left - Distance guide sign on eastbound Hwy 3A between Nelson and Balfour. See an
Enlarged Photo Here. (Photograph taken on June 12, 2017 - © Cameron Bevers) Right - Distance guide sign on Hwy 3A west of Balfour indicating the distance to the Kootenay Lake Ferry Terminal. See an Enlarged Photo Here. (Photograph taken on June 12, 2017 - © Cameron Bevers) 

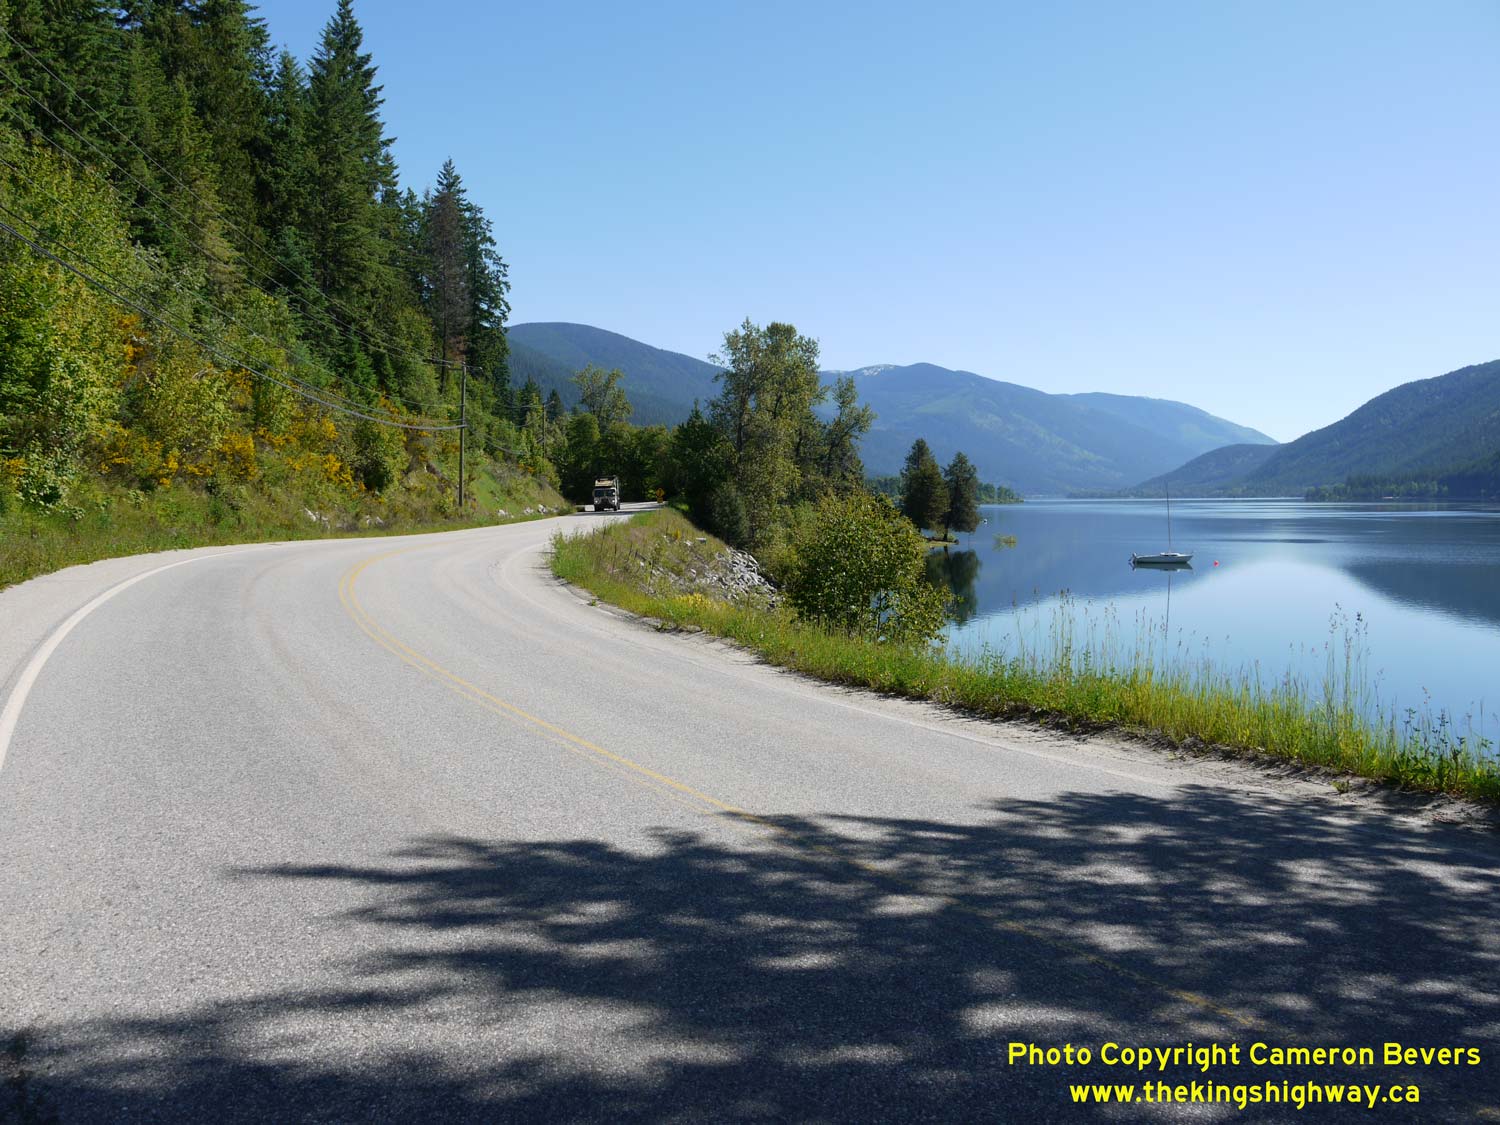
Left - Facing west along Hwy 3A towards Nelson, about 10 km west of Balfour. See an
Enlarged Photo Here. (Photograph taken on June 12, 2017 - © Cameron Bevers) Right - Hwy 3A winds its way east along an arm of Kootenay Lake towards Balfour, about 20 km east of Nelson. This long arm of Kootenay Lake extends west from Balfour to Nelson, where the lake ultimately drains out into the Kootenay River at Grohman Narrows. See an Enlarged Photo Here. (Photograph taken on June 12, 2017 - © Cameron Bevers) 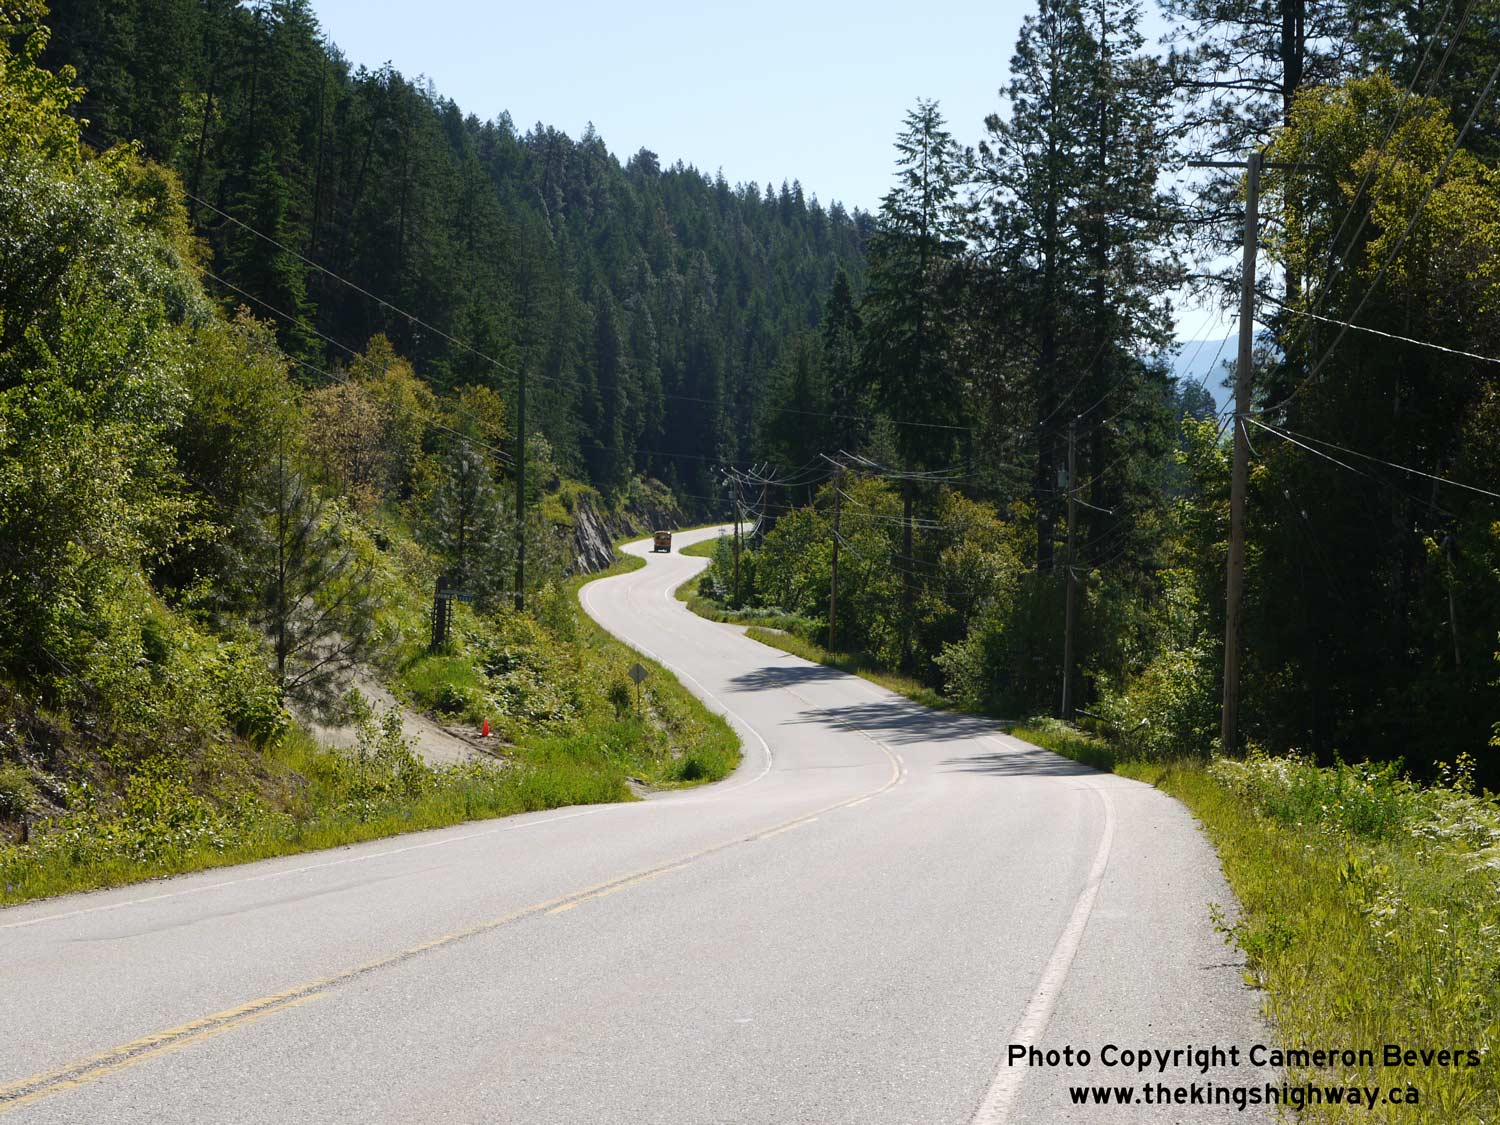
Left - For much of its route between Nelson and Balfour, Hwy 3A is pinched between the high mountains of the Kokanee Range and Kootenay Lake. Accordingly, the
highway alignment is very constrained in places. This section of Hwy 3A is located about 11 km west of Balfour. See an
Enlarged Photo Here. (Photograph taken on June 12, 2017 - © Cameron Bevers) Right - Facing east along Hwy 3A at the Kokanee Creek Bridge, located about 13 km west of Balfour. See an Enlarged Photo Here. (Photograph taken on June 12, 2017 - © Cameron Bevers) 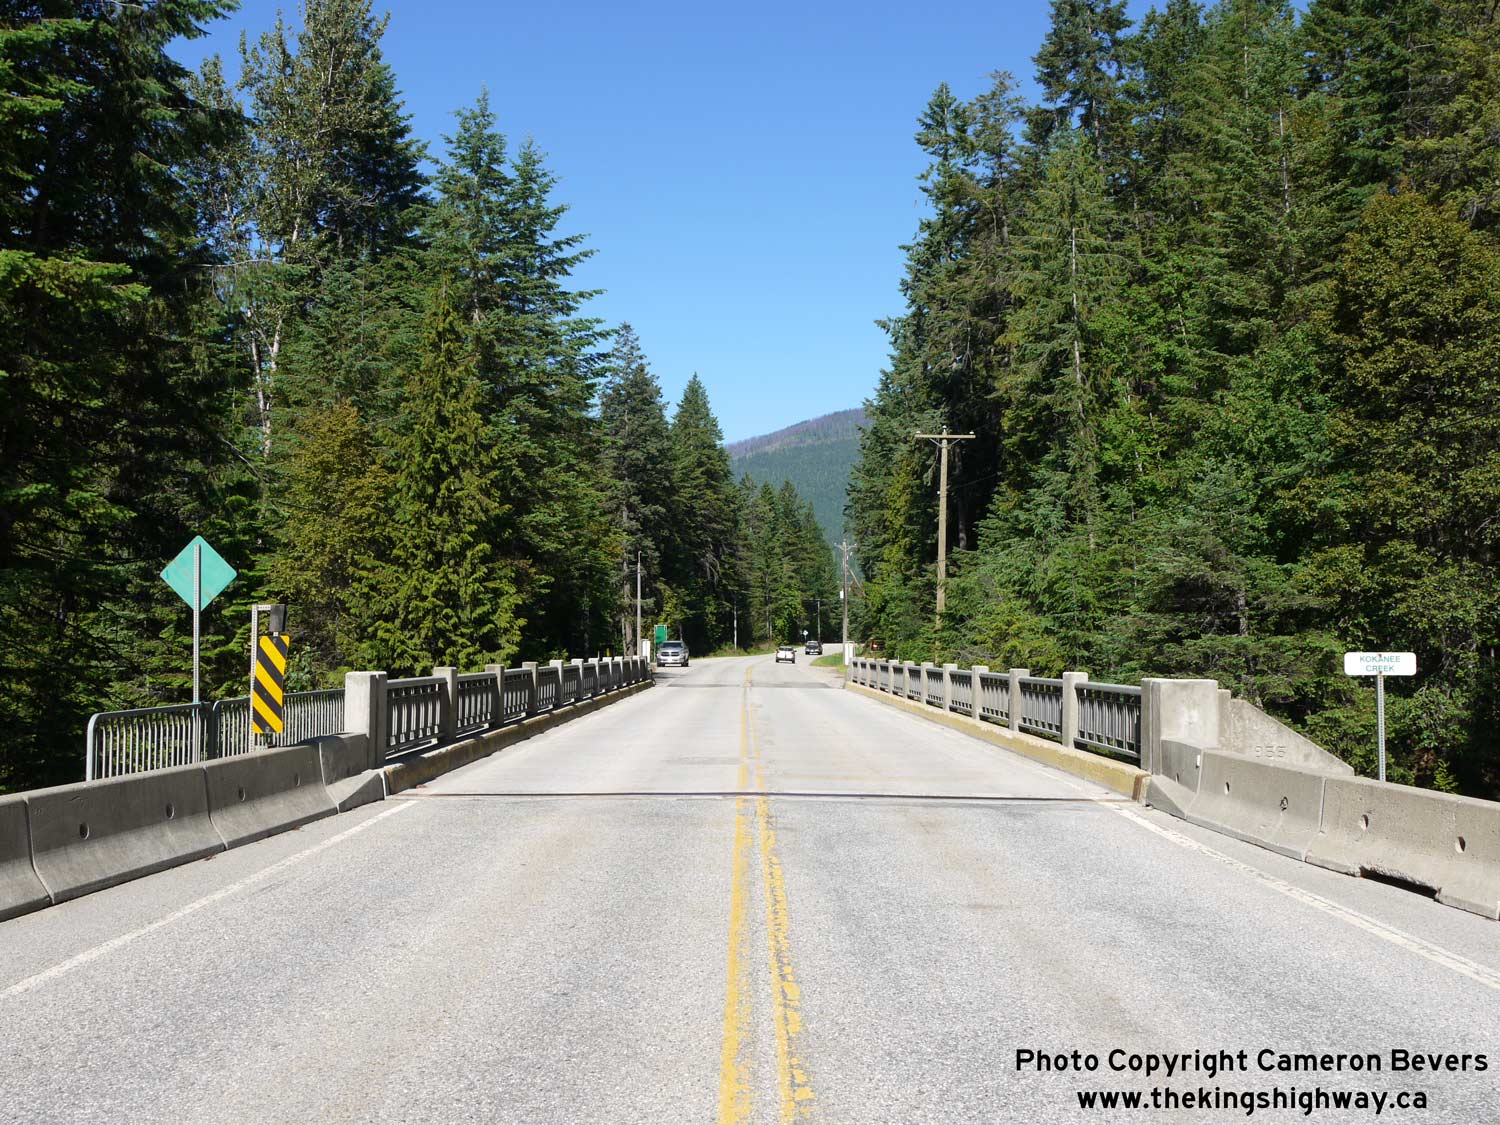
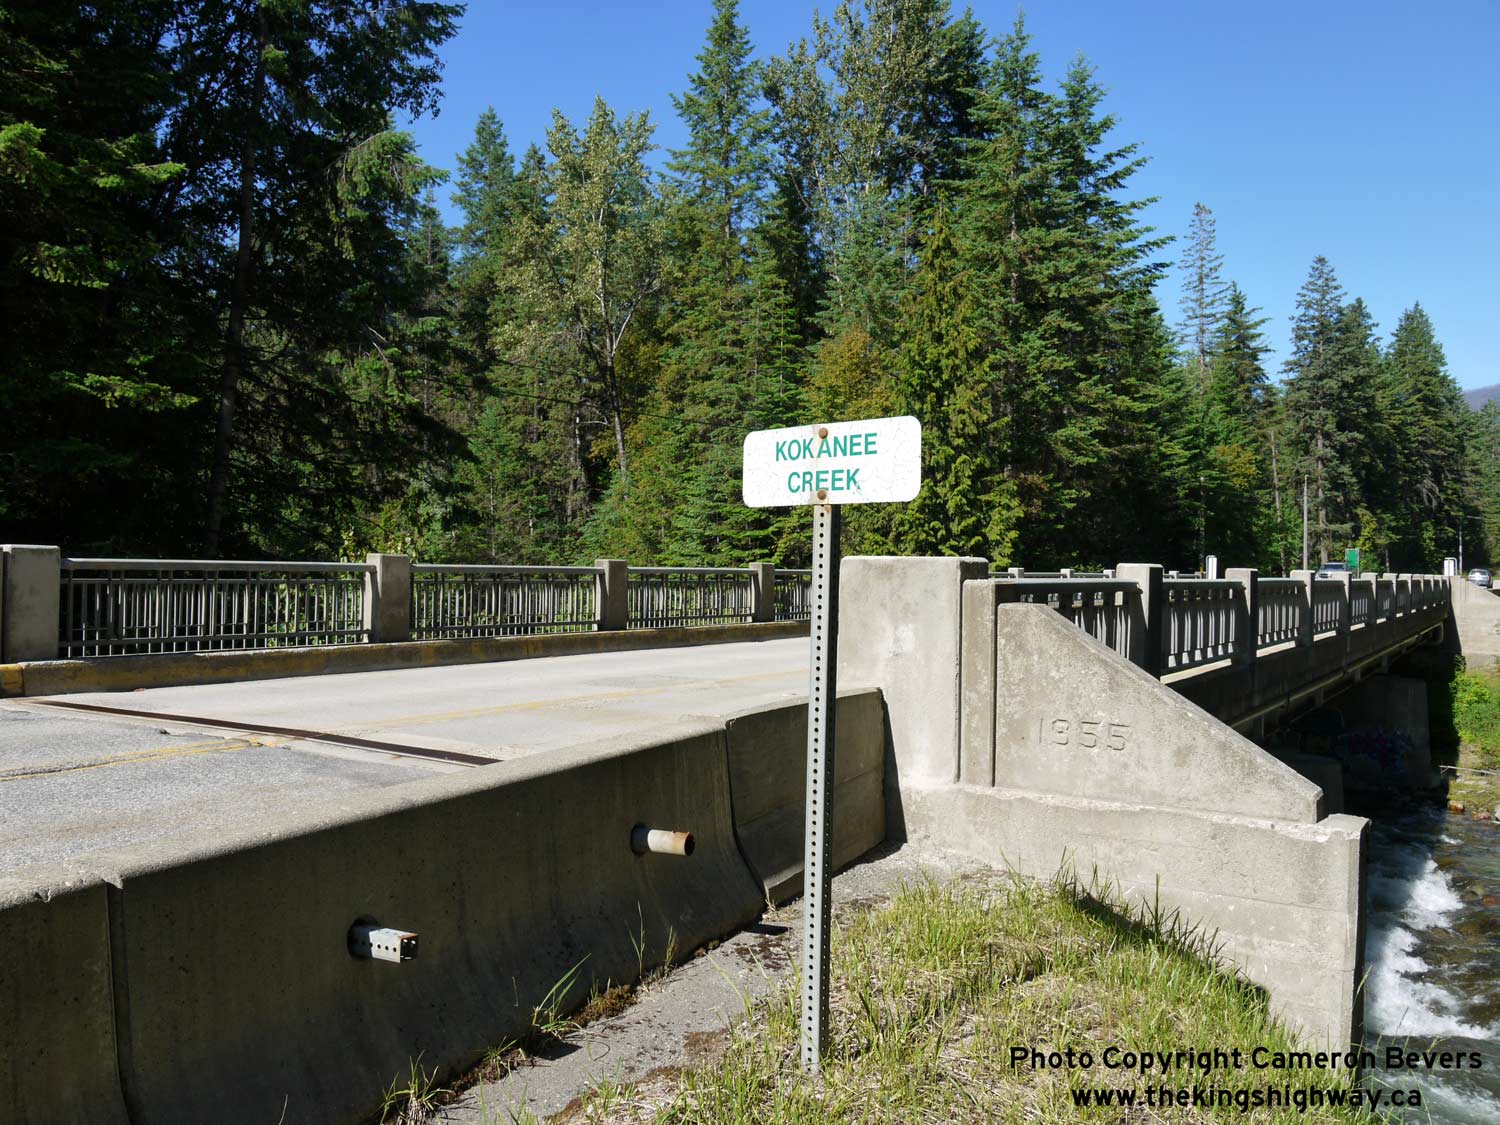
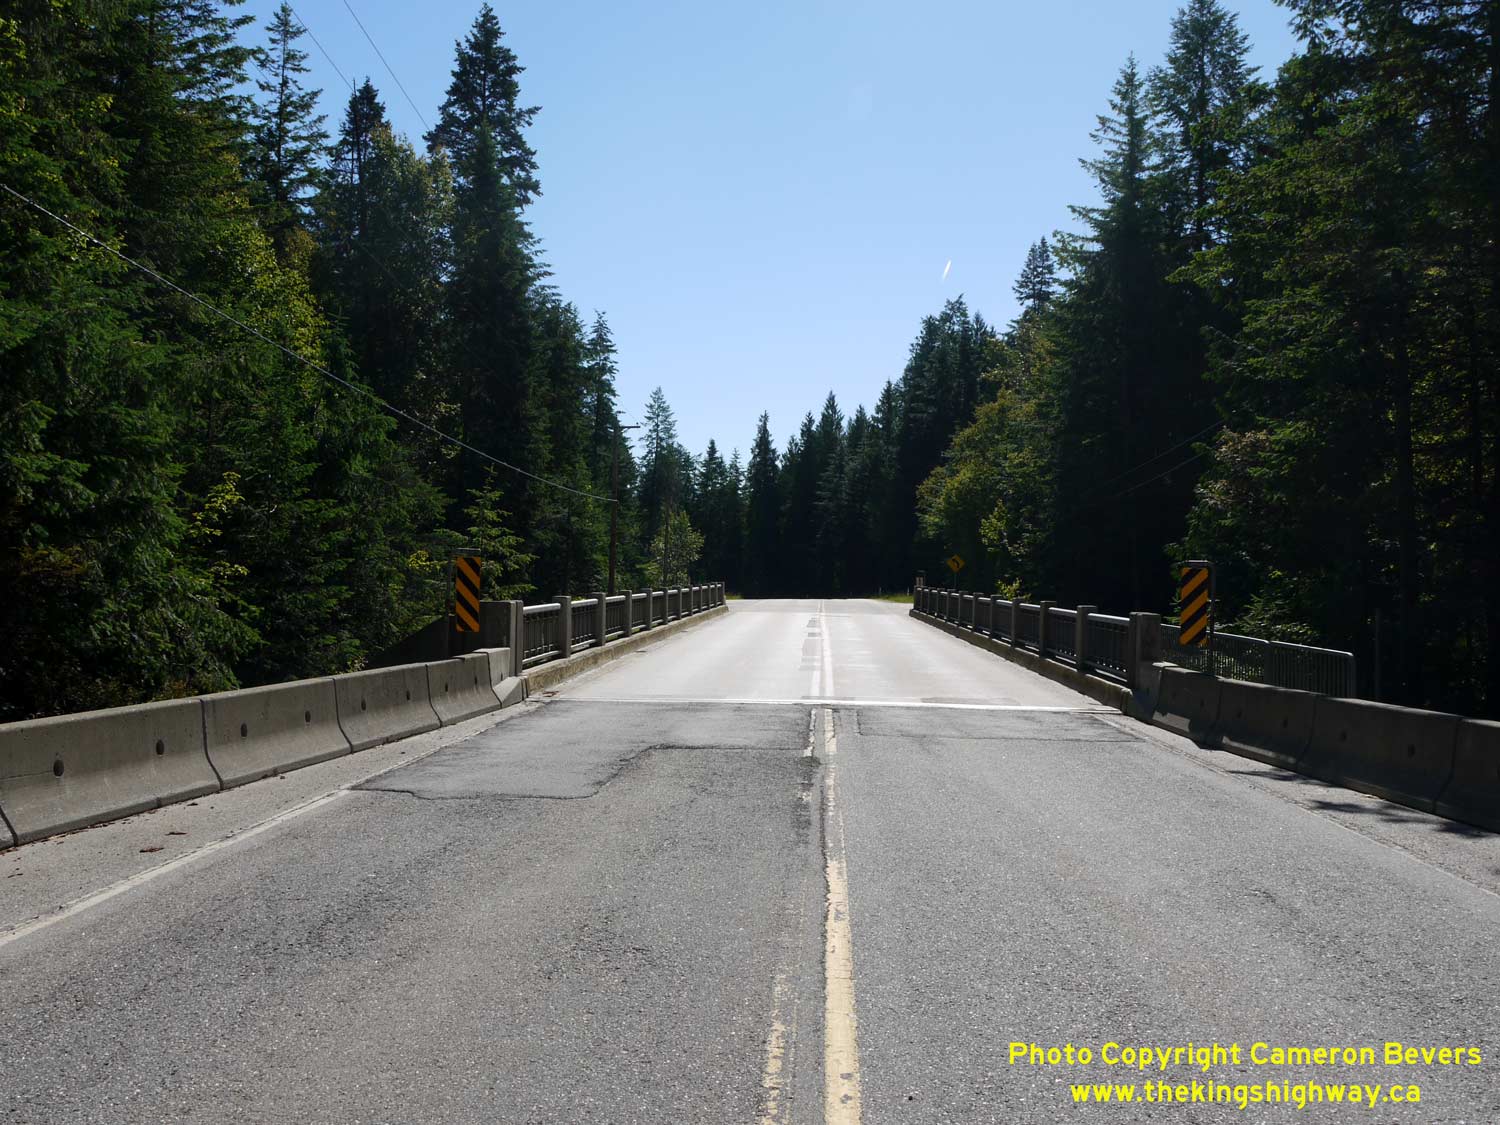
Left - Facing west along Hwy 3A at the Kokanee Creek Bridge west of Balfour. See an
Enlarged Photo Here. (Photograph taken on June 12, 2017 - © Cameron Bevers) Right - Date stamp (1955) on the Kokanee Creek Bridge on Hwy 3A. See an Enlarged Photo Here. (Photograph taken on June 12, 2017 - © Cameron Bevers) 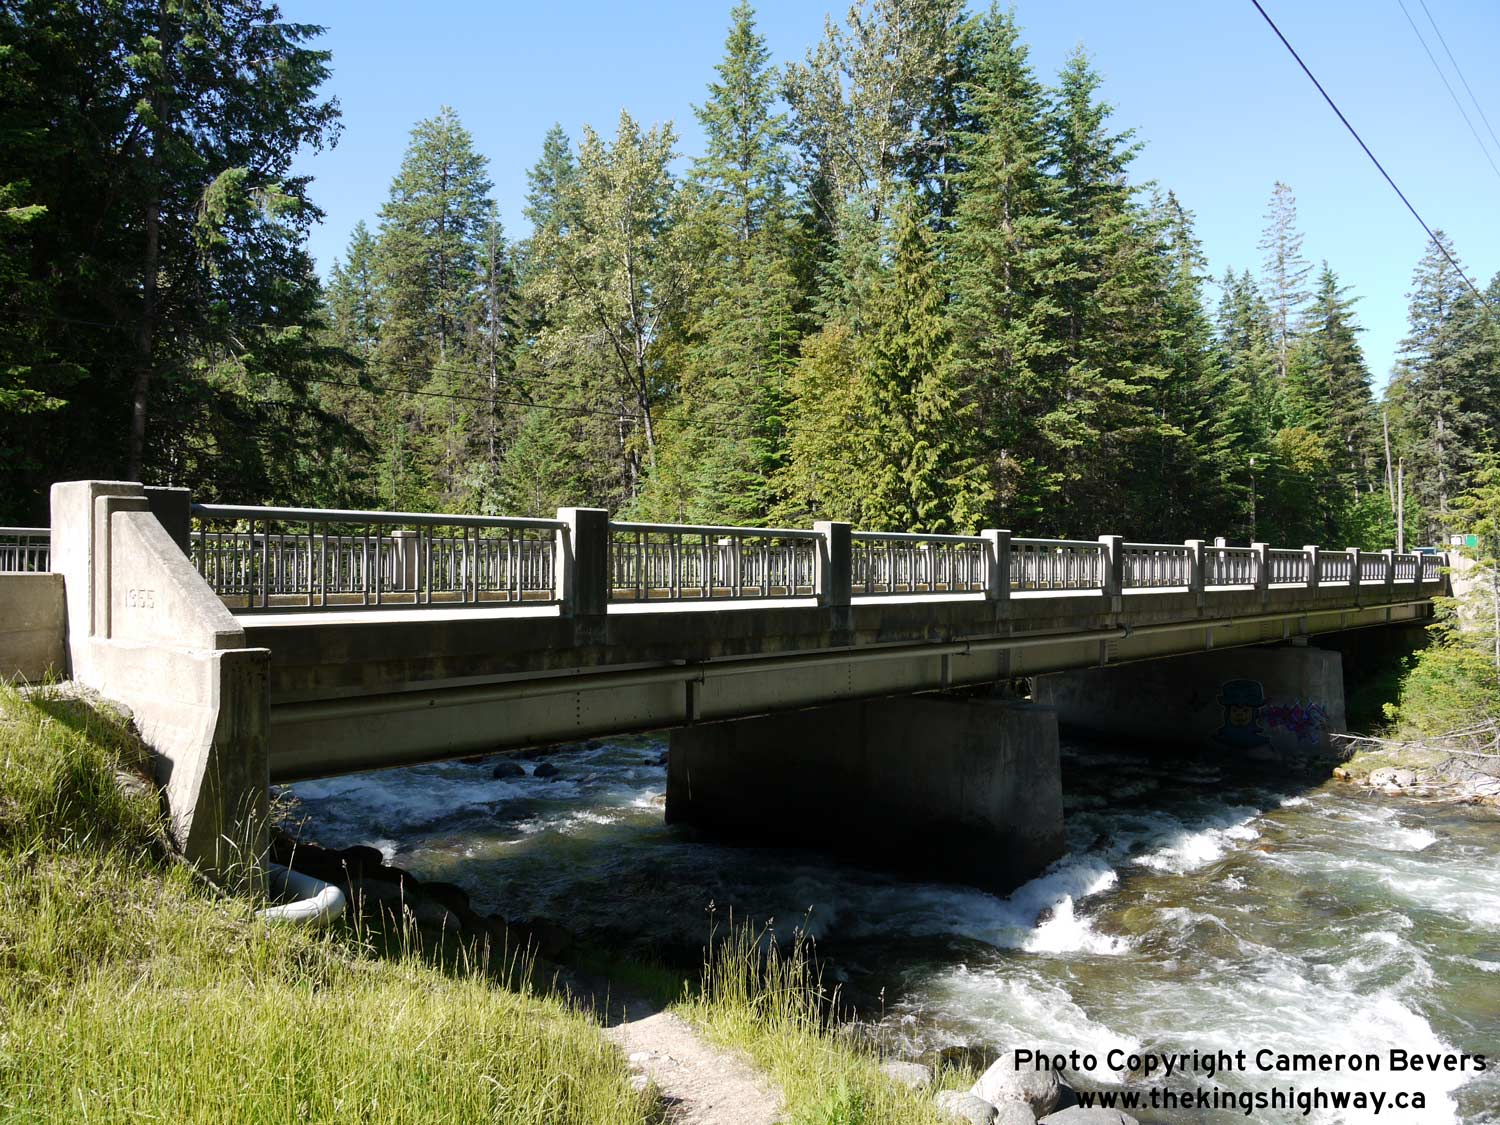
Left - Kokanee Creek Bridge on Hwy 3A. The source of this glacial stream lies deep in the mountains within Kokanee Glacier Provincial Park. See an
Enlarged Photo Here. (Photograph taken on June 12, 2017 - © Cameron Bevers) Right - Distance guide sign on westbound Hwy 3A, about 17 km east of Balfour. See an Enlarged Photo Here. (Photograph taken on June 12, 2017 - © Cameron Bevers) 

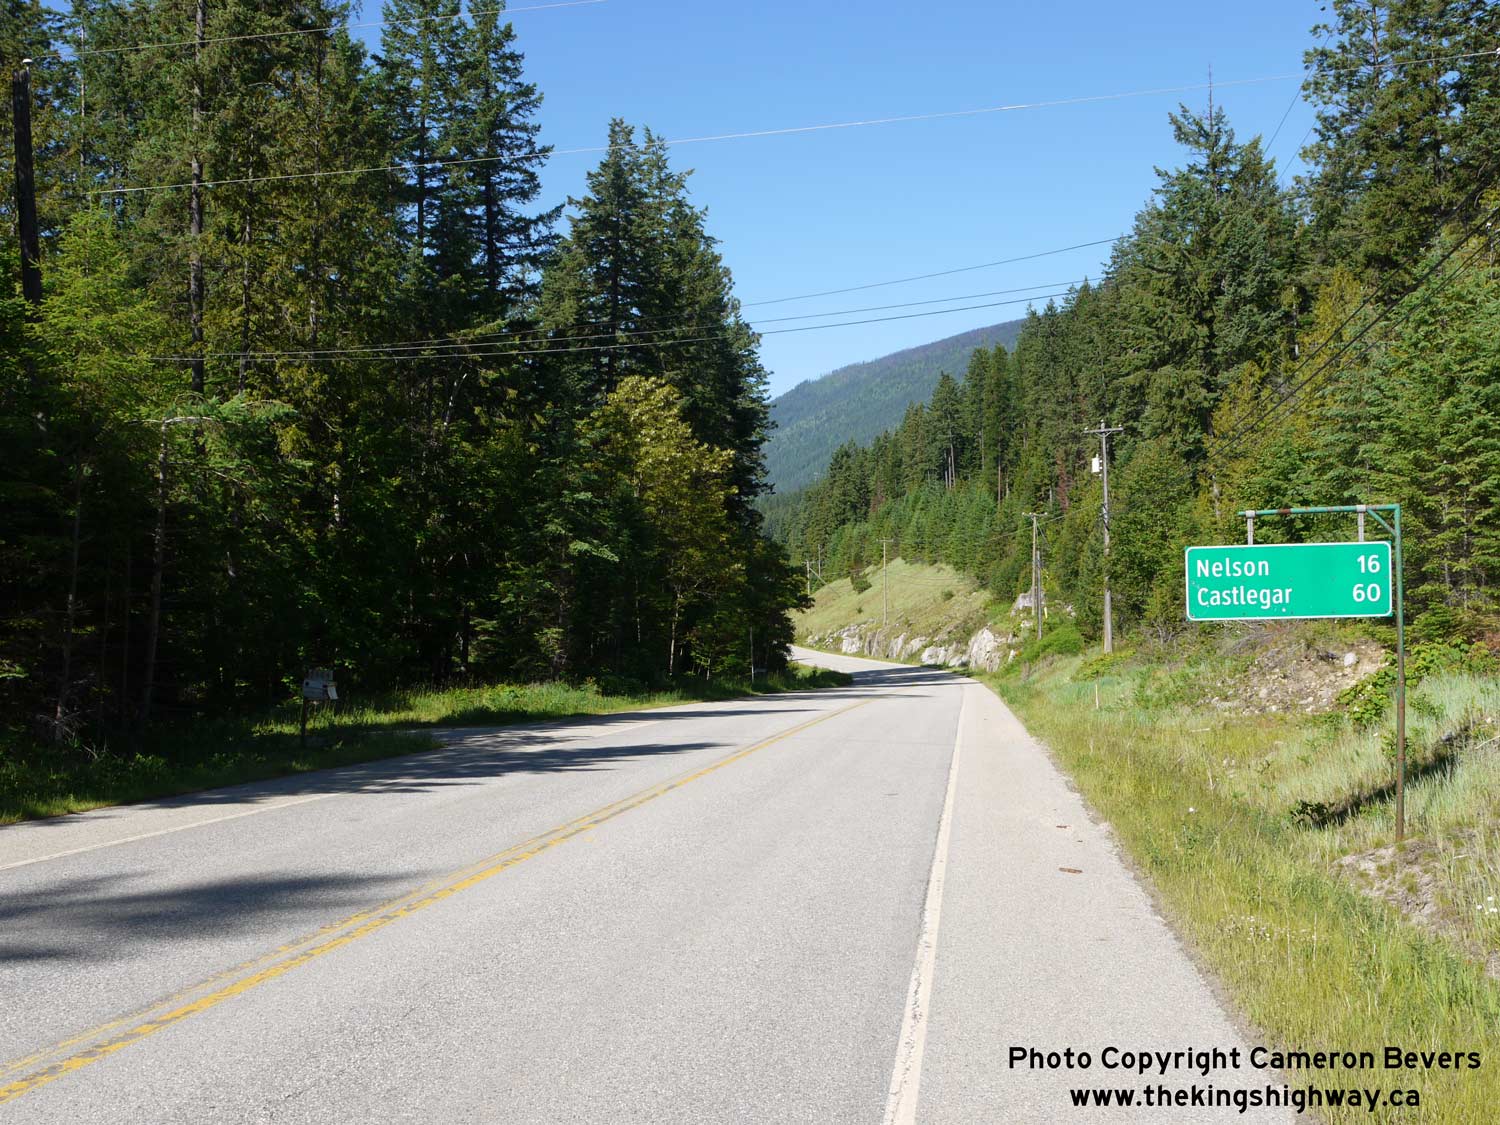
Left - Distance guide sign on eastbound Hwy 3A, about 16 km east of Nelson. See an
Enlarged Photo Here. (Photograph taken on June 12, 2017 - © Cameron Bevers) Right - With comparatively low traffic volumes, great scenery and numerous curves, it's little wonder that Hwy 3A is a well-travelled motorcycle route! See an Enlarged Photo Here. (Photograph taken on June 12, 2017 - © Cameron Bevers) 

Left - Facing west along Hwy 3A towards Nelson, about 18 km west of Balfour. See an
Enlarged Photo Here. (Photograph taken on June 12, 2017 - © Cameron Bevers) Right - Facing east along Hwy 3A towards Balfour, about 13 km east of Nelson. See an Enlarged Photo Here. (Photograph taken on June 12, 2017 - © Cameron Bevers) 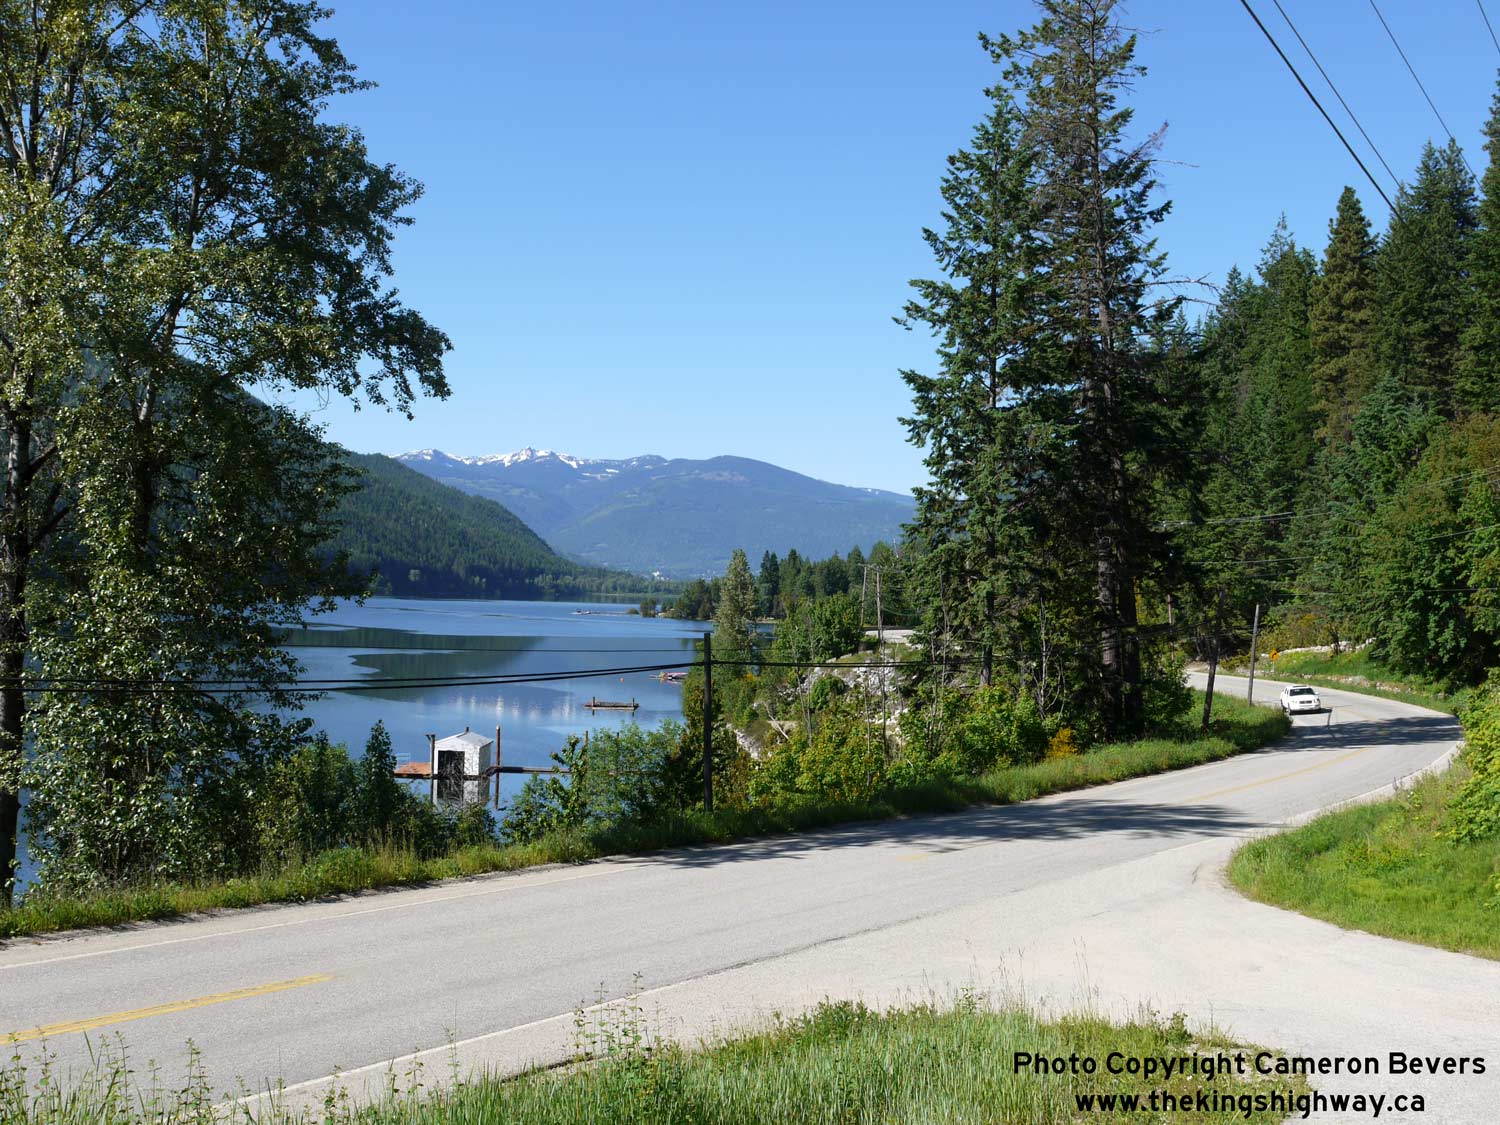
Left - View of Hwy 3A near Willow Point, about 20 km west of Balfour. See an
Enlarged Photo Here. (Photograph taken on June 12, 2017 - © Cameron Bevers) Right - Waterfront view of Hwy 3A, about 6 km east of Nelson, facing east. See an Enlarged Photo Here. (Photograph taken on June 12, 2017 - © Cameron Bevers) 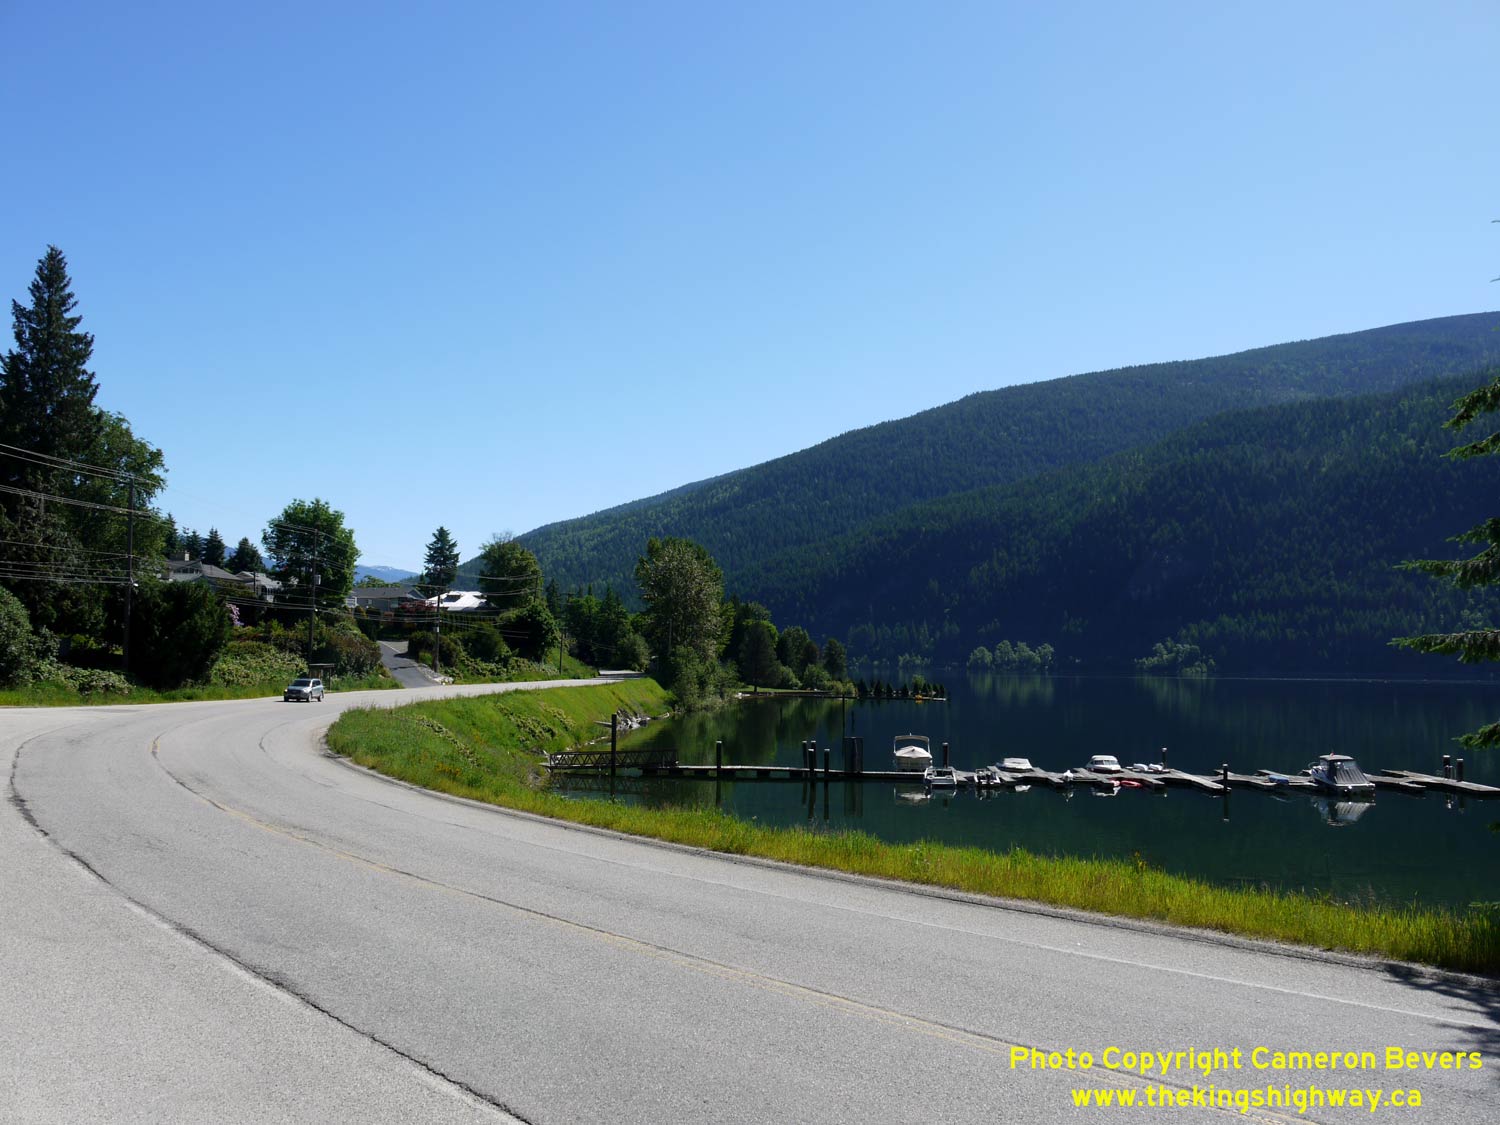

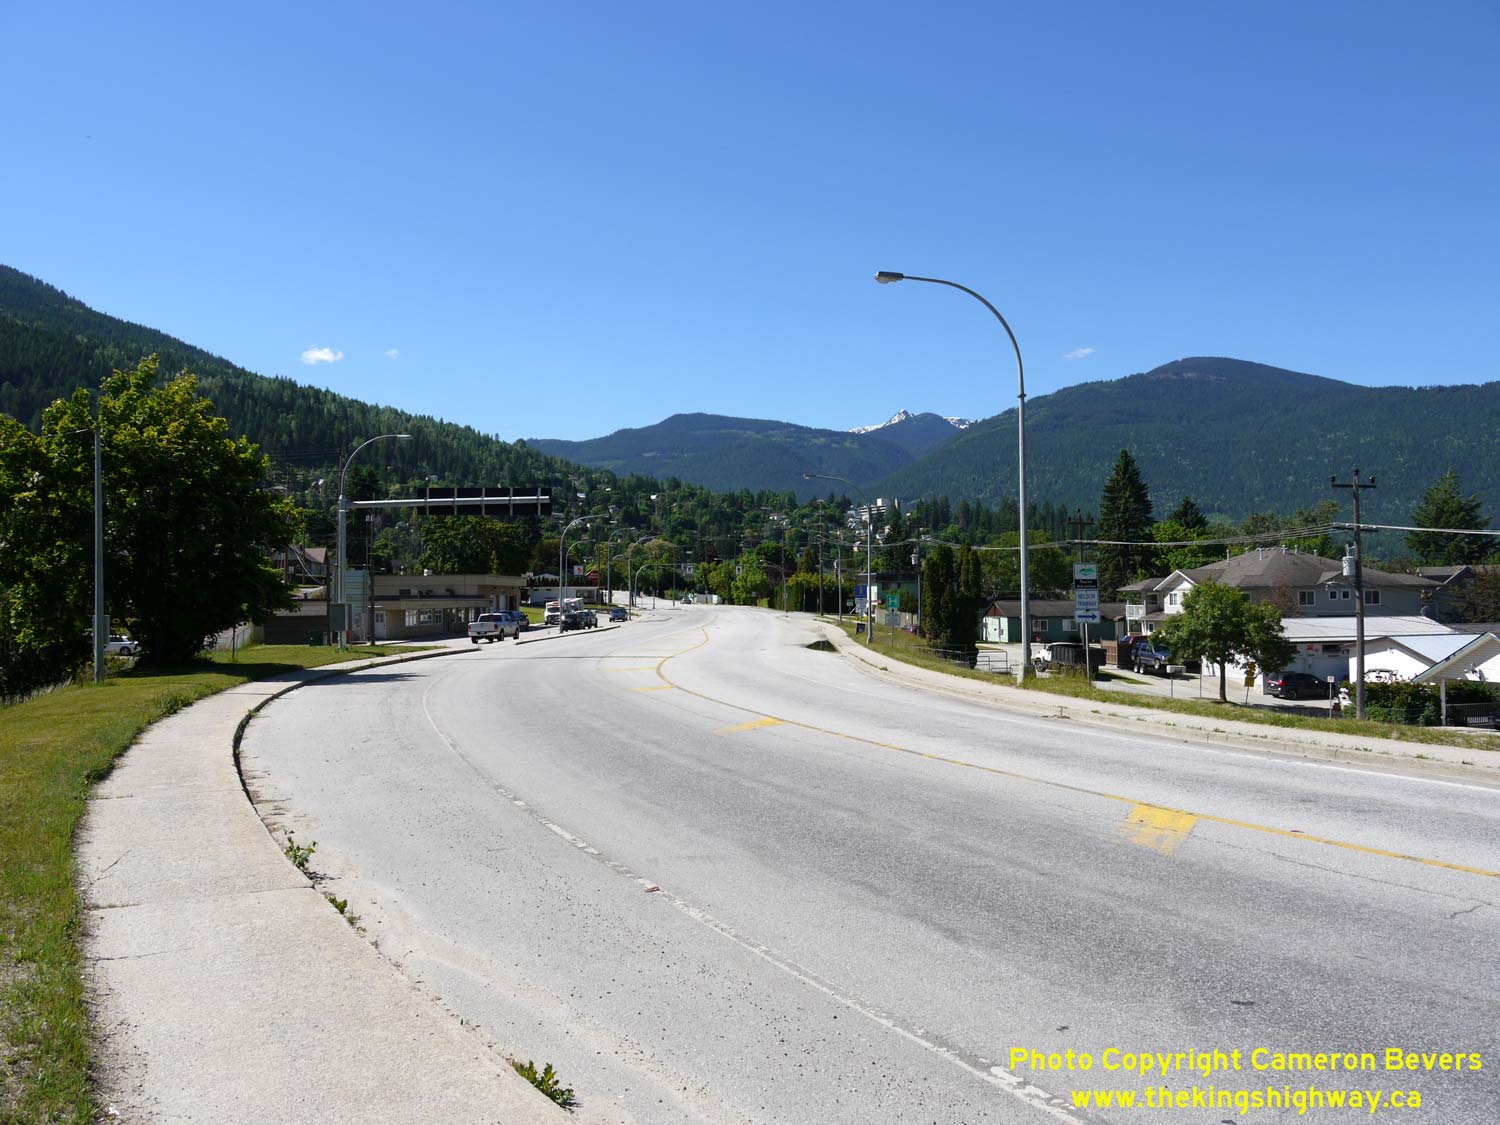
Left - Facing east along Hwy 3A towards Balfour, about 3 km east of Nelson. See an
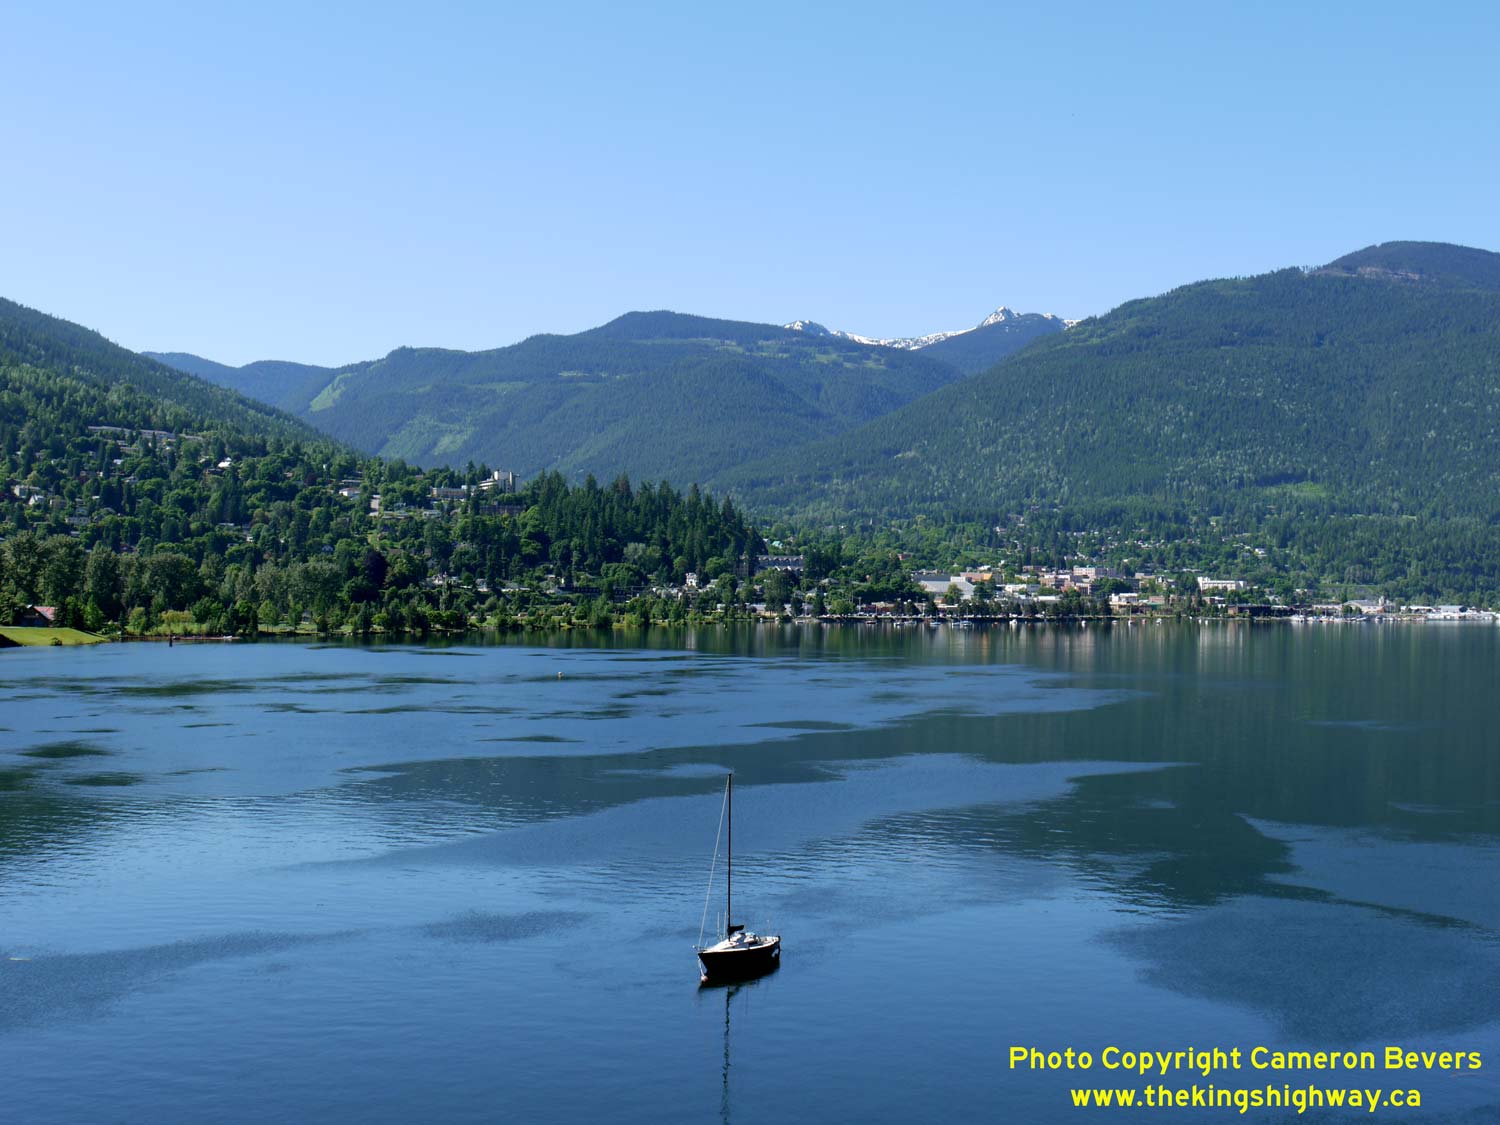
Enlarged Photo Here. (Photograph taken on June 12, 2017 - © Cameron Bevers) Right - View of Nelson from Hwy 3A across Kootenay Lake. This small mountainside city is also one of British Columbia's most picturesque. With tree-lined avenues, historical downtown buildings and located in an unforgettable setting where the mountains meet the waterfront, Nelson is a must-see for anyone travelling to the BC Interior. See an Enlarged Photo Here. (Photograph taken on June 12, 2017 - © Cameron Bevers) 

Left - Facing west along Hwy 3A, about 3 km east of Nelson. See an
Enlarged Photo Here. (Photograph taken on June 12, 2017 - © Cameron Bevers) Right - Facing east along Hwy 3A towards Balfour, about 2 km east of Nelson. See an Enlarged Photo Here. (Photograph taken on June 12, 2017 - © Cameron Bevers) 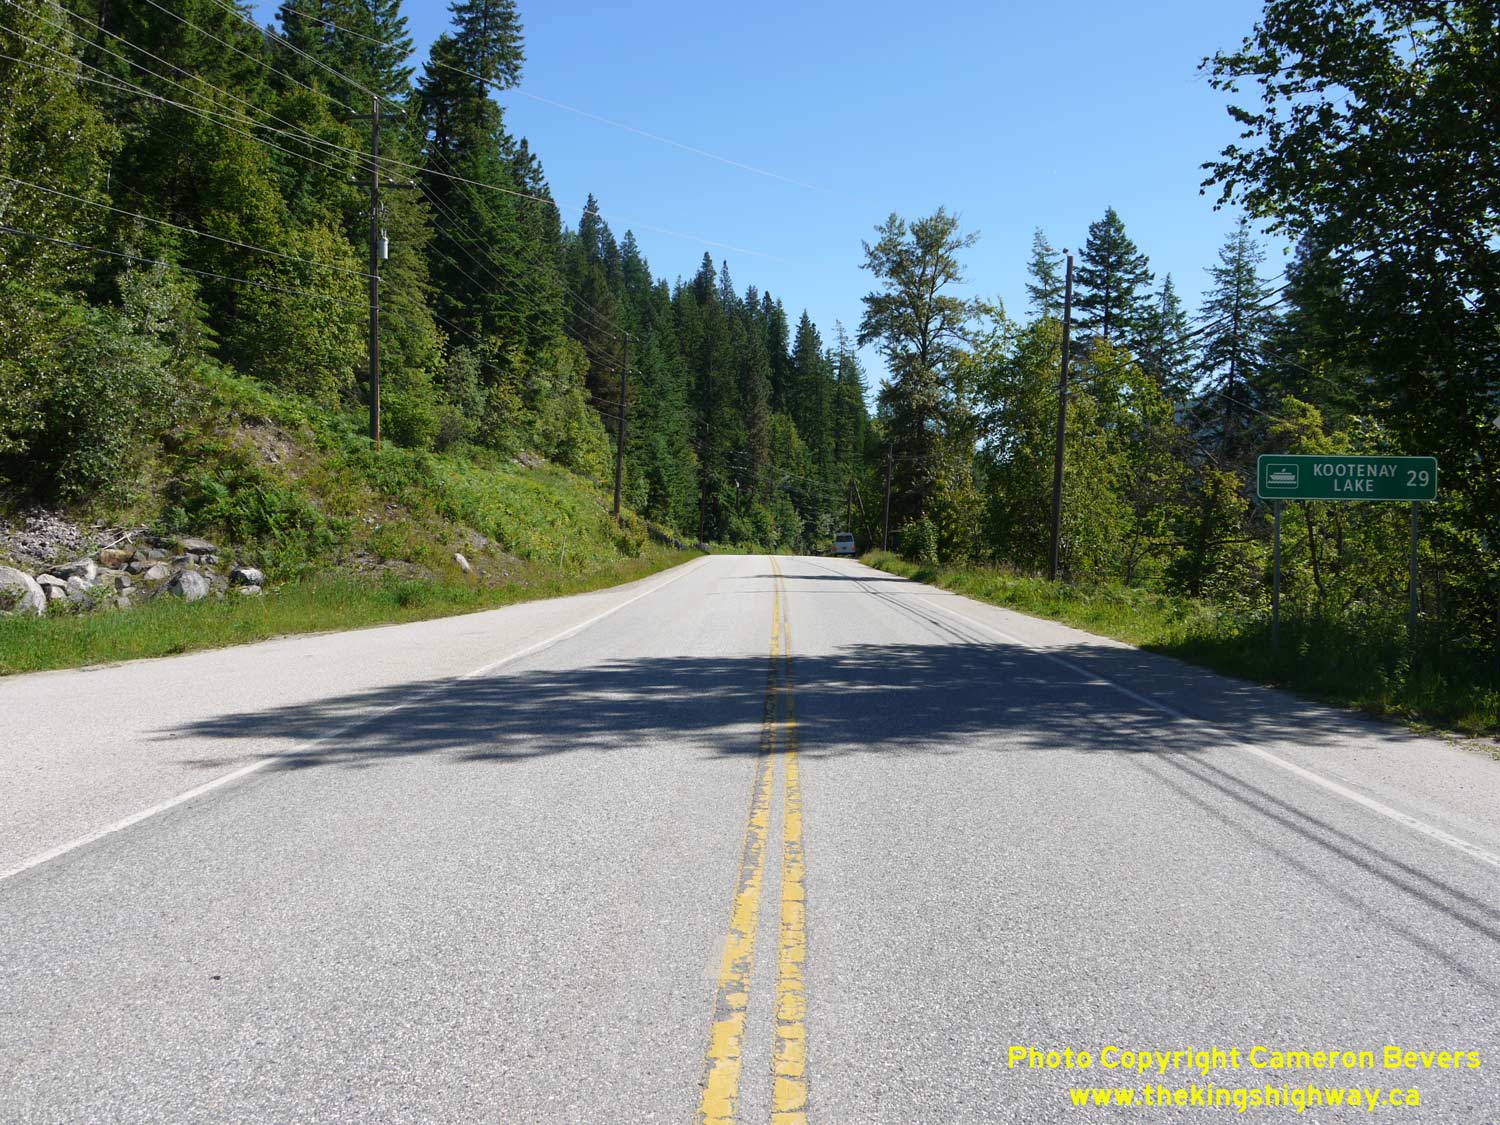
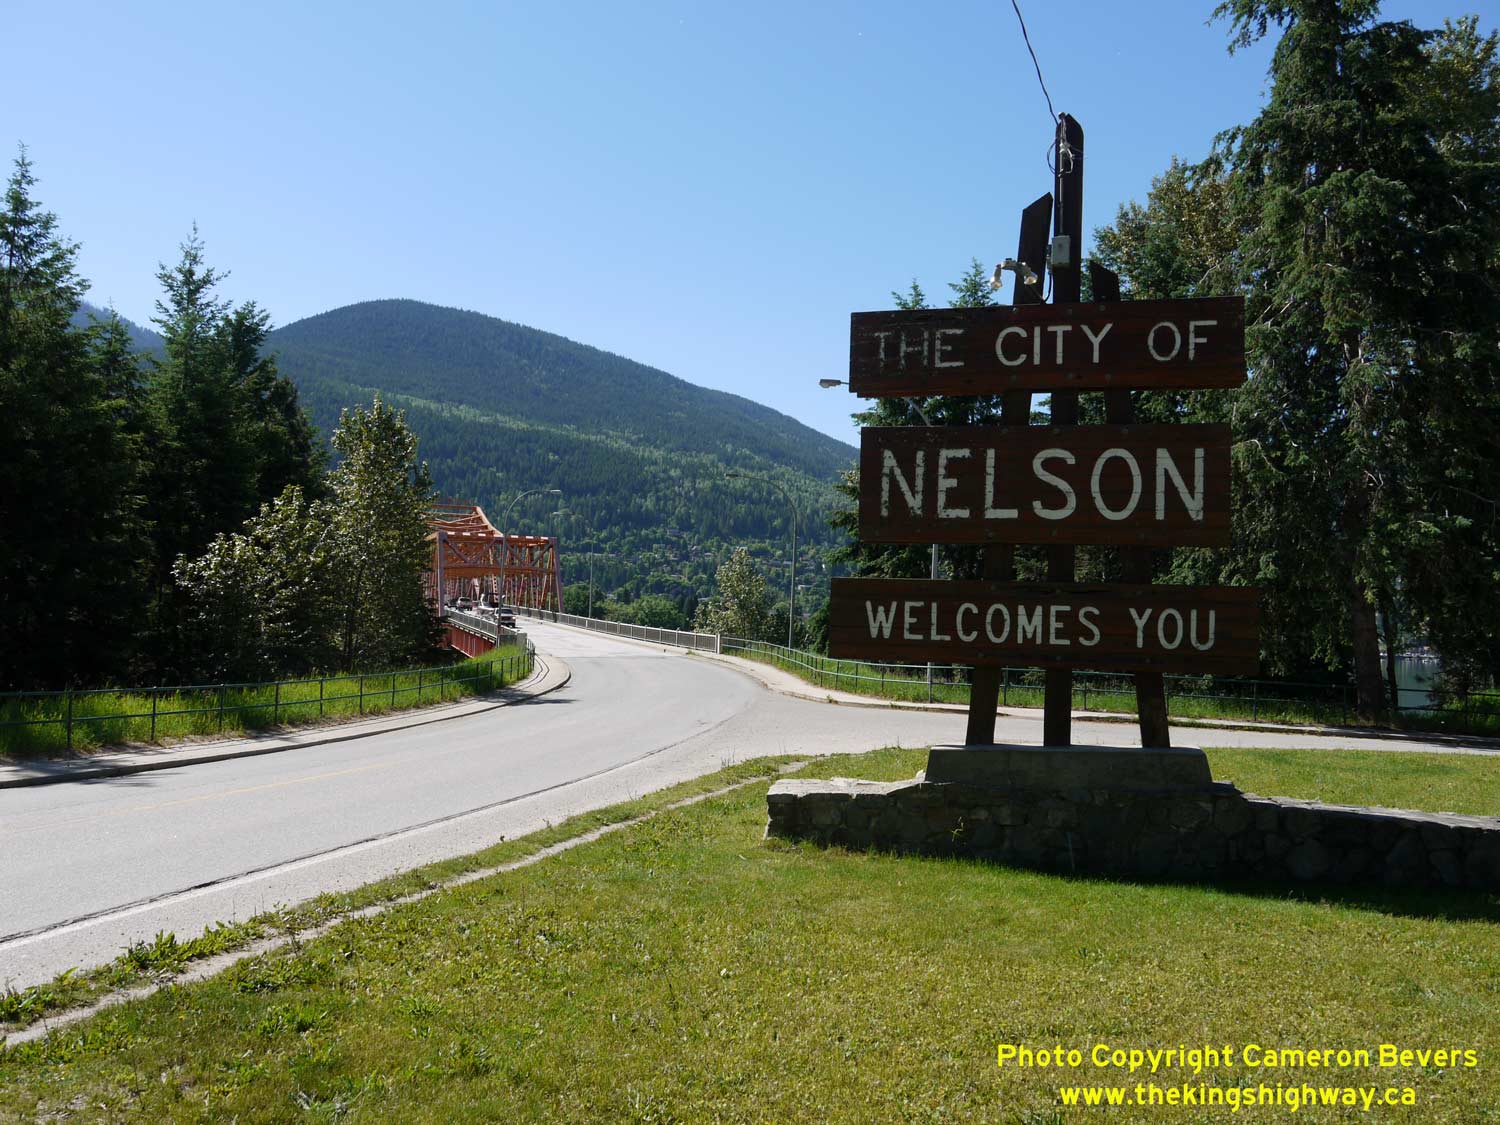
Left - Distance guide sign on eastbound Hwy 3A departing from Nelson, showing the distance to the Kootenay Lake Ferry Terminal at Balfour. See an
Enlarged Photo Here. (Photograph taken on June 12, 2017 - © Cameron Bevers) Right - Welcome to Nelson entrance sign on westbound Hwy 3A. The signature orange Nelson Bridge can be seen in the background. See an Enlarged Photo Here. (Photograph taken on June 12, 2017 - © Cameron Bevers) 
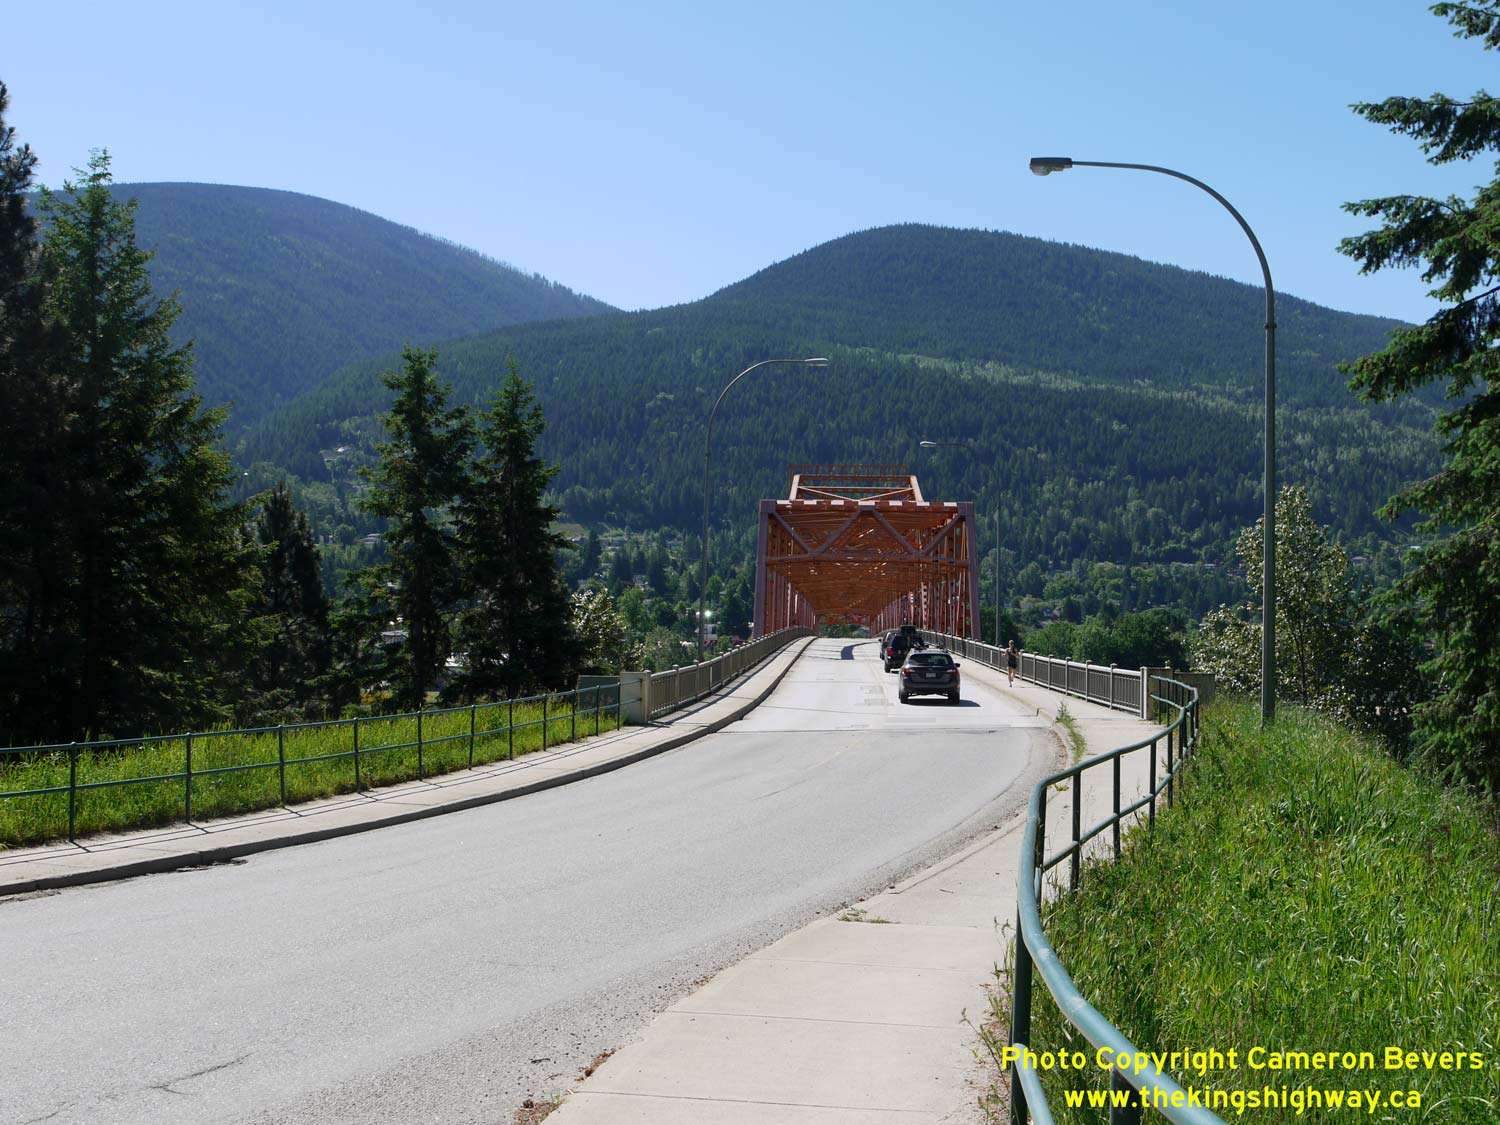
Left - Facing east along Hwy 3A towards Balfour from the north end of the Nelson Bridge. See an
Enlarged Photo Here. (Photograph taken on June 12, 2017 - © Cameron Bevers) Right - Approaching the Nelson Bridge over the west arm of Kootenay Lake. See an Enlarged Photo Here. (Photograph taken on June 12, 2017 - © Cameron Bevers) 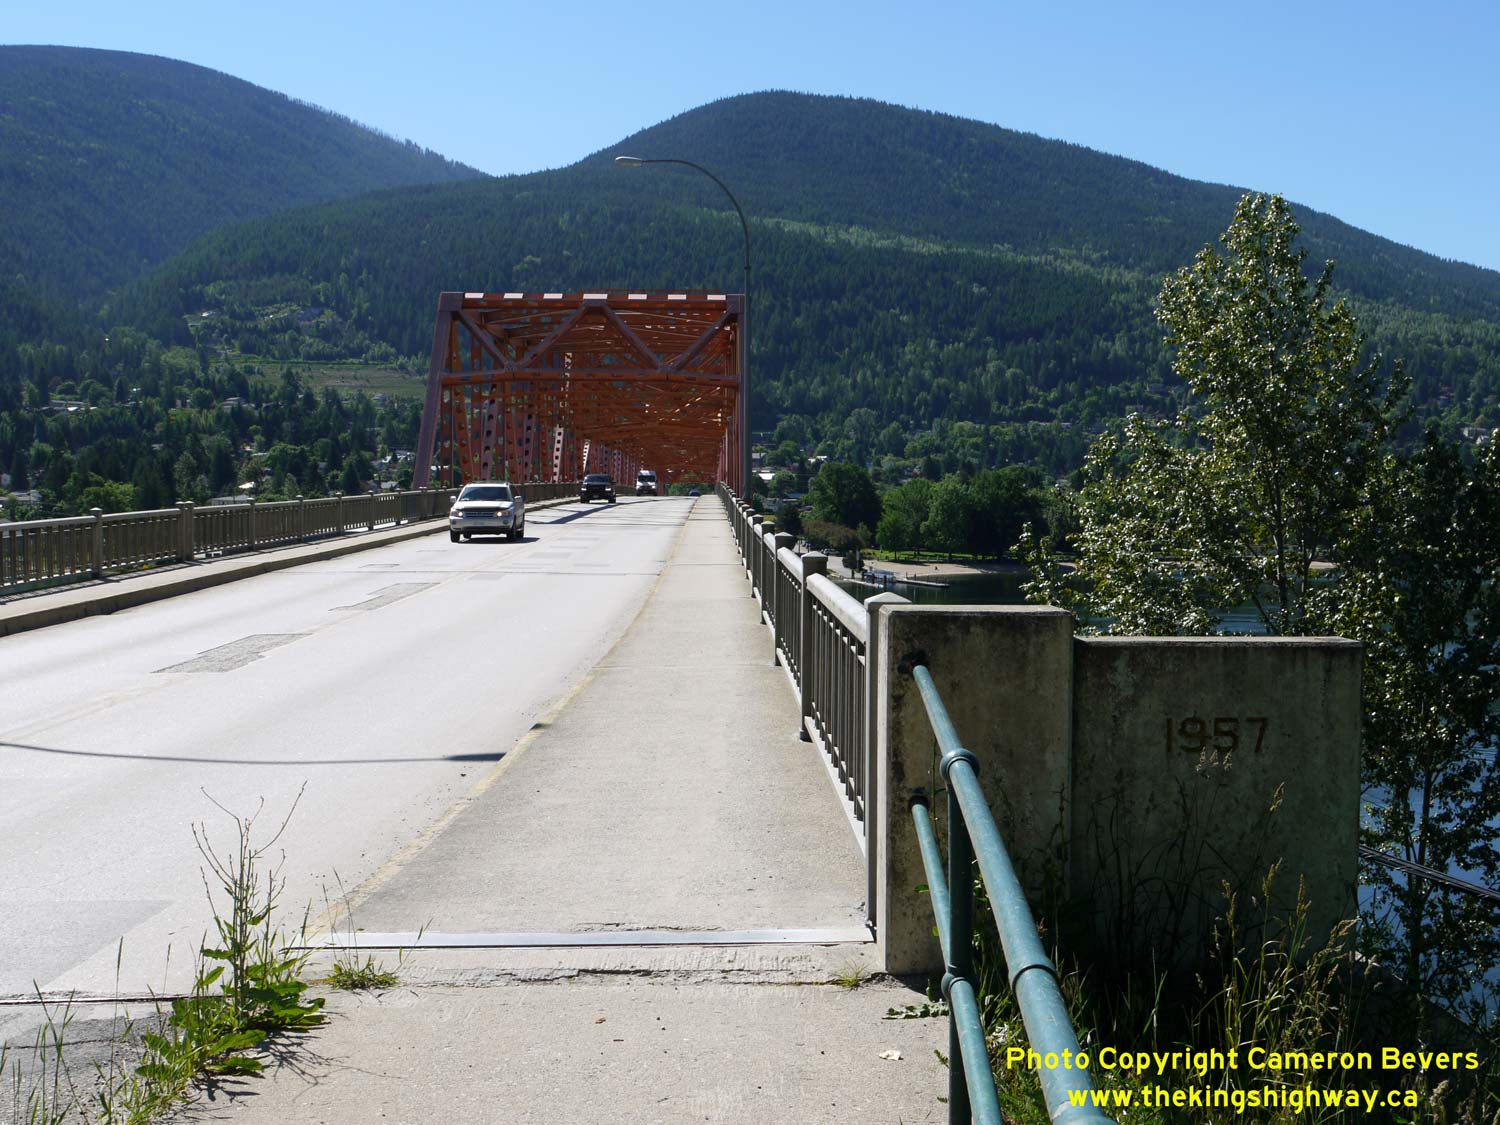
Left - Date stamp (1957) on the Nelson Bridge on Hwy 3A. The Nelson Bridge is one of British Columbia's most iconic highway bridges. This impressive structure
was officially opened to traffic on November 7, 1957, at an original construction cost of about $4 million in 1957 Dollars (roughly the equivalent of $36 million
today). The bridge replaced a short ferry service between Nelson and the north shore of Kootenay Lake's western arm. See an
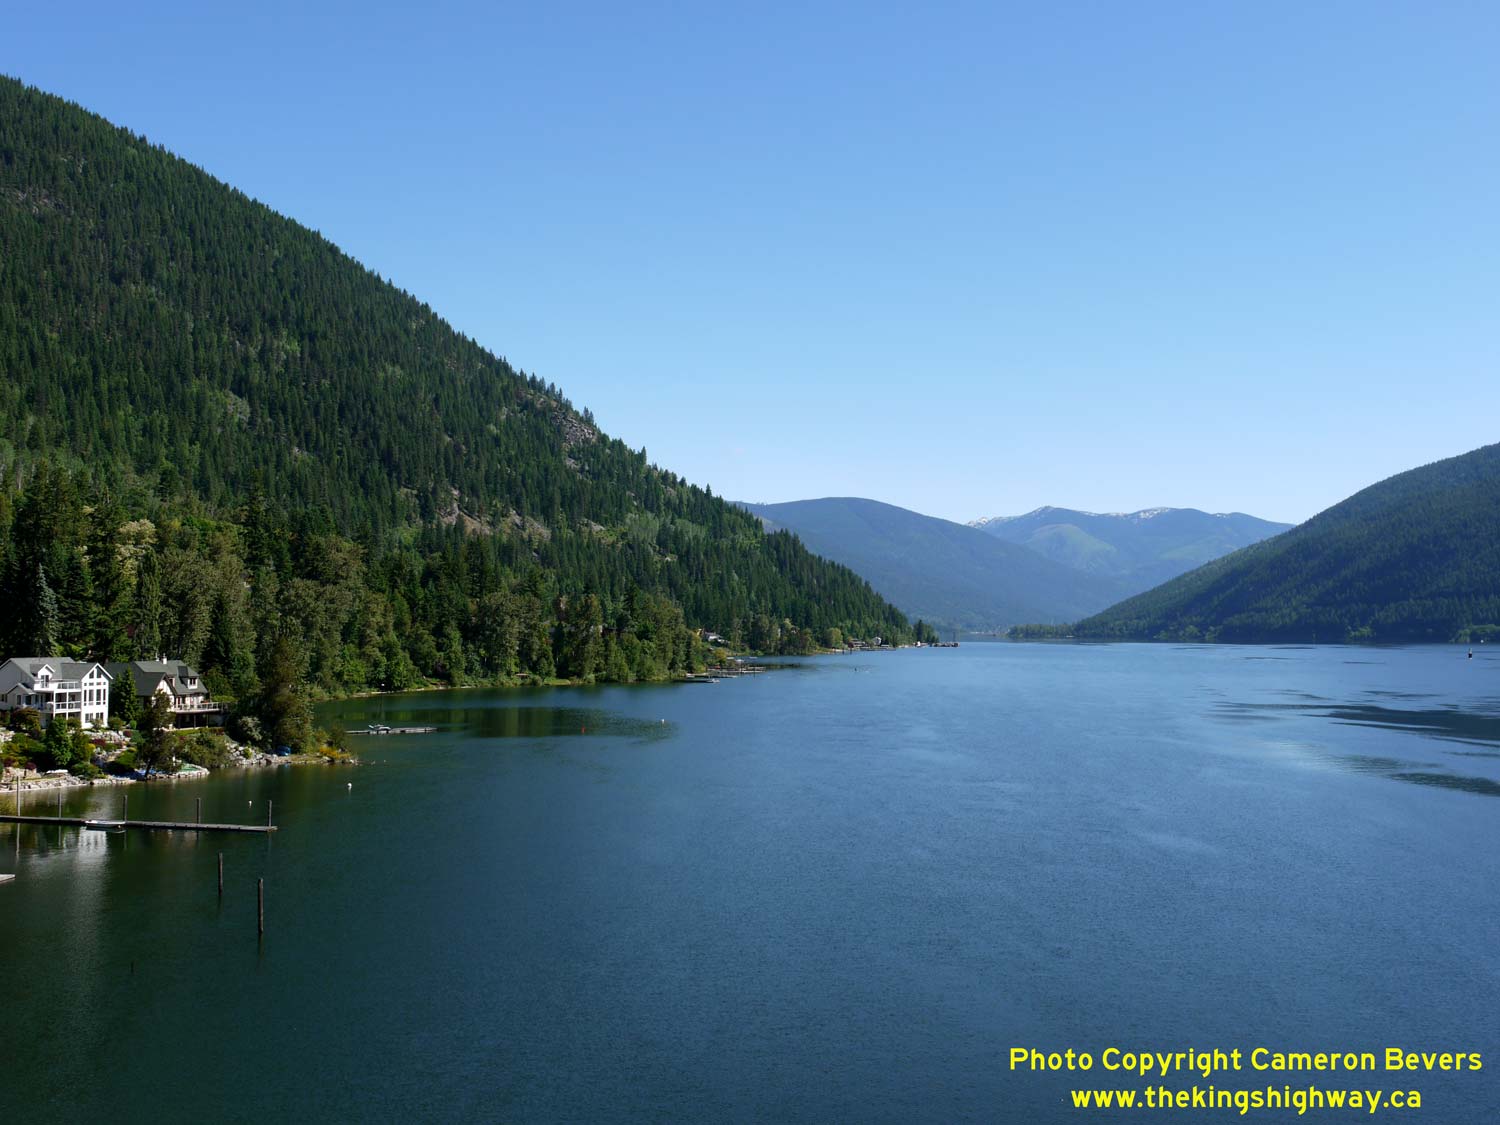
Enlarged Photo Here. (Photograph taken on June 12, 2017 - © Cameron Bevers) Right - View of the west arm of Kootenay Lake from the Nelson Bridge on Hwy 3A. See an Enlarged Photo Here. (Photograph taken on June 12, 2017 - © Cameron Bevers) 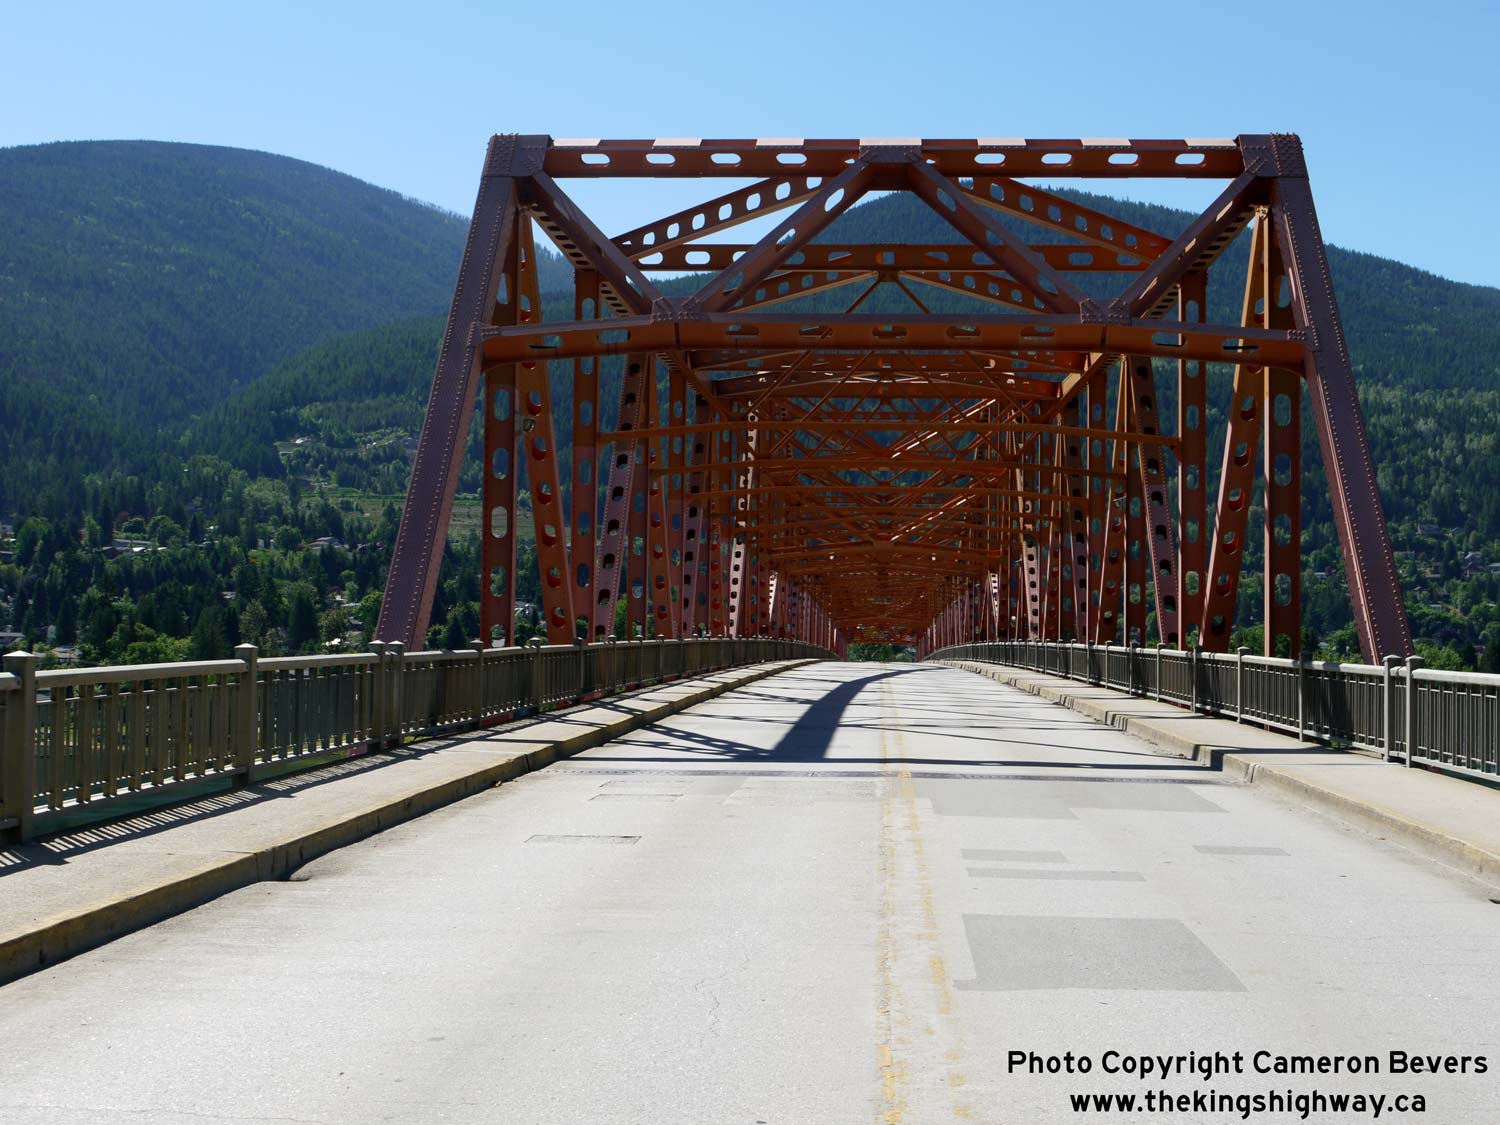
Left - Facing west along Hwy 3A across the cantilevered through truss section of the Nelson Bridge. See an
Enlarged Photo Here. (Photograph taken on June 12, 2017 - © Cameron Bevers) Right - Downtown Nelson can be seen in this spectacular view from the Nelson Bridge on Hwy 3A. See an Enlarged Photo Here. (Photograph taken on June 12, 2017 - © Cameron Bevers) 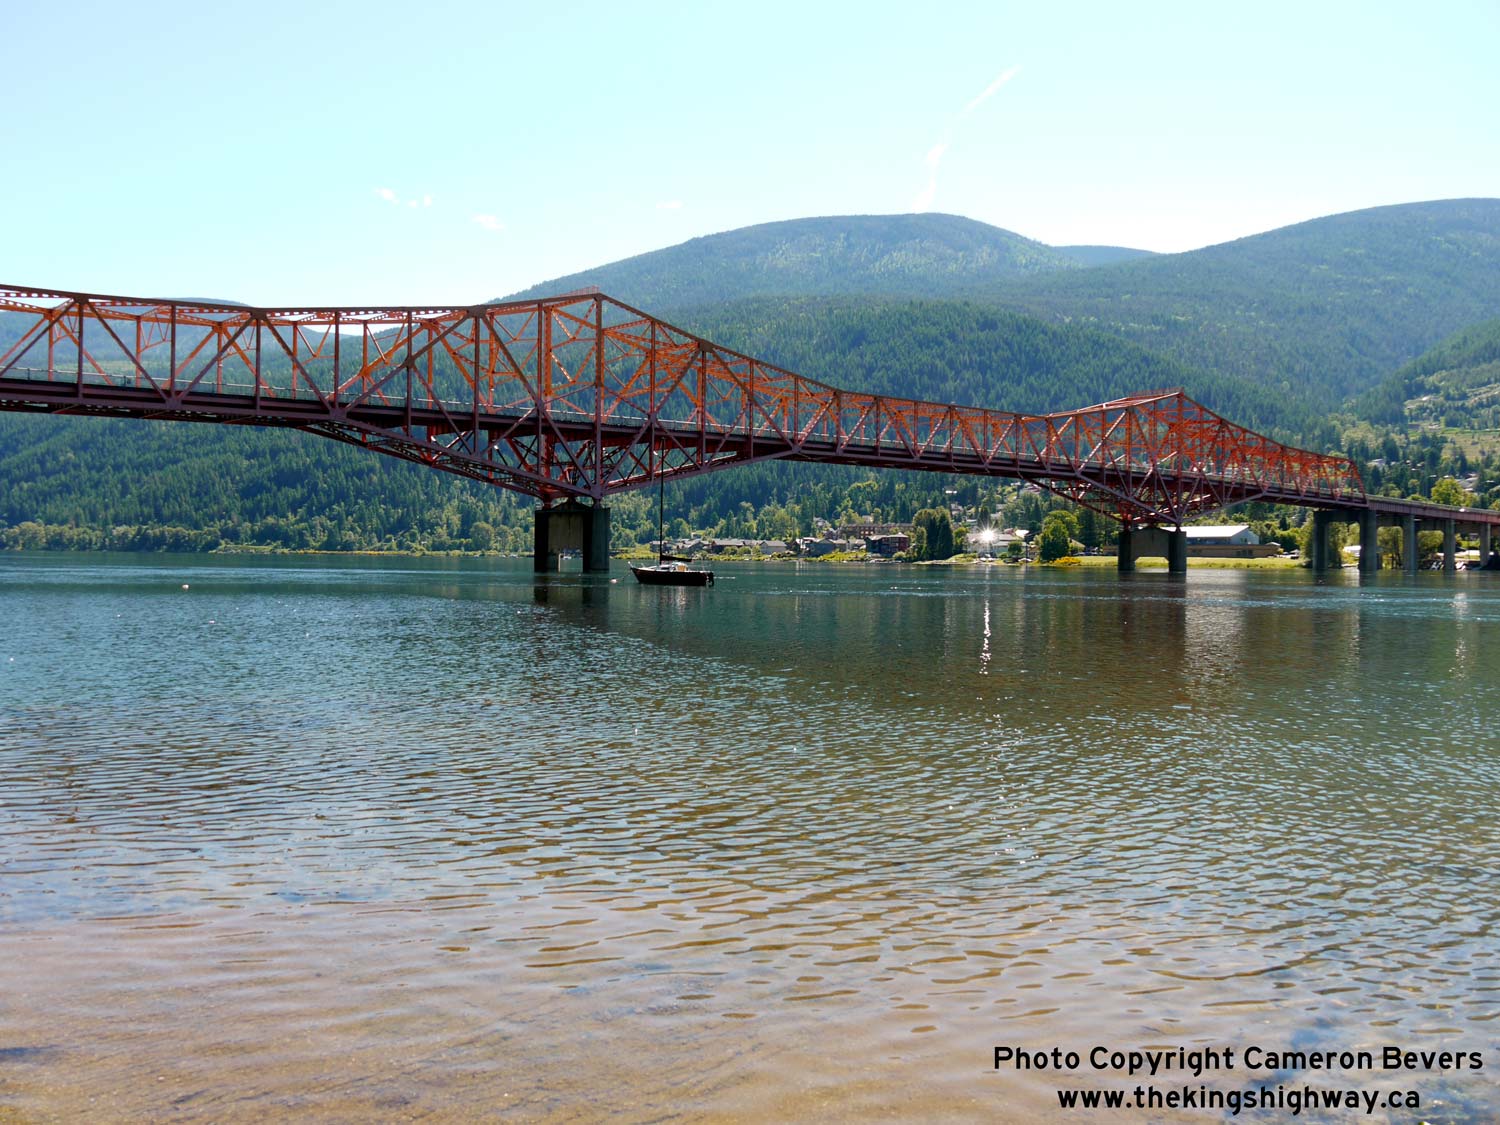
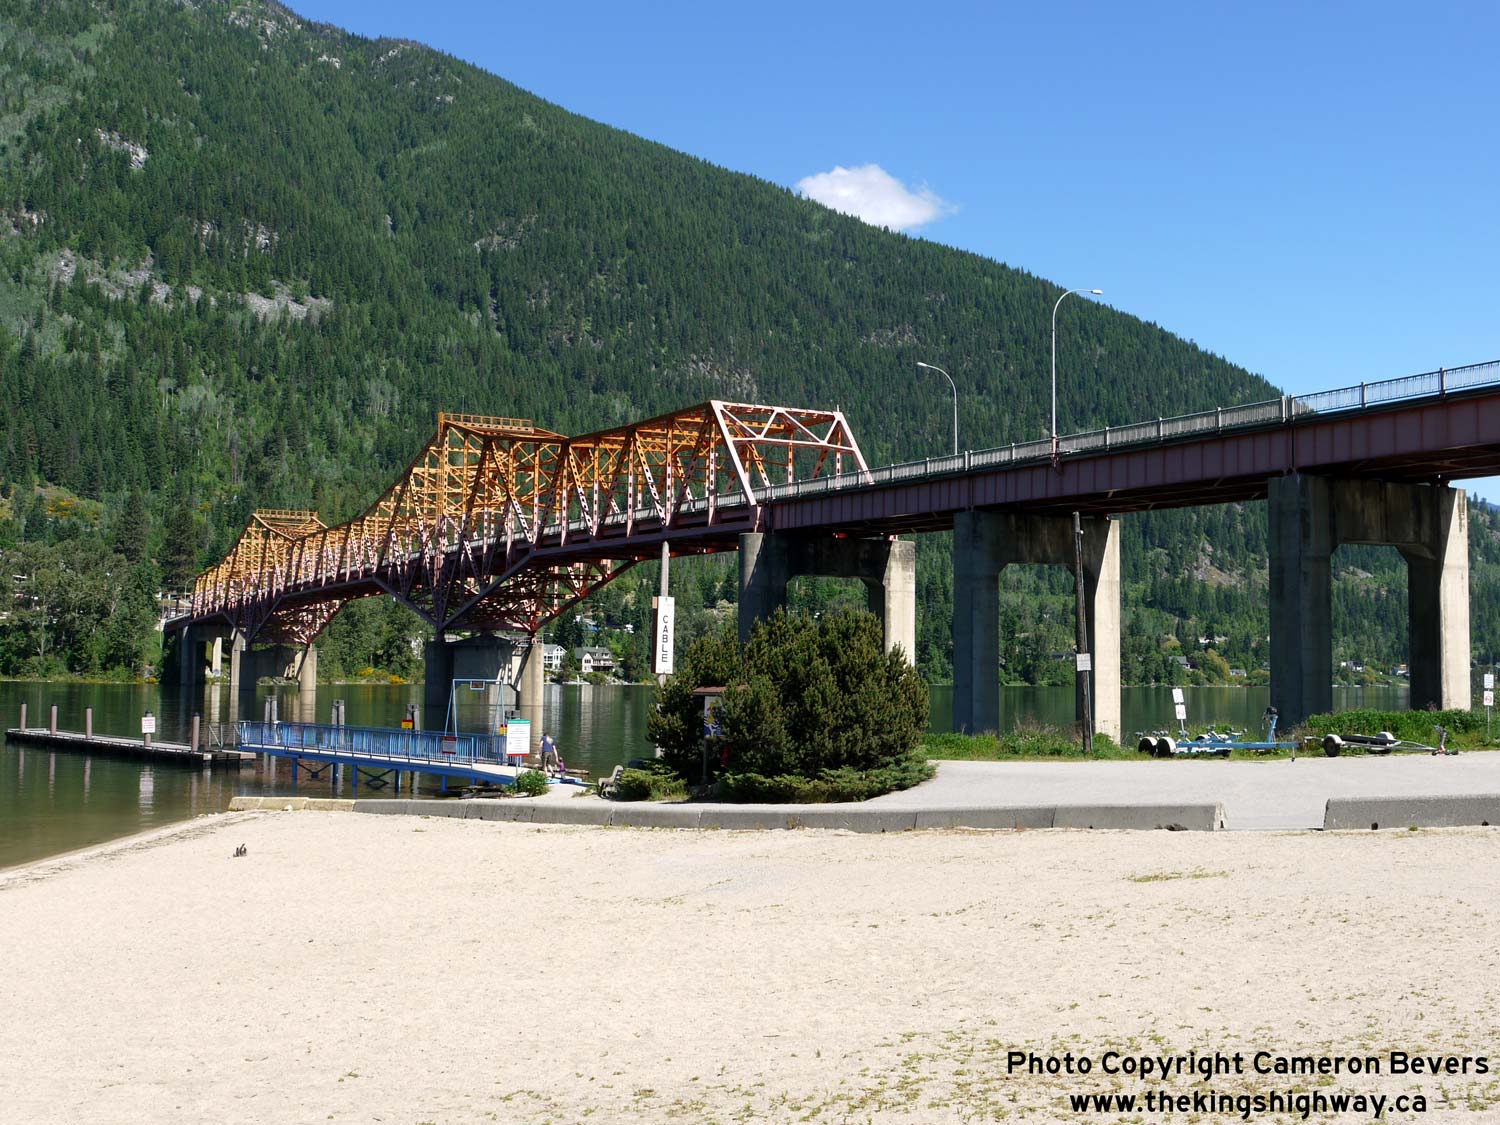
Left - View of the western side of the Nelson Bridge on Hwy 3A from the north shore. The centre section of the Nelson Bridge is a cantilevered through truss
structure. The bright orange colour of the bridge stands out against both the blue waters of Kootenay Lake at well as the forested mountains in the background. See an
Enlarged Photo Here. (Photograph taken on June 12, 2017 - © Cameron Bevers) Right - Western side of the Nelson Bridge on Hwy 3A, as seen from Lake Side Park in Nelson. See an Enlarged Photo Here. (Photograph taken on June 12, 2017 - © Cameron Bevers) 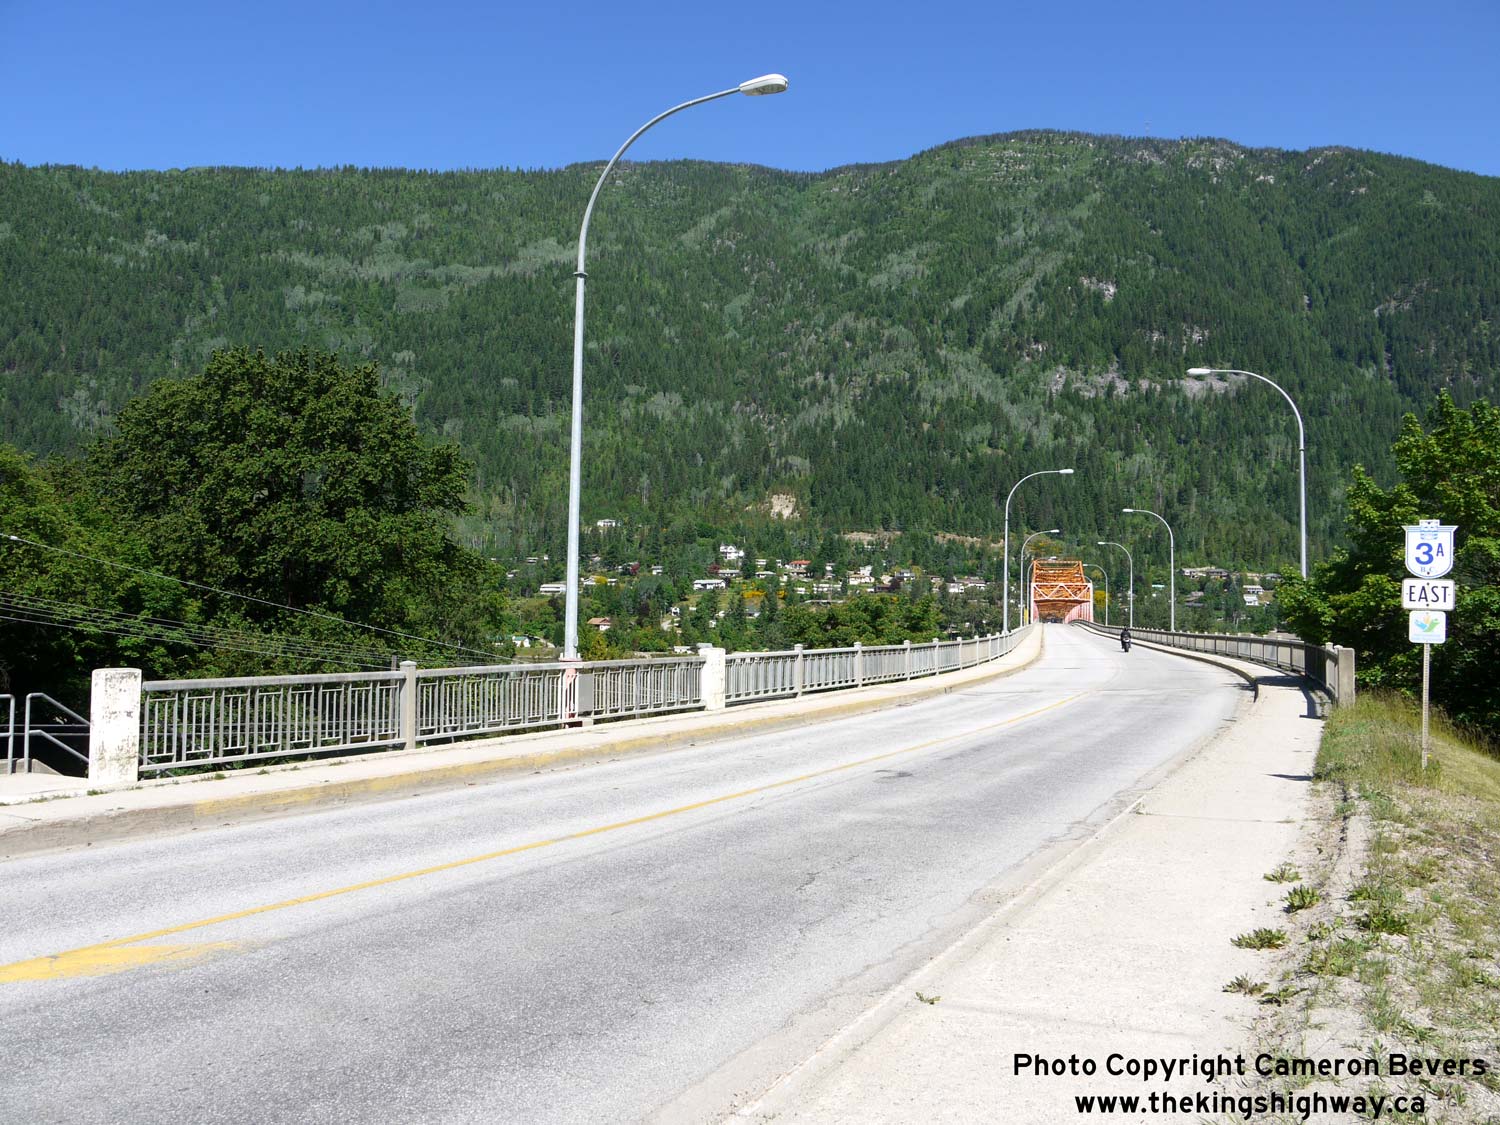
Left - Facing east along Hwy 3A across the Nelson Bridge. When the Nelson Bridge first opened to traffic in 1957, it was a toll bridge. Toll collection on the
Nelson Bridge ceased in 1963, once a more direct route was completed for Hwy 3 (Crowsnest Highway) through Kootenay Pass between Creston and Selmo. See an
Enlarged Photo Here. (Photograph taken on June 12, 2017 - © Cameron Bevers) Right - Facing west along Hwy 3A (Nelson Avenue) towards the city centre from the south end of the Nelson Bridge. Downtown Nelson lies 2 km southwest of the Nelson Bridge. See an Enlarged Photo Here. (Photograph taken on June 12, 2017 - © Cameron Bevers) 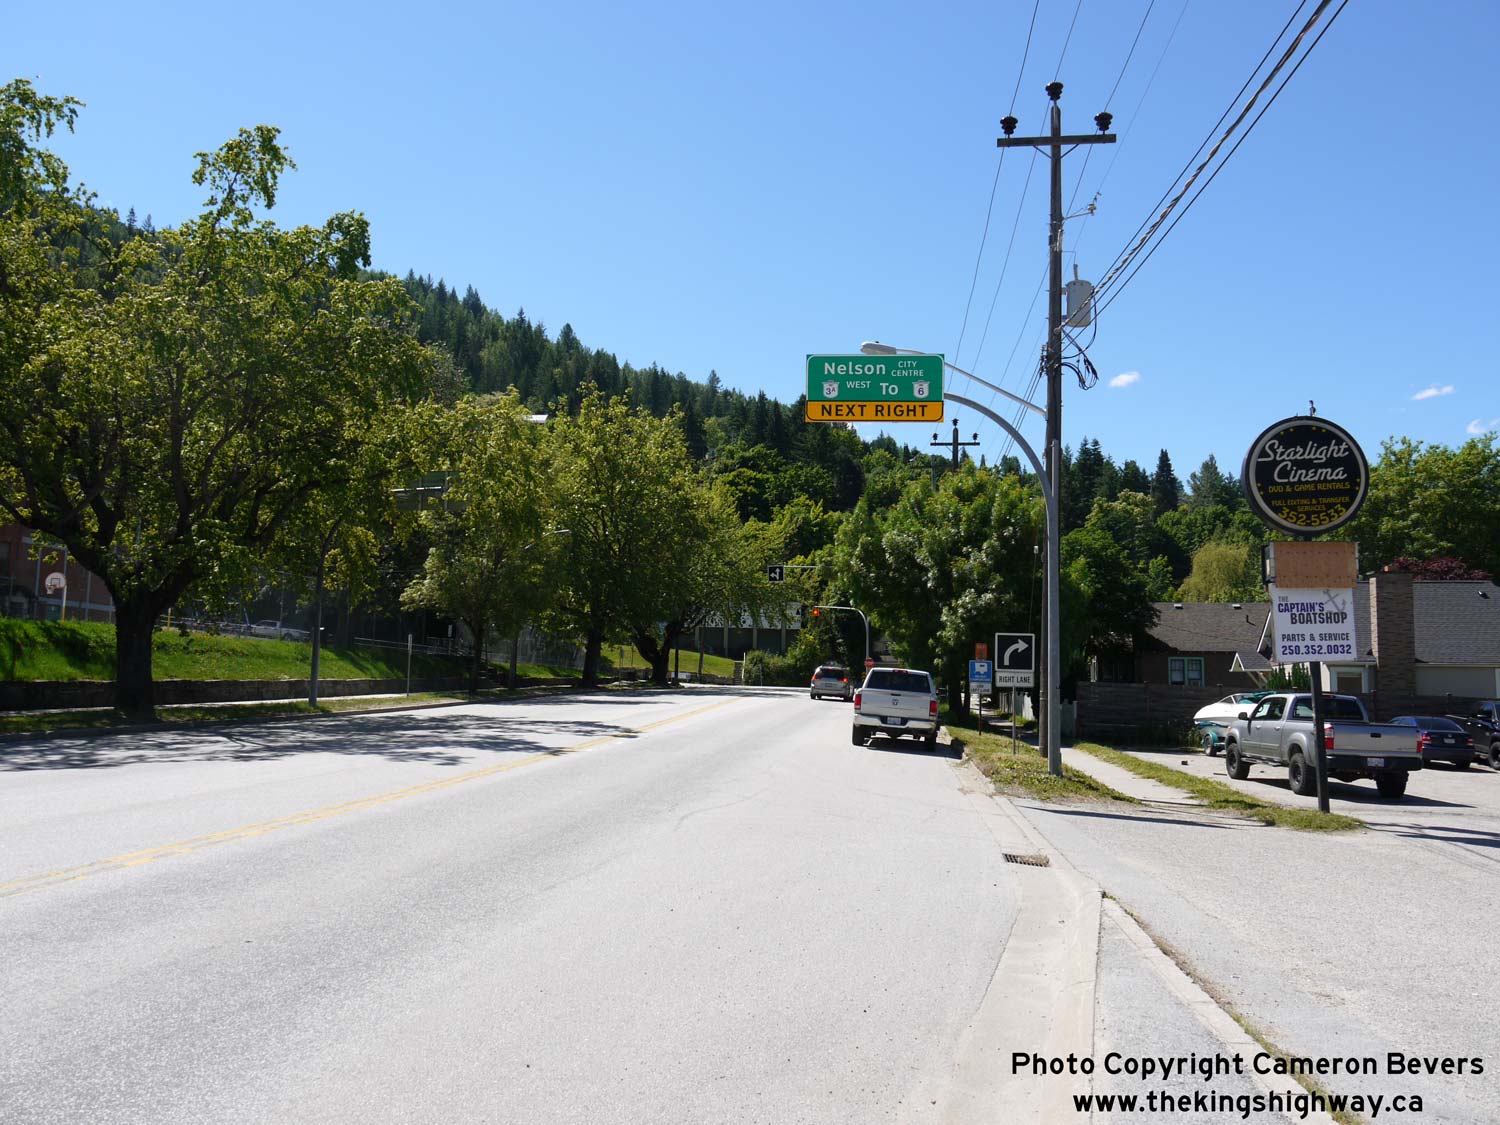

Left - The route of Hwy 3A turns right from Nelson Avenue onto Anderson Street. Note the overhead sign which marks the upcoming turn in the route of Hwy 3A,
but also has trailblazers for nearby Hwy 6. These two highways meet at an interchange just beyond Downtown Nelson. See an
Enlarged Photo Here. (Photograph taken on June 12, 2017 - © Cameron Bevers) Right - Facing east along Anderson Street (Hwy 3A) approaching the turn onto Nelson Avenue. See an Enlarged Photo Here. (Photograph taken on June 12, 2017 - © Cameron Bevers) 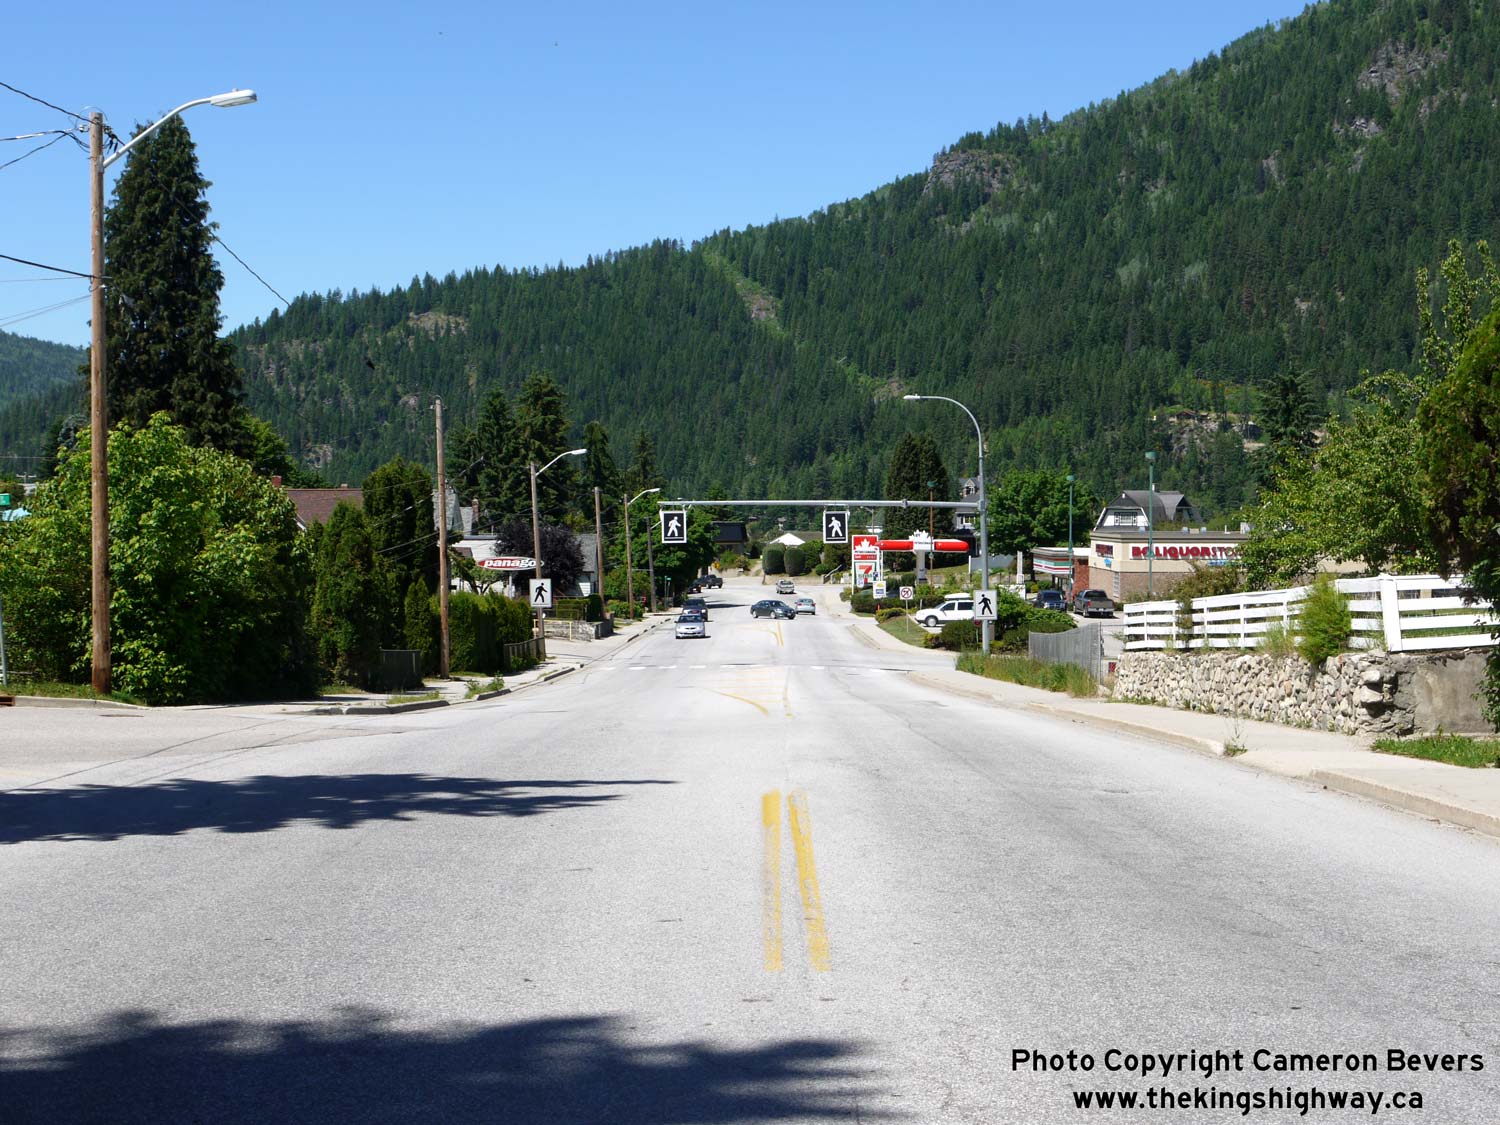

Left - Facing west along Anderson Street (Hwy 3A) through Nelson. Near the Petro-Canada Station in the background, Anderson Streets curves to the left and
becomes Front Street. See an Enlarged Photo Here. (Photograph taken on June 12, 2017 - © Cameron Bevers) Right - Facing east along Hwy 3A (Front Street) from Ward Street in Downtown Nelson. See an Enlarged Photo Here. (Photograph taken on June 12, 2017 - © Cameron Bevers) 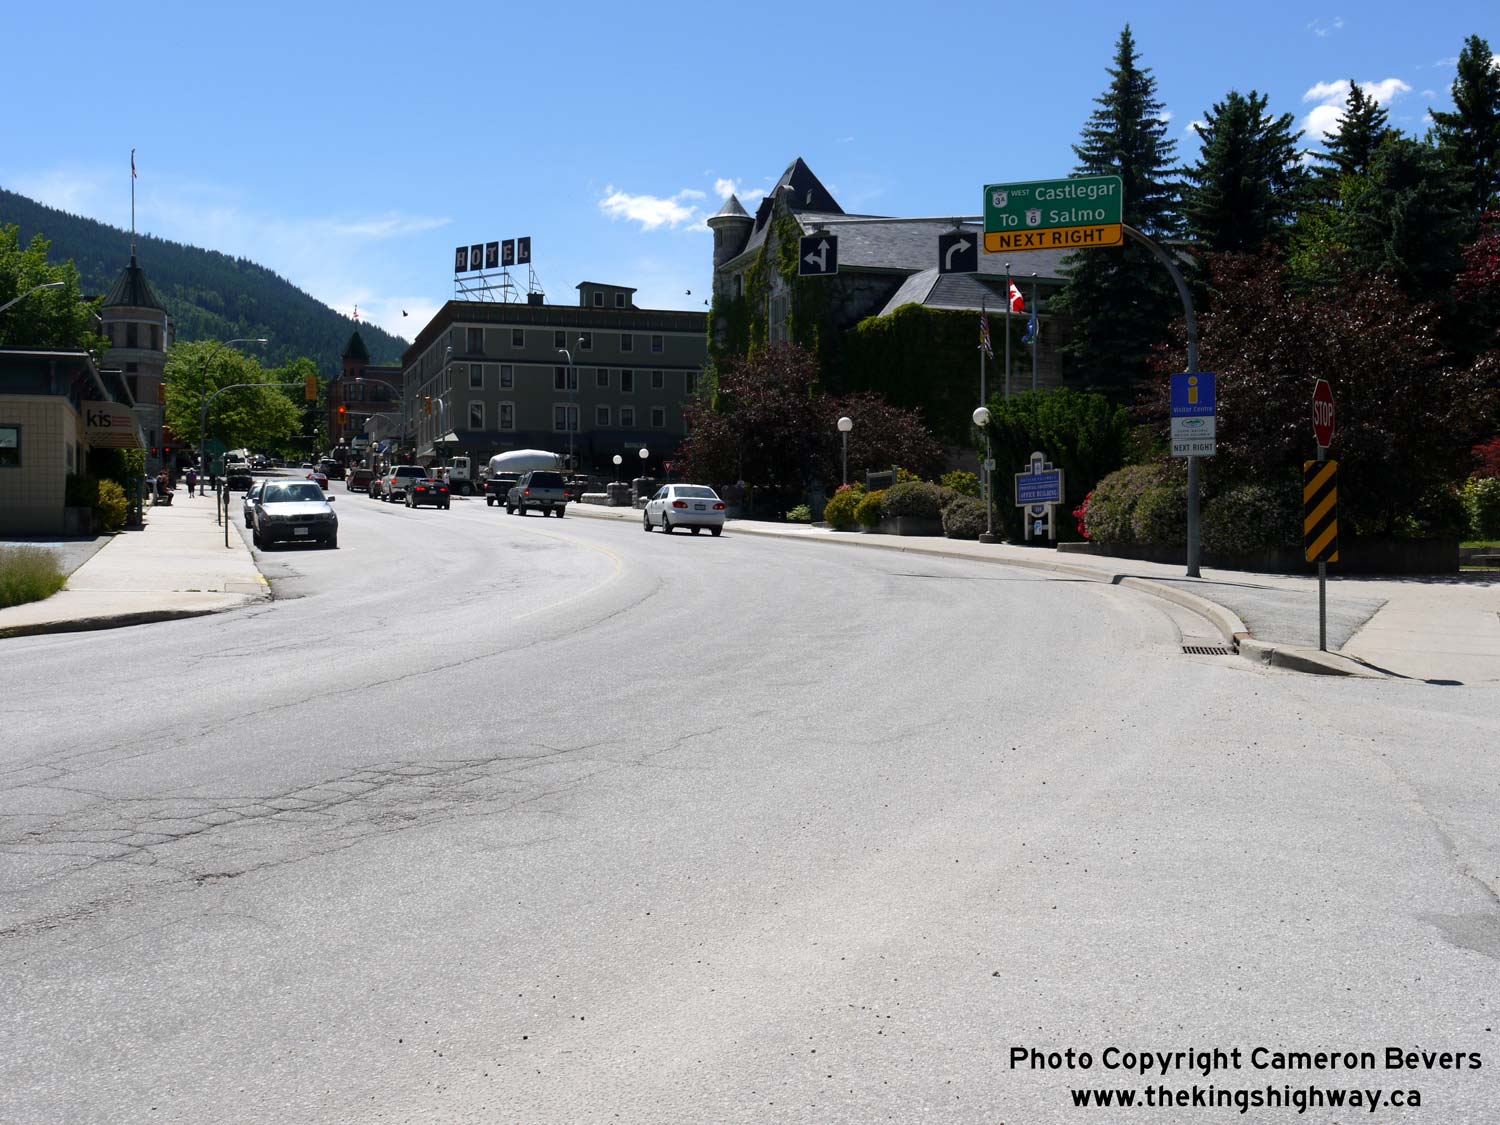
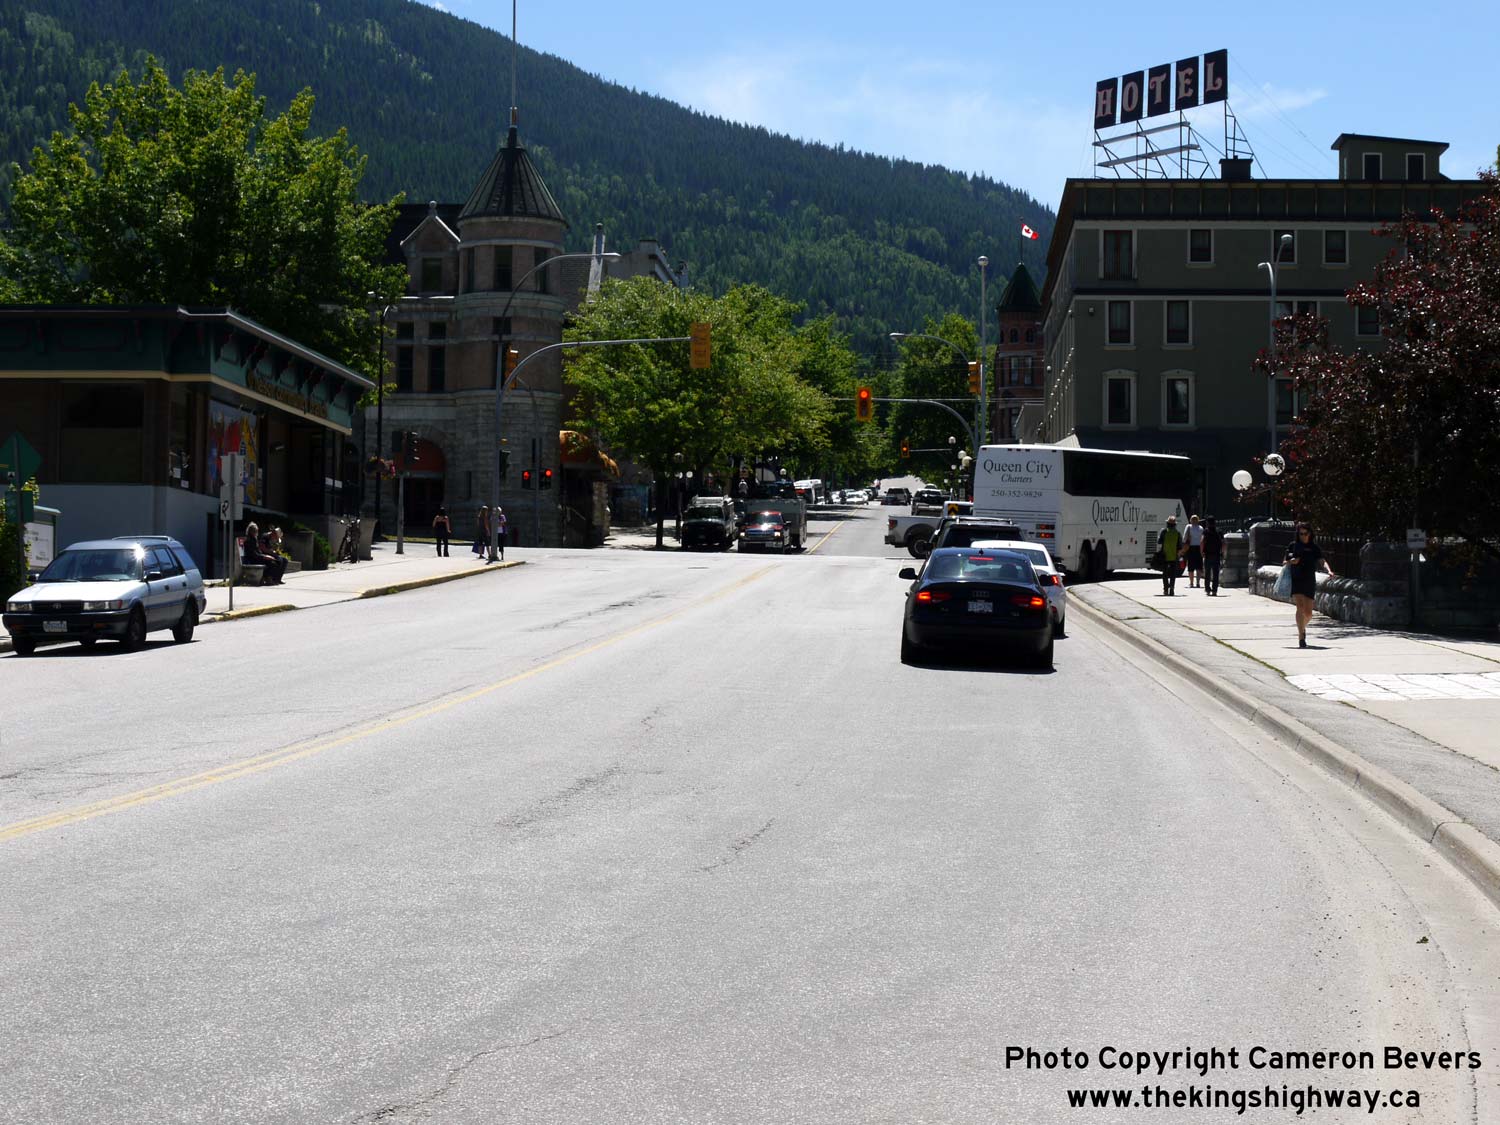
Left - Hwy 3A curves from Front Street onto Ward Street in Downtown Nelson. The highway then immediately turns right at the next intersection onto Vernon
Street. Although the route of Hwy 3A through Nelson is rather complicated, it is well marked through the use of overhead guide signs. See an
Enlarged Photo Here. (Photograph taken on June 12, 2017 - © Cameron Bevers) Right - Facing south along Ward Street at Vernon Street. Some of Downtown Nelson's classic 19th Century architecture can be seen in this photo. Since the city is built up the side of the mountain, steep grades on city streets and flat, table-top intersections are quite common here. Note the successive series of intersections as Ward Street progresses uphill in the distance. See an Enlarged Photo Here. (Photograph taken on June 12, 2017 - © Cameron Bevers) 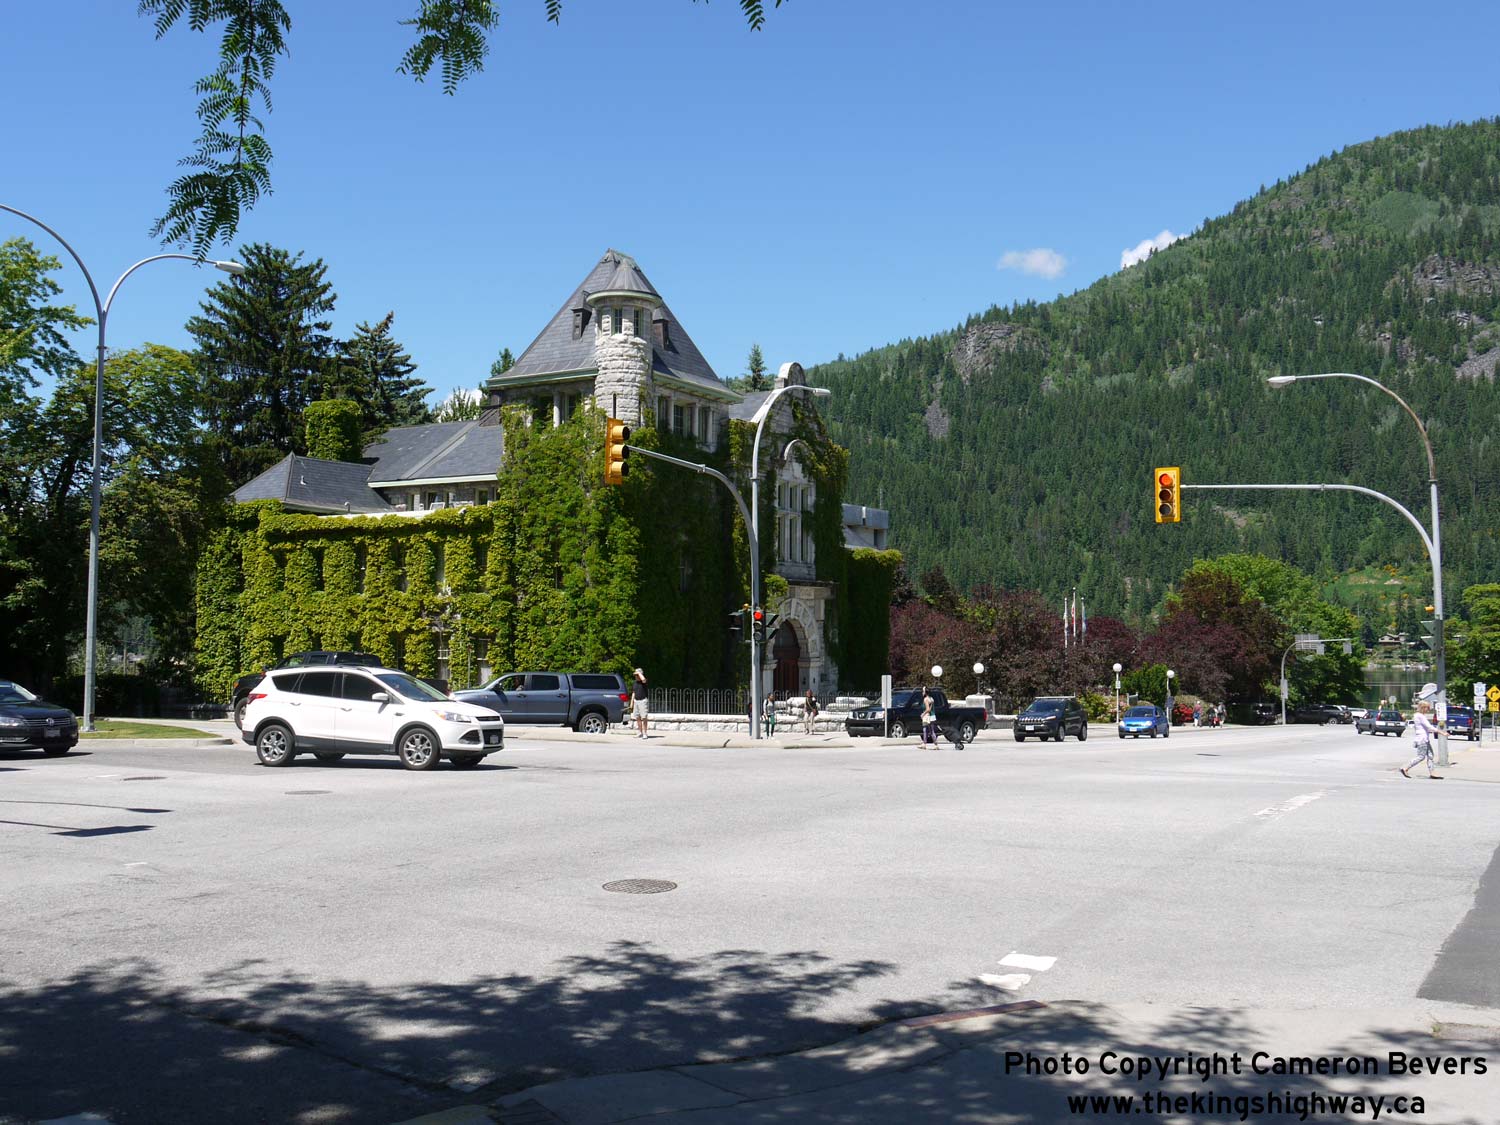
Left - Nelson's historic courthouse is a focal point at the intersection of Ward Street and Vernon Street (Hwy 3A) in Downtown Nelson. See an
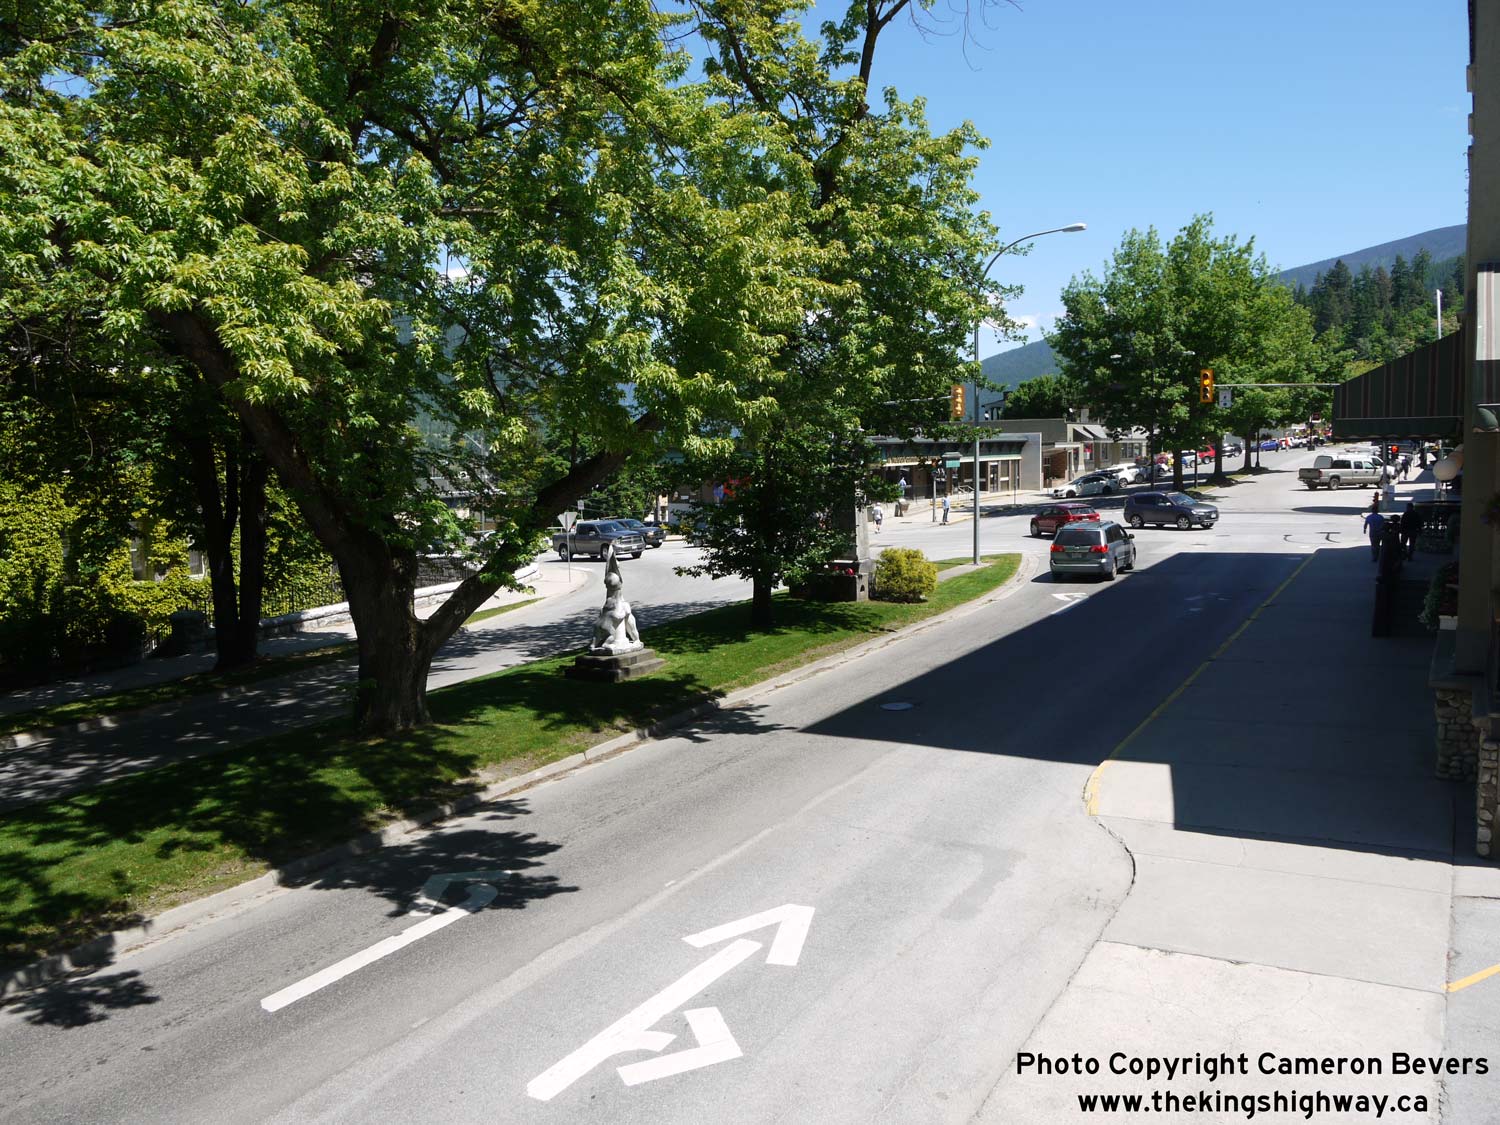
Enlarged Photo Here. (Photograph taken on June 12, 2017 - © Cameron Bevers) Right - Facing east along tree-lined Vernon Street (Hwy 3A) approaching Ward Street. Hwy 3A turns left onto Ward Street as it heads east towards the Kootenay Lake Ferry. See an Enlarged Photo Here. (Photograph taken on June 12, 2017 - © Cameron Bevers) 
Left - Hwy 3A (Vernon Street) in Downtown Nelson, facing east from Stanley Street. See an
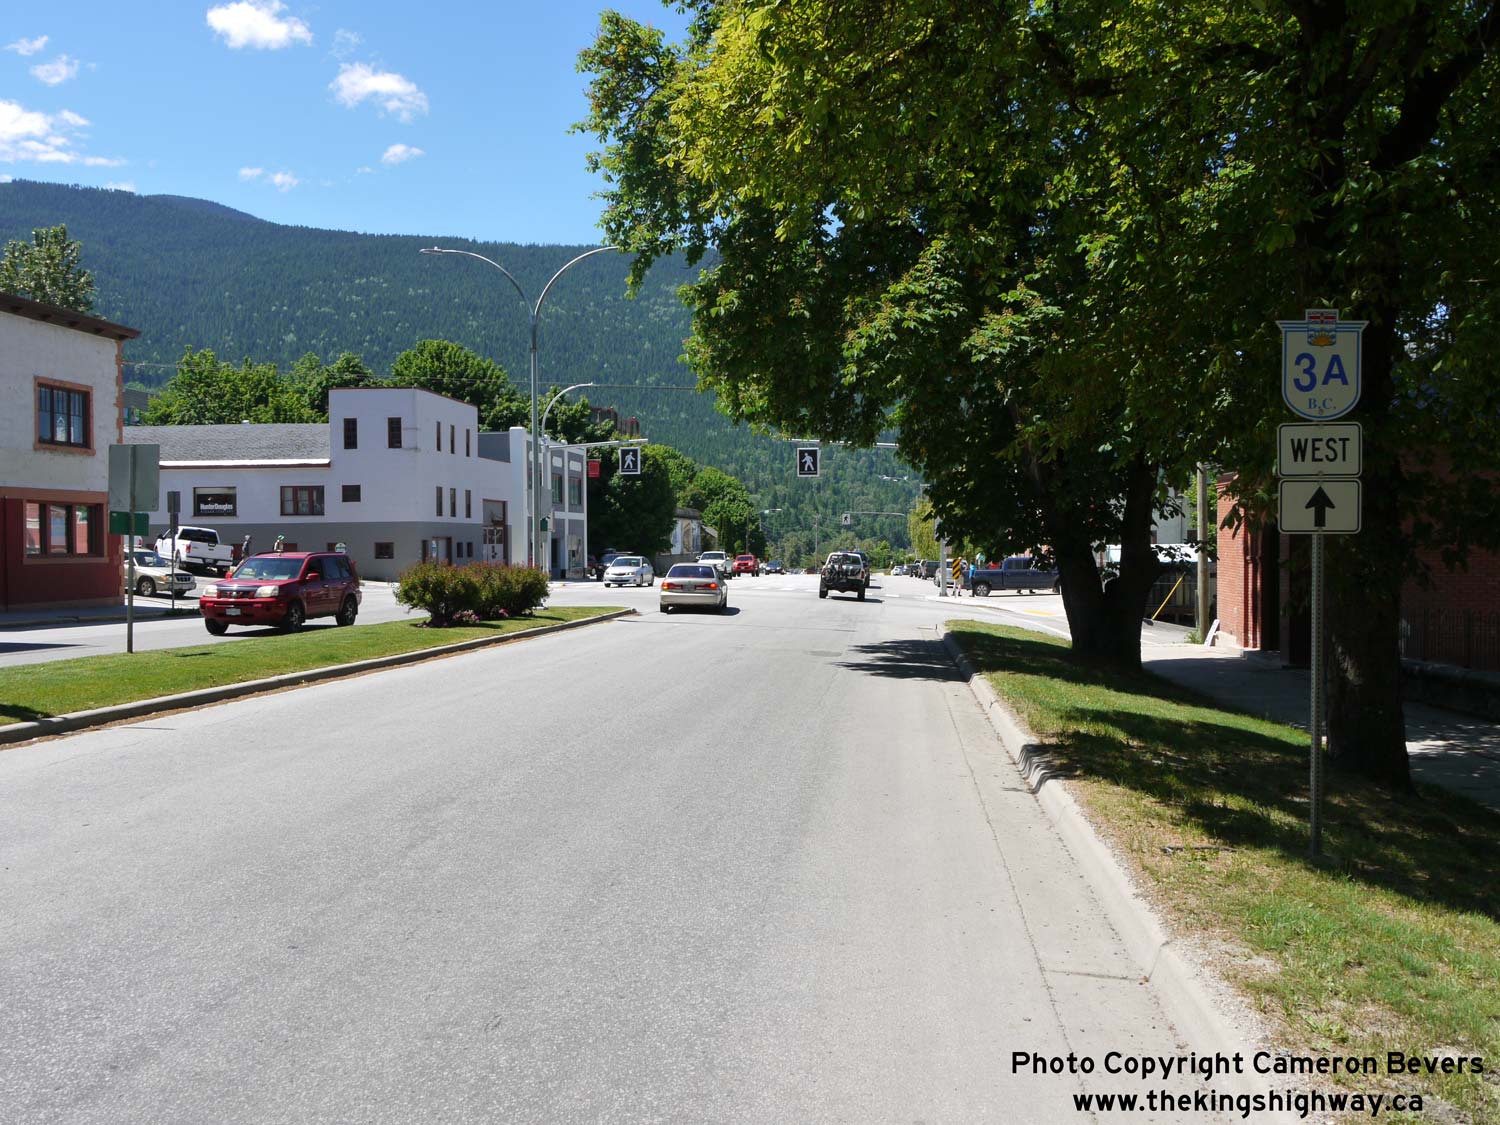
Enlarged Photo Here. (Photograph taken on June 12, 2017 - © Cameron Bevers) Right - Facing west along Vernon Street (Hwy 3A) departing Downtown Nelson. At the end of Vernon Street, Hwy 3A curves to the left and connects with Hwy 6 at a grade-separated interchange. From Nelson, traffic can either head south towards Selmo and the United States Border via Hwy 6, or continue west via Hwy 3A & Hwy 6 towards Castlegar. See an Enlarged Photo Here. (Photograph taken on June 12, 2017 - © Cameron Bevers)
Continue west along BC Highway 3A from Nelson to Castlegar |
|---|
Links to Adjacent BC Highway Photograph Pages:
Back to BC Highway 3 Photos /
British Columbia Highways Photo Index /
On to BC Highway 3B Photos
Ontario Highway History - Main Menu / Vacation Highway Photos - Main Menu Website contents, photos & text © 2002-2026, Cameron
Bevers (Webmaster) - All Rights Reserved / Contact Me
|
|---|