| 
| |
|
|
This page contains historical and present day photos of Ontario's King's Highway 11B (Tri-Town Business Route). All
photographs displayed on this page were taken by the Webmaster (Cameron Bevers), unless specifically noted otherwise. Historical photographs are arranged in
approximate chronological order, while present day photographs (Year 2005 to date) are arranged by location from south to north. Click on any thumbnail to see a
larger image!
Please note that all photographs displayed on this
website are protected by copyright. These photographs must not be reproduced, published,
electronically stored or copied, distributed, or posted onto other websites without
my written permission. If you want to use photos from this website, please
email me first for permission. Thank-you!
|
|---|
|
Historical King's Highway 11B (Tri-Town) Photographs
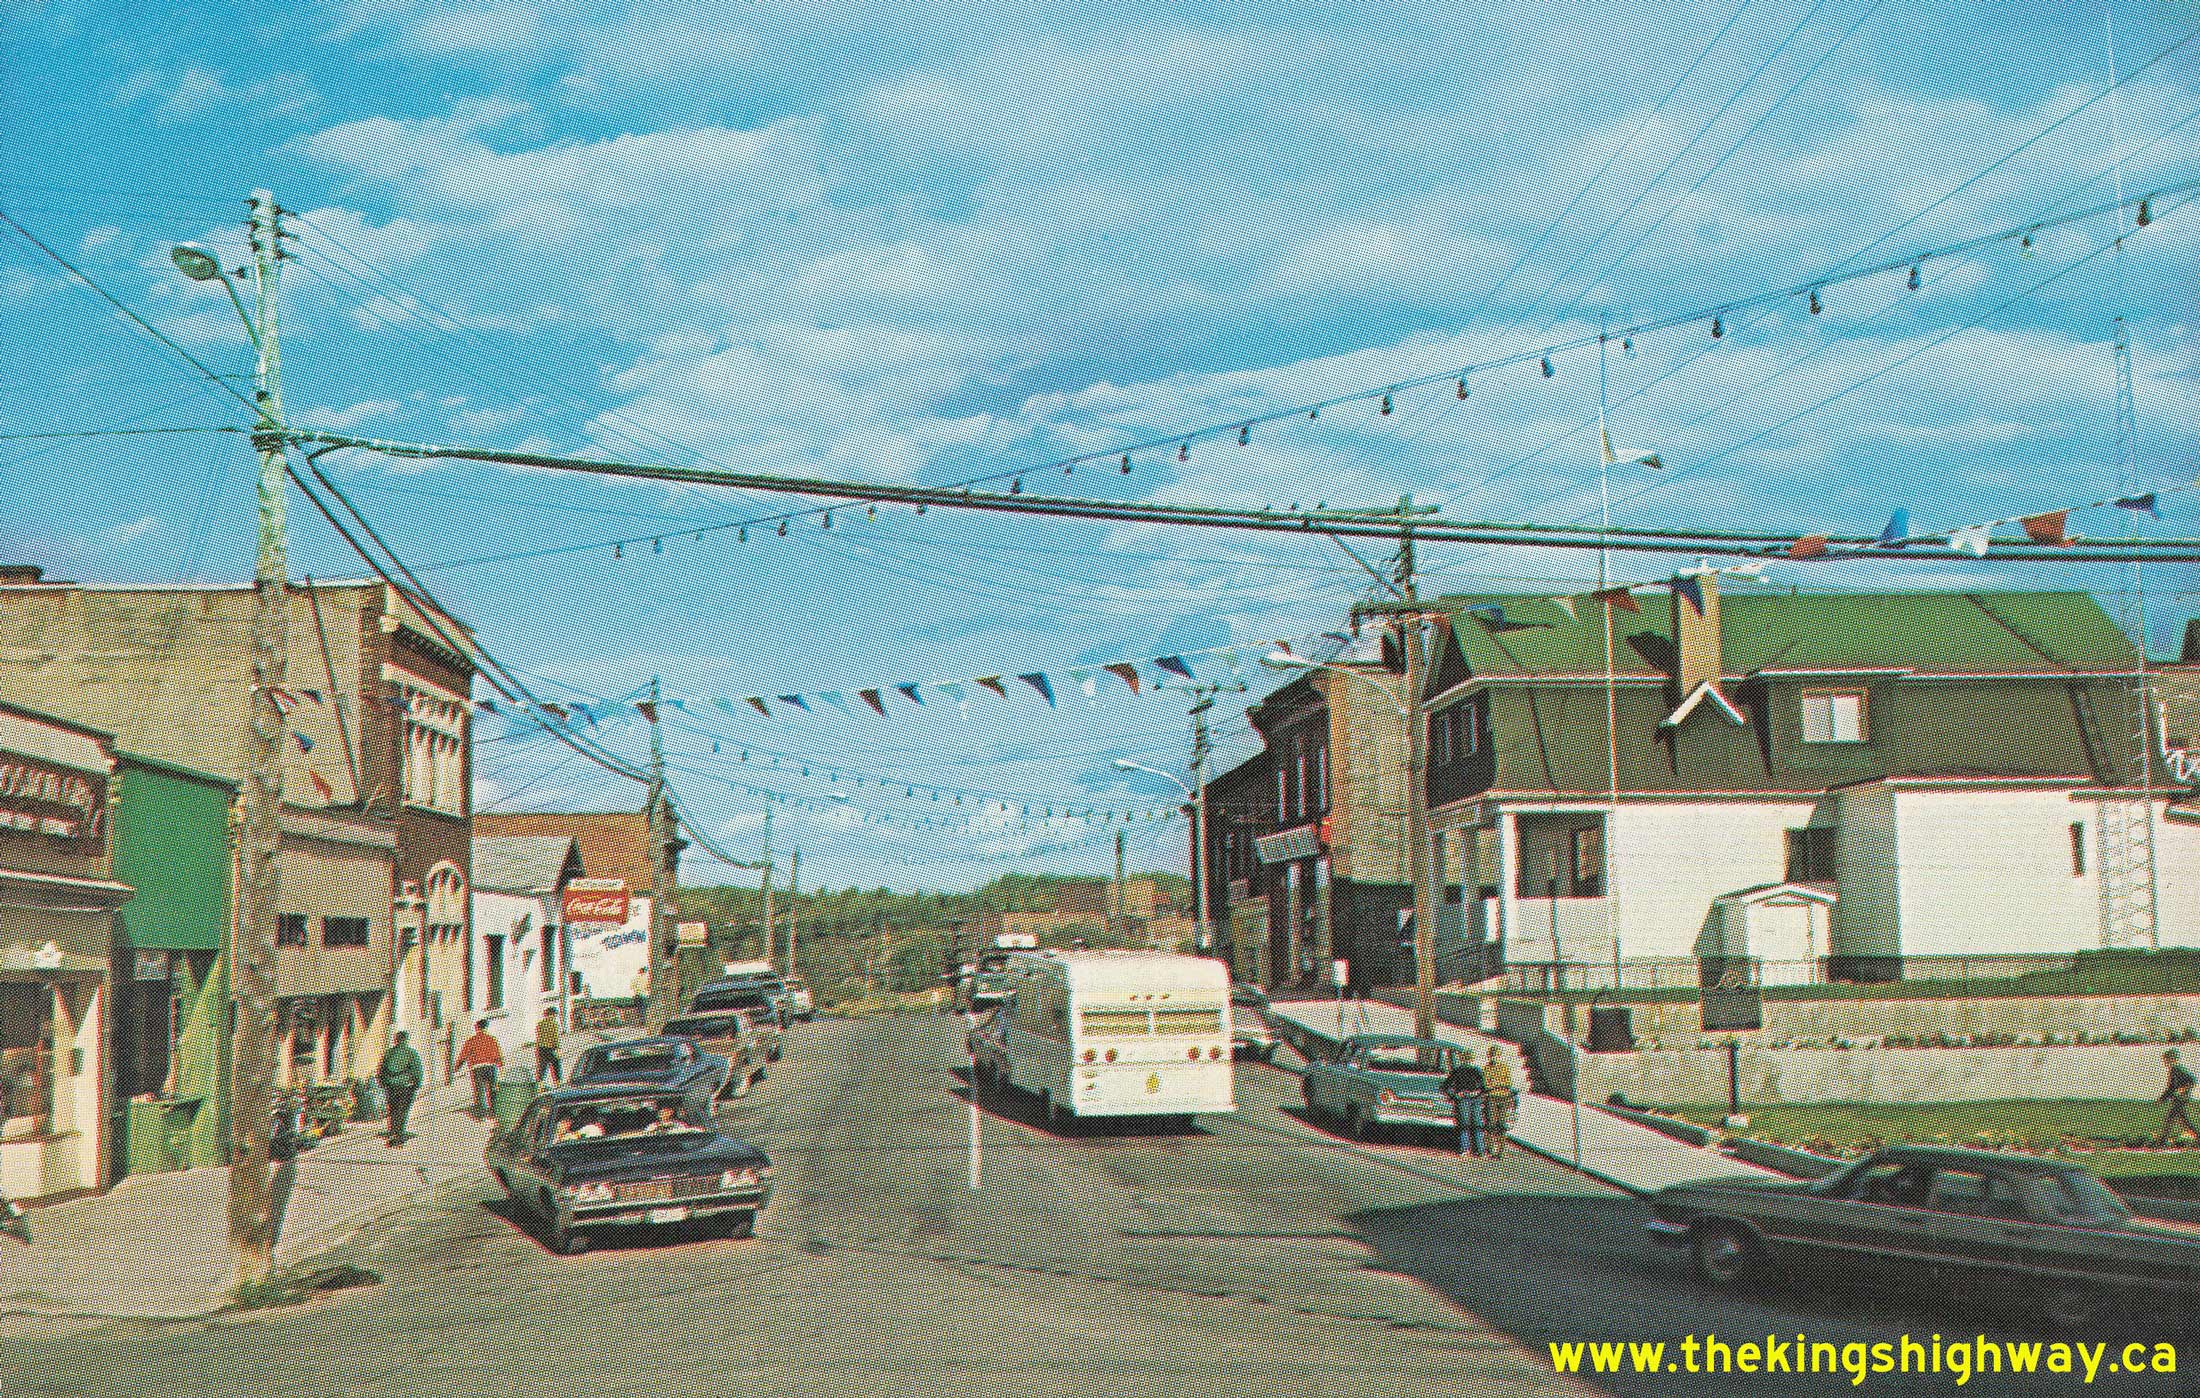
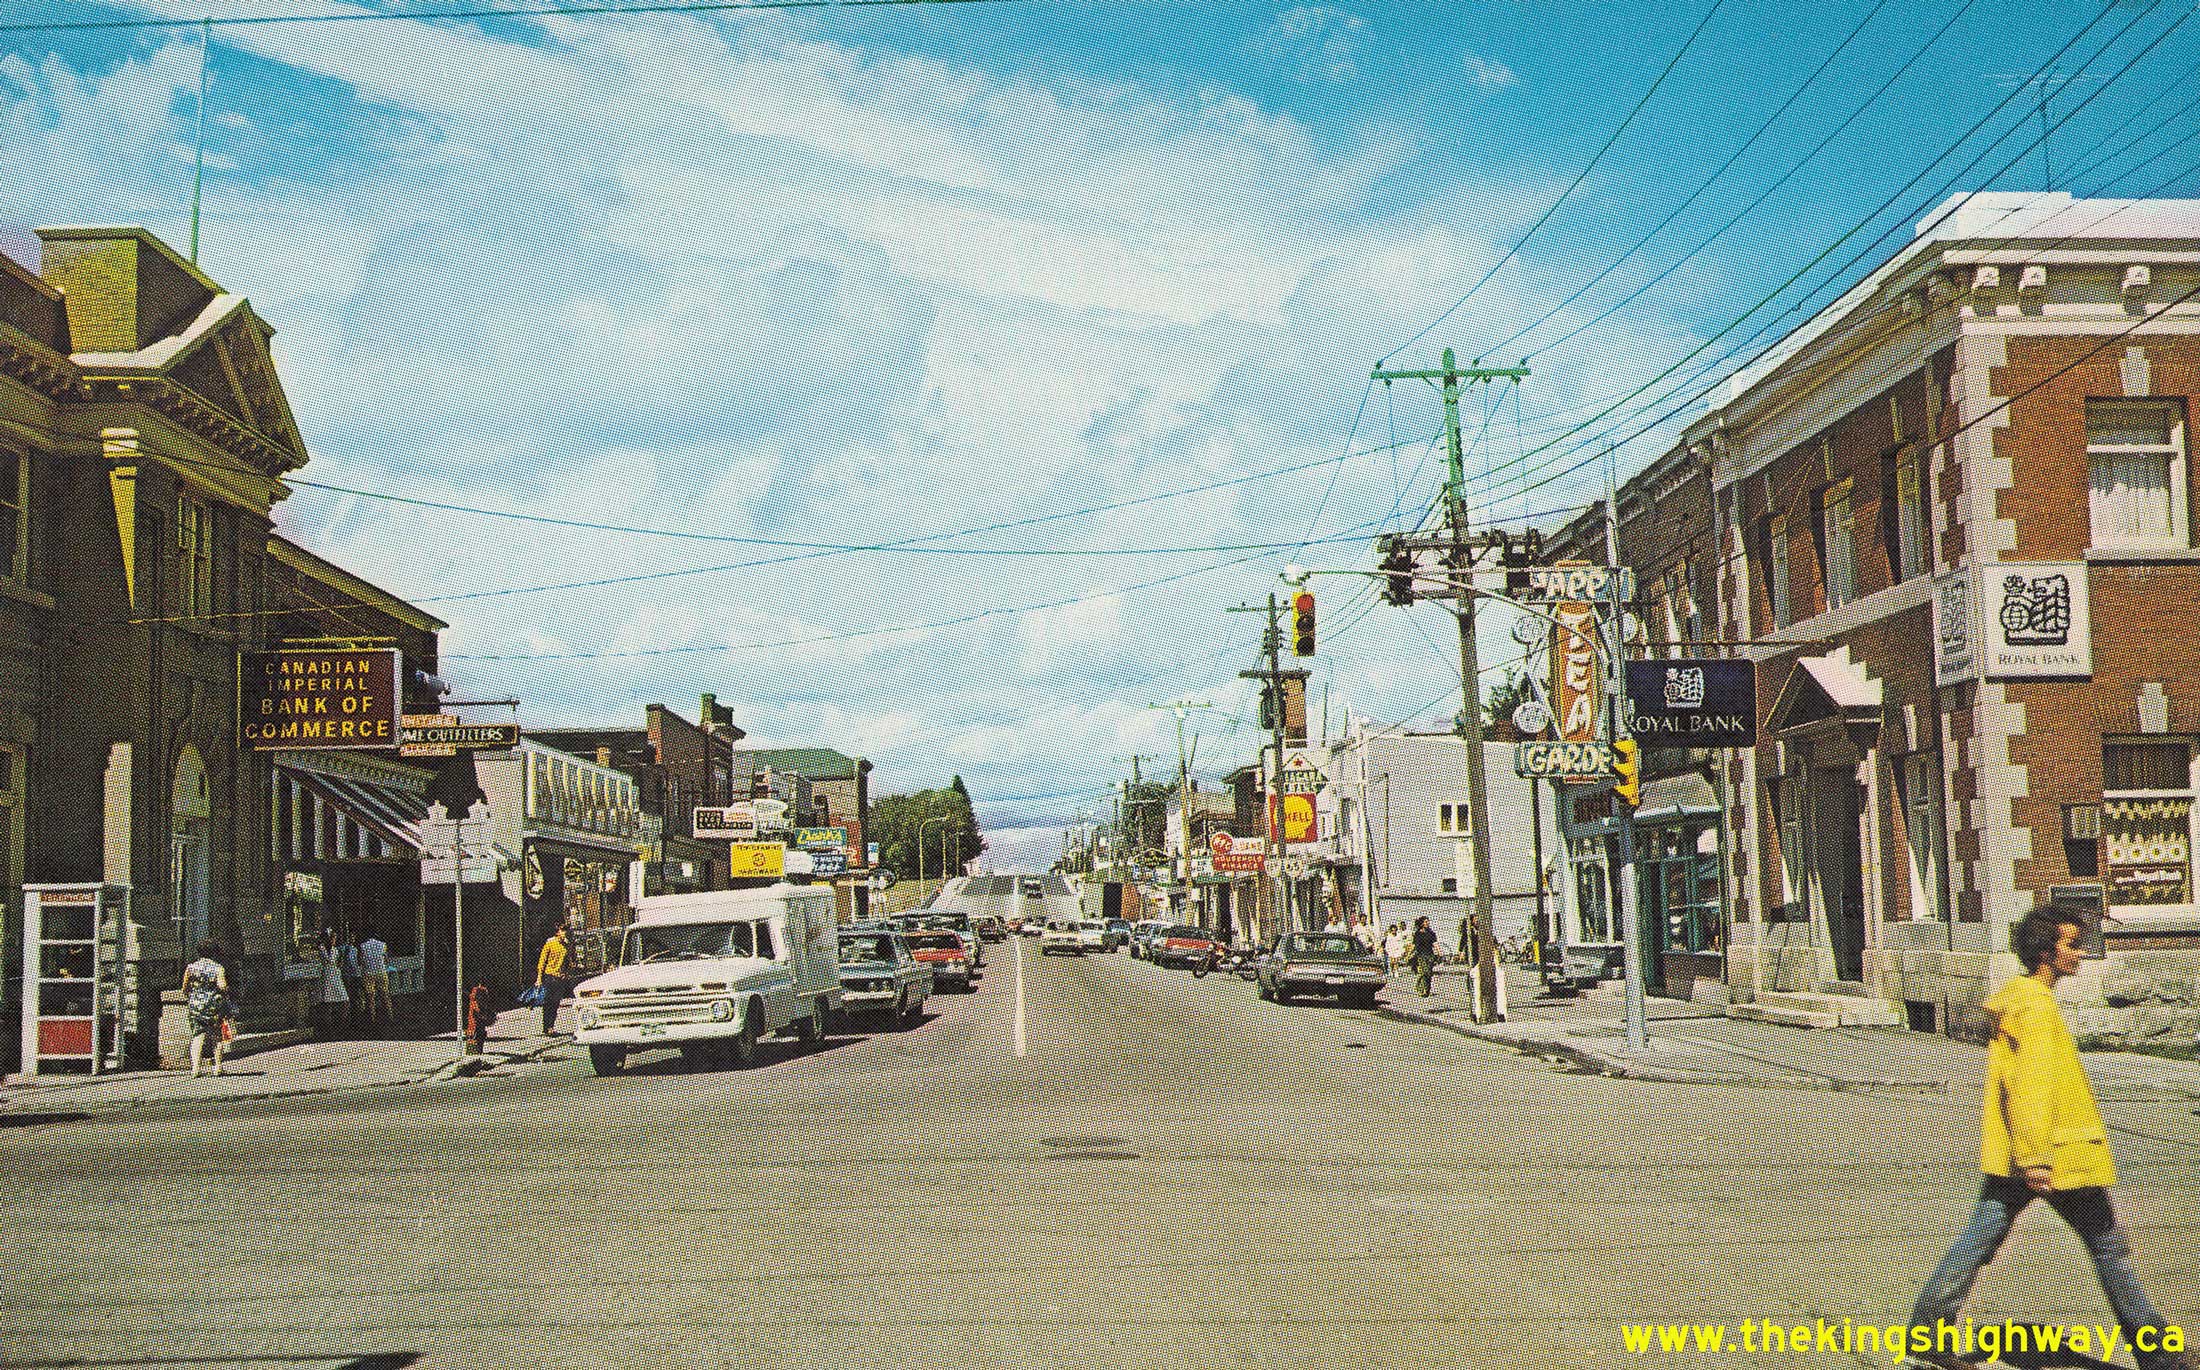
  Above - Circa 1966 postcard view of Hwy 11B (Lang Street), facing north from Silver Street in Downtown Cobalt. The construction of the Tri-Town Bypass in the
early 1960s provided considerable relief from traffic congestion through the town centres of Cobalt, Haileybury and New Liskeard. Prior to the completion of the bypass
in 1963, every truck heading into Northeastern Ontario via Hwy 11 had to negotiate Cobalt's winding streets. See an
Enlarged Photo Here. Above - Circa 1966 postcard view of Hwy 11B (Lang Street), facing north from Silver Street in Downtown Cobalt. The construction of the Tri-Town Bypass in the
early 1960s provided considerable relief from traffic congestion through the town centres of Cobalt, Haileybury and New Liskeard. Prior to the completion of the bypass
in 1963, every truck heading into Northeastern Ontario via Hwy 11 had to negotiate Cobalt's winding streets. See an
Enlarged Photo Here.(Photo courtesy of Len Leiffer) 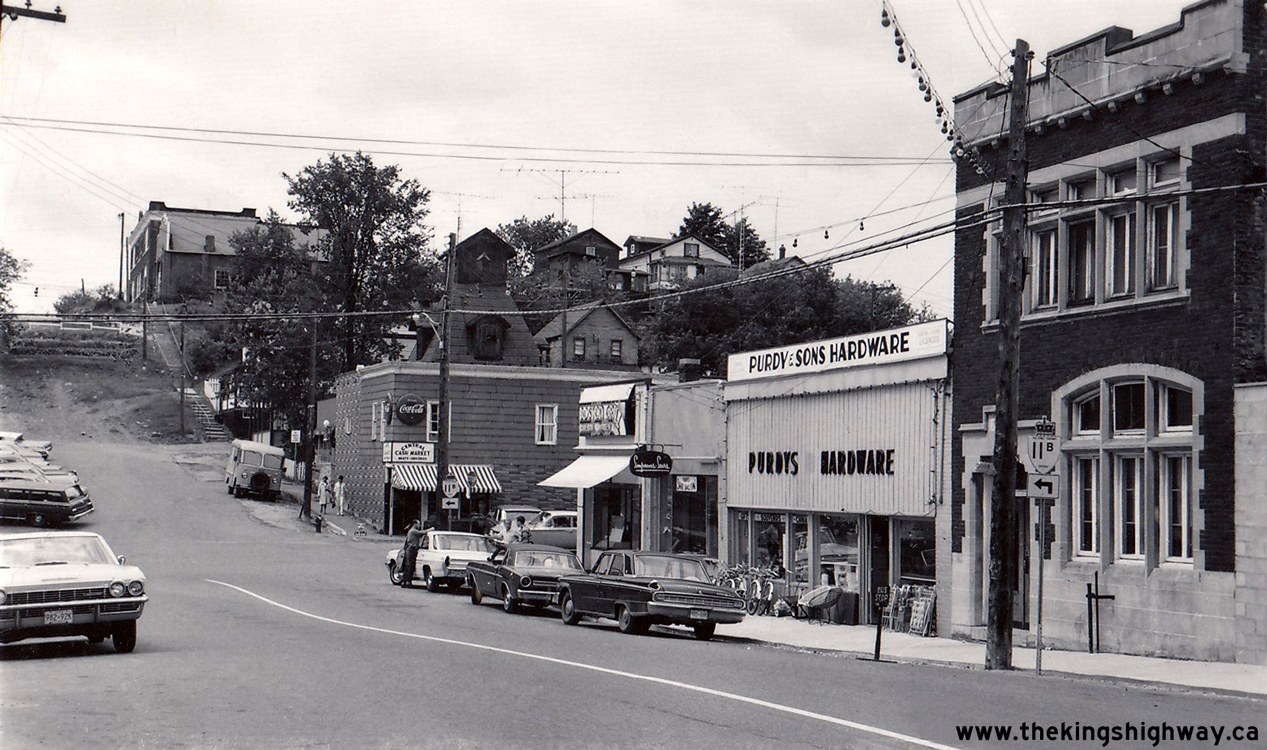
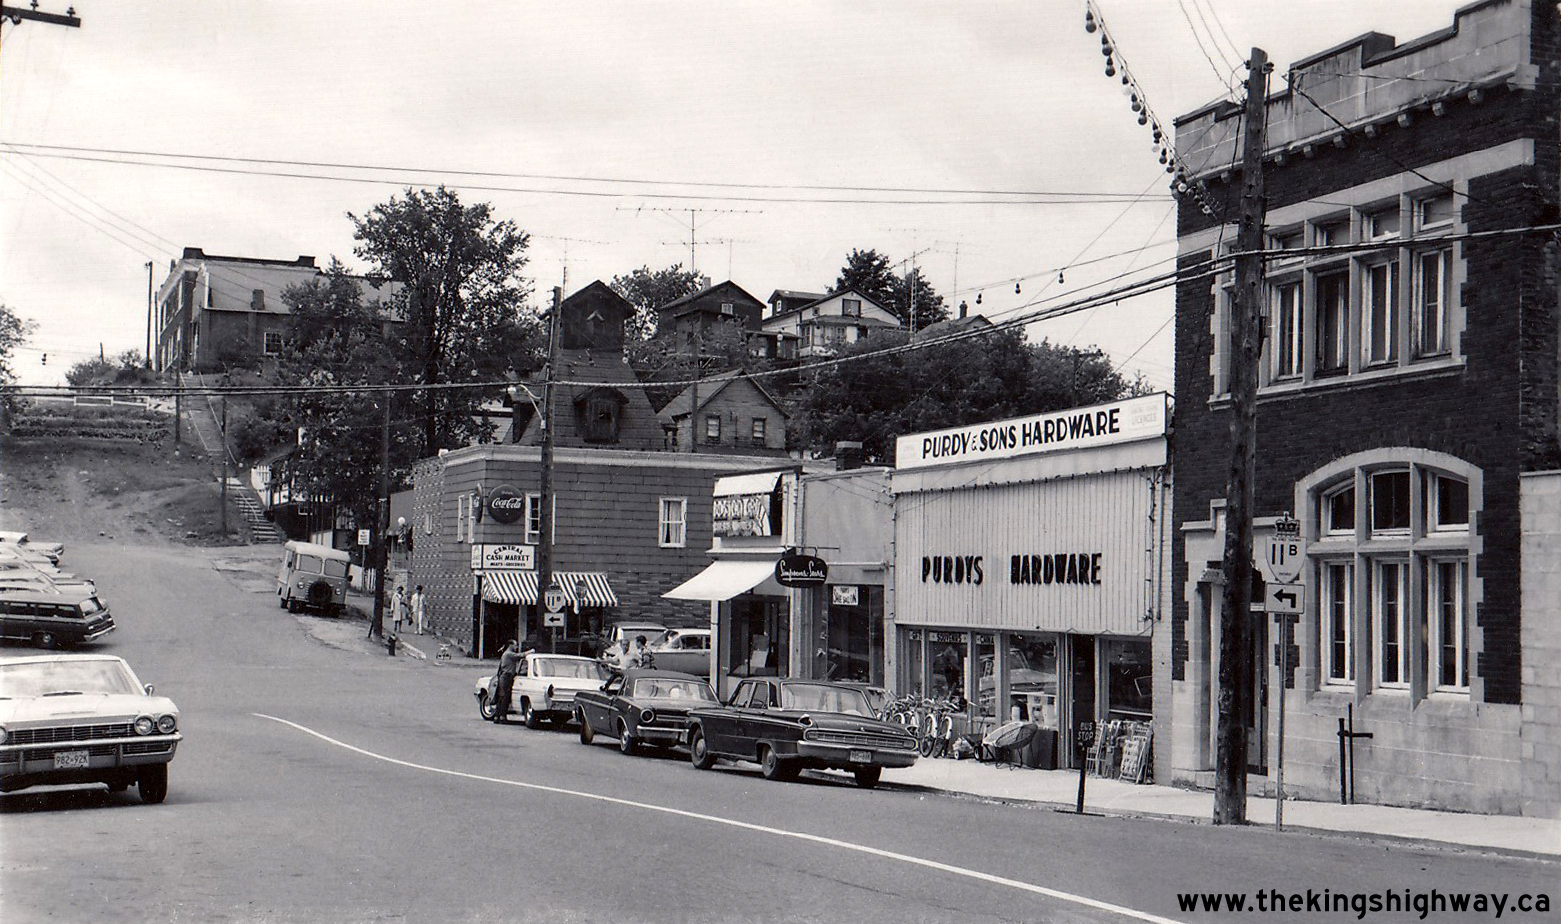
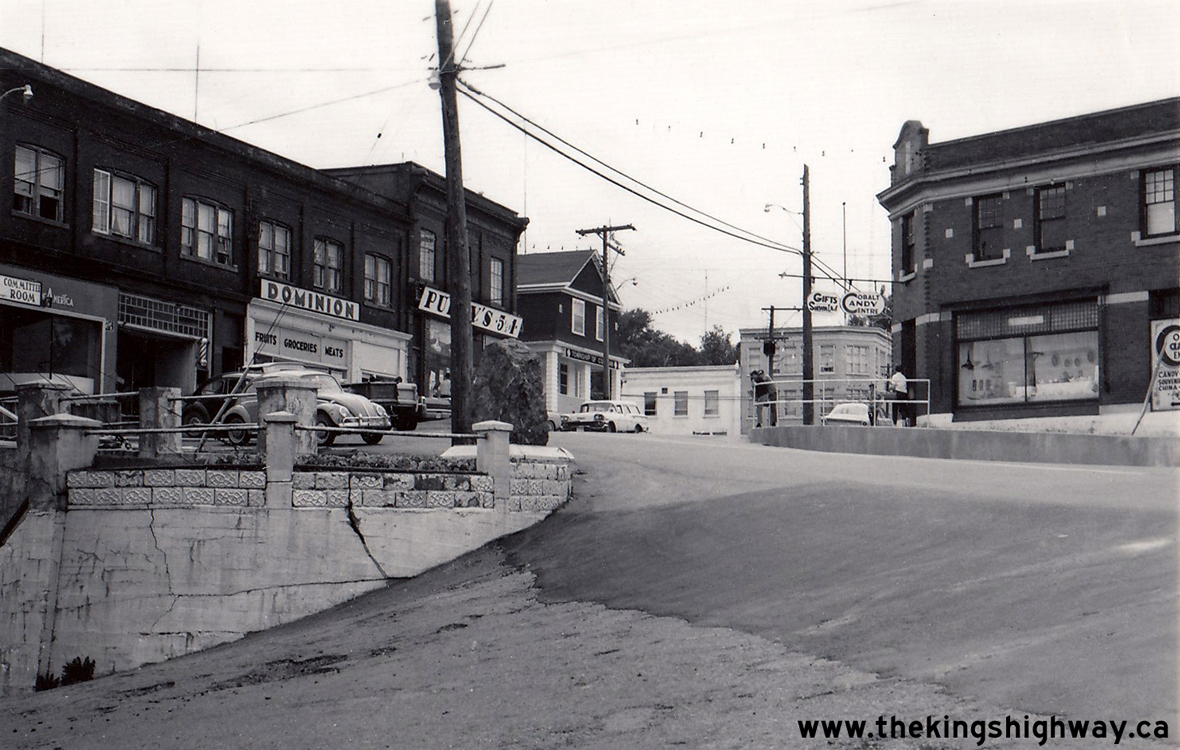 Left - View of Hwy 11B (Lang Street), facing south towards Silver Street in Downtown Cobalt in 1968. One of Cobalt's most curious historical buildings is the
grocery store (Central Cash Market) located at the intersection of Lang Street and Silver Street, which was built on top of an old mine shaft in the 1920s. The grocer
ingeniously used the old mine site to let the cold air rising from the deep as a natural refrigeration and air conditioning system for the store. Careful observers
will note the old mining headframe protruding through the roof of the store. This building still stands today, and currently operates as the Lavender Fox Tea House.
See an Enlarged Photo Here. Photo taken in 1968. Left - View of Hwy 11B (Lang Street), facing south towards Silver Street in Downtown Cobalt in 1968. One of Cobalt's most curious historical buildings is the
grocery store (Central Cash Market) located at the intersection of Lang Street and Silver Street, which was built on top of an old mine shaft in the 1920s. The grocer
ingeniously used the old mine site to let the cold air rising from the deep as a natural refrigeration and air conditioning system for the store. Careful observers
will note the old mining headframe protruding through the roof of the store. This building still stands today, and currently operates as the Lavender Fox Tea House.
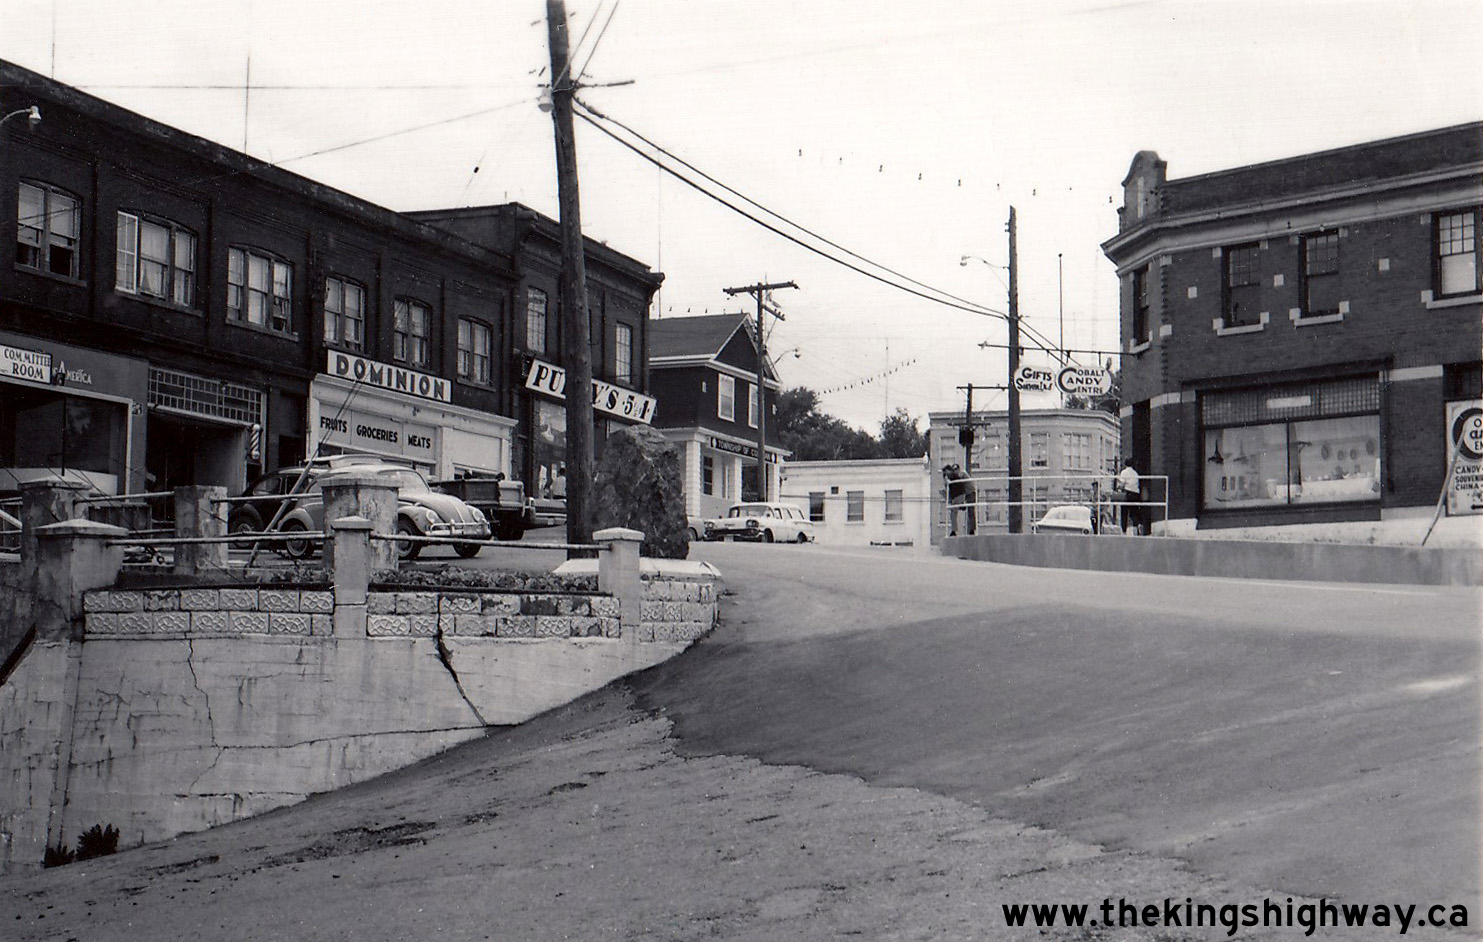
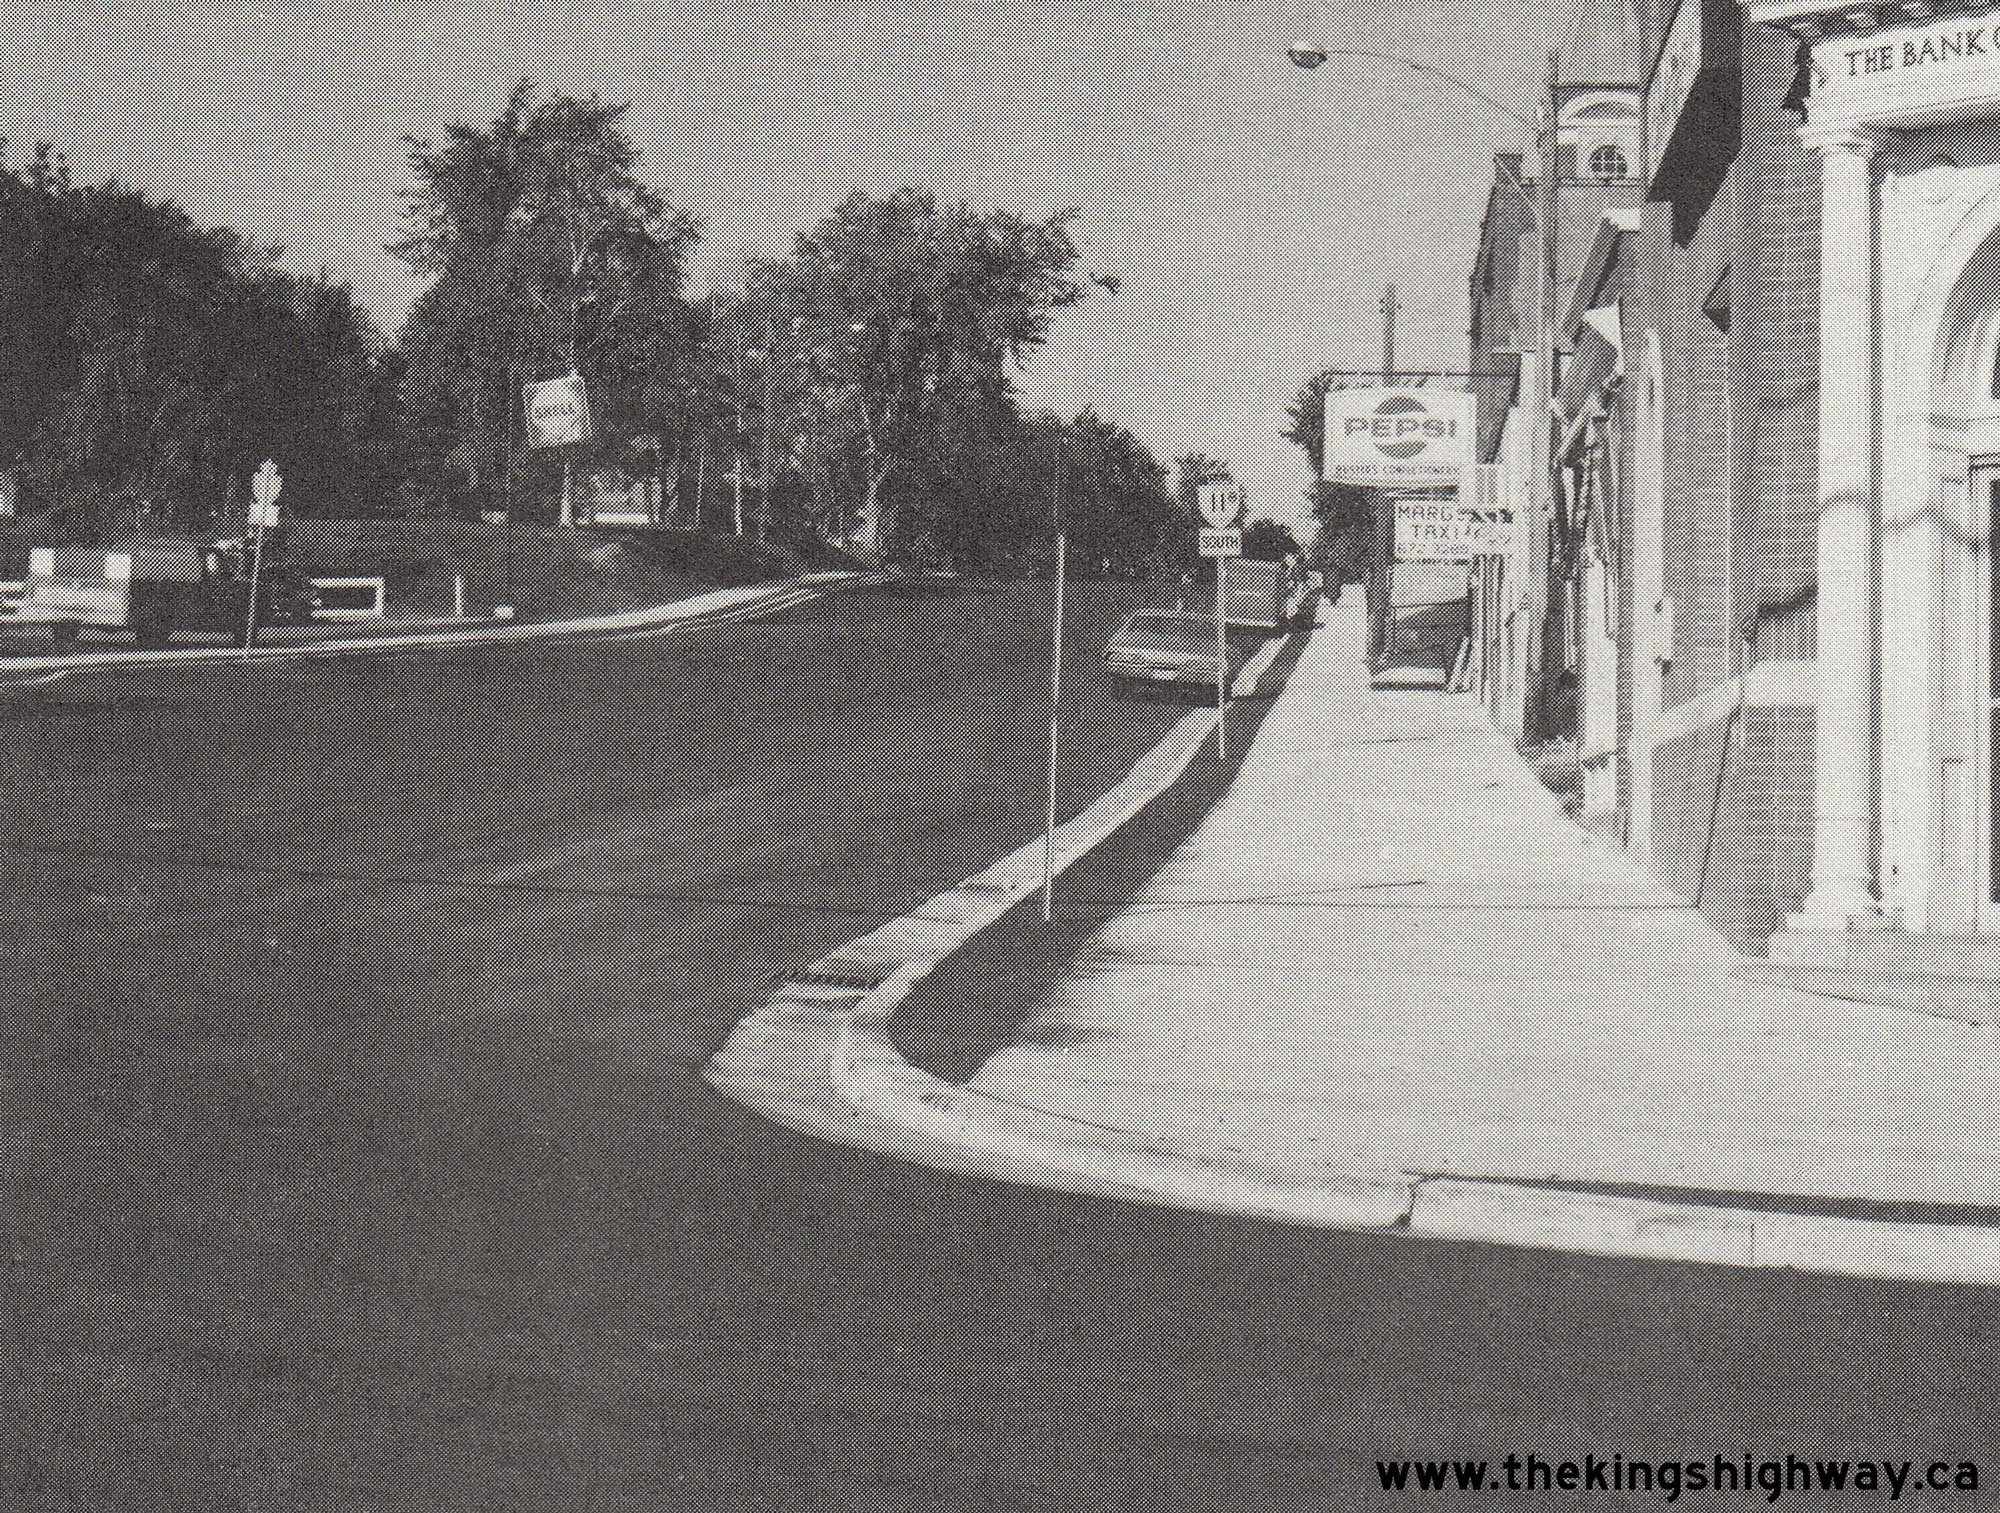
See an Enlarged Photo Here. Photo taken in 1968.(Photo from Cameron Bevers' historical photograph collection - Original photographer unknown) Right - View of Hwy 11B (Lang Street), facing south from Argentite Street in Downtown Cobalt. See an
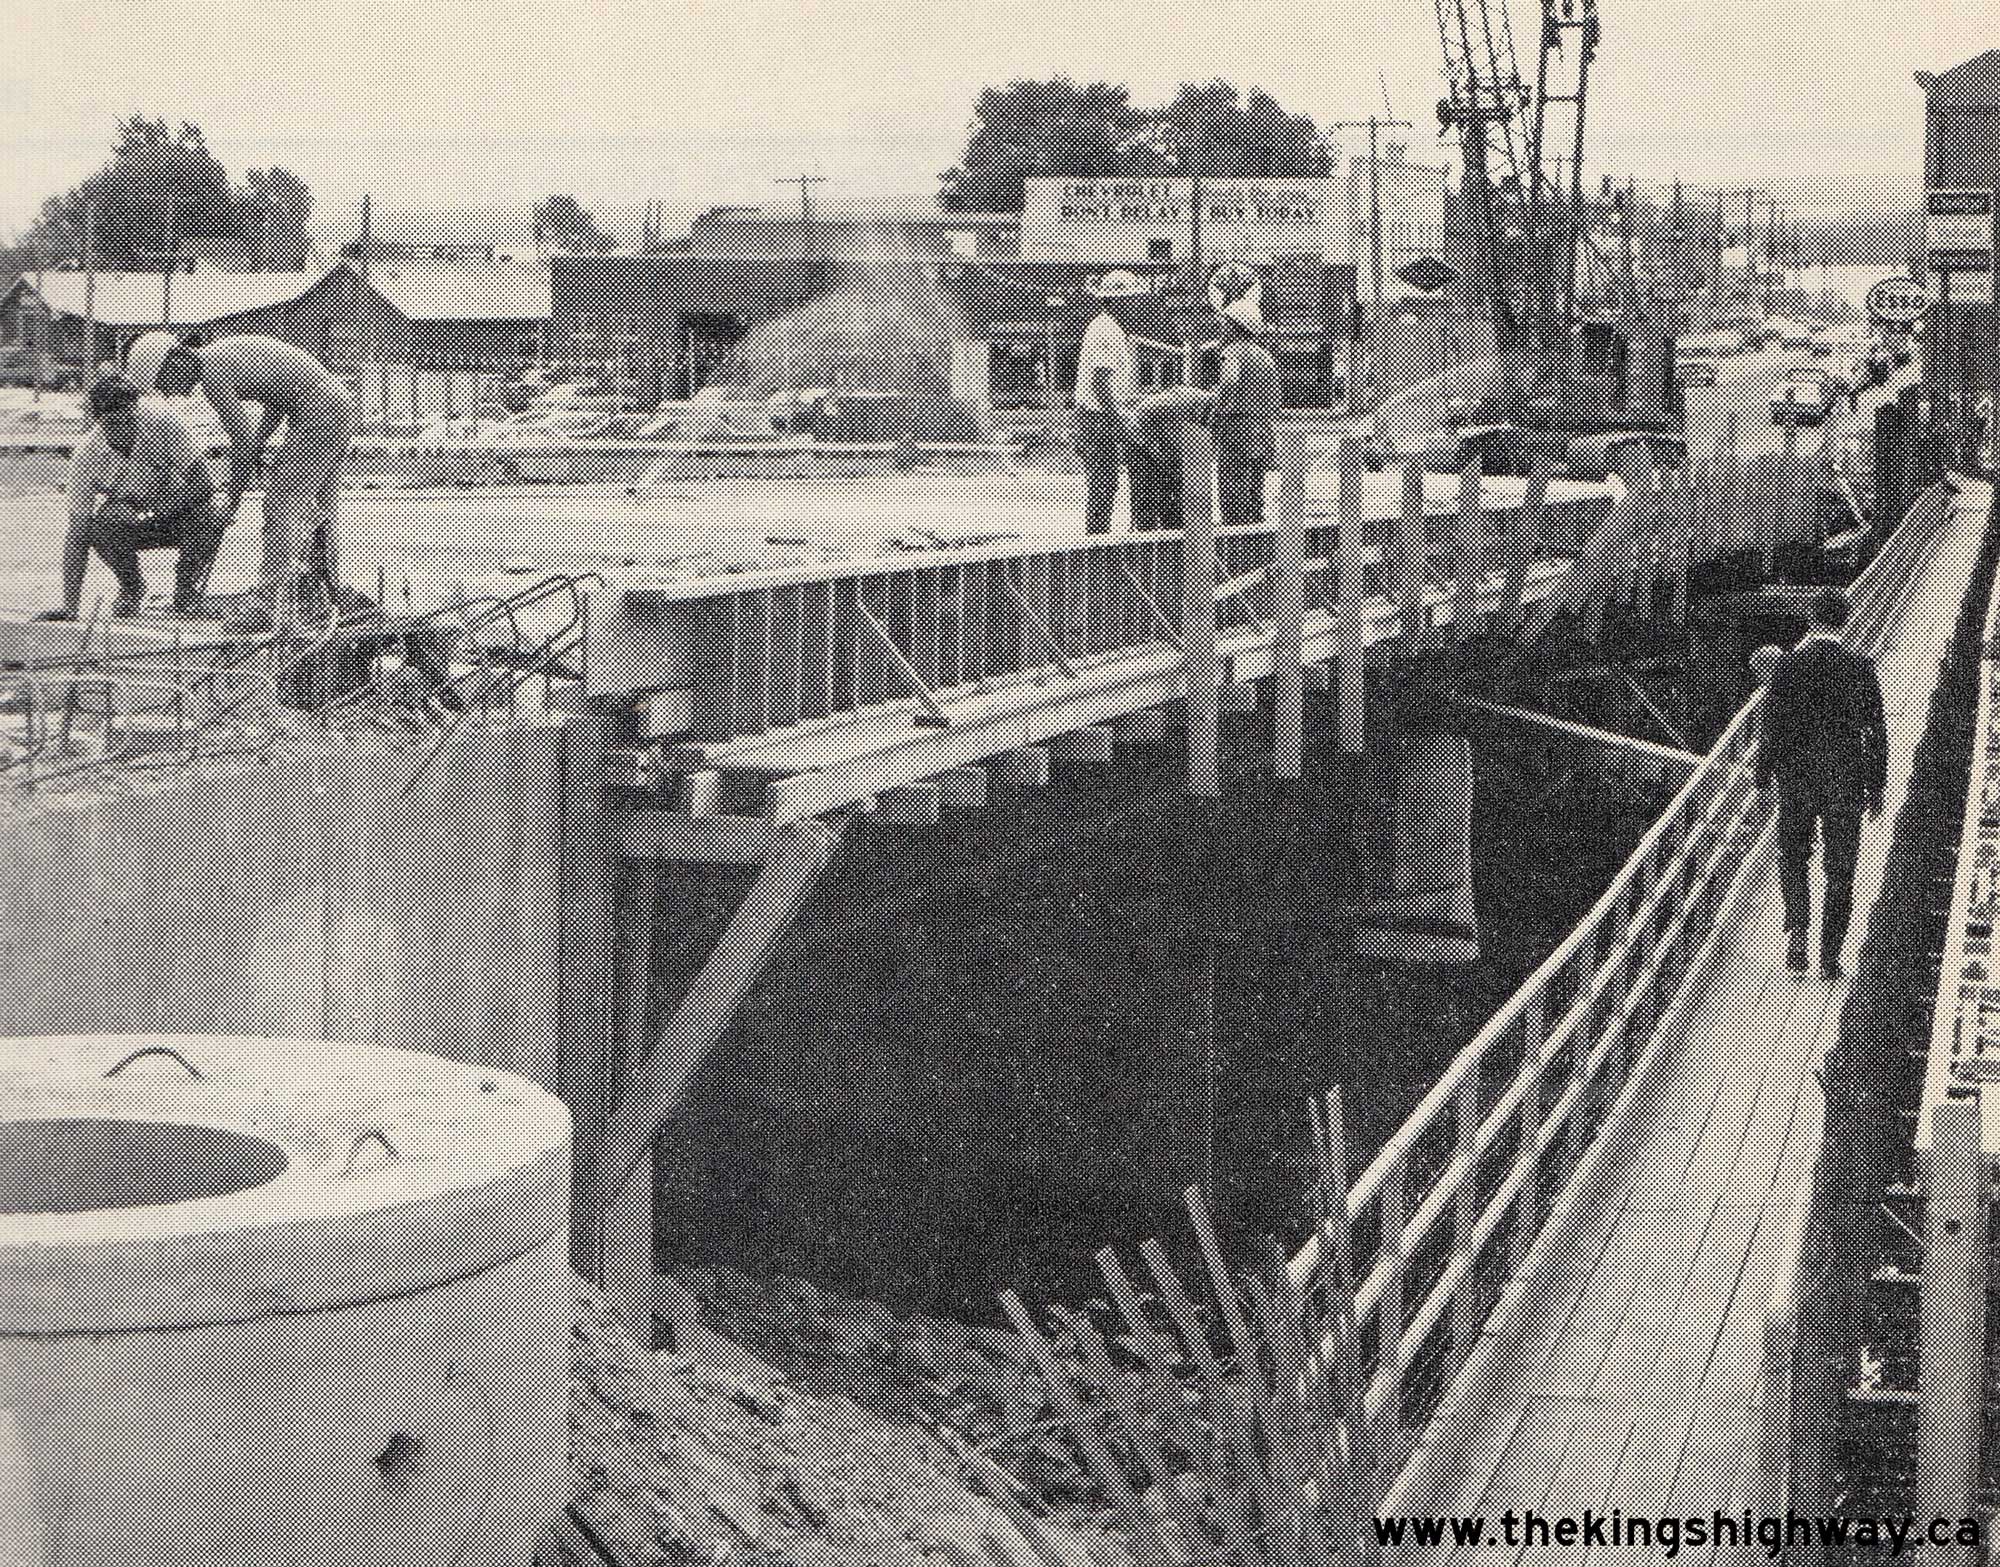
Enlarged Photo Here. Photo taken in 1968.(Photo from Cameron Bevers' historical photograph collection - Original photographer unknown) 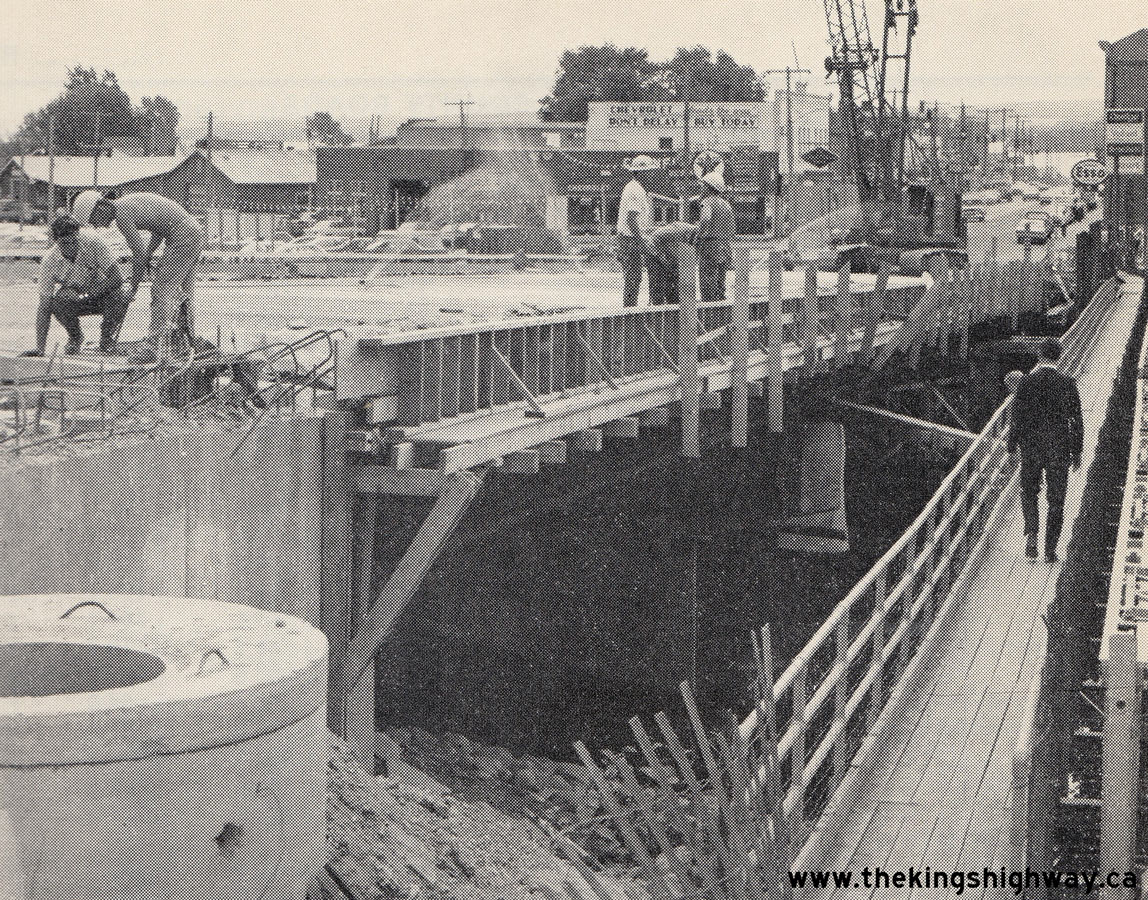 Above - Replacement of the Wabi River Bridge on Armstrong Street (Hwy 11B & Hwy 65) in New Liskeard, Contract #1968-174. See an
Enlarged Photo Here. Photo taken in 1969. Above - Replacement of the Wabi River Bridge on Armstrong Street (Hwy 11B & Hwy 65) in New Liskeard, Contract #1968-174. See an
Enlarged Photo Here. Photo taken in 1969.(Photo courtesy of Ontario Ministry of Transportation - © King's Printer for Ontario, 1969) 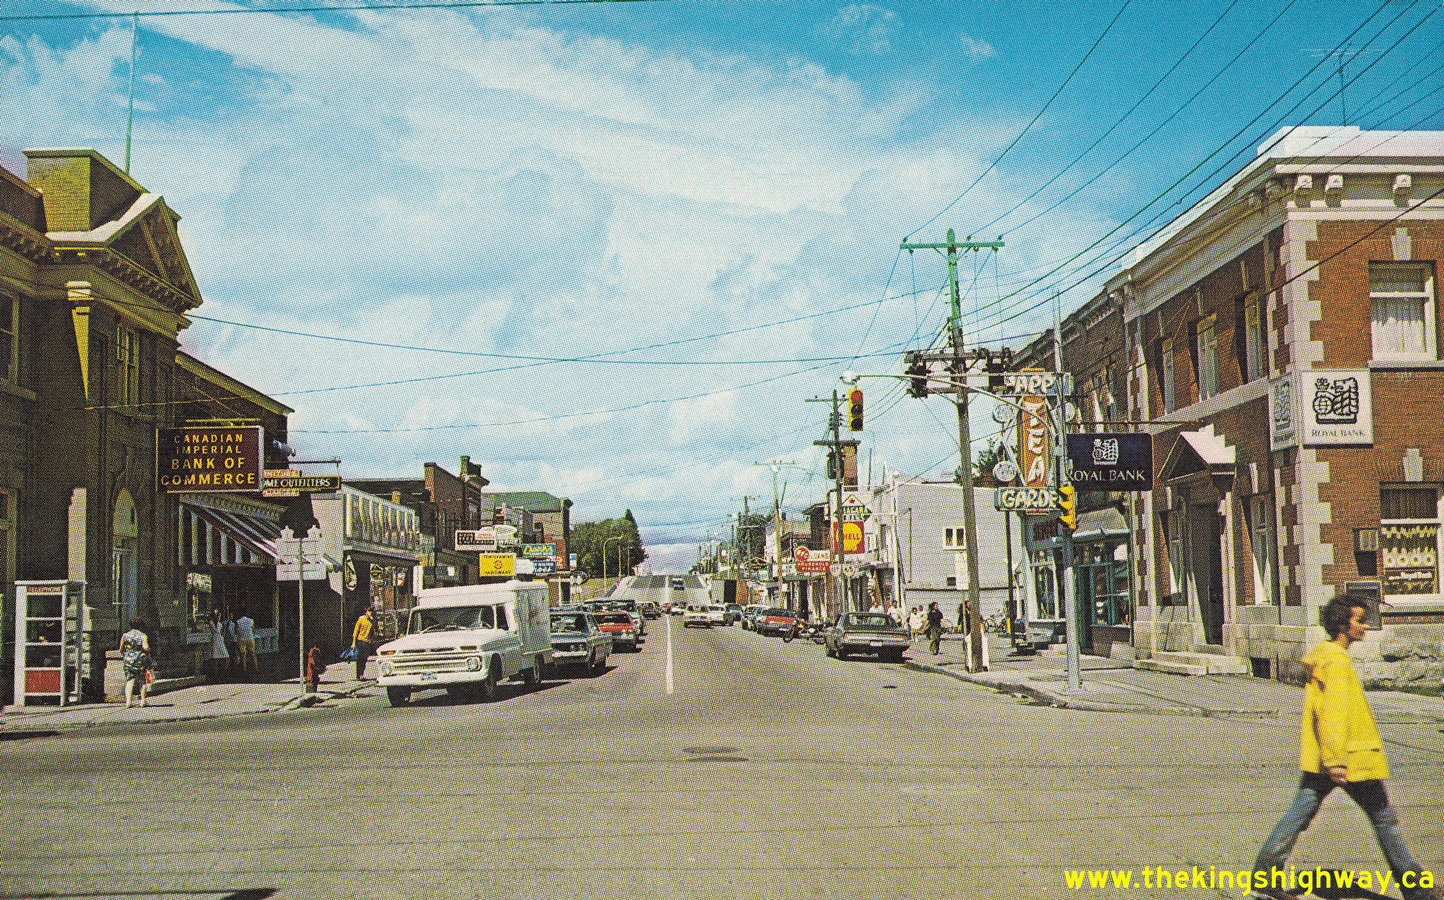
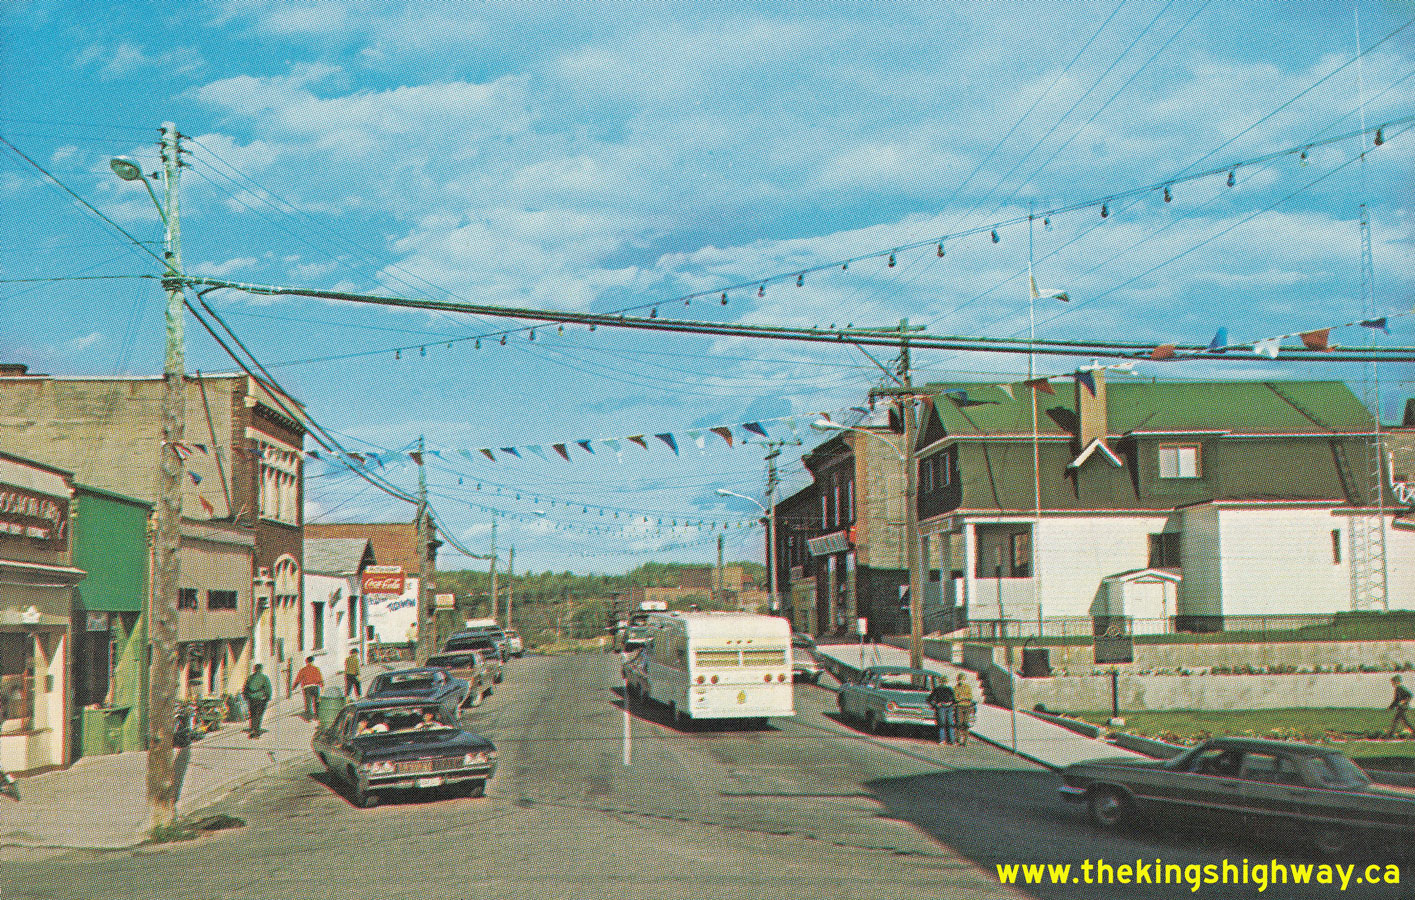
 Left - Circa 1970 postcard view of Armstrong Street (Hwy 11B & Hwy 65) in Downtown New Liskeard, facing north from Whitewood Avenue. See an
Enlarged Photo Here. Left - Circa 1970 postcard view of Armstrong Street (Hwy 11B & Hwy 65) in Downtown New Liskeard, facing north from Whitewood Avenue. See an
Enlarged Photo Here.(Photo courtesy of Len Leiffer)
Right - Circa 1970 postcard view of the Hwy 11B and Hwy 65 Junction at the intersection of Whitewood Avenue and Paget Street in Downtown New Liskeard. See an
Enlarged Photo Here. (Photograph courtesy of Len Leiffer) 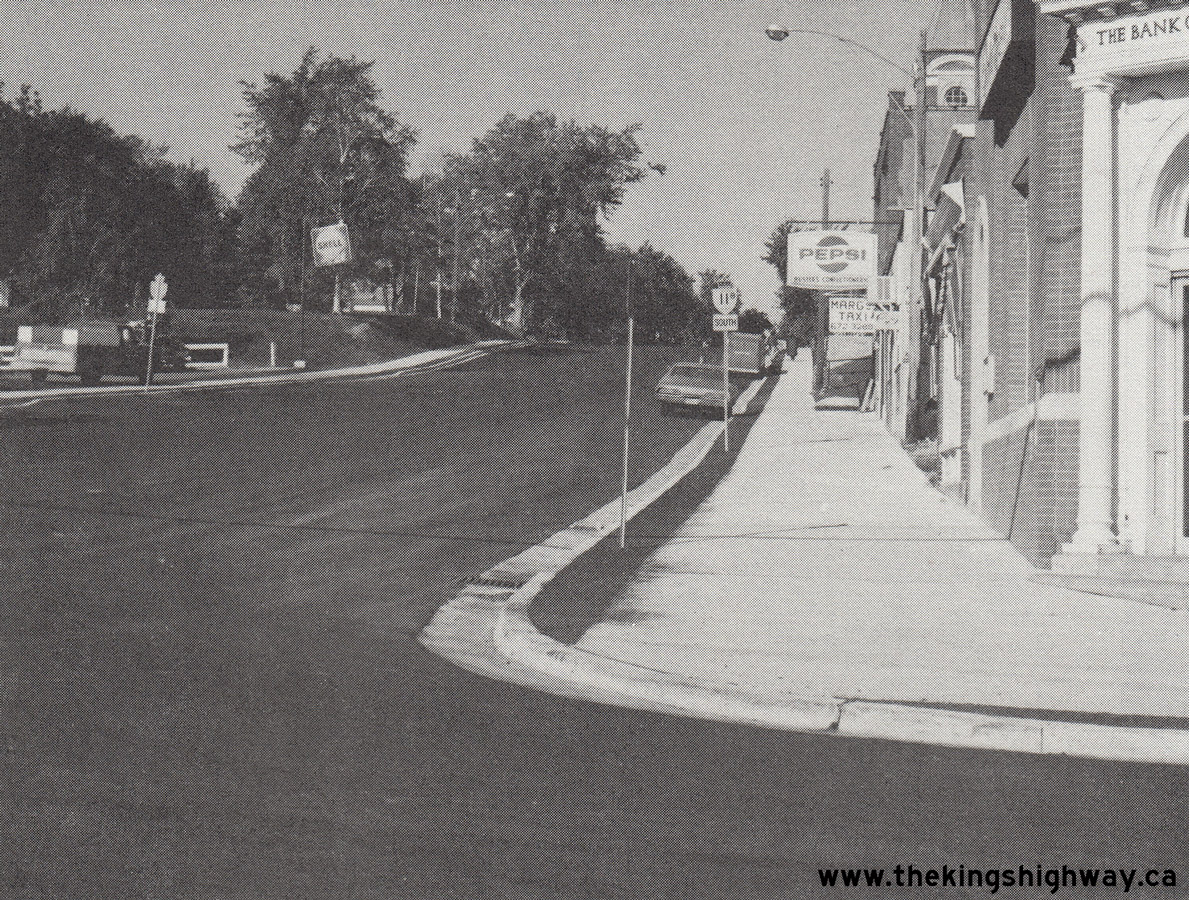 Above - Resurfaced section of Hwy 11B (Main Street) in Haileybury in 1972, facing west from Ferguson Avenue. The highway through Haileybury was resurfaced
under Contract #1971-130. See an Enlarged Photo Here. Photo taken in 1972. Above - Resurfaced section of Hwy 11B (Main Street) in Haileybury in 1972, facing west from Ferguson Avenue. The highway through Haileybury was resurfaced
under Contract #1971-130. See an Enlarged Photo Here. Photo taken in 1972.(Photo courtesy of Ontario Ministry of Transportation - © King's Printer for Ontario, 1972) 
Above - Hwy 11B & Hwy 65 King's Highway route markers along Armstrong Street in New Liskeard. See an
Enlarged Photo Here. (Photograph taken on January 19, 2003 - © Cameron Bevers) |
|---|
|
Present Day King's Highway 11B (Tri-Town) Photographs


Left - Distance guide sign on southbound Hwy 11 at the Hwy 11B Junction near Cobalt. See an
Enlarged Photo Here. (Photograph taken on September 24, 2017 - © Cameron Bevers) Right - Advance green guide sign marking the upcoming Hwy 11B Junction on Hwy 11 south of Cobalt. See an Enlarged Photo Here. (Photograph taken on September 1, 2007 - © Cameron Bevers) 

Left - Approaching the Hwy 11B Junction on Hwy 11 at Lorrain, facing north towards New Liskeard. At one time, Hwy 11 curved to the right and followed what is
now Hwy 11B into the "Tri-Town" area of Cobalt, Haileybury and New Liskeard. All three of these towns were bypassed by a new route for Hwy 11 in the early 1960s,
which can be seen continuing straight ahead at this highway junction. Note the oversized Hwy 11 route marker at the junction, which reinforces the fact that Hwy 11
follows the bypass. See an Enlarged Photo Here. (Photograph taken on August 3, 2012 - © Cameron Bevers) Right - Green guide sign marking the Hwy 11B Junction on Hwy 11 south of Cobalt. Following the completion of the Tri-Town Bypass in 1963, the former route of Hwy 11 through the Tri-Town area was renumbered as Hwy 11B, so that it served as a signed "Business Route" through the three bypassed towns. Over the years, Ontario has had more than a dozen different Hwy 11B Business Routes signed through various towns. Only two Hwy 11B routes still exist today. One in located in Cobalt and the other in located in Atikokan. See an Enlarged Photo Here. (Photograph taken on August 3, 2012 - © Cameron Bevers) 

Left - Facing south along Hwy 11 towards Latchford from the Hwy 11B Junction at Lorrain. At left, a channelized right-turn ramp carries Cobalt-bound traffic
on northbound Hwy 11 onto northbound Hwy 11B. The mining headframe beside Hwy 11 at left serves as a reminder of Cobalt's grander early days as a famous mining
district. Silver was discovered near Cobalt in 1903, which triggered a frenzied stampede of mining prospectors to this area in the early decades of the 20th Century.
See an Enlarged Photo Here. (Photograph taken on August 3, 2012 - © Cameron Bevers) Right - Junction sign assembly at the southern terminus of Hwy 11B at the Hwy 11 Junction south of Cobalt. See an Enlarged Photo Here. (Photograph taken on August 3, 2012 - © Cameron Bevers) 

Left - Facing north along Hwy 11B towards Cobalt from the Hwy 11 Junction at Lorrain. Cobalt lies about 6 km northeast of the Hwy 11 Junction. See an
Enlarged Photo Here. (Photograph taken on August 3, 2012 - © Cameron Bevers) Right - Approaching the southern terminus of Hwy 11B at the Hwy 11 Junction at Lorrain. See an Enlarged Photo Here. (Photograph taken on August 3, 2012 - © Cameron Bevers) 

Left - Facing south along Hwy 11 towards Latchford approaching the Hwy 11B Junction at Lorrain. This intersection marks the southern end of the Tri-Town
Bypass, where the relocated route of Hwy 11 ties back into the pre-1963 route of Hwy 11 south of Cobalt. See an
Enlarged Photo Here. (Photograph taken on August 3, 2012 - © Cameron Bevers) Right - View of the Tri-Town Bypass (Hwy 11) facing north from the Hwy 11B Junction at Lorrain. A 20 km bypass of Cobalt, Haileybury and New Liskeard was completed and opened to traffic in September 1963, which allowed long-distance through traffic on Hwy 11 to quickly bypass the Tri-Town area. See an Enlarged Photo Here. (Photograph taken on August 3, 2012 - © Cameron Bevers) 
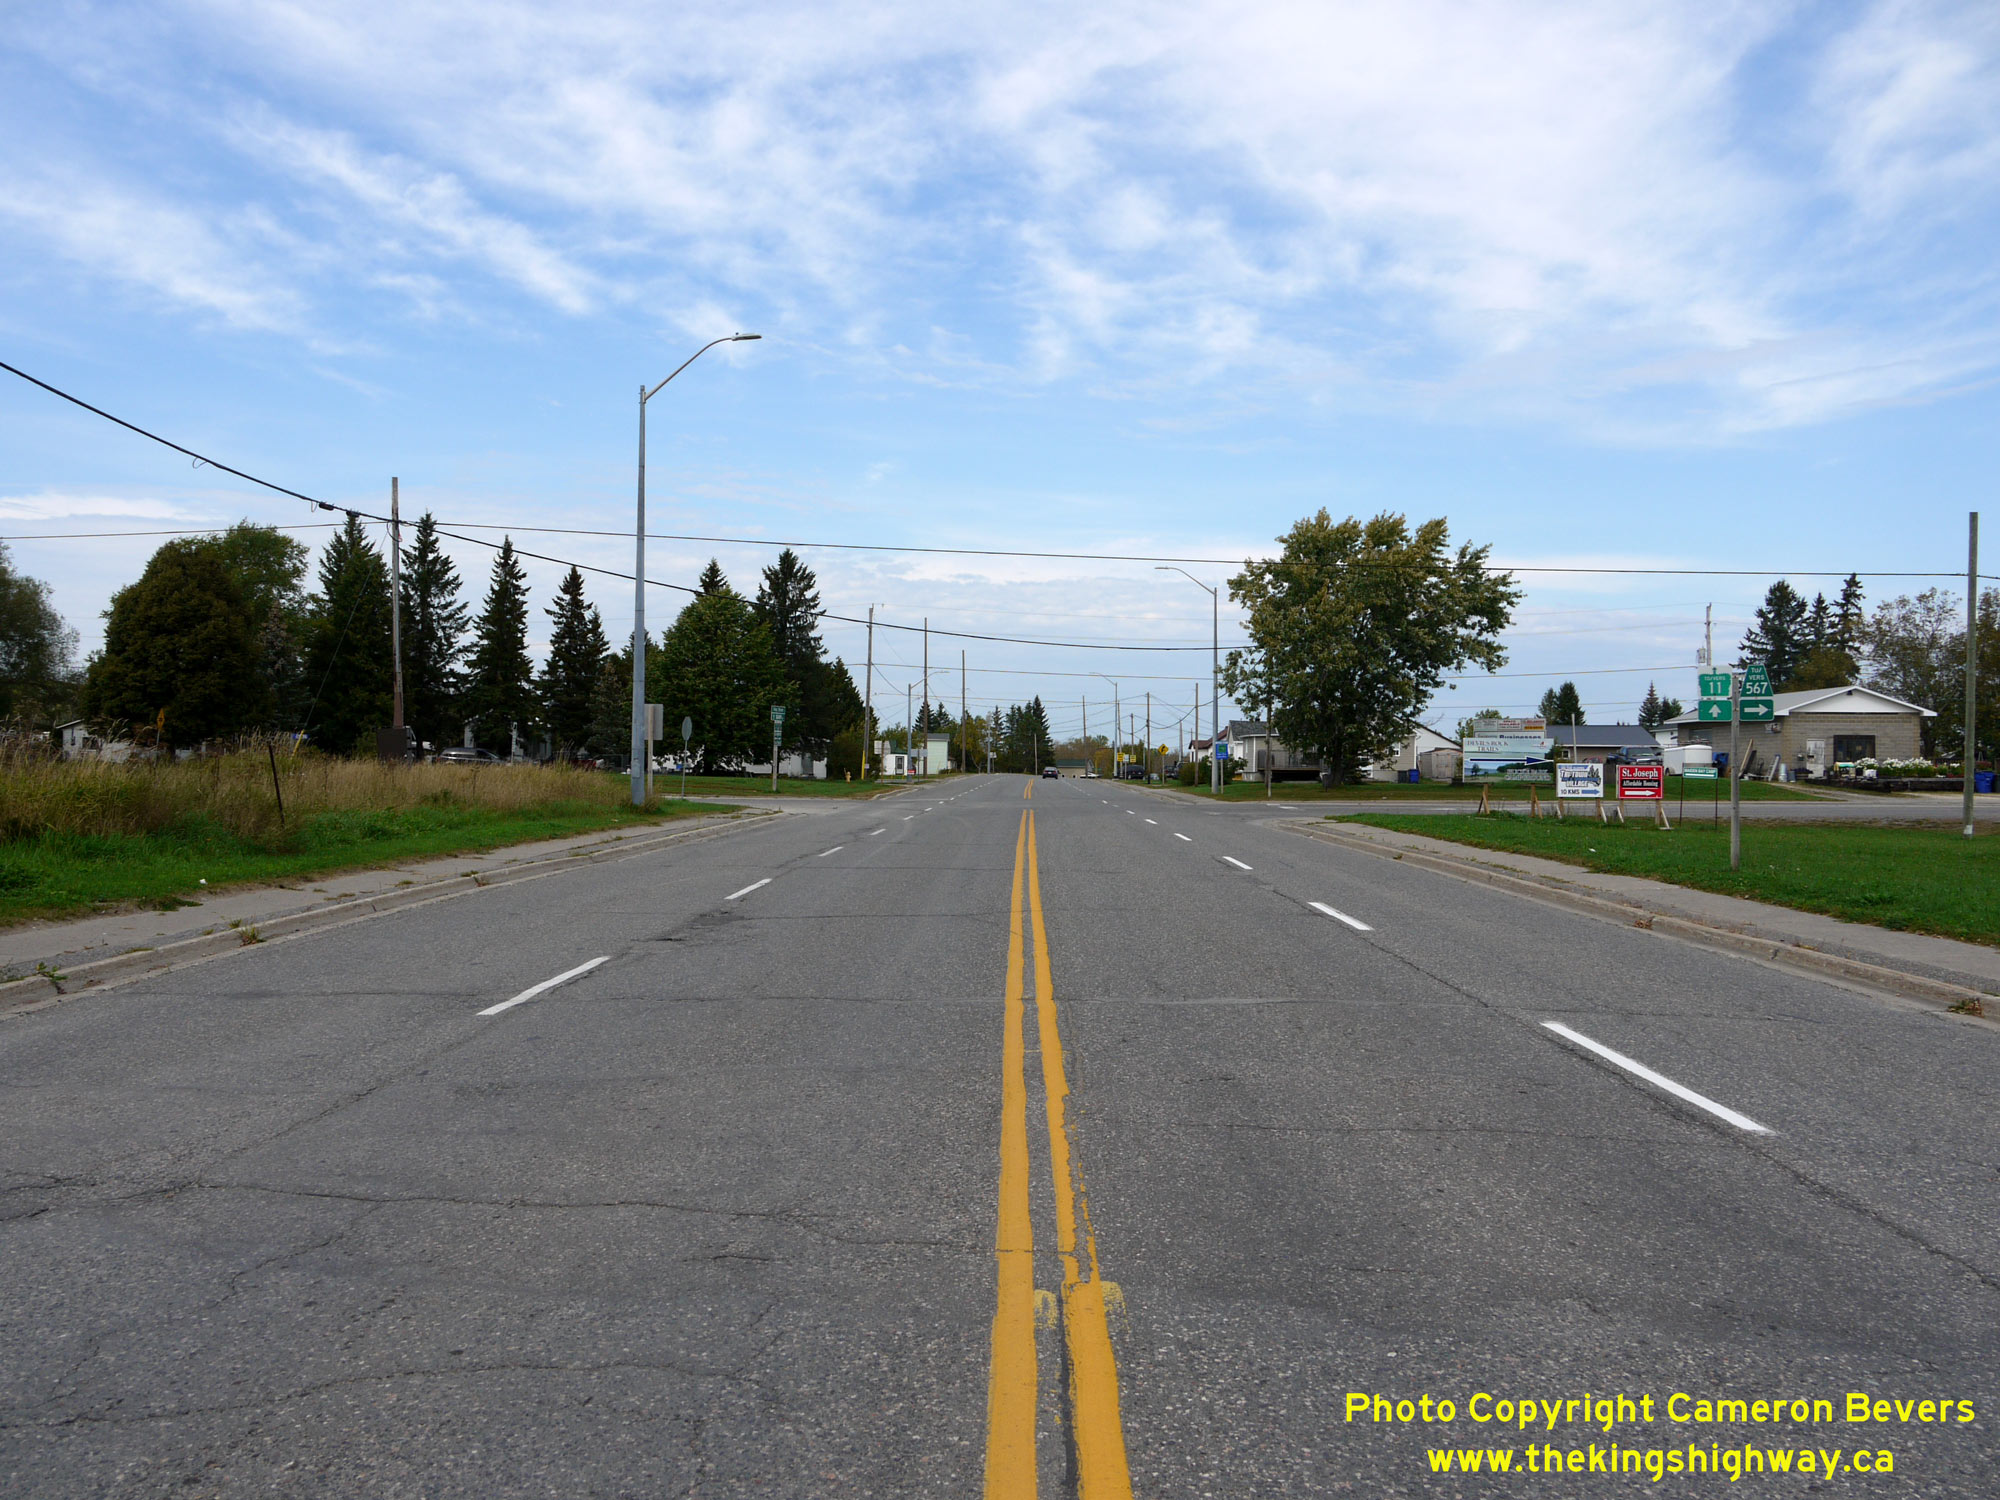
Left - Distance guide sign on northbound Hwy 11 near the Hwy 11B Junction at Lorrain. See an
Enlarged Photo Here. (Photograph taken on August 3, 2012 - © Cameron Bevers) Right - Facing north along Hwy 11B (King Street) in North Cobalt, approaching Lakeshore Drive (Hwy 567). See an
Enlarged Photo Here.(Photograph taken on September 23, 2017 - © Cameron Bevers) 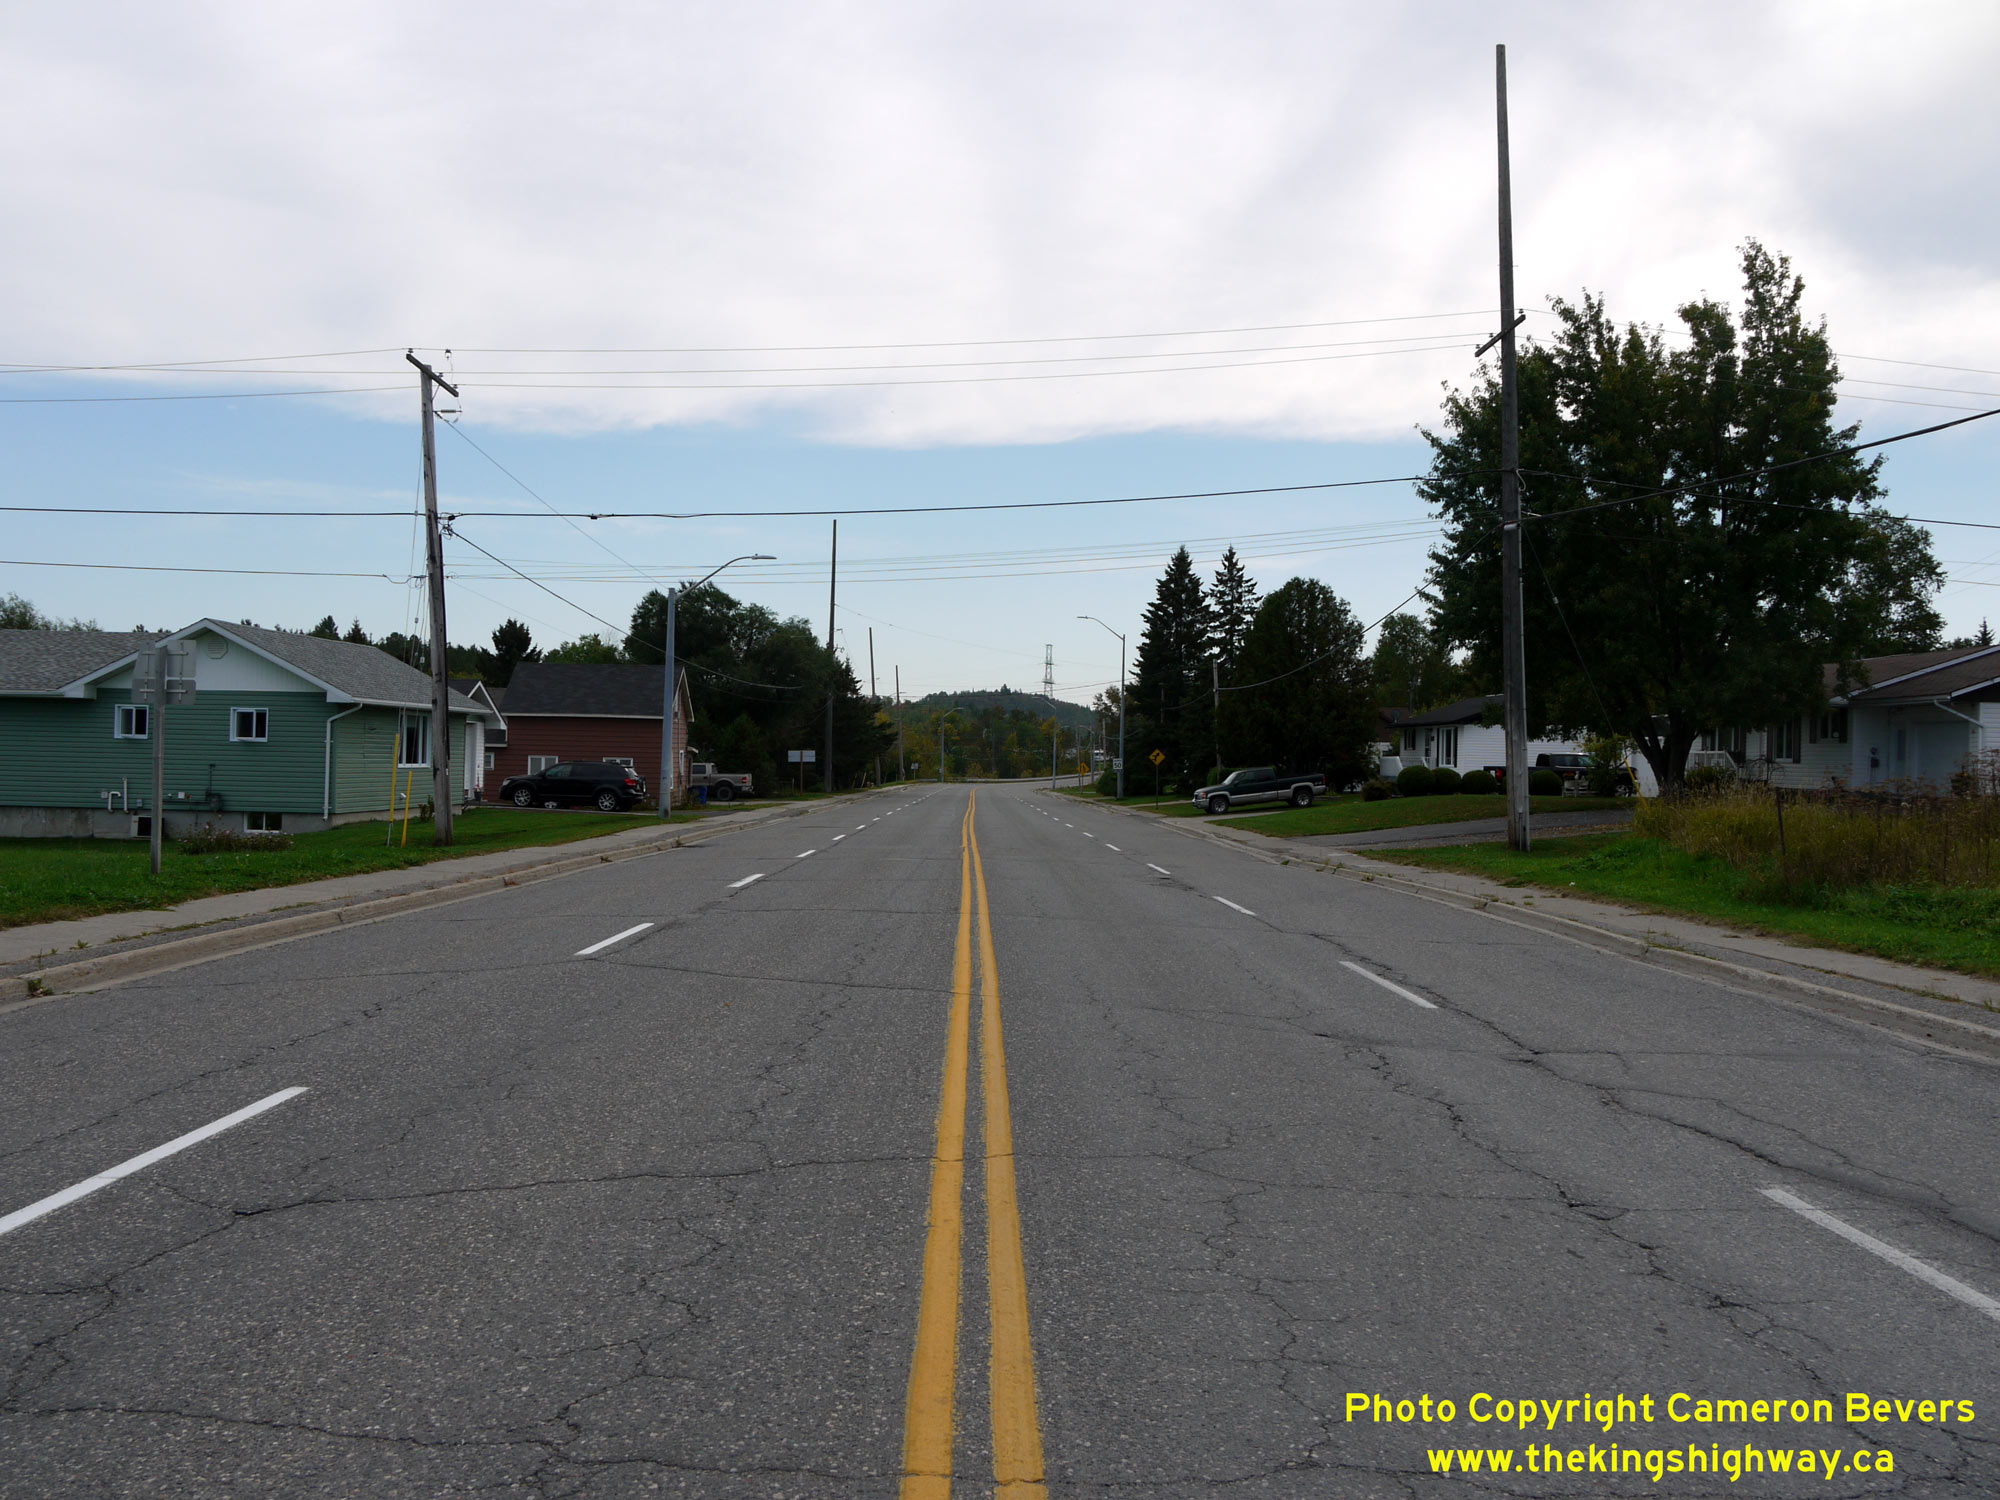
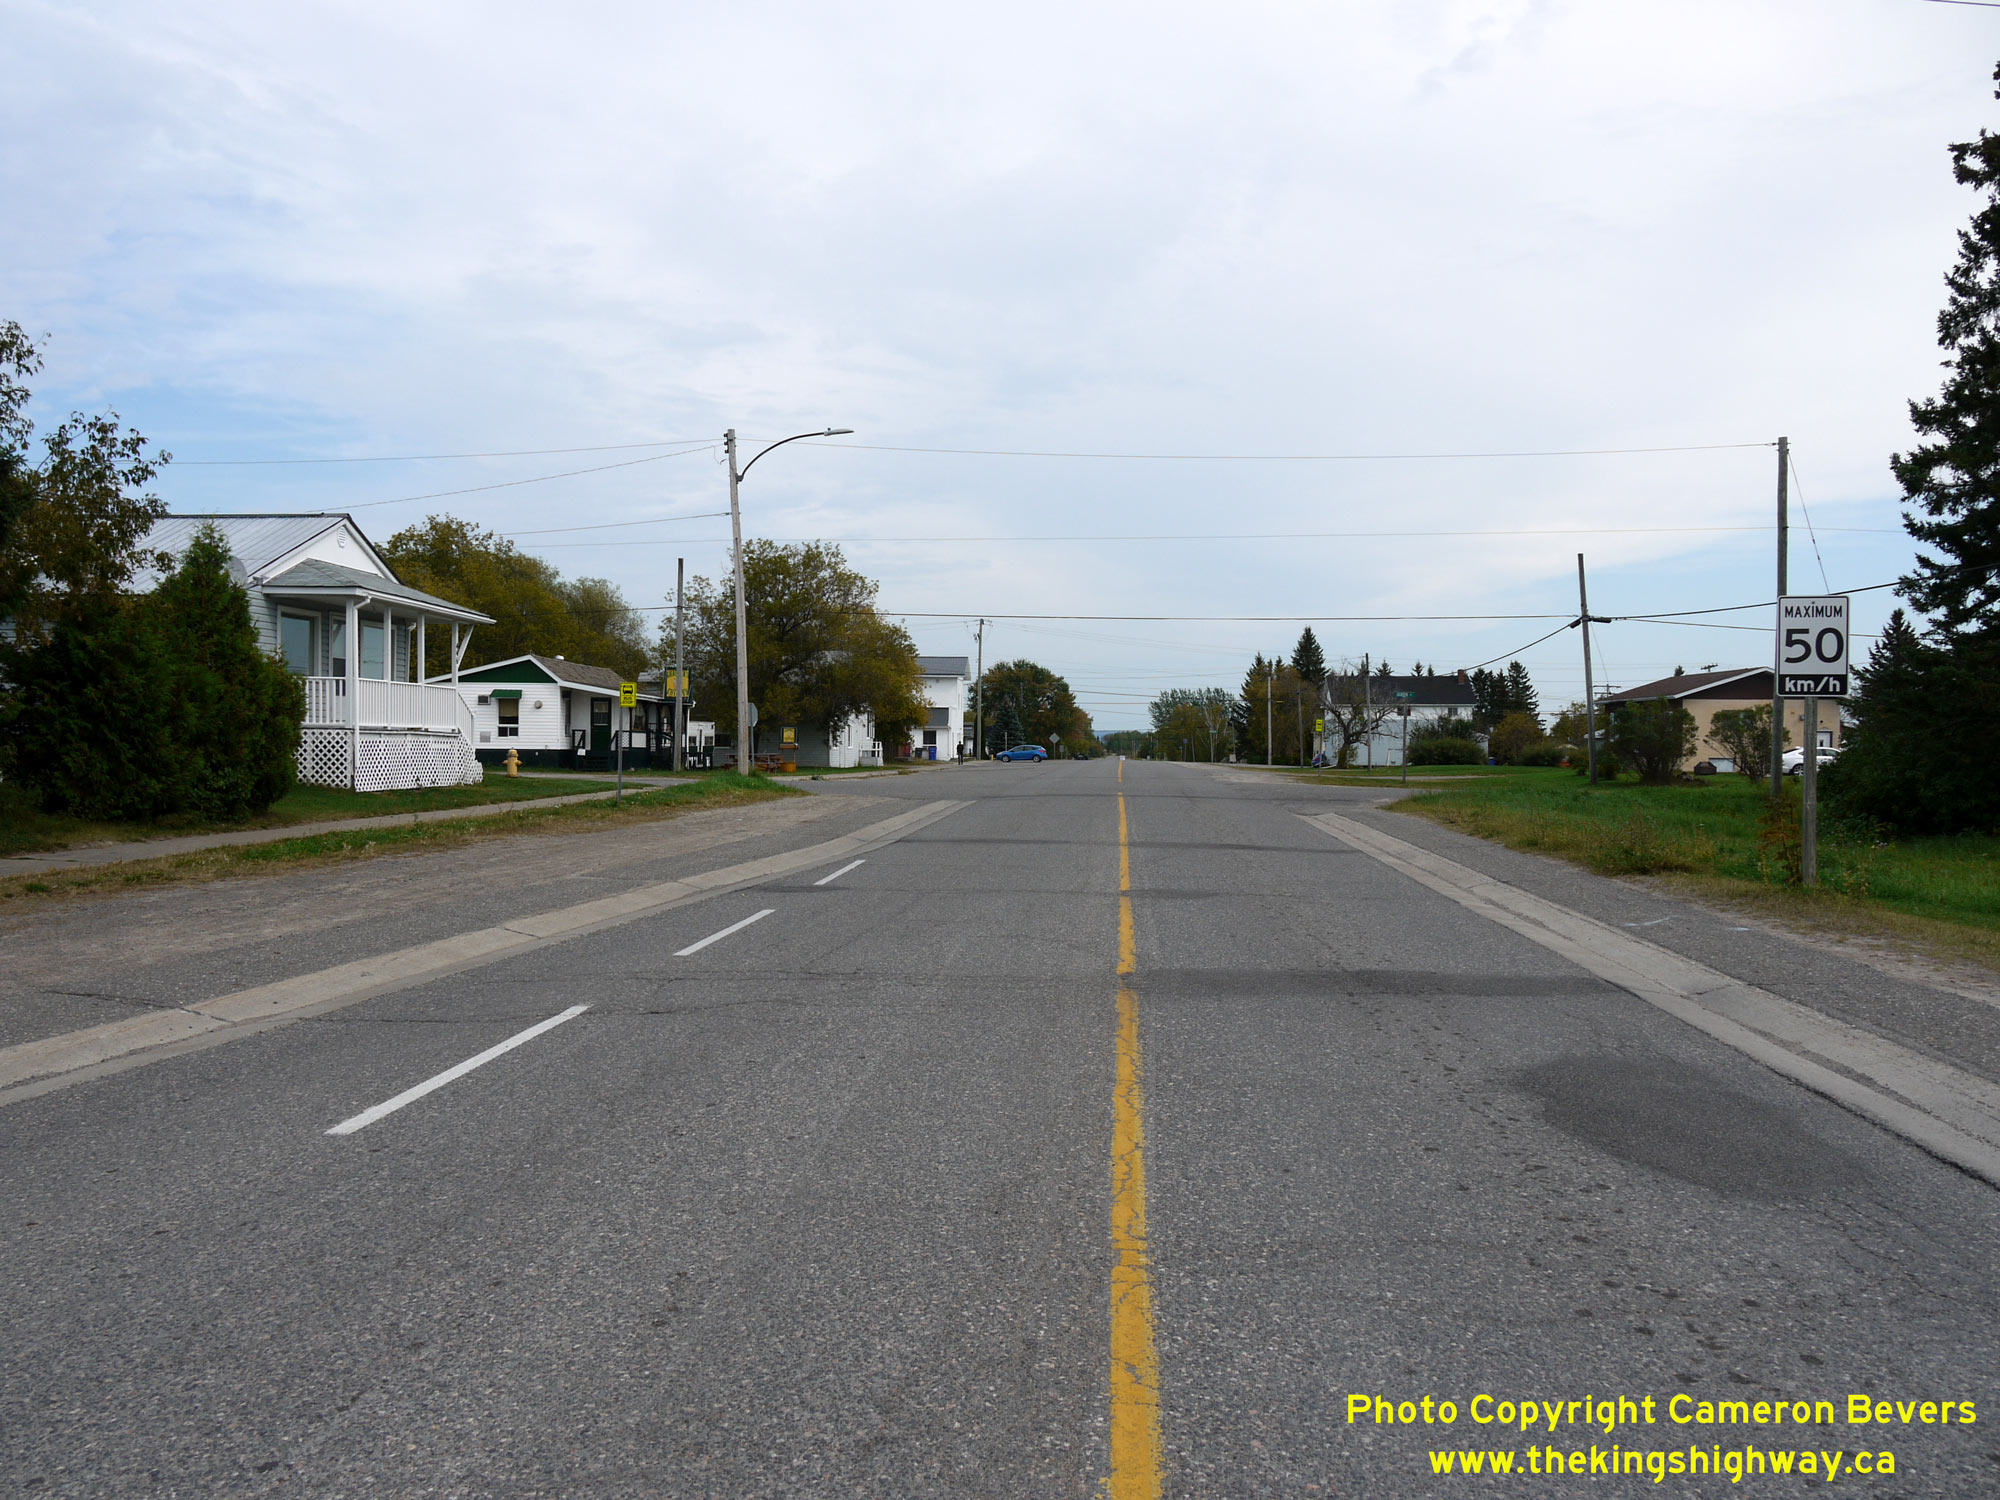 Left - View of Hwy 11B (King Street) facing south from the Hwy 567 Junction at Lakeshore Drive. See an
Enlarged Photo Here. Left - View of Hwy 11B (King Street) facing south from the Hwy 567 Junction at Lakeshore Drive. See an
Enlarged Photo Here.(Photograph taken on September 23, 2017 - © Cameron Bevers) Right - Facing south along Hwy 567 from the Hwy 11B Junction. This long Secondary Highway begins in North Cobalt and passes through the Lorrain Valley on its
route to the Lower Notch Hydro Dam on the Montreal River, which lies about 38 km to the south. Provincial jurisdiction over Hwy 567 begins about 3.7 km ahead. The
northern end of Hwy 567 is now maintained by the City of Temiskaming Shores. See an
Enlarged Photo Here.(Photograph taken on September 23, 2017 - © Cameron Bevers) 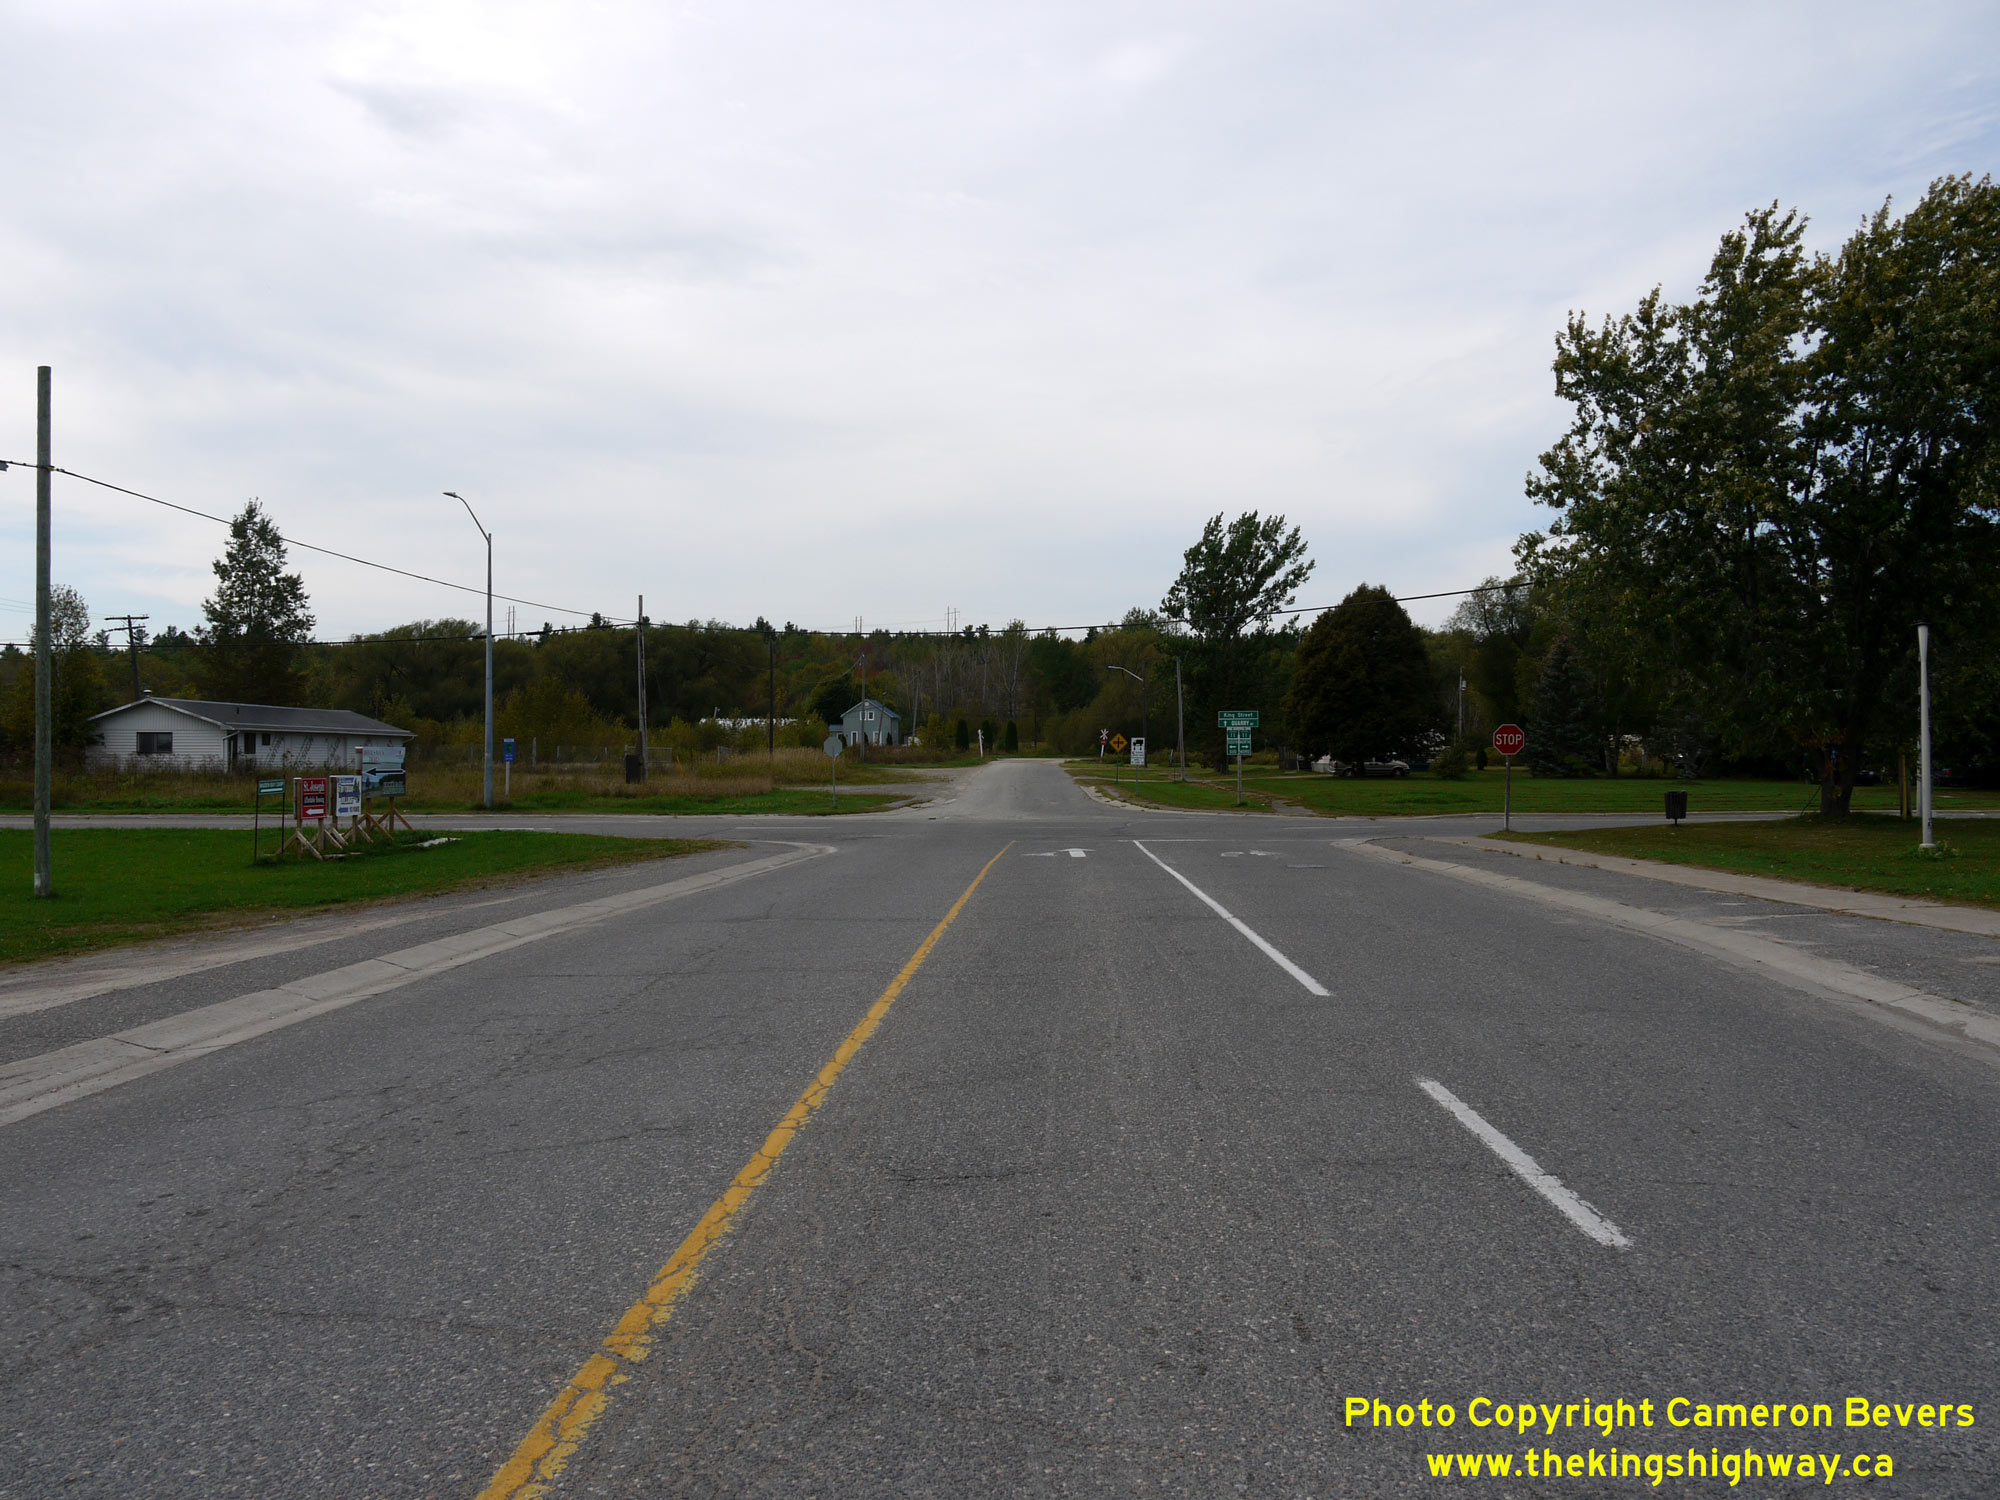
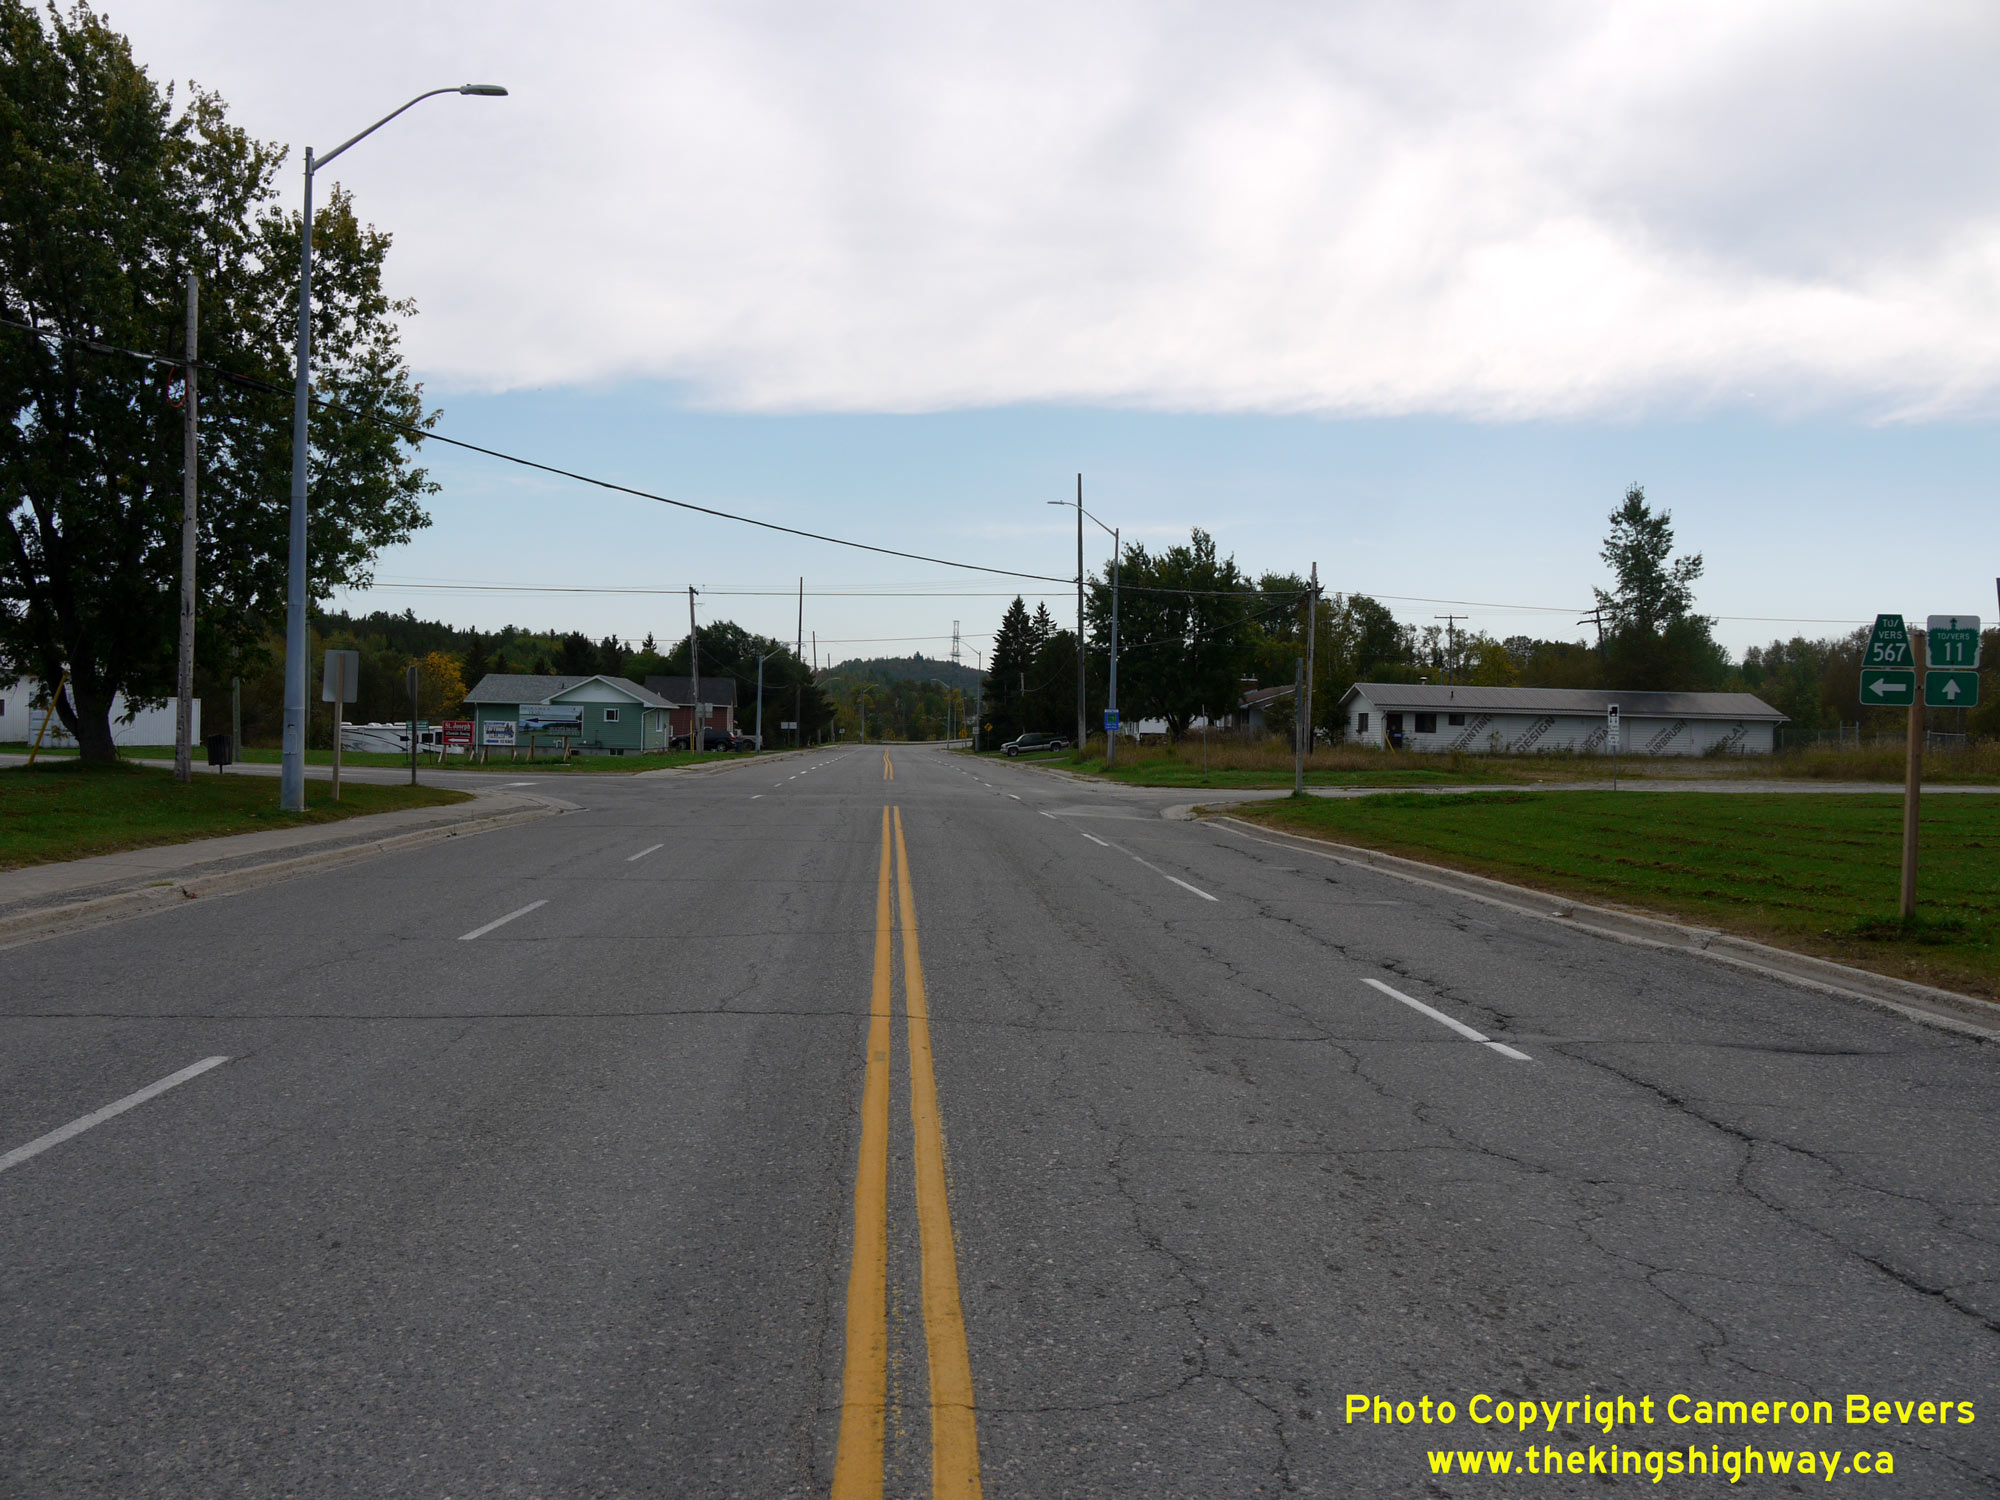 Left - Northern terminus of Hwy 567 at Hwy 11B in North Cobalt. See an
Enlarged Photo Here. Left - Northern terminus of Hwy 567 at Hwy 11B in North Cobalt. See an
Enlarged Photo Here.(Photograph taken on September 23, 2017 - © Cameron Bevers) Right - View of the Hwy 11B & Hwy 567 Junction in North Cobalt, facing south. See an
Enlarged Photo Here.(Photograph taken on September 23, 2017 - © Cameron Bevers) 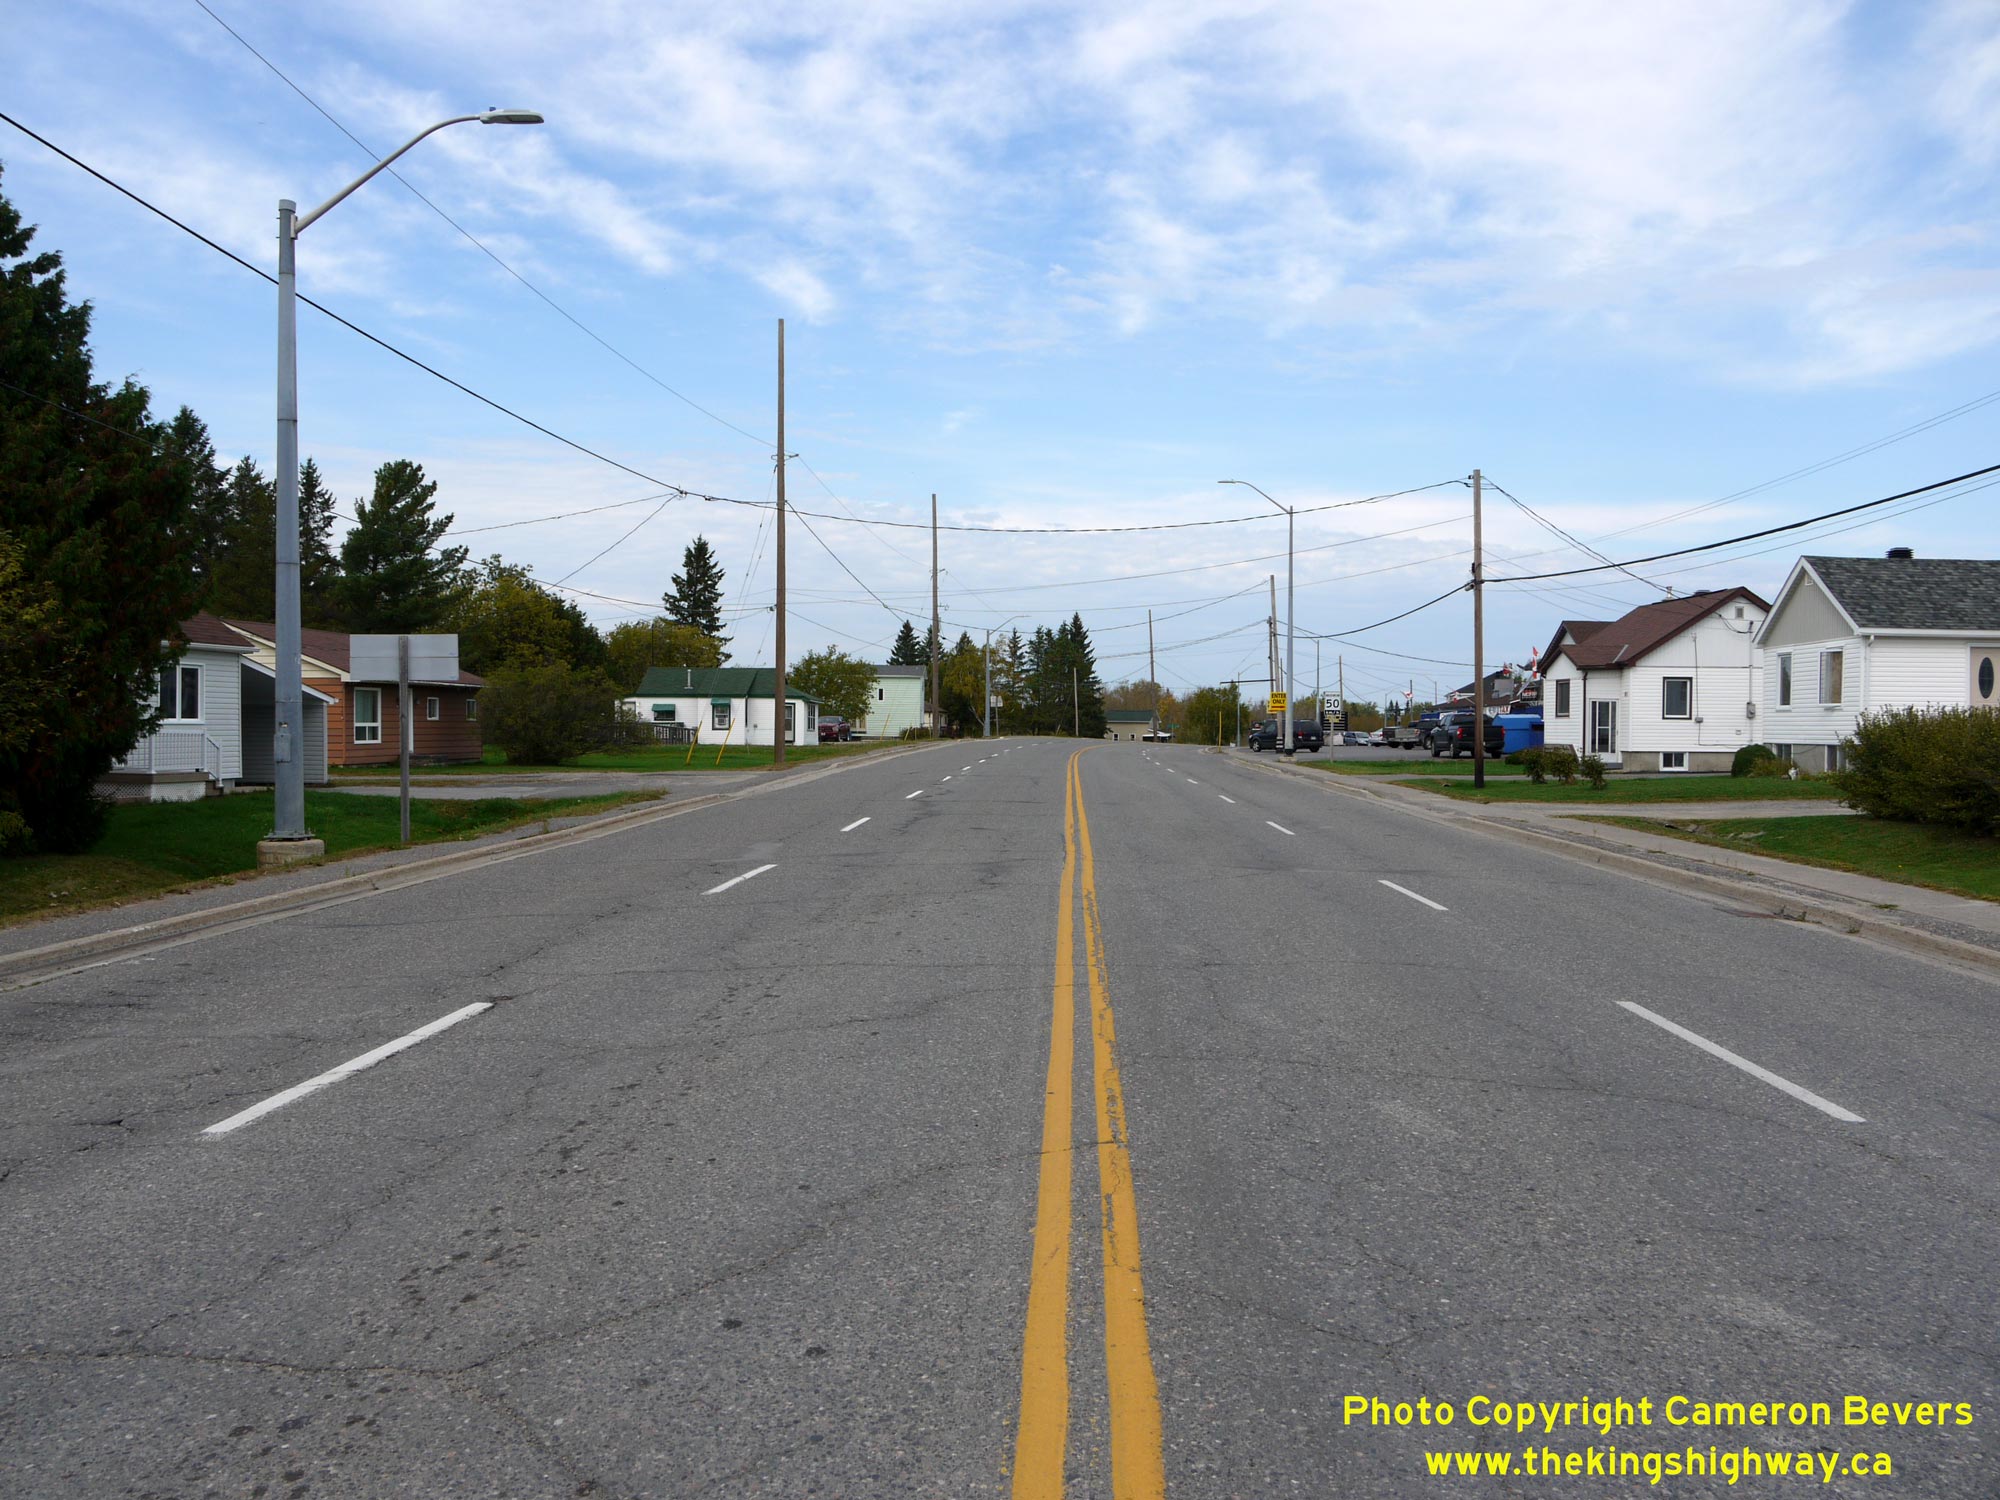
 Left - Facing north along King Street (Hwy 11B) from the Hwy 567 Junction in North Cobalt. See an
Enlarged Photo Here. Left - Facing north along King Street (Hwy 11B) from the Hwy 567 Junction in North Cobalt. See an
Enlarged Photo Here.(Photograph taken on September 23, 2017 - © Cameron Bevers) Right - Facing east along Hwy 65 (Formerly Hwy 11B) approaching New Liskeard. This short 1 km section of the highway is quite urbanized. The commercial development along this corridor is a significant change from the predominantly rural environment along the remainder of Hwy 65. In 2003, the old route of Hwy 65 through Downtown New Liskeard was decommissioned. As a result, Hwy 65 was relocated from its former route through Downtown New Liskeard to a new route along the Tri-Town Bypass. The northern section of Hwy 11B north of New Liskeard was renumbered as Hwy 65. The route renumbering provided a more efficient route for Hwy 65 through the New Liskeard area. See an Enlarged Photo Here. (Photograph taken on August 3, 2012 - © Cameron Bevers) 

Left - Facing south along the Tri-Town Bypass (Hwy 11 & Hwy 65) from the north entrance to New Liskeard (Former Hwy 11B). See an
Enlarged Photo Here. (Photograph taken on August 3, 2012 - © Cameron Bevers) Right - Approaching the Hwy 65 East (Former Hwy 11B) Junction on the Tri-Town Bypass. At this junction, Hwy 11 & Hwy 65 part ways after sharing a short concurrent route along the Tri-Town Bypass. The route of Hwy 65 turns right at this junction and heads east towards New Liskeard and Notre-Dame-du-Nord, Quebec, while Hwy 11 continues straight ahead towards Cochrane. See an Enlarged Photo Here. (Photograph taken on August 3, 2012 - © Cameron Bevers) 

Left - Green guide sign marking the Hwy 65 Junction on northbound Hwy 11 near New Liskeard. The northbound turn lane to Hwy 65 East is channelized. Up until
2003, the intersecting road was known as Hwy 11B. The old route of Hwy 11B and Hwy 65 through Downtown New Liskeard was discontinued in 2003. The current route of
Hwy 65 follows the Tri-Town Bypass concurrently with Hwy 11 and a short section of Former Hwy 11B at the northern entrance to New Liskeard. See an
Enlarged Photo Here. (Photograph taken on August 3, 2012 - © Cameron Bevers) Right - Green guide sign for Hwy 11 at the Hwy 65 East Junction in New Liskeard. There are no signs at the intersection guiding traffic to the western leg of Hwy 65, even though Hwy 65 continues west from this junction via a short concurrent routing with Hwy 11 South. See an Enlarged Photo Here. (Photograph taken on August 3, 2012 - © Cameron Bevers) 

Left - Approaching the Hwy 11 Junction on Hwy 65 (Formerly Hwy 11B) in New Liskeard. See an
Enlarged Photo Here. (Photograph taken on August 3, 2012 - © Cameron Bevers) Right - Junction of Hwy 65 East (Formerly Hwy 11B) at the Tri-Town Bypass. From here, traffic can turn right and follow Hwy 11 North towards Cochrane or turn left and follow Hwy 11 South towards North Bay. Although unmarked, the route of Hwy 65 turns left and briefly follows the Tri-Town Bypass on its route west towards Elk Lake. This is the first signalized intersection along Hwy 11 since the highway departed from North Bay nearly 160 km to the south. See an Enlarged Photo Here. (Photograph taken on August 3, 2012 - © Cameron Bevers) 

Left - General view of the Hwy 11 & Hwy 65 East Junction on the Tri-Town Bypass in New Liskeard, facing south. The Tri-Town Bypass can be seen curving away
in the distance. Historically, the route of Hwy 11 went right through Downtown New Liskeard, as well as nearby Haileybury and Cobalt. The old route of Hwy 11 was very
awkward and had numerous intersections and turns which were difficult for trucks to negotiate. A new 19 km bypass around the three towns was built in the early 1960s.
The new Tri-Town Bypass was officially opened to traffic on September 16, 1963. The new bypass shortened the highway distance between North Bay and Cochrane by about
7 km. The old route of Hwy 11 through the three towns was renumbered as Hwy 11B, although the northernmost part of Hwy 11B was recently renumbered as Hwy 65. See an
Enlarged Photo Here. (Photograph taken on August 3, 2012 - © Cameron Bevers) Right - Green guide sign marking the Hwy 65 (Former Hwy 11B) Junction on southbound Hwy 11 near New Liskeard. See an Enlarged Photo Here. (Photograph taken on August 3, 2012 - © Cameron Bevers) 

Left - Facing south along Hwy 11 towards the start of the Tri-Town Bypass at the Hwy 65 East Junction in New Liskeard. Prior to the construction of the
Tri-Town Bypass in the early 1960s, Hwy 11 continued straight ahead into Downtown New Liskeard. The original highway alignment followed the hydro pole line
seen at left. See an Enlarged Photo Here. (Photograph taken on August 3, 2012 - © Cameron Bevers) Right - Facing north along Hwy 11 towards Englehart from the Hwy 65 East (Former Hwy 11B) Junction. See an Enlarged Photo Here. (Photograph taken on August 3, 2012 - © Cameron Bevers) 
Above - Distance guide sign on the Tri-Town Bypass (Hwy 11 & Hwy 65) heading south from New Liskeard. See an
Enlarged Photo Here. (Photograph taken on August 3, 2012 - © Cameron Bevers)
More King's Highway 11B Photographs Coming Soon!
|
|---|
Links to Adjacent King's Highway Photograph Pages:
Back to King's Highway 11 Photos /
King's Highway 11B (Tri-Town) History /
On to King's Highway 12 Photos
Ontario Highway History - Main Menu / Back to List of Highways Website contents, photos & text © 2002-2026, Cameron
Bevers (Webmaster) - All Rights Reserved / Contact Me
|
|---|