
| 
| |
|
|
This page contains present day photos (Year 2000 to date) of Ontario's King's Highway 11, arranged by location from
Burk's Falls northerly to Sundridge. All photographs displayed on this page were taken by the Webmaster (Cameron Bevers), unless specifically noted otherwise. Click
on any thumbnail to see a larger image!
Please note that all photographs displayed on this
website are protected by copyright. These photographs must not be reproduced, published,
electronically stored or copied, distributed, or posted onto other websites without
my written permission. If you want to use photos from this website, please
email me first for permission. Thank-you!
|
|---|
|
Page 13: Present Day King's Highway 11 Photographs (Burk's Falls to Sundridge)


Left - Burk's Falls Bridge on Old Hwy 11 (now Hwy 520). Structure completed in 1938. (Photograph taken on July 6, 2003 - © Cameron Bevers) Right - Facing north along Old Hwy 11 towards the Burk's Falls Bridge over Magnetawan River. (Photograph taken on June 17, 2006 - © Cameron Bevers) 

Left - The Burk's Falls Bridge is a two-span pony truss bridge with steel girder approach spans. See an
Enlarged Photo Here. (Photograph taken on June 17, 2006 - © Cameron Bevers) Right - Close-up of the steel Warren Truss design of Burk's Falls Bridge on Old Hwy 11. (Photograph taken on June 17, 2006 - © Cameron Bevers) 

Left - Bridge manufacturer's plaque on the Magnetawan River Bridge in Burk's Falls. (Photograph taken on June 17, 2006 - © Cameron Bevers) Right - The Burk's Falls Bridge on Old Hwy 11 is situated on a 4% grade. (Photograph taken on June 17, 2006 - © Cameron Bevers) 

Left - Facing south along Old Hwy 11 towards the Burk's Falls Bridge over the Magnetawan River. (Photograph taken on June 17, 2006 - © Cameron Bevers) Right - Date stamp (1938) on the Magnetawan River Bridge at Burk's Falls. This date stamp was not actually part of the original structure. It was added to the concrete during reconstruction of the girder approach spans in the late 1980s. (Photograph taken on June 17, 2006 - © Cameron Bevers) 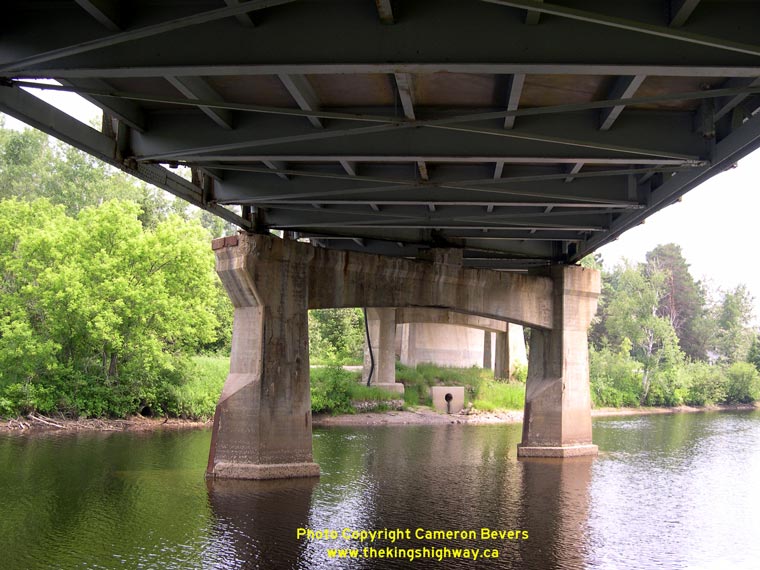

Left - View beneath the deck of the Burk's Falls Bridge across the Magnetawan River. (Photograph taken on June 17, 2006 - © Cameron Bevers) Right - The Burk's Falls Bridge not only crossed the Magnetawan River, but also a former railway line and a municipal street. (Photograph taken on June 17, 2006 - © Cameron Bevers) 

Left - Western side of the Magnetawan River Bridge at Burk's Falls. Note the steep grade across the structure. See an
Enlarged Photo Here. (Photograph taken on June 17, 2006 - © Cameron Bevers) Right - Eastern side of the Burk's Falls Bridge, as seen from the site of the former railway line. (Photograph taken on June 17, 2006 - © Cameron Bevers) 

Left - Facing north along the Burk's Falls Bypass towards the Magnetawan River Bridge and Hwy 520 Underpass. Note the new northbound structure being built at
right. (Photograph taken on July 11, 2010 - © Cameron Bevers) Right - Facing south along the Burk's Falls Bypass towards the new Magnetawan River Bridge, before twinning. See an Enlarged Photo Here. (Photograph taken on June 4, 2006 - © Cameron Bevers) 

Left - Facing north along the Burk's Falls Bypass towards Ontario Street (Old Hwy 11). See an
Enlarged Photo Here. (Photograph taken on June 4, 2006 - © Cameron Bevers) Right - Facing north along Hwy 11, about 3 km north of Burk's Falls. (Photograph taken on September 19, 2008 - © Cameron Bevers) 

Left - Facing south towards Burk's Falls on Hwy 11, 8 km south of Sundridge. See an
Enlarged Photo Here. (Photograph taken on June 17, 2006 - © Cameron Bevers) Right - Another view of Hwy 11, about 8 km south of Sundridge. (Photograph taken on June 17, 2006 - © Cameron Bevers) 

Left - Facing north towards Sundridge along Hwy 11, 7 km north of Burk's Falls. See an
Enlarged Photo Here. (Photograph taken on June 17, 2006 - © Cameron Bevers) Right - Facing north along Hwy 11 towards the Bernard Creek Bridge south of Sundridge. See an Enlarged Photo Here. (Photograph taken on June 17, 2006 - © Cameron Bevers) 

Left - Facing south along Hwy 11 towards Burk's Falls at the Bernard Creek Bridge. See an
Enlarged Photo Here. (Photograph taken on June 17, 2006 - © Cameron Bevers) Right - Close-up of the steel and concrete handrail of the Bernard Creek Bridge on Hwy 11 south of Sundridge. (Photograph taken on June 17, 2006 - © Cameron Bevers) 

Left - Eastern side of the Bernard Creek Bridge on Hwy 11 south of Sundridge. (Photograph taken on June 17, 2006 - © Cameron Bevers) Right - View underneath the Bernard Creek Bridge. The original Bernard Creek Bridge (at left) was a simple concrete beam bridge built in the 1920s by the Department of Northern Development to carry the Ferguson Highway. It was widened in 1959 with the arched span at right to accommodate the current Hwy 11. (Photograph taken on June 17, 2006 - © Cameron Bevers) 

Left - Western side of the Bernard Creek Bridge on Hwy 11 south of Sundridge. (Photograph taken on June 17, 2006 - © Cameron Bevers) Right - View underneath the western side of the Bernard Creek Bridge. Note the concrete beam span (at left) built in the 1920s which was later widened in 1959 with the concrete rigid frame span at right. (Photograph taken on June 17, 2006 - © Cameron Bevers) 

Left - Facing north towards Sundridge from the Bernard Creek Bridge on Hwy 11. See an
Enlarged Photo Here. (Photograph taken on June 17, 2006 - © Cameron Bevers) Right - Facing north along Hwy 11 from Black Creek Road south of Sundridge. See an Enlarged Photo Here. (Photograph taken on June 17, 2006 - © Cameron Bevers) 
Above - Facing south along Hwy 11 from Black Creek Road south of Sundridge. See an
Enlarged Photo Here. (Photograph taken on June 17, 2006 - © Cameron Bevers)
Continue on to King's Highway 11 Photos: Sundridge to South River
|
|---|
Links to Adjacent King's Highway Photograph Pages:
Back to King's Highway 10 Photos /
King's Highway 11 History /
On to King's Highway 12 Photos
Ontario Highway History - Main Menu / Back to List of Highways Website contents, photos & text © 2002-2026, Cameron
Bevers (Webmaster) - All Rights Reserved / Contact Me
|
|---|