
| 
| |
|
|
This page contains present day photos (Year 2000 to date) of Ontario's King's Highway 11, arranged by location from North Bay
northerly to Temagami. All photographs displayed on this page were taken by the Webmaster (Cameron Bevers), unless specifically noted otherwise. Click on any
thumbnail to see a larger image!
Please note that all photographs displayed on this
website are protected by copyright. These photographs must not be reproduced, published,
electronically stored or copied, distributed, or posted onto other websites without
my written permission. If you want to use photos from this website, please
email me first for permission. Thank-you!
|
|---|
|
Page 18: Present Day King's Highway 11 Photographs (North Bay to Temagami)


Left - Duchesnay Creek Bridge on Hwy 11 north of North Bay. (Photograph taken on June 29, 2003 - © Cameron Bevers) Right - Eastern side of the Duchesnay Creek Bridge. Structure completed in 1938. (Photograph taken on June 29, 2003 - © Cameron Bevers) 

Left - Facing north along Hwy 11 approaching the Tomiko River. (Photograph taken on August 28, 2006 - © Cameron Bevers) Right - Tomiko River Bridge on Hwy 11 north of North Bay. Structure completed in 1961. (Photograph taken on August 28, 2006 - © Cameron Bevers) 
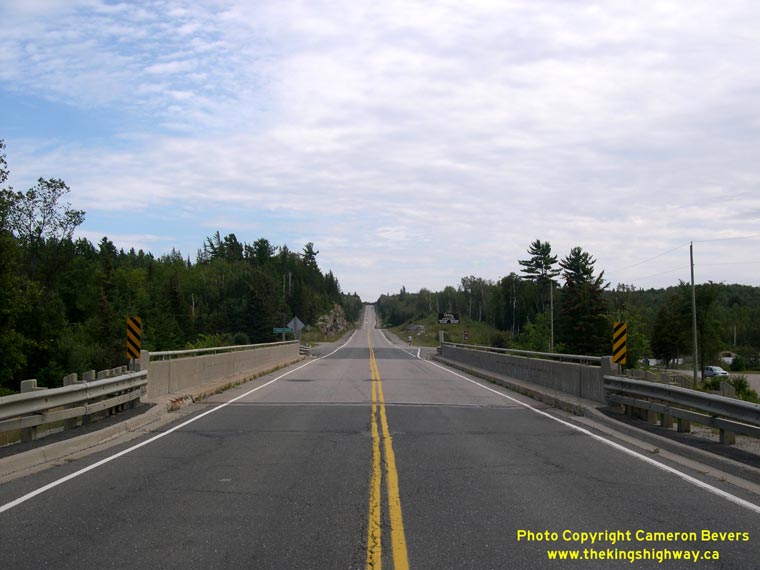
Left - Eastern side of the Tomiko River Bridge on Hwy 11. (Photograph taken on August 28, 2006 - © Cameron Bevers) Right - Facing south along Hwy 11 towards North Bay at the Tomiko River Bridge. (Photograph taken on August 28, 2006 - © Cameron Bevers) 

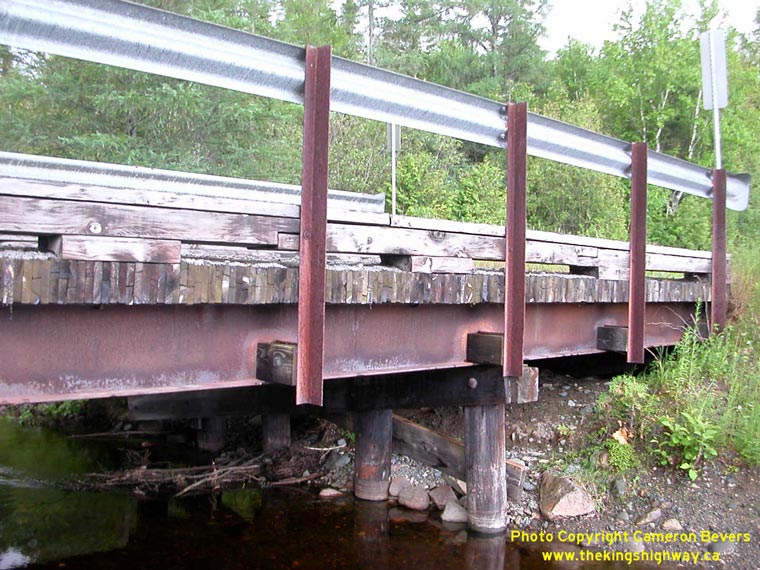
Left - Traces of the old timber bents for the original Tomiko River Bridge on Hwy 11 can be seen submerged in the river. With the exception of these sawn-off
timber bents, the original timber structure was completely removed in 1961, after the current steel beam structure was completed at this location. (Photograph taken on August 28, 2006 - © Cameron Bevers) Right - Facing north along Hwy 11 towards Marten River at the Tomiko River Bridge. (Photograph taken on August 28, 2006 - © Cameron Bevers) 

Left - Facing north along Hwy 11 towards the Marten River Bridge, between North Bay and the Hwy 64 Junction. See an
Enlarged Photo Here. (Photograph taken on July 1, 2006 - © Cameron Bevers) Right - Marten River Bridge on Hwy 11 north of North Bay. Structure completed in 1990. (Photograph taken on July 1, 2006 - © Cameron Bevers) 

Left - Previously, Hwy 11 crossed a steel truss bridge at Marten River, which was completed in 1940. The piers of the old Marten River Bridge are
still visible today at the water's edge, immediately east of the current highway bridge. The steel truss bridge was demolished in 1990, as soon as the new bridge was finished. (Photograph taken on July 1, 2006 - © Cameron Bevers) Right - Facing south along Hwy 11 towards the Marten River Bridge. (Photograph taken on July 1, 2006 - © Cameron Bevers) 

Left - Facing north along Hwy 11 between the Marten River Bridge and the Hwy 64 Junction. (Photograph taken on July 1, 2006 - © Cameron Bevers) Right - Approaching the Hwy 64 Junction on Hwy 11 at Marten River, facing north. (Photograph taken on August 6, 2011 - © Cameron Bevers) 

Left - Distance sign on Southbound Hwy 11 at the Hwy 64 Junction. (Photograph taken on August 6, 2011 - © Cameron Bevers) Right - Facing south along Hwy 11 from the Hwy 64 Junction at Marten River. (Photograph taken on July 1, 2006 - © Cameron Bevers) 

Left - Unusual warning sign on Hwy 11 at Marten River, alerting drivers to the possibility that they may encounter moose on the highway at night. (Photograph taken on July 1, 2006 - © Cameron Bevers) Right - Directional sign for Hwy 64 at the Hwy 11 Junction at Marten River. (Photograph taken on July 1, 2006 - © Cameron Bevers) 

Left - Junction signs at the intersection of Hwy 64 and Hwy 11 at Marten River. (Photograph taken on July 1, 2006 - © Cameron Bevers) Right - Facing south along Hwy 64 from the Hwy 11 Junction at Marten River. (Photograph taken on July 1, 2006 - © Cameron Bevers) 

Left - Facing north along Hwy 11 at the Hwy 64 Junction at Marten River. (Photograph taken on August 6, 2011 - © Cameron Bevers) Right - Facing south along Hwy 11 at the Hwy 64 Junction at Marten River. (Photograph taken on August 6, 2011 - © Cameron Bevers) 

Left - Facing north along Hwy 11 from the Hwy 64 Junction at Marten River. (Photograph taken on August 6, 2011 - © Cameron Bevers) Right - Approaching the Hwy 64 Junction on Hwy 11 at Marten River, facing south. (Photograph taken on August 6, 2011 - © Cameron Bevers) 

Left - Distance sign on Northbound Hwy 11 at the Hwy 64 Junction. (Photograph taken on August 6, 2011 - © Cameron Bevers) Right - Abandoned Hwy 11 alignment near the Hwy 64 Junction at Marten River. (Photograph taken on June 29, 2003 - © Cameron Bevers) 

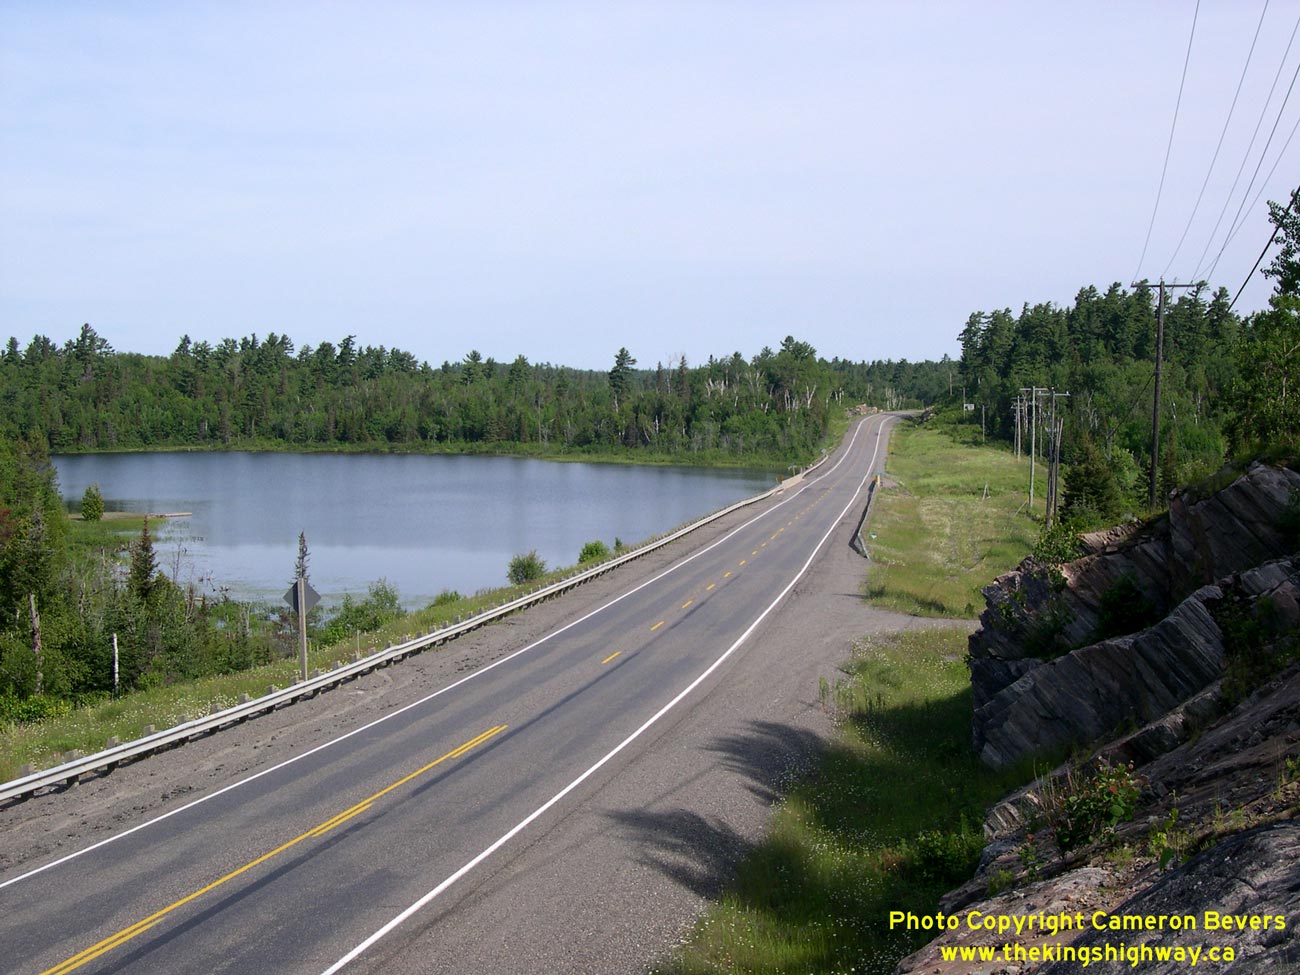
Left - Facing north along Hwy 11 towards Marian Lake, about 2 km north of the Hwy 64 Junction. (Photograph taken on August 6, 2011 - © Cameron Bevers) Right - Hwy 11 at Marian Lake, facing north towards Temagami. (Photograph taken on August 6, 2011 - © Cameron Bevers) 

Left - A scenic view of Marian Lake from Hwy 11, north of Marten River. (Photograph taken on August 6, 2011 - © Cameron Bevers) Right - Summer recreational traffic on Hwy 11 near Marian Lake. See an Enlarged Photo Here. (Photograph taken on August 6, 2011 - © Cameron Bevers) 

Left - A former alignment of Hwy 11 near Olive Lake, between Marten River and Temagami. (Photograph taken on June 29, 2003 - © Cameron Bevers) Right - Olive Lake Diversion on Hwy 11 between Marten River and Temagami. This was one of several sections of Hwy 11 that was relocated during highway improvement projects in the 1940s. The old highway, shown in the photo at left, now serves as an access road to cottages on nearby Olive Lake. (Photograph taken on August 6, 2011 - © Cameron Bevers) 

Left - Highway designers took advantage of the rolling topography in the area east of Olive Lake to install passing lanes along Hwy 11. (Photograph taken on August 6, 2011 - © Cameron Bevers) Right - Facing north along Hwy 11 towards Temagami near Olive Lake. (Photograph taken on August 6, 2011 - © Cameron Bevers) 

Left - The Olive Lake Diversion is approximately 3 km in length. The new highway diversion eliminated many hazardous curves that plagued the original
highway's route. (Photograph taken on August 6, 2011 - © Cameron Bevers) Right - Facing north along Hwy 11 near Red Canoe Lake south of Temagami. (Photograph taken on August 6, 2011 - © Cameron Bevers) 

Left - Facing south along Hwy 11 at Red Canoe Lake south of Temagami. (Photograph taken on August 6, 2011 - © Cameron Bevers) Right - Approaching Tonomo Lake Road on Hwy 11, facing north. At this point, the original route of the Ferguson Highway (Hwy 11) turned towards the left. In 1940, the Jumping Caribou Lake Diversion was completed, opening up a new route for through traffic heading north towards Temagami. This 18 km highway diversion tied into the existing highway at this location. The Jumping Caribou Lake Diversion bypassed a particularly notorious section of the original Ferguson Highway, which was well-known for its tight curves and steep hills. (Photograph taken on August 6, 2011 - © Cameron Bevers) 

Left - Rock cut on the Jumping Caribou Lake Diversion on Hwy 11. Obstacles like this were often avoided during the early days of road construction in Northern
Ontario. However, as the demand for faster long distance highways became more pronounced, rock obstacles such as this one were simply blasted out of the way in an effort
to improve the highway's alignment. (Photograph taken on August 6, 2011 - © Cameron Bevers) Right - Facing south along Hwy 11 at Tonomo Lake Road (Old Hwy 11). This point marks the southern end of the Jumping Caribou Lake Diversion. (Photograph taken on August 6, 2011 - © Cameron Bevers) 
Left - Old steel beam and laminated timber deck bridge on the original Ferguson Highway over Brophy Creek near Jumping Caribou Lake. This section of Hwy 11
was bypassed by the Jumping Caribou Lake Diversion in the 1940s. (Photograph taken on June 29, 2003 - © Cameron Bevers) Right - Steel beam and laminated timber deck bridge on the Old Ferguson Highway (Wilson Lake Road) near Jumping Caribou Lake. (Photograph taken on June 29, 2003 - © Cameron Bevers) 

Left - Facing north along Hwy 11 towards Temagami at Pan Lake. (Photograph taken on August 6, 2011 - © Cameron Bevers) Right - Hwy 11 at Pan Lake, facing south towards Marten River. (Photograph taken on August 6, 2011 - © Cameron Bevers) 

Left - Facing north along Hwy 11, north of Pan Lake. In addition to improving the alignment of Hwy 11, the completion of the Jumping Caribou Lake Diversion
shortened the route between Marten River and Temagami by roughly one mile. (Photograph taken on August 6, 2011 - © Cameron Bevers) Right - Many of the rock cuts on the Jumping Caribou Lake Diversion have not been altered substantially since the highway was first constructed over 70 years ago. Older rock cuts tend to have uneven vertical faces, since construction techniques used at the time did not allow rocks to be blasted with any degree of precision. Newer rock cuts tend to be squared off vertically, because modern highway builders can now blast rocks out of the way with extreme precision. (Photograph taken on August 6, 2011 - © Cameron Bevers) 

Left -Facing north along the Jumping Caribou Lake Diversion on Hwy 11 south of Temagami. (Photograph taken on August 6, 2011 - © Cameron Bevers) Right - The Jumping Caribou Lake Diversion is approximately 18 km in length. Completed in 1940, this new highway diversion bypassed a narrow and winding section of the original 1920s-era Ferguson Highway. See an Enlarged Photo Here. (Photograph taken on August 6, 2011 - © Cameron Bevers) 

Left - Moose warning sign on Hwy 11 at Jumping Caribou Lake. (Photograph taken on August 6, 2011 - © Cameron Bevers) Right - Facing south along Hwy 11 towards Marten River near Jumping Caribou Lake. (Photograph taken on August 6, 2011 - © Cameron Bevers) 
Above - A late evening sun falls over Lake Temagami. In the centre of this photo, Hwy 11 can be seen skirting the shoreline of Lake Temagami.
See an Enlarged Photo Here. (Photograph taken on August 6, 2011 - © Cameron Bevers)
Continue on to King's Highway 11 Photos: Temagami to Latchford
|
|---|
Links to Adjacent King's Highway Photograph Pages:
Back to King's Highway 10 Photos /
King's Highway 11 History /
On to King's Highway 12 Photos
Ontario Highway History - Main Menu / Back to List of Highways Website contents, photos & text © 2002-2026, Cameron
Bevers (Webmaster) - All Rights Reserved / Contact Me
|
|---|