
| 
| |
|
|
This page contains present day photos (Year 2000 to date) of Ontario's King's Highway 11, arranged by location from
Temagami northerly to Latchford. All photographs displayed on this page were taken by the Webmaster (Cameron Bevers), unless specifically noted otherwise. Click
on any thumbnail to see a larger image!
Please note that all photographs displayed on this
website are protected by copyright. These photographs must not be reproduced, published,
electronically stored or copied, distributed, or posted onto other websites without
my written permission. If you want to use photos from this website, please
email me first for permission. Thank-you!
|
|---|
|
Page 19: Present Day King's Highway 11 Photographs (Temagami to Latchford)


Left - Looking south from Temagami across Portage Bay towards Hwy 11. See an
Enlarged Photo Here. (Photograph taken on August 17, 2003 - © Cameron Bevers) Right - Looking north along Hwy 11 north of Net Lake near Temagami. See an Enlarged Photo Here. (Photograph taken on August 17, 2003 - © Cameron Bevers) 

Left - Looking south along Hwy 11 at Granite Lake. See an
Enlarged Photo Here. (Photograph taken on August 17, 2003 - © Cameron Bevers) Right - Granite Lake Bridge on Hwy 11. Structure completed in 1938. See an Enlarged Photo Here. (Photograph taken on August 17, 2003 - © Cameron Bevers) 

Left - Another view of the Granite Lake Bridge on Hwy 11 north of Temagami. See an
Enlarged Photo Here. (Photograph taken on August 17, 2003 - © Cameron Bevers) Right - Superelevated curve on Hwy 11, facing north towards Latchford. See an Enlarged Photo Here. (Photograph taken on August 17, 2003 - © Cameron Bevers) 

Left - The Aubrey Cosens Memorial Bridge in Latchford, shortly after the deck partially failed. See an
Enlarged Photo Here. (Photograph taken on January 19, 2003 - © Cameron Bevers) Right - The deck of the Aubrey Cosens Memorial Bridge in Latchford failed on January 14, 2003. See an Enlarged Photo Here. (Photograph taken on January 19, 2003 - © Cameron Bevers) 

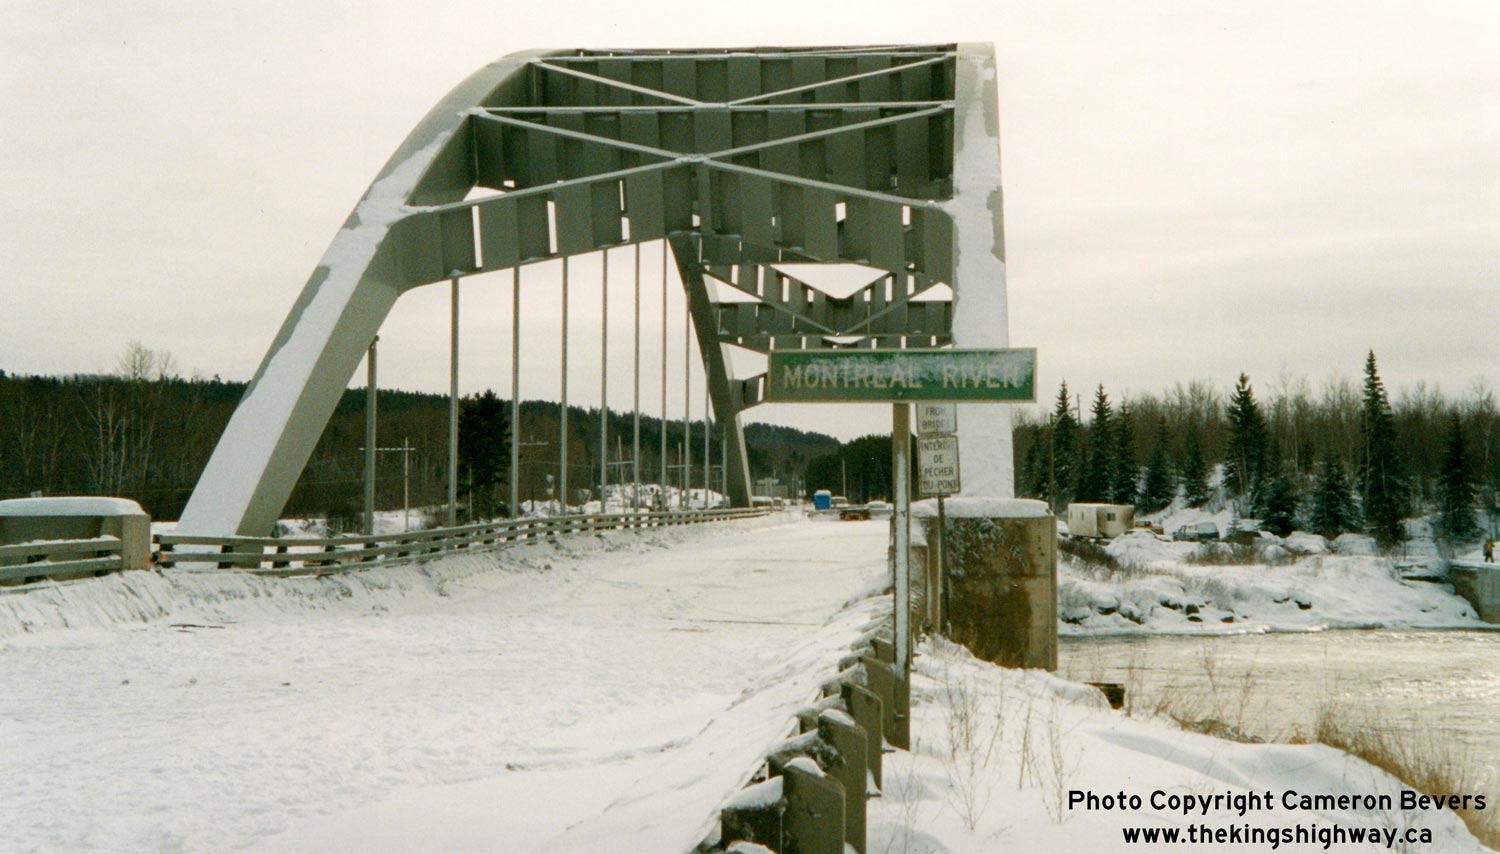
Left - The deck failure affected the southbound lane, at the north end of the span. See an
Enlarged Photo Here. (Photograph taken on January 19, 2003 - © Cameron Bevers) Right - Close-up view of the collapsed deck of the Montreal River Bridge at Latchford. See an Enlarged Photo Here. (Photograph taken on January 19, 2003 - © Cameron Bevers) 

Left - The deck failure caused a full closure of Hwy 11 between North Bay and New Liskeard for several weeks. No practical alternate routes were
available in Ontario to bypass the damaged bridge, so traffic was re-routed through Quebec until a temporary bridge was installed. See an
Enlarged Photo Here. (Photograph taken on January 19, 2003 - © Cameron Bevers) Right - Only five days after the failure on January 14th, construction of the new temporary bridge was already well underway. In the background, a bulldozer grades a causeway to carry a temporary Hwy 11 Bridge across the Montreal River. See an Enlarged Photo Here. (Photograph taken on January 19, 2003 - © Cameron Bevers) 

Left - Facing south across the failed Aubrey Cosens Memorial Bridge on Hwy 11 in Latchford. See an
Enlarged Photo Here. (Photograph taken on January 19, 2003 - © Cameron Bevers) Right - Facing north towards the Aubrey Cosens Memorial Bridge on Hwy 11 in Latchford. See an Enlarged Photo Here. (Photograph taken on January 19, 2003 - © Cameron Bevers) 

Left - Temporary Hwy 11 Bridge under construction on the eastern side of the failed span at Latchford. See an
Enlarged Photo Here. (Photograph taken on January 19, 2003 - © Cameron Bevers) Right - The Latchford Dam (at left) was opened to pedestrian traffic to allow Latchford residents living south of the bridge to access the rest of the town. While the passage across the dam could be made on foot in about 1 minute, the distance by car from the south end of Latchford to the north end of Latchford via the detour through Quebec was roughly 370 km. See an Enlarged Photo Here. (Photograph taken on January 19, 2003 - © Cameron Bevers) 

Left - The closed Sgt. Aubrey Cosens Memorial Bridge in Latchford, which failed in January 2003. See an
Enlarged Photo Here. (Photograph taken on August 17, 2003 - © Cameron Bevers) Right - The Aubrey Cosens Bridge was temporarily put out of service in 2003-2004. See an Enlarged Photo Here. (Photograph taken on August 17, 2003 - © Cameron Bevers) 

Left - The north portion of the span collapsed during a record cold snap which caused the suspension cables to break away from the overhead arches.
Nobody was injured in the January 14th incident, but Hwy 11 was closed to traffic for 2 weeks until a temporary bridge was built. See an
Enlarged Photo Here. (Photograph taken on August 17, 2003 - © Cameron Bevers) Right - Close-up of the demolished bridge deck. Note the temporary modular bridge at left. The bridge was re-decked in 2004, and was put back into service in 2005. See an Enlarged Photo Here. (Photograph taken on August 17, 2003 - © Cameron Bevers)
Continue on to King's Highway 11 Photos: Latchford to New Liskeard
|
|---|
Links to Adjacent King's Highway Photograph Pages:
Back to King's Highway 10 Photos /
King's Highway 11 History /
On to King's Highway 12 Photos
Ontario Highway History - Main Menu / Back to List of Highways Website contents, photos & text © 2002-2026, Cameron
Bevers (Webmaster) - All Rights Reserved / Contact Me
|
|---|