
| 
| |
|
|
This page contains present day photos (Year 2000 to date) of Ontario's King's Highway 11, arranged by location from Hearst
westerly to Otasawian River. All photographs displayed on this page were taken by the Webmaster (Cameron Bevers), unless specifically noted otherwise. Click
on any thumbnail to see a larger image!
Please note that all photographs displayed on this
website are protected by copyright. These photographs must not be reproduced, published,
electronically stored or copied, distributed, or posted onto other websites without
my written permission. If you want to use photos from this website, please
email me first for permission. Thank-you!
|
|---|
|
Page 27: Present Day King's Highway 11 Photographs (Hearst to Otasawian River)


Left - Distance guide sign on westbound Hwy 11 departing Hearst. There are no settlements of any kind along Hwy 11 between Hearst and Longlac. The two towns
are separated by a very desolate and remote forested region. There are also no commercial gas stations located along this 210 km (130 mile) section of Hwy 11, so
motorists are strongly advised to fill-up before leaving town. See an Enlarged Photo here. (Photograph taken on September 5, 2007 - © Cameron Bevers) Right - A late summer sunset descends over Hwy 11 near the Valentine River Bridge, about 20 km west of Hearst. See an Enlarged Photo here. (Photograph taken on August 28, 2006 - © Cameron Bevers) 

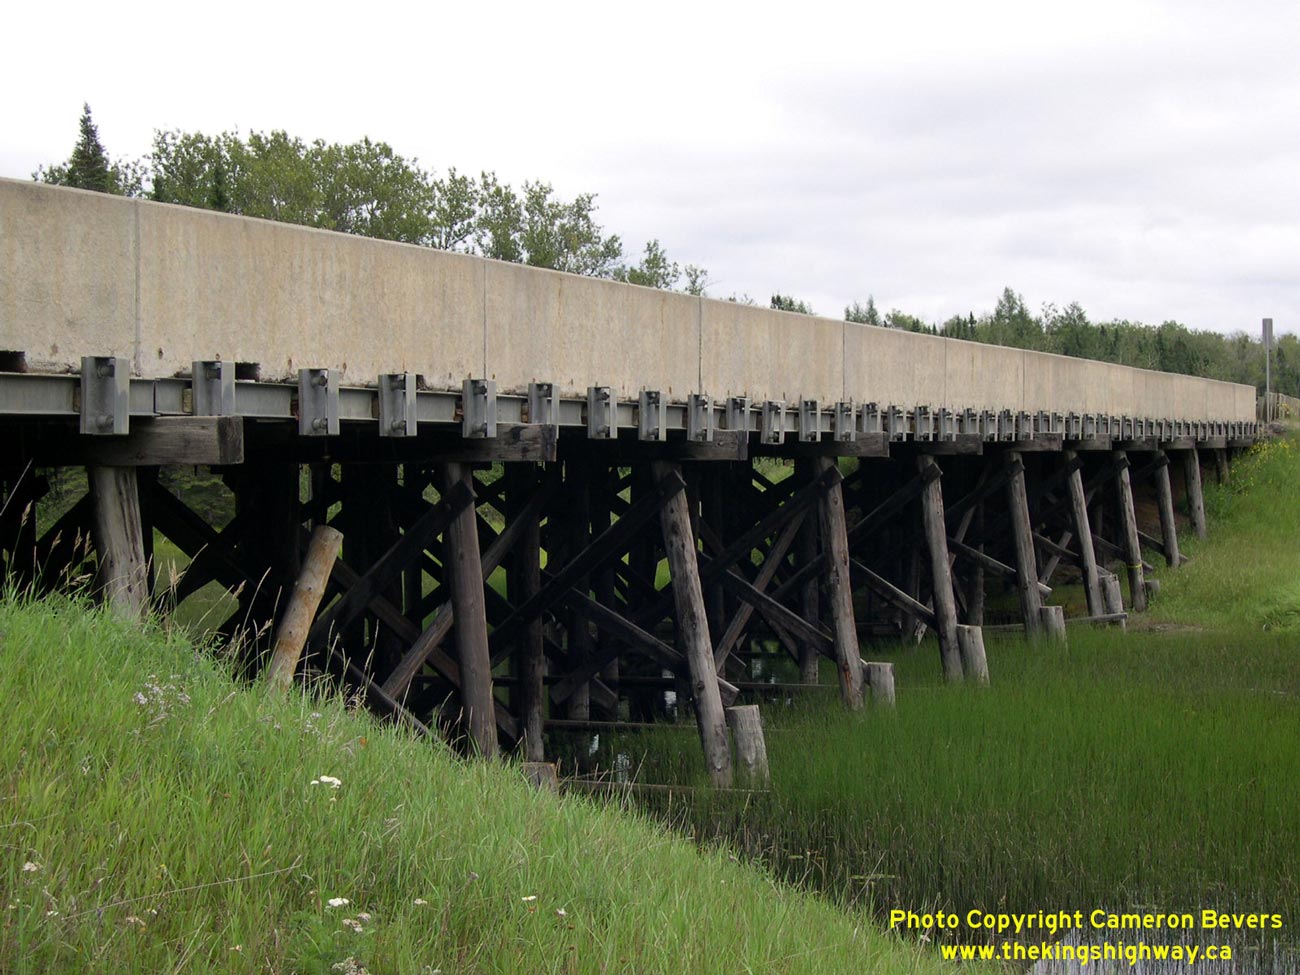
Left - Timber trestle bridge over the Valentine River on Hwy 11 west of Hearst. See an
Enlarged Photo here. (Photograph taken on August 20, 2003 - © Cameron Bevers) Right - Looking underneath the Valentine River Bridge at the laminated timber bridge deck. Timber bridges such as this one were frequently built in the more remote areas of Northern Ontario, where it was often difficult to find a local concrete supplier. In many cases, the cost of hauling concrete to remote bridge sites made the use of cast-in-place concrete construction prohibitively expensive. See an Enlarged Photo here. (Photograph taken on August 20, 2003 - © Cameron Bevers) 

Left - Southern side of the Valentine River Bridge on Hwy 11. This 13-span creosoted timber trestle structure was completed in 1956. The Valentine River Bridge
was replaced with a new structure in 2015. See an Enlarged Photo here. (Photograph taken on August 20, 2003 - © Cameron Bevers) Right - Facing east along Hwy 11 towards Hearst across the Valentine River Bridge. See an Enlarged Photo here. (Photograph taken on August 20, 2003 - © Cameron Bevers) 

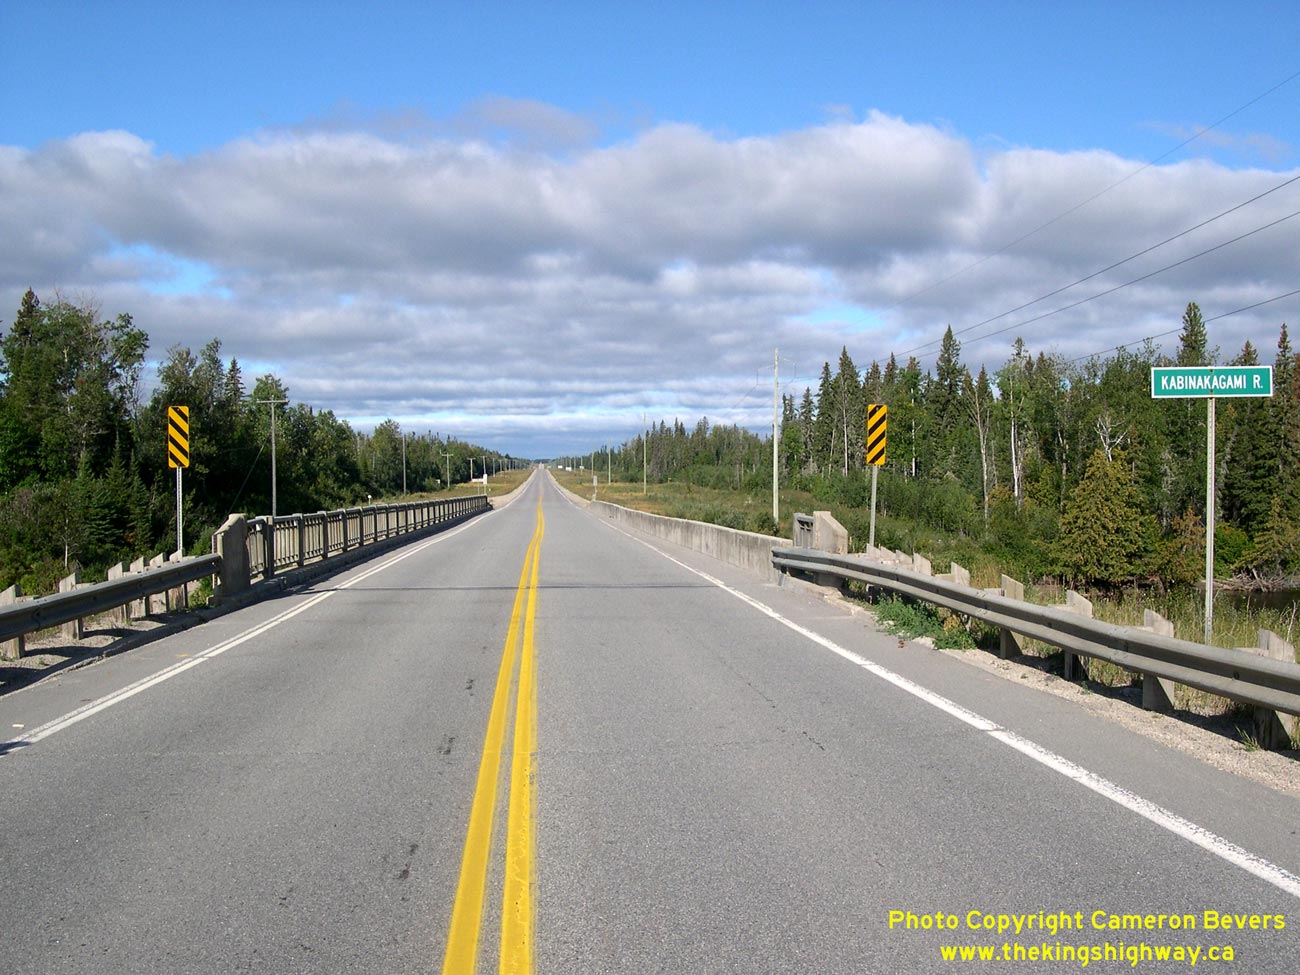
Left - Facing east along Hwy 11 at the Kabinakagami River Bridge, located about 30 km west of Hearst. See an
Enlarged Photo here. (Photograph taken on August 29, 2006 - © Cameron Bevers) Right - Kabinakagami River Bridge on Hwy 11 near Calstock. This five-span steel girder structure was completed in 1944. See an Enlarged Photo here. (Photograph taken on August 20, 2003 - © Cameron Bevers) 

Left - The northern side of the Kabinakagami River Bridge has a newer section of concrete parapet wall. A portion of the old steel handrail on the
north side of the bridge was damaged several years ago and was subsequently replaced. See an
Enlarged Photo here. (Photograph taken on August 29, 2006 - © Cameron Bevers) Right - Looking underneath the Kabinakagami River Bridge on Hwy 11. There were significant construction delays when the Kabinakagami River was first built in the 1940s. Construction of the new permanent bridge got underway in 1941, but it took three years to finish the bridge. The footings and piers were completed by 1942, but the highway builders were unable to finish the structure due to insufficient supplies of structural steel. The partially-completed structure sat disused until 1944, when a small supply of structural steel was acquired to complete the bridge deck. In the interim period, Hwy 11 traffic had to make use of a temporary timber bridge across the river. Severe shortages of structural steel plagued the construction of new highway bridges across Ontario during the final years of World War II. See an Enlarged Photo here. (Photograph taken on August 29, 2006 - © Cameron Bevers) 

Left - Facing west along Hwy 11 at the Kabinakagami River Bridge near Calstock. See an
Enlarged Photo here. (Photograph taken on August 29, 2006 - © Cameron Bevers) Right - Structure identification number and date stamp (1979) on the Kabinakagami River Bridge on Hwy 11. In this case, the 1979 date stamp refers to the date of the last major bridge rehabilitation, not the actual year of the bridge's construction. See an Enlarged Photo here. (Photograph taken on August 29, 2006 - © Cameron Bevers) 

Left - Southern side of the Kabinakagami River Bridge on Hwy 11. This bridge was one of only 10 structures completed on the provincial highway network during
the critical war year, 1944. The construction of the Hearst-Geraldton Highway was considered a high-priority Wartime project. Even though structural steel was in
short supply at the time, the Kabinakagami River Bridge was one of several permanent steel and concrete bridges built along Hwy 11 in the Hearst-Geraldton area during
the 1940s. Compare this 2006 photo of the Kabinakagami River Bridge with this
Historic 1953 Photo. See an
Enlarged Photo here. (Photograph taken on August 29, 2006 - © Cameron Bevers) Right - Concrete and steel handrail on the Kabinakagami River Bridge on Hwy 11. When the Kabinakagami River Bridge was first completed in 1944, it was fitted with a standard Department of Highways' concrete bar-and-post handrail. When the bridge was rehabilitated a number of years later, the concrete bar-and-post handrail was removed and replaced with the steel handrail seen here. See an Enlarged Photo here. (Photograph taken on August 29, 2006 - © Cameron Bevers) 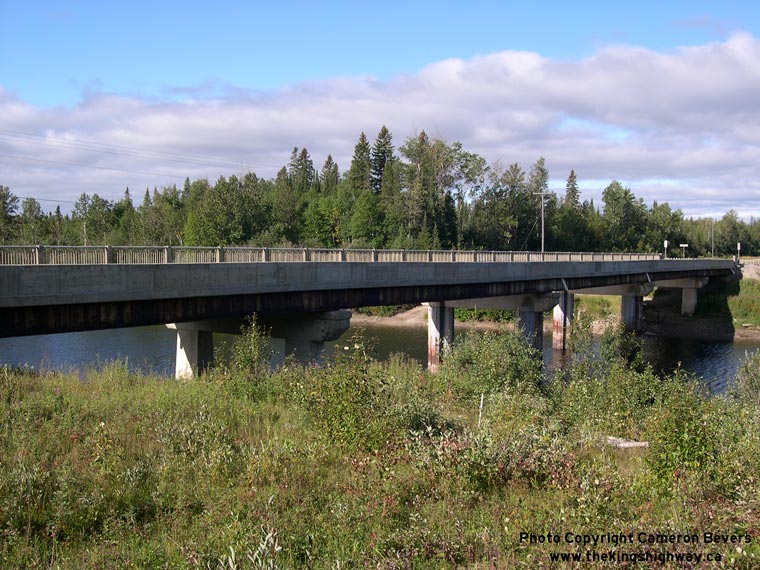

Left - Northern side of the Kabinakagami River Bridge on Hwy 11 near Calstock. The Kabinakagami River Bridge was replaced with a new structure in 2009. Despite
its rather difficult initial construction period, the Kabinakagami River Bridge served Hwy 11 traffic for 65 years following its completion. See an
Enlarged Photo here. (Photograph taken on August 29, 2006 - © Cameron Bevers) Right - Facing west along Hwy 11 towards Longlac from the Hwy 663 Junction west of Hearst. See an Enlarged Photo here. (Photograph taken on August 29, 2006 - © Cameron Bevers) 

Left - Scenic view of the Shekak River from Hwy 11 between Hearst and Longlac. Like many rivers in Northern Ontario, the Shekak River is actually part of the Arctic Ocean Watershed. Rivers in this part of Ontario flow north towards Hudson Bay. See an
Enlarged Photo here. (Photograph taken on August 29, 2006 - © Cameron Bevers) Right - Northern side of the Shekak River Bridge on Hwy 11 west of Hearst. See an Enlarged Photo here. (Photograph taken on August 29, 2006 - © Cameron Bevers) 

Left - Shekak River Bridge on Hwy 11 east of the Hwy 631 Junction. This five-span steel girder structure was completed in 1957. See an
Enlarged Photo here. (Photograph taken on August 29, 2006 - © Cameron Bevers) Right - Facing west along Hwy 11 towards Longlac at the Shekak River Bridge. See an Enlarged Photo here. (Photograph taken on August 29, 2006 - © Cameron Bevers) 

Left - Southern side of the Shekak River Bridge on Hwy 11 west of Hearst. See an
Enlarged Photo here. (Photograph taken on August 29, 2006 - © Cameron Bevers) Right - Below-deck view of the Shekak River Bridge. The pier design of this bridge is very unusual, as the steel deck girders are supported on a series of transverse steel beams which are supported on the two large circular concrete piers. A nearby bridge at the Nagagami River has a virtually identical design. See an Enlarged Photo here. (Photograph taken on August 29, 2006 - © Cameron Bevers) 

Left - Northern terminus of Hwy 631 at the Hwy 11 Junction west of Hearst. See an
Enlarged Photo here. (Photograph taken on August 29, 2006 - © Cameron Bevers) Right - Facing east along Hwy 11 towards the Hwy 631 Junction. Despite its remote location, the Hwy 11 & Hwy 631 Junction is the most important highway junction in this part of Ontario. The latter highway provides the area's only north-south road link to Hwy 11. The next north-south road link is Hwy 655, located 250 km to the east. There are no major provincial highway links west of this point, until Hwy 11 and Hwy 17 connect 340 km west of here at Nipigon. All other north-south provincial highways which intersect Hwy 11 along the 590 km stretch between Driftwood and Nipigon are not through roads. See an Enlarged Photo here. (Photograph taken on August 29, 2006 - © Cameron Bevers) 

Left - Directional signs and shield assembly at the northern terminus of Hwy 631 at Hwy 11. The two highways intersect 63 km west of Hearst. See an
Enlarged Photo here. (Photograph taken on August 29, 2006 - © Cameron Bevers) Right - Facing west along Hwy 11 at the Hwy 631 Junction west of Hearst. From this point, it is a very lonely 150 km drive along Hwy 11 to Longlac. See an Enlarged Photo here. (Photograph taken on August 29, 2006 - © Cameron Bevers) 

Left - Facing south along Hwy 631 towards Hornepayne from the Hwy 11 Junction west of Hearst. See an
Enlarged Photo here. (Photograph taken on August 29, 2006 - © Cameron Bevers) Right - Warning sign on Hwy 631 indicating that there are no services on this highway for 72 km. Motorists who are short on fuel in this part of the province can easily be stranded in this area, as there are no service stations located along this section of Hwy 11 either. However, gas is sometimes available for purchase at a seasonal outfitter at the Nagagami River Bridge when they are open. See an Enlarged Photo here. (Photograph taken on August 29, 2006 - © Cameron Bevers) 

Left - Nagagami River Bridge on Hwy 11, located just west of the Hwy 631 Junction west of Hearst. See an
Enlarged Photo here. (Photograph taken on August 20, 2003 - © Cameron Bevers) Right - Southern side of the Nagagami River Bridge on Hwy 11 near the Hwy 631 Junction west of Hearst. This five-span steel girder structure was completed in 1958. See an Enlarged Photo here. (Photograph taken on September 4, 2007 - © Cameron Bevers) 

Left - An elevated view of the southern side of the Nagagami River Bridge on Hwy 11 west of Hearst. See an
Enlarged Photo here. (Photograph taken on September 4, 2007 - © Cameron Bevers) Right - Facing west along Hwy 11 towards Longlac across the Nagagami River Bridge. See an Enlarged Photo here. (Photograph taken on September 4, 2007 - © Cameron Bevers) 

Left - View underneath the Nagagami River Bridge on Hwy 11. The pier design of the Nagagami River Bridge is essentially identical to the one used for the
adjacent Shekak River Bridge, located about 10 km to the east. The number of bridge spans and overall length of the Nagagami River Bridge are actually identical to
the bridge at Shekak River, which suggests that both bridges were designed by the same Department of Highways engineer. See an
Enlarged Photo here. (Photograph taken on September 4, 2007 - © Cameron Bevers) Right - Concrete and steel handrail design of the Nagagami River Bridge on Hwy 11 west of Hearst. See an Enlarged Photo here. (Photograph taken on September 4, 2007 - © Cameron Bevers) 

Left - The 1958 Nagagami River Bridge replaced a crude timber truss structure that was built a short distance to the north of the current
bridge during the initial construction of Hwy 11 in the early 1940s. The severe shortage of structural steel brought about by World
War II resulted in the construction of many temporary timber and log truss bridges on the new highway link between Hearst and Geraldton. Some of these
"temporary" Wartime timber bridges actually survived until well into the 1950s, due to post-war shortages of steel and other construction materials. See an
Enlarged Photo here. (Photograph taken on September 4, 2007 - © Cameron Bevers) Right - The beautiful Nagagami River meanders slowly northwards towards James Bay and the Arctic Ocean. The temporary Hwy 11 timber truss bridge built during World War II crossed the Nagagami River at this location, a short distance downstream of the current Hwy 11 bridge. See an Enlarged Photo here. (Photograph taken on August 29, 2006 - © Cameron Bevers) 

Left - Using a bucket truck, bridge engineers perform a routine inspection below the deck of the Nagagami River Bridge on Hwy 11. All provincial
highway bridges are inspected frequently to monitor the structural conditions and to set a priority schedule for bridge rehabilitation and maintenance work.
In extreme cases, older structures may have to be replaced altogether as their maximum useful life span in reached. Most bridges in Ontario are designed to
last between 50 and 75 years. See an Enlarged Photo here. (Photograph taken on August 29, 2006 - © Cameron Bevers) Right - Facing west along Hwy 11 towards the Nagagami River Bridge west of Hearst. See an Enlarged Photo here. (Photograph taken on August 29, 2006 - © Cameron Bevers) 

Left - Facing east along Hwy 11 towards Hearst across the Nagagami River Bridge. See an
Enlarged Photo here. (Photograph taken on September 4, 2007 - © Cameron Bevers) Right - Facing west along Hwy 11 towards Longlac, about 3 km west of the Nagagami River Bridge. The extension of Hwy 11 from Hearst to Geraldton was constructed in the early 1940s, in order to provide the first link in the Trans-Canada Highway. Prior to the completion of this section of Hwy 11 in 1943, there was no highway linking Eastern and Western Canada. The new 153-mile highway link from Hearst to Geraldton was built under extremely difficult conditions during World War II. A second link in the Trans-Canada Highway (Hwy 17) was completed between Sault Ste. Marie and Nipigon seventeen years later, in 1960. See an Enlarged Photo here. (Photograph taken on August 20, 2003 - © Cameron Bevers) 

Left - Facing west along Hwy 11 towards Longlac at the Otasawian River Bridge. This bridge is located about 100 km west of Hearst. See an
Enlarged Photo here. (Photograph taken on September 5, 2007 - © Cameron Bevers) Right - Facing east along Hwy 11 towards Hearst at the Otasawian River Bridge. See an Enlarged Photo here. (Photograph taken on September 5, 2007 - © Cameron Bevers) 

Left - Southern side of the Otasawian River Bridge on Hwy 11 between Hearst and Longlac. See an
Enlarged Photo here. (Photograph taken on September 5, 2007 - © Cameron Bevers) Right - Northern side of the Otasawian River Bridge on Hwy 11. This three-span steel girder structure was completed in 1958. See an Enlarged Photo here. (Photograph taken on September 5, 2007 - © Cameron Bevers) 

Left - Steel and concrete handrail design of the Otasawian River Bridge on Hwy 11 west of Hearst. See an
Enlarged Photo here. (Photograph taken on September 5, 2007 - © Cameron Bevers) Right - View underneath the Otasawian River Bridge on Hwy 11 between Hearst and Longlac. See an Enlarged Photo here. (Photograph taken on September 5, 2007 - © Cameron Bevers) 
Above - The current Otasawian River Bridge replaced a temporary timber trestle bridge built during World War II. The sawn-off timber bents which
once supported the temporary timber bridge sit just below the river's surface on the north side of the existing structure. See an
Enlarged Photo here. (Photograph taken on September 5, 2007 - © Cameron Bevers)
Continue on to King's Highway 11 Photos: Otasawian River to Longlac
|
|---|
Links to Adjacent King's Highway Photograph Pages:
Back to King's Highway 10 Photos /
King's Highway 11 History /
On to King's Highway 12 Photos
Ontario Highway History - Main Menu / Back to List of Highways Website contents, photos & text © 2002-2026, Cameron
Bevers (Webmaster) - All Rights Reserved / Contact Me
|
|---|