
| 
| |
|
|
This page contains historical photos of Ontario's King's Highway 11 dating from 1970 to 1979. All photographs displayed on
this page were taken by the Ontario Ministry of Transportation, unless specifically noted otherwise. Historical photographs are arranged in approximate chronological
order. Click on any thumbnail to see a larger image!
Please note that all photographs displayed on this
website are protected by copyright. These photographs must not be reproduced, published,
electronically stored or copied, distributed, or posted onto other websites without
my written permission. If you want to use photos from this website, please
email me first for permission. Thank-you!
|
|---|
|
Page 5: Historical King's Highway 11 Photographs (1970 to 1979)


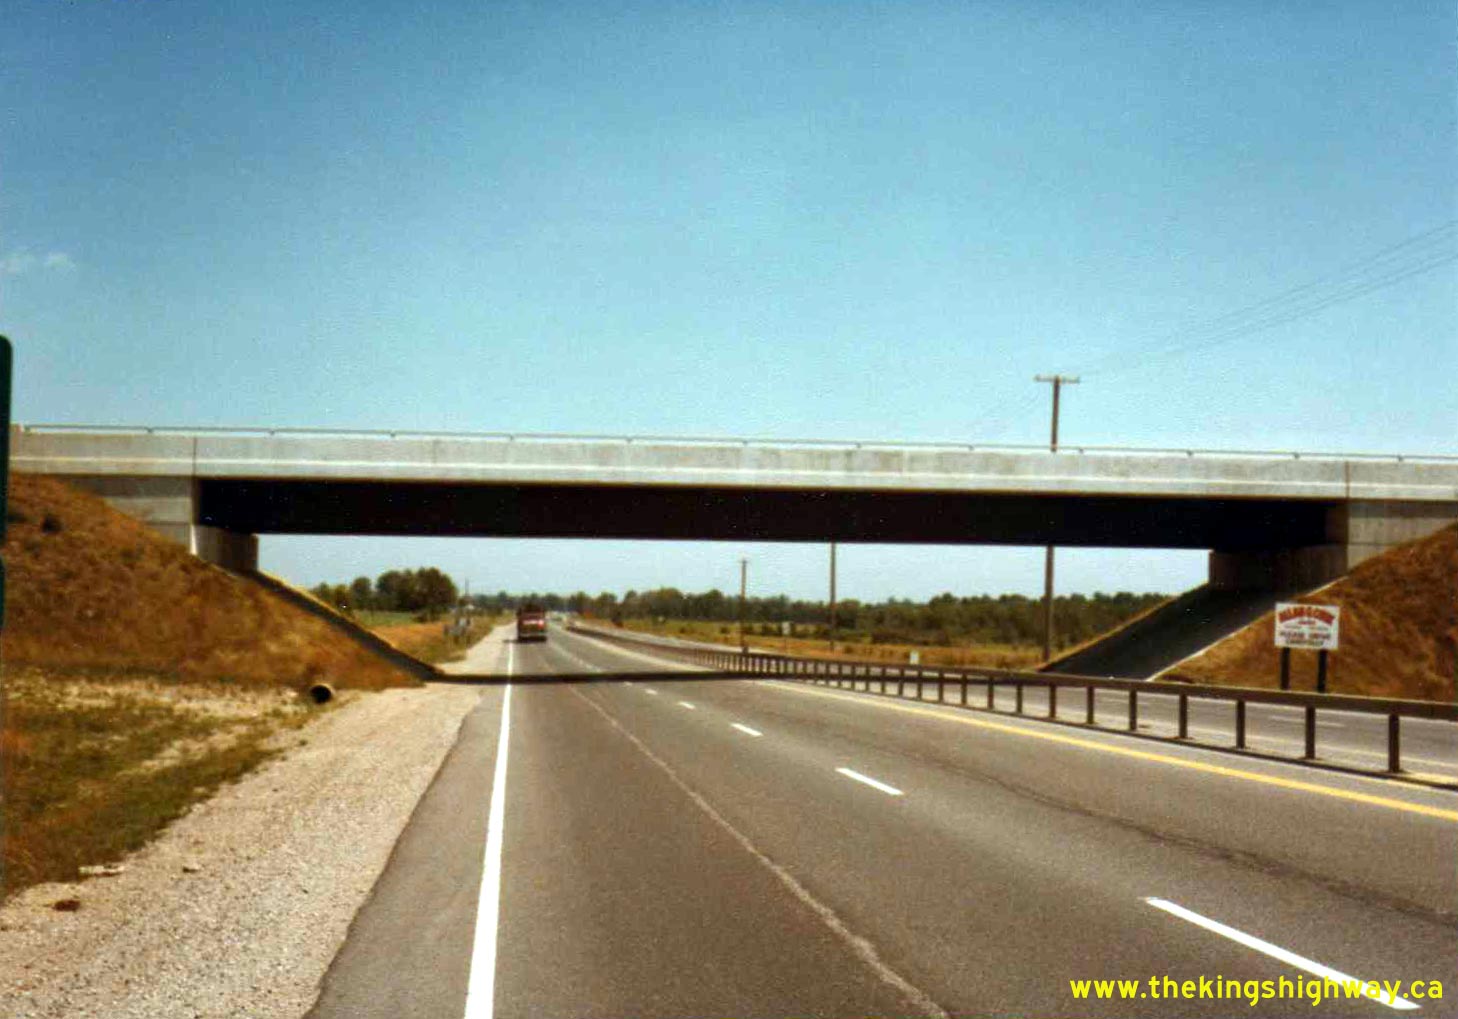
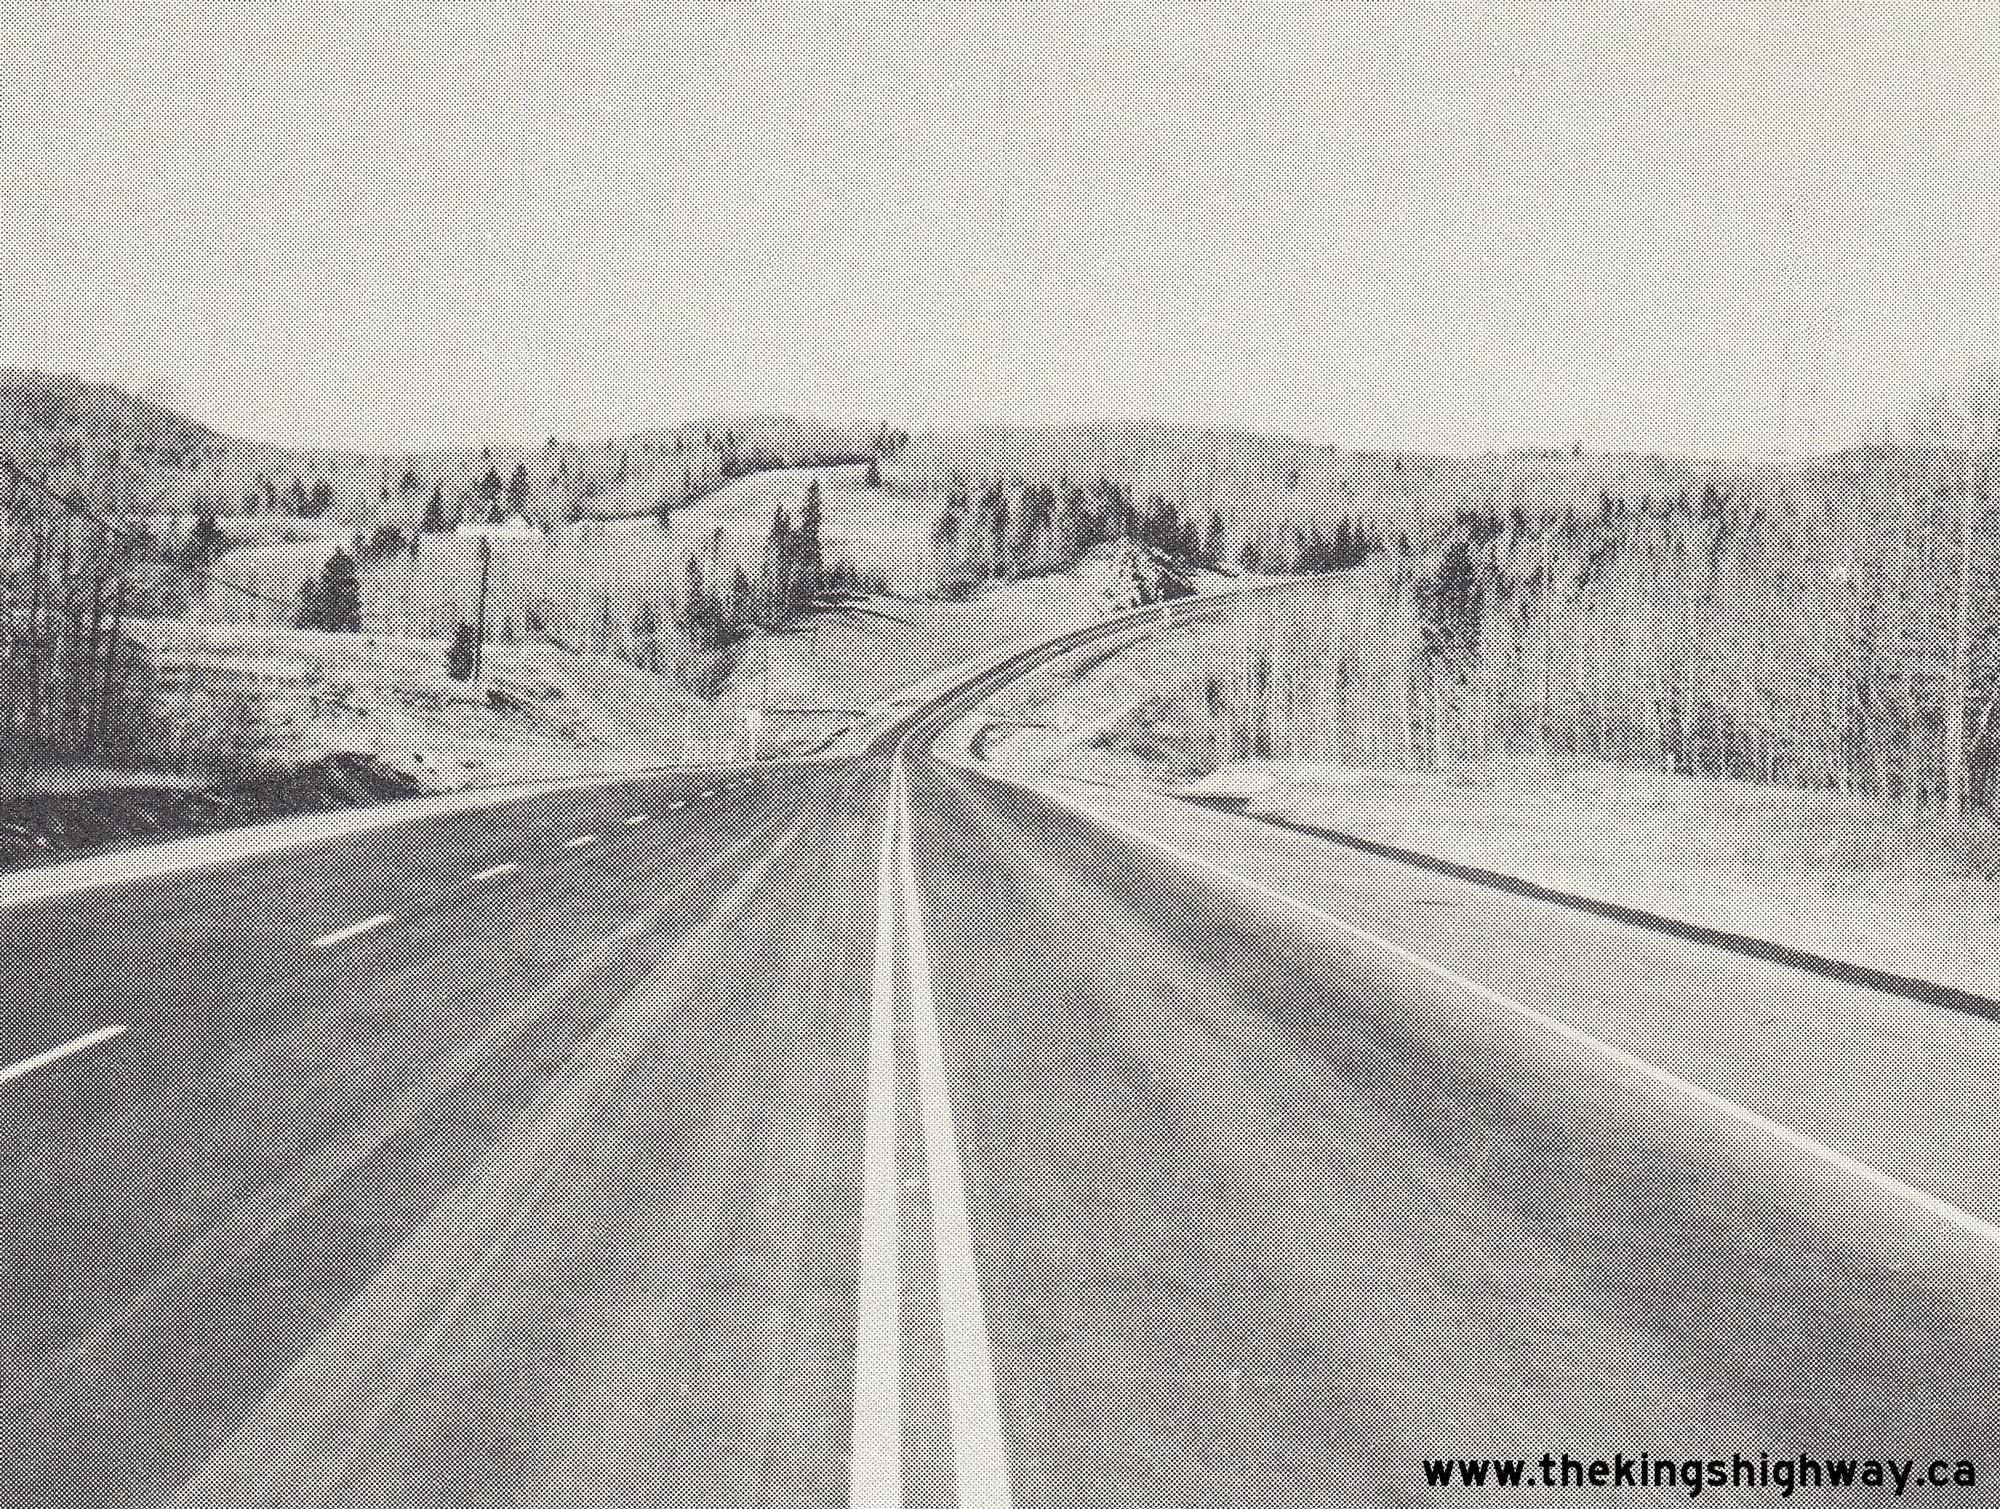
Left - Facing north along Hwy 11 towards Gravenhurst at the Trent-Severn Waterway Bridge at Washago in 1970. This photo shows a recently-widened section of the
Washago Bypass (Hwy 11), only a few years after it was expanded from two to four lanes. Although this section of Hwy 11 has a median barrier today, it wasn't
installed until the mid-1980s. Up until 1984, the highway had a 48-foot undivided four-lane pavement with a narrow painted flush median, as seen here. Apart from
Hwy 11 in the Orillia area, this type of flush median treatment never saw widespread use on the Ontario Highway System. Only a handful of other examples were ever
built. See an Enlarged Photo Here. Photo taken on September 8, 1970. (Photo courtesy of Ontario Ministry of Transportation - © King's Printer for Ontario, 2020) Right - Eastern side of the Trent-Severn Waterway Bridge on Hwy 11 at Washago. See an Enlarged Photo Here. Photo taken on September 8, 1970. (Photo courtesy of Ontario Ministry of Transportation - © King's Printer for Ontario, 2020) 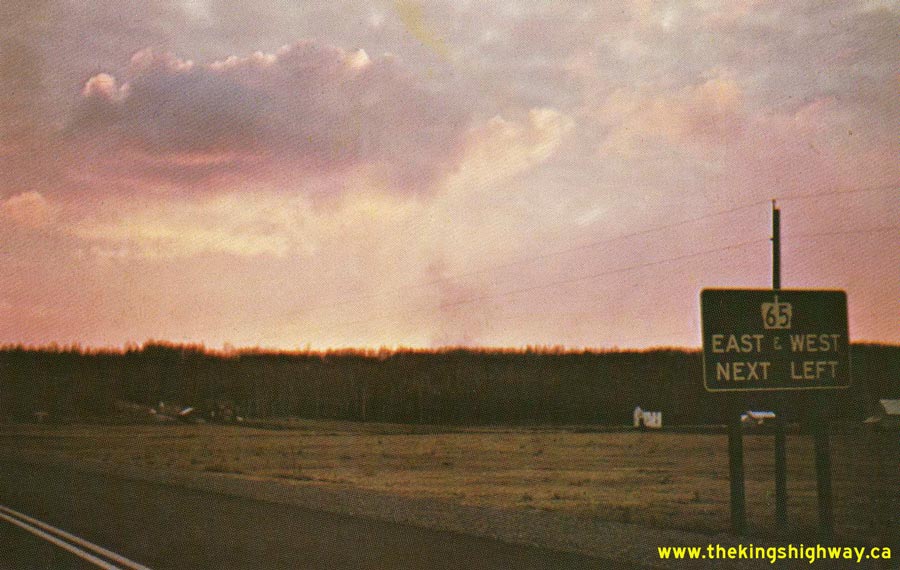
Above - Circa 1970 postcard view of a sunset over Hwy 11 at the Hwy 65 Junction near New Liskeard. See an
Enlarged Photo Here. (Photograph courtesy of Len Leiffer) 

Left - Reconstruction and widening of Hwy 11 (Yonge Street) south of Aurora, Contract #1970-42. See an
Enlarged Photo Here. Photo taken in 1970. (Photo courtesy of Ontario Ministry of Transportation - © King's Printer for Ontario, 1970) Right - Facing north along the newly-built Gravenhurst Bypass (Hwy 11) at Gull Lake Narrows, Contract #1968-195. See an Enlarged Photo Here. Photo taken in 1970. (Photo courtesy of Ontario Ministry of Transportation - © King's Printer for Ontario, 1970) 
Above - Gull Lake Narrows Bridge on Hwy 11 near Gravenhurst in 1970, facing south. It is interesting to note that the northbound and southbound lanes of the
Gravenhurst Bypass were not opened simultaneously. Here, northbound traffic can be seen using the structure in the foreground, while construction crews work to finish
the southbound lanes of the highway in the background. Southbound traffic on Hwy 11 was still using Old Hwy 11 (now Bethune Drive) through Gravenhurst at the time
this photo was taken. See an Enlarged Photo Here. Photo taken in 1970. (Photo courtesy of Ontario Ministry of Transportation - © King's Printer for Ontario, 1970) 

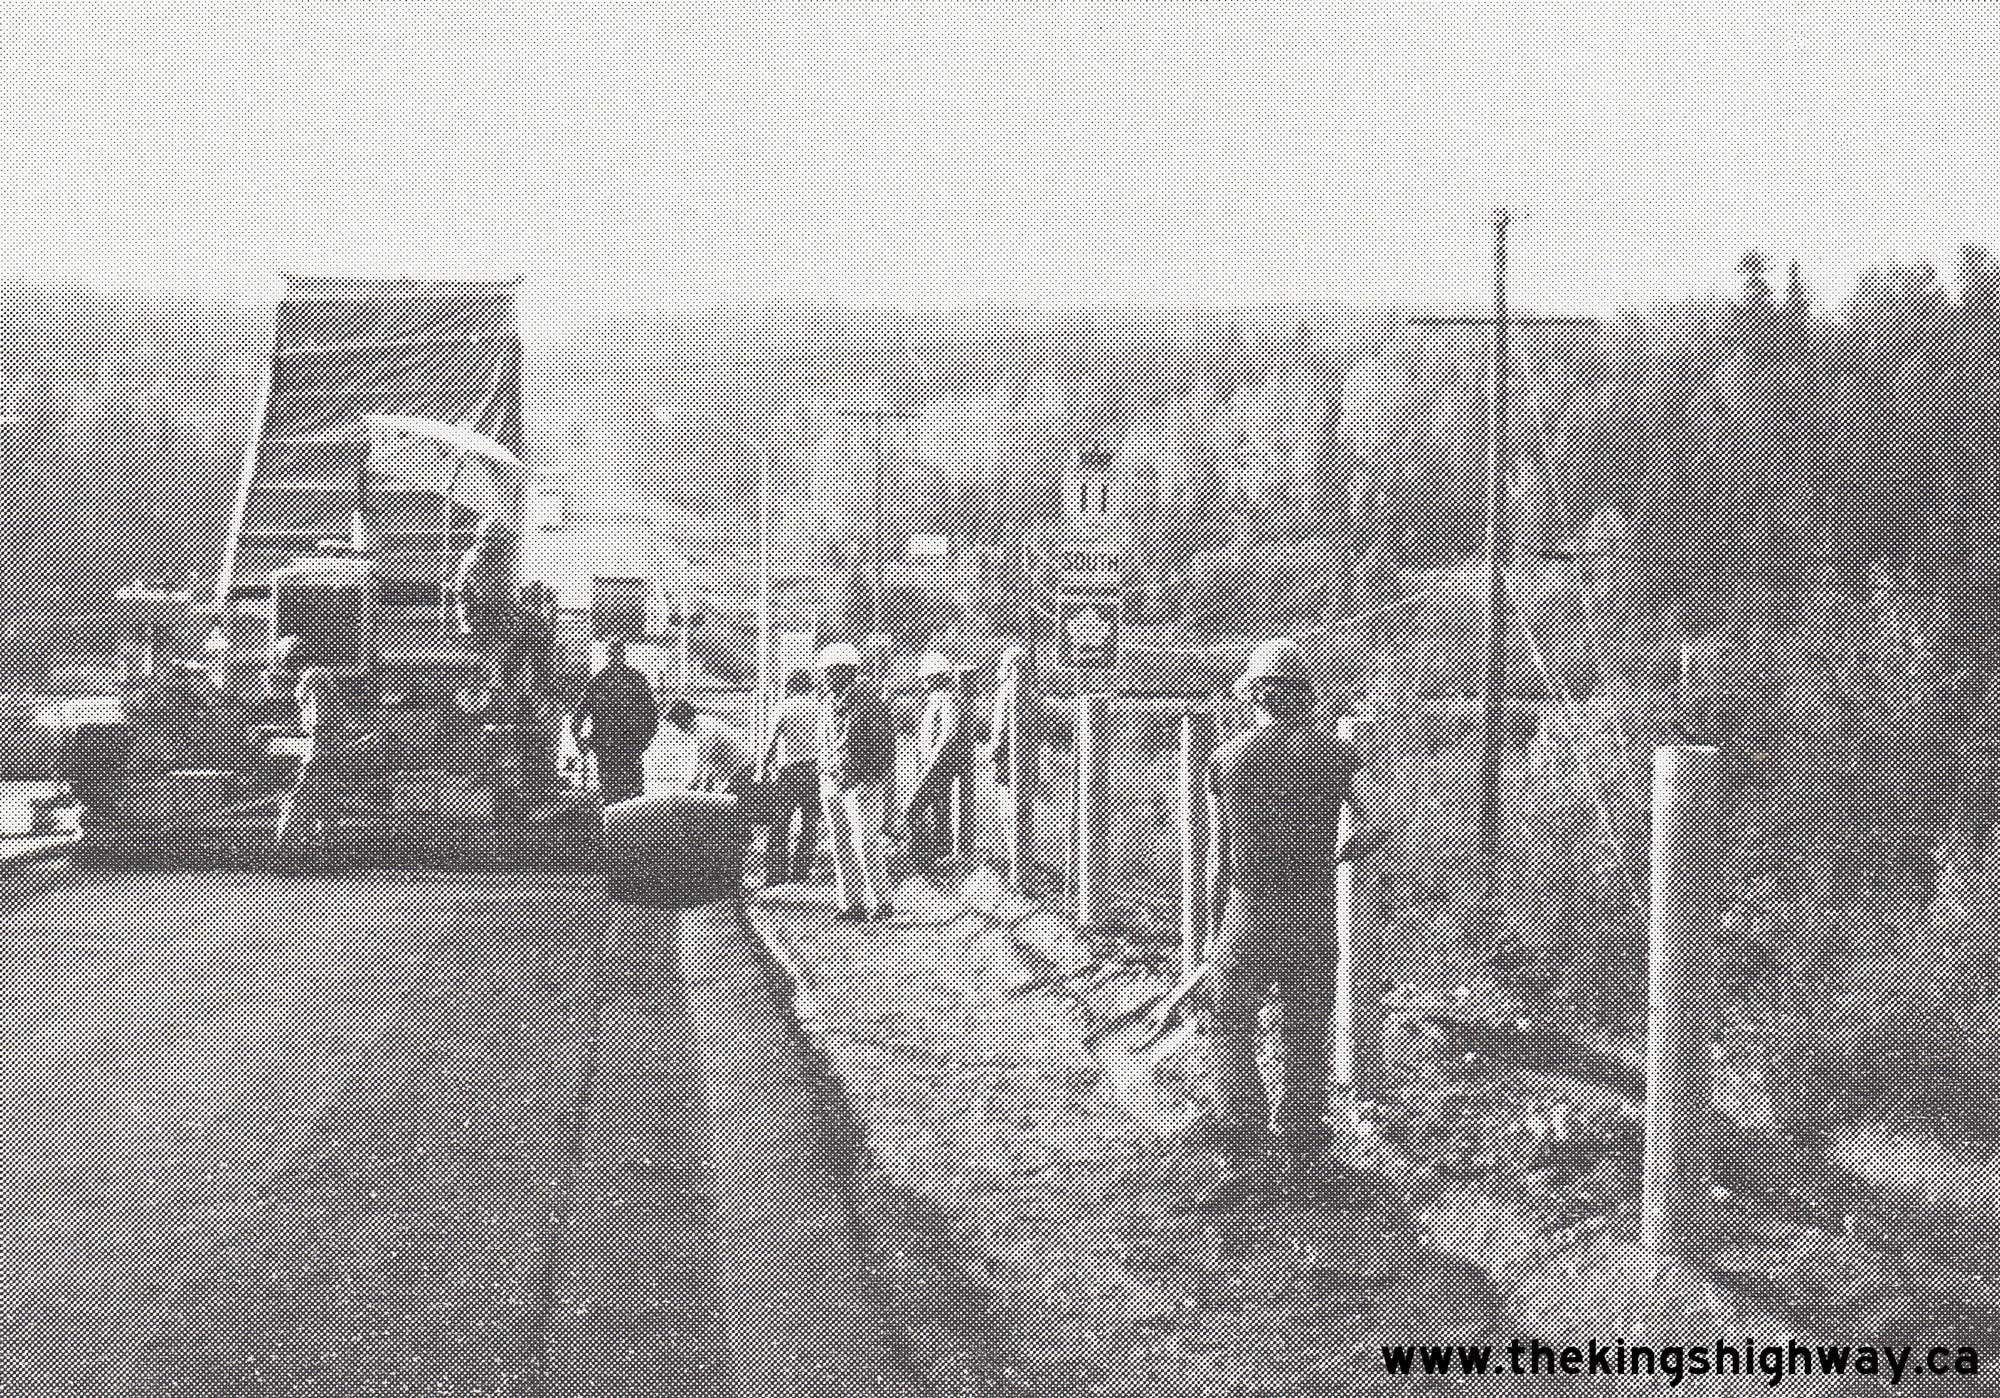
Left - Reconstruction of Hwy 11 west of Hearst, Contract #1969-505. A construction worker walks beside skids of polystyrene sheets, awaiting installation on a
trial pavement section. In an effort to minimize seasonal frost heaving, the Department of Highways of Ontario (DHO), and its successor, the Ministry of
Transportation and Communications (MTC), experimented by using various materials in the road base during highway reconstruction projects in the 1960s and 1970s. At
one time, the DHO/MTC was a North American leader in highway and materials engineering research. Government cost-cutting (by all political stripes) and a gradual
breakdown of knowledge transfer as "in-house" staff experts retired from the organization eventually took their toll, which greatly diminished Ontario's contributions
to various engineering research fields. See an Enlarged Photo Here. Photo taken in 1970. (Photo courtesy of Ontario Ministry of Transportation - © King's Printer for Ontario, 1970) Right - Placement of granular material on the shoulder of Hwy 11 near the Hwy 631 Junction west of Hearst, Contract #1969-621. See an Enlarged Photo Here. Photo taken in 1970. (Photo courtesy of Ontario Ministry of Transportation - © King's Printer for Ontario, 1970) 

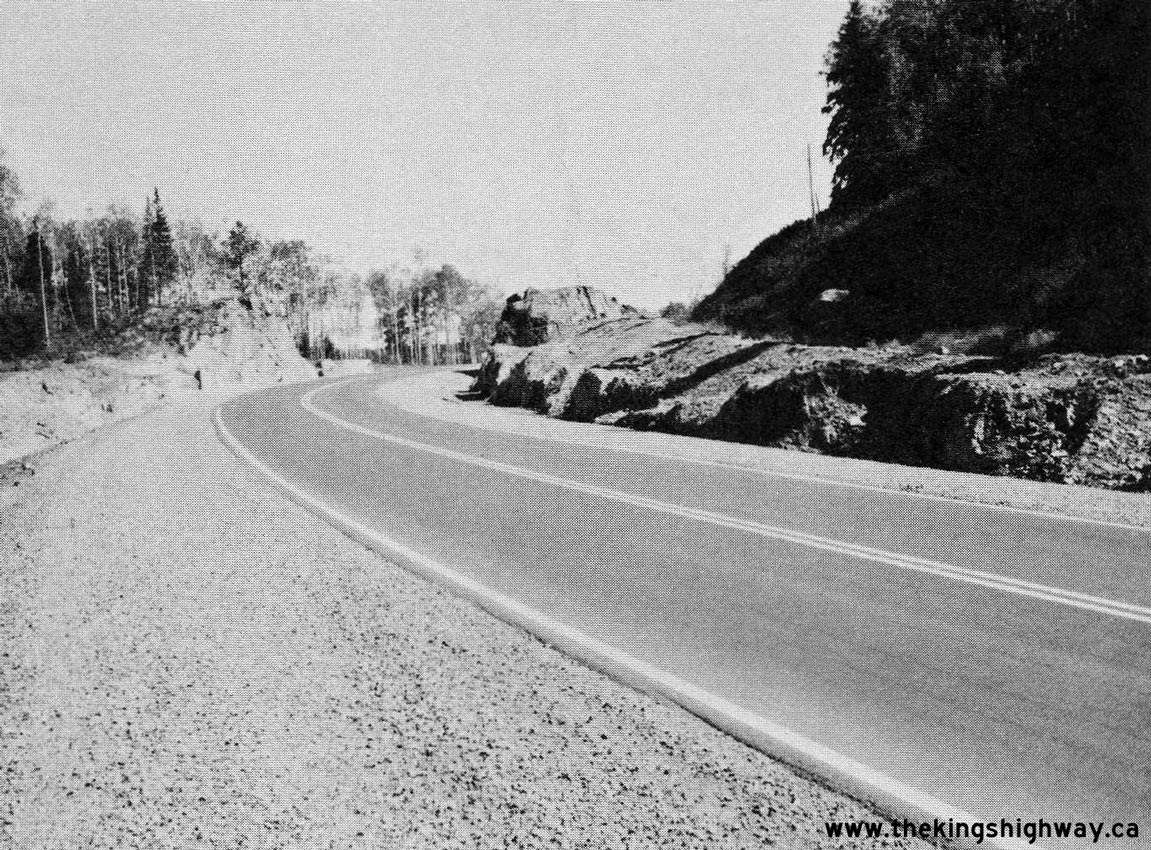
Left - Rock drilling operations on a Hwy 11 expansion project between Gravenhurst and Bracebridge, Contract #1971-84. See an
Enlarged Photo Here. Photo taken in 1972. (Photo courtesy of Ontario Ministry of Transportation - © King's Printer for Ontario, 1972) Right - Construction of a new bridge over Solomon Creek on Hwy 11 near Kapuskasing, Contract #1971-125. See an Enlarged Photo Here. Photo taken in 1972. (Photo courtesy of Ontario Ministry of Transportation - © King's Printer for Ontario, 1972) 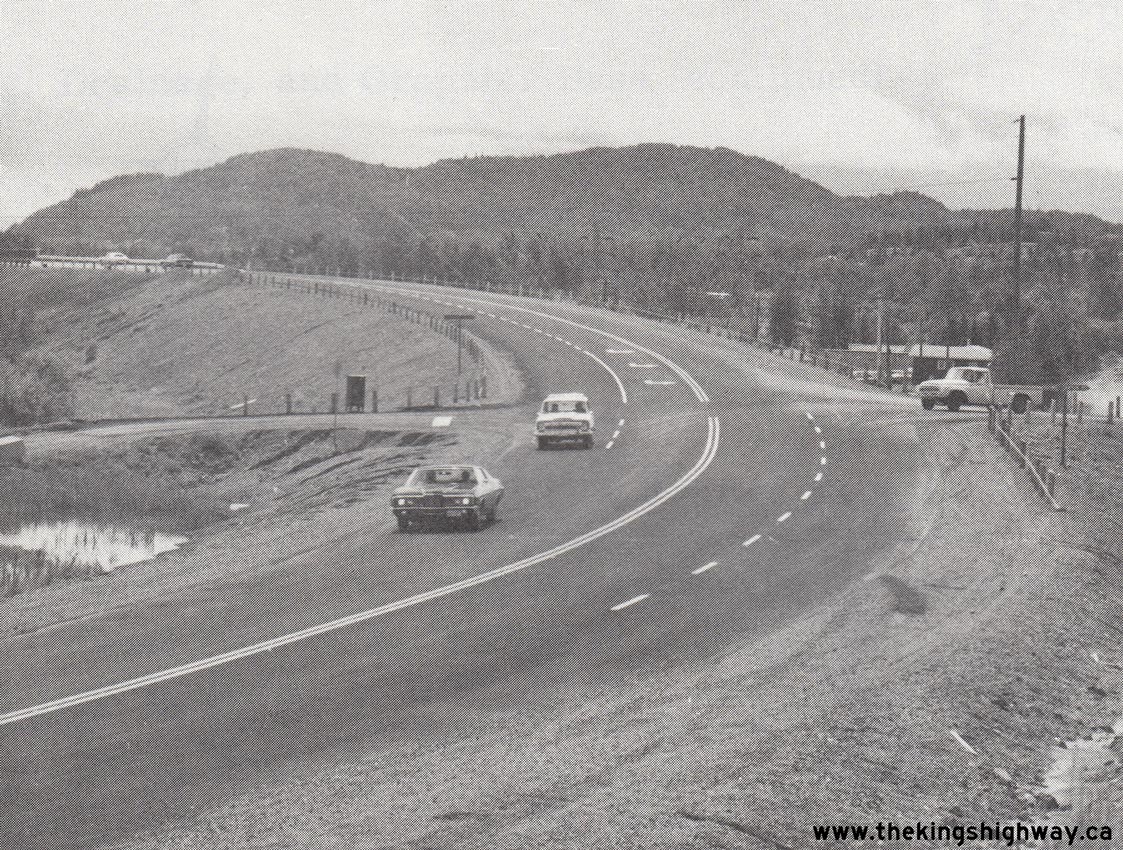

Left - Intersection improvements at Hwy 11 & Hwy 17 and Ouimet Canyon Road between Thunder Bay and Nipigon, Contract #1971-123. See an
Enlarged Photo Here. Photo taken in 1972. (Photo courtesy of Ontario Ministry of Transportation - © King's Printer for Ontario, 1972) Right - Rock cut widening on Hwy 11 near Burk's Falls south of Katrine, Contract #1972-69. See an Enlarged Photo Here. Photo taken in 1973. (Photo courtesy of Ontario Ministry of Transportation - © King's Printer for Ontario, 1973) 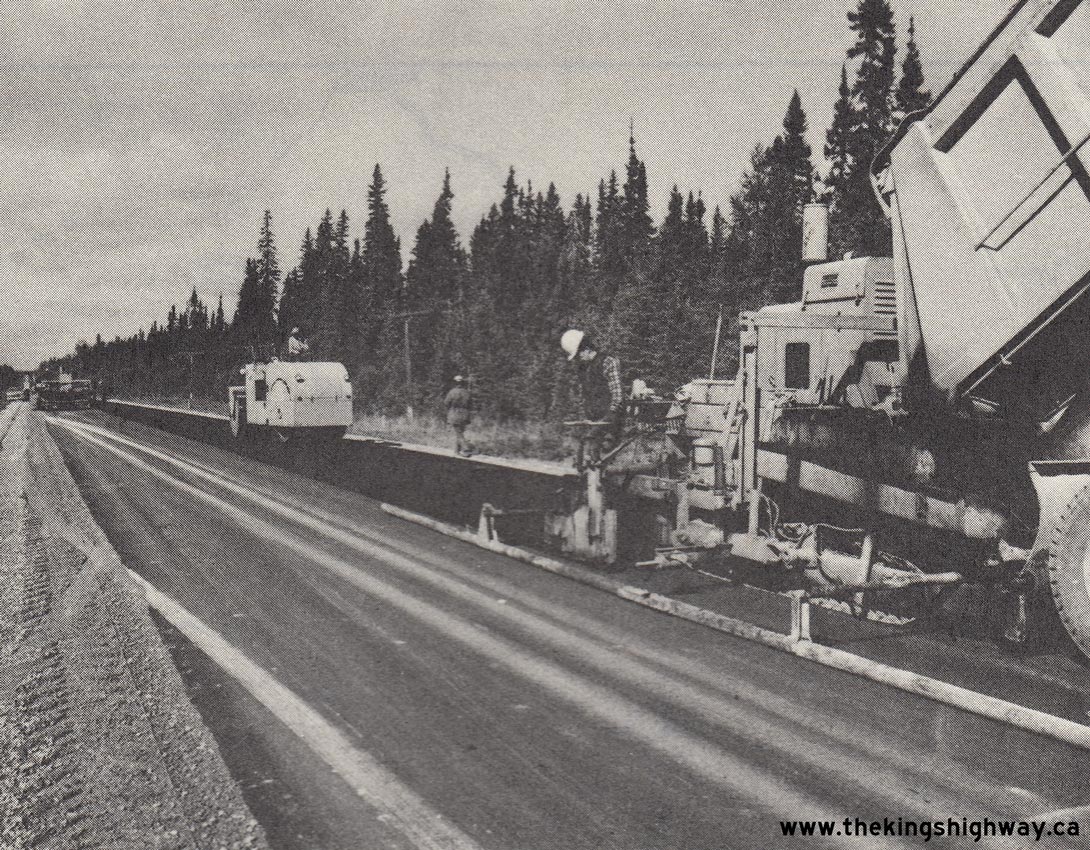

Left - Paving operations underway on Hwy 11 west of the Pagwachuan River Bridge between Hearst and Longlac, Contract #1971-514. See an
Enlarged Photo Here. Photo taken in 1973. (Photo courtesy of Ontario Ministry of Transportation - © King's Printer for Ontario, 1973) Right - Reconstruction of drainage ditches along Hwy 11 near Mattice, Contract #1972-134. See an Enlarged Photo Here. Photo taken in 1973. (Photo courtesy of Ontario Ministry of Transportation - © King's Printer for Ontario, 1973) 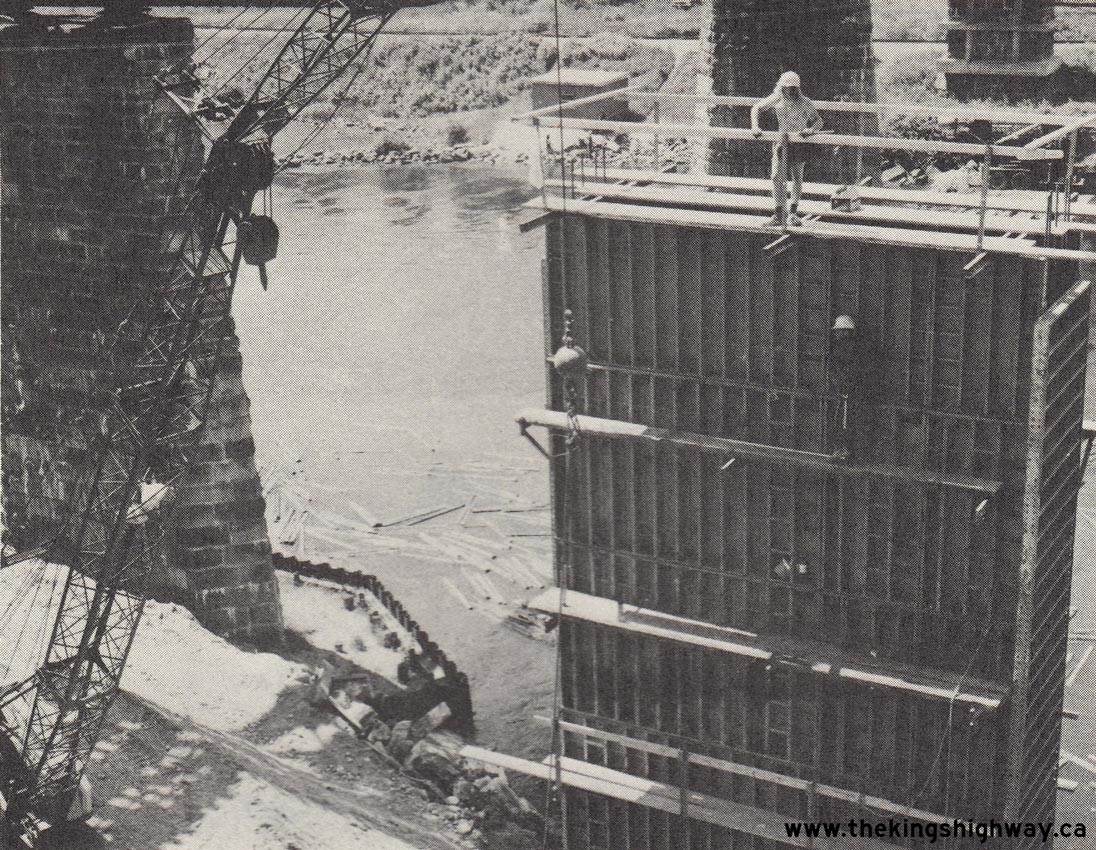

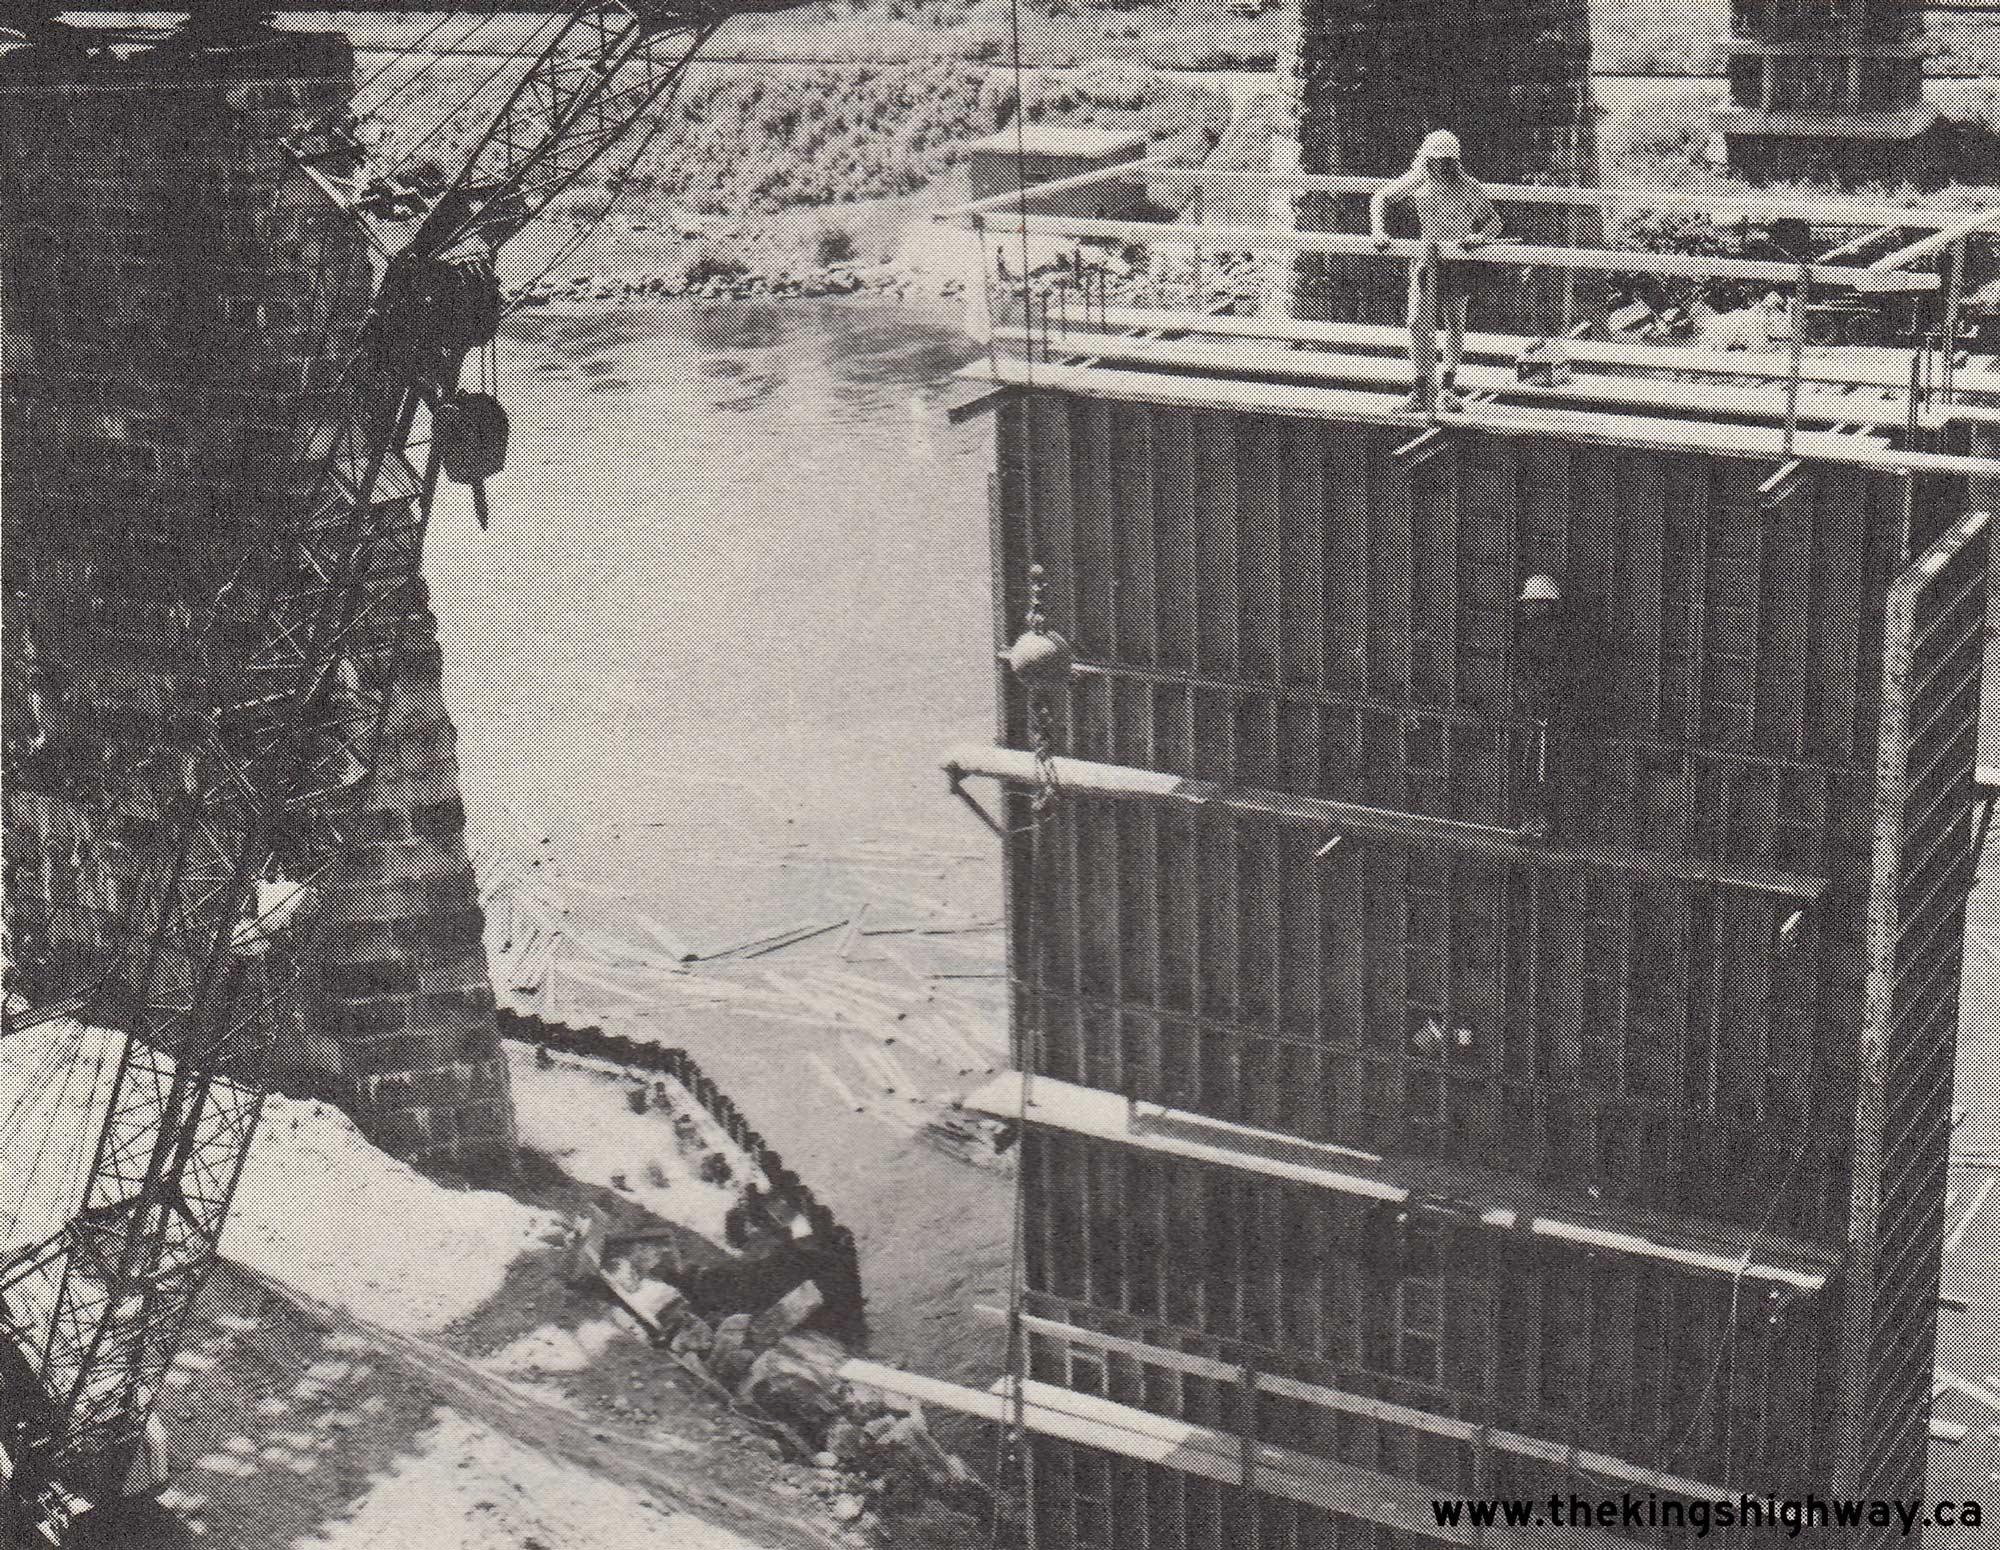
Left - Pier construction for the new Nipigon River Bridge on Hwy 11 & Hwy 17 near Nipigon, Contract #1972-205. See an
Enlarged Photo Here. Photo taken in 1973. (Photo courtesy of Ontario Ministry of Transportation - © King's Printer for Ontario, 1973) Right - New granular base on Hwy 11 west of Shabaqua Corners, Contract #1972-129. See an Enlarged Photo Here. Photo taken in 1973. (Photo courtesy of Ontario Ministry of Transportation - © King's Printer for Ontario, 1973) 
Above - Facing north along Hwy 400 from the Willow Creek Bridge towards Hwy 11 and the Crown Hill Overpass north of Barrie in 1973. Note the pre-Metric "60
Begins" speed limit sign (in miles per hour) in the median on the northbound approach to Hwy 11. Although it is pointing in the opposite direction, the sign facing
southbound Hwy 400 traffic at left is a "70 Begins" sign, with a "Trucks 60" tab underneath. See an
Enlarged Photo Here. Photo taken in September, 1973. (Photo courtesy of Ontario Ministry of Transportation - © King's Printer for Ontario, 2010) 
Above - Aerial view of the Hwy 400 and Hwy 11 Interchange at Crown Hill north of Barrie (1974) (Photo courtesy of Ontario Ministry of Transportation - © King's Printer for Ontario, 2010) 

Left - Heavy grading operations underway on the Bracebridge Bypass (Hwy 11) expansion, Contract #1973-80. See an
Enlarged Photo Here. Photo taken in 1974. (Photo courtesy of Ontario Ministry of Transportation - © King's Printer for Ontario, 1974) Right - Newly-installed overhead directional guide signs at the Hwy 11 & Hwy 101 Junction west of Matheson. See an Enlarged Photo Here. Photo taken in 1974. (Photo courtesy of Ontario Ministry of Transportation - © King's Printer for Ontario, 1974) 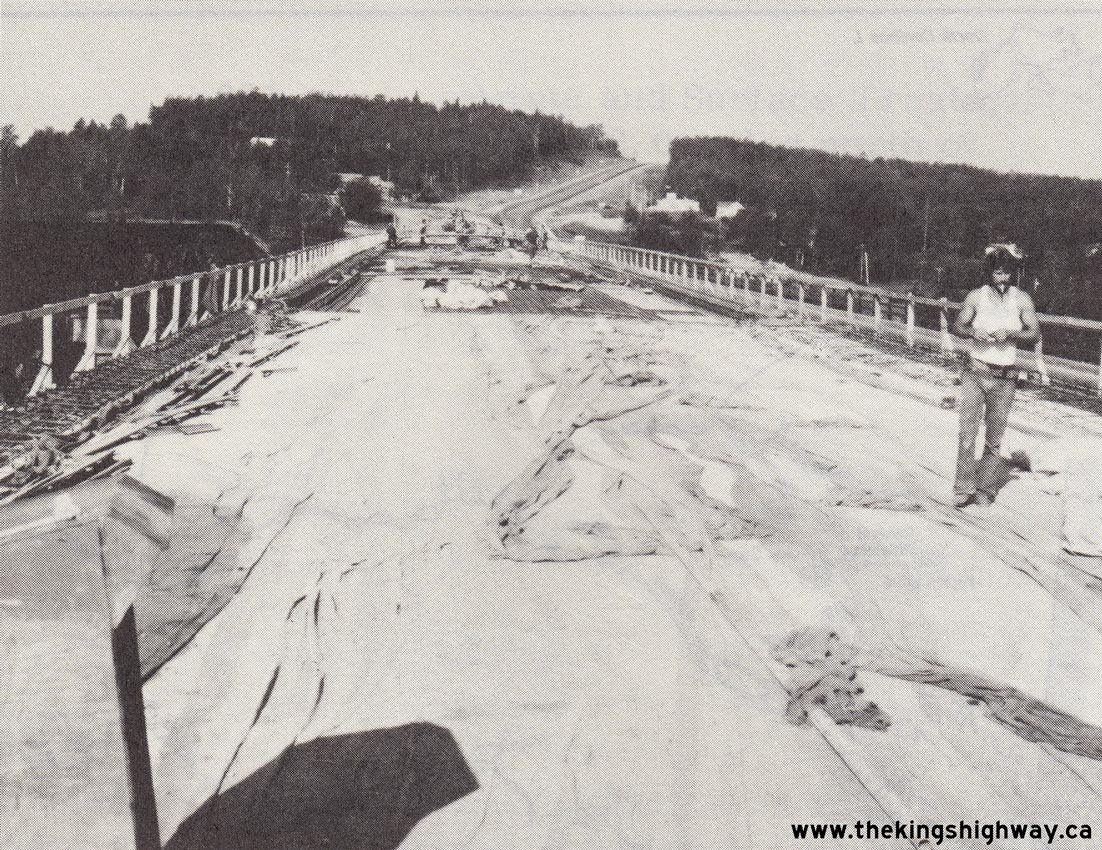
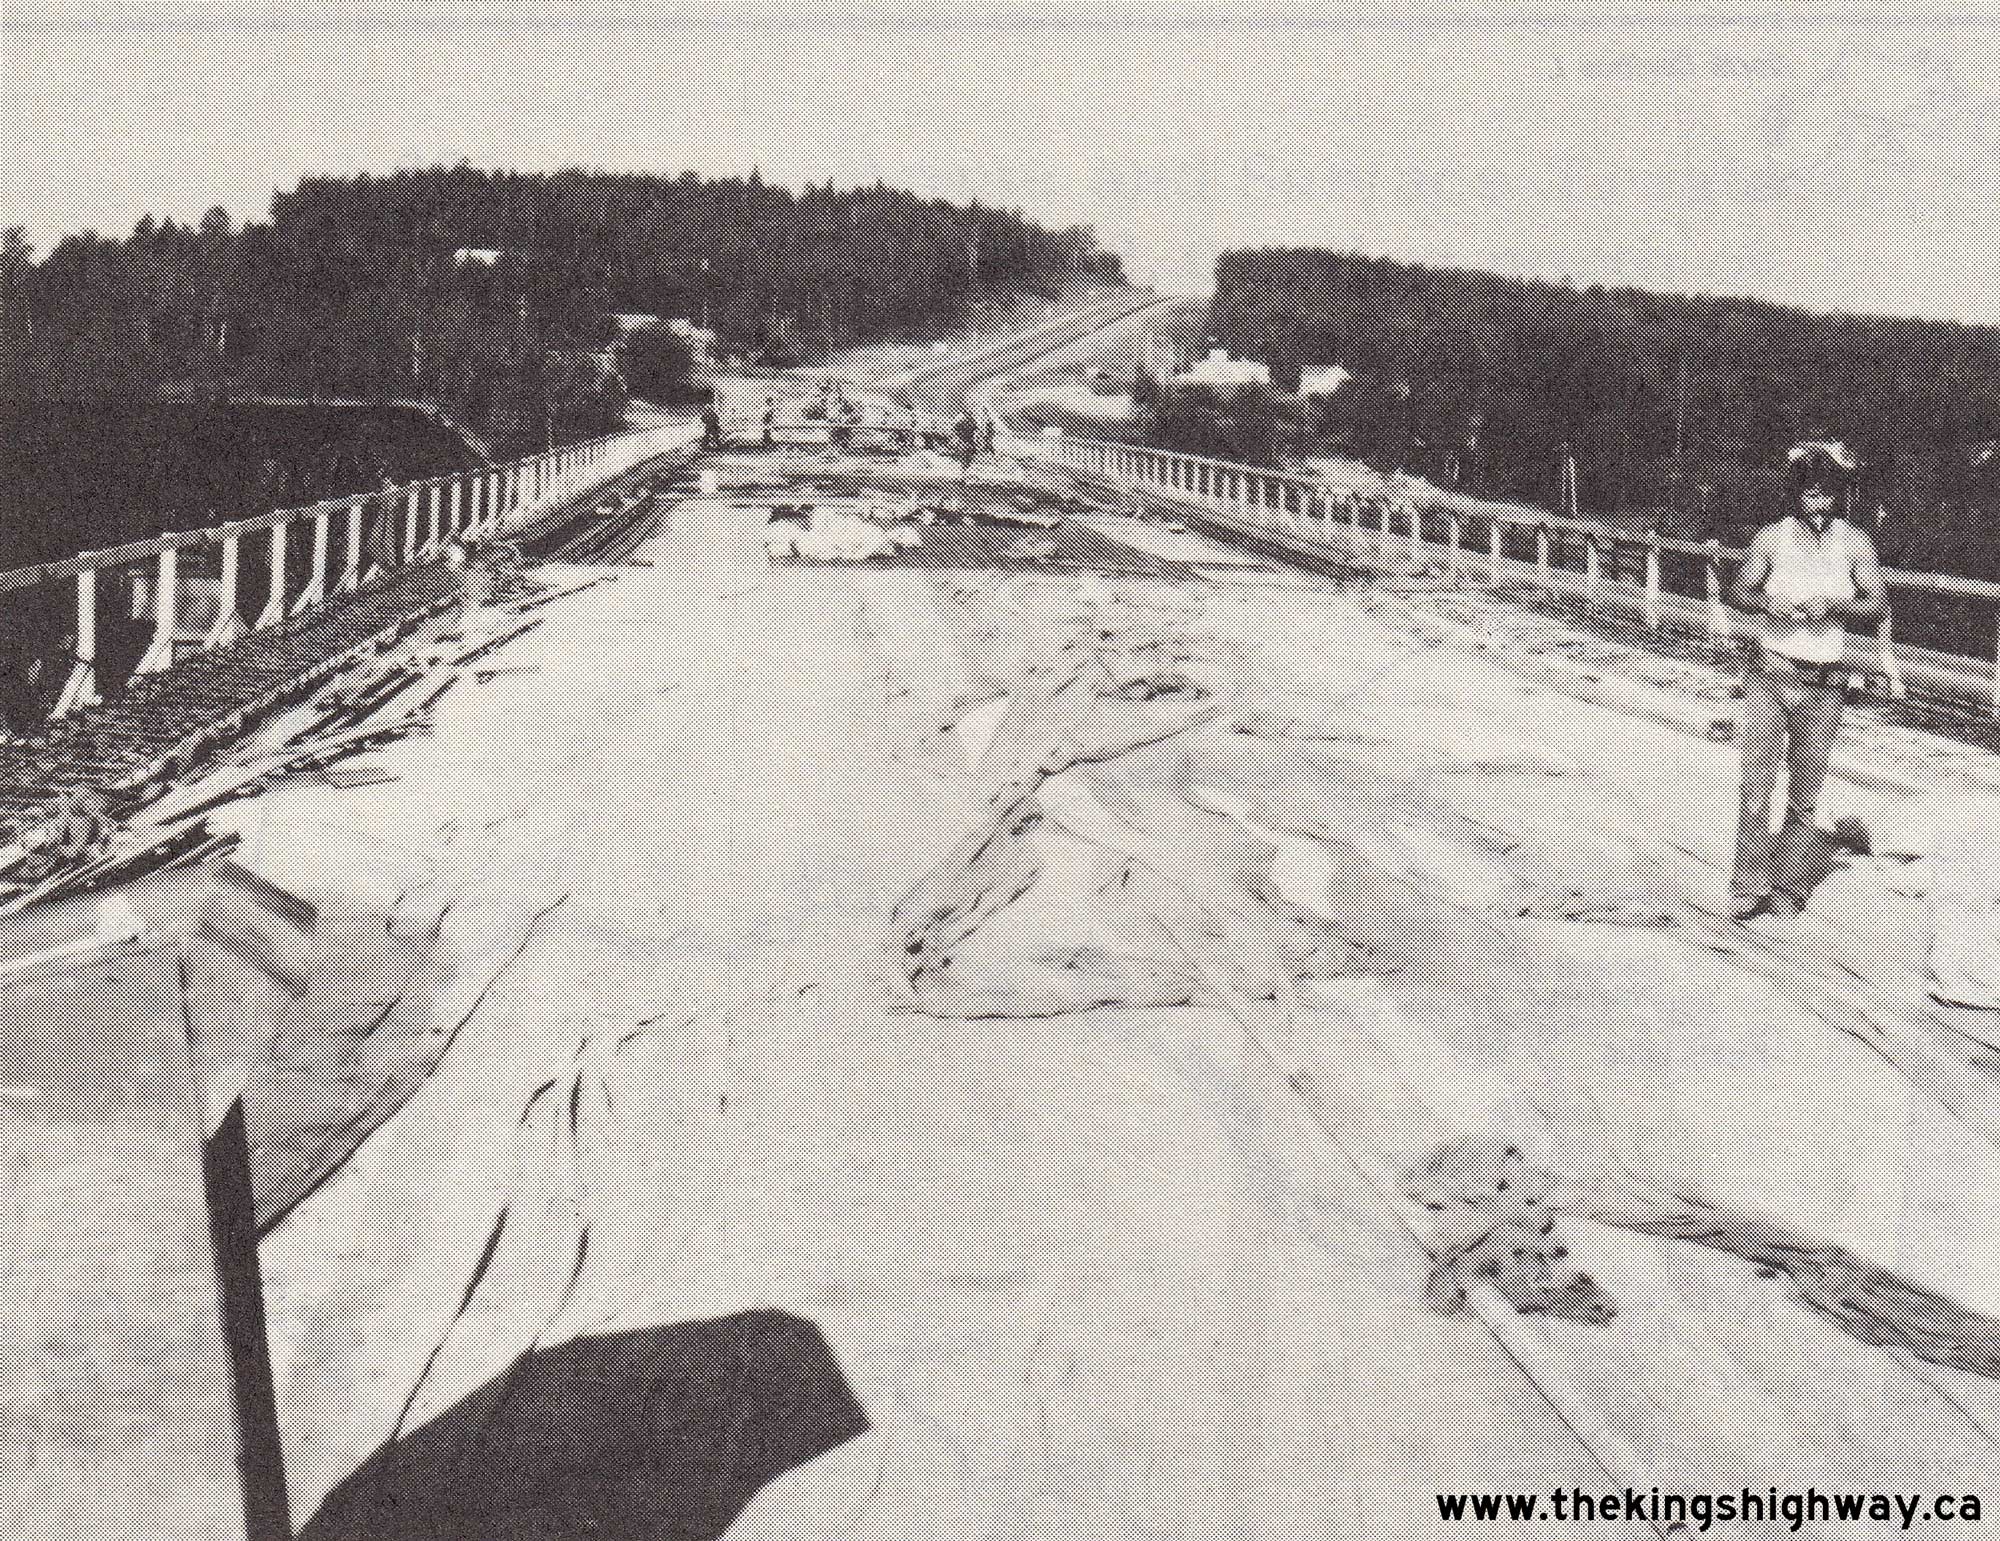
Left - Deck construction on the new Nipigon River Bridge on Hwy 11 & Hwy 17 near Nipigon, Contract #1972-205. See an
Enlarged Photo Here. Photo taken in 1974. (Photo courtesy of Ontario Ministry of Transportation - © King's Printer for Ontario, 1974) Right - Heavy grading for a new section of the Thunder Bay Expressway (Hwy 11 & Hwy 17) near Oliver Road, Contract #1972-202. See an Enlarged Photo Here. Photo taken in 1974. (Photo courtesy of Ontario Ministry of Transportation - © King's Printer for Ontario, 1974) 

Left - Reconstruction of Hwy 11 south of Barrie near Stroud, Contract #1974-183. See an
Enlarged Photo Here. Photo taken in 1975. (Photo courtesy of Ontario Ministry of Transportation - © King's Printer for Ontario, 1975) Right - Earth cut excavation on a Hwy 11 expansion project north of the Hwy 117 Junction between Bracebridge and Port Sydney, Contract #1975-58. See an Enlarged Photo Here. Photo taken in 1975. (Photo courtesy of Ontario Ministry of Transportation - © King's Printer for Ontario, 1975) 

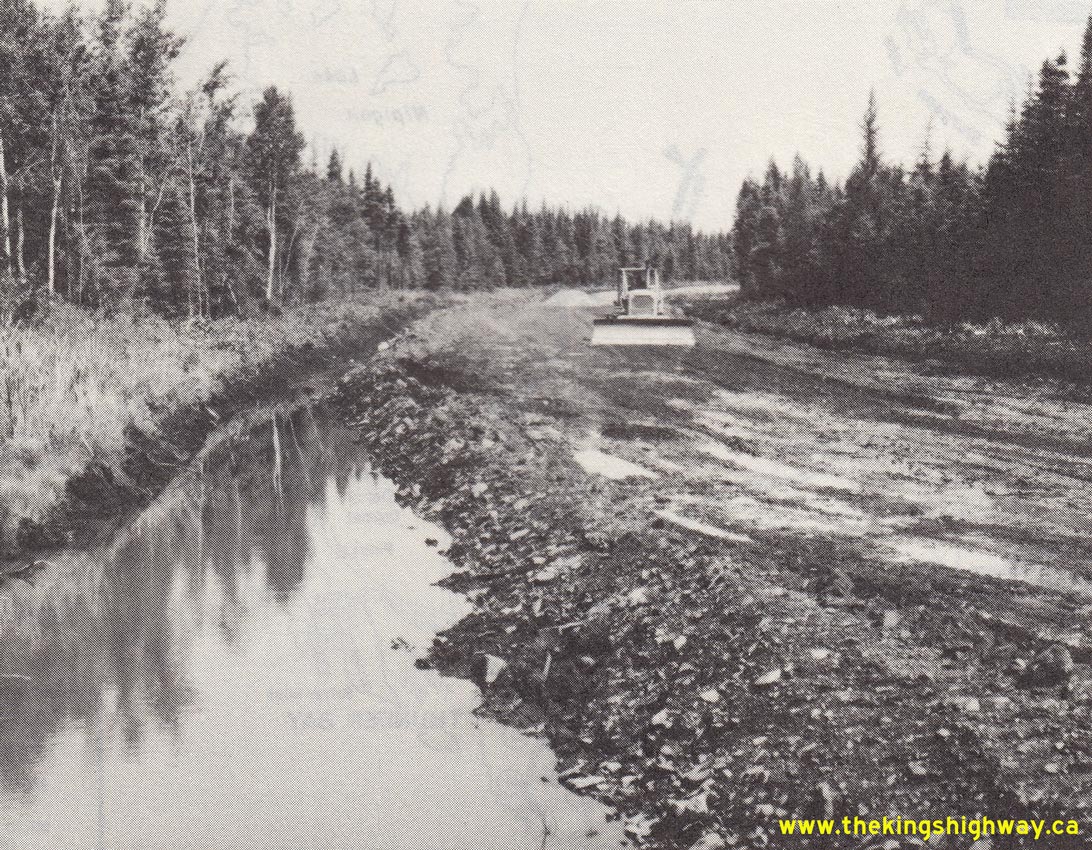
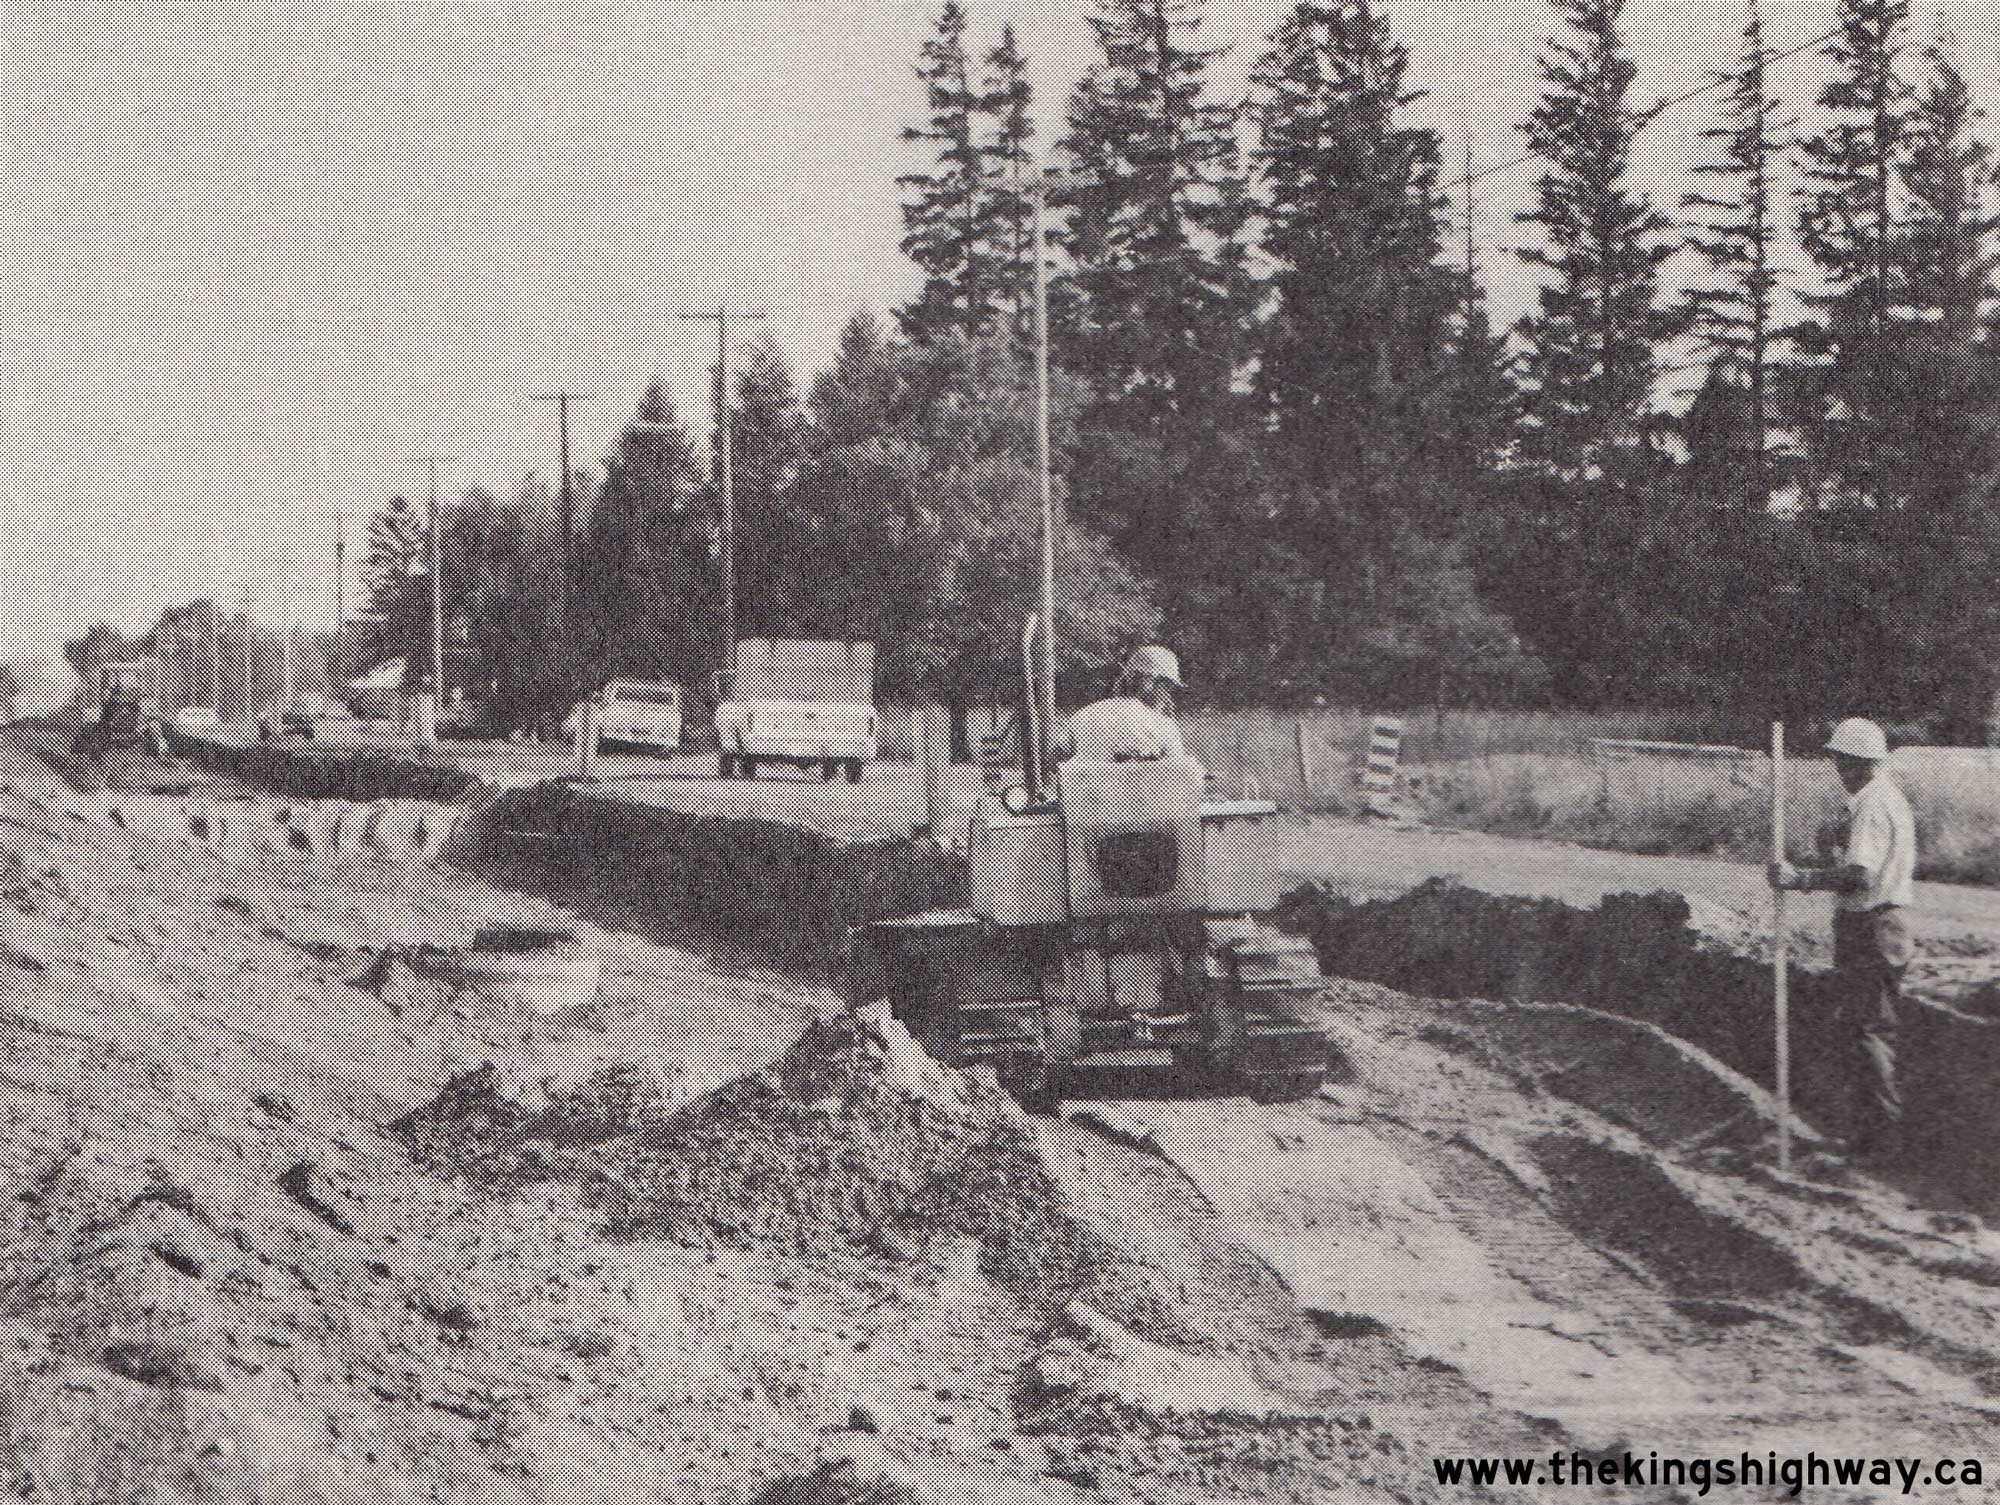
Left - Reconstruction of drainage ditches along Hwy 11 west of Hearst, Contract #1974-68. See an
Enlarged Photo Here. Photo taken in 1975. (Photo courtesy of Ontario Ministry of Transportation - © King's Printer for Ontario, 1975) Right - Reconstruction of Hwy 11 near Fauquier, Contract #1975-53. See an Enlarged Photo Here. Photo taken in 1975. (Photo courtesy of Ontario Ministry of Transportation - © King's Printer for Ontario, 1975) 
Above - Facing north along the newly-completed Burk's Falls Bypass (Hwy 11) approaching the Magnetawan River Bridge and Hwy 520 Underpass. See an
Enlarged Photo Here. Photo taken in 1976. (Photo courtesy of Ontario Ministry of Transportation - © King's Printer for Ontario, 1976) 

Left - Facing north along Hwy 11 at the newly-built West Street Interchange in Orillia, Contract #1973-17. See an
Enlarged Photo Here. Photo taken on October 28, 1976. (Photo courtesy of Ontario Ministry of Transportation - © King's Printer for Ontario, 2020) Right - View of the new West Street Overpass on the Orillia Bypass (Hwy 11). See an Enlarged Photo Here. Photo taken on October 28, 1976. (Photo courtesy of Ontario Ministry of Transportation - © King's Printer for Ontario, 2020) 

Left - Reconstruction of Hwy 11 at Opasatika, Contract #1976-48. See an
Enlarged Photo Here. Photo taken in 1976. (Photo courtesy of Ontario Ministry of Transportation - © King's Printer for Ontario, 1976) Right - Completed resurfacing along Hwy 11 about 10 miles east of Kapuskasing, Contract #1975-53. See an Enlarged Photo Here. Photo taken in 1976. (Photo courtesy of Ontario Ministry of Transportation - © King's Printer for Ontario, 1976) 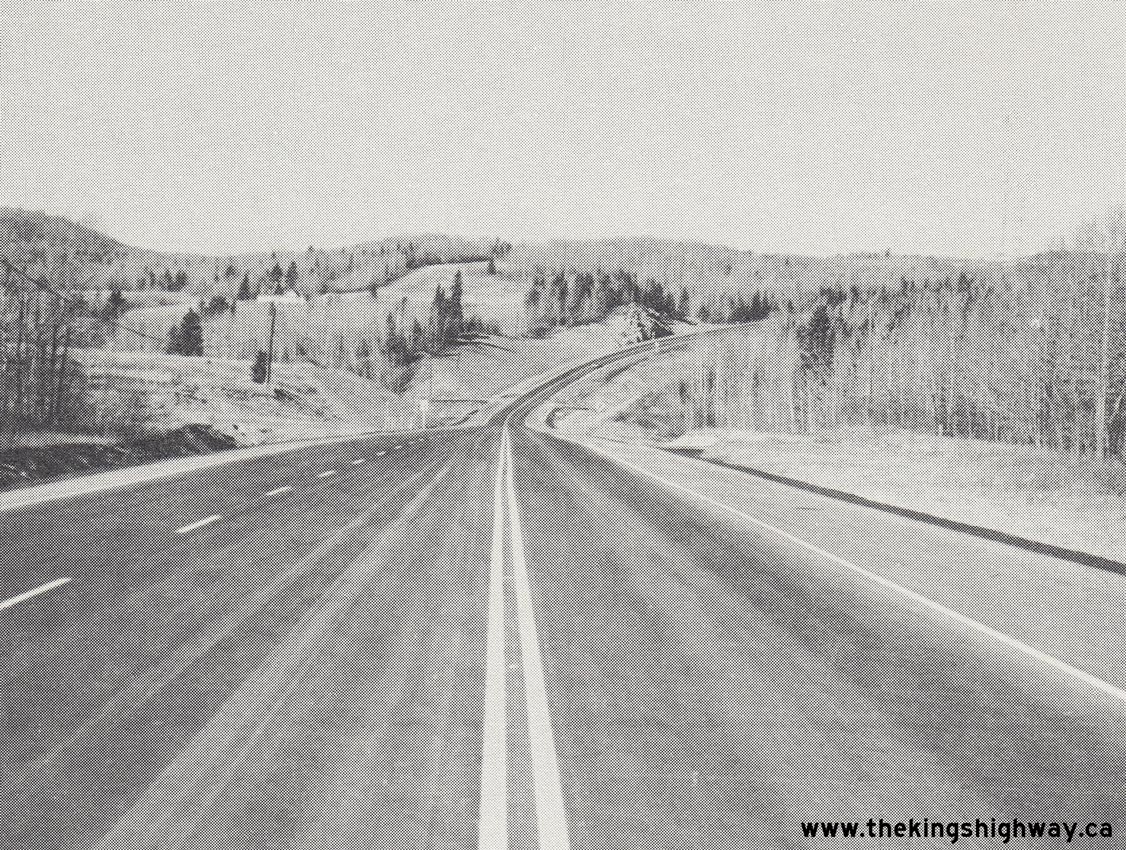

Left - New passing lane on Hwy 11 & Hwy 17, about 22 1/2 miles west of Thunder Bay, Contract #1975-26. See an
Enlarged Photo Here. Photo taken in 1976. (Photo courtesy of Ontario Ministry of Transportation - © King's Printer for Ontario, 1976) Right - Twinning of Hwy 11 south of Huntsville, Contract #1976-67. See an Enlarged Photo Here. Photo taken in 1977. (Photo courtesy of Ontario Ministry of Transportation - © King's Printer for Ontario, 1977) 
Left - Heavy grading and earth fill construction for the twinning of Hwy 11 south of Huntsville, Contract #1976-67. See an
Enlarged Photo Here. Photo taken in 1977. (Photo courtesy of Ontario Ministry of Transportation - © King's Printer for Ontario, 1977) Right - New vertical grade revision and rock cut on Hwy 11 & Hwy 17 east of Shabaqua Corners, Contract #1976-17. See an Enlarged Photo Here. Photo taken in 1977. (Photo courtesy of Ontario Ministry of Transportation - © King's Printer for Ontario, 1977) 
Above - Widening of the Thunder Bay Expressway (Hwy 11 & Hwy 17) approaching John Street, Contract #1977-41. See an
Enlarged Photo Here. Photo taken in 1977. (Photo courtesy of Ontario Ministry of Transportation - © King's Printer for Ontario, 1977) 

Left - Pouring the deck of the new Oro Concession Road 5 Overpass on Hwy 11 at Guthrie between Barrie and Orillia, Contract #1976-116. See an
Enlarged Photo Here. Photo taken in 1977. (Photo courtesy of Ontario Ministry of Transportation - © King's Printer for Ontario, 1977) Right - Completed resurfacing on Hwy 11, 16 miles west of Kapuskasing, Contract #1976-48. See an Enlarged Photo Here. Photo taken in 1977. (Photo courtesy of Ontario Ministry of Transportation - © King's Printer for Ontario, 1977) 

Left - Resurfacing on Hwy 11 about 40 miles east of Longlac, Contract #1976-103. See an
Enlarged Photo Here. Photo taken in 1977. (Photo courtesy of Ontario Ministry of Transportation - © King's Printer for Ontario, 1977) Right - Facing north along Hwy 11 at the Green River Bridge (Severn River, West Branch) near Washago. See an Enlarged Photo Here. Photo taken on September 28, 1977. (Photo courtesy of Ontario Ministry of Transportation - © King's Printer for Ontario, 2020) 
Above - Green River Bridge (Severn River, West Branch) on Hwy 11 near Washago. See an
Enlarged Photo Here. Photo taken on September 28, 1977. (Photo courtesy of Ontario Ministry of Transportation - © King's Printer for Ontario, 2020) 

Left - Western side of the Trent-Severn Waterway Bridge on Hwy 11 at Washago. See an
Enlarged Photo Here. Photo taken on September 28, 1977. (Photo courtesy of Ontario Ministry of Transportation - © King's Printer for Ontario, 2020) Right - Facing north along Hwy 11 towards Gravenhurst at the Trent-Severn Waterway Bridge on Hwy 11 at Washago. See an Enlarged Photo Here. Photo taken on September 28, 1977. (Photo courtesy of Ontario Ministry of Transportation - © King's Printer for Ontario, 2020) 

Left - Western side of the Washago Railway Overhead on Hwy 11 north of Orillia. See an
Enlarged Photo Here. Photo taken on September 28, 1977. (Photo courtesy of Ontario Ministry of Transportation - © King's Printer for Ontario, 2020) Right - Facing north along Hwy 11 towards Gravenhurst at the Washago Railway Overhead north of Orillia. Note that the grade-separated interchange at adjacent Hwy 169 had not yet been constructed. Up until 1984, Hwy 11 met Hwy 169 at a Stop-controlled at-grade intersection near Washago. See an Enlarged Photo Here. Photo taken on September 28, 1977. (Photo courtesy of Ontario Ministry of Transportation - © King's Printer for Ontario, 2020) 

Left - Facing north along Hwy 11 at the Severn River Bridge between Washago and Gravenhurst. See an
Enlarged Photo Here. Photo taken on September 28, 1977. (Photo courtesy of Ontario Ministry of Transportation - © King's Printer for Ontario, 2020) Right - Severn River Bridge on Hwy 11 between Washago and Gravenhurst. See an Enlarged Photo Here. Photo taken on September 28, 1977. (Photo courtesy of Ontario Ministry of Transportation - © King's Printer for Ontario, 2020) 

Left - Hwy 11B (Laclie Street) Underpass on Hwy 11 in Orillia, facing north. See an
Enlarged Photo Here. Photo taken on September 29, 1977. (Photo courtesy of Ontario Ministry of Transportation - © King's Printer for Ontario, 2011) Right - Facing north along Hwy 11 from the Hwy 11B (Laclie Street) Interchange on the Orillia Bypass in 1977. This photo shows the undivided four-lane cross section of Hwy 11 north of Orillia just before the box-beam median barrier was constructed in the late 1970s. See an Enlarged Photo Here. Photo taken on September 29, 1977. (Photo courtesy of Ontario Ministry of Transportation - © King's Printer for Ontario, 2011) 

Left - Canadian National Railway (CNR) Overhead on the Orillia Bypass (Hwy 11) just north of the Hwy 11B (Laclie Street) Interchange. See an
Enlarged Photo Here. Photo taken on September 29, 1977. (Photo courtesy of Ontario Ministry of Transportation - © King's Printer for Ontario, 2020) Right - Facing north along Hwy 11 at the CNR Overhead on the Orillia Bypass (Hwy 11) near the Hwy 11B (Laclie Street) Interchange in 1977. Note the recently-installed kilometric distance guide sign at right, with the educational "km" tab shown above the distances. This photo was taken only a few weeks after Ontario's highways were officially converted to Metric measurements. Metric conversion took place province-wide on September 6, 1977 - the Tuesday immediately following the Labour Day Weekend. Educational tabs such as this one were used on highway signs for many years following Metric conversion to remind motorists that the distances were now shown in kilometres, not miles. See an Enlarged Photo Here. Photo taken on September 29, 1977. (Photo courtesy of Ontario Ministry of Transportation - © King's Printer for Ontario, 2020) 

Left - Western side of the Canadian Pacific Railway (CPR) Overhead on Hwy 11 north of Orillia in 1977. This photo shows the Orillia CPR Overhead just before
the bridge was widened for a third time in 1979. This structure, whose original 1931 spans can be seen in the foreground, had been previously widened during an
earlier highway improvement project carried out in 1957. The widened 1957 structure is located on the eastern side of the crossing and exhibits a different pier
and deck design from its 1931 counterpart. See an Enlarged Photo Here. Photo taken on
September 29, 1977. (Photo courtesy of Ontario Ministry of Transportation - © King's Printer for Ontario, 2020) Right - Facing north along Hwy 11 towards Washago at the CPR Overhead north of Orillia. See an Enlarged Photo Here. Photo taken on September 29, 1977. (Photo courtesy of Ontario Ministry of Transportation - © King's Printer for Ontario, 2020) 

Left - Twinning of the Lake Vernon Narrows Bridge on the Huntsville Bypass (Hwy 11), Contract #1977-130. See an
Enlarged Photo Here. Photo taken in 1978. (Photo courtesy of Ontario Ministry of Transportation - © King's Printer for Ontario, 1978) Right - Reconstruction of Hwy 11 north of Burk's Falls, Contract #1977-91. See an Enlarged Photo Here. Photo taken in 1978. (Photo courtesy of Ontario Ministry of Transportation - © King's Printer for Ontario, 1978) 

Left - Reconstruction of Hwy 11 north of Burk's Falls, Contract #1977-91. See an
Enlarged Photo Here. Photo taken in 1978. (Photo courtesy of Ontario Ministry of Transportation - © King's Printer for Ontario, 1978) Right - Resurfacing of Hwy 11 east of Fort Frances, Contract #1978-68. See an Enlarged Photo Here. Photo taken in 1978. (Photo courtesy of Ontario Ministry of Transportation - © King's Printer for Ontario, 1978) 

Left - Hwy 93 Underpass on Hwy 11 at the Crown Hill Interchange, facing north towards Midland. See an
Enlarged Photo Here. Photo taken on August 2, 1978. (Photo courtesy of Ontario Ministry of Transportation - © King's Printer for Ontario, 2020) Right - Facing north along Hwy 11 towards Orillia from the Crown Hill Interchange at Hwy 93. See an Enlarged Photo Here. Photo taken on August 2, 1978. (Photo courtesy of Ontario Ministry of Transportation - © King's Printer for Ontario, 2020) 

Left - Newly-widened Willow Creek Bridge on Hwy 11 at "Gasoline Alley" north of Crown Hill. See an
Enlarged Photo Here. Photo taken on August 2, 1978. (Photo courtesy of Ontario Ministry of Transportation - © King's Printer for Ontario, 2020) Right - Facing north along Hwy 11 towards Orillia at the Willow Creek Bridge at "Gasoline Alley". The traces of leftover pavement markings on the highway from the previous construction project indicate a very complex, multi-stage construction sequence. The highway platform north of Crown Hill was widened in 1976-1977 to install a new box-beam median barrier (over which the photographer is standing), along with new speed-change lanes to the adjacent Oro Concession Road 1 ramps. See an Enlarged Photo Here. Photo taken on August 2, 1978. (Photo courtesy of Ontario Ministry of Transportation - © King's Printer for Ontario, 2020) 

Left - View across the new Oro Concession Road 3 Overpass on Hwy 11 north of Crown Hill, Contract #1976-116. See an
Enlarged Photo Here. Photo taken on August 2, 1978. (Photo courtesy of Ontario Ministry of Transportation - © King's Printer for Ontario, 2020) Right - Facing north along Hwy 11 at the Oro Concession Road 3 Overpass north of Crown Hill. See an Enlarged Photo Here. Photo taken on August 2, 1978. (Photo courtesy of Ontario Ministry of Transportation - © King's Printer for Ontario, 2020) 
Left - View across the new Oro Concession Road 5 Overpass on Hwy 11 at Guthrie between Barrie and Orillia, Contract #1976-116. See an
Enlarged Photo Here. Photo taken on August 2, 1978. (Photo courtesy of Ontario Ministry of Transportation - © King's Printer for Ontario, 2020) Right - Facing north along Hwy 11 at the Oro Concession Road 5 Overpass at Guthrie. Note the end of the divided highway just ahead, near where the truck is approaching in the southbound lanes. The installation of a new box-beam median barrier progressed fairly quickly along Hwy 11 from Barrie northerly to Orillia during the latter half of the 1970s. See an Enlarged Photo Here. Photo taken on August 2, 1978. (Photo courtesy of Ontario Ministry of Transportation - © King's Printer for Ontario, 2020) 

Left - Facing south along the northbound lanes of Hwy 400 at the Hwy 11 split between Barrie and Crown Hill. See an
Enlarged Photo Here. Photo taken on August 2, 1978. (Photo courtesy of Ontario Ministry of Transportation - © King's Printer for Ontario, 2010) Right - Construction of the new Forest Home Overpass (Line 15) on Hwy 11 south of Orillia, Contract #1979-88. See an Enlarged Photo Here. Photo taken in 1979. (Photo courtesy of Ontario Ministry of Transportation - © King's Printer for Ontario, 1979) 

Left - Completed resurfacing on Hwy 11 (Yonge Street) north of the Hwy 7 Junction in Thornhill, Contract #1978-88. See an
Enlarged Photo Here. Photo taken in 1979. (Photo courtesy of Ontario Ministry of Transportation - © King's Printer for Ontario, 1979) Right - Newly-completed four-lane section of Hwy 11 south of Huntsville, Contract #1978-74. See an Enlarged Photo Here. Photo taken in 1979. (Photo courtesy of Ontario Ministry of Transportation - © King's Printer for Ontario, 1979) 
Above - Completed twinning of the Huntsville Bypass (Hwy 11) at the Lake Vernon Narrows Bridge. The new northbound Hwy 11 structure seen here took
approximately 2 years to build at a cost of $2.2 Million (in 1977 Dollars), the equivalent of about $9 Million in 2020 Dollars. See an
Enlarged Photo Here. Photo taken in 1979. (Photo courtesy of Ontario Ministry of Transportation - © King's Printer for Ontario, 1979) 

Left - Rock drilling operations underway on the Huntsville Bypass (Hwy 11) north of Lake Vernon Narrows Bridge, Contract #1978-106. See an
Enlarged Photo Here. Photo taken in 1979. (Photo courtesy of Ontario Ministry of Transportation - © King's Printer for Ontario, 1979) Right - Reconstruction of Hwy 11 through Temagami, Contract #1978-85. See an Enlarged Photo Here. Photo taken in 1979. (Photo courtesy of Ontario Ministry of Transportation - © King's Printer for Ontario, 1979) 

Left - Resurfacing operations underway on Hwy 11 north of Temagami, Contract #1978-86. See an
Enlarged Photo Here. Photo taken in 1979. (Photo courtesy of Ontario Ministry of Transportation - © King's Printer for Ontario, 1979) Right - Spreading new granular base on Hwy 11 west of Hearst near the Hwy 631 Junction, Contract #1979-60. See an Enlarged Photo Here. Photo taken in 1979. (Photo courtesy of Ontario Ministry of Transportation - © King's Printer for Ontario, 1979)
Continue to King's Highway 11 Historical Photos from 1980 to 1989
|
|---|
Links to Adjacent King's Highway Photograph Pages:
Back to Hwy 11 - Historical Photos (1960 to 1969)
Hwy 11 Photo Index
On to Hwy 11 - Historical Photos (1980 to 1989)
Back to King's Highway 10 Photos /
King's Highway 11 History /
On to King's Highway 12 Photos
Ontario Highway History - Main Menu / Back to List of Highways Website contents, photos & text © 2002-2026, Cameron
Bevers (Webmaster) - All Rights Reserved / Contact Me
|
|---|