
| 
| |
|
|
This page contains historical photos of Ontario's King's Highway 11 dating from 1990 to 1999. All photographs displayed on
this page were taken by the Ontario Ministry of Transportation, unless specifically noted otherwise. Historical photographs are arranged in approximate chronological
order. Click on any thumbnail to see a larger image!
Please note that all photographs displayed on this
website are protected by copyright. These photographs must not be reproduced, published,
electronically stored or copied, distributed, or posted onto other websites without
my written permission. If you want to use photos from this website, please
email me first for permission. Thank-you!
|
|---|
|
Page 7: Historical King's Highway 11 Photographs (1990 to 1999)


Left - Facing north along Hwy 400 towards Coldwater at the Hwy 11 Interchange near Crown Hill, just north of Barrie. This structure carries the northbound
lanes of Hwy 400 across the ramp connections to Hwy 11 at Crown Hill. See an Enlarged Photo Here. Photo taken on May 23, 1990. (Photo courtesy of Ontario Ministry of Transportation - © King's Printer for Ontario, 2014) Right - Southern side of the Crown Hill Overpass on Hwy 11 north of Barrie, which carries the northbound lanes of Hwy 400. See an Enlarged Photo Here. Photo taken on May 23, 1990. (Photo courtesy of Ontario Ministry of Transportation - © King's Printer for Ontario, 2014) 
  Left - Washago Canadian National Railway (CNR) Overhead on Hwy 11, showing steel girder painting under Contract #1989-94. See an
Enlarged Photo Here. Photo taken on June 22, 1990. Left - Washago Canadian National Railway (CNR) Overhead on Hwy 11, showing steel girder painting under Contract #1989-94. See an
Enlarged Photo Here. Photo taken on June 22, 1990.(Photo courtesy of Ontario Ministry of Transportation - © King's Printer for Ontario, 2025) Right - View underneath the Washago CNR Overhead (Site #30-09) on Hwy 11, showing steel girder painting. This below-deck view of the overhead also shows the
two phases of this bridge's construction. When the Washago Bypass (Hwy 11 New) was first being constructed in the 1950s, all of the structures along the new bypass
were designed to carry two traffic lanes. However, as traffic volumes continued to grow along Hwy 11, the highway was later expanded to four lanes in the mid-1960s.
The original structure at left was built under Contract #1954-28 and was completed in 1954, while the western extension at right was built under Contract #1964-300
and was completed in 1965. Note the construction joint between the two phases of the bridge. See an
Enlarged Photo Here. Photo taken on June 22, 1990.(Photo courtesy of Ontario Ministry of Transportation - © King's Printer for Ontario, 2025) 
 Left - Facing north along Hwy 11 approaching the Willow Creek Bridge at "Gasoline Alley" north of Crown Hill. See an
Enlarged Photo Here. Photo taken on July 31, 1990. Left - Facing north along Hwy 11 approaching the Willow Creek Bridge at "Gasoline Alley" north of Crown Hill. See an
Enlarged Photo Here. Photo taken on July 31, 1990.(Photo courtesy of Ontario Ministry of Transportation - © King's Printer for Ontario, 2025) Right - View of Hwy 11 at "Gasoline Alley", facing south towards the Willow Creek Bridge (Site #30-135) near Crown Hill. With service stations flanking both
sides of Hwy 11 north of Crown Hill, it is fairly obvious how this section of Hwy 11 got its nickname. See an
Enlarged Photo Here. Photo taken on July 31, 1990.(Photo courtesy of Ontario Ministry of Transportation - © King's Printer for Ontario, 2025) 
 Left - Southern side of the Oro Township Line 11 & Simcoe County Road 20 Overpass on Hwy 11, located about 8 km south of Orillia. See an
Enlarged Photo Here. Photo taken on July 31, 1990. Left - Southern side of the Oro Township Line 11 & Simcoe County Road 20 Overpass on Hwy 11, located about 8 km south of Orillia. See an
Enlarged Photo Here. Photo taken on July 31, 1990.(Photo courtesy of Ontario Ministry of Transportation - © King's Printer for Ontario, 2025) Right - Facing west across the Oro Township Line 11 & Simcoe County Road 20 Overpass (Site #30-472) south of Orillia. See an
Enlarged Photo Here. Photo taken on July 31, 1990.(Photo courtesy of Ontario Ministry of Transportation - © King's Printer for Ontario, 2025) 
 Left - Northern side of the Oro-Orillia Townline Overpass (today's Oro-Medonte Line 14), located about 3 km south of Orillia. See an
Enlarged Photo Here. Photo taken on September 26, 1990. Left - Northern side of the Oro-Orillia Townline Overpass (today's Oro-Medonte Line 14), located about 3 km south of Orillia. See an
Enlarged Photo Here. Photo taken on September 26, 1990.(Photo courtesy of Ontario Ministry of Transportation - © King's Printer for Ontario, 2025) Right - Facing west across the Oro-Orillia Townline Overpass (Site #30-473) south of Orillia. See an
Enlarged Photo Here. Photo taken on September 26, 1990.(Photo courtesy of Ontario Ministry of Transportation - © King's Printer for Ontario, 2025) 
 Left - Northern side of the Orillia Township Line 2 Overpass (today's Oro-Medonte Line 15), located about 1 km south of Orillia. See an
Enlarged Photo Here. Photo taken on September 26, 1990. Left - Northern side of the Orillia Township Line 2 Overpass (today's Oro-Medonte Line 15), located about 1 km south of Orillia. See an
Enlarged Photo Here. Photo taken on September 26, 1990.(Photo courtesy of Ontario Ministry of Transportation - © King's Printer for Ontario, 2025) Right - Facing west across the Orillia Township Line 2 Overpass (Site #30-490) south of Orillia. See an
Enlarged Photo Here. Photo taken on September 26, 1990.(Photo courtesy of Ontario Ministry of Transportation - © King's Printer for Ontario, 2025) 
 Left - Northern side of the Memorial Avenue (Formerly Hwy 11B) Overpass on Hwy 11 in Orillia. See an
Enlarged Photo Here. Photo taken on September 26, 1990. Left - Northern side of the Memorial Avenue (Formerly Hwy 11B) Overpass on Hwy 11 in Orillia. See an
Enlarged Photo Here. Photo taken on September 26, 1990.(Photo courtesy of Ontario Ministry of Transportation - © King's Printer for Ontario, 2025) Right - Facing west across the Memorial Avenue Overpass (Site #30-91) on Hwy 11 in Orillia. See an
Enlarged Photo Here. Photo taken on September 26, 1990.(Photo courtesy of Ontario Ministry of Transportation - © King's Printer for Ontario, 2025) 
 Left - Northern side of the overpass carrying the South Orillia Bypass (Hwy 12 South) over Hwy 11 in Orillia. This interesting four-span structure was
completed in 1958 and marked one of the first instances that the Department of Highways of Ontario (DHO) used precast concrete girders for bridge construction, rather
than cast-in-place concrete as was typically done up until that time. This bridge is situated at the junction between the Orillia Bypass (Hwy 11) and the South Orillia
Bypass (Hwy 12 South). See an Enlarged Photo Here. Photo taken on September 26, 1990. Left - Northern side of the overpass carrying the South Orillia Bypass (Hwy 12 South) over Hwy 11 in Orillia. This interesting four-span structure was
completed in 1958 and marked one of the first instances that the Department of Highways of Ontario (DHO) used precast concrete girders for bridge construction, rather
than cast-in-place concrete as was typically done up until that time. This bridge is situated at the junction between the Orillia Bypass (Hwy 11) and the South Orillia
Bypass (Hwy 12 South). See an Enlarged Photo Here. Photo taken on September 26, 1990.(Photo courtesy of Ontario Ministry of Transportation - © King's Printer for Ontario, 2025) Right - Facing west across the Hwy 12 South Overpass (Site #30-76) on the Orillia Bypass (Hwy 11). See an
Enlarged Photo Here. Photo taken on September 26, 1990.(Photo courtesy of Ontario Ministry of Transportation - © King's Printer for Ontario, 2025) 
 Left - Northern side of the Hwy 12 West Overpass on the Orillia Bypass (Hwy 11). At the time this photo was taken in 1990, the interchange ramps at the Hwy 11
& Hwy 12 West Junction were still in their original eight-ramp cloverleaf configuration as initially built along the Orillia Bypass during the 1950s. See an
Enlarged Photo Here. Photo taken on September 26, 1990. Left - Northern side of the Hwy 12 West Overpass on the Orillia Bypass (Hwy 11). At the time this photo was taken in 1990, the interchange ramps at the Hwy 11
& Hwy 12 West Junction were still in their original eight-ramp cloverleaf configuration as initially built along the Orillia Bypass during the 1950s. See an
Enlarged Photo Here. Photo taken on September 26, 1990.(Photo courtesy of Ontario Ministry of Transportation - © King's Printer for Ontario, 2025) Right - Facing west towards Coldwater across the Hwy 12 West Overpass (Site #30-77) on the Orillia Bypass (Hwy 11). Note the rural areas along Hwy 12 west of
the Hwy 11 Interchange. Today, this area is now completely urbanized. See an
Enlarged Photo Here. Photo taken on September 26, 1990.(Photo courtesy of Ontario Ministry of Transportation - © King's Printer for Ontario, 2025) 
 Left - Northern side of the West Street Overpass on the Orillia Bypass (Hwy 11). See an
Enlarged Photo Here. Photo taken on September 26, 1990. Left - Northern side of the West Street Overpass on the Orillia Bypass (Hwy 11). See an
Enlarged Photo Here. Photo taken on September 26, 1990.(Photo courtesy of Ontario Ministry of Transportation - © King's Printer for Ontario, 2025) Right - Facing west across the West Street Overpass (Site #30-397) on the Orillia Bypass (Hwy 11). See an
Enlarged Photo Here. Photo taken on September 26, 1990.(Photo courtesy of Ontario Ministry of Transportation - © King's Printer for Ontario, 2025) 
 Left - Southern side of the Orillia Township Line 8 (today's Soules Road) Overpass on Hwy 11, located about 4 km north of Orillia. See an
Enlarged Photo Here. Photo taken on October 30, 1990. Left - Southern side of the Orillia Township Line 8 (today's Soules Road) Overpass on Hwy 11, located about 4 km north of Orillia. See an
Enlarged Photo Here. Photo taken on October 30, 1990.(Photo courtesy of Ontario Ministry of Transportation - © King's Printer for Ontario, 2025) Right - Facing east across the Orillia Township Line 8 Overpass (Site #30-476) on Hwy 11. See an
Enlarged Photo Here. Photo taken on October 30, 1990.(Photo courtesy of Ontario Ministry of Transportation - © King's Printer for Ontario, 2025) 
 Left - Northern side of the Orillia Township Line 10 Overpass (Site #30-477) on Hwy 11, located about 7 km north of Orillia. See an
Enlarged Photo Here. Photo taken on October 31, 1990. Left - Northern side of the Orillia Township Line 10 Overpass (Site #30-477) on Hwy 11, located about 7 km north of Orillia. See an
Enlarged Photo Here. Photo taken on October 31, 1990.(Photo courtesy of Ontario Ministry of Transportation - © King's Printer for Ontario, 2025) Right - Eastern side of the Washago CNR Overhead on Hwy 11 near the Hwy 169 Interchange, showing completed steel girder painting. See an
Enlarged Photo Here. Photo taken on October 31, 1990.(Photo courtesy of Ontario Ministry of Transportation - © King's Printer for Ontario, 2025) 
 Left - Facing north along Hwy 11 & Hwy 169 towards Gravenhurst at the Green River Bridge (Severn River, West Branch) in Washago. See an
Enlarged Photo Here. Photo taken on October 31, 1990. Left - Facing north along Hwy 11 & Hwy 169 towards Gravenhurst at the Green River Bridge (Severn River, West Branch) in Washago. See an
Enlarged Photo Here. Photo taken on October 31, 1990.(Photo courtesy of Ontario Ministry of Transportation - © King's Printer for Ontario, 2025) Right - New Truck Inspection Station nearing completion of Hwy 11 between Powassan and Callander. See an
Enlarged Photo Here. Photo taken in 1990.(Photo courtesy of Ontario Ministry of Transportation - © King's Printer for Ontario, 1990) 
 Left - Southern side of the Hwy 12 South Overpass on the Orillia Bypass (Hwy 11). See an
Enlarged Photo Here. Photo taken on September 17, 1992. Left - Southern side of the Hwy 12 South Overpass on the Orillia Bypass (Hwy 11). See an
Enlarged Photo Here. Photo taken on September 17, 1992.(Photo courtesy of Ontario Ministry of Transportation - © King's Printer for Ontario, 2025) Right - Facing south along the Orillia Bypass (Hwy 11) towards Barrie at the Hwy 12 South Interchange. For many years, the Orillia Bypass did not have a
continuous median barrier system in place. Instead, short sections of barrier systems were in place approaching bridges to protect specific roadside obstructions. See
an Enlarged Photo Here. Photo taken on September 17, 1992.(Photo courtesy of Ontario Ministry of Transportation - © King's Printer for Ontario, 2025)  Above - Fitch barrels protecting the centre pier of the Hwy 12 South Overpass on the Orillia Bypass (Hwy 11). See an
Enlarged Photo Here. Photo taken on September 17, 1992. Above - Fitch barrels protecting the centre pier of the Hwy 12 South Overpass on the Orillia Bypass (Hwy 11). See an
Enlarged Photo Here. Photo taken on September 17, 1992.(Photo courtesy of Ontario Ministry of Transportation - © King's Printer for Ontario, 2025) 
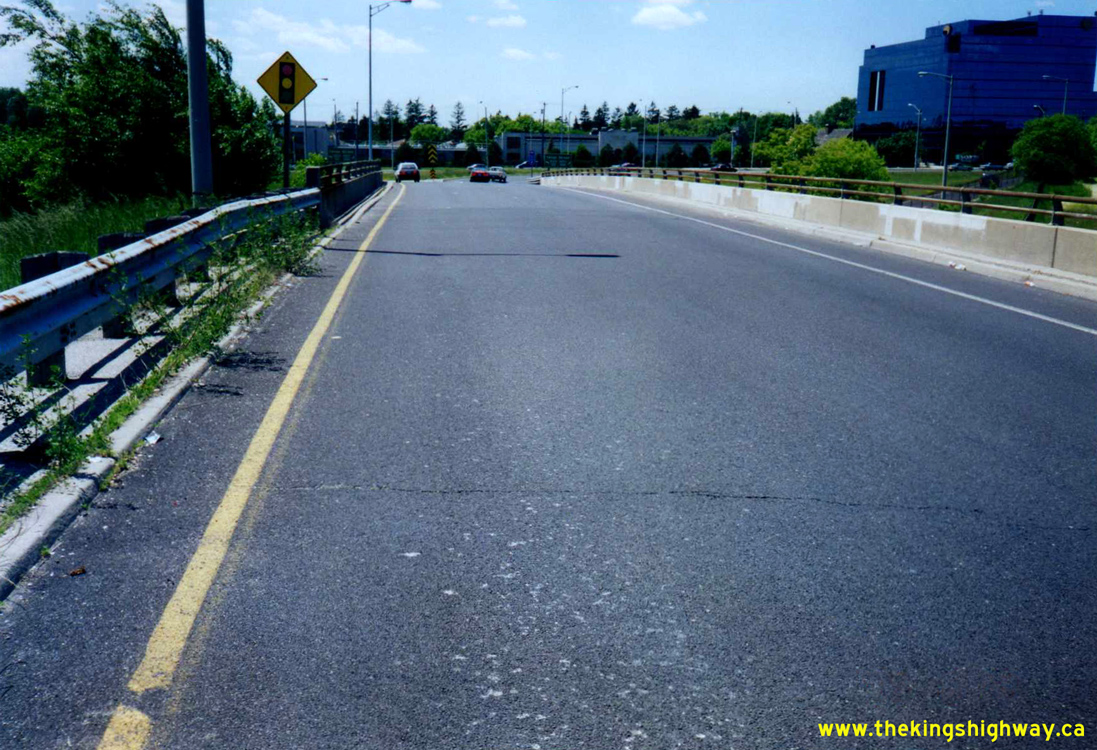 Left - View of the eastbound Hwy 401 directional exit ramp to northbound Yonge Street (Hwy 11) in Toronto, where it passes below the structure (Site #37-342)
carrying the exit ramp from westbound Hwy 401 to Yonge Street. This directional exit ramp was built this way in the mid-1960s due to the adjacent Hogg's Hollow
Bridge and the skew of the Yonge Street crossing, which made the construction of a conventional exit ramp to Yonge Street very challenging and costly. This
directional ramp also provides a high-capacity facility to service the heavy traffic volumes exiting from eastbound Hwy 401 to northbound Yonge Street. See an
Enlarged Photo Here. Photo taken on June 14, 1995. Left - View of the eastbound Hwy 401 directional exit ramp to northbound Yonge Street (Hwy 11) in Toronto, where it passes below the structure (Site #37-342)
carrying the exit ramp from westbound Hwy 401 to Yonge Street. This directional exit ramp was built this way in the mid-1960s due to the adjacent Hogg's Hollow
Bridge and the skew of the Yonge Street crossing, which made the construction of a conventional exit ramp to Yonge Street very challenging and costly. This
directional ramp also provides a high-capacity facility to service the heavy traffic volumes exiting from eastbound Hwy 401 to northbound Yonge Street. See an
Enlarged Photo Here. Photo taken on June 14, 1995.(Photo courtesy of Ontario Ministry of Transportation - © King's Printer for Ontario, 2026) Right - Facing west along the exit ramp to Yonge Street (Hwy 11) from westbound Hwy 401, where it passes over the directional exit ramp from eastbound Hwy 401.
The Yonge Street (Hwy 11) interchange on Hwy 401 was initially built in the 1950s as a full eight-ramp cloverleaf - and a very constrained one, at that. The original
cloverleaf interchange began to exhibit operational problems in the years following its opening, due to quickly rising traffic volumes and poor ramp geometry. As part
of the reconstruction and widening of Hwy 401 during the 1960s, the Yonge Street Interchange was redesigned to the layout seen today. See an
Enlarged Photo Here. Photo taken on June 14, 1995.(Photo courtesy of Ontario Ministry of Transportation - © King's Printer for Ontario, 2026) 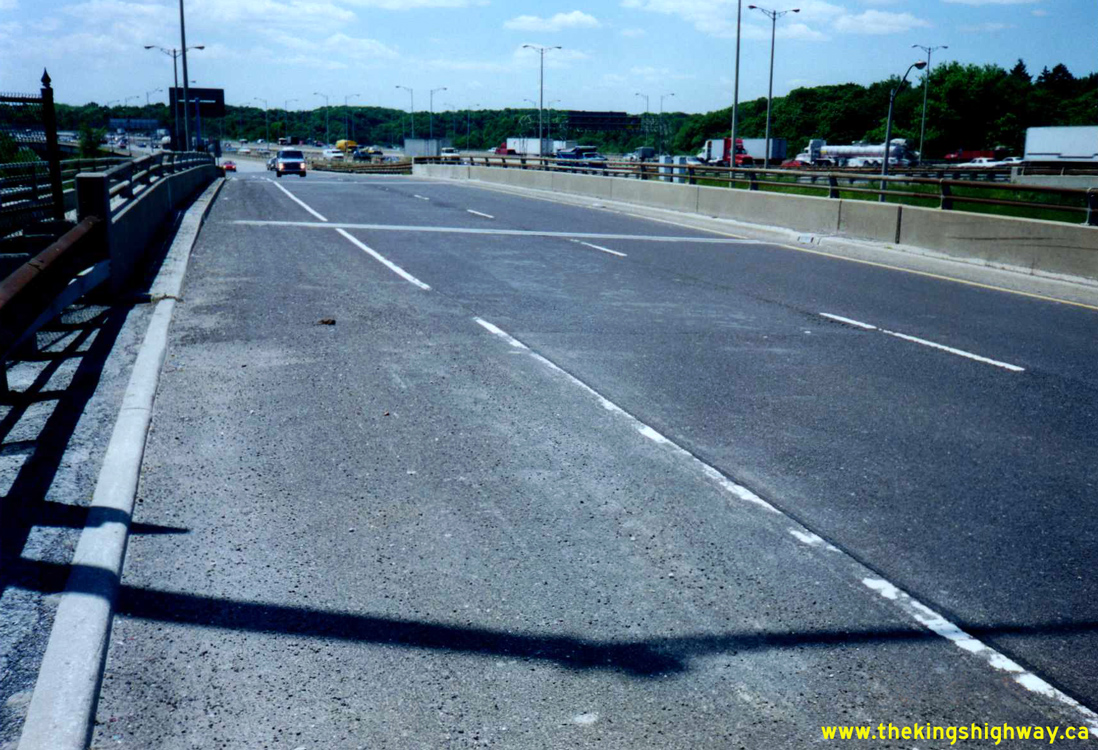
 Left - Facing west along the eastbound exit ramp from Hwy 401 at the Yonge Street (Hwy 11) Interchange in Toronto. After diverging from Hwy 401, this exit ramp
forks into two ramps - the two-lane directional ramp to northbound Yonge Street and a single-lane ramp to southbound Yonge Street. The high-level viaduct structure
over the Don River at Hogg's Hollow can be seen in the background just beyond the highway curve. See an
Enlarged Photo Here. Photo taken on June 14, 1995. Left - Facing west along the eastbound exit ramp from Hwy 401 at the Yonge Street (Hwy 11) Interchange in Toronto. After diverging from Hwy 401, this exit ramp
forks into two ramps - the two-lane directional ramp to northbound Yonge Street and a single-lane ramp to southbound Yonge Street. The high-level viaduct structure
over the Don River at Hogg's Hollow can be seen in the background just beyond the highway curve. See an
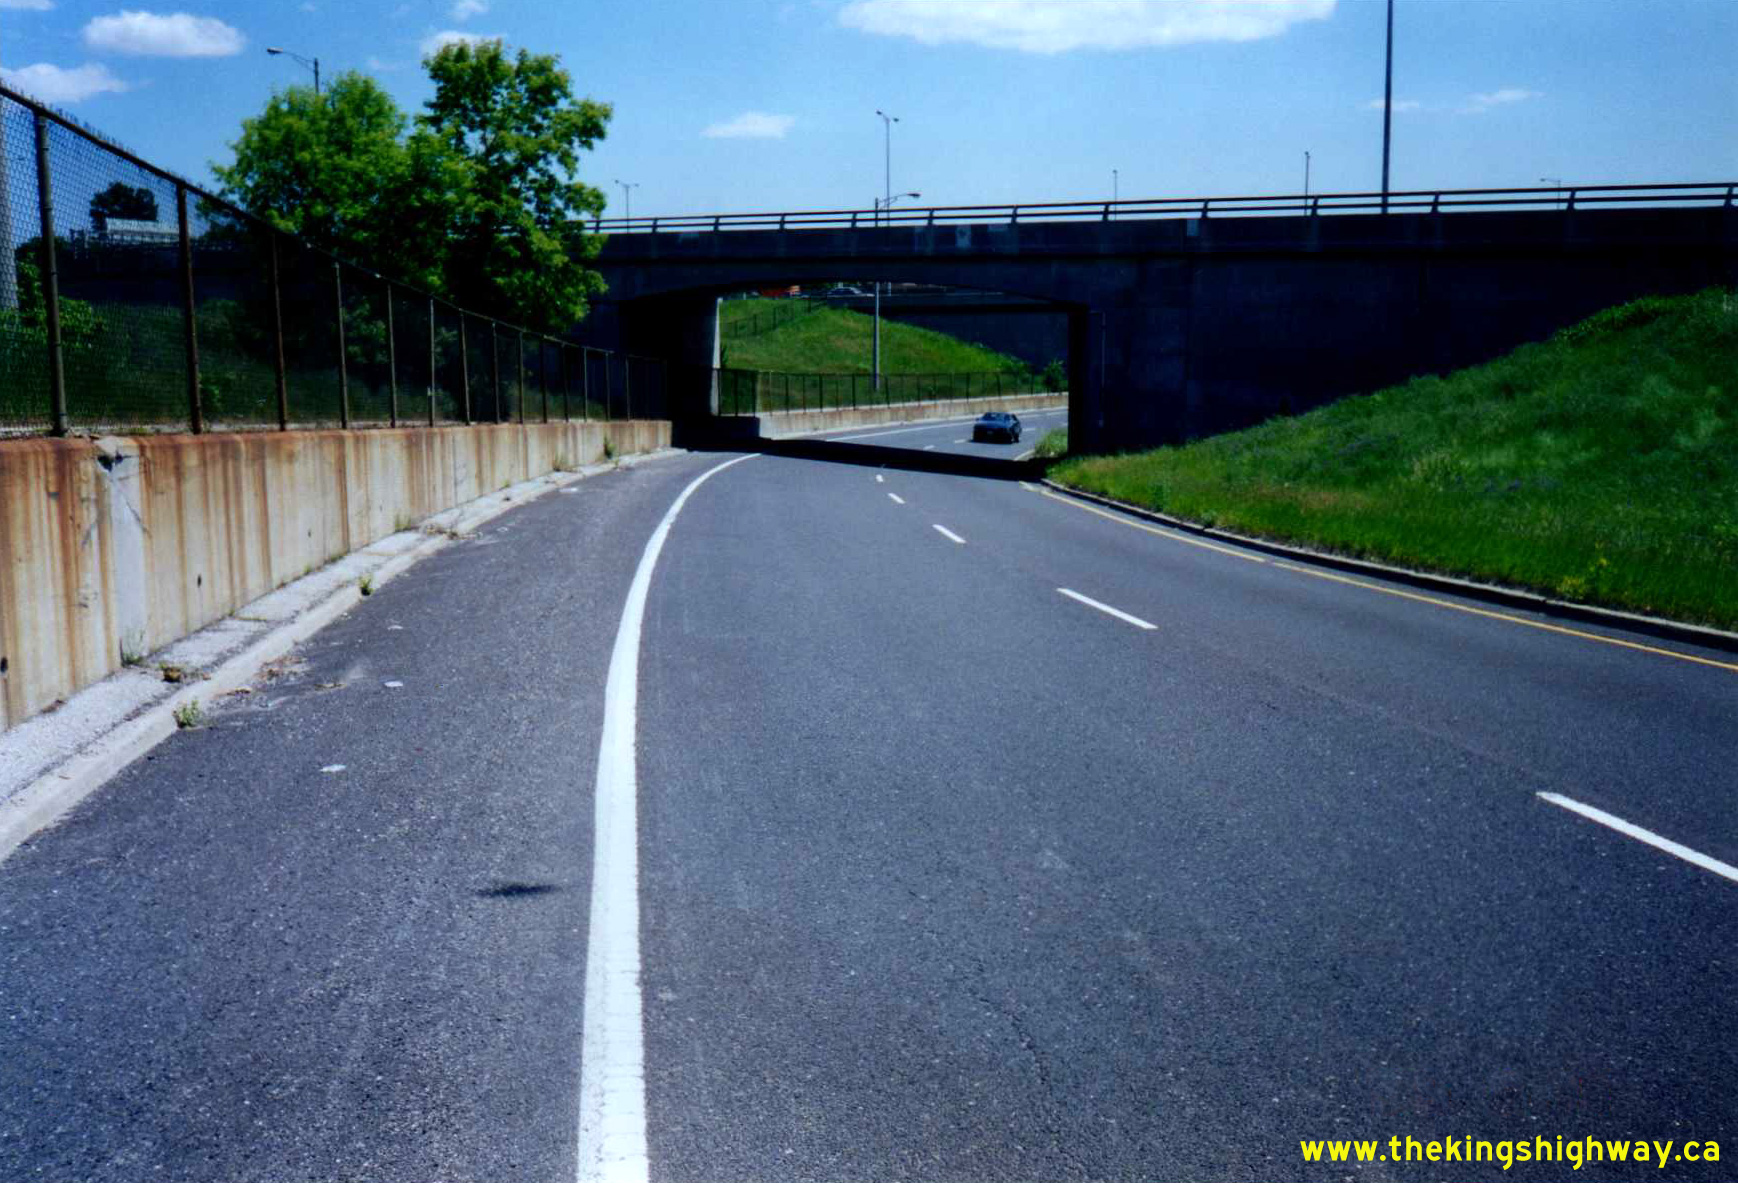
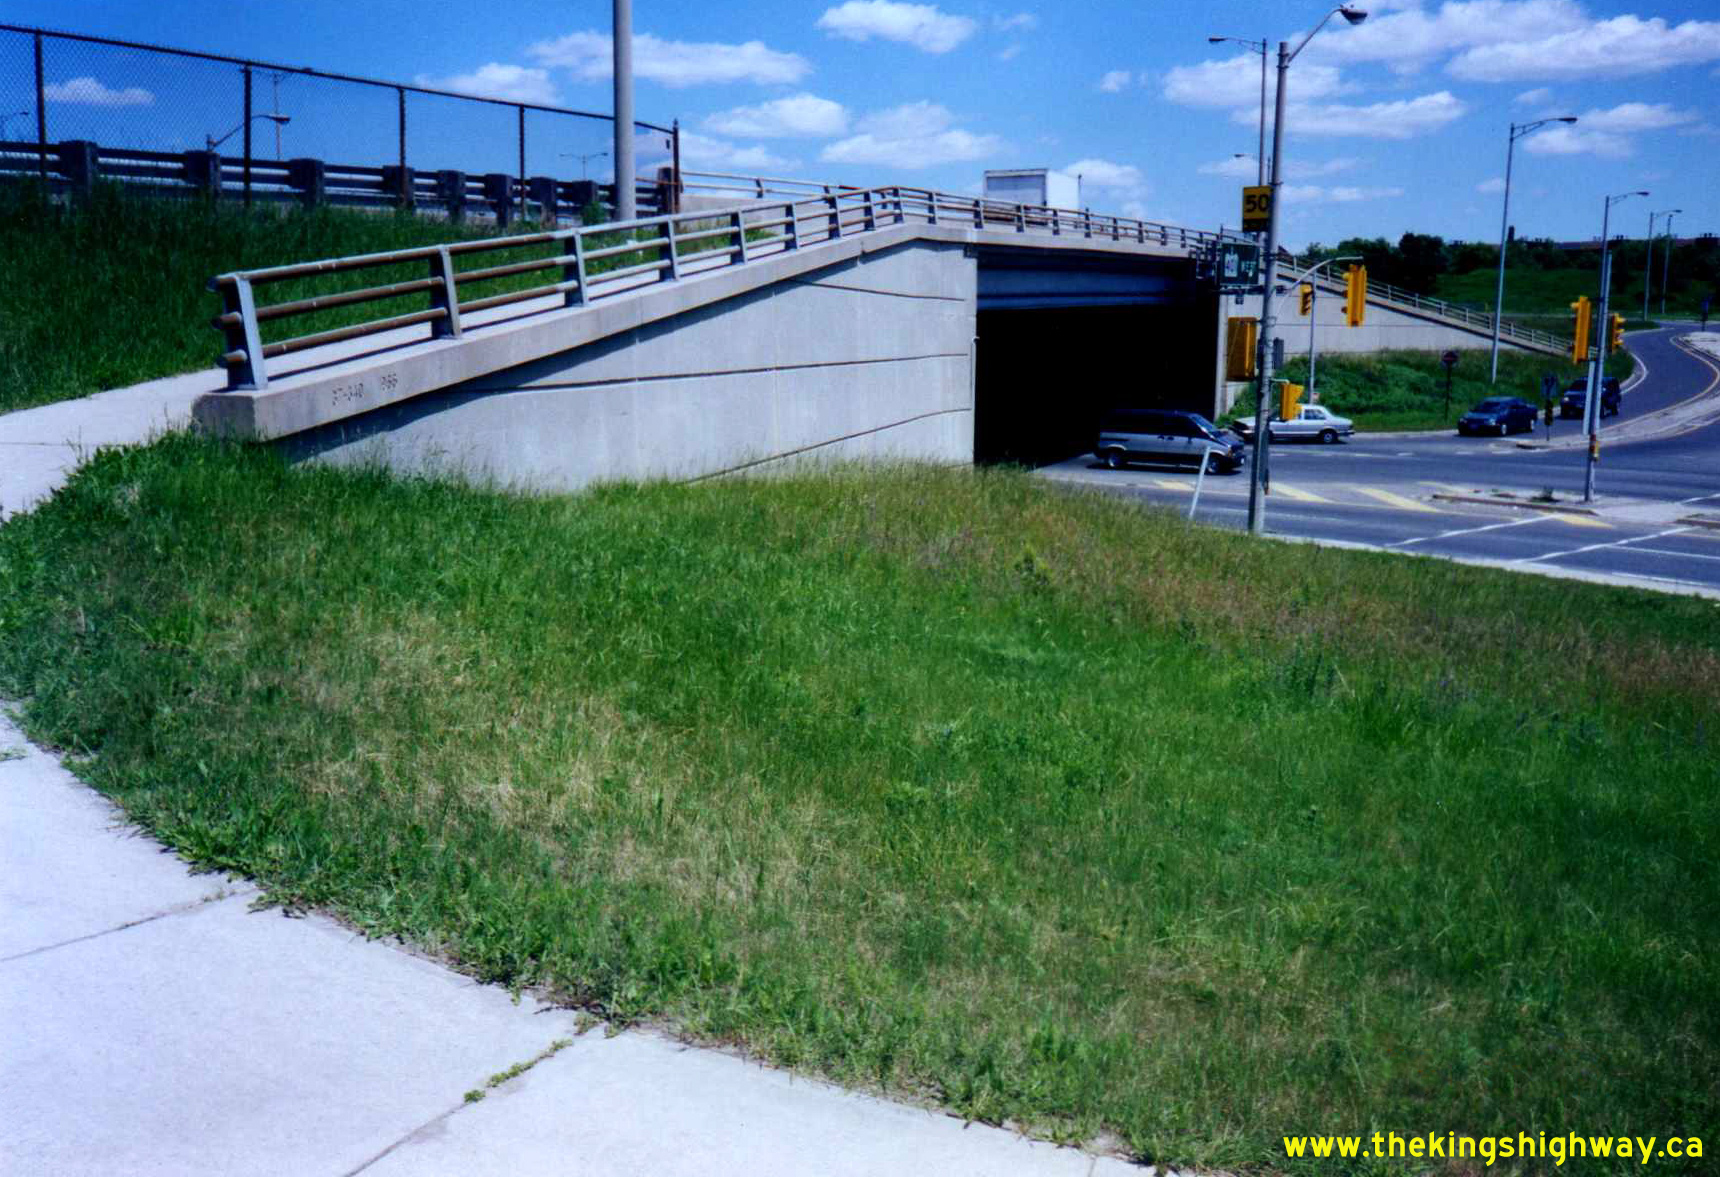
Enlarged Photo Here. Photo taken on June 14, 1995.(Photo courtesy of Ontario Ministry of Transportation - © King's Printer for Ontario, 2026) Right - Southern side of the Yonge Street (Hwy 11) Underpass (Site #37-340) below the directional ramp from eastbound Hwy 401 to northbound Yonge Street in
Toronto. The Yonge Street Interchange is rather complex, with four different grade-separated crossings. Three of the grade separations are situated along the
directional West-to-North ramp. This structure over Yonge Street also carries a pedestrain sidewalk between the east and west sides of Yonge Street. See an
Enlarged Photo Here. Photo taken on June 14, 1995.(Photo courtesy of Ontario Ministry of Transportation - © King's Printer for Ontario, 2026) 
Above - Dual Hwy 11 & Hwy 169 route markers between Washago and Gravenhurst. See an
Enlarged Photo here. (Photograph taken on June 23, 1995 - © Roger Fox) 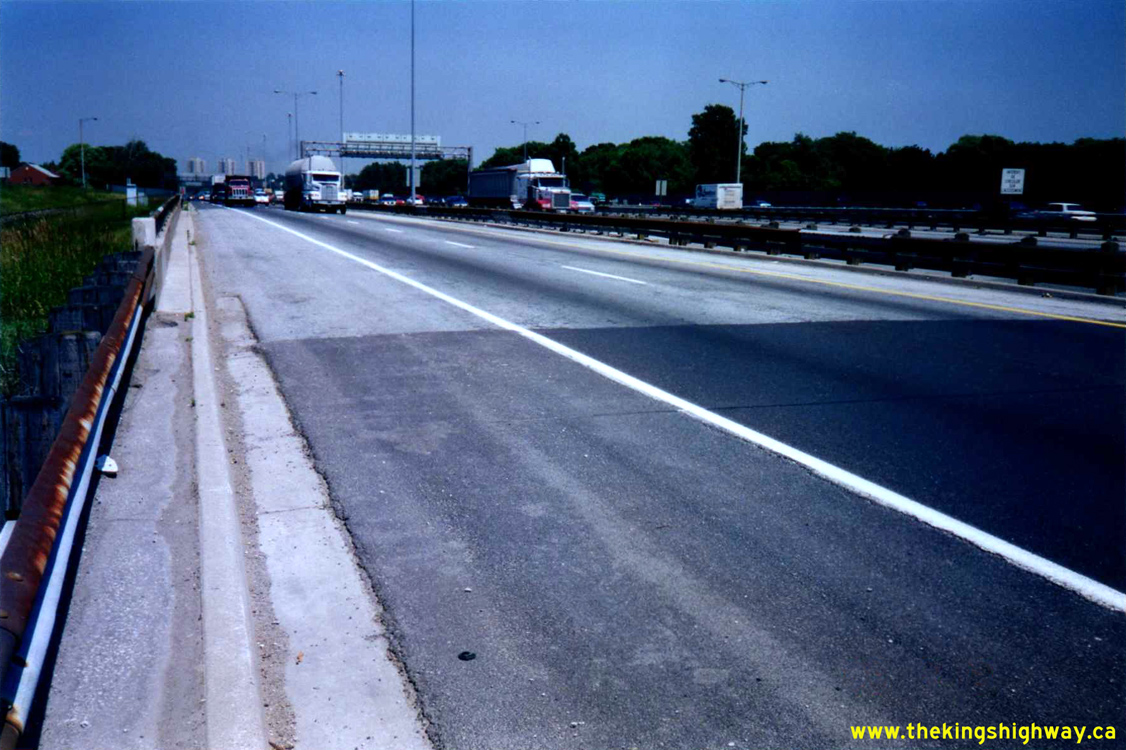
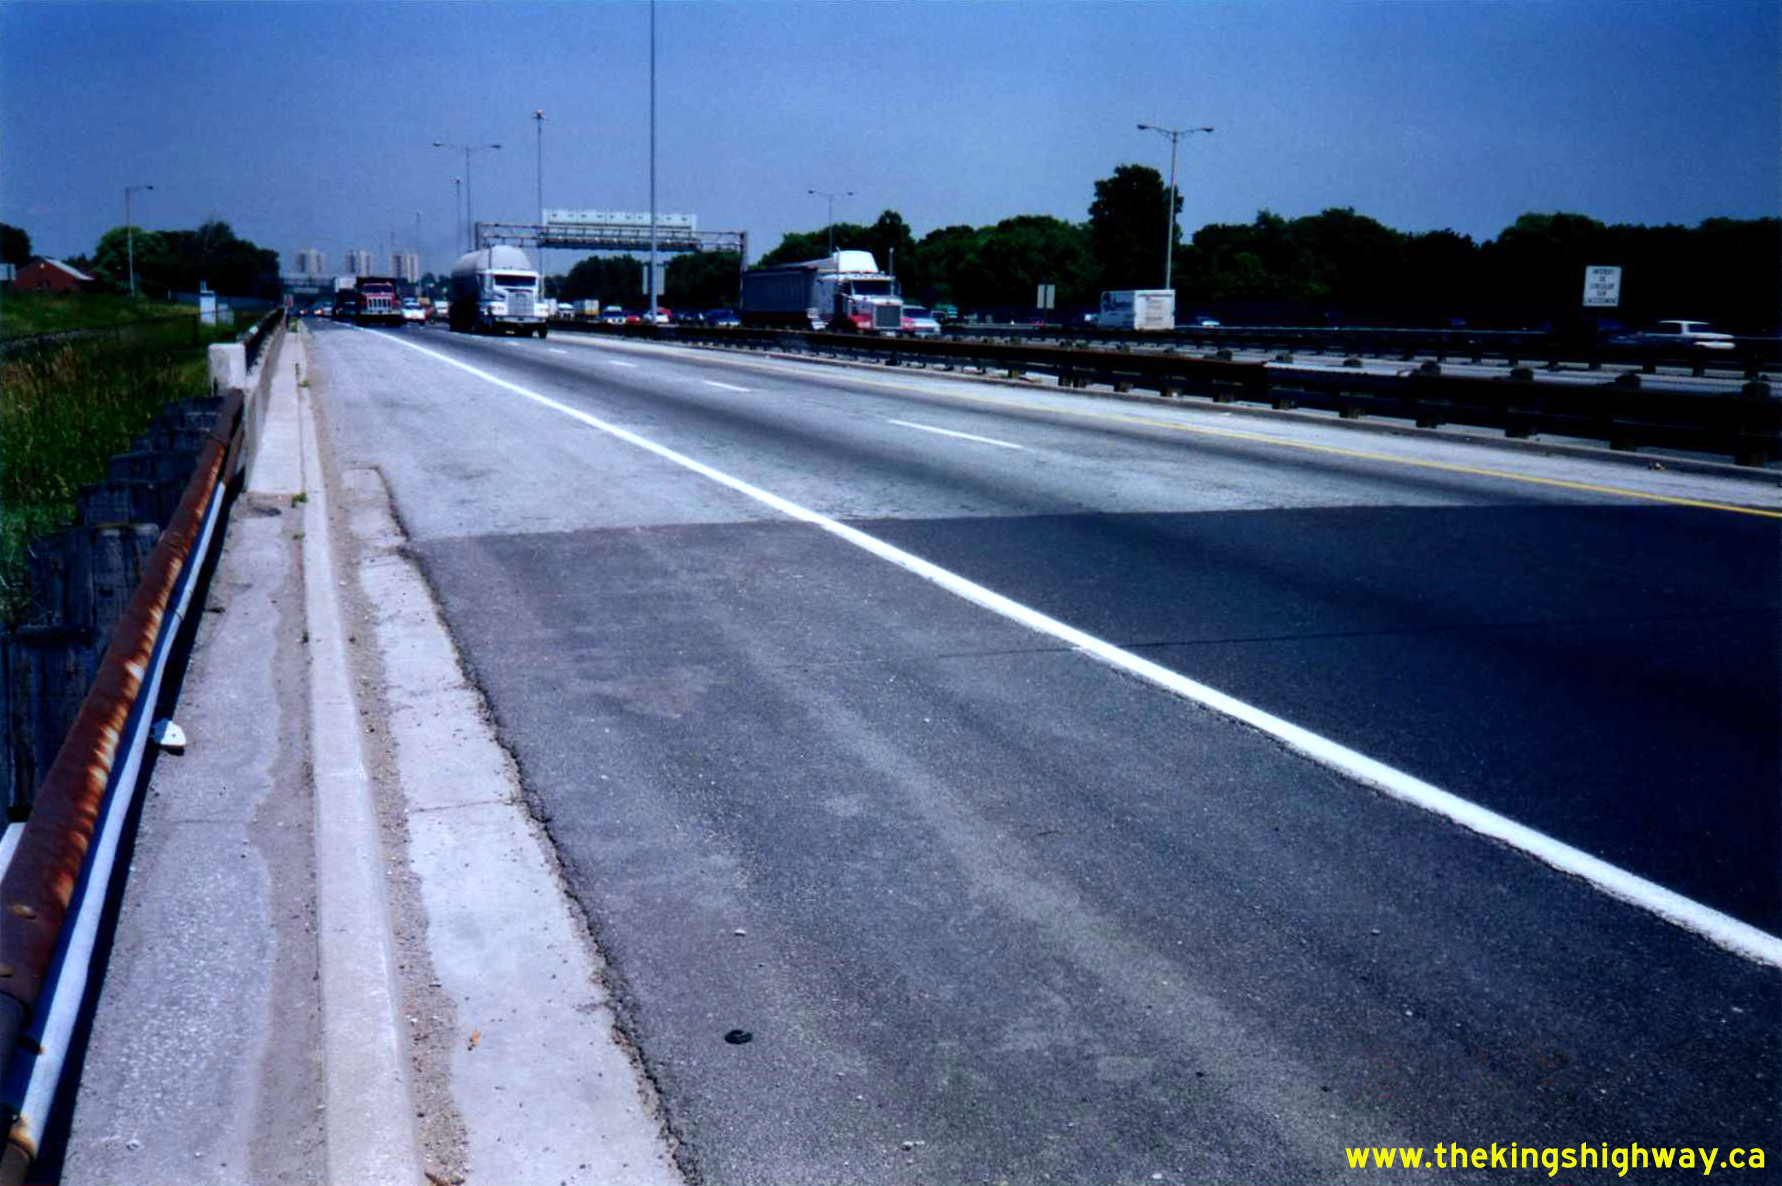
 Left - Facing east along the westbound Hwy 401 Collector Lanes at the West-to-North
directional ramp underpass (Site #37-341/2) to northbound Yonge Street in Toronto. The westbound Hwy 401 Collector Lanes narrow to two lanes only through the Yonge
Street Interchange - one of the few places within the Express-Collector Lane System where this occurs. See an
Enlarged Photo Here. Photo taken on July 12, 1995. Left - Facing east along the westbound Hwy 401 Collector Lanes at the West-to-North
directional ramp underpass (Site #37-341/2) to northbound Yonge Street in Toronto. The westbound Hwy 401 Collector Lanes narrow to two lanes only through the Yonge
Street Interchange - one of the few places within the Express-Collector Lane System where this occurs. See an
Enlarged Photo Here. Photo taken on July 12, 1995.(Photo courtesy of Ontario Ministry of Transportation - © King's Printer for Ontario, 2026) Right - View of the westbound Hwy 401 Collector Lanes approaching Yonge Street at the
West-to-North directional ramp underpass to northbound Yonge Street. After crossing the directional ramp, Hwy 401 crosses Yonge Street and then proceeds across the
viaduct over Hogg's Hollow. See an Enlarged Photo Here. Photo taken on July 12, 1995.(Photo courtesy of Ontario Ministry of Transportation - © King's Printer for Ontario, 2026) 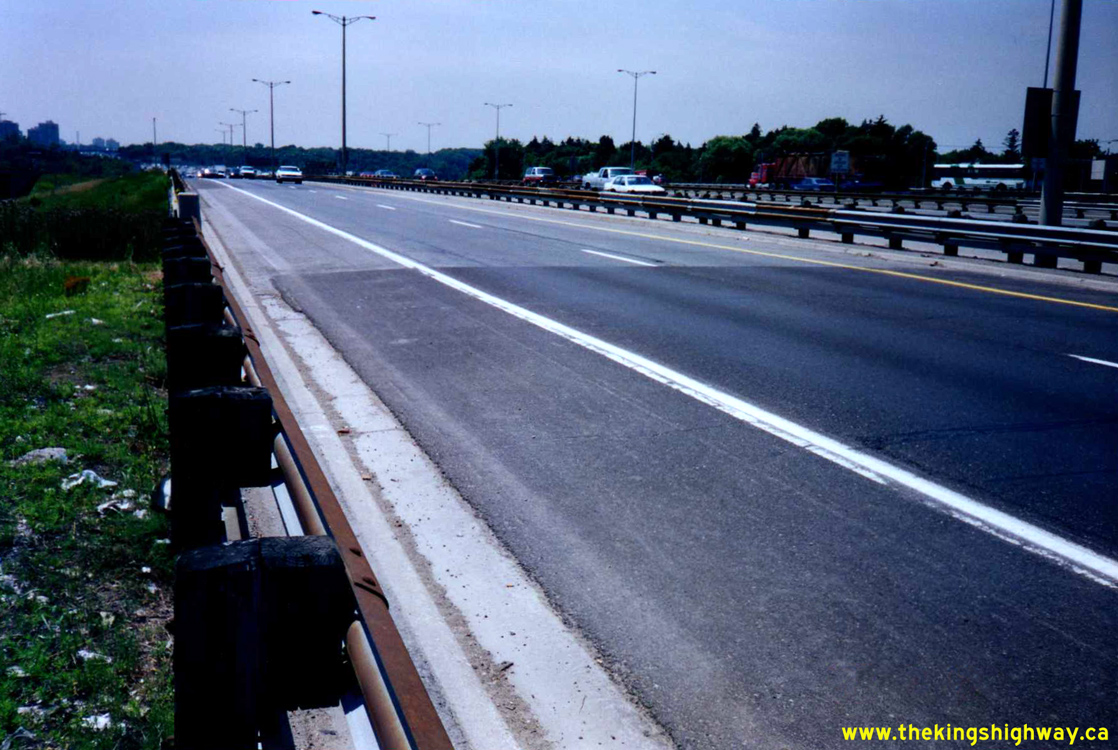
 Left - View of Hwy 401 approaching the Yonge Street (Hwy 11) Interchange in Toronto, facing west along the eastbound Hwy 401 Collector Lanes at the directional
West-to-North ramp underpass (Site #37-341/1). The complex interchange at Yonge Street was built as part of a multi-year reconstruction and widening project. Under
Contract #1965-131, an Express-Collector Lane System was introduced along Hwy 401 from Hogg's Hollow to a point just east of the Bayview Avenue Interchange along with
a new higher-capacity interchange at Yonge Street (Hwy 11). See an Enlarged Photo Here.
Photo taken on July 12, 1995. Left - View of Hwy 401 approaching the Yonge Street (Hwy 11) Interchange in Toronto, facing west along the eastbound Hwy 401 Collector Lanes at the directional
West-to-North ramp underpass (Site #37-341/1). The complex interchange at Yonge Street was built as part of a multi-year reconstruction and widening project. Under
Contract #1965-131, an Express-Collector Lane System was introduced along Hwy 401 from Hogg's Hollow to a point just east of the Bayview Avenue Interchange along with
a new higher-capacity interchange at Yonge Street (Hwy 11). See an Enlarged Photo Here.
Photo taken on July 12, 1995.(Photo courtesy of Ontario Ministry of Transportation - © King's Printer for Ontario, 2026) Right - Facing east along the eastbound Hwy 401 Collector Lanes at the directional West-to-North ramp underpass (Site #37-341/1). When the highway was
initially widened to 12 lanes through the Yonge Street Interchange in the mid-1960s, the eastbound Hwy 401 Collector Lanes had only two lanes through the Yonge Street
Interchange. During subsequent reconstruction work, an additional eastbound lane was carried through the interchange. See an
Enlarged Photo Here. Photo taken on July 12, 1995.(Photo courtesy of Ontario Ministry of Transportation - © King's Printer for Ontario, 2026) 
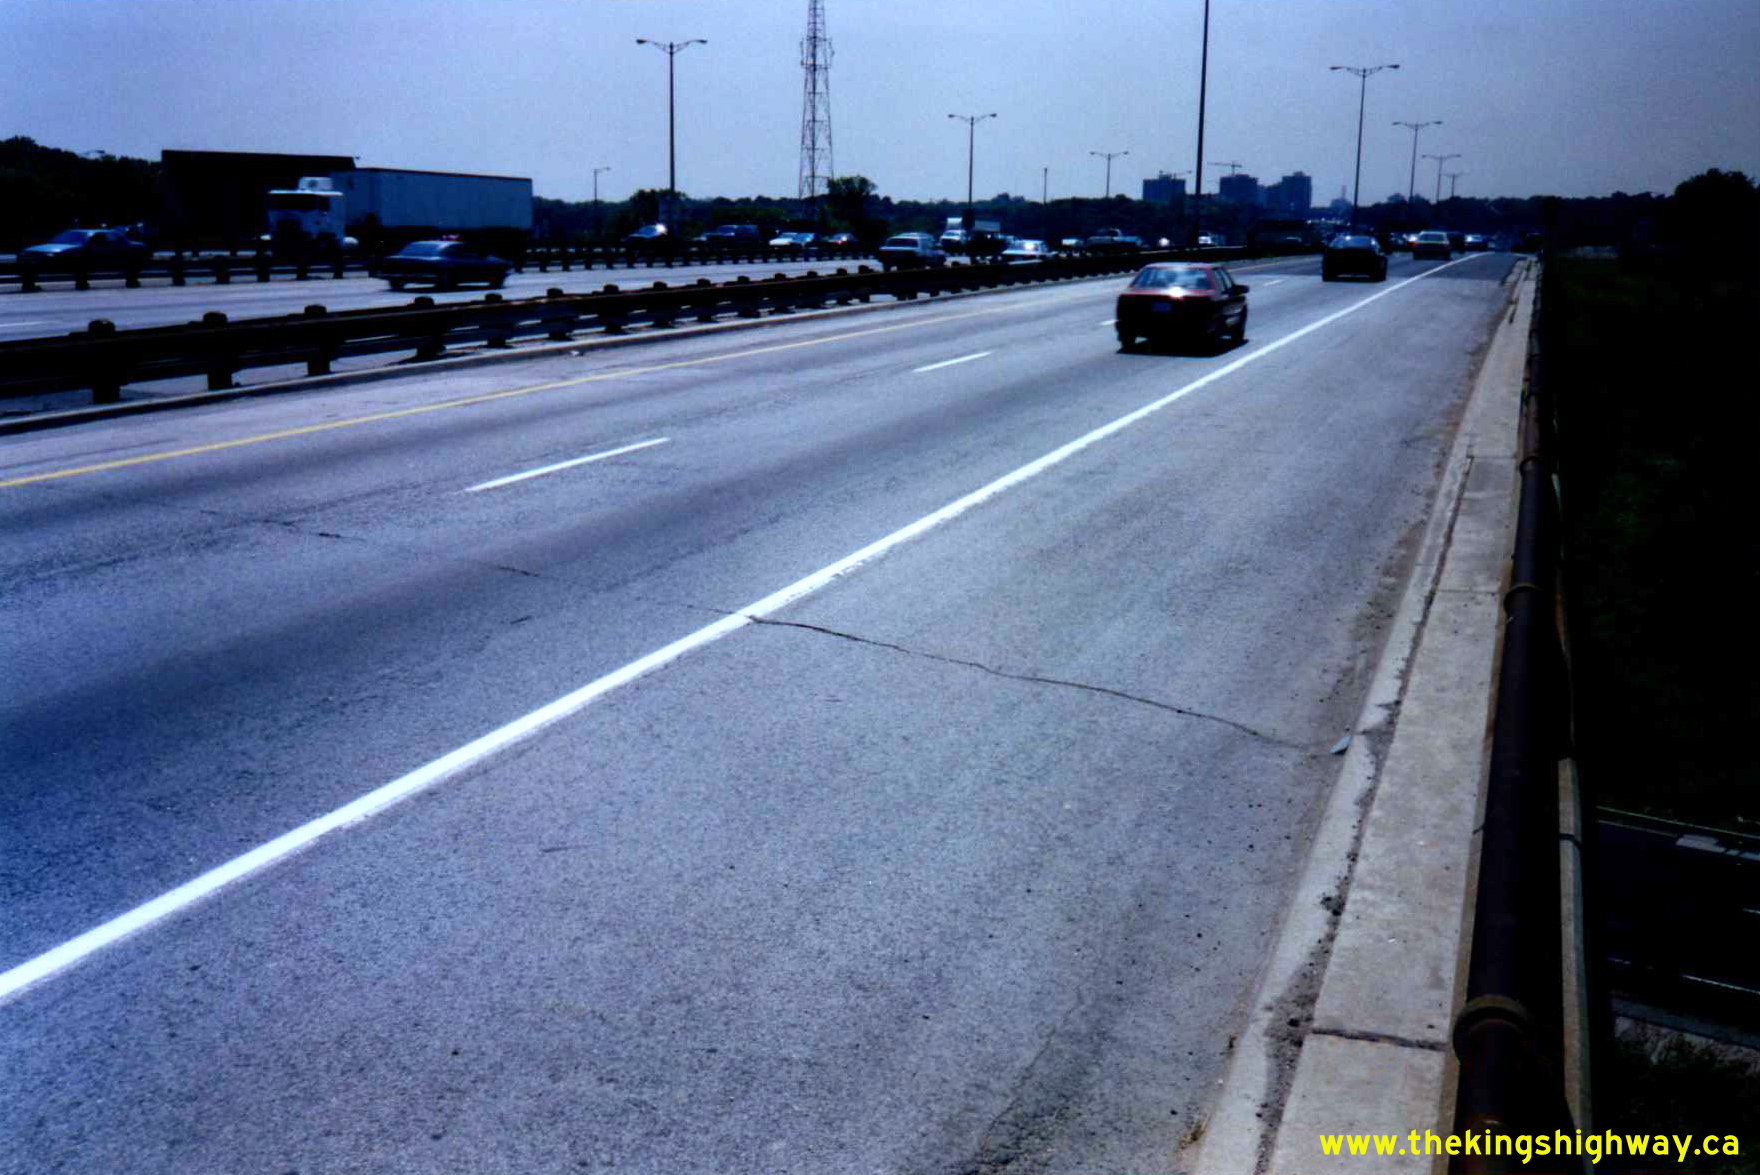
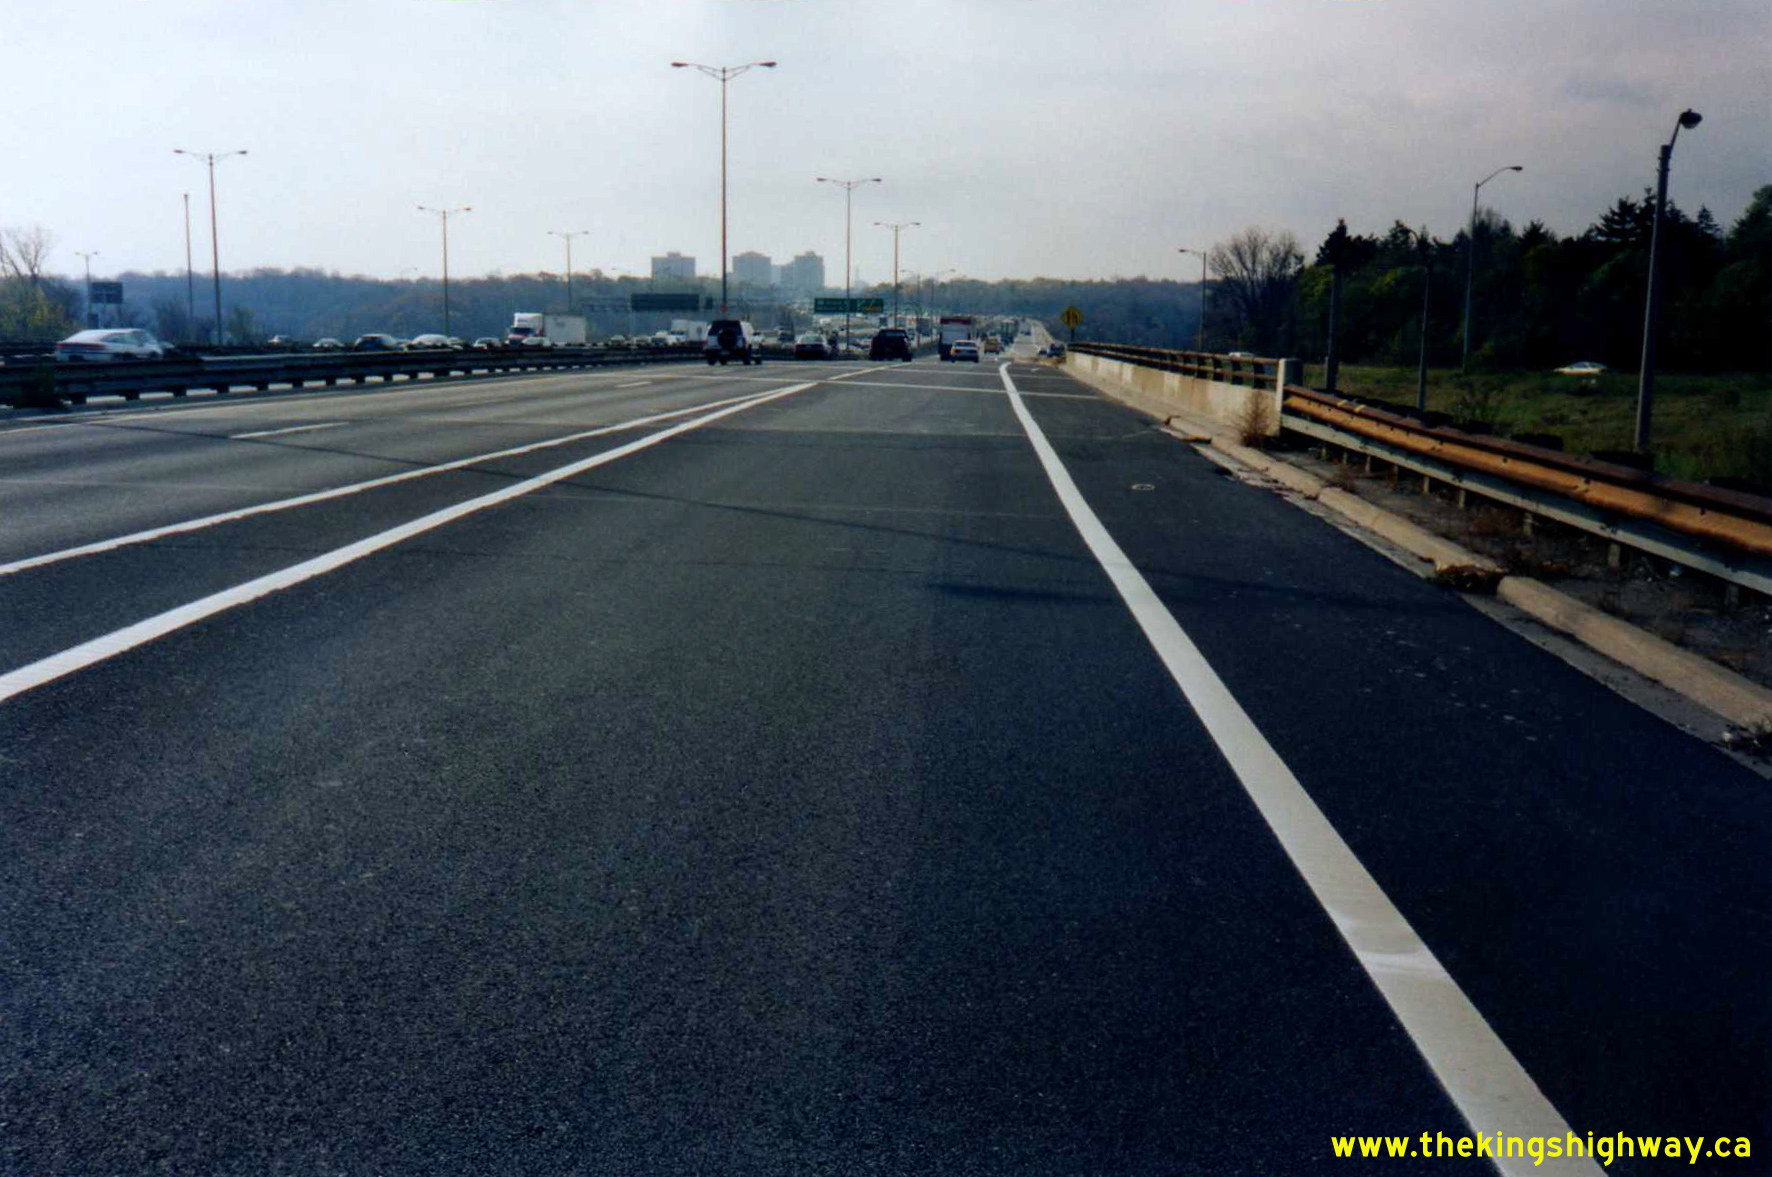
 Left - Facing west along the westbound Hwy 401 Express Lanes in Toronto at the Yonge Street (Hwy 11) Interchange. See an
Enlarged Photo Here. Photo taken on September 10, 1995. Left - Facing west along the westbound Hwy 401 Express Lanes in Toronto at the Yonge Street (Hwy 11) Interchange. See an
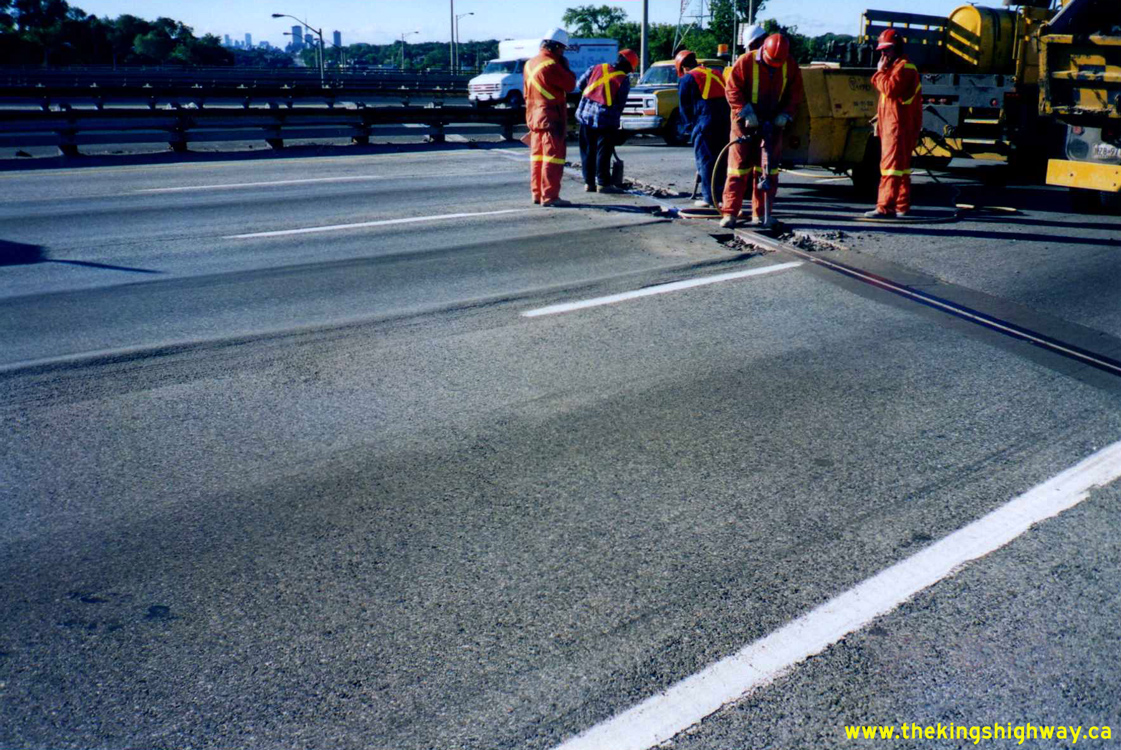
Enlarged Photo Here. Photo taken on September 10, 1995.(Photo courtesy of Ontario Ministry of Transportation - © King's Printer for Ontario, 2026) Right - MTO Bridge Maintenance Crew undertaking expansion joint repairs at the Yonge Street Underpass (Site #37-204/4) on the westbound Hwy 401 Express Lanes.
Historically, MTO had an in-house bridge maintenance crew who could respond to emergency incidents and undertake repairs to provincial highway bridges as needed. See
an Enlarged Photo Here. Photo taken on September 10, 1995.(Photo courtesy of Ontario Ministry of Transportation - © King's Printer for Ontario, 2026) 
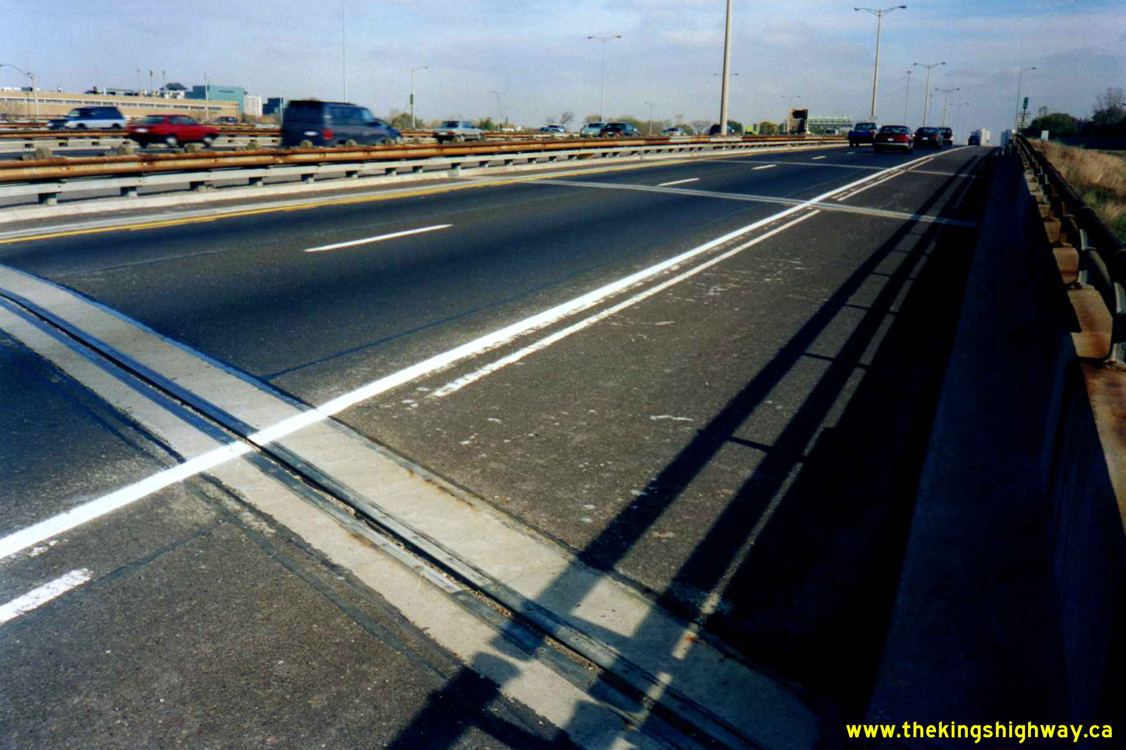
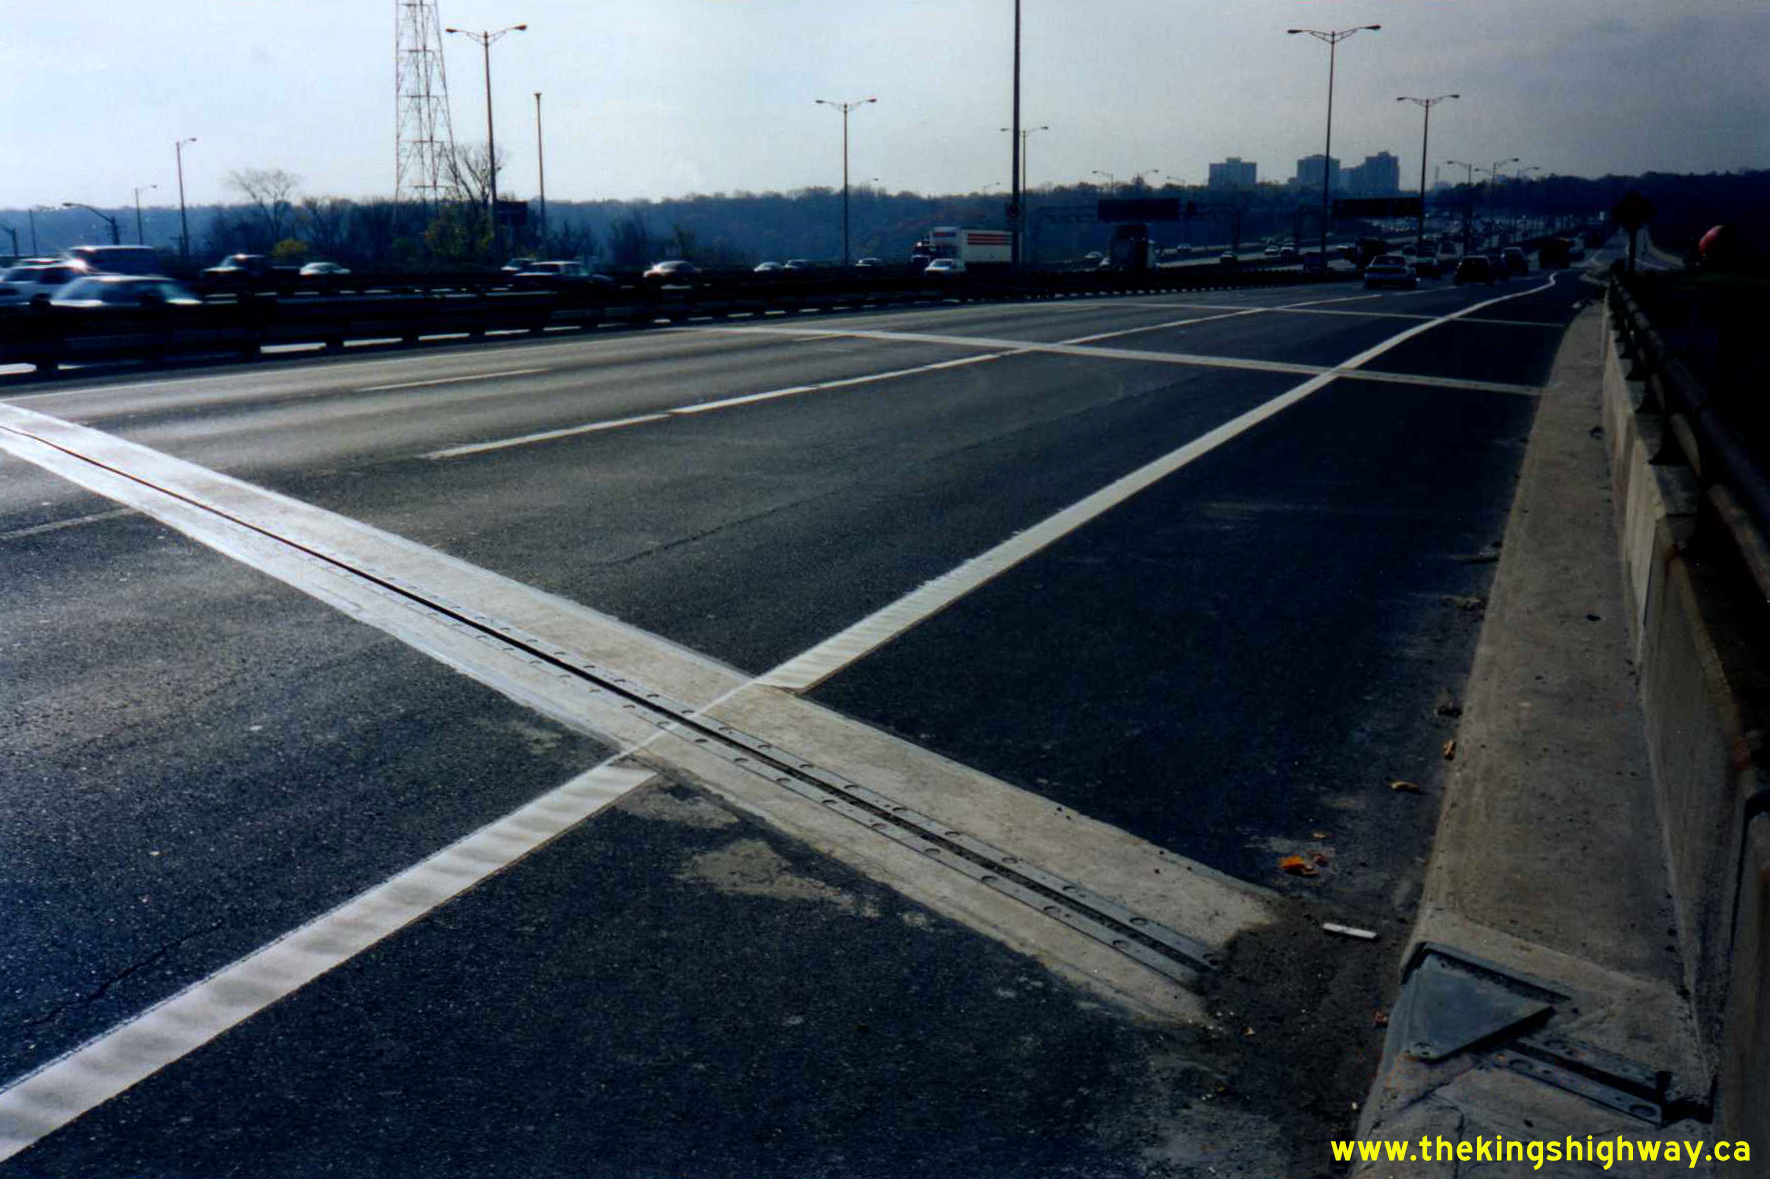
 Left - Facing west along the westbound Hwy 401 Collector Lanes towards Hogg's Hollow at the Yonge Street Underpass (Site #37-204/2). The long viaduct over
Hogg's Hollow starts immediately west of the Yonge Street Interchange. See an
Enlarged Photo Here. Photo taken on November 6, 1995. Left - Facing west along the westbound Hwy 401 Collector Lanes towards Hogg's Hollow at the Yonge Street Underpass (Site #37-204/2). The long viaduct over
Hogg's Hollow starts immediately west of the Yonge Street Interchange. See an
Enlarged Photo Here. Photo taken on November 6, 1995.(Photo courtesy of Ontario Ministry of Transportation - © King's Printer for Ontario, 2026) Right - View of the reconstructed expansion joints at the Yonge Street Underpass on the westbound Hwy 401 Collector Lanes. See an
Enlarged Photo Here. Photo taken on November 6, 1995.(Photo courtesy of Ontario Ministry of Transportation - © King's Printer for Ontario, 2026) 
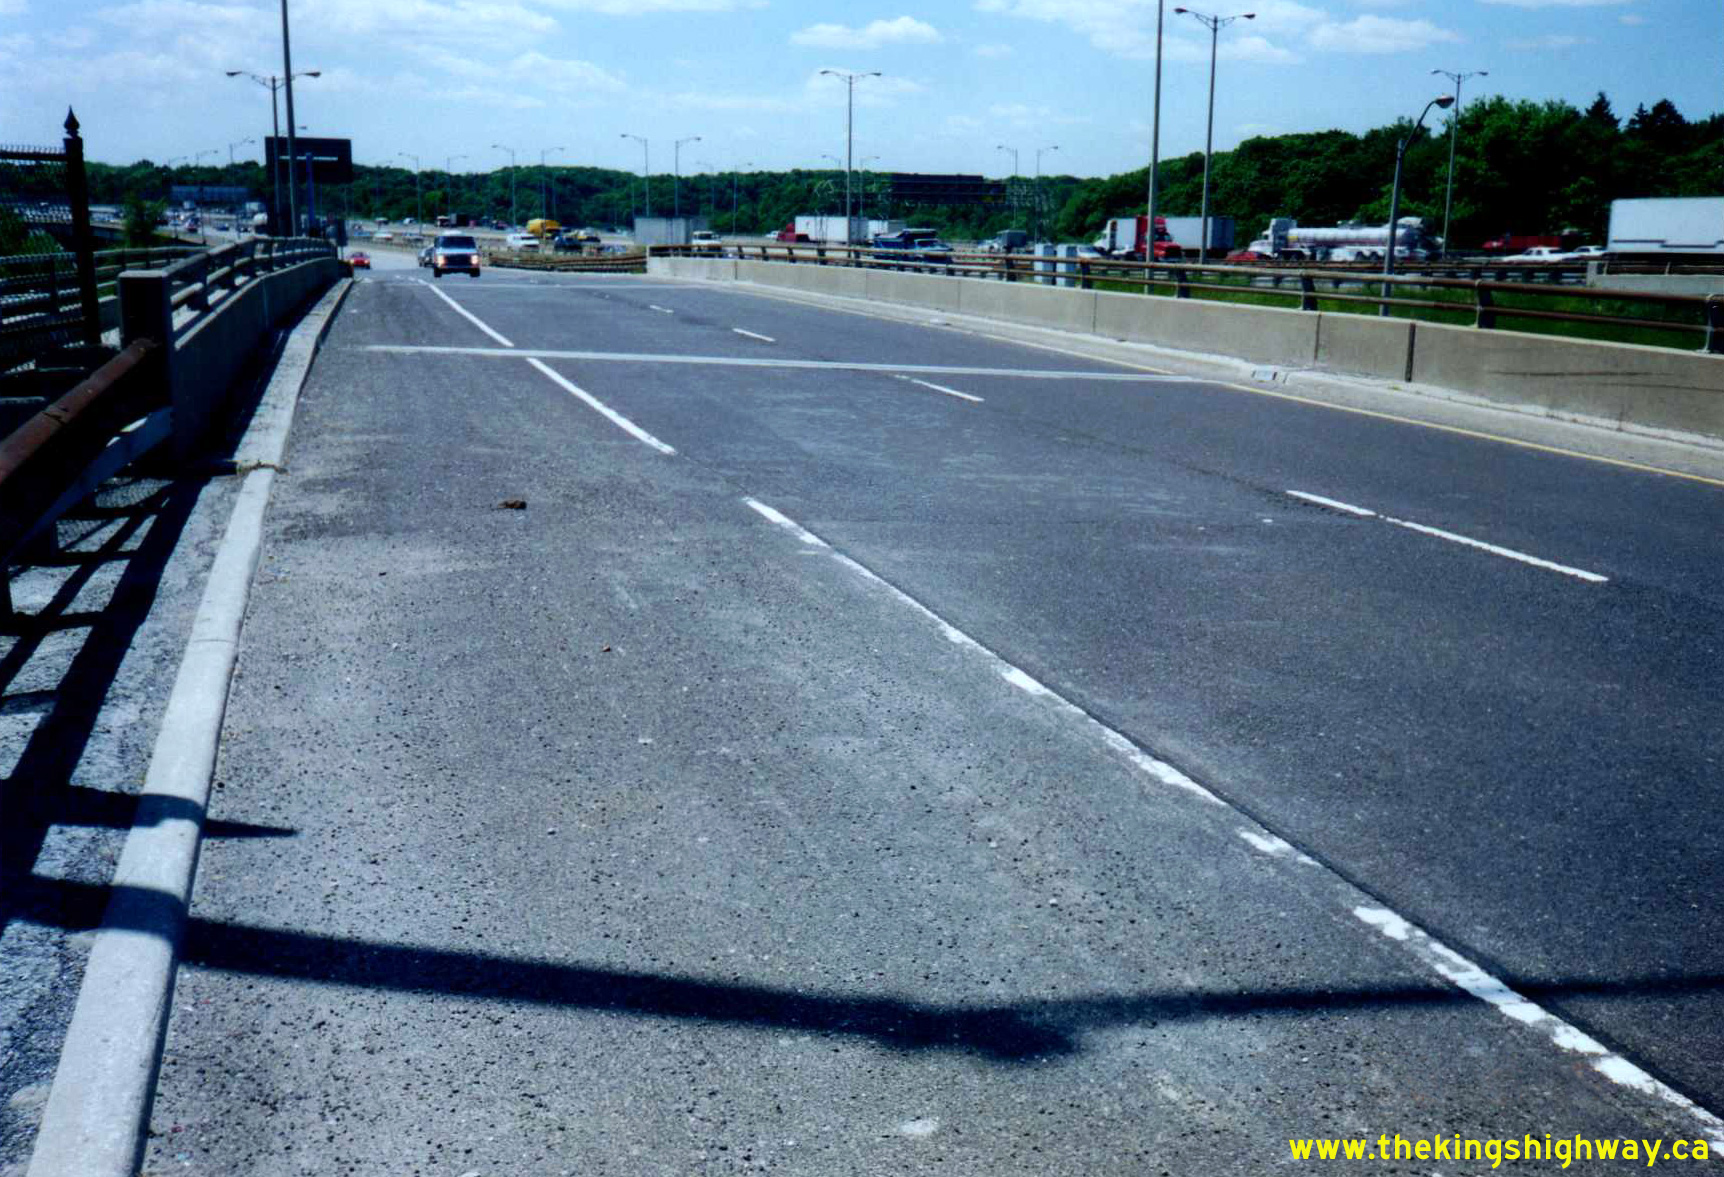
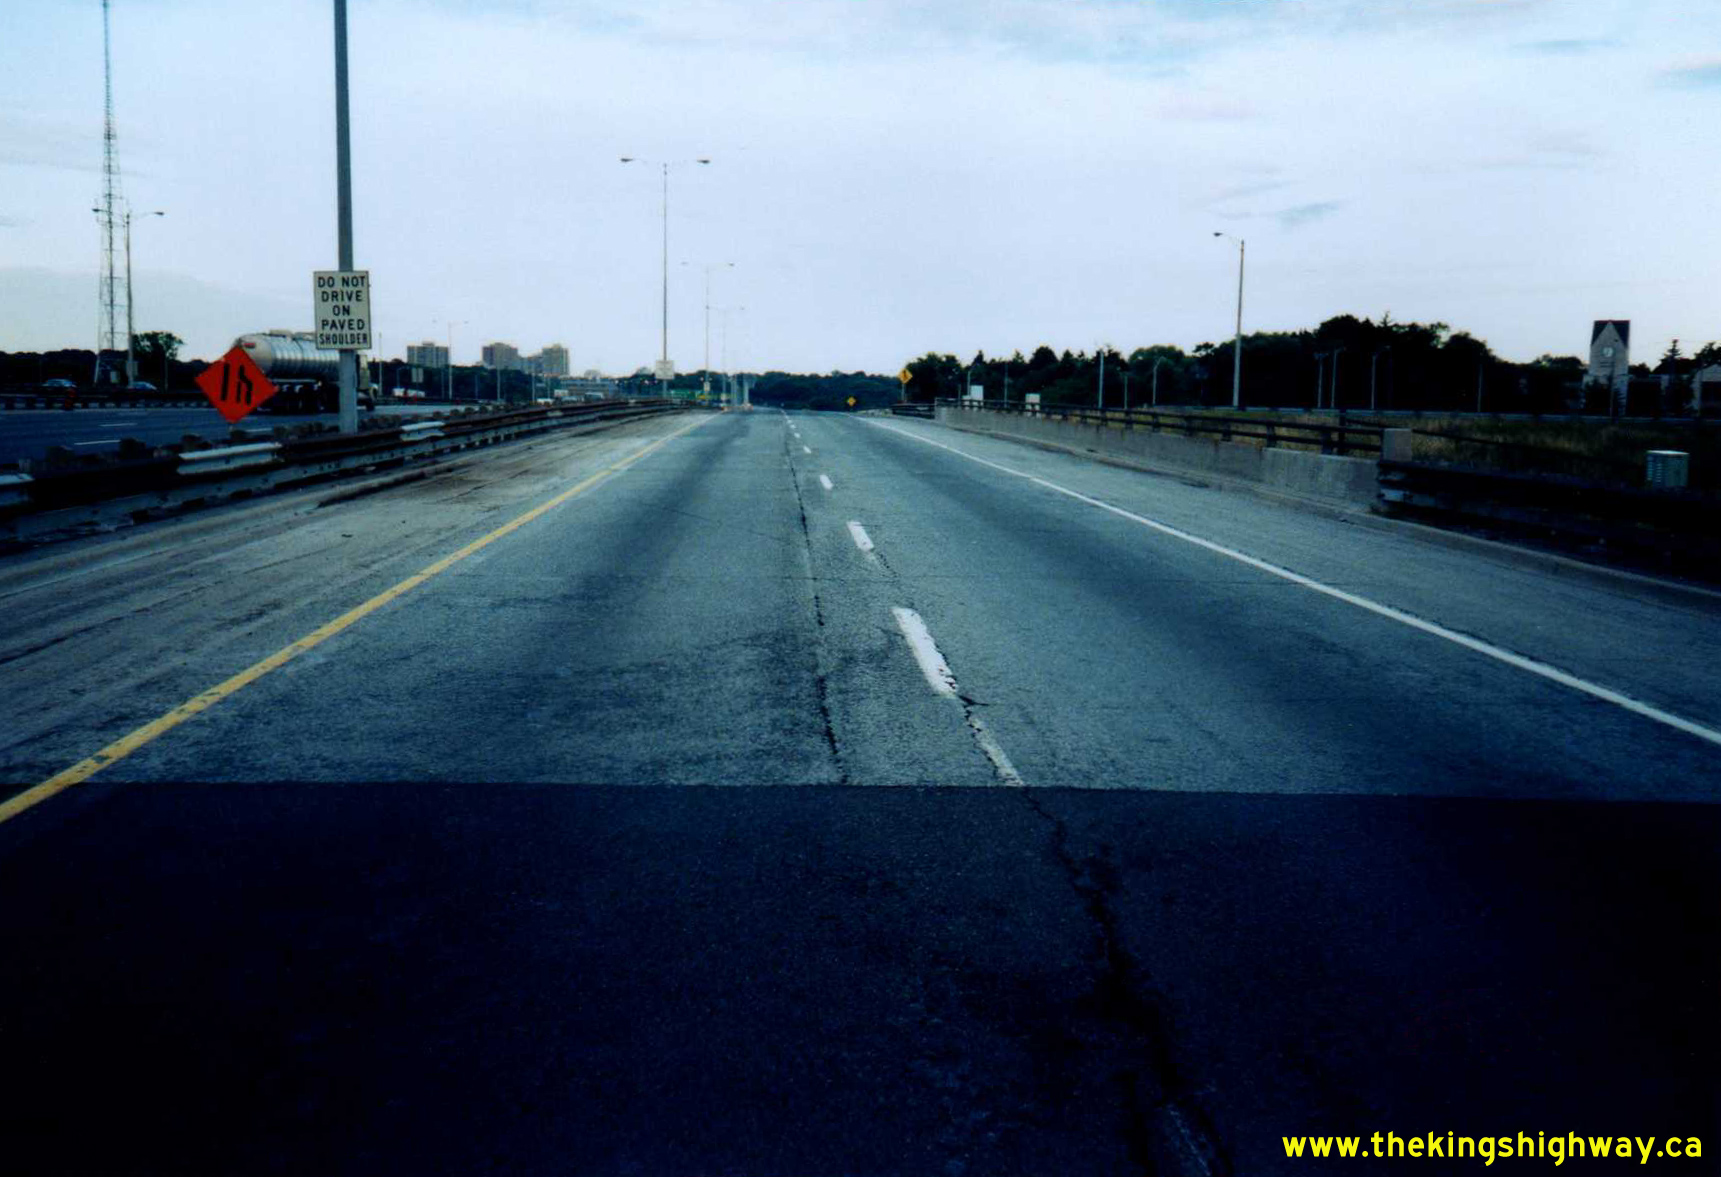
 Left - Facing east along the eastbound Hwy 401 Collector Lanes at the Yonge Street Underpass (Site #37-204/1). See an
Enlarged Photo Here. Photo taken on November 6, 1995. Left - Facing east along the eastbound Hwy 401 Collector Lanes at the Yonge Street Underpass (Site #37-204/1). See an
Enlarged Photo Here. Photo taken on November 6, 1995.(Photo courtesy of Ontario Ministry of Transportation - © King's Printer for Ontario, 2026) Right - View of Hwy 401 at the Yonge Street Interchange, facing northeast from the eastbound Hwy 401 Collector Lanes. This area has changed quite dramatically
in recent years, with the low-density industrial and residential buildings seen in this photo replaced with high-rise towers along the northern side of Hwy 401. See
an Enlarged Photo Here. Photo taken on November 6, 1995.(Photo courtesy of Ontario Ministry of Transportation - © King's Printer for Ontario, 2026) 
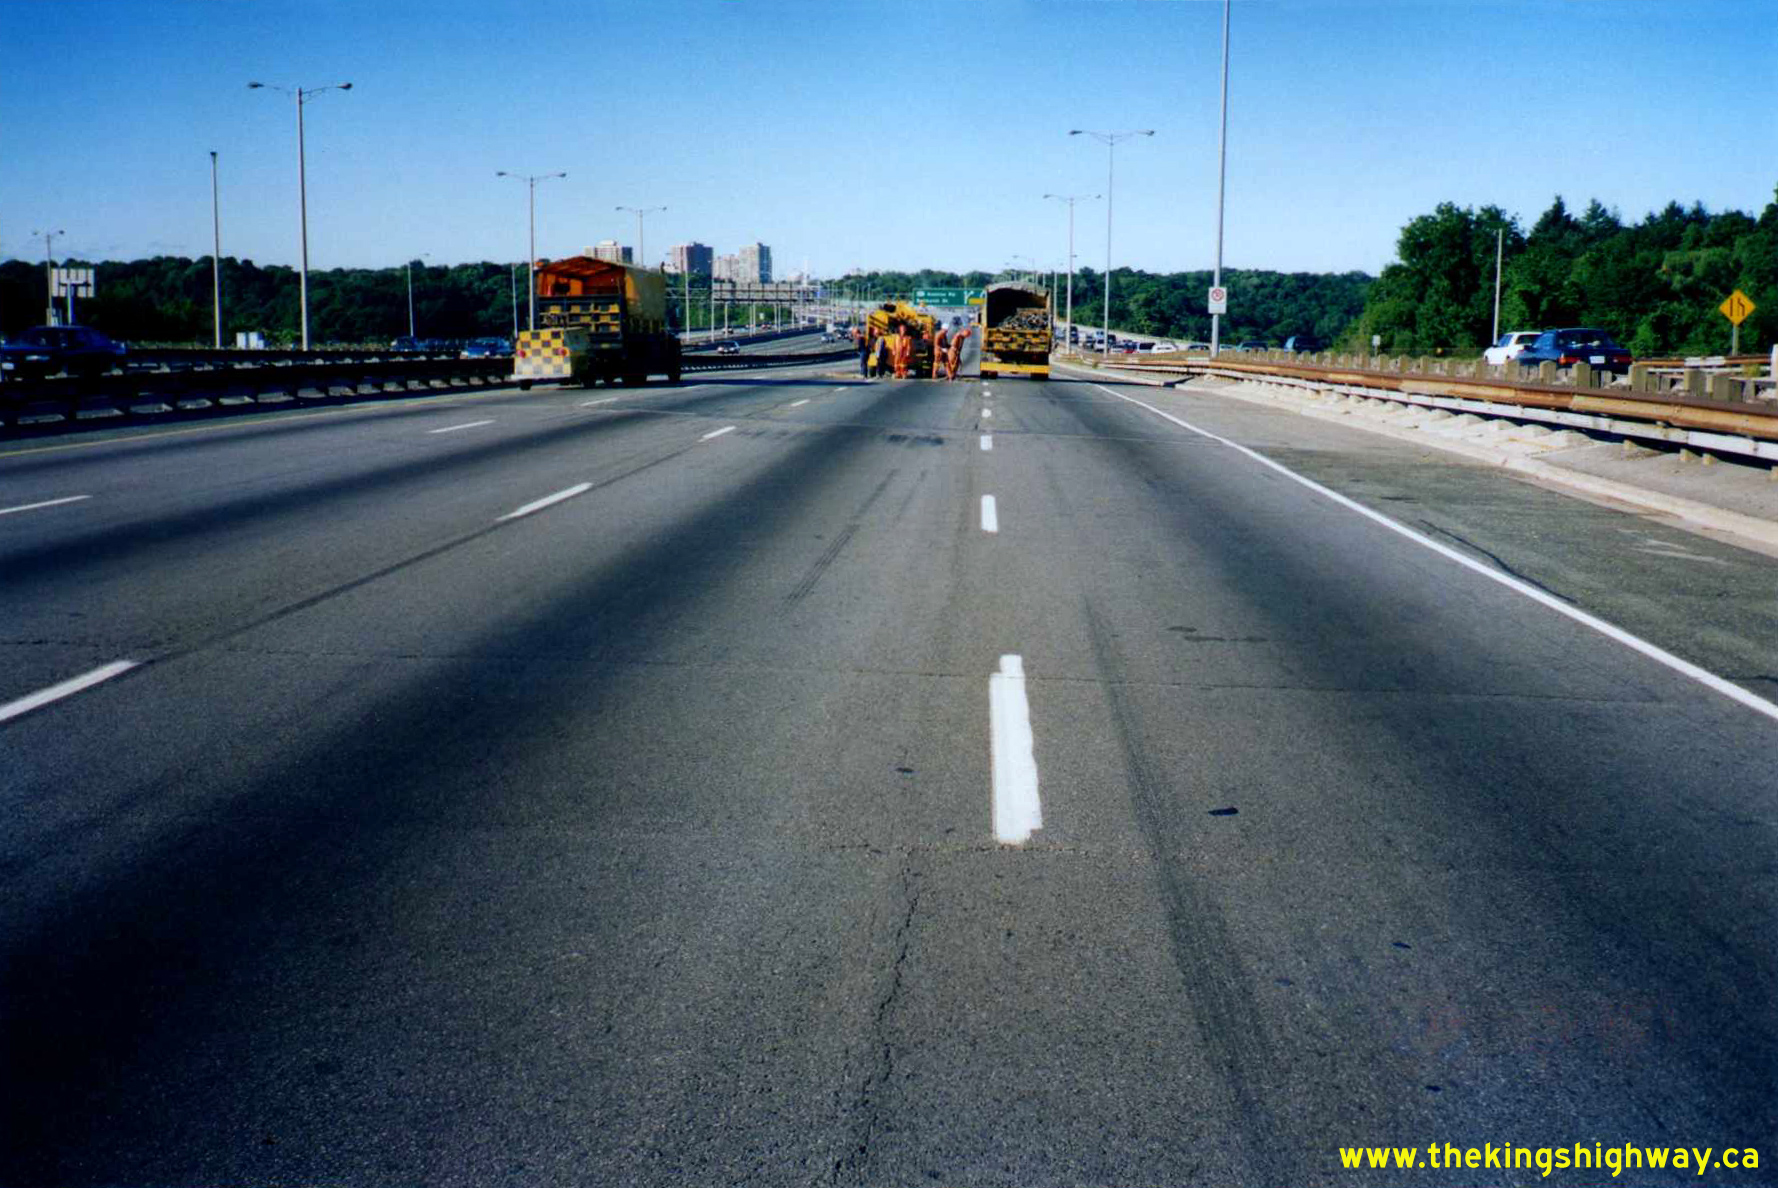
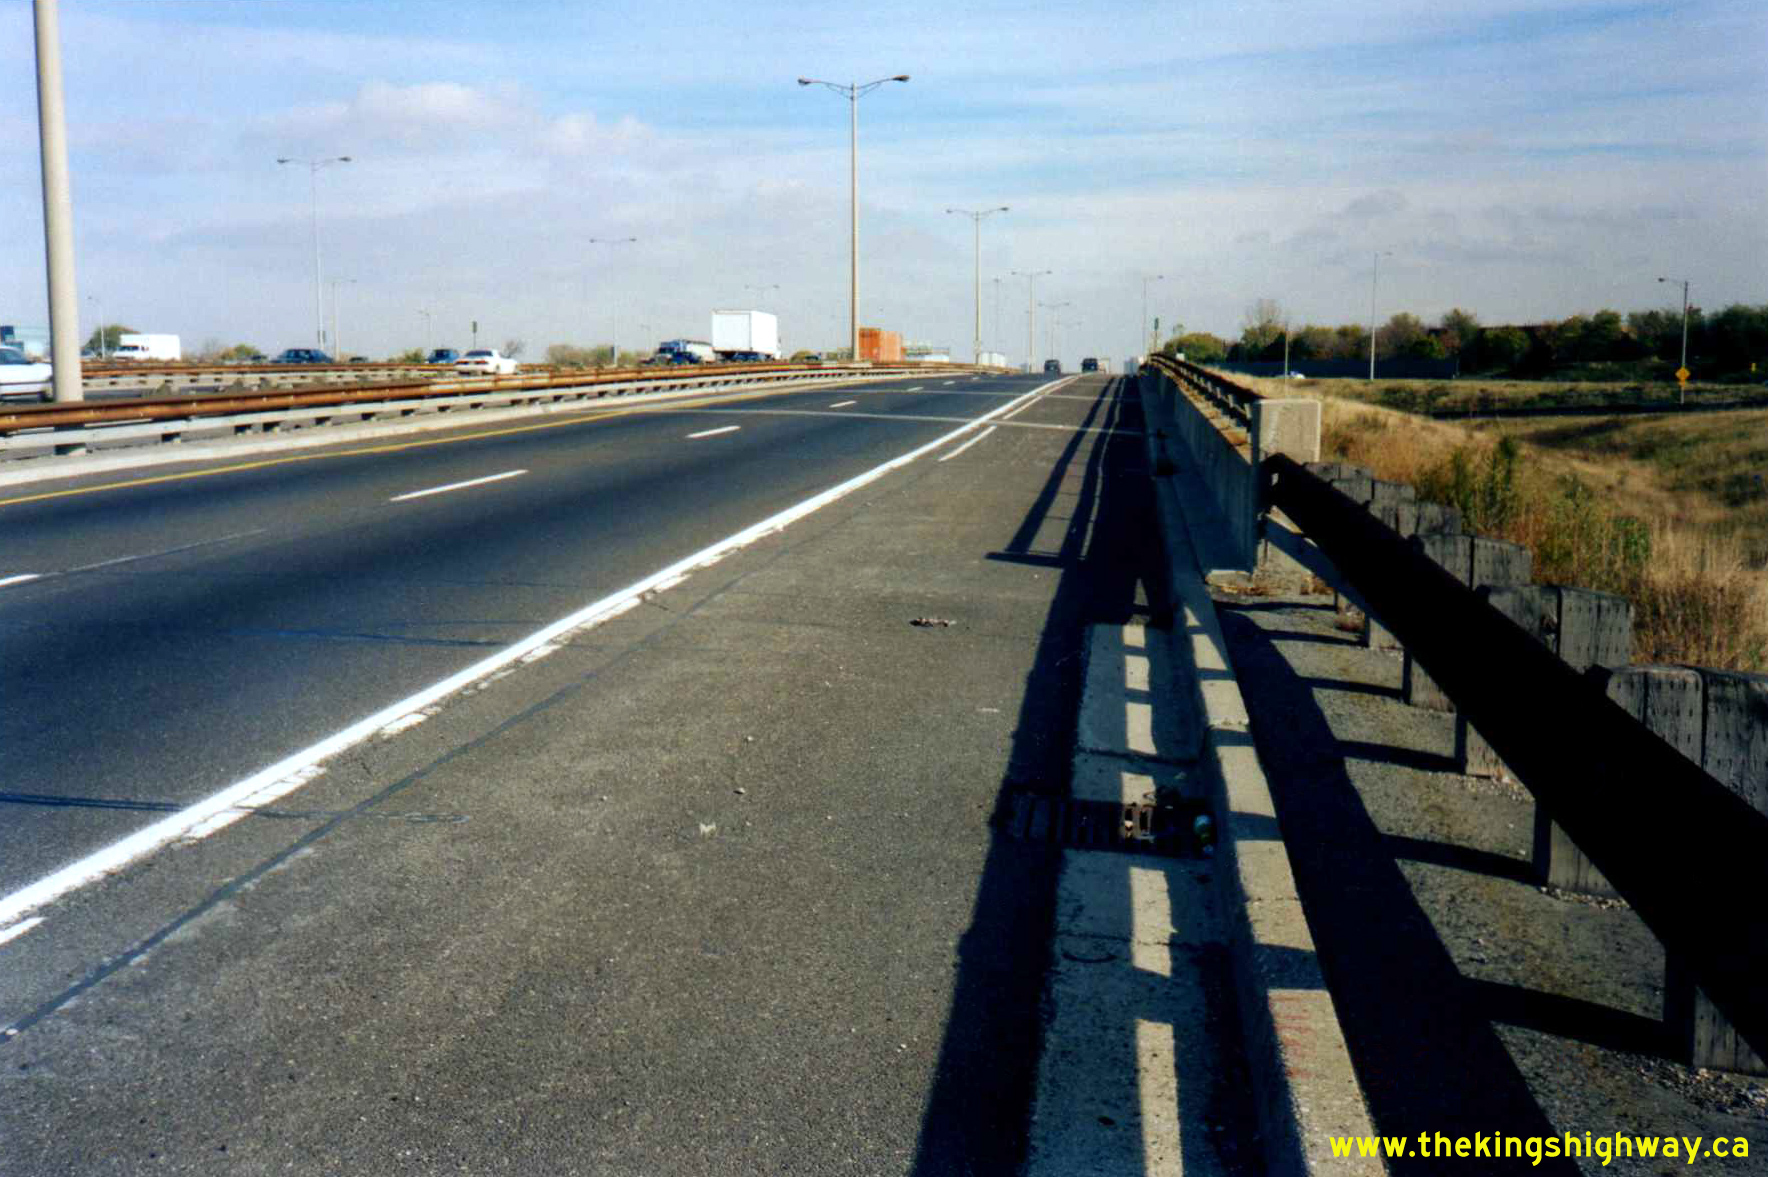
 Left - Facing west along the westbound Hwy 401 Collector Lanes at the underpass structure for the directional Yonge Street West-to-North Ramp
(Site #37-341/2). See an Enlarged Photo Here. Photo taken on August 23. 1997. Left - Facing west along the westbound Hwy 401 Collector Lanes at the underpass structure for the directional Yonge Street West-to-North Ramp
(Site #37-341/2). See an Enlarged Photo Here. Photo taken on August 23. 1997.(Photo courtesy of Ontario Ministry of Transportation - © King's Printer for Ontario, 2026) Right - View of Hwy 401 at the the directional Yonge Street West-to-North Ramp Underpass (Site #37-341/2). This photo provides a general view of the
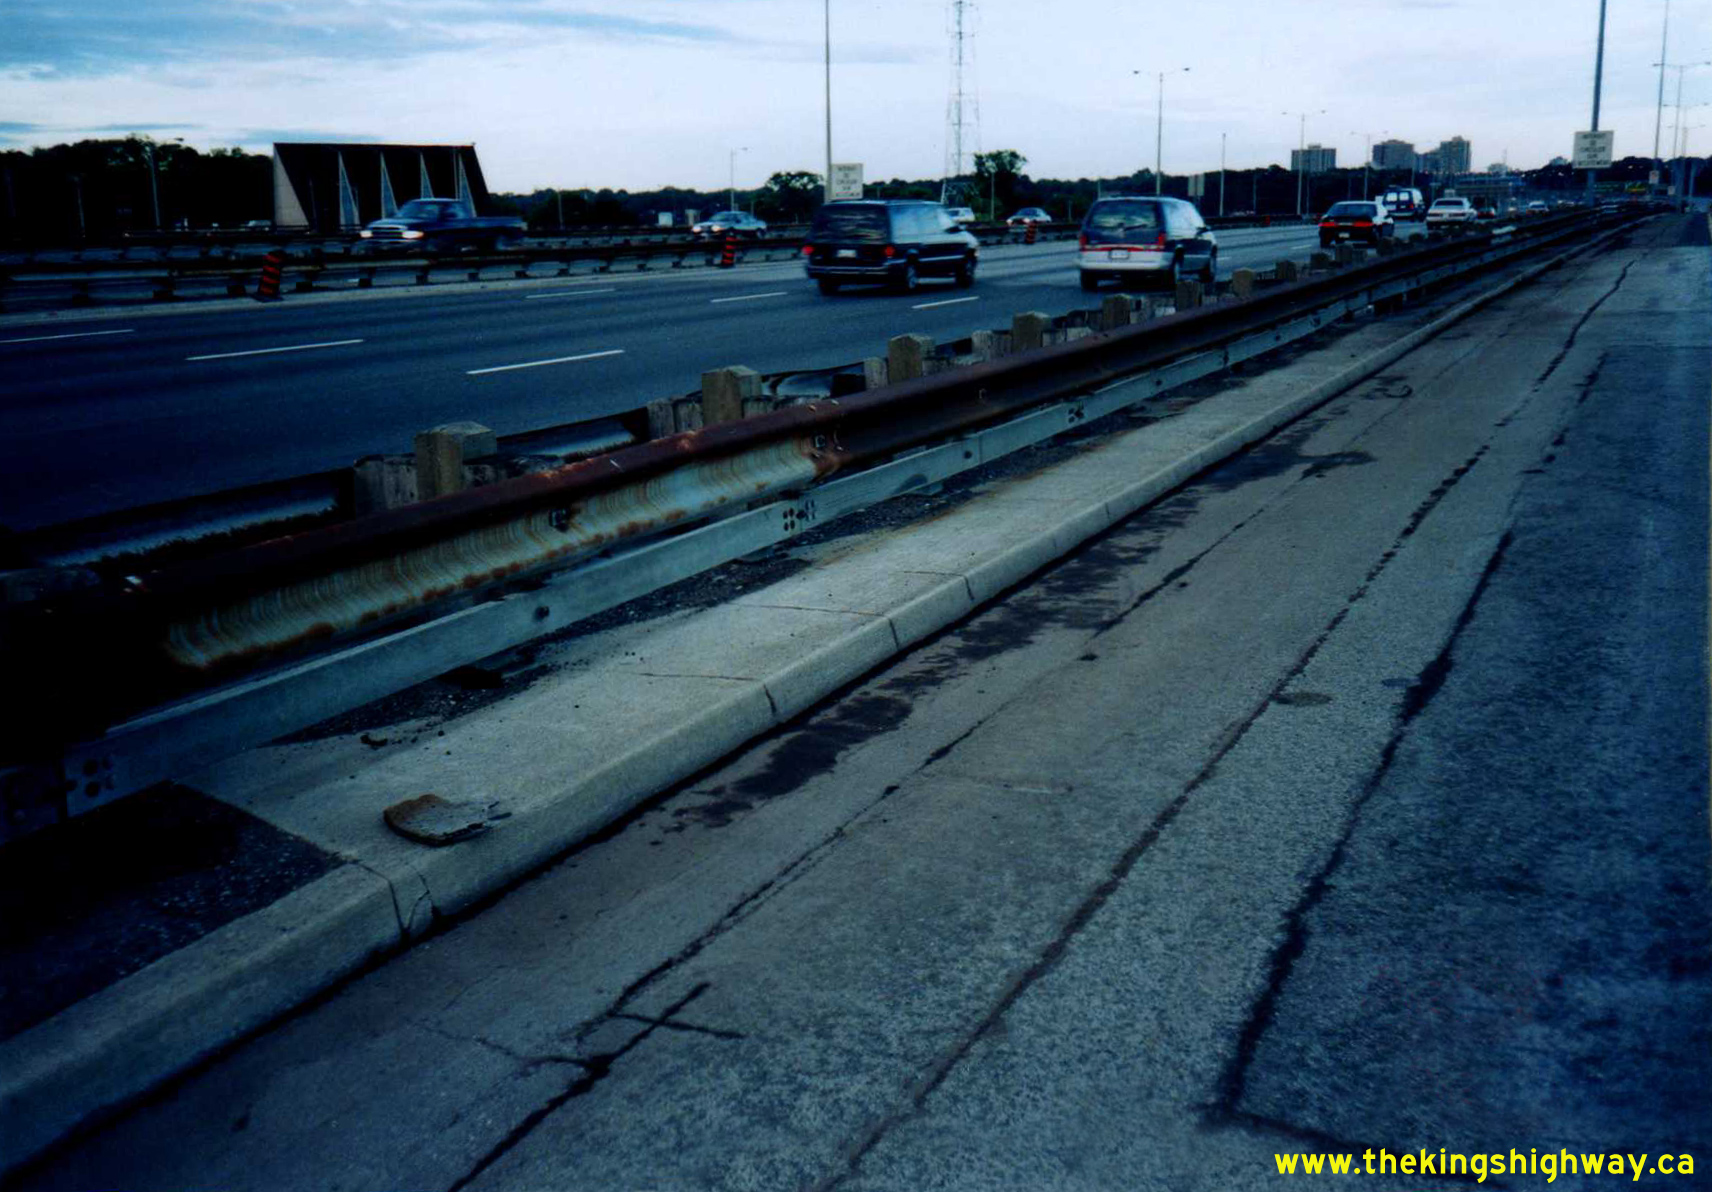
Express-Collector Lane System through Toronto. Constructed in the mid-1960s under Contract #1965-131, the original four-lane Toronto Bypass was expanded to 12 lanes
through this area. The four individual roadways comprising the Express-Collector Lane System were separated by steel beam guide rail barriers. The Express-Collector
Lane System separated shorter-distance traffic which was more local in nature from longer-distance through traffic using Hwy 401. See an
Enlarged Photo Here. Photo taken on August 23. 1997.(Photo courtesy of Ontario Ministry of Transportation - © King's Printer for Ontario, 2026)
Continue to King's Highway 11 Present Day Photos: Toronto to Orillia
|
|---|
Links to Adjacent King's Highway Photograph Pages:
Back to Hwy 11 - Historical Photos (1980 to 1989)
Hwy 11 Photo Index
On to Hwy 11 - Toronto to Orillia
Back to King's Highway 10 Photos /
King's Highway 11 History /
On to King's Highway 12 Photos
Ontario Highway History - Main Menu / Back to List of Highways Website contents, photos & text © 2002-2026, Cameron
Bevers (Webmaster) - All Rights Reserved / Contact Me
|
|---|