
| 
| |
|
|
This page contains historical and present day photos of Ontario's King's Highway 35B (Lindsay Business Route). All photographs
displayed on this page were taken by the Webmaster (Cameron Bevers), unless specifically noted otherwise. Historical photographs are arranged in approximate
chronological order, while present day photographs (Year 2010 to date) are arranged by location from south to north. Click on any thumbnail to see a larger image!
Please note that all photographs displayed on this
website are protected by copyright. These photographs must not be reproduced, published,
electronically stored or copied, distributed, or posted onto other websites without
my written permission. If you want to use photos from this website, please
email me first for permission. Thank-you!
|
|---|
|
Historical King's Highway 35B (Lindsay) Photographs
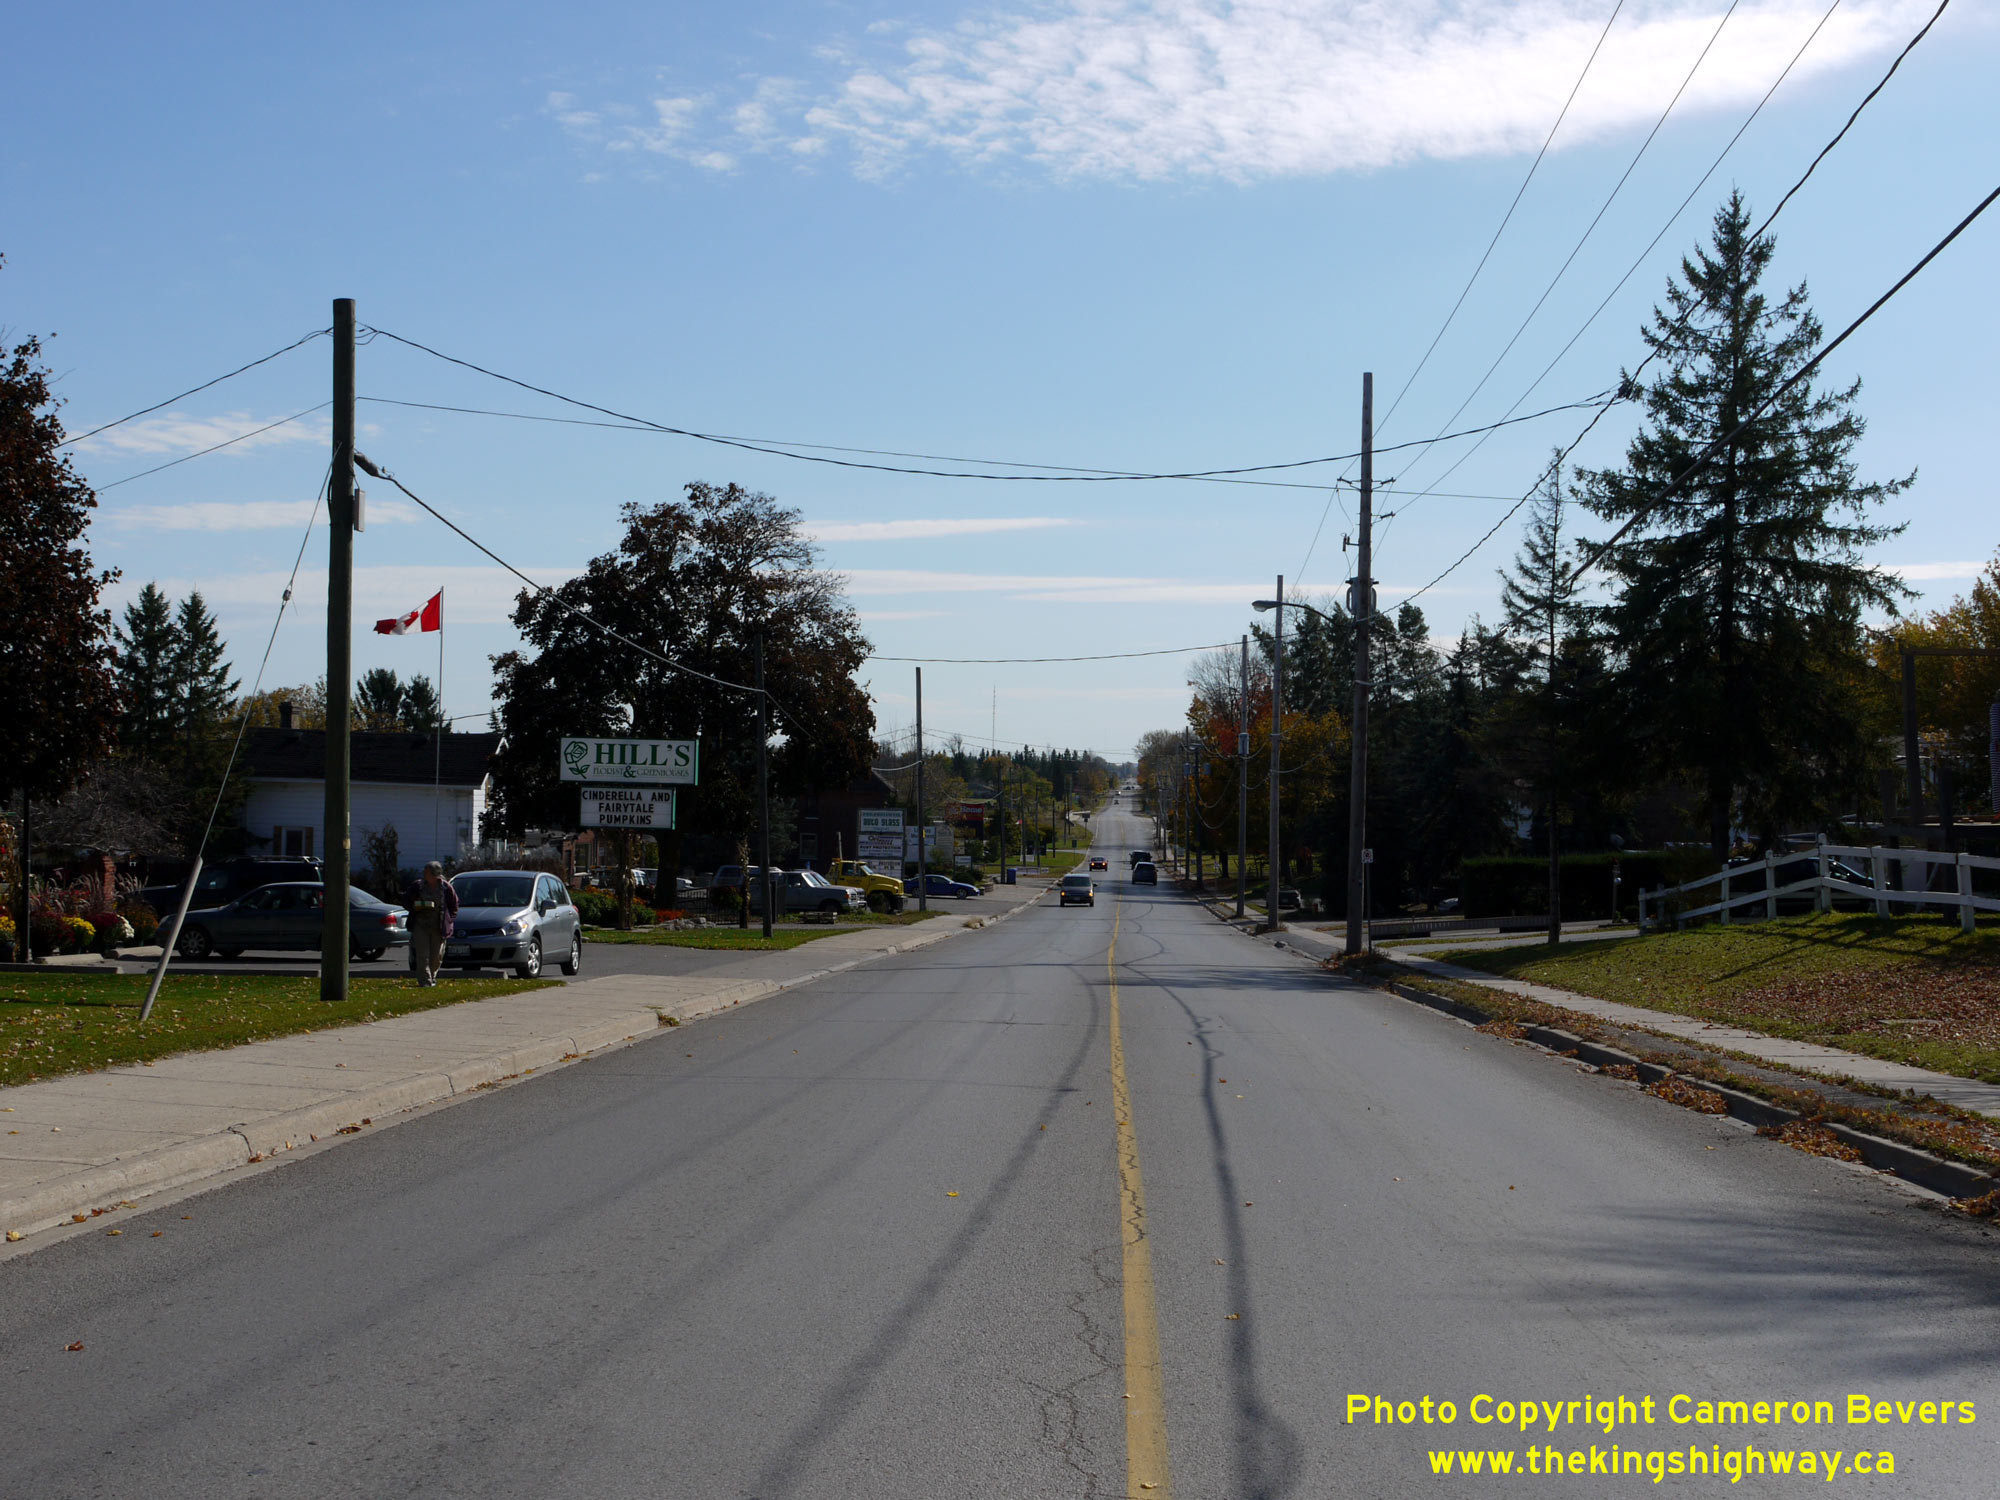
  Above - View of Kent Street (Hwy 7B & Hwy 35B) near William Street in Downtown Lindsay. See an
Enlarged Photo Here. Photo taken in 1961. Above - View of Kent Street (Hwy 7B & Hwy 35B) near William Street in Downtown Lindsay. See an
Enlarged Photo Here. Photo taken in 1961.(Photo from Cameron Bevers' historical photograph collection - Original photographer unknown) |
|---|
|
Present Day King's Highway 35B (Lindsay) Photographs
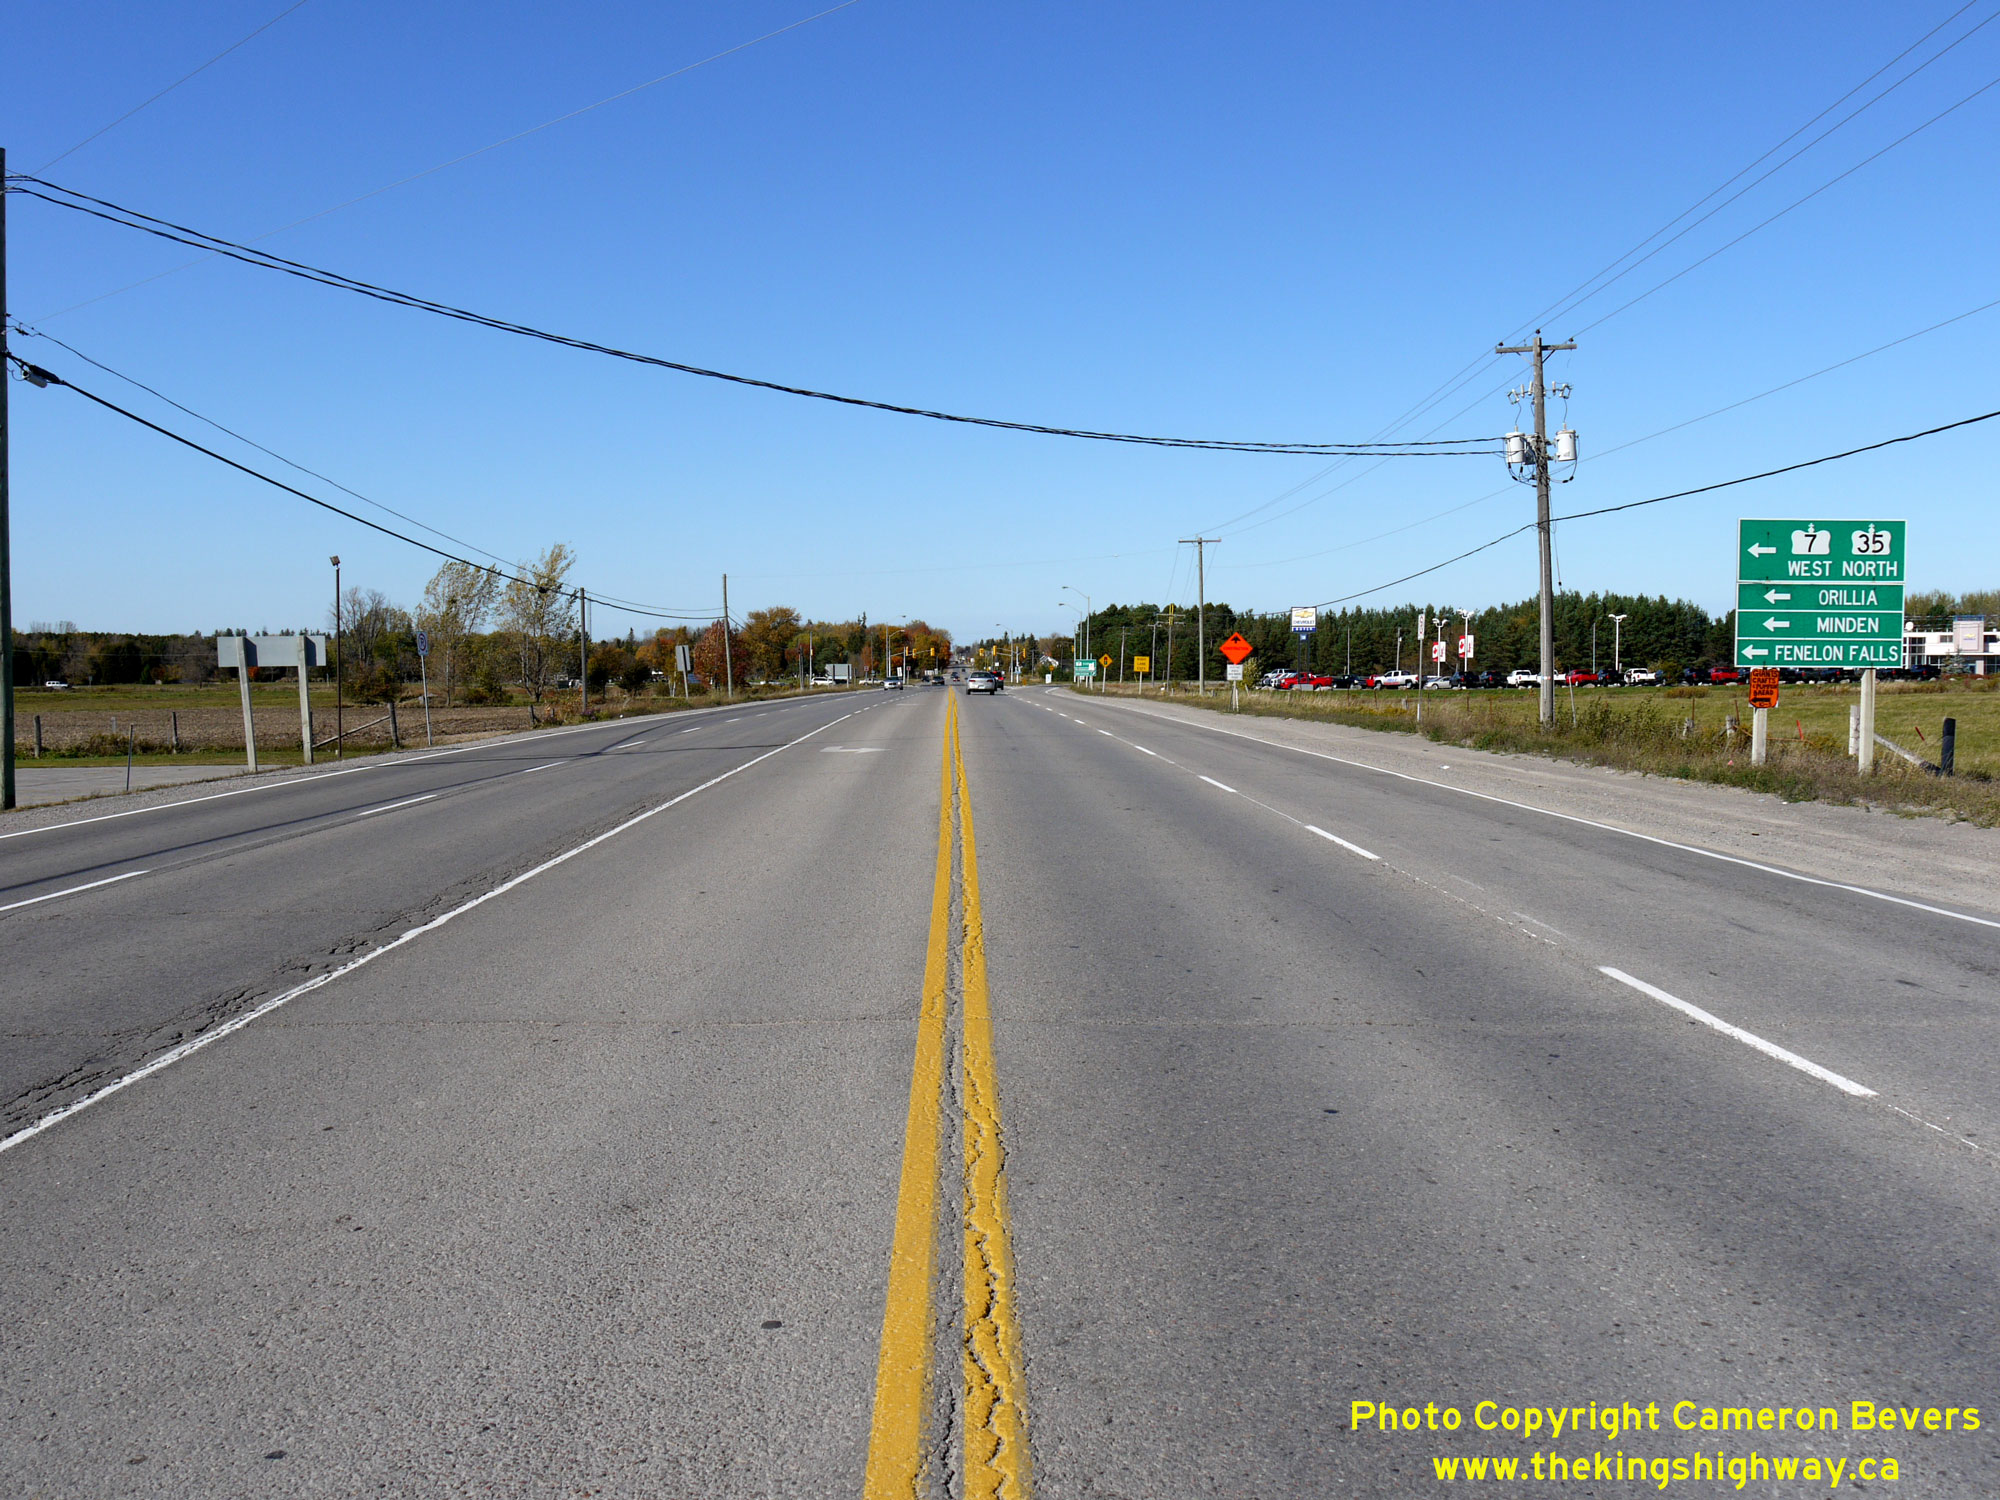
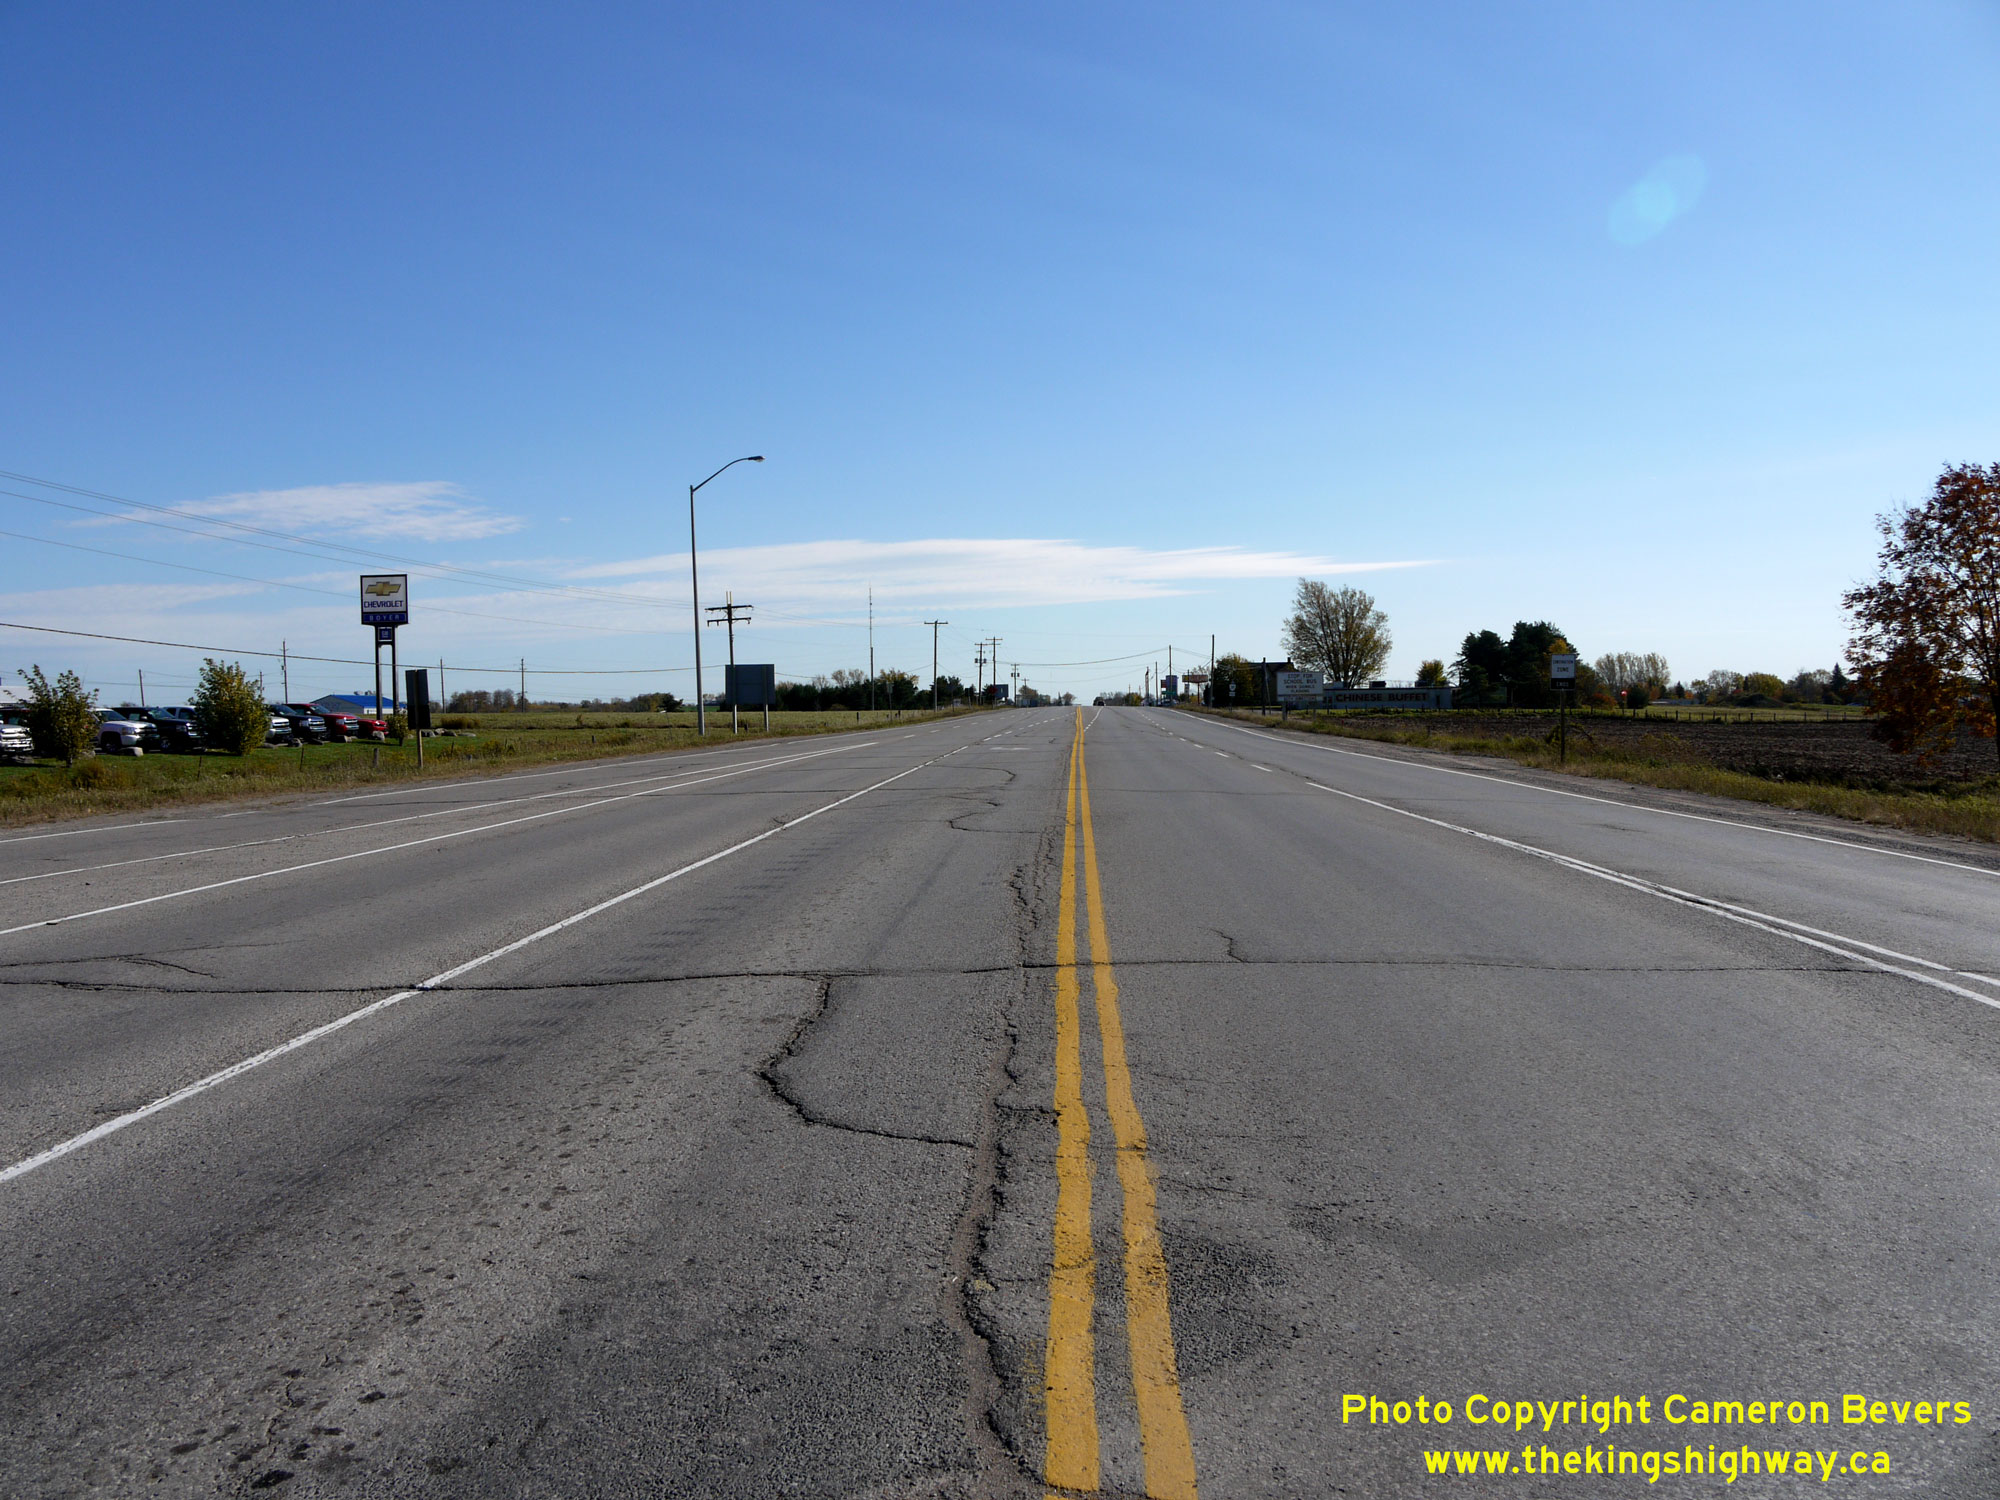
 Left - Facing north along Hwy 35 approaching the Hwy 7 Junction at the Lindsay Bypass. This highway junction is a major decision point in the provincial
highway system, with motorists having the choice of following Hwy 7 East towards Peterborough, or Hwy 7 West & Hwy 35 North towards Sunderland and Minden,
respectively. Much of Central Ontario's long-distance through traffic passes through this intersection. Historically, this was also the southern terminus of Lindsay's
Business Route (Hwy 7B & Hwy 35B). See an Enlarged Photo Here. Left - Facing north along Hwy 35 approaching the Hwy 7 Junction at the Lindsay Bypass. This highway junction is a major decision point in the provincial
highway system, with motorists having the choice of following Hwy 7 East towards Peterborough, or Hwy 7 West & Hwy 35 North towards Sunderland and Minden,
respectively. Much of Central Ontario's long-distance through traffic passes through this intersection. Historically, this was also the southern terminus of Lindsay's
Business Route (Hwy 7B & Hwy 35B). See an Enlarged Photo Here.(Photograph taken on October 10, 2010 - © Cameron Bevers) Right - Green guide signs marking the overlapped route of Hwy 7 West & Hwy 35 North via the Lindsay Bypass, along with destination guide signs. Although
the "control city" of Orillia is signed at this junction, the city is actually not located on either Hwy 7 or Hwy 35. Rather, traffic needs to turn north from Hwy 7
via Hwy 12 at Sunderland Corners in order to reach Orillia. For northbound Hwy 35 motorists, Orillia is actually a logical control city to sign to, as this is the
most direct route to Orillia from many cities and towns located along Lake Ontario's shoreline. See an
Enlarged Photo Here.(Photograph taken on October 10, 2010 - © Cameron Bevers) 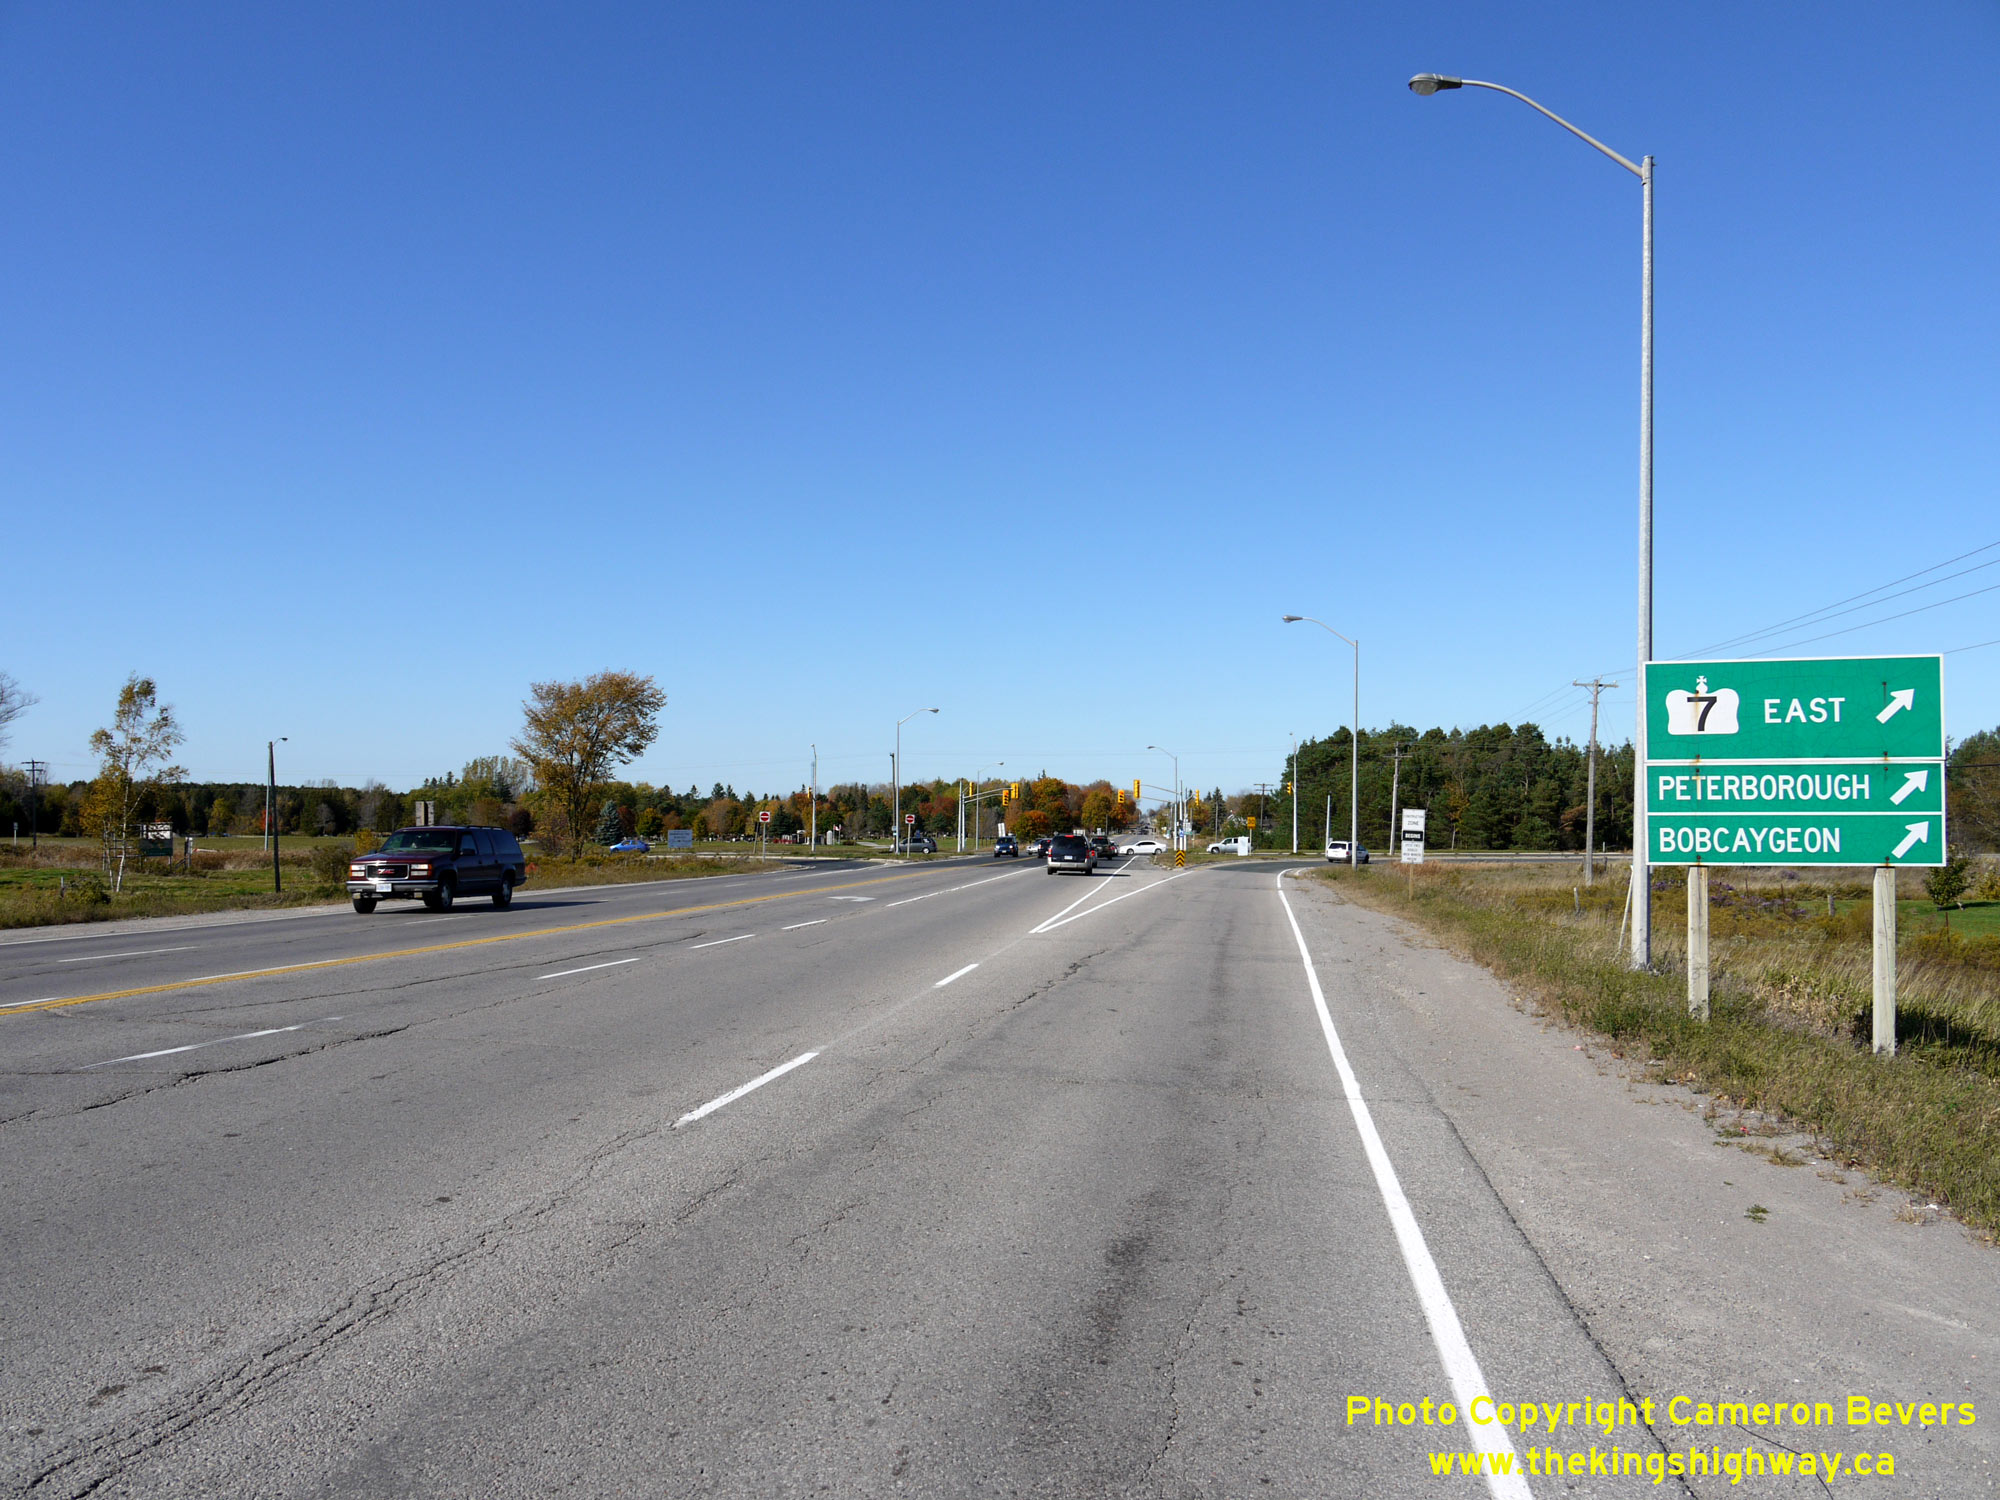
 Left - Green guide signs marking Hwy 7 East on northbound Hwy 35 near Lindsay. Bobcaygeon is signed as a control city via Hwy 7 East even though traffic needs
to turn north from Hwy 7 via nearby Hwy 36 in order to reach Bobcaygeon. Logically, Peterborough is signed as the next eastbound control city via Hwy 7 East. See an
Enlarged Photo Here. Left - Green guide signs marking Hwy 7 East on northbound Hwy 35 near Lindsay. Bobcaygeon is signed as a control city via Hwy 7 East even though traffic needs
to turn north from Hwy 7 via nearby Hwy 36 in order to reach Bobcaygeon. Logically, Peterborough is signed as the next eastbound control city via Hwy 7 East. See an
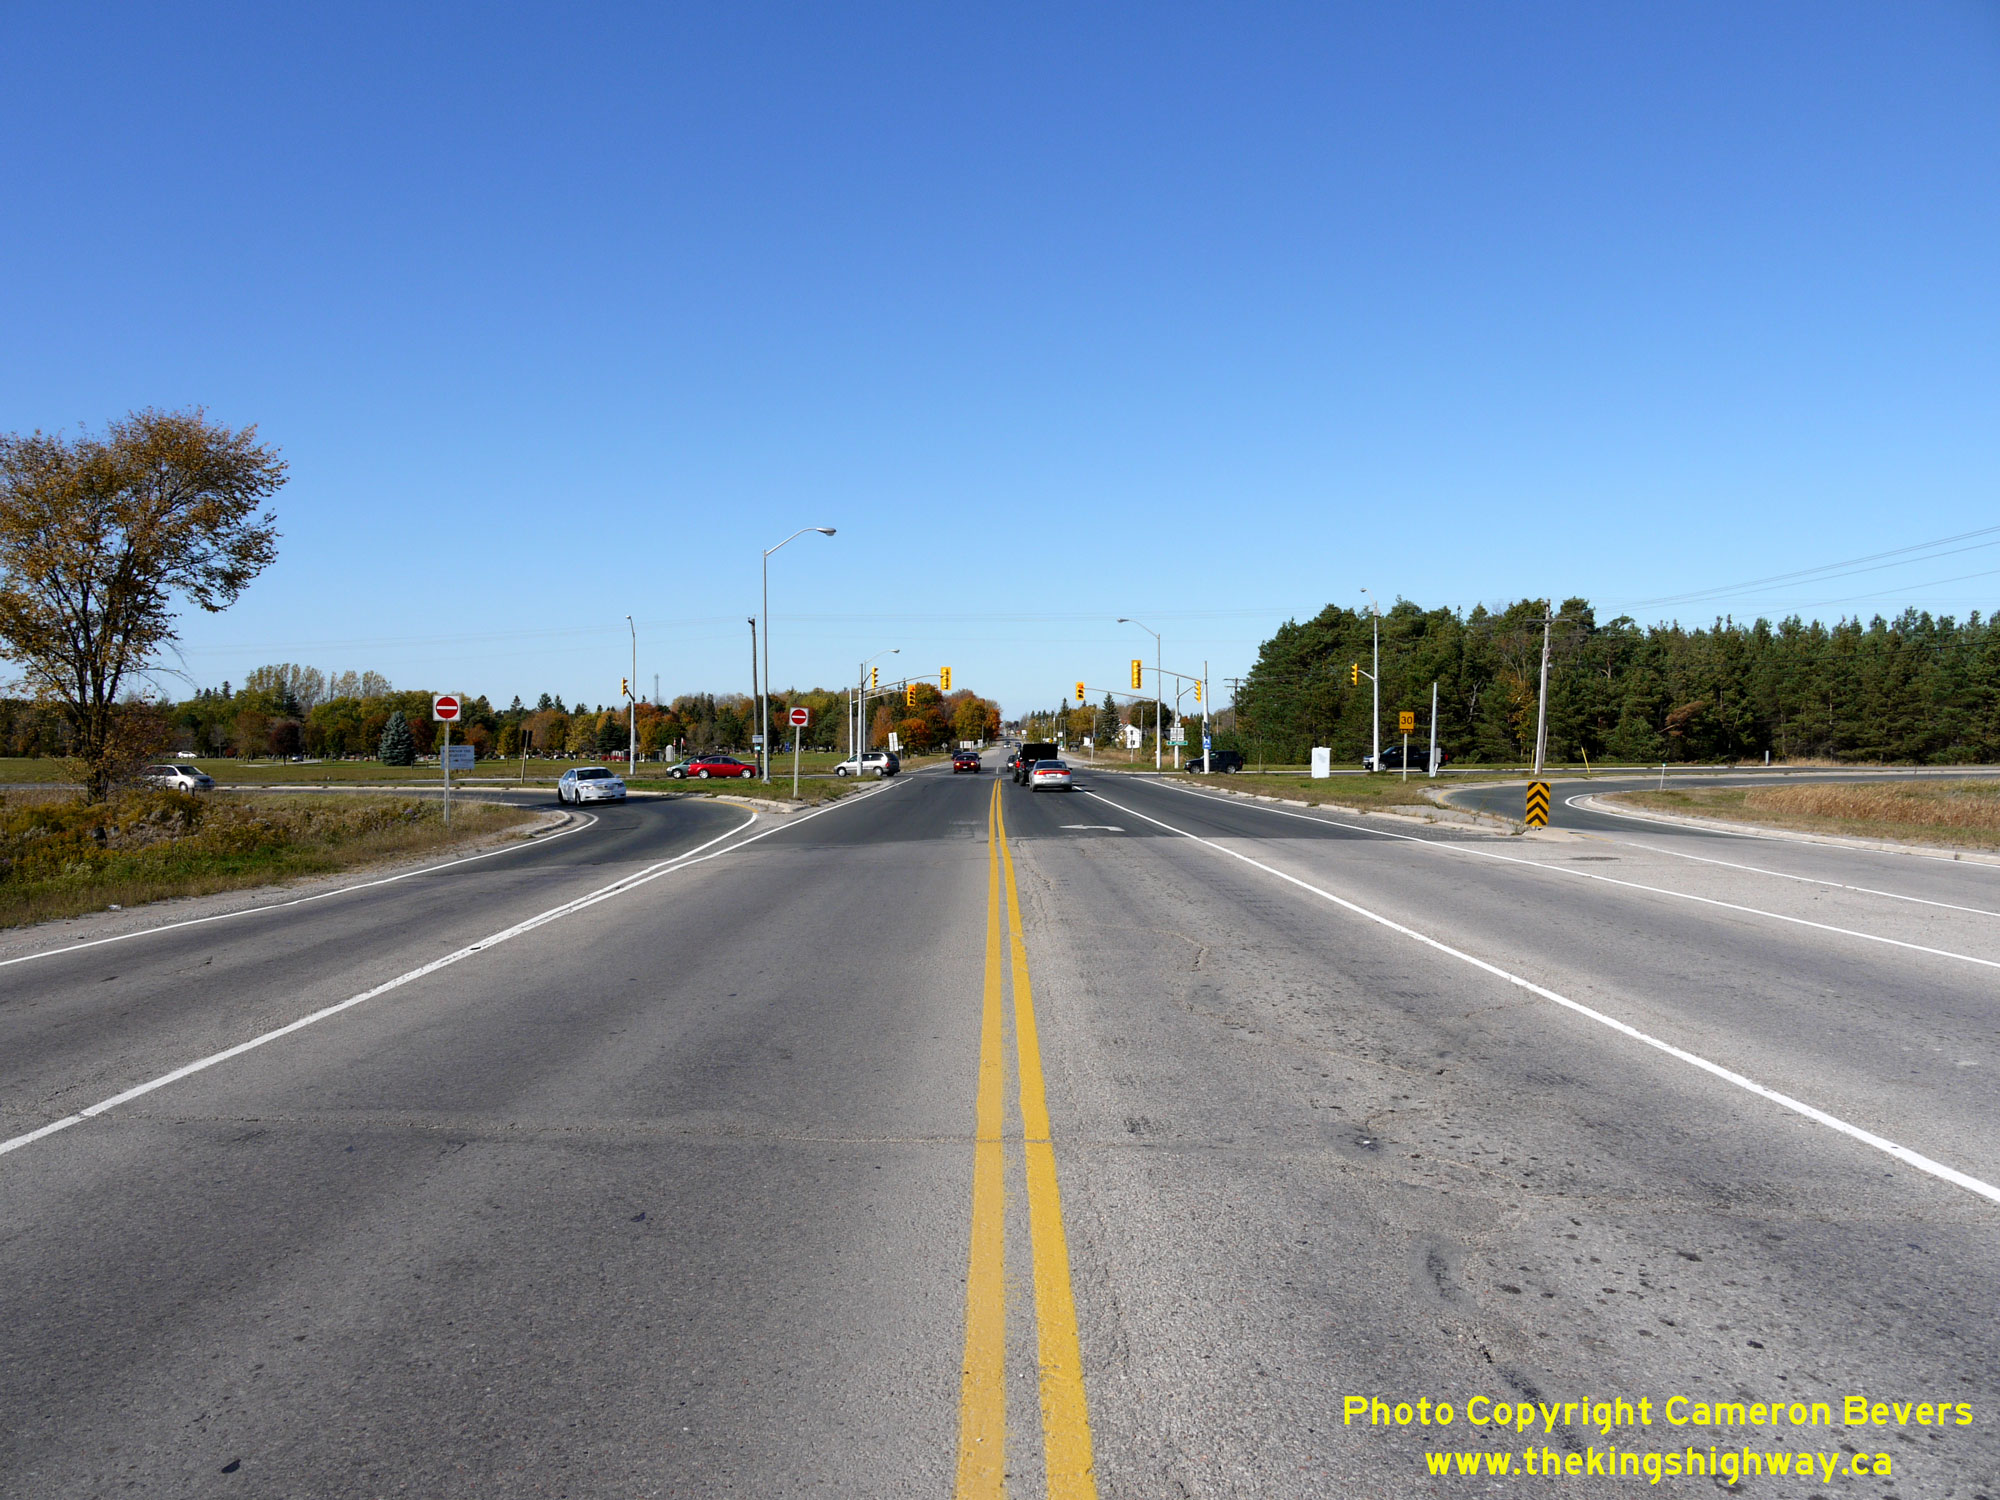
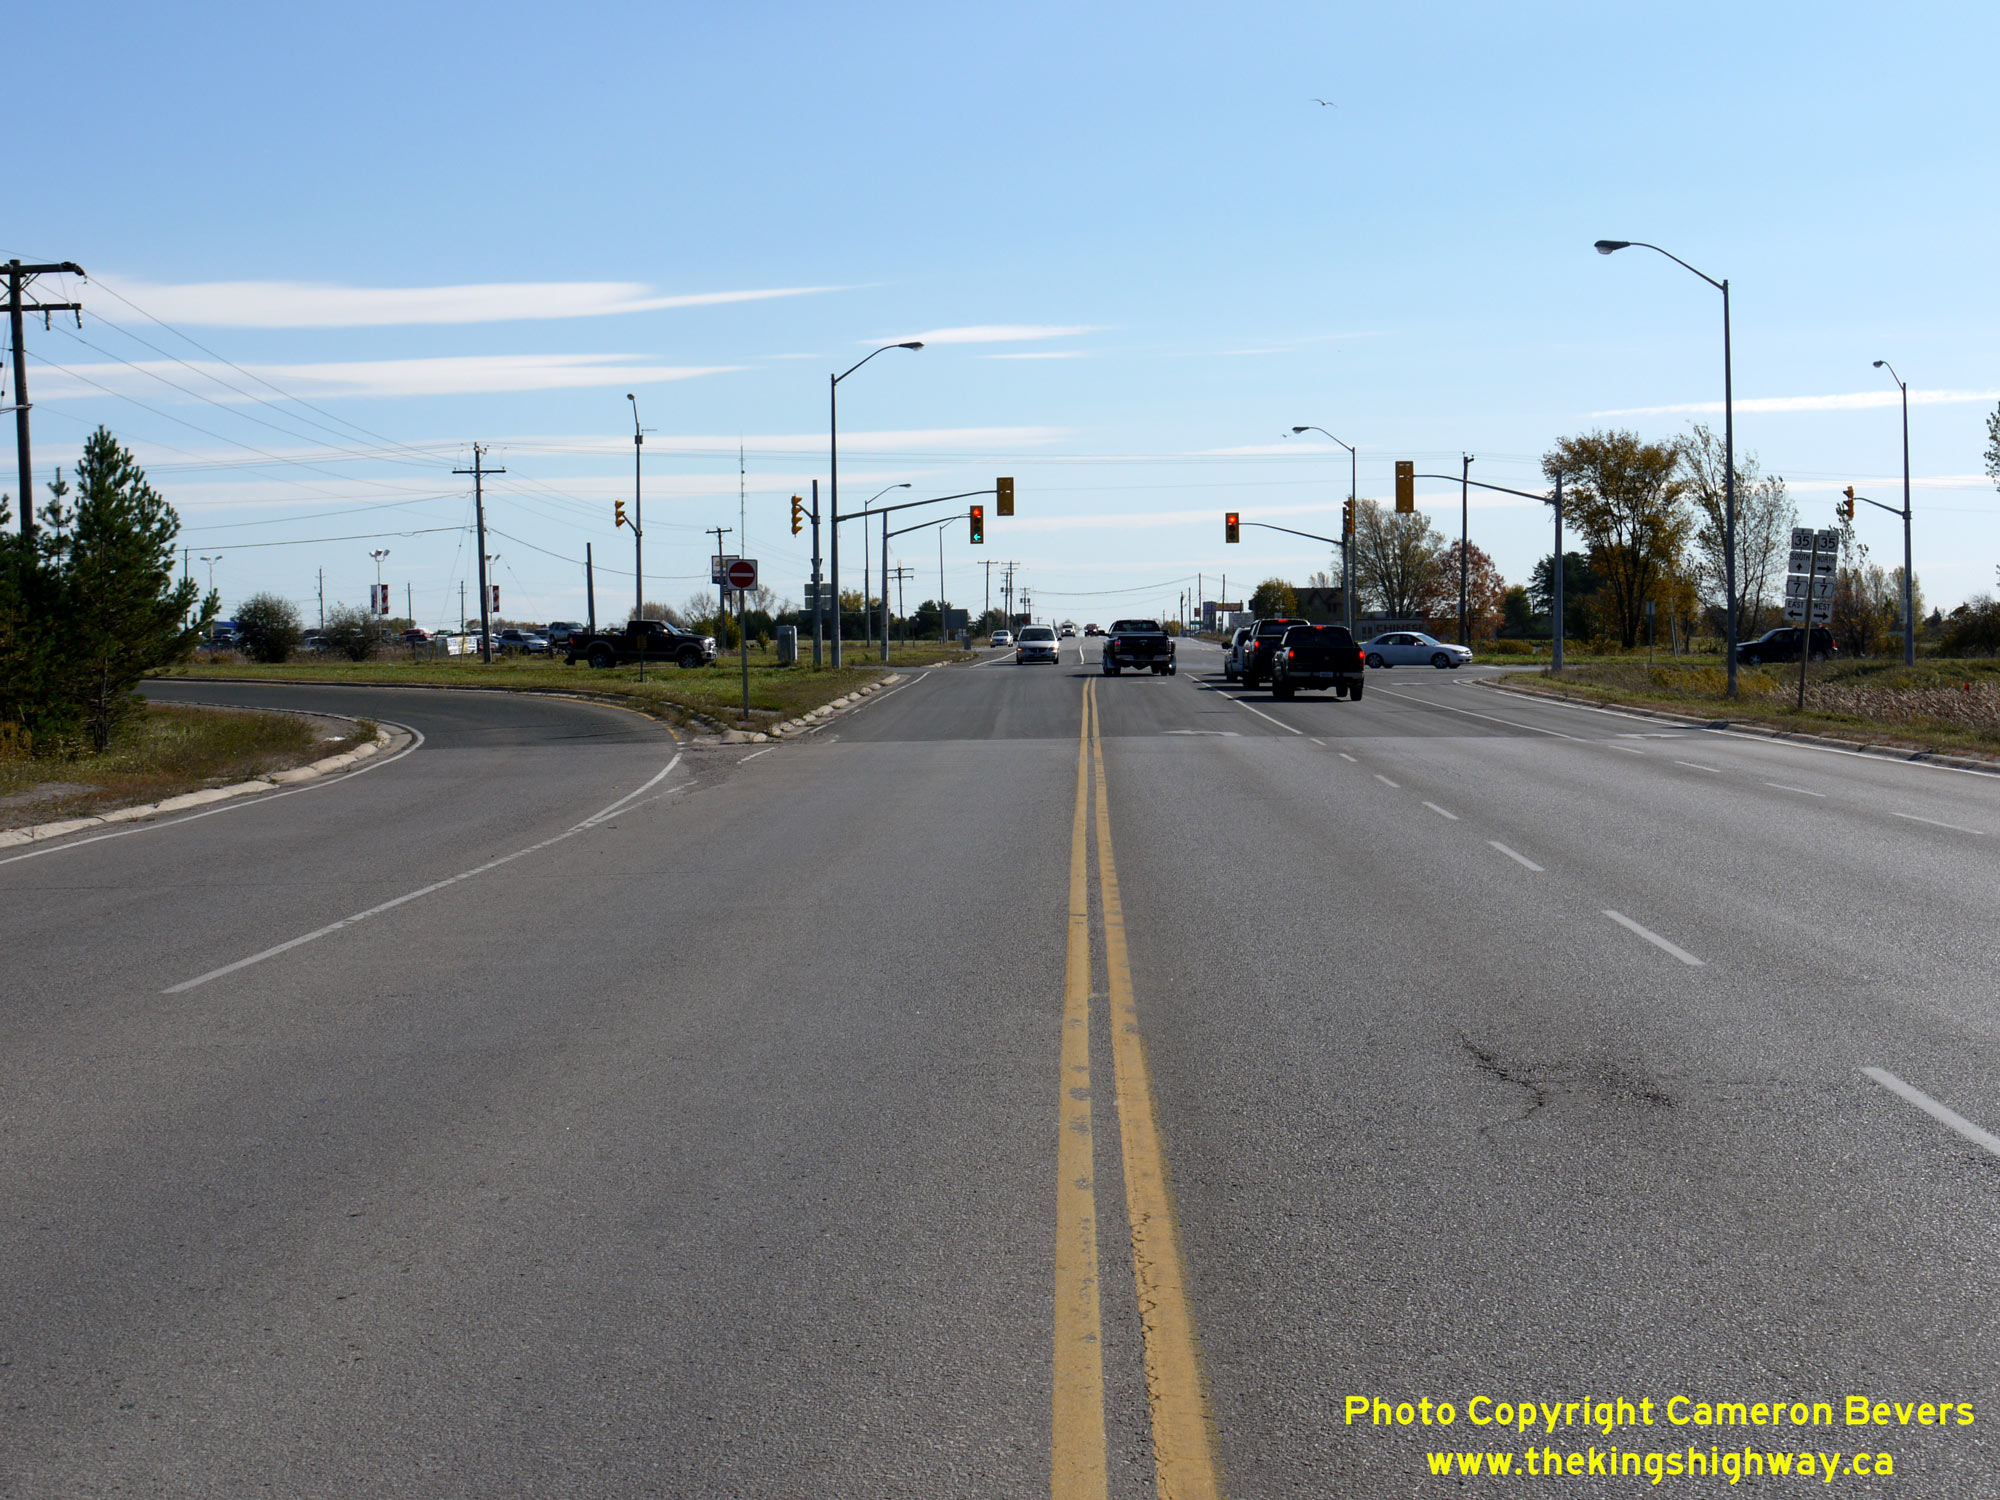
Enlarged Photo Here.(Photograph taken on October 10, 2010 - © Cameron Bevers) Right - Approaching the Hwy 7 Junction on Hwy 35, facing north towards Lindsay. Three of the quadrants at this highway junction are channelized - the ramp from
northbound Hwy 35 to eastbound Hwy 7 and from the eastbound Lindsay Bypass (Hwy 7 & Hwy 35) to southbound Hwy 35. Additionally, westbound traffic on Hwy 7 turns
into Lindsay via a channelized right-turn ramp. Straight ahead, Lindsay Street (Former Hwy 7B & Hwy 35B) continues north into Downtown Lindsay. See an
Enlarged Photo Here.(Photograph taken on October 10, 2010 - © Cameron Bevers) 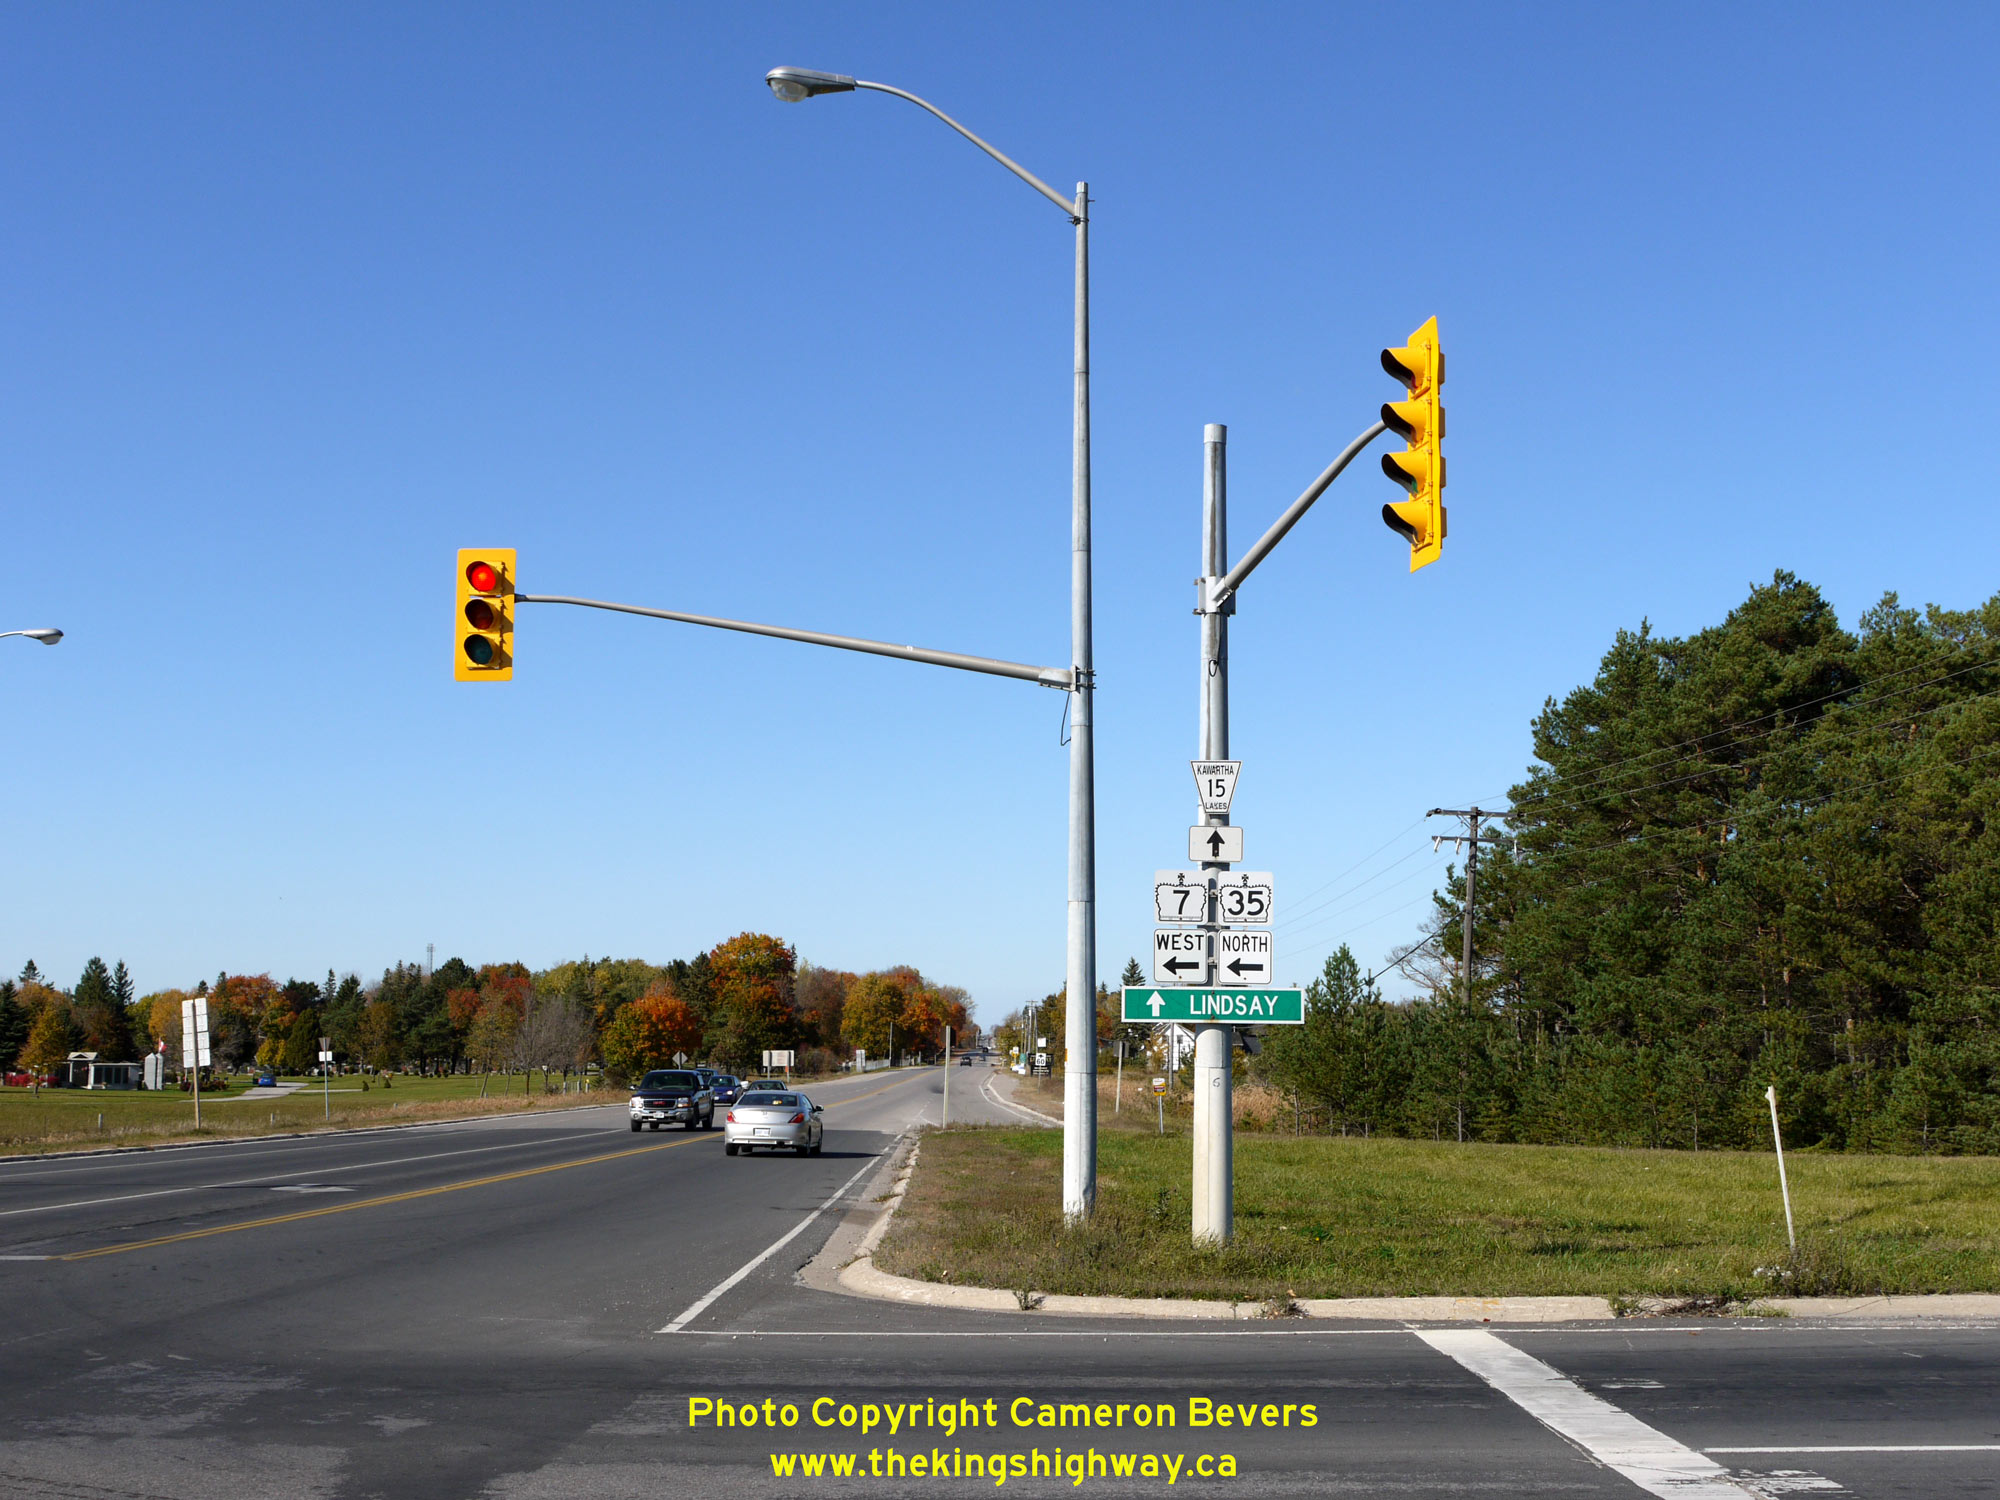
 Left - Junction sign assembly at the Hwy 7 & Hwy 35 Junction, facing north. Following the decommissioning and transfer of Hwy 7B & Hwy 35B in the 1990s,
the signed route via Lindsay Street was discontinued at this junction. The former highway was renamed Victoria County Road 15 (now known as Kawartha Lakes Road 15).
See an Enlarged Photo Here. Left - Junction sign assembly at the Hwy 7 & Hwy 35 Junction, facing north. Following the decommissioning and transfer of Hwy 7B & Hwy 35B in the 1990s,
the signed route via Lindsay Street was discontinued at this junction. The former highway was renamed Victoria County Road 15 (now known as Kawartha Lakes Road 15).
See an Enlarged Photo Here.(Photograph taken on October 10, 2010 - © Cameron Bevers) Right - Facing south along Hwy 35 towards Newcastle from the Hwy 7 Junction near Lindsay. While Hwy 35 between Newcastle and Lindsay is a modern arterial
highway today, it wasn't always a good route. Early motorists using Hwy 35 south of Lindsay would recall a dusty, pot-holed gravel road, with numerous sharp turns and
a poor alignment. In fact, many sections of the original highway were in such poor condition that they were abandoned altogether when Hwy 35 was rebuilt in the late
1950s. See an Enlarged Photo Here.(Photograph taken on October 10, 2010 - © Cameron Bevers) 
 Left - Destination guide signs along westbound Hwy 7 approaching the Hwy 35 Junction. Through traffic on Hwy 7 and traffic bound for Hwy 35 North are signed
straight ahead, while traffic bound for Newcastle is signed via Hwy 35 South at left. Lindsay is signed to the north via Lindsay Street (Hwy 7B & Hwy 35B). See an
Enlarged Photo Here. Left - Destination guide signs along westbound Hwy 7 approaching the Hwy 35 Junction. Through traffic on Hwy 7 and traffic bound for Hwy 35 North are signed
straight ahead, while traffic bound for Newcastle is signed via Hwy 35 South at left. Lindsay is signed to the north via Lindsay Street (Hwy 7B & Hwy 35B). See an
Enlarged Photo Here.(Photograph taken on October 10, 2010 - © Cameron Bevers) Right - Facing west along Hwy 7 towards the Hwy 35 South Junction near Lindsay. Historically, Hwy 7 curved to the right at this point and joined Hwy 35. Both
highways continued north into Lindsay via an overlapped, concurrent route. As part of the Trans-Canada Highway's construction in the 1950s, a new bypass was
constructed around the southern side of Lindsay. Rather than curve to the right, through traffic on the Trans-Canada Highway could continue straight ahead via the
Lindsay Bypass to avoid the congested downtown area. The Lindsay Bypass was unofficially made available to public travel as a gravel highway in the early Summer of
1958. Final paving of the bypass was completed in September, with the new highway officially opened to traffic on October 10, 1958. Following the completion of the
Lindsay Bypass, the original highway route through Lindsay was renumbered as Hwy 7B & Hwy 35B. See an
Enlarged Photo Here.(Photograph taken on October 10, 2010 - © Cameron Bevers) 
 Left - Destination guide signs on the Lindsay Bypass facing east, approaching the Hwy 35 South Junction. At this intersection, Hwy 7 & Hwy 35 part ways
again, with Hwy 35 turning right and heading south towards Newcastle. Traffic continues straight ahead towards Peterborough via Hwy 7, while traffic bound for
Downtown Lindsay can turn left and follow Lindsay Street (Hwy 7B & Hwy 35B). See an
Enlarged Photo Here. Left - Destination guide signs on the Lindsay Bypass facing east, approaching the Hwy 35 South Junction. At this intersection, Hwy 7 & Hwy 35 part ways
again, with Hwy 35 turning right and heading south towards Newcastle. Traffic continues straight ahead towards Peterborough via Hwy 7, while traffic bound for
Downtown Lindsay can turn left and follow Lindsay Street (Hwy 7B & Hwy 35B). See an
Enlarged Photo Here.(Photograph taken on October 10, 2010 - © Cameron Bevers) Right - Facing west along the Lindsay Bypass (Hwy 7 & Hwy 35) from the Hwy 35 South Junction near Lindsay. Built as part of the Trans-Canada Highway's
Central Ontario Route, the 5-mile Lindsay Bypass formed a strategic bypass around the southern side of town. The first construction contract for the Lindsay Bypass
was awarded in November 1956, with construction taking just under two years to complete. Grading for the new bypass was completed under Contract #1956-141, with final
hot-mix asphalt paving completed along the bypass under Contract #1958-122. See an
Enlarged Photo Here.(Photograph taken on October 10, 2010 - © Cameron Bevers) 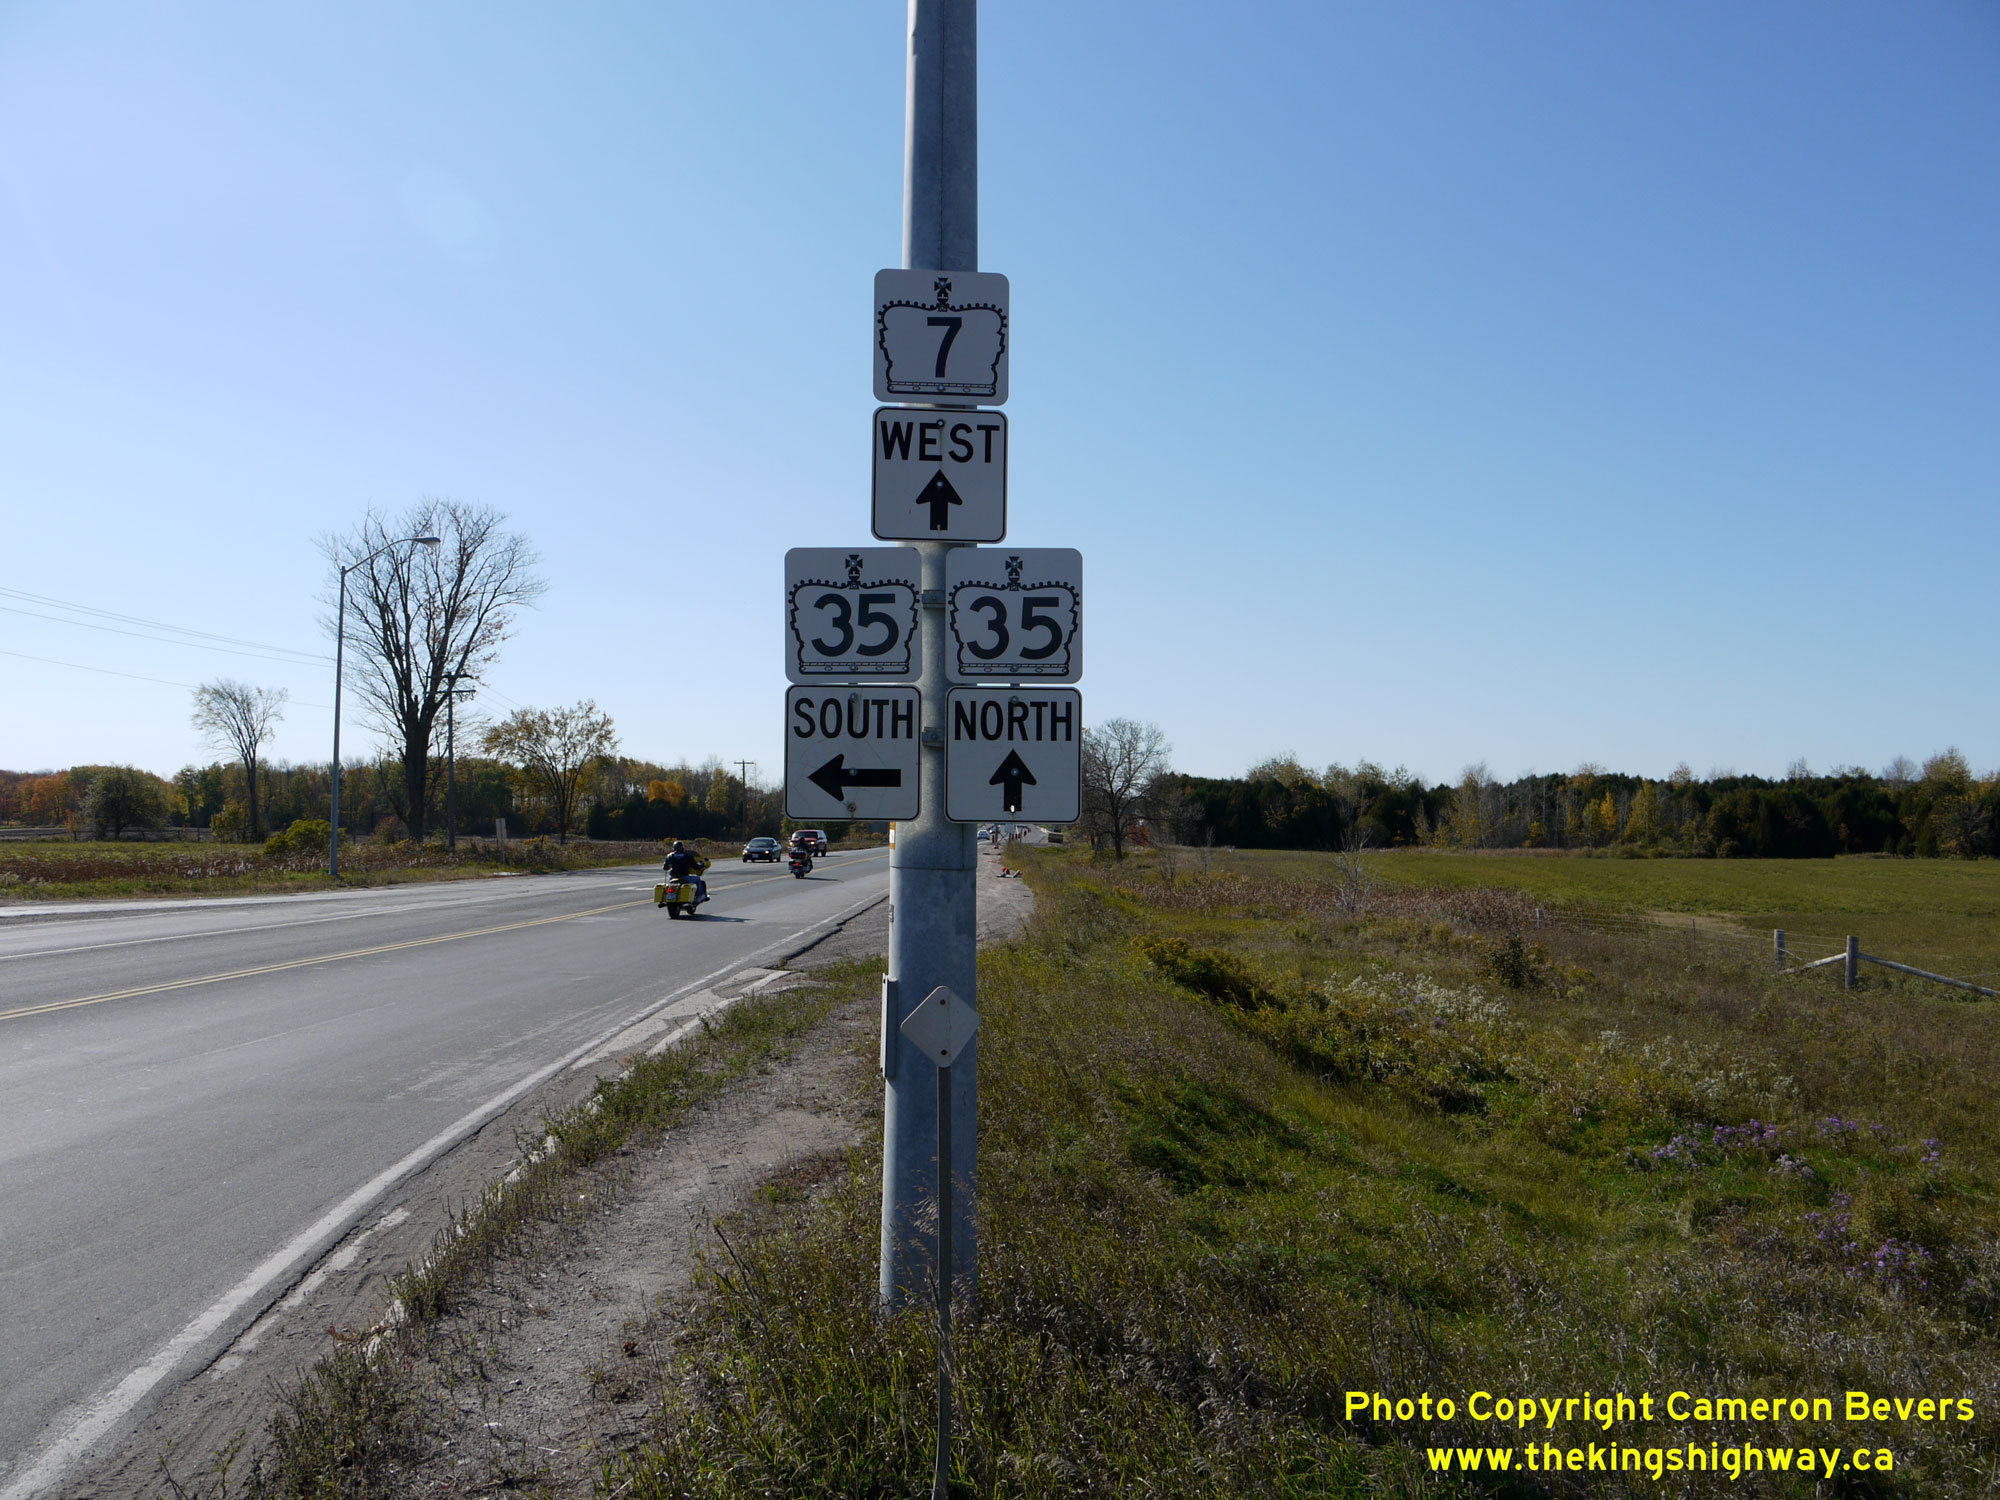
 Left - Junction sign assembly at the eastern end of the Lindsay Bypass at the Hwy 7 & Hwy 35 Junction. Both Hwy 7 & Hwy 35 share an overlapped
concurrent route for a distance of about 5 km along the Lindsay Bypass. Although unsigned facing west at this highway junction, the Lindsay Bypass is part of the
Central Ontario Route of the Trans-Canada Highway. See an Enlarged Photo Here. Left - Junction sign assembly at the eastern end of the Lindsay Bypass at the Hwy 7 & Hwy 35 Junction. Both Hwy 7 & Hwy 35 share an overlapped
concurrent route for a distance of about 5 km along the Lindsay Bypass. Although unsigned facing west at this highway junction, the Lindsay Bypass is part of the
Central Ontario Route of the Trans-Canada Highway. See an Enlarged Photo Here.(Photograph taken on October 10, 2010 - © Cameron Bevers) Right - Approaching the eastern terminus of the Lindsay Bypass at the Hwy 35 South Junction. At this junction, the Lindsay Bypass tied back into the original
route of Hwy 7 coming out of Lindsay. From here, Hwy 7 continues east towards Peterborough more or less along its original 1920s alignment. See an
Enlarged Photo Here.(Photograph taken on October 10, 2010 - © Cameron Bevers) 
 Left - Turn-off junction sign assembly on southbound Lindsay Street (Hwy 7B & Hwy 35B) at the Lindsay Bypass. See an
Enlarged Photo Here. Left - Turn-off junction sign assembly on southbound Lindsay Street (Hwy 7B & Hwy 35B) at the Lindsay Bypass. See an
Enlarged Photo Here.(Photograph taken on October 10, 2010 - © Cameron Bevers) Right - Facing south along Lindsay Street (Hwy 7B & Hwy 35B) towards the Lindsay Bypass. At this intersection, traffic can either proceed south towards
Newcastle via Hwy 35, turn left towards Peterborough via Hwy 7 East or turn right towards Orillia via Hwy 7 West and Hwy 35 North. This intersection was also the
historical southern terminus of the Lindsay Business Route (Hwy 7B & Hwy 35B). See an
Enlarged Photo Here.(Photograph taken on October 10, 2010 - © Cameron Bevers) 
 Left - An older destination guide sign on southbound Lindsay Street (Hwy 7B & Hwy 35B) approaching the Lindsay Bypass. See an
Enlarged Photo Here. Left - An older destination guide sign on southbound Lindsay Street (Hwy 7B & Hwy 35B) approaching the Lindsay Bypass. See an
Enlarged Photo Here.(Photograph taken on October 10, 2010 - © Cameron Bevers) Right - Facing south along Lindsay Street (Hwy 7B & Hwy 35B) approaching the Hwy 7 & Hwy 35 Junction near Lindsay. At one time, Hwy 7 & Hwy 35 met
at a Y-junction at this point, where Hwy 7 curved off to the left towards Peterborough, while Hwy 35 continued straight ahead towards Newcastle. It is believed that
the curved diversion for Hwy 7 was built in 1934, soon after a railway line through this area was taken out of service. Previously, Hwy 7 crossed this railway line
within the intersection. This 1930s highway curve was closed to traffic when the Lindsay Bypass was constructed in the late 1950s. Today, there is almost no evidence
that there ever was a large highway curve located here. See an Enlarged Photo Here.(Photograph taken on October 10, 2010 - © Cameron Bevers) 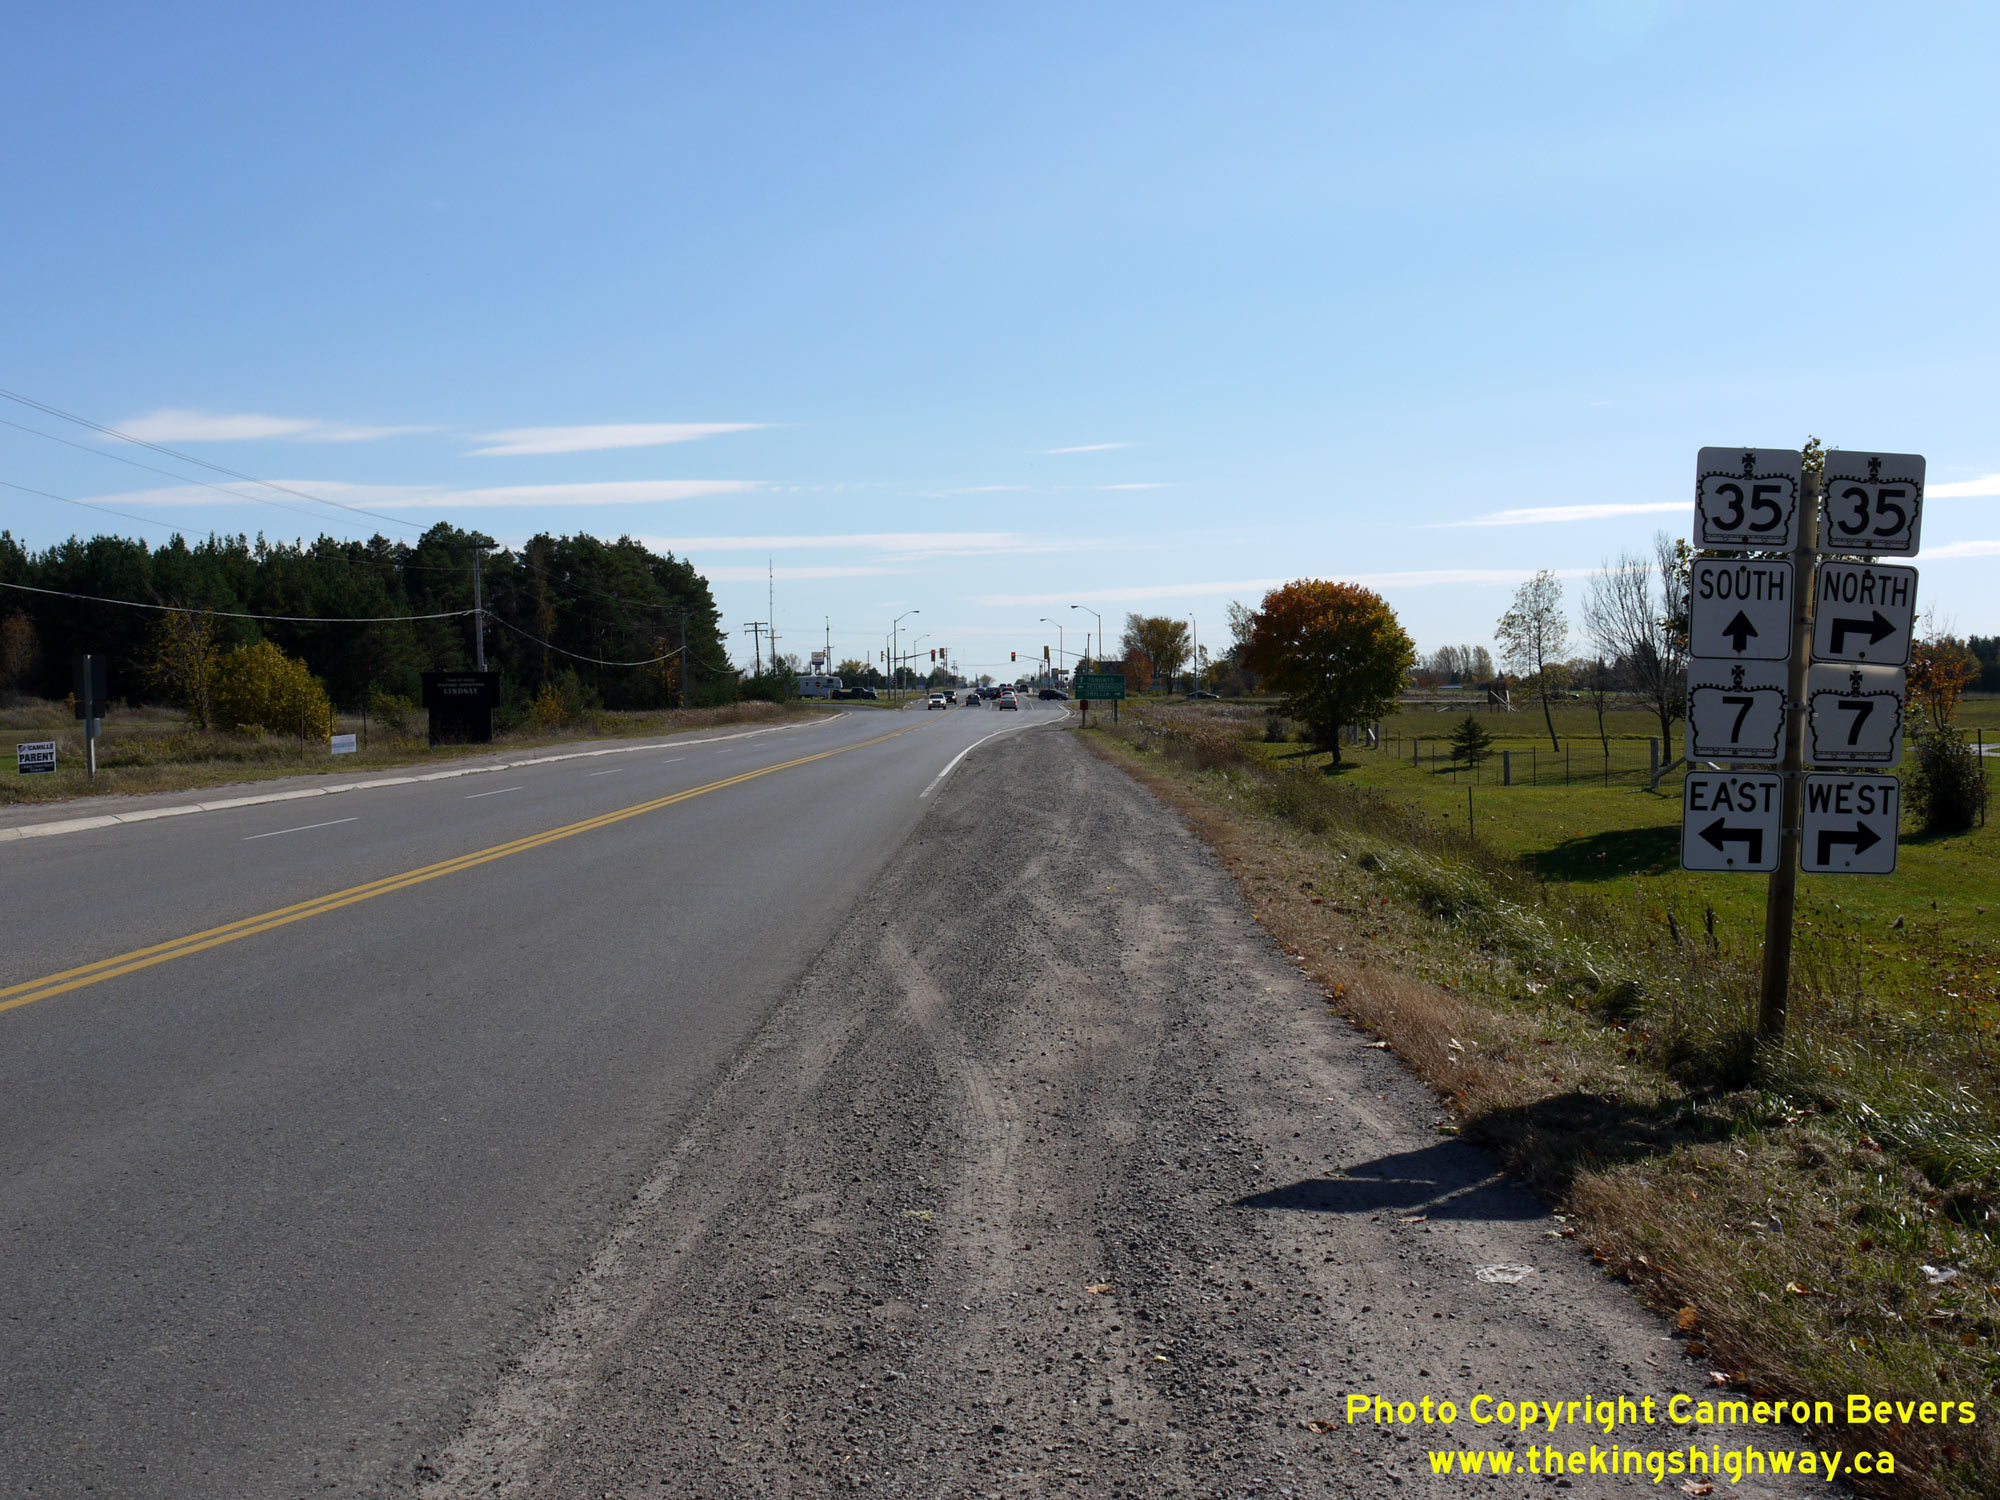
 Left - Advance junction sign assembly on southbound Lindsay Street (Hwy 7B & Hwy 35B) approaching the Lindsay Bypass. See an
Enlarged Photo Here. Left - Advance junction sign assembly on southbound Lindsay Street (Hwy 7B & Hwy 35B) approaching the Lindsay Bypass. See an
Enlarged Photo Here.(Photograph taken on October 10, 2010 - © Cameron Bevers) Right - Facing north along Lindsay Street (Hwy 7B & Hwy 35B) from the Lindsay Bypass (Hwy 7 & Hwy 35). See an
Enlarged Photo Here.(Photograph taken on October 10, 2010 - © Cameron Bevers) 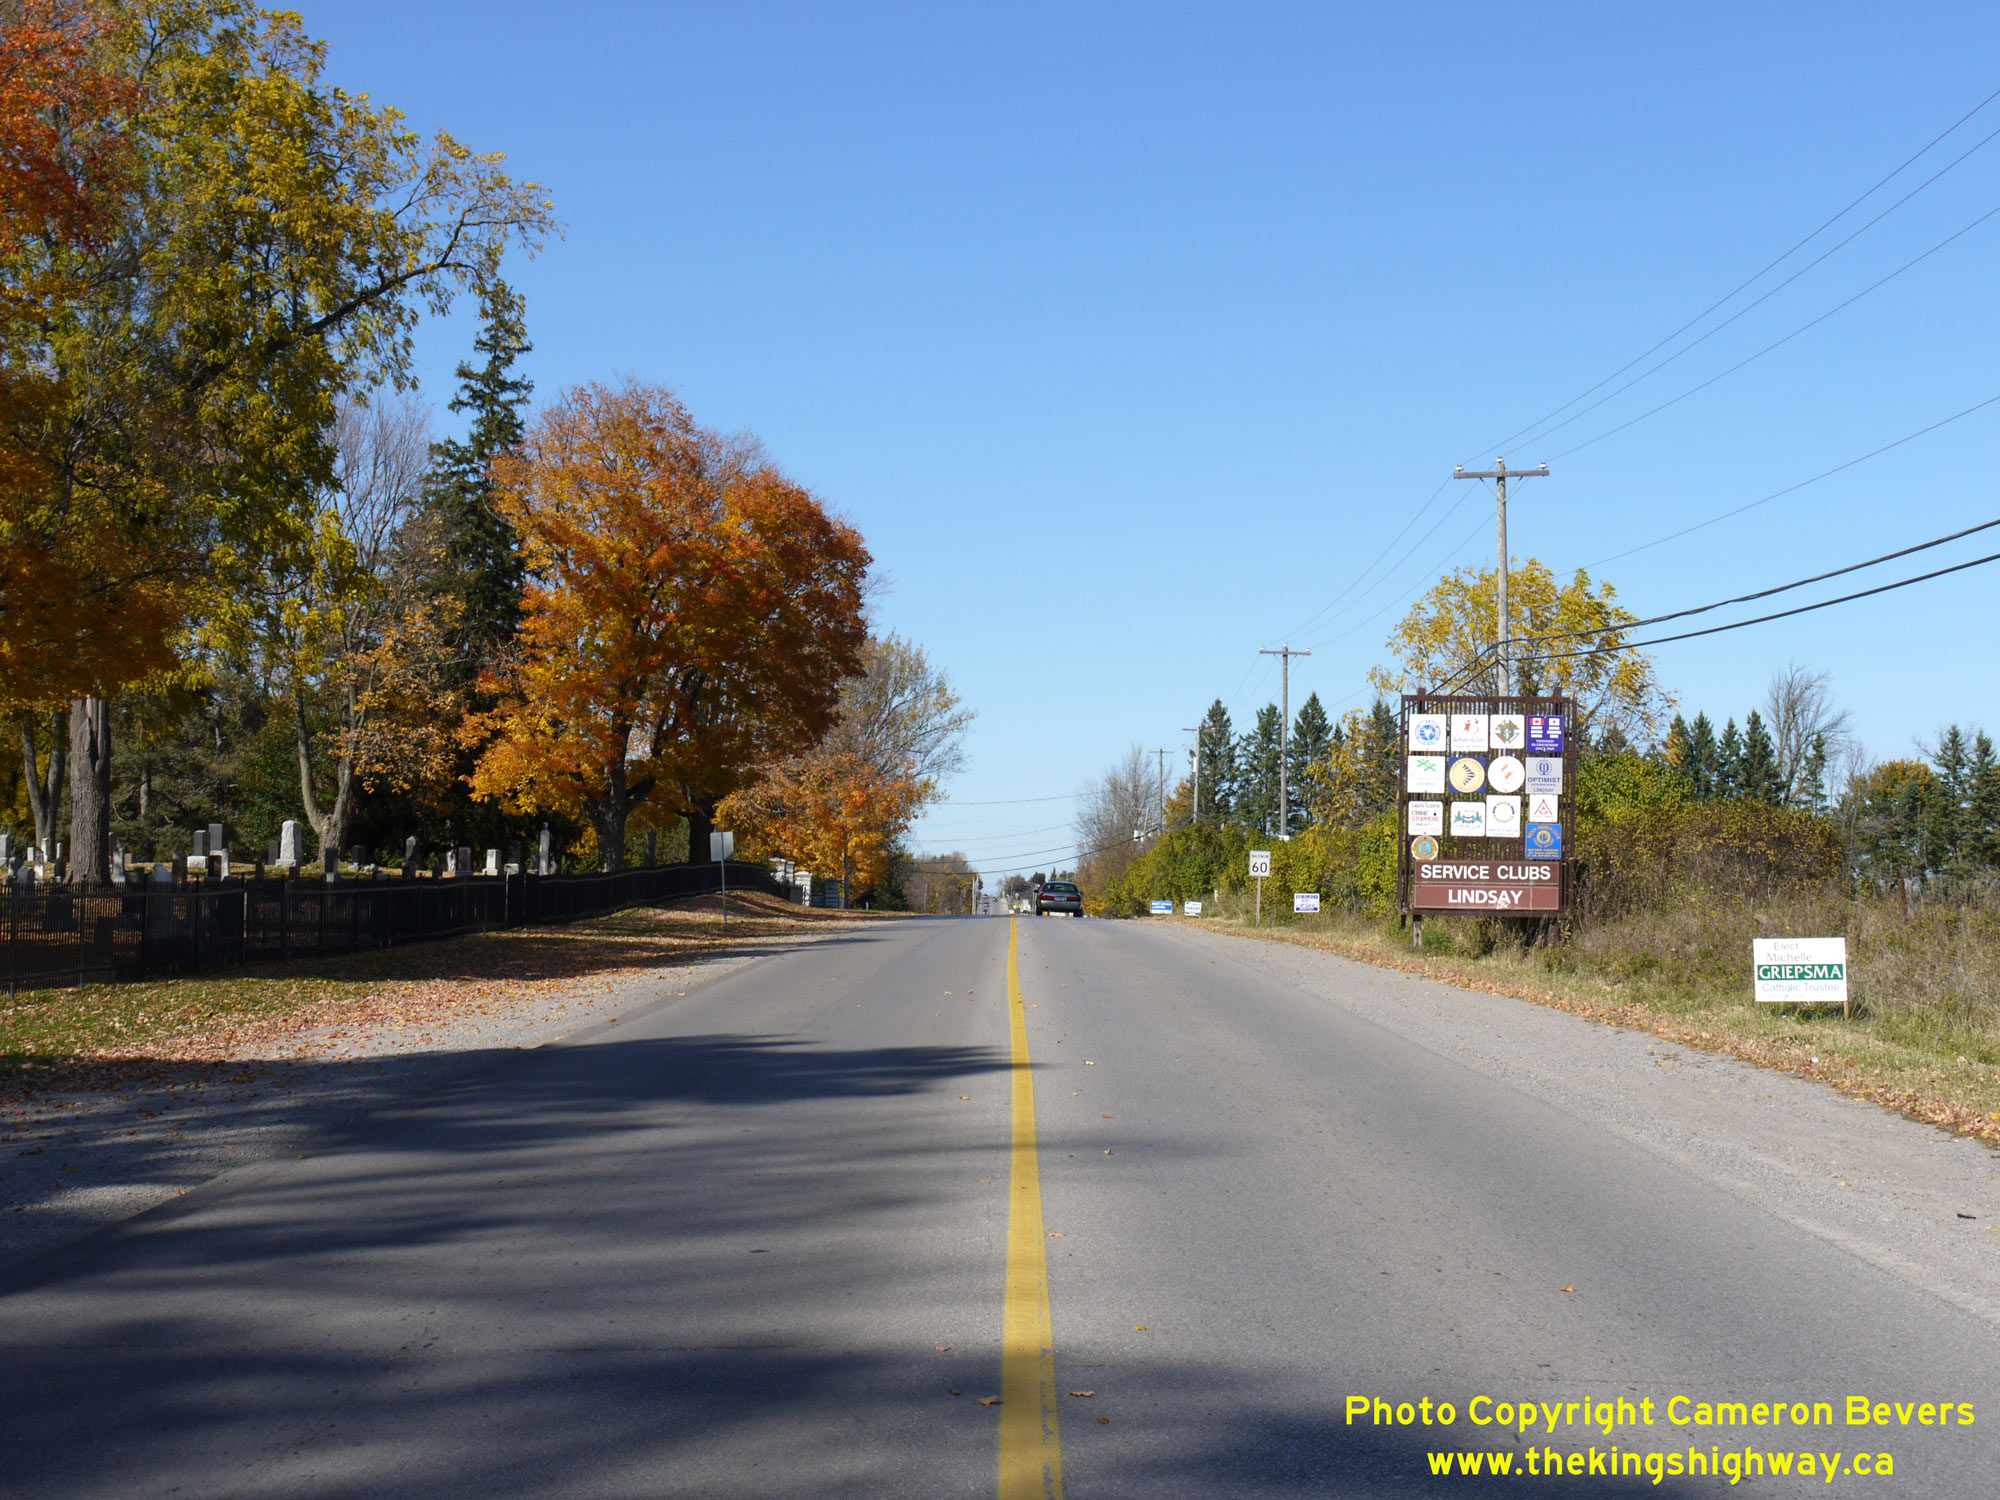
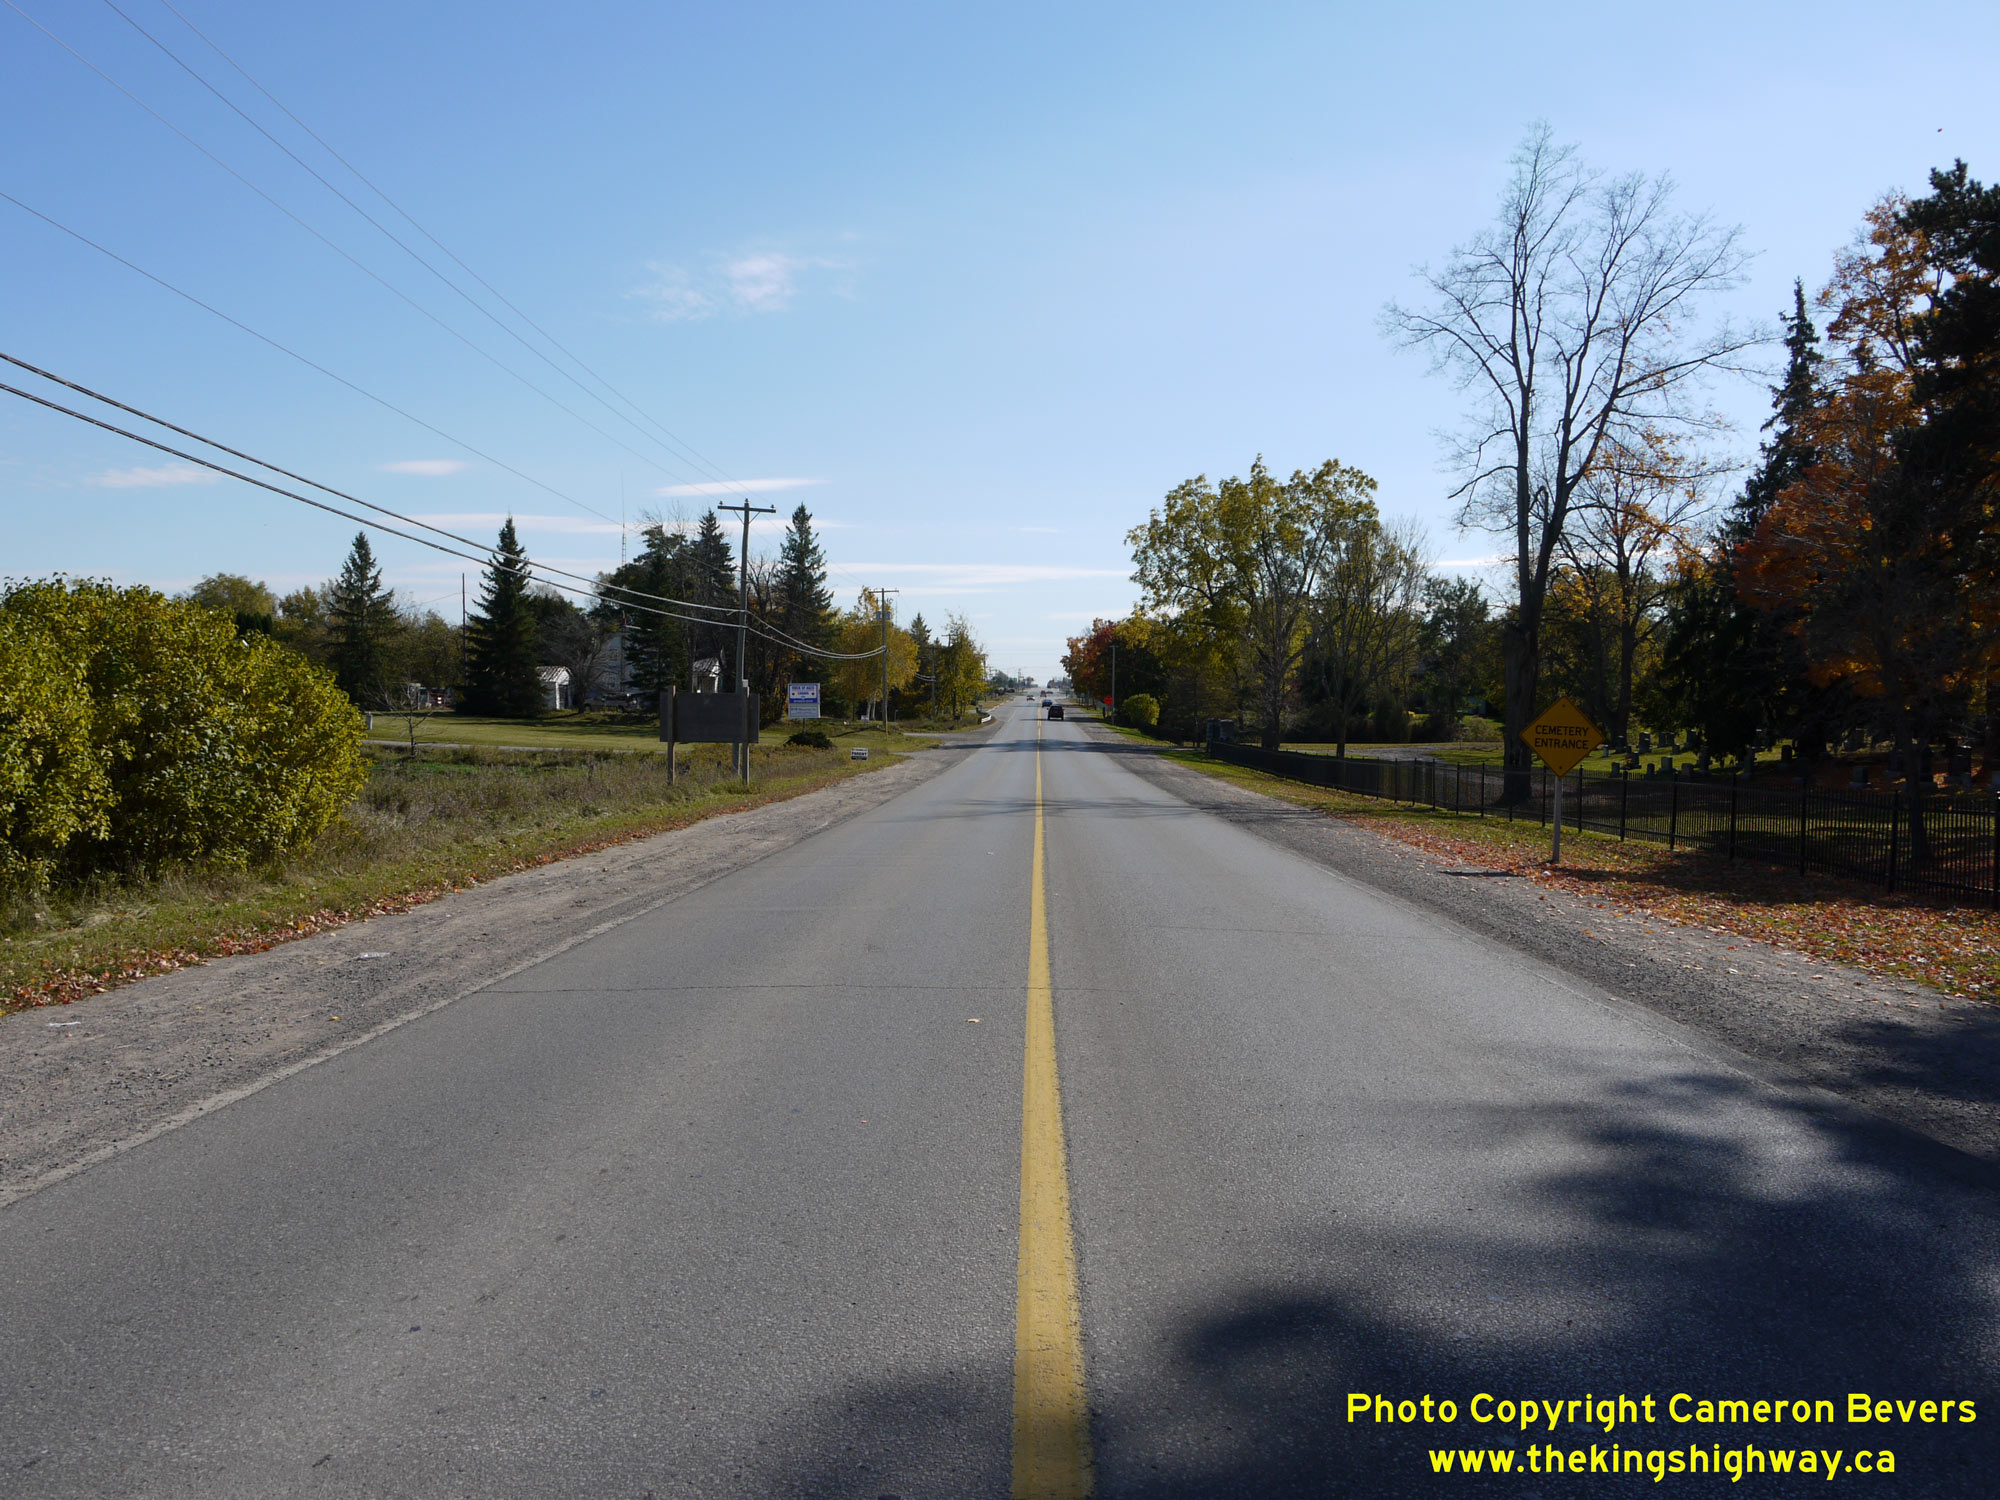 Left - Facing north along Lindsay Street (Hwy 7B & Hwy 35B) approaching the start of the Municipal Connecting Link. Despite being bypassed in 1958, the
province retained ownership of this short section of Hwy 7B & Hwy 35B south of Lindsay's town limits right up until 1997, when jurisdiction over the highway was
transferred to the County of Victoria. The Municipal Connecting Link began about 1.3 km north of the Lindsay Bypass, with the balance of the highway through the urban
area maintained by the Town of Lindsay. See an Enlarged Photo Here. Left - Facing north along Lindsay Street (Hwy 7B & Hwy 35B) approaching the start of the Municipal Connecting Link. Despite being bypassed in 1958, the
province retained ownership of this short section of Hwy 7B & Hwy 35B south of Lindsay's town limits right up until 1997, when jurisdiction over the highway was
transferred to the County of Victoria. The Municipal Connecting Link began about 1.3 km north of the Lindsay Bypass, with the balance of the highway through the urban
area maintained by the Town of Lindsay. See an Enlarged Photo Here.(Photograph taken on October 10, 2010 - © Cameron Bevers) Right - View of Lindsay Street (Hwy 7B & Hwy 35B) facing south. South of the Scugog River Bridge, the highway leaves town and intersects with the Lindsay
Bypass (Hwy 7 & Hwy 35) about 1.5 km ahead. Note the yellow warning sign for the "Cemetery Entrance" at right. This is one of the few warning signs remaining in
Ontario which still uses text to convey the sign's message. Over the decades, symbols and graphics have replaced most text on warning signs. However, the "Cemetery
Entrance" sign is a notable exception, as traffic engineers have long struggled with ways to accurately convey the intended message with a graphic that can be
universally understood by motorists. See an Enlarged Photo Here.(Photograph taken on October 10, 2010 - © Cameron Bevers) 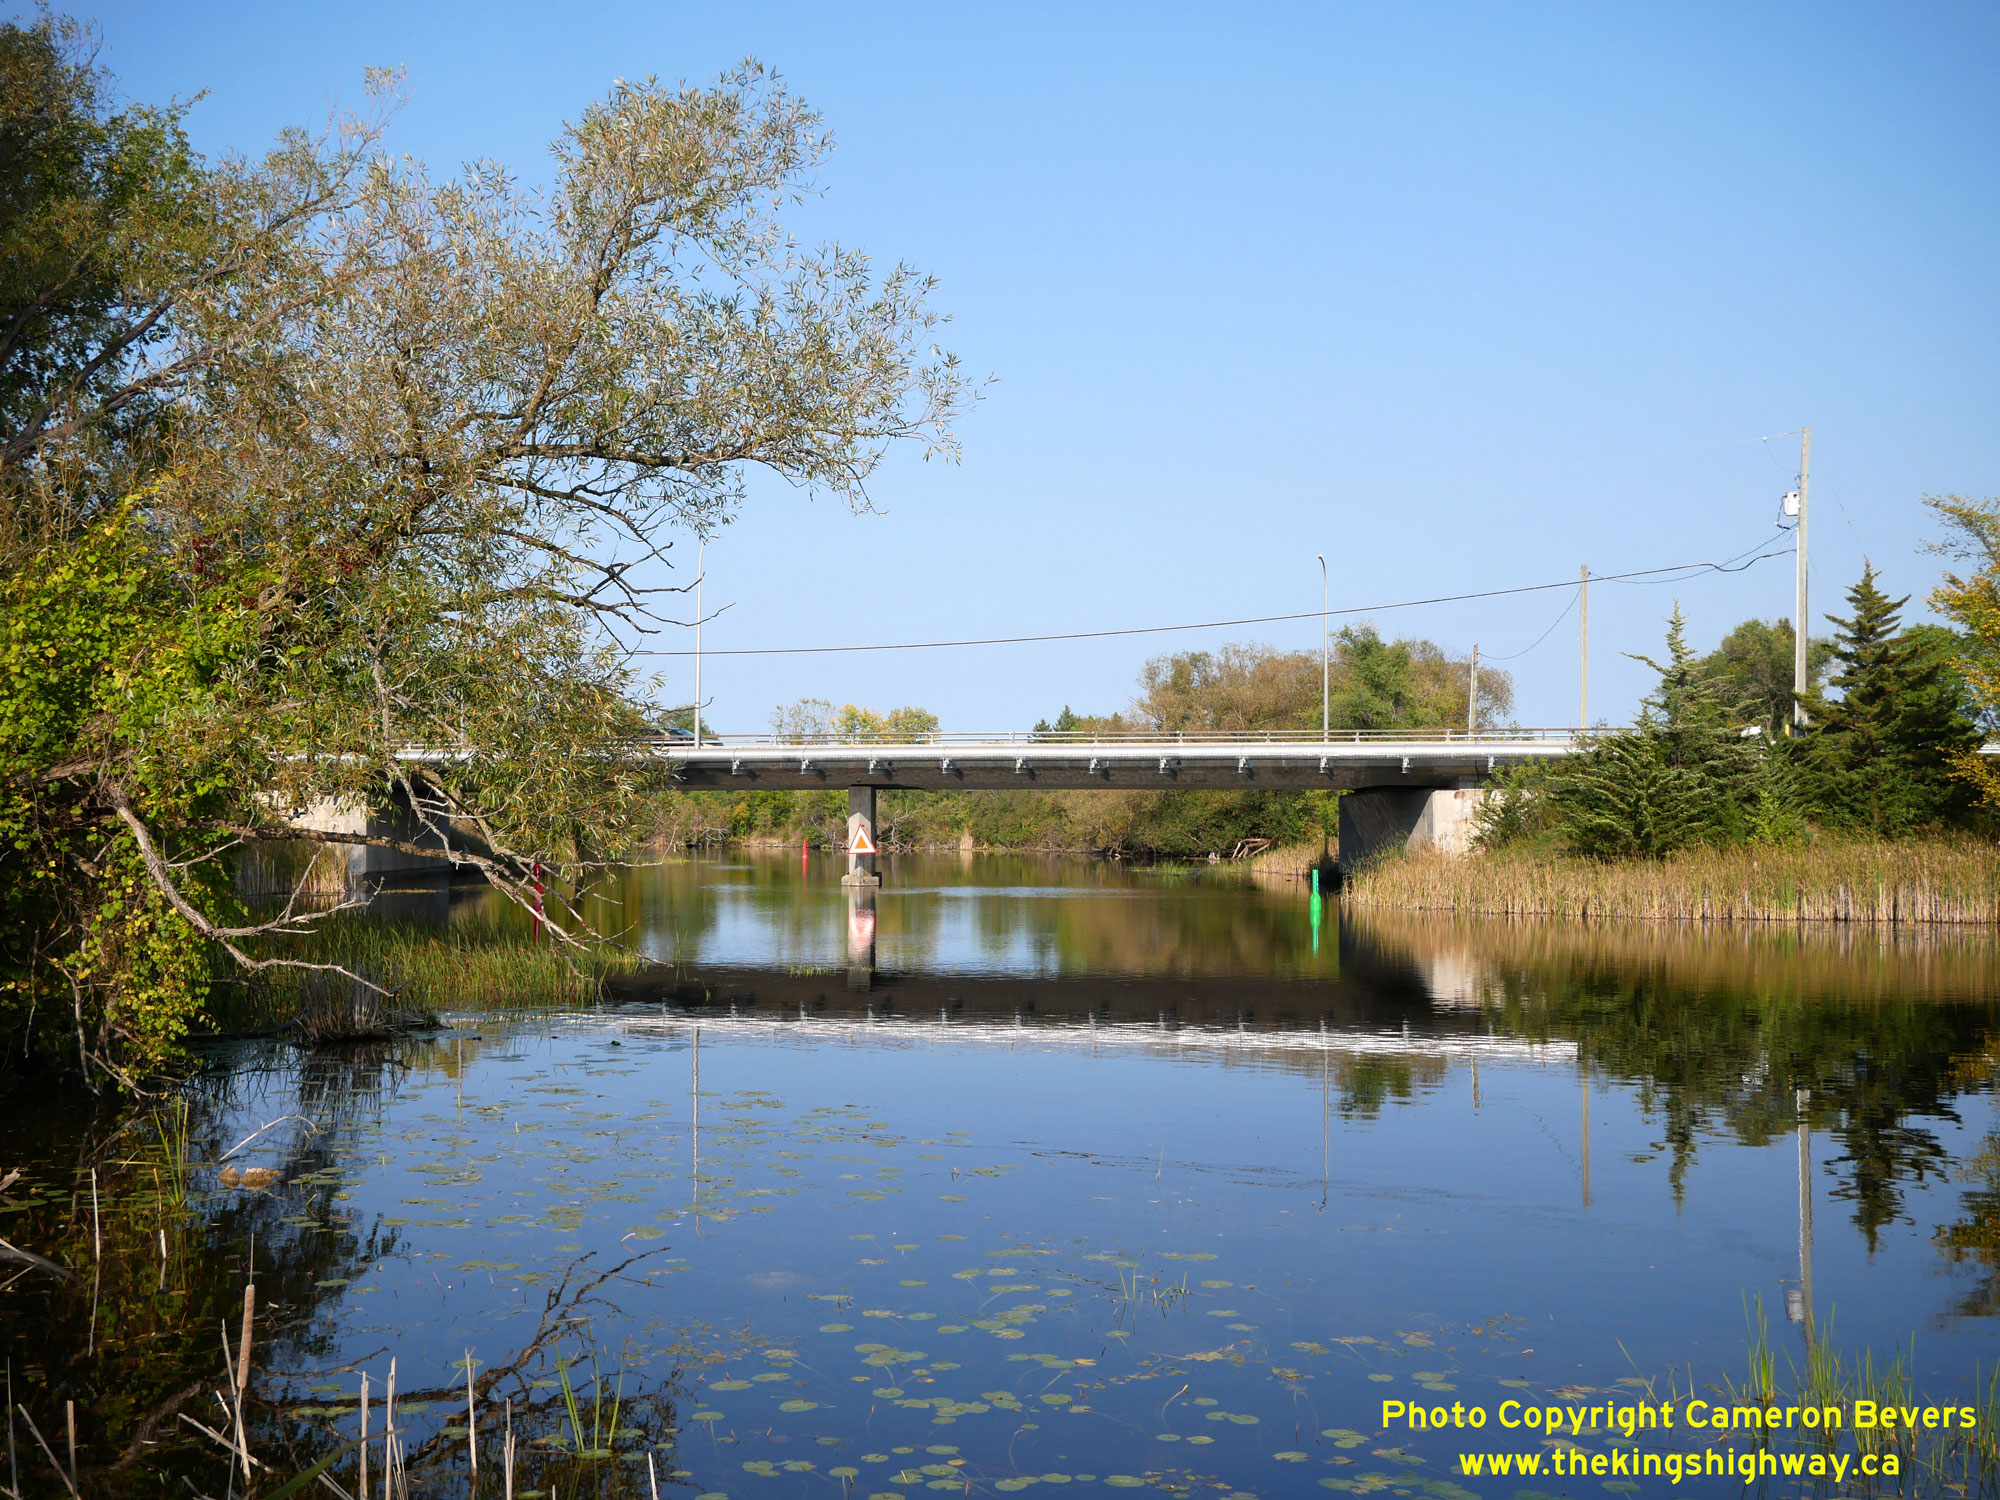
 Left - Western side of the Scugog River Bridge (Site #32-98) on Lindsay Street (Hwy 7B & Hwy 35B). See an
Enlarged Photo Here. Left - Western side of the Scugog River Bridge (Site #32-98) on Lindsay Street (Hwy 7B & Hwy 35B). See an
Enlarged Photo Here.(Photograph taken on September 22, 2023 - © Cameron Bevers) Right - Facing south across the Scugog River Bridge on Lindsay Street (Hwy 7B & Hwy 35B). The former town limits of Lindsay lie a few hundred metres south of the Scugog River Bridge.
The former Town of Lindsay was amalgamated with all other lower-tier municipalities within Victoria County to form a single-tier municipality known as the City of
Kawartha Lakes in 2001. See an Enlarged Photo Here.(Photograph taken on September 22, 2023 - © Cameron Bevers) 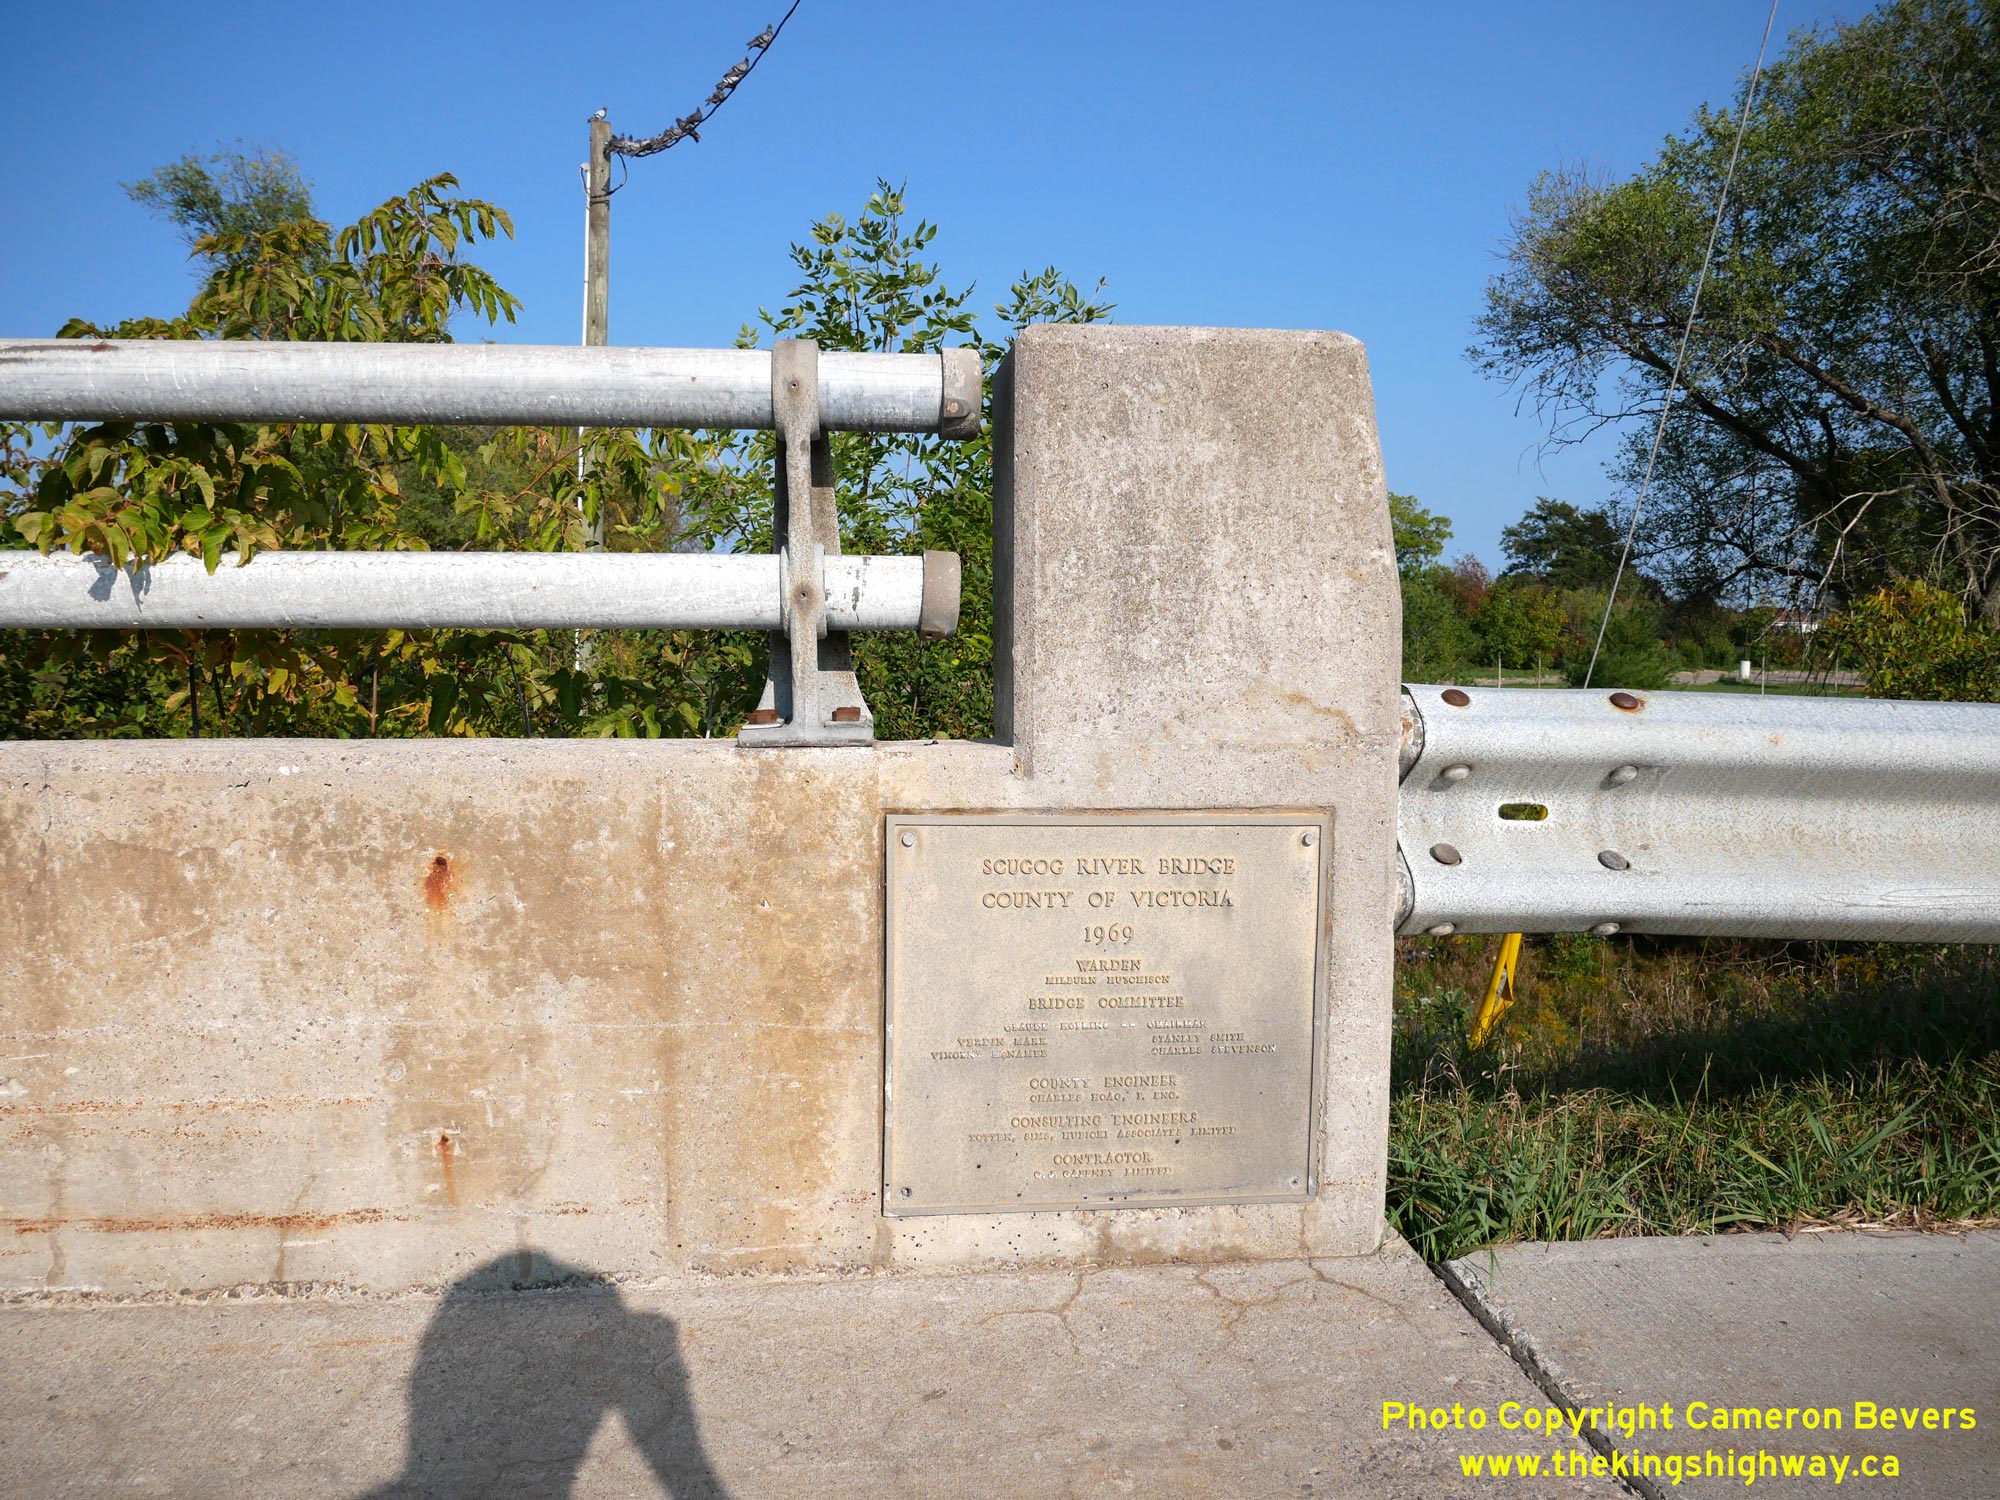
 Left - Plaque commemorating the completion of the Scugog River Bridge by the County of Victoria in 1969. Previously, a three-span concrete rigid frame bridge
known as the Ops Bridge carried the highway across the Scugog River and into Lindsay. The structure was built by the Department of Highways of Ontario (DHO) under
Contract #1931-71, at an original construction cost of $27,550 - the equivalent of about $750,000 in 2026 Dollars. At the time of the Ops Bridge's completion in 1932,
it was briefly the longest concrete rigid frame bridge built by the DHO, with a total length of 150 feet. The bridge featured a 30-foot roadway width and a 5-foot
sidewalk. See an Enlarged Photo Here. Left - Plaque commemorating the completion of the Scugog River Bridge by the County of Victoria in 1969. Previously, a three-span concrete rigid frame bridge
known as the Ops Bridge carried the highway across the Scugog River and into Lindsay. The structure was built by the Department of Highways of Ontario (DHO) under
Contract #1931-71, at an original construction cost of $27,550 - the equivalent of about $750,000 in 2026 Dollars. At the time of the Ops Bridge's completion in 1932,
it was briefly the longest concrete rigid frame bridge built by the DHO, with a total length of 150 feet. The bridge featured a 30-foot roadway width and a 5-foot
sidewalk. See an Enlarged Photo Here.(Photograph taken on September 22, 2023 - © Cameron Bevers) Right - Eastern side of the Scugog River Bridge on Lindsay Street (Hwy 7B & Hwy 35B). The current Scugog River Bridge is a two-span post-tensioned concrete
structure. A key advantage of this type of bridge design is the shallow deck slab, which allowed for the maximum possible vertical clearance for the marine navigation
channel below the structure. The Scugog River links nearby Lake Scugog with the Trent-Severn Waterway via a canal lock in Lindsay. See an
Enlarged Photo Here.(Photograph taken on September 22, 2023 - © Cameron Bevers) 
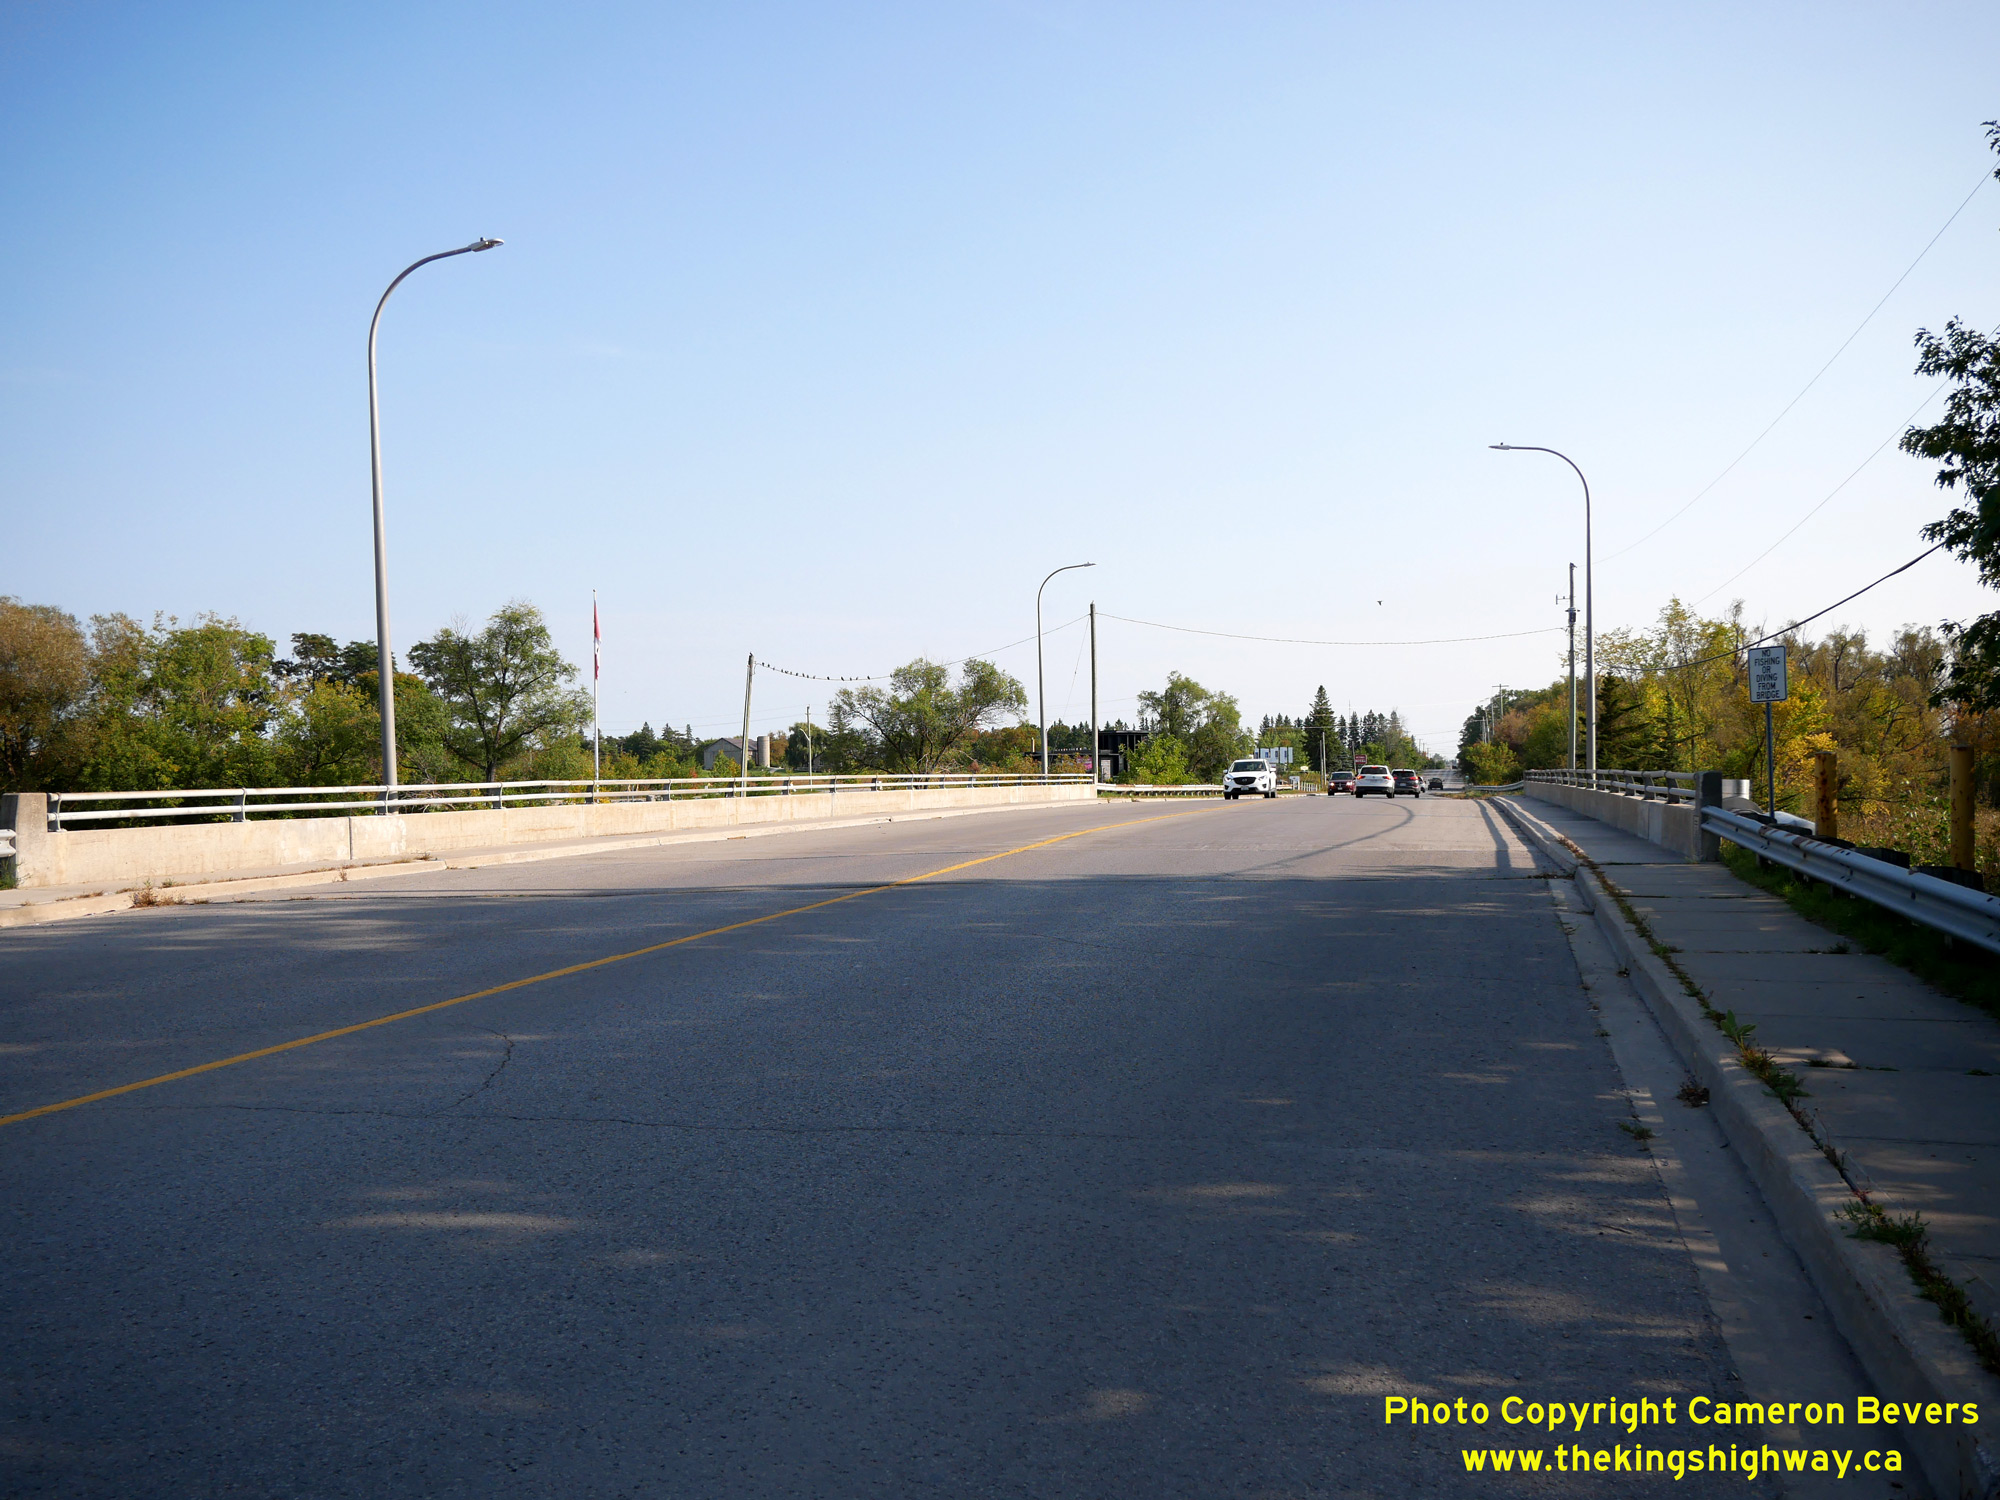
 Left - Facing north towards Downtown Lindsay across the Scugog River Bridge on Hwy 7B & Hwy 35B. This structure was originally designed to accommodate a
four-lane roadway in the future. Post-tensioned concrete structures are notoriously challenging to widen once built. When selecting this bridge type, designers have
to be particularly forward-thinking when it comes to the possibility of changing traffic needs throughout the bridge's anticipated design life. See an
Enlarged Photo Here. Left - Facing north towards Downtown Lindsay across the Scugog River Bridge on Hwy 7B & Hwy 35B. This structure was originally designed to accommodate a
four-lane roadway in the future. Post-tensioned concrete structures are notoriously challenging to widen once built. When selecting this bridge type, designers have
to be particularly forward-thinking when it comes to the possibility of changing traffic needs throughout the bridge's anticipated design life. See an
Enlarged Photo Here.(Photograph taken on September 22, 2023 - © Cameron Bevers) Right - Facing south along Lindsay Street (Hwy 7B & Hwy 35B) from Mary Street in Lindsay. See an
Enlarged Photo Here.(Photograph taken on October 10, 2010 - © Cameron Bevers) 
 Left - Facing north along Lindsay Street (Hwy 7B & Hwy 35B) from Mary Street in Lindsay. Note the pair of King's Highway shields in front of the Dairy
Queen at right for Hwy 7B & Hwy 35B. Provincial jurisdiction over Hwy 7B & Hwy 35B south of Lindsay ended in 1997, but the Lindsay Business Route was still
signed through town for many years thereafter. See an Enlarged Photo Here. Left - Facing north along Lindsay Street (Hwy 7B & Hwy 35B) from Mary Street in Lindsay. Note the pair of King's Highway shields in front of the Dairy
Queen at right for Hwy 7B & Hwy 35B. Provincial jurisdiction over Hwy 7B & Hwy 35B south of Lindsay ended in 1997, but the Lindsay Business Route was still
signed through town for many years thereafter. See an Enlarged Photo Here.(Photograph taken on October 10, 2010 - © Cameron Bevers) Right - View of Kent Street (Hwy 7B & Hwy 35B) facing east from Adelaide Street in Lindsay. See an
Enlarged Photo Here.(Photograph taken on October 10, 2010 - © Cameron Bevers) 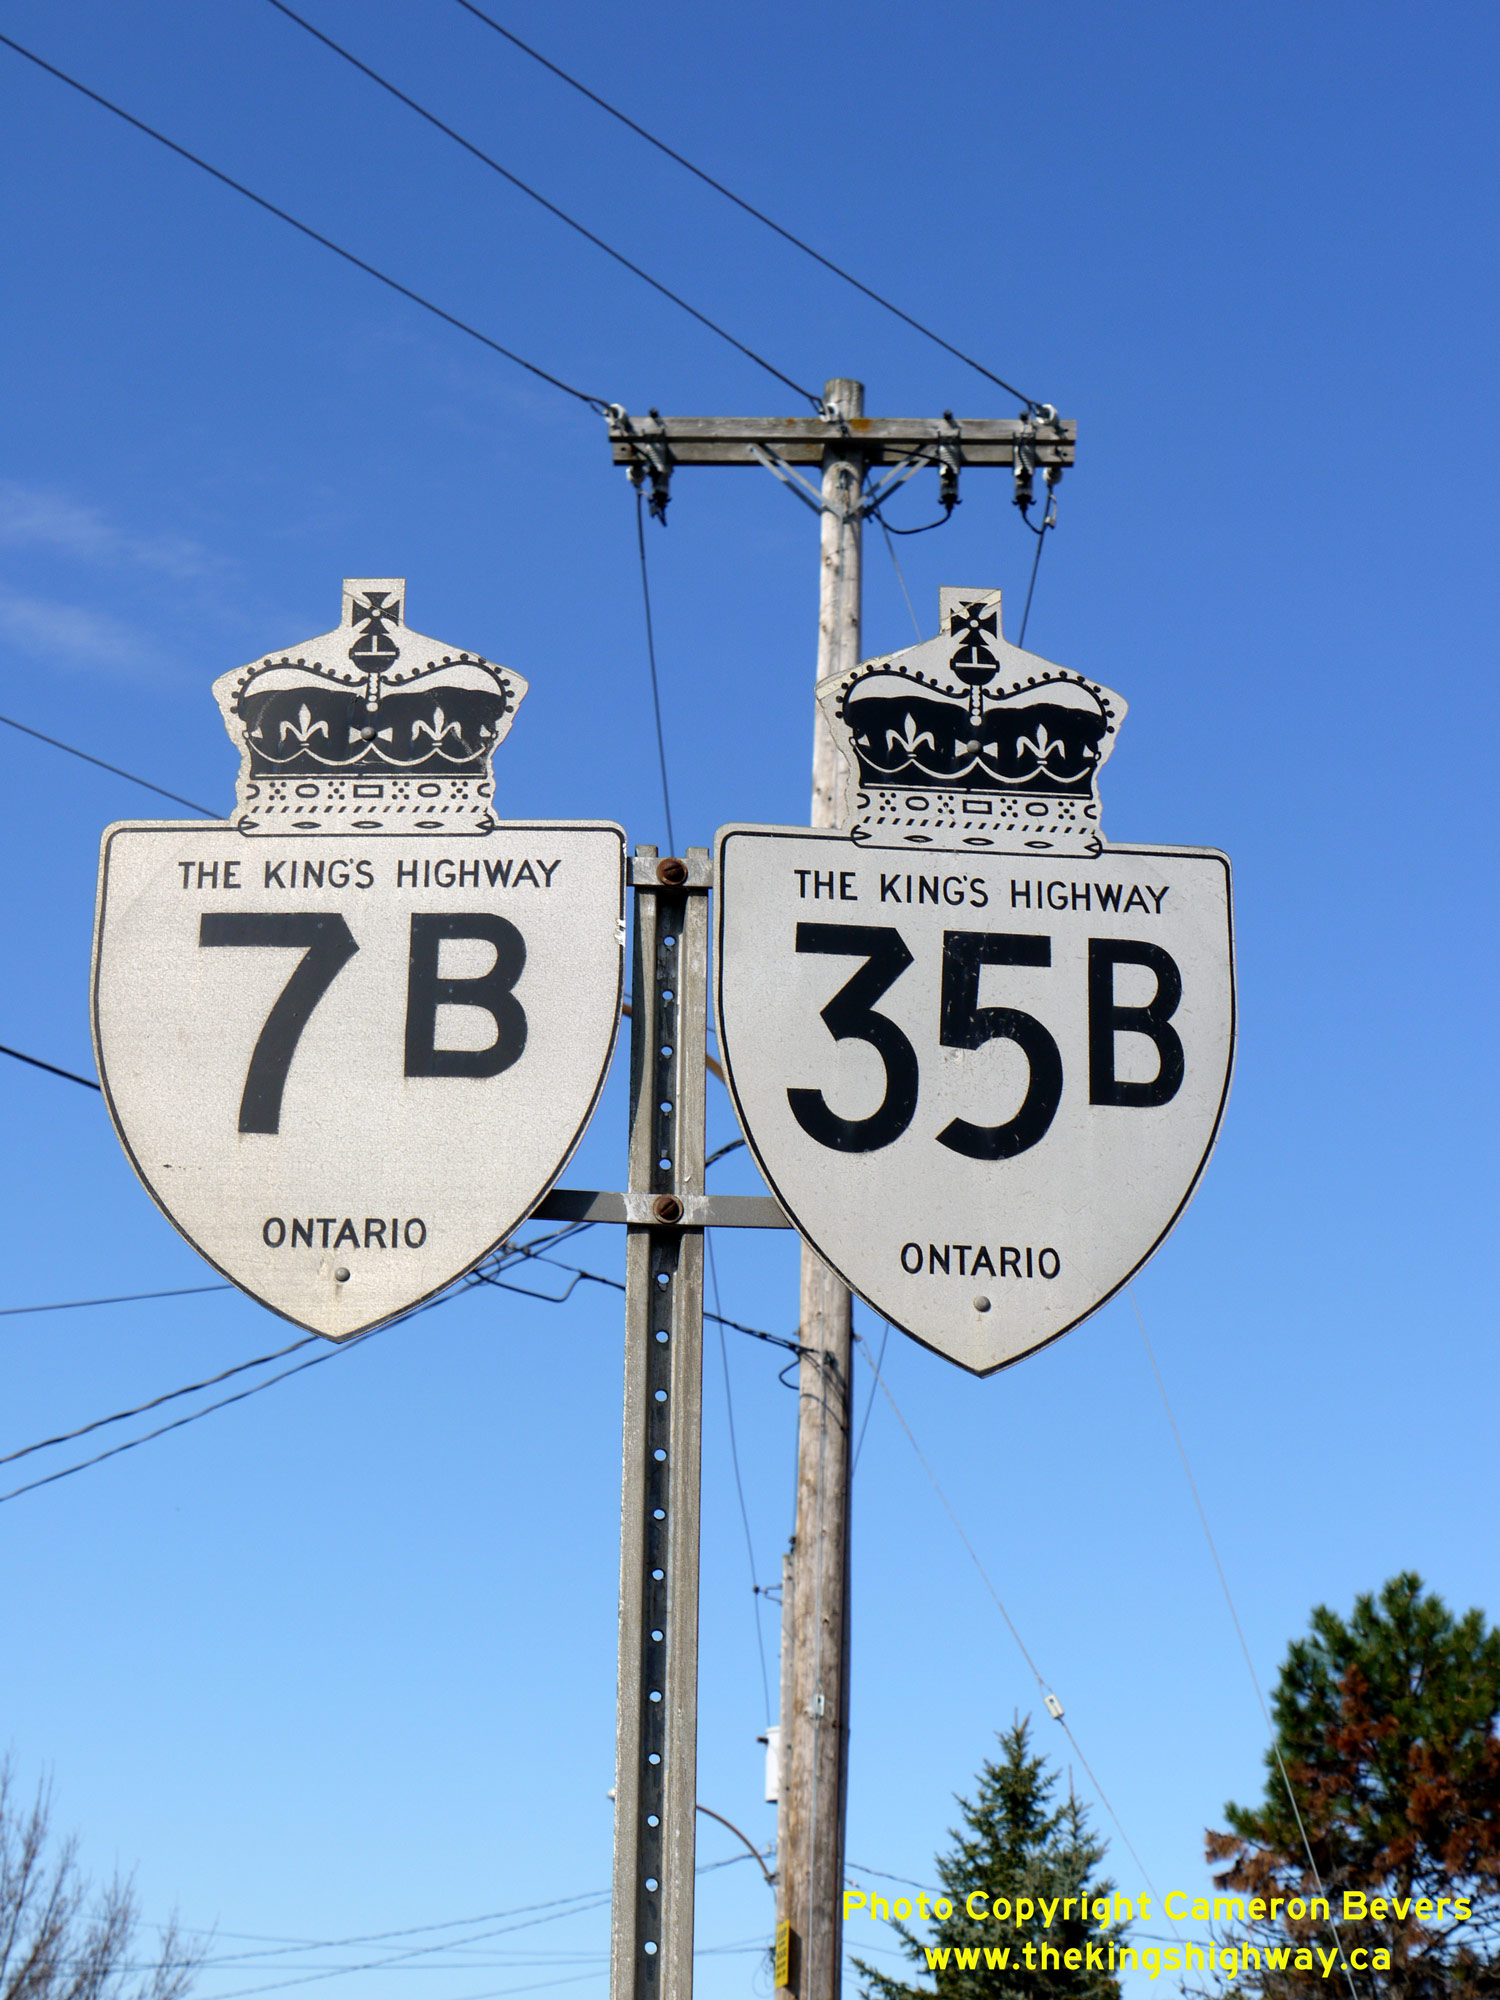
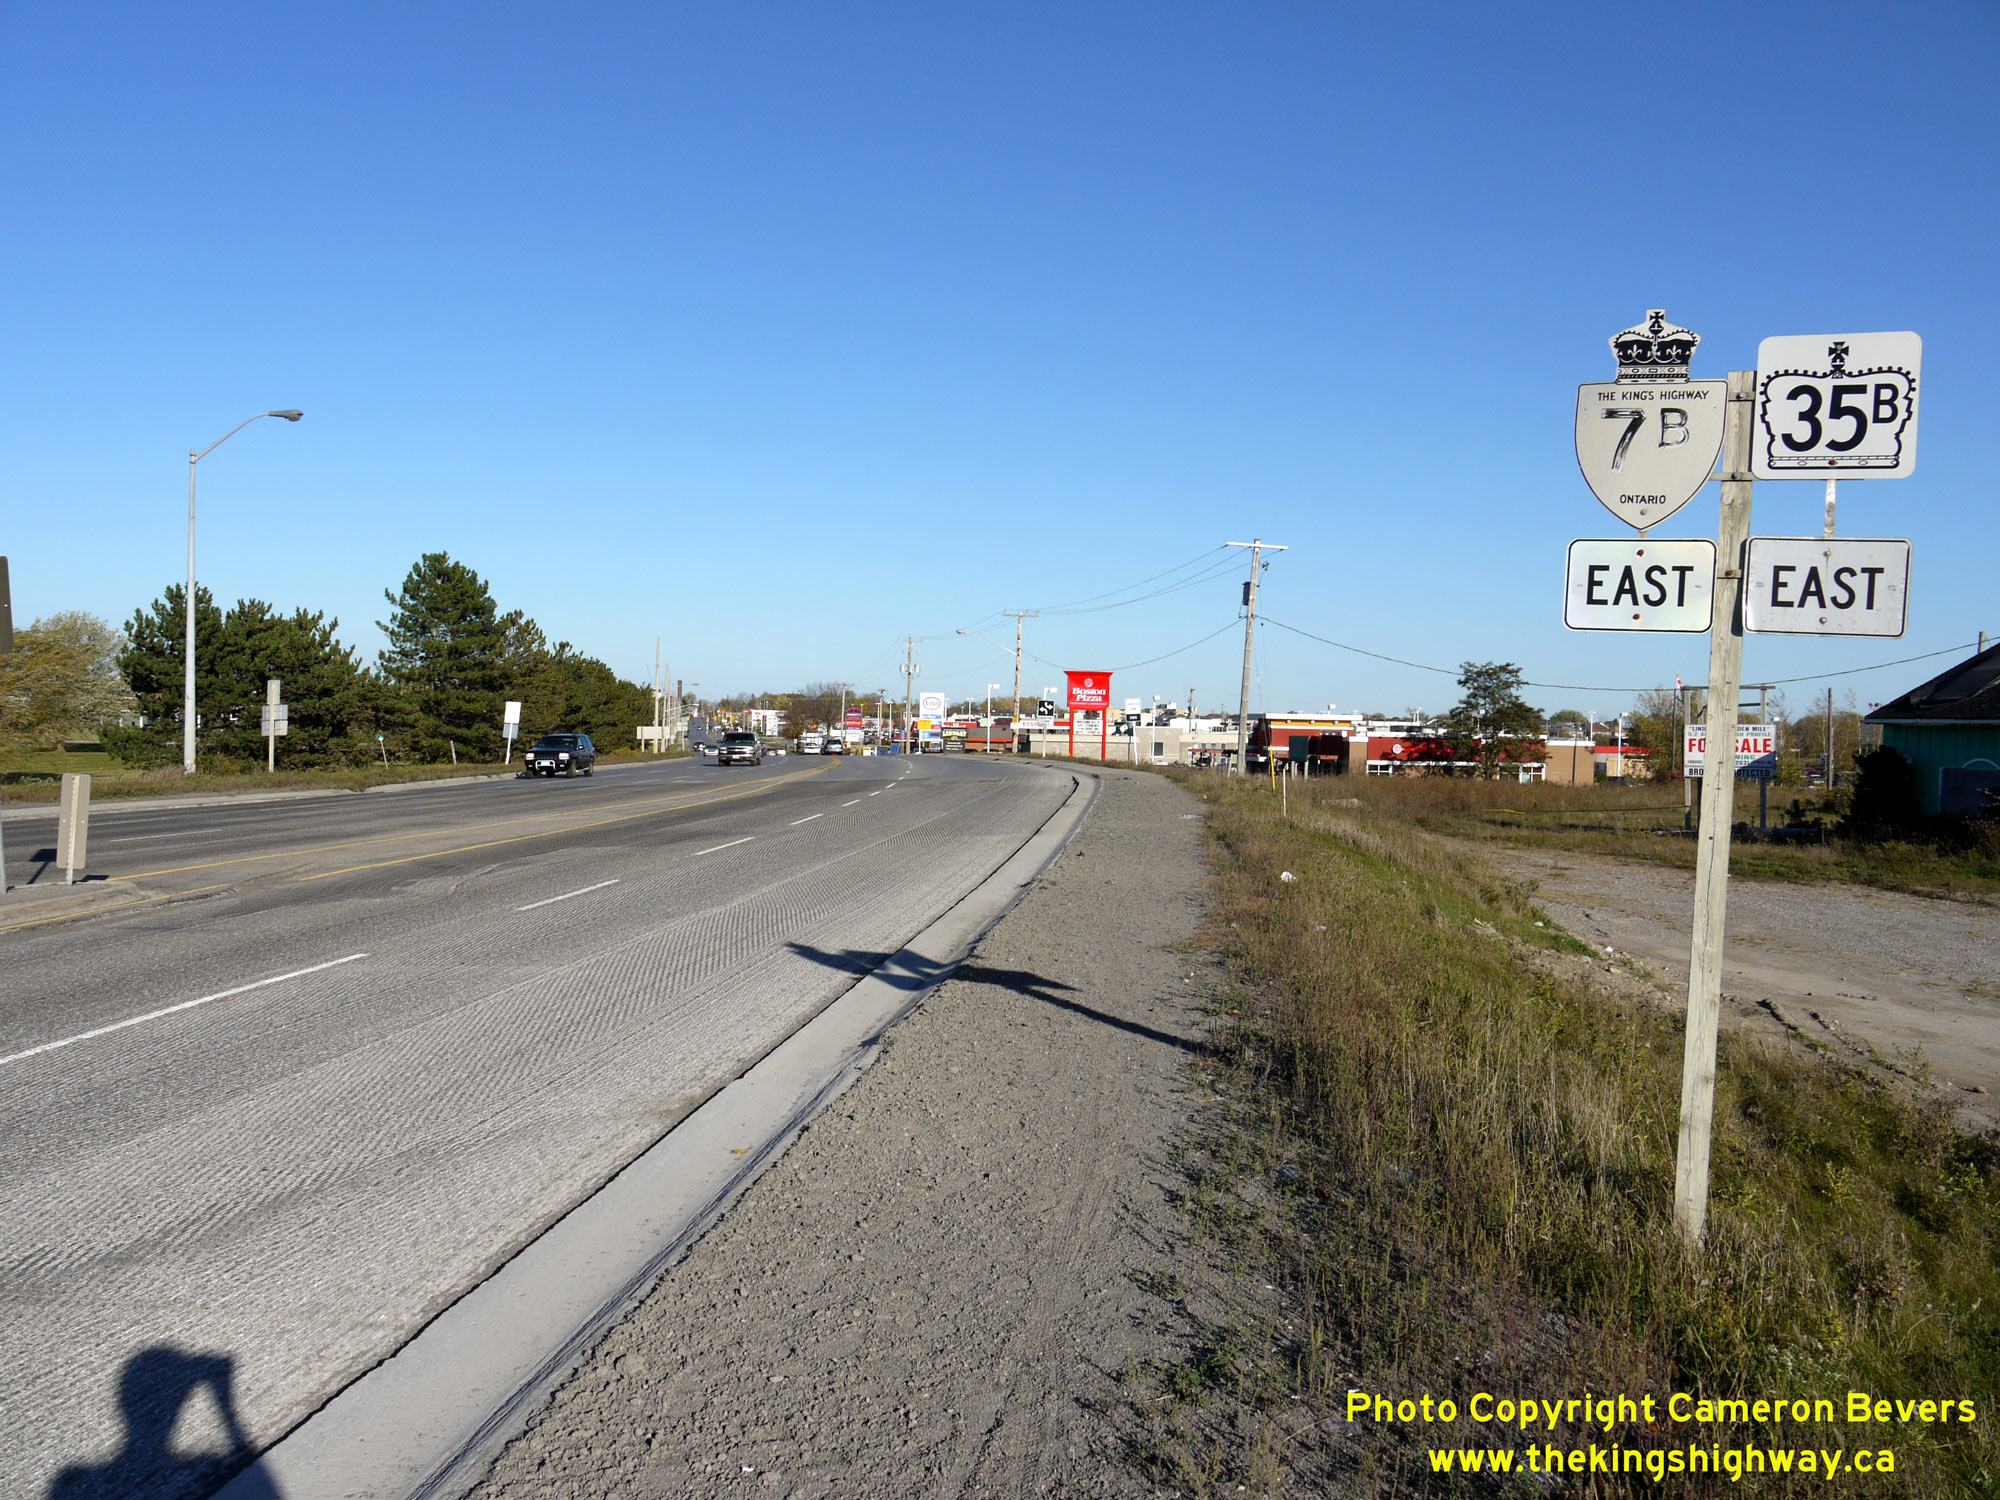
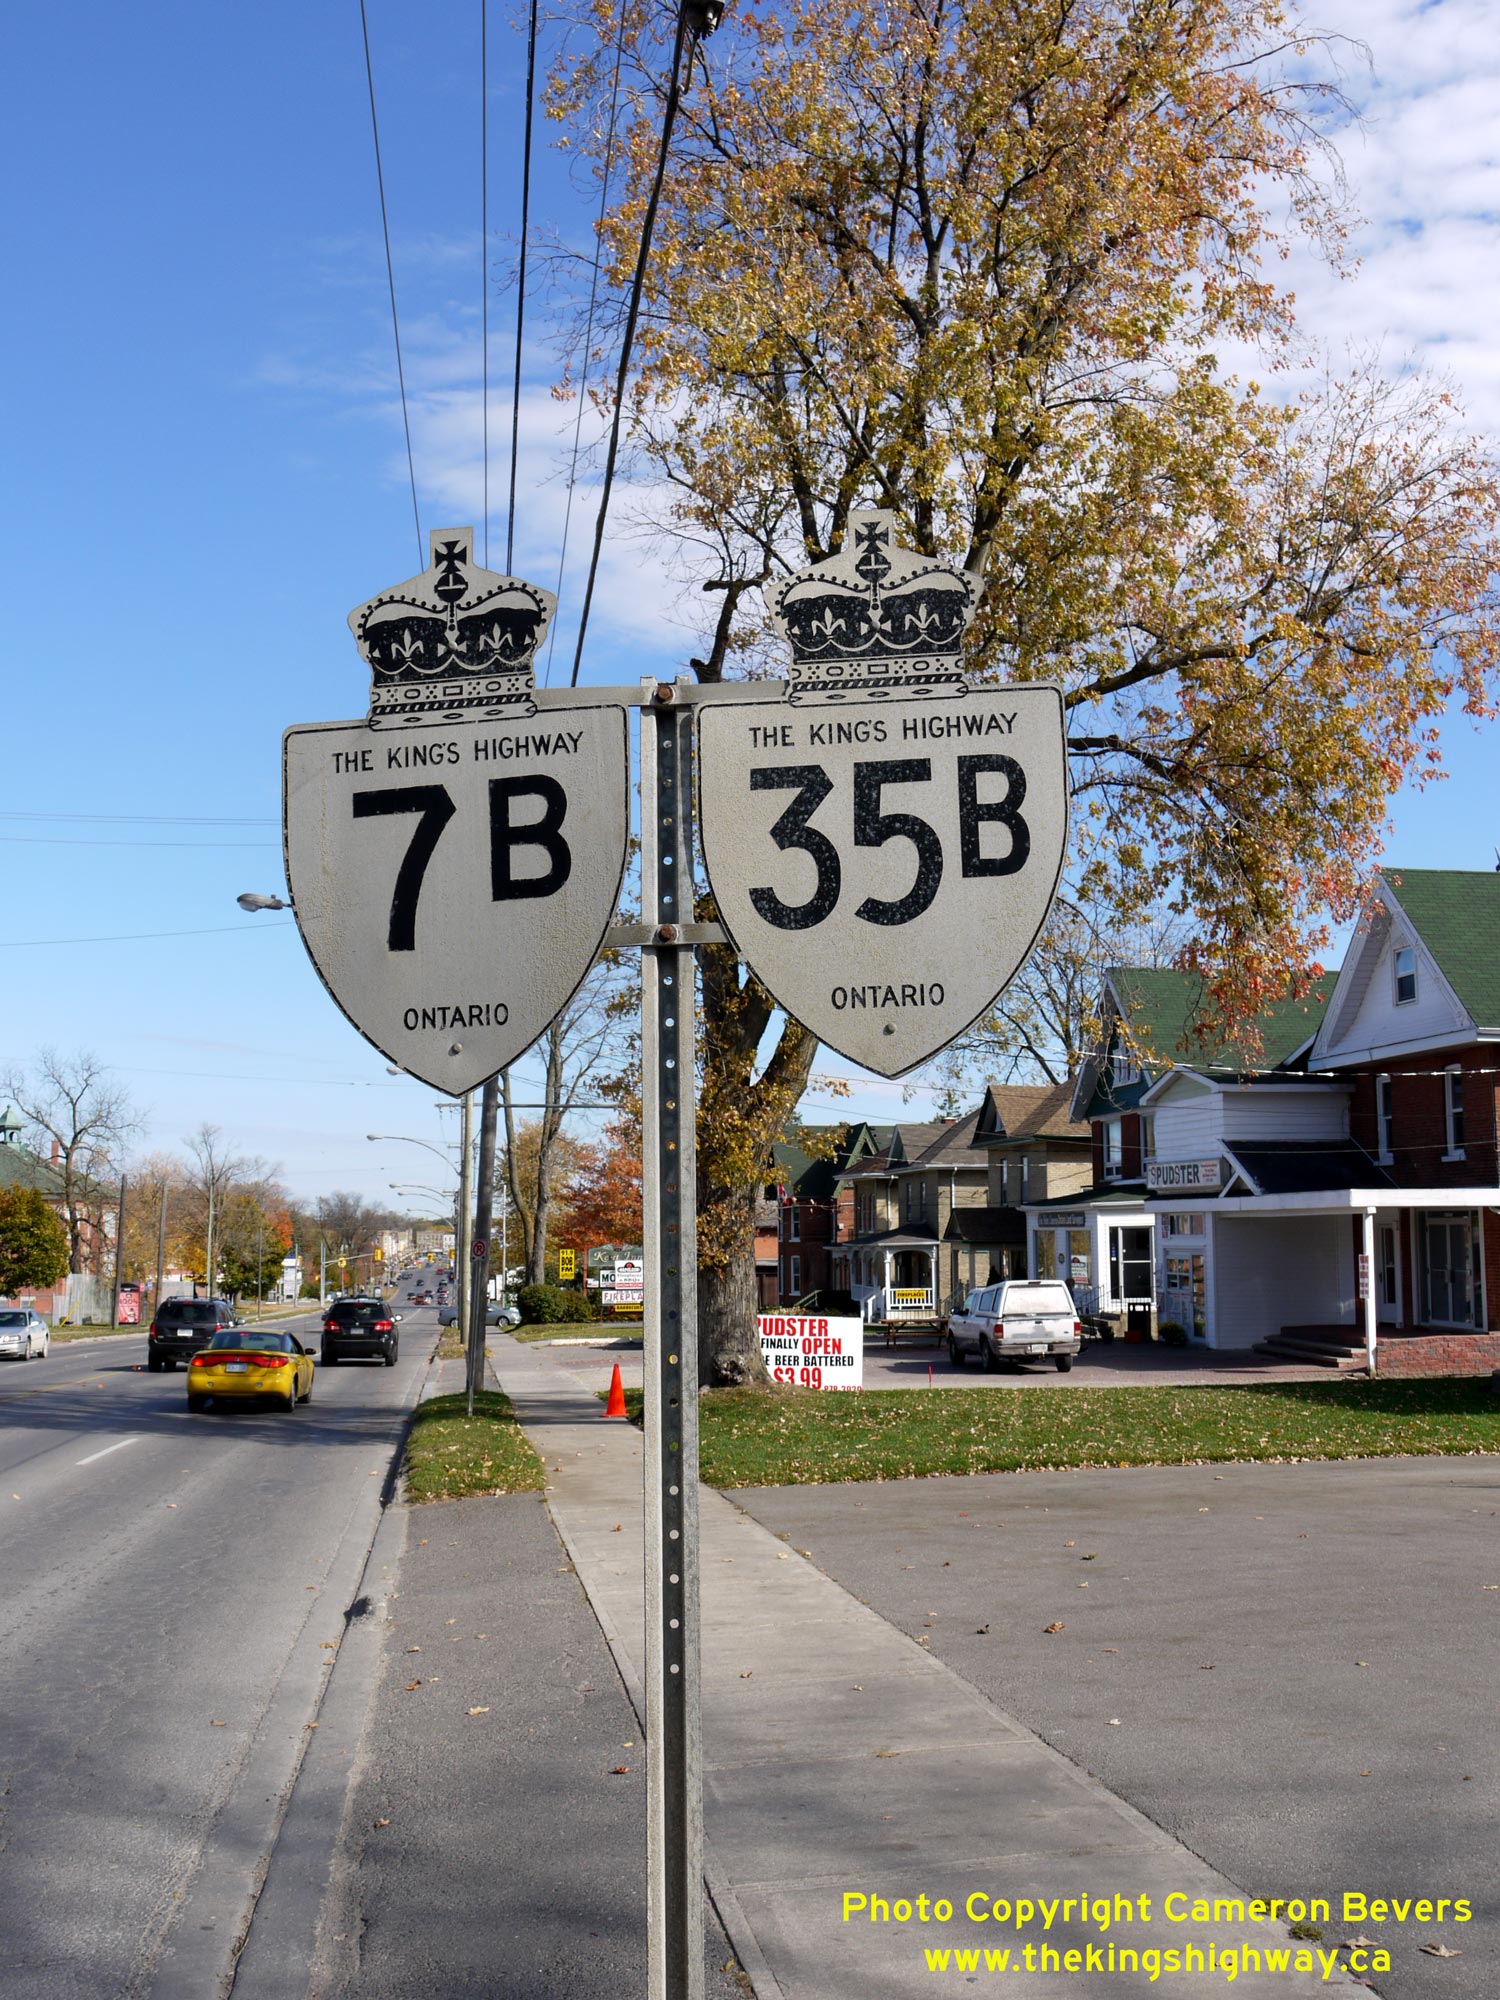 Left - Dual King's Highway route markers for Hwy 7B & Hwy 35B on Lindsay Street. Signed Business Routes typically feature the "parent" highway number
followed by a "B" suffix. These routes are intended to guide motorists into and through a bypassed town or city and then bring them back out to the main highway. Up
until the 1970s, these B-routes were very commonly used for old sections of highway left behind, once an urbanized area was bypassed by a new highway. The practice of
signing B-routes has become much less prevalent in more recent years. See an
Enlarged Photo Here. Left - Dual King's Highway route markers for Hwy 7B & Hwy 35B on Lindsay Street. Signed Business Routes typically feature the "parent" highway number
followed by a "B" suffix. These routes are intended to guide motorists into and through a bypassed town or city and then bring them back out to the main highway. Up
until the 1970s, these B-routes were very commonly used for old sections of highway left behind, once an urbanized area was bypassed by a new highway. The practice of
signing B-routes has become much less prevalent in more recent years. See an
Enlarged Photo Here.(Photograph taken on October 10, 2010 - © Cameron Bevers) Right - Dual King's Highway route markers for Hwy 7B & Hwy 35B on Kent Street in Lindsay. See an
Enlarged Photo Here.(Photograph taken on October 10, 2010 - © Cameron Bevers) 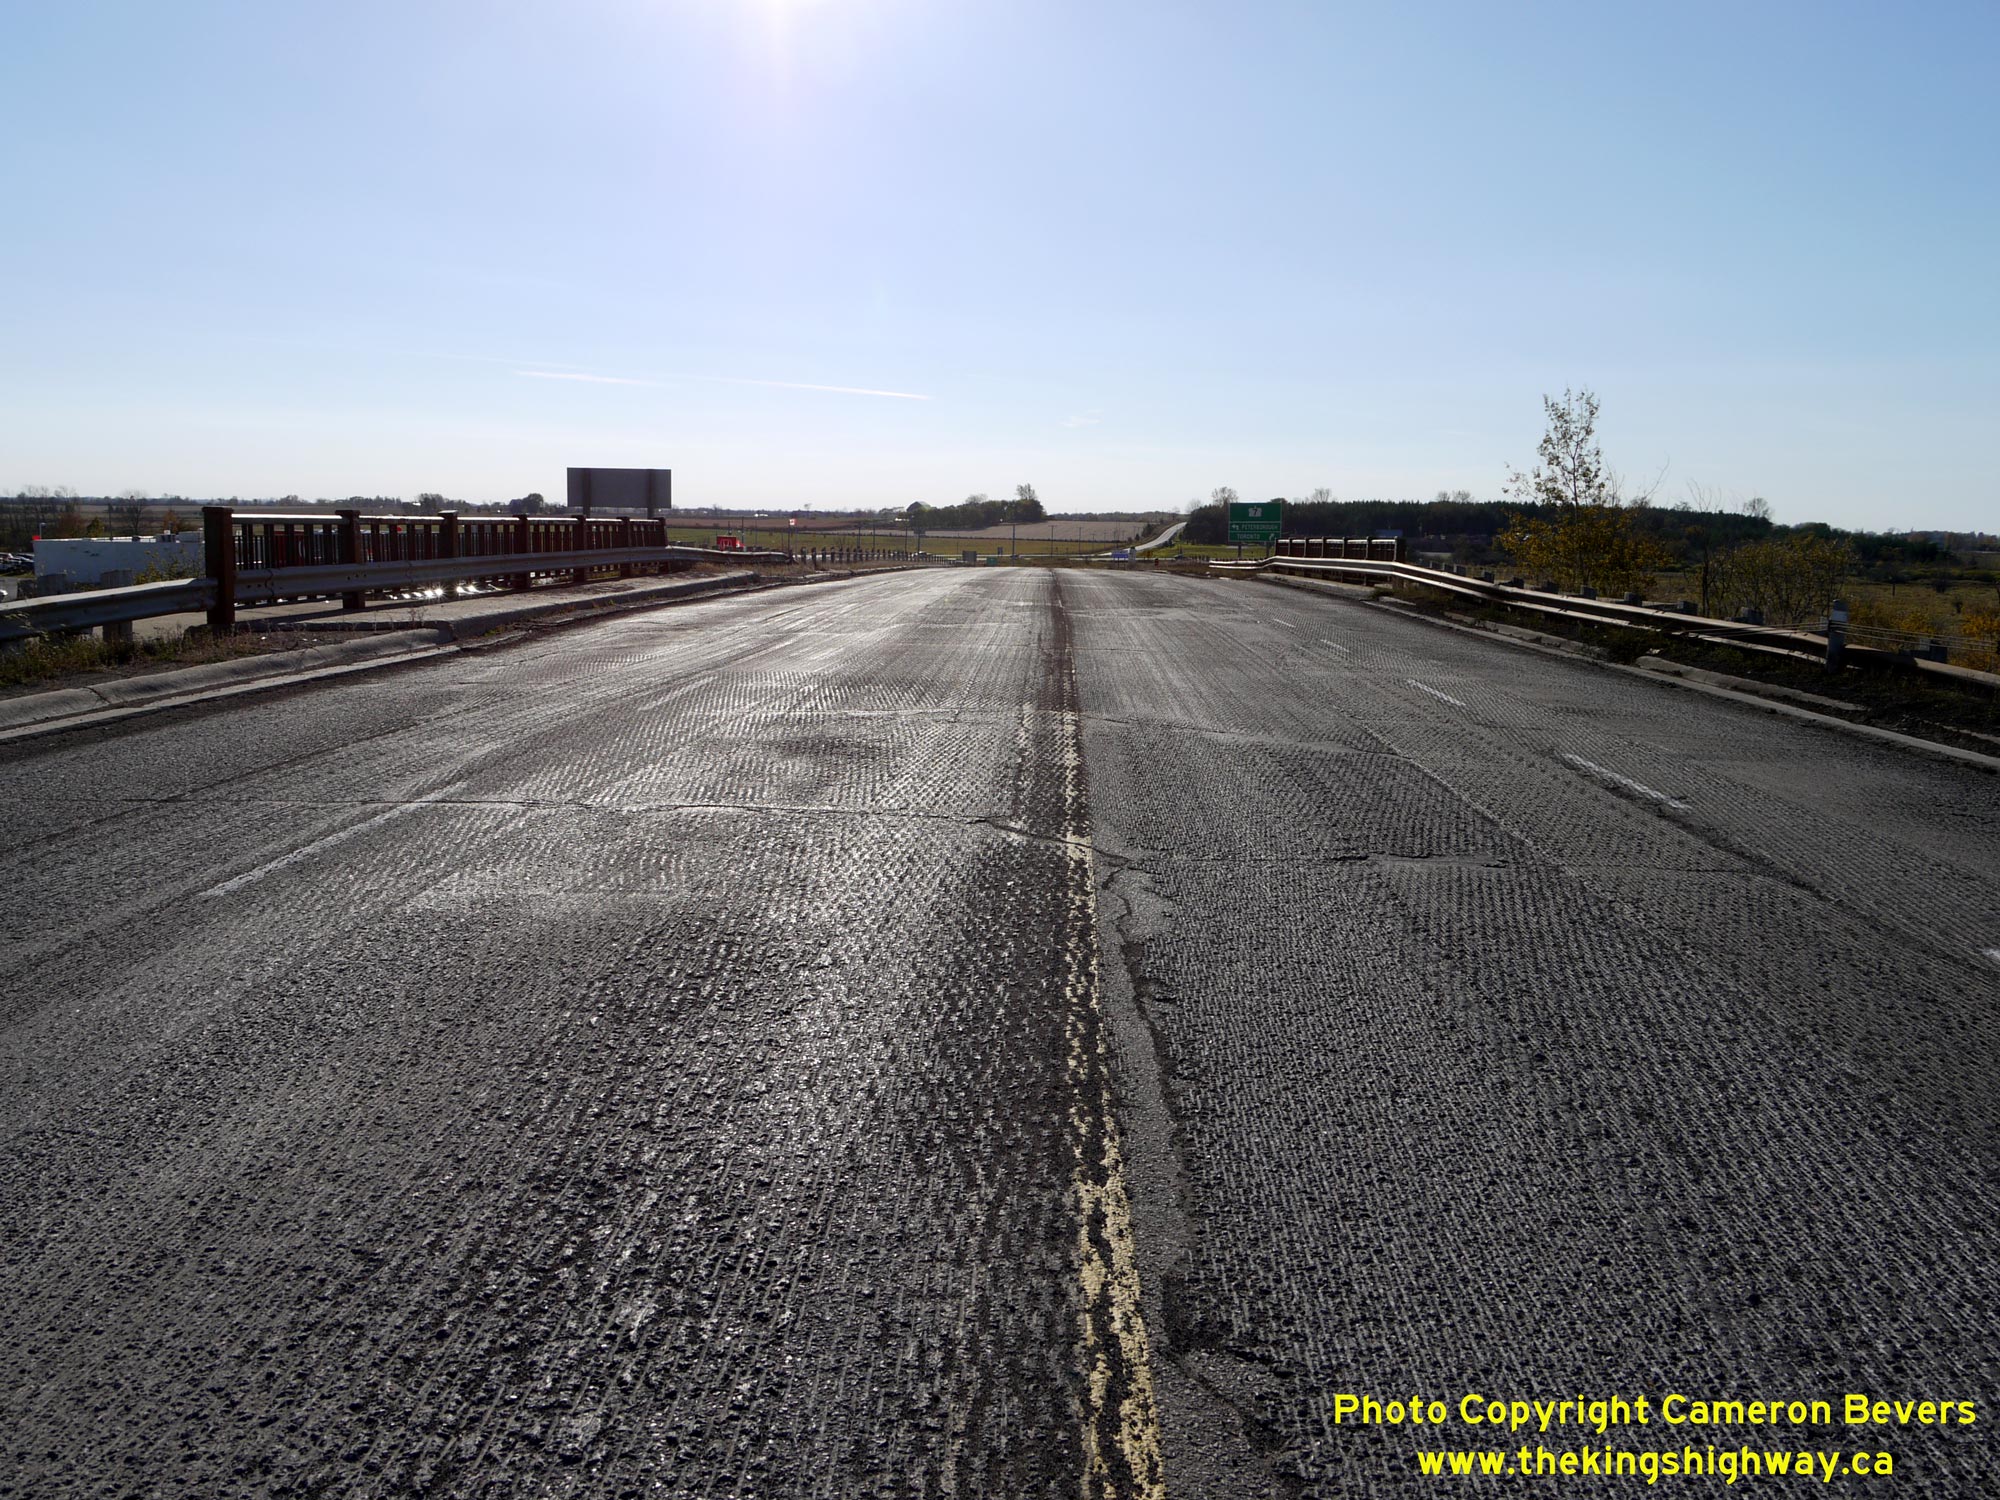
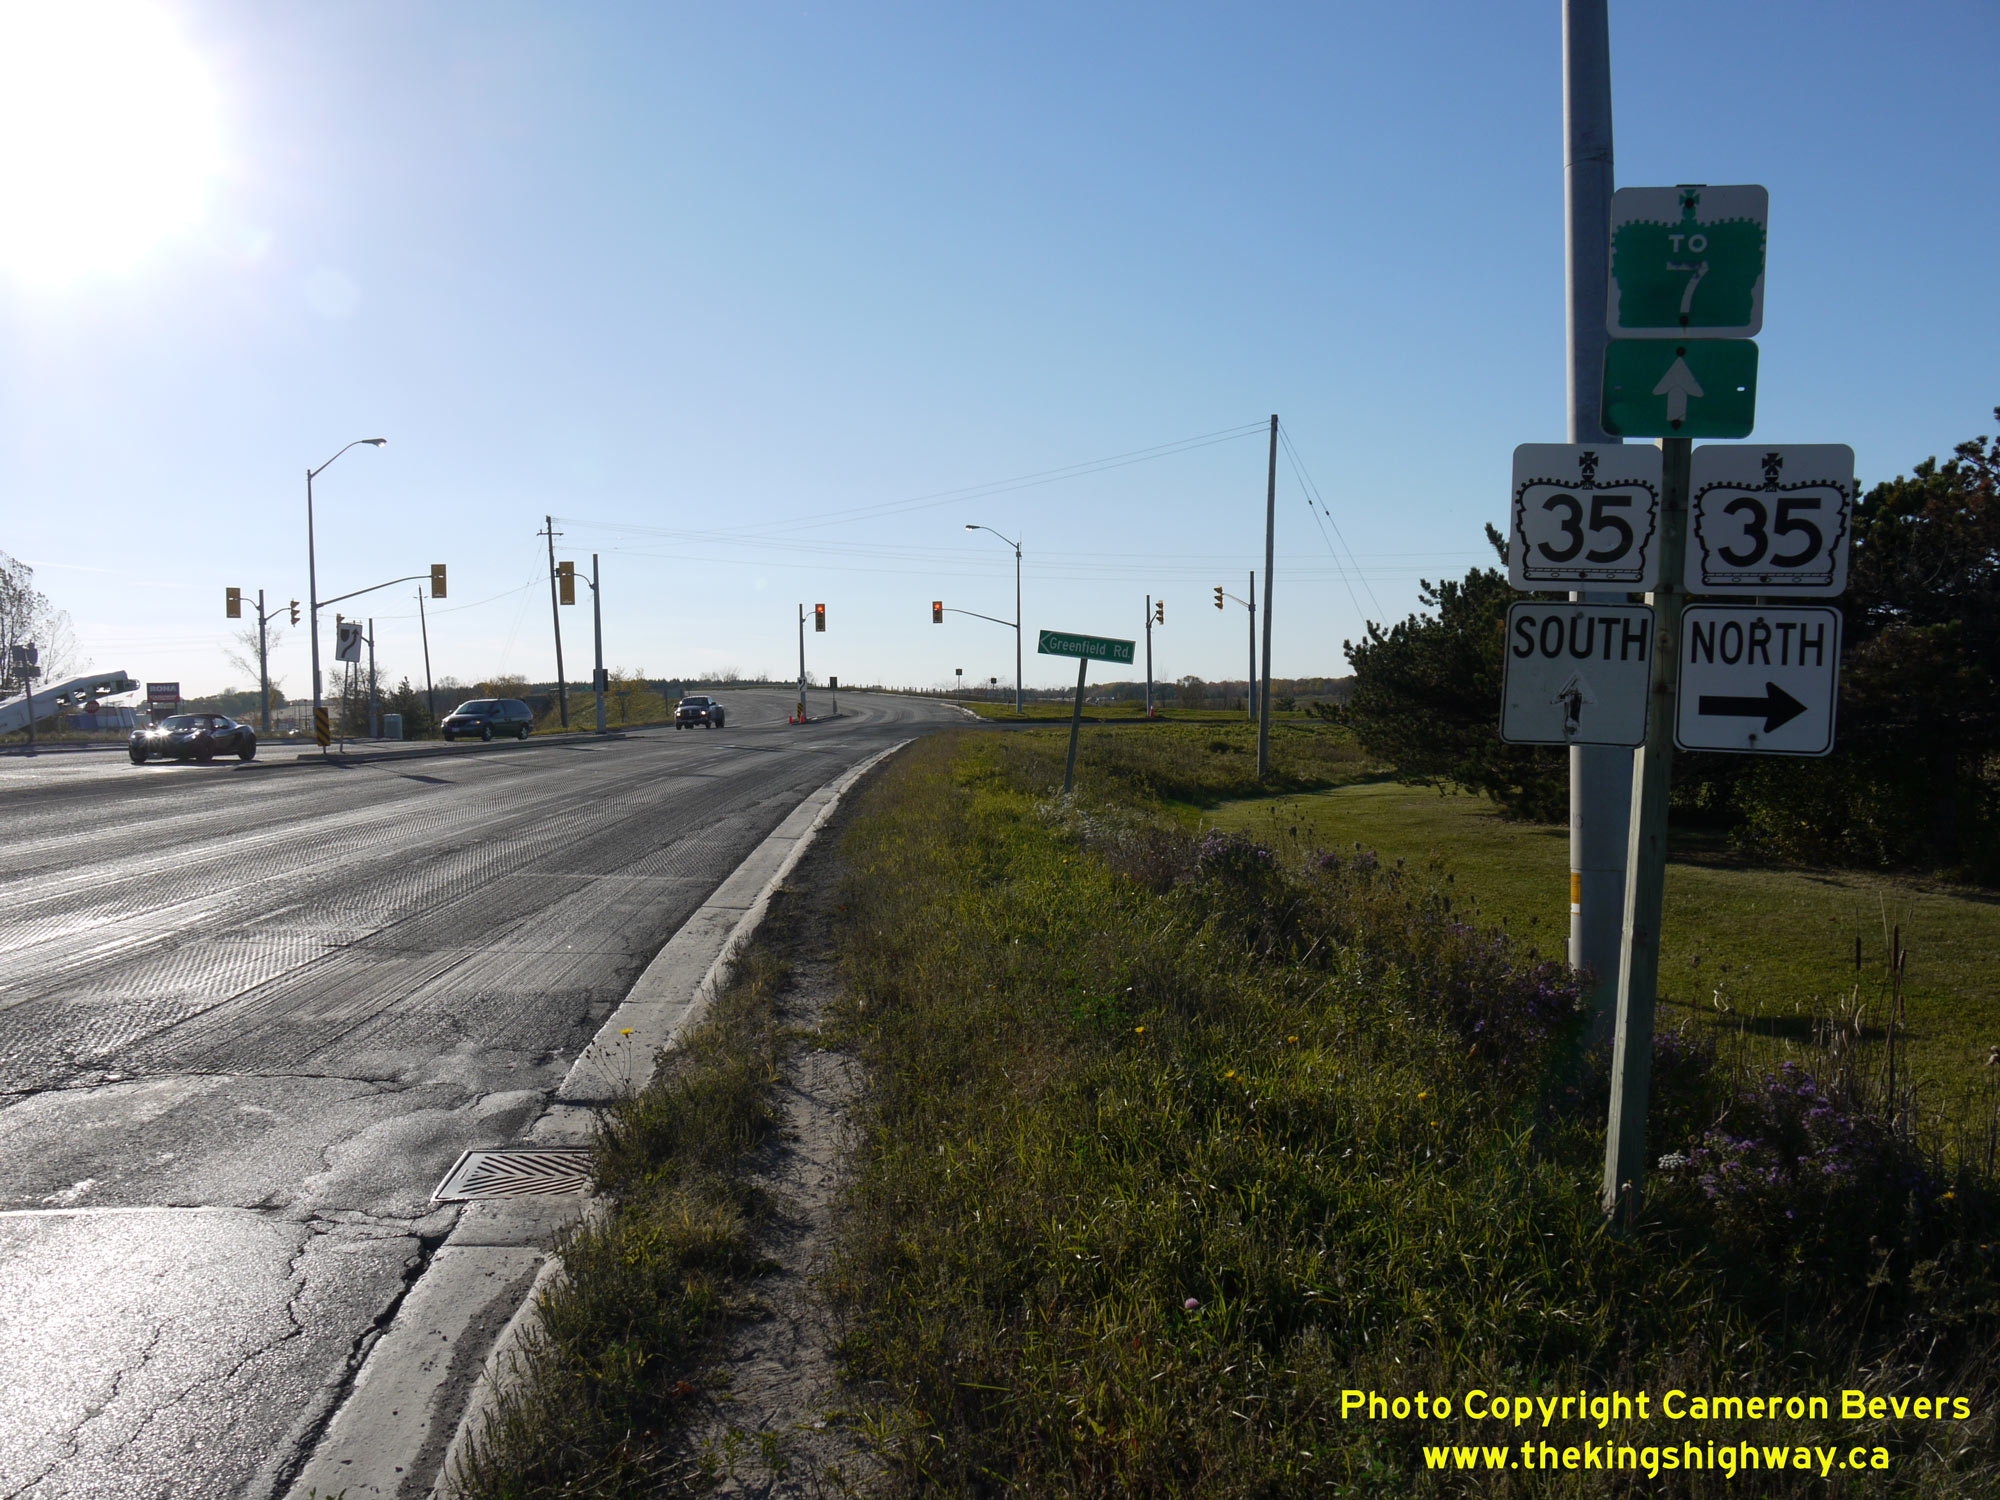
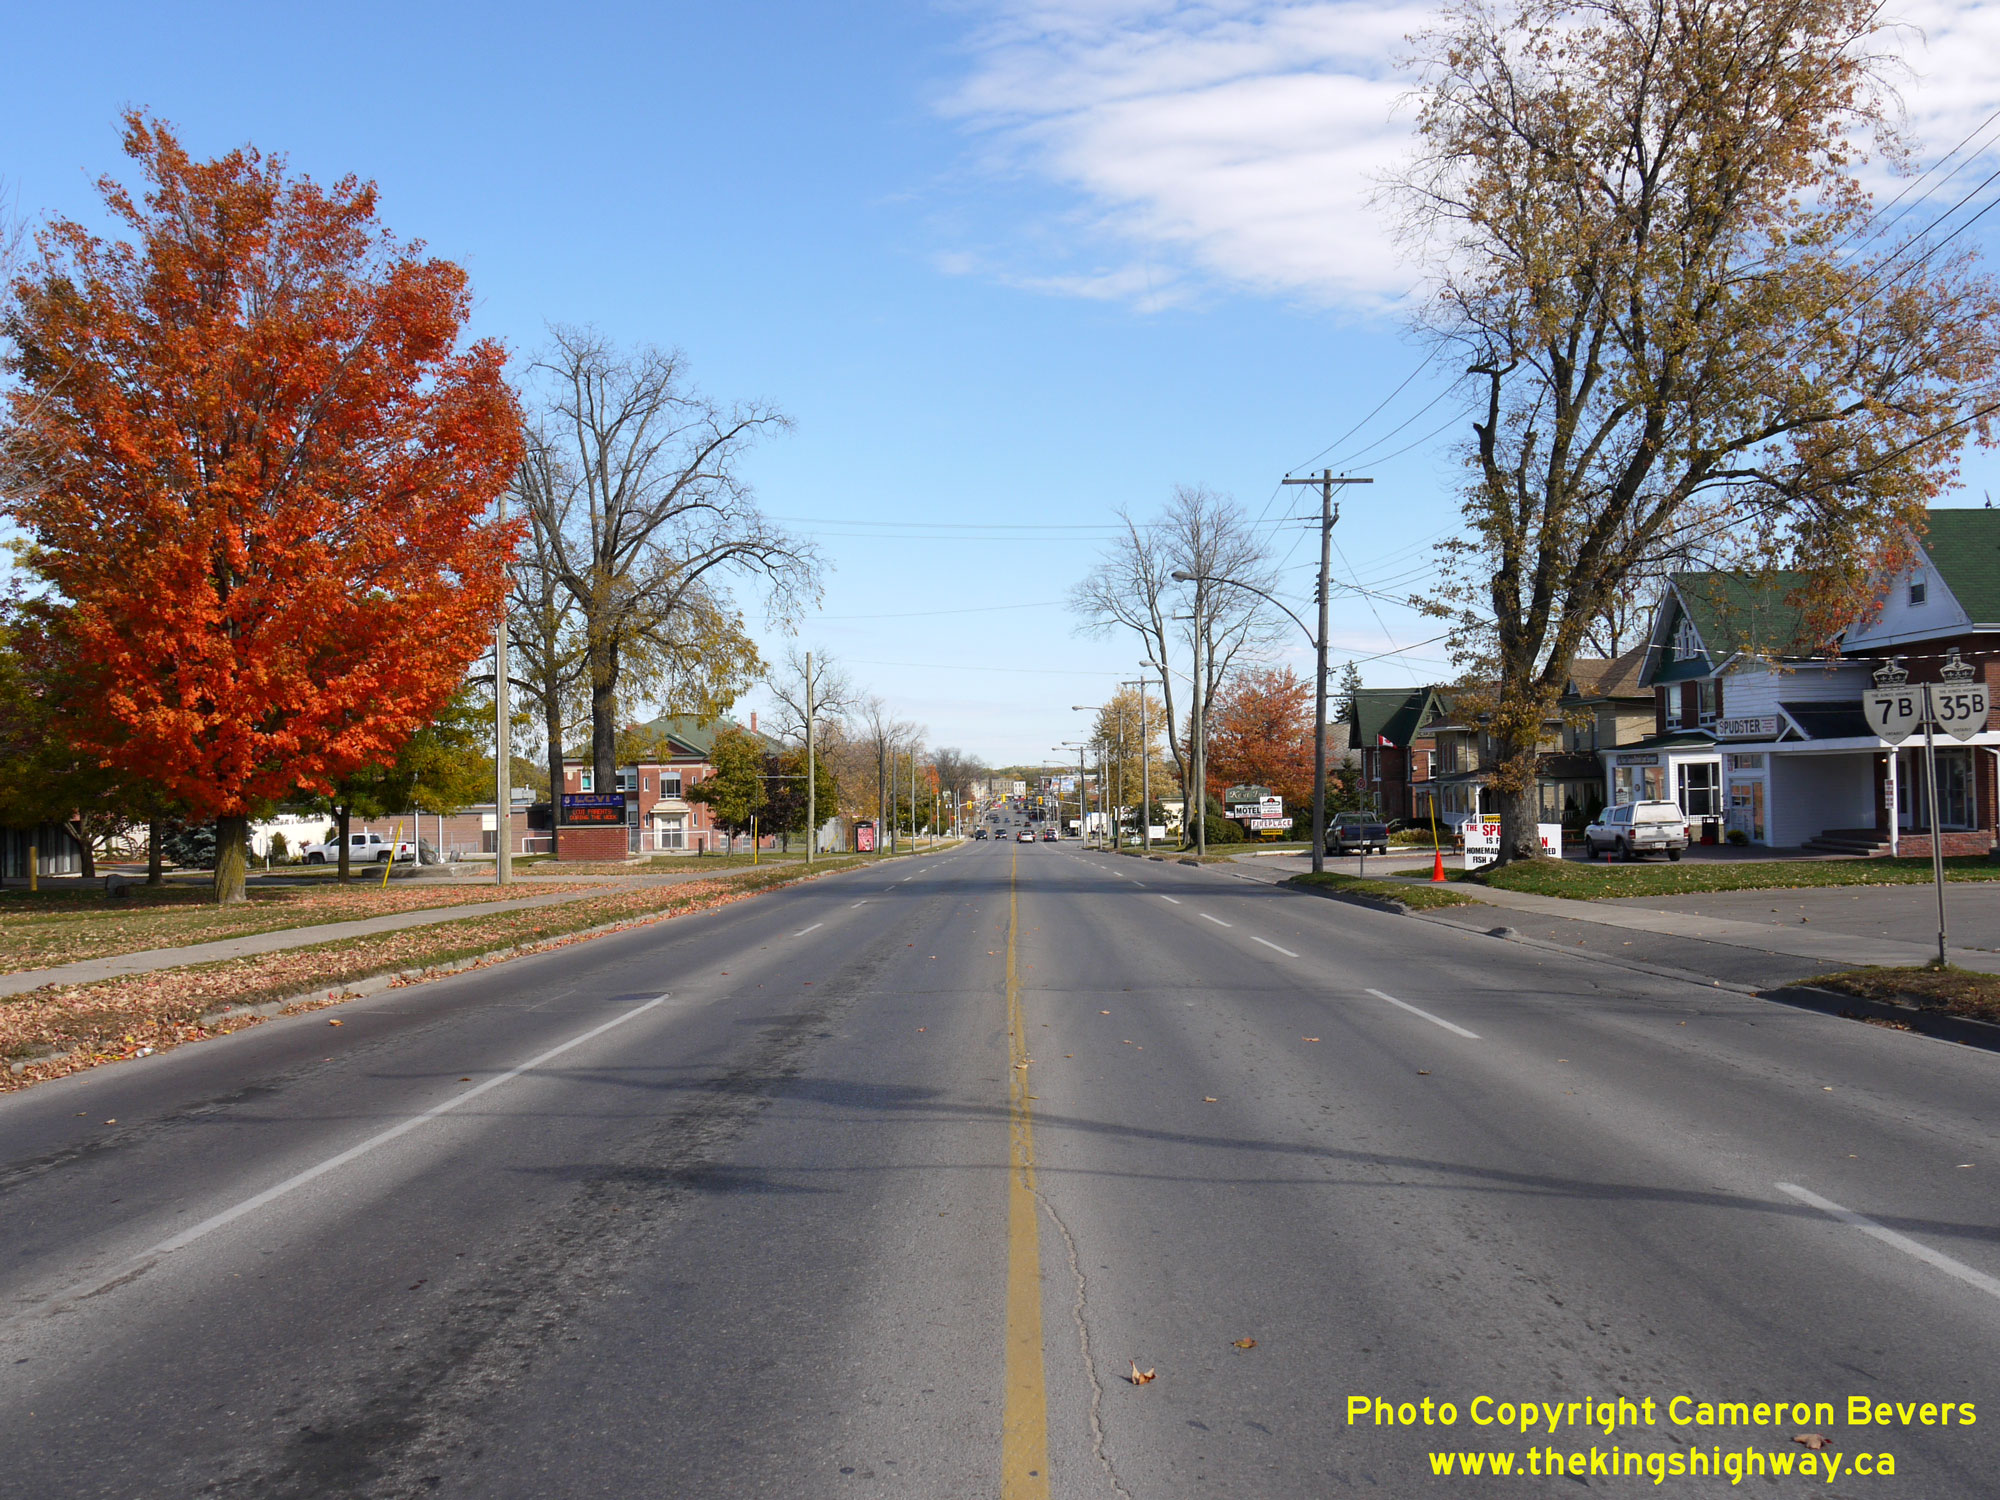
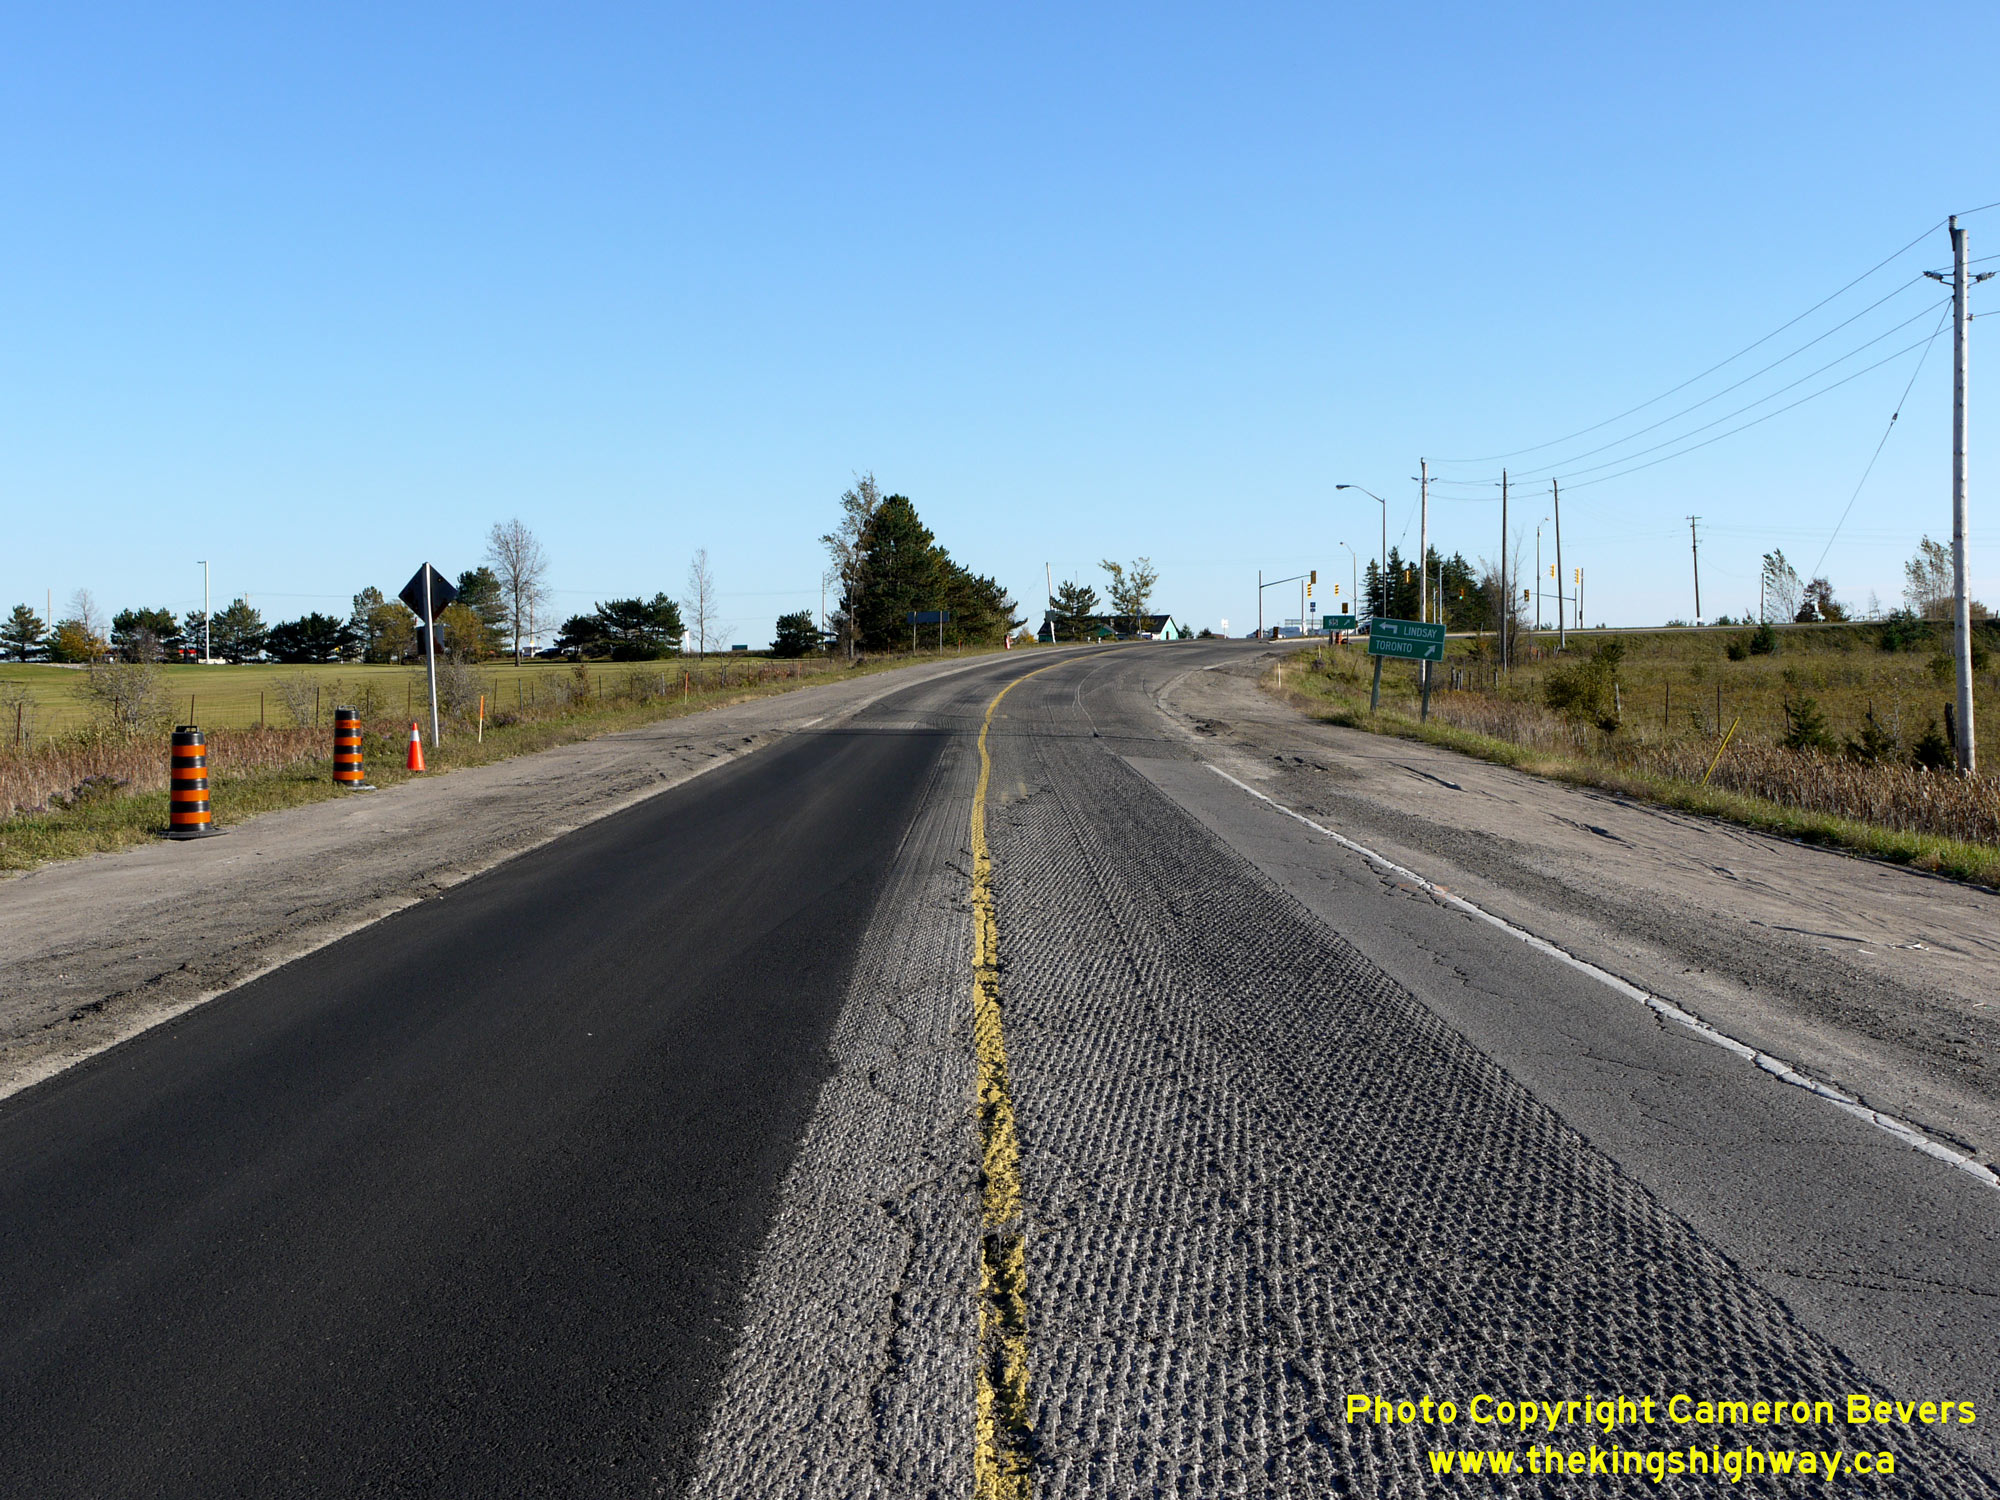
Left - View of the Lindsay Overhead on Hwy 35 & Hwy 7B, facing west from the Hwy 35 North and Hwy 35B Junction in Lindsay. See an
Enlarged Photo Here. (Photograph taken on October 10, 2010 - © Cameron Bevers) Right - Facing west along Kent Street (Hwy 7B & Hwy 35B) towards the Hwy 35 Junction. Note that Hwy 7 is trailblazed along the route of Hwy 35 South. Although it is not signed, this intersection marks the terminus of Hwy 35B. However, the route of Hwy 7B continues west for another 800 metres before terminating at nearby Hwy 7. See an Enlarged Photo Here. (Photograph taken on October 10, 2010 - © Cameron Bevers) 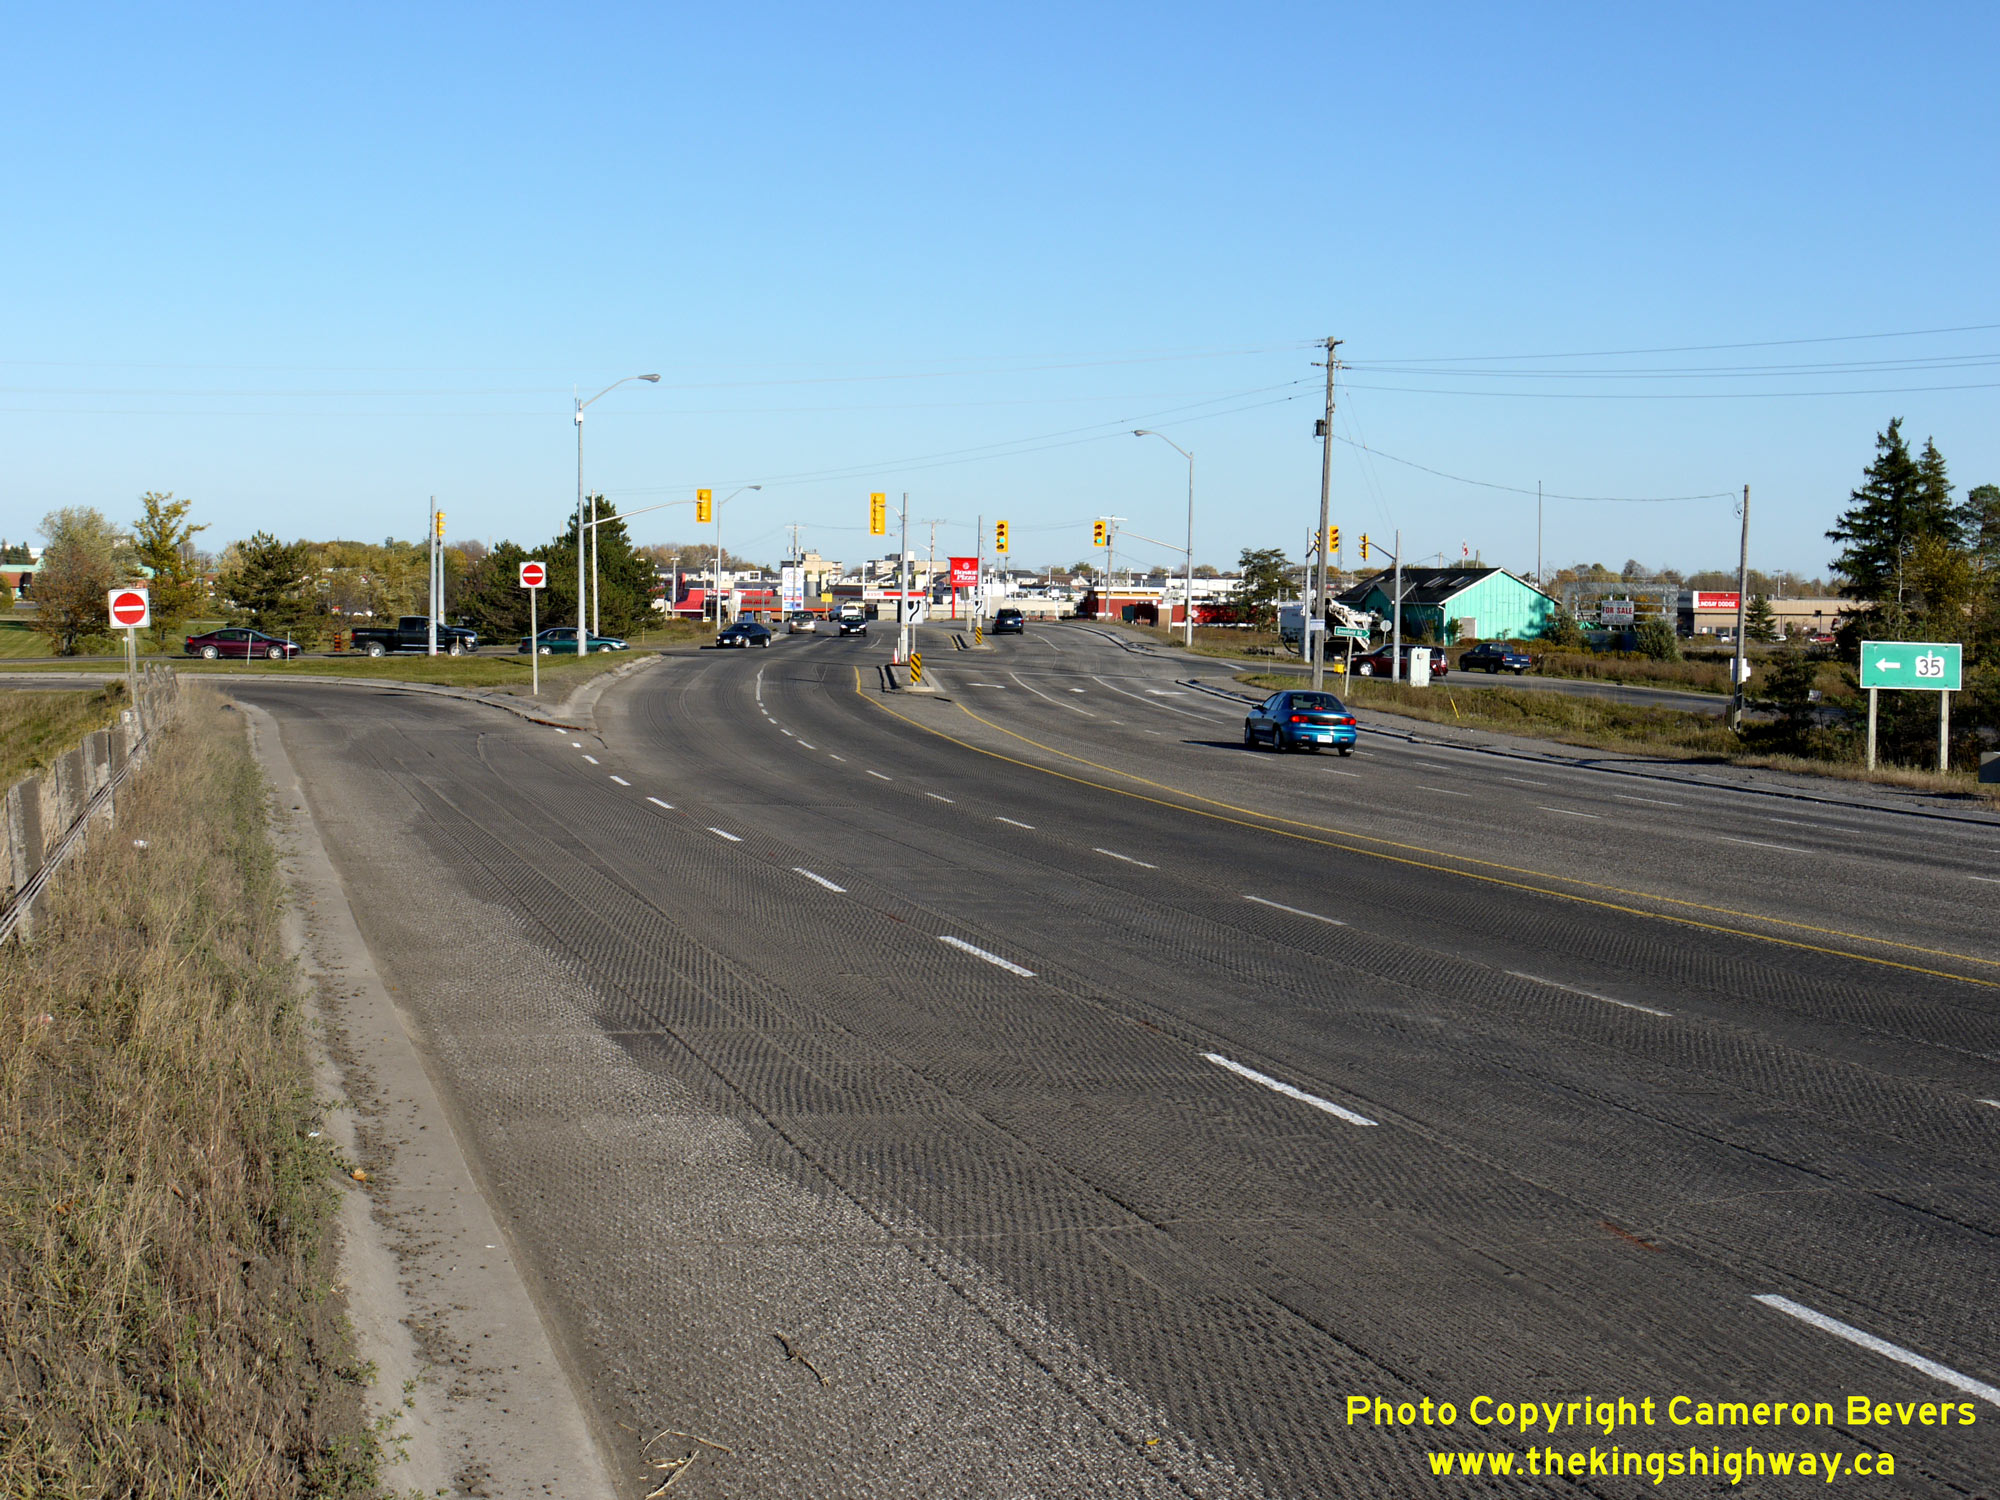
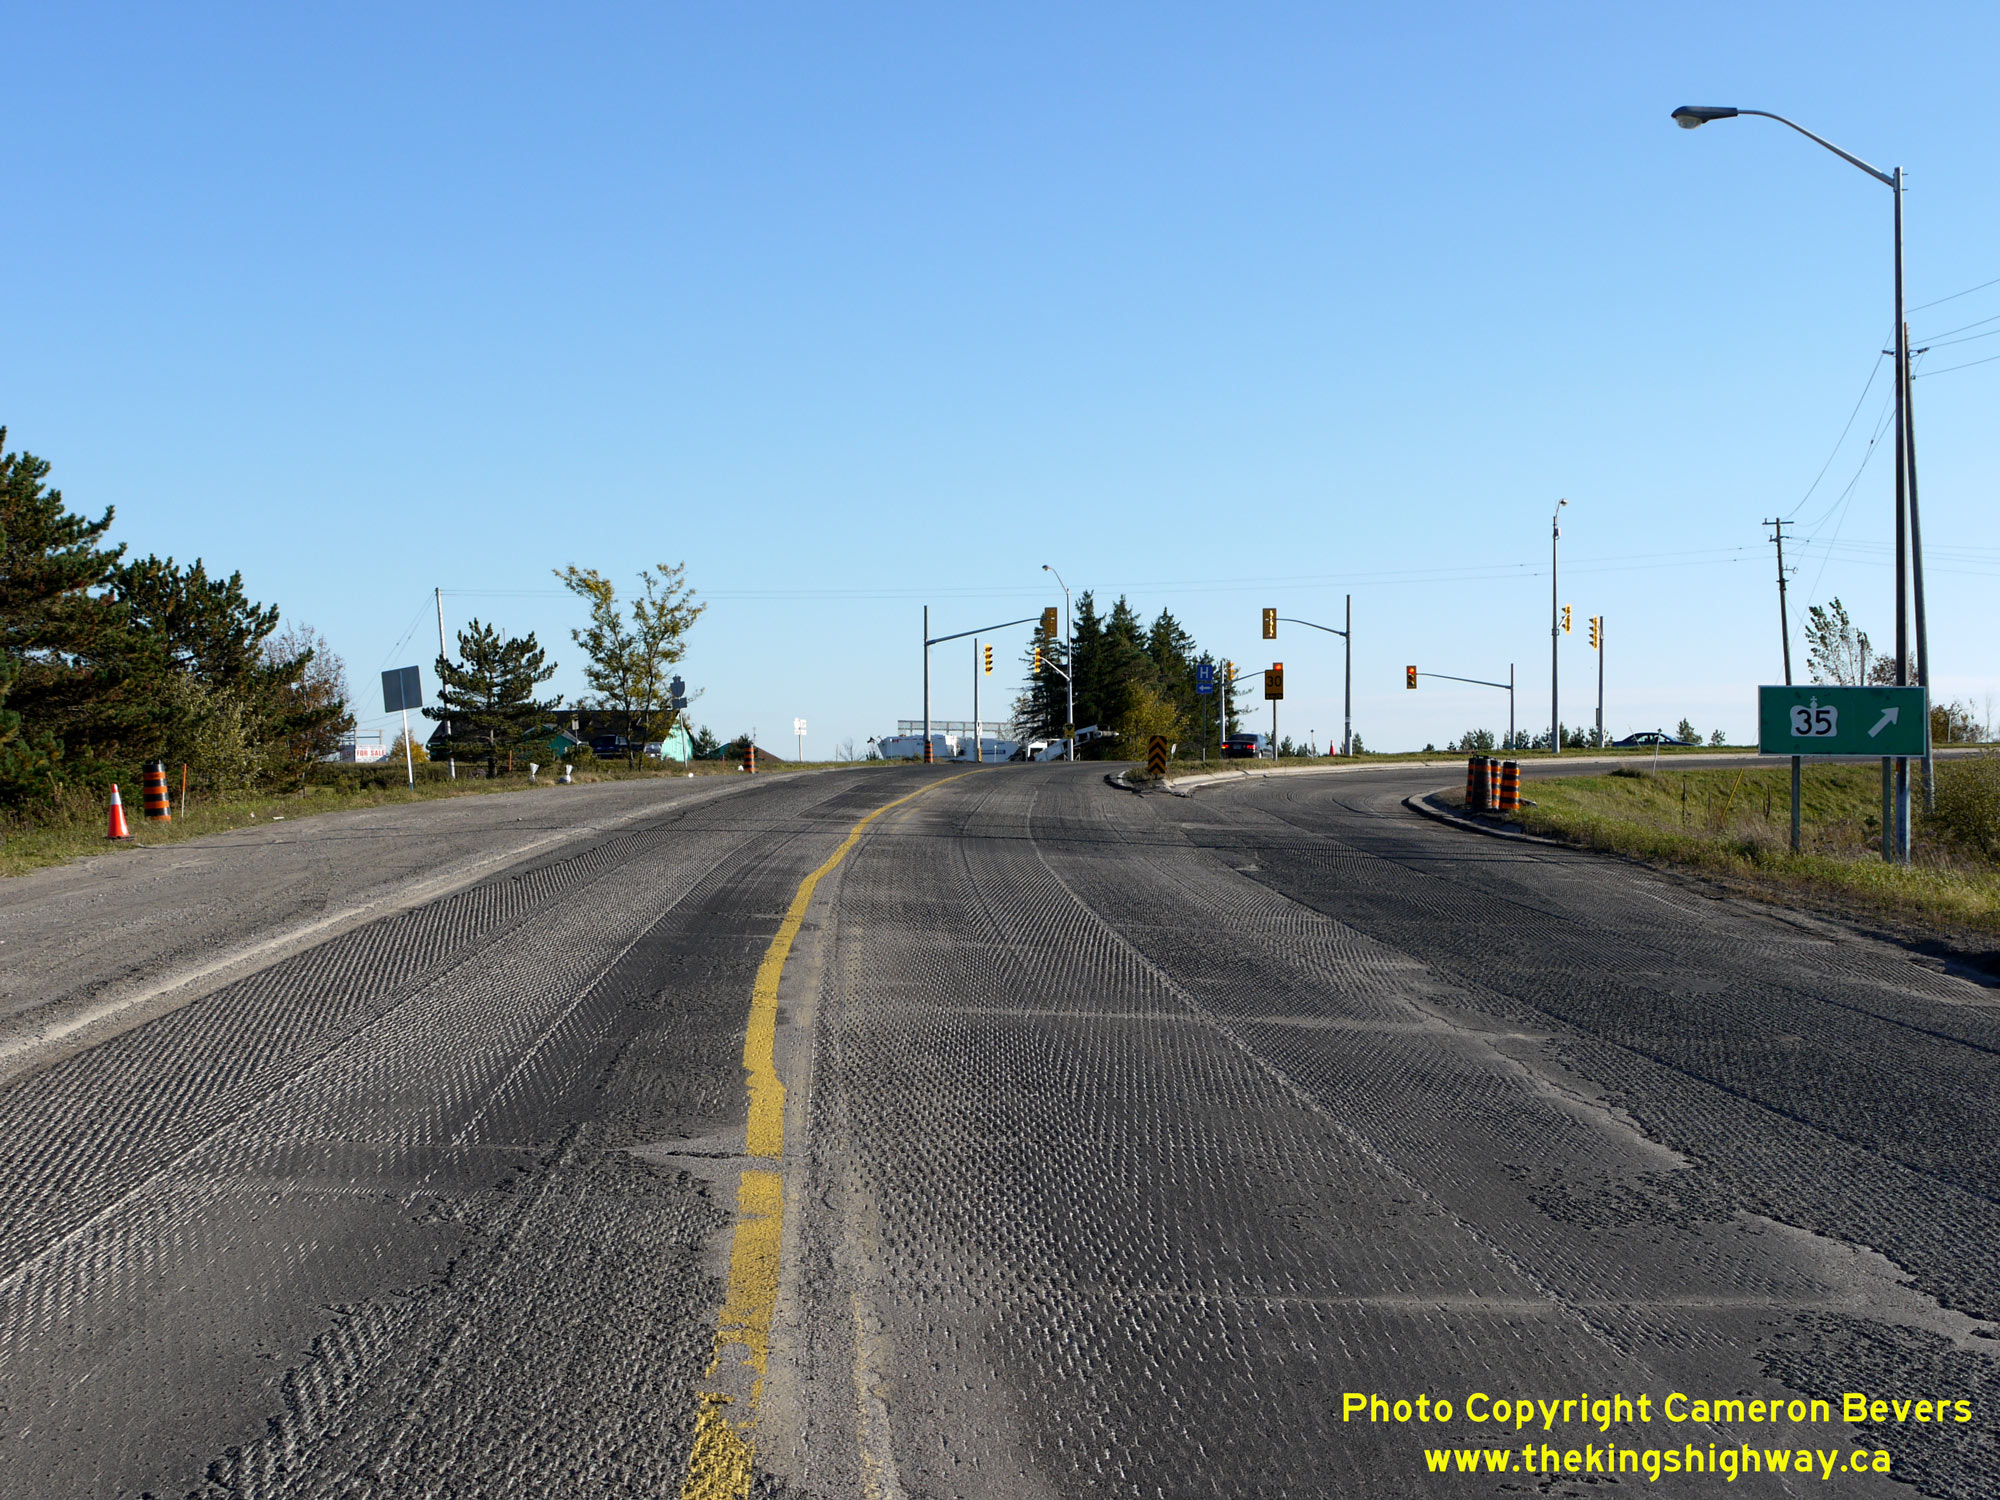
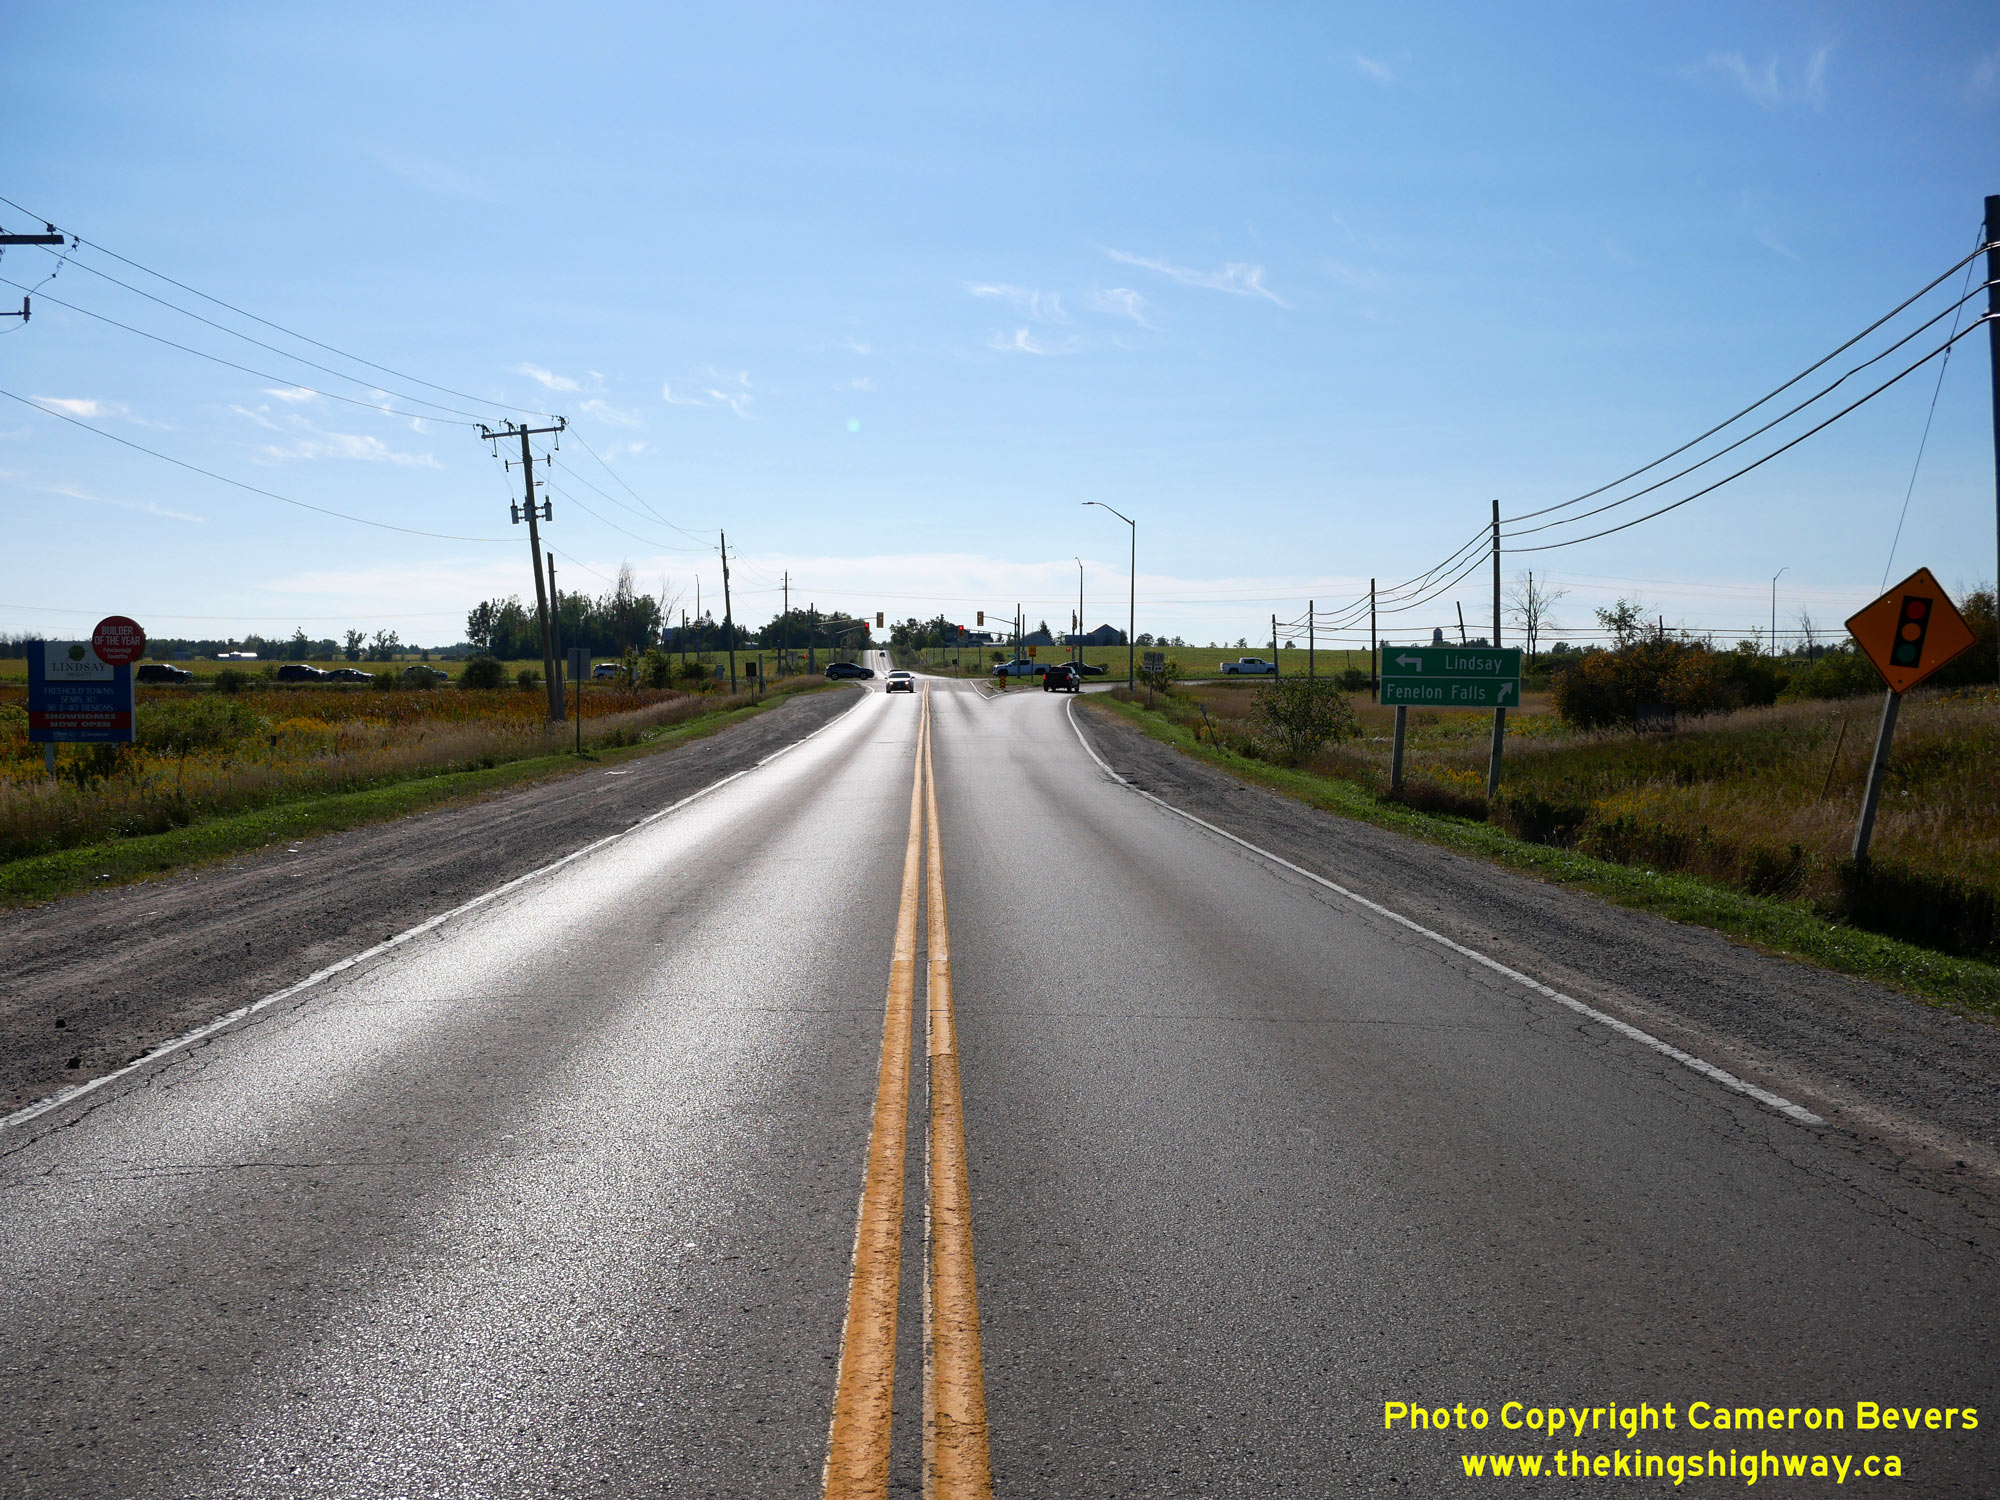
Left - Junction of Hwy 35 North and Hwy 7B, facing east towards Lindsay. At this junction, Lindsay's Hwy 35B Business Route also begins. It follows Kent
Street into Downtown Lindsay, concurrently with Hwy 7B. The route of Hwy 35 turns left here, and resumes its route north towards Fenelon Falls. See an
Enlarged Photo Here. (Photograph taken on October 10, 2010 - © Cameron Bevers) Right - Dual King's Highway route markers for Hwy 7B & Hwy 35B on Kent Street approaching Lindsay. See an Enlarged Photo Here. (Photograph taken on October 10, 2010 - © Cameron Bevers) 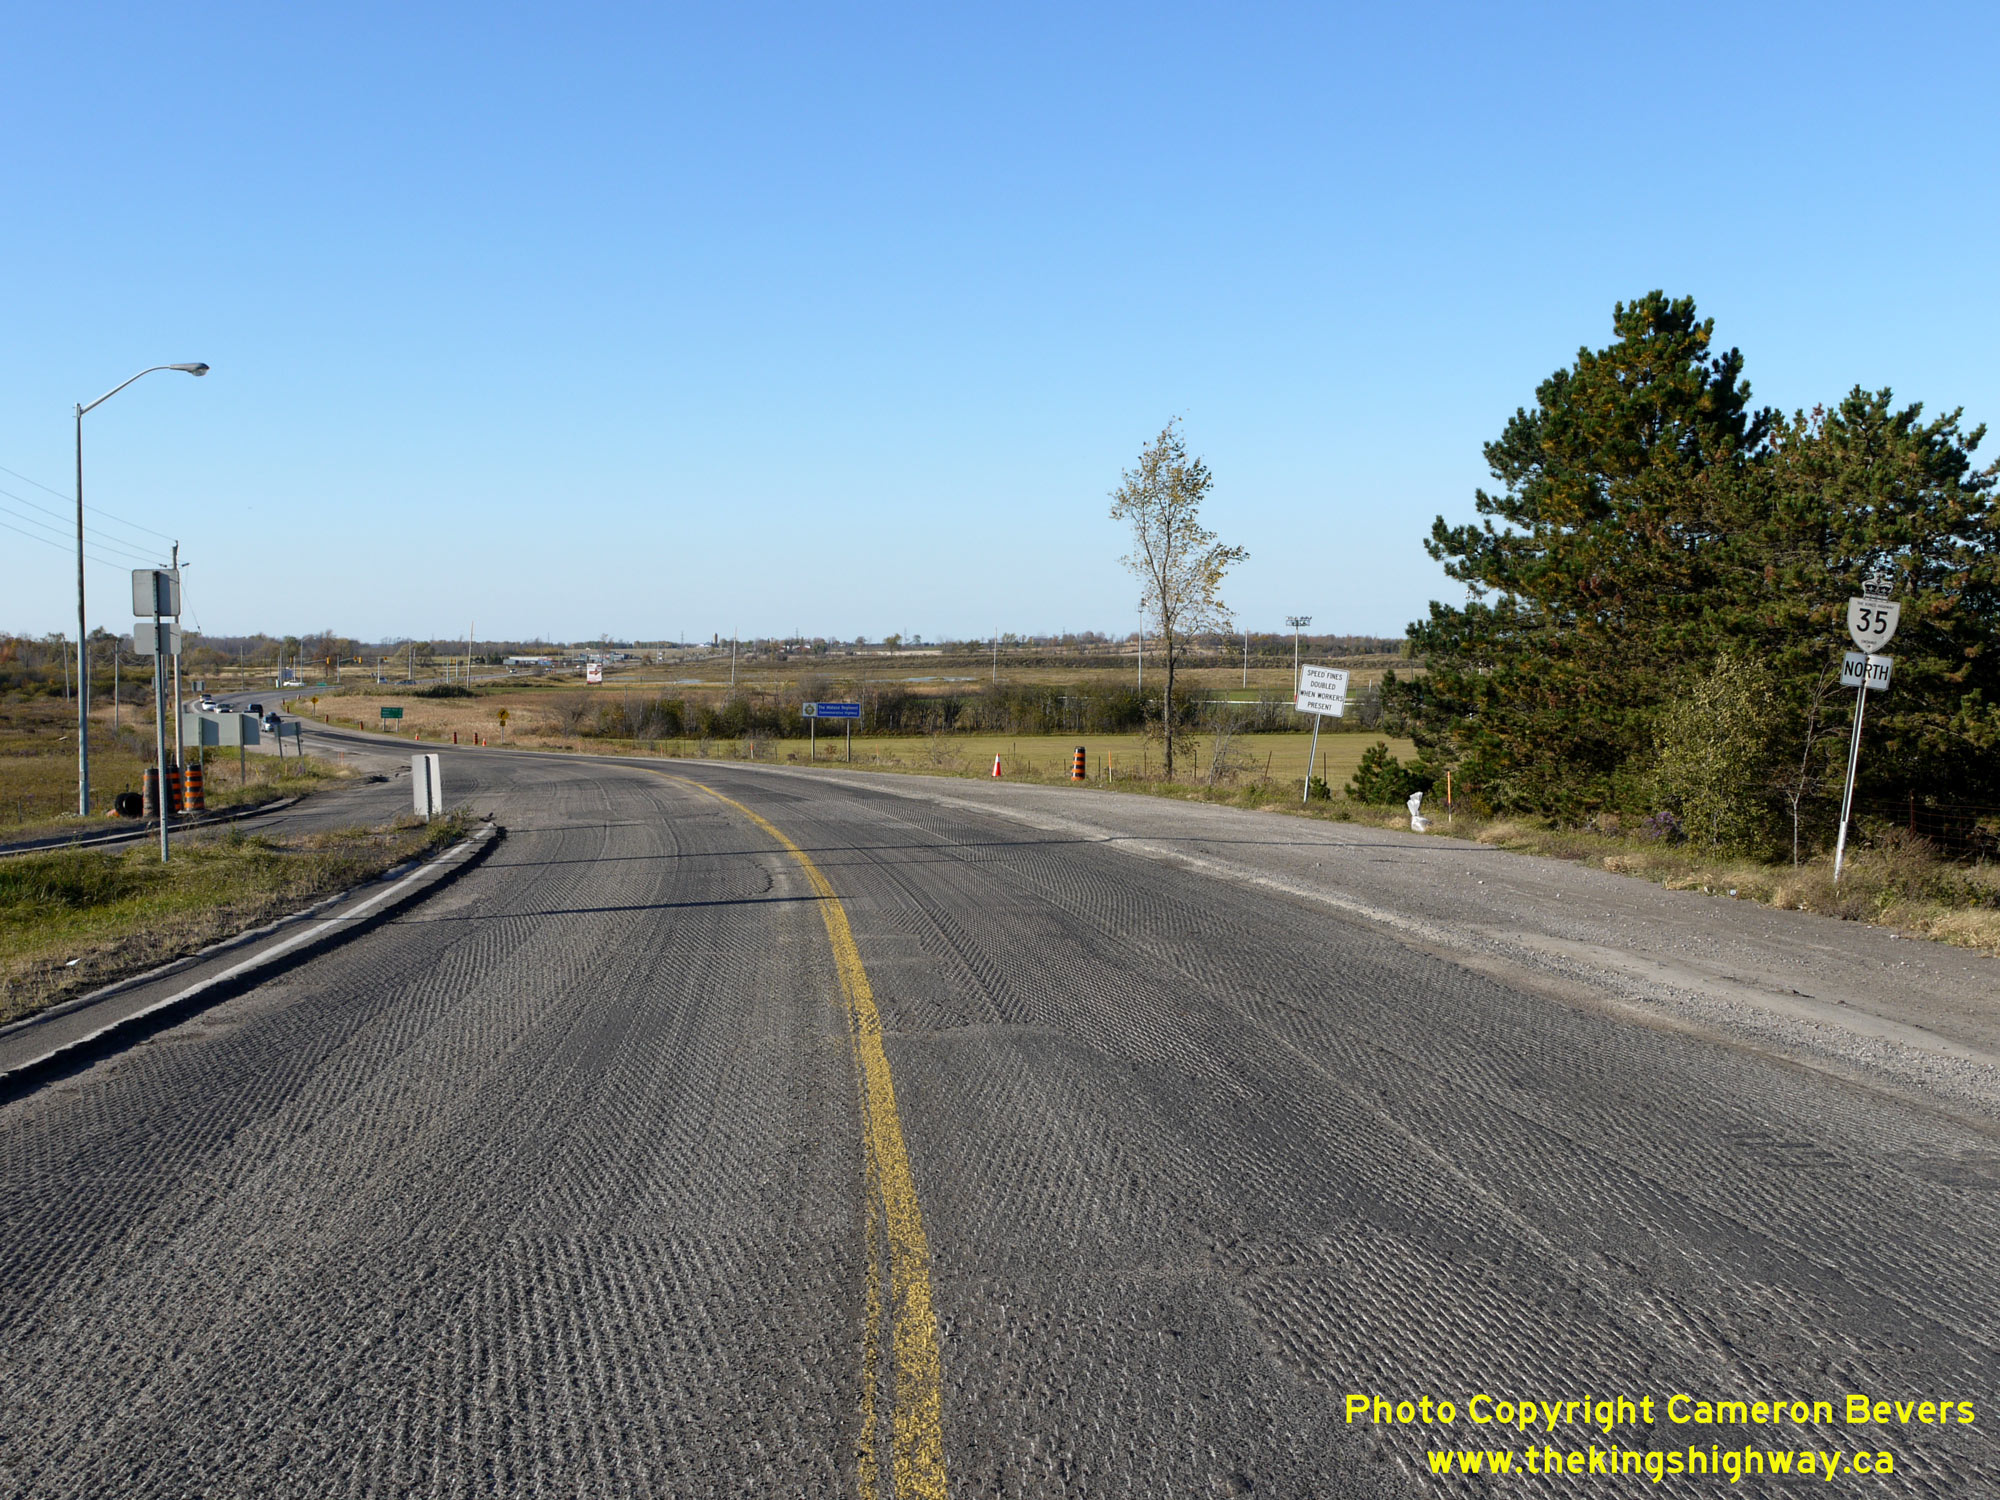
Left - View of Hwy 35 facing north from the Hwy 7B & Hwy 35B Junction at Kent Street in Lindsay. See an
Enlarged Photo Here. (Photograph taken on October 10, 2010 - © Cameron Bevers) Right - Facing south along Hwy 35 towards the Kent Street Junction (Hwy 7B & Hwy 35B) in Lindsay. A right-turn channelization ramp carries southbound Hwy 35 traffic out to the nearby Lindsay Bypass (Hwy 7 & Hwy 35). See an Enlarged Photo Here. (Photograph taken on October 10, 2010 - © Cameron Bevers) 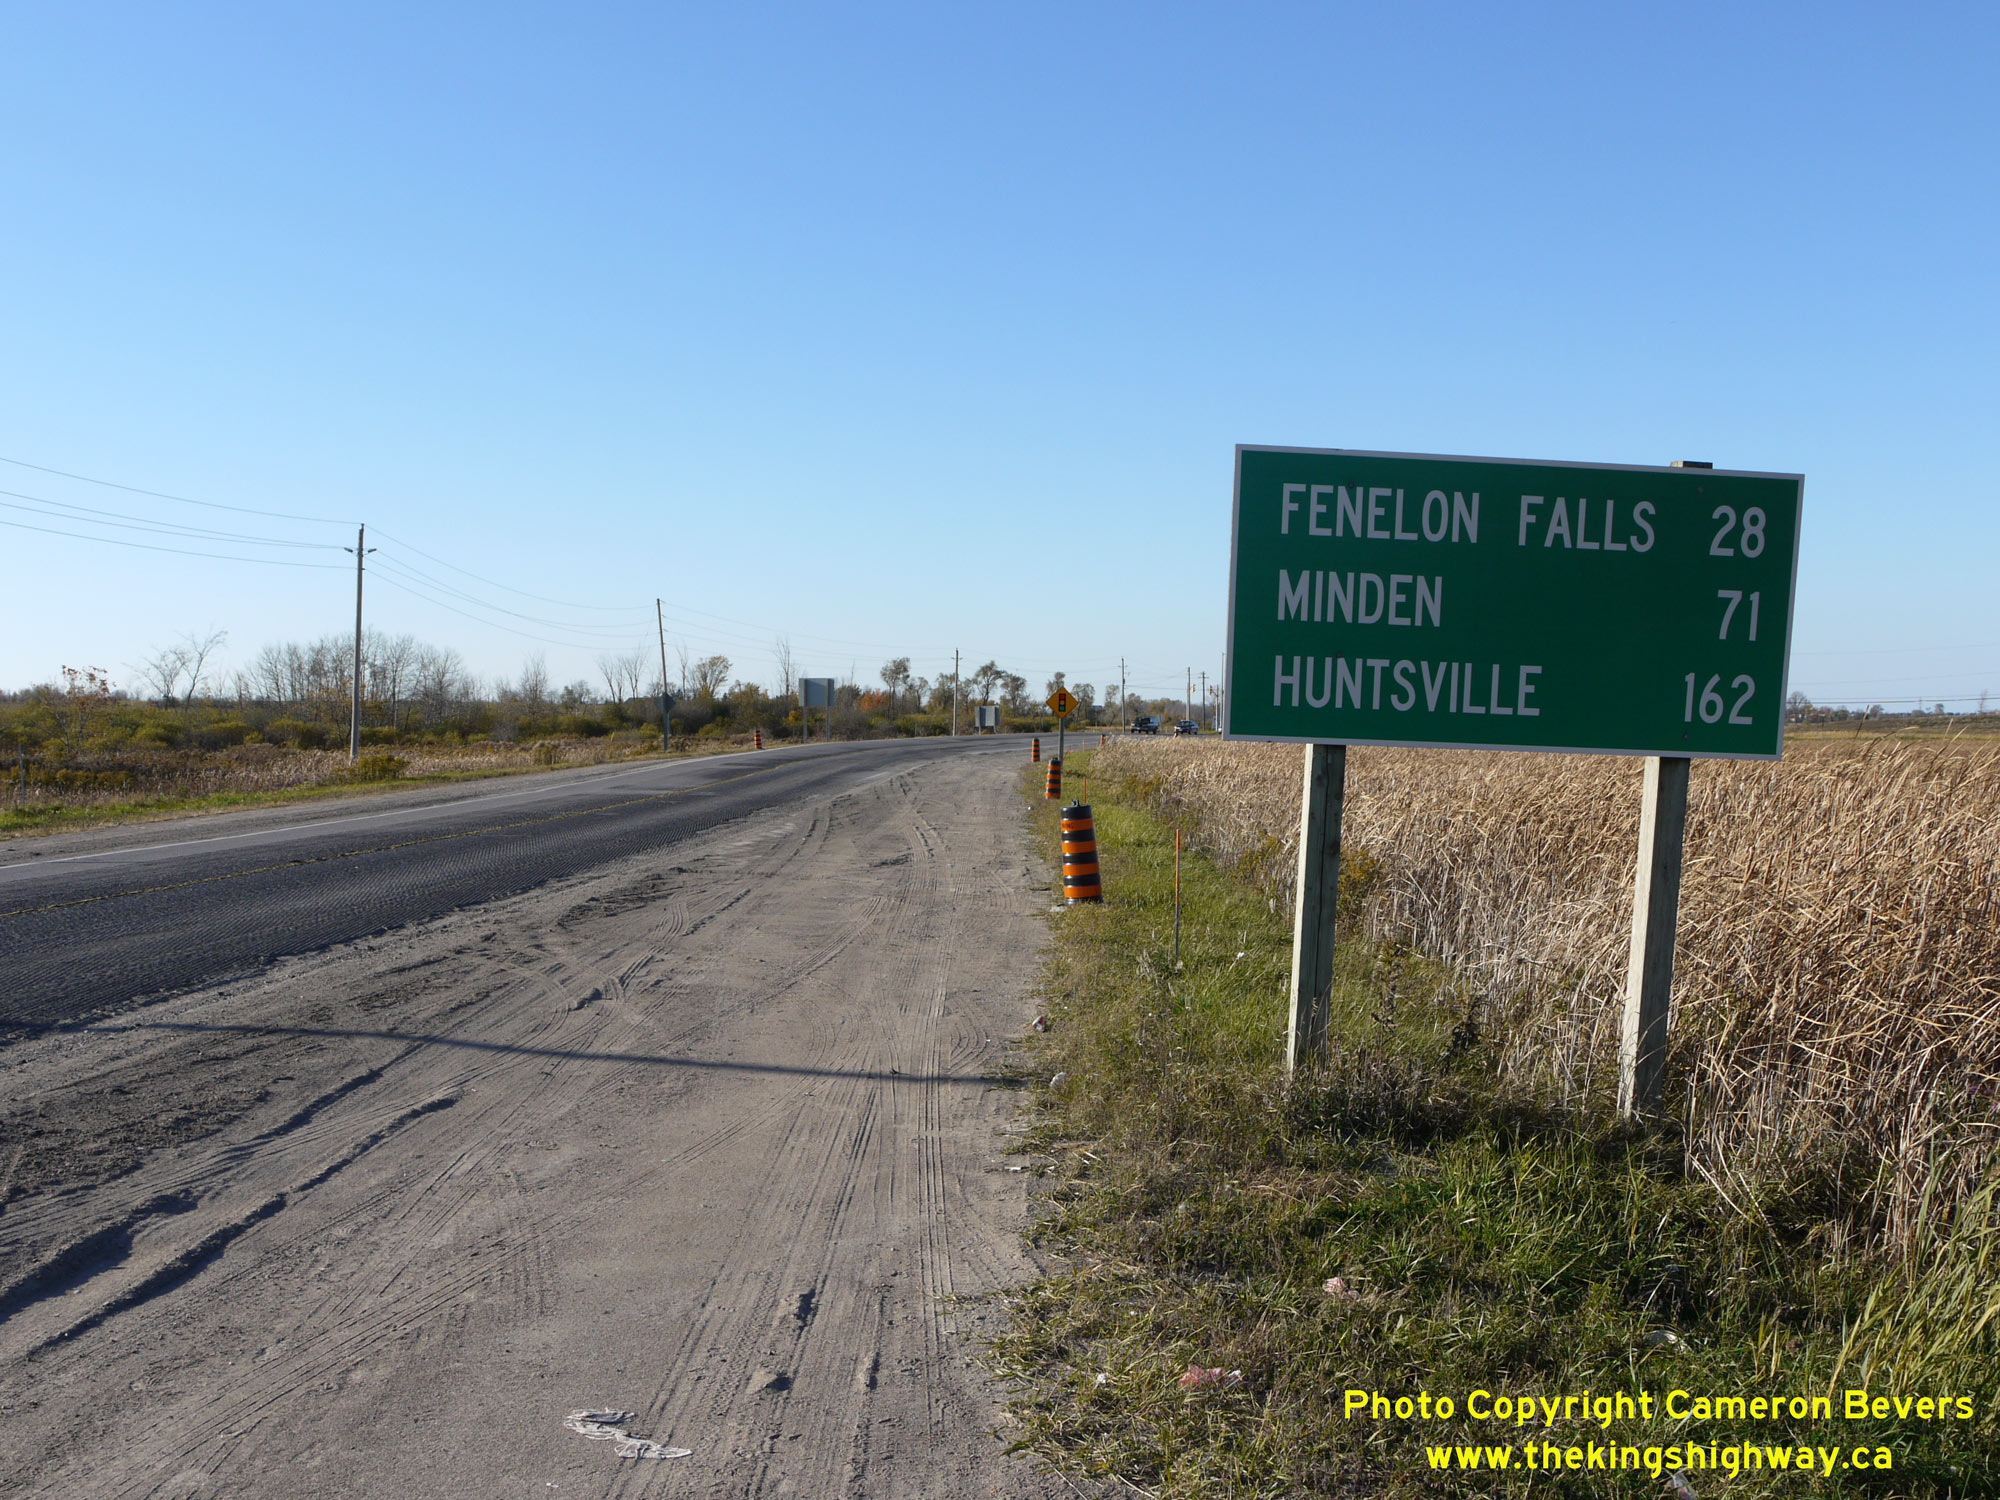
Left - Distance guide sign facing northbound Hwy 35 traffic, just north of the Hwy 7B & Hwy 35B Junction at Kent Street in Lindsay. See an
Enlarged Photo Here. (Photograph taken on October 10, 2010 - © Cameron Bevers) Right - Approaching the Hwy 7B & Hwy 35B Junction at Kent Street on southbound Hwy 35 in Lindsay. See an Enlarged Photo Here. (Photograph taken on October 10, 2010 - © Cameron Bevers) 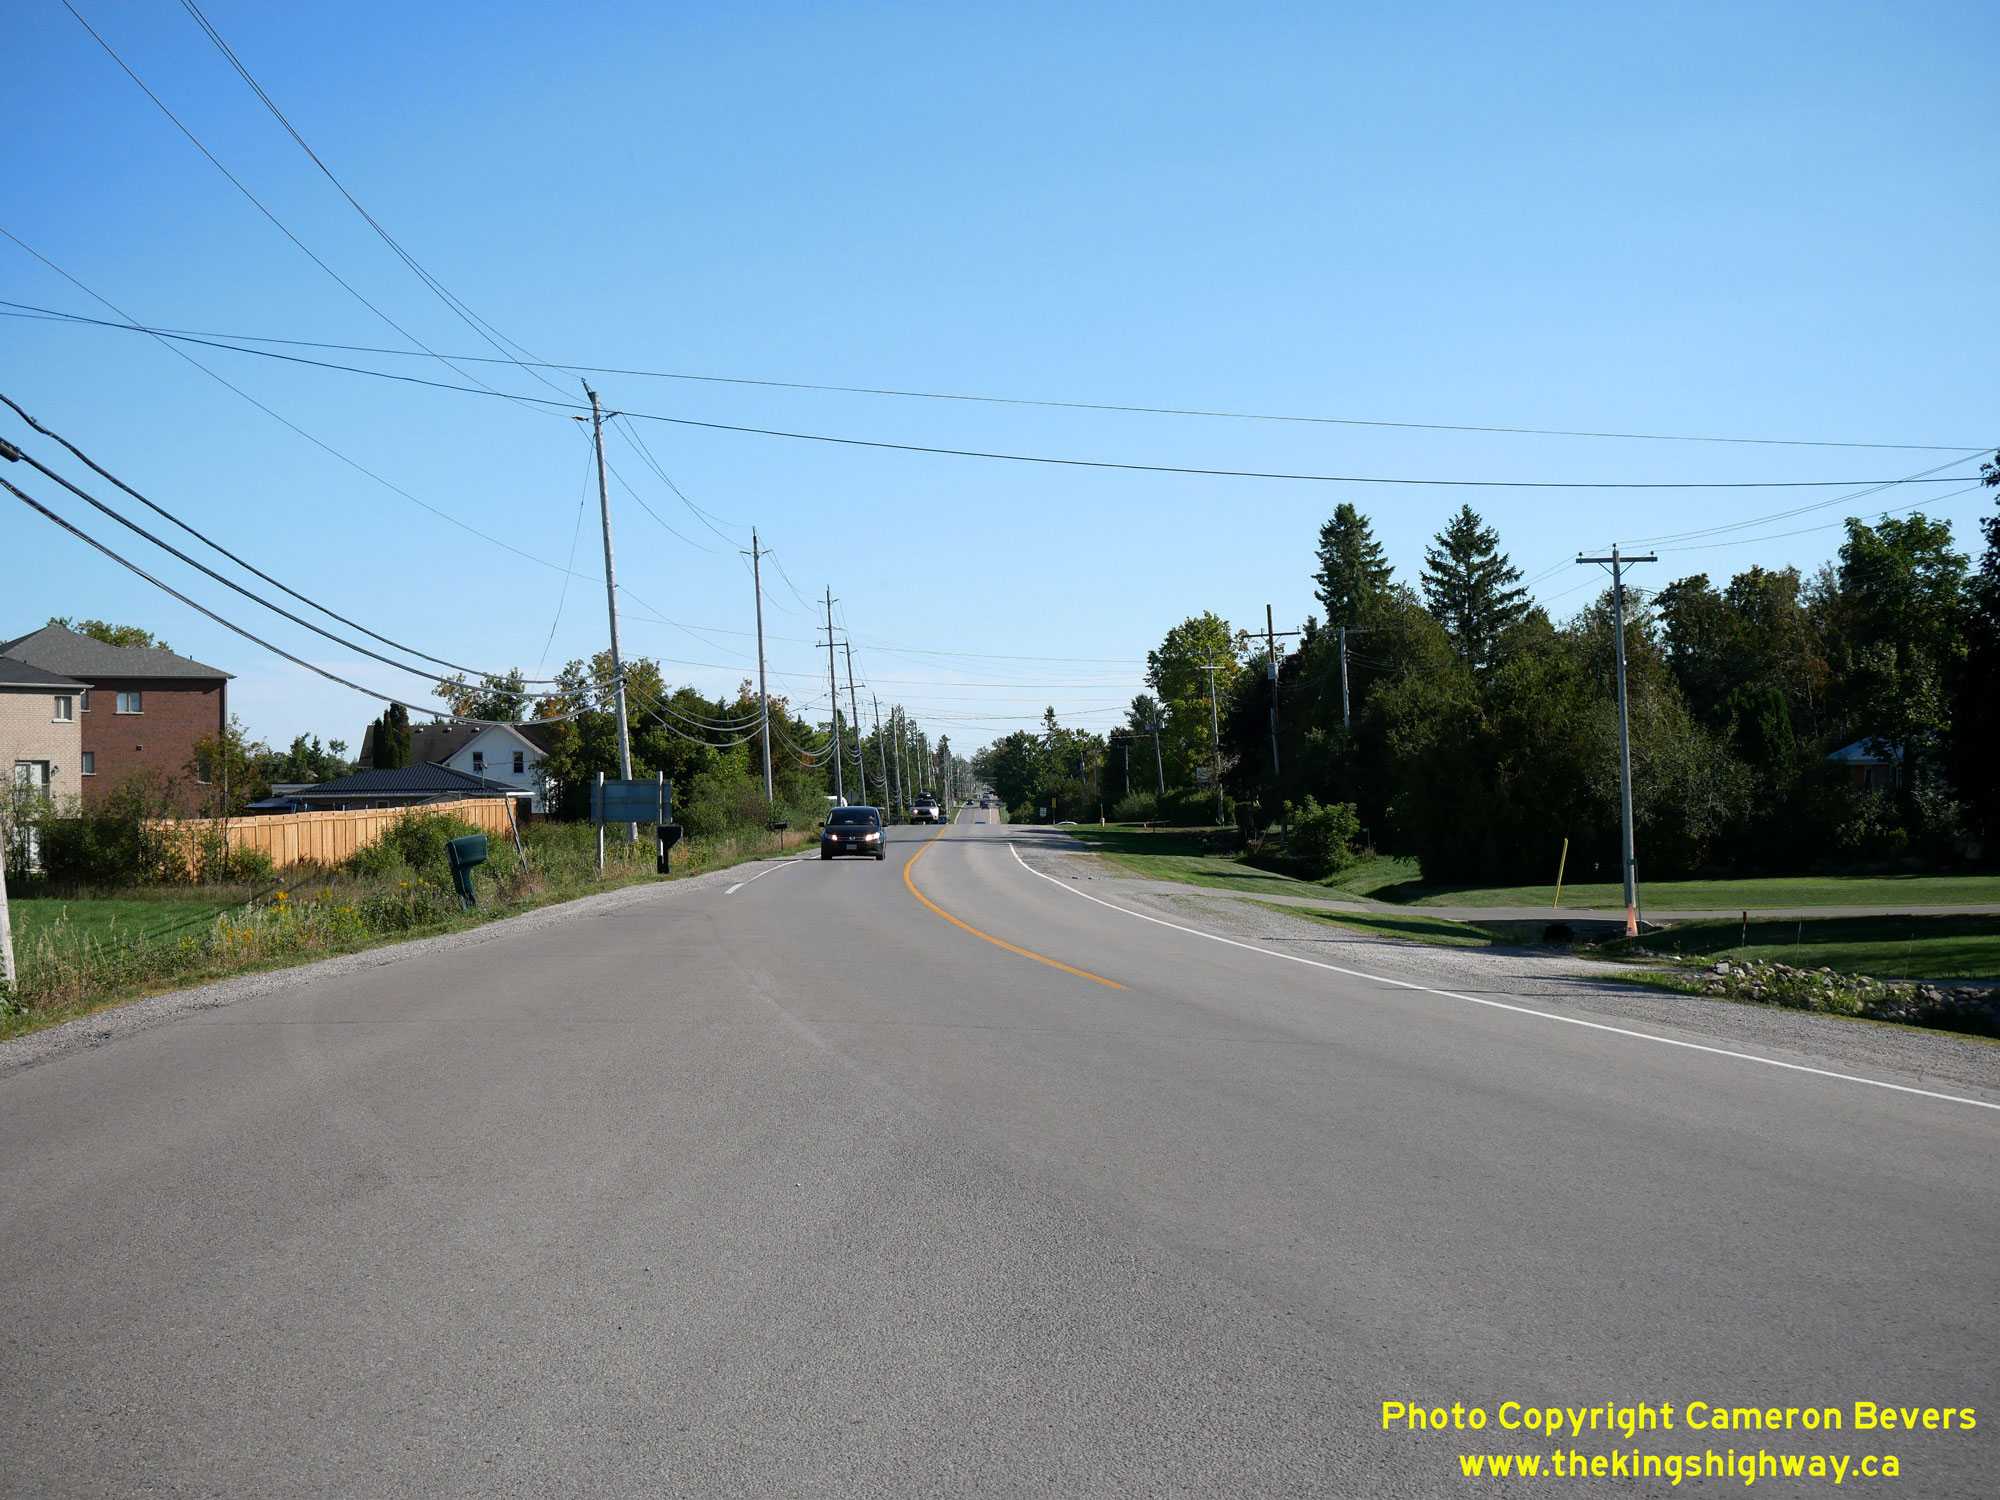
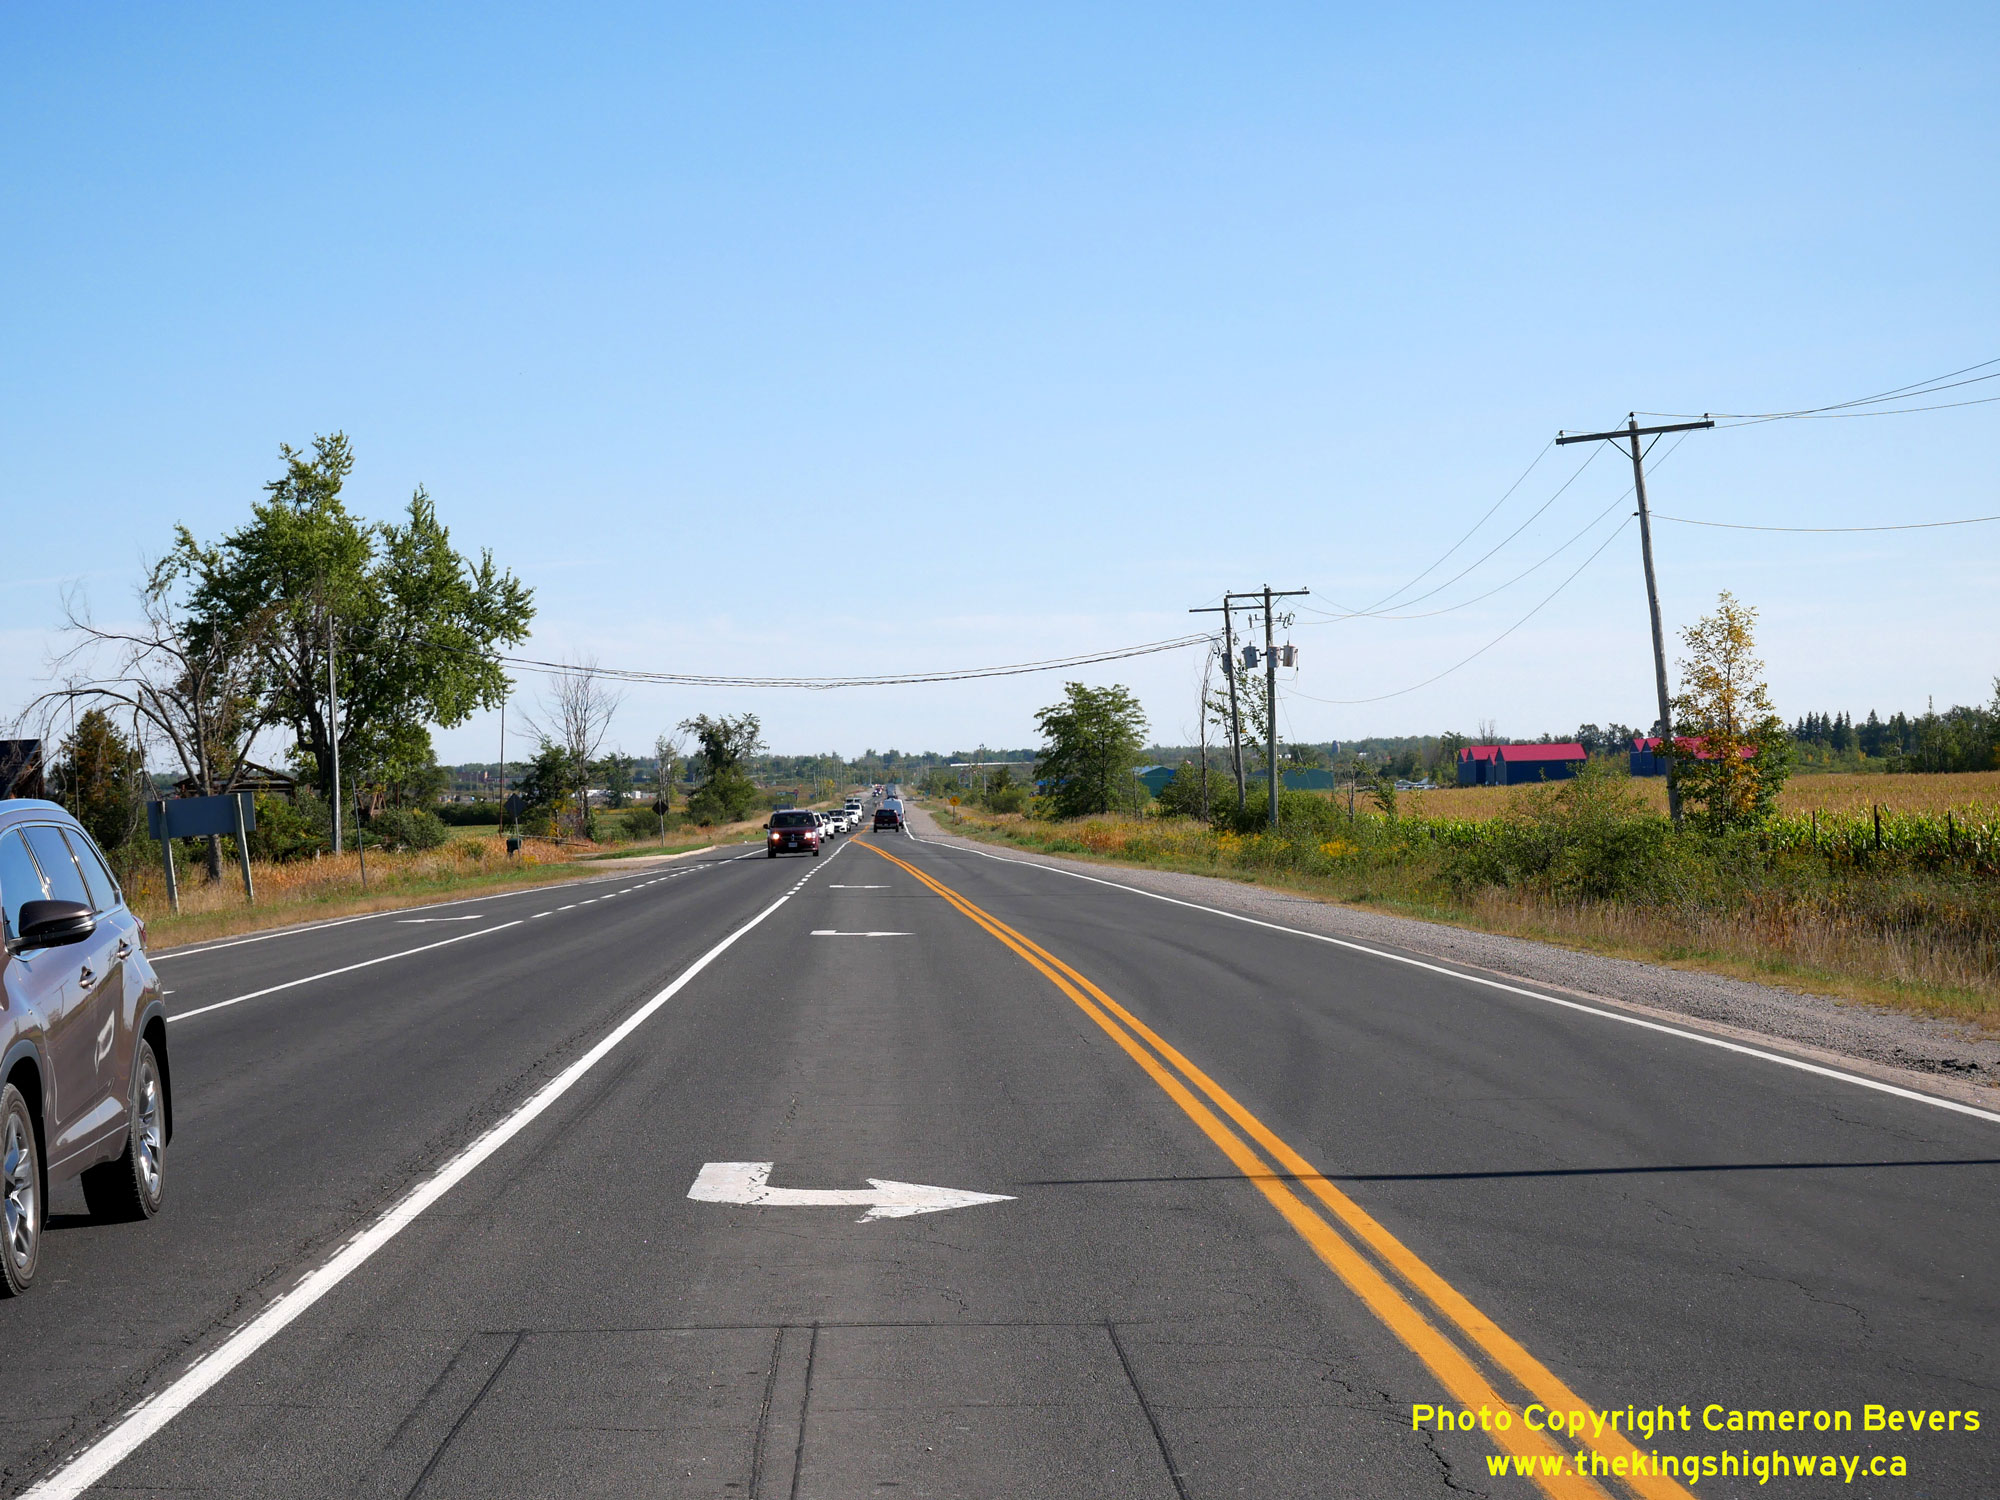
 Left - Facing south along Old Hwy 35B (Angeline Street) at the northern entrance to Lindsay's urban area. Prior to the construction of the Lindsay Bypass in
the 1950s, the route of Hwy 35 departed from town via Angeline Street. Once the new bypass was completed and opened to traffic in 1958, Hwy 35 was rerouted onto the
new bypass. The old route of Hwy 35 through town was renumbered as Hwy 35B. The Lindsay Business Route was modified in the 1960s, and as a result, Angeline Street
only served as the route of Hwy 35B from 1958 to 1968. See an Enlarged Photo Here. Left - Facing south along Old Hwy 35B (Angeline Street) at the northern entrance to Lindsay's urban area. Prior to the construction of the Lindsay Bypass in
the 1950s, the route of Hwy 35 departed from town via Angeline Street. Once the new bypass was completed and opened to traffic in 1958, Hwy 35 was rerouted onto the
new bypass. The old route of Hwy 35 through town was renumbered as Hwy 35B. The Lindsay Business Route was modified in the 1960s, and as a result, Angeline Street
only served as the route of Hwy 35B from 1958 to 1968. See an Enlarged Photo Here.(Photograph taken on September 16, 2025 - © Cameron Bevers) Right - View of Old Hwy 35B at the curve just north of Lindsay. When Hwy 35 was first assumed as a King's Highway in 1931, the highway continued straight
ahead. A curved corner diversion was constructed here in 1938 to allow use by faster through traffic. This new curve bypassed an older curve with a very tight radius
on the original highway's route. See an Enlarged Photo Here.(Photograph taken on September 16, 2025 - © Cameron Bevers) 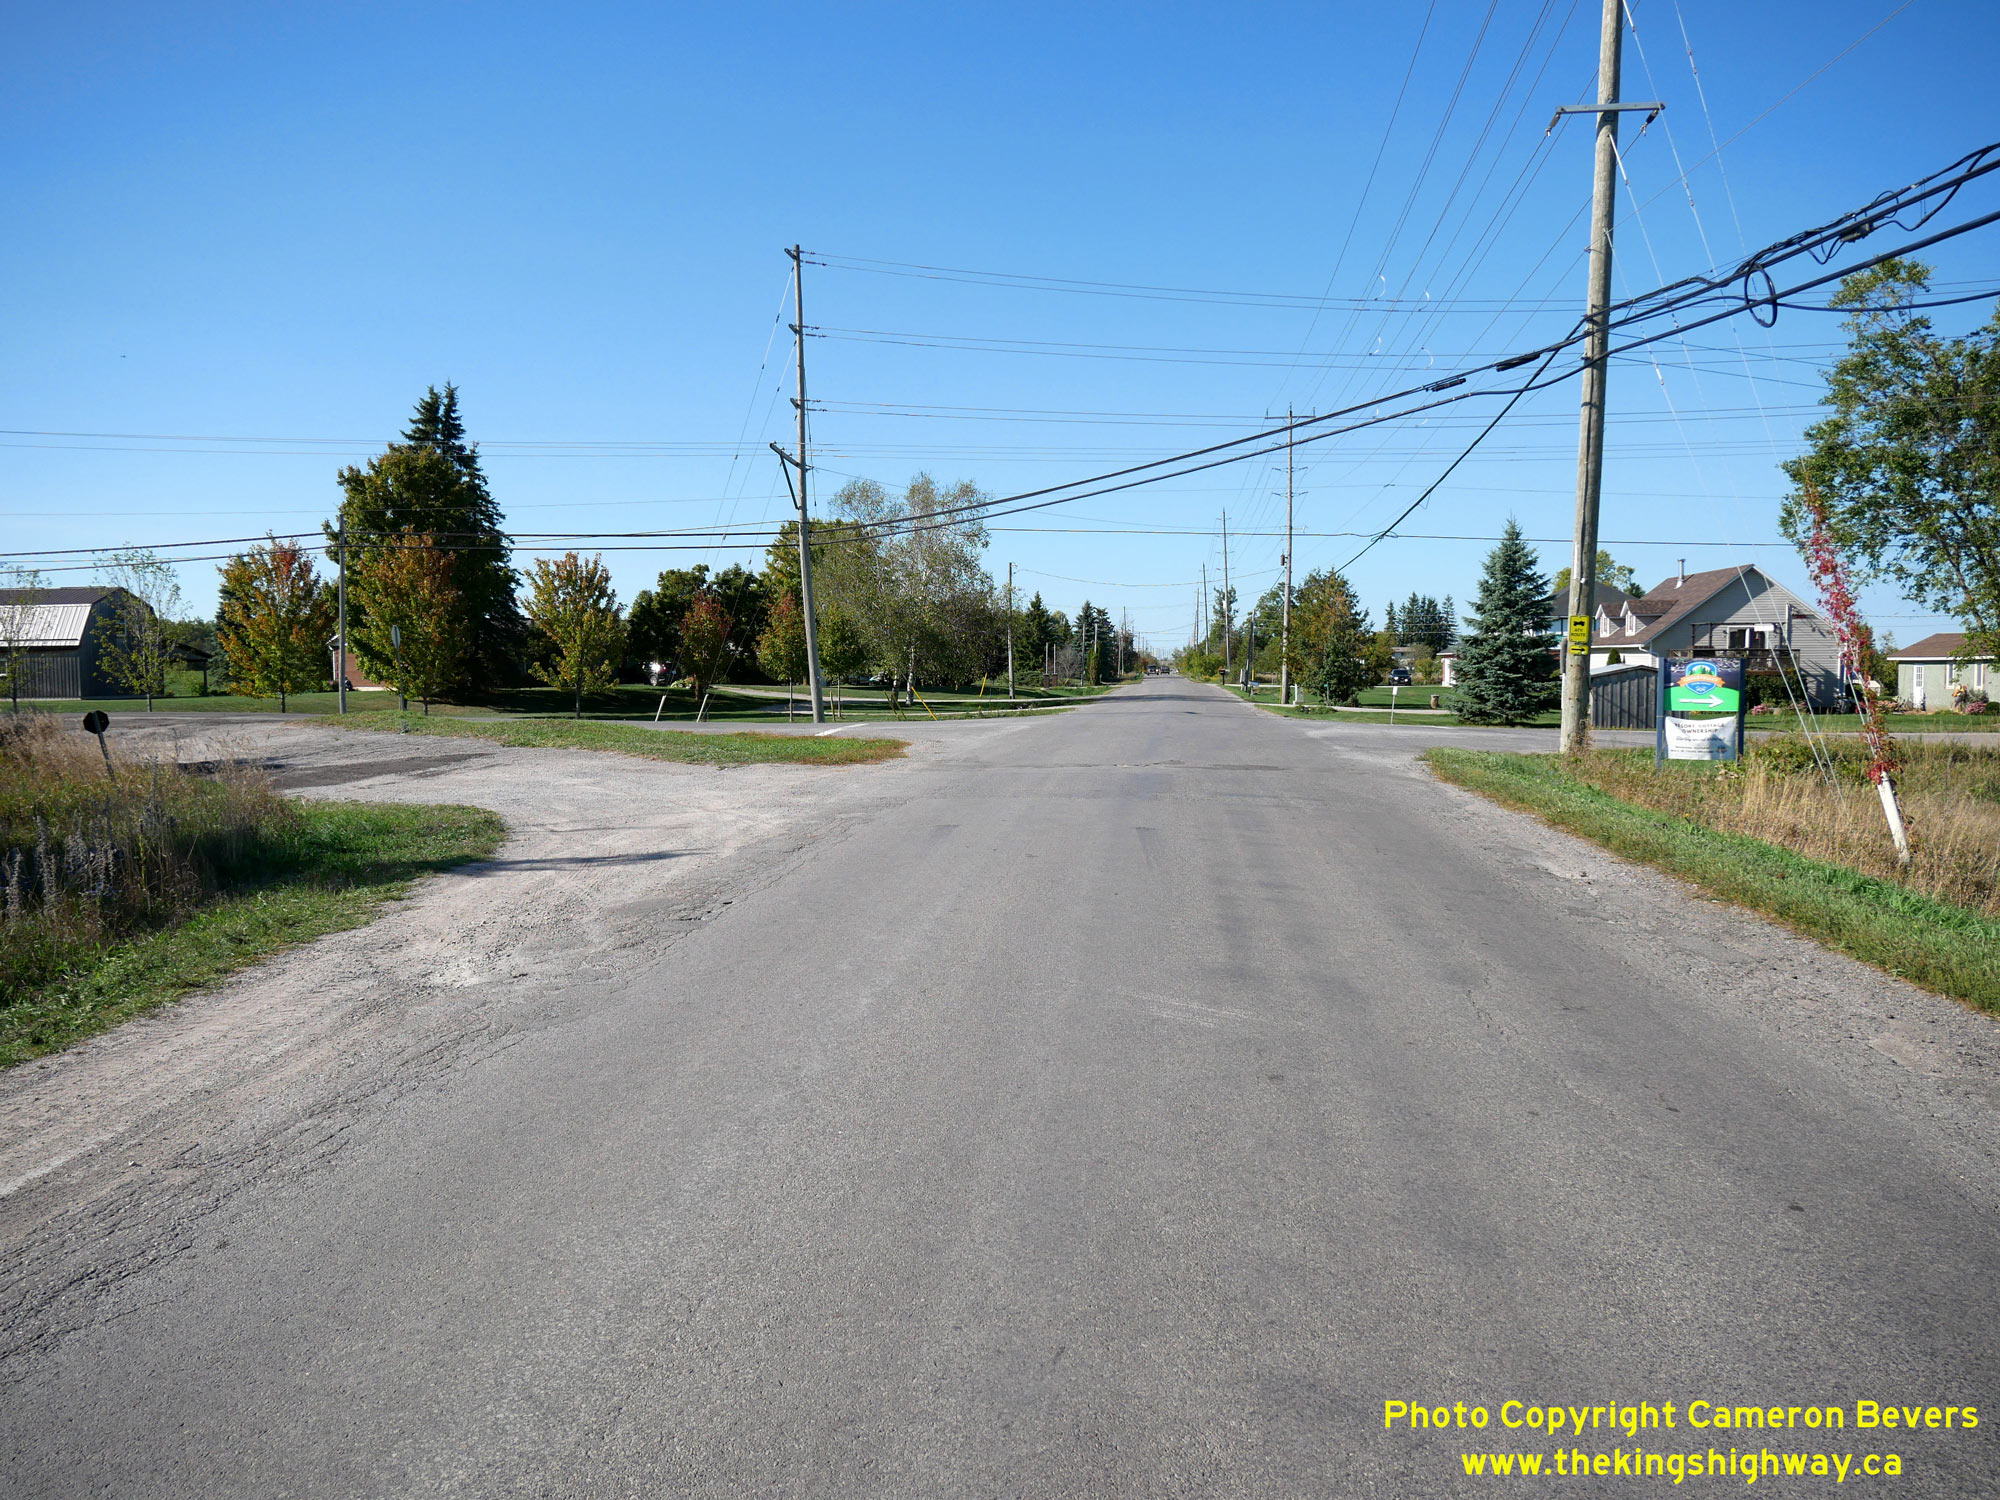
 Left - Facing north along Angeline Street at Thunder Bridge Road. Early motorists using Hwy 35 would have had to curve sharply to the left at this intersection
in order to continue north along Hwy 35 towards Fenelon Falls. Note the superelevated highway curve at left. With a radius of approximately 100 feet (30 metres), this
would have been a very hazardous curve for motorists approaching it at any appreciable rate of speed. See an
Enlarged Photo Here. Left - Facing north along Angeline Street at Thunder Bridge Road. Early motorists using Hwy 35 would have had to curve sharply to the left at this intersection
in order to continue north along Hwy 35 towards Fenelon Falls. Note the superelevated highway curve at left. With a radius of approximately 100 feet (30 metres), this
would have been a very hazardous curve for motorists approaching it at any appreciable rate of speed. See an
Enlarged Photo Here.(Photograph taken on September 16, 2025 - © Cameron Bevers) Right - View of Angeline Street facing south from Thunder Bridge Road. The old highway curve can be seen joining in at right. In the distance, Angeline Street
intersects with the realigned highway curve built in 1938. Provincial jurisdiction over the bypassed highway and old curve ended in January 1940, when the old highway
was transferred from the DHO back to the County of Victoria. See an Enlarged Photo Here.(Photograph taken on September 16, 2025 - © Cameron Bevers) 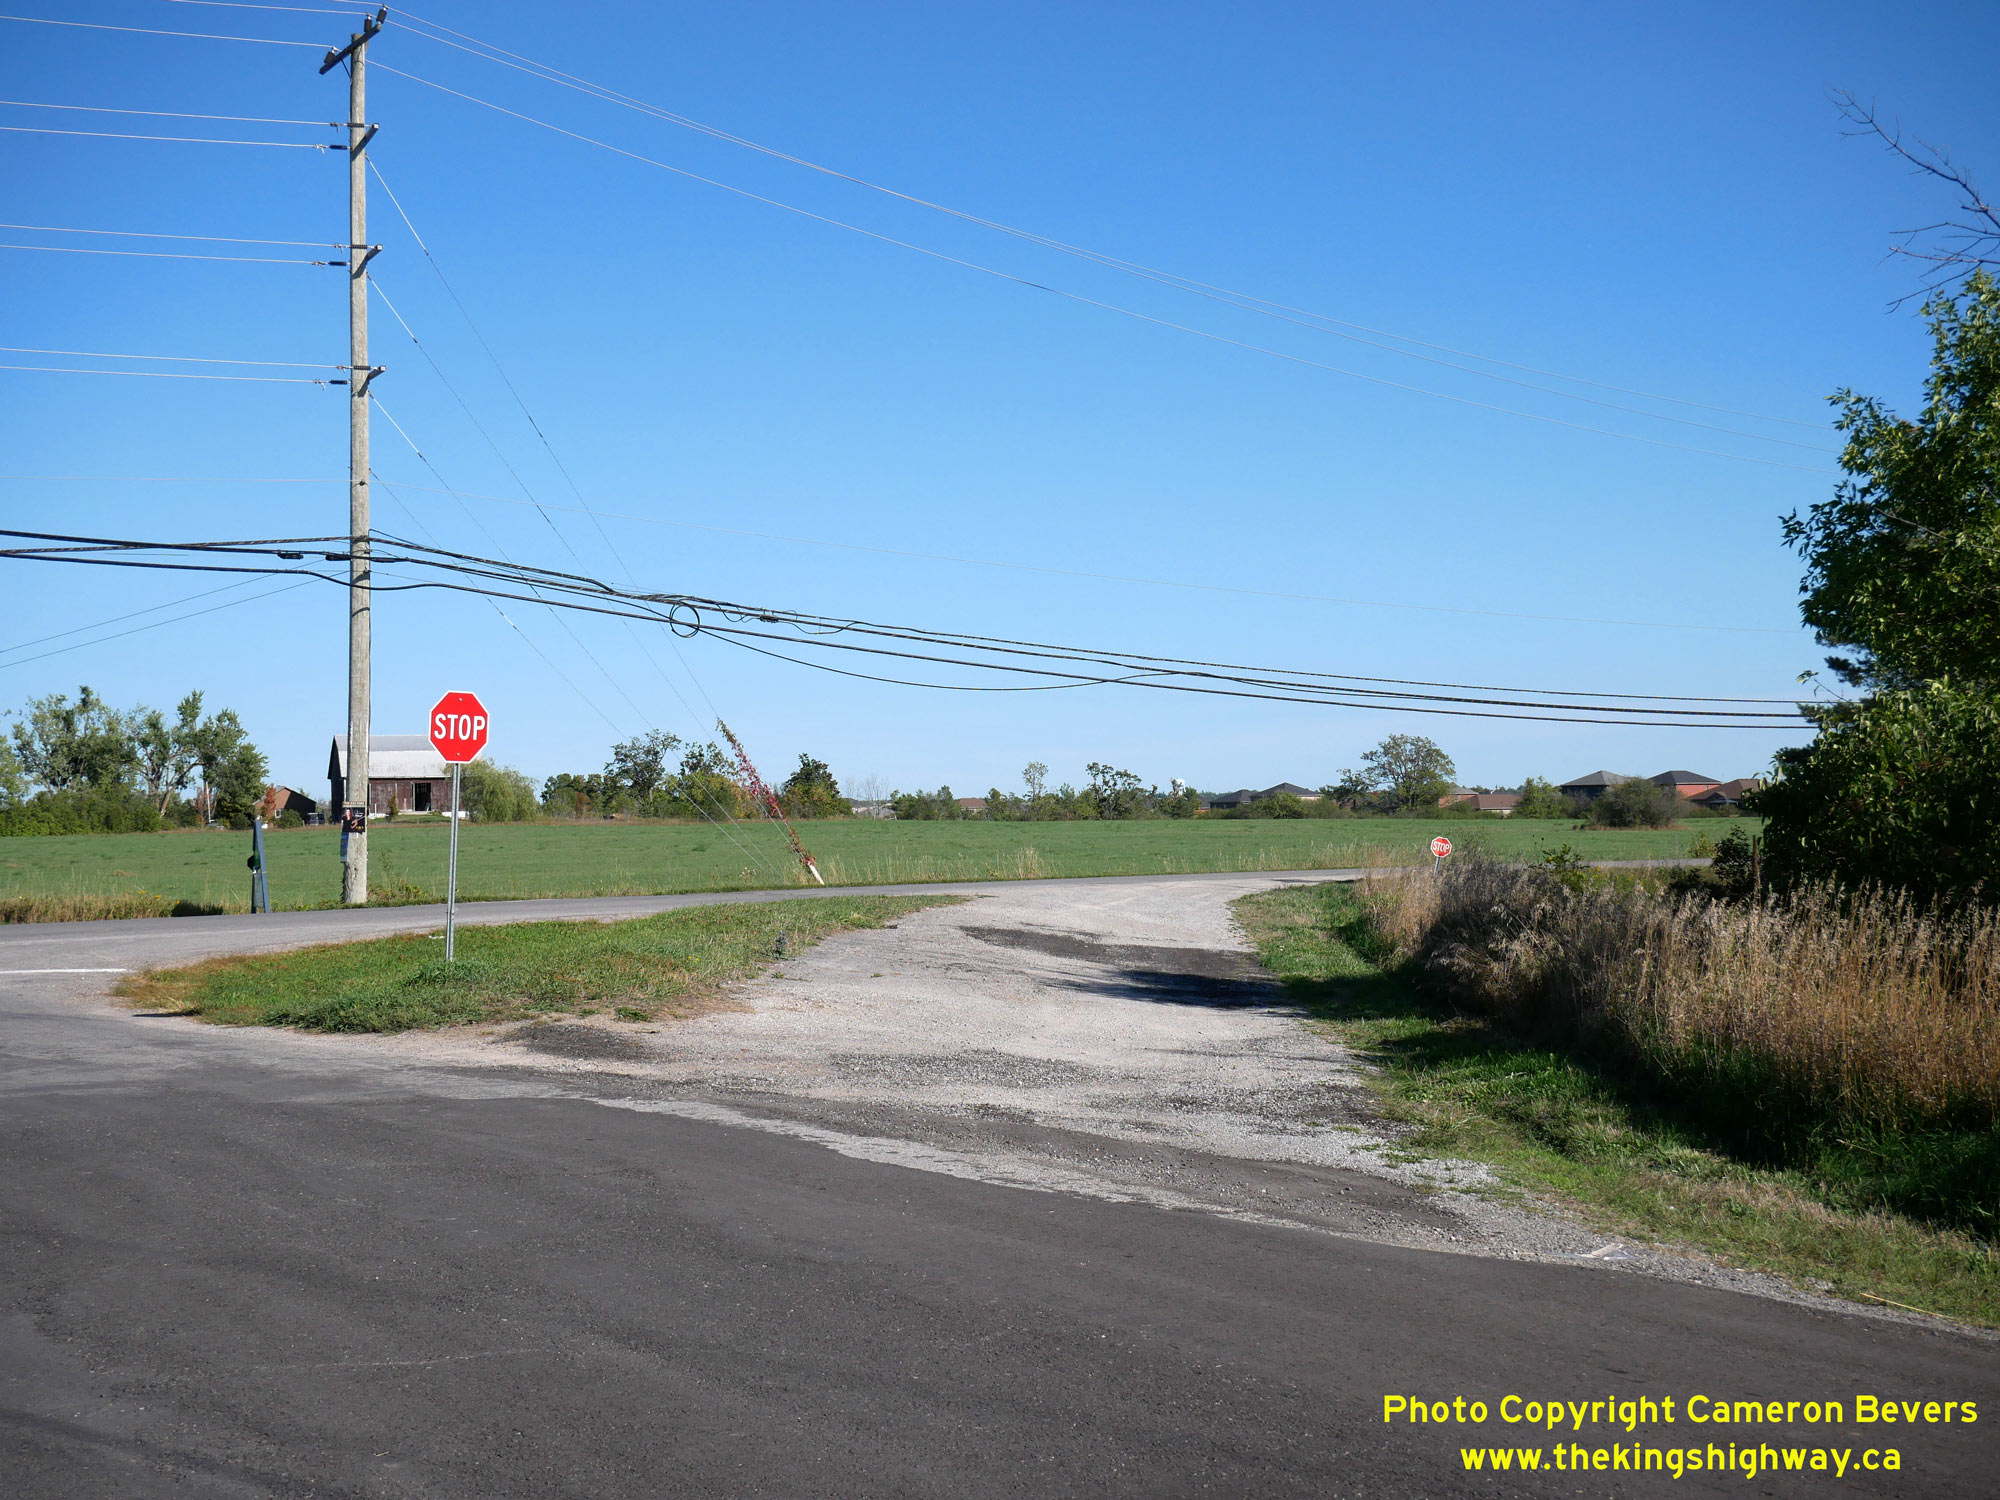
 Left - View of the old highway curve at Angeline Street and Thunder Bridge Road north of Lindsay. The old highway curve was superelevated to mitigate the
risk of a vehicle overturning on the curve. Even with the superelevation in place, this sharp curve likely surprised many early motorists using Hwy 35. The highway
was rebuilt on a significantly improved alignment with a larger radius curve in 1938. See an
Enlarged Photo Here. Left - View of the old highway curve at Angeline Street and Thunder Bridge Road north of Lindsay. The old highway curve was superelevated to mitigate the
risk of a vehicle overturning on the curve. Even with the superelevation in place, this sharp curve likely surprised many early motorists using Hwy 35. The highway
was rebuilt on a significantly improved alignment with a larger radius curve in 1938. See an
Enlarged Photo Here.(Photograph taken on September 16, 2025 - © Cameron Bevers) Right - Facing west along Thunder Bridge Road from Angeline Street north of Lindsay. This original section of Hwy 35 was bypassed by a new highway curve in
the 1930s. See an Enlarged Photo Here.(Photograph taken on September 16, 2025 - © Cameron Bevers) 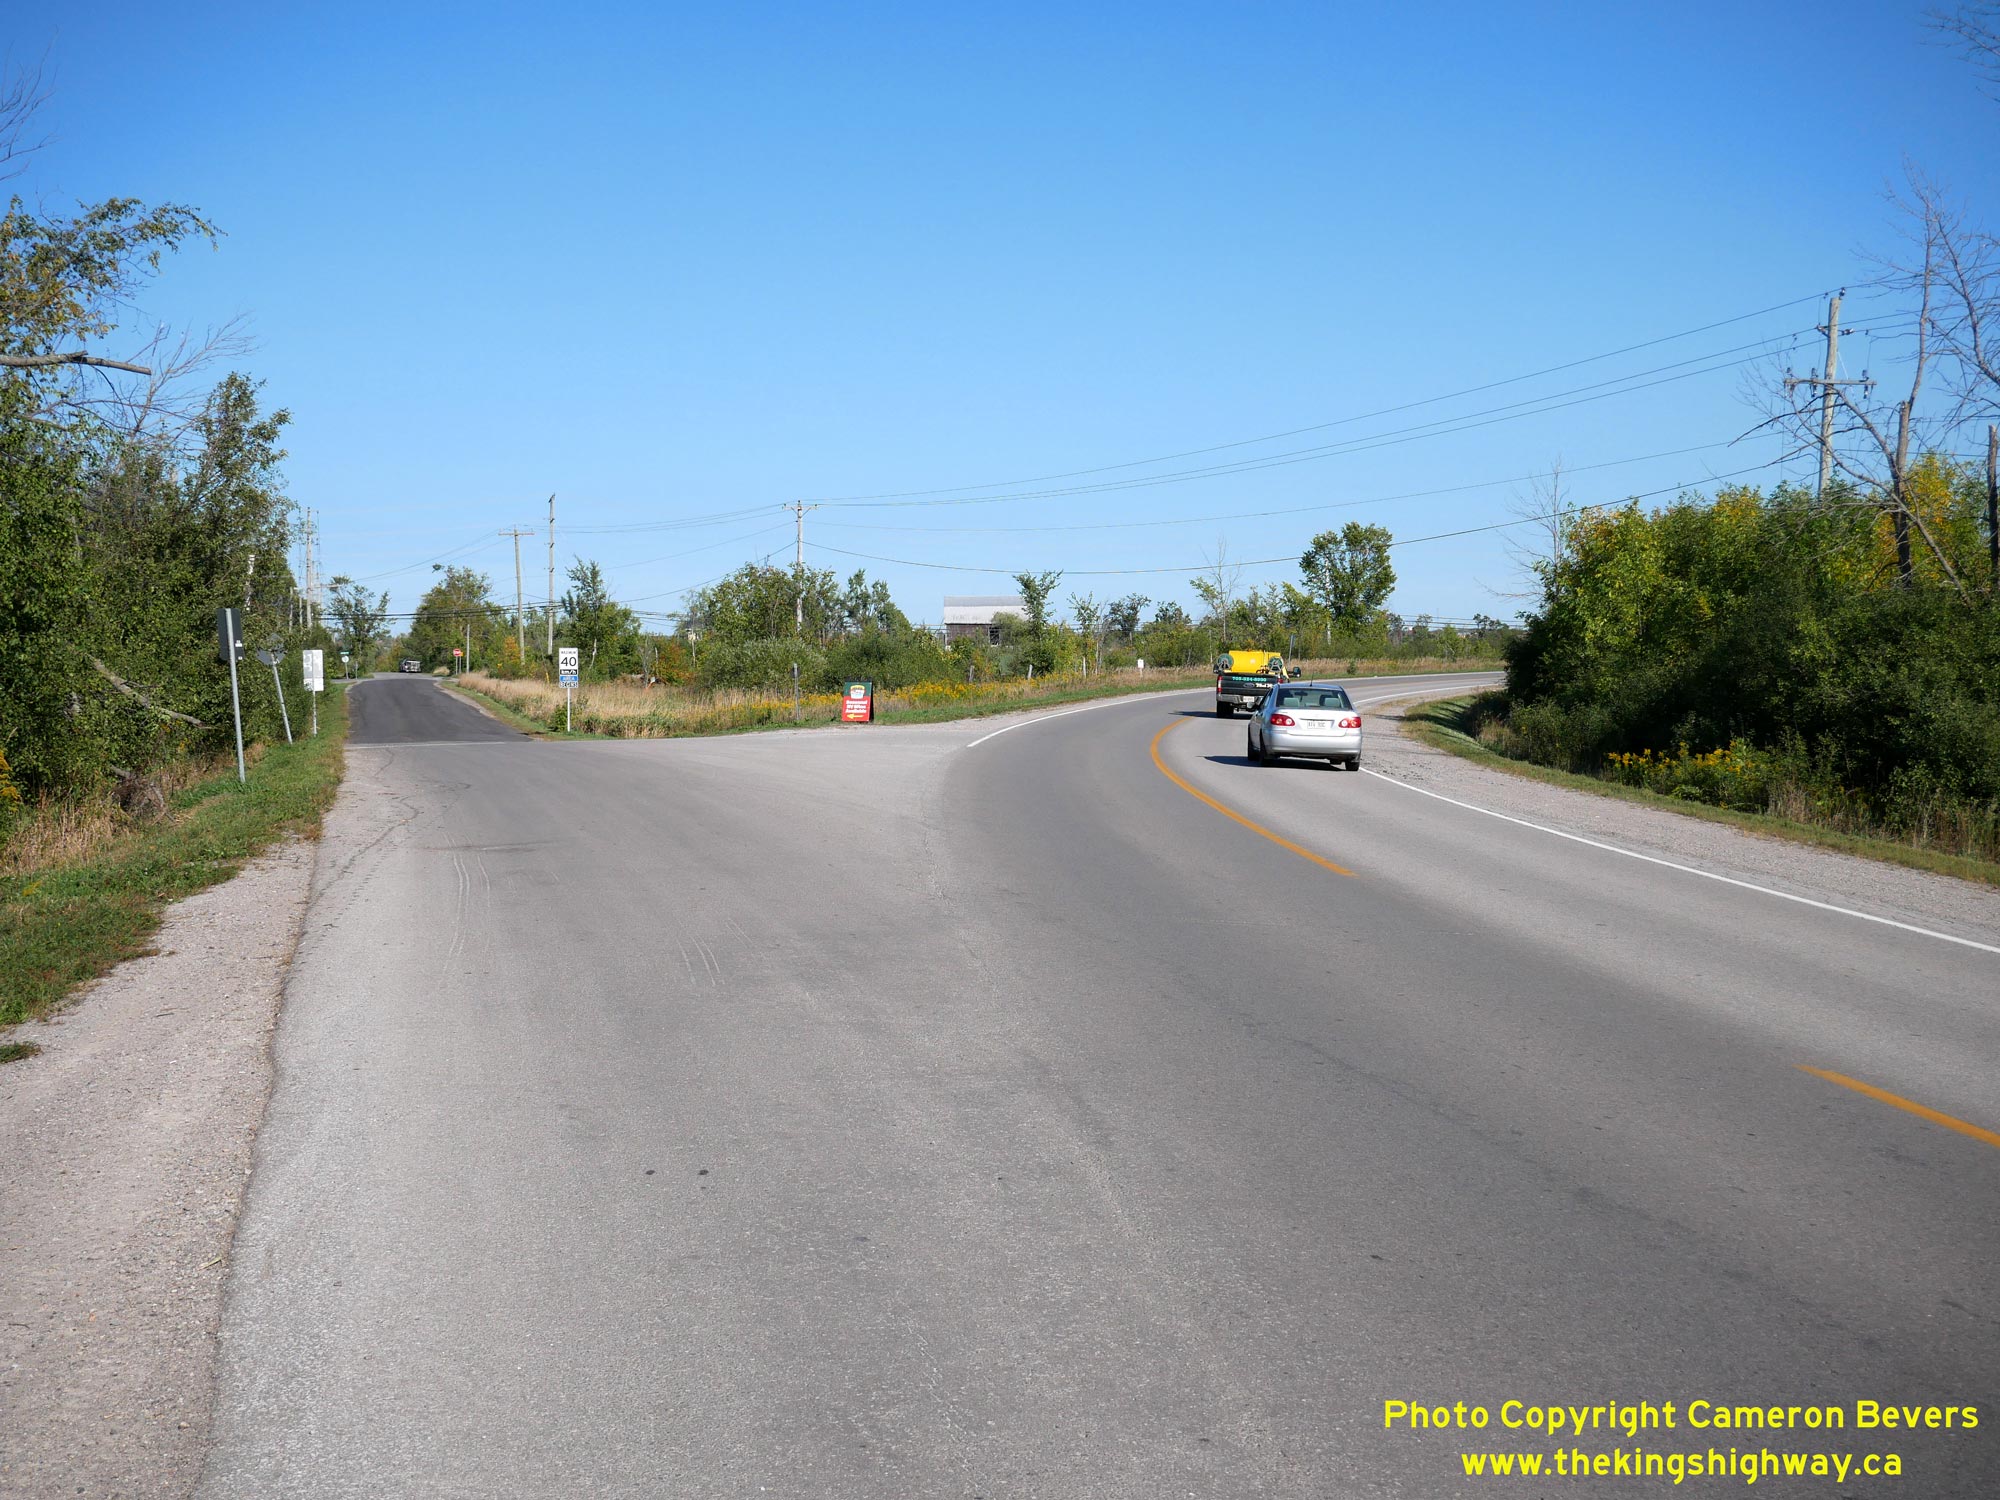
 Left - View of the realigned highway at Thunder Bridge Road and Angeline Street, facing south towards Lindsay. Under a highway improvement project carried out
here in 1938, a new highway curve was built to bypass a very hazardous curve on the original highway's route. The radius of the new curve was broadened to 955 feet -
well above that of the old highway curve, which had a radius of roughly 100 feet. After serving as the main route of Hwy 35 for two decades, this realigned curve
became a part of Hwy 35B following the completion of the Lindsay Bypass in 1958. The bypassed, original route of Hwy 35 at left ceased to be a provincial highway in
1940. See an Enlarged Photo Here. Left - View of the realigned highway at Thunder Bridge Road and Angeline Street, facing south towards Lindsay. Under a highway improvement project carried out
here in 1938, a new highway curve was built to bypass a very hazardous curve on the original highway's route. The radius of the new curve was broadened to 955 feet -
well above that of the old highway curve, which had a radius of roughly 100 feet. After serving as the main route of Hwy 35 for two decades, this realigned curve
became a part of Hwy 35B following the completion of the Lindsay Bypass in 1958. The bypassed, original route of Hwy 35 at left ceased to be a provincial highway in
1940. See an Enlarged Photo Here.(Photograph taken on September 16, 2025 - © Cameron Bevers) Right - Facing west along Thunder Bridge Road (Old Hwy 35B) from the highway curve north of Lindsay. As a result of a rerouting of Hwy 35B through Lindsay in
the late 1960s, this section of Hwy 35B was no longer needed in the provincial highway system and was ultimately transferred back over to municipal control. The old
route of Hwy 35B seen here was transferred to the County of Victoria, effective September 21, 1968. See an
Enlarged Photo Here.(Photograph taken on September 16, 2025 - © Cameron Bevers) 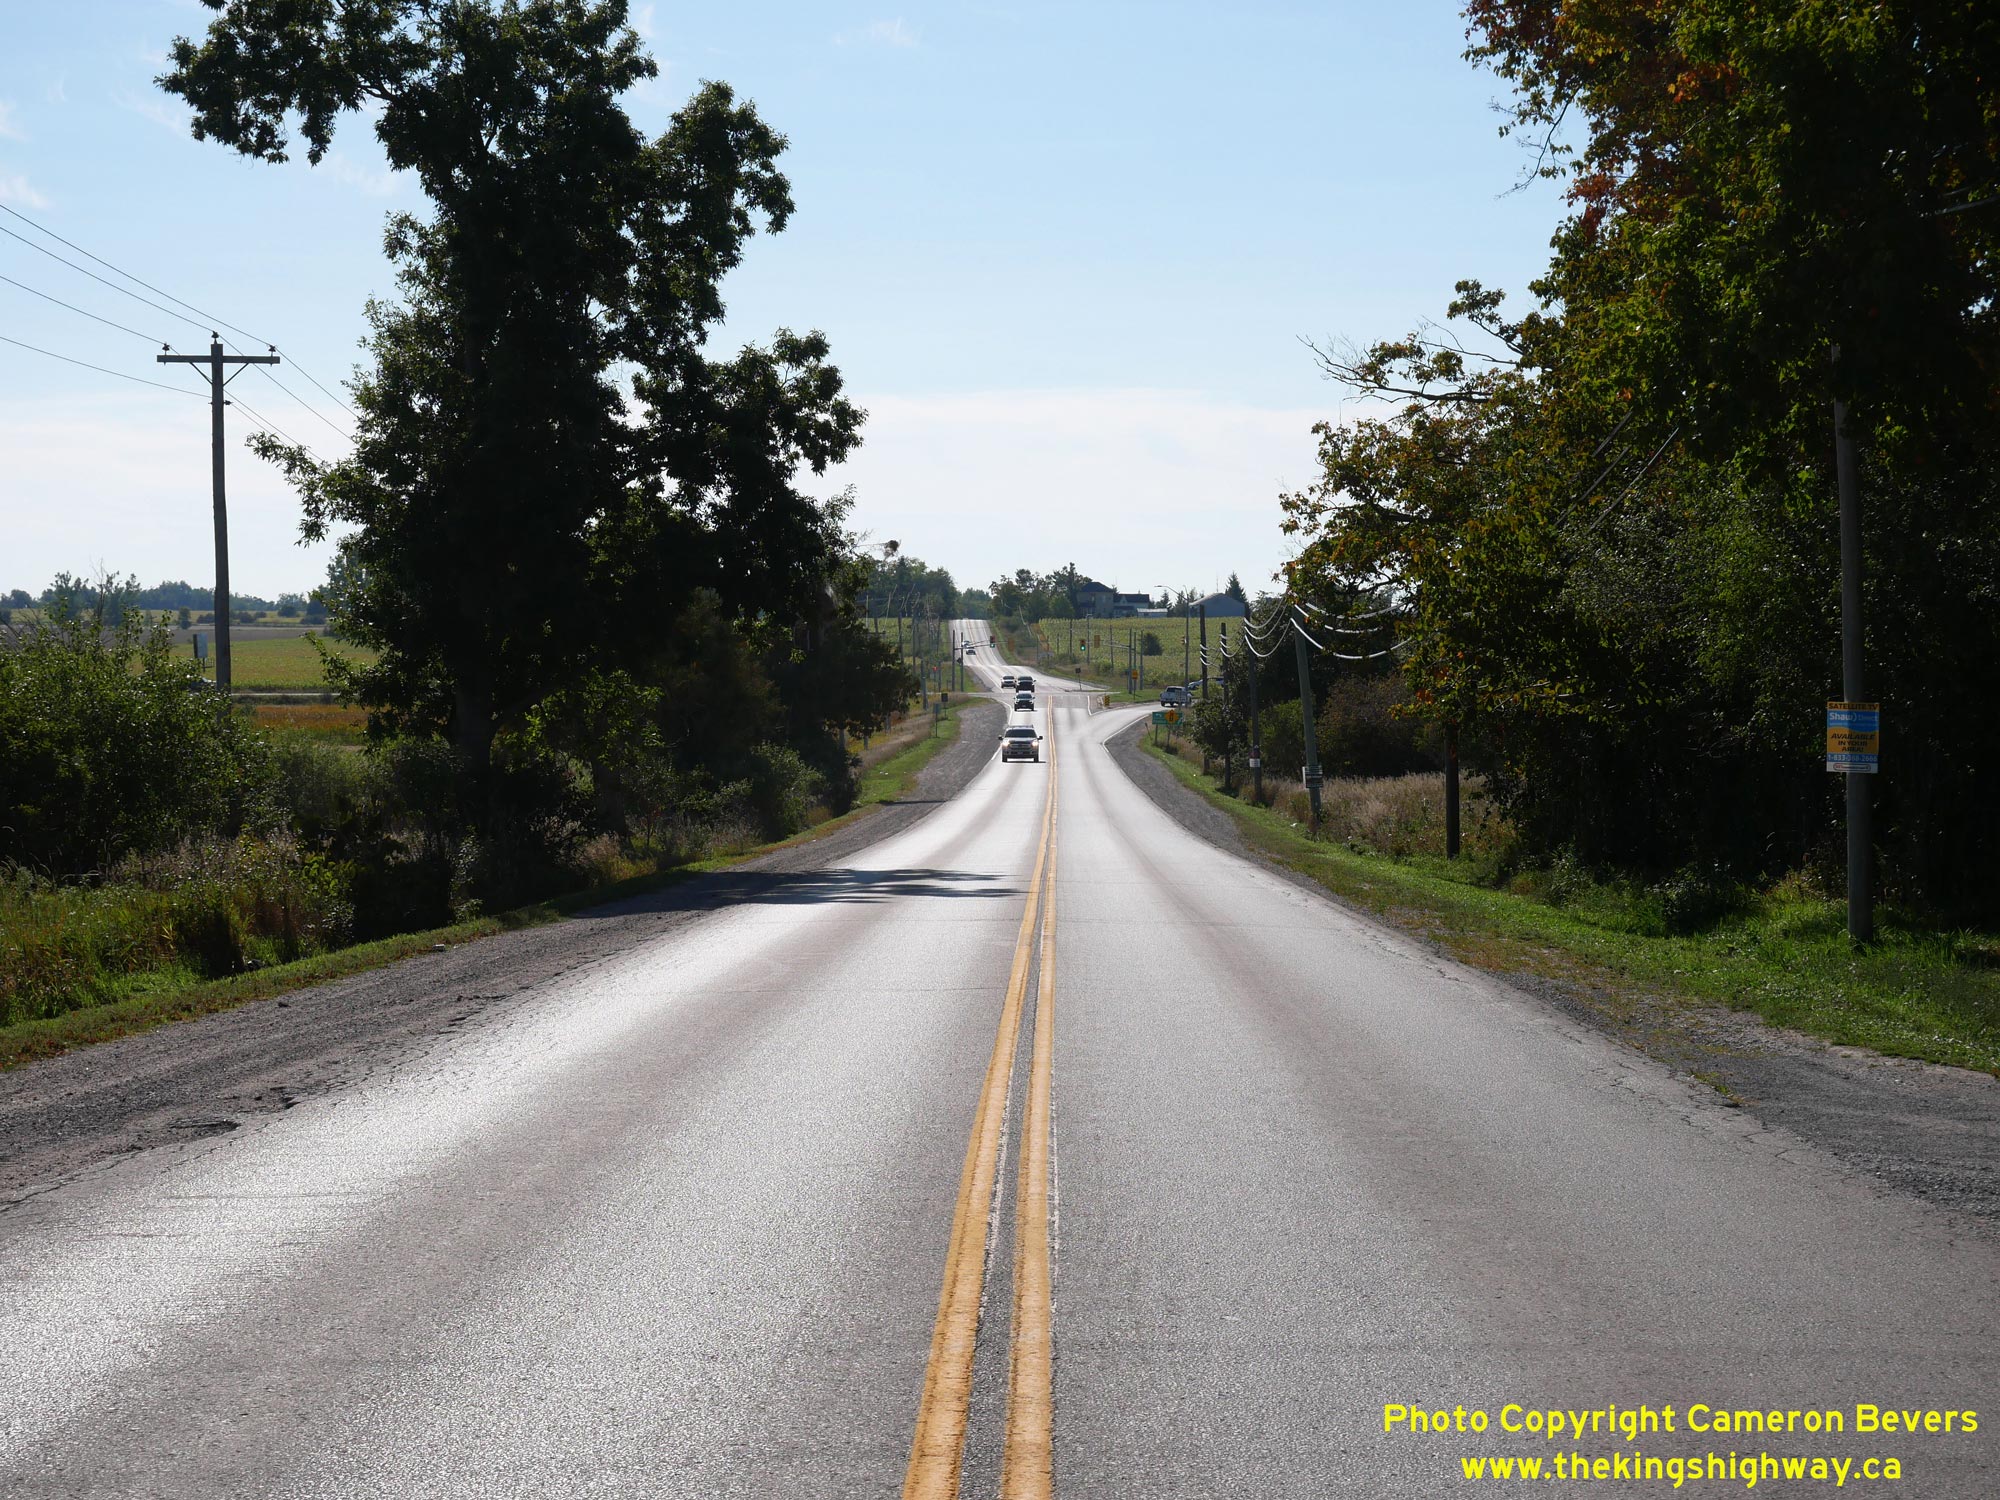
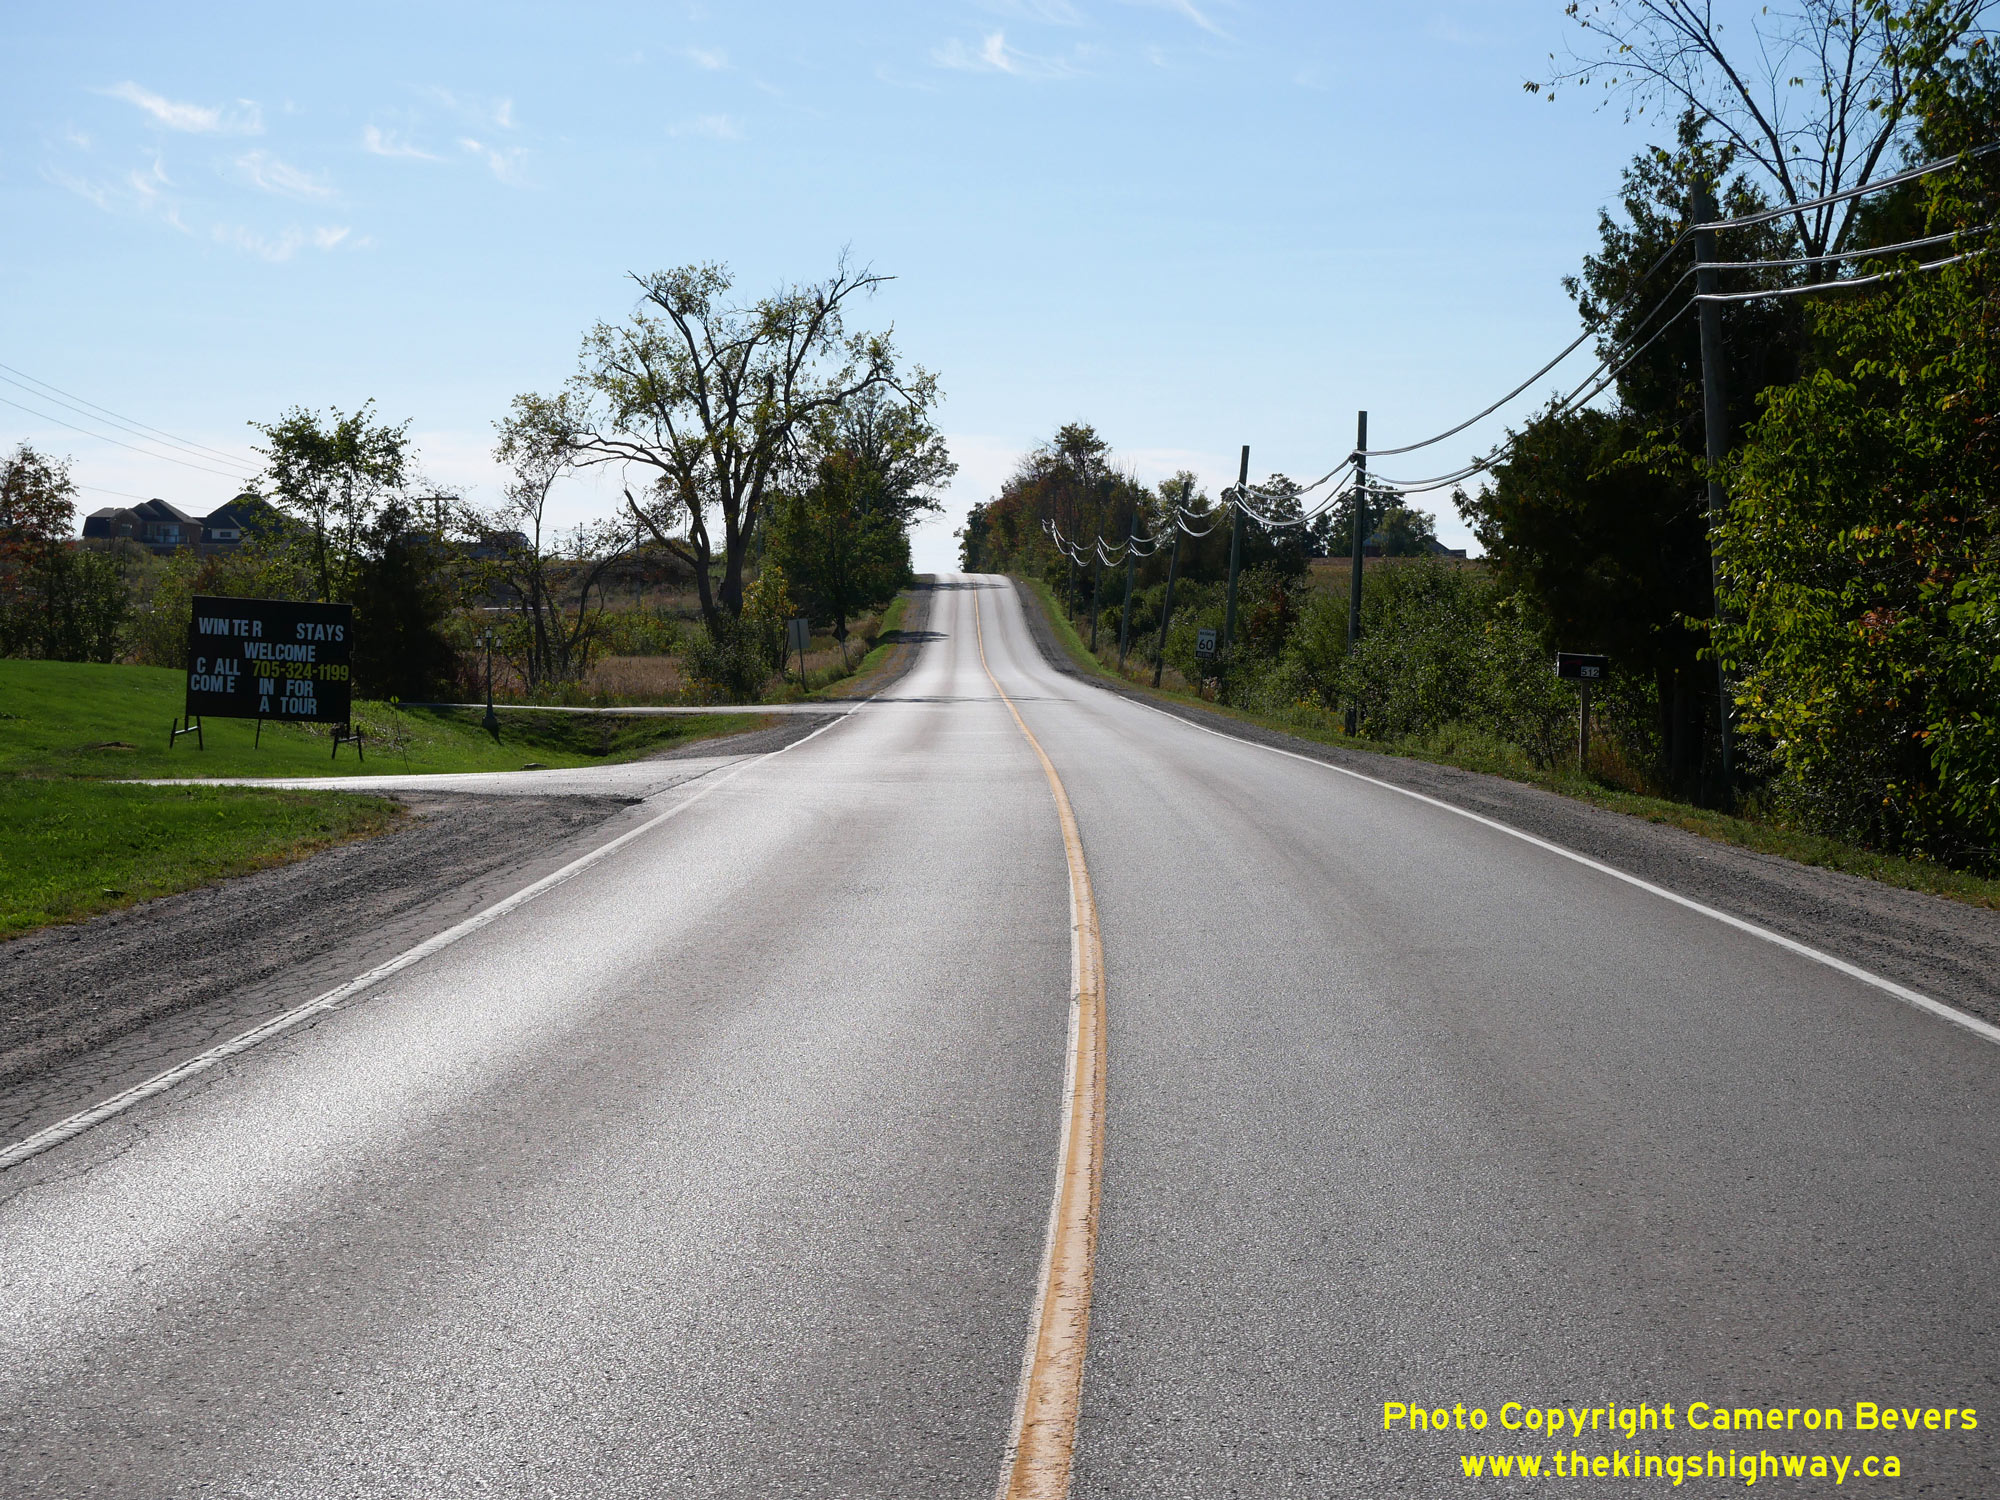
 Left - Facing west along Thunder Bridge Road (Old Hwy 35B) north of Lindsay. Hwy 35B once came to an end at the Hwy 35 Junction in the background. See an
Enlarged Photo Here. Left - Facing west along Thunder Bridge Road (Old Hwy 35B) north of Lindsay. Hwy 35B once came to an end at the Hwy 35 Junction in the background. See an
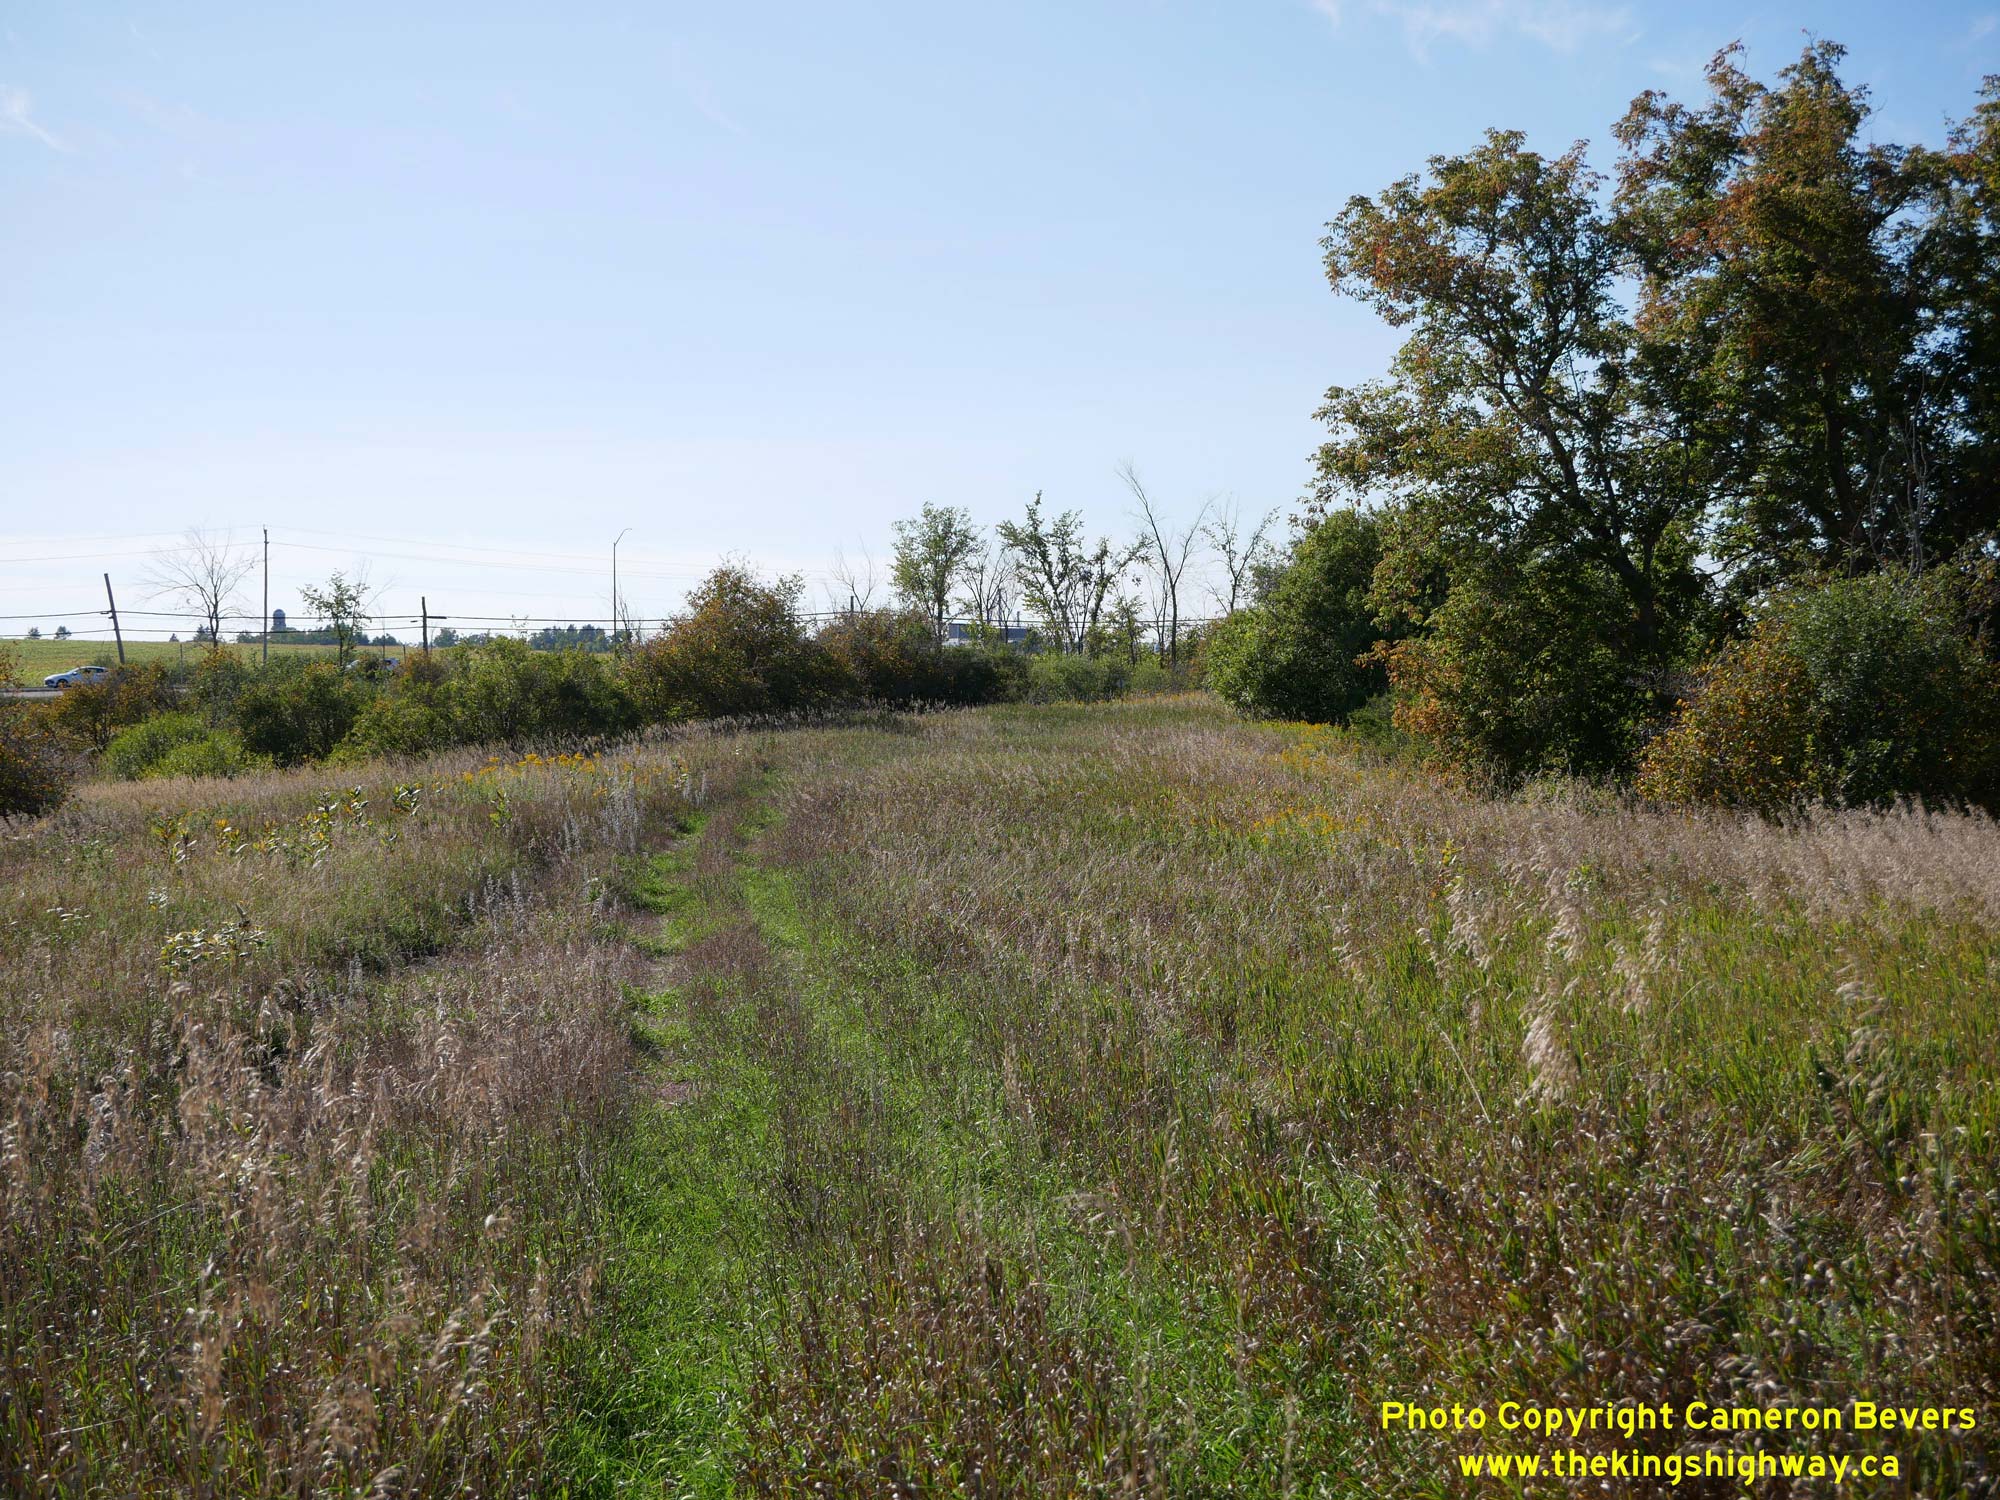
Enlarged Photo Here.(Photograph taken on September 16, 2025 - © Cameron Bevers) Right - Site of an abandoned highway curve near Hwy 35 and Thunder Bridge Road (Old Hwy 35B). This was one of two large curves constructed along Hwy 35 north
of Lindsay as part of a highway improvement project in 1938. Unlike a similar curve located a short distance to the east, this curve was abandoned altogether. Today,
only faint traces of the curve's location remain. The original highway pavement was buried in 1975 underneath surplus earth fill material excavated for a nearby
highway construction project. Traffic can be seen using the relocated Hwy 35 at far left. See an
Enlarged Photo Here.(Photograph taken on September 16, 2025 - © Cameron Bevers) 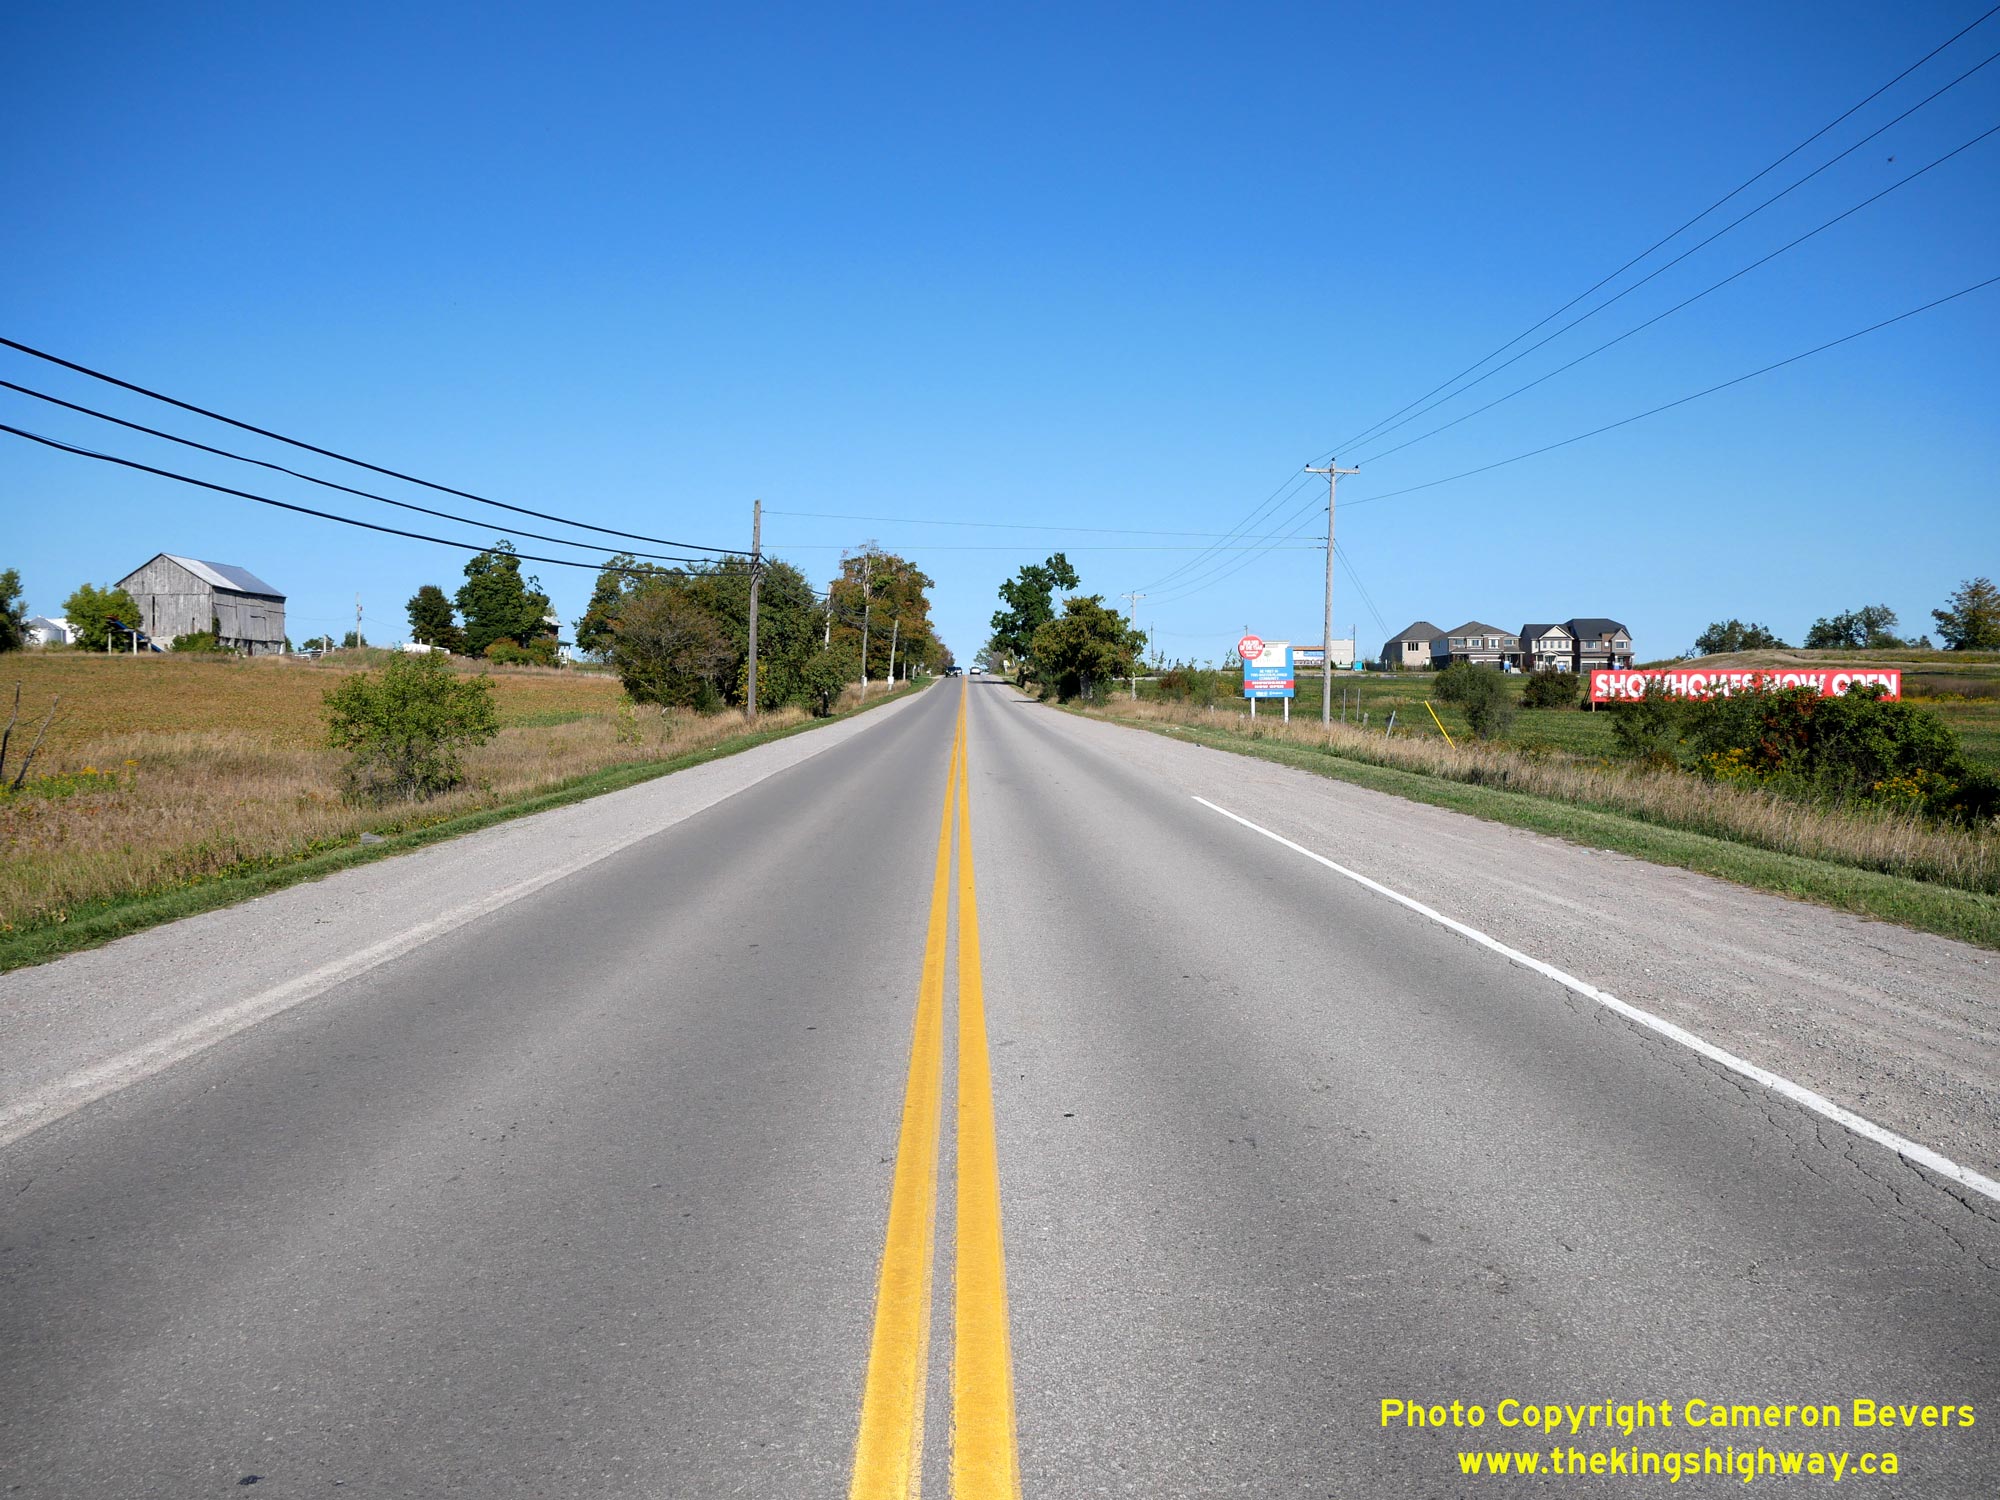
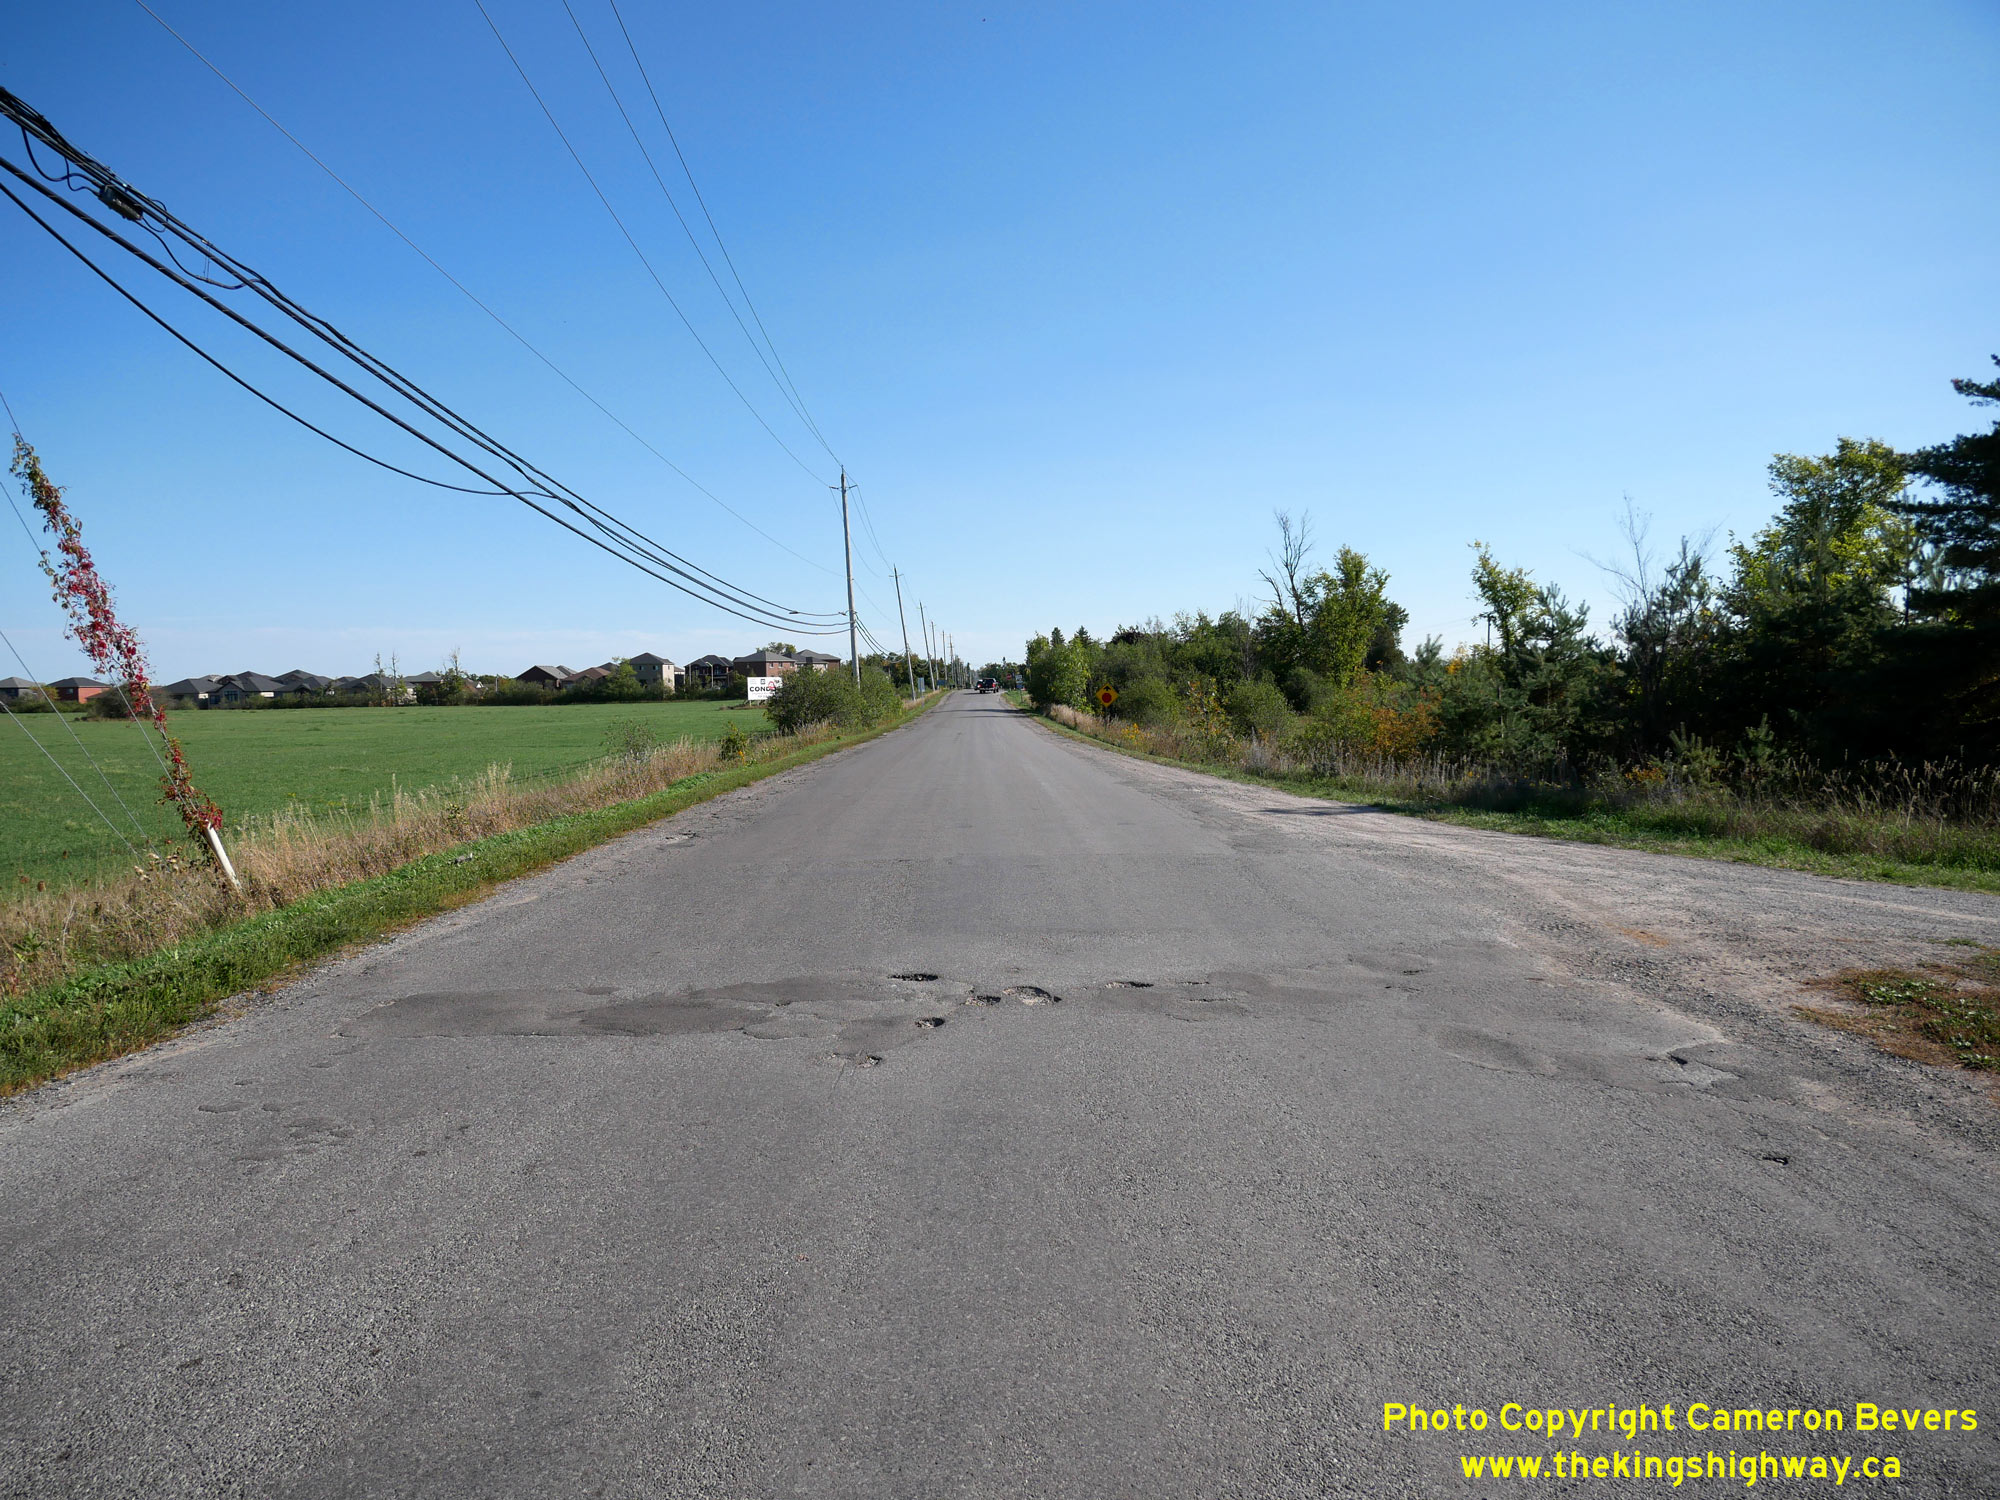
 Left - Facing west along Thunder Bridge Road (Old Hwy 35B) from the Hwy 35 Junction. Here, a rural farm scene along the north side of Old Hwy 35B contrasts
with newer suburban residential development to the south. Lindsay is situated within the commuter belt of the Greater Toronto Area and has seen large residential
subdivisions developed in recent years. See an Enlarged Photo Here. Left - Facing west along Thunder Bridge Road (Old Hwy 35B) from the Hwy 35 Junction. Here, a rural farm scene along the north side of Old Hwy 35B contrasts
with newer suburban residential development to the south. Lindsay is situated within the commuter belt of the Greater Toronto Area and has seen large residential
subdivisions developed in recent years. See an Enlarged Photo Here.(Photograph taken on September 16, 2025 - © Cameron Bevers) Right - Approaching the Hwy 35 Junction on Thunder Bridge Road (Old Hwy 35B) north of Lindsay, facing west. Historically, Hwy 35B ended at this junction. The
destination guide signs at right are typically only used at the junction of two provincial highways, which provides careful observers with a hint that this
intersecting road was once a King's Highway as well. At this junction, motorists can either turn left and head south along Hwy 35 towards Lindsay and Newcastle or turn
right and head north along Hwy 35 towards Fenelon Falls and Minden. See an
Enlarged Photo Here.(Photograph taken on September 16, 2025 - © Cameron Bevers) 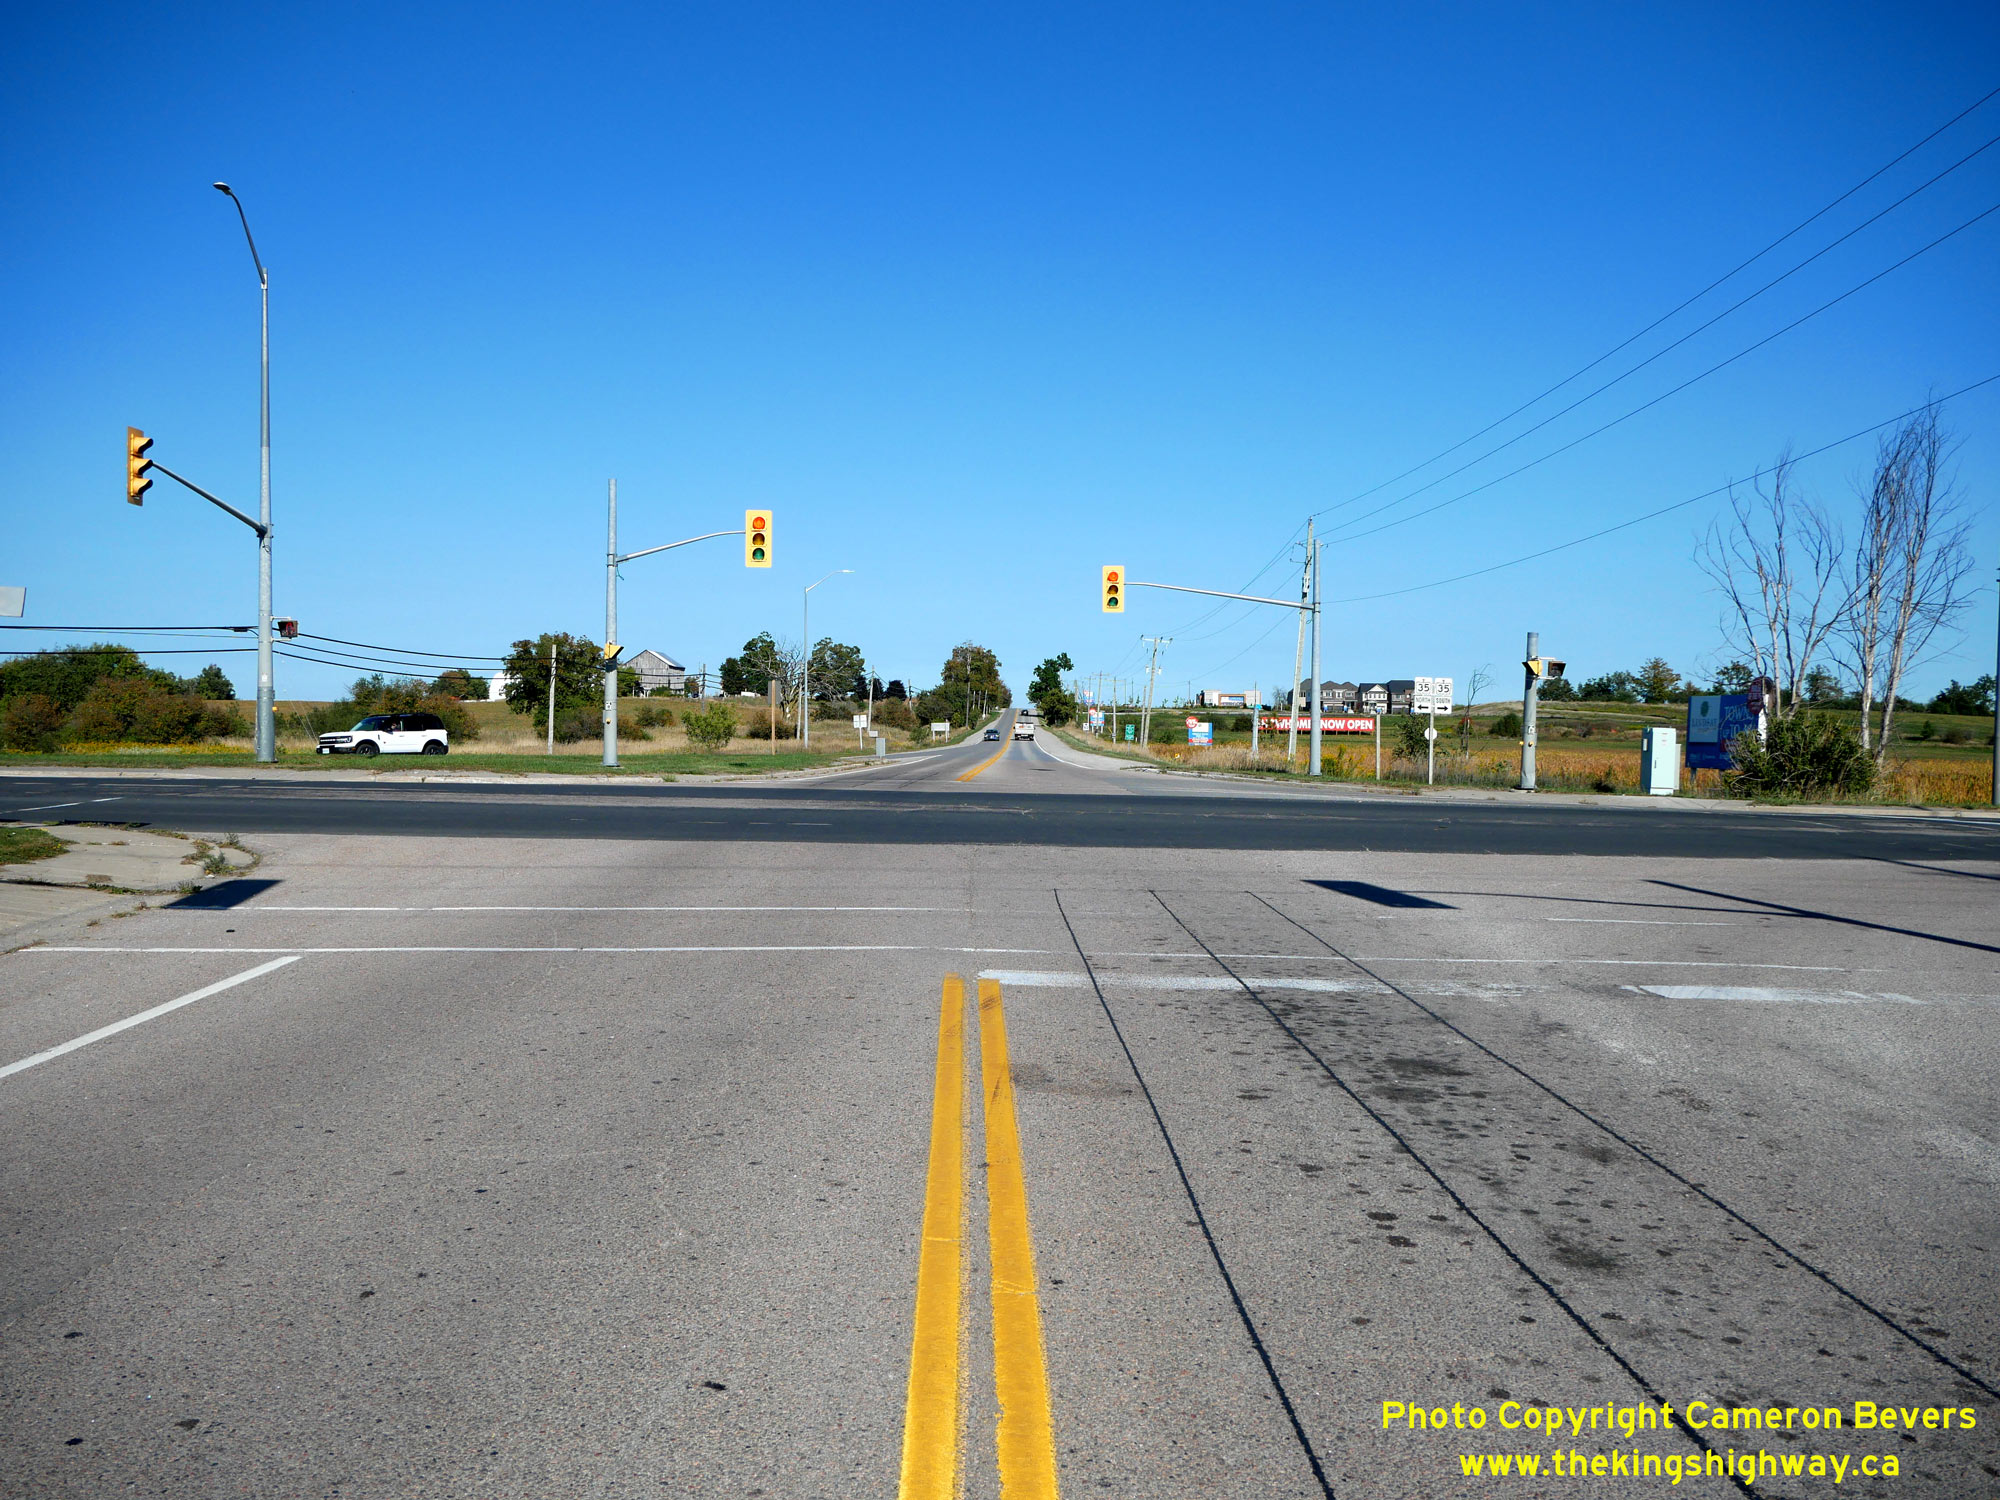
 Left - Facing east along Thunder Bridge Road at the Hwy 35 Junction. Historically, Hwy 35B began at this intersection and continued for almost 5 1/2 miles
through Lindsay. The Lindsay Business Route reconnected with Hwy 35 at the southern entrance to Lindsay. In the late 1960s, the route of Hwy 35B was shortened so that
it followed Kent Street into the town centre. The old route of Hwy 35B was subsequently transferred to the County of Victoria. See an
Enlarged Photo Here. Left - Facing east along Thunder Bridge Road at the Hwy 35 Junction. Historically, Hwy 35B began at this intersection and continued for almost 5 1/2 miles
through Lindsay. The Lindsay Business Route reconnected with Hwy 35 at the southern entrance to Lindsay. In the late 1960s, the route of Hwy 35B was shortened so that
it followed Kent Street into the town centre. The old route of Hwy 35B was subsequently transferred to the County of Victoria. See an
Enlarged Photo Here.(Photograph taken on September 16, 2025 - © Cameron Bevers) Right - View of the relocated Hwy 35 approaching Lindsay, facing south from Thunder Bridge Road (Old Hwy 35B). This diversion of Hwy 35 was built in
conjunction with the Lindsay Bypass in the 1950s. Grading for the Hwy 35 relocation took place under Contract #1957-35, with final paving performed under
Contract #1958-122. See an Enlarged Photo Here.(Photograph taken on September 16, 2025 - © Cameron Bevers) 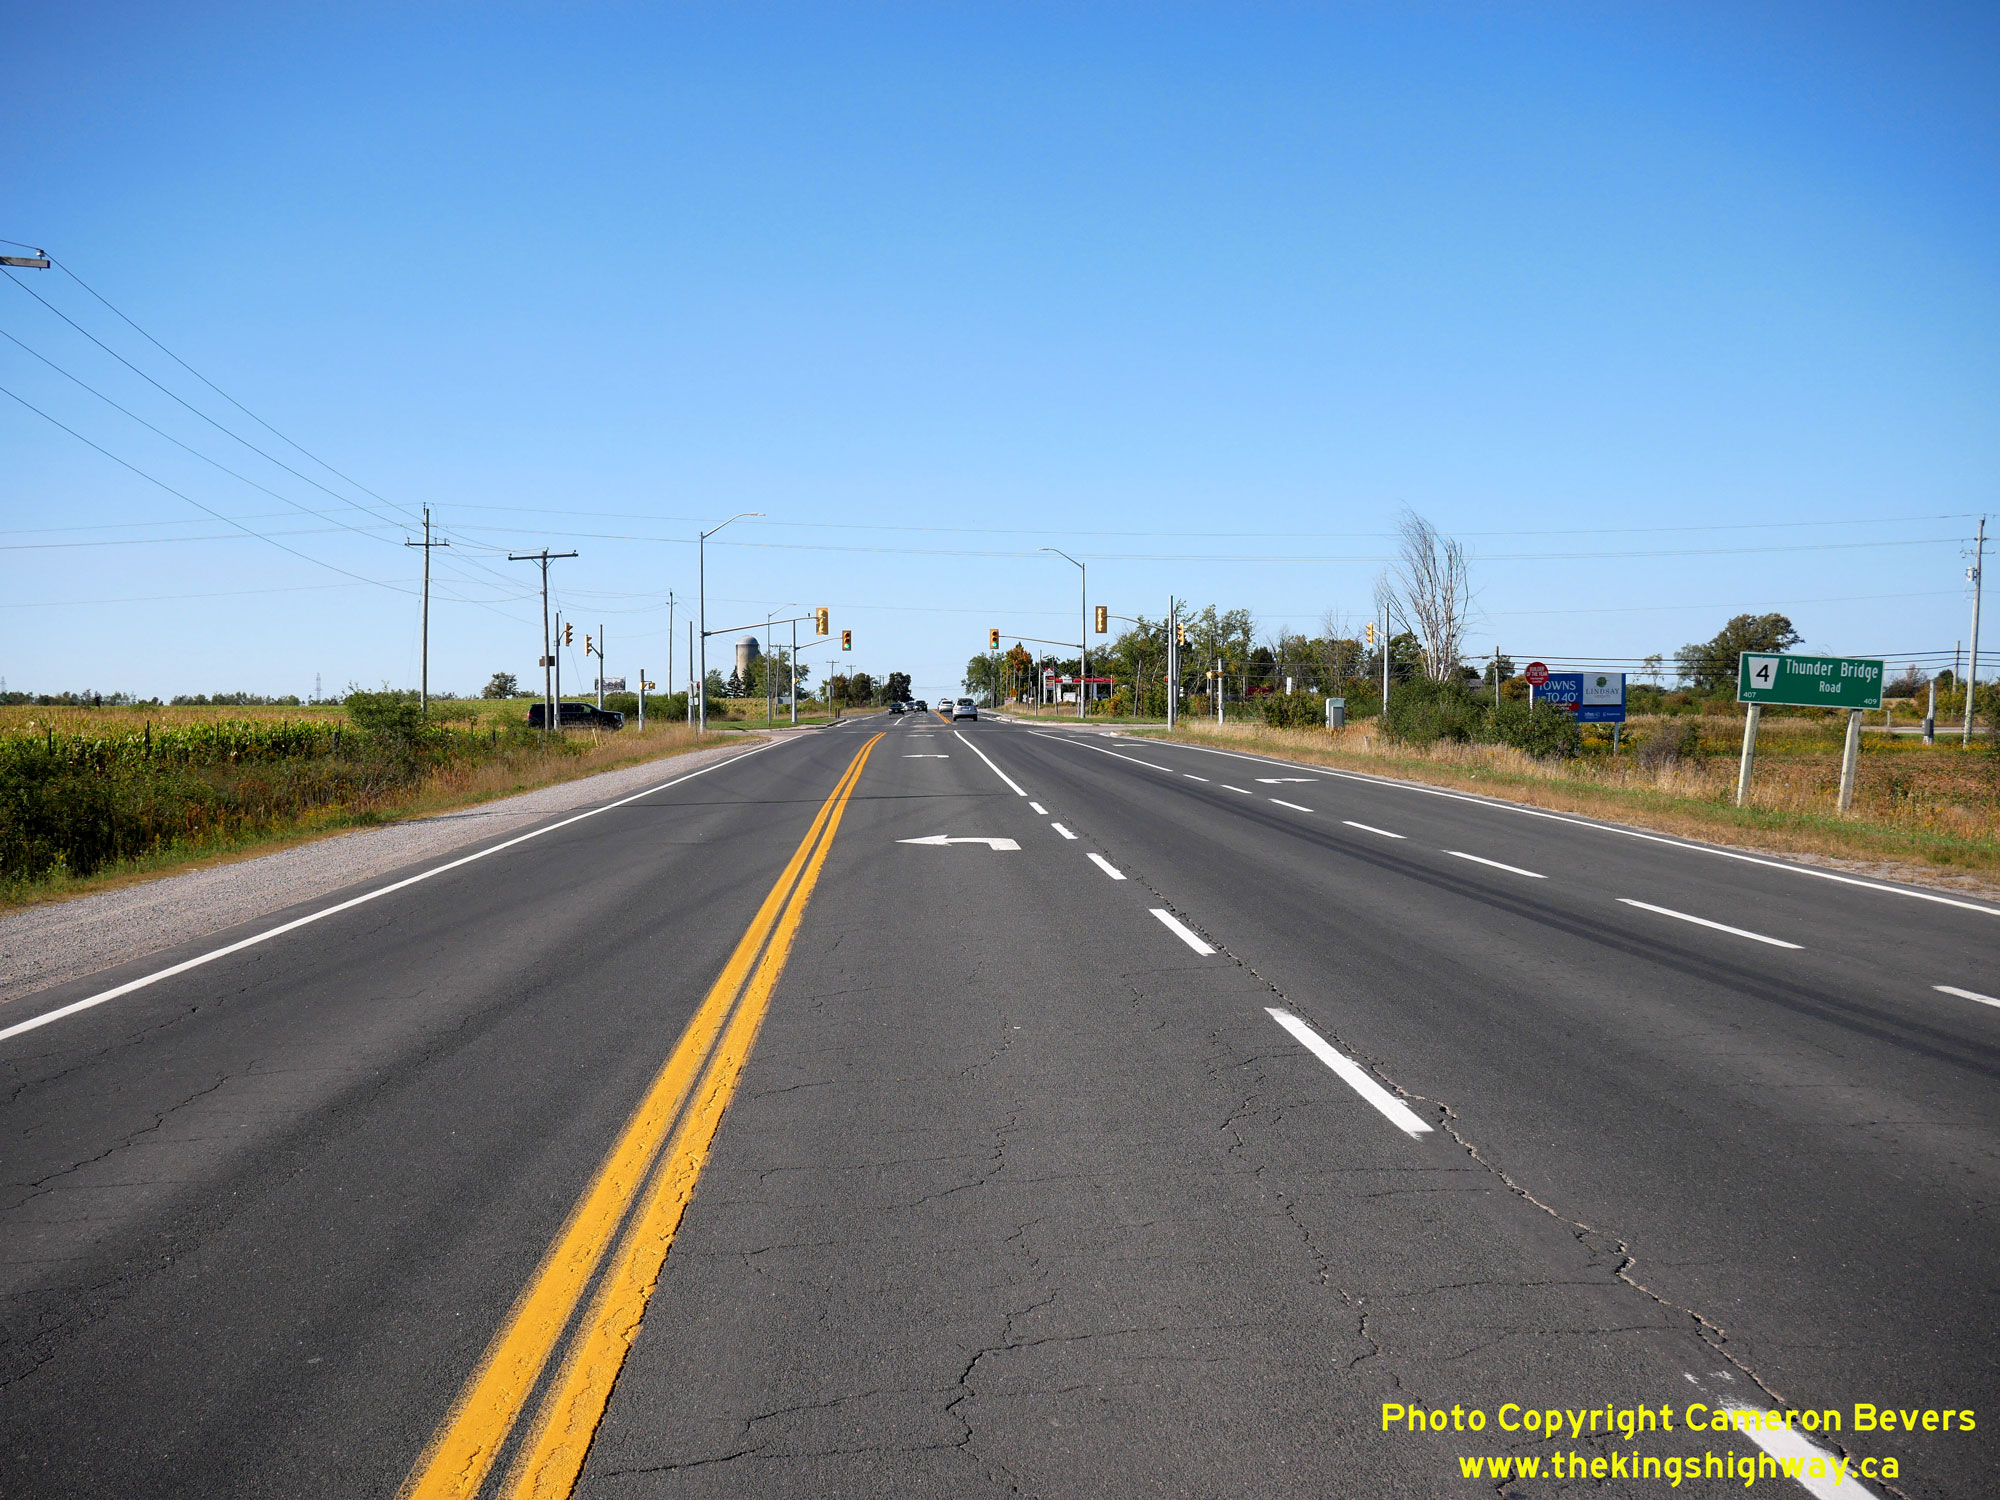
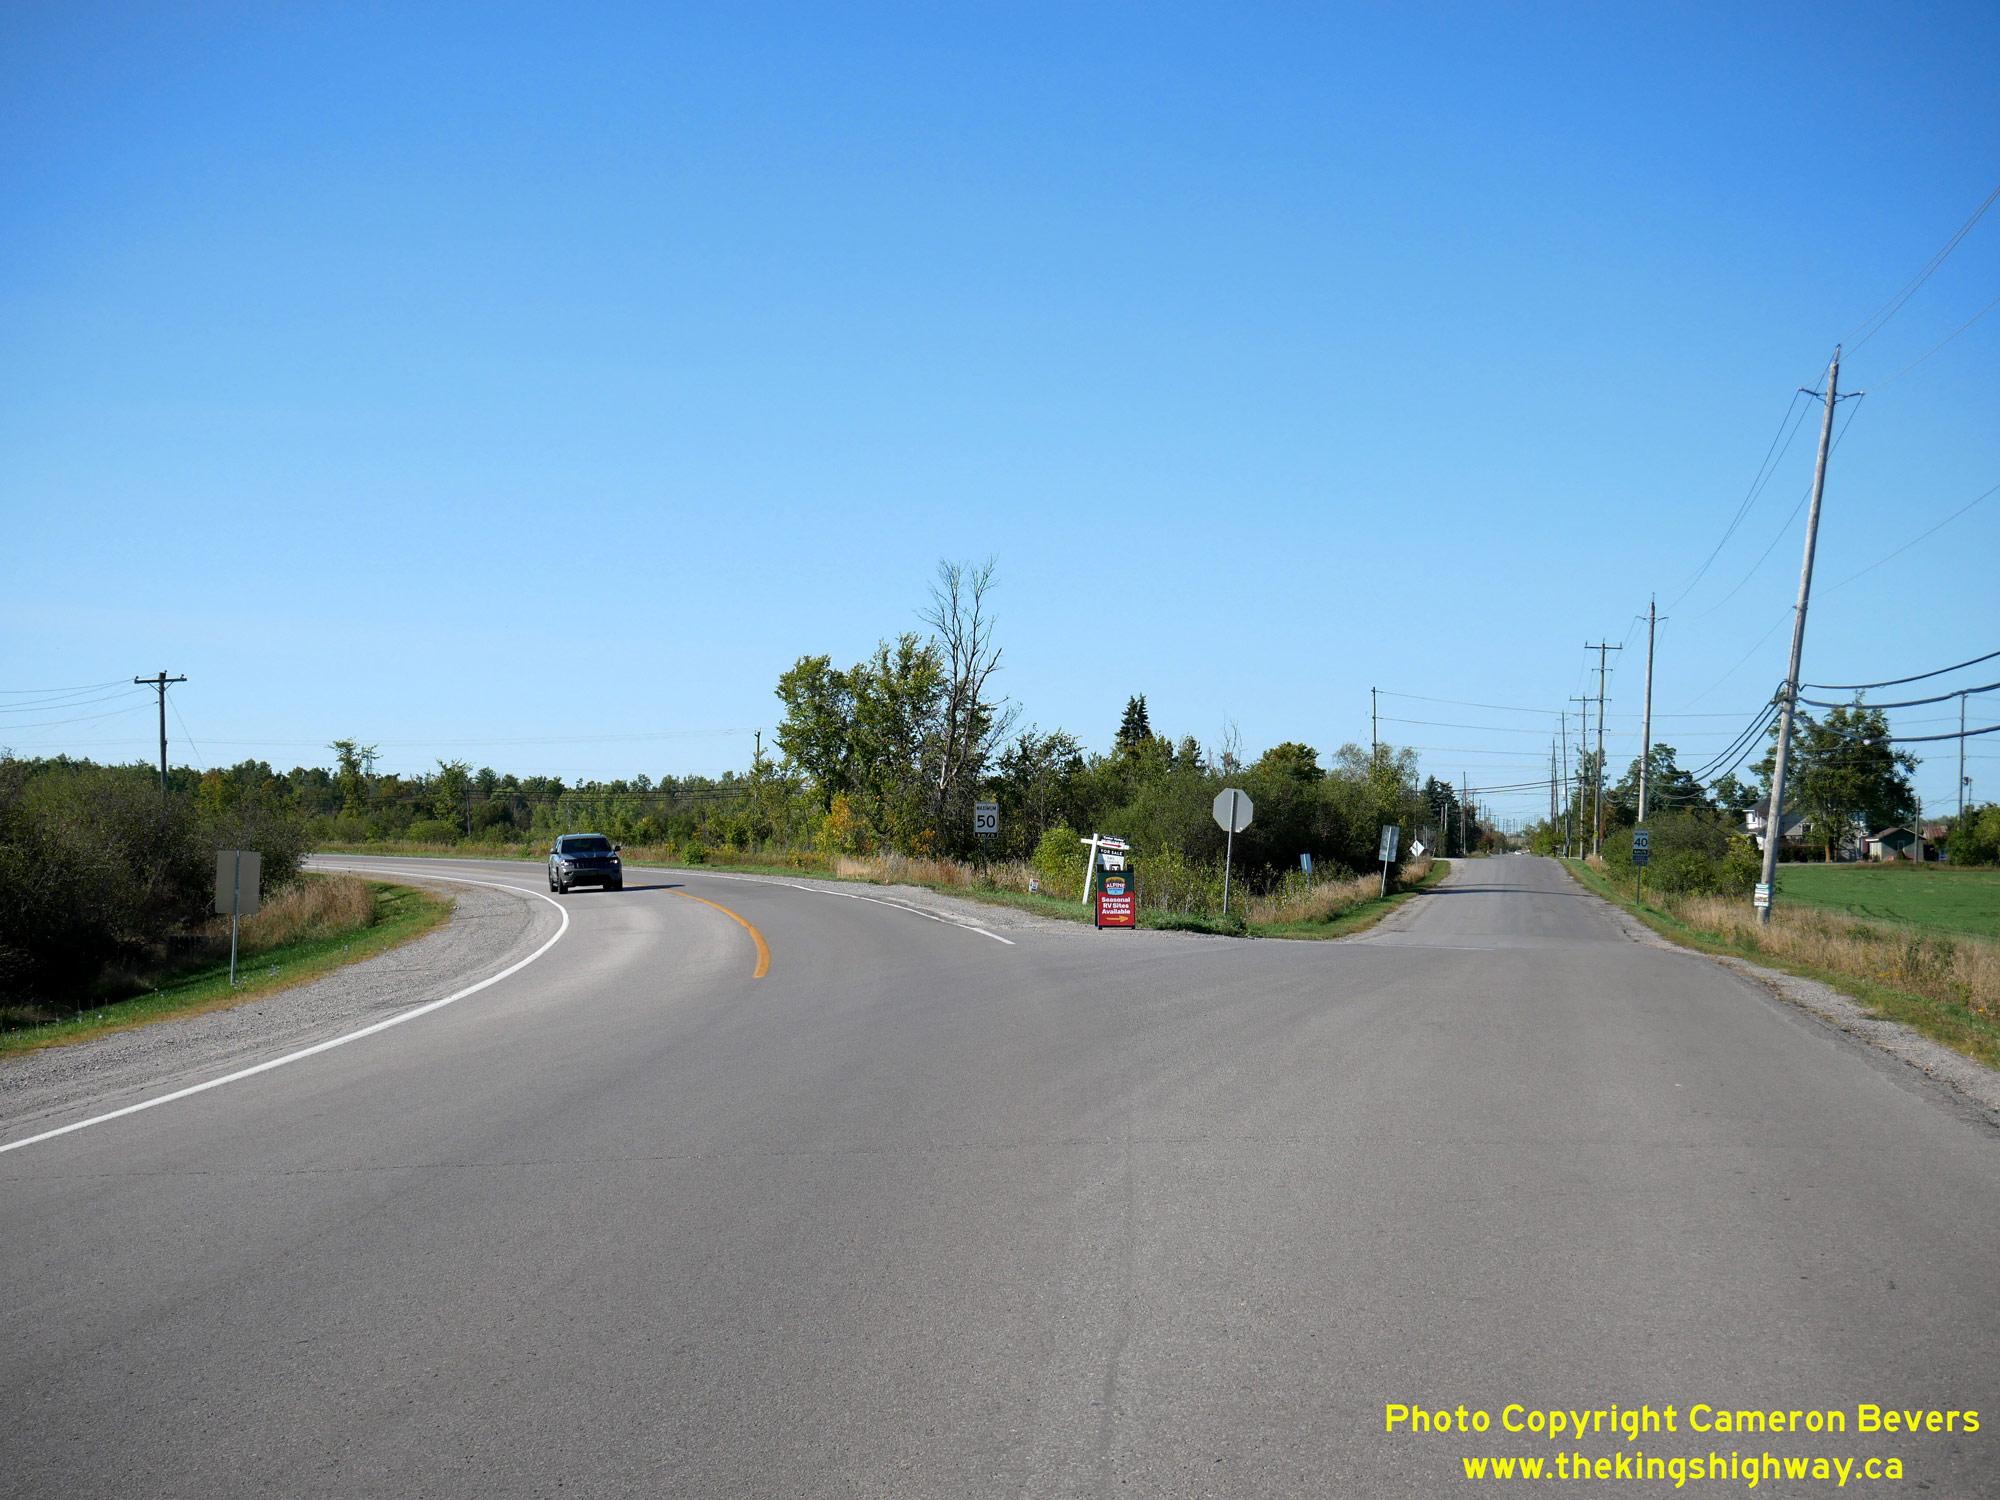
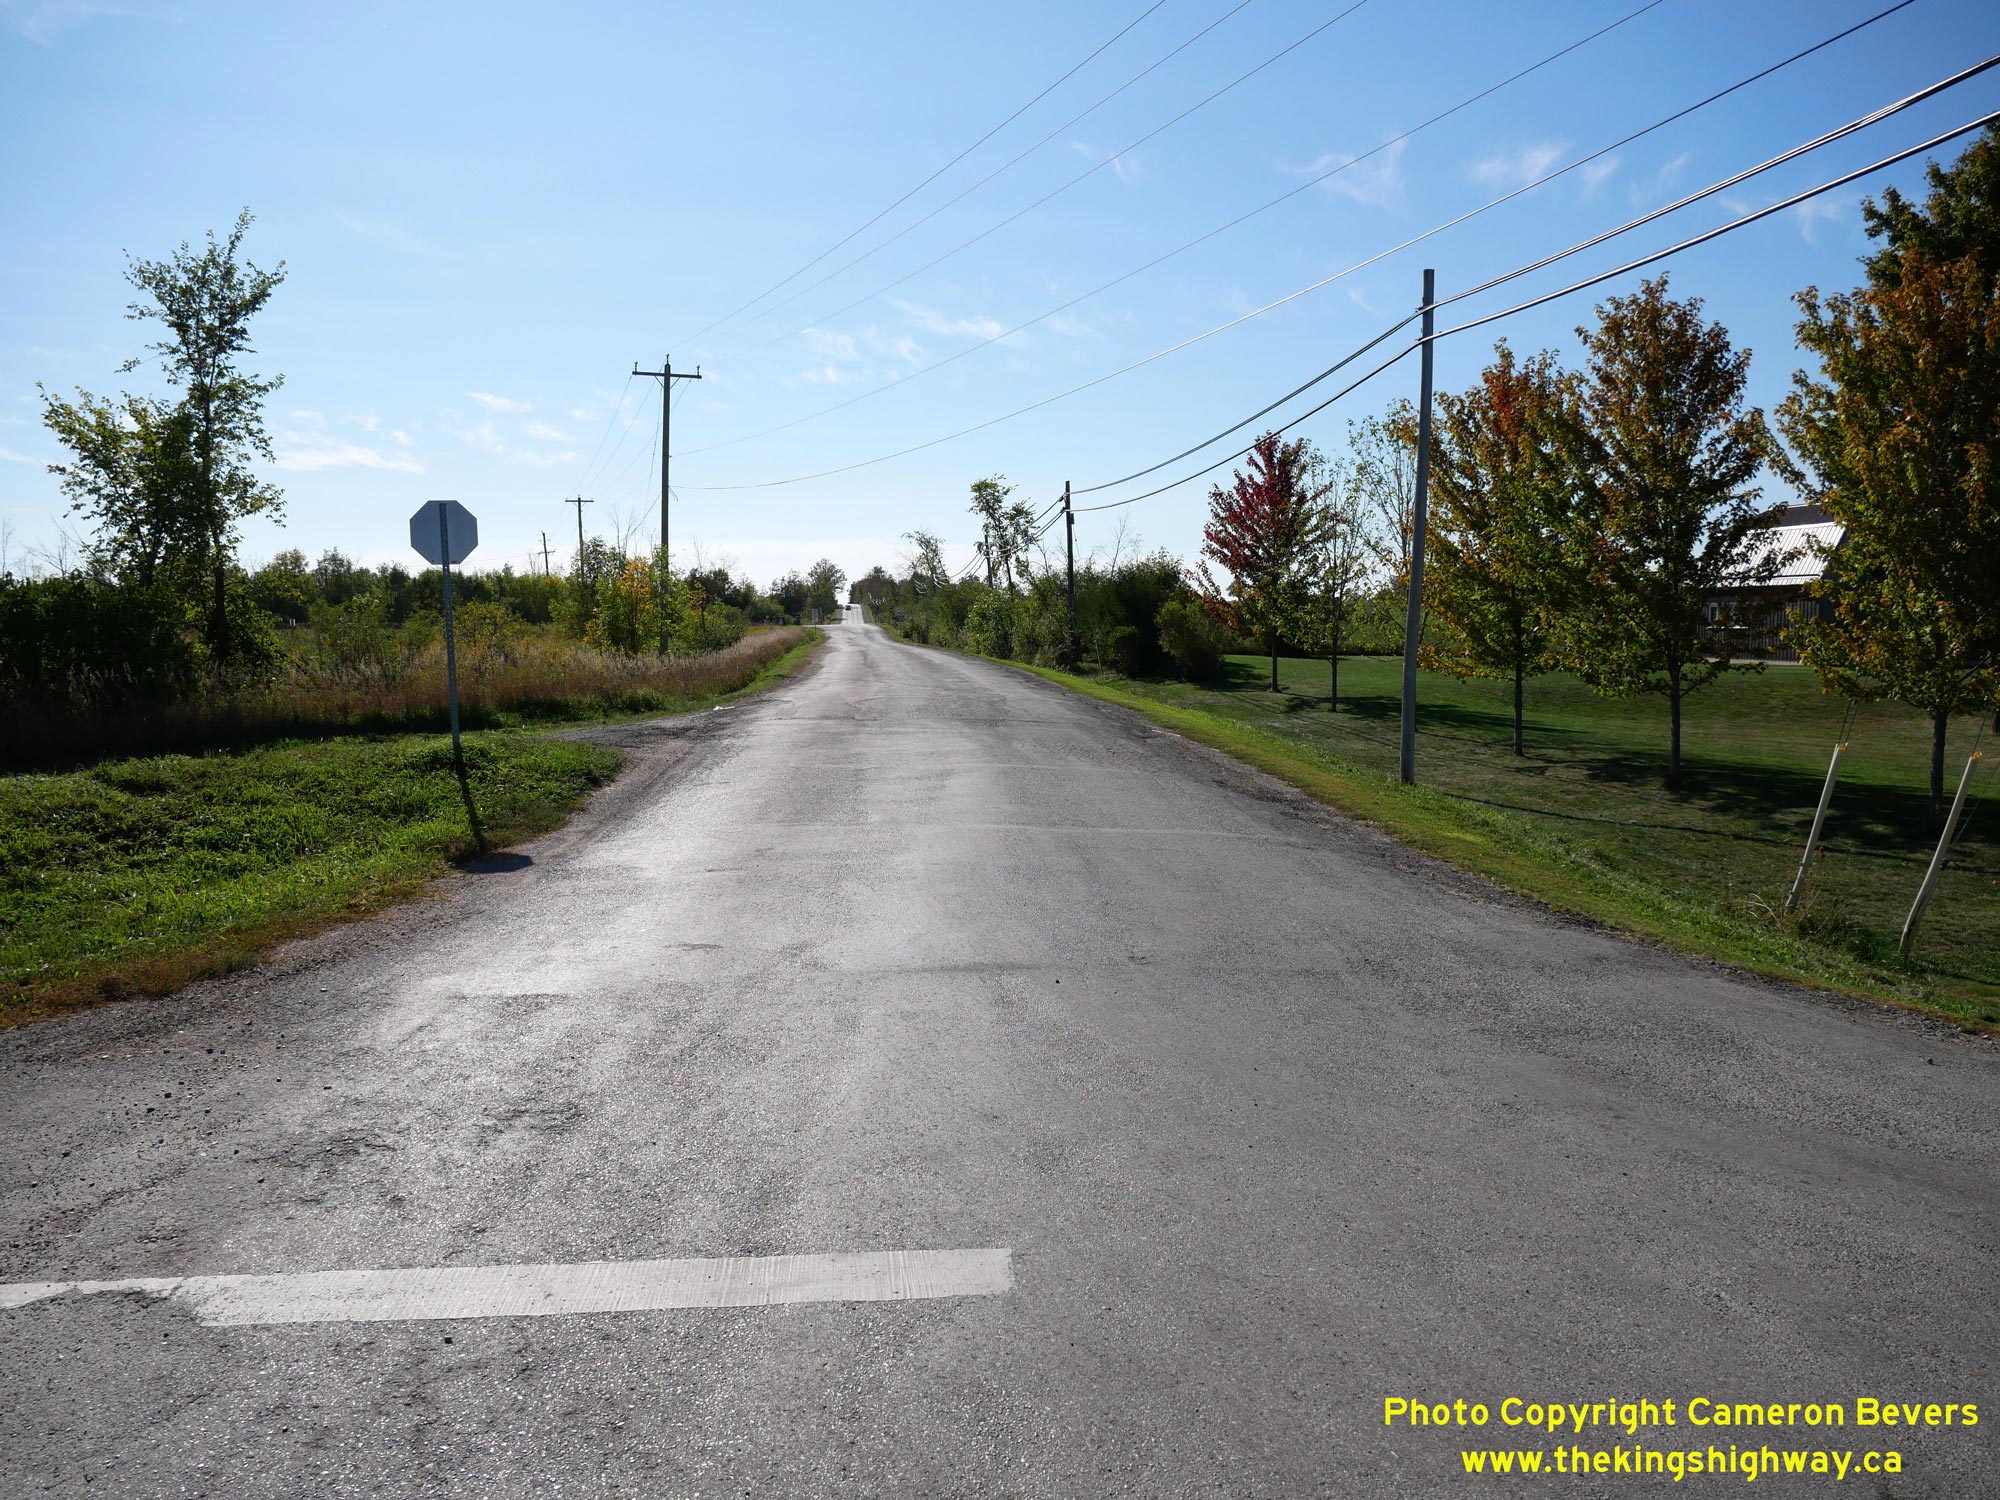
 Left - Approaching Thunder Bridge Road on Hwy 35, facing north towards Fenelon Falls. Historically, Hwy 35B followed Thunder Bridge Road into Lindsay. The
diversion of Hwy 35 which was built around the western side of Lindsay during the 1950s comes to an end at this intersection. An old curved diversion once existed at
these corners, but the curve was abandoned as part of the relocation of Hwy 35. See an
Enlarged Photo Here. Left - Approaching Thunder Bridge Road on Hwy 35, facing north towards Fenelon Falls. Historically, Hwy 35B followed Thunder Bridge Road into Lindsay. The
diversion of Hwy 35 which was built around the western side of Lindsay during the 1950s comes to an end at this intersection. An old curved diversion once existed at
these corners, but the curve was abandoned as part of the relocation of Hwy 35. See an
Enlarged Photo Here.(Photograph taken on September 16, 2025 - © Cameron Bevers) Right - Facing north along Hwy 35 from Thunder Bridge Road (Old Hwy 35B). From this point northerly to Powles Corners, today's route of Hwy 35 fairly closely
follows the original highway route established back in the 1930s. The DHO assumed jurisdiction over the Lindsay-Fenelon Falls Road as a new King's Highway, effective
July 1, 1931. See an Enlarged Photo Here.(Photograph taken on September 16, 2025 - © Cameron Bevers) 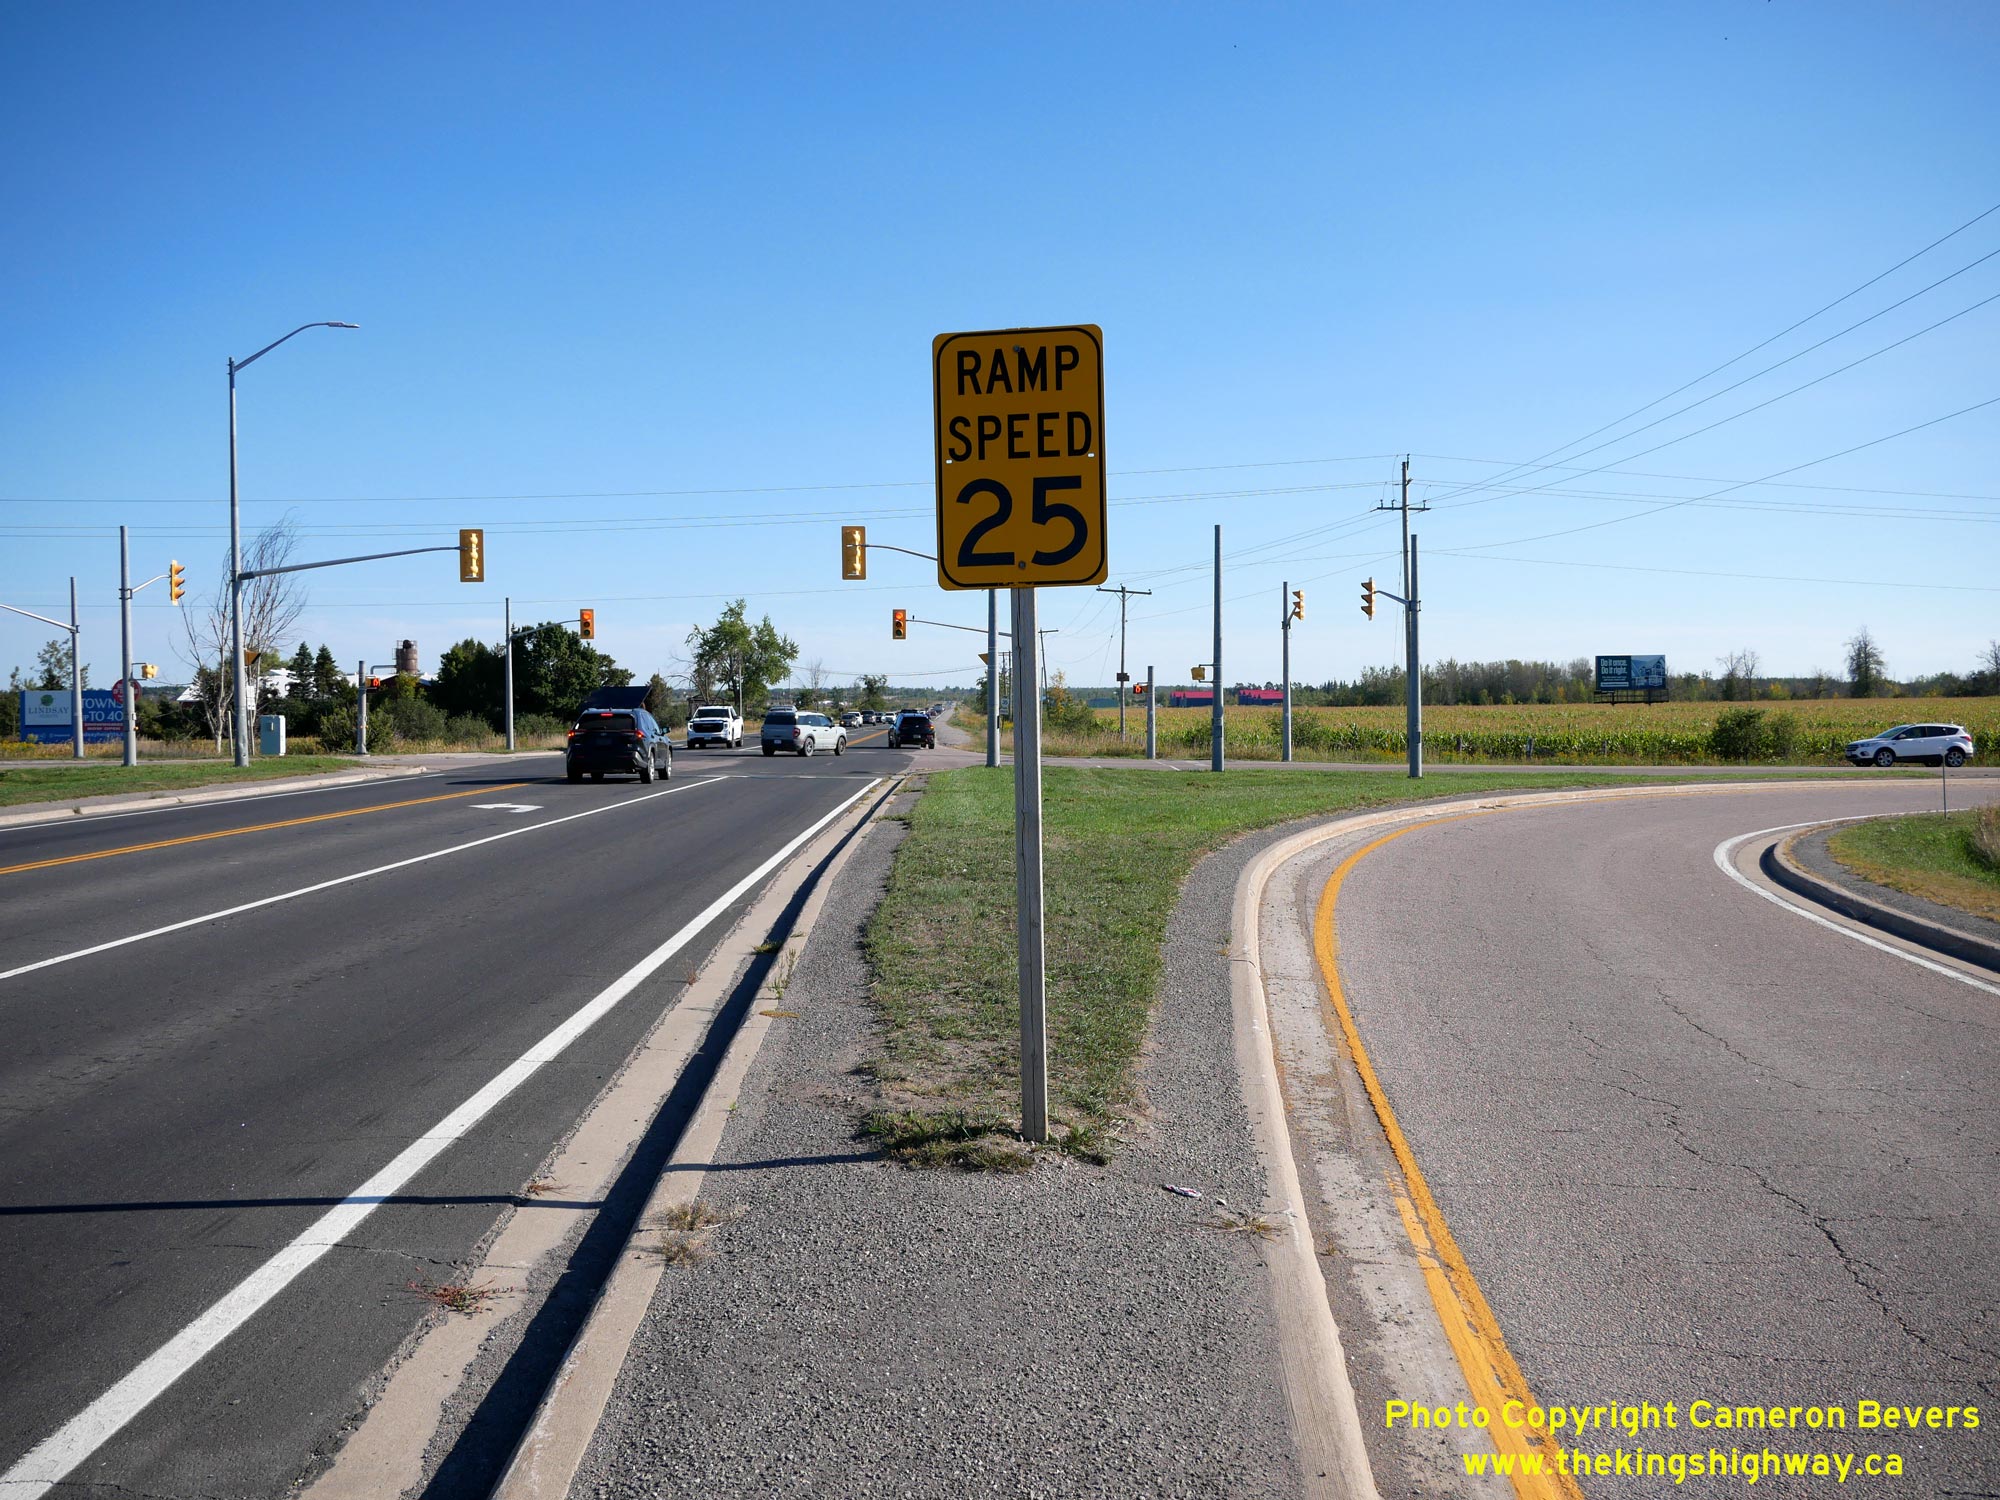
 Left - An older "Ramp Speed 25" sign on Hwy 35 at the Old Hwy 35B Junction north of Lindsay. These signs are being phased out by the MTO and replaced with new
plain yellow signs which just post the numerical advisory speed only. See an
Enlarged Photo Here. Left - An older "Ramp Speed 25" sign on Hwy 35 at the Old Hwy 35B Junction north of Lindsay. These signs are being phased out by the MTO and replaced with new
plain yellow signs which just post the numerical advisory speed only. See an
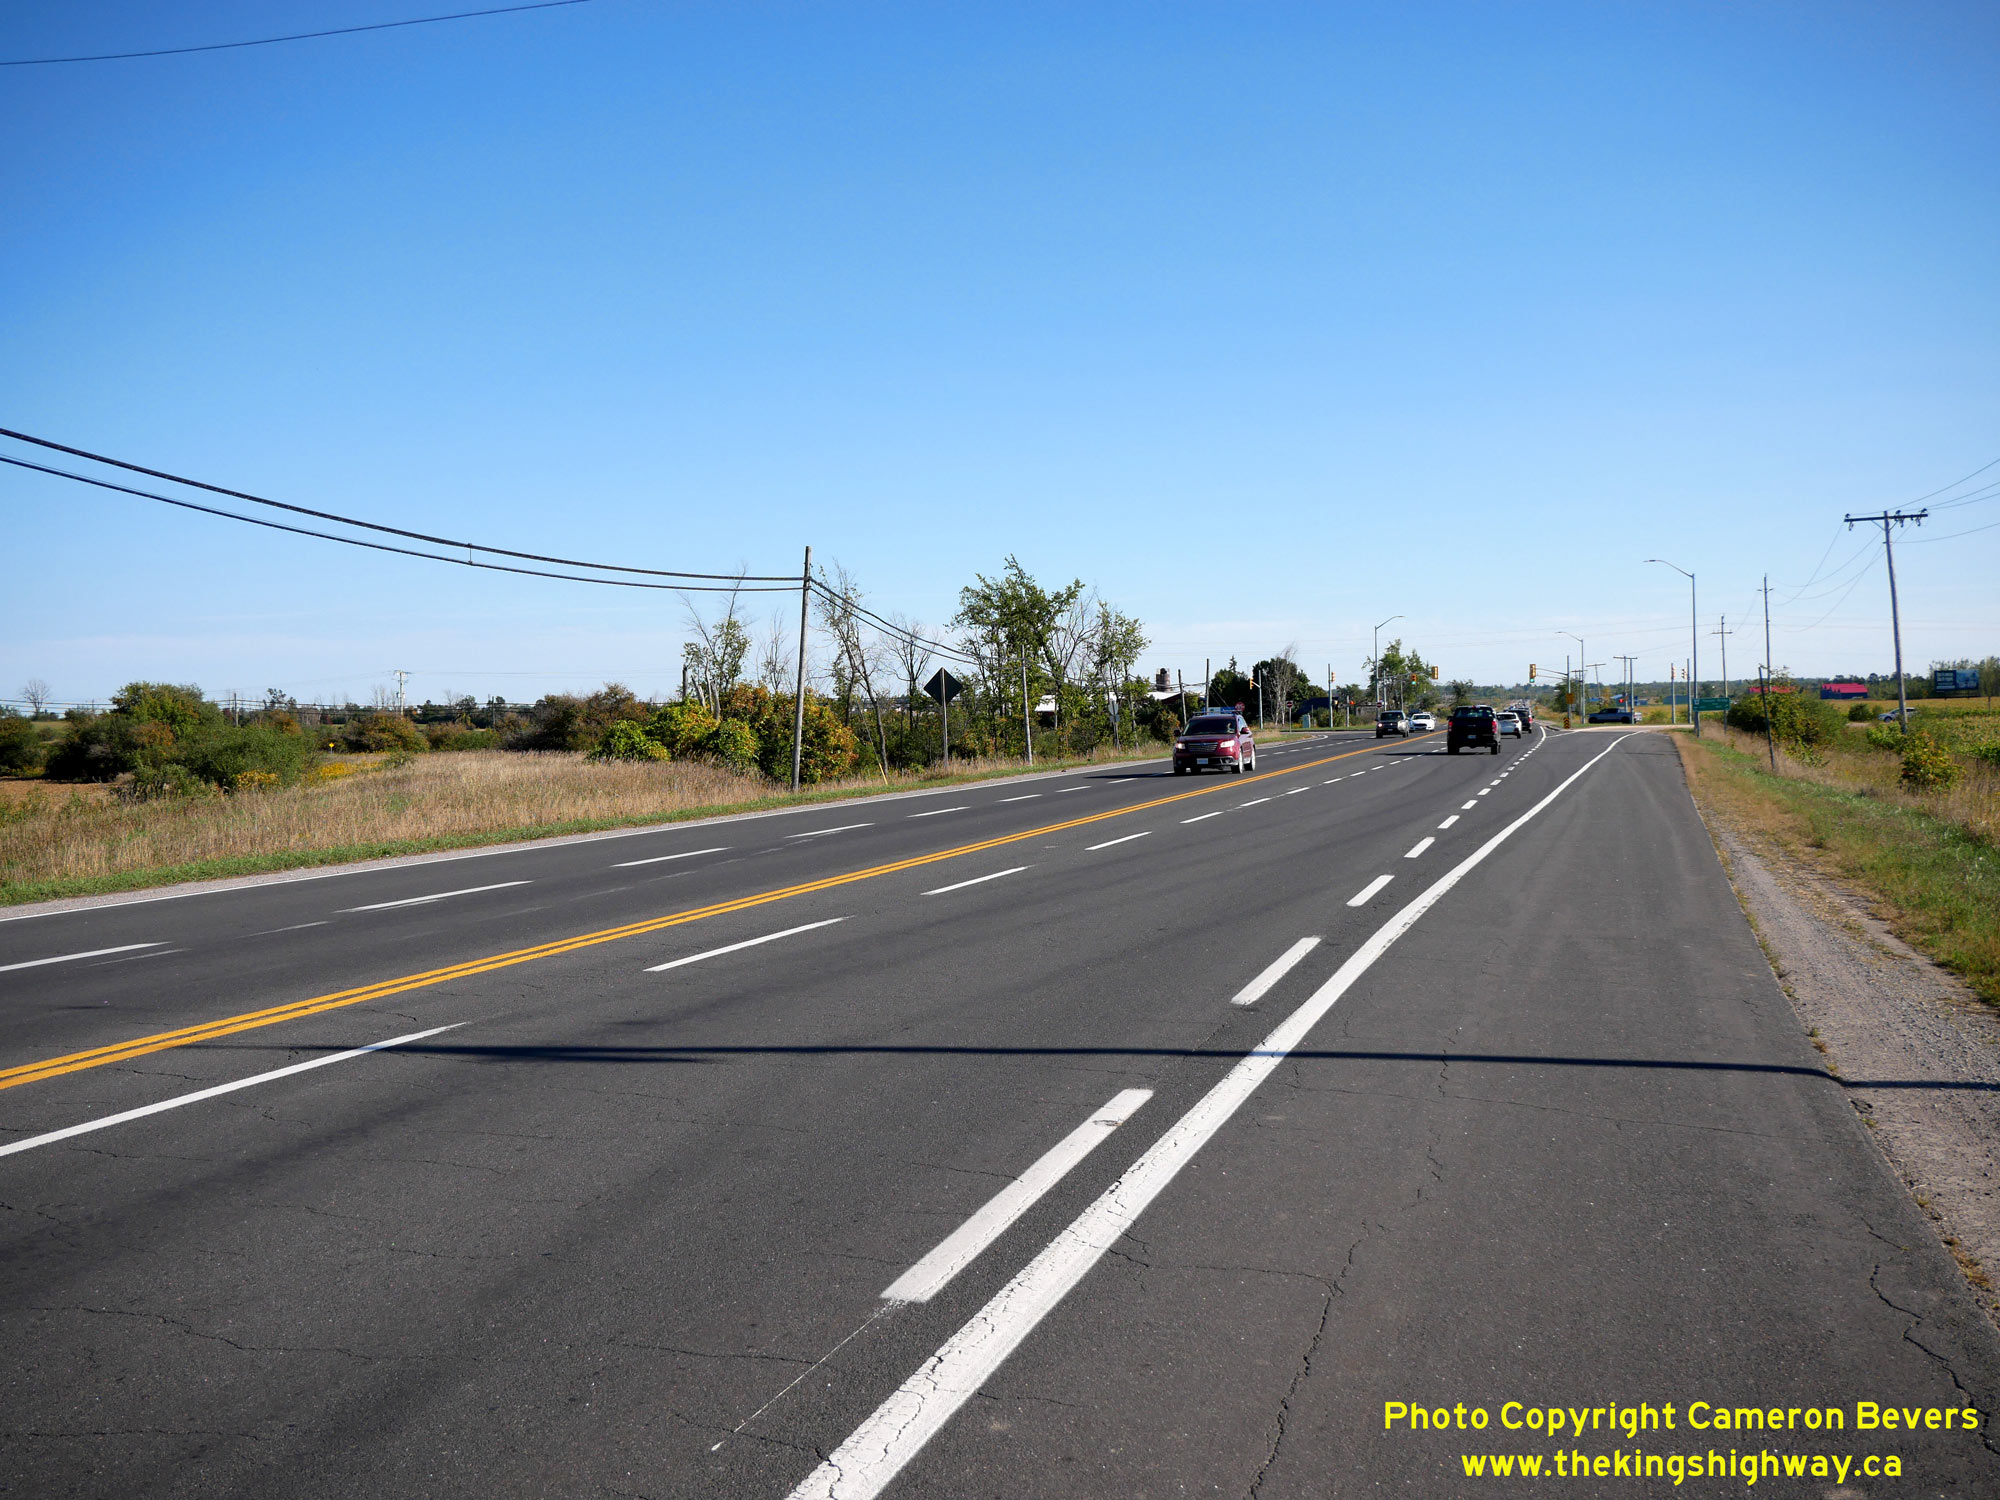
Enlarged Photo Here.(Photograph taken on September 16, 2025 - © Cameron Bevers) Right - Facing south along Hwy 35 approaching Thunder Bridge Road (Old Hwy 35B) north of Lindsay. At left, faint traces of the old highway curve into Lindsay
can be seen. Traffic has not used this old highway curve for many decades. The curve was closed once the relocated Hwy 35 opened to traffic in 1958. See an
Enlarged Photo Here.(Photograph taken on September 16, 2025 - © Cameron Bevers) |
|---|
Links to Adjacent King's Highway Photograph Pages:
Back to King's Highway 35A Photos /
King's Highway 35B (Lindsay) History /
Back to King's Highway 35B (Dorset) Photos
Ontario Highway History - Main Menu / Back to List of Highways Website contents, photos & text © 2002-2026, Cameron
Bevers (Webmaster) - All Rights Reserved / Contact Me
|
|---|