
| 
| |
|
|
This page contains present day photos (Year 2010 to date) of Ontario's King's Highway 400, arranged by location from the
Highway 7 Interchange in Vaughan northerly to the King Road Interchange near King City. All photographs displayed on this page were taken by the Webmaster
(Cameron Bevers), unless specifically noted otherwise. Click on any thumbnail to see a larger image!
Please note that all photographs displayed on this
website are protected by copyright. These photographs must not be reproduced, published,
electronically stored or copied, distributed, or posted onto other websites without
my written permission. If you want to use photos from this website, please
email me first for permission. Thank-you!
|
|---|
|
Page 11: Present Day King's Highway 400 Photographs (Hwy 7 to King Road)
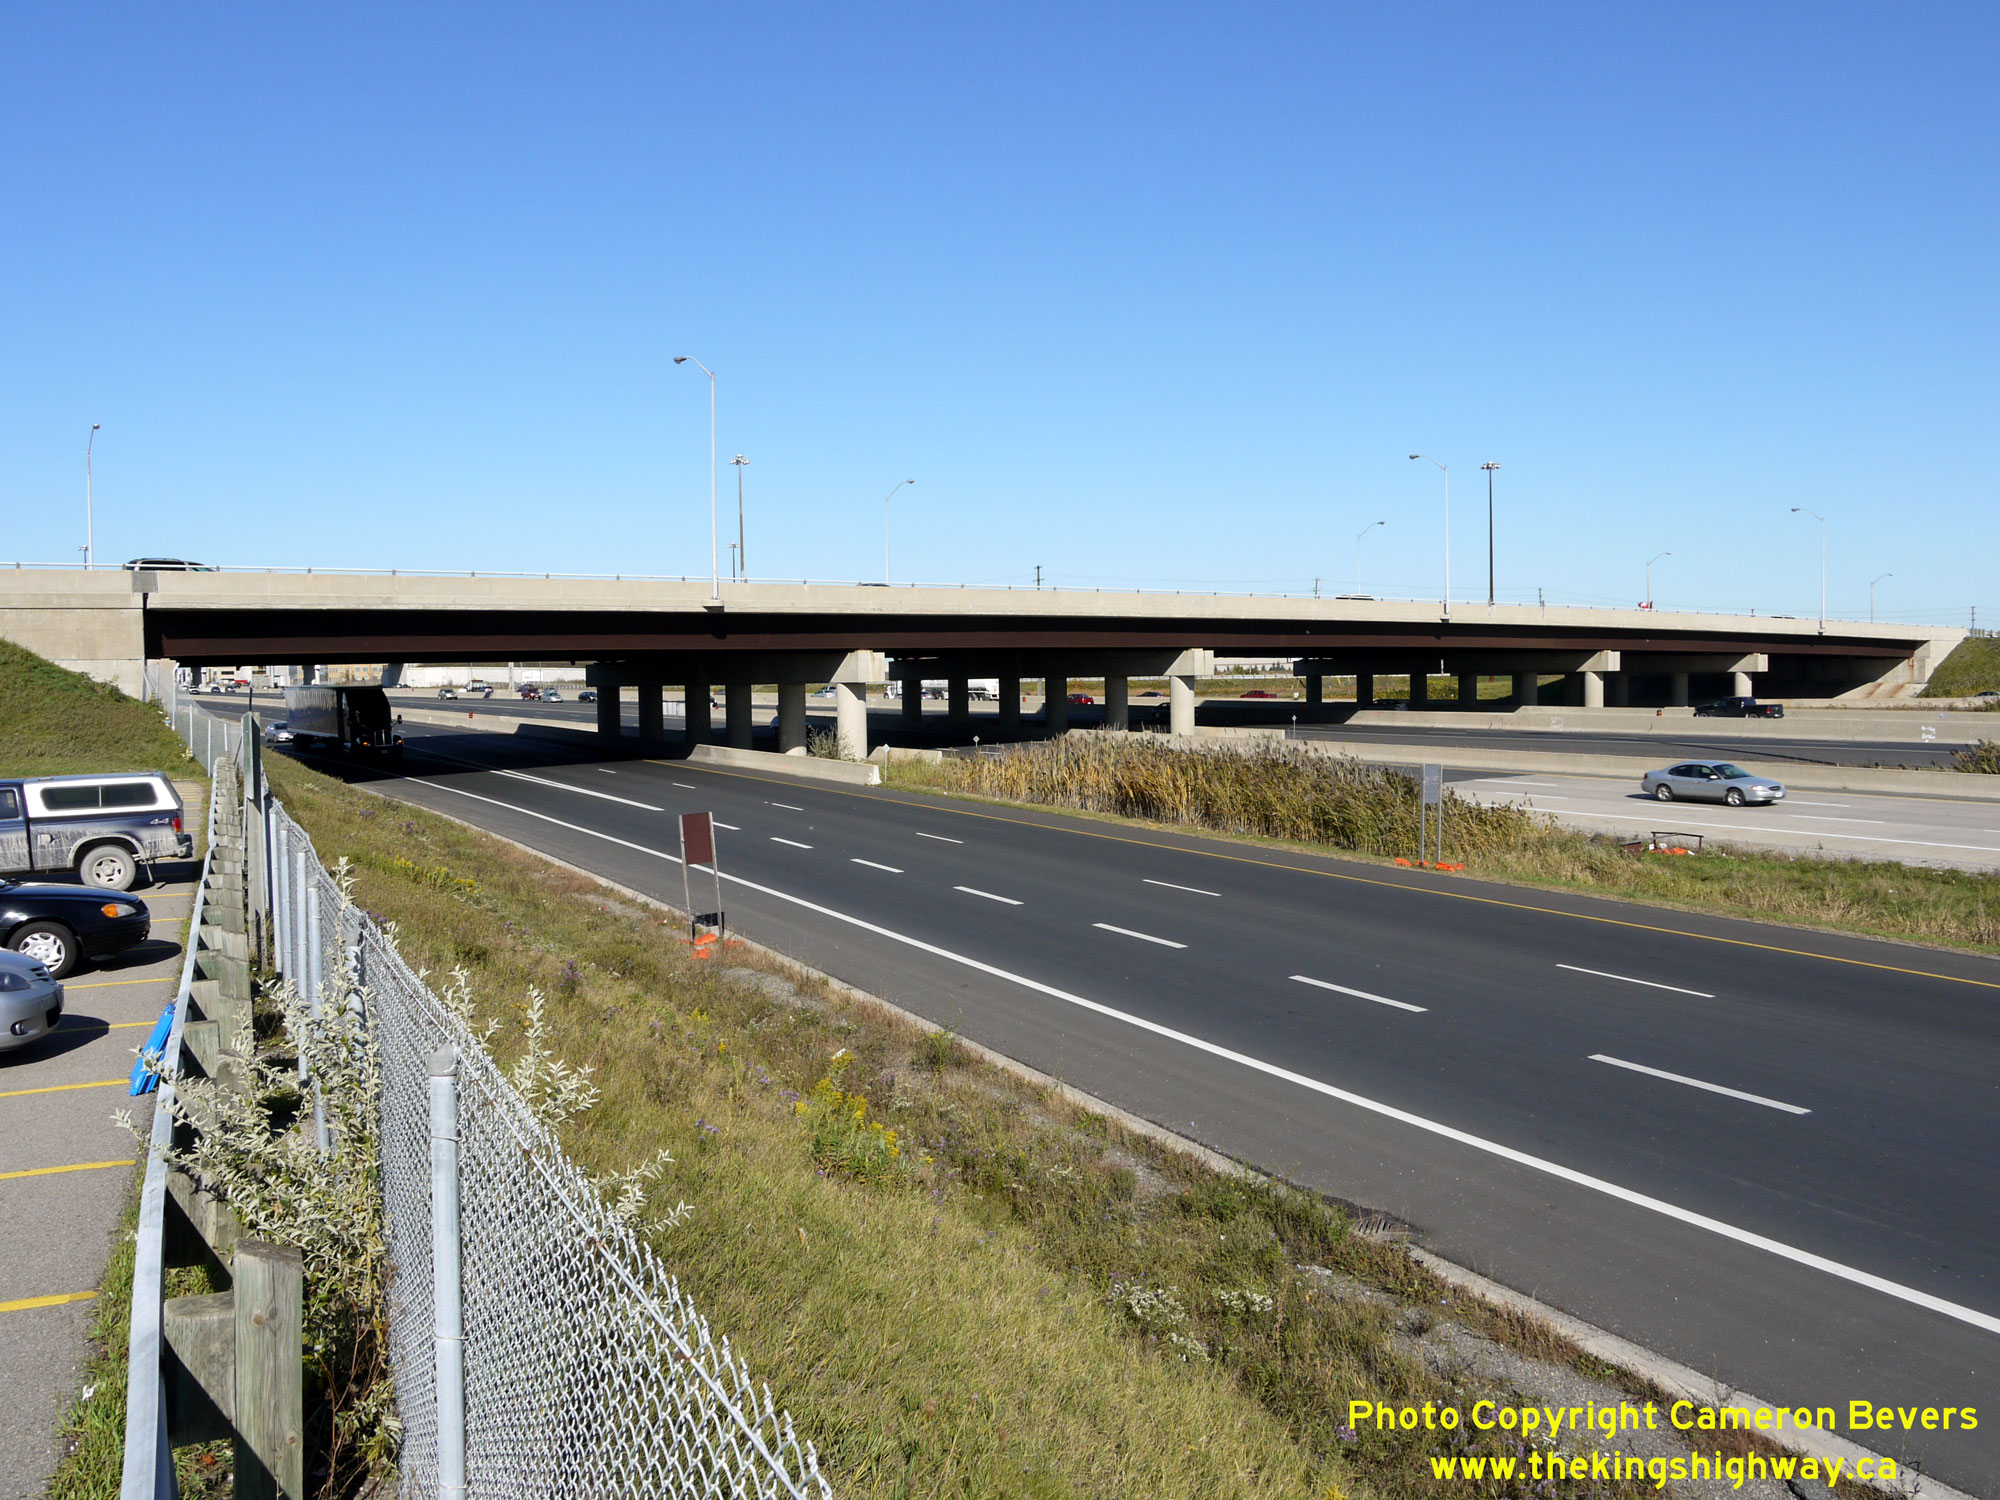  Left - View of the southbound Hwy 400 Collector Lanes, facing south towards the Hwy 407 Express Toll Route (ETR) Interchange. During the 1990s, a short
Express-Collector Lane System was constructed along Hwy 400 to service the Hwy 7 and Langstaff Road Interchanges. The southbound Hwy 400 Collector Lanes pass below
the southbound exit ramp from Hwy 400 to Hwy 407 ETR. See an
Enlarged Photo Here. Left - View of the southbound Hwy 400 Collector Lanes, facing south towards the Hwy 407 Express Toll Route (ETR) Interchange. During the 1990s, a short
Express-Collector Lane System was constructed along Hwy 400 to service the Hwy 7 and Langstaff Road Interchanges. The southbound Hwy 400 Collector Lanes pass below
the southbound exit ramp from Hwy 400 to Hwy 407 ETR. See an
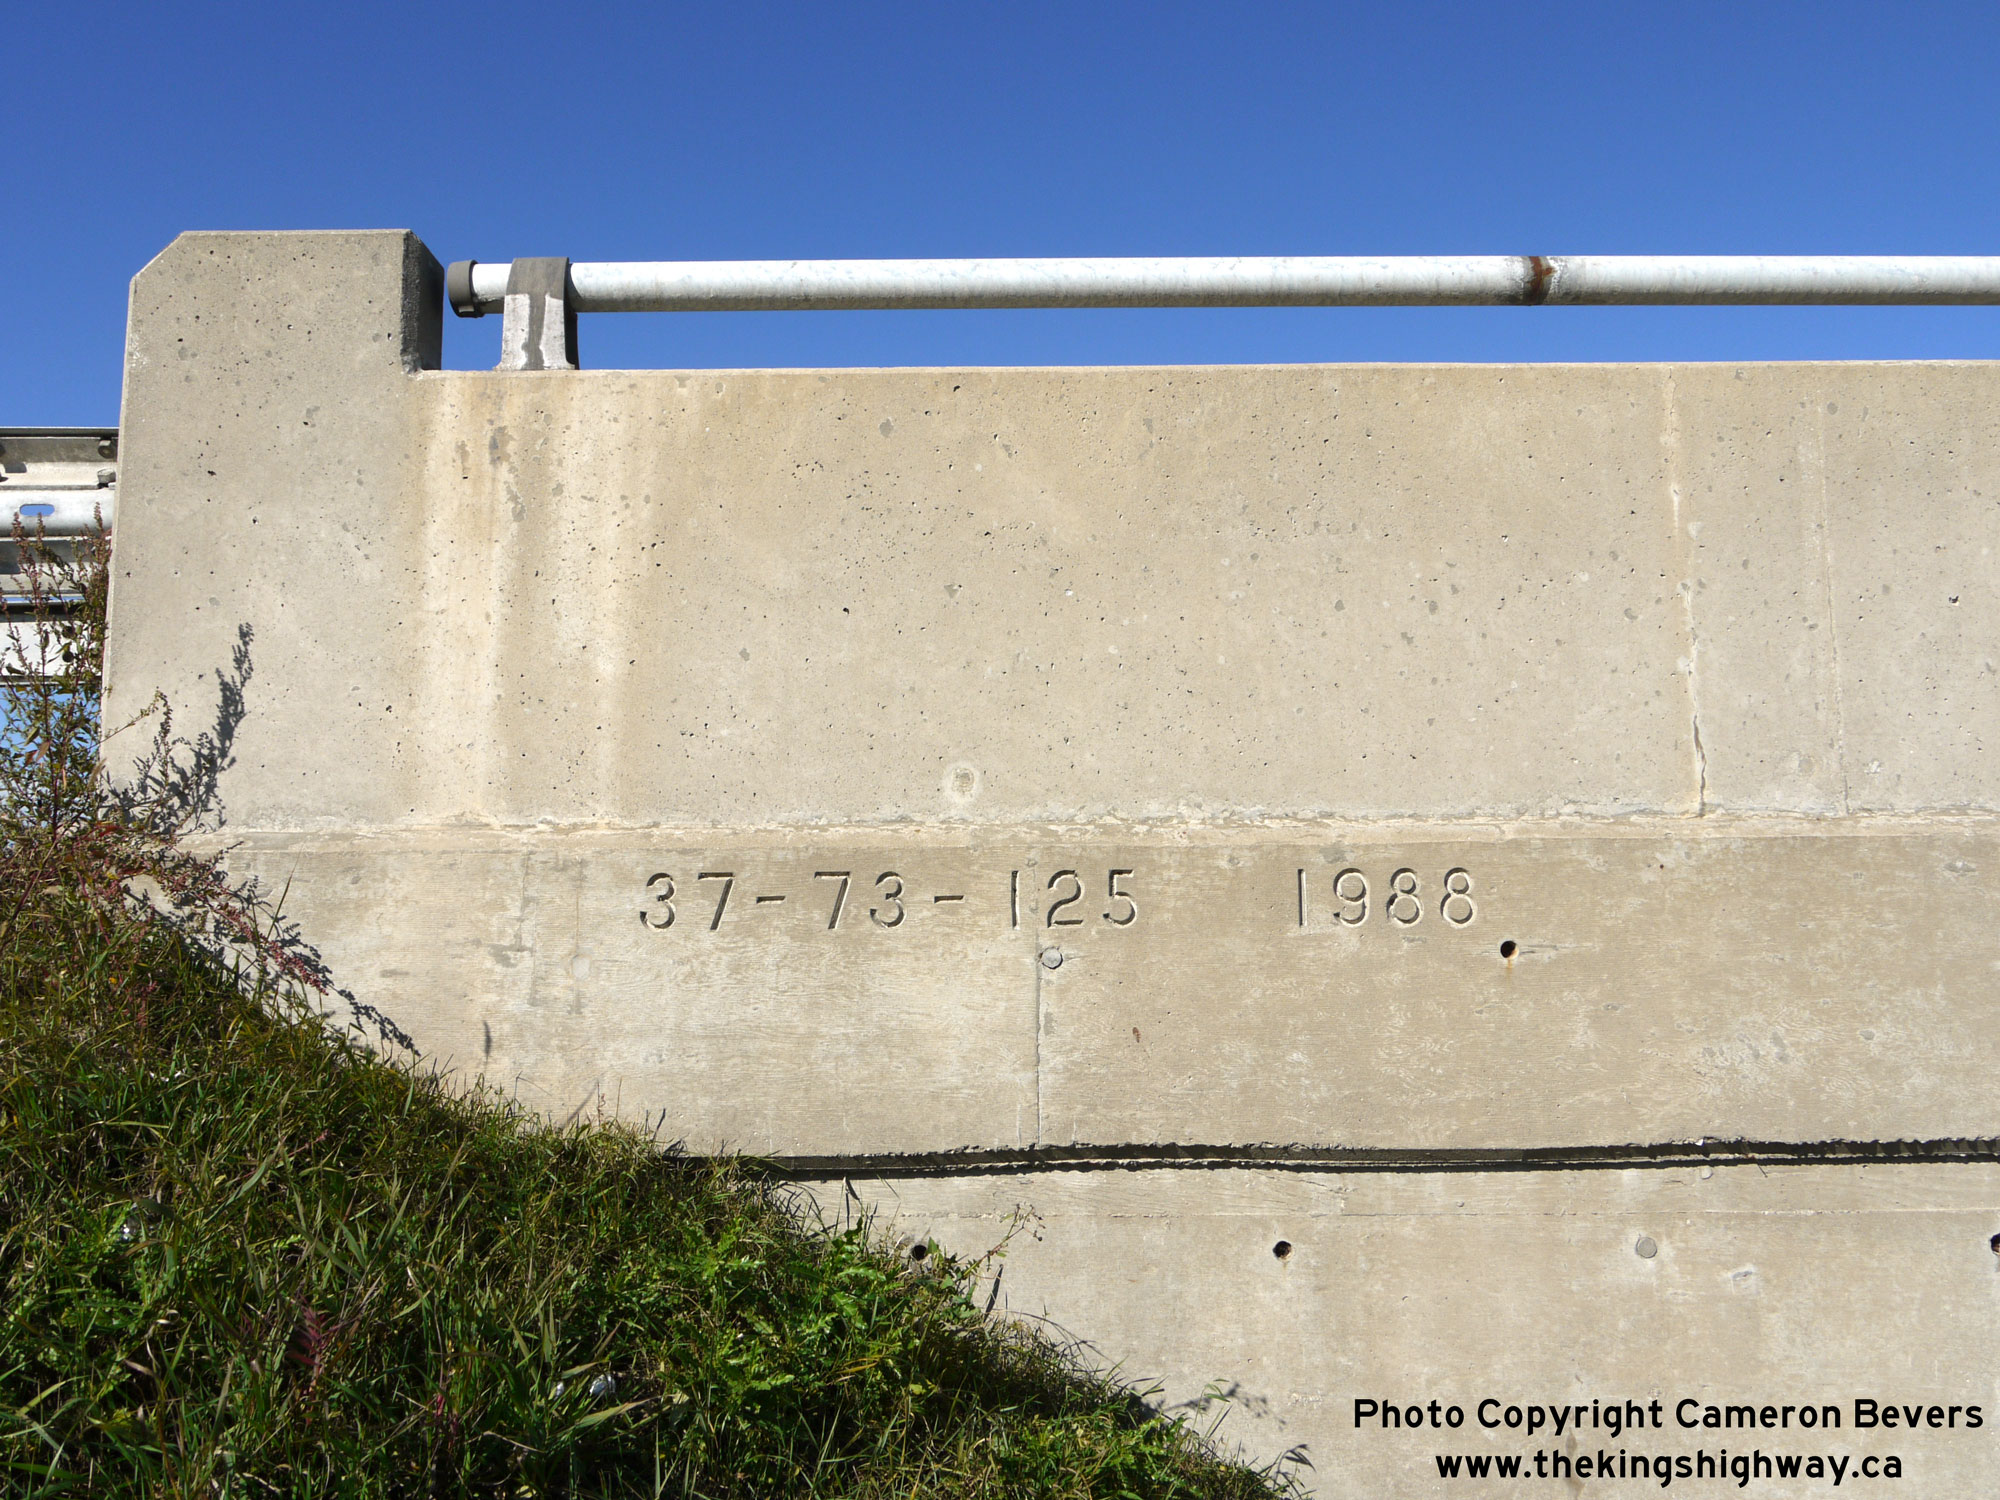
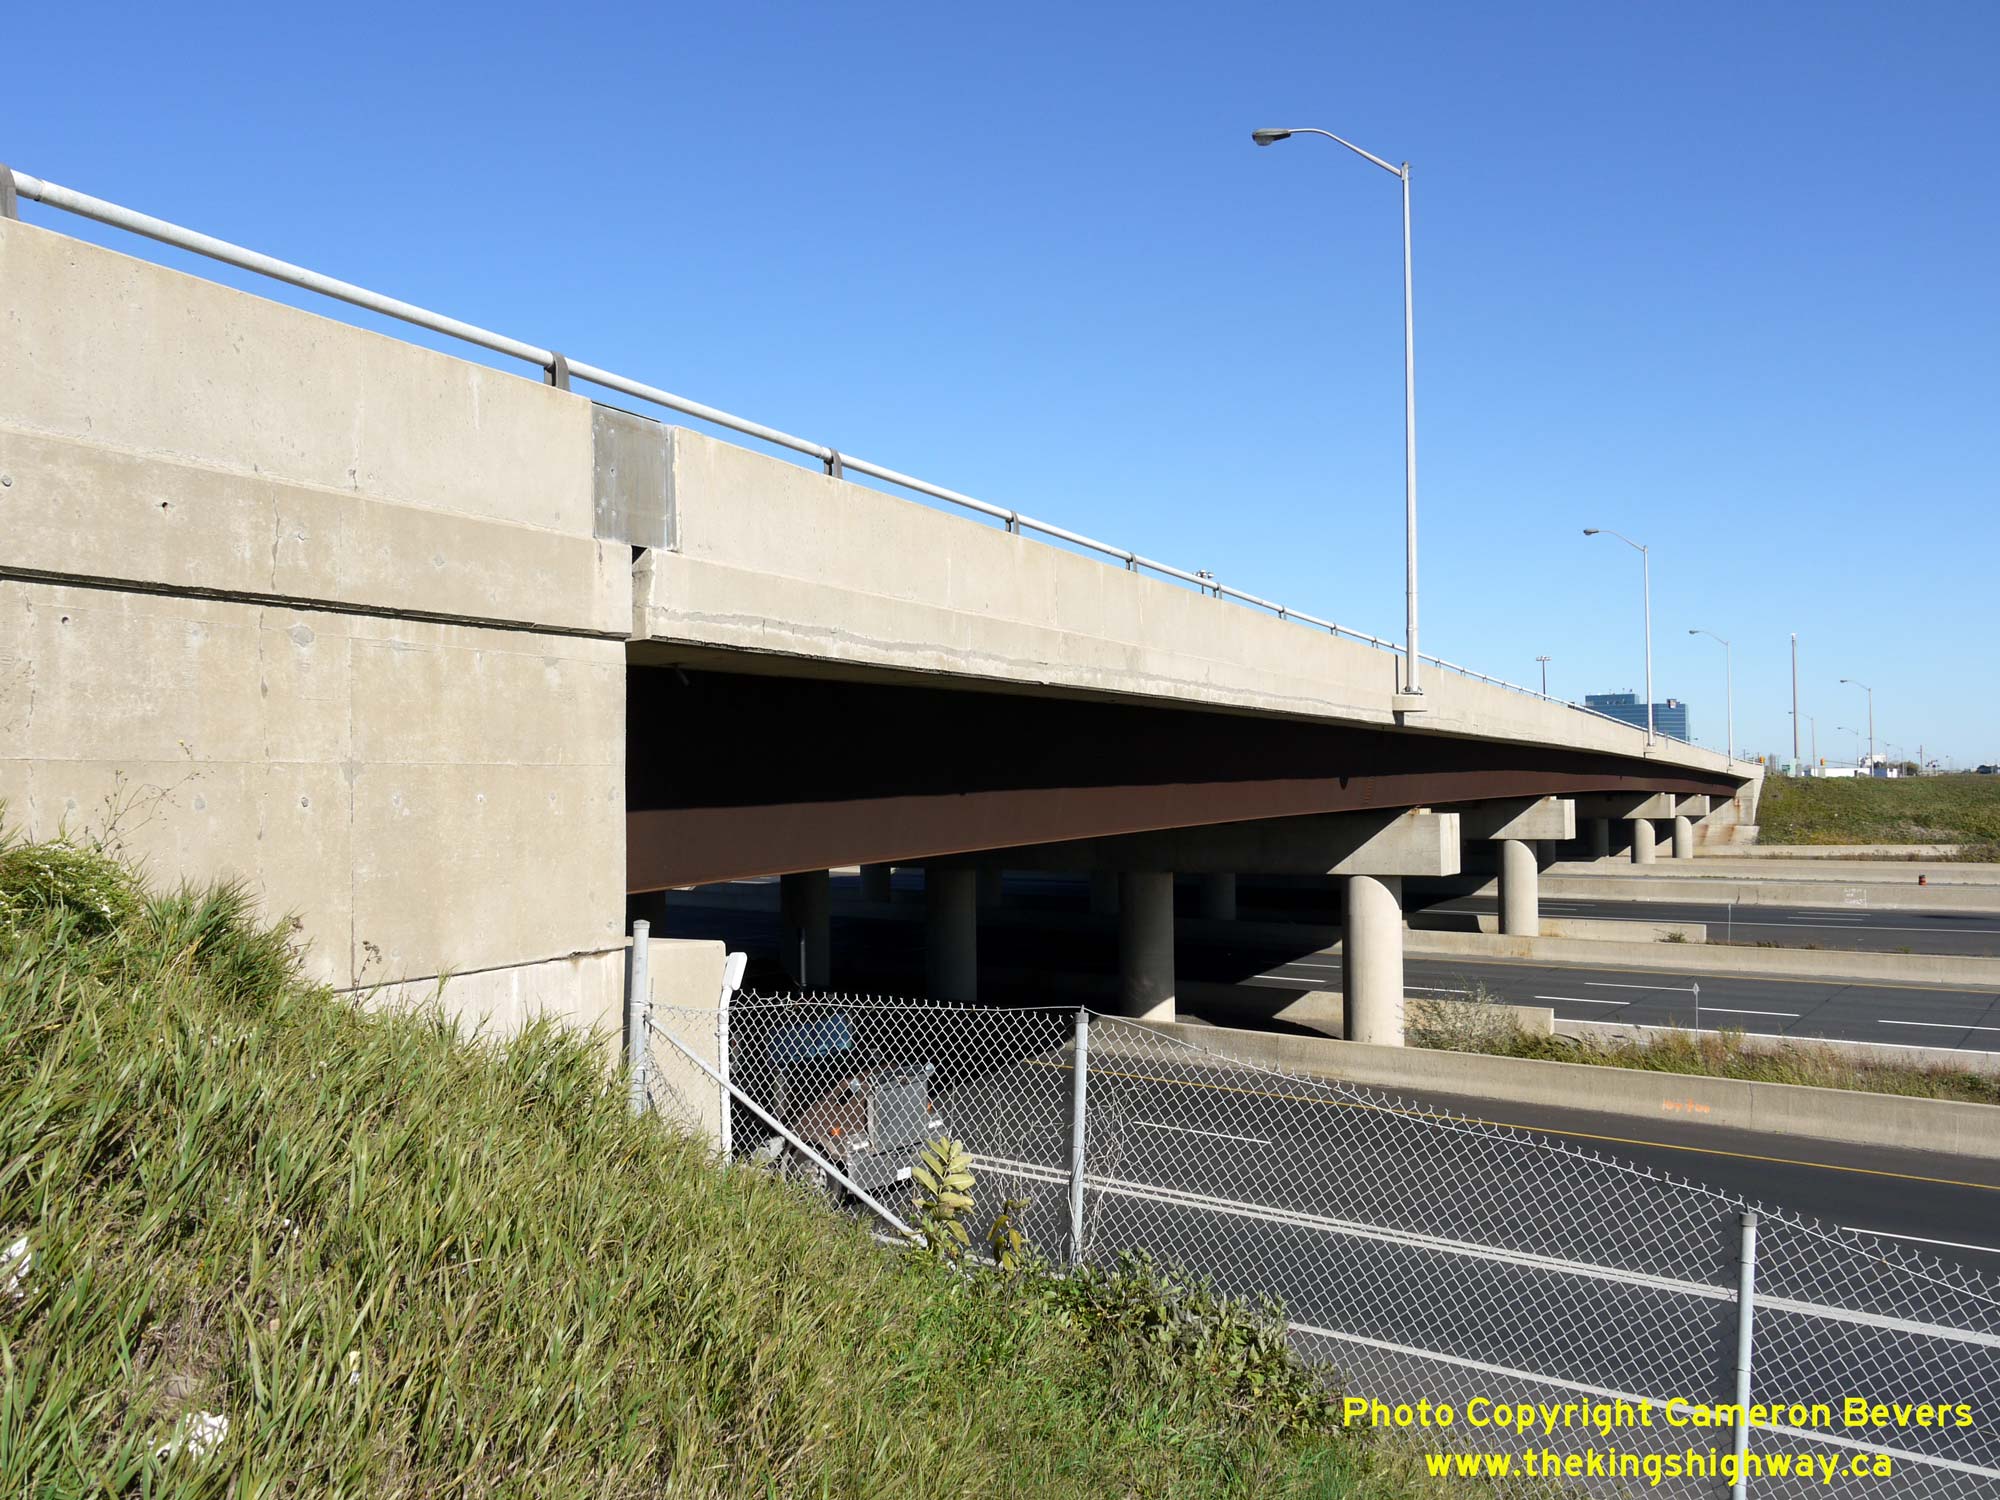
Enlarged Photo Here.(Photograph taken on October 27, 2010 - © Cameron Bevers) Right - Southern side of the Hwy 7 Overpass (Site #37-125) on Hwy 400 in Vaughan. This five-span trapezoidal steel box girder structure was constructed under
Contract #1987-60 and was completed in 1988. This new multi-span structure replaced an older single-span concrete rigid frame structure which was completed along the
Toronto-Barrie Highway (Hwy 400) in 1950. The original Hwy 7 Overpass was built under Contract #1948-83 (structural steel) and Contract #1949-63 (general contract).
The original Hwy 7 Overpass can be seen in this Historical 1950 Photo, taken while the
Toronto-Barrie Highway was still being constructed through the proposed Hwy 7 Cloverleaf. See an
Enlarged Photo Here.(Photograph taken on October 27, 2010 - © Cameron Bevers) 
 Left - Facing east across the Hwy 7 Overpass on Hwy 400. Constructed in the late 1980s, the new Hwy 7 Overpass featured six through lanes. See an
Enlarged Photo Here. Left - Facing east across the Hwy 7 Overpass on Hwy 400. Constructed in the late 1980s, the new Hwy 7 Overpass featured six through lanes. See an
Enlarged Photo Here.(Photograph taken on October 27, 2010 - © Cameron Bevers) Right - Structure identification number (Site #37-125) and date stamp (1988) on the Hwy 7 Overpass on Hwy 400 in Vaughan. See an
Enlarged Photo Here.(Photograph taken on October 27, 2010 - © Cameron Bevers) 
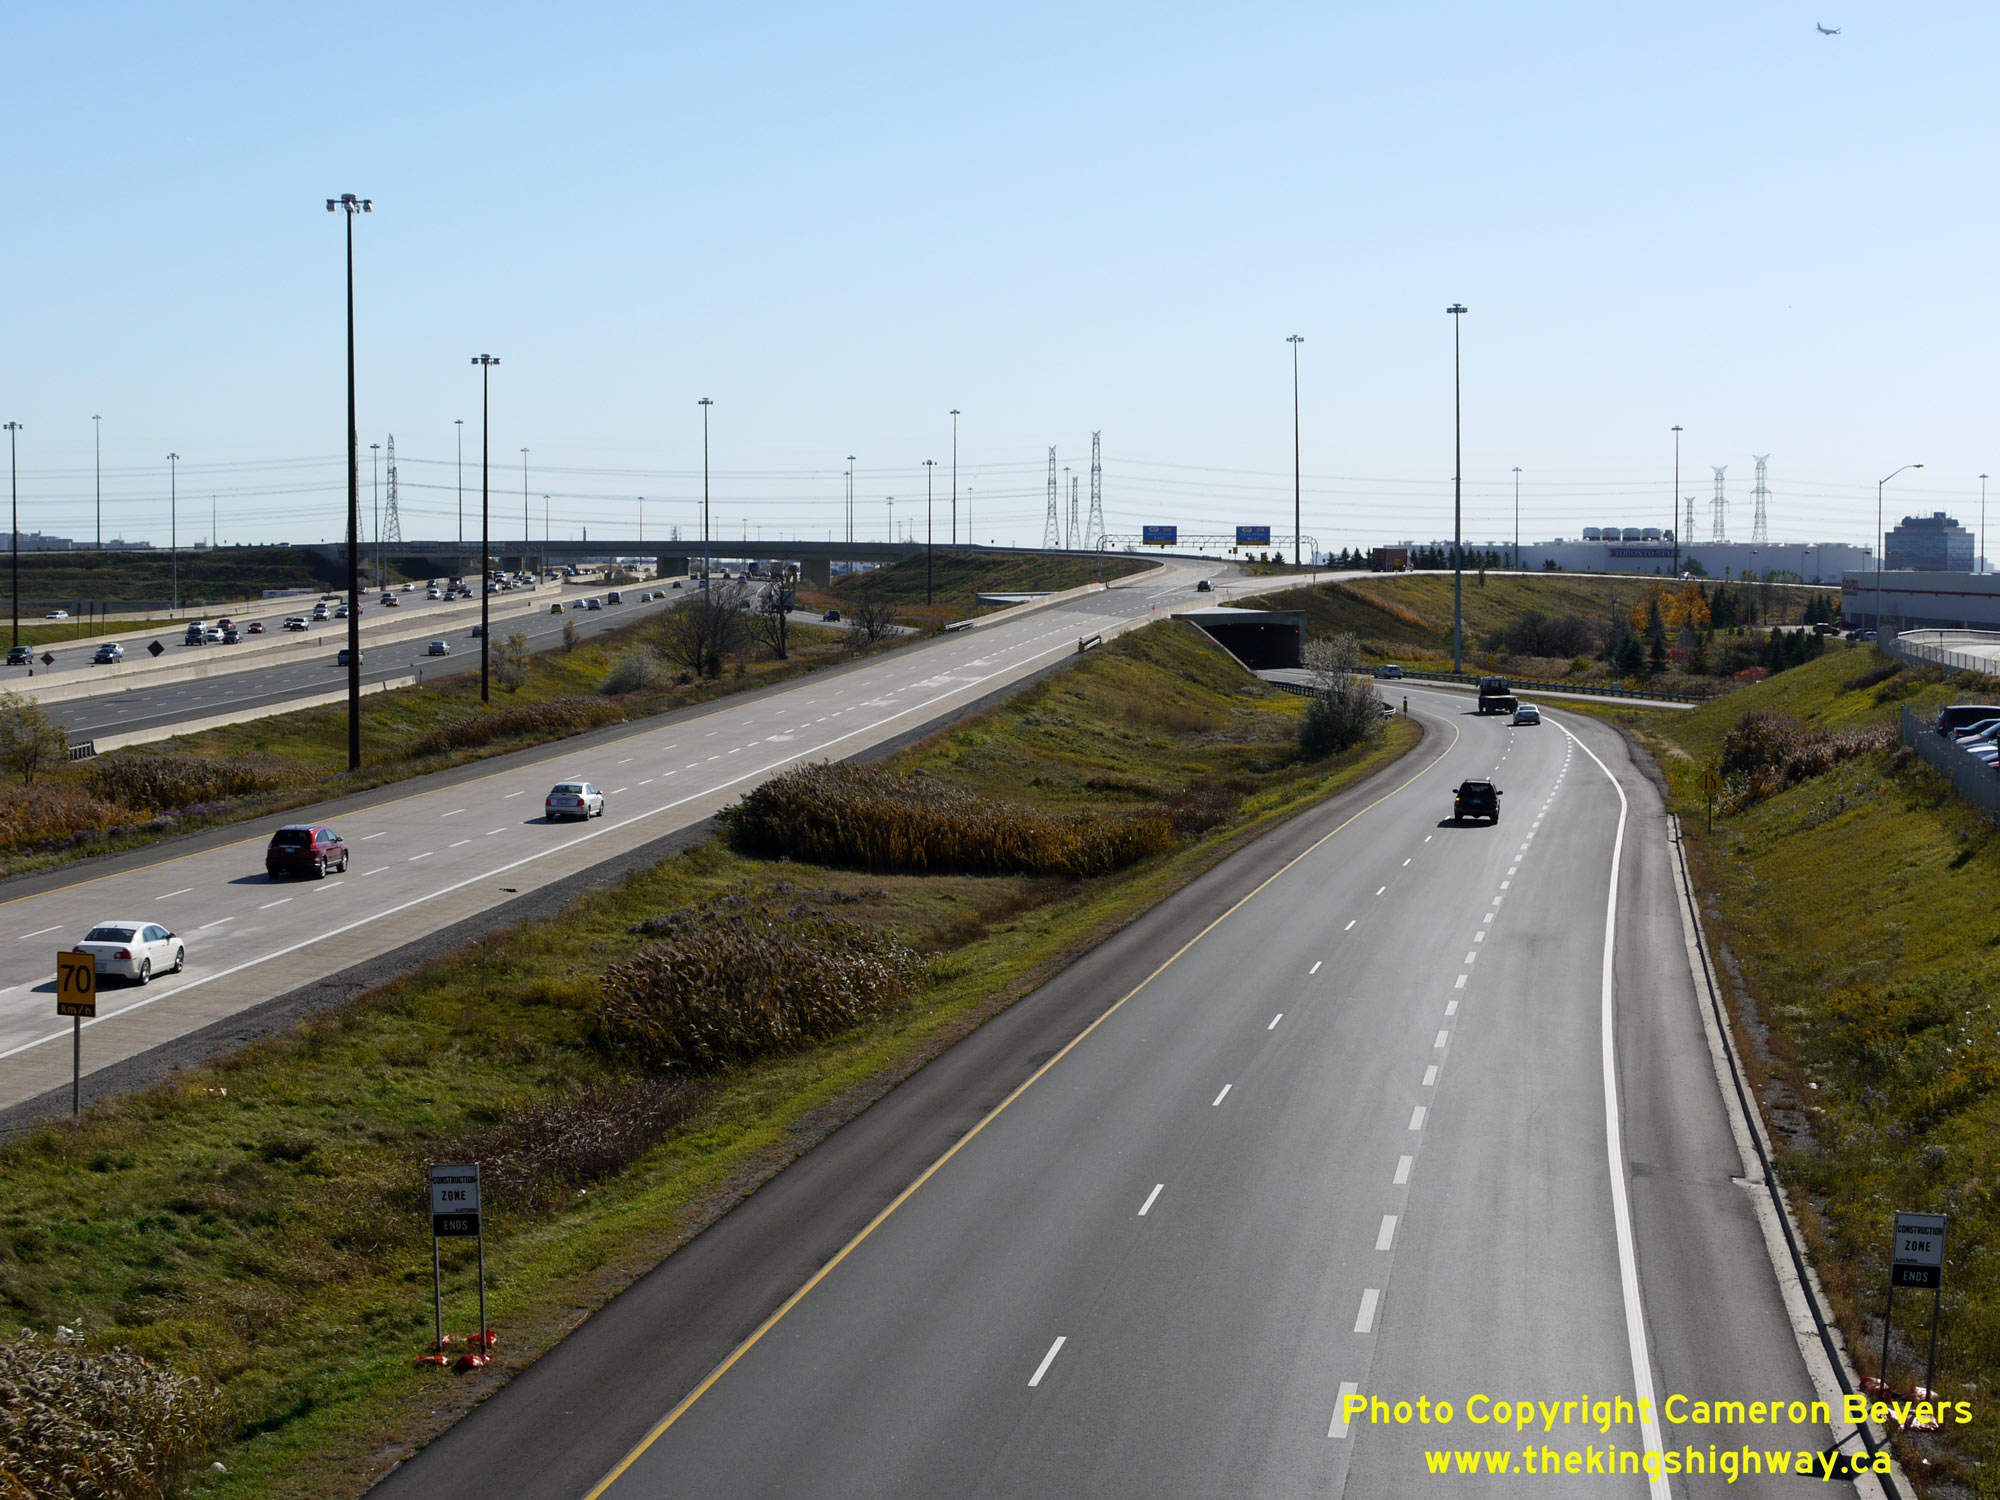
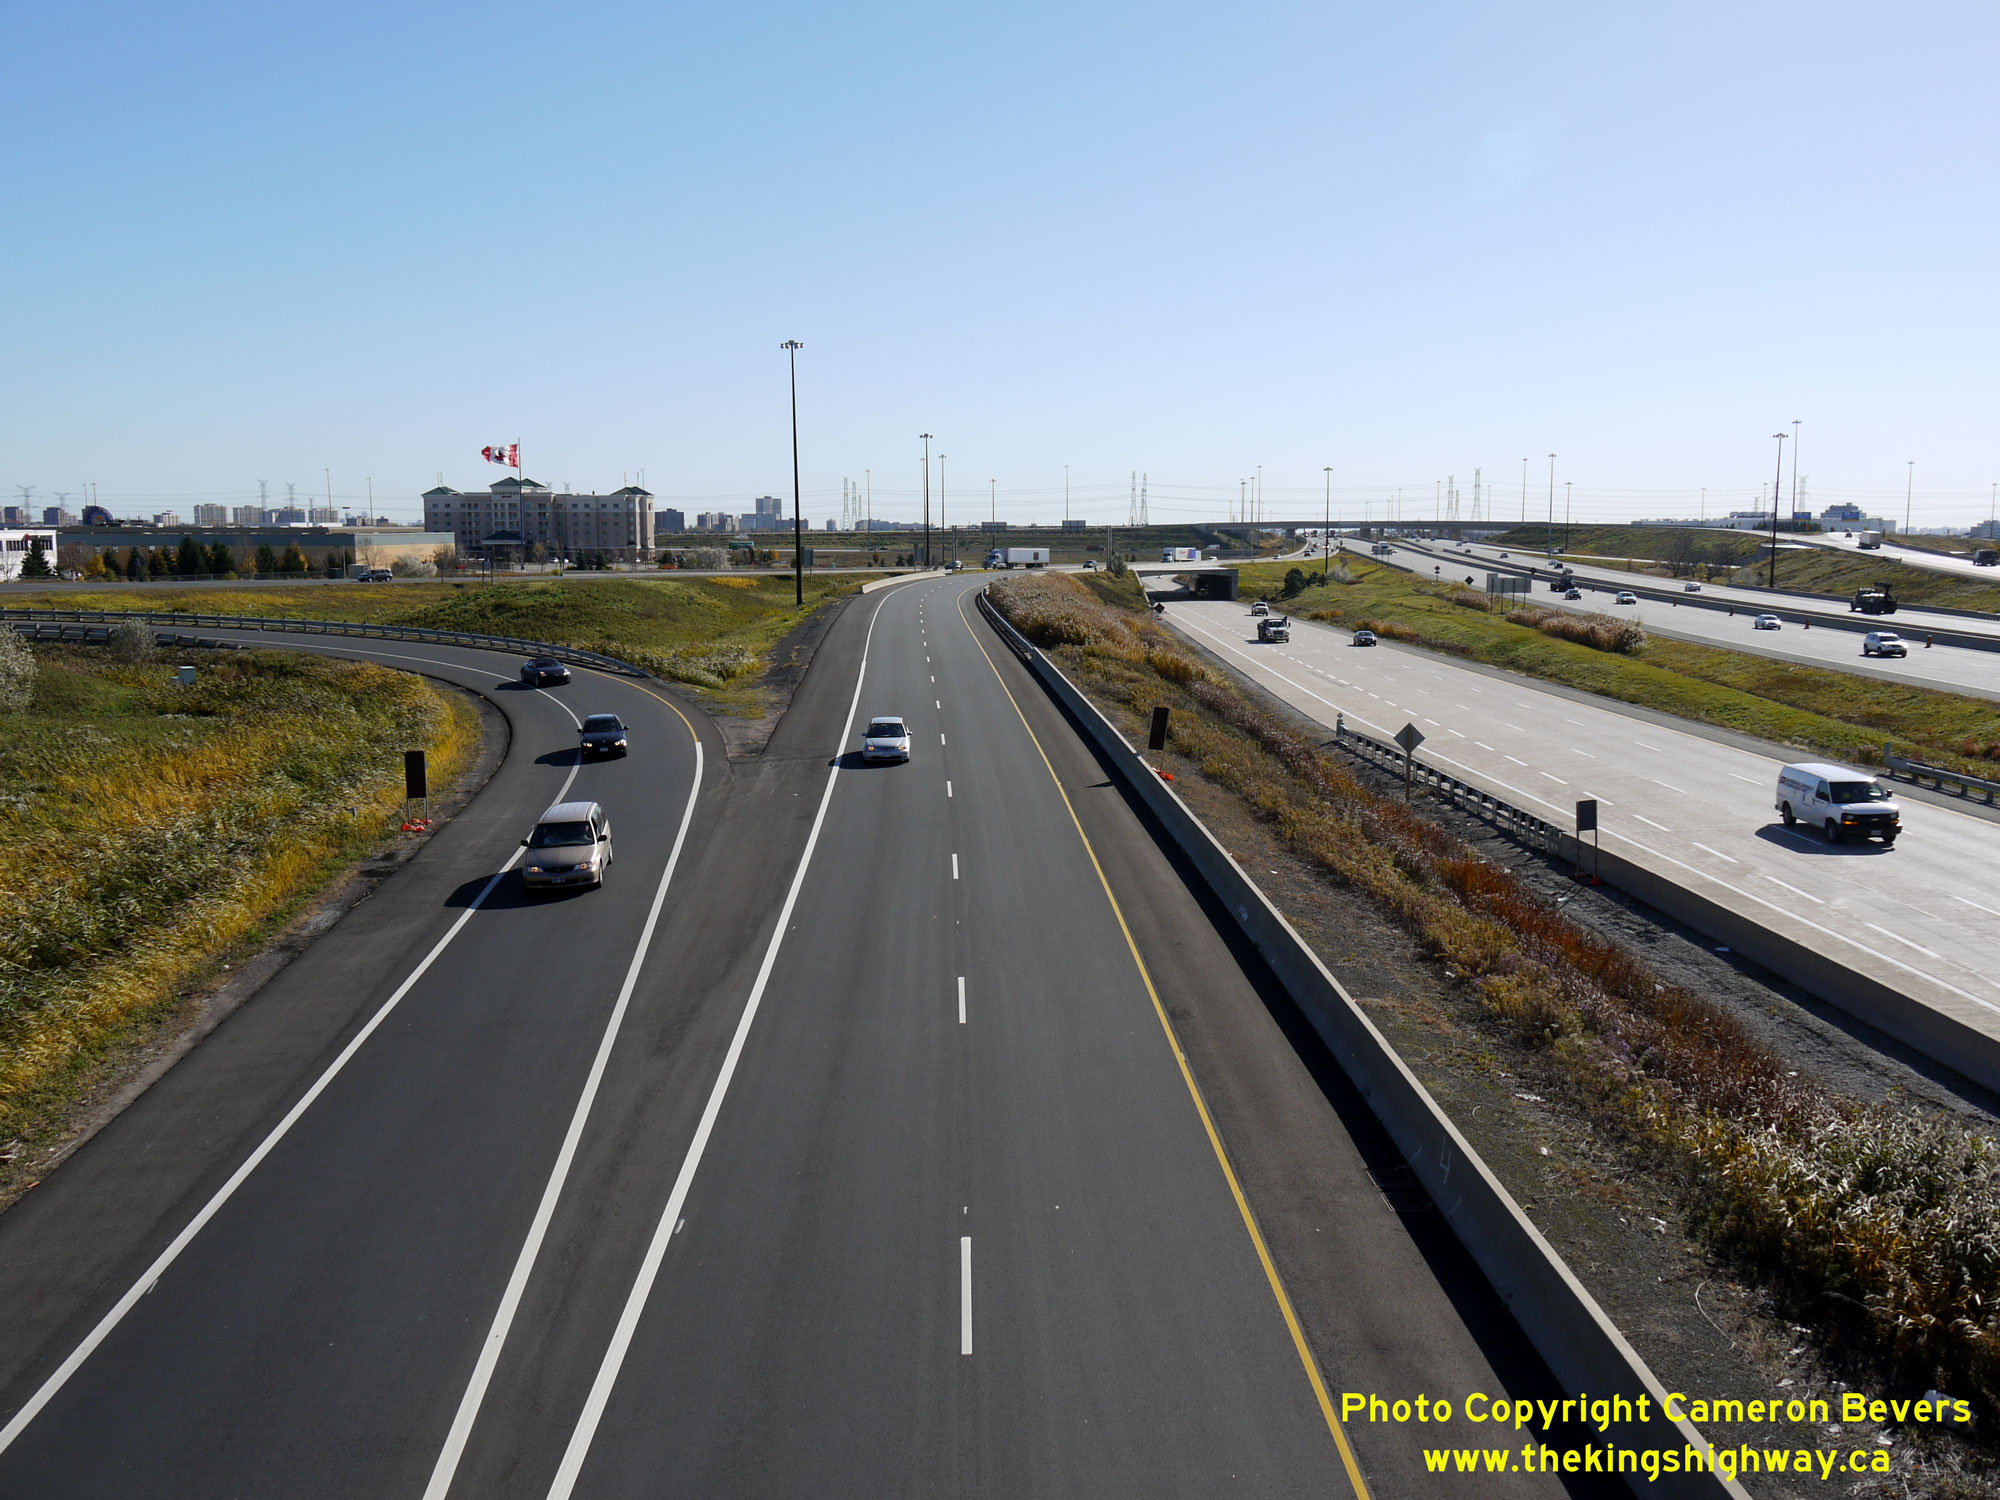
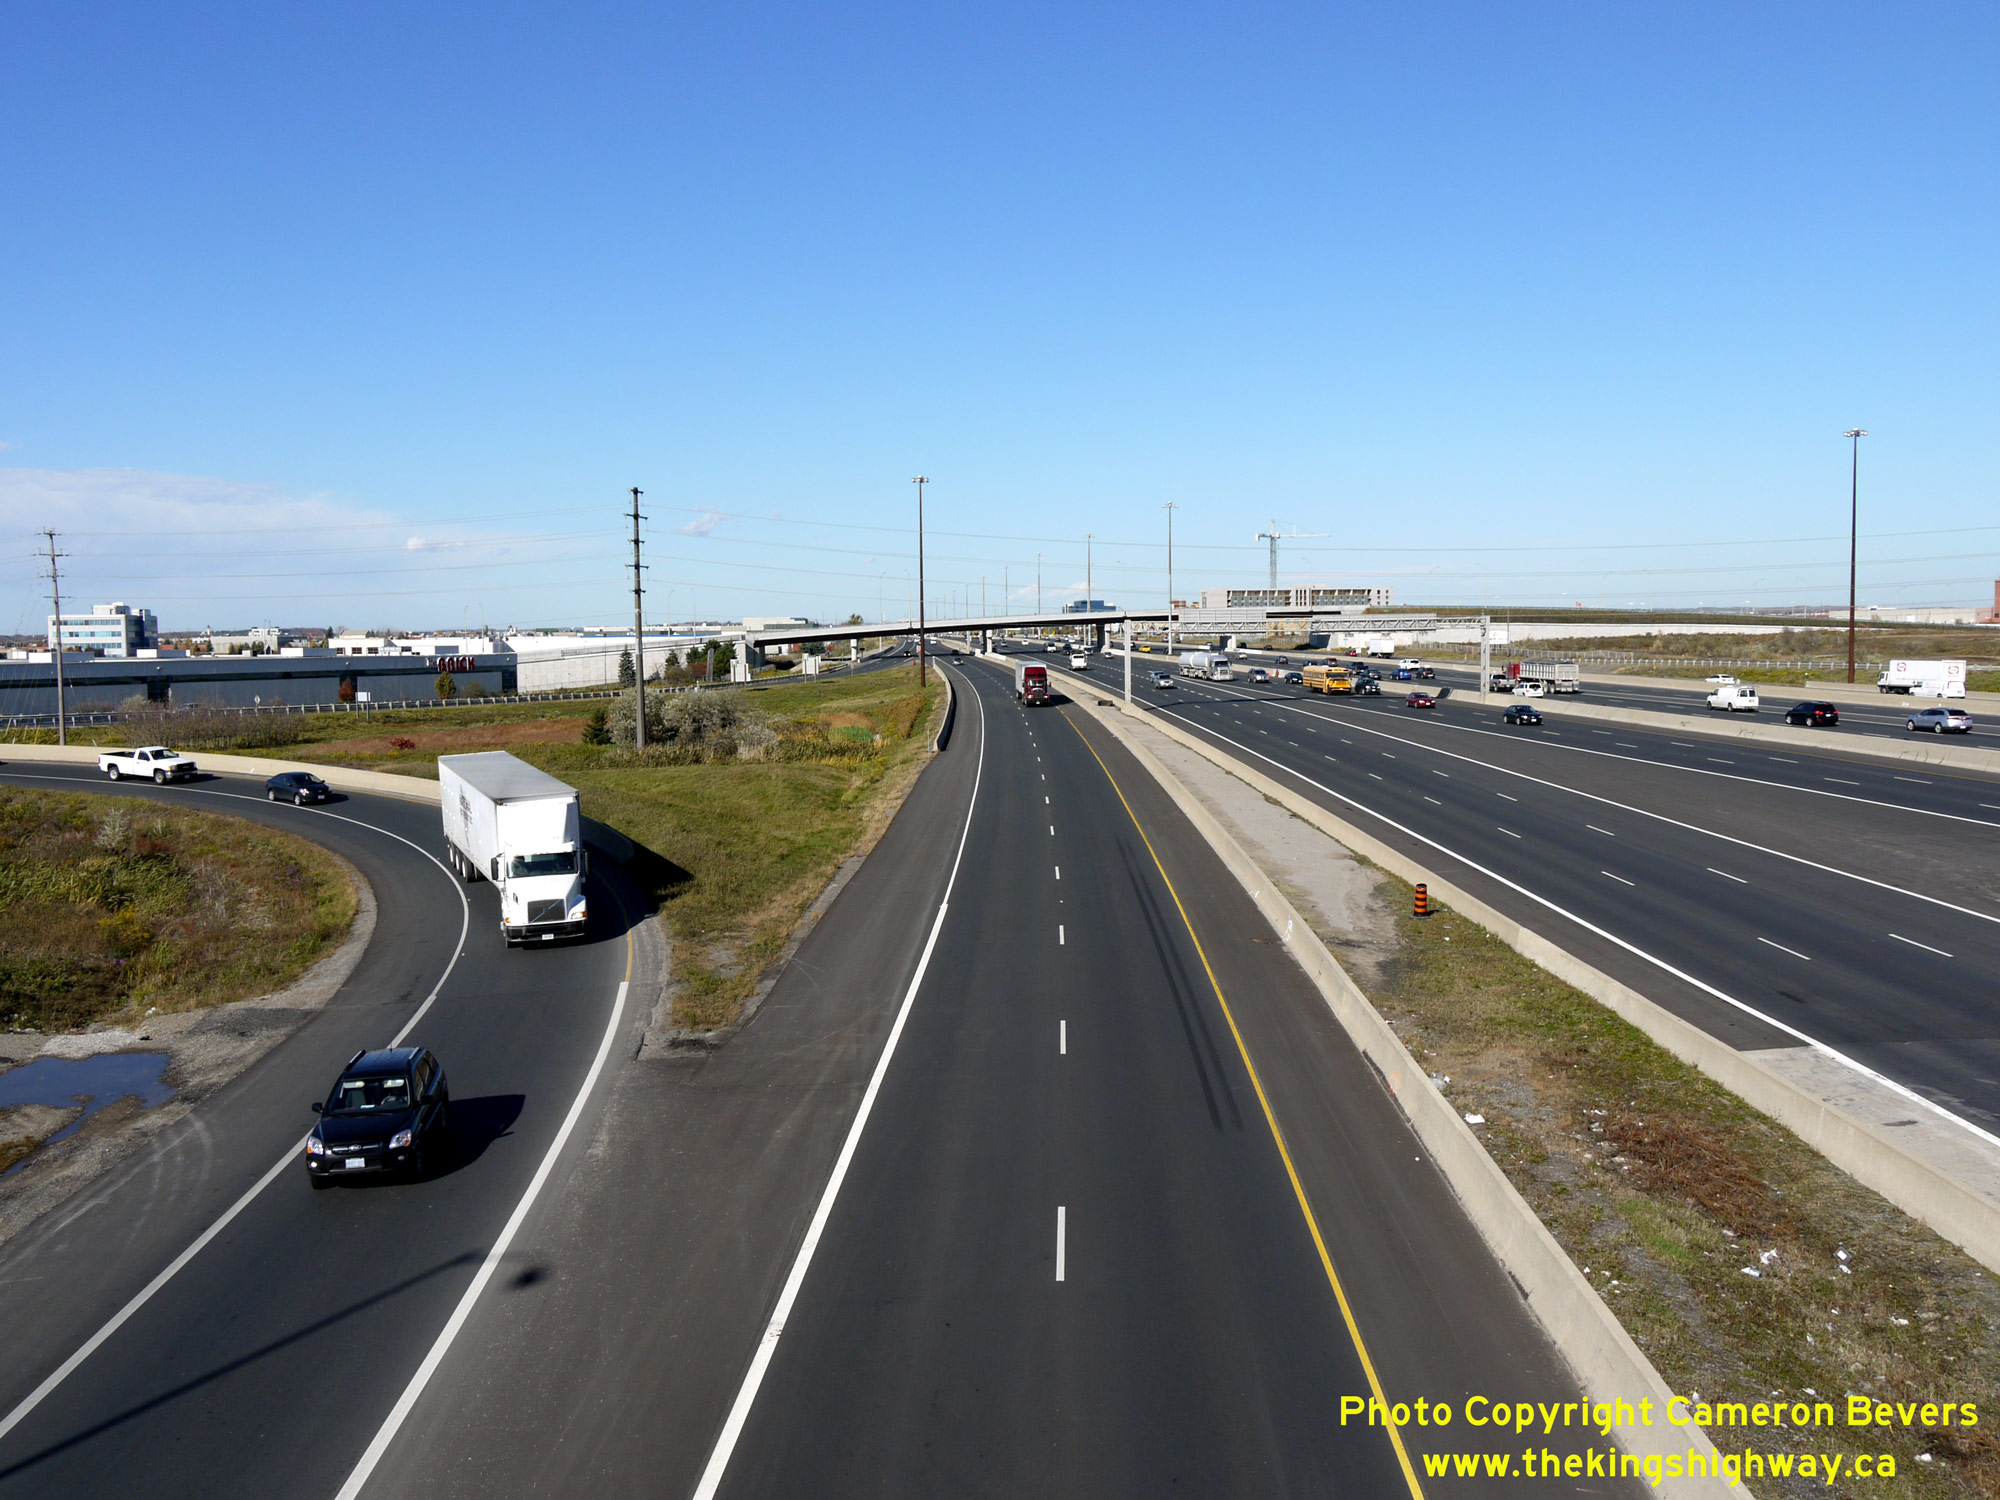
 Left - Facing south along Hwy 400 towards Toronto from the Hwy 7 Interchange in Vaughan. When the Toronto-Barrie Highway (Hwy 400) was first opened to traffic
in the early 1950s, the highway had a total of four lanes, with two lanes provided for each direction of traffic. The highway was expanded from four to six lanes from
a point just north of the Finch Avenue Interchange in Toronto to a point just north of the Maple Sideroad Interchange (today's Major Mackenzie Drive) in Vaughan under
Contract #1971-14. Additional widening of Hwy 400 took place in the 1990s to accommodate the construction of Hwy 407 ETR, including the construction of an
Express-Collector Lane System. See an Enlarged Photo Here. Left - Facing south along Hwy 400 towards Toronto from the Hwy 7 Interchange in Vaughan. When the Toronto-Barrie Highway (Hwy 400) was first opened to traffic
in the early 1950s, the highway had a total of four lanes, with two lanes provided for each direction of traffic. The highway was expanded from four to six lanes from
a point just north of the Finch Avenue Interchange in Toronto to a point just north of the Maple Sideroad Interchange (today's Major Mackenzie Drive) in Vaughan under
Contract #1971-14. Additional widening of Hwy 400 took place in the 1990s to accommodate the construction of Hwy 407 ETR, including the construction of an
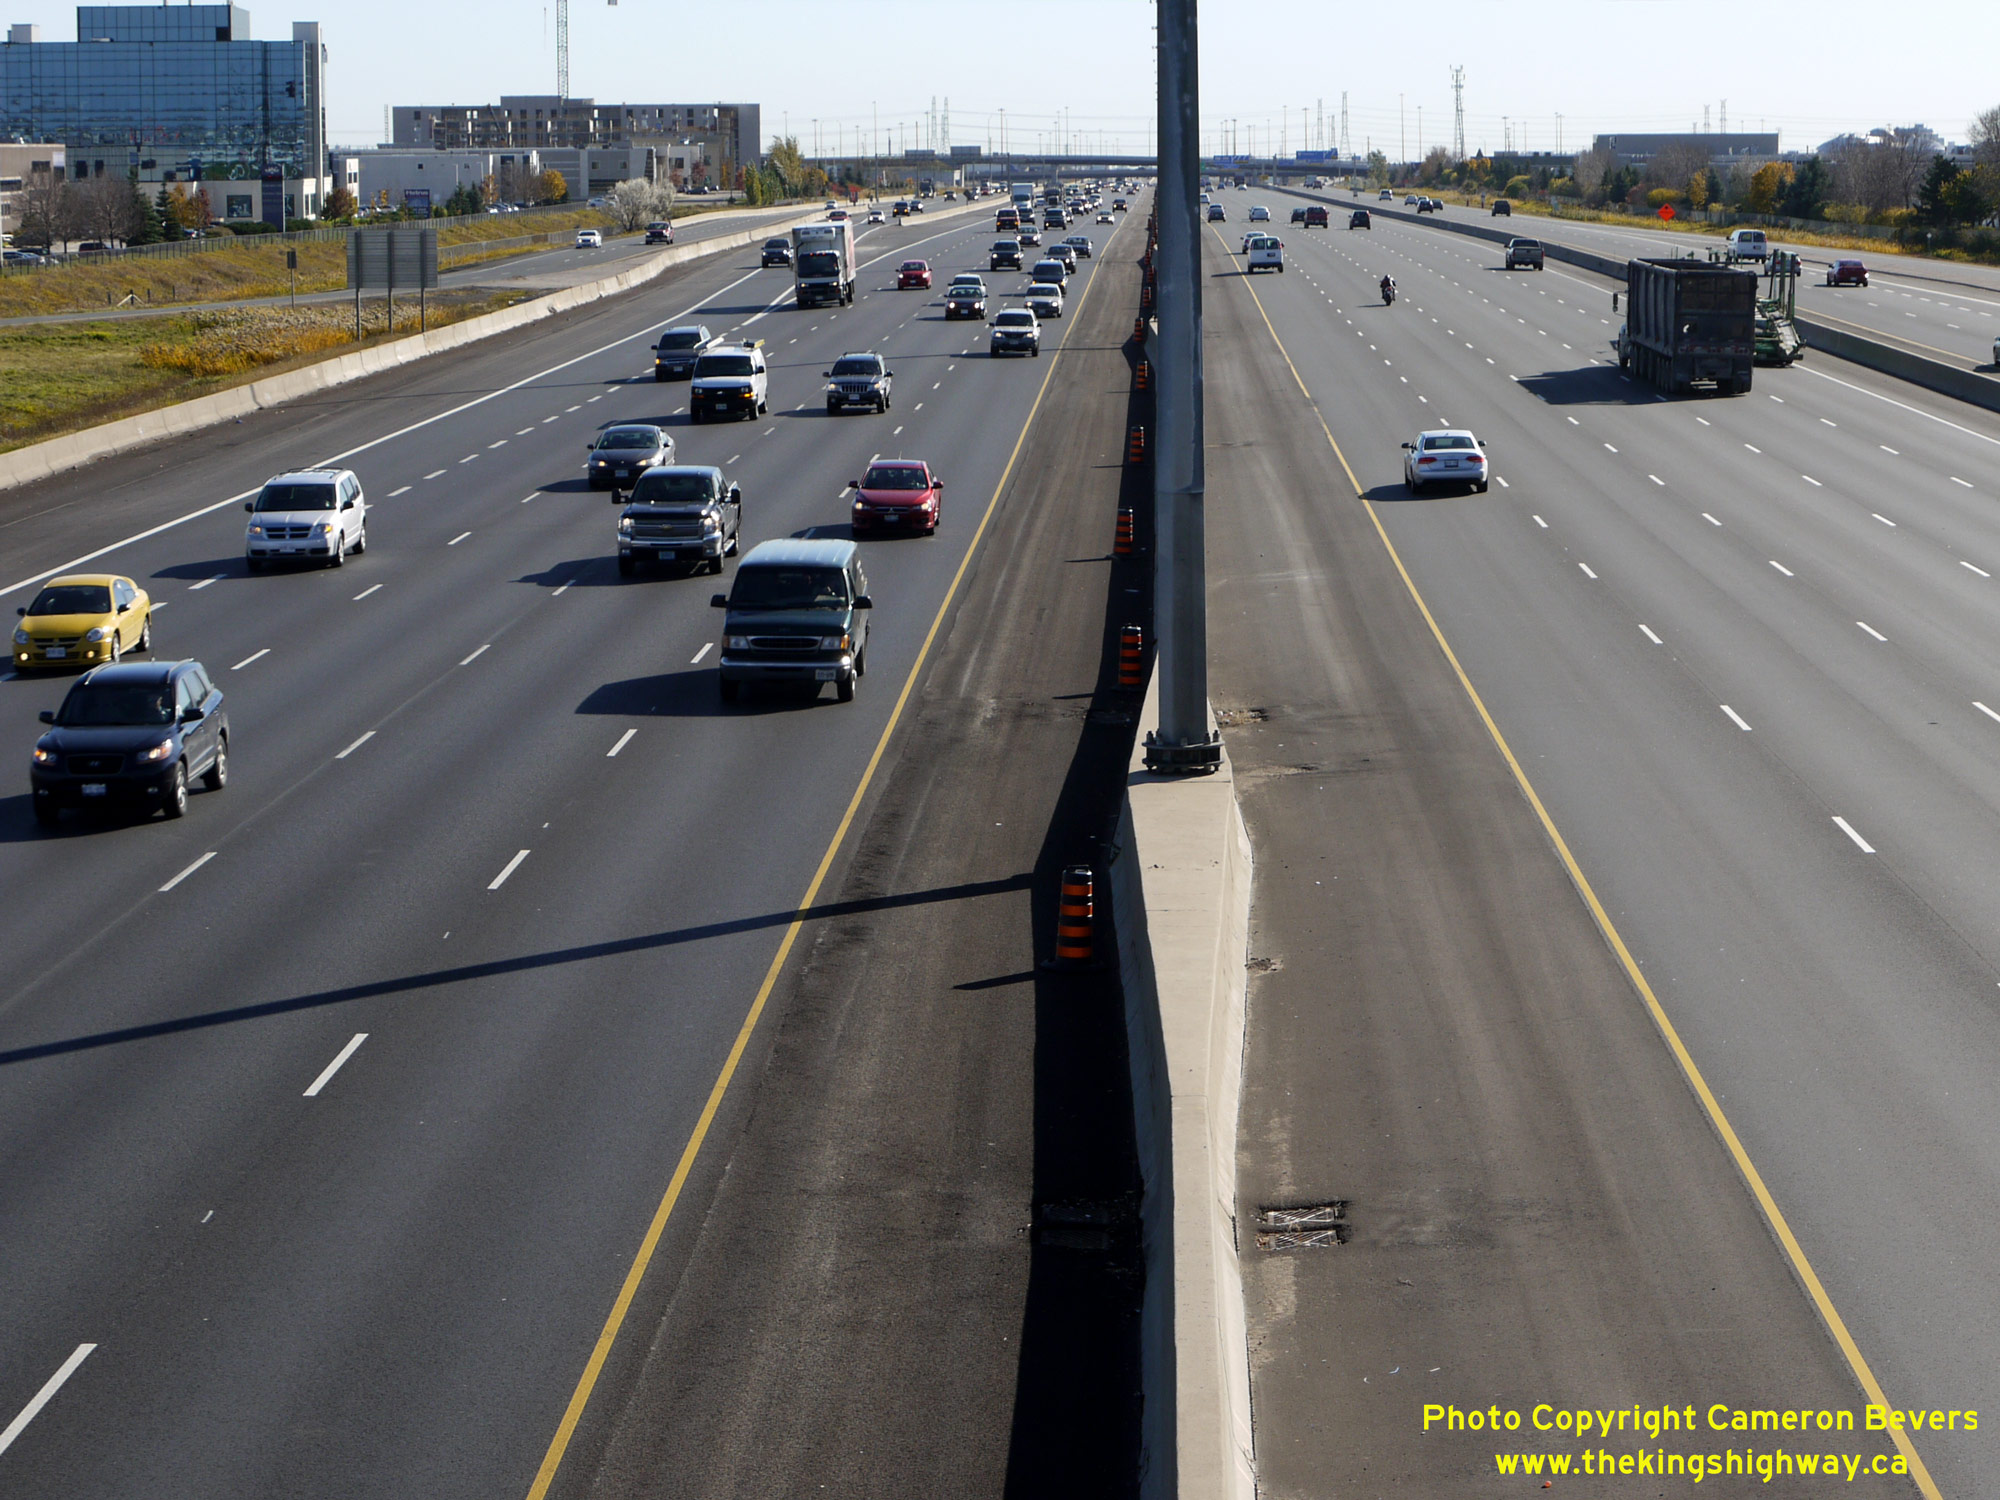
Express-Collector Lane System. See an Enlarged Photo Here.(Photograph taken on October 27, 2010 - © Cameron Bevers) Right - View of the southbound exit ramp from Hwy 400 to Hwy 407 ETR from the Hwy 7 Overpass in Vaughan. After passing over the southbound Hwy 400 Collector
Lanes, the three-lane exit ramp to Hwy 407 ETR divides into separate two-lane eastbound and westbound ramps. Although fairly common in the United States, the
Hwy 400 & Hwy 407 ETR Interchange is Ontario's only four-leg, four-level directional stack interchange. Interchanges of this design feature a single exit ramp for both
directions of traffic, which then split into two ramps which travel in opposite directions along the intersecting freeway. These ramps then merge with the entrance
ramps coming from the opposing direction on the freeway. This interchange type has a very high vehicular capacity, and it operates at much higher speeds than those
freeway-to-freeway interchanges with inner loop ramps. The first four-level directional stack interchange was built in Downtown Los Angeles in 1949, at the junction
of the Harbor, Santa Ana, Pasadena and Hollywood Freeways. Los Angeles' famous "Four-Level Interchange" is a far more compact version of the interchange seen here,
with all ramps and flyovers ingeniously constructed within a single multi-level freeway structure. By comparison, the Hwy 400 & Hwy 407 ETR Interchange consists of
six structures, not including any of the basketweave structures on the ramp approaches. See an
Enlarged Photo Here.(Photograph taken on October 27, 2010 - © Cameron Bevers) 
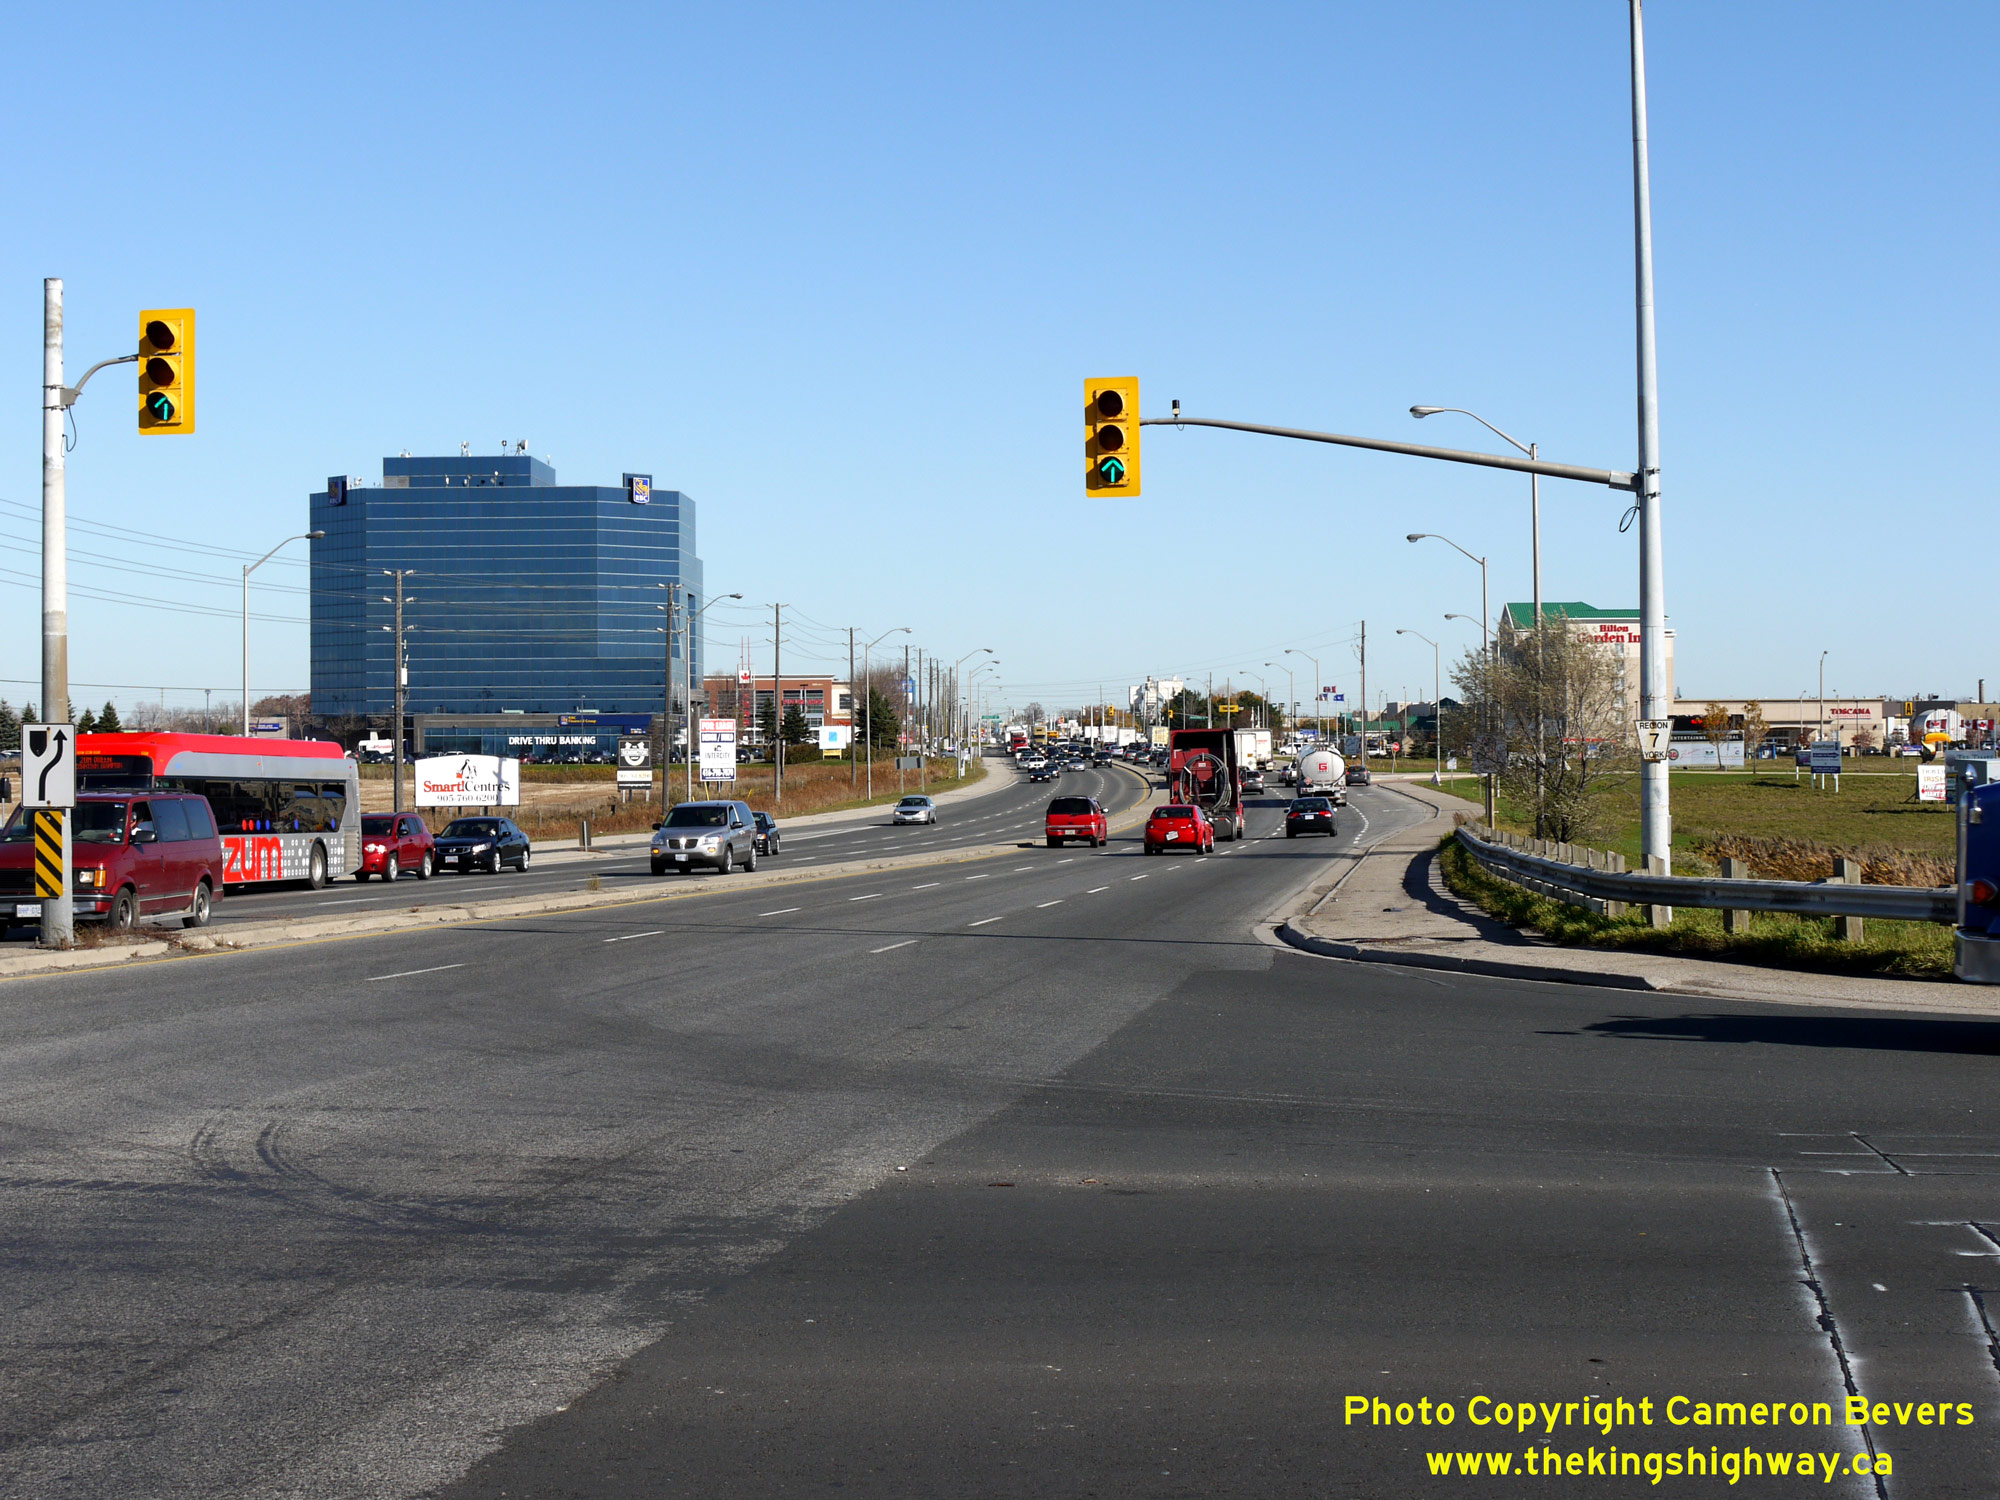 Left - Facing west along Hwy 7 towards Woodbridge from the Hwy 400 Interchange in Vaughan. Although it might seem hard to believe today, Hwy 7 was once a
two-lane rural highway which skirted the sleepy northern suburbs of Toronto. A cloverleaf interchange and overpass was built on Hwy 7 between Woodbridge and Thornhill
at the proposed Toronto-Barrie Highway (Hwy 400) in 1949-1950. In the early 1960s, Hwy 7 was expanded from two to four lanes between the Hwy 400 Interchange and
Woodbridge under Contract #1961-23. The highway was expanded from four to six lanes on either side of the Hwy 400 Interchange as part of the replacement of the Hwy 7
Overpass under Contract #1987-60. See an Enlarged Photo Here. Left - Facing west along Hwy 7 towards Woodbridge from the Hwy 400 Interchange in Vaughan. Although it might seem hard to believe today, Hwy 7 was once a
two-lane rural highway which skirted the sleepy northern suburbs of Toronto. A cloverleaf interchange and overpass was built on Hwy 7 between Woodbridge and Thornhill
at the proposed Toronto-Barrie Highway (Hwy 400) in 1949-1950. In the early 1960s, Hwy 7 was expanded from two to four lanes between the Hwy 400 Interchange and
Woodbridge under Contract #1961-23. The highway was expanded from four to six lanes on either side of the Hwy 400 Interchange as part of the replacement of the Hwy 7
Overpass under Contract #1987-60. See an Enlarged Photo Here.(Photograph taken on October 27, 2010 - © Cameron Bevers) Right - View of Hwy 7 facing east towards Thornhill from the Hwy 400 Interchange in Vaughan. The area around this interchange remained quite rural for several
decades after the completion of Hwy 400 in the early 1950s. The area really didn't start to develop significantly until the late 1980s. In the years which have passed
since I took this photo in 2010, this scene has become even more heavily-urbanized, with high-density residential condo towers now lining both sides of Hwy 7. See an
Enlarged Photo Here.(Photograph taken on October 27, 2010 - © Cameron Bevers) 
 Left - The on-ramps to northbound Hwy 400 from Hwy 407 ETR pass below a partial basketweave structure carrying the northbound Hwy 400 Collector Lanes. The exit
ramps from Hwy 407 ETR to Hwy 400 form the bottom level of this four-level stack interchange. The second and third levels of the interchange carry Hwy 407 ETR and
Hwy 400, respectively. The top level of this interchange carries the ramps exiting from Hwy 400 to Hwy 407 ETR. See an
Enlarged Photo Here. Left - The on-ramps to northbound Hwy 400 from Hwy 407 ETR pass below a partial basketweave structure carrying the northbound Hwy 400 Collector Lanes. The exit
ramps from Hwy 407 ETR to Hwy 400 form the bottom level of this four-level stack interchange. The second and third levels of the interchange carry Hwy 407 ETR and
Hwy 400, respectively. The top level of this interchange carries the ramps exiting from Hwy 400 to Hwy 407 ETR. See an
Enlarged Photo Here.(Photograph taken on October 27, 2010 - © Cameron Bevers) Right - View of the northbound Hwy 400 Collector Lanes from the Hwy 7 Overpass in Vaughan. This short Express-Collector Lane System services the Hwy 7 and
Langstaff Road Interchanges. This complex freeway system was constructed during the 1990s in preparation for the opening of Hwy 407 ETR. See an
Enlarged Photo Here.(Photograph taken on October 27, 2010 - © Cameron Bevers) 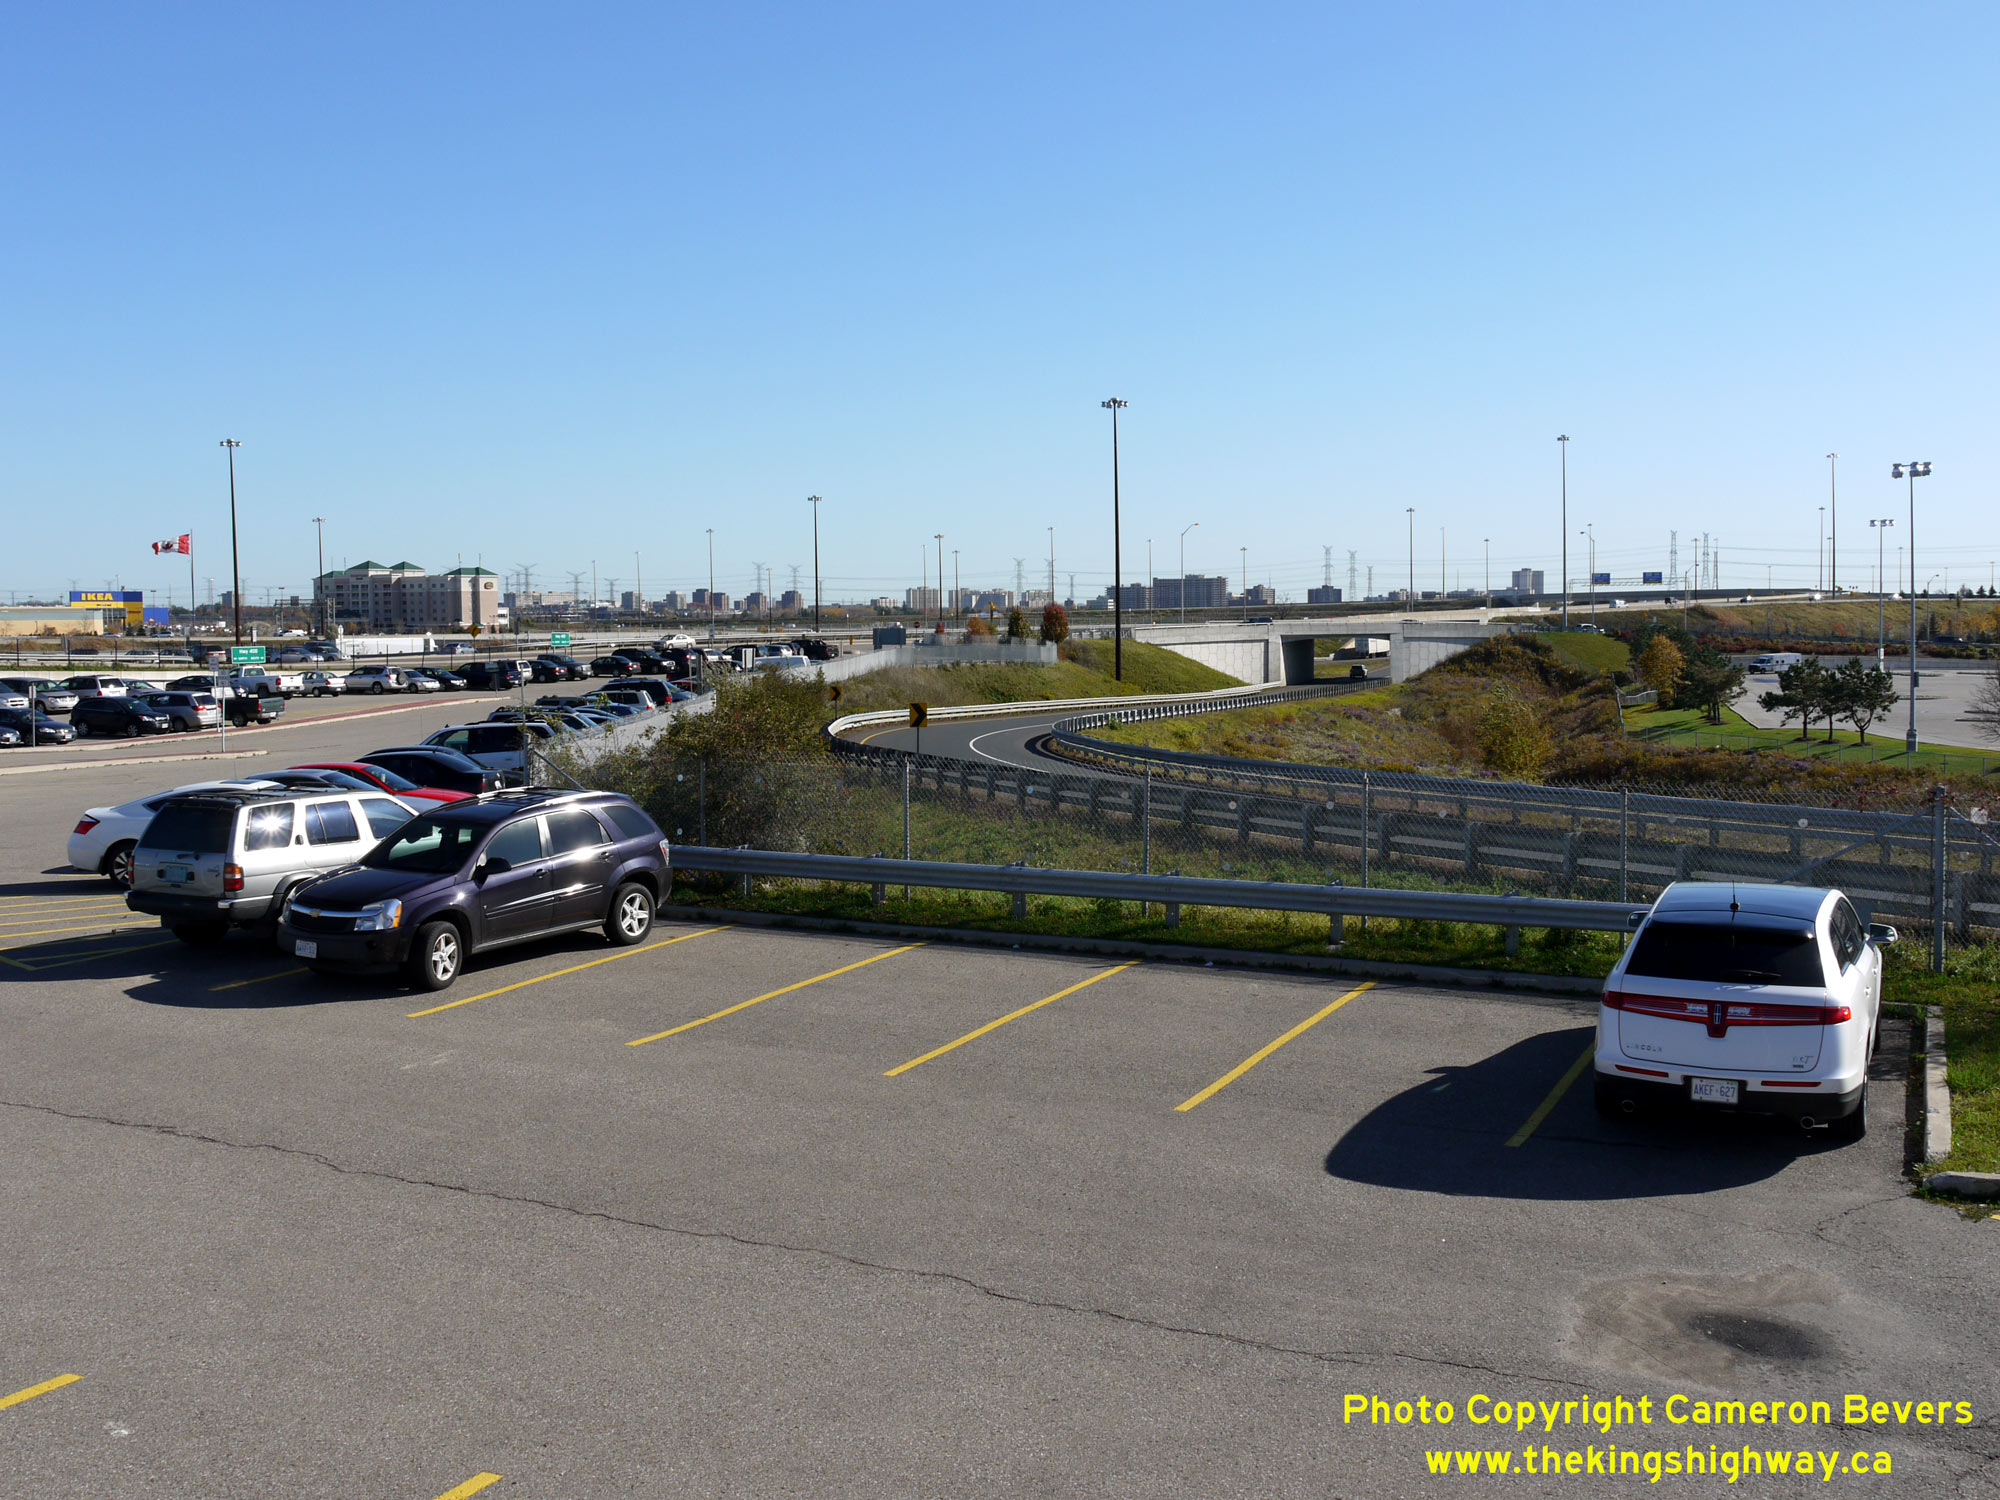
 Left - A large commuter carpool lot exists in the southwest quadrant of the Hwy 400 & Hwy 7 Interchange. See an
Enlarged Photo Here. Left - A large commuter carpool lot exists in the southwest quadrant of the Hwy 400 & Hwy 7 Interchange. See an
Enlarged Photo Here.(Photograph taken on October 27, 2010 - © Cameron Bevers) Right - The Hwy 7 Interchange also features a direct access road from the southbound Hwy 400 ramp terminal. This direct access road (Colossus Drive) passes
above one of the carpool lot's internal aisles. This unusual carpool lot has separate east and west parking areas, which flank both sides of Colossus Drive. See an
Enlarged Photo Here.(Photograph taken on October 27, 2010 - © Cameron Bevers) 
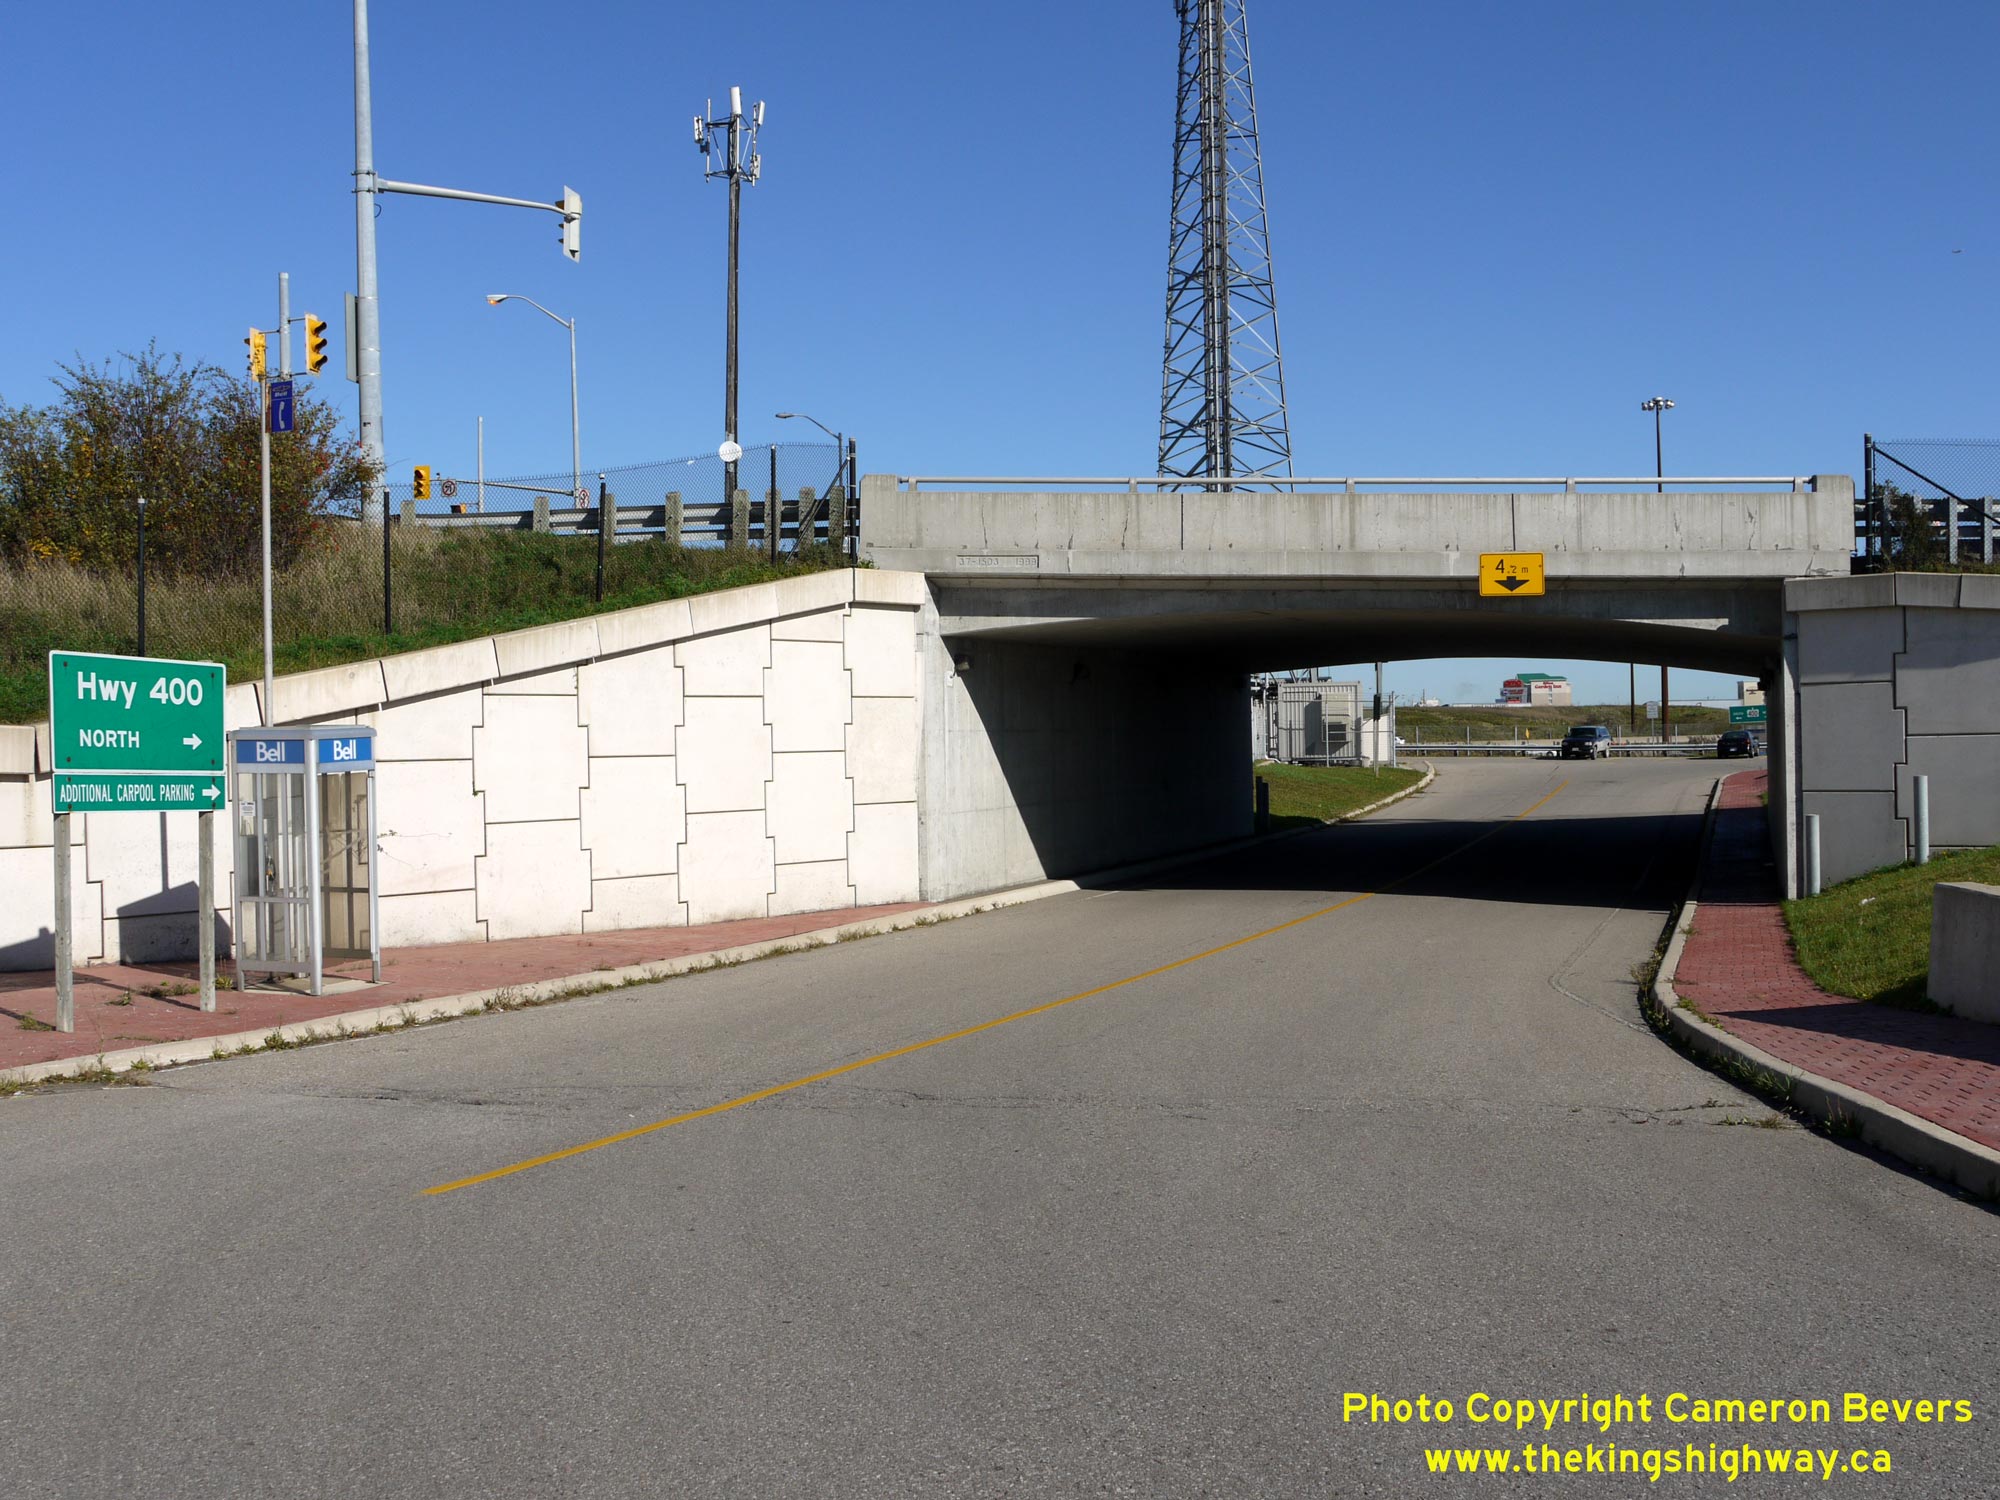
 Left - Green guide sign within the Hwy 400 & Hwy 7 Interchange Carpool Lot, directing traffic back to the freeway. See an
Enlarged Photo Here. Left - Green guide sign within the Hwy 400 & Hwy 7 Interchange Carpool Lot, directing traffic back to the freeway. See an
Enlarged Photo Here.(Photograph taken on October 27, 2010 - © Cameron Bevers) Right - Southern side of the Hwy 7 Overpass, facing east towards Thornhill. The replacement of this structure in 1987-1988 set the stage for the construction
of the adjacent Hwy 407 ETR Interchange in the 1990s. The original 1950 structure which carried Hwy 7 over Hwy 400 had a maximum capacity of six through lanes below
the structure, plus the two speed change lanes from the cloverleaf ramps. The replacement Hwy 7 structure currently accommodates a total of 16 through lanes and ramp
lanes, plus the two speed change lanes from the Hwy 7 Interchange. See an
Enlarged Photo Here.(Photograph taken on October 27, 2010 - © Cameron Bevers) 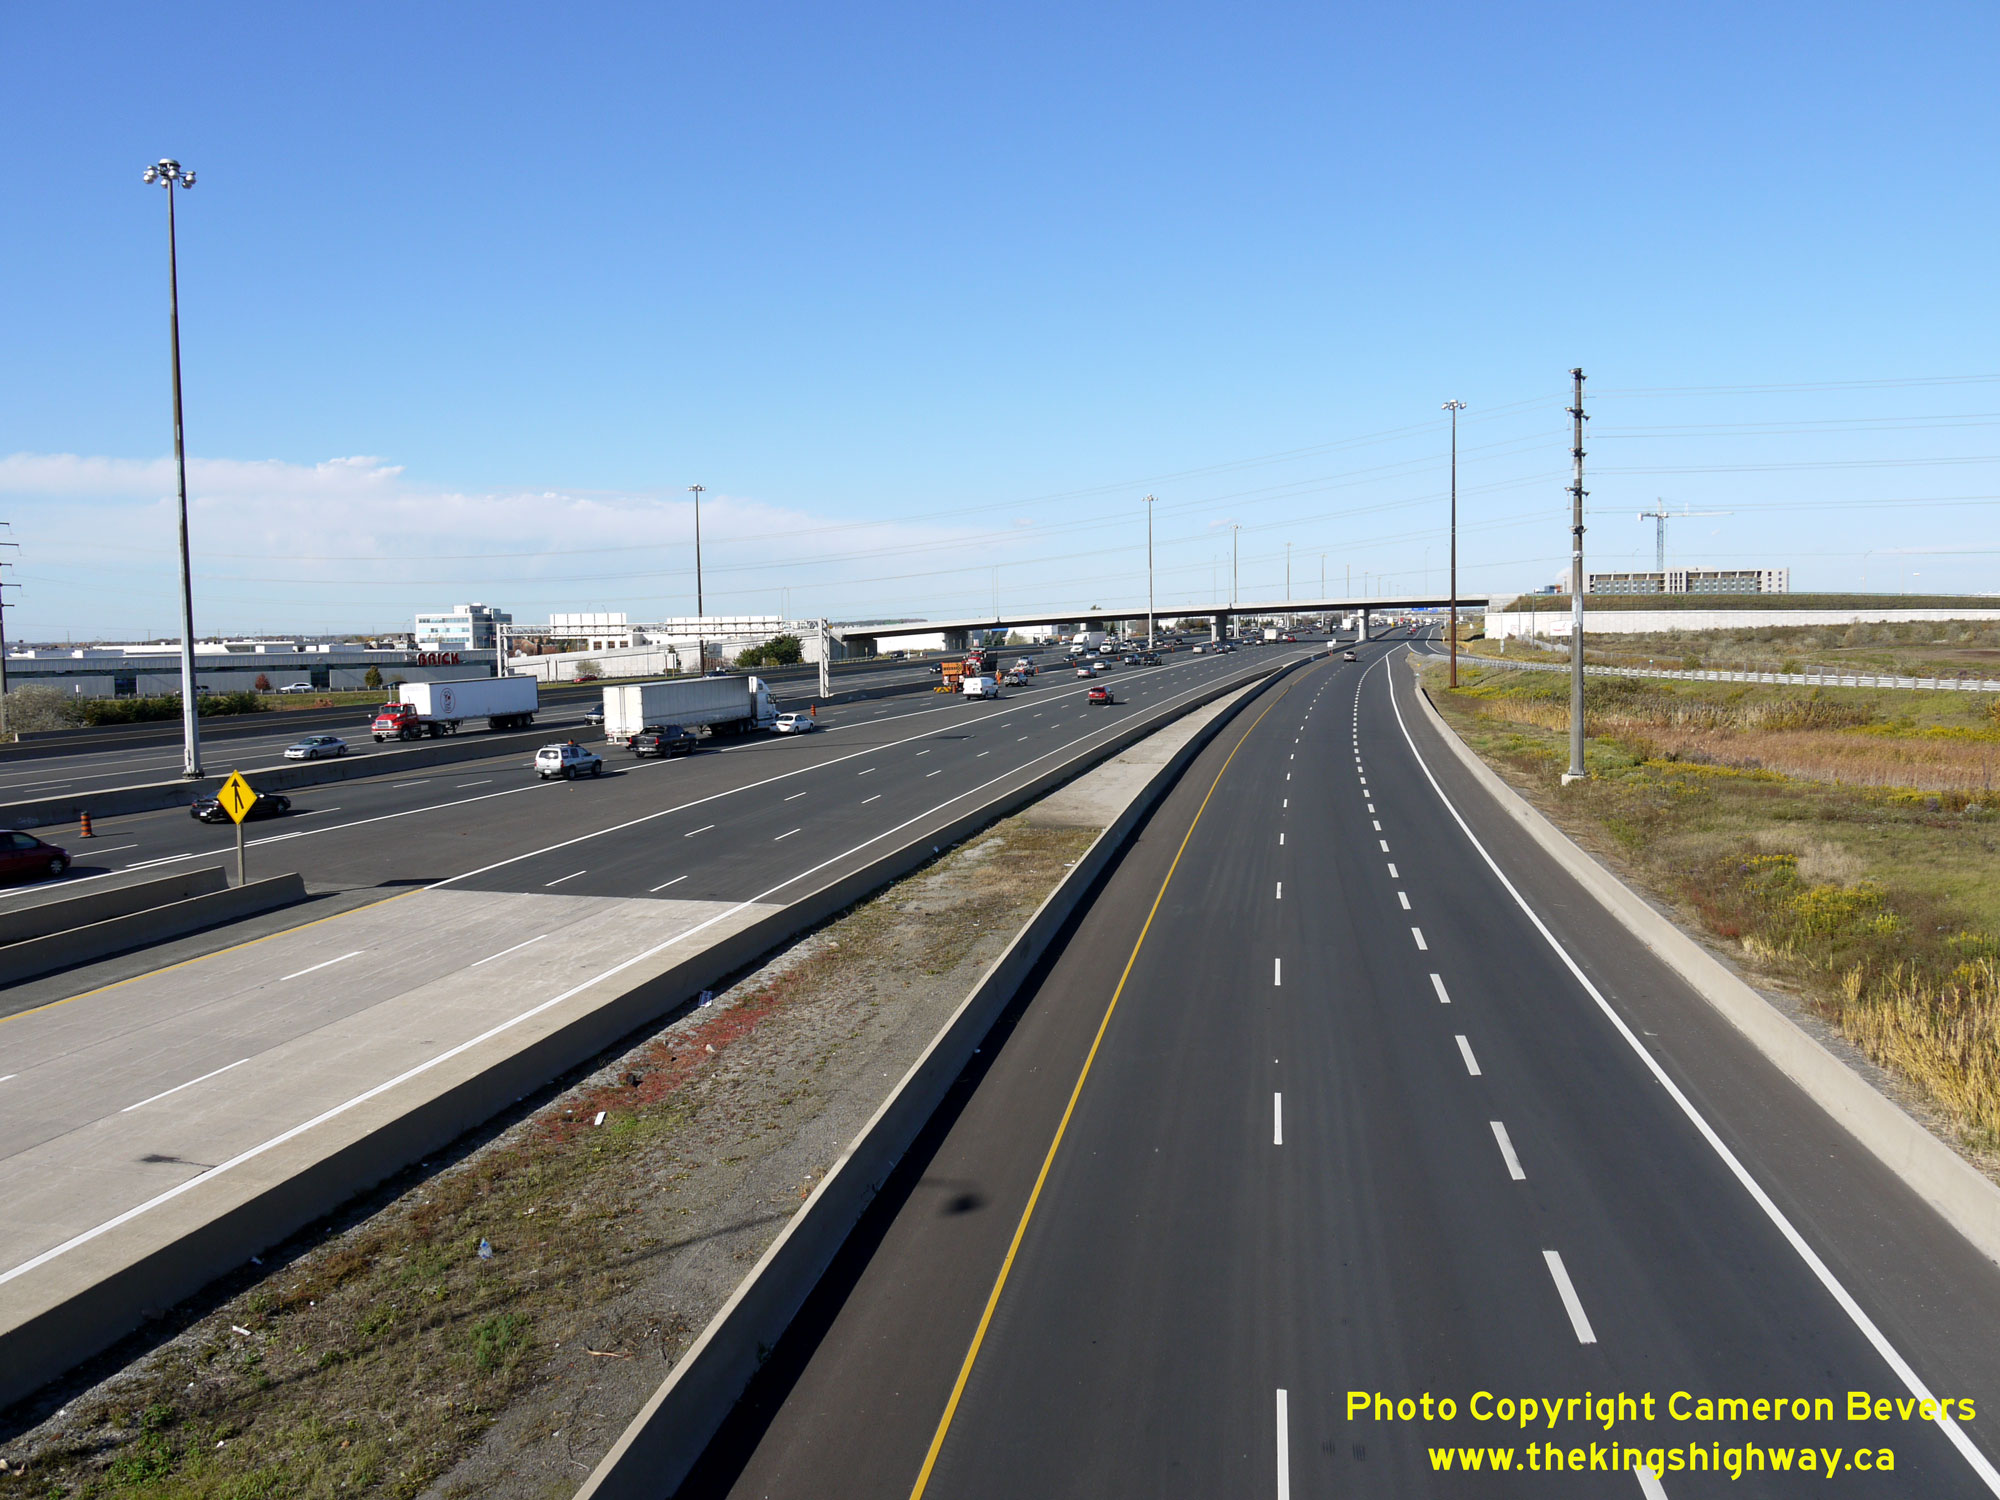
 Left - Facing north along the Hwy 400 Collector Lanes from the Hwy 7 Overpass. The Hwy 400 Express-Collector Lane System was extended north from Hwy 7 to
Langstaff Road in the early 1990s under Contract #1993-72. Previously, Hwy 400 had only two carriageways as opposed to four. See an
Enlarged Photo Here. Left - Facing north along the Hwy 400 Collector Lanes from the Hwy 7 Overpass. The Hwy 400 Express-Collector Lane System was extended north from Hwy 7 to
Langstaff Road in the early 1990s under Contract #1993-72. Previously, Hwy 400 had only two carriageways as opposed to four. See an
Enlarged Photo Here.(Photograph taken on October 27, 2010 - © Cameron Bevers) Right - View of the northbound Hwy 400 Express Lanes at the Hwy 7 Interchange. The ramp coming from Hwy 407 ETR can be seen joining in at right. Careful
observers might note that provisions were left here for a future fourth northbound through lane on Hwy 400. Currently, Lane #4 of the northbound lanes drops through
the Hwy 7 Interchange. See an Enlarged Photo Here.(Photograph taken on October 27, 2010 - © Cameron Bevers) 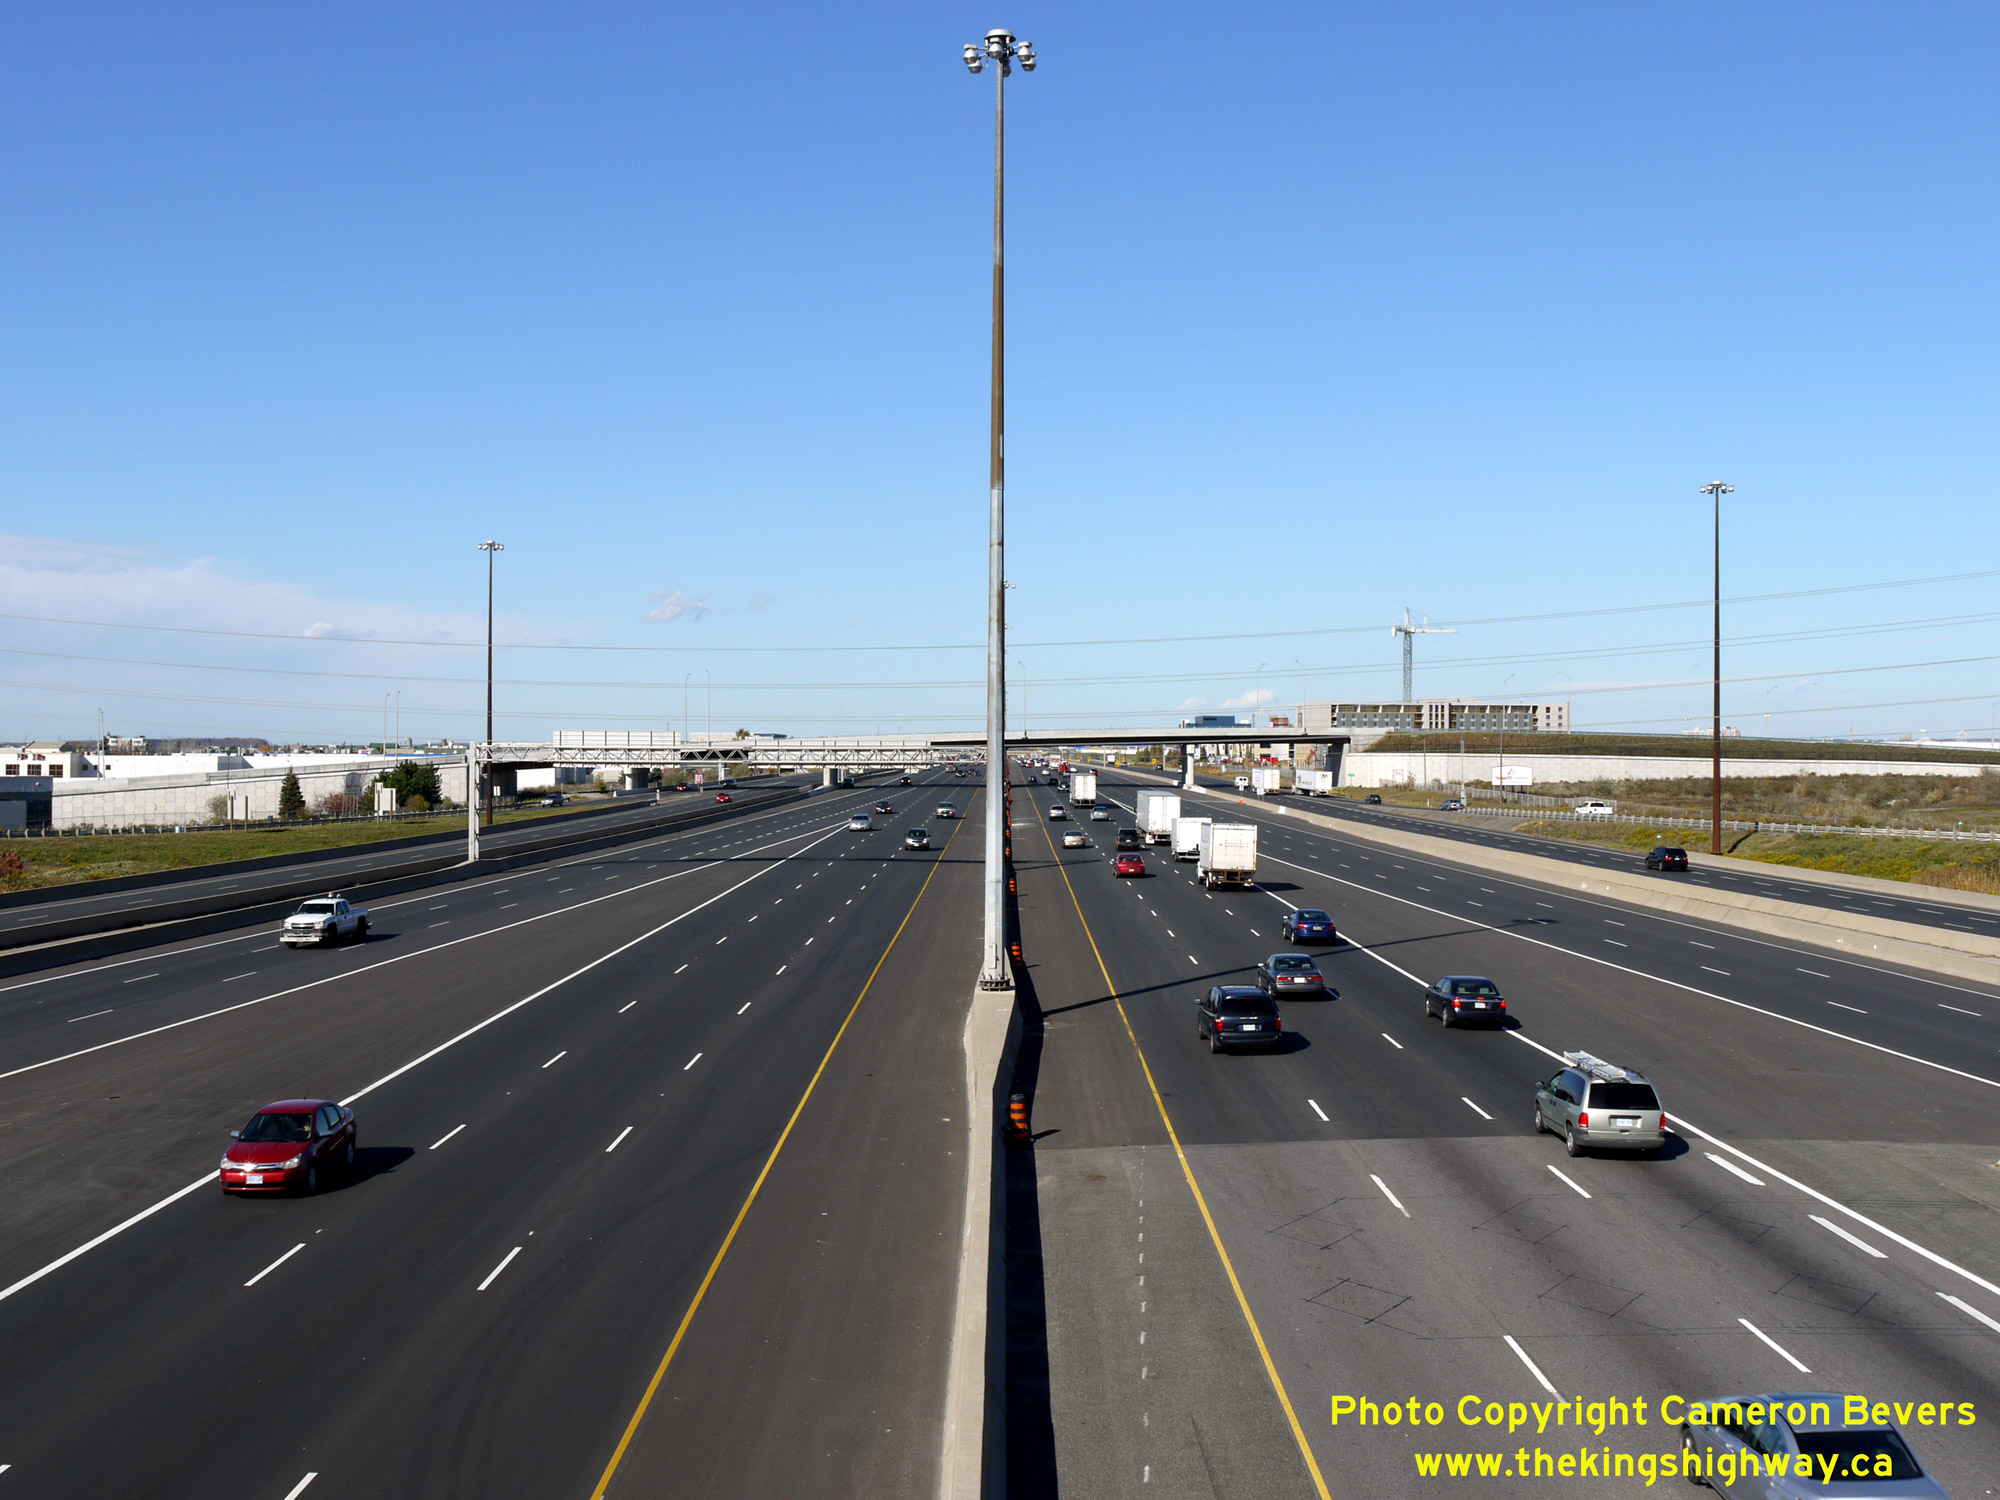
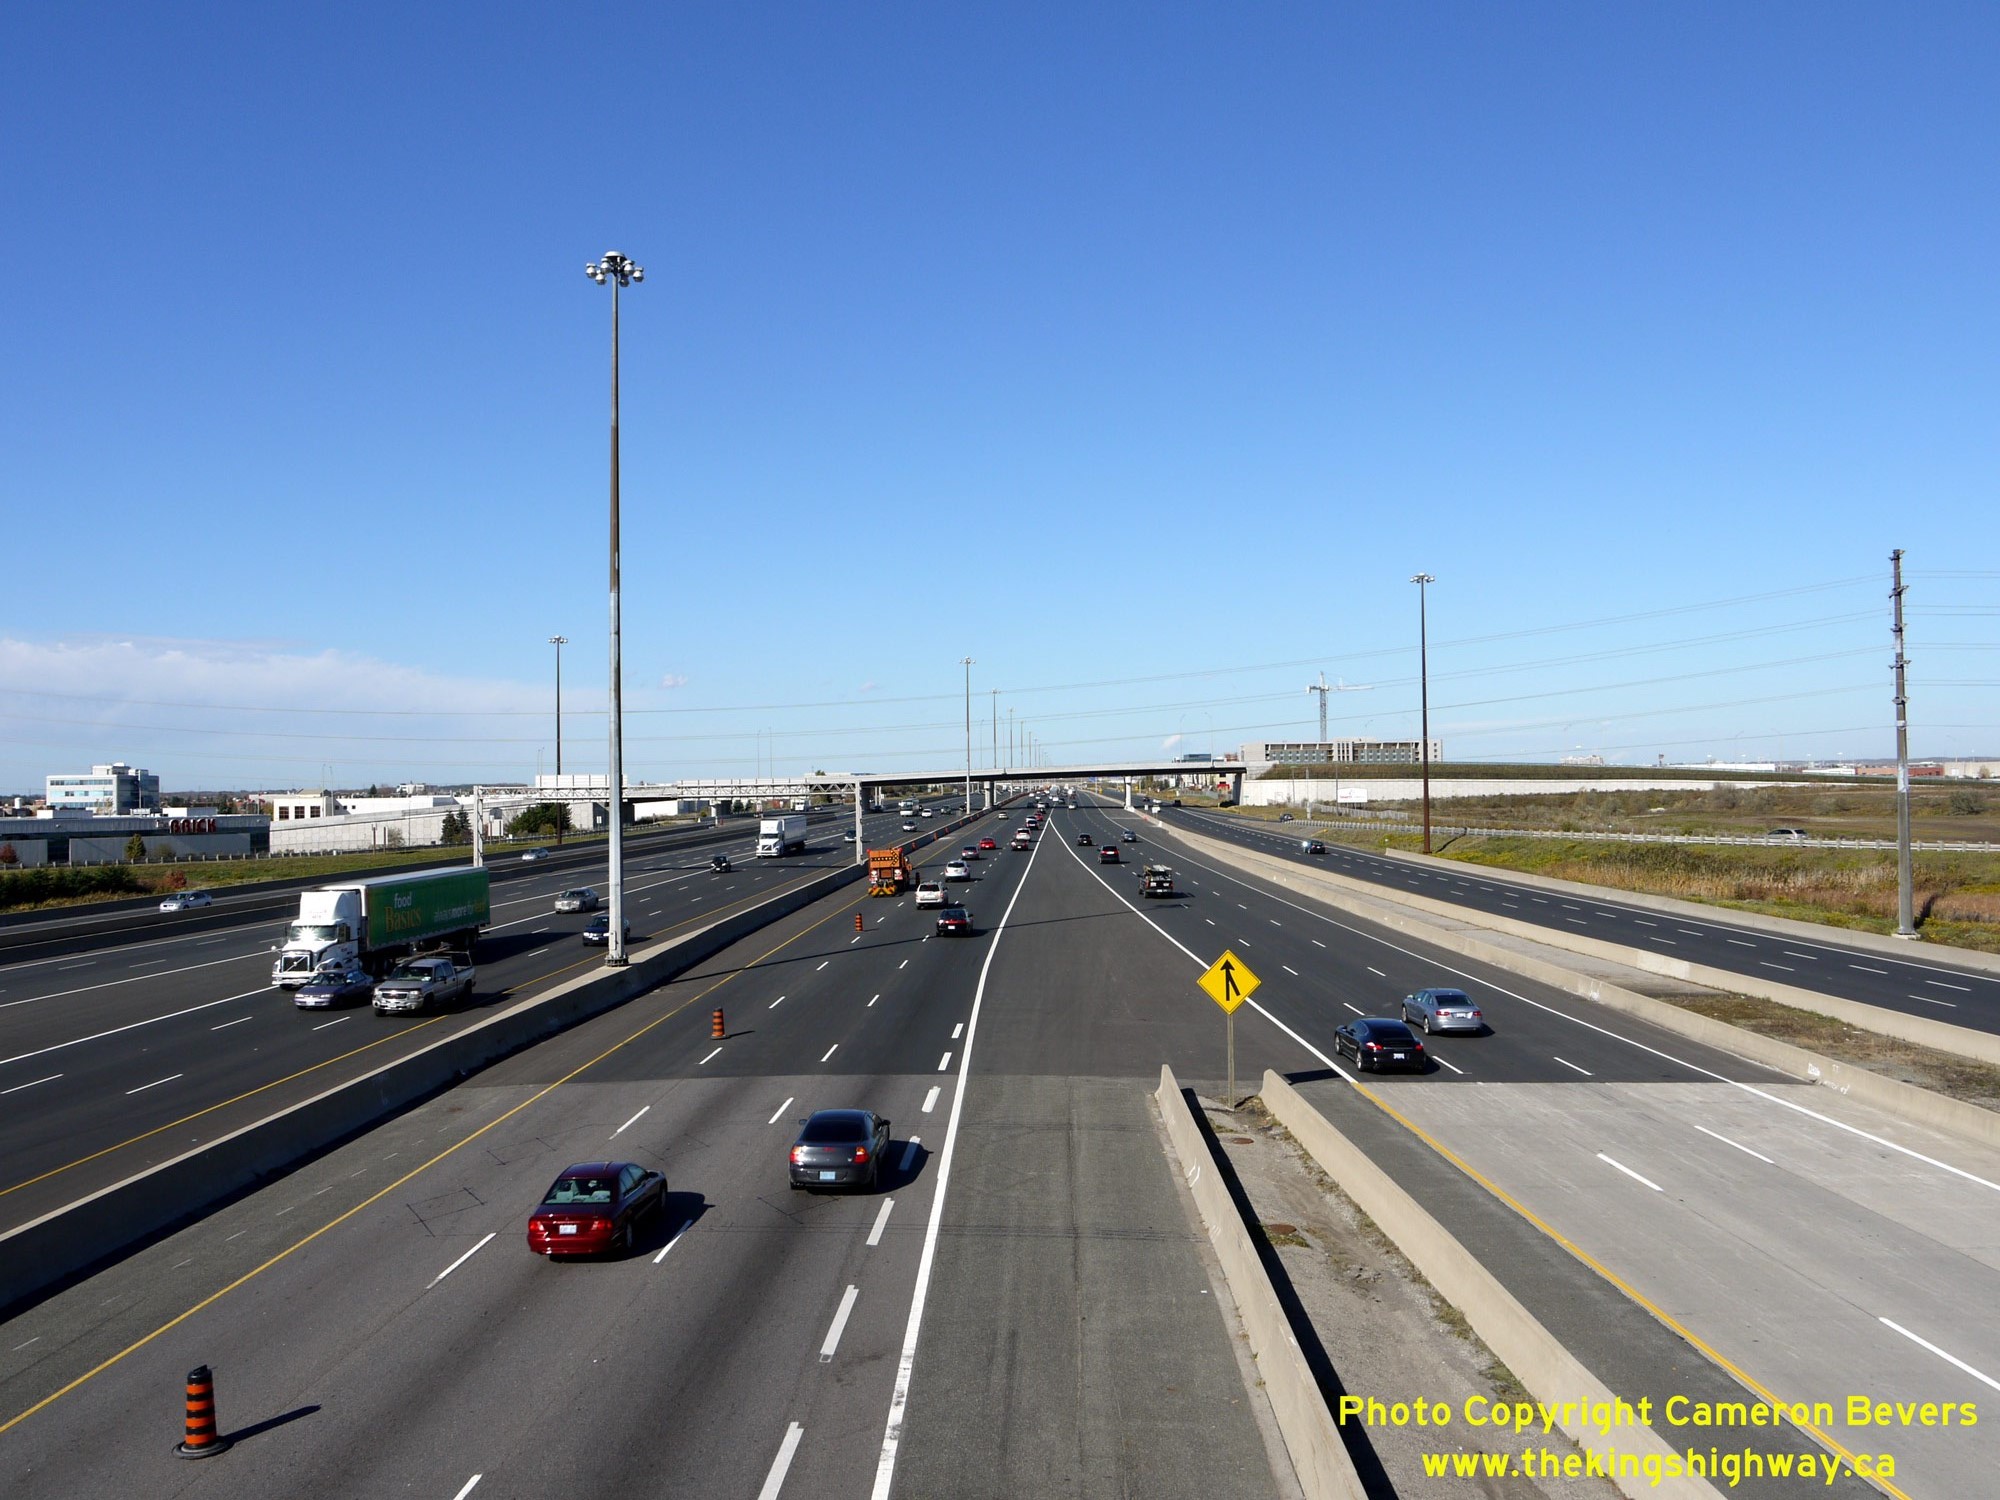
 Left - Facing north along Hwy 400 from the Hwy 7 Overpass. This centreline view of Hwy 400 shows the northbound and southbound Hwy 400 Express Lanes, flanked
by the exit and entrance ramps to/from Hwy 407 ETR, which in turn are flanked by the Hwy 400 Collector Lanes. The Hwy 7 Interchange we see today was built out over
several contracts spanning the better part of a decade, with the ultimate interchange finally reaching completion with the opening of the Hwy 400 Collector Lanes
between Hwy 7 and Langstaff Road in the Summer of 1994. Compare this photo of Hwy 400 taken in 2010 to this
Historical 1951 Photo taken from the Hwy 7 Overpass, just as the initial construction of
Hwy 400 was nearing completion. See an Enlarged Photo Here. Left - Facing north along Hwy 400 from the Hwy 7 Overpass. This centreline view of Hwy 400 shows the northbound and southbound Hwy 400 Express Lanes, flanked
by the exit and entrance ramps to/from Hwy 407 ETR, which in turn are flanked by the Hwy 400 Collector Lanes. The Hwy 7 Interchange we see today was built out over
several contracts spanning the better part of a decade, with the ultimate interchange finally reaching completion with the opening of the Hwy 400 Collector Lanes
between Hwy 7 and Langstaff Road in the Summer of 1994. Compare this photo of Hwy 400 taken in 2010 to this
Historical 1951 Photo taken from the Hwy 7 Overpass, just as the initial construction of
Hwy 400 was nearing completion. See an Enlarged Photo Here.(Photograph taken on October 27, 2010 - © Cameron Bevers) Right - View of the southbound Hwy 400 Collector Lanes from the Hwy 7 Overpass. The Hwy 400 Express-Collector Lane System was completed in two phases during
the early 1990s. Under Contract #1992-66, the northbound and southbound Hwy 400 Collector Lanes were completed from the vicinity of the Hwy 407 ETR Interchange
northerly to a point just north of Hwy 7, with exit access to Hwy 7 only going northbound and access from Hwy 7 only going southbound. Construction of the Hwy 400
Collector Lanes was continued north from Hwy 7 beginning in 1993. See an
Enlarged Photo Here.(Photograph taken on October 27, 2010 - © Cameron Bevers) 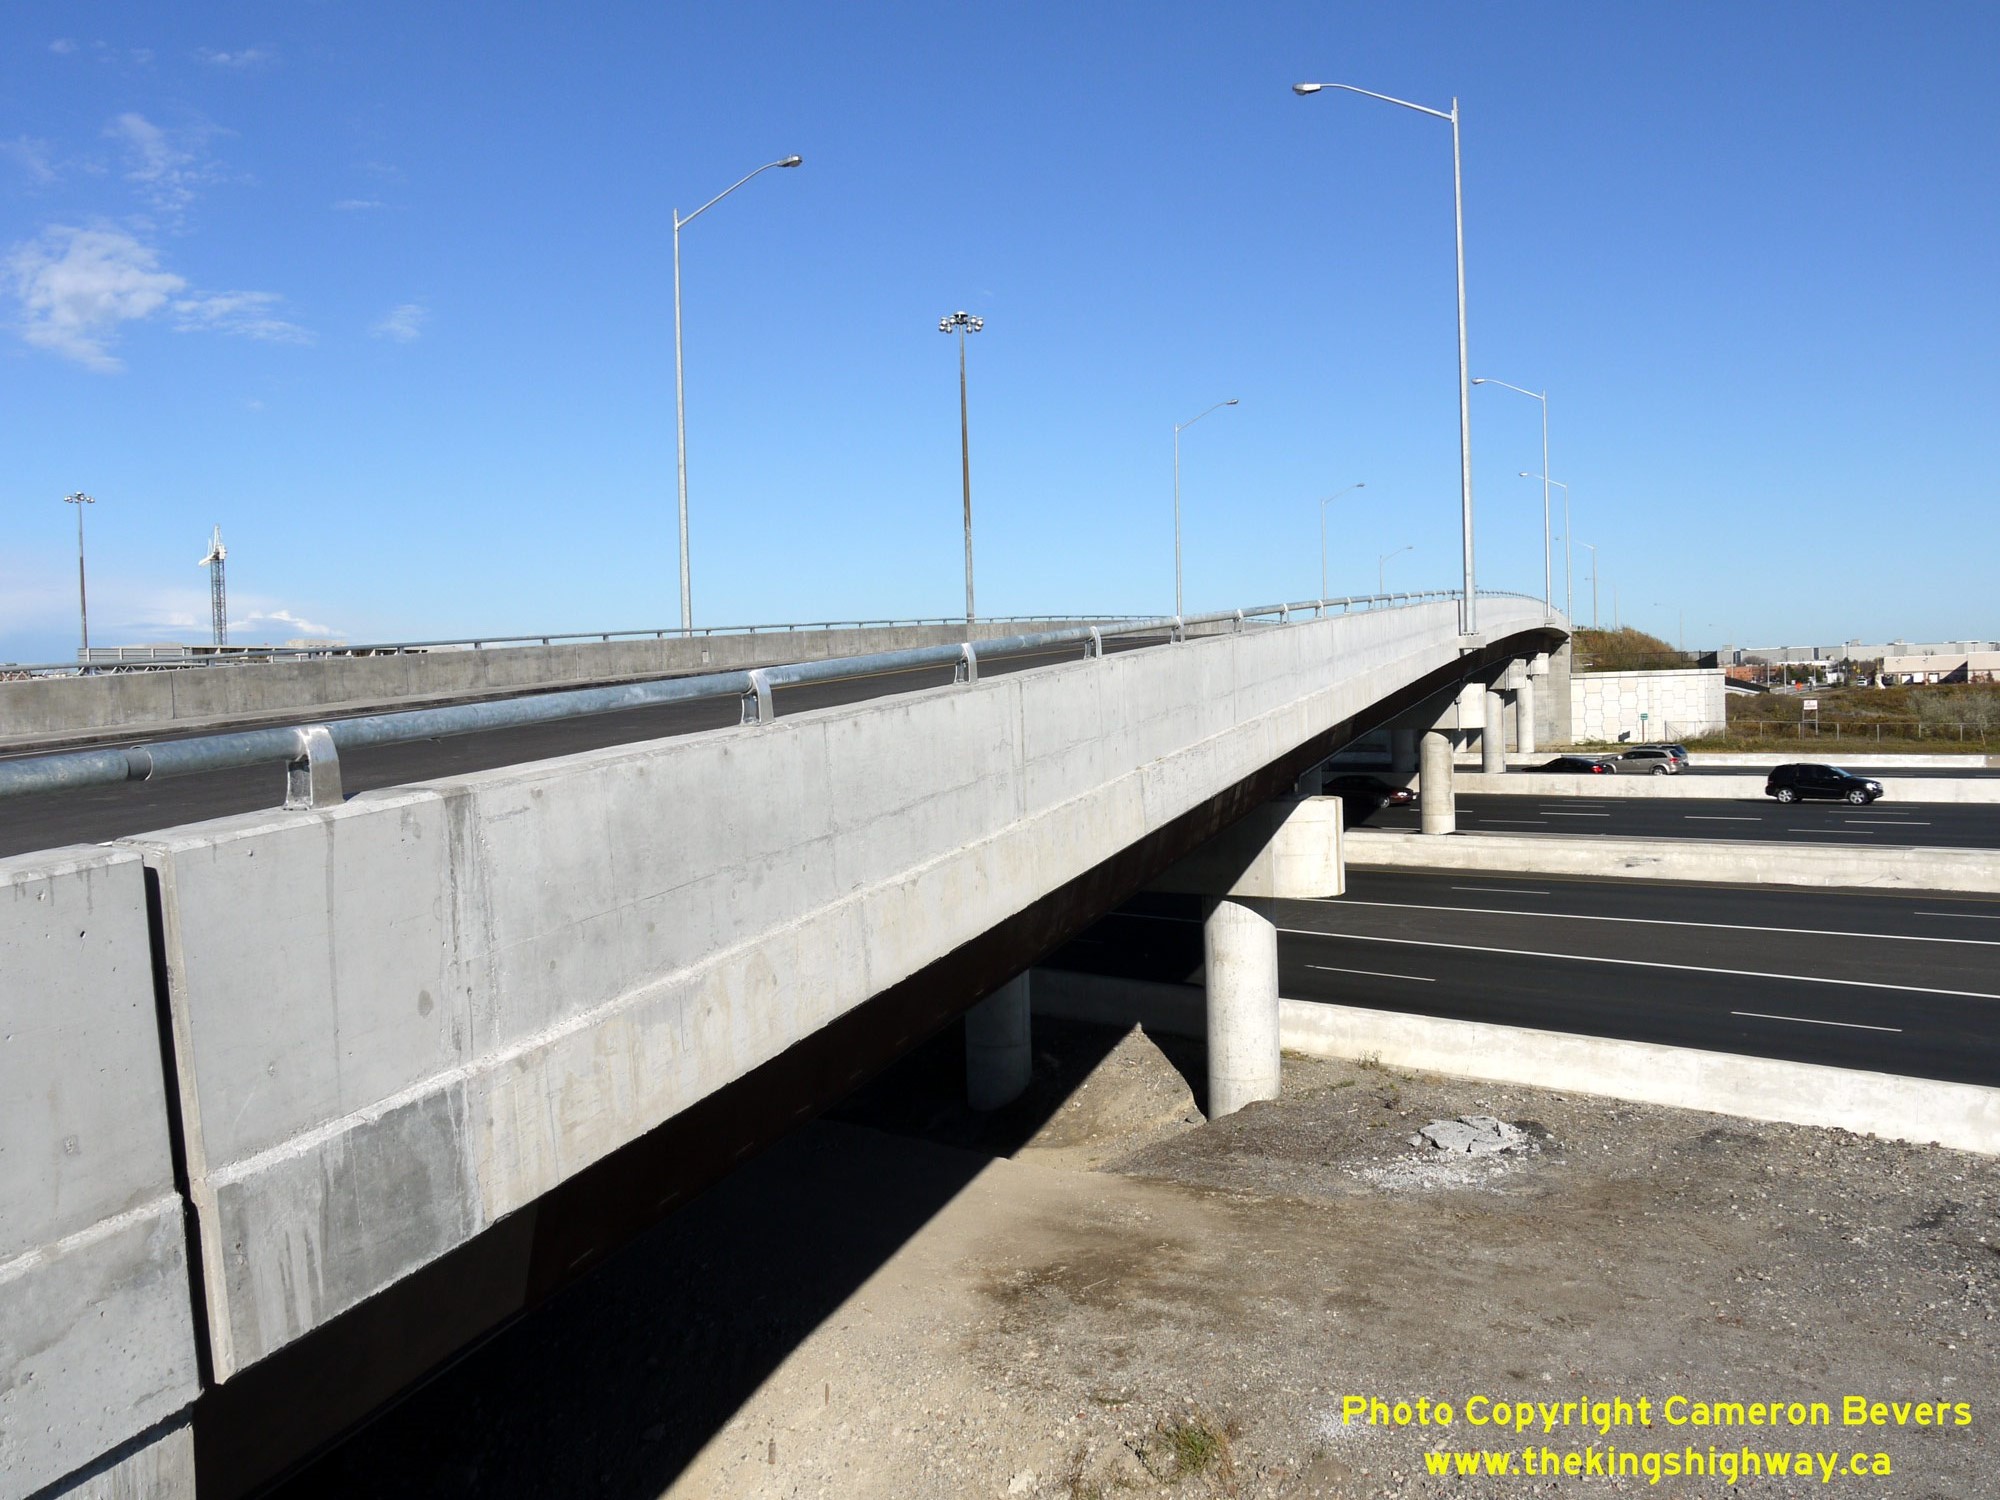
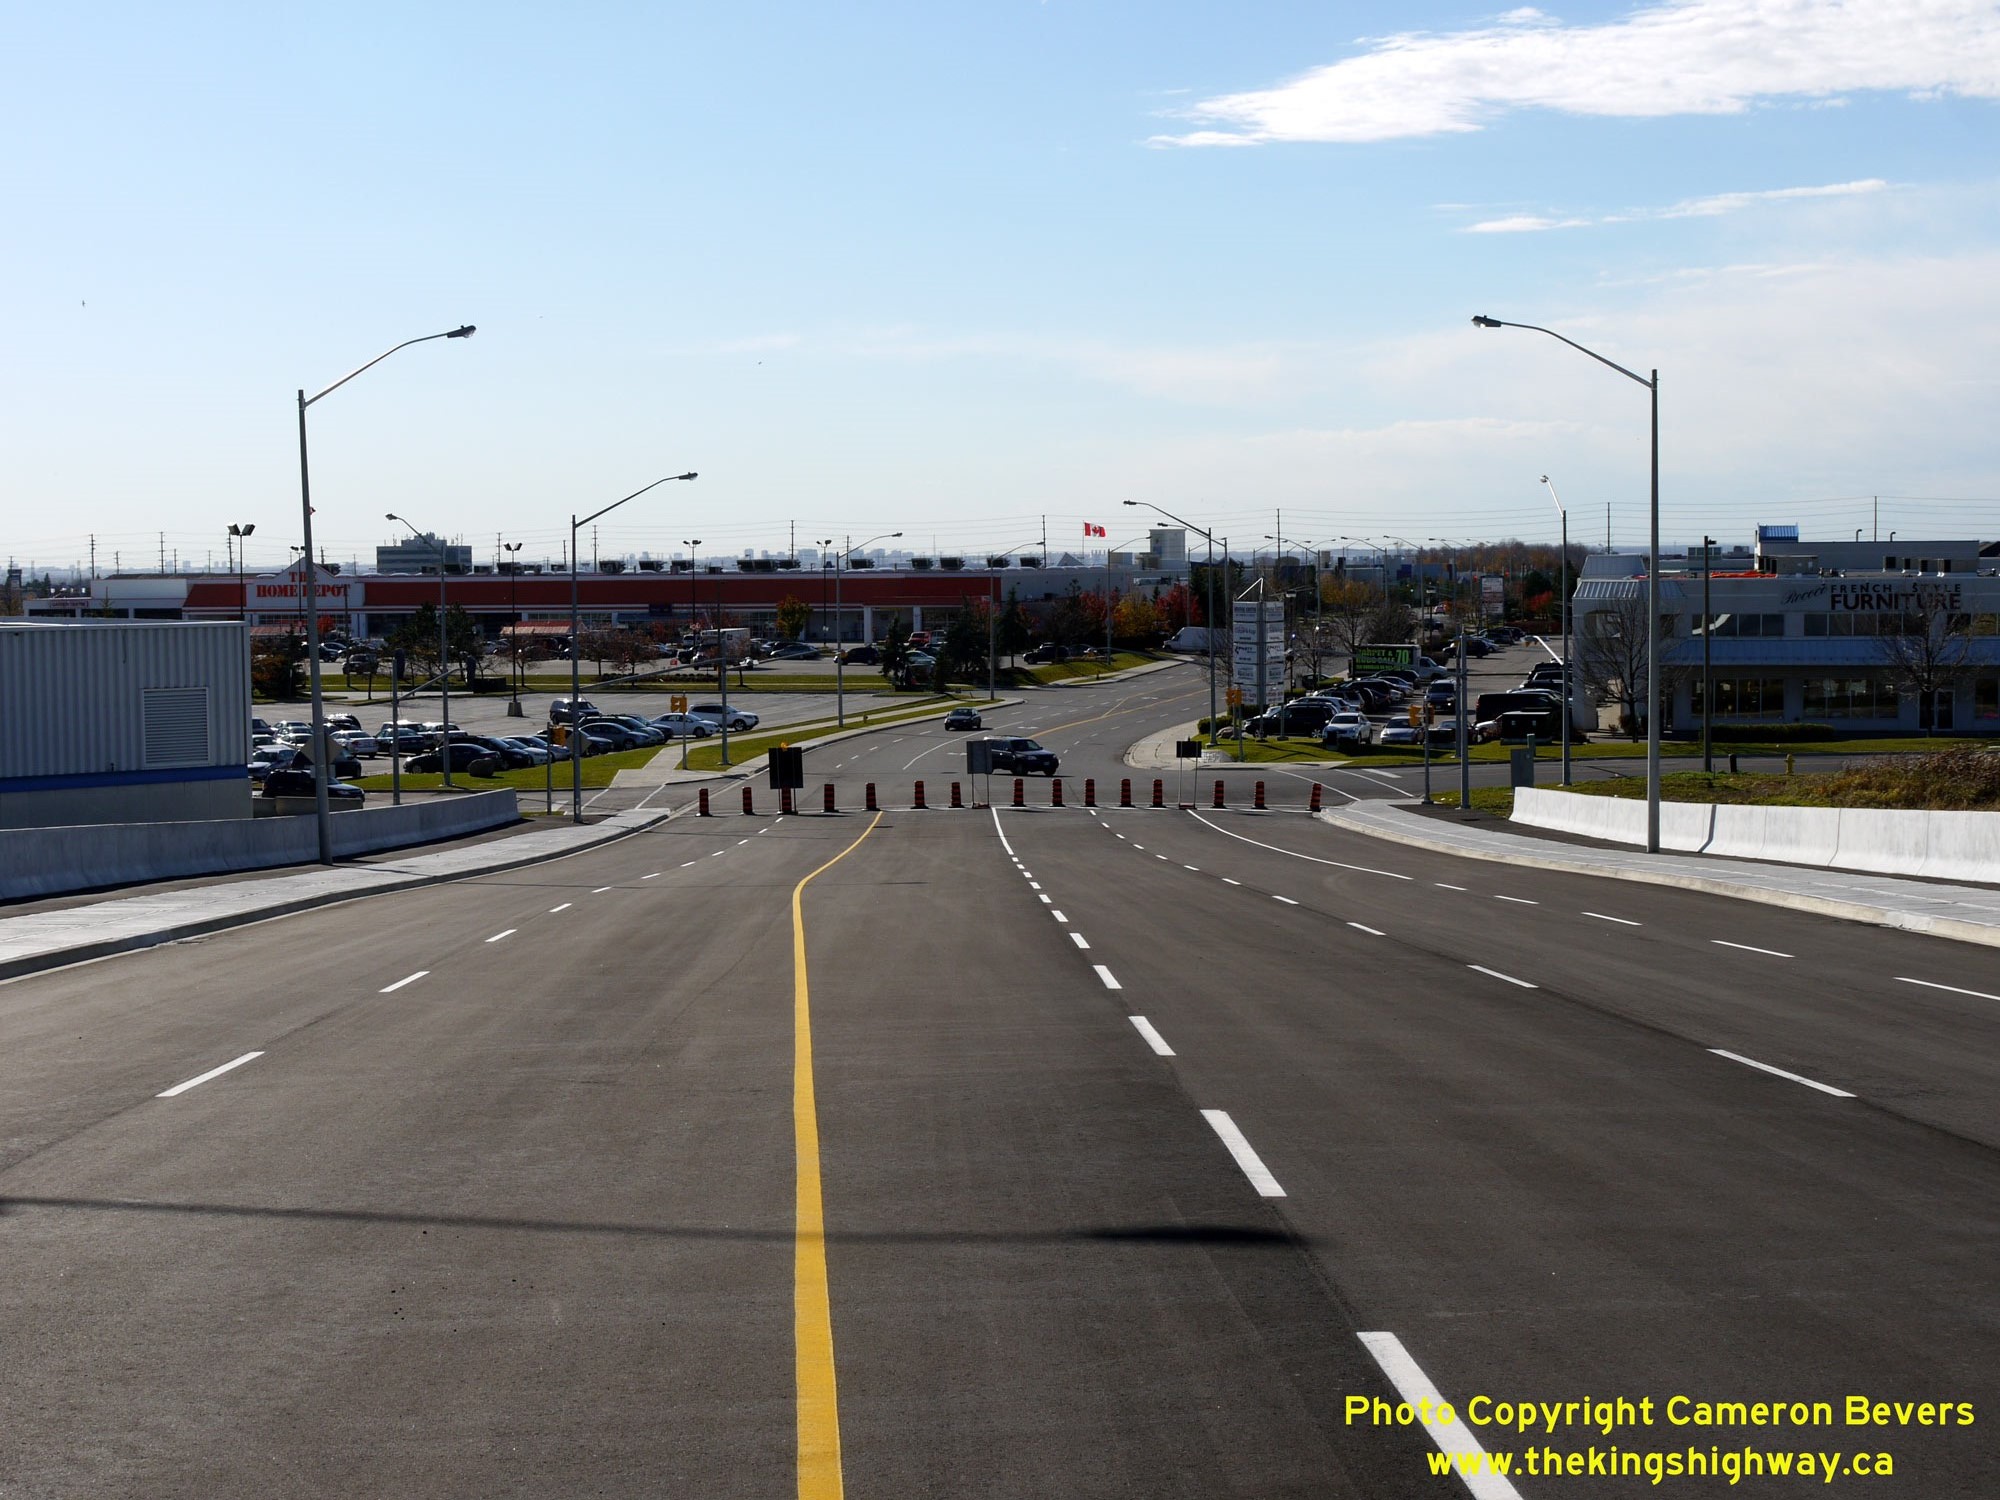
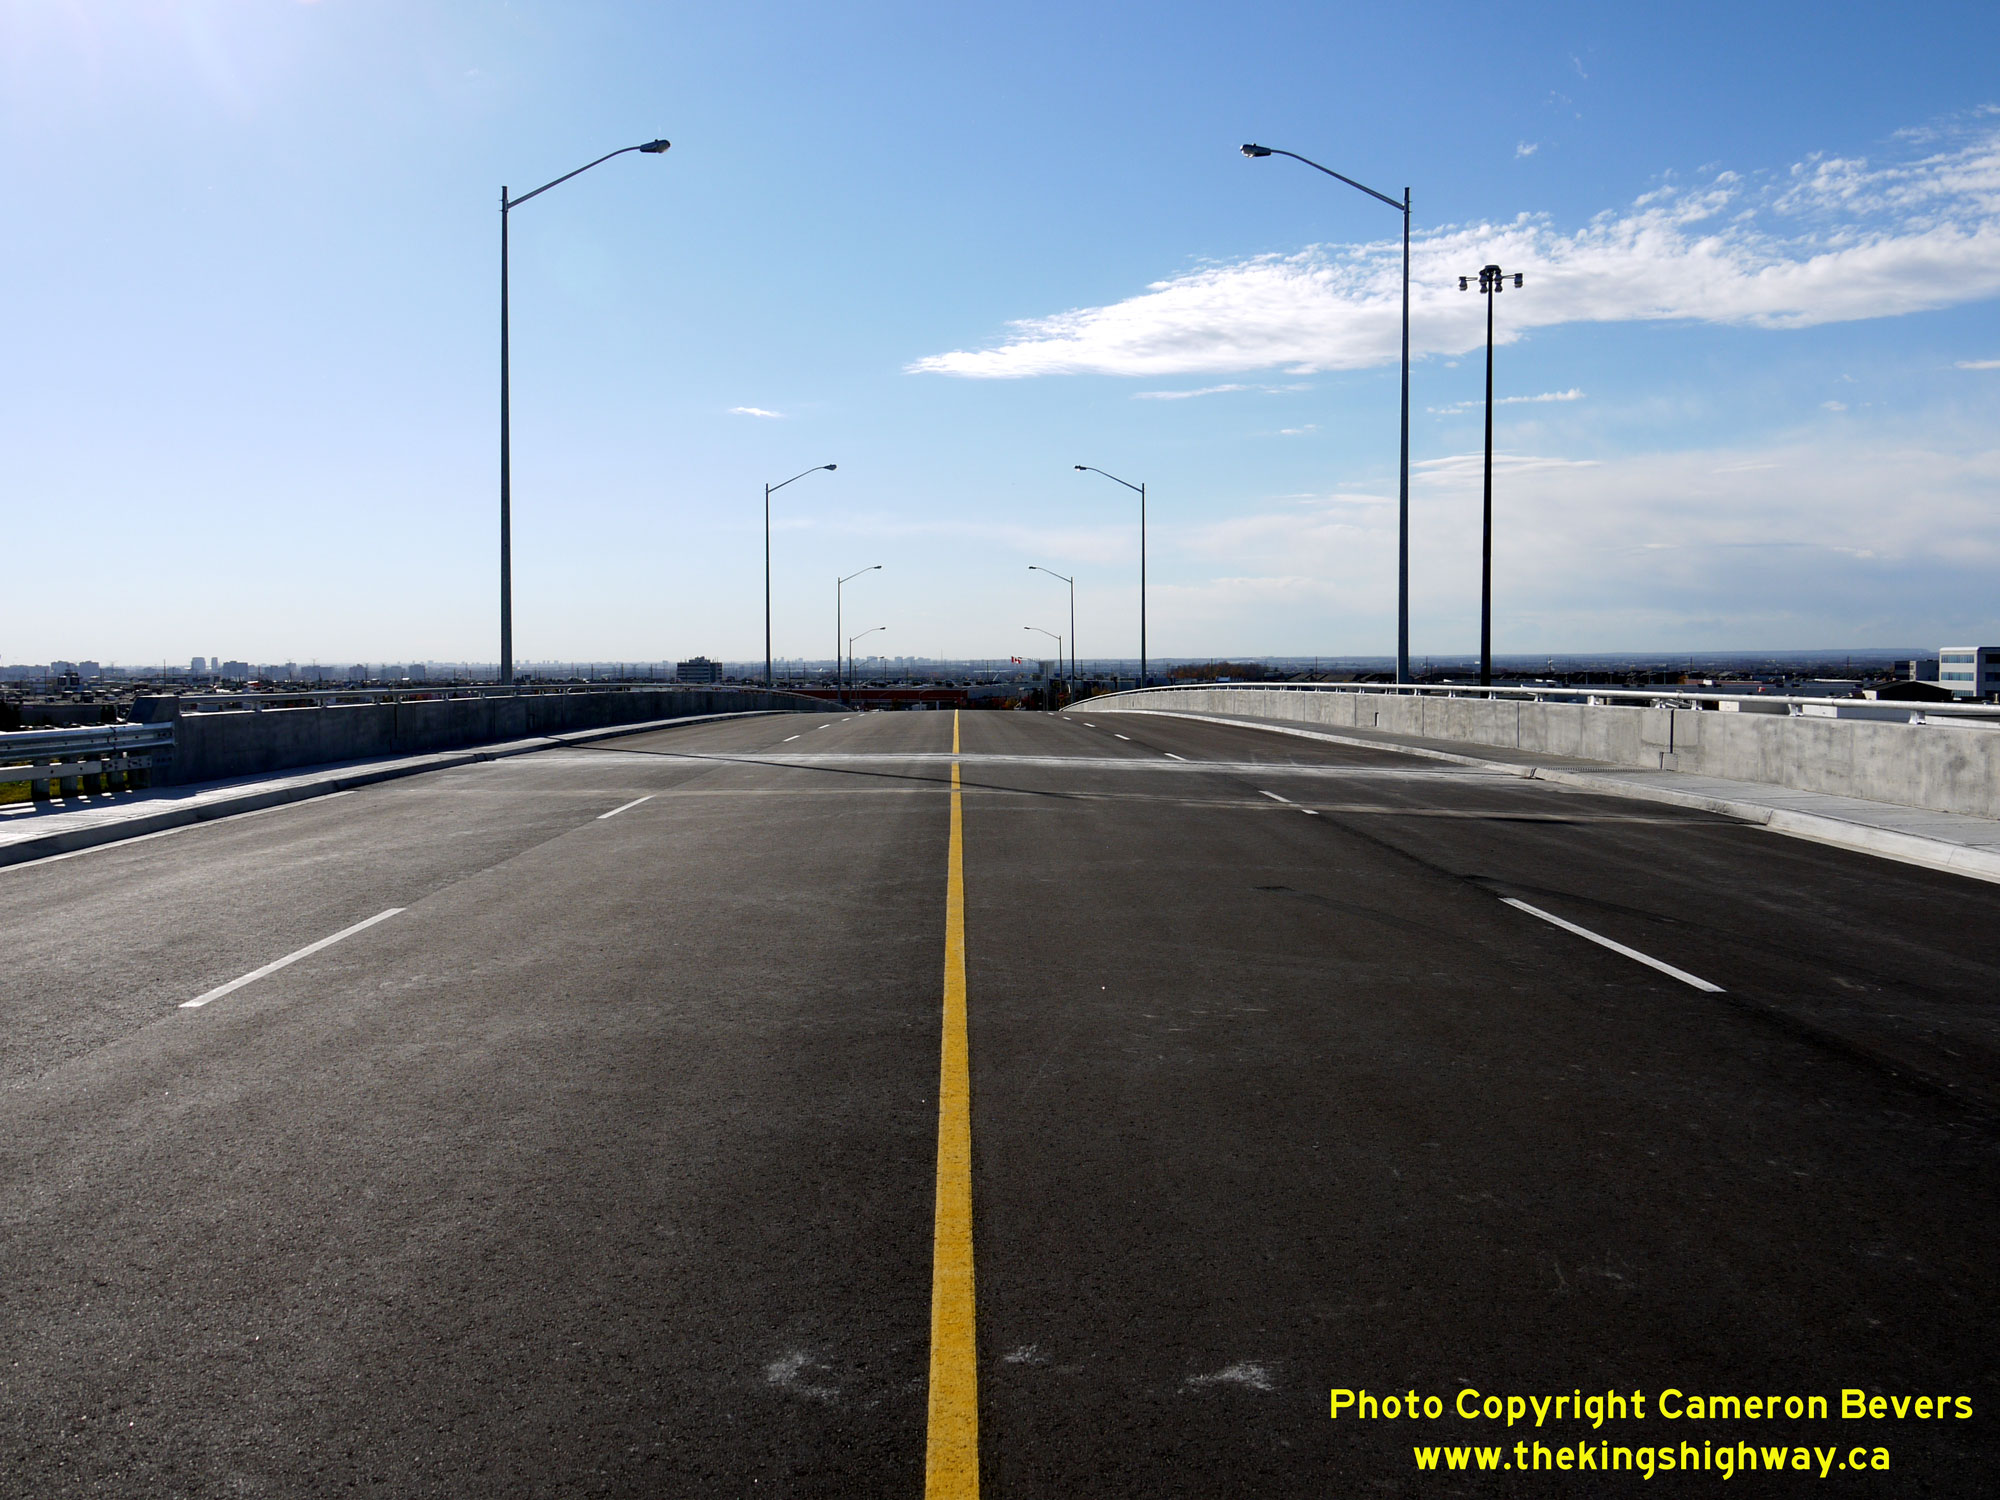
 Left - Southern side of the Portage Parkway Overpass (Site #37-1530) on Hwy 400 in Vaughan. This "mid-block" structure was built by the City of Vaughan in an
effort to ease traffic congestion along parallel municipal roads. This five-span trapezoidal steel box girder structure was completed in 2010. See an
Enlarged Photo Here. Left - Southern side of the Portage Parkway Overpass (Site #37-1530) on Hwy 400 in Vaughan. This "mid-block" structure was built by the City of Vaughan in an
effort to ease traffic congestion along parallel municipal roads. This five-span trapezoidal steel box girder structure was completed in 2010. See an
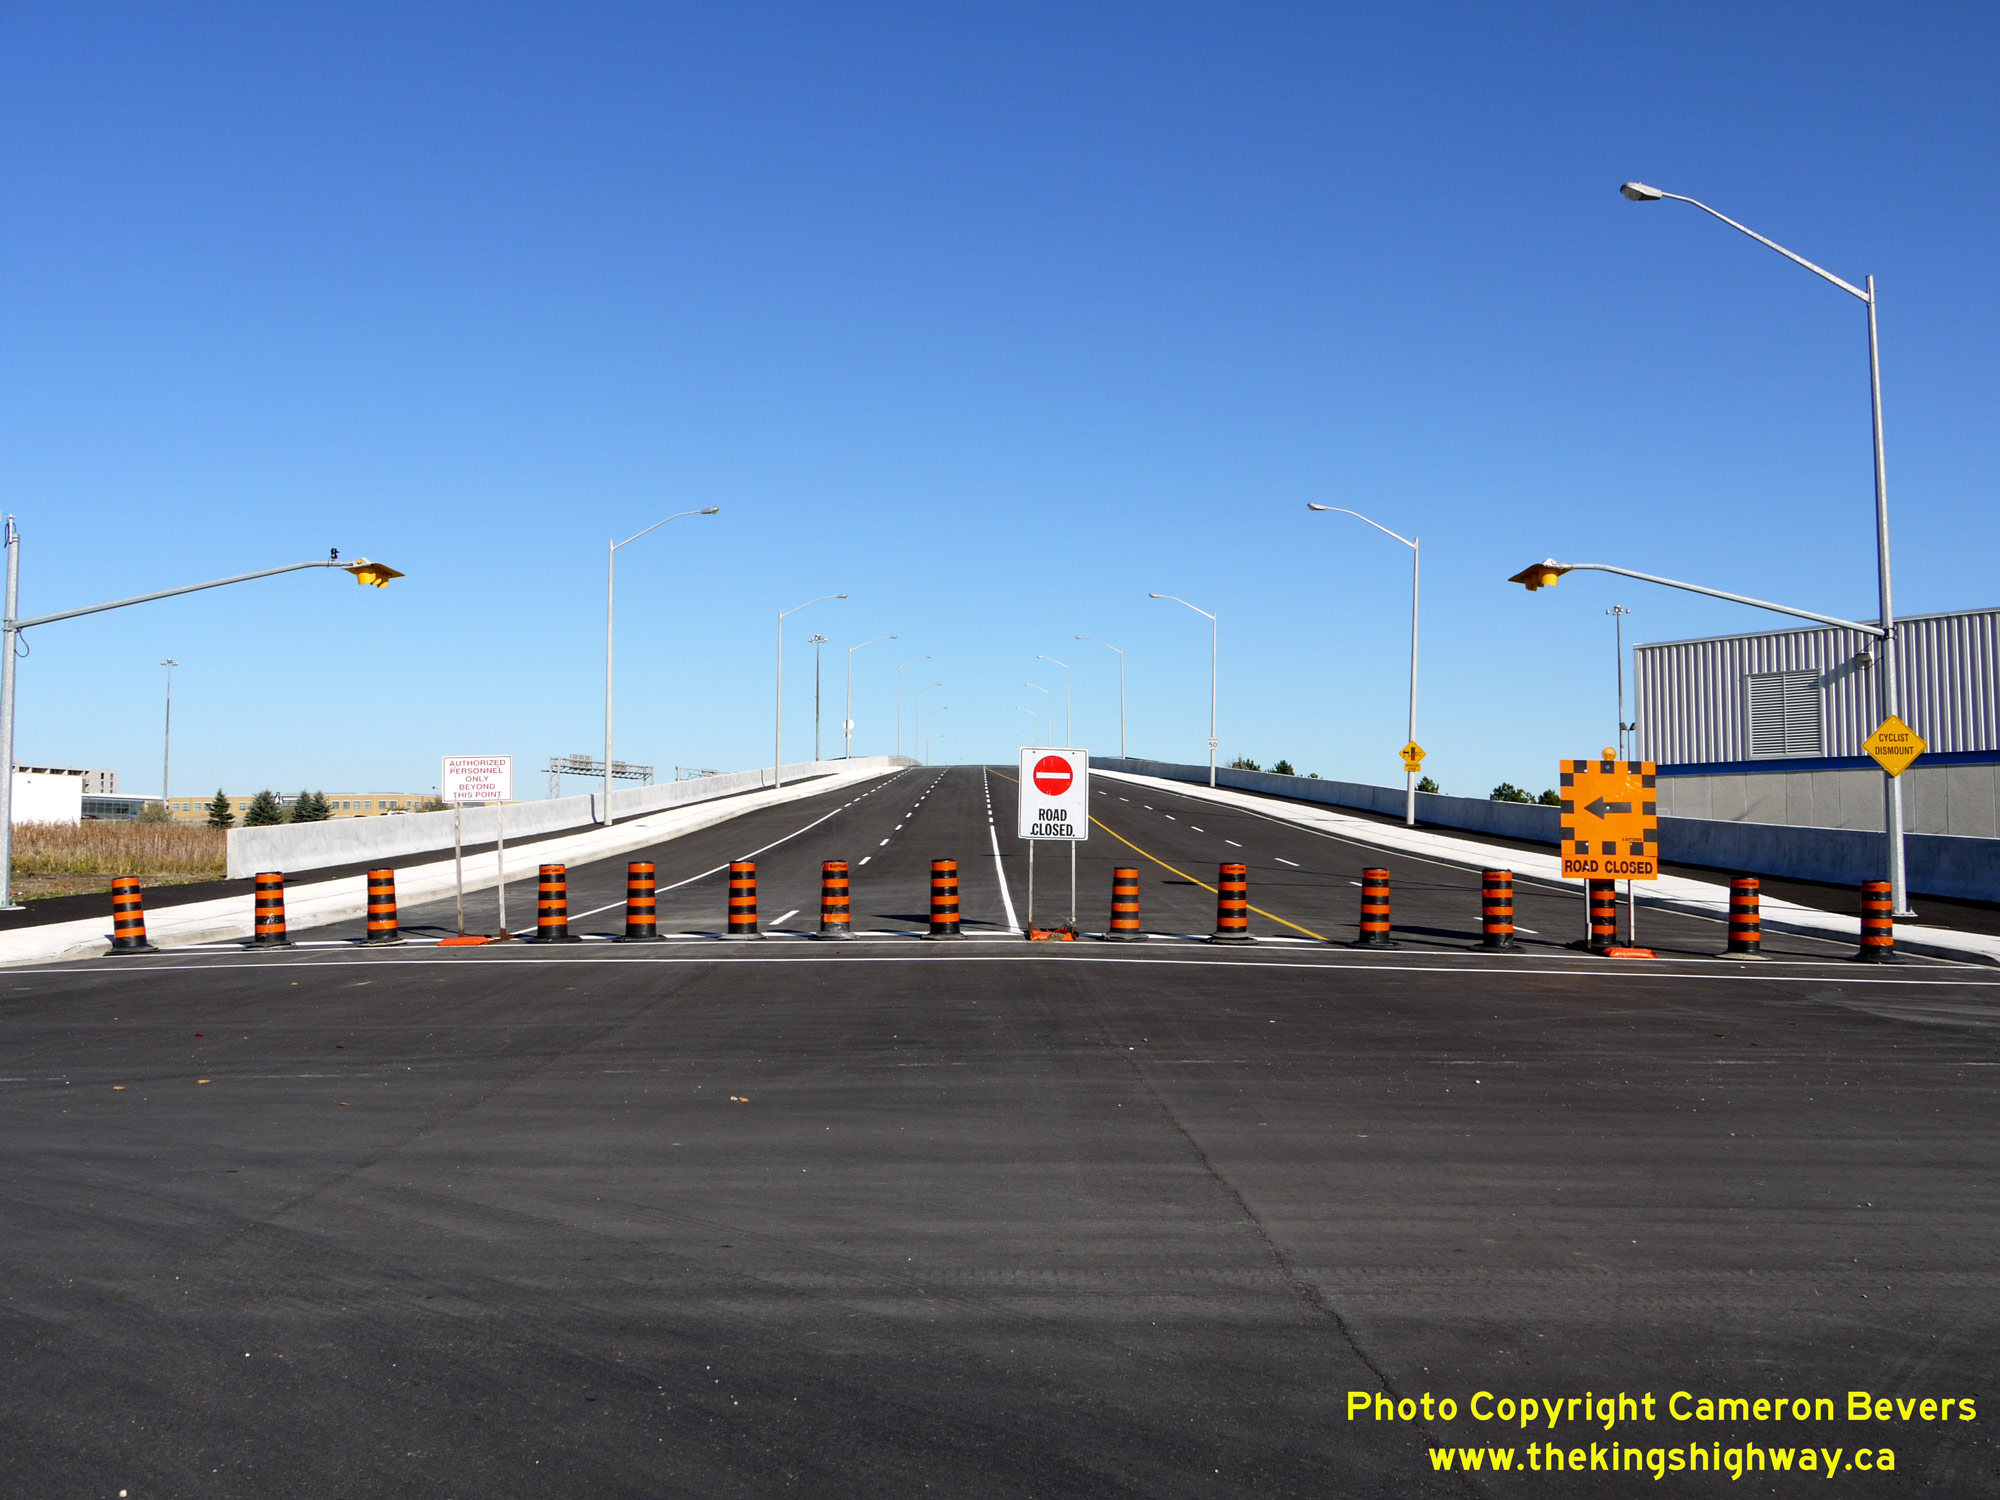
Enlarged Photo Here.(Photograph taken on October 27, 2010 - © Cameron Bevers) Right - Facing east towards the new Portage Parkway Overpass at Hwy 400. This photo was taken shortly before the new mid-block crossing was opened to traffic
in 2010. See an Enlarged Photo Here.(Photograph taken on October 27, 2010 - © Cameron Bevers) 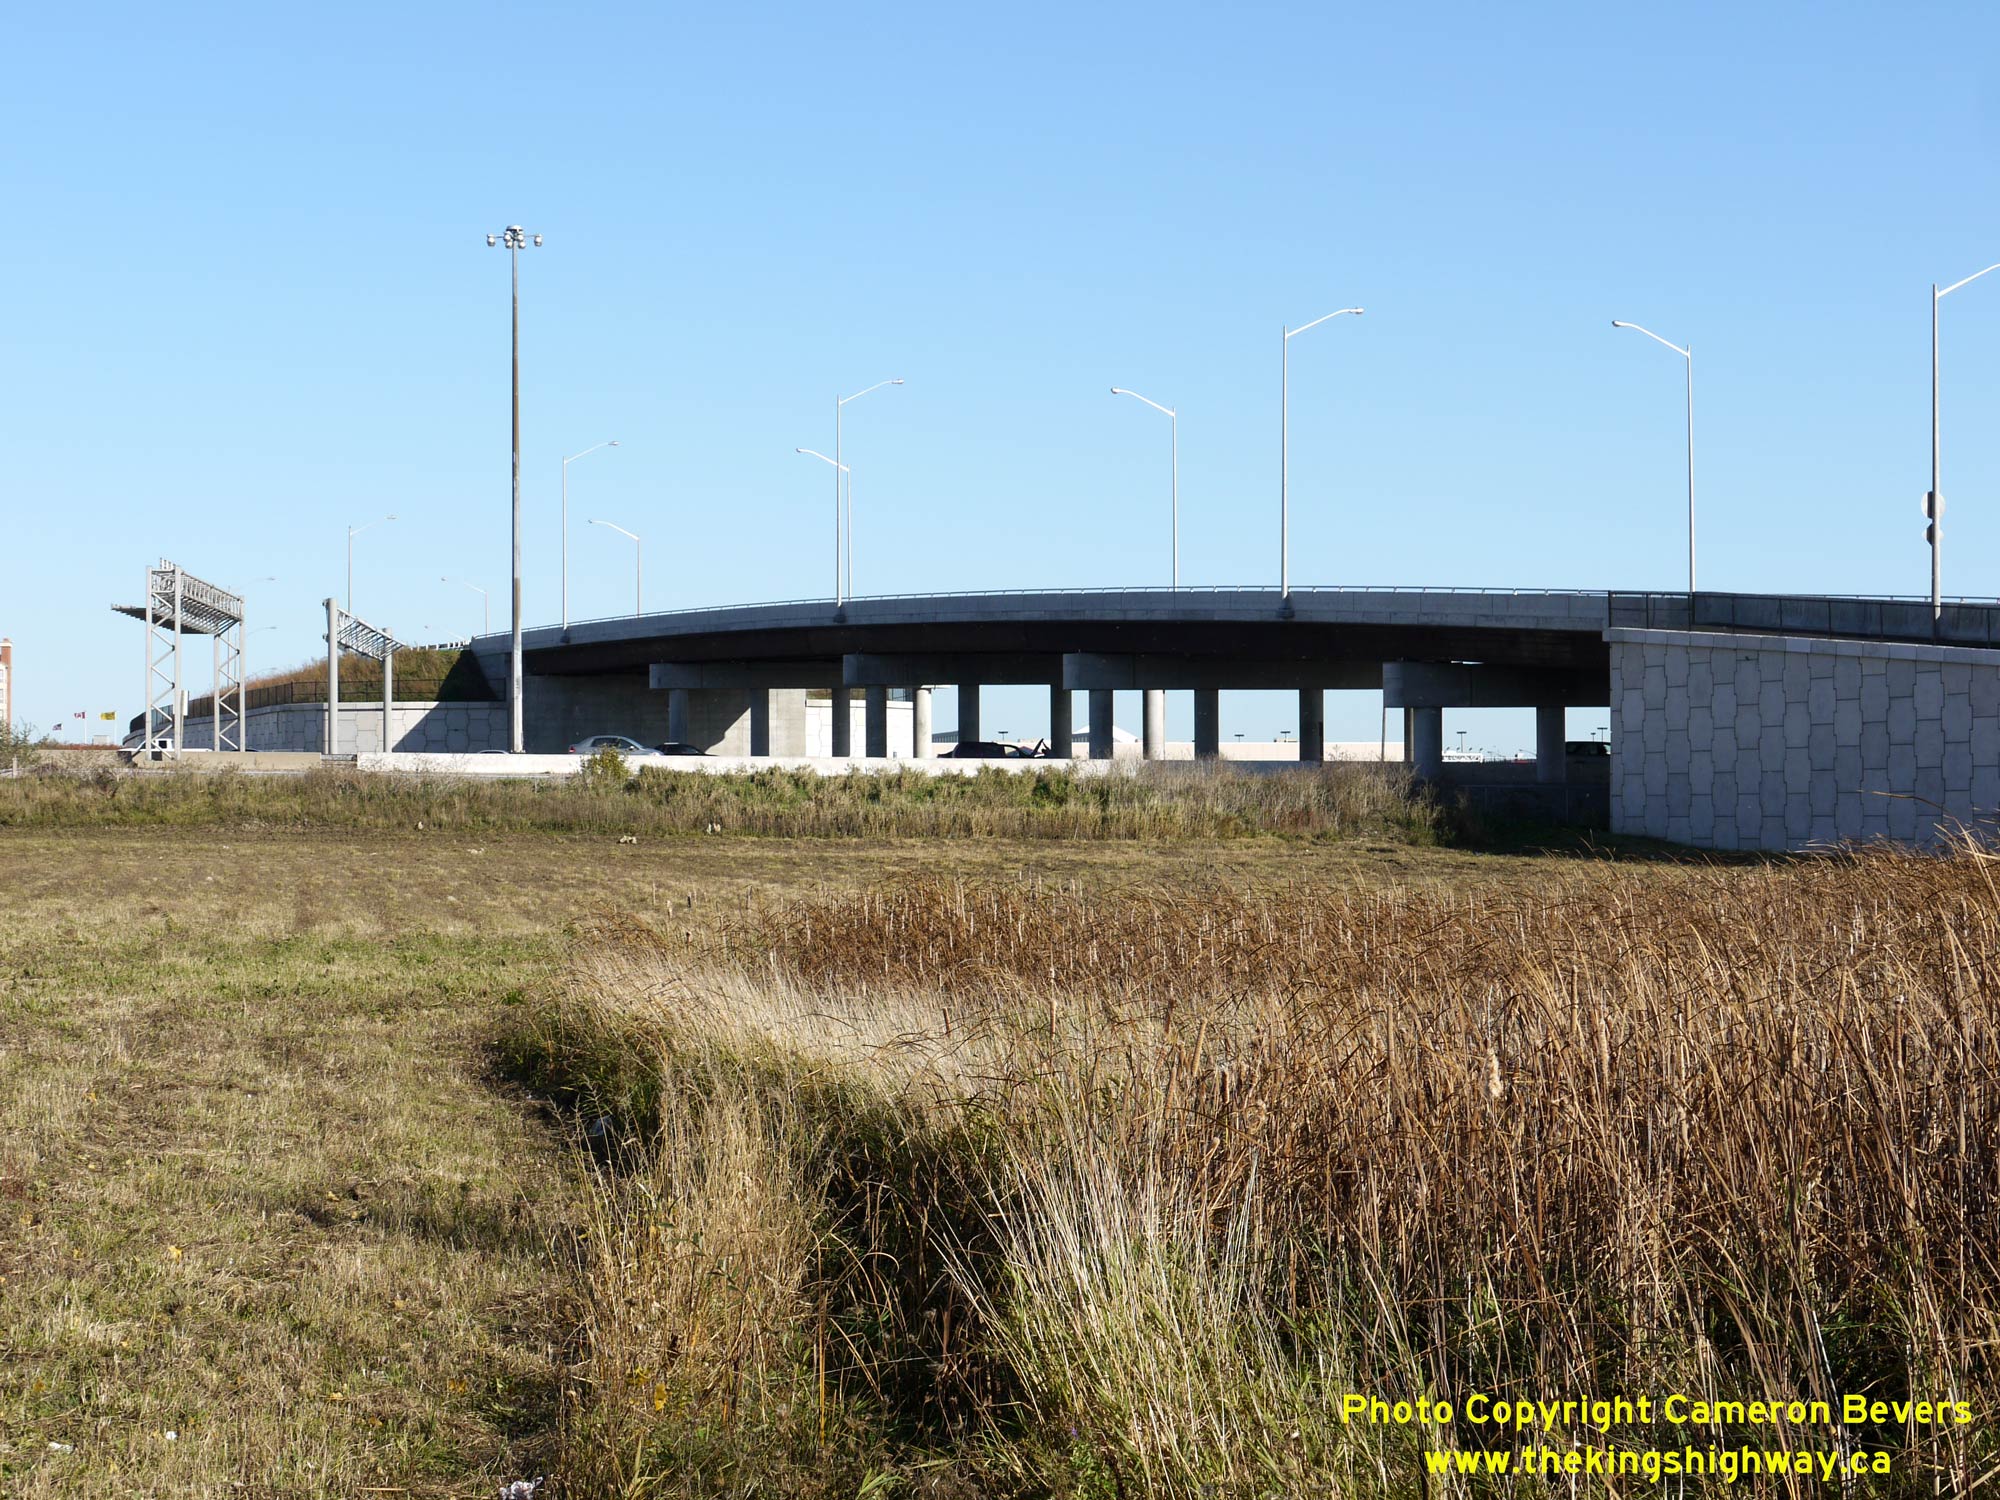
 Left - Northern side of the Portage Parkway Overpass on Hwy 400 in Vaughan. This structure was built with Retained Soil System (RSS) walls at each approach
fill, in order to minimize the footprint of this structure. RSS walls are expensive to construct, but they can still prove to be economical to use in certain
applications. They are particularly useful in areas where land values are high or where there are design constraints which cannot be easily relocated, such as major
utilities, existing roads or railways, or critical drainage features. See an
Enlarged Photo Here. Left - Northern side of the Portage Parkway Overpass on Hwy 400 in Vaughan. This structure was built with Retained Soil System (RSS) walls at each approach
fill, in order to minimize the footprint of this structure. RSS walls are expensive to construct, but they can still prove to be economical to use in certain
applications. They are particularly useful in areas where land values are high or where there are design constraints which cannot be easily relocated, such as major
utilities, existing roads or railways, or critical drainage features. See an
Enlarged Photo Here.(Photograph taken on October 27, 2010 - © Cameron Bevers) Right - Facing west along Portage Parkway from the Hwy 400 structure, just prior to opening. See an
Enlarged Photo Here.(Photograph taken on October 27, 2010 - © Cameron Bevers) 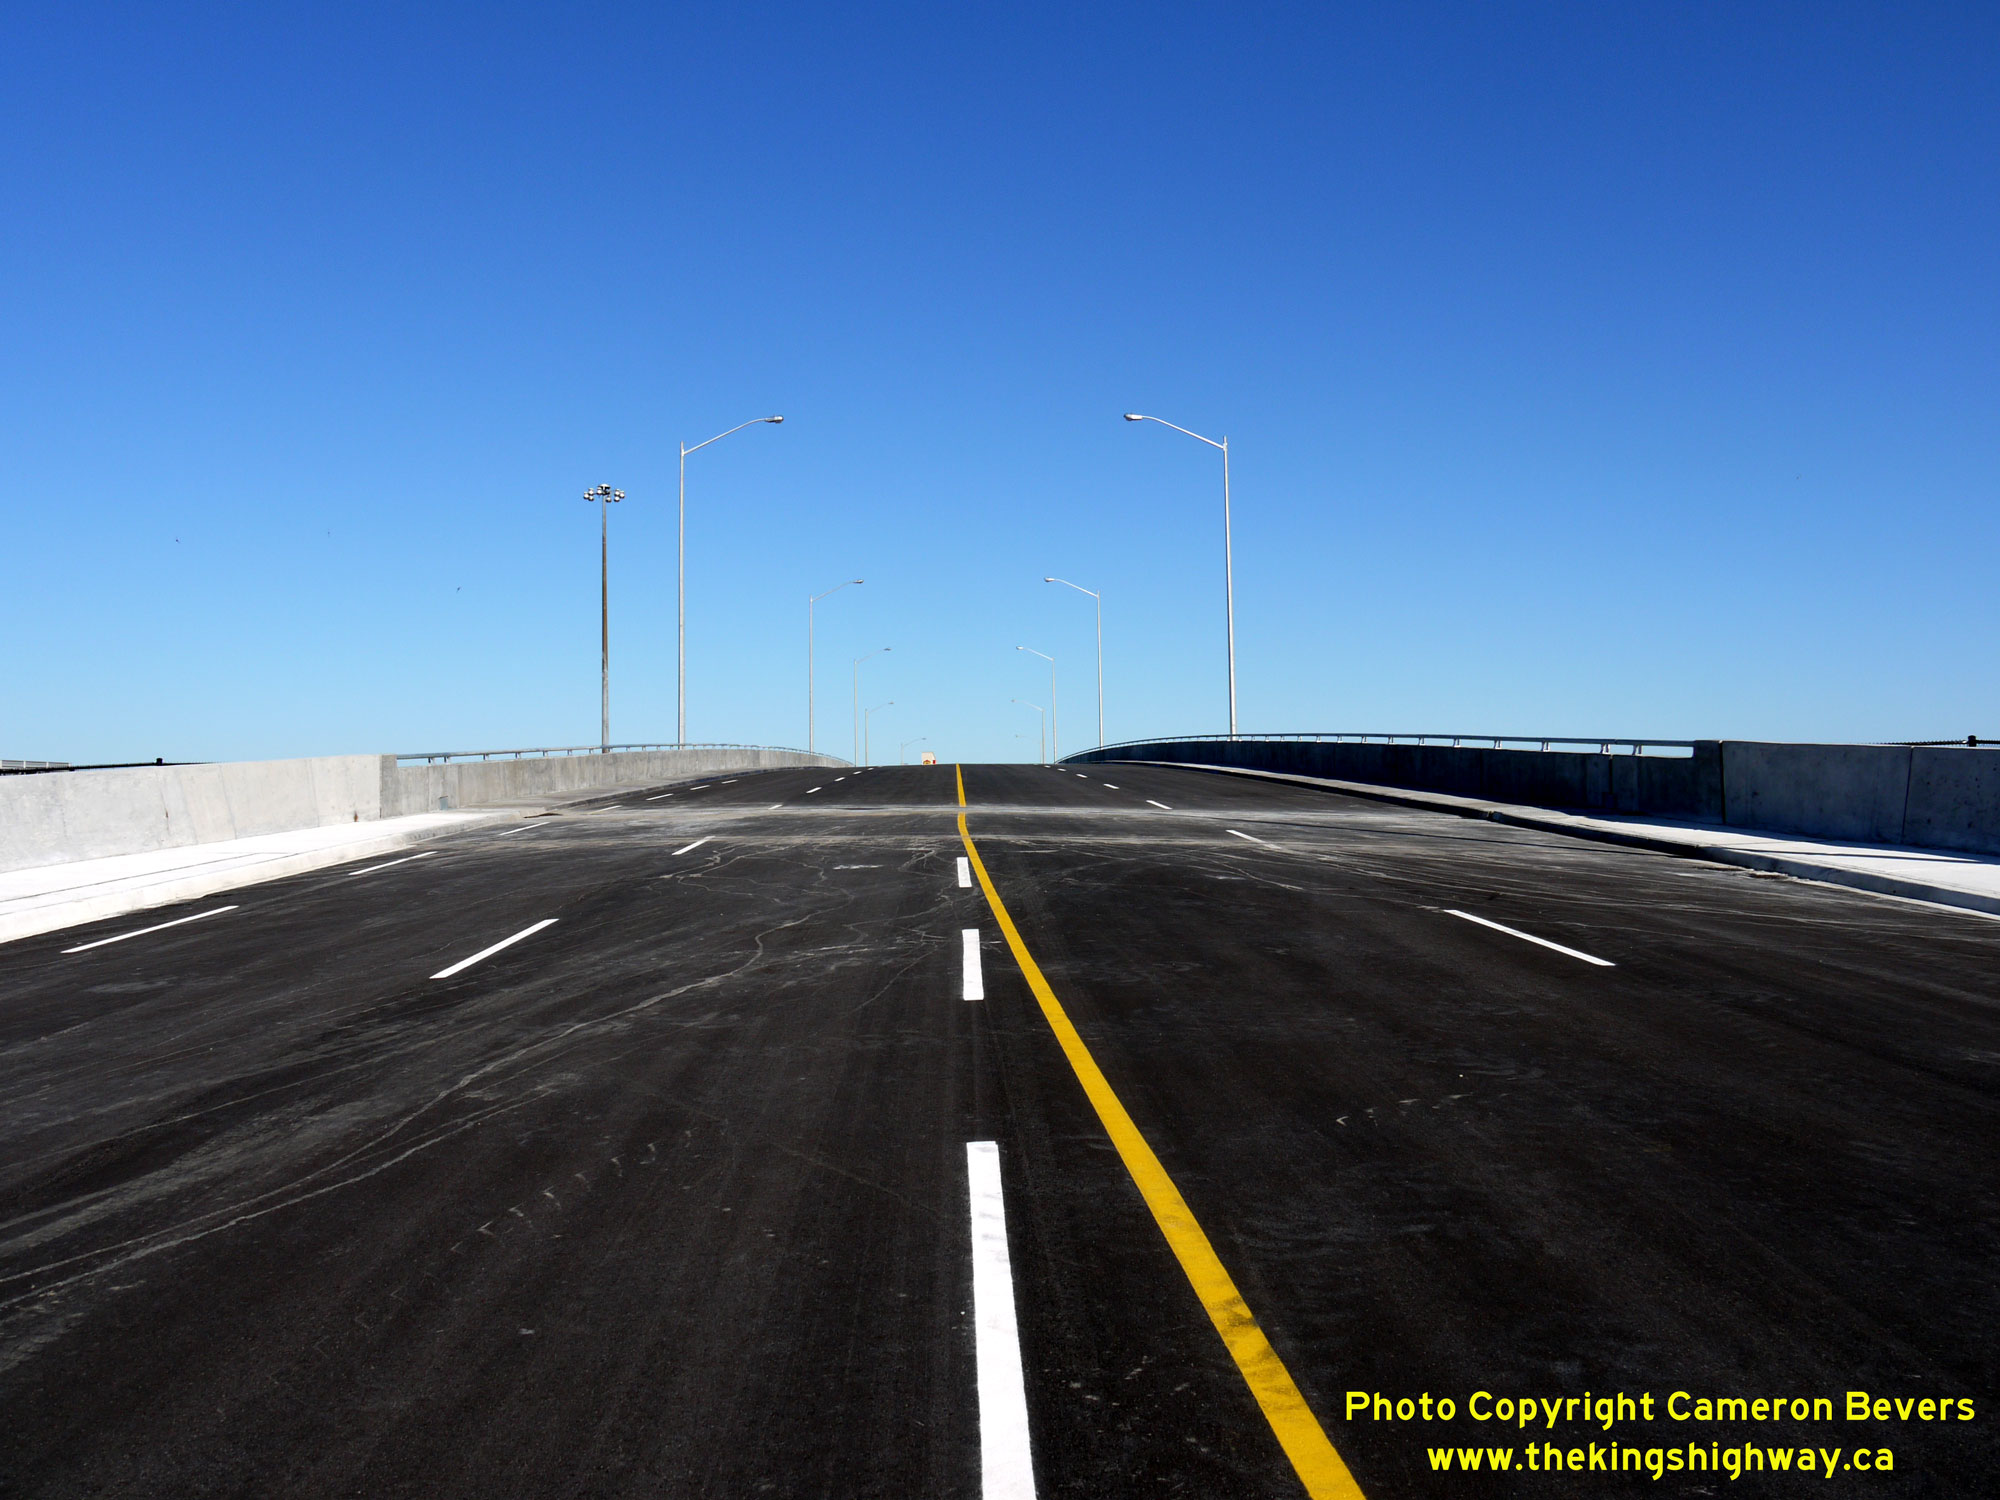
 Left - Facing east across the Portage Parkway Overpass on Hwy 400 in Vaughan. See an
Enlarged Photo Here. Left - Facing east across the Portage Parkway Overpass on Hwy 400 in Vaughan. See an
Enlarged Photo Here.(Photograph taken on October 27, 2010 - © Cameron Bevers) Right - View of the Hwy 7 & Hwy 400 Interchange, facing south from the Portage Parkway Overpass. The exit ramp at right carries traffic from the southbound
Hwy 400 Collector Lanes to Hwy 7. Motorists who continue south beyond the Hwy 7 Interchange in the southbound Hwy 400 Collector Lanes will merge back into the Hwy 400
Express Lanes near the Hwy 407 ETR Underpass, located about 1 km to the south. See an
Enlarged Photo Here.(Photograph taken on October 27, 2010 - © Cameron Bevers) 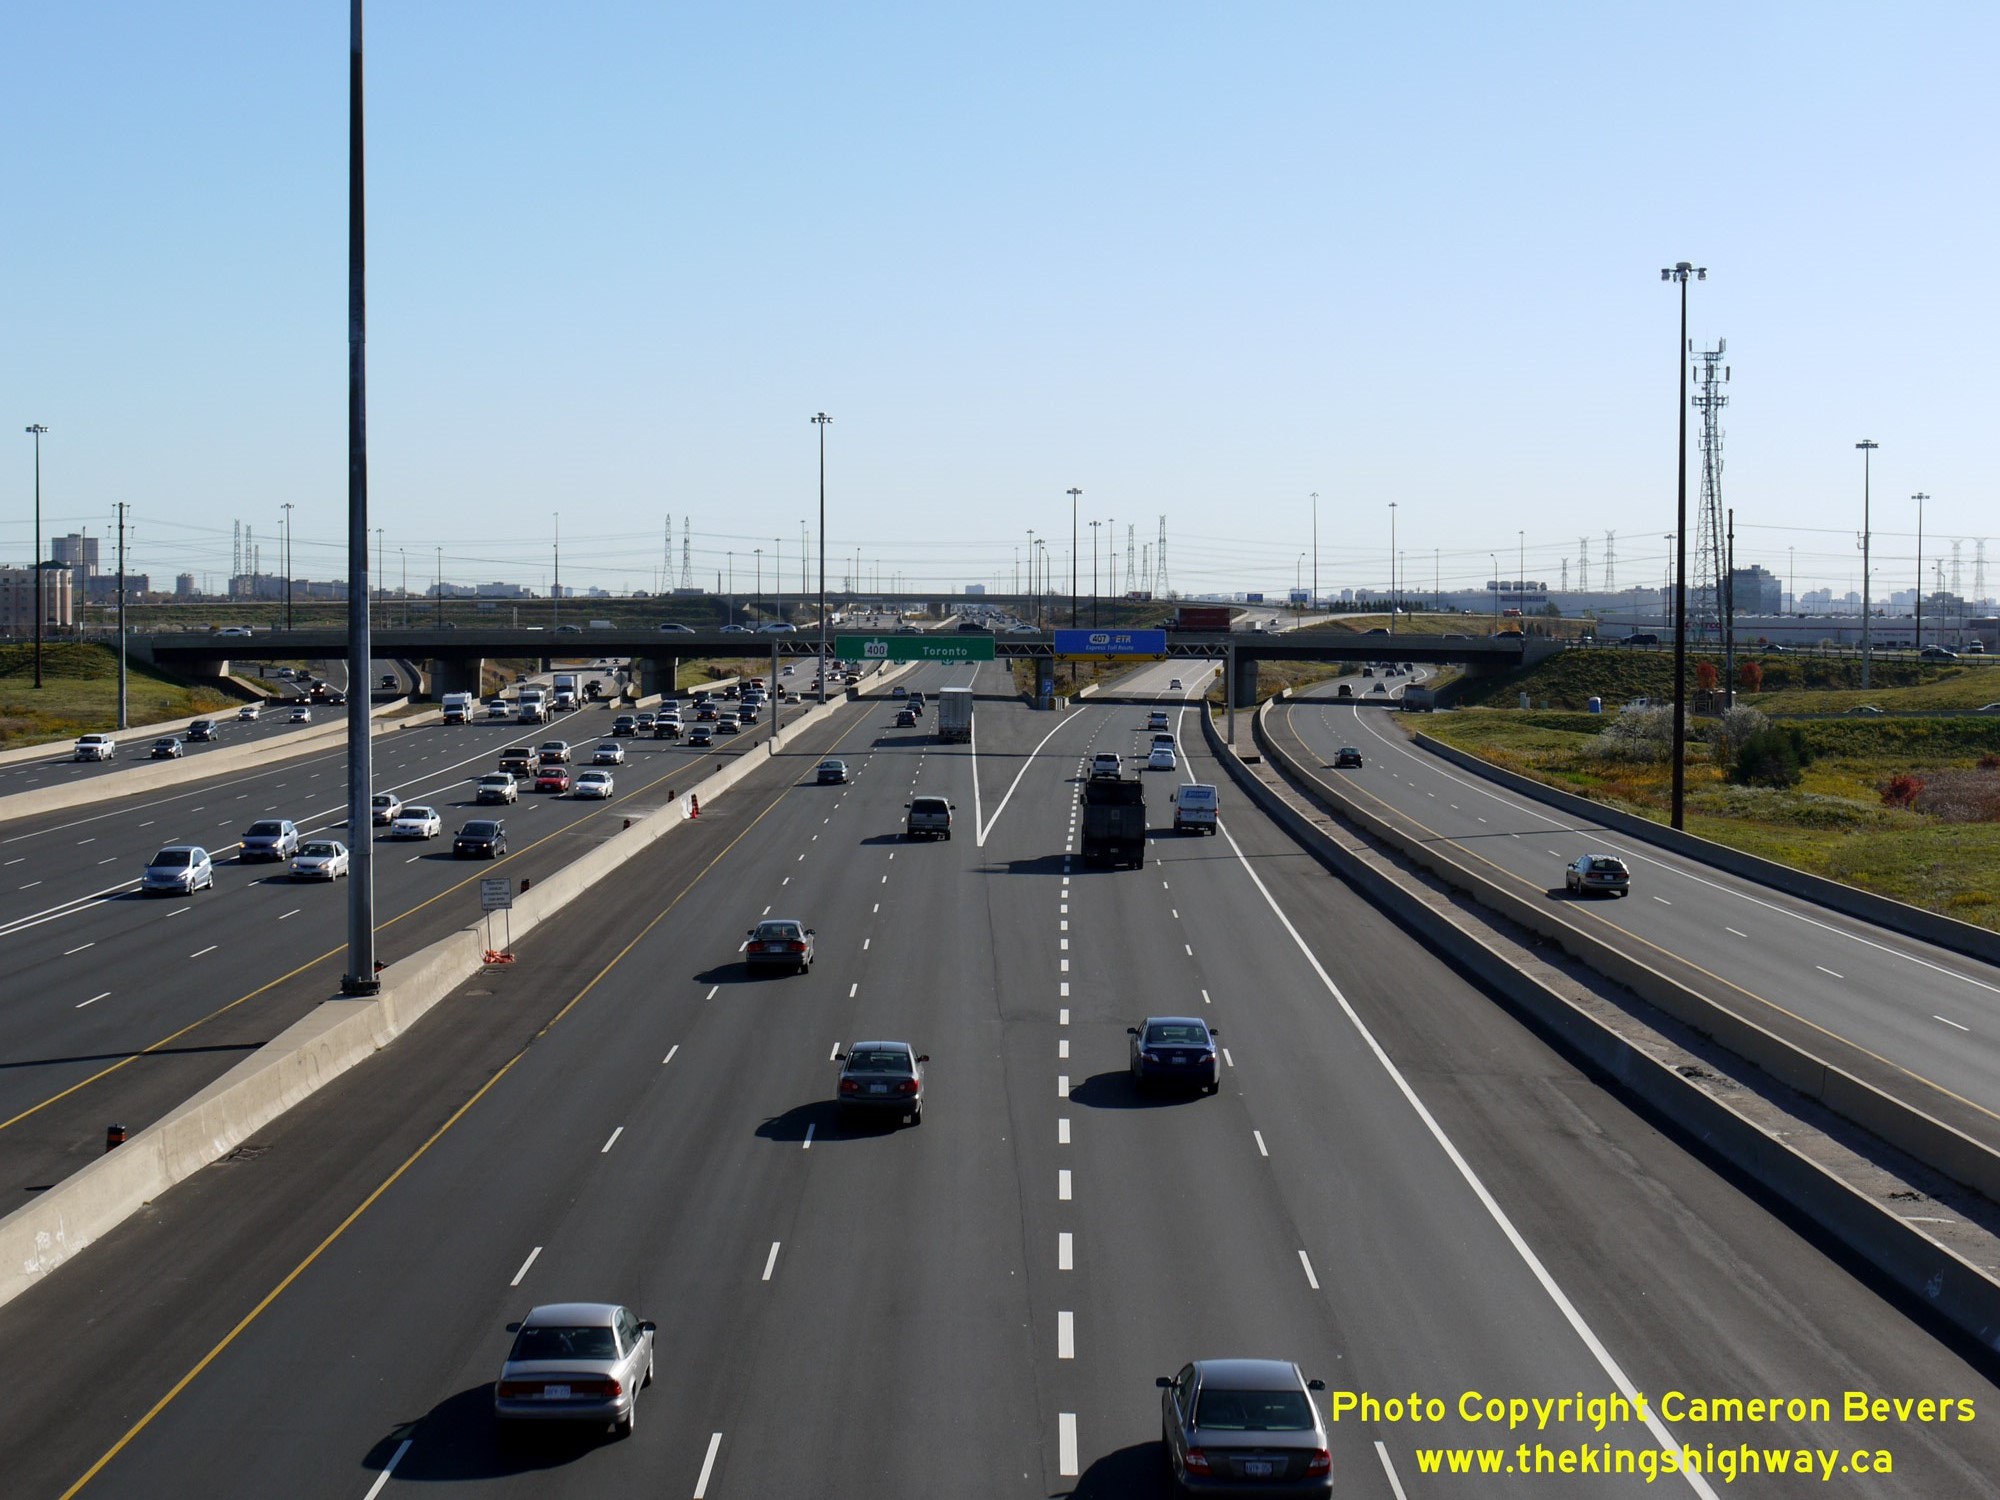
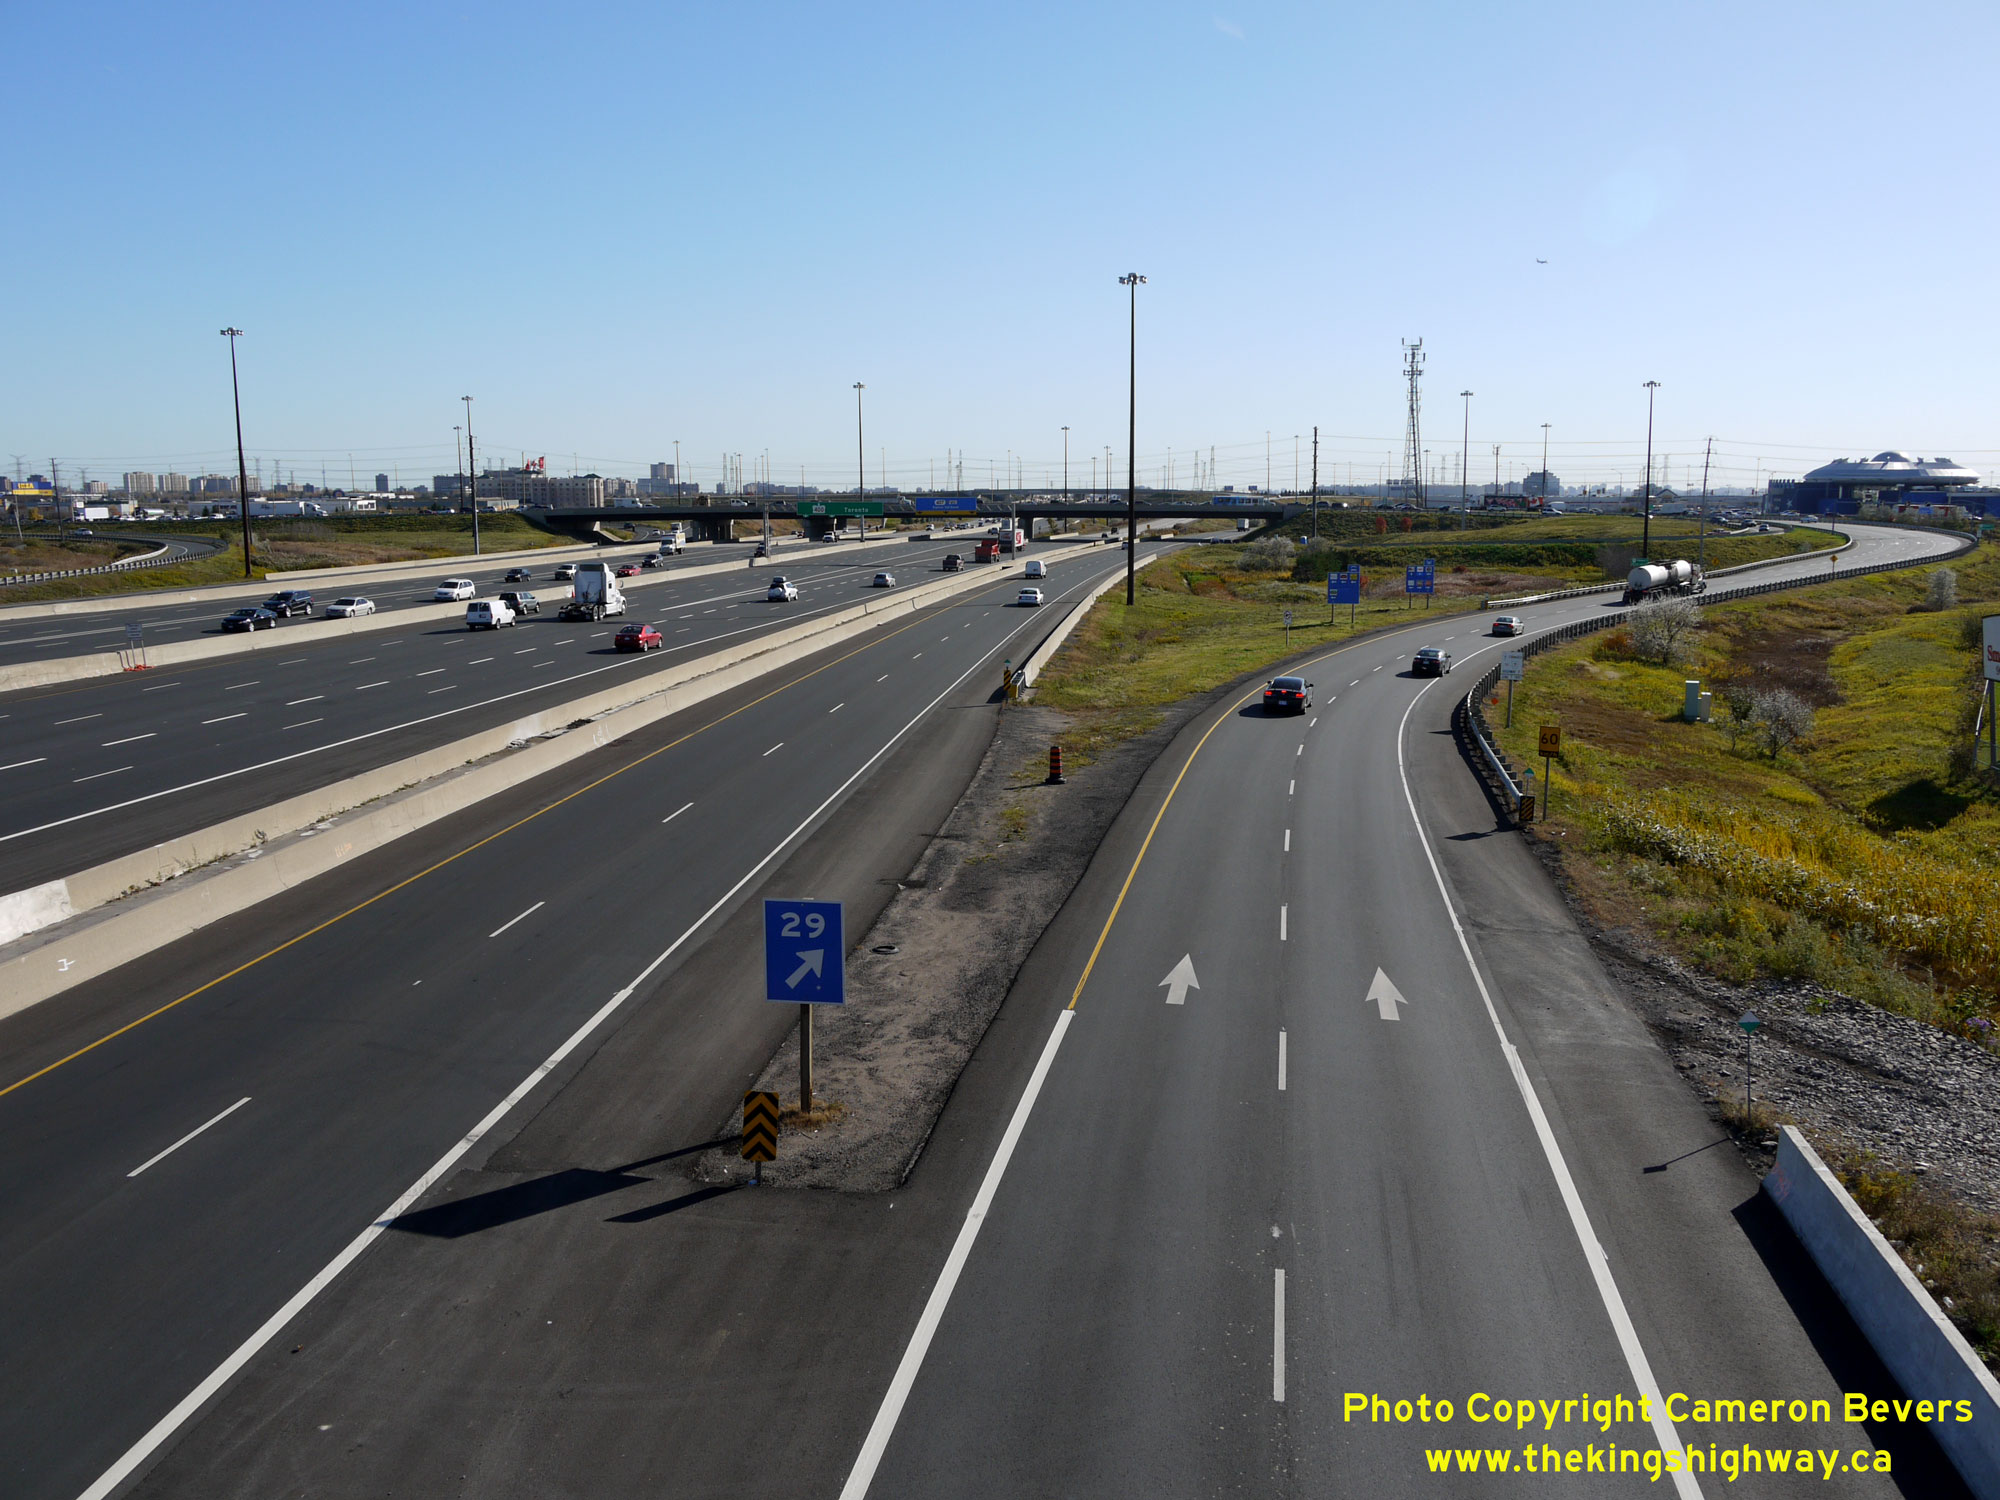
 Left - Facing south along the southbound Hwy 400 Express Lanes from the Portage Parkway Overpass in Vaughan. Just ahead, a three-lane exit ramp diverges off to
Hwy 407 ETR, while three lanes continue south along Hwy 400 towards Toronto. This design concept, known as "lane balancing", has five approaching freeway lanes feeding
into six departing lanes, with the centre lane being an "either-or" lane where motorists can choose to either continue along the freeway or take the exit. Multi-lane
interchanges with this design typically offer superior traffic operations to those with only "force-off" exit lanes, as they can help to reduce the number of
last-minute lane changes by motorists who find themselves inadvertently caught in an exit lane. See an
Enlarged Photo Here. Left - Facing south along the southbound Hwy 400 Express Lanes from the Portage Parkway Overpass in Vaughan. Just ahead, a three-lane exit ramp diverges off to
Hwy 407 ETR, while three lanes continue south along Hwy 400 towards Toronto. This design concept, known as "lane balancing", has five approaching freeway lanes feeding
into six departing lanes, with the centre lane being an "either-or" lane where motorists can choose to either continue along the freeway or take the exit. Multi-lane
interchanges with this design typically offer superior traffic operations to those with only "force-off" exit lanes, as they can help to reduce the number of
last-minute lane changes by motorists who find themselves inadvertently caught in an exit lane. See an
Enlarged Photo Here.(Photograph taken on October 27, 2010 - © Cameron Bevers) Right - View of the Hwy 407 ETR ramp where it joins the northbound Hwy 400 Express Lanes, facing south from the Portage Parkway Overpass. One of the quirks of
the lane balancing design concept at a freeway-to-freeway interchange is that one typically ends up with one additional lane on the departing side of the interchange
just after the two freeway ramps converge, which results in an asymmetrical design. This is because a parallel lane is always needed at a freeway entrance ramp in
order to have entering traffic accelerate and then merge safely. At a diverge point, it is an acceptable - and in most cases, preferable - to have one lane fork into
two lanes right at the exit gore. In this instance, six lanes continue north away from the Hwy 407 ETR Interchange, while the southbound side of the highway seen in
the left-hand photo has only five lanes approaching the interchange. See an
Enlarged Photo Here.(Photograph taken on October 27, 2010 - © Cameron Bevers) 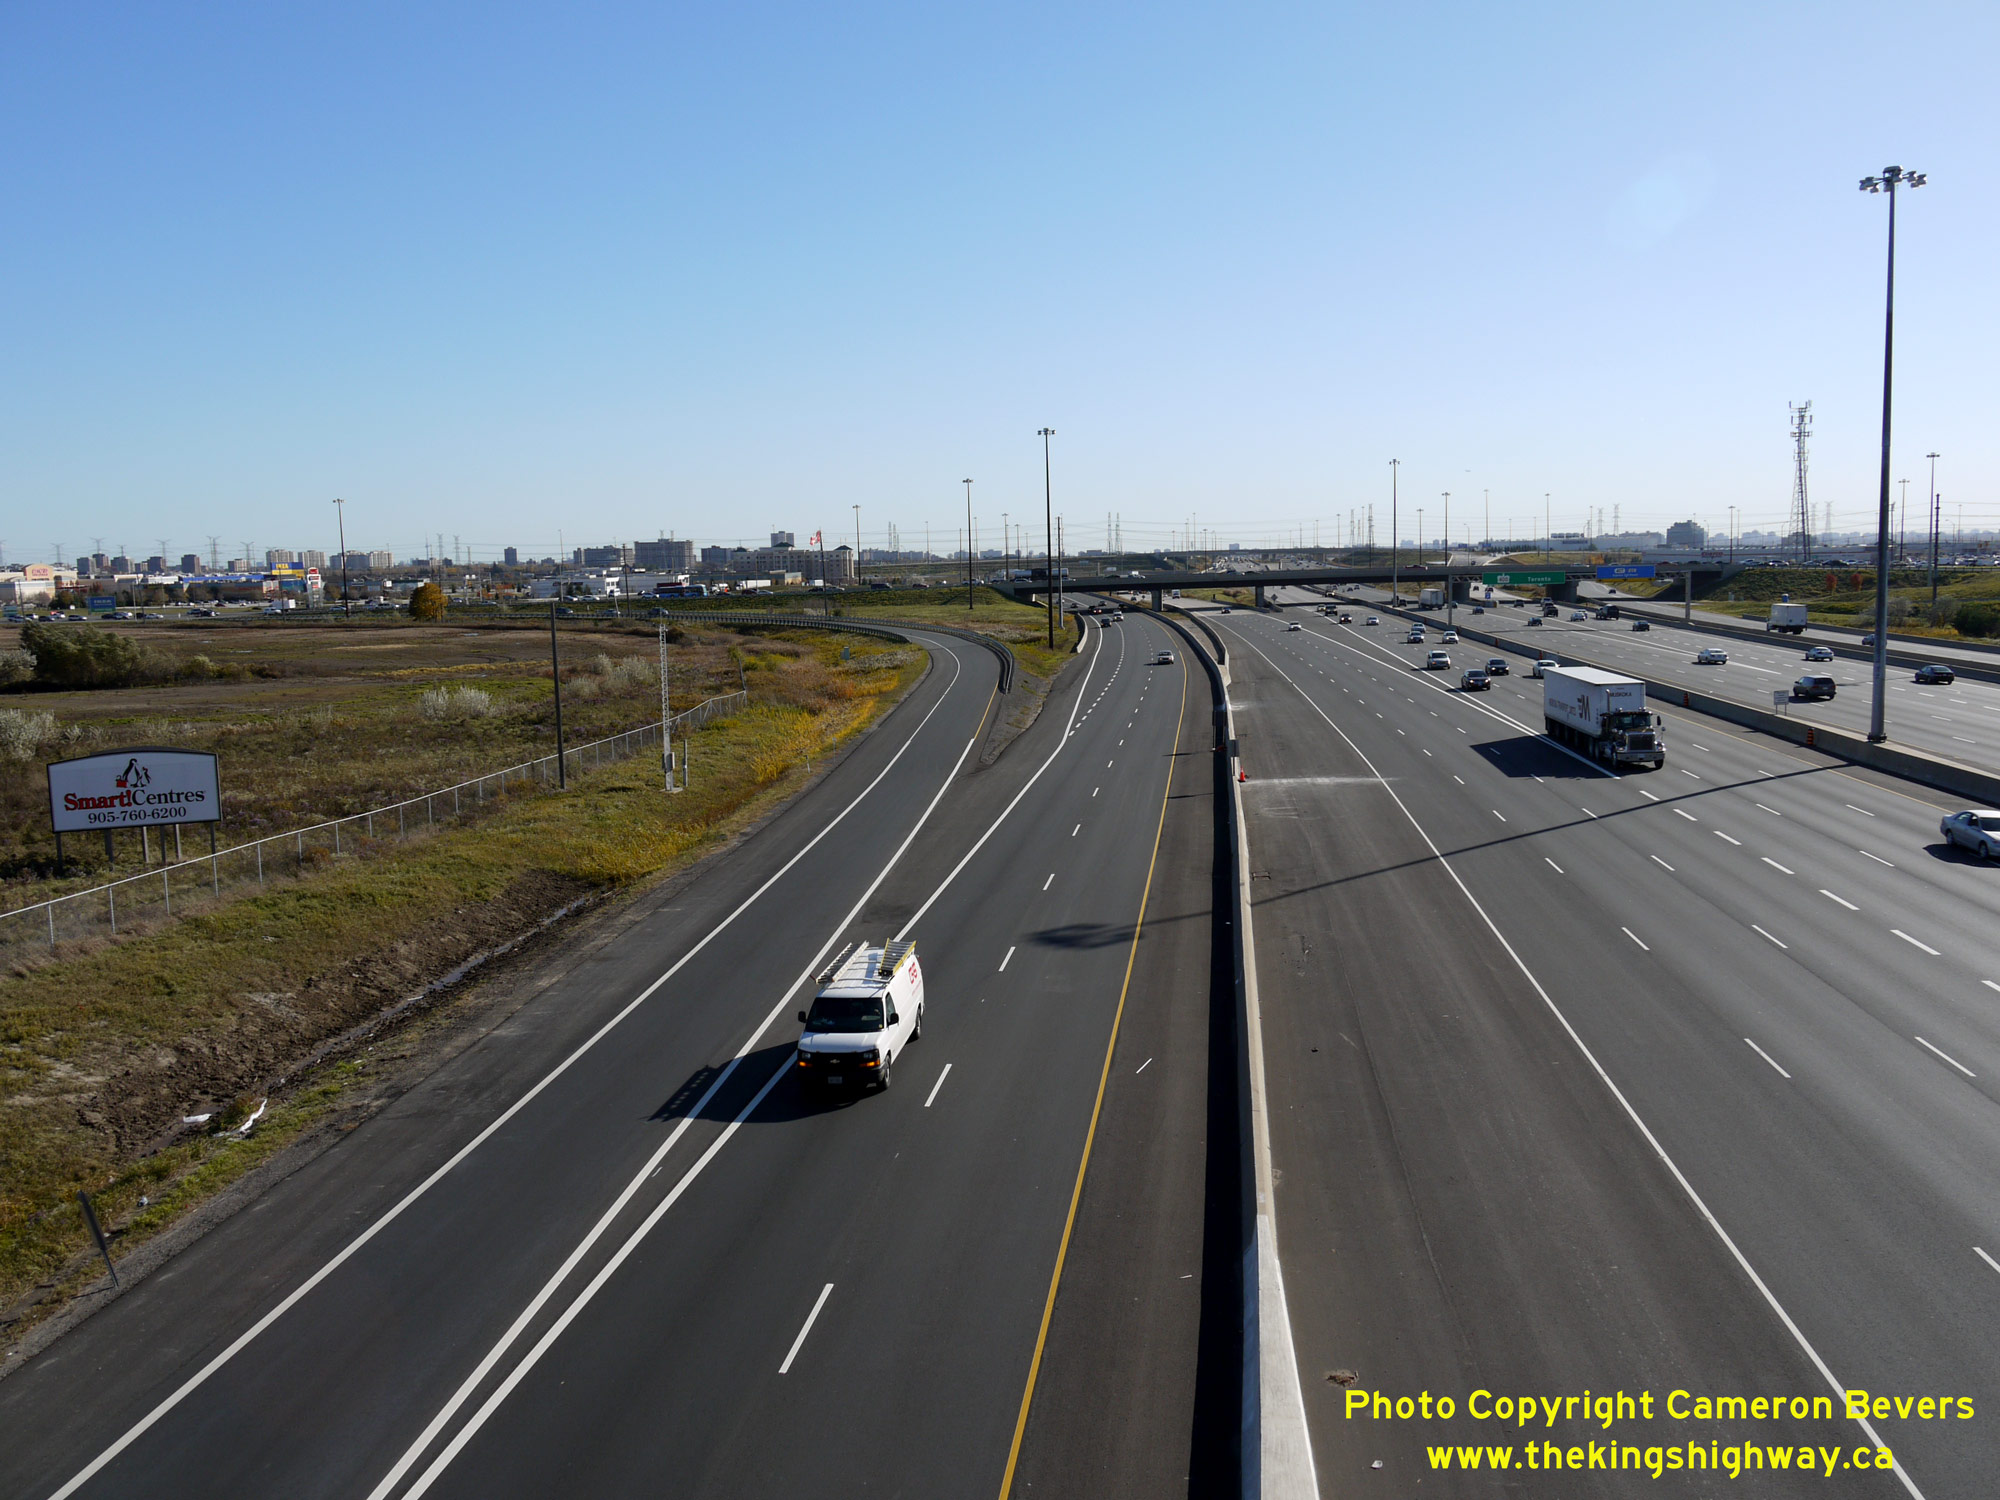
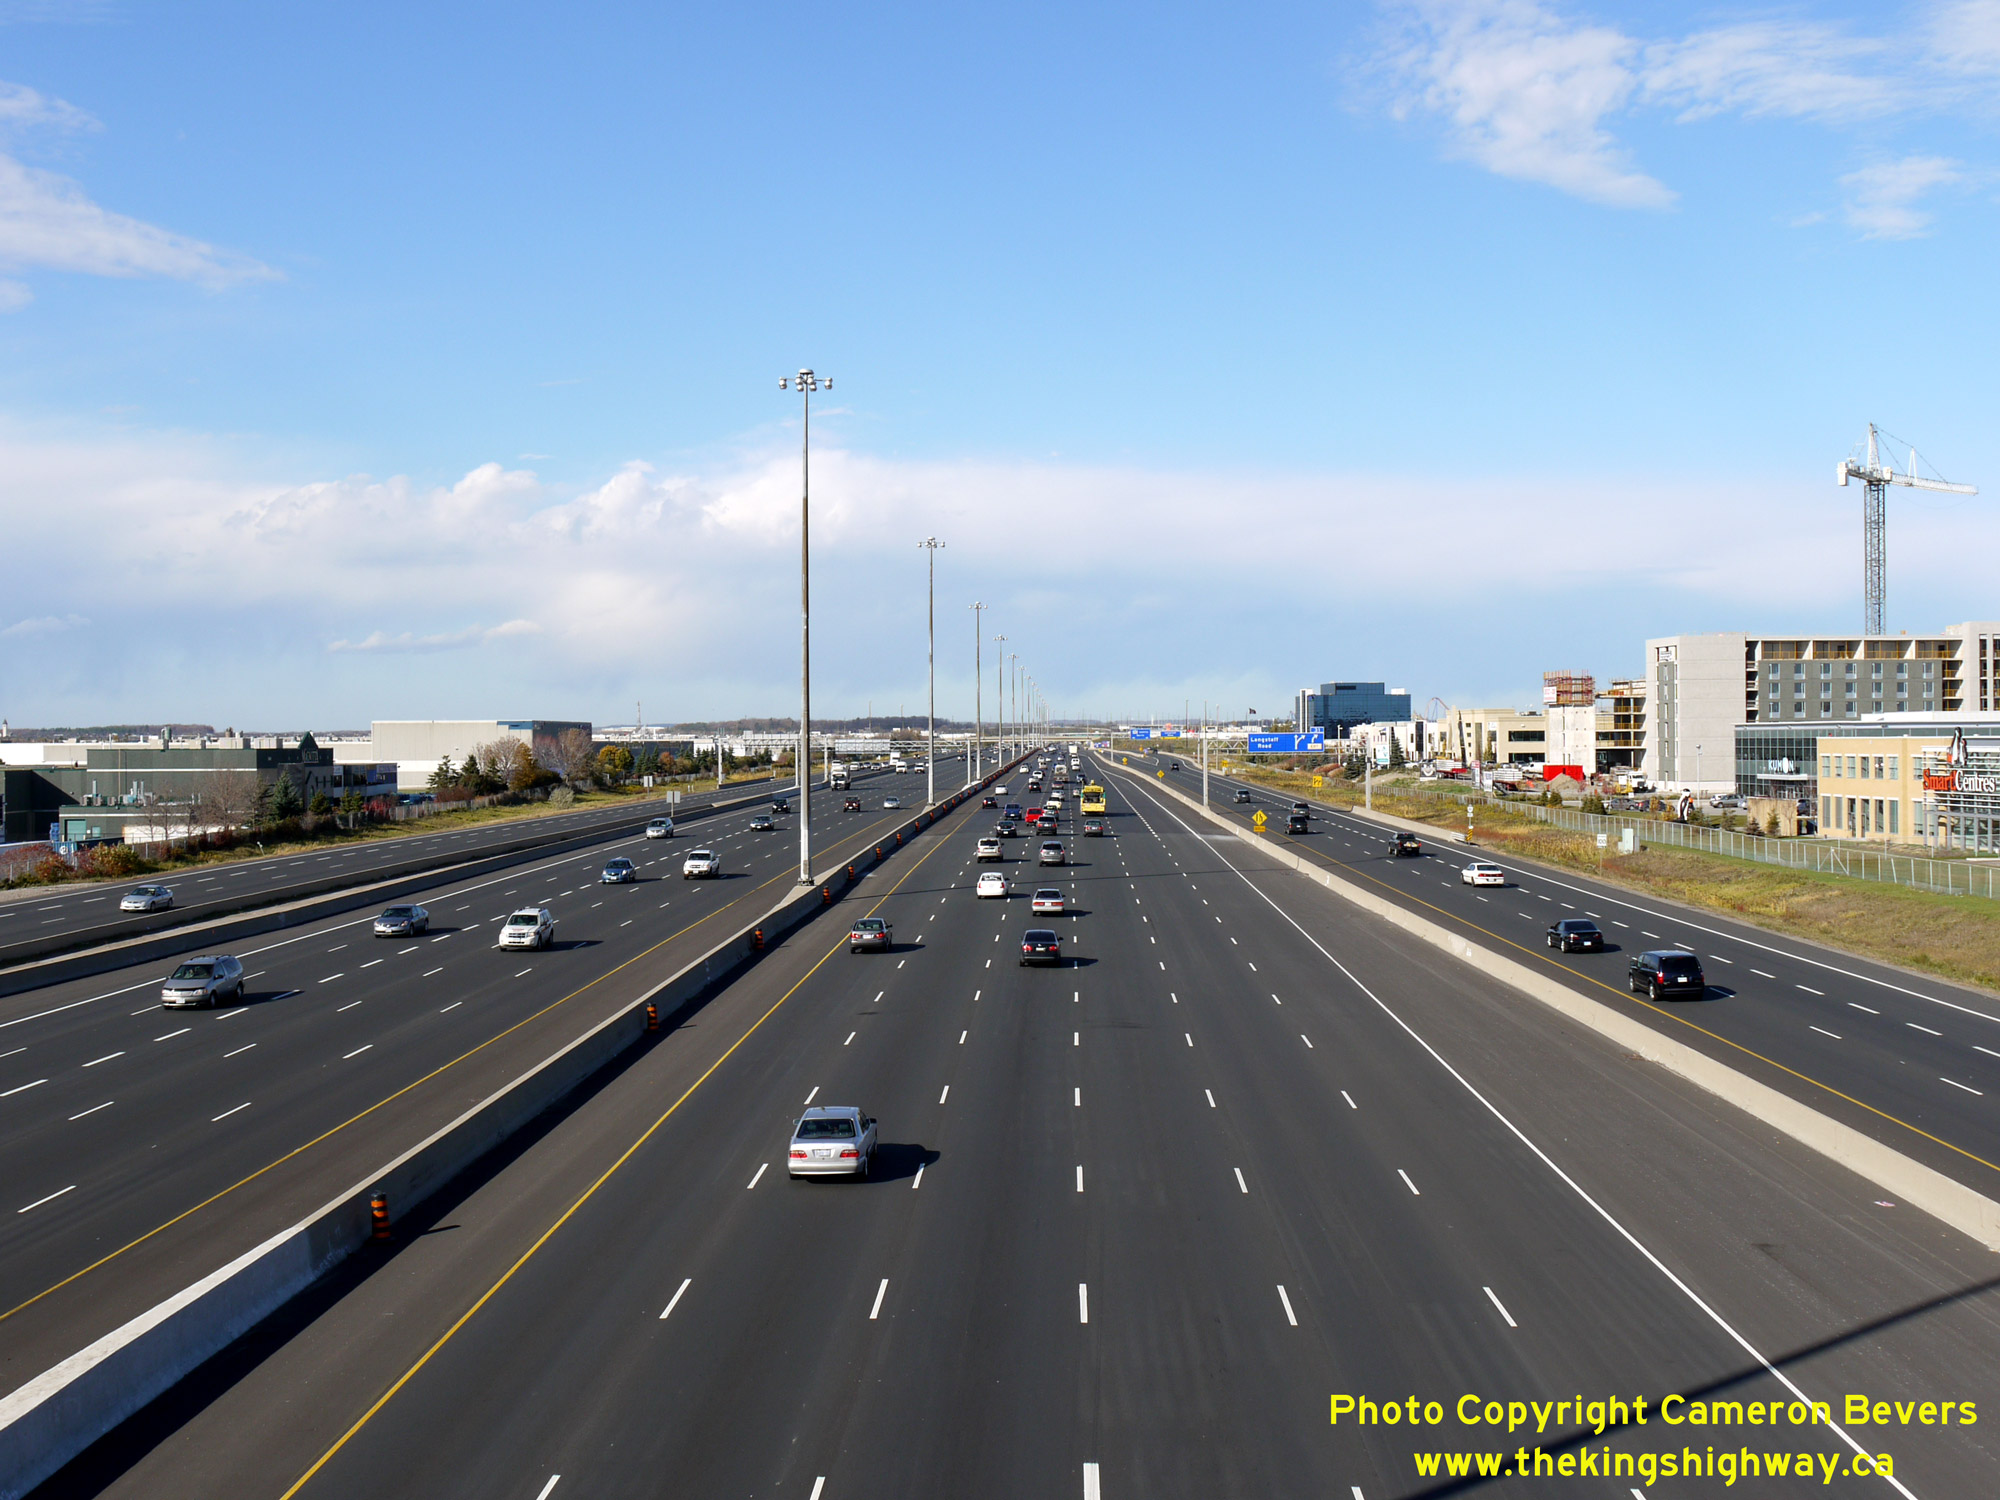
 Left - View of the northbound Hwy 400 Collector Lanes from the Portage Parkway Overpass in Vaughan, facing south towards the Hwy 7 Interchange. From this
vantage point, it is fairly clear why it was necessary to build an Express-Collector Lane System here. Due to the close proximity of the Hwy 7 and Hwy 407 ETR
Interchanges along Hwy 400, there would have been a total of 8 lanes heading northbound along Hwy 400 from these two interchanges, not including the two speed change
lanes from Hwy 7. As a highway's cross section gets wider, it becomes progressively more difficult to manage storm water runoff. By designing wide multi-lane freeways
in an Express-Collector Lane System, engineers are provided with additional opportunities to drain storm water away via underground drainage systems along the
barriers which separate the various roadways. Additionally, Express-Collector Lane Systems help to minimize traffic weaving near closely-spaced interchange
ramps. See an Enlarged Photo Here. Left - View of the northbound Hwy 400 Collector Lanes from the Portage Parkway Overpass in Vaughan, facing south towards the Hwy 7 Interchange. From this
vantage point, it is fairly clear why it was necessary to build an Express-Collector Lane System here. Due to the close proximity of the Hwy 7 and Hwy 407 ETR
Interchanges along Hwy 400, there would have been a total of 8 lanes heading northbound along Hwy 400 from these two interchanges, not including the two speed change
lanes from Hwy 7. As a highway's cross section gets wider, it becomes progressively more difficult to manage storm water runoff. By designing wide multi-lane freeways
in an Express-Collector Lane System, engineers are provided with additional opportunities to drain storm water away via underground drainage systems along the
barriers which separate the various roadways. Additionally, Express-Collector Lane Systems help to minimize traffic weaving near closely-spaced interchange
ramps. See an Enlarged Photo Here.(Photograph taken on October 27, 2010 - © Cameron Bevers) Right - Facing west across the new Portage Parkway Overpass across Hwy 400 in Vaughan, just prior to opening in 2010. See an
Enlarged Photo Here.(Photograph taken on October 27, 2010 - © Cameron Bevers) 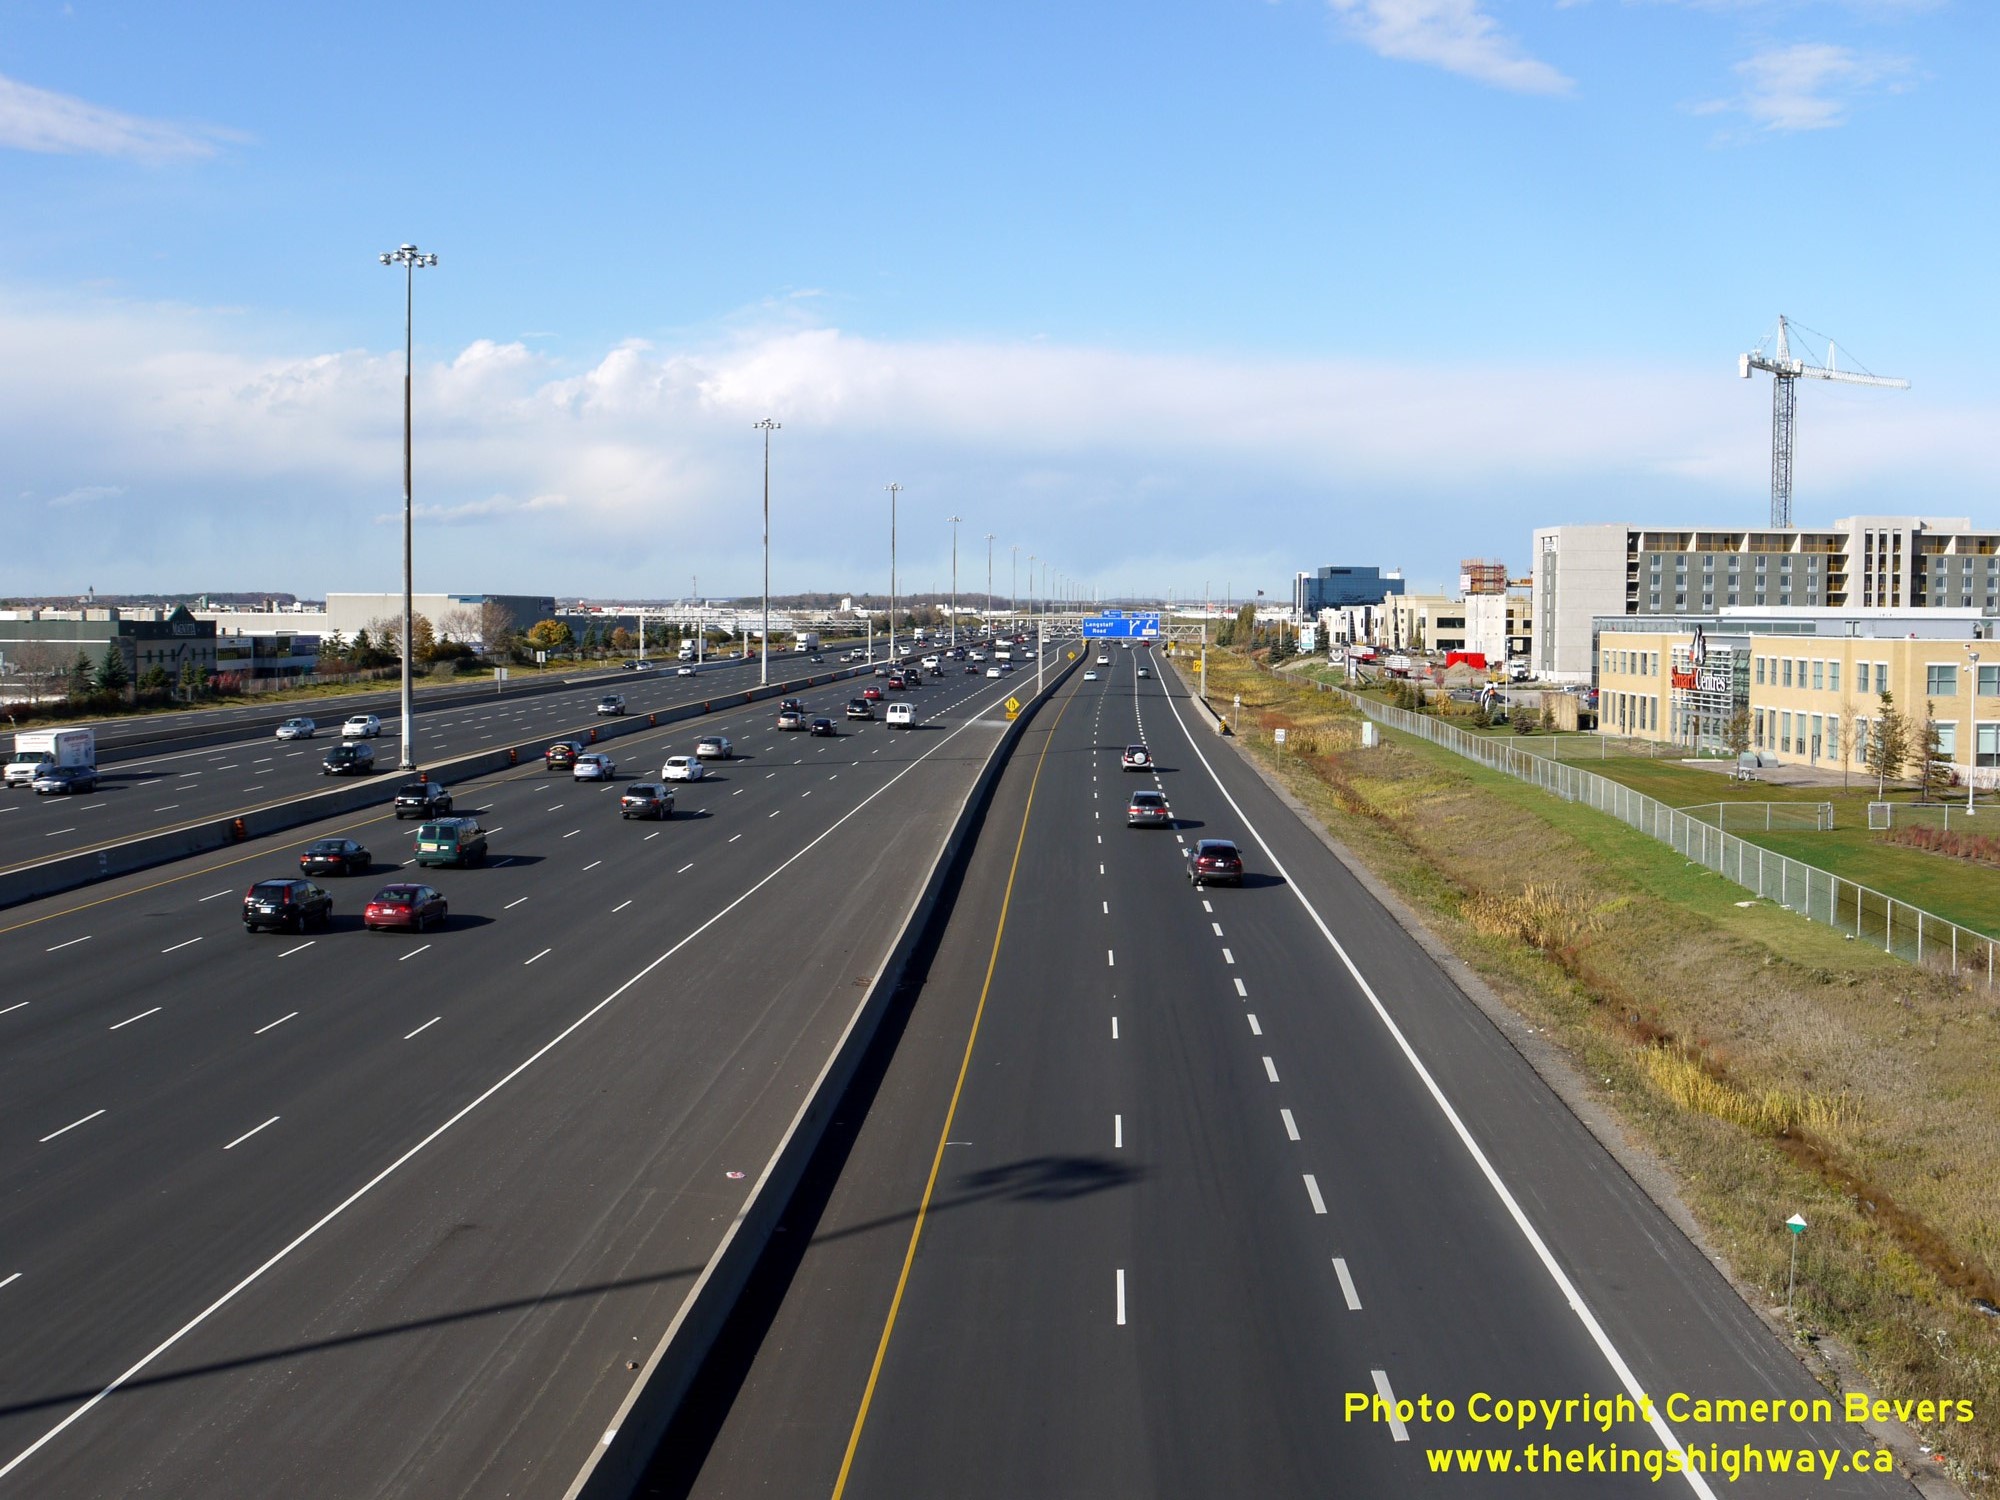
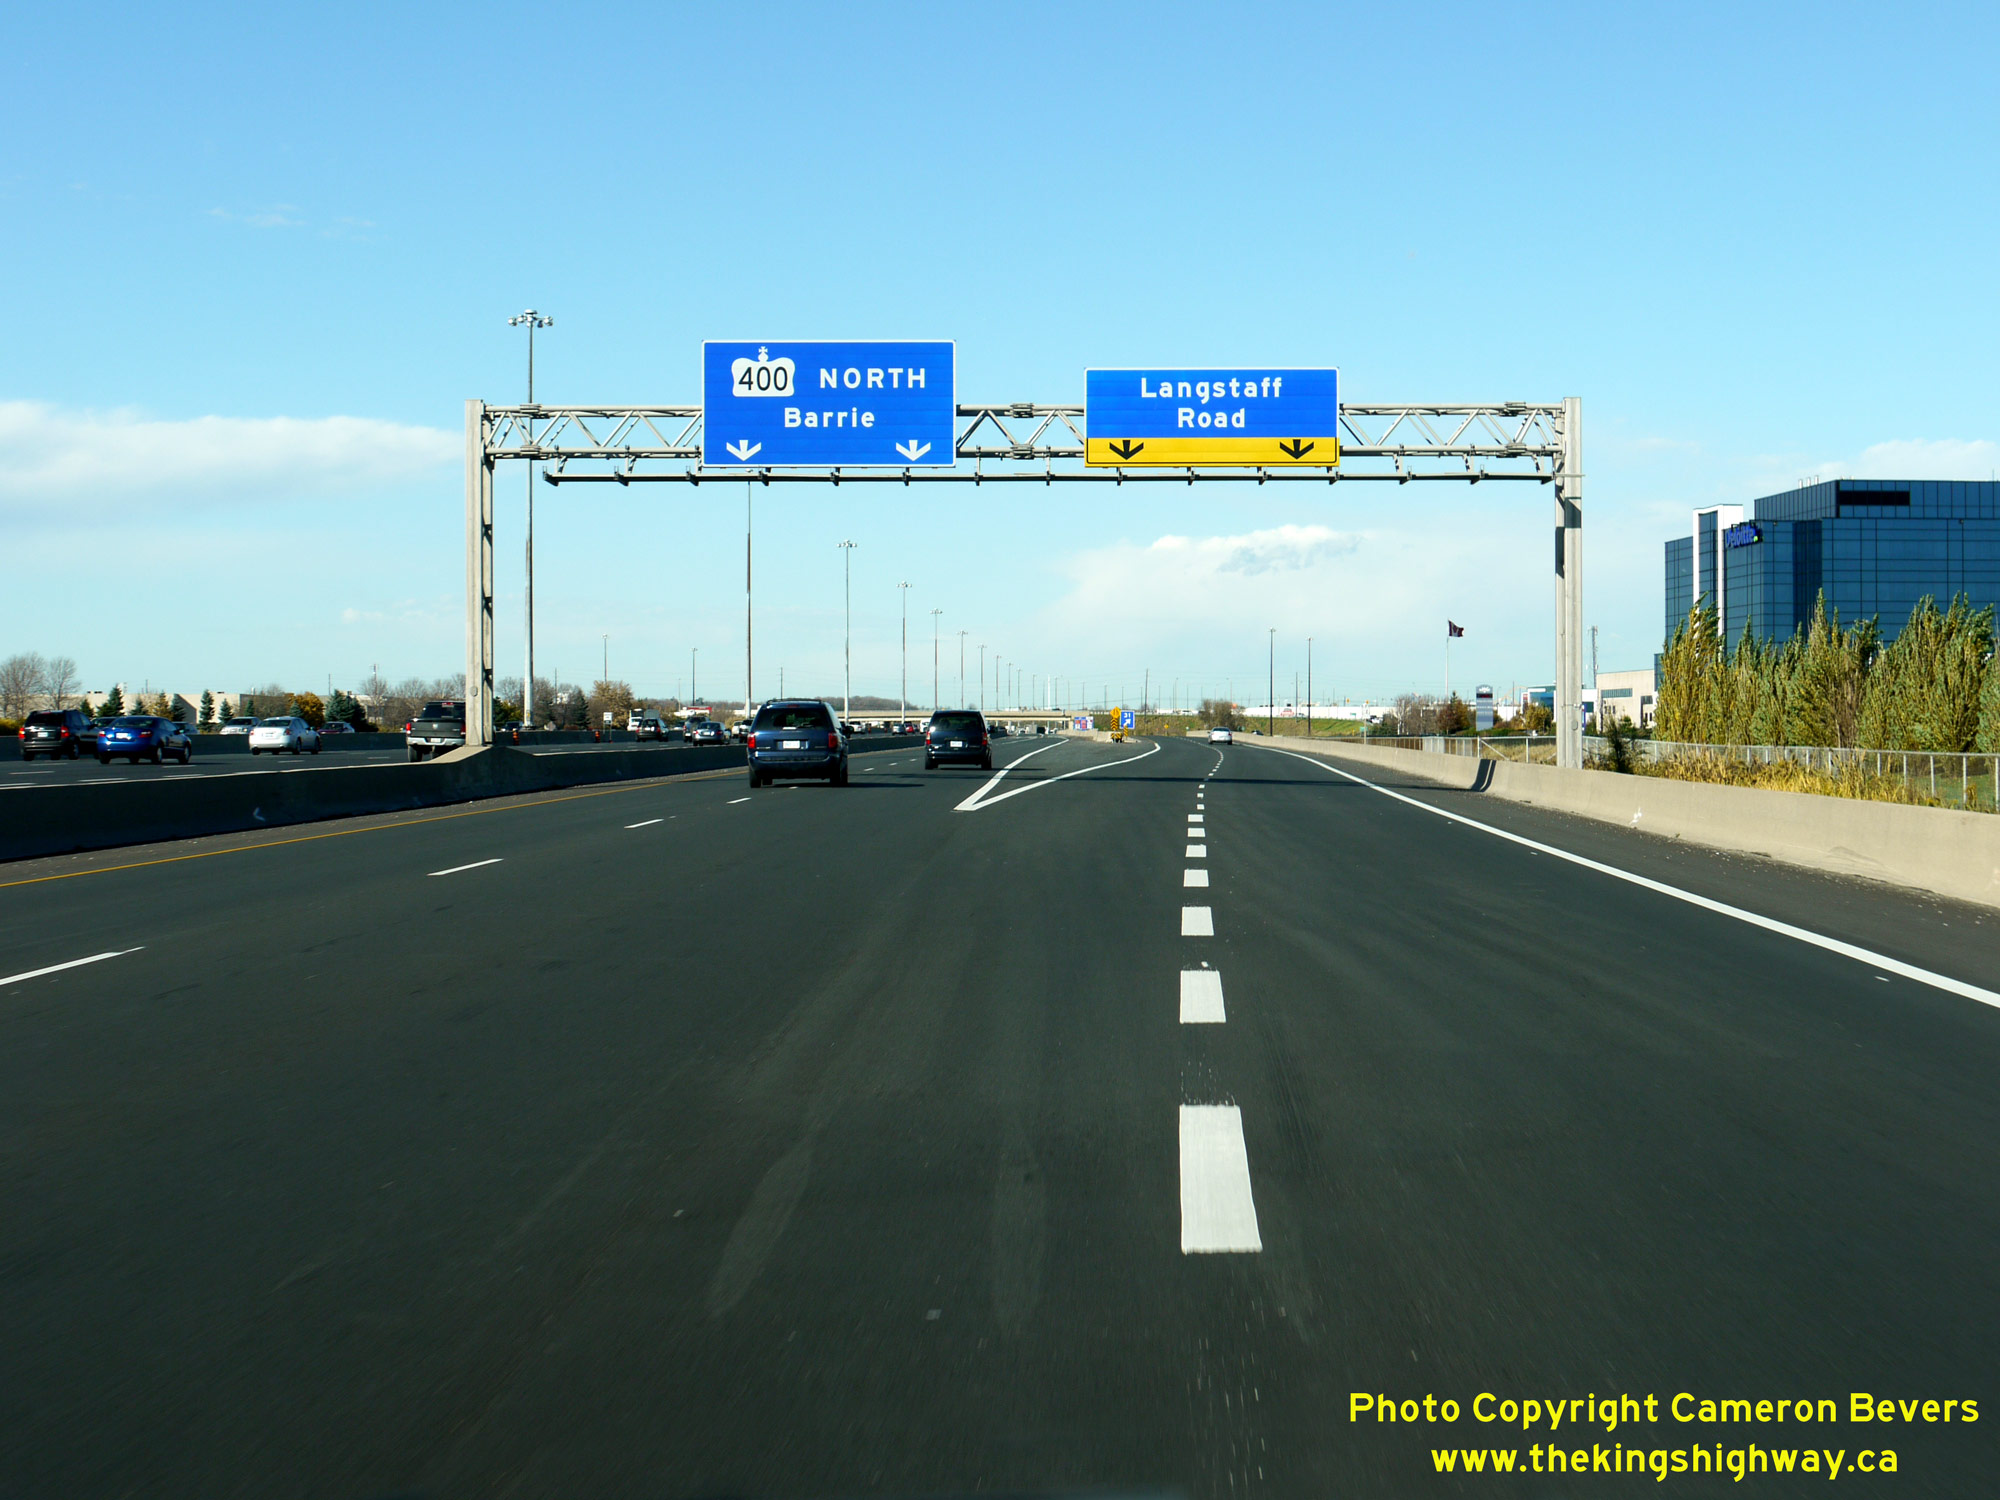
 Left - View of the northbound Hwy 400 Collector Lanes from the Portage Parkway Overpass, facing north towards the Langstaff Road Interchange. The northbound
Hwy 400 Collector Lanes collapse back into the Hwy 400 Express Lanes through the Langstaff Road Interchange. See an
Enlarged Photo Here. Left - View of the northbound Hwy 400 Collector Lanes from the Portage Parkway Overpass, facing north towards the Langstaff Road Interchange. The northbound
Hwy 400 Collector Lanes collapse back into the Hwy 400 Express Lanes through the Langstaff Road Interchange. See an
Enlarged Photo Here.(Photograph taken on October 27, 2010 - © Cameron Bevers) Right - Facing north along the northbound Hwy 400 Express Lanes from the Portage Parkway Overpass in Vaughan. With three northbound lanes coming from Toronto on
Hwy 400 and three lanes entering from the ramps from Hwy 407 ETR, a total of six northbound lanes continue underneath the Portage Parkway Overpass. At the time this
photo was taken in 2010, two of the lanes entering from Hwy 407 ETR dropped before Langstaff Road, while four lanes continued north towards Barrie. See an
Enlarged Photo Here.(Photograph taken on October 27, 2010 - © Cameron Bevers) 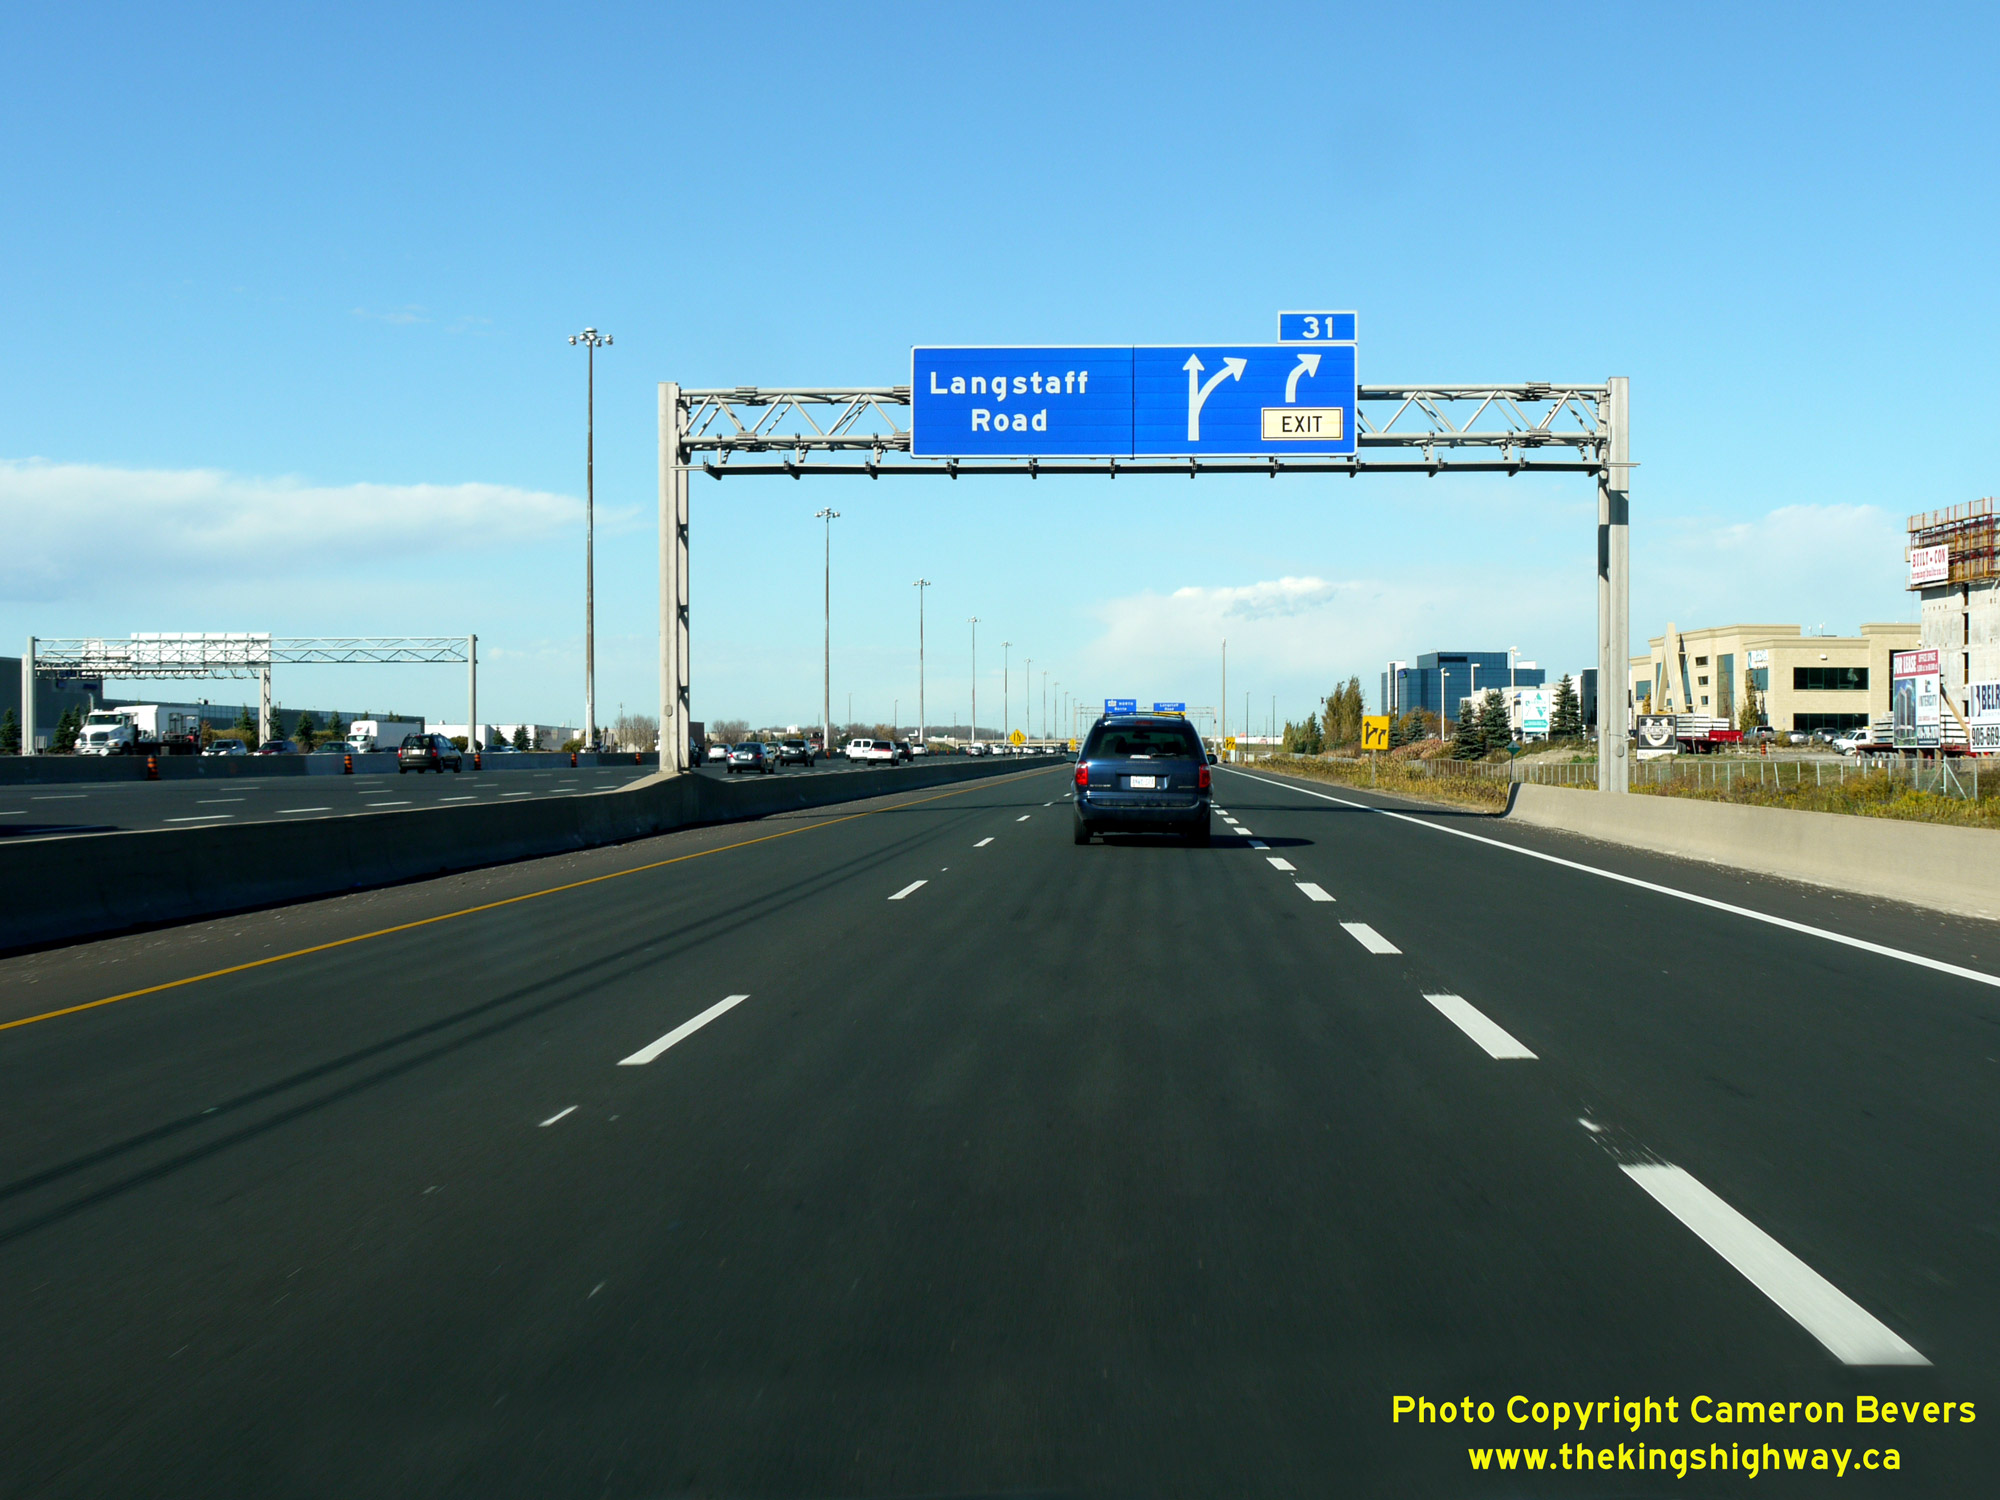
 Left - Overhead freeway guide sign approaching the Langstaff Road Interchange on the northbound Hwy 400 Collector Lanes. Like the signing along Ontario's other
complex freeway systems such as those on sections of Hwy 401 and Hwy 427, blue guide signs are used for the Hwy 400 Collector Lanes to distinguish them from the green
guide signs used in the Hwy 400 Express Lanes. See an Enlarged Photo Here. Left - Overhead freeway guide sign approaching the Langstaff Road Interchange on the northbound Hwy 400 Collector Lanes. Like the signing along Ontario's other
complex freeway systems such as those on sections of Hwy 401 and Hwy 427, blue guide signs are used for the Hwy 400 Collector Lanes to distinguish them from the green
guide signs used in the Hwy 400 Express Lanes. See an Enlarged Photo Here.(Photograph taken on October 27, 2010 - © Cameron Bevers) Right - Overhead freeway guide signs at the end of the northbound Hwy 400 Collector Lanes at the Langstaff Road Interchange. Beyond the exit ramp to Langstaff
Road, the Hwy 400 Collector Lanes collapse into the Hwy 400 Express Lanes which brings the complex freeway system to an end. See an
Enlarged Photo Here.(Photograph taken on October 27, 2010 - © Cameron Bevers) 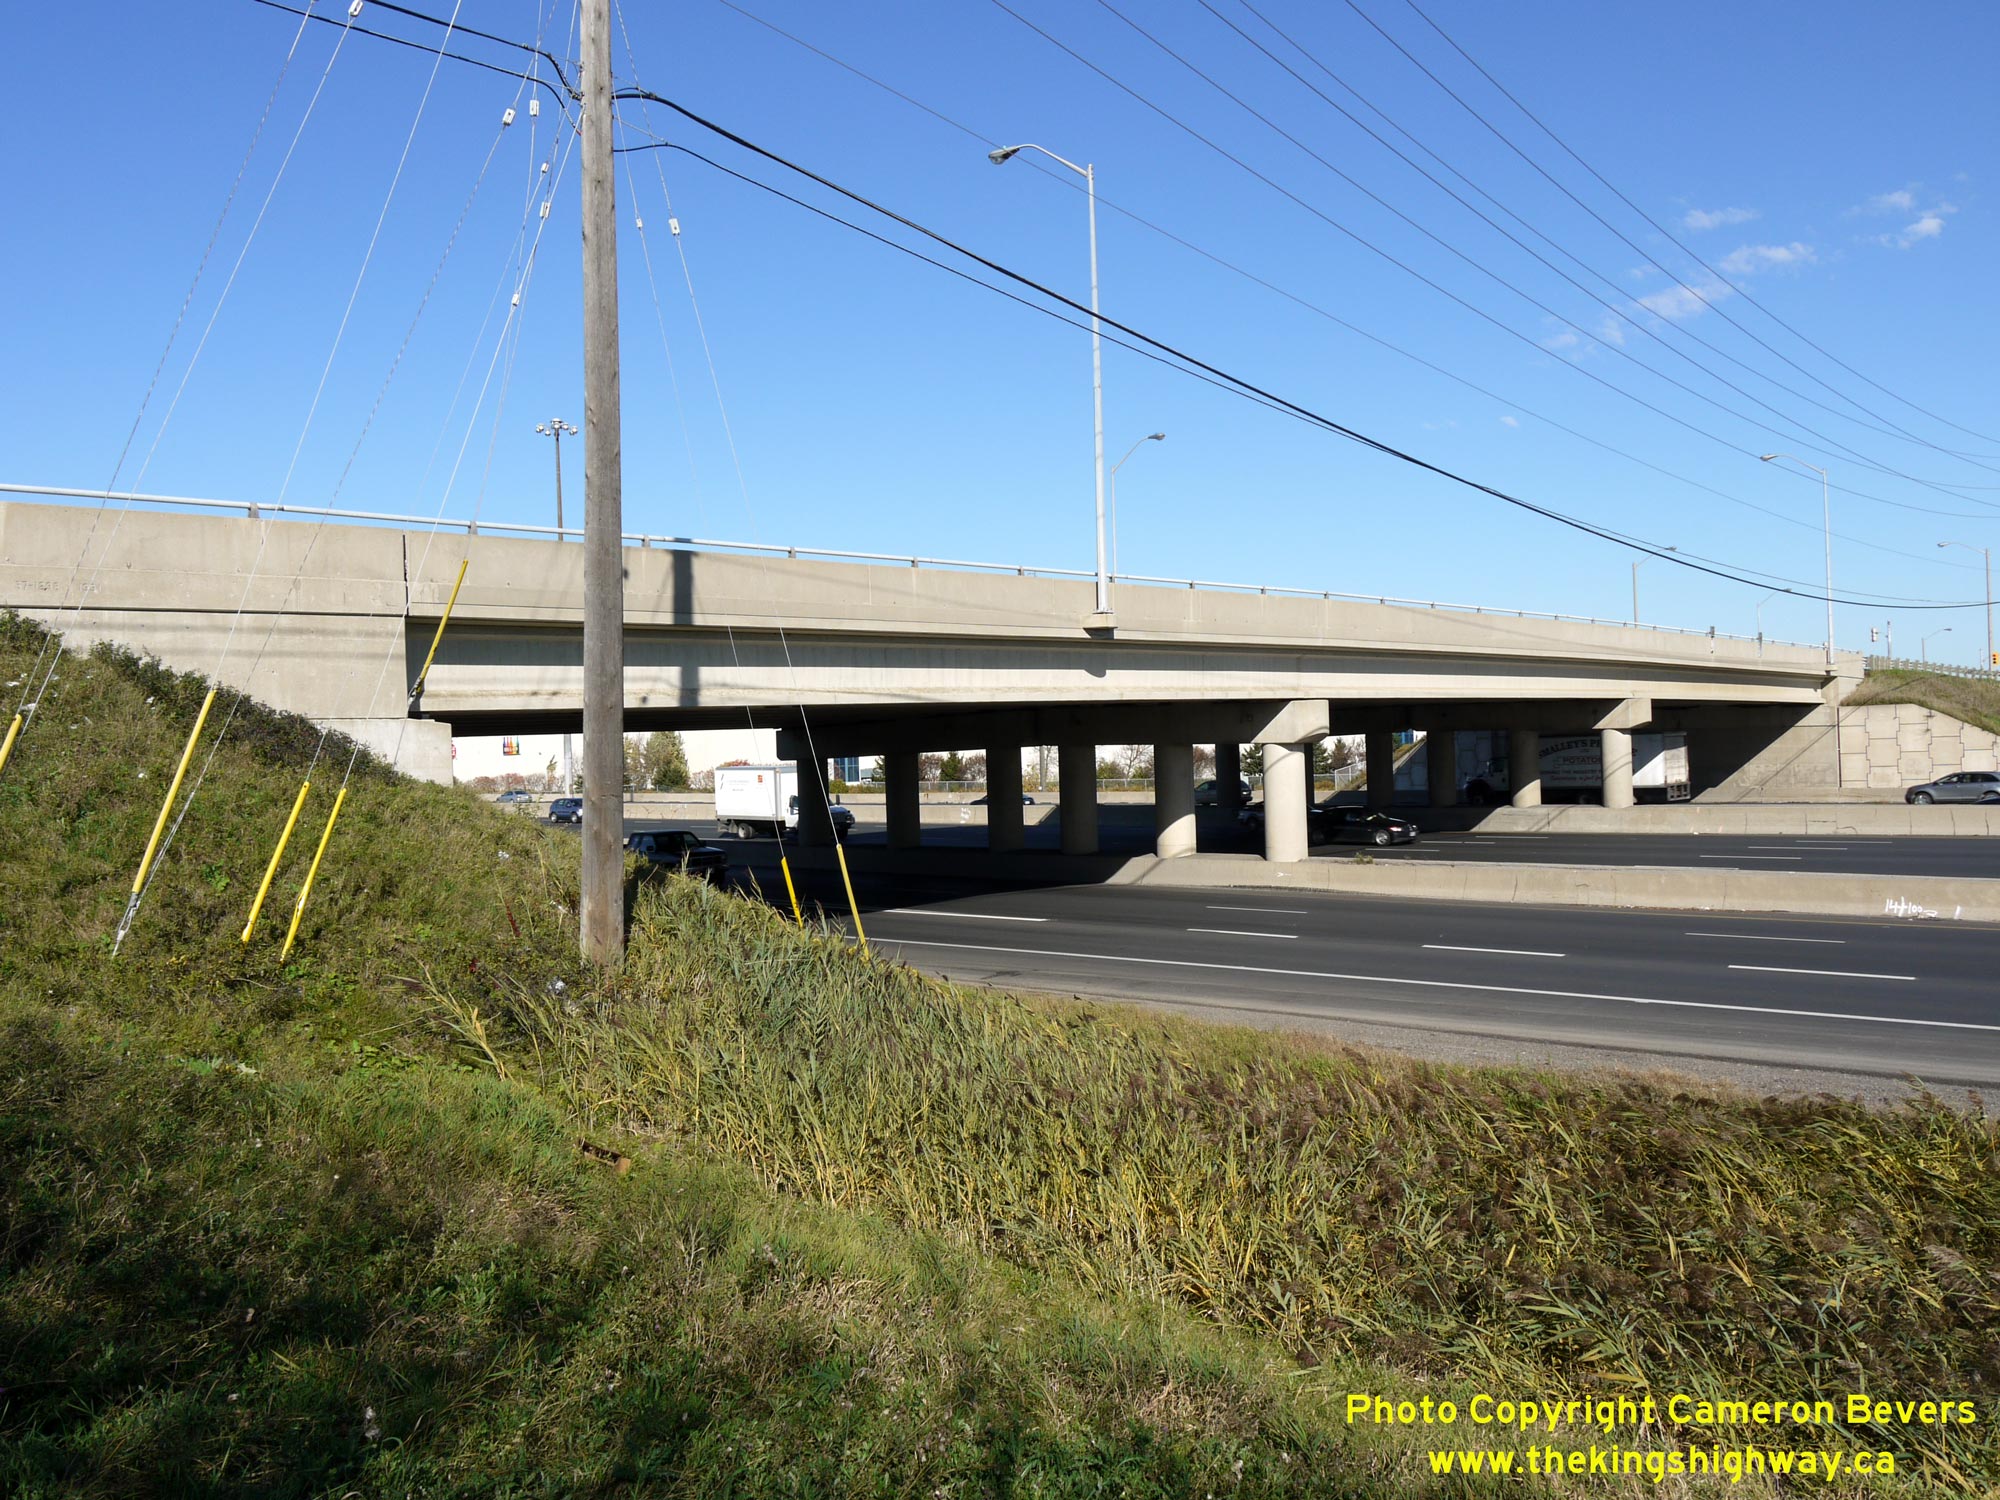
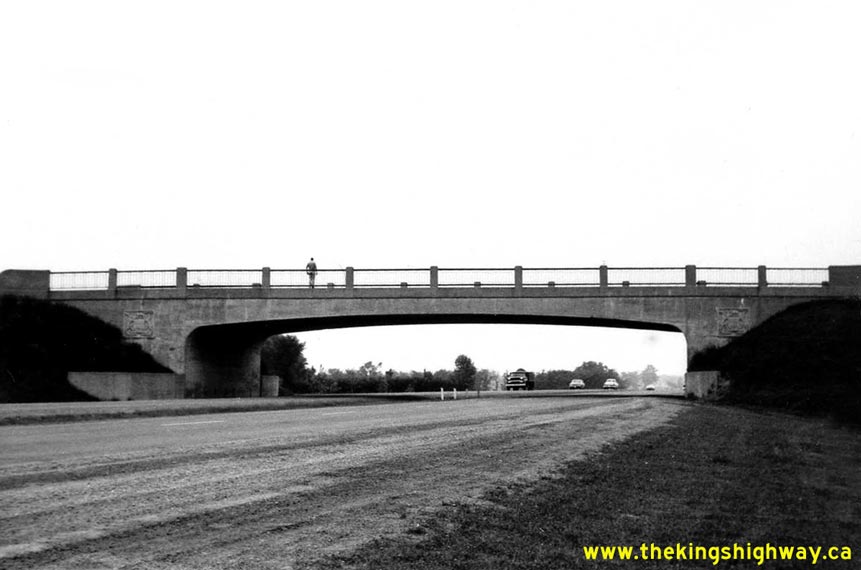
 Left - Langstaff Road Overpass on Hwy 400 in Vaughan. This three-span concrete girder structure was completed in 1991. When the Toronto-Barrie Highway
(Hwy 400) was first built in the late 1940s and early 1950s, there were no roads crossing the dual highway between Hwy 7 and the Richvale Sideroad (today's Rutherford
Road). As industrial parks were built alongside Hwy 400 in the late 1980s and early 1990s, Langstaff Road was extended westerly across Hwy 400 and a new partial
interchange with south-oriented ramps was constructed. See an Enlarged Photo Here. Left - Langstaff Road Overpass on Hwy 400 in Vaughan. This three-span concrete girder structure was completed in 1991. When the Toronto-Barrie Highway
(Hwy 400) was first built in the late 1940s and early 1950s, there were no roads crossing the dual highway between Hwy 7 and the Richvale Sideroad (today's Rutherford
Road). As industrial parks were built alongside Hwy 400 in the late 1980s and early 1990s, Langstaff Road was extended westerly across Hwy 400 and a new partial
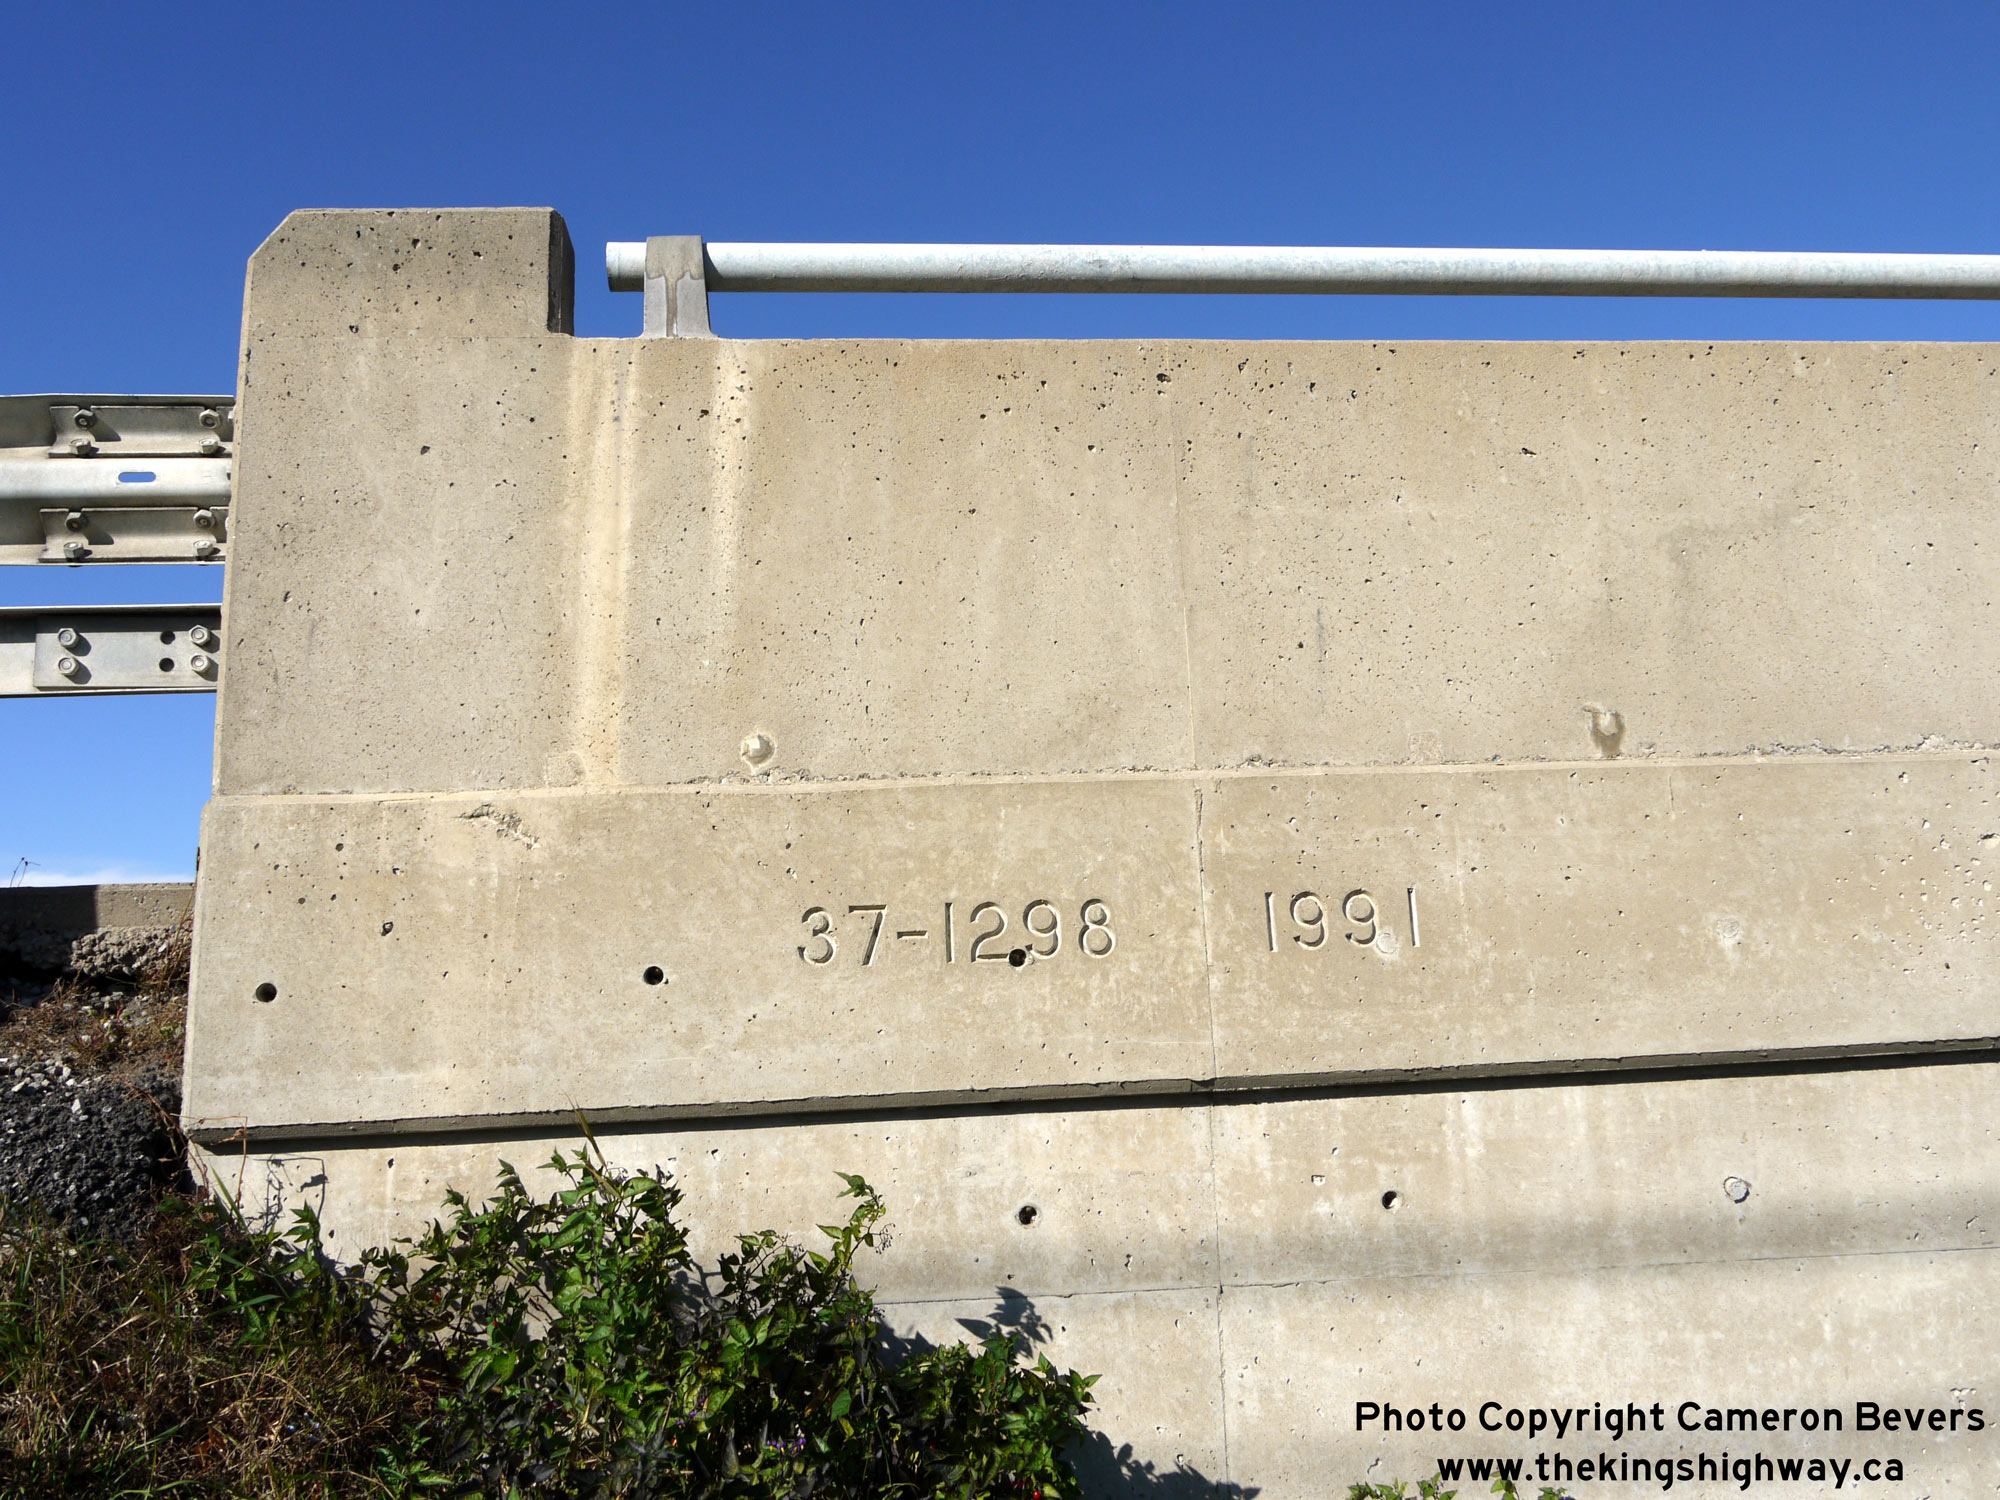
interchange with south-oriented ramps was constructed. See an Enlarged Photo Here.(Photograph taken on October 27, 2010 - © Cameron Bevers) Right - Structure identification number (Site #37-1298) and date stamp (1991) on the Langstaff Road Overpass on Hwy 400 in Vaughan. See an
Enlarged Photo Here.(Photograph taken on October 27, 2010 - © Cameron Bevers) 
 Left - Facing south along the southbound Hwy 400 Collector Lanes from the Langstaff Road Overpass in Vaughan. The southbound Hwy 400 Collector Lanes have two
basic through lanes with a continuous auxiliary lane from the eastbound-to-southbound ramp (W-S Ramp) from the Langstaff Road Interchange southerly to the adjacent
Hwy 7 Interchange. See an Enlarged Photo Here. Left - Facing south along the southbound Hwy 400 Collector Lanes from the Langstaff Road Overpass in Vaughan. The southbound Hwy 400 Collector Lanes have two
basic through lanes with a continuous auxiliary lane from the eastbound-to-southbound ramp (W-S Ramp) from the Langstaff Road Interchange southerly to the adjacent
Hwy 7 Interchange. See an Enlarged Photo Here.(Photograph taken on October 27, 2010 - © Cameron Bevers) Right - Facing south along Hwy 400 from the Langstaff Road Overpass in Vaughan. Note that the northbound Hwy 400 Collector Lanes at left collapse just before
the overpass. The southbound Hwy 400 Collector Lanes develop upstream of Langstaff Road. See an
Enlarged Photo Here.(Photograph taken on October 27, 2010 - © Cameron Bevers) 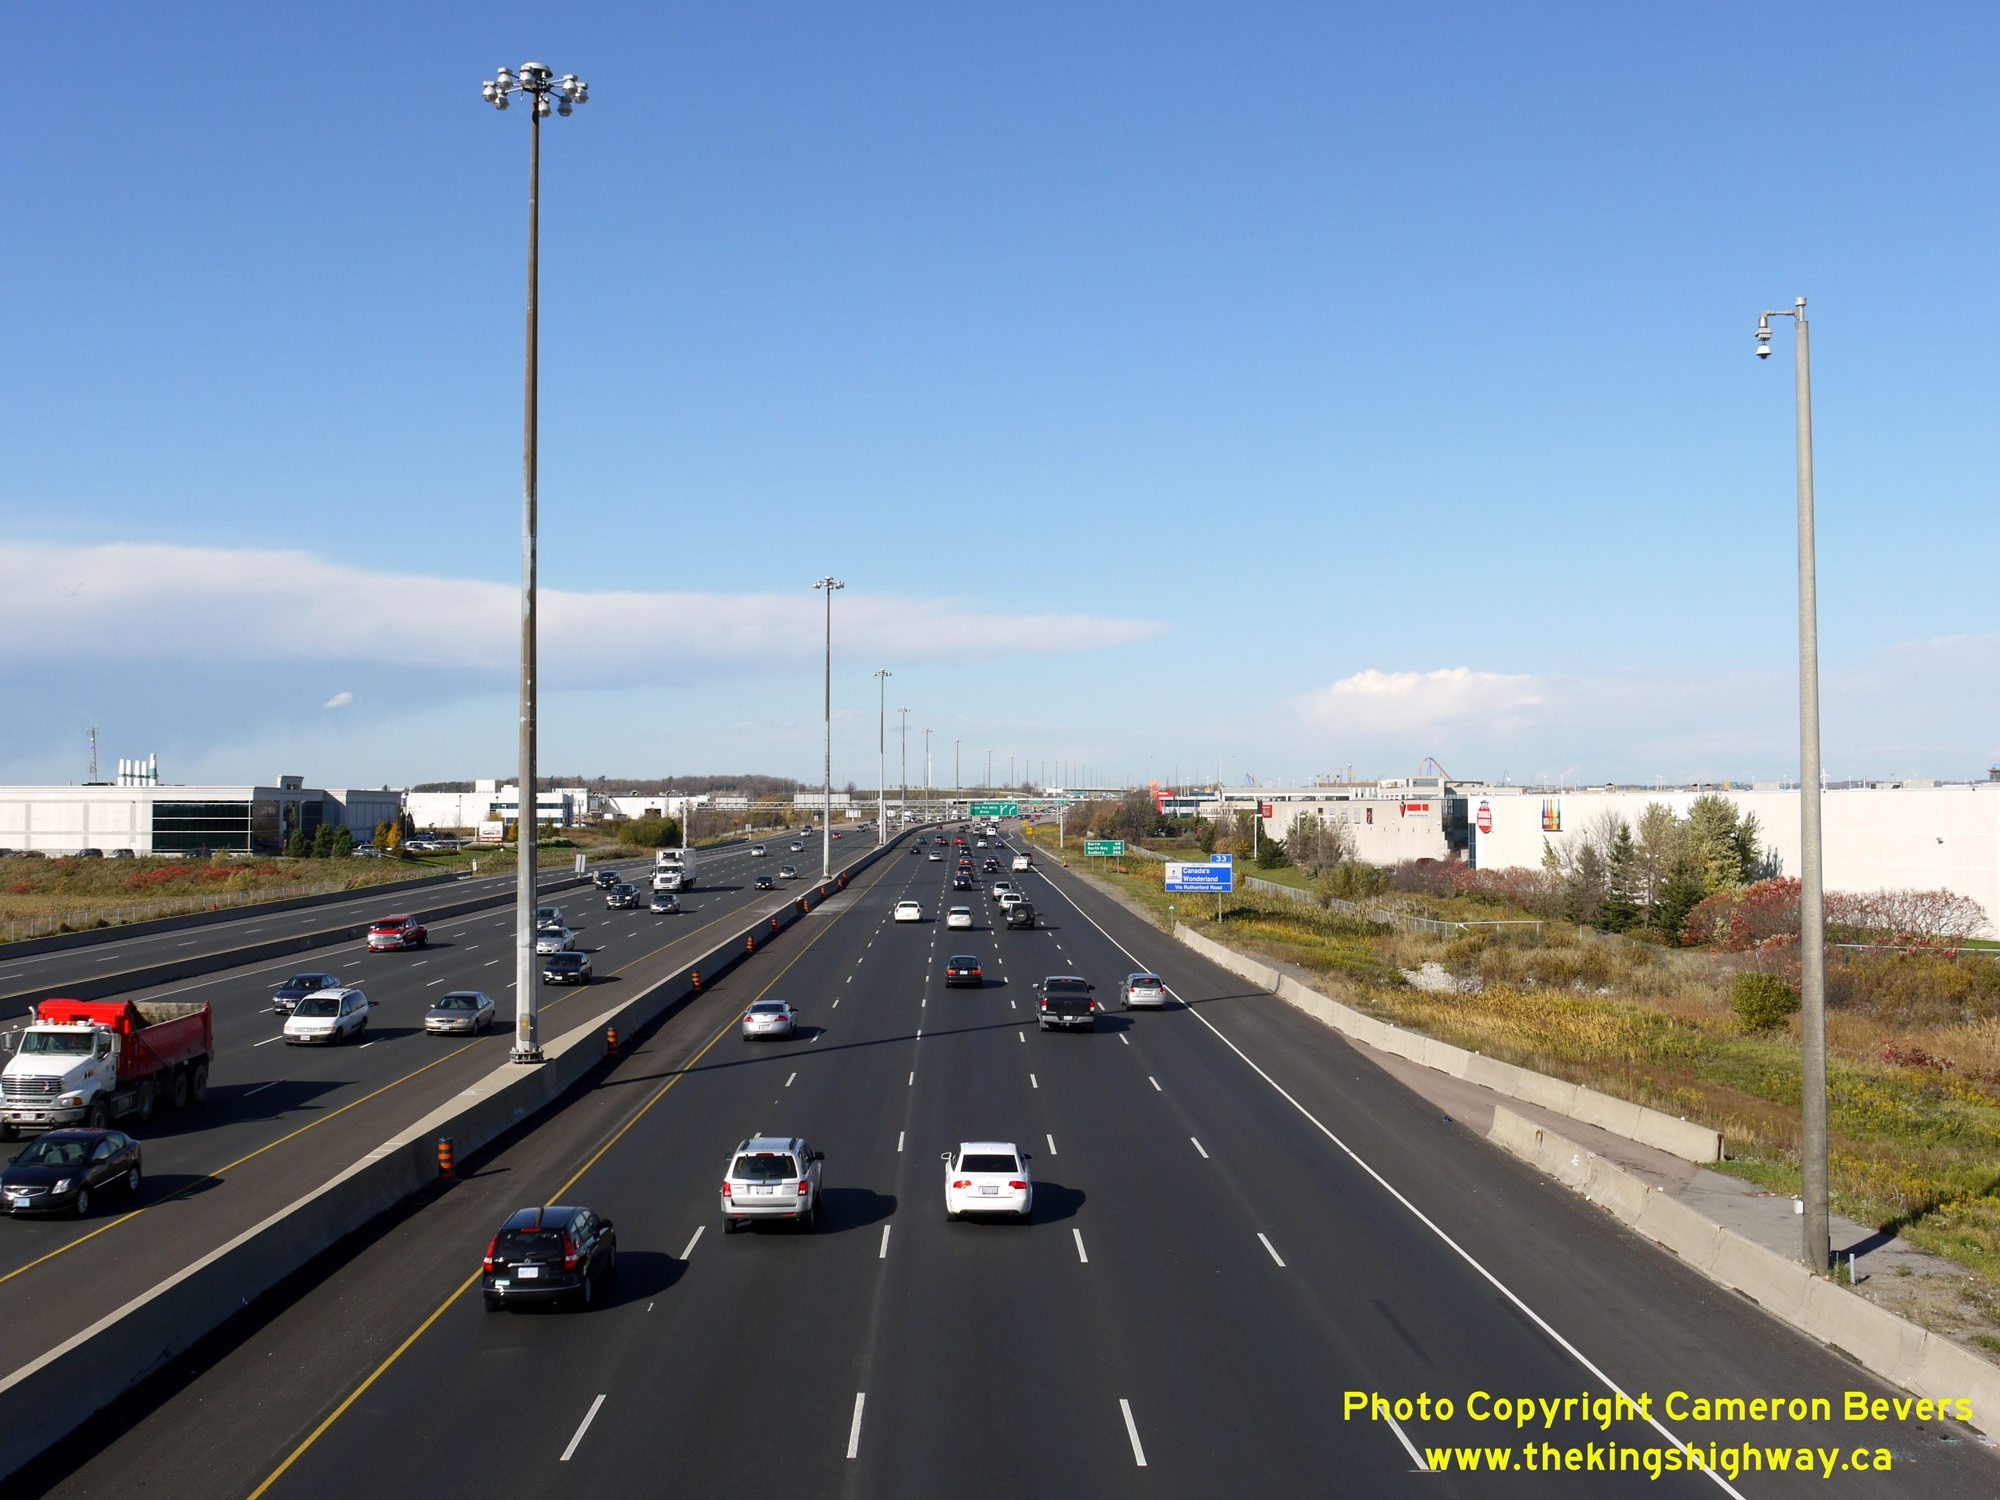
 Left - Facing north along the northbound lanes of Hwy 400 from the Langstaff Road Overpass in Vaughan. The northbound Express-Collector Lane System has just
ended at this point. As part of the construction of the Hwy 400 Express-Collector Lane System through Vaughan under Contract #1993-72, a fourth northbound lane was
carried through from the vicinity of Langstaff Road northerly up to Rutherford Road, rather than the three lanes which existed here previously. Under a subsequent
highway widening which took place under Contract #2000-0027, a fifth lane was carried through from Langstaff Road up to Rutherford Road. At the time of writing in
March 2026, High Occupancy Vehicle (HOV) carpool lanes are being constructed along Hwy 400 between the Langstaff Road Interchange and the Major Mackenzie Drive
Interchange, under Contract #2024-2010. See an Enlarged Photo Here. Left - Facing north along the northbound lanes of Hwy 400 from the Langstaff Road Overpass in Vaughan. The northbound Express-Collector Lane System has just
ended at this point. As part of the construction of the Hwy 400 Express-Collector Lane System through Vaughan under Contract #1993-72, a fourth northbound lane was
carried through from the vicinity of Langstaff Road northerly up to Rutherford Road, rather than the three lanes which existed here previously. Under a subsequent
highway widening which took place under Contract #2000-0027, a fifth lane was carried through from Langstaff Road up to Rutherford Road. At the time of writing in
March 2026, High Occupancy Vehicle (HOV) carpool lanes are being constructed along Hwy 400 between the Langstaff Road Interchange and the Major Mackenzie Drive
Interchange, under Contract #2024-2010. See an Enlarged Photo Here.(Photograph taken on October 27, 2010 - © Cameron Bevers) Right - Facing north along the southbound Hwy 400 Express Lanes from the Langstaff Road Overpass. The southbound Express-Collector Lane System begins just
ahead. In the southbound direction, only those motorists wishing to exit to Hwy 7 must use the Hwy 400 Collector Lanes. Toronto-bound through traffic may also use the
Hwy 400 Collector Lanes in order to continue south into the city. All interchanges other than Hwy 7 can be accessed from the Hwy 400 Express Lanes in the southbound
direction. See an Enlarged Photo Here.(Photograph taken on October 27, 2010 - © Cameron Bevers) 
 Left - Facing north along Hwy 400 towards Barrie from the Rutherford Road Overpass in Vaughan. Note Canada's Wonderland at right, which is the Greater Toronto
Area's largest amusement park. The existence of an interchange at Rutherford Road is largely owed to the construction of Canada's Wonderland. When Hwy 400 was first
built in the 1940s and early 1950s, there was no interchange at the Richvale Sideroad (today's Rutherford Road). Under Contract #1979-100, a partial two-ramp
interchange was built at Rutherford Road to service the proposed park. The new interchange was completed in 1980, just prior to the official opening of Canada's
Wonderland in May 1981. The Rutherford Road Interchange was expanded to an "all-moves" interchange during the 1990s. All missing interchange ramps except the
southbound Hwy 400 exit ramp to Rutherford Road were constructed under Contract #1992-78. Construction of the southbound exit ramp had to be deferred as it was first
necessary to relocate the Maple Truck Scales, which once existed along the southbound lanes of Hwy 400 south of Major Mackenzie Drive. The Maple Truck Scales were
closed and demolished under Contract #1995-13. The new southbound exit ramp to Rutherford Road was constructed after the Maple Truck Scales were removed, thus
completing the interchange. See an Enlarged Photo Here. Left - Facing north along Hwy 400 towards Barrie from the Rutherford Road Overpass in Vaughan. Note Canada's Wonderland at right, which is the Greater Toronto
Area's largest amusement park. The existence of an interchange at Rutherford Road is largely owed to the construction of Canada's Wonderland. When Hwy 400 was first
built in the 1940s and early 1950s, there was no interchange at the Richvale Sideroad (today's Rutherford Road). Under Contract #1979-100, a partial two-ramp
interchange was built at Rutherford Road to service the proposed park. The new interchange was completed in 1980, just prior to the official opening of Canada's
Wonderland in May 1981. The Rutherford Road Interchange was expanded to an "all-moves" interchange during the 1990s. All missing interchange ramps except the
southbound Hwy 400 exit ramp to Rutherford Road were constructed under Contract #1992-78. Construction of the southbound exit ramp had to be deferred as it was first
necessary to relocate the Maple Truck Scales, which once existed along the southbound lanes of Hwy 400 south of Major Mackenzie Drive. The Maple Truck Scales were
closed and demolished under Contract #1995-13. The new southbound exit ramp to Rutherford Road was constructed after the Maple Truck Scales were removed, thus
completing the interchange. See an Enlarged Photo Here.(Photograph taken on October 27, 2010 - © Cameron Bevers) Right - Structure identification number (Site #37-127) and date stamp (1992) on the Rutherford Road Overpass on Hwy 400. The new Rutherford Road Interchange
and overpass structure were built under Contract #1992-78. However, due to the complex construction staging required to build the new Rutherford Road Interchange, the
new structure wasn't fully opened to traffic until 1994. See an Enlarged Photo Here.(Photograph taken on October 27, 2010 - © Cameron Bevers) 
 Left - Southern side of the Rutherford Road Overpass on Hwy 400 in Vaughan. This bridge is a two-span trapezoidal steel box girder structure, which was built
on a slightly curved alignment. The bridge had to be built this way in order to keep the original Rutherford Road Bridge open to traffic throughout construction. The
new Rutherford Road Overpass was built entirely offline to the north of the original structure, and wasn't put into service until fairly late in the construction
project. The old Rutherford Road Bridge, seen here in this Historical 1962 Photo, was
demolished in June 1994. See an Enlarged Photo Here. Left - Southern side of the Rutherford Road Overpass on Hwy 400 in Vaughan. This bridge is a two-span trapezoidal steel box girder structure, which was built
on a slightly curved alignment. The bridge had to be built this way in order to keep the original Rutherford Road Bridge open to traffic throughout construction. The
new Rutherford Road Overpass was built entirely offline to the north of the original structure, and wasn't put into service until fairly late in the construction
project. The old Rutherford Road Bridge, seen here in this Historical 1962 Photo, was
demolished in June 1994. See an Enlarged Photo Here.(Photograph taken on October 27, 2010 - © Cameron Bevers) Right - Facing south along Hwy 400 towards Toronto from the Rutherford Road Overpass in Vaughan. The section of Hwy 400 through this interchange has been
widened multiple times since the highway was initially opened to traffic in the early 1950s. As originally constructed, Hwy 400 had dual two-lane carriageways
separated by a depressed grass median. The highway was expanded from four to six lanes between Finch Avenue and Major Mackenzie Drive in the early 1970s under
Contract #1971-14, by filling in the centre grass median and installing a new steel box beam median barrier between the northbound and southbound lanes. The highway
was widened yet again from six to eight lanes under Contract #2000-0027 between Rutherford Road and Major Mackenzie Drive, along with the replacement of the
1970s-era box beam median barrier with a new concrete "Tall Wall" median barrier. At the time of writing in March 2026, this section of Hwy 400 is being expanded once
again for HOV carpool lanes under Contract #2024-2010 between Langstaff Road and Major Mackenzie Drive. See an
Enlarged Photo Here.(Photograph taken on October 27, 2010 - © Cameron Bevers) 
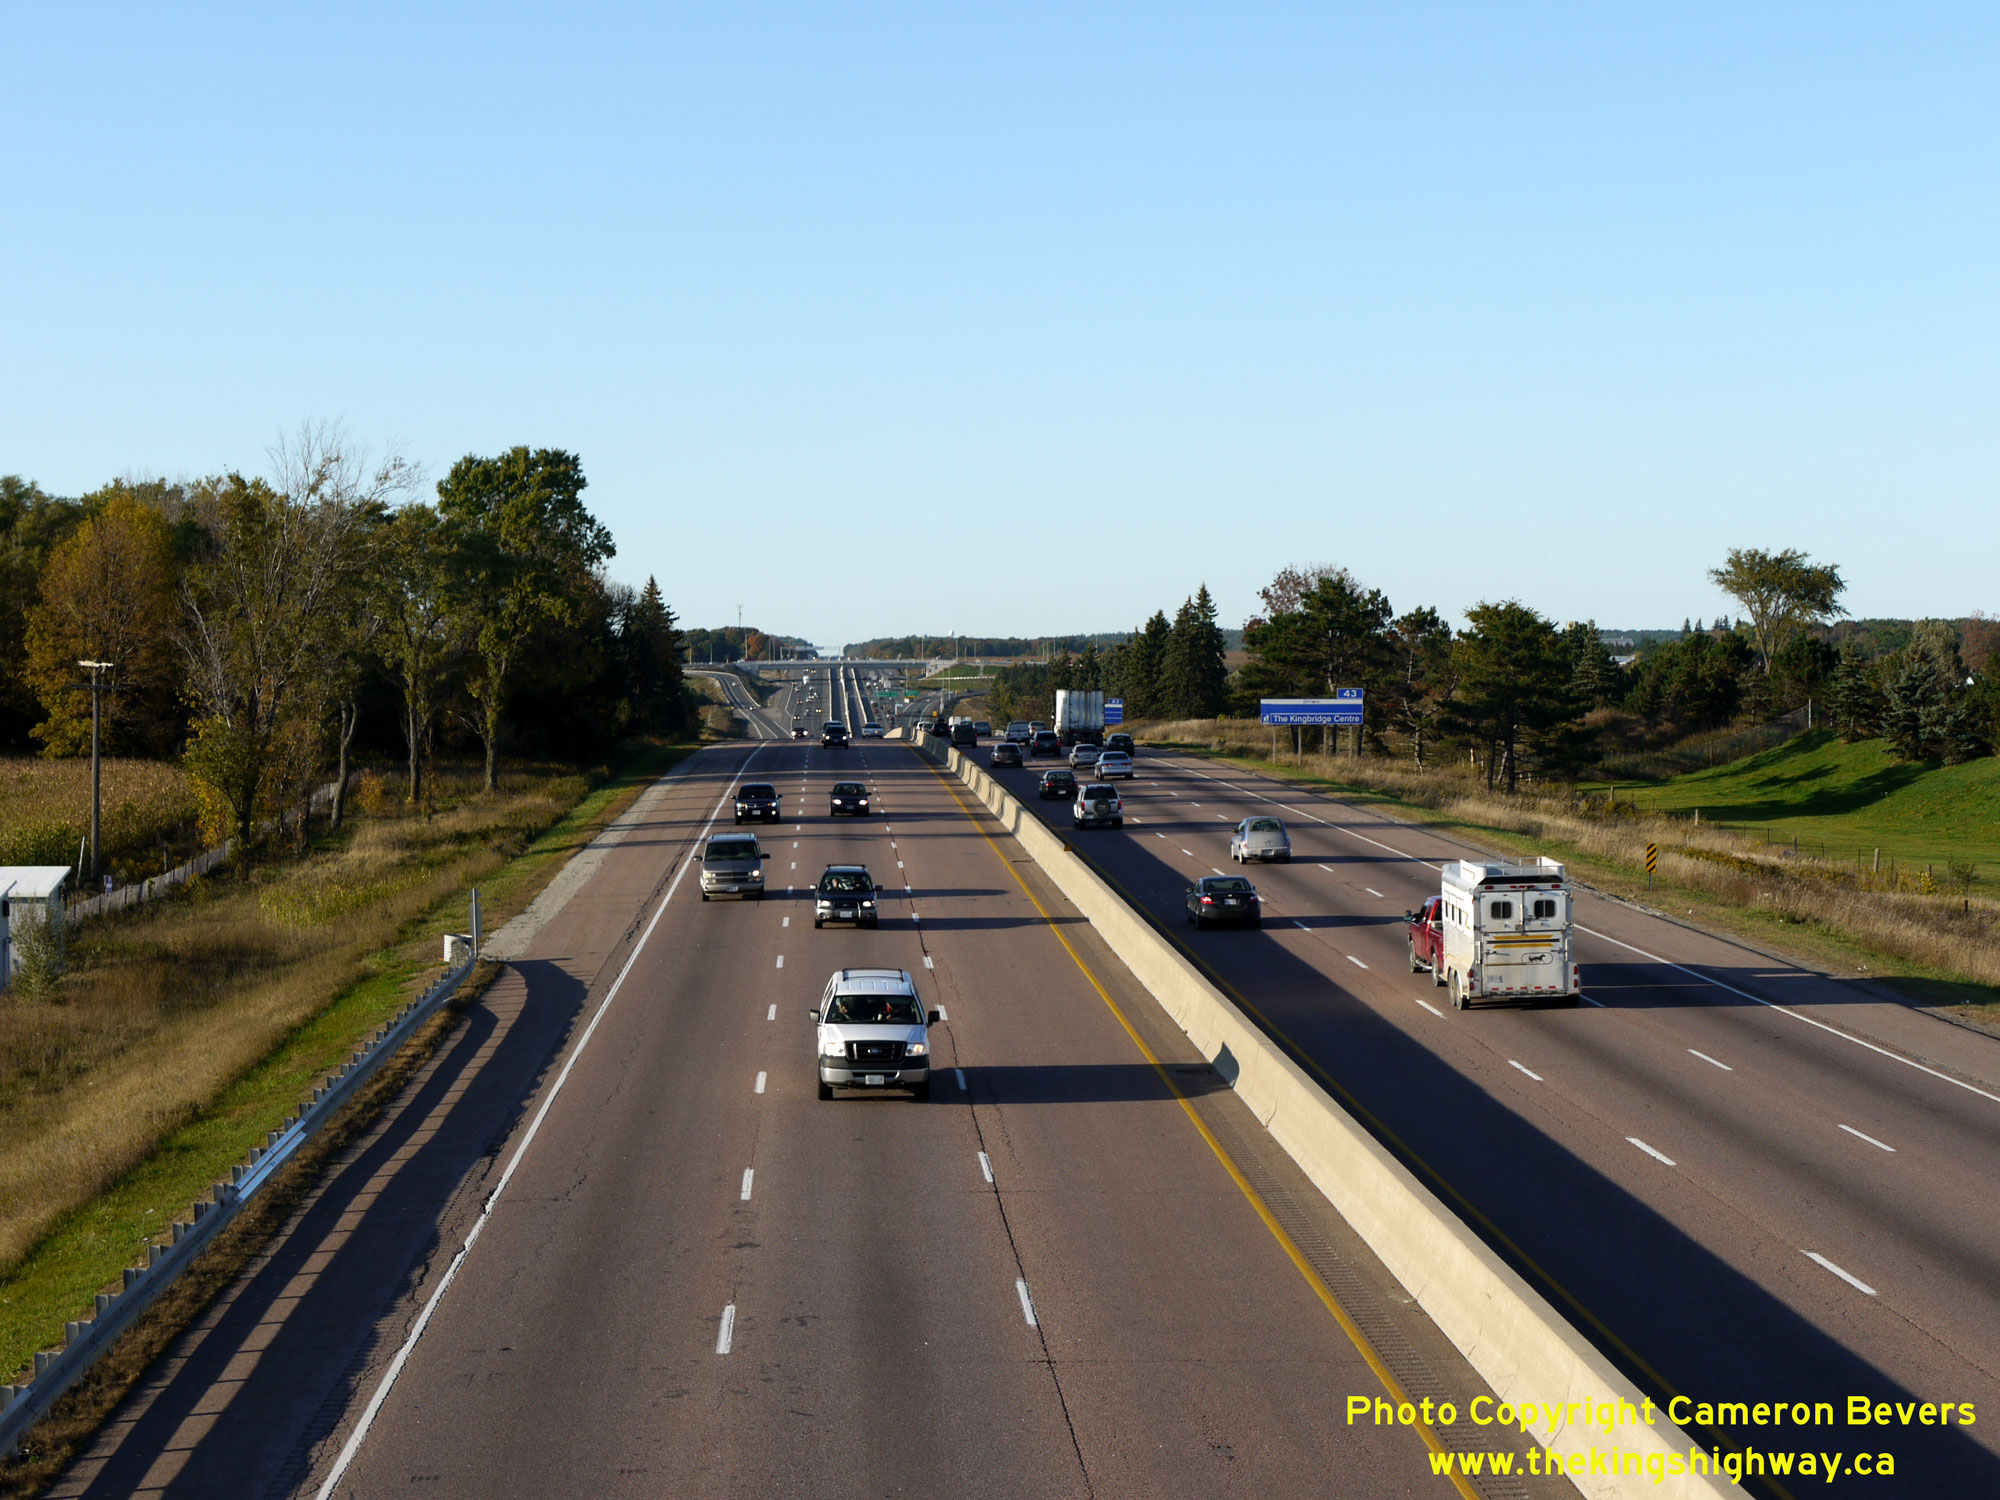
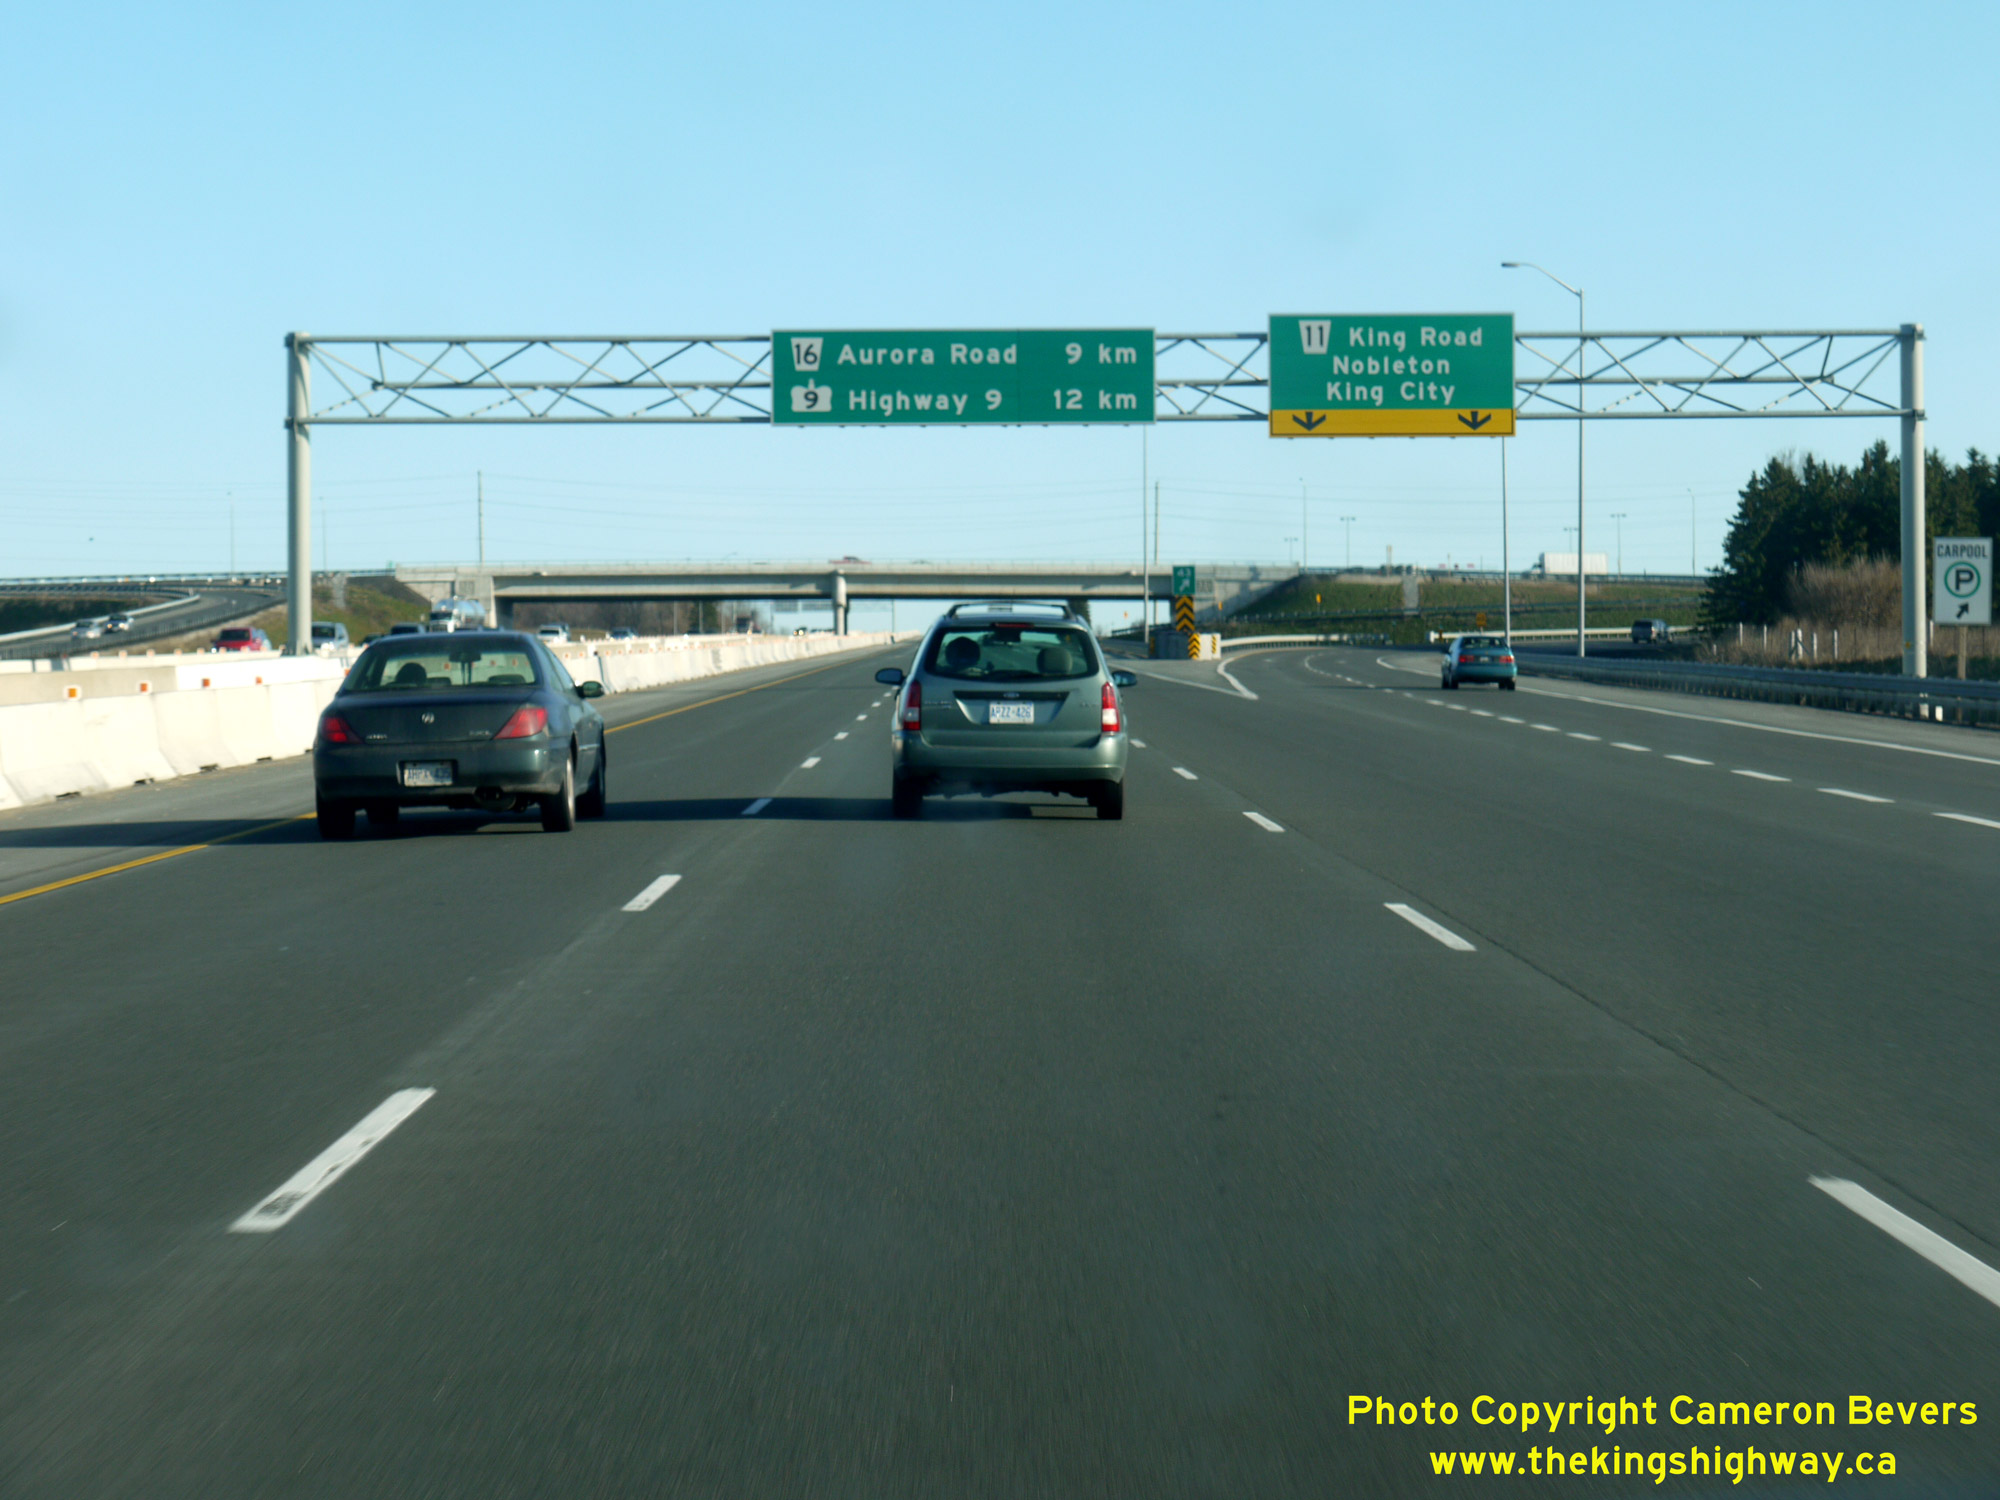
 Left - Advance guide sign for the upcoming King City Service Centre on northbound Hwy 400 near Teston Road. See an
Enlarged Photo Here. Left - Advance guide sign for the upcoming King City Service Centre on northbound Hwy 400 near Teston Road. See an
Enlarged Photo Here.(Photograph taken on October 4, 2011 - © Cameron Bevers) Right - Western side of the Kirby Road Underpass (Site #37-95) on Hwy 400. This single-span concrete rigid frame structure was built under Contract #1950-156
and was completed in 1951. The bridge was rehabilitated and widened along its eastern side in the early 1990s under Contract #1992-95. See an
Enlarged Photo Here.(Photograph taken on October 4, 2011 - © Cameron Bevers) 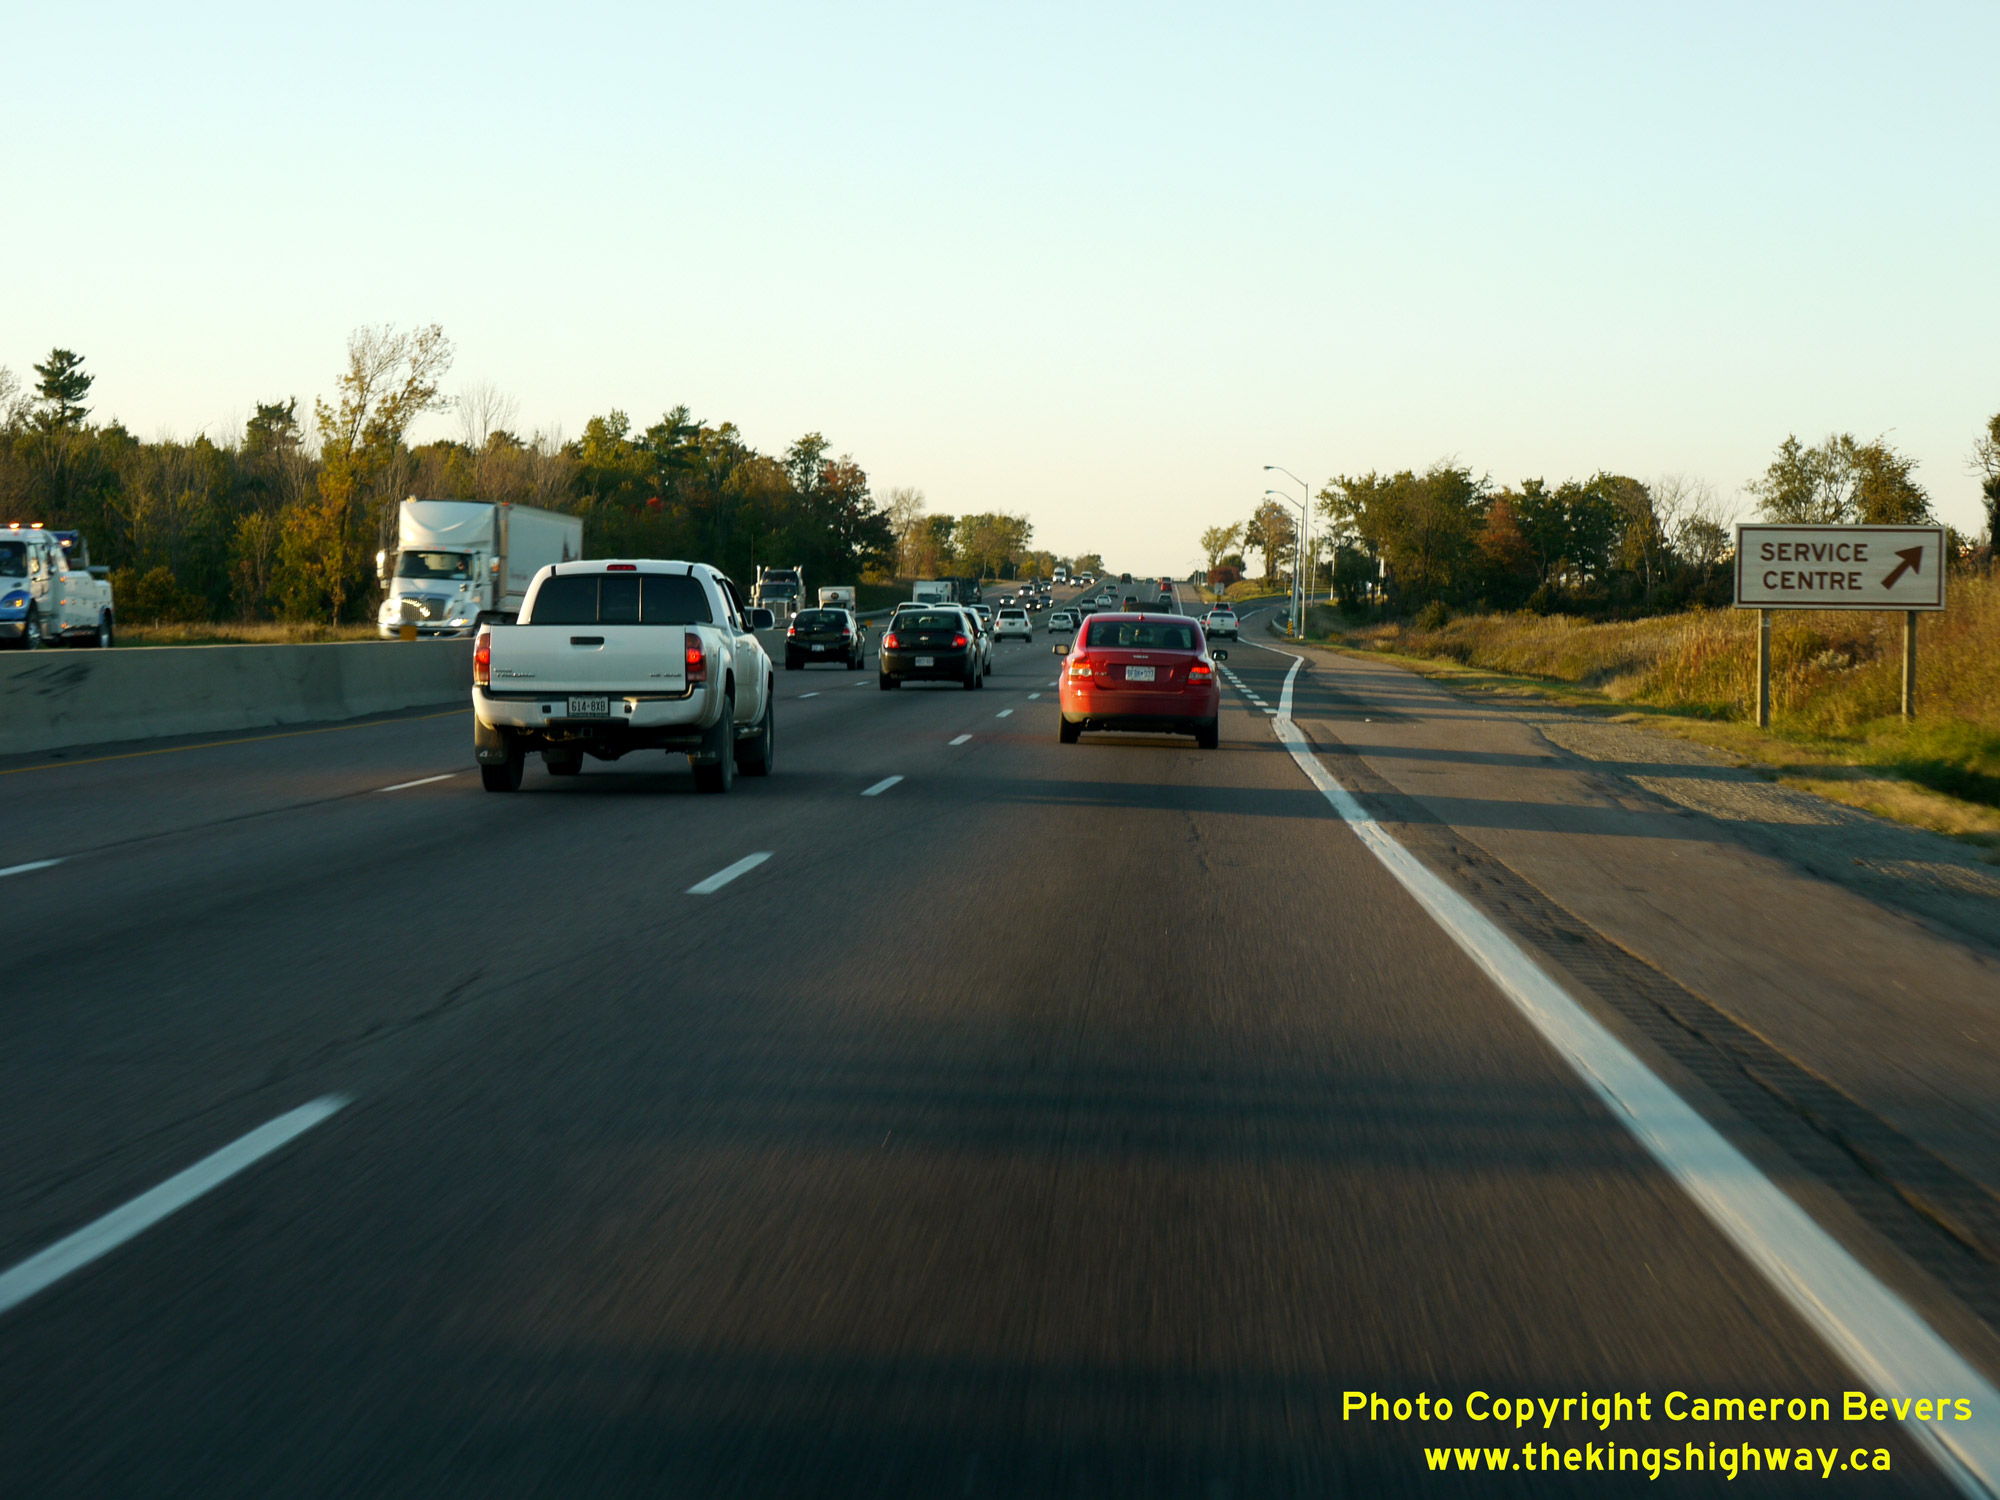
 Left - Exit sign for the King City Service Centre on northbound Hwy 400. The King City Service Centre was reconstructed and re-branded as an "OnRoute" facility
in 2012. See an Enlarged Photo Here. Left - Exit sign for the King City Service Centre on northbound Hwy 400. The King City Service Centre was reconstructed and re-branded as an "OnRoute" facility
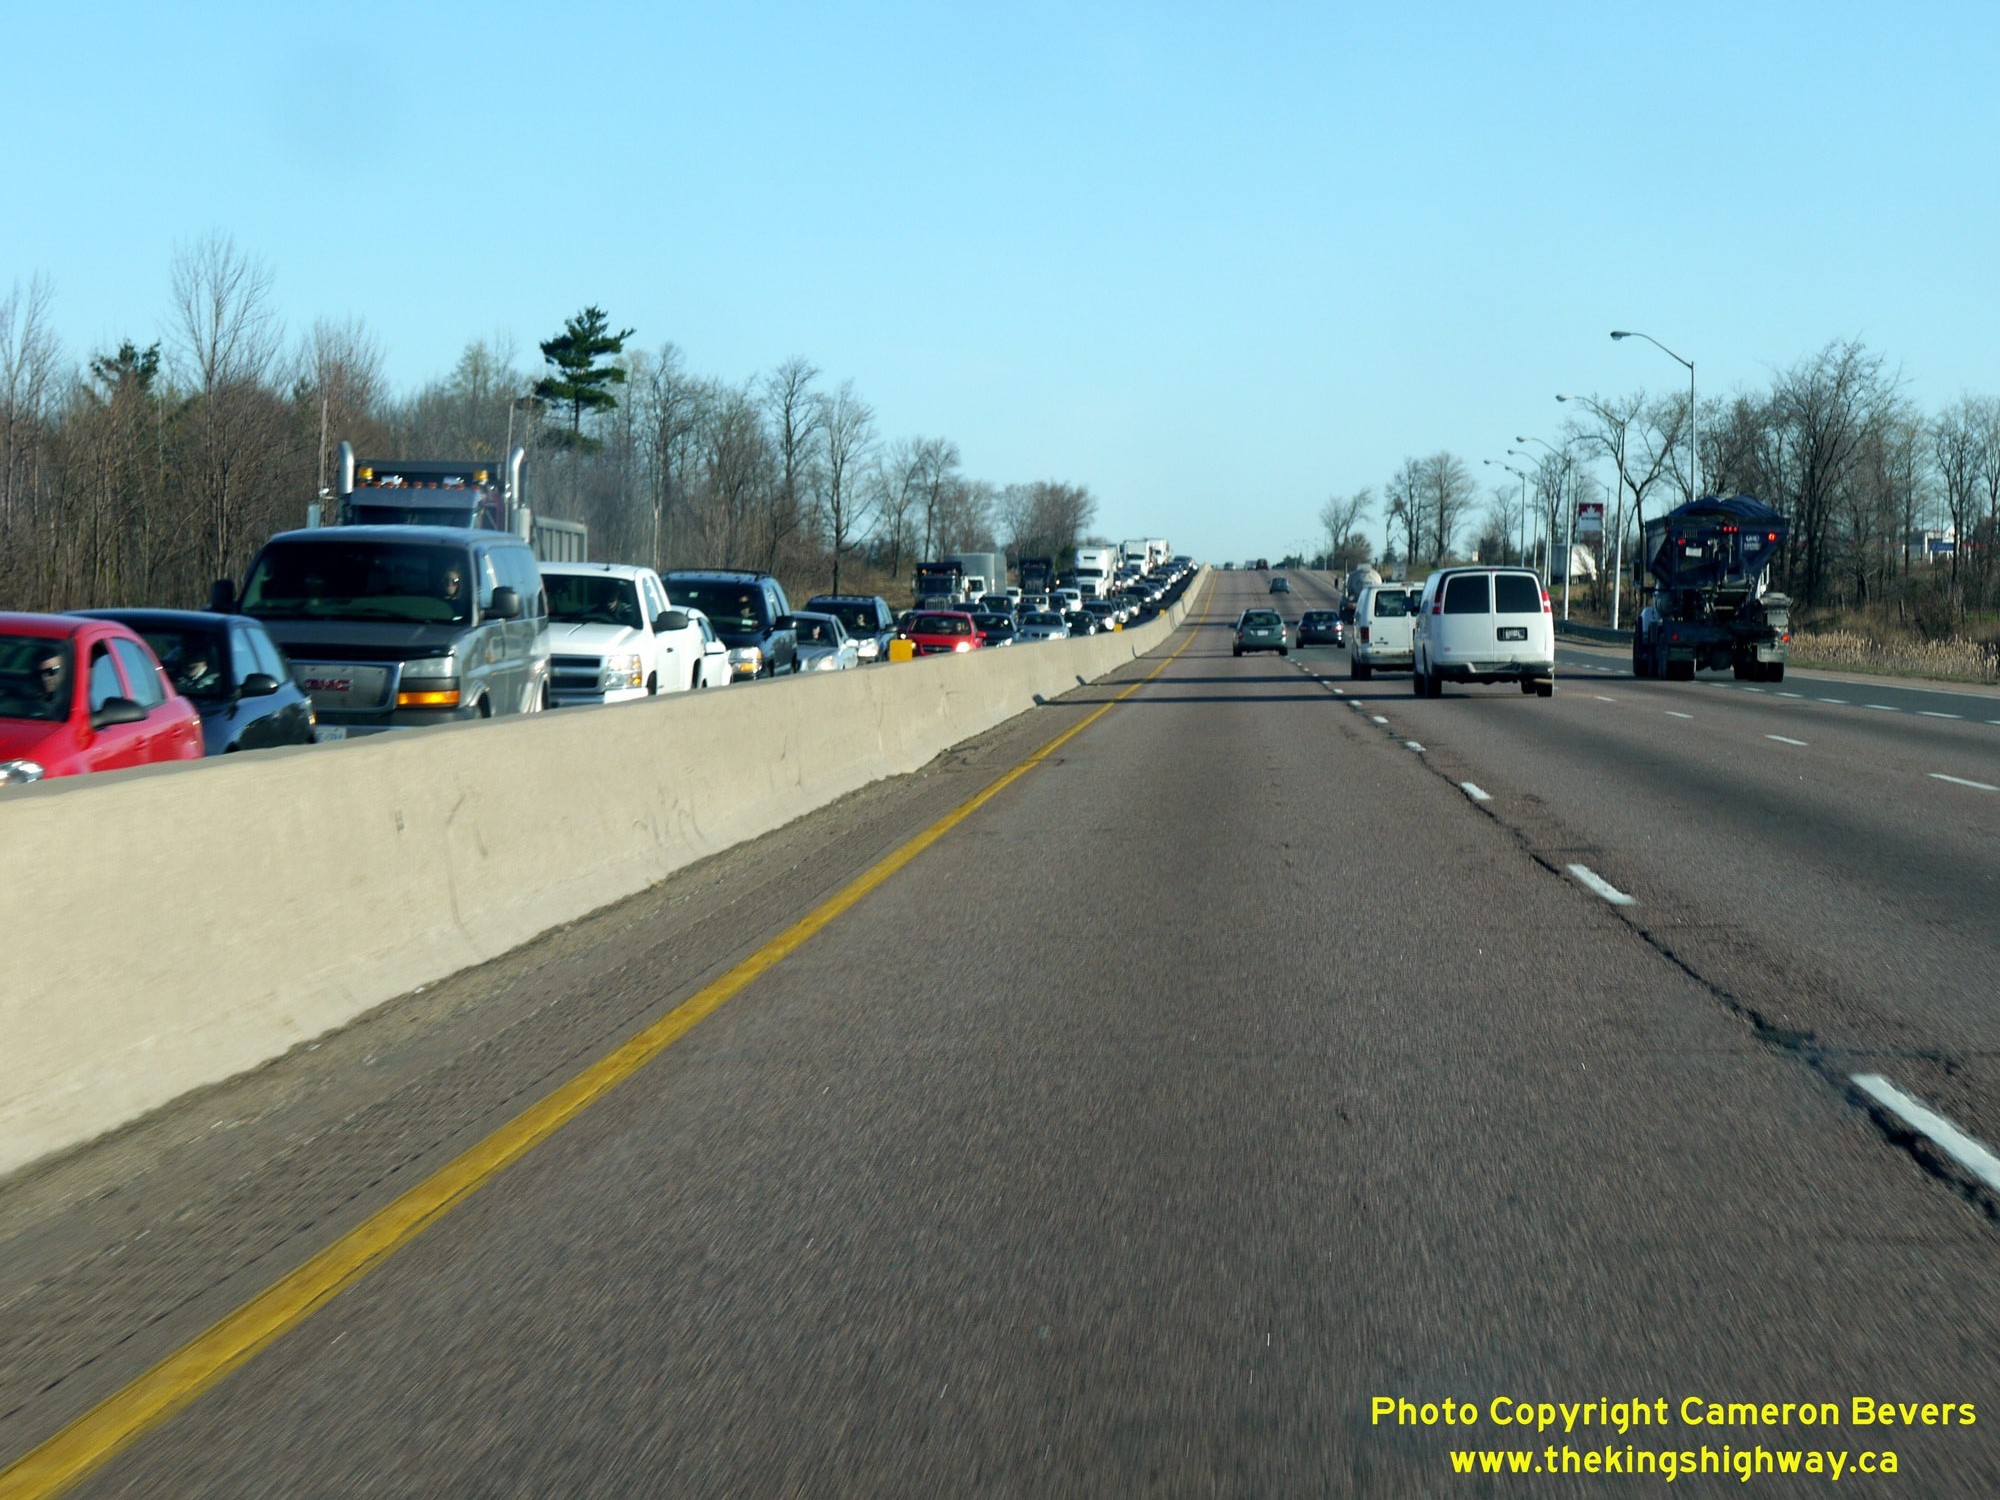
in 2012. See an Enlarged Photo Here.(Photograph taken on October 4, 2011 - © Cameron Bevers) Right - Facing north along Hwy 400 approaching the King City Service Centre. Note the heavy rush hour traffic on the Toronto-bound side of Hwy 400. Traffic
congestion along Hwy 400 is certainly not a new phenomenon, although it was primarily a summer weekend problem until recent decades. In an effort to accommodate the
high number of recreational travellers along Hwy 400, the highway was expanded from four to six lanes between Major Mackenzie Drive and King Road in the early 1970s
under Contract #1971-15. The new lanes were built by backfilling the centre grass median and installing a new steel box beam median barrier between the northbound and
southbound lanes. HOV Carpool Lanes were constructed along Hwy 400 from Major Mackenzie Drive to a point just north of King Road under Contract #2017-2001, with a
subsequent widening of Hwy 400 by one additional non-HOV lane under Contract #2023-2014. Today, this section of the highway has 4 lanes per direction, plus an HOV
lane in each direction - for a total of 10 lanes. See an Enlarged Photo Here.(Photograph taken on April 12, 2012 - © Cameron Bevers) 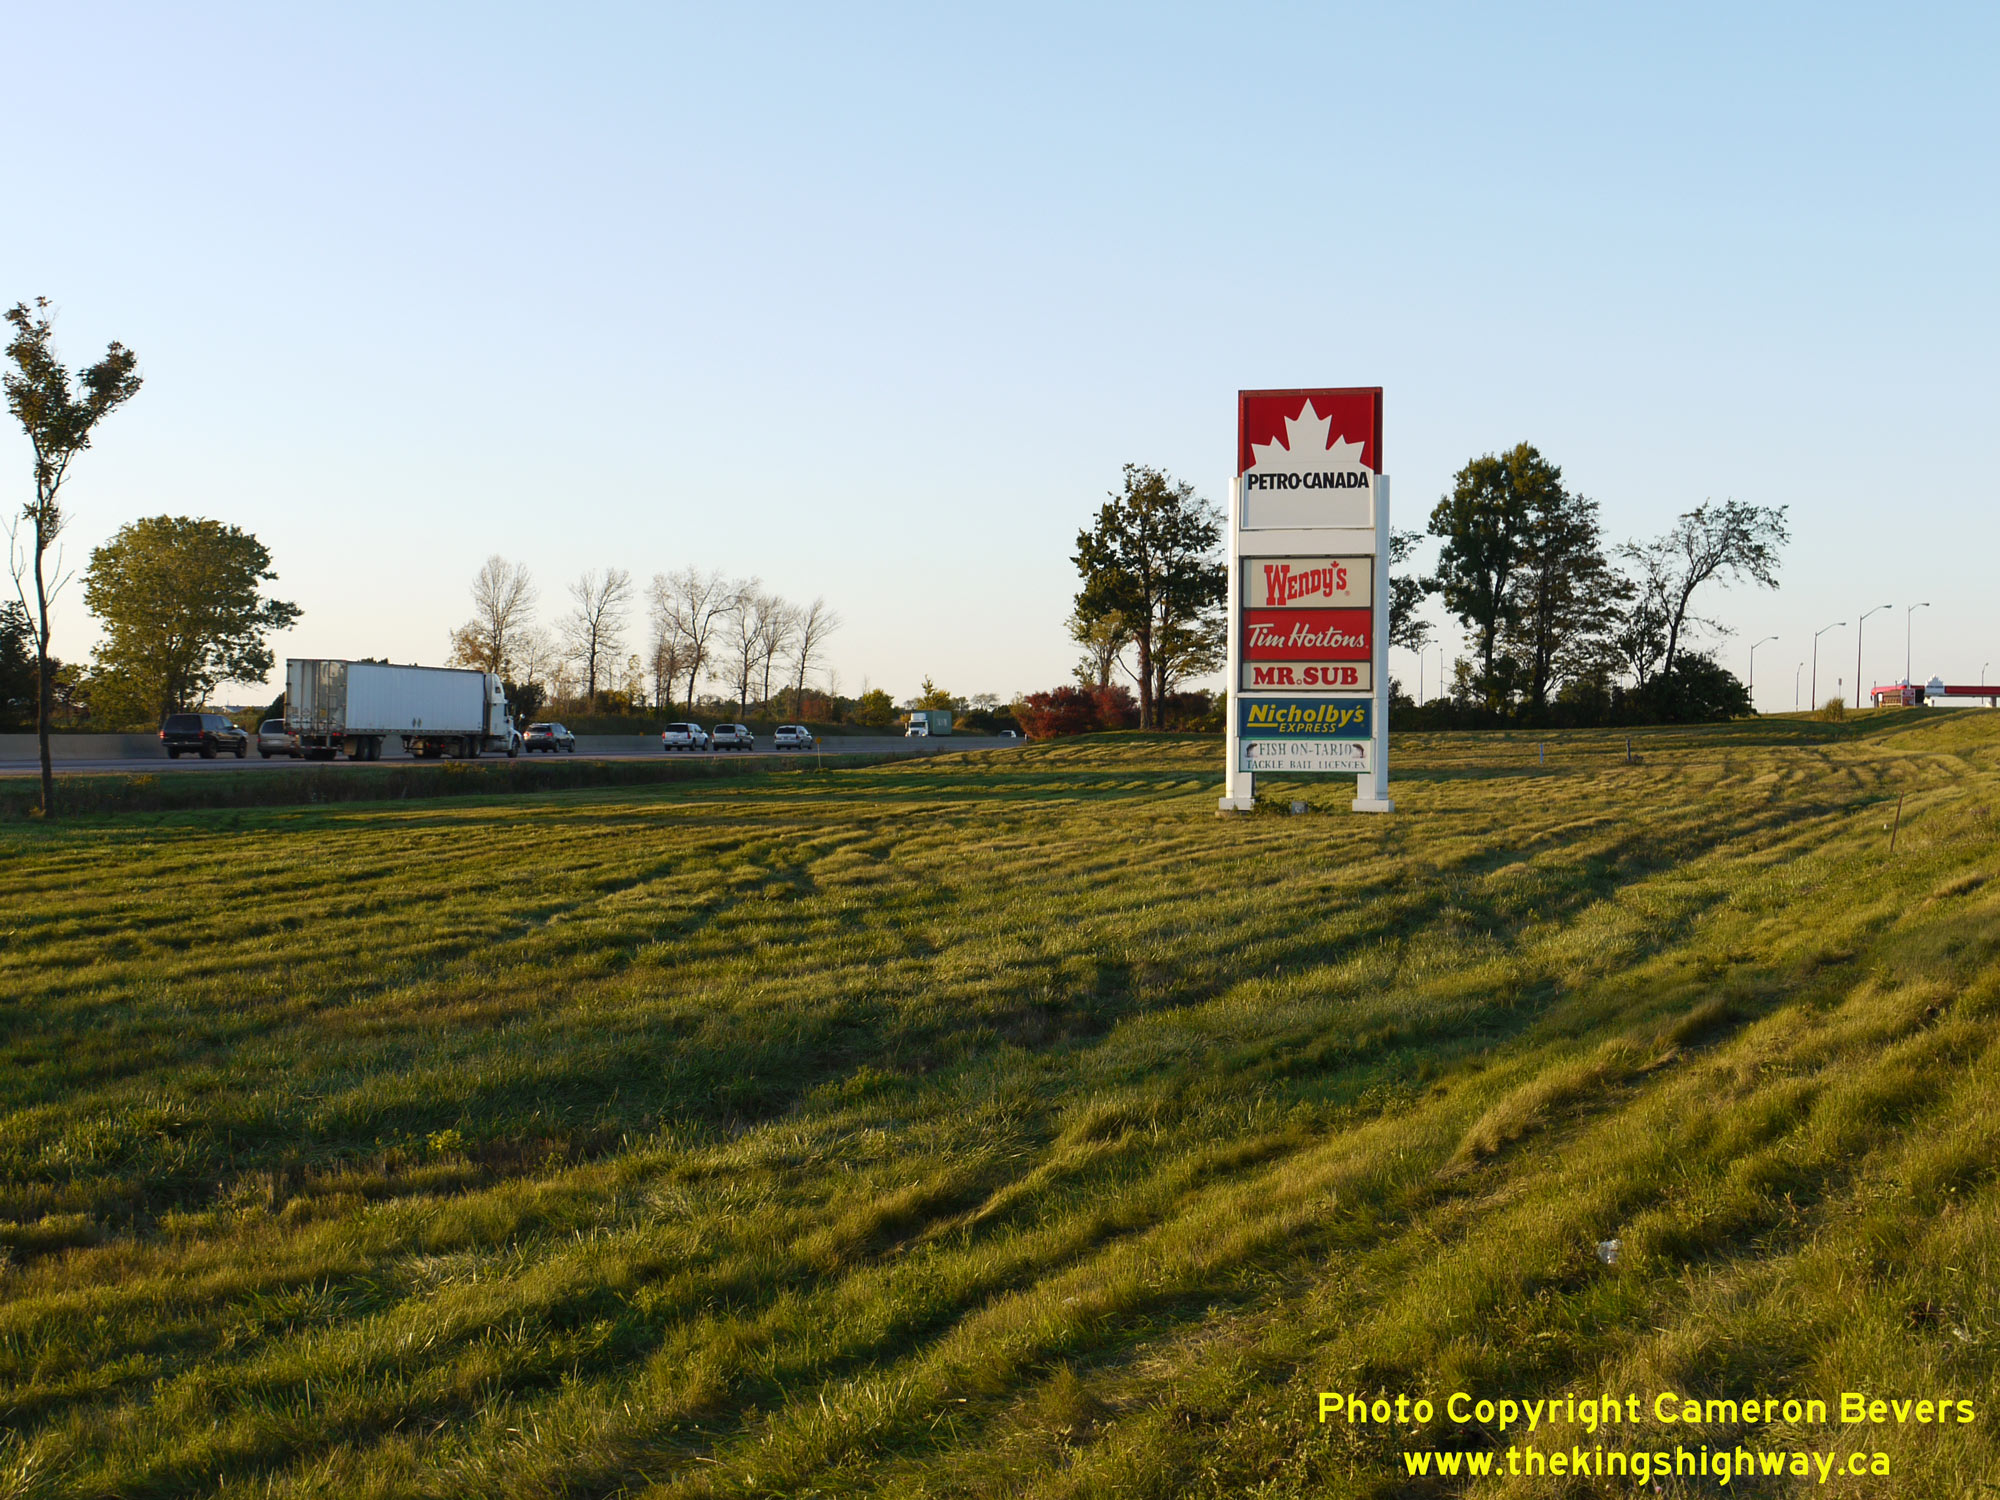
 Left - Services sign at the King City Service Centre on northbound Hwy 400 in 2011, prior to reconstruction.
See an Enlarged Photo Here. Left - Services sign at the King City Service Centre on northbound Hwy 400 in 2011, prior to reconstruction.
See an Enlarged Photo Here.(Photograph taken on October 4, 2011 - © Cameron Bevers) Right - Main concourse building of the King City Service Centre on northbound Hwy 400 in 2011, prior to reconstruction. The King City Service Centre seen here
was actually a relocation of the original facility, which sold Shell branded gasoline. The previous Shell King City Service Centre was built within the ramps at the
King City Interchange in 1954. Due to its small site, the original Shell Service Centre suffered from overcrowding and a chronic lack of parking. It wasn't possible
to expand that site either, as the facility was constrained within the confines of the interchange ramps themselves. The relocated King City Service Centre was built
under Contract #1973-90 and opened to the public in the Summer of 1974, after which time the original Shell King City Service Centre was permanently closed. See an
Enlarged Photo Here.(Photograph taken on October 4, 2011 - © Cameron Bevers) 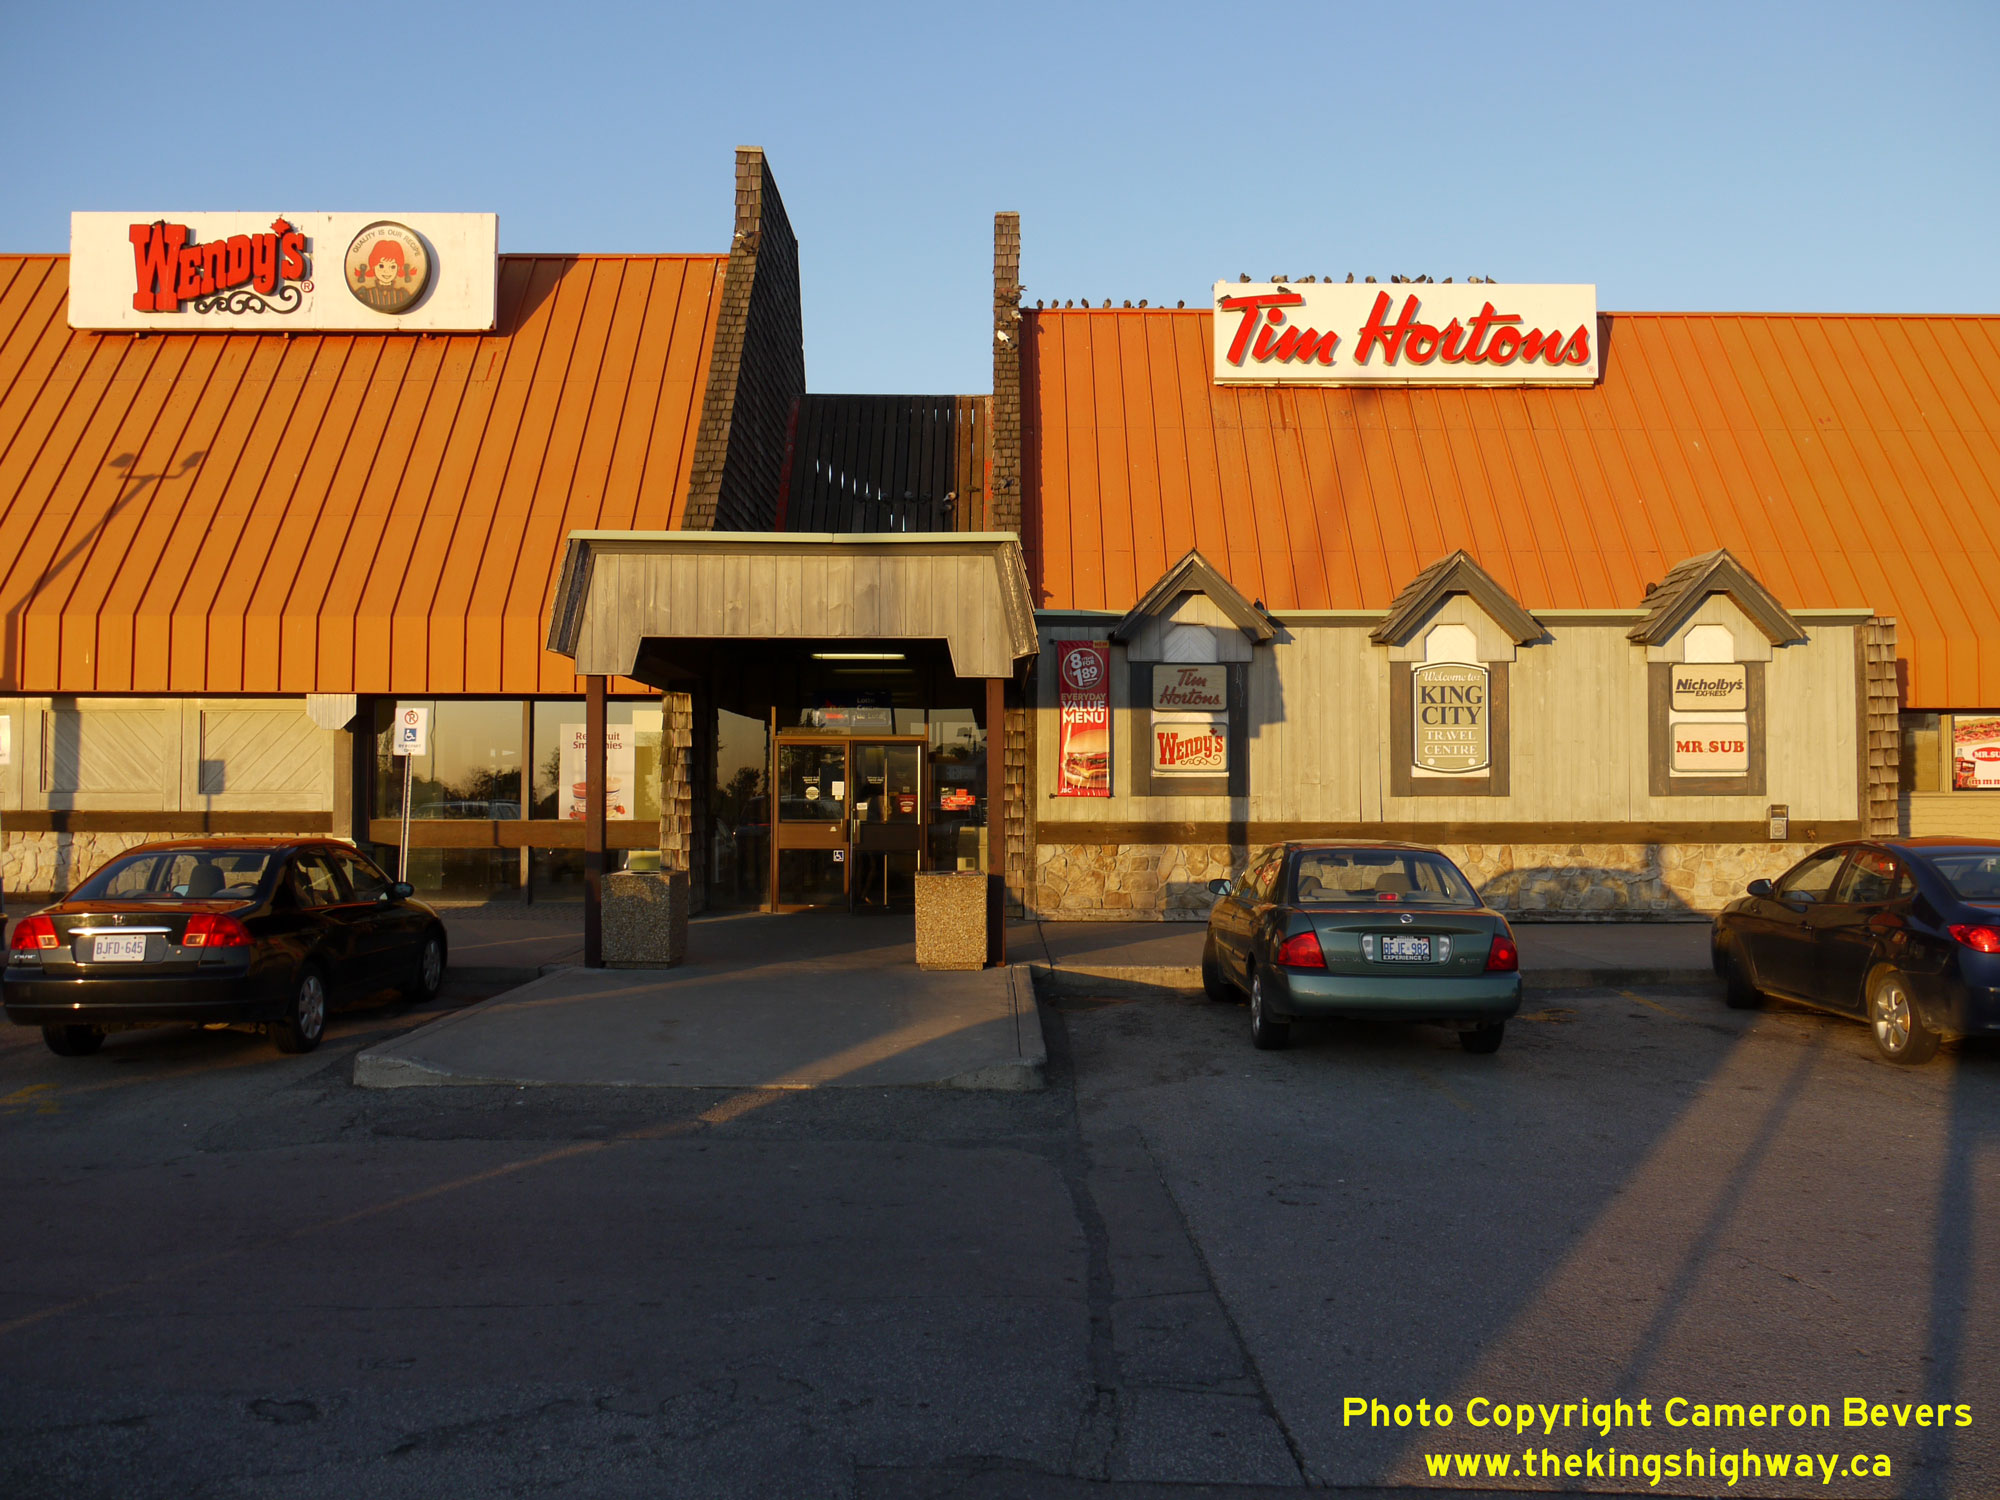
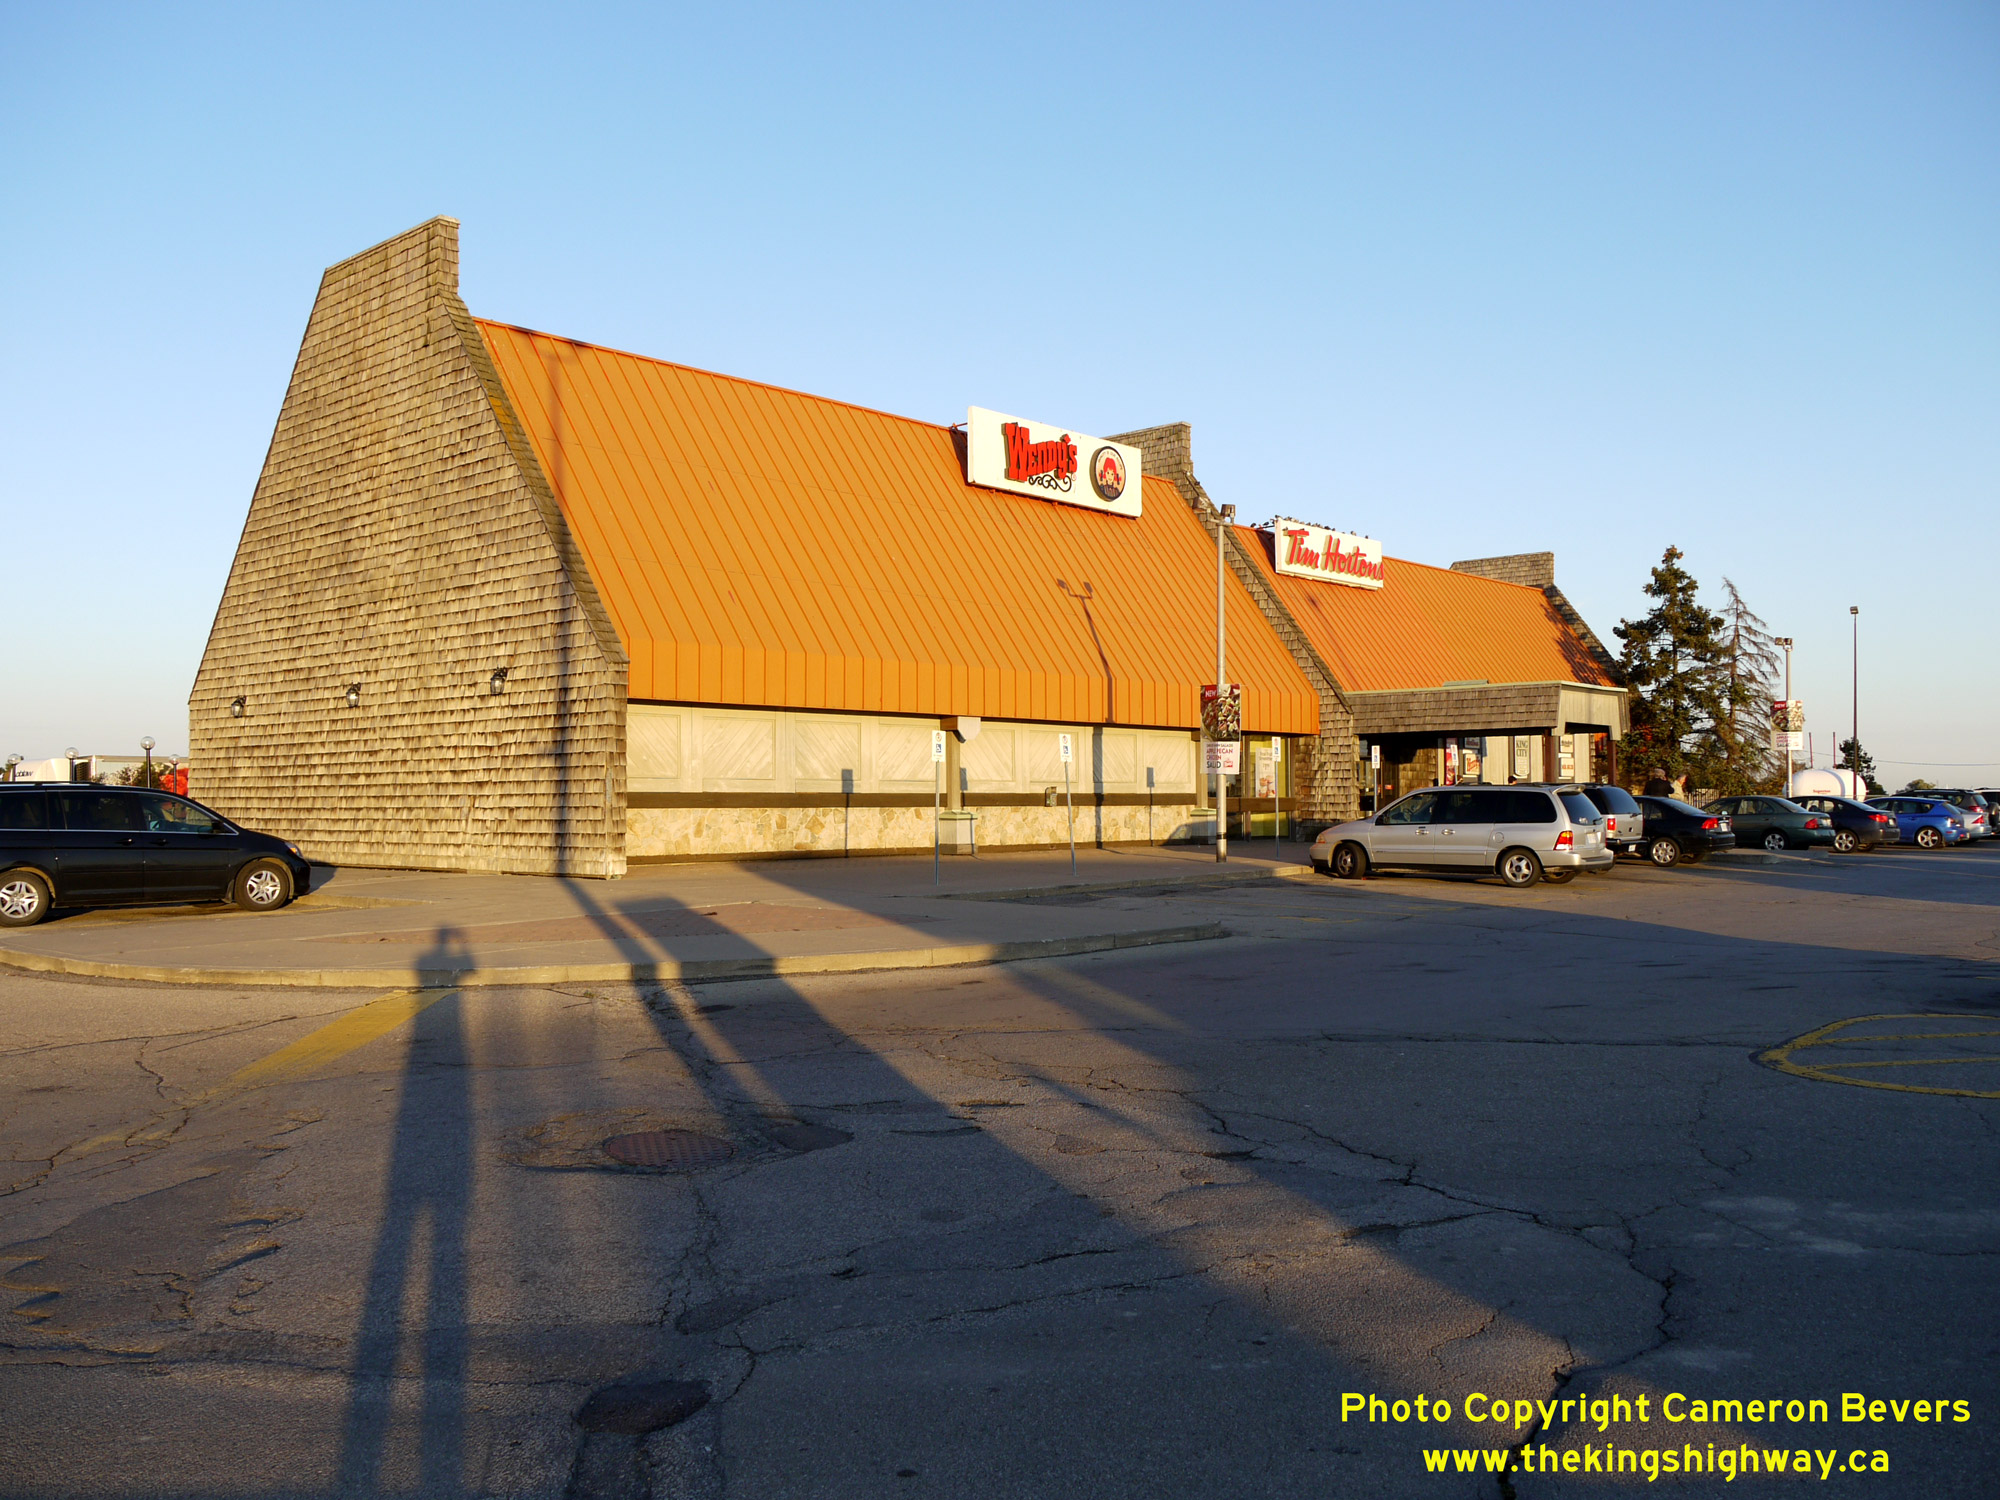
 Left - Entrance to the main concourse building of the King City Service Centre on northbound Hwy 400. This building contained a food court, washrooms and a
convenience & souvenir store. When this Service Centre was reconstructed and re-branded as an OnRoute in 2012, the food court was expanded to provide more seating
capacity and a greater selection of restaurants. See an Enlarged Photo Here. Left - Entrance to the main concourse building of the King City Service Centre on northbound Hwy 400. This building contained a food court, washrooms and a
convenience & souvenir store. When this Service Centre was reconstructed and re-branded as an OnRoute in 2012, the food court was expanded to provide more seating
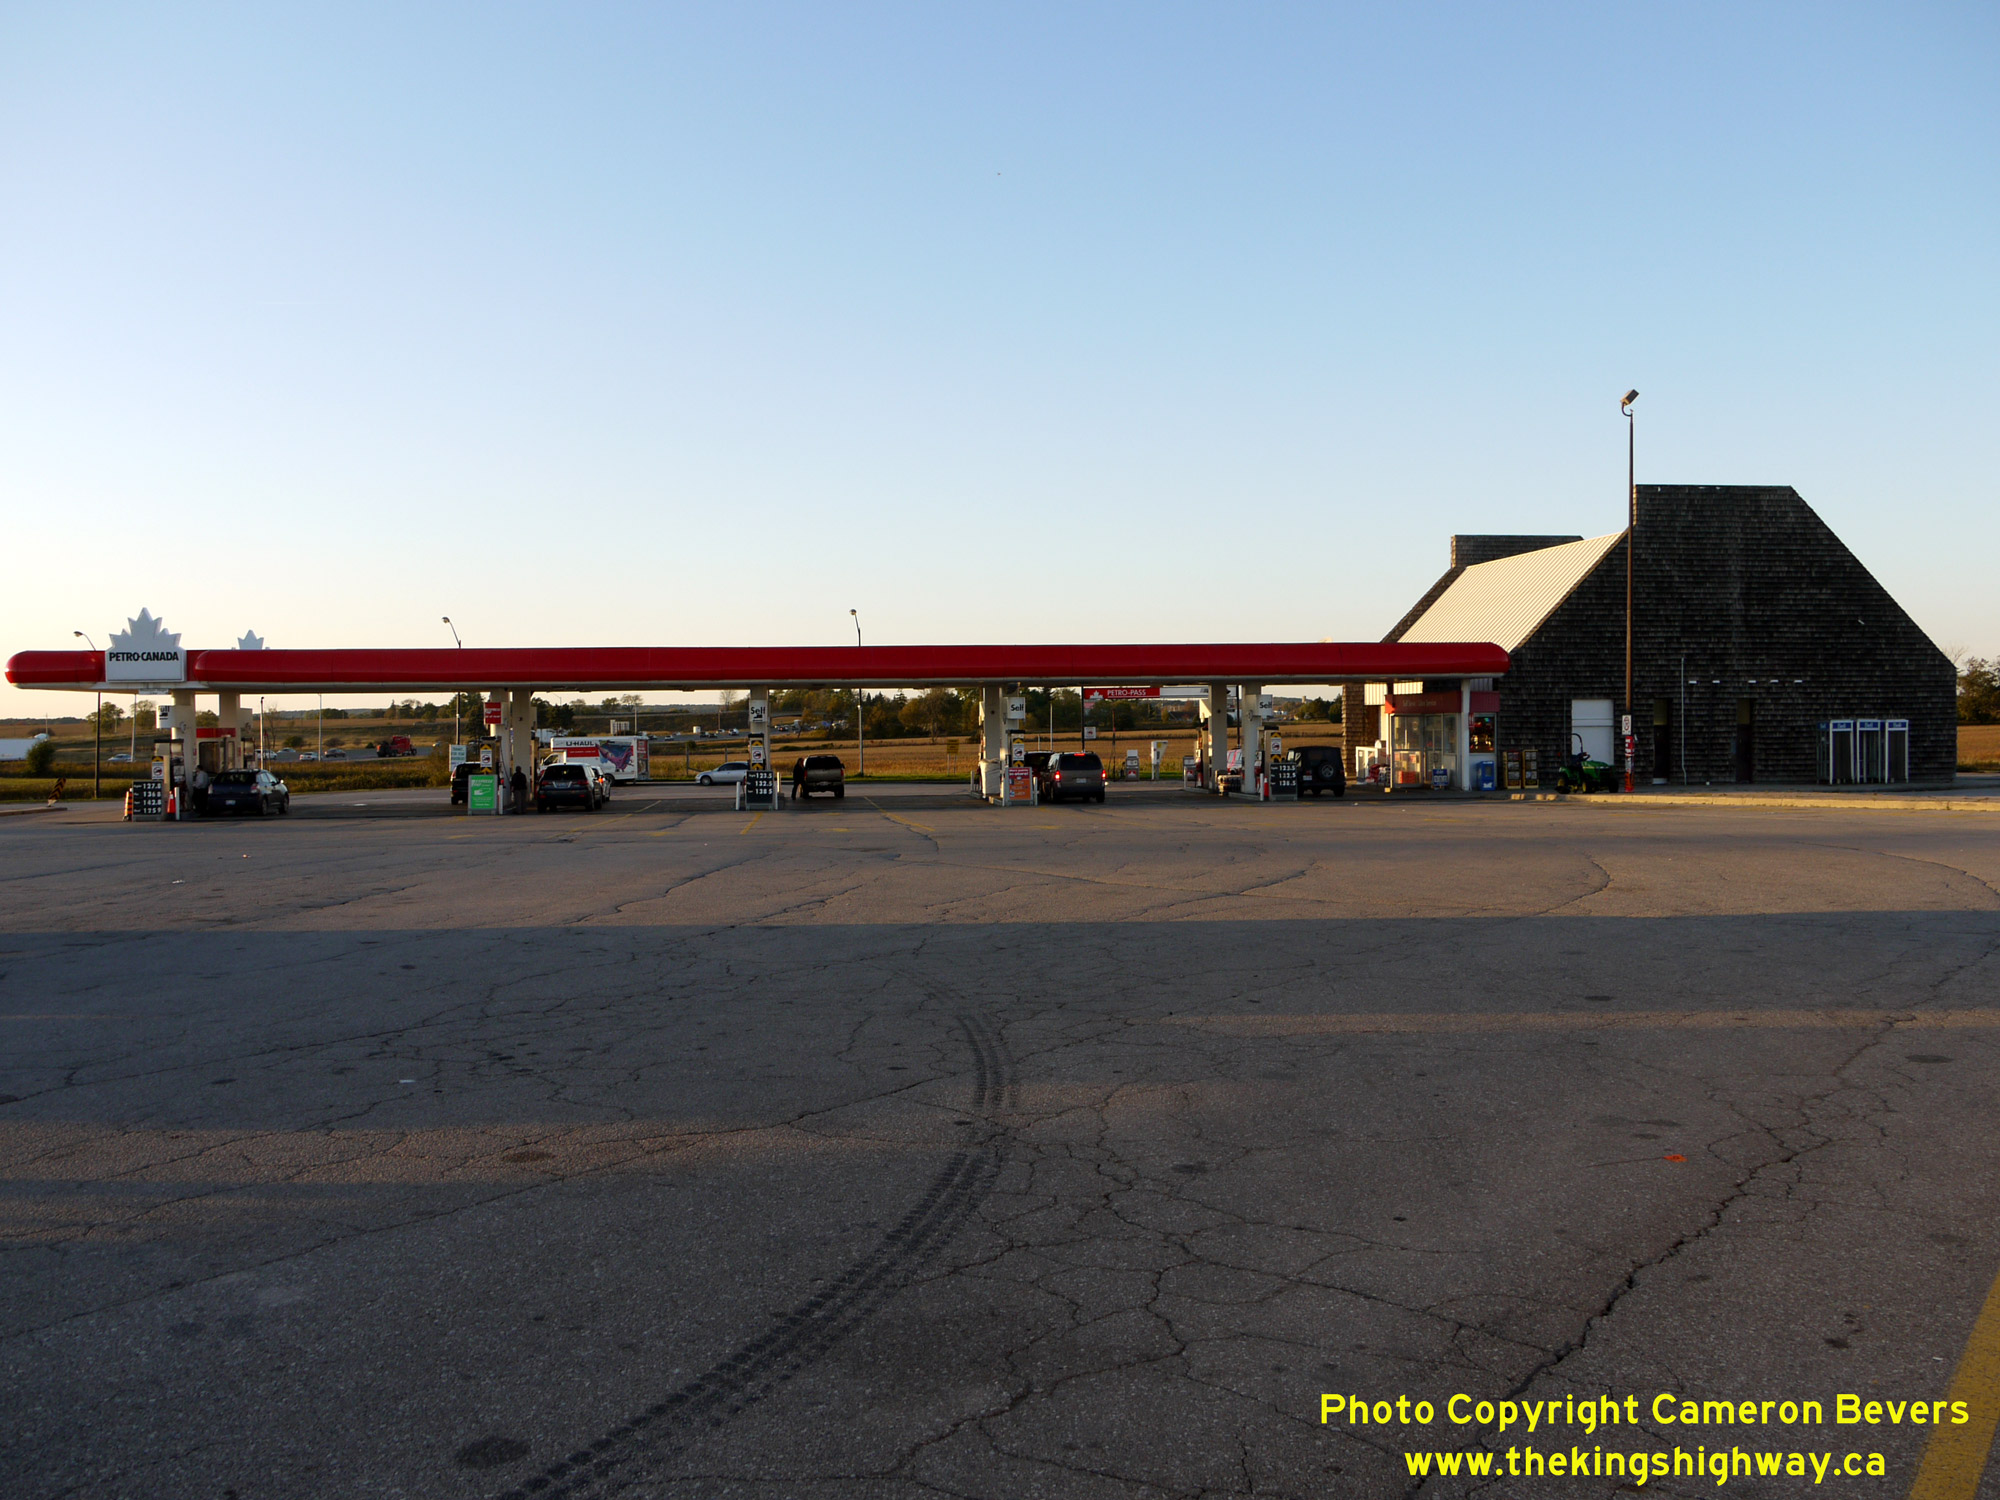
capacity and a greater selection of restaurants. See an Enlarged Photo Here.(Photograph taken on October 4, 2011 - © Cameron Bevers) Right - Gas station pumps at the King City Service Centre. The convenience store attached to the gas station was housed in a building with a similar
architectural style as the main concourse building. During the reconstruction of the King City Service Centre as an OnRoute, all buildings on the site were
demolished. When this Service Centre first opened in 1974, it sold British Petroleum (BP) branded gasoline. See an
Enlarged Photo Here.(Photograph taken on October 4, 2011 - © Cameron Bevers) 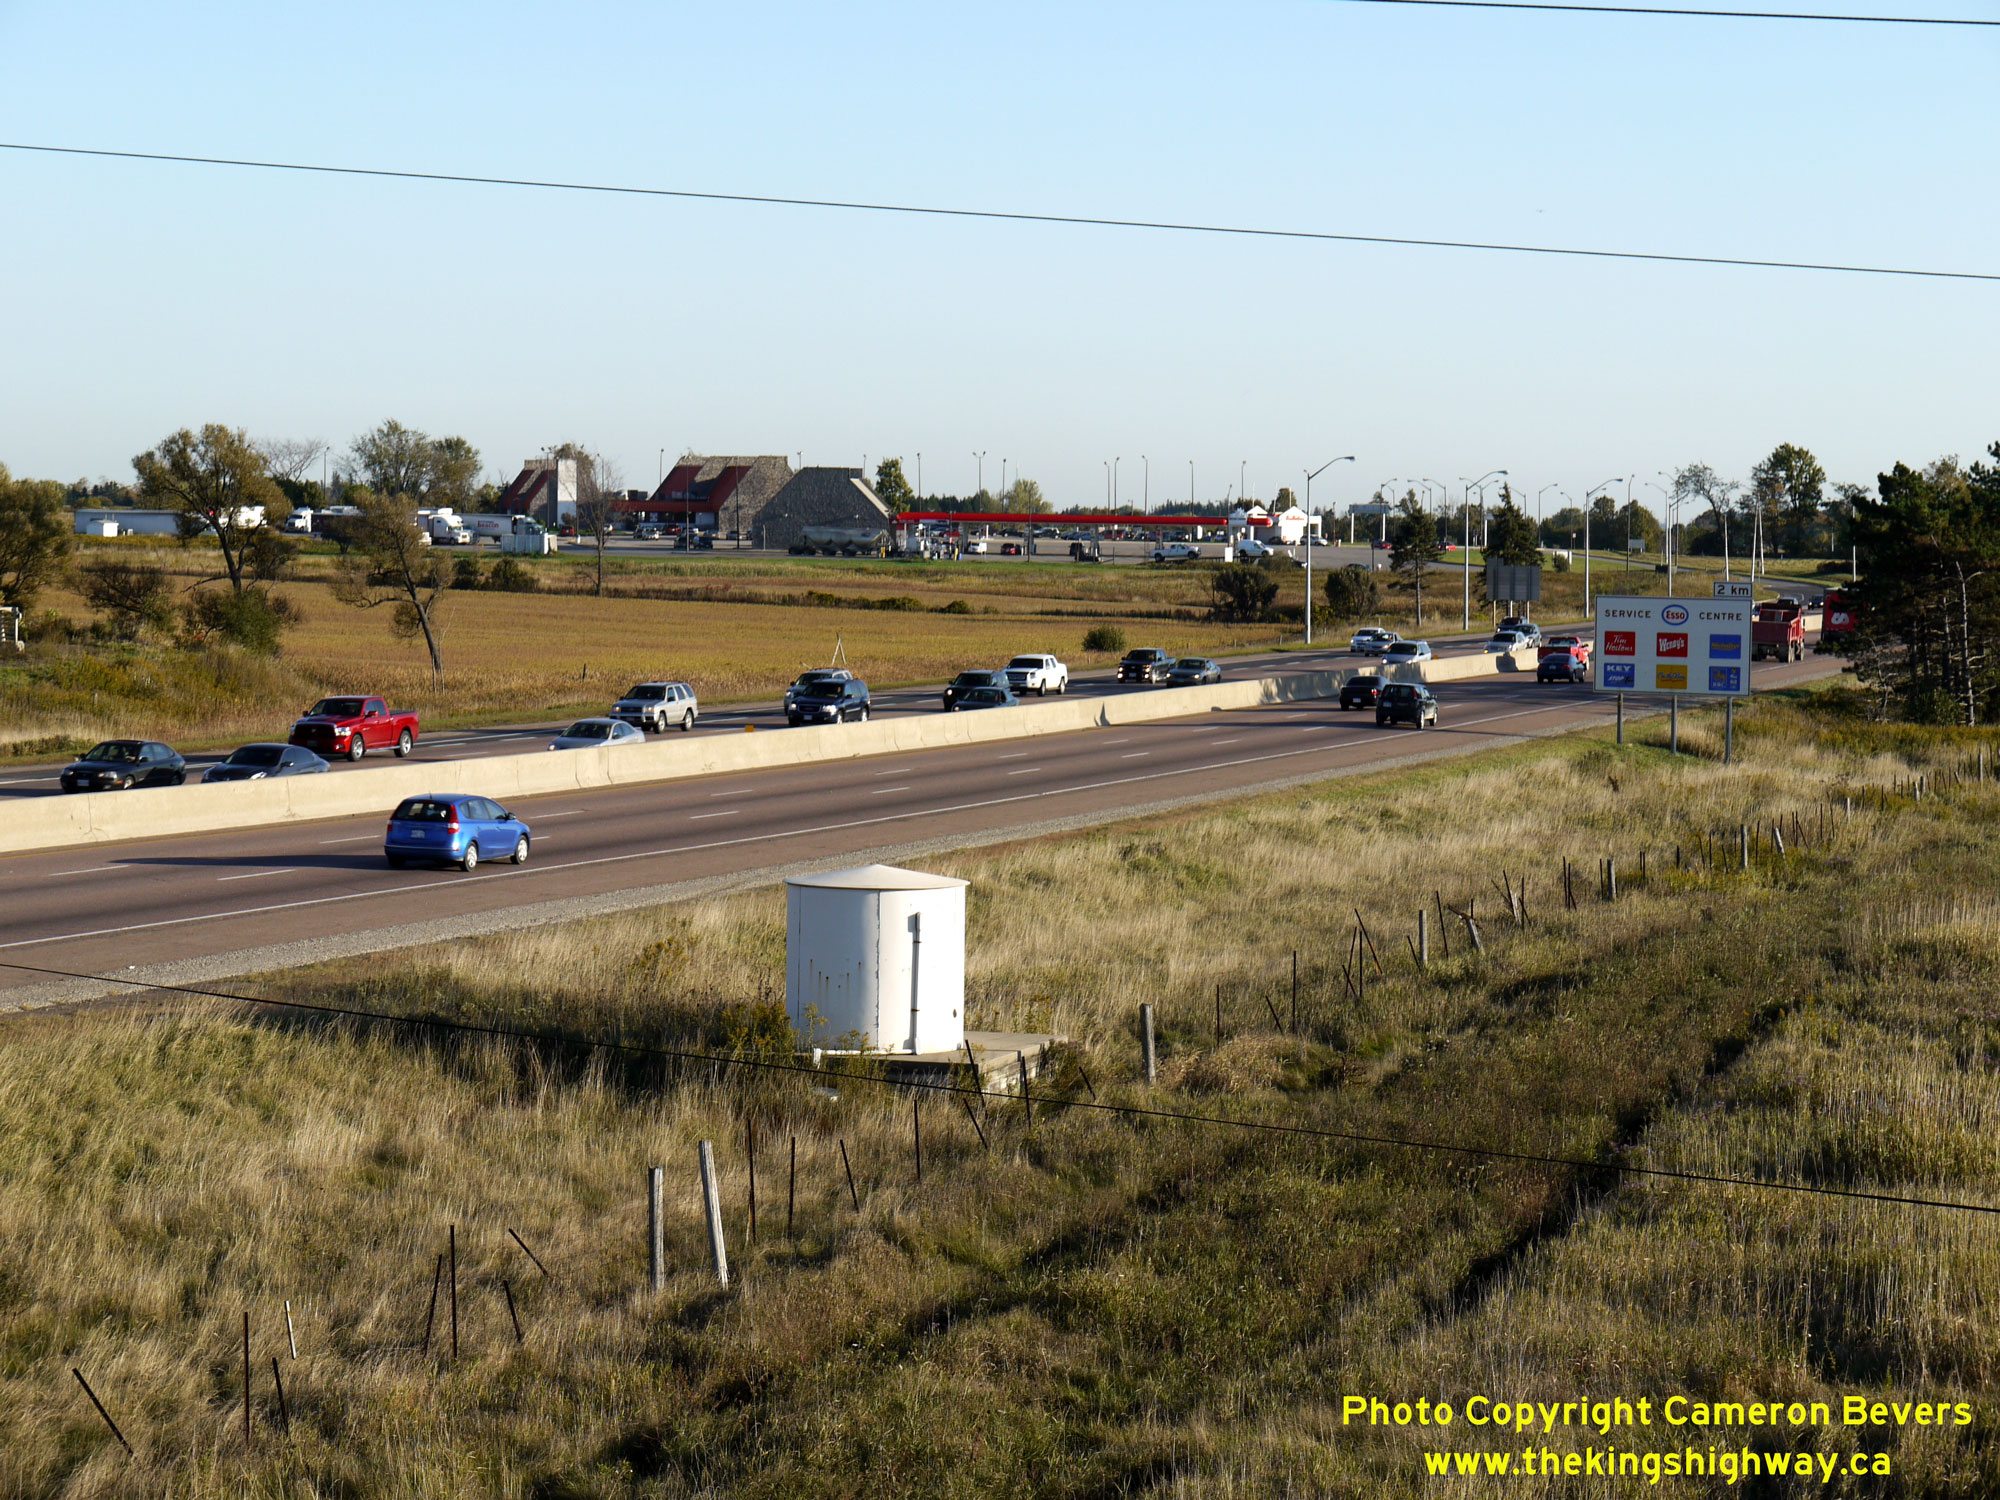
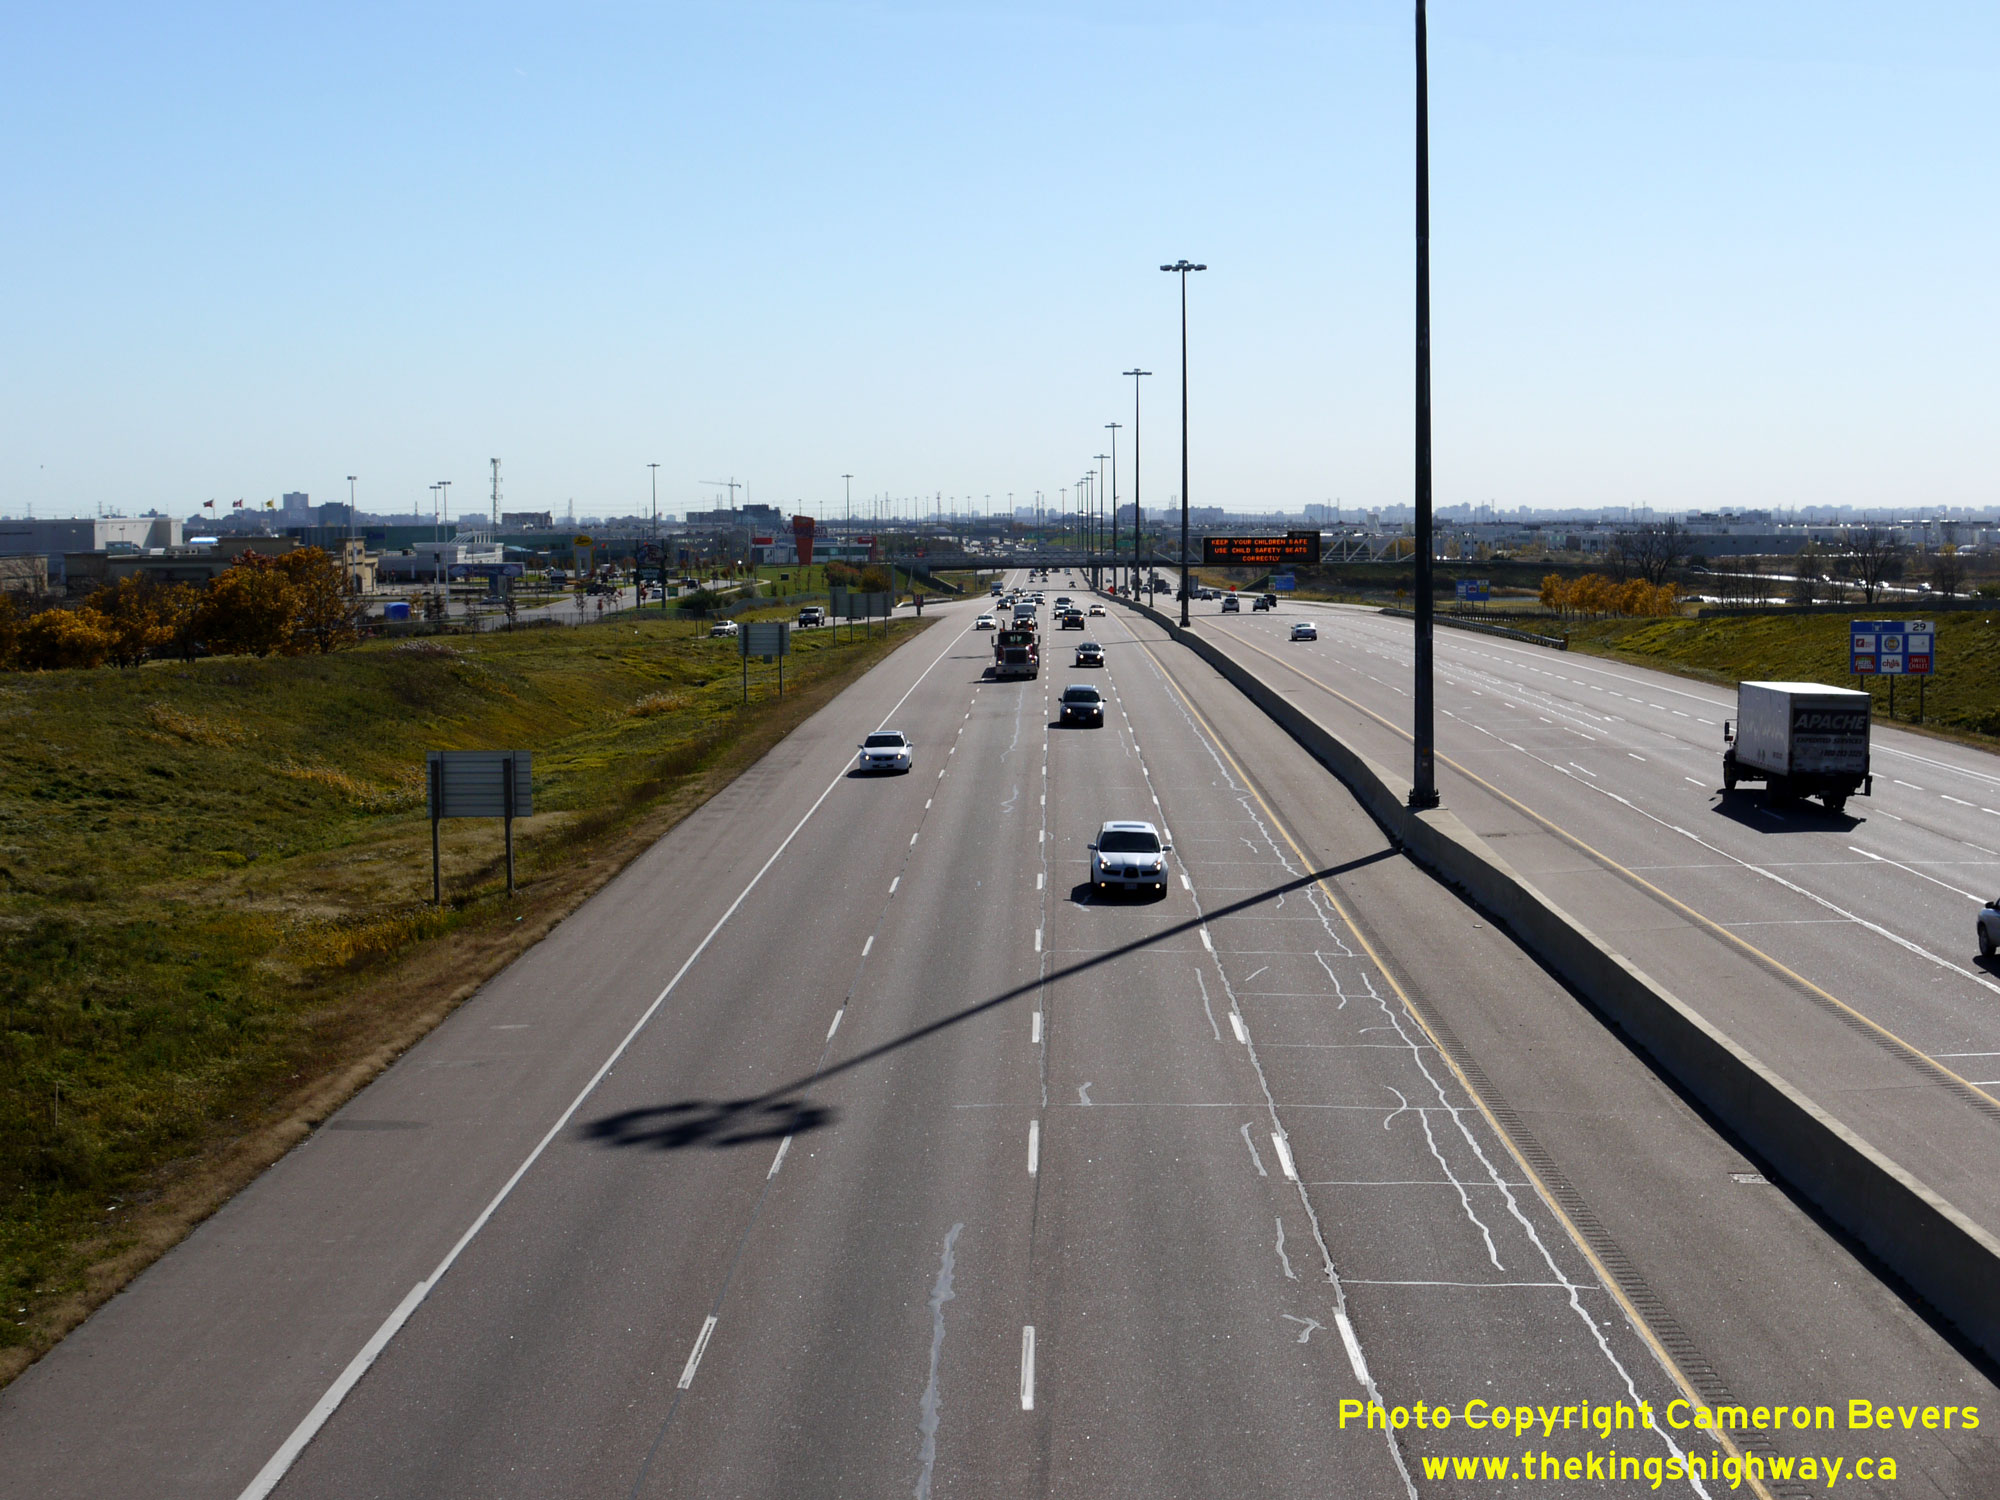
 Left - View of Hwy 400 between the King-Vaughan Townline Overpass and the northbound King City Service Centre. The advance guide sign for the opposing
southbound King City Service Centre can be seen in the background. Interestingly, the two Service Centres on Hwy 400 at King City were built at different times. The
southbound Hwy 400 Service Centre was built first in 1965, in an effort to alleviate chronic overcrowding at the tiny original Shell King City Service Centre. When
the Shell Service Centre first opened in 1954, it was utilized by traffic in both directions along Hwy 400. Motorists on the southbound side of the highway could
access the Service Centre by exiting at the King City Sideroad (today's King Road) and use the interchange ramps to access the Service Centre on the northbound side.
For a number of years thereafter, the Shell Service Centre at the King City Interchange continued to operate, but it served northbound traffic only. The circular hut
in the foreground is one of the Ministry of Transportation's permanent traffic counting stations. These stations collect traffic data continuously 24 hours a day, 365
days per year at strategic study "screen lines" throughout the provincial highway system. These permanent stations differ from the more commonly seen seasonal traffic
counting stations, which are used intermittently to collect seasonal traffic data during a specified period only. See an
Enlarged Photo Here. Left - View of Hwy 400 between the King-Vaughan Townline Overpass and the northbound King City Service Centre. The advance guide sign for the opposing
southbound King City Service Centre can be seen in the background. Interestingly, the two Service Centres on Hwy 400 at King City were built at different times. The
southbound Hwy 400 Service Centre was built first in 1965, in an effort to alleviate chronic overcrowding at the tiny original Shell King City Service Centre. When
the Shell Service Centre first opened in 1954, it was utilized by traffic in both directions along Hwy 400. Motorists on the southbound side of the highway could
access the Service Centre by exiting at the King City Sideroad (today's King Road) and use the interchange ramps to access the Service Centre on the northbound side.
For a number of years thereafter, the Shell Service Centre at the King City Interchange continued to operate, but it served northbound traffic only. The circular hut
in the foreground is one of the Ministry of Transportation's permanent traffic counting stations. These stations collect traffic data continuously 24 hours a day, 365
days per year at strategic study "screen lines" throughout the provincial highway system. These permanent stations differ from the more commonly seen seasonal traffic
counting stations, which are used intermittently to collect seasonal traffic data during a specified period only. See an
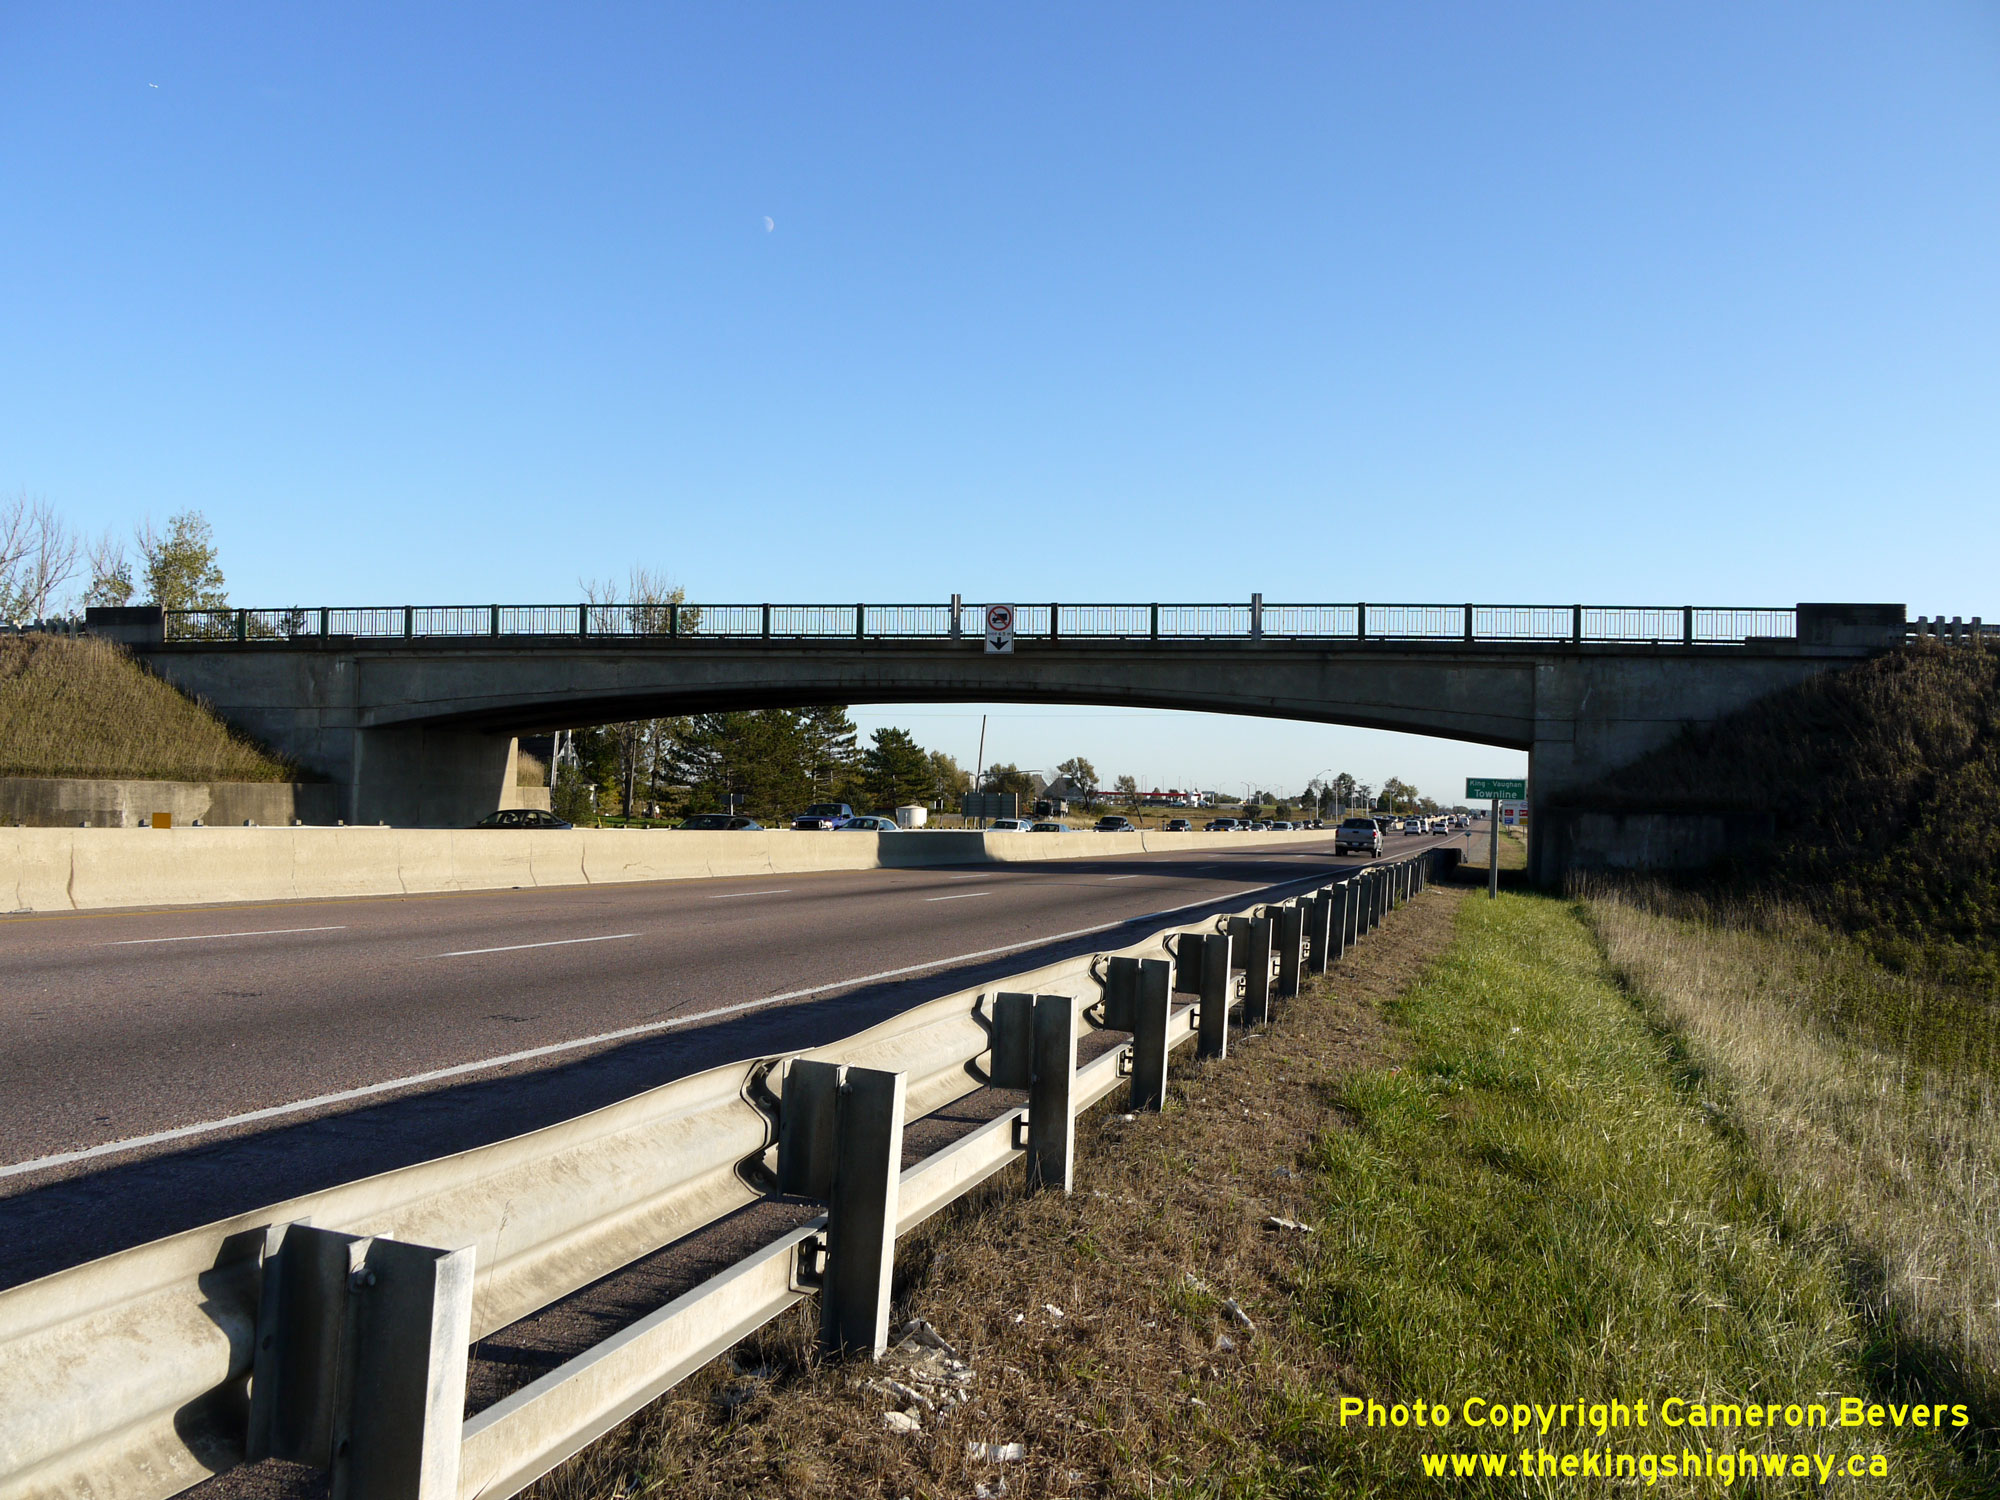
Enlarged Photo Here.(Photograph taken on October 4, 2011 - © Cameron Bevers) Right - Northern side of the King-Vaughan Townline Overpass on Hwy 400. This single-span concrete rigid frame girder structure was built under Contract
#1960-276 and was completed in 1961. This was among the later structures built on the Toronto-Barrie section of Hwy 400. Prior to the construction of this overpass in
1961, King-Vaughan Townline crossed Hwy 400 via an at-grade intersection. This was one of the handful of at-grade intersections either grade-separated or closed along
Hwy 400 during the early 1960s. See an Enlarged Photo Here.(Photograph taken on October 4, 2011 - © Cameron Bevers) 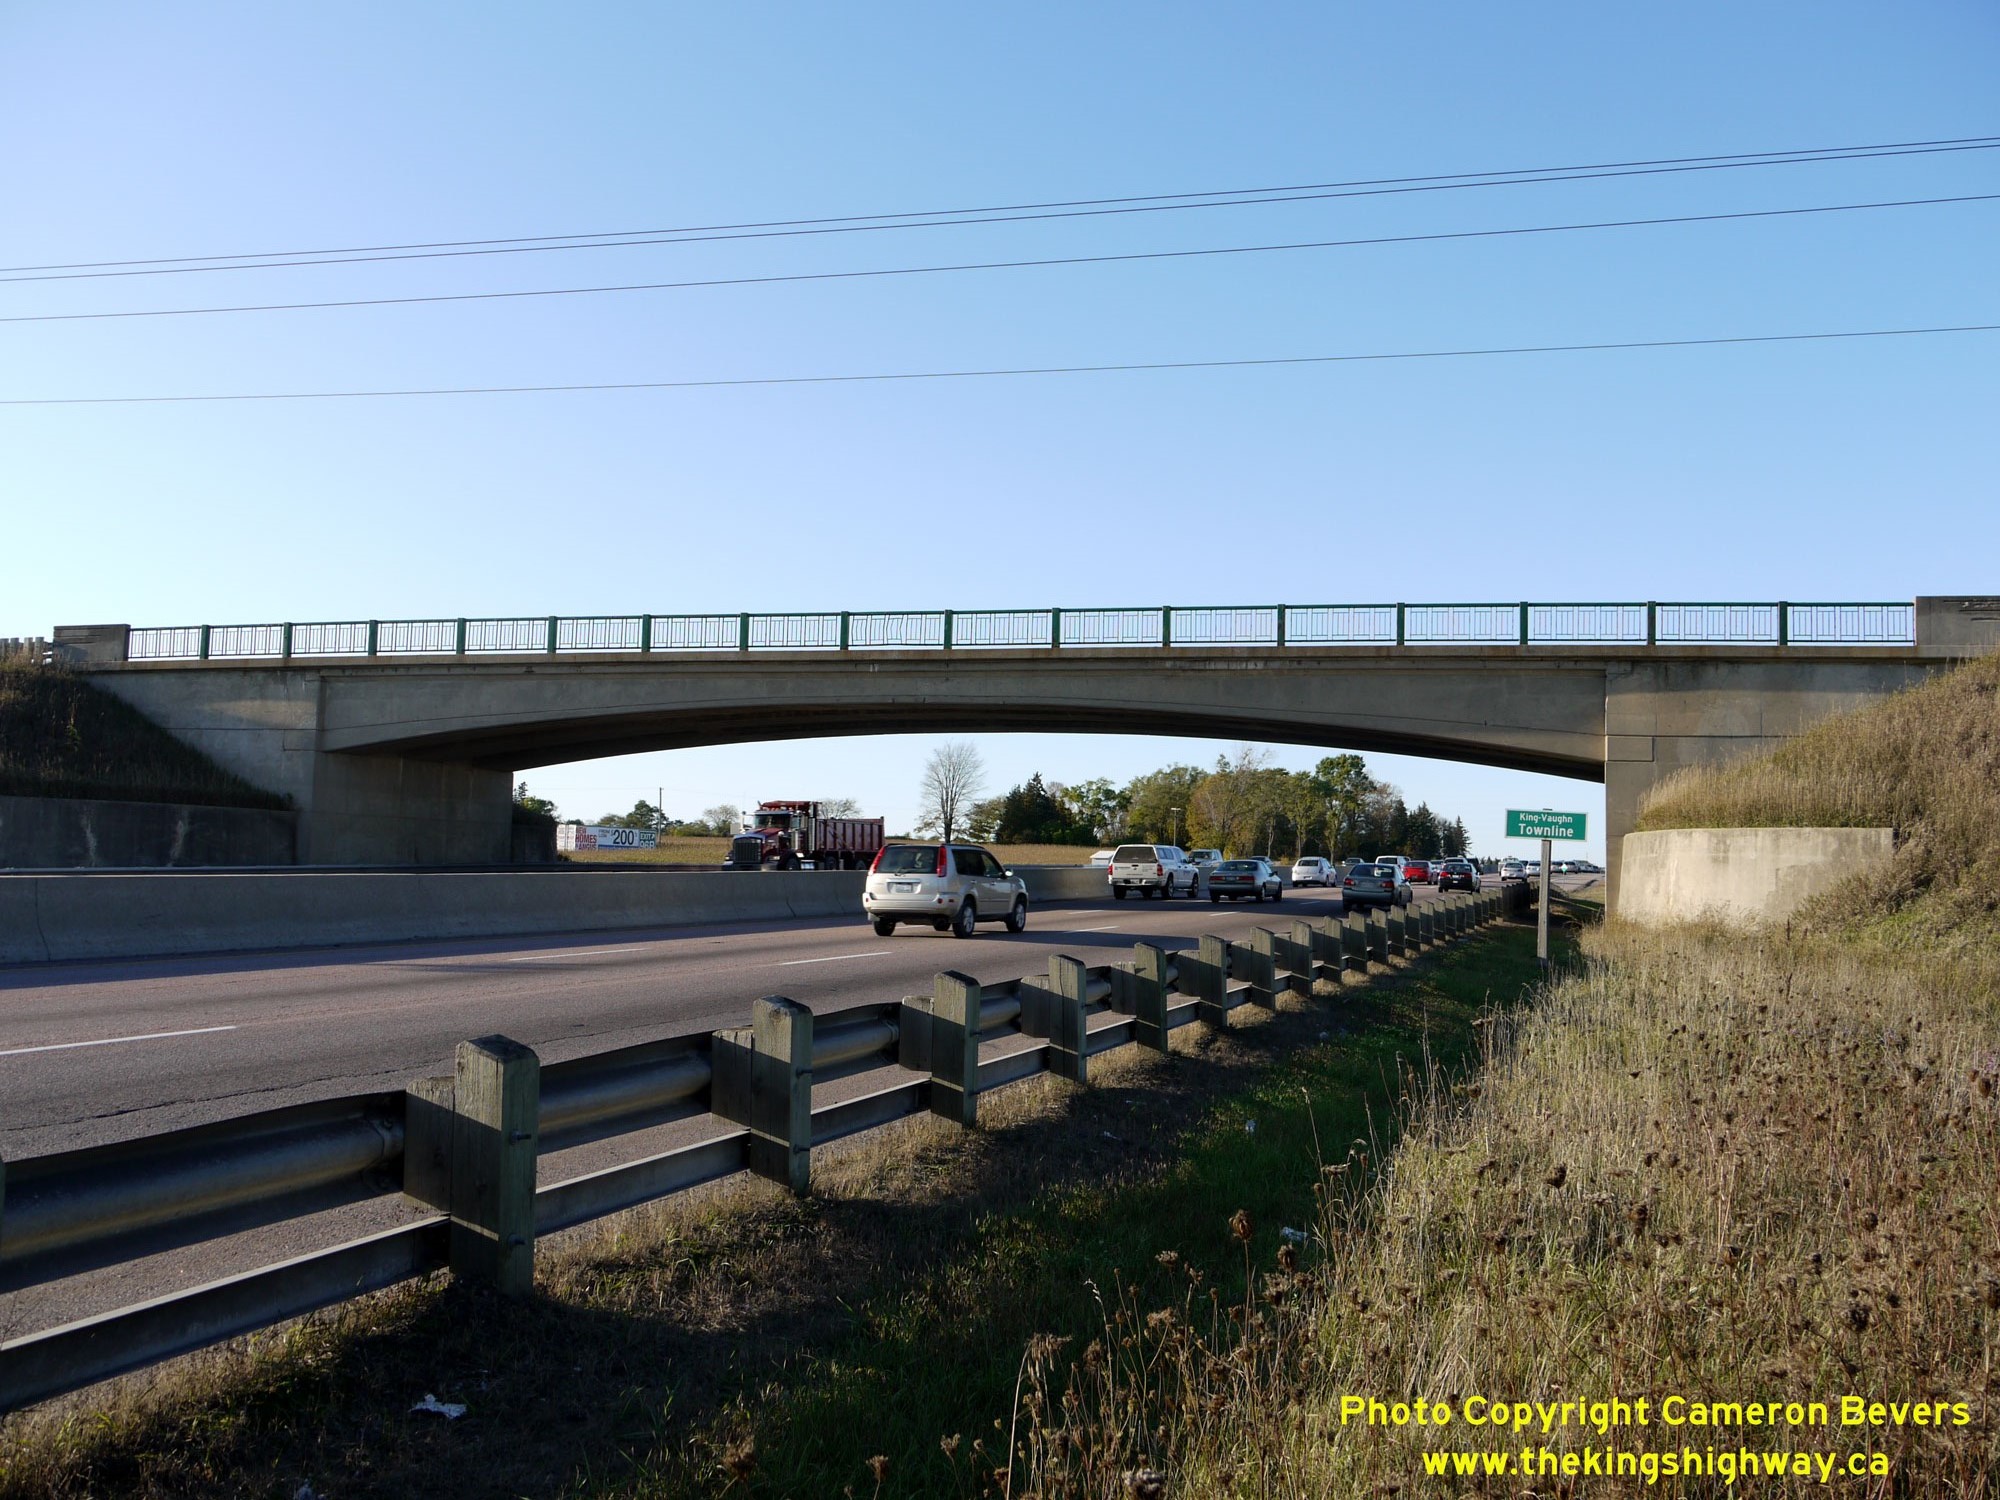
 Left - Southern side of the King-Vaughan Townline Overpass (Site #37-271) on Hwy 400. This structure is situated about 2 km south of the King Road Interchange.
See an Enlarged Photo Here. Left - Southern side of the King-Vaughan Townline Overpass (Site #37-271) on Hwy 400. This structure is situated about 2 km south of the King Road Interchange.
See an Enlarged Photo Here.(Photograph taken on October 4, 2011 - © Cameron Bevers) Right - Facing north along Hwy 400 towards Barrie from the King-Vaughan Townline Underpass in 2011, prior to widening. See an
Enlarged Photo Here.(Photograph taken on October 4, 2011 - © Cameron Bevers) 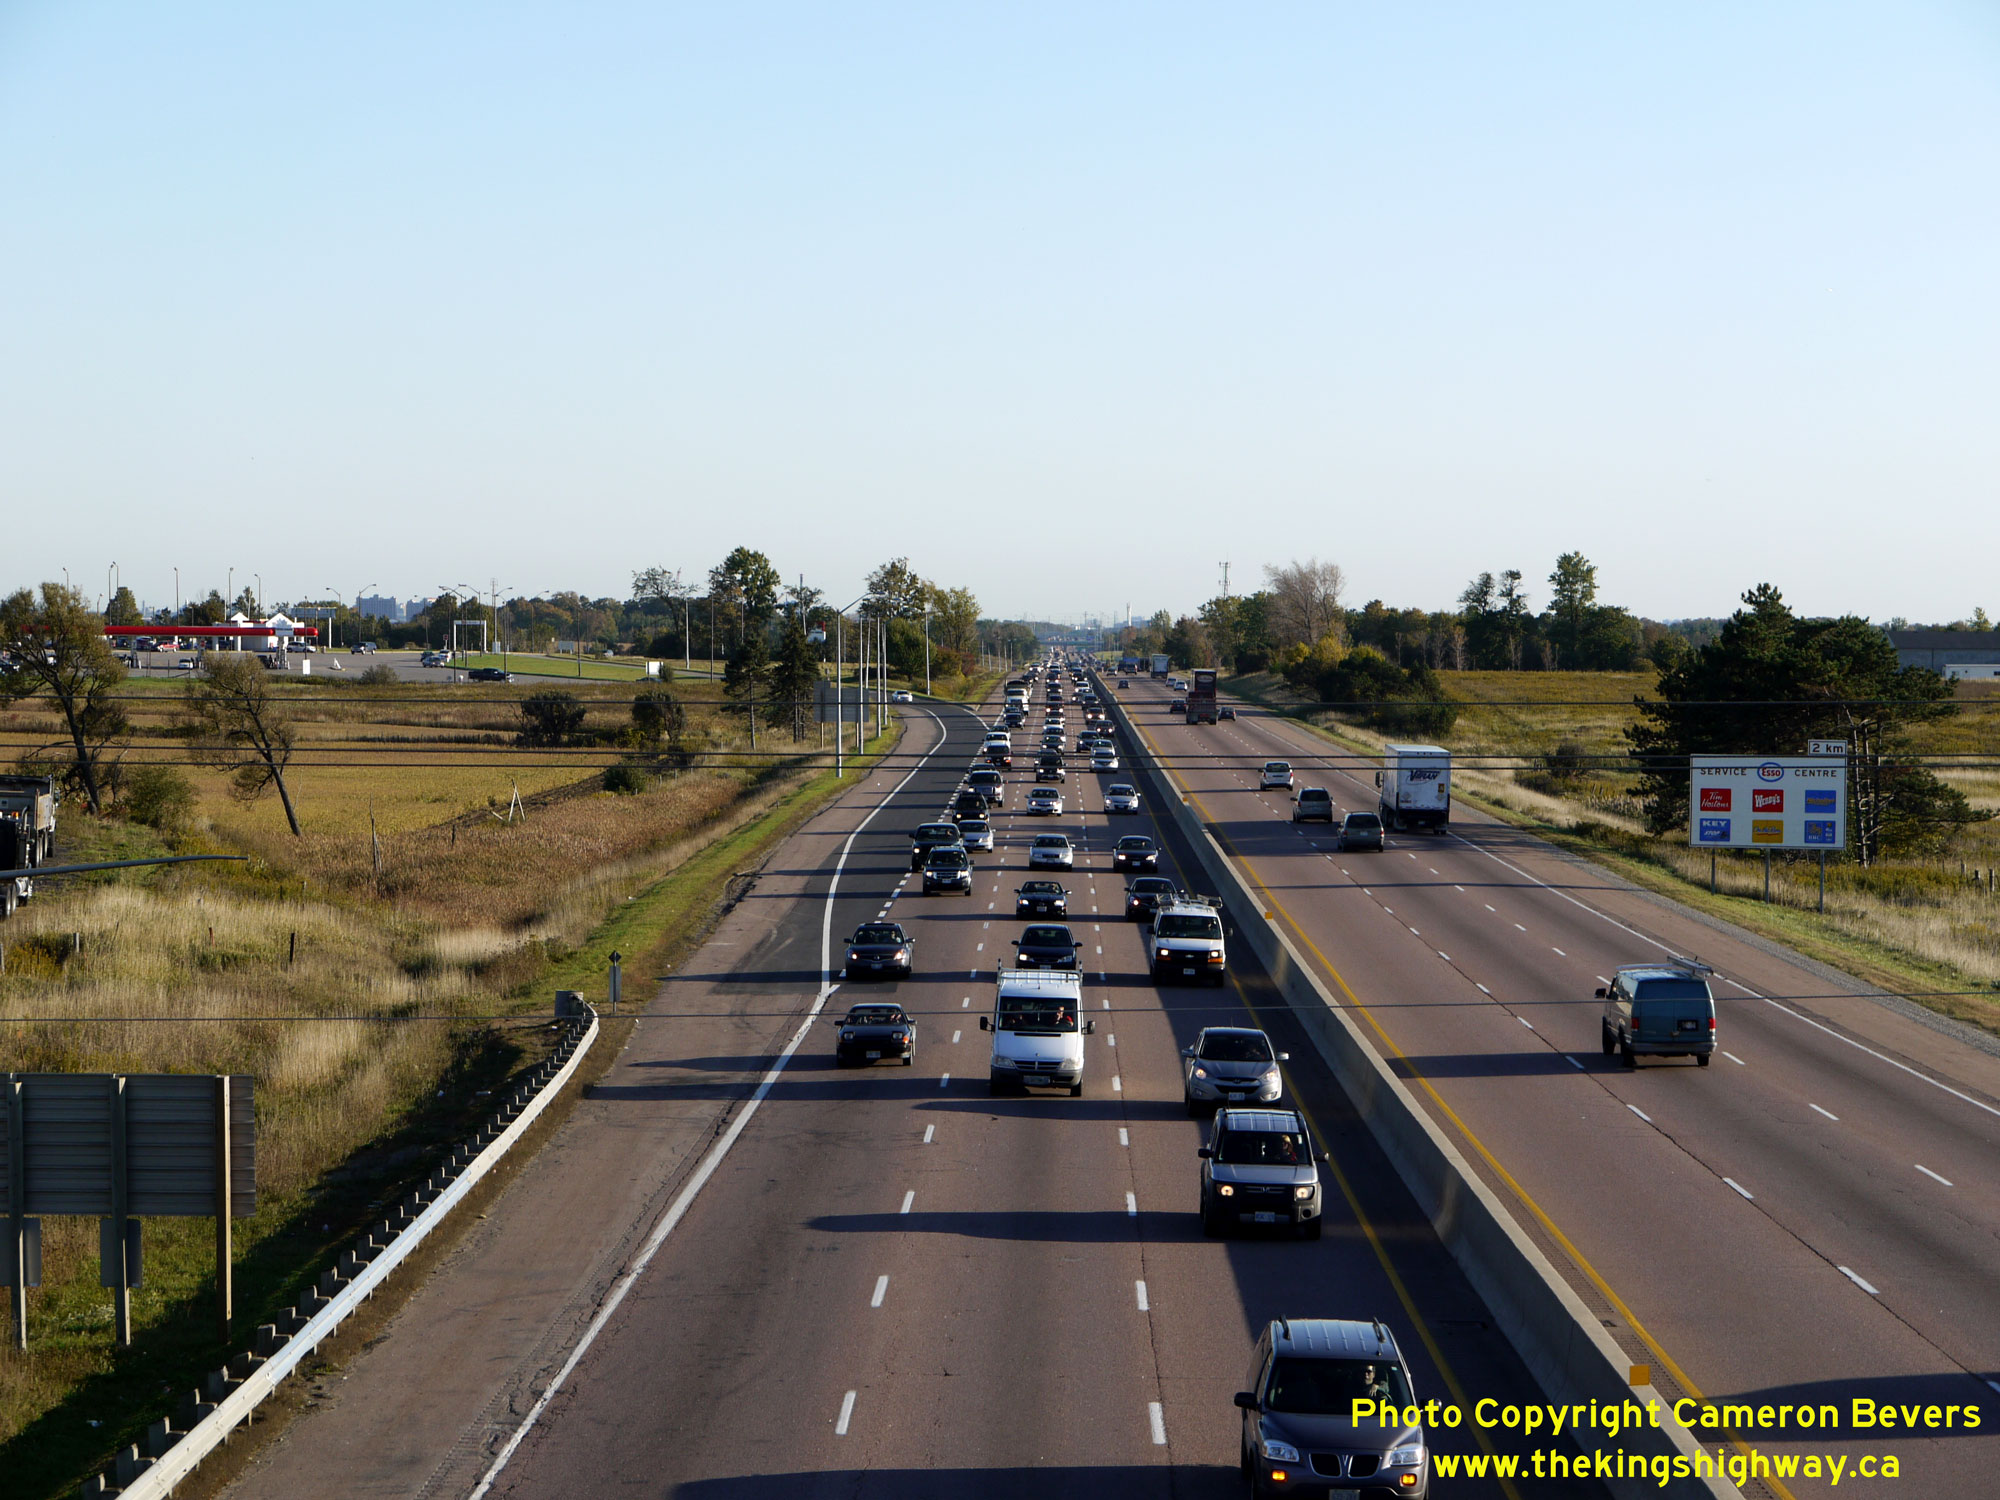
 Left - Facing south along Hwy 400 towards Toronto from the King-Vaughan Townline Underpass in 2011, prior to widening. See an
Enlarged Photo Here. Left - Facing south along Hwy 400 towards Toronto from the King-Vaughan Townline Underpass in 2011, prior to widening. See an
Enlarged Photo Here.(Photograph taken on October 4, 2011 - © Cameron Bevers) Right - King-Vaughan Townline Overpass on Hwy 400, facing east towards Richmond Hill. This structure was demolished and replaced as part of the widening of
Hwy 400 for HOV lanes under Contract #2017-2001. The replacement bridge was designed to accommodate a widened 10-lane Hwy 400 below the structure. See an
Enlarged Photo Here.(Photograph taken on October 4, 2011 - © Cameron Bevers) 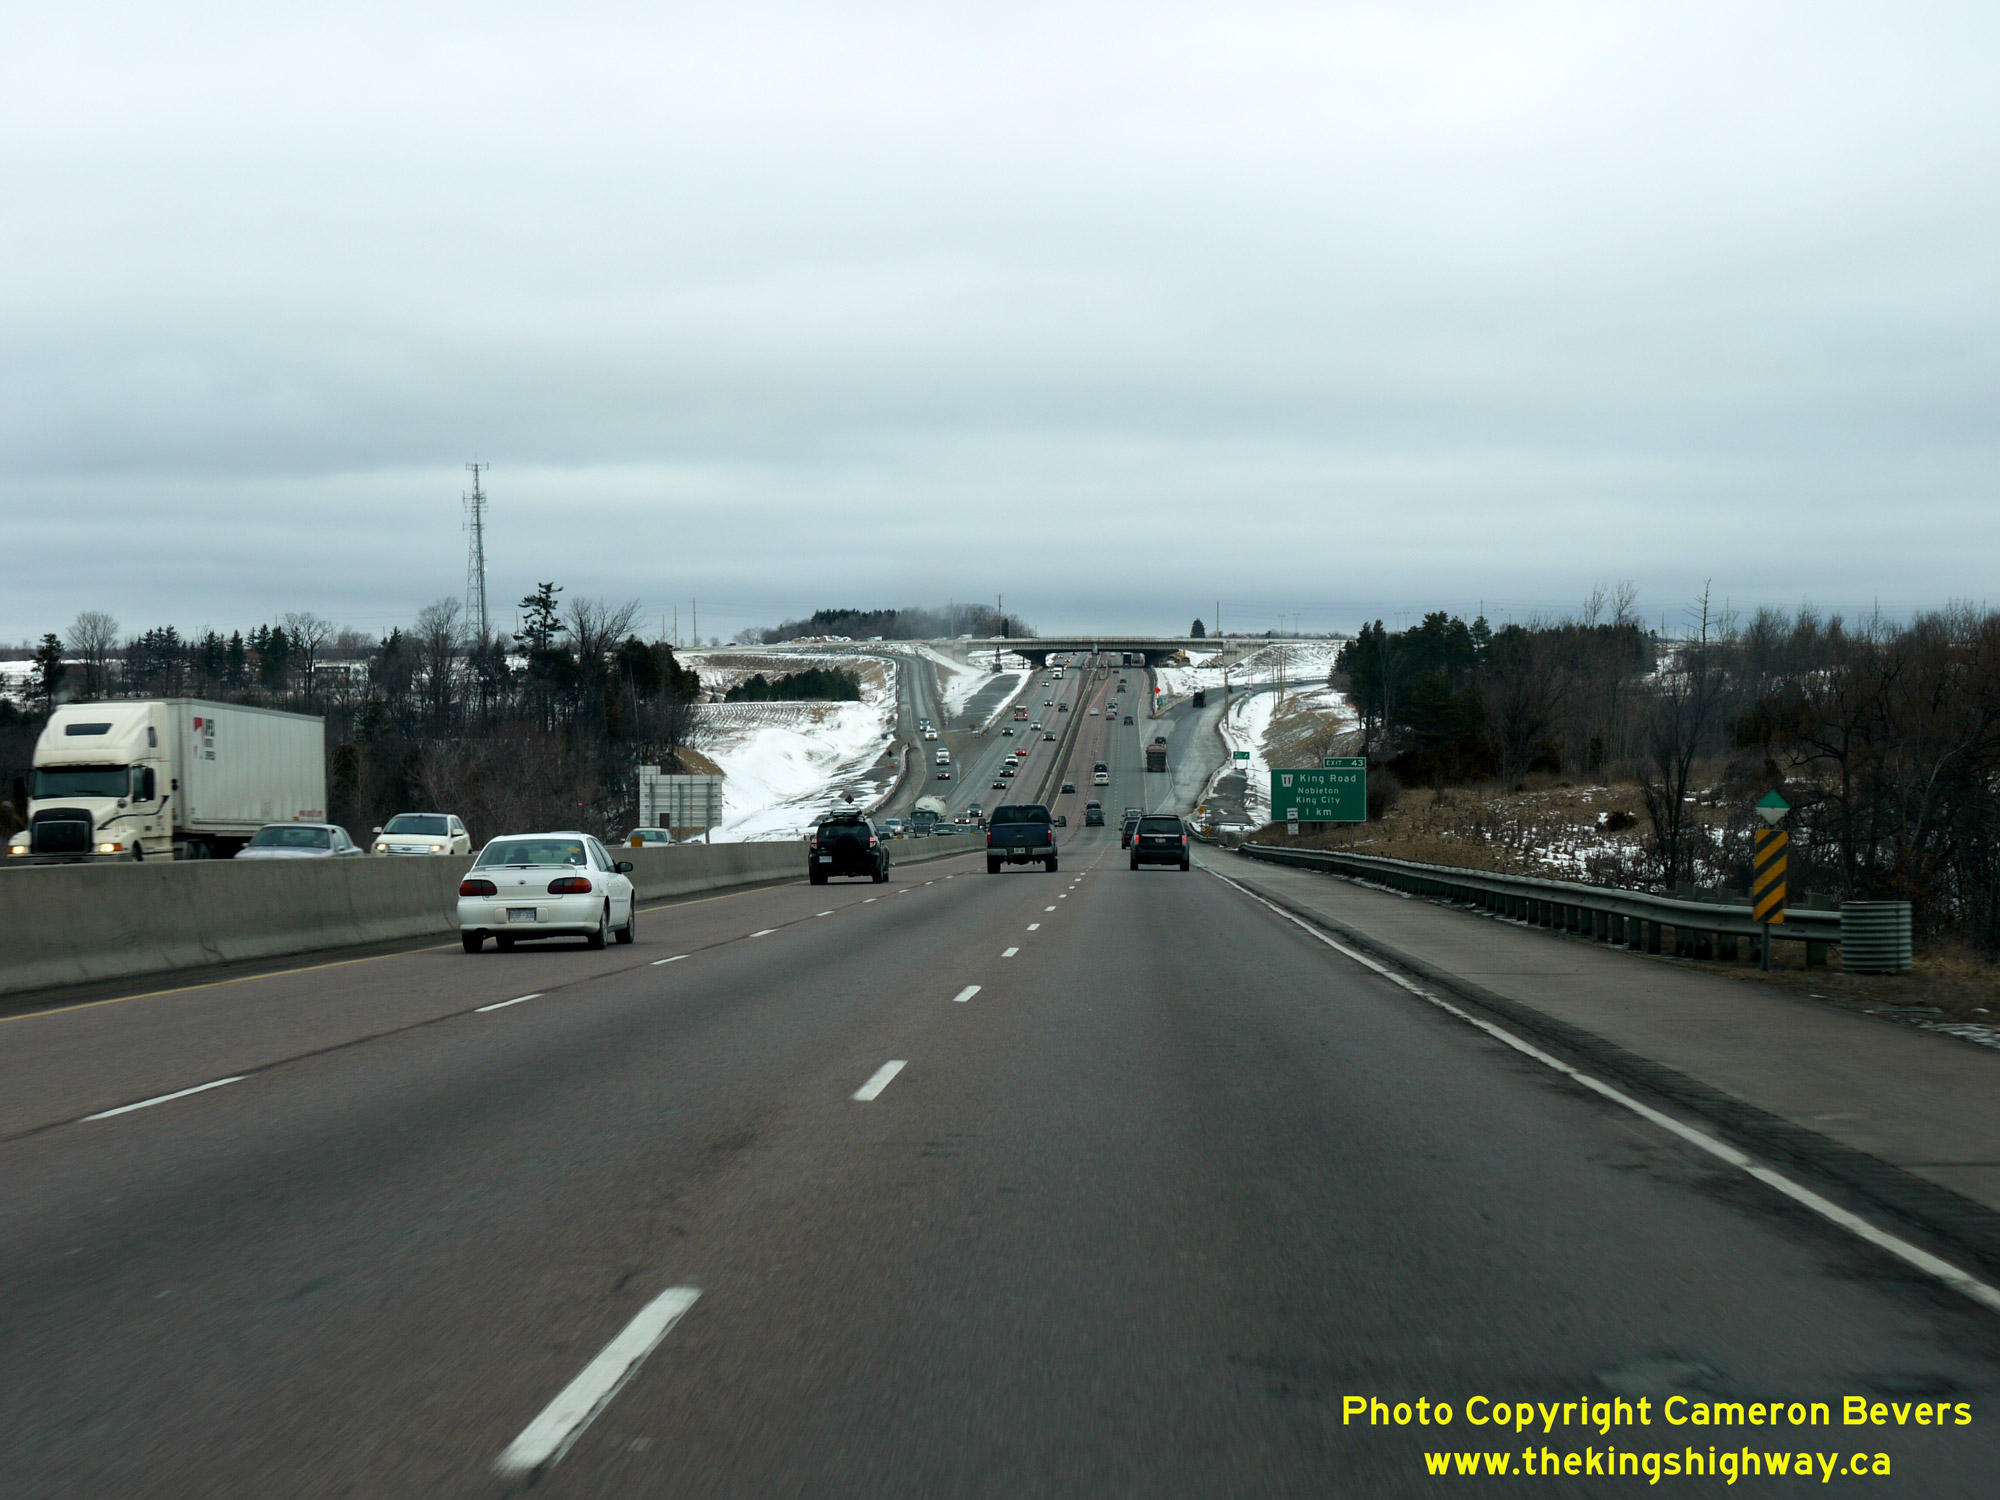

Left - Facing north along Hwy 400 approaching the King Road Interchange. Note the newly-completed directional ramp in the southwest quadrant at left. The
advance construction of this ramp was necessary so that Hwy 400 traffic could be detoured through the ramp during the demolition of the old King Road Overpass. See an
Enlarged Photo Here. (Photograph taken on February 19, 2010 - © Cameron Bevers) Right - Ground-mounted freeway exit guide sign for the upcoming King Road Interchange on northbound Hwy 400. Ground-mounted freeway exit guide signs are becoming rather rare on the southernmost portion of Hwy 400, as the MTO slowly converts the highway's guide signs to overhead truss-mounted exit signs. See an Enlarged Photo Here. (Photograph taken on February 19, 2010 - © Cameron Bevers) 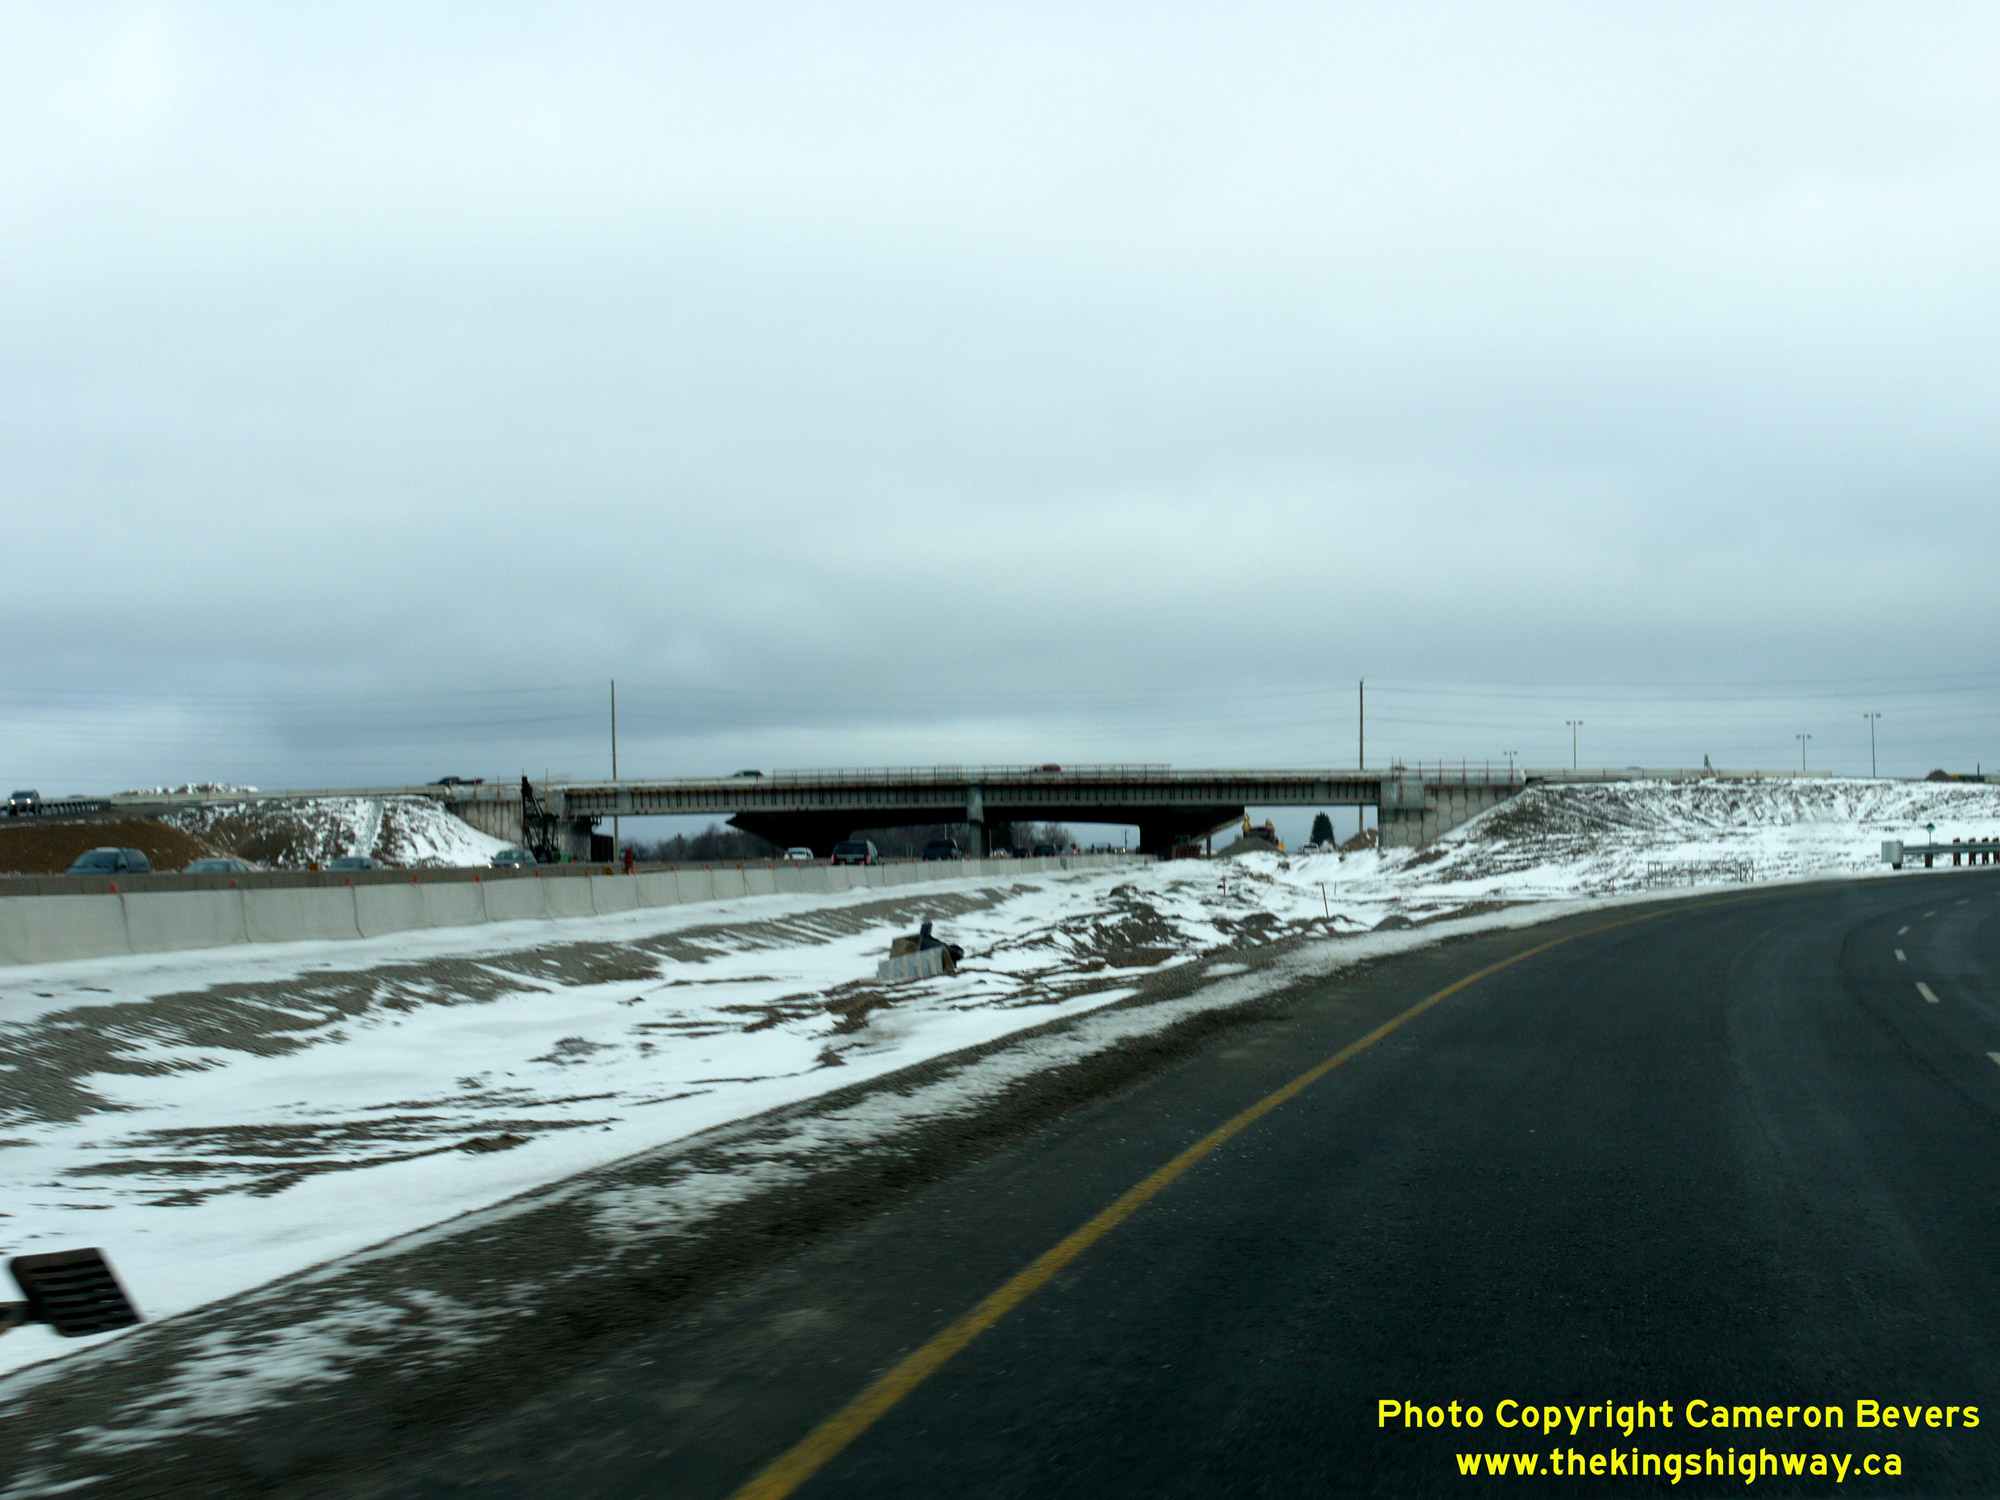
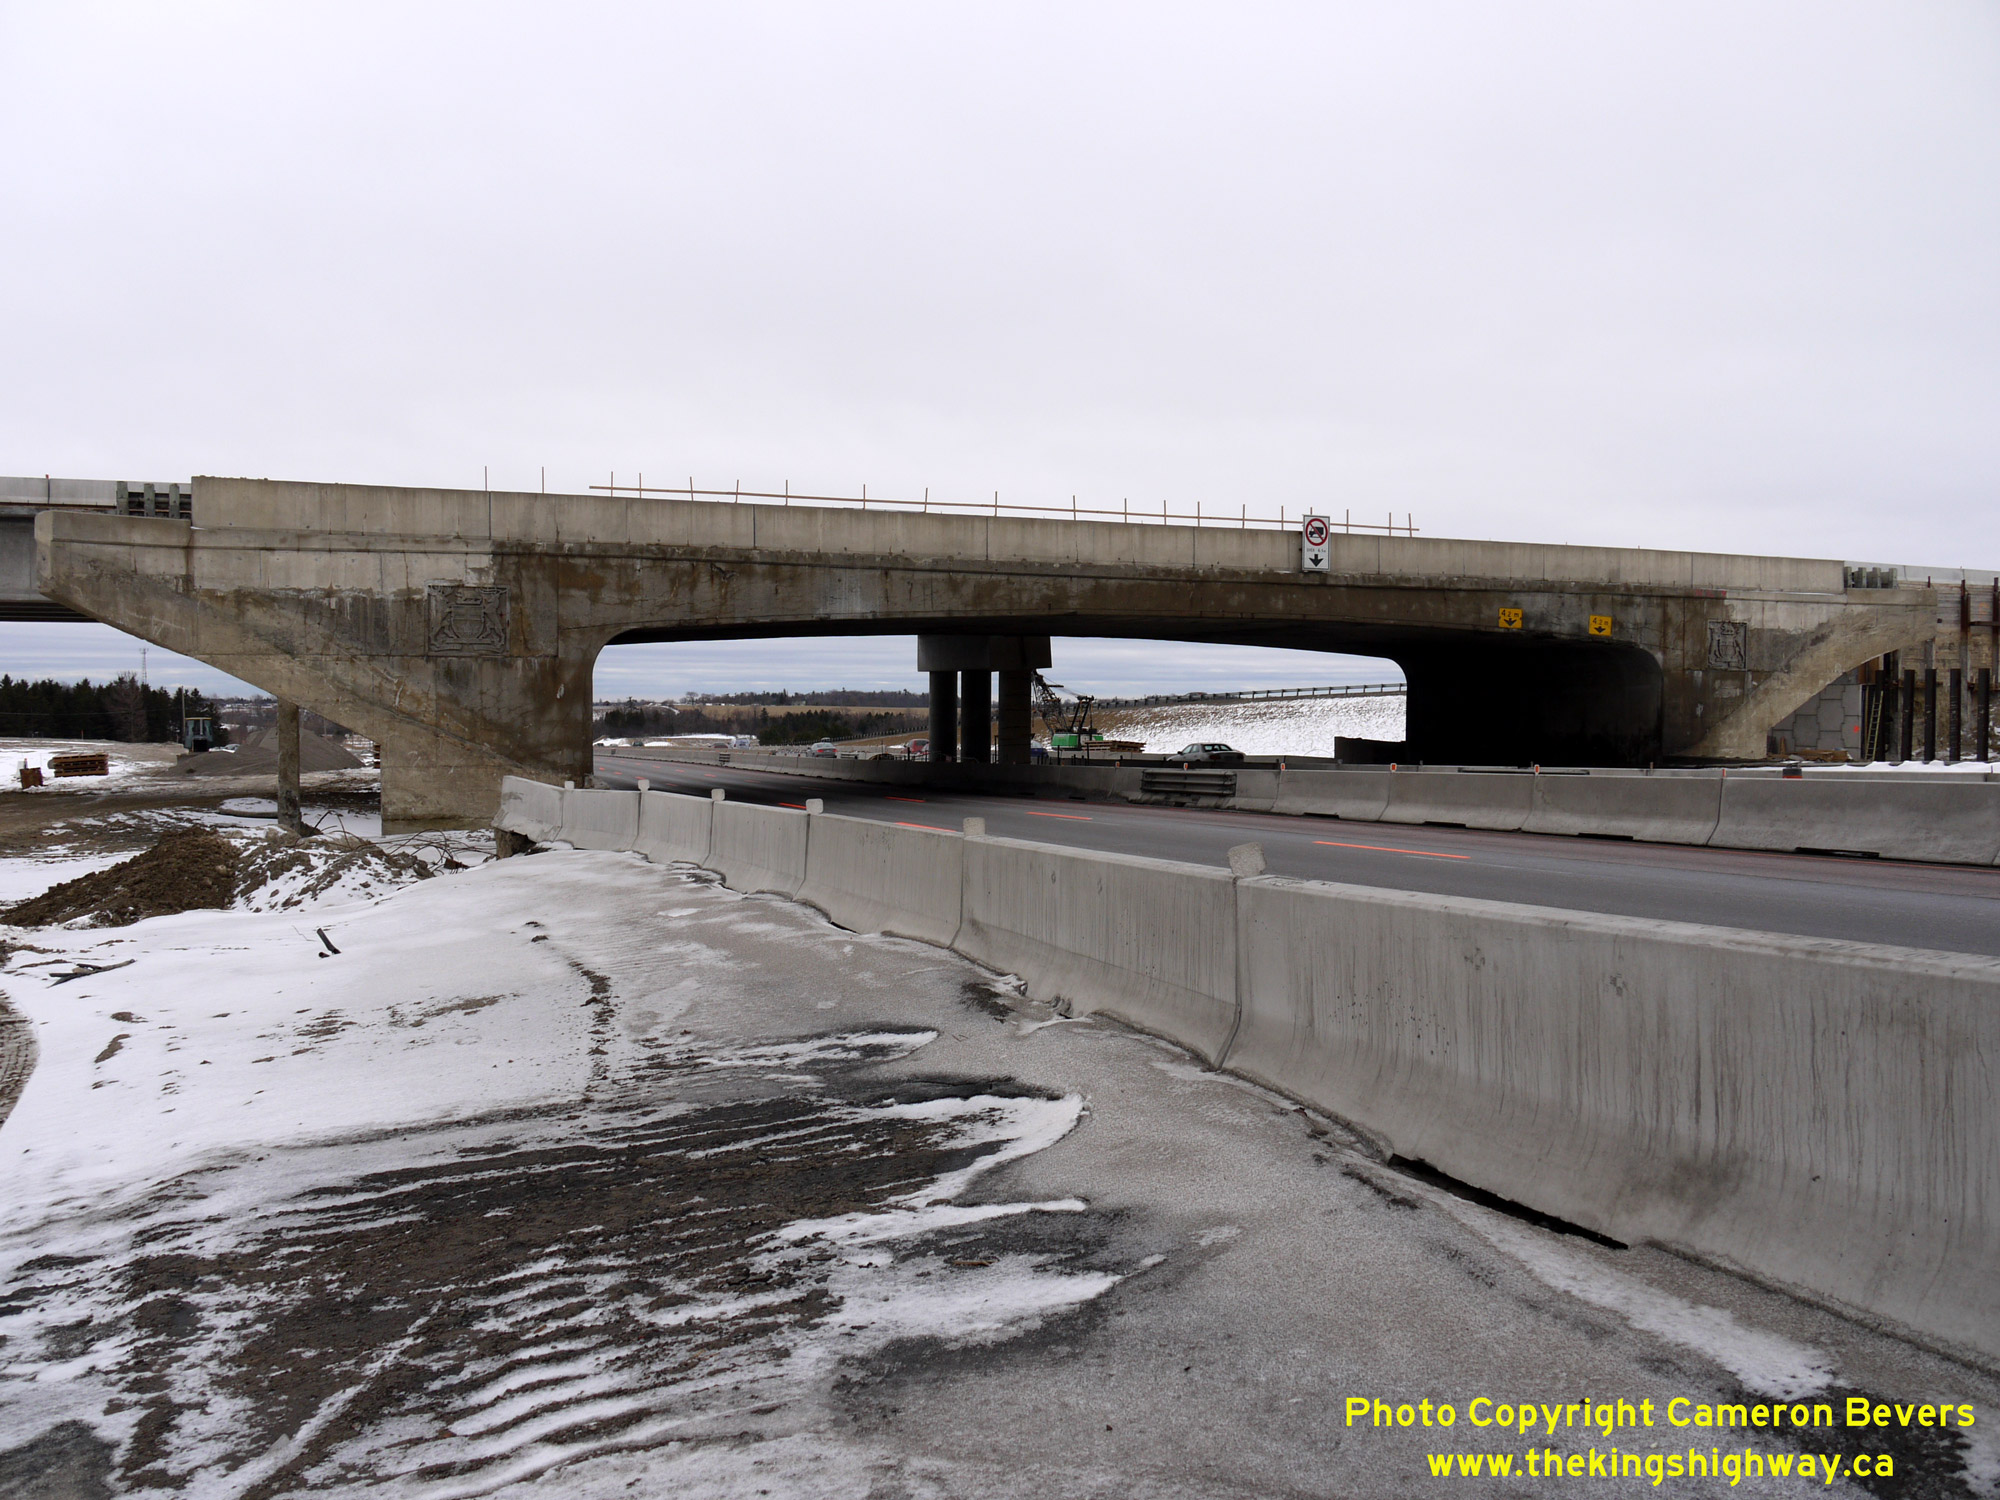
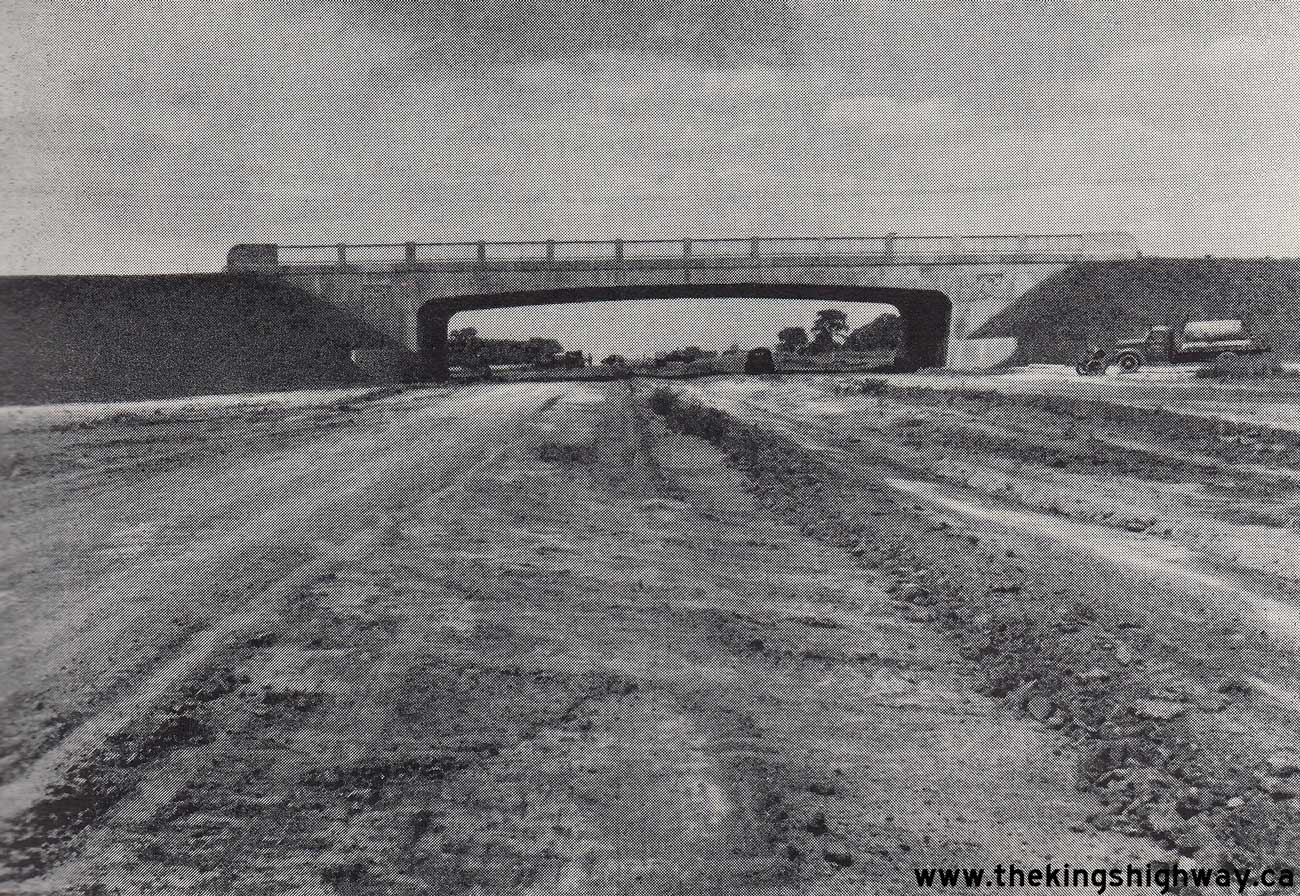
Left - New King Road Overpass as seen from the northbound Hwy 400 exit ramp. The old 1950 concrete rigid frame overpass can be seen in the background. See an
Enlarged Photo Here. (Photograph taken on February 19, 2010 - © Cameron Bevers) Right - Old King Road Overpass, two days before the structure was demolished. The approaches have been pulled back in preparation for the bridge removal stage. The King Road Interchange was originally built in 1949-1950, and was reconstructed under Contract #2008-2018. See an Enlarged Photo Here. (Photograph taken on February 19, 2010 - © Cameron Bevers) 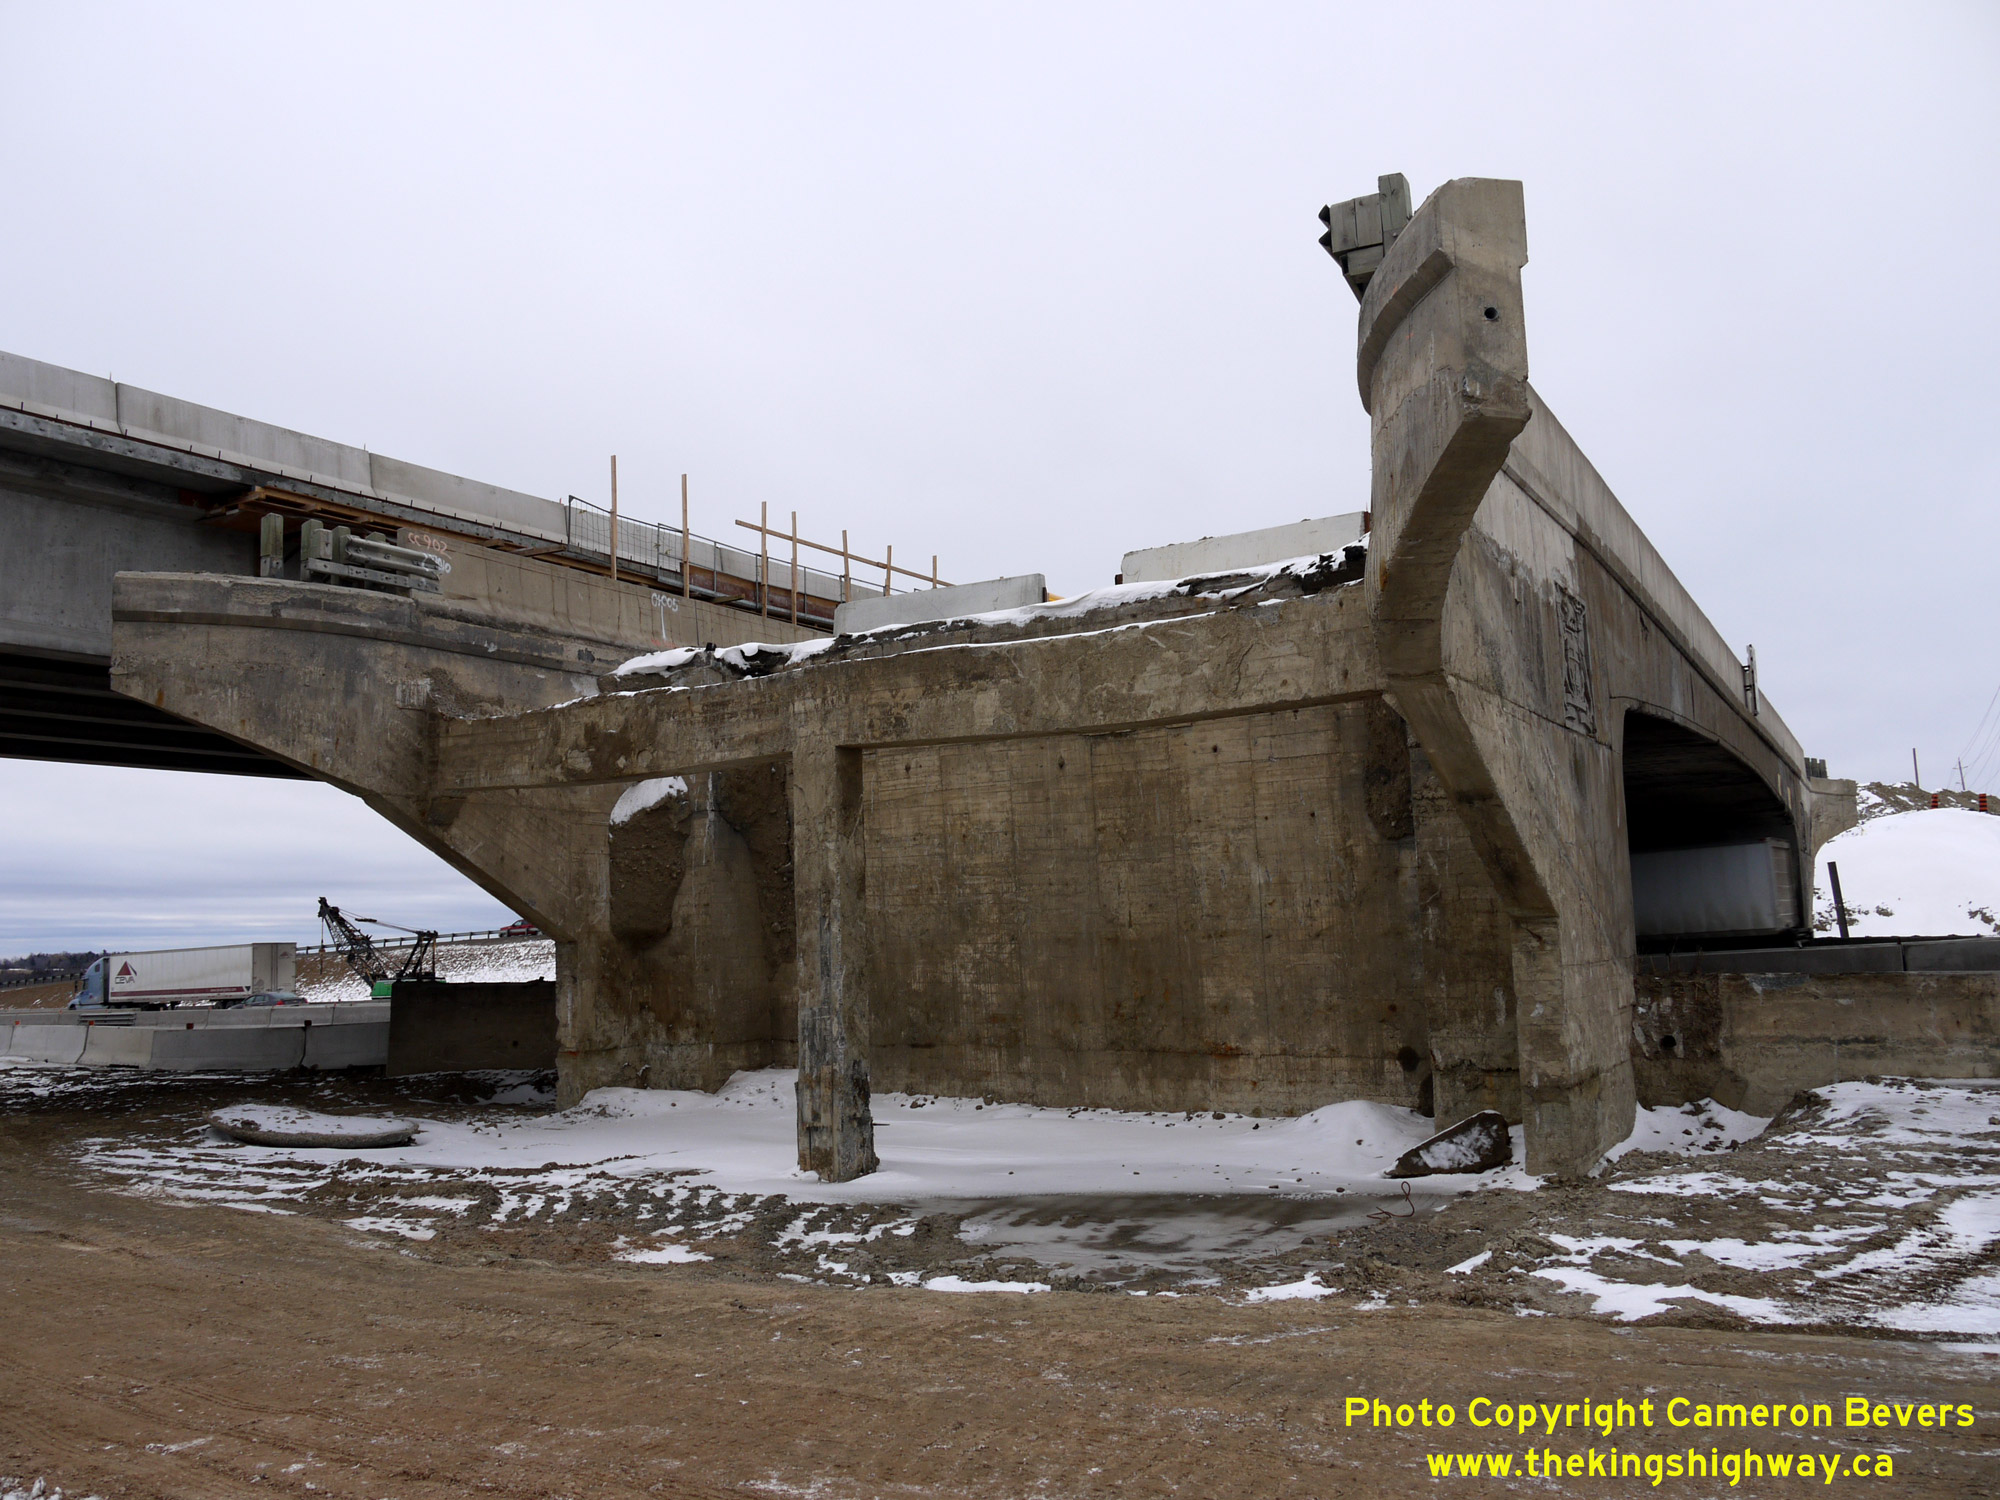

Left - With the approach fill removed, the angled wing walls of the King Road Overpass and the T-beam behind the bridge abutment have been uncovered. The
original King Road Overpass was built under Contract #1948-83 (structural steel) and Contract #1949-63 (general contract) and was completed in 1950. See an
Enlarged Photo Here. (Photograph taken on February 19, 2010 - © Cameron Bevers) Right - Old and new King Road Overpasses side by side. Once the old 1950 structure is removed, the second half of the new structure will be completed in its place. See an Enlarged Photo Here. (Photograph taken on February 19, 2010 - © Cameron Bevers) 
Left - The old 1950 structure was initially designed to cross over a four-lane freeway with a depressed grass median. The grass median was backfilled in 1971
in order to permit the construction of one additional freeway lane per direction, so the bridge then crossed over six lanes of traffic (three lanes per direction).
The new King Road Overpass on Hwy 400 has room for two additional lanes in each direction on the freeway below. One of the new lanes on Hwy 400 will be an HOV carpool
lane. See an Enlarged Photo Here. (Photograph taken on February 19, 2010 - © Cameron Bevers) Right - Approaching the Old King Road Overpass on southbound Hwy 400, two days before the structure was demolished. See an Enlarged Photo Here. (Photograph taken on February 19, 2010 - © Cameron Bevers) 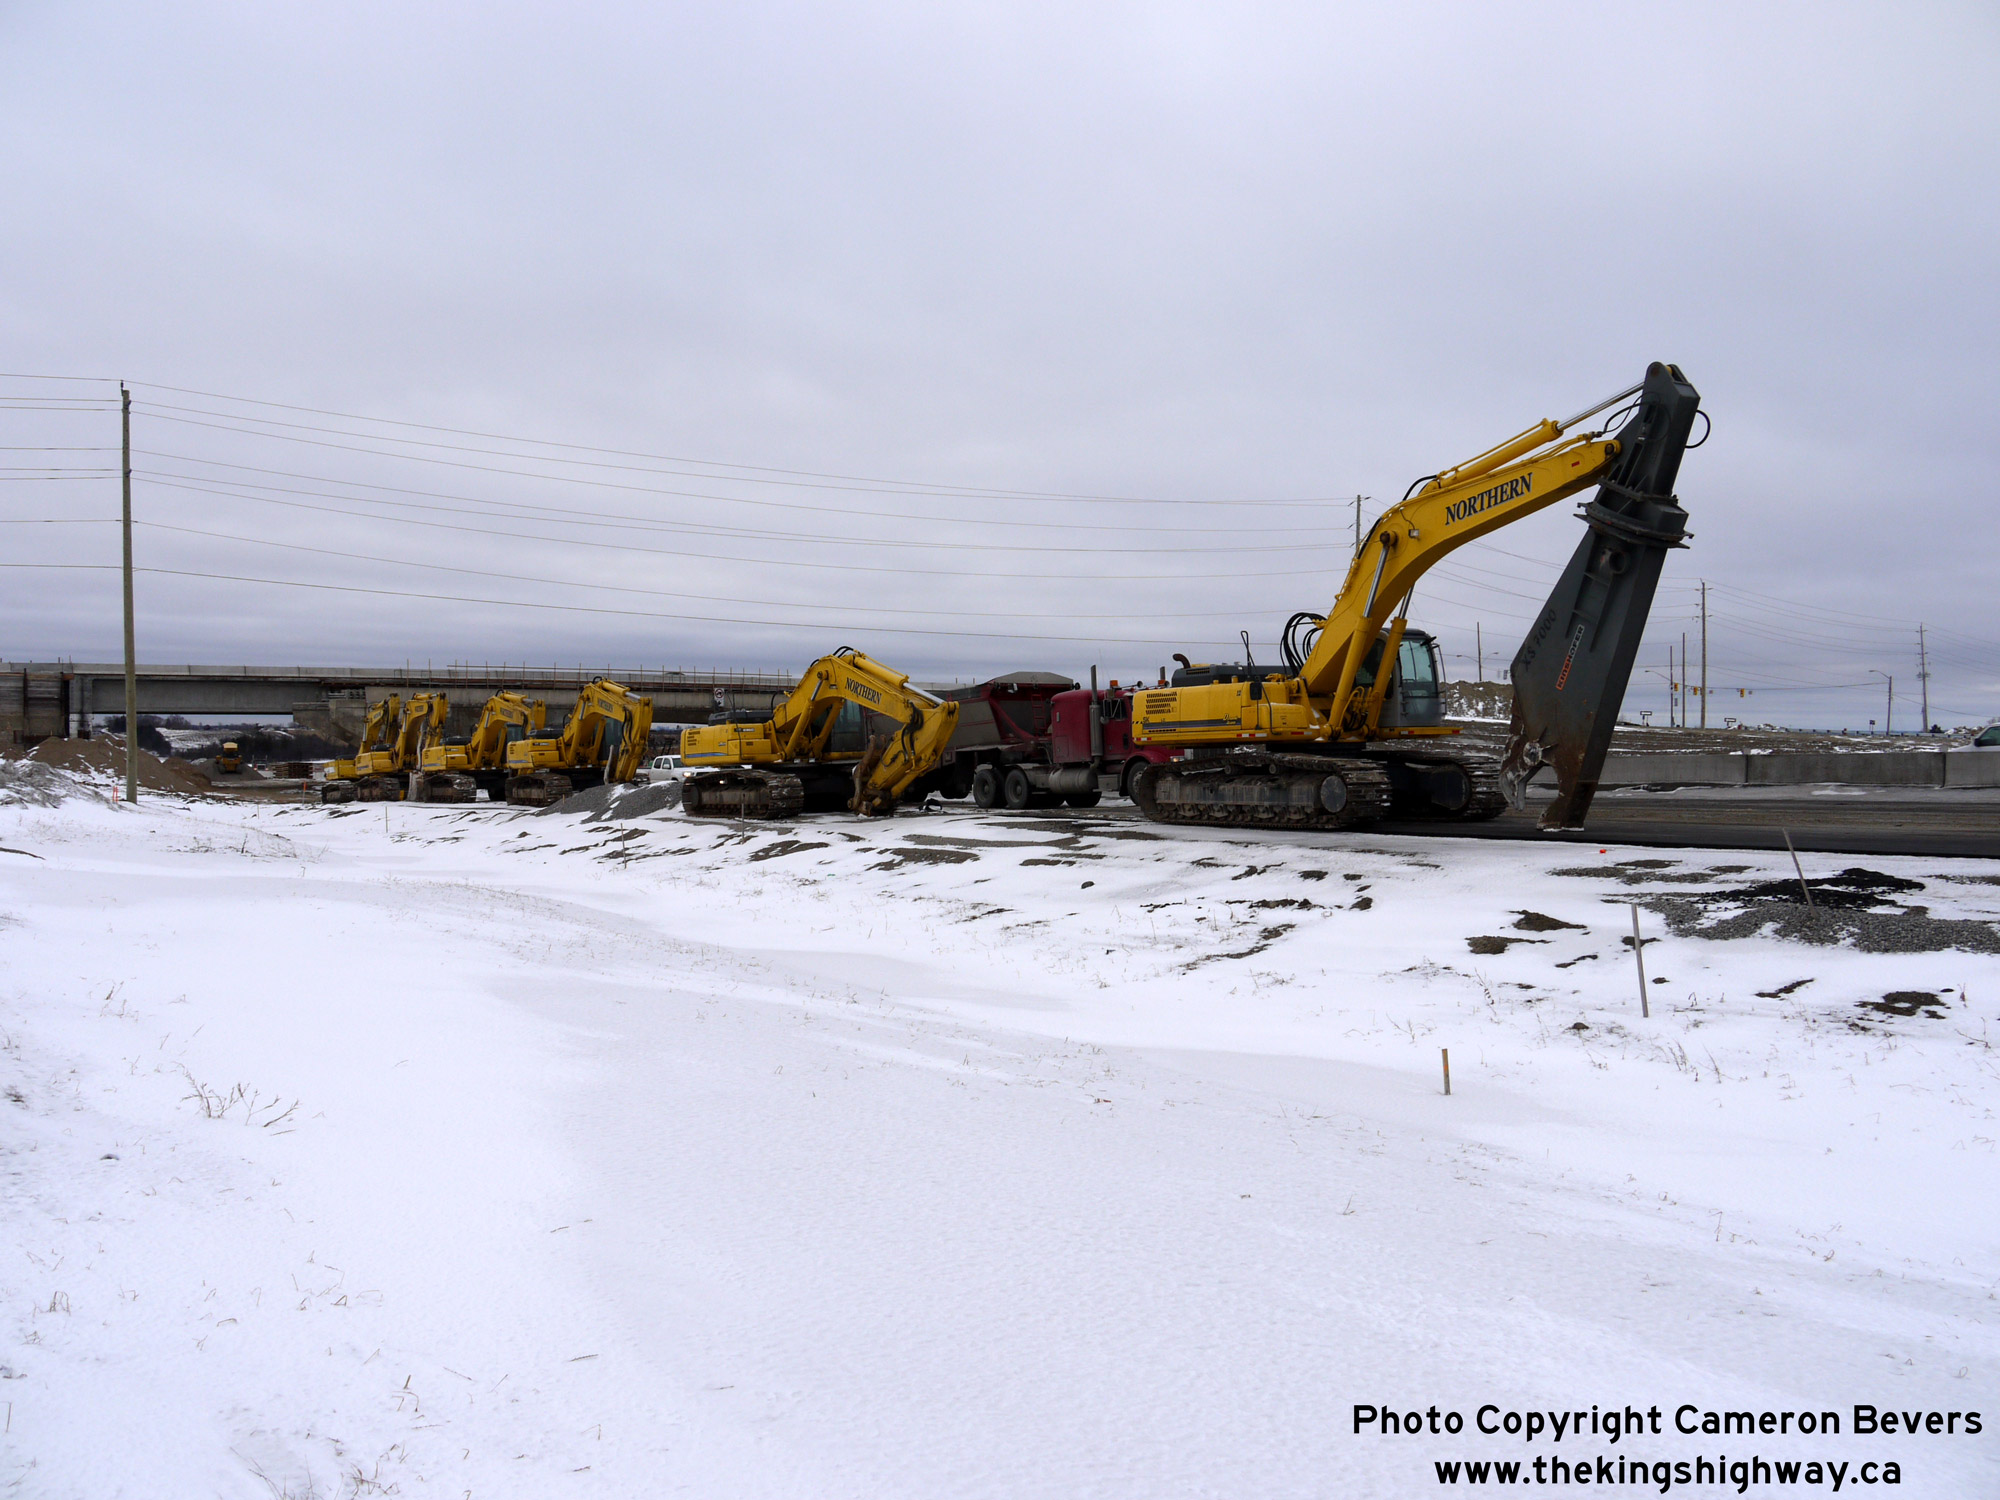
Left - Demolition equipment is lined up along the shoulder of Hwy 400 in preparation for the removal of the old King Road Overpass. As with most other recent Ontario bridge replacement projects, the old structure
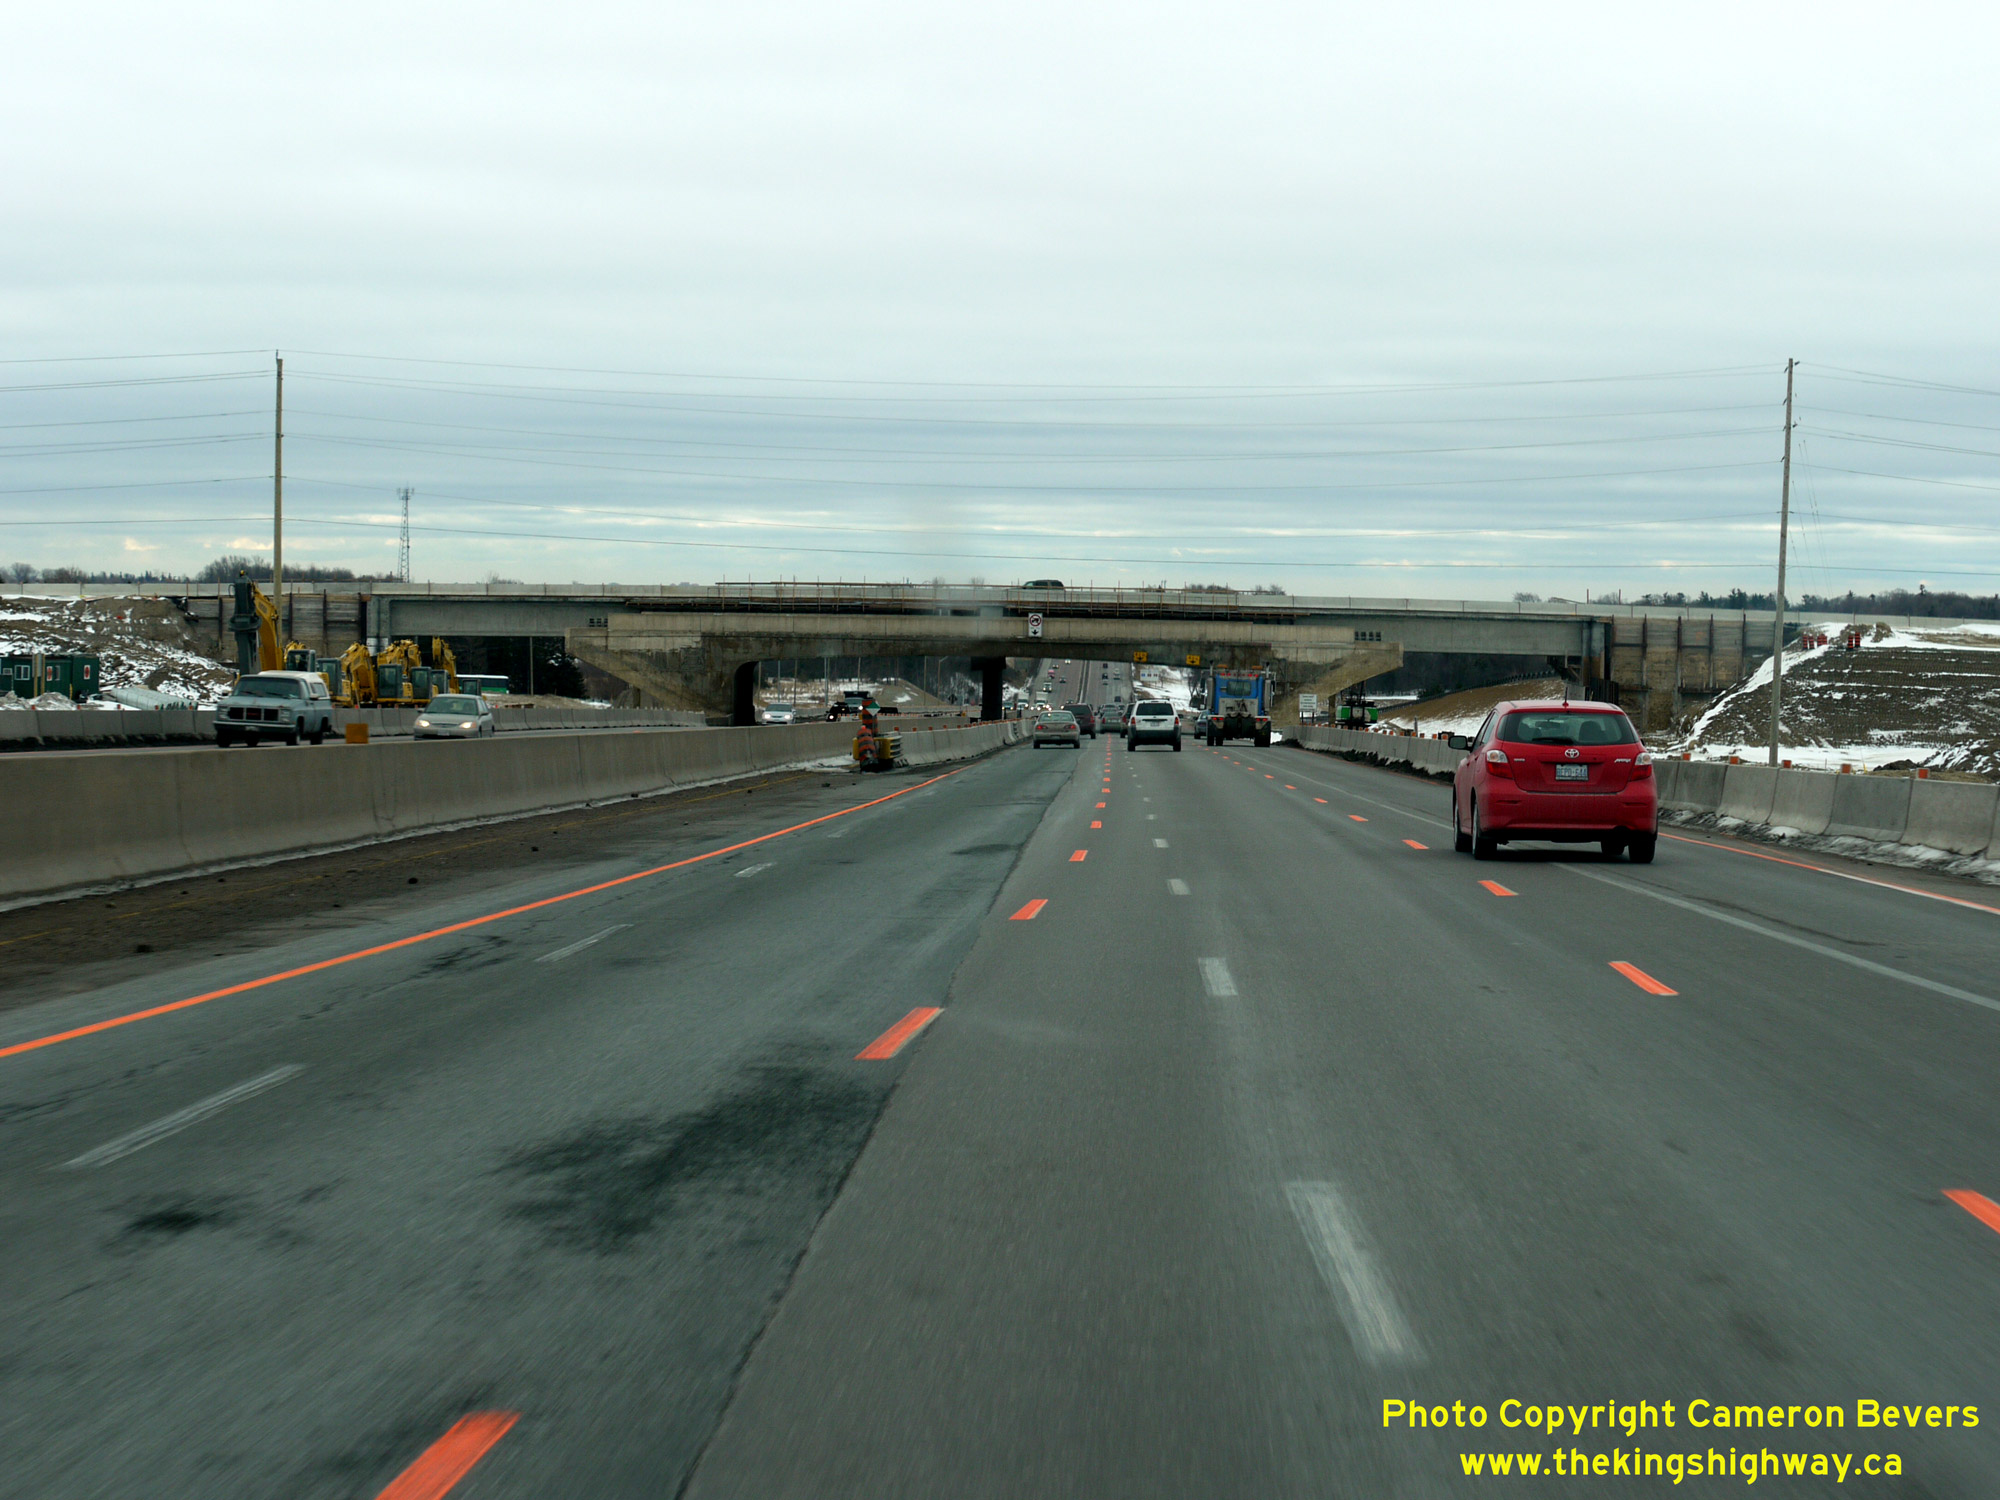
will be demolished in a single night. See an Enlarged Photo Here. (Photograph taken on February 19, 2010 - © Cameron Bevers) Right - Overhead freeway guide signs on the northbound lanes of Hwy 400 at the reconstructed King Road Interchange. See an
Enlarged Photo Here.(Photograph taken on April 12, 2012 - © Cameron Bevers) 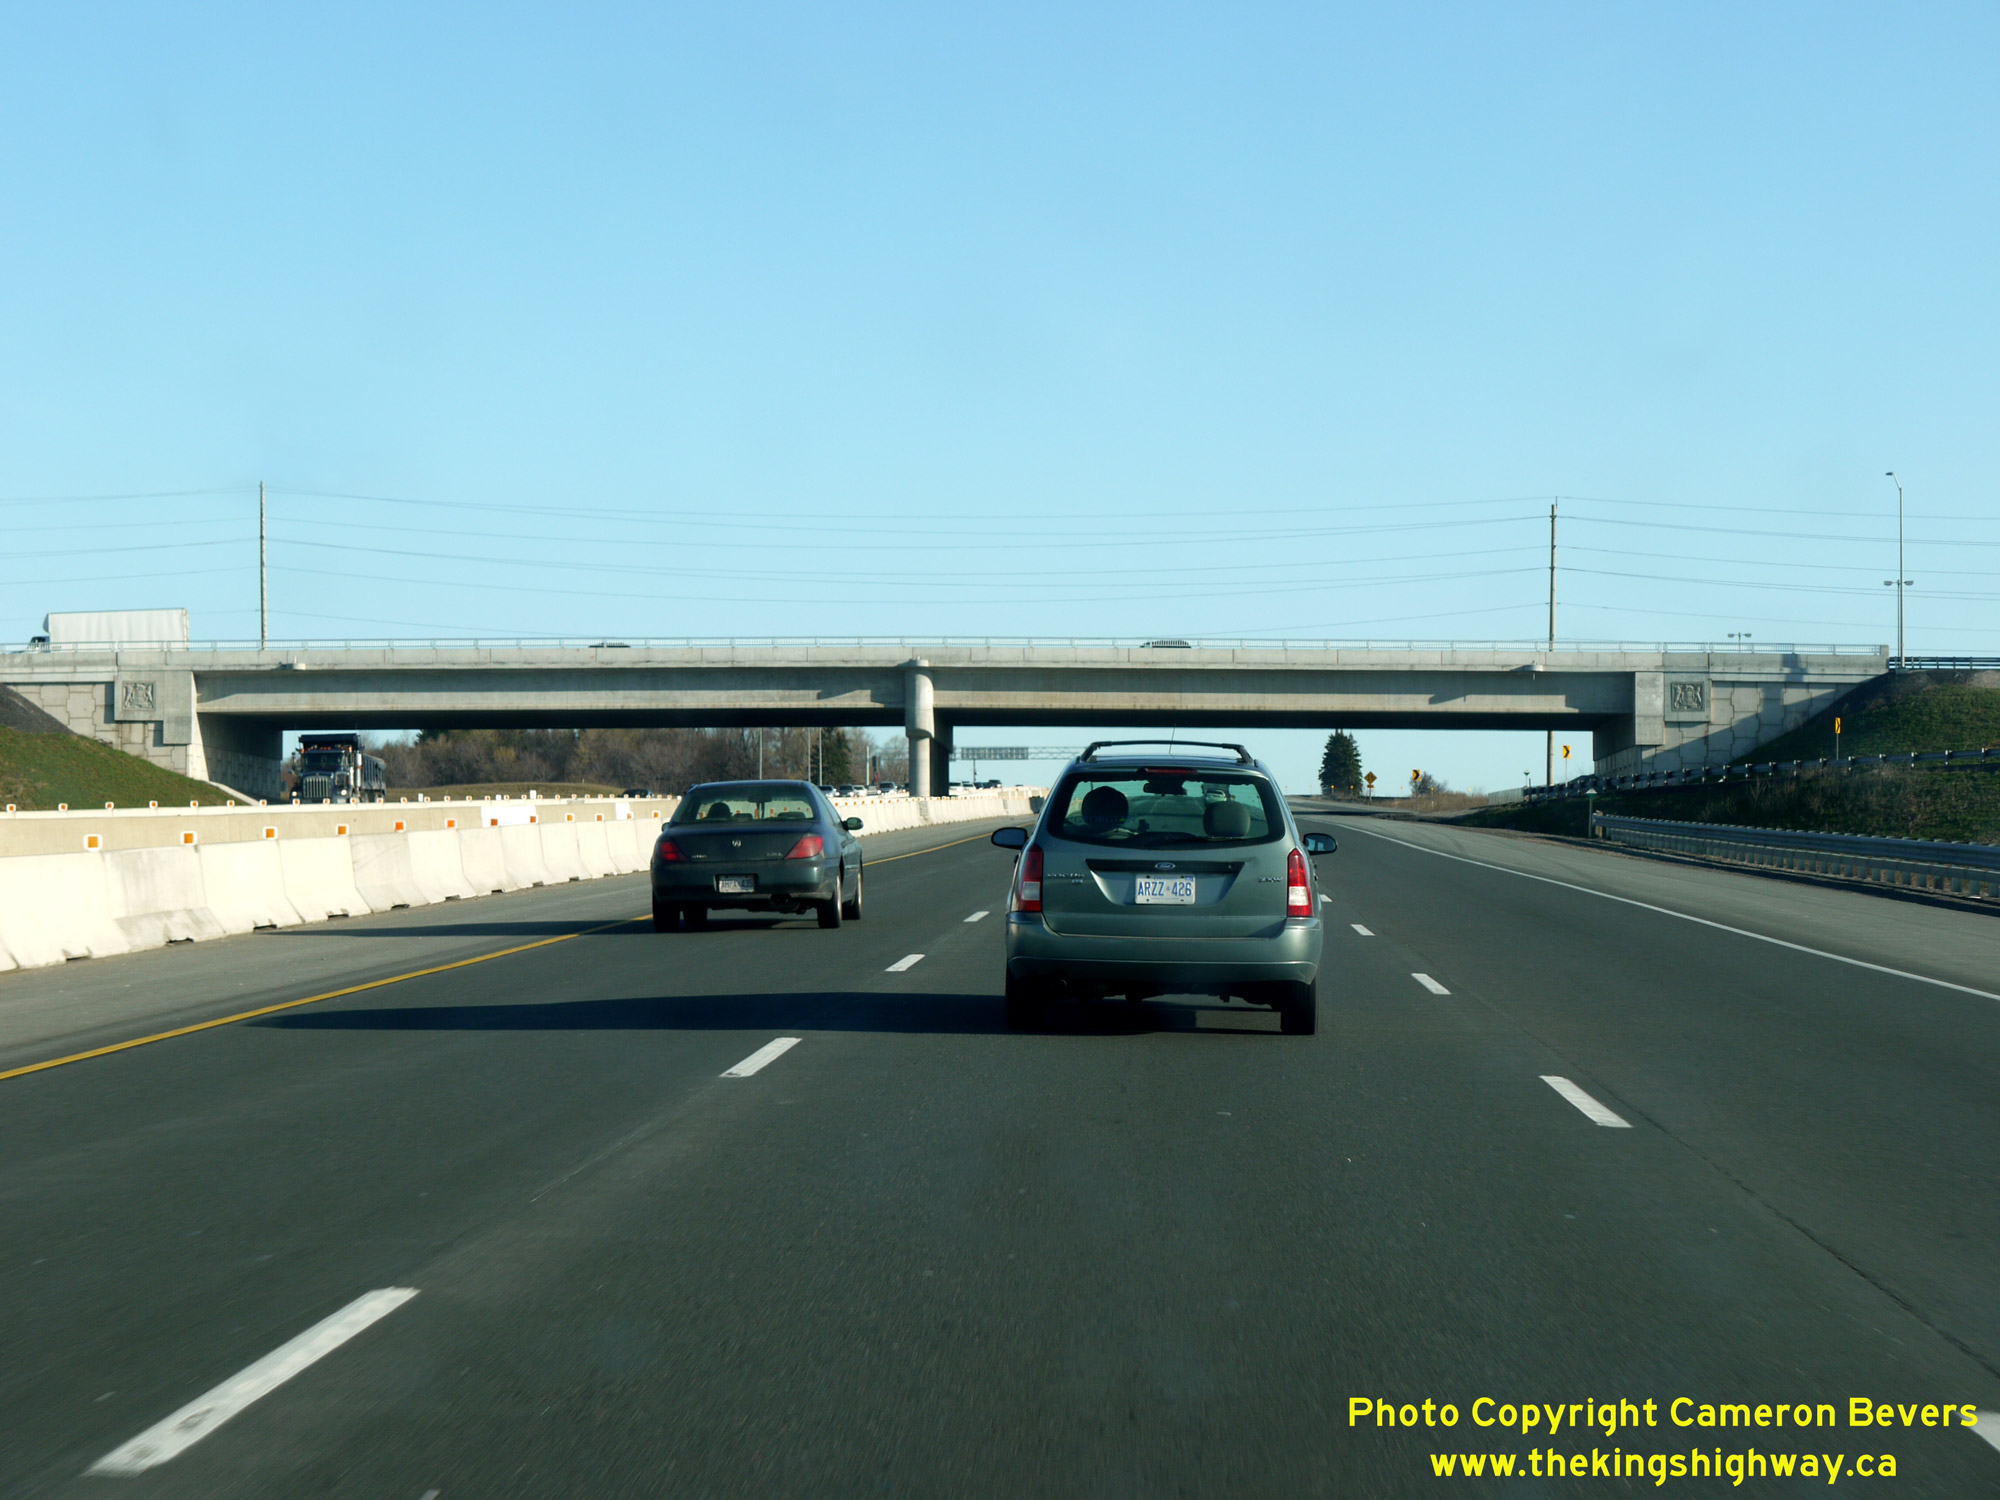 Above - Completed replacement King Road Overpass (Site #37-93) on Hwy 400 near King City. See an
Enlarged Photo Here. Above - Completed replacement King Road Overpass (Site #37-93) on Hwy 400 near King City. See an
Enlarged Photo Here.(Photograph taken on April 12, 2012 - © Cameron Bevers)
Continue on to King's Highway 400 Photos: King Road to Hwy 88
|
|---|
Links to Adjacent King's Highway Photograph Pages:
Back to King's Highway 169 Photos /
King's Highway 400 History /
On to King's Highway 401 Photos
Ontario Highway History - Main Menu / Back to List of Highways Website contents, photos & text © 2002-2026, Cameron
Bevers (Webmaster) - All Rights Reserved / Contact Me
|
|---|