
| 
| |
|
|
This page contains historical photos of Ontario's King's Highway 400 dating from 1985 to 1989. All photographs displayed on
this page were taken by the Ontario Ministry of Transportation, unless specifically noted otherwise. Historical photographs are arranged in approximate chronological
order. Click on any thumbnail to see a larger image!
Please note that all photographs displayed on this
website are protected by copyright. These photographs must not be reproduced, published,
electronically stored or copied, distributed, or posted onto other websites without
my written permission. If you want to use photos from this website, please
email me first for permission. Thank-you!
|
|---|
|
Page 6: Historical King's Highway 400 Photographs (1985 to 1989)

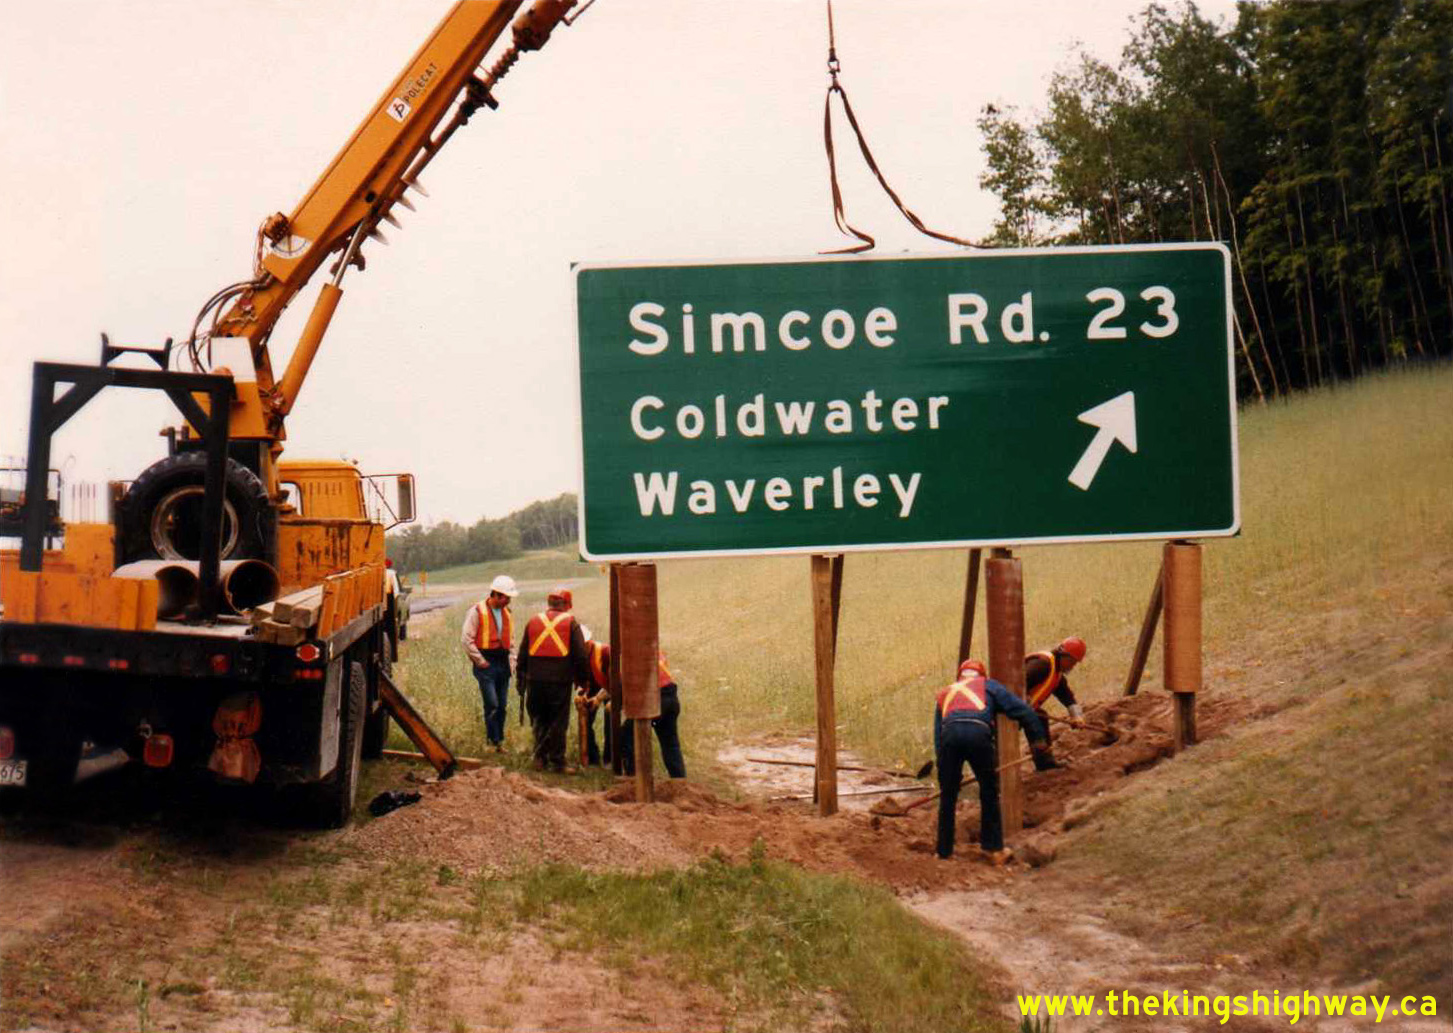
  Left - Ministry of Transportation and Communications (MTC) sign crew installing a new freeway exit guide sign on the Hwy 400 Extension at the Simcoe County
Road 23 Interchange in 1985. The twinning of Hwy 400 near Coldwater resulted in the construction of a new southbound exit ramp to Simcoe County Road 23. When
motorists are driving along at freeway speeds, it isn't always apparent to them just how big these exit guide signs actually are. This photo provides some context to
the actual scale of these signs, when compared to the relative heights of the crew members doing the installation. See an
Enlarged Photo Here. Photo taken on June 13, 1985. Left - Ministry of Transportation and Communications (MTC) sign crew installing a new freeway exit guide sign on the Hwy 400 Extension at the Simcoe County
Road 23 Interchange in 1985. The twinning of Hwy 400 near Coldwater resulted in the construction of a new southbound exit ramp to Simcoe County Road 23. When
motorists are driving along at freeway speeds, it isn't always apparent to them just how big these exit guide signs actually are. This photo provides some context to
the actual scale of these signs, when compared to the relative heights of the crew members doing the installation. See an
Enlarged Photo Here. Photo taken on June 13, 1985.(Photo courtesy of Ontario Ministry of Transportation - © King's Printer for Ontario, 2024) Right - Newly-built structure carrying the southbound lanes of Hwy 400 at the Simcoe County Road 23 Interchange near Coldwater, Contract #1983-53. After being
opened in an initial two-lane configuration in 1979, the extension of Hwy 400 from Coldwater to Waubaushene was twinned in the 1980s. A second carriageway was built
to carry all southbound Hwy 400 traffic. Until the twinning project at Coldwater was completed in 1985, both directions of traffic on Hwy 400 used a single
carriageway, which form today's northbound lanes. See an Enlarged Photo Here. Photo taken on
June 13, 1985.(Photo courtesy of Ontario Ministry of Transportation - © King's Printer for Ontario, 2024) 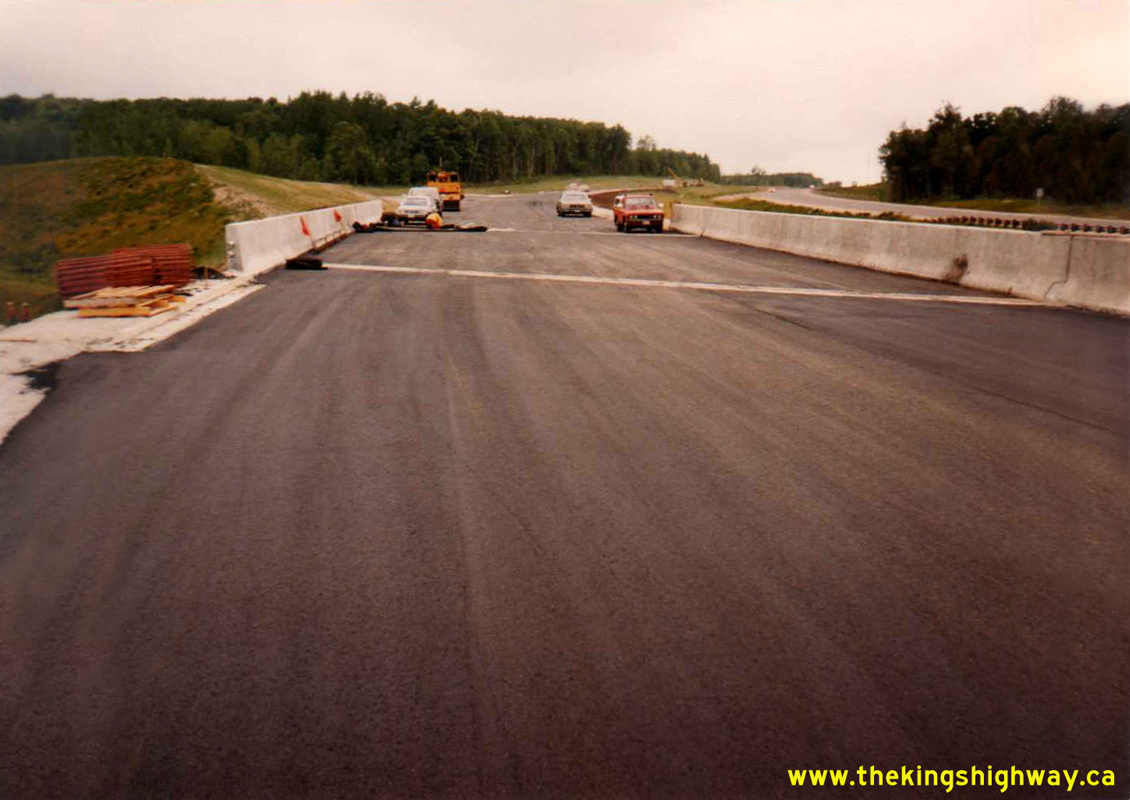
 Left - Facing north along the future southbound lanes of Hwy 400 at the Simcoe County Road 23 Interchange near Coldwater in 1985. The northbound lanes at
right carried two-way traffic on Hwy 400 for several years following the completion of the interim two-lane Hwy 400 Extension from Coldwater to Waubaushene in 1979.
The Simcoe County Road 23 Interchange was built out to its ultimate four-ramp "Parclo A-2" configuration under Contract #1983-53. The interim interchange at Hwy 400
and Simcoe County Road 23 which initially opened to traffic in 1979 consisted of a single southbound "Diamond" configuration ramp in the interchange's northwest
quadrant and an "all moves" connector road located in the interchange's southeast quadrant. The 1979 southbound diamond ramp was removed and obliterated during the
twinning of Hwy 400 in the 1980s, while the connector road was reconfigured to service traffic exiting from the northbound lanes of Hwy 400 only. See an
Enlarged Photo Here. Photo taken on June 13, 1985. Left - Facing north along the future southbound lanes of Hwy 400 at the Simcoe County Road 23 Interchange near Coldwater in 1985. The northbound lanes at
right carried two-way traffic on Hwy 400 for several years following the completion of the interim two-lane Hwy 400 Extension from Coldwater to Waubaushene in 1979.
The Simcoe County Road 23 Interchange was built out to its ultimate four-ramp "Parclo A-2" configuration under Contract #1983-53. The interim interchange at Hwy 400
and Simcoe County Road 23 which initially opened to traffic in 1979 consisted of a single southbound "Diamond" configuration ramp in the interchange's northwest
quadrant and an "all moves" connector road located in the interchange's southeast quadrant. The 1979 southbound diamond ramp was removed and obliterated during the
twinning of Hwy 400 in the 1980s, while the connector road was reconfigured to service traffic exiting from the northbound lanes of Hwy 400 only. See an
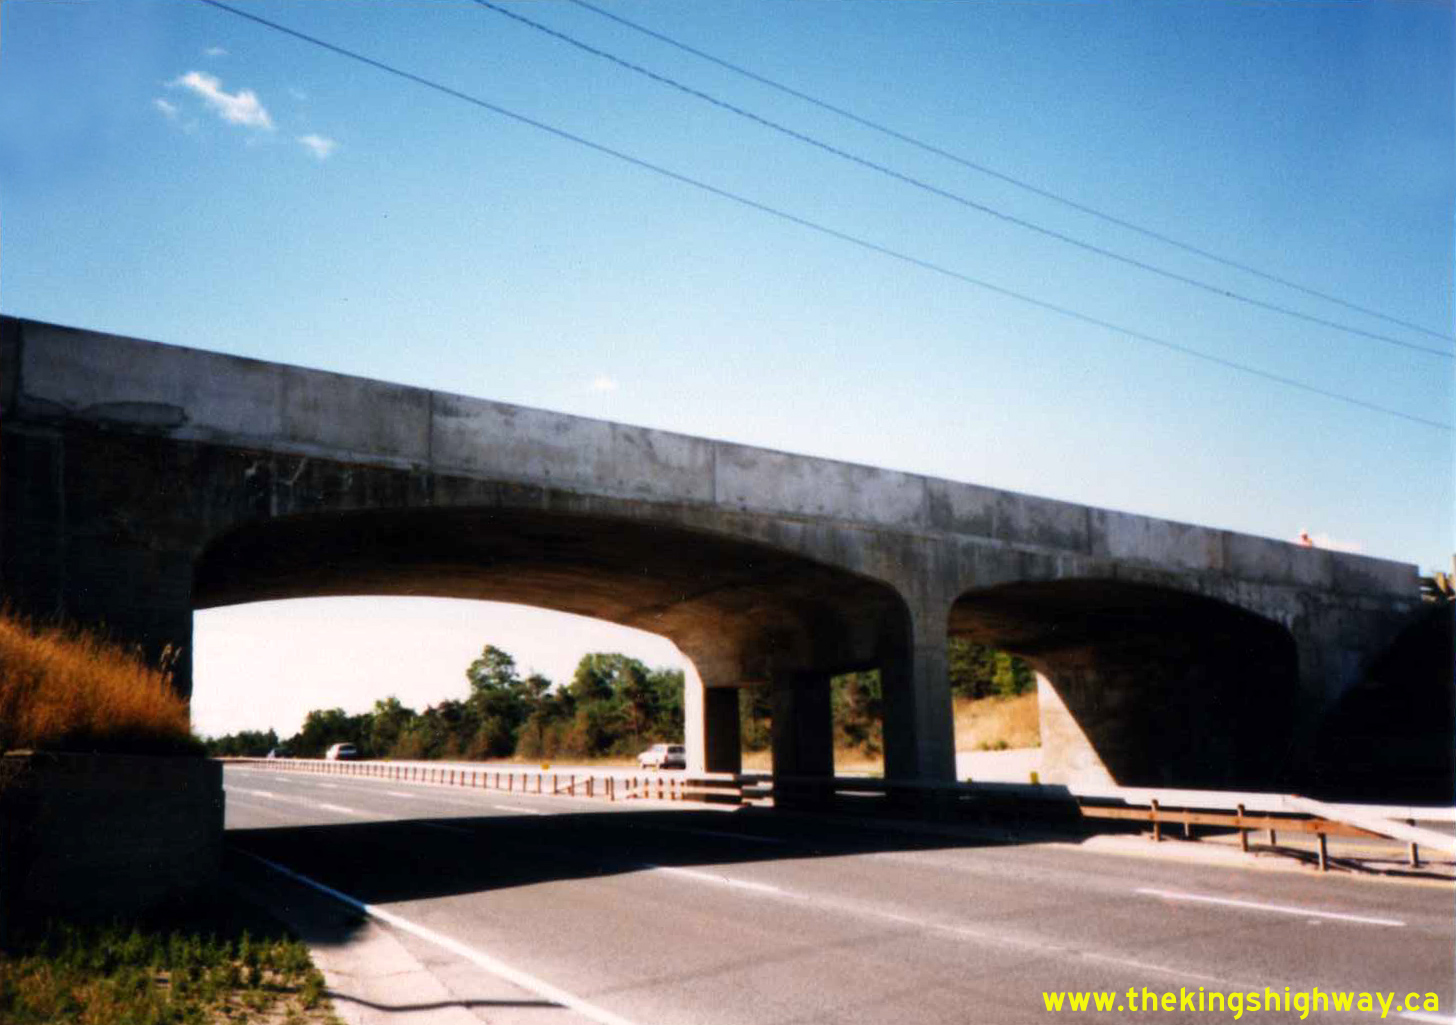
Enlarged Photo Here. Photo taken on June 13, 1985.(Photo courtesy of Ontario Ministry of Transportation - © King's Printer for Ontario, 2024) Right - New southbound Hwy 400 structure over Simcoe County Road 23 near Coldwater in 1985. This twin structure was built in 1984 to carry the future
southbound lanes of Hwy 400. It complemented the existing Hwy 400 structure which was built in 1978 to carry the future northbound lanes of the highway. The 1978
structure carried two-way traffic for several years in the late 1970s and early 1980s. See an
Enlarged Photo Here. Photo taken on June 13, 1985.(Photo courtesy of Ontario Ministry of Transportation - © King's Printer for Ontario, 2024) 
 Left - Western side of the new southbound Hwy 400 structure over Simcoe County Road 23 near Coldwater, Contract #1983-53. See an
Enlarged Photo Here. Photo taken on June 13, 1985. Left - Western side of the new southbound Hwy 400 structure over Simcoe County Road 23 near Coldwater, Contract #1983-53. See an
Enlarged Photo Here. Photo taken on June 13, 1985.(Photo courtesy of Ontario Ministry of Transportation - © King's Printer for Ontario, 2024) Right - Facing north along Hwy 400 from the Coldwater Service Road (today's Reservoir Road) Overpass at the southern entrance to Coldwater. In this photo, a
single southbound car can be seen on the existing northbound carriageway at right, while the new southbound carriageway at left is nearing completion. Northbound and
southbound motorists using the northern section of Hwy 400 near Coldwater had to share a single roadway for 6 years, from the completion of the interim Hwy 400
Extension in 1979 up until the completion of the Hwy 400 twinning in 1985. See an
Enlarged Photo Here. Photo taken on June 13, 1985.(Photo courtesy of Ontario Ministry of Transportation - © King's Printer for Ontario, 2024) 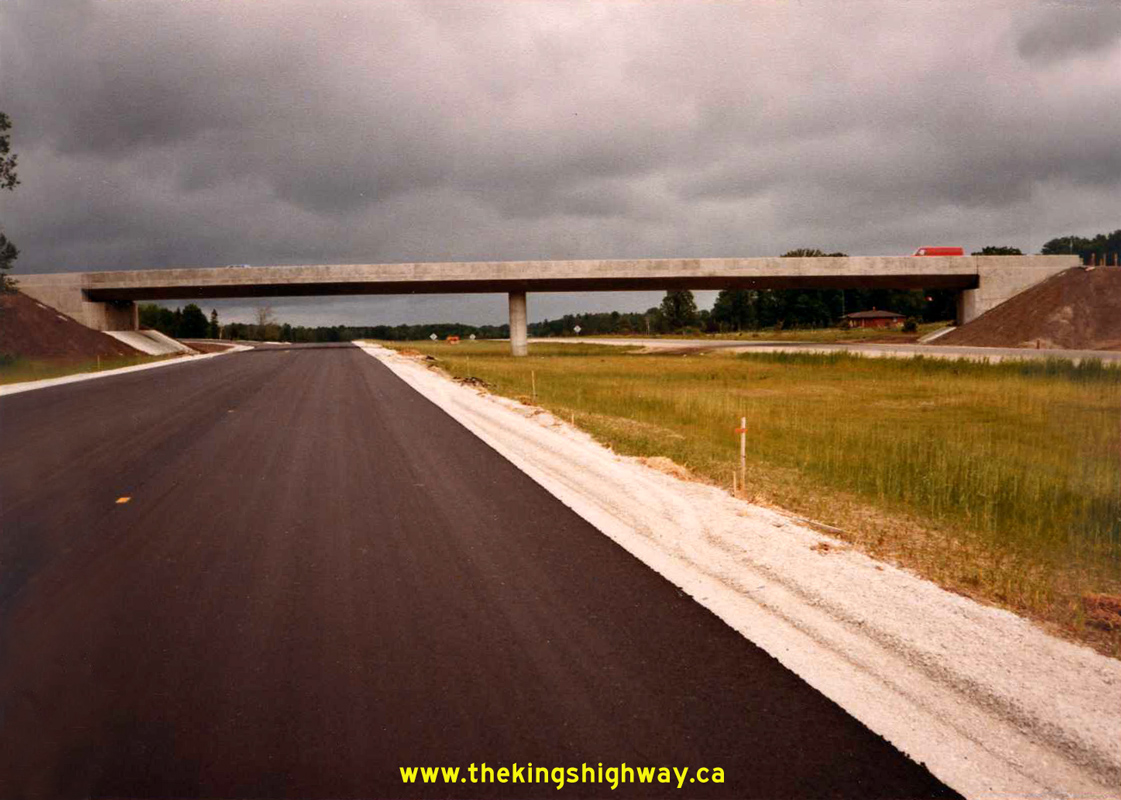
 Left - View of the twin southbound carriageway of Hwy 400 nearing completion in 1985 approaching the Coldwater Service Road Overpass. Under Contract #1983-53,
Hwy 400 was twinned from the end of the four-lane highway at Moonstone Road south of Coldwater to a point about 2 km north of the Simcoe County Road 23 Interchange. A
second new interchange was built at the Coldwater Service Road & Lower Big Chute Road (Old Hwy 400) at the southern entrance to Coldwater, in addition to
interchange improvements at Simcoe County Road 23. See an Enlarged Photo Here. Photo taken on
June 13, 1985. Left - View of the twin southbound carriageway of Hwy 400 nearing completion in 1985 approaching the Coldwater Service Road Overpass. Under Contract #1983-53,
Hwy 400 was twinned from the end of the four-lane highway at Moonstone Road south of Coldwater to a point about 2 km north of the Simcoe County Road 23 Interchange. A
second new interchange was built at the Coldwater Service Road & Lower Big Chute Road (Old Hwy 400) at the southern entrance to Coldwater, in addition to
interchange improvements at Simcoe County Road 23. See an Enlarged Photo Here. Photo taken on
June 13, 1985.(Photo courtesy of Ontario Ministry of Transportation - © King's Printer for Ontario, 2024) Right - Completed Coldwater Service Road Overpass on Hwy 400 in 1985. This structure was built under Contract #1983-53 and provided access to a small community
lying to the west of Hwy 400. This service road also provided access to an on-ramp to the southbound lanes of Hwy 400 at the southern entrance to Coldwater. A former
alignment of Hwy 400 (Lower Big Chute Road) provided access to Coldwater from the northbound lanes of Hwy 400 near this location. See an
Enlarged Photo Here. Photo taken on June 13, 1985.(Photo courtesy of Ontario Ministry of Transportation - © King's Printer for Ontario, 2024) 
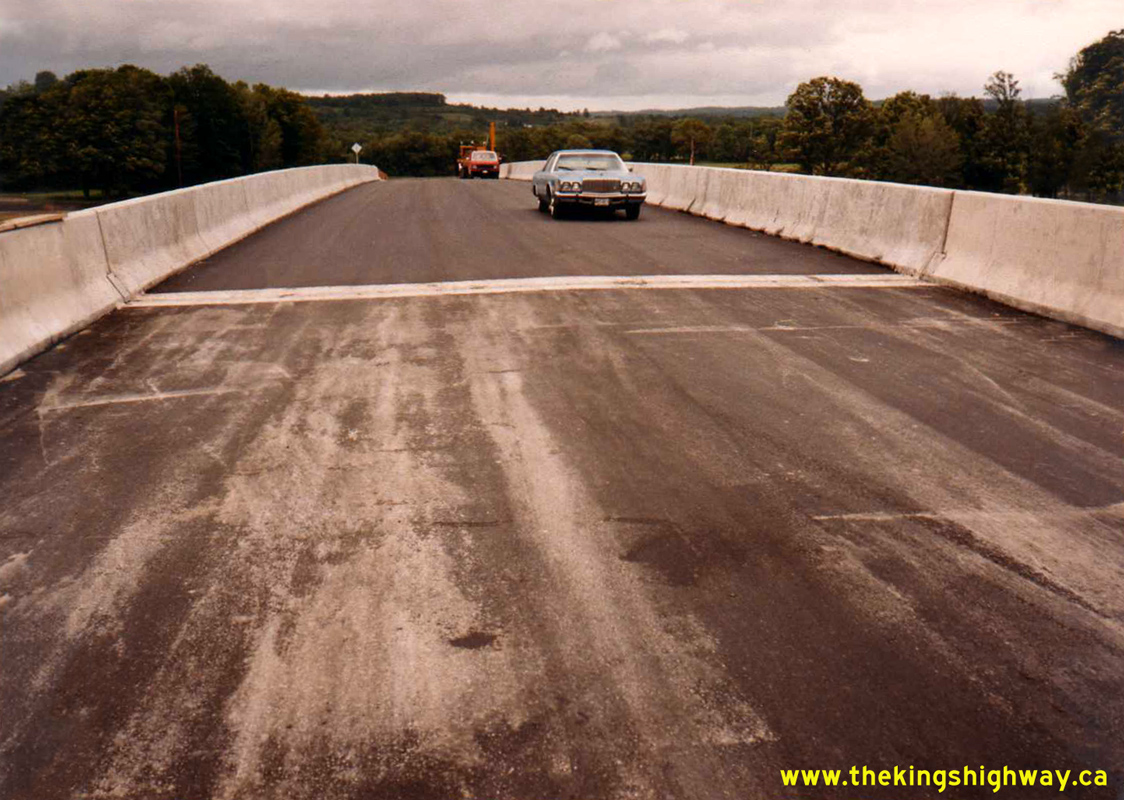
 Left - Facing south along Hwy 400 from the Coldwater Service Road Overpass in 1985. Prior to the completion of the twinned highway through the Coldwater area,
the southbound carriageway of Hwy 400 began at the northern limits of the Moonstone Road Interchange. Following the completion of twinning in 1985, the divided
four-lane highway collapsed into a single roadway about 2 km north of the Simcoe County Road 23 Interchange. Thus, this highway expansion project resulted in the
widening of about 7 km of Hwy 400 to four lanes through the Coldwater area. See an
Enlarged Photo Here. Photo taken on June 13, 1985. Left - Facing south along Hwy 400 from the Coldwater Service Road Overpass in 1985. Prior to the completion of the twinned highway through the Coldwater area,
the southbound carriageway of Hwy 400 began at the northern limits of the Moonstone Road Interchange. Following the completion of twinning in 1985, the divided
four-lane highway collapsed into a single roadway about 2 km north of the Simcoe County Road 23 Interchange. Thus, this highway expansion project resulted in the
widening of about 7 km of Hwy 400 to four lanes through the Coldwater area. See an
Enlarged Photo Here. Photo taken on June 13, 1985.(Photo courtesy of Ontario Ministry of Transportation - © King's Printer for Ontario, 2024) Right - New Coldwater Service Road Overpass on Hwy 400 in 1985, facing east. This service road connects to Lower Big Chute Road (Old Hwy 400) about 300 metres
to the east. These two roads form a partial interchange with south-oriented ramps only. See an
Enlarged Photo Here. Photo taken on June 13, 1985.(Photo courtesy of Ontario Ministry of Transportation - © King's Printer for Ontario, 2024)  Above - Facing south along Hwy 400 from the Hwy 90 Overpass (Dunlop Street) in Barrie in 1985. This interesting photo shows one of the earliest uses of a
portable concrete Temporary Construction Barrier (TCB) on an Ontario freeway. Although ubiquitous in construction zones on today's freeways, the portable TCB was a
relatively new innovation at the time this photo was taken in the mid-1980s. These barriers provided improved protection of construction workers and equipment from
freeway traffic inadvertently encroaching into a closed lane or shoulder. More as a general comment, but it always surprises me looking at highway photos from
yesteryear just how old the vehicle fleets were on the road compared to today. Vehicles dating from the 1960s can still be seen out on the road in this 1985 photo.
Today, it just isn't that common to see 20-year-old vehicles out on the highways - a true testament to how durable older cars once were, and how disposable they have
since become. See an Enlarged Photo Here. Photo taken in 1985. Above - Facing south along Hwy 400 from the Hwy 90 Overpass (Dunlop Street) in Barrie in 1985. This interesting photo shows one of the earliest uses of a
portable concrete Temporary Construction Barrier (TCB) on an Ontario freeway. Although ubiquitous in construction zones on today's freeways, the portable TCB was a
relatively new innovation at the time this photo was taken in the mid-1980s. These barriers provided improved protection of construction workers and equipment from
freeway traffic inadvertently encroaching into a closed lane or shoulder. More as a general comment, but it always surprises me looking at highway photos from
yesteryear just how old the vehicle fleets were on the road compared to today. Vehicles dating from the 1960s can still be seen out on the road in this 1985 photo.
Today, it just isn't that common to see 20-year-old vehicles out on the highways - a true testament to how durable older cars once were, and how disposable they have
since become. See an Enlarged Photo Here. Photo taken in 1985.(Photo courtesy of Ontario Ministry of Transportation - © King's Printer for Ontario, 2024) 
 Left - The use of other new traffic control features were also captured within the photos of this construction zone at the Hwy 90 Overpass in Barrie in 1985.
A blocker or "crash" truck and an electronic arrow board (Temporary Conditions Traffic Control Device #12, or "TC-12") were both employed within this construction
zone. Earlier blocker trucks were fully loaded up to ensure that an errant vehicle would hit the blocker truck and come to a stop before entering a closed lane within
a construction zone. While blocker trucks were very effective in preventing errant vehicles from encroaching into a construction zone and endangering workers, freeway
traffic vehicle occupants unfortunately did not fare very well when the blocker truck was struck from behind. Newer blocker trucks have energy attenuation devices
mounted to the rear of the truck which are designed to collapse and crush on impact, thereby slowing errant vehicles far less abruptly. See an
Enlarged Photo Here. Photo taken in 1985. Left - The use of other new traffic control features were also captured within the photos of this construction zone at the Hwy 90 Overpass in Barrie in 1985.
A blocker or "crash" truck and an electronic arrow board (Temporary Conditions Traffic Control Device #12, or "TC-12") were both employed within this construction
zone. Earlier blocker trucks were fully loaded up to ensure that an errant vehicle would hit the blocker truck and come to a stop before entering a closed lane within
a construction zone. While blocker trucks were very effective in preventing errant vehicles from encroaching into a construction zone and endangering workers, freeway
traffic vehicle occupants unfortunately did not fare very well when the blocker truck was struck from behind. Newer blocker trucks have energy attenuation devices
mounted to the rear of the truck which are designed to collapse and crush on impact, thereby slowing errant vehicles far less abruptly. See an
Enlarged Photo Here. Photo taken in 1985.(Photo courtesy of Ontario Ministry of Transportation - © King's Printer for Ontario, 2024) Right - Construction crew carrying out concrete deck repairs on the Hwy 90 (Dunlop Street) Overpass on Hwy 400 in Barrie, Contract #1985-20. See an
Enlarged Photo Here. Photo taken in 1985.(Photo courtesy of Ontario Ministry of Transportation - © King's Printer for Ontario, 2024) 
 Left - Completed rehabilitation of the northern side (westbound lane) of the Hwy 90 Overpass on Hwy 400, showing the resurfaced bridge deck and reconstructed
sidewalk. Not only were portable concrete TCBs used on the freeway below, but they were also used to protect the construction zone from traffic on Hwy 90, which was
taken down to an alternating single lane of traffic during Contract #1985-20. See an
Enlarged Photo Here. Photo taken in 1985. Left - Completed rehabilitation of the northern side (westbound lane) of the Hwy 90 Overpass on Hwy 400, showing the resurfaced bridge deck and reconstructed
sidewalk. Not only were portable concrete TCBs used on the freeway below, but they were also used to protect the construction zone from traffic on Hwy 90, which was
taken down to an alternating single lane of traffic during Contract #1985-20. See an
Enlarged Photo Here. Photo taken in 1985.(Photo courtesy of Ontario Ministry of Transportation - © King's Printer for Ontario, 2024) Right - Milled asphalt on the southern side of the deck of the Hwy 90 (Dunlop Street) Overpass on Hwy 400, Contract #1985-20. See an
Enlarged Photo Here. Photo taken in 1985.(Photo courtesy of Ontario Ministry of Transportation - © King's Printer for Ontario, 2024) 
 Left - Work crew assembling formwork for a new concrete sidewalk on the Hwy 90 (Dunlop Street) Overpass on Hwy 400, Contract #1985-20. See an
Enlarged Photo Here. Photo taken in 1985. Left - Work crew assembling formwork for a new concrete sidewalk on the Hwy 90 (Dunlop Street) Overpass on Hwy 400, Contract #1985-20. See an
Enlarged Photo Here. Photo taken in 1985.(Photo courtesy of Ontario Ministry of Transportation - © King's Printer for Ontario, 2024) Right - Repainting of the Hwy 90 (Dunlop Street) Overpass on Hwy 400, Contract #1985-20. The yellow paint seen on portions of the steel girders in this photo
was actually a base primer coat and not the bridge's original colour. Following the base primer coat application, the bridge's steel girders were painted grey. See an
Enlarged Photo Here. Photo taken in 1985.(Photo courtesy of Ontario Ministry of Transportation - © King's Printer for Ontario, 2024) 
 Left - A construction worker removes surface rust from the steel girders of the Hwy 90 (Dunlop Street) Overpass on Hwy 400. Once the steel girders have been
stripped of surface rust, a new base primer coat will be applied and the bridge painted to its final colours. See an
Enlarged Photo Here. Photo taken in 1985. Left - A construction worker removes surface rust from the steel girders of the Hwy 90 (Dunlop Street) Overpass on Hwy 400. Once the steel girders have been
stripped of surface rust, a new base primer coat will be applied and the bridge painted to its final colours. See an
Enlarged Photo Here. Photo taken in 1985.(Photo courtesy of Ontario Ministry of Transportation - © King's Printer for Ontario, 2024) Right - Comparison of the rehabilitated versus original steel girders of the Hwy 90 (Dunlop Street) Overpass on Hwy 400. Older steel bridges required periodic
painting to protect the steel from deterioration. Newer steel bridges in Ontario are usually built using a weathering steel, which is designed to develop a thin layer
of surface oxidation once exposed to the elements. In turn, this oxidation layer protects the steel underneath. Bridges of this design do not require ongoing paint
maintenance, but they do look perpetually rusty. See an Enlarged Photo Here. Photo taken in
1985.(Photo courtesy of Ontario Ministry of Transportation - © King's Printer for Ontario, 2024) 
 Left - Painting progress during the rehabilitation of the Hwy 90 (Dunlop Street) Overpass on Hwy 400, Contract #1985-20. See an
Enlarged Photo Here. Photo taken in 1985. Left - Painting progress during the rehabilitation of the Hwy 90 (Dunlop Street) Overpass on Hwy 400, Contract #1985-20. See an
Enlarged Photo Here. Photo taken in 1985.(Photo courtesy of Ontario Ministry of Transportation - © King's Printer for Ontario, 2024) Right - Completed deck rehabilitation of the Hwy 90 (Dunlop Street) Overpass, constructed under Contract #1985-20. This view is facing east along Dunlop Street
from Hwy 400 towards Downtown Barrie. See an Enlarged Photo Here. Photo taken in 1985.(Photo courtesy of Ontario Ministry of Transportation - © King's Printer for Ontario, 2024) 
 Left - Facing west along Hwy 90 (Dunlop Street) at the Hwy 400 Interchange in Barrie, showing the completed rehabilitation of the bridge. See an
Enlarged Photo Here. Photo taken in 1985. Left - Facing west along Hwy 90 (Dunlop Street) at the Hwy 400 Interchange in Barrie, showing the completed rehabilitation of the bridge. See an
Enlarged Photo Here. Photo taken in 1985.(Photo courtesy of Ontario Ministry of Transportation - © King's Printer for Ontario, 2024) Right - Southern side of the Hwy 90 (Dunlop Street) Overpass on Hwy 400, facing east towards Downtown Barrie in 1985. Note the freeway exit guide sign in the
background for Hwy 90 to Angus. This aluminum extruded sign was installed along Hwy 400 on February 28, 1973. It replaced a much smaller plywood exit sign which were
commonly used on early Ontario freeways. Historically, Hwy 90 was only signed westerly from its interchange with Hwy 400, as the eastern leg of Hwy 90 (Dunlop Street)
did not cater to through traffic and came to an end only a few blocks to the east in Downtown Barrie. The first (eastbound) exit ramp at this interchange was merely
signed as Dunlop Street, with no indication that the street was also known as Hwy 90. See an
Enlarged Photo Here. Photo taken in 1985.(Photo courtesy of Ontario Ministry of Transportation - © King's Printer for Ontario, 2024) 
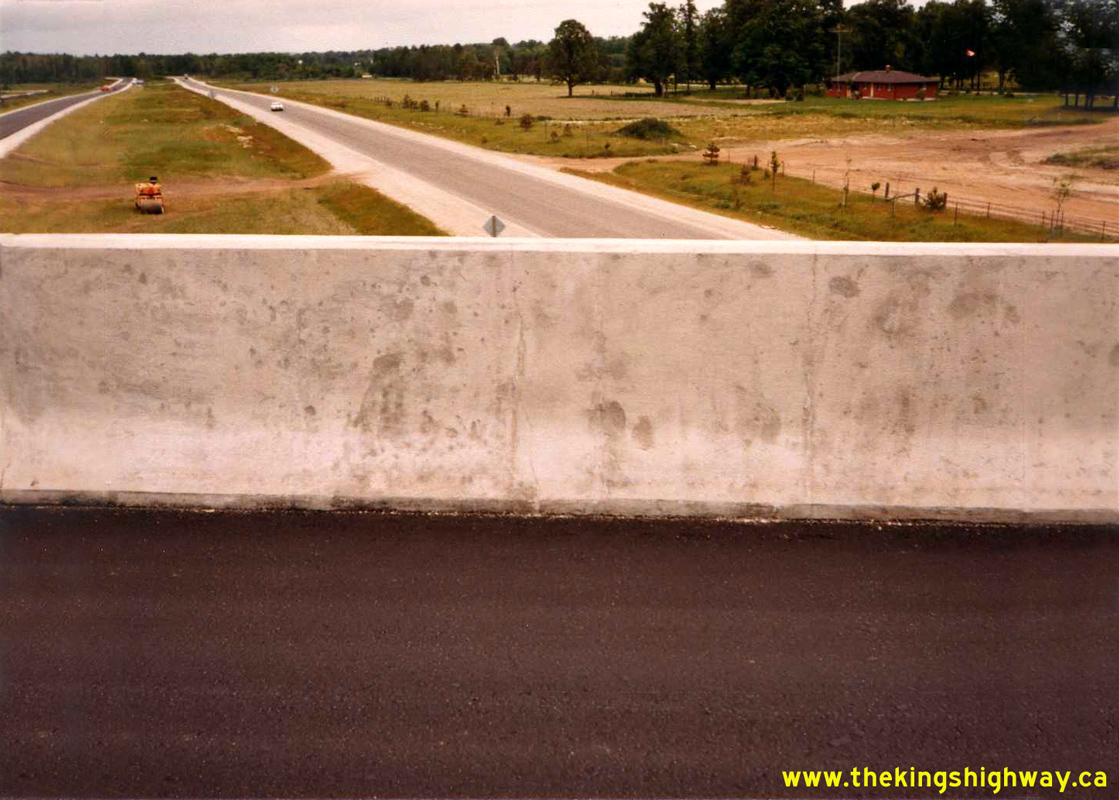
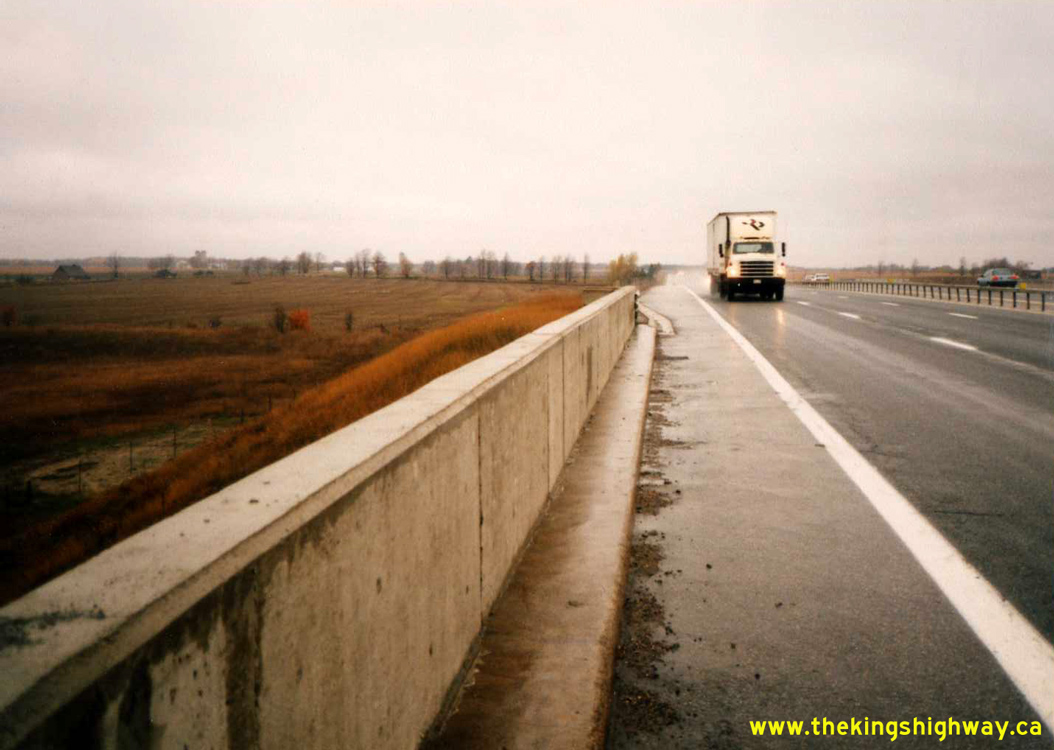
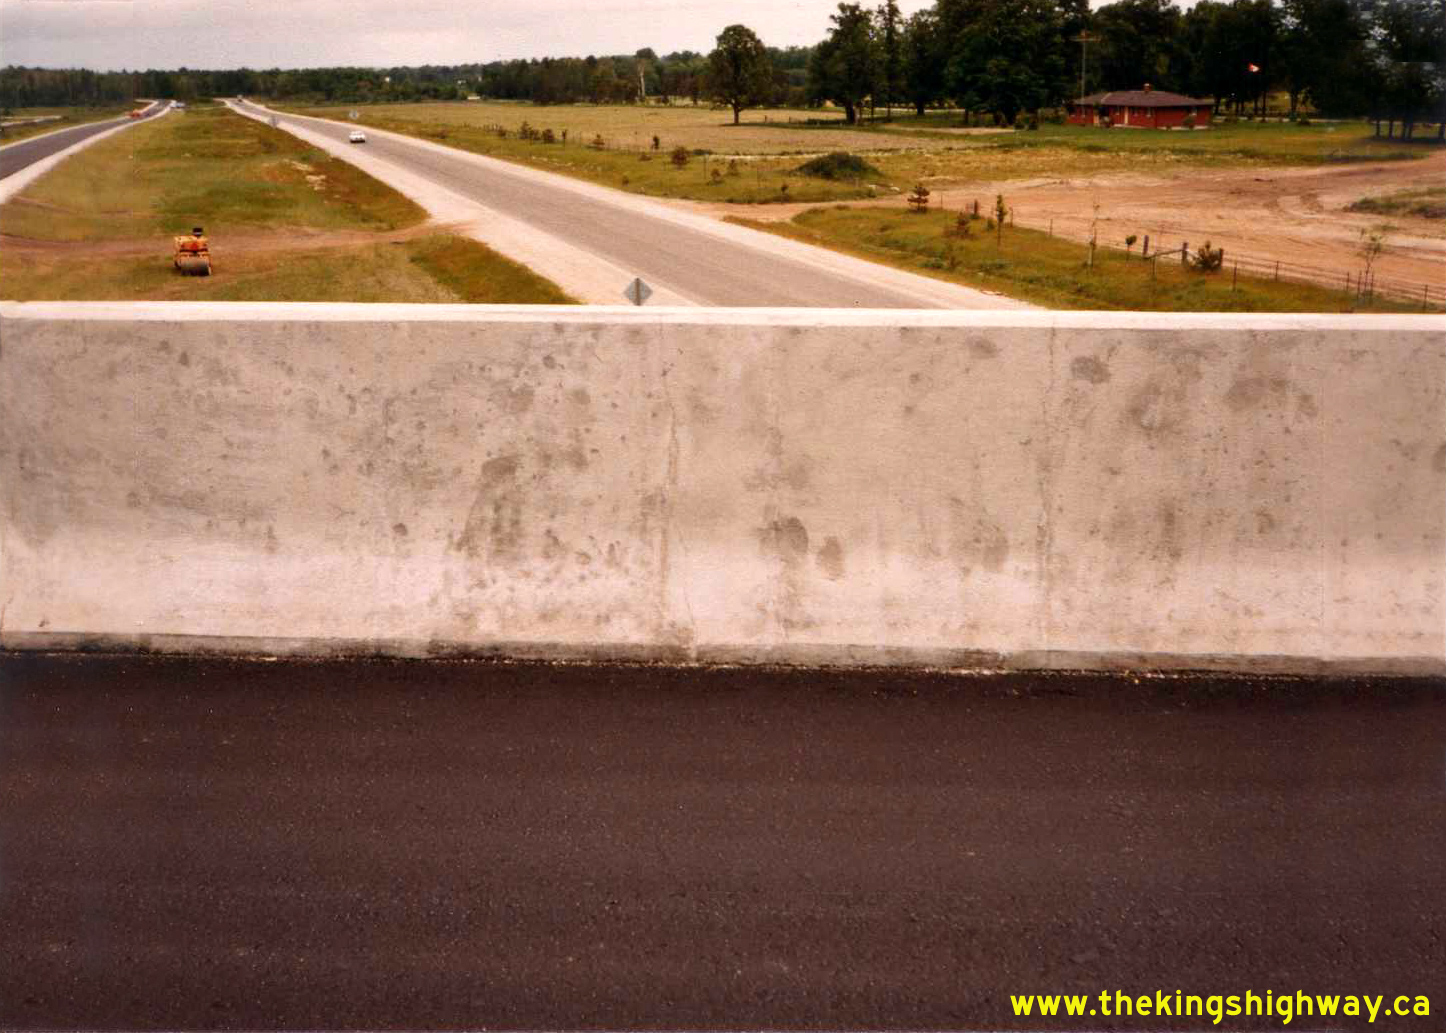
Above - Northern side of the Hwy 88 Overpass near Bradford in 1985, showing the new concrete barrier wall built during the rehabilitation of the bridge in
1983. See an Enlarged Photo Here. Photo taken in September 1985. (Photo courtesy of Ontario Ministry of Transportation - © King's Printer for Ontario, 2010) 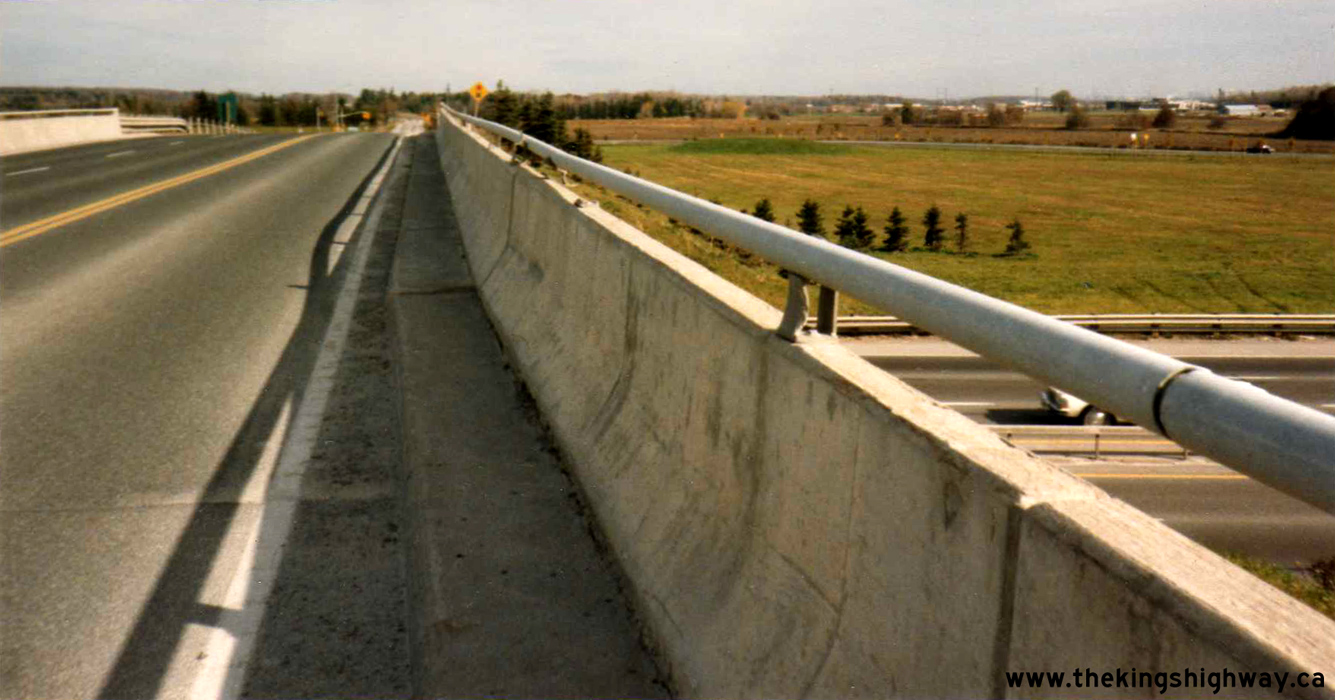 Above - Facing east across the Rutherford Road Overpass on Hwy 400 in Vaughan in 1985. When the new Toronto-Barrie Highway was first constructed after World
War II, there was no interchange at the Richvale Sideroad (today's Rutherford Road). During 1979-1980, a new two-ramp interchange was built at Rutherford Road to
service a new amusement park (Canada's Wonderland), which was being constructed just to the east of Hwy 400. Both interchange ramps at Rutherford Road were
south-oriented, with northbound Hwy 400 traffic being able to exit to Rutherford Road and traffic from Rutherford Road being able to access southbound Hwy 400 only.
There was initially no access from or to the north at this interchange. For several years after Canada's Wonderland's opening in 1981, there were no other amenities
at the Rutherford Road Interchange. However, things did not stay that way for long. In response to growing urban development pressures in this area, a new "all moves"
interchange was constructed at Rutherford Road in the early 1990s. Note the future site of the Vaughan Mills Shopping Centre beside the exit ramp from Hwy 400, which
was all farm fields when this photo was taken in the mid-1980s. See an Enlarged Photo Here.
Photo taken on October 30, 1985. Above - Facing east across the Rutherford Road Overpass on Hwy 400 in Vaughan in 1985. When the new Toronto-Barrie Highway was first constructed after World
War II, there was no interchange at the Richvale Sideroad (today's Rutherford Road). During 1979-1980, a new two-ramp interchange was built at Rutherford Road to
service a new amusement park (Canada's Wonderland), which was being constructed just to the east of Hwy 400. Both interchange ramps at Rutherford Road were
south-oriented, with northbound Hwy 400 traffic being able to exit to Rutherford Road and traffic from Rutherford Road being able to access southbound Hwy 400 only.
There was initially no access from or to the north at this interchange. For several years after Canada's Wonderland's opening in 1981, there were no other amenities
at the Rutherford Road Interchange. However, things did not stay that way for long. In response to growing urban development pressures in this area, a new "all moves"
interchange was constructed at Rutherford Road in the early 1990s. Note the future site of the Vaughan Mills Shopping Centre beside the exit ramp from Hwy 400, which
was all farm fields when this photo was taken in the mid-1980s. See an Enlarged Photo Here.
Photo taken on October 30, 1985.(Photo courtesy of Ontario Ministry of Transportation - © King's Printer for Ontario, 2024)  Above - Facing north along Hwy 400 at the Tiffin Street Underpass in Barrie in 1986. Note the old Ontario Travel Centre in the background located just north of
this underpass. The Travel Centre was relocated to a new site at the Molson Park Drive (today's Mapleview Drive) Interchange soon after this photo was taken. See an
Enlarged Photo Here. Photo taken in May 1986. Above - Facing north along Hwy 400 at the Tiffin Street Underpass in Barrie in 1986. Note the old Ontario Travel Centre in the background located just north of
this underpass. The Travel Centre was relocated to a new site at the Molson Park Drive (today's Mapleview Drive) Interchange soon after this photo was taken. See an
Enlarged Photo Here. Photo taken in May 1986.(Photo courtesy of Ontario Ministry of Transportation - © King's Printer for Ontario, 2024) 
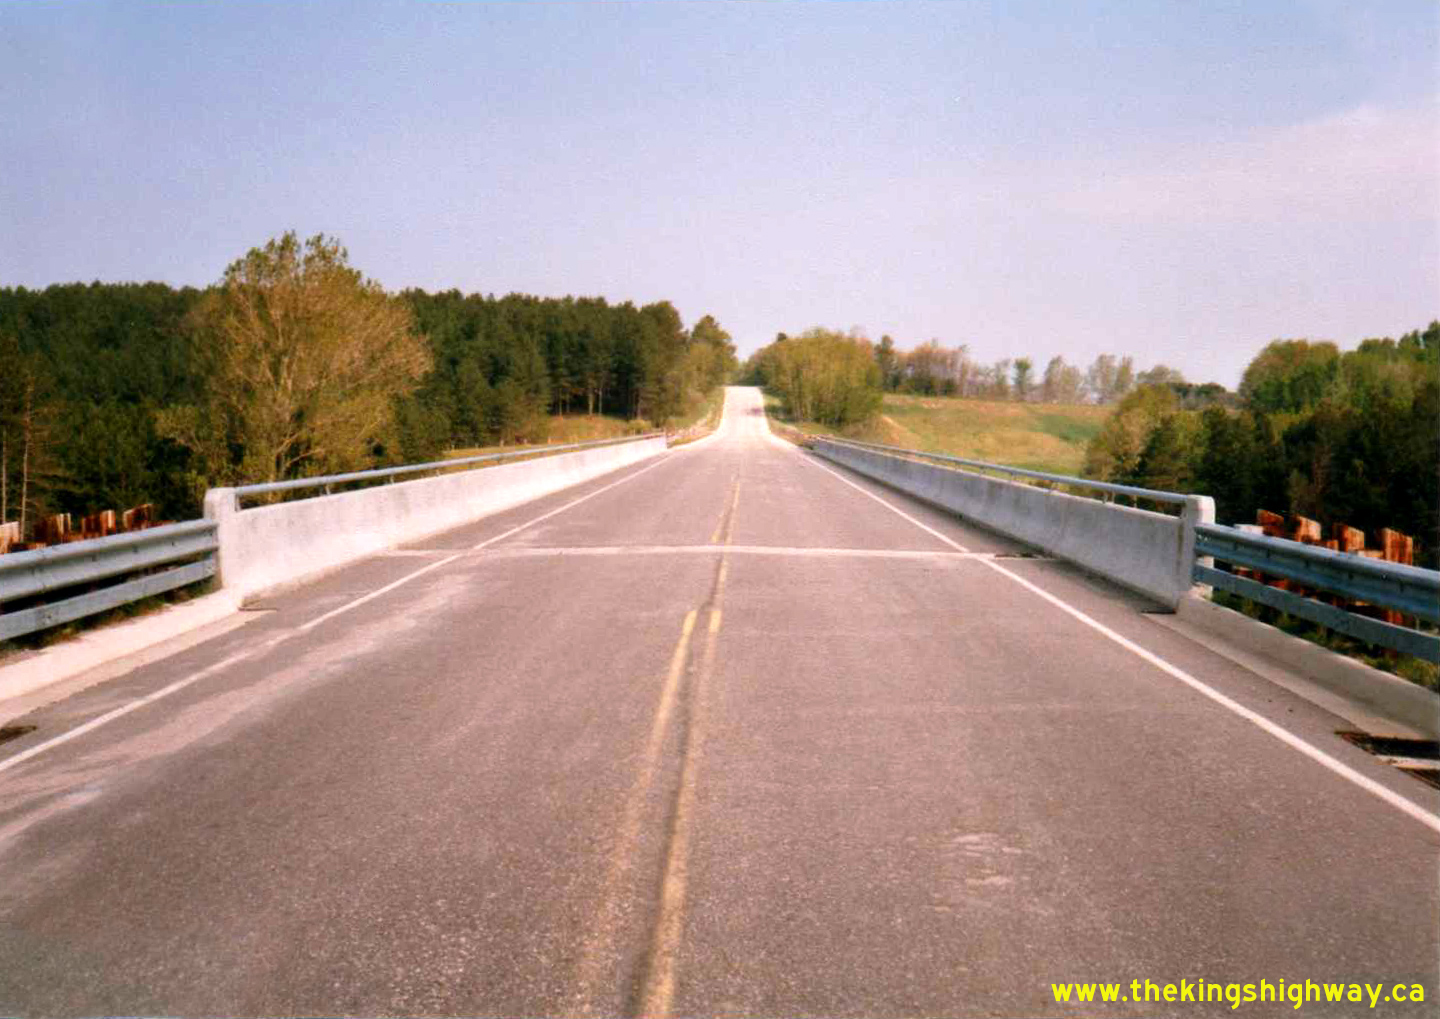
 Left - Facing north across the Medonte 4th Line Overpass on Hwy 400 southwest of Coldwater. See an
Enlarged Photo Here. Photo taken in May 1986. Left - Facing north across the Medonte 4th Line Overpass on Hwy 400 southwest of Coldwater. See an
Enlarged Photo Here. Photo taken in May 1986.(Photo courtesy of Ontario Ministry of Transportation - © King's Printer for Ontario, 2024) Right - View of Hwy 400 at the Medonte 4th Line Overpass, facing south towards Barrie. At the time this photo was taken in 1986, the freeway had only been in
operation for about 4 years. The original two-lane Hwy 400 Extension to Coldwater was expanded to four lanes in the early 1980s and converted from an arterial highway
to a freeway. The expanded four-lane freeway opened to traffic between the Hwy 93 Interchange and the Moonstone Road Interchange in the Fall of 1982. See an
Enlarged Photo Here. Photo taken in May 1986.(Photo courtesy of Ontario Ministry of Transportation - © King's Printer for Ontario, 2024) 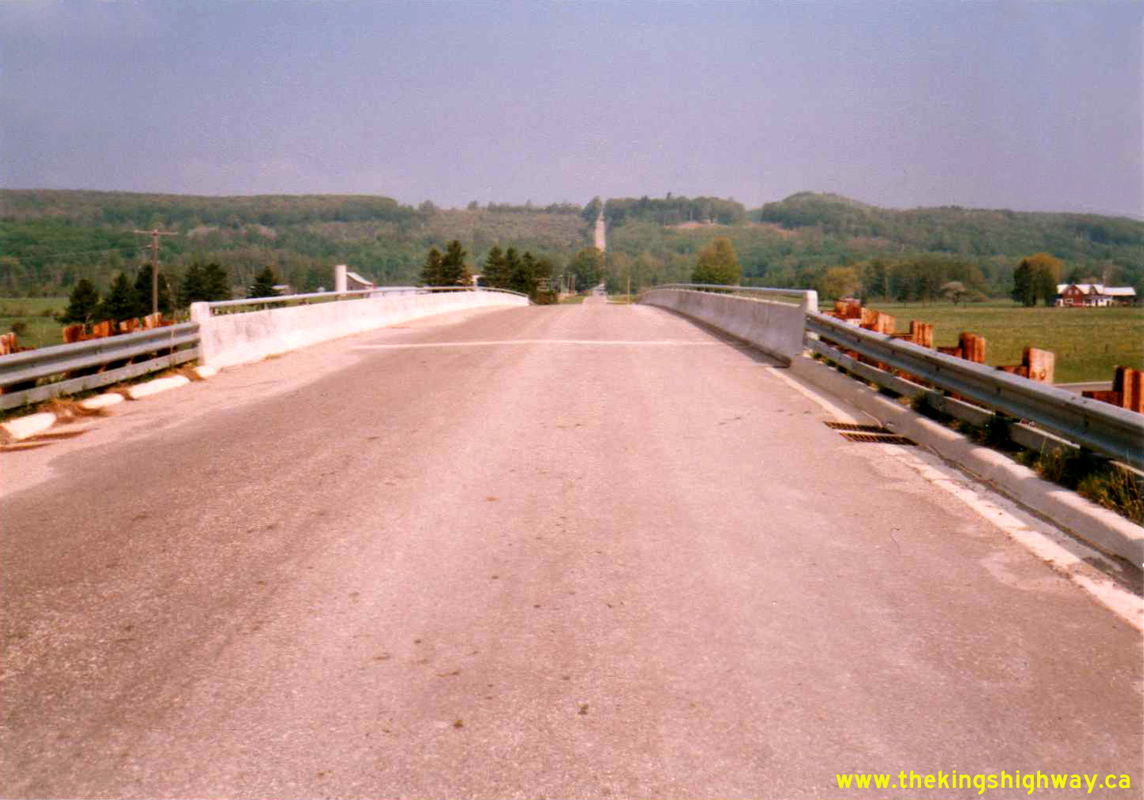
 Left - Facing north across the Medonte 6th Line Overpass on Hwy 400 southwest of Coldwater. Of interest in this photo is the lack of development around the
Mount St. Louis-Moonstone Ski Resort, which was expanded all the way out to 6th Line after this photo was taken in the 1980s. See an
Enlarged Photo Here. Photo taken in May 1986. Left - Facing north across the Medonte 6th Line Overpass on Hwy 400 southwest of Coldwater. Of interest in this photo is the lack of development around the
Mount St. Louis-Moonstone Ski Resort, which was expanded all the way out to 6th Line after this photo was taken in the 1980s. See an
Enlarged Photo Here. Photo taken in May 1986.(Photo courtesy of Ontario Ministry of Transportation - © King's Printer for Ontario, 2024) Right - View of Hwy 400 at the Medonte 6th Line Overpass, facing south towards Barrie. See an
Enlarged Photo Here. Photo taken in May 1986.(Photo courtesy of Ontario Ministry of Transportation - © King's Printer for Ontario, 2024) 
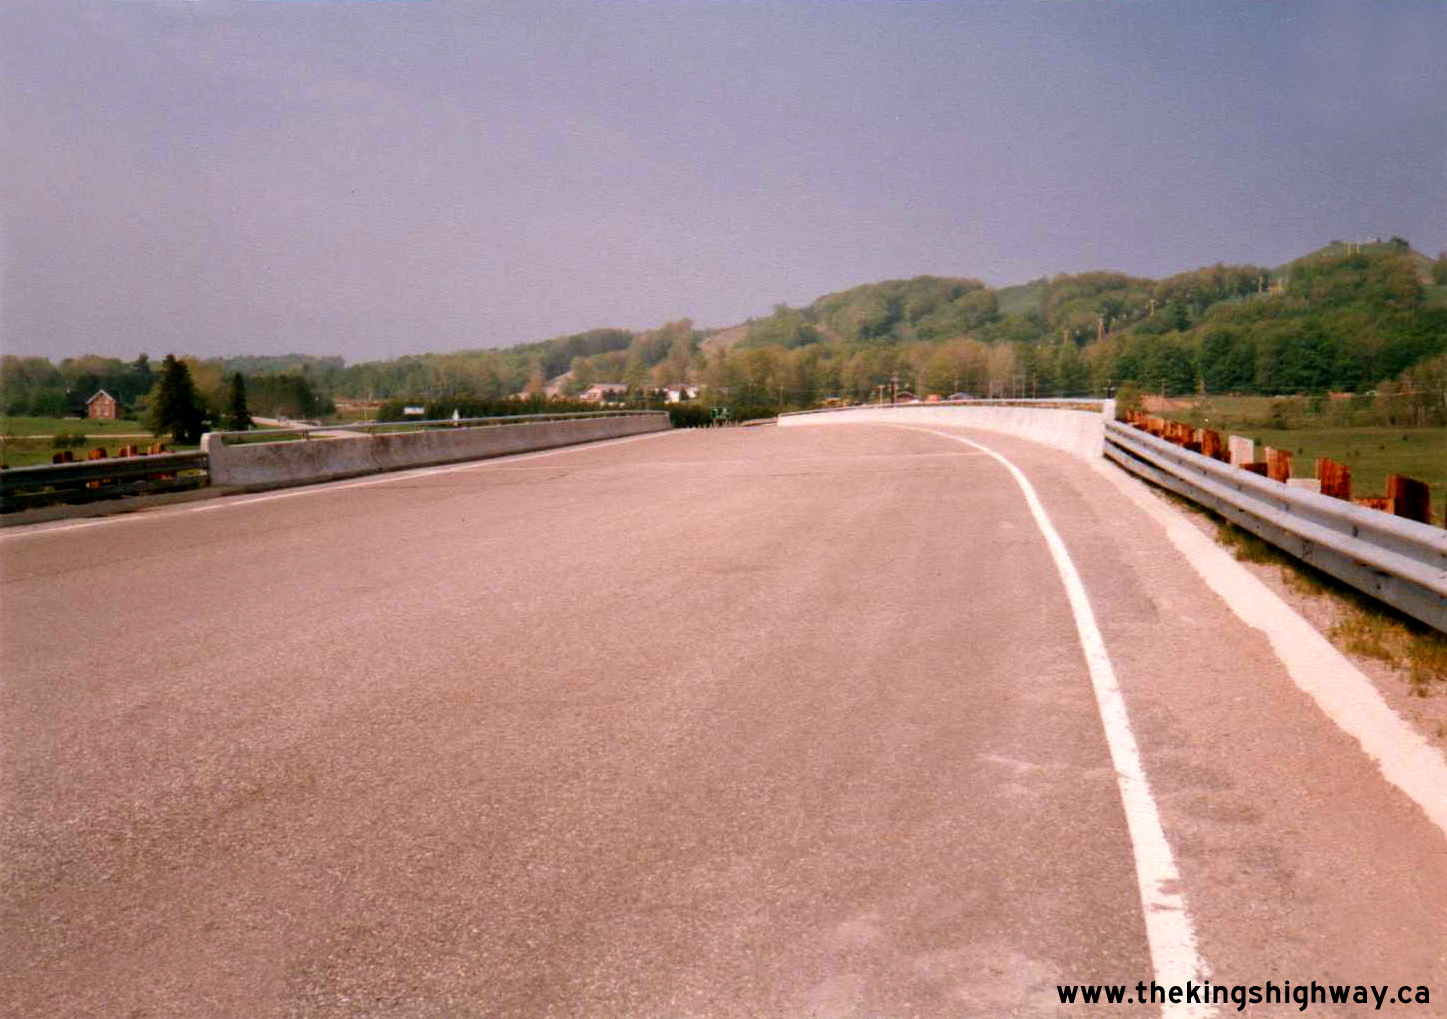
 Left - Facing north along Hwy 400 approaching the Mount St. Louis Road Interchange southwest of Coldwater. See an
Enlarged Photo Here. Photo taken in May 1986. Left - Facing north along Hwy 400 approaching the Mount St. Louis Road Interchange southwest of Coldwater. See an
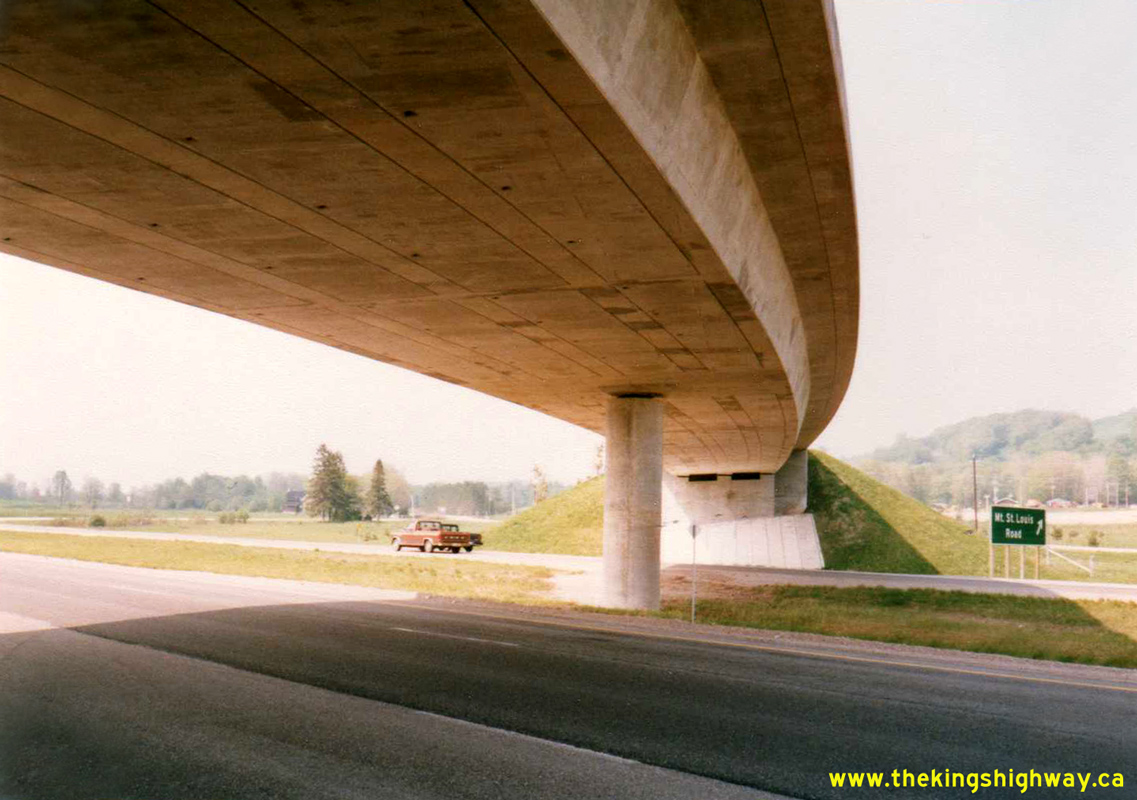
Enlarged Photo Here. Photo taken in May 1986.(Photo courtesy of Ontario Ministry of Transportation - © King's Printer for Ontario, 2024) Right - Below-deck view showing the curved superstructure of the Mount St. Louis Road Overpass on Hwy 400. See an
Enlarged Photo Here. Photo taken in May 1986.(Photo courtesy of Ontario Ministry of Transportation - © King's Printer for Ontario, 2024) 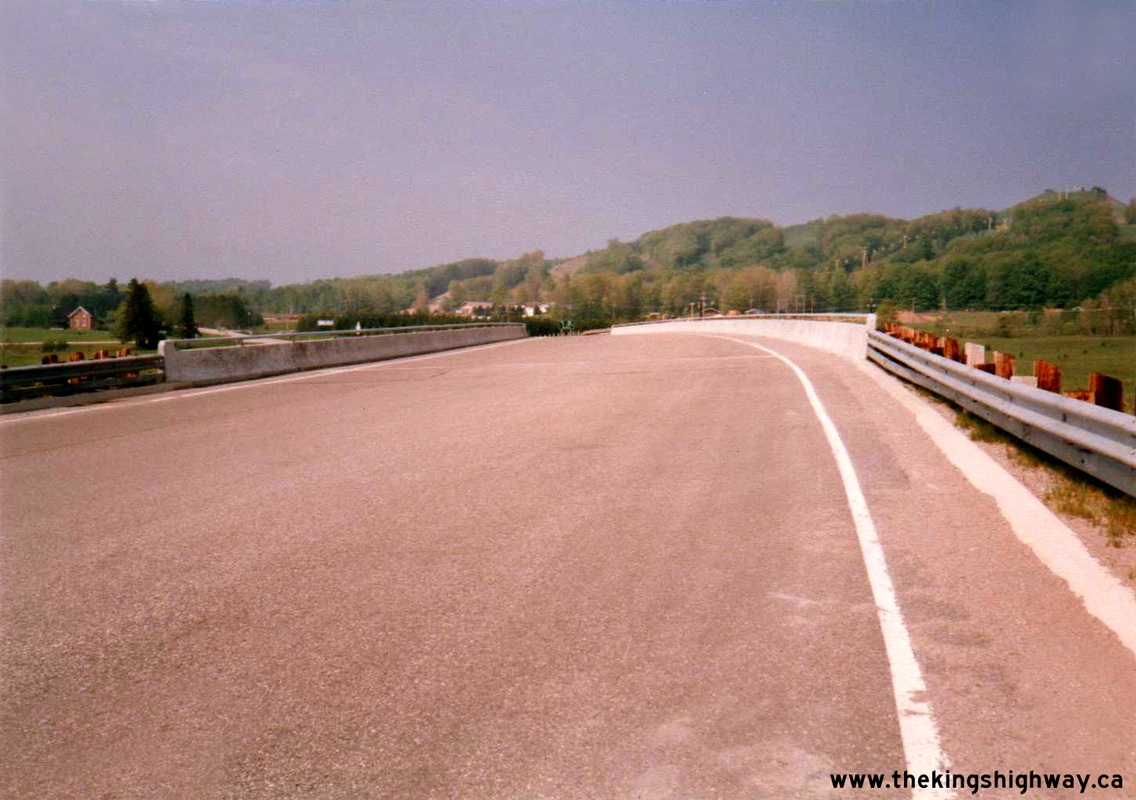
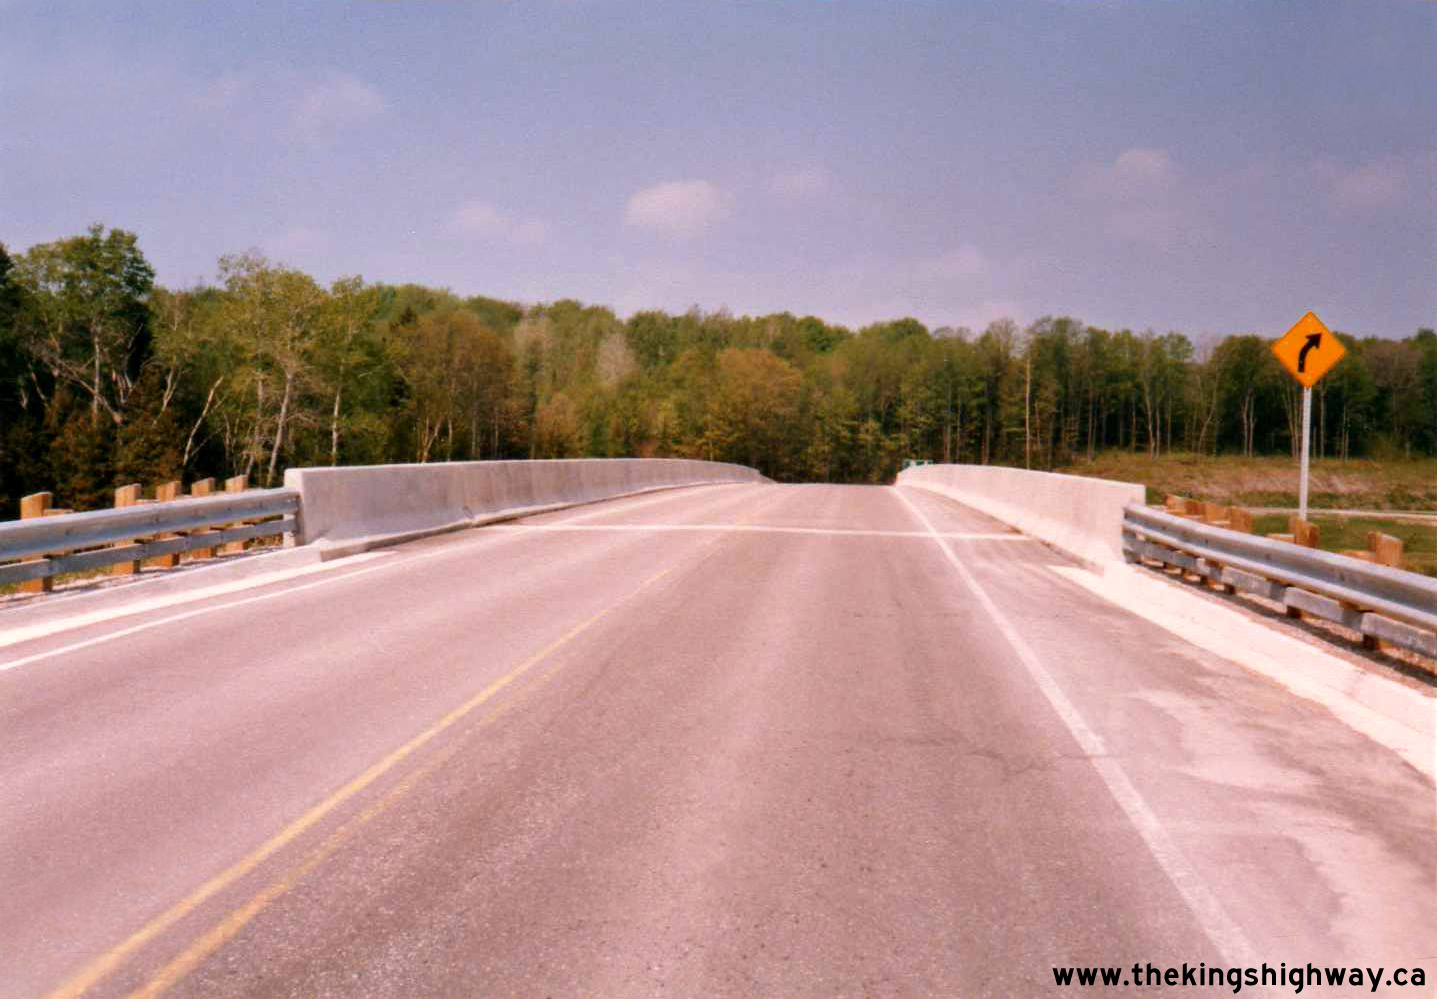
 Left - Facing west across the Mount St. Louis Road Overpass on Hwy 400. See an
Enlarged Photo Here. Photo taken in May 1986. Left - Facing west across the Mount St. Louis Road Overpass on Hwy 400. See an
Enlarged Photo Here. Photo taken in May 1986.(Photo courtesy of Ontario Ministry of Transportation - © King's Printer for Ontario, 2024) Right - Coldwater Service Road Overpass on Hwy 400 near Coldwater, facing west. See an
Enlarged Photo Here. Photo taken in May 1986.(Photo courtesy of Ontario Ministry of Transportation - © King's Printer for Ontario, 2024) 
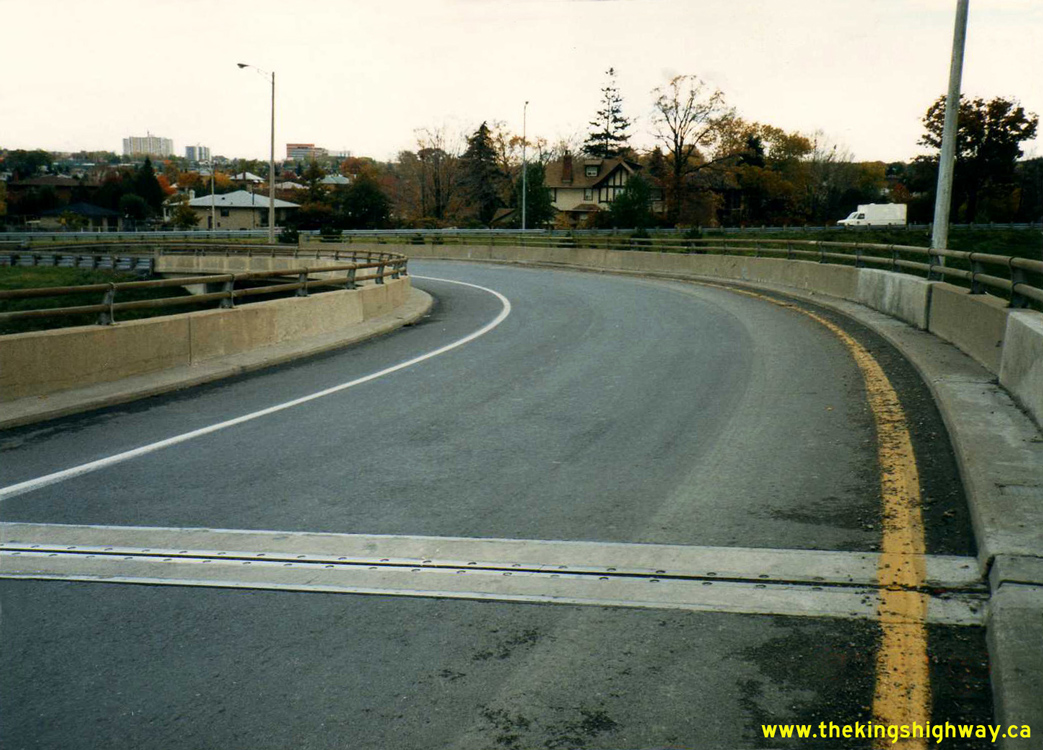
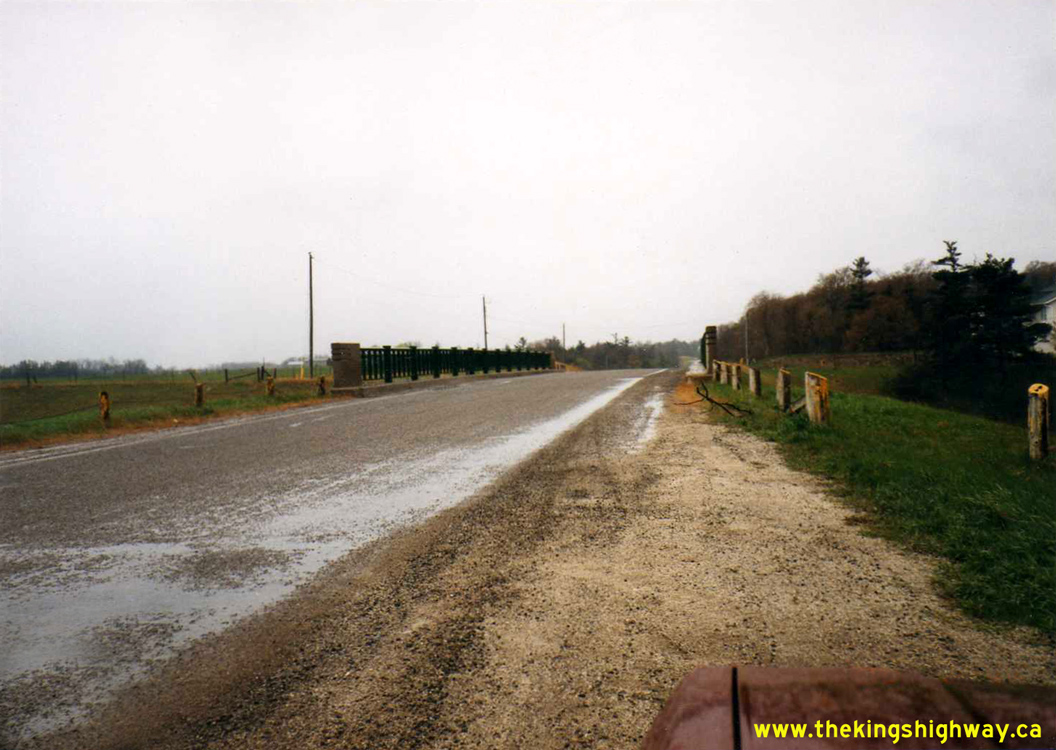
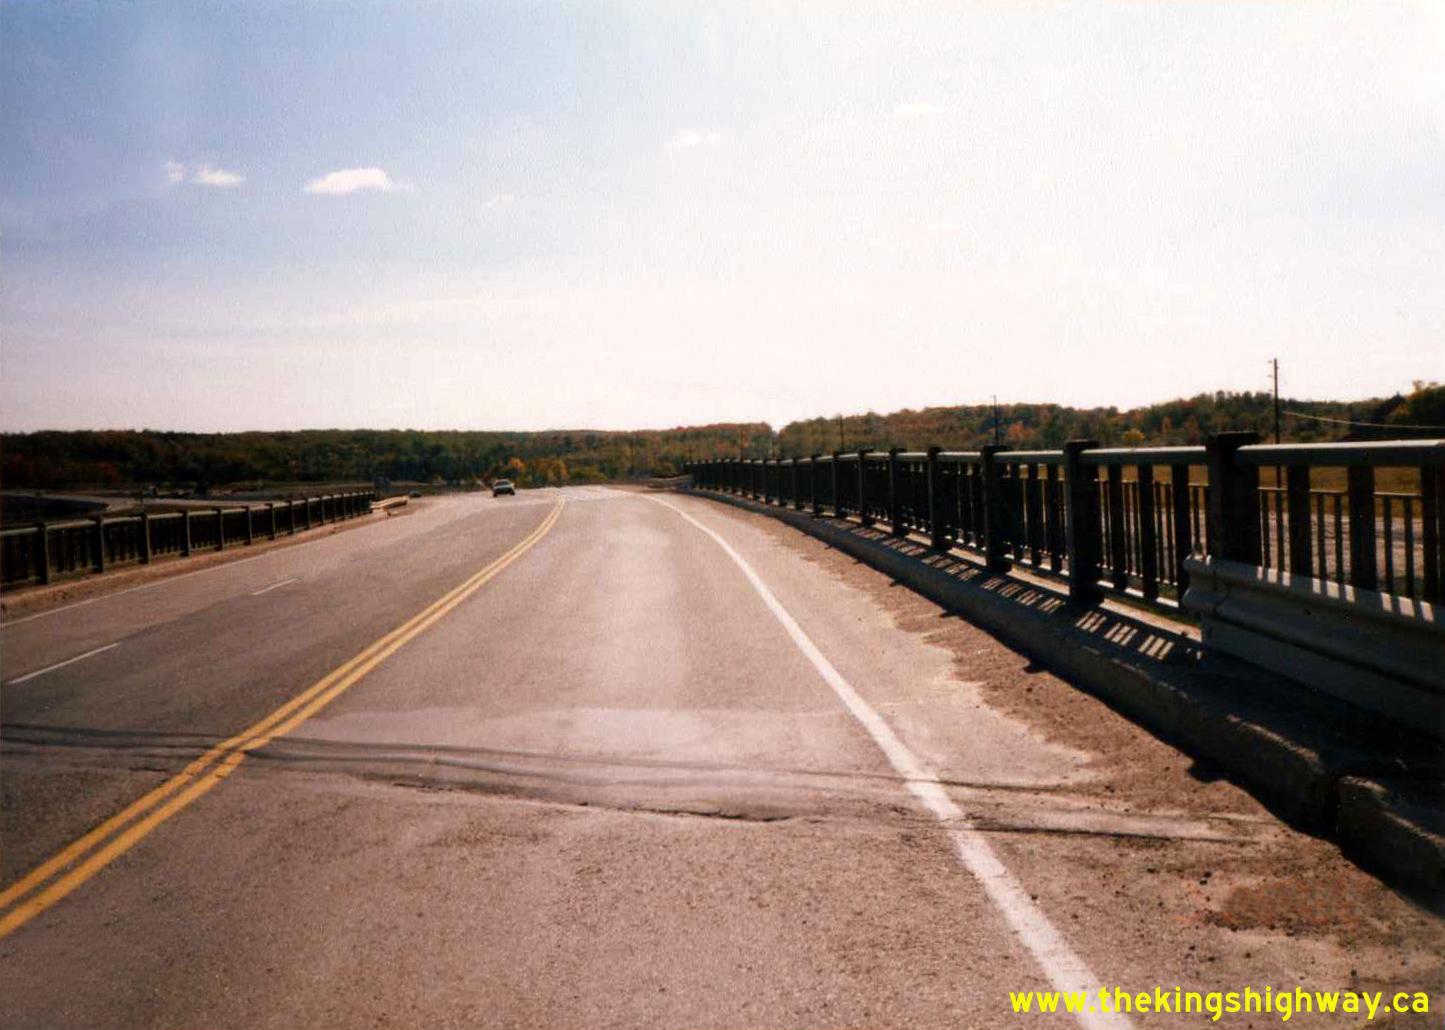
 Left - Facing north along Hwy 400 approaching the Coldwater Service Road Overpass in 1986. Note that in this photo, the twinned highway was already in service,
with all southbound traffic now using the new carriageway at left. In the foreground, the existing carriageway which initially carried two-way traffic on Hwy 400 was
repurposed to carry northbound traffic only. See an Enlarged Photo Here. Photo taken in May
1986. Left - Facing north along Hwy 400 approaching the Coldwater Service Road Overpass in 1986. Note that in this photo, the twinned highway was already in service,
with all southbound traffic now using the new carriageway at left. In the foreground, the existing carriageway which initially carried two-way traffic on Hwy 400 was
repurposed to carry northbound traffic only. See an Enlarged Photo Here. Photo taken in May
1986.(Photo courtesy of Ontario Ministry of Transportation - © King's Printer for Ontario, 2024) Right - Close-up view of the original concrete bar-and-post handrail on the West Gwillimbury 9th Line Underpass on Hwy 400, facing south towards Bradford.
Owing to Post-War shortages of steel, many bridges built along the Toronto-Barrie Highway in the late 1940s and early 1950s were designed with the concrete
bar-and-post handrail, as this handrail design required far less steel for construction than other typical handrail designs. See an
Enlarged Photo Here. Photo taken on June 3, 1986.(Photo courtesy of Ontario Ministry of Transportation - © King's Printer for Ontario, 2024) 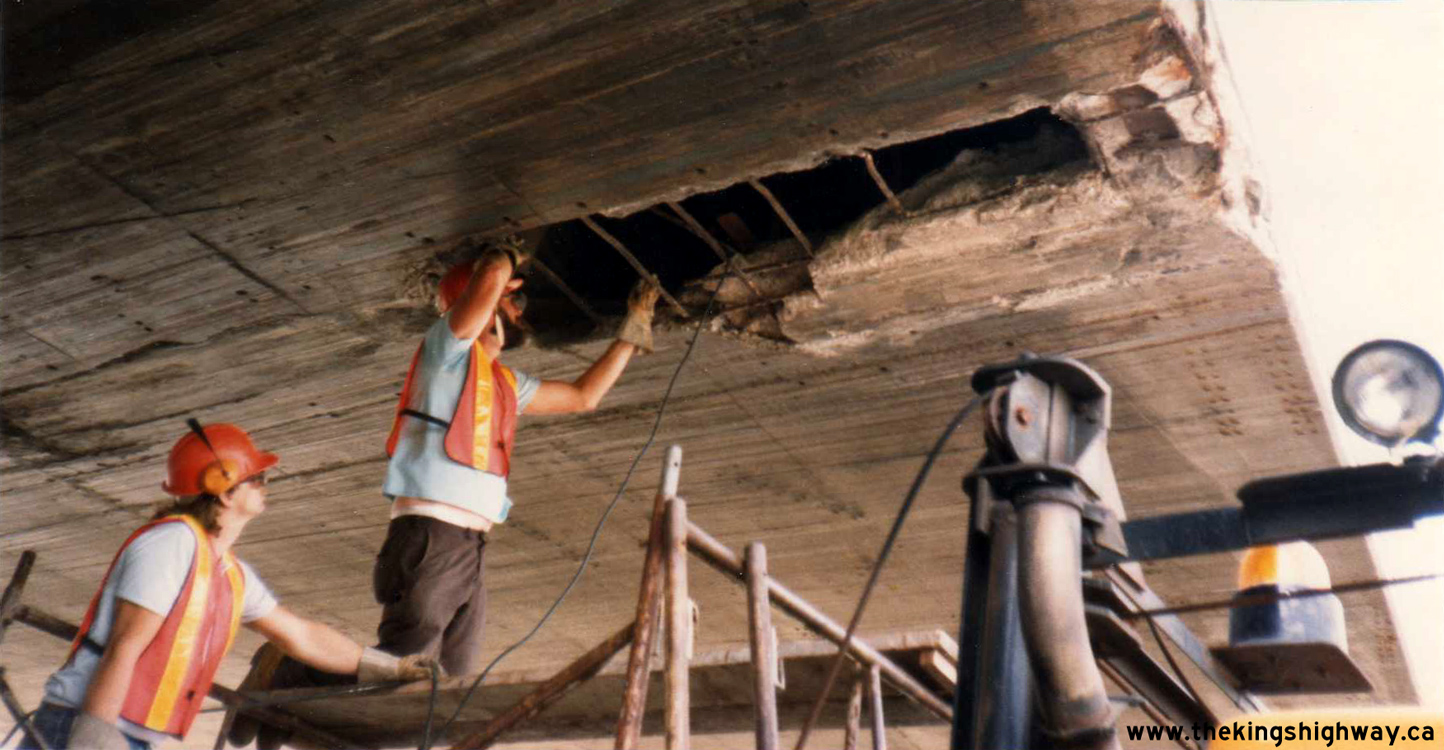 Above - MTC Bridge Maintenance Crew doing an inspection and repairs to the Rutherford Road Overpass on Hwy 400 in Vaughan in 1986, following a severe bridge
strike by a truck carrying an over-height load. Historically, MTC had an in-house bridge maintenance crew who could respond to emergency incidents such as this and
undertake repairs to provincial highway bridges as needed. Although this bridge was repaired, the original Rutherford Road Overpass seen here was replaced by a new
structure in the early 1990s. The new bridge had an improved vertical clearance and also an expanded opening to carry additional traffic lanes on Hwy 400 below the
structure. See an Enlarged Photo Here. Photo taken on June 25, 1986. Above - MTC Bridge Maintenance Crew doing an inspection and repairs to the Rutherford Road Overpass on Hwy 400 in Vaughan in 1986, following a severe bridge
strike by a truck carrying an over-height load. Historically, MTC had an in-house bridge maintenance crew who could respond to emergency incidents such as this and
undertake repairs to provincial highway bridges as needed. Although this bridge was repaired, the original Rutherford Road Overpass seen here was replaced by a new
structure in the early 1990s. The new bridge had an improved vertical clearance and also an expanded opening to carry additional traffic lanes on Hwy 400 below the
structure. See an Enlarged Photo Here. Photo taken on June 25, 1986.(Photo courtesy of Ontario Ministry of Transportation - © King's Printer for Ontario, 2024) 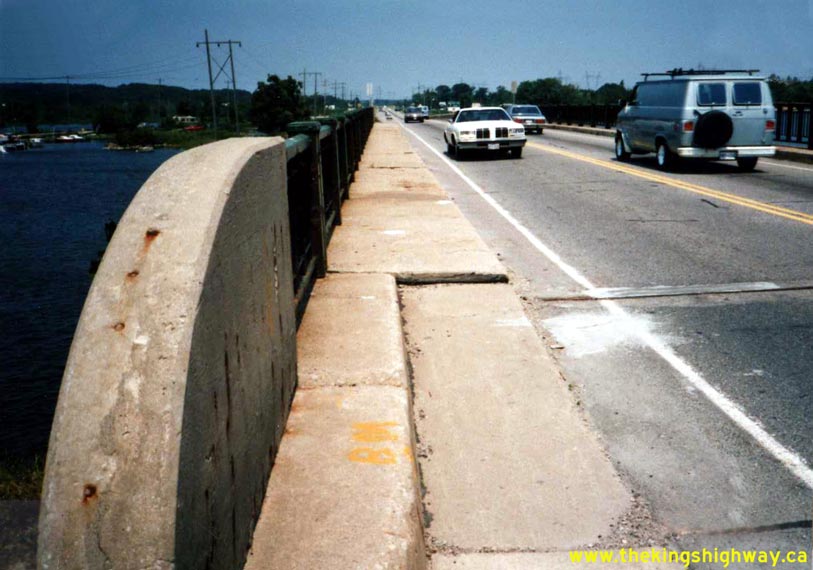
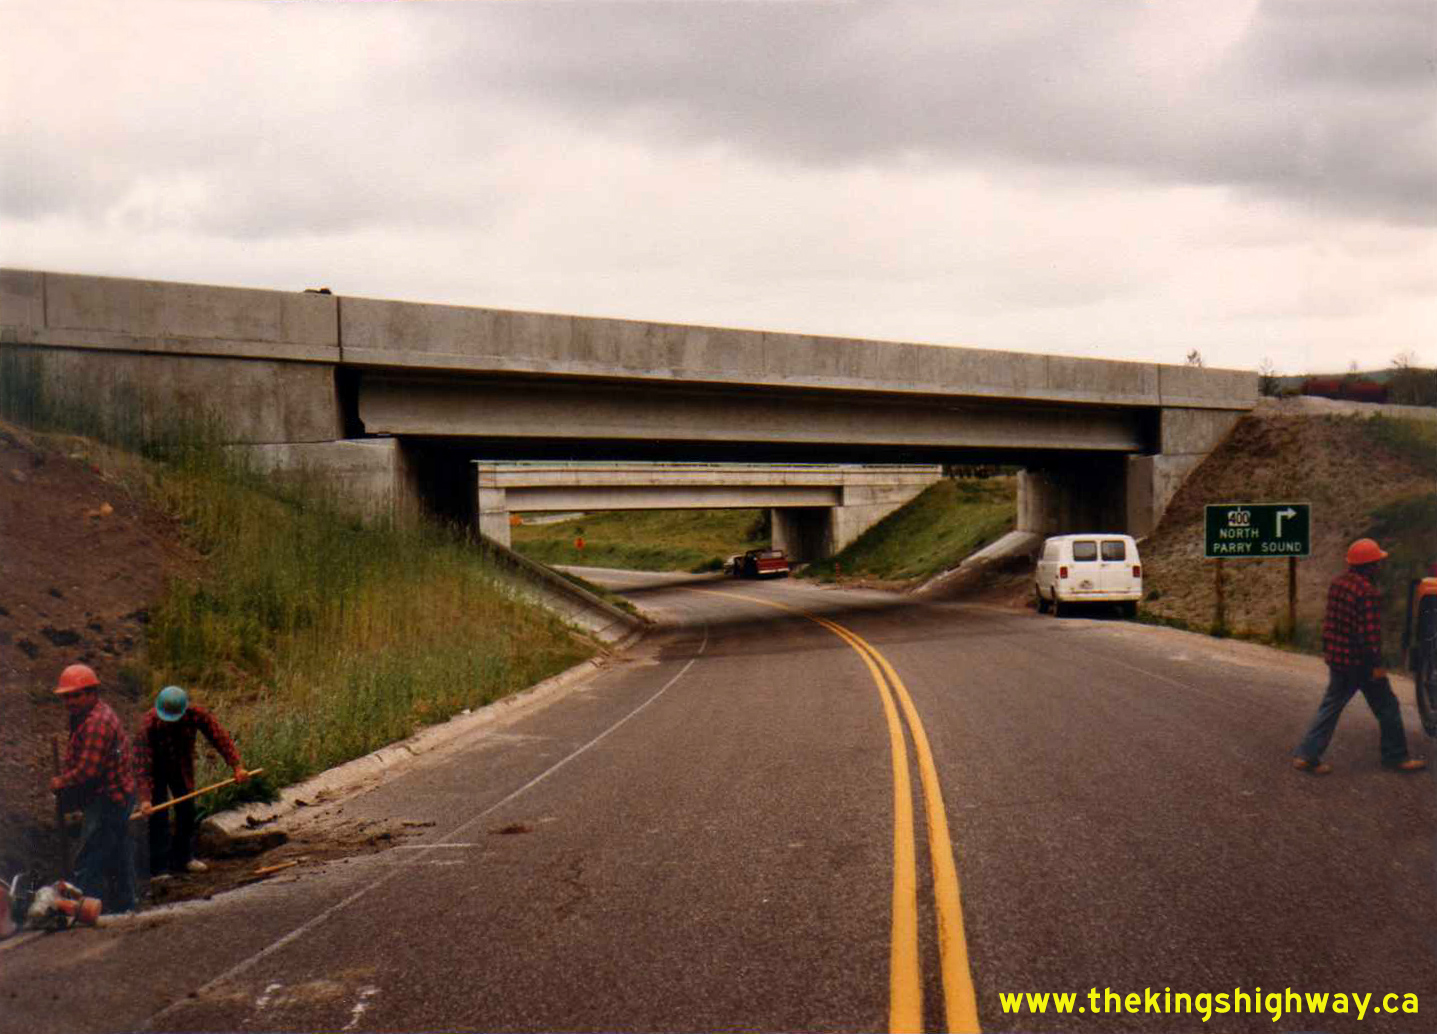
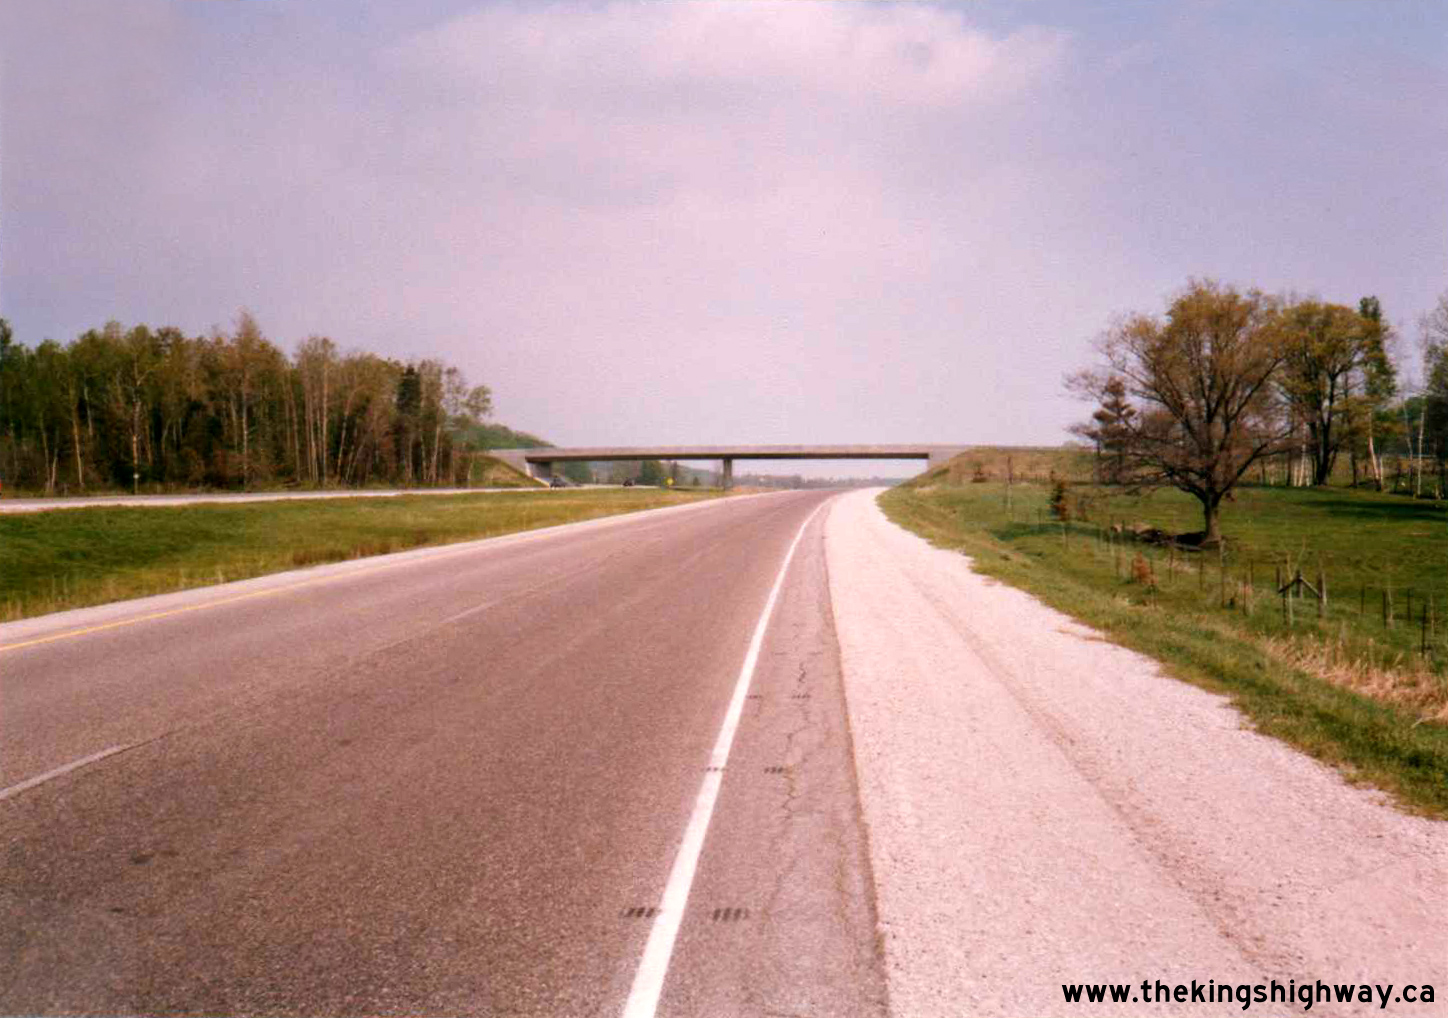
Above - Facing north along Hwy 69 (today's Hwy 400) towards Port Severn from the Matchedash Bay Bridge in Waubaushene in 1987. Heavy summer traffic volumes
along Hwy 69 between Waubaushene and Port Severn prompted MTO to begin expansion of the highway from two to four lanes. Construction began on the highway widening at
Waubaushene during 1987, but it took several years to complete due to the complex construction staging and sequencing of operations required to build the expanded
highway. See an Enlarged Photo Here. Photo taken on June 25, 1987. (Photo courtesy of Ontario Ministry of Transportation - © King's Printer for Ontario, 2012) 
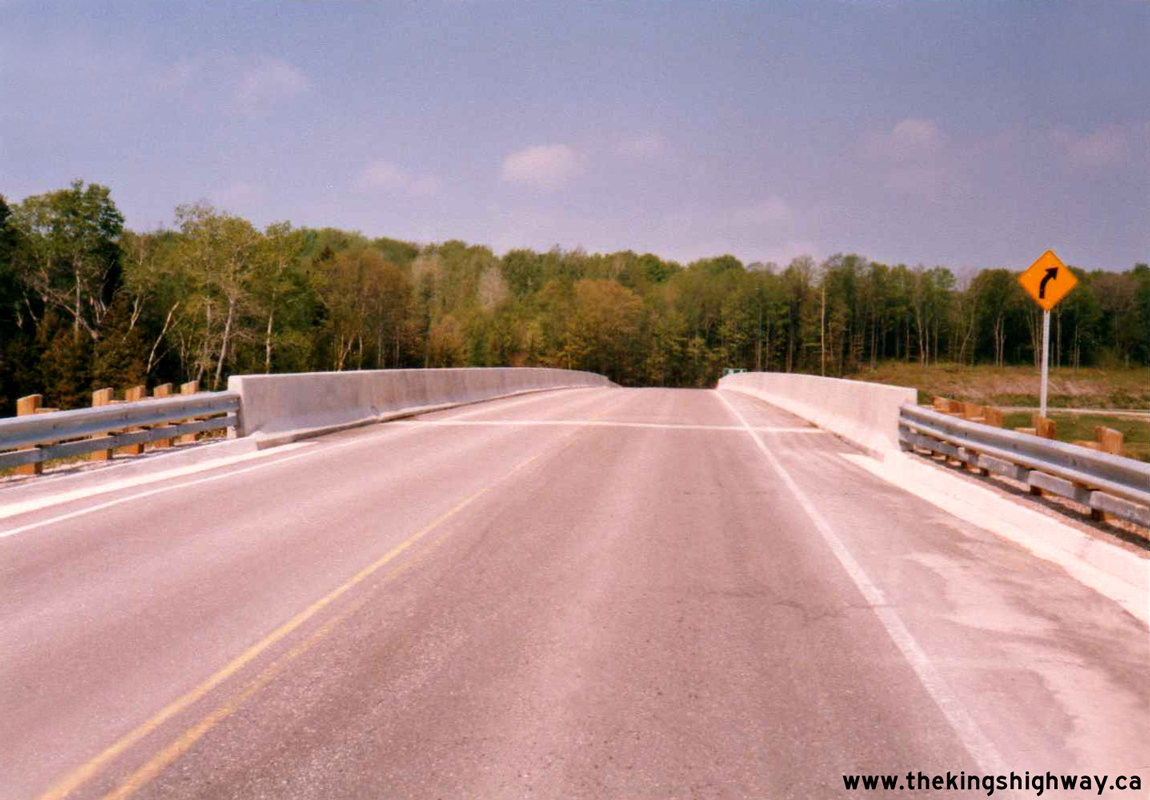
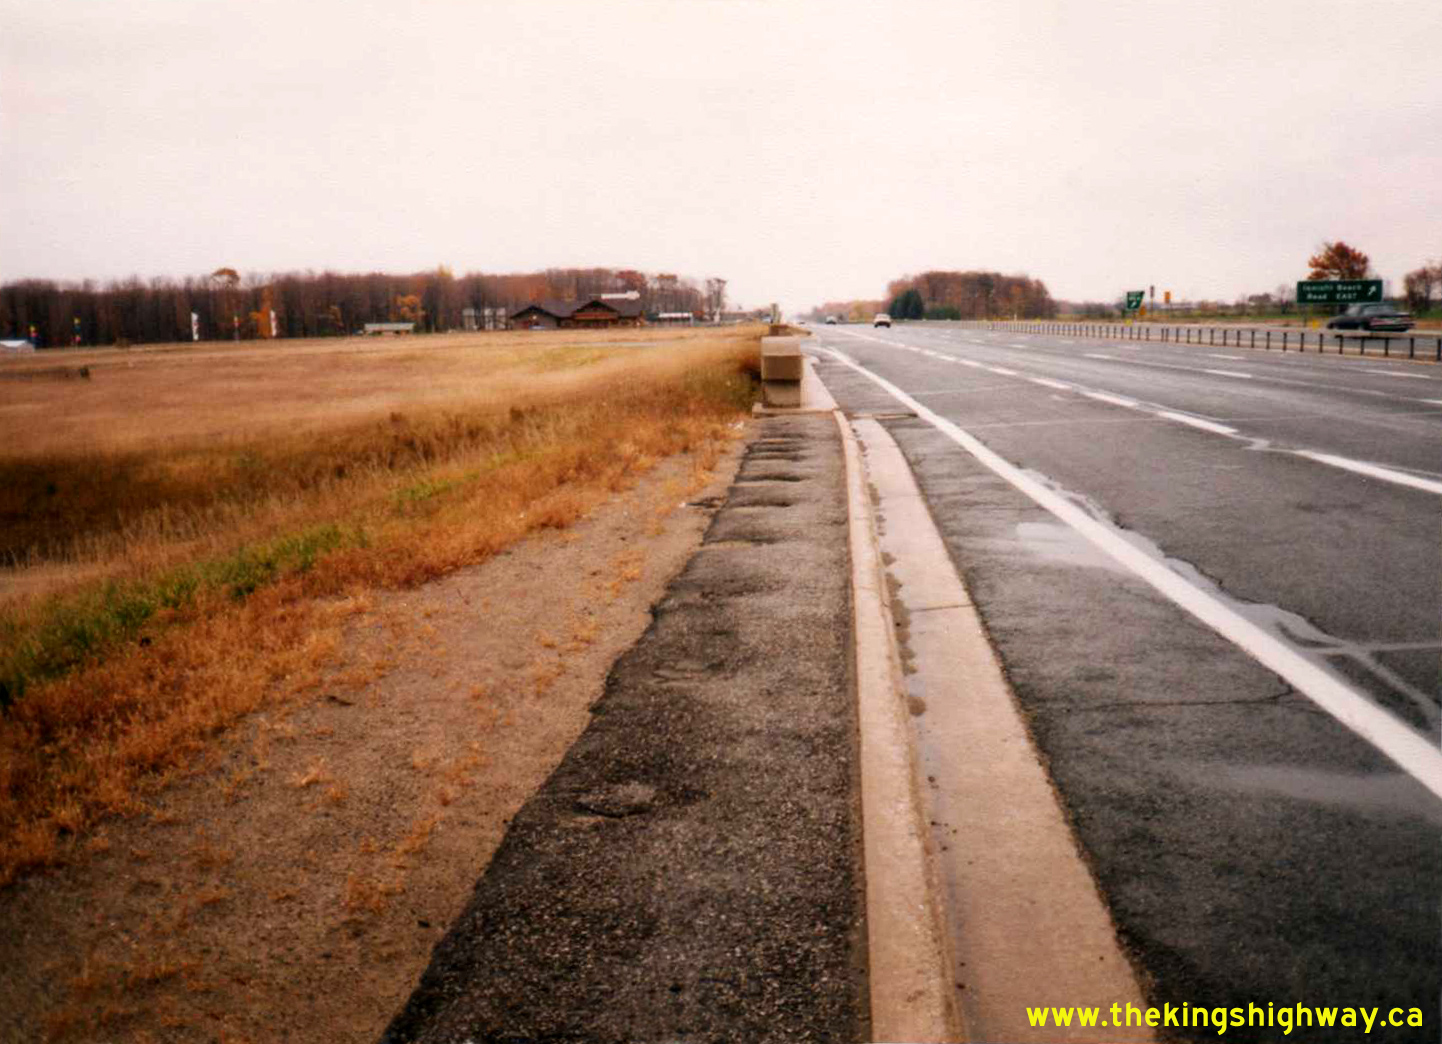
 Left - Facing south along Hwy 400 at the Innisfil Beach Road Interchange near Thornton. At the time this photo was taken in 1987, this interchange was still in
its original eight-ramp cloverleaf configuration which was designed back in the 1940s. The Thornton Cloverleaf was one of the original interchanges along the new
Toronto-Barrie Highway when it first opened to traffic in 1951. As with all cloverleaf interchanges, the traffic conflicts which resulted from the short weaving space
between the inner loop ramps and the significant speed differentials between entering and exiting traffic led to the cloverleaf interchange quickly falling out of
favour with designers for new interchanges in Ontario by the 1960s. See an
Enlarged Photo Here. Photo taken in October 1987. Left - Facing south along Hwy 400 at the Innisfil Beach Road Interchange near Thornton. At the time this photo was taken in 1987, this interchange was still in
its original eight-ramp cloverleaf configuration which was designed back in the 1940s. The Thornton Cloverleaf was one of the original interchanges along the new
Toronto-Barrie Highway when it first opened to traffic in 1951. As with all cloverleaf interchanges, the traffic conflicts which resulted from the short weaving space
between the inner loop ramps and the significant speed differentials between entering and exiting traffic led to the cloverleaf interchange quickly falling out of
favour with designers for new interchanges in Ontario by the 1960s. See an
Enlarged Photo Here. Photo taken in October 1987.(Photo courtesy of Ontario Ministry of Transportation - © King's Printer for Ontario, 2024) Right - Close-up view of the concrete bar-and-post handrail on the Innisfil Beach Road Underpass on Hwy 400 in 1987, facing south towards Bradford. The
concrete bar-and-post handrail was introduced on provincial highway bridges during World War II, when steel shortages hampered the construction of many bridges. This
design allowed the provision of an adequate roadside barrier for the vehicles of the day and also required substantially less steel than the typical handrail designs
used on bridges built before World War II. The Innisfil Beach Road Underpass was completed in 1949, at a time when Post-War shortages of steel were still very acute.
See an Enlarged Photo Here. Photo taken in October 1987.(Photo courtesy of Ontario Ministry of Transportation - © King's Printer for Ontario, 2024) 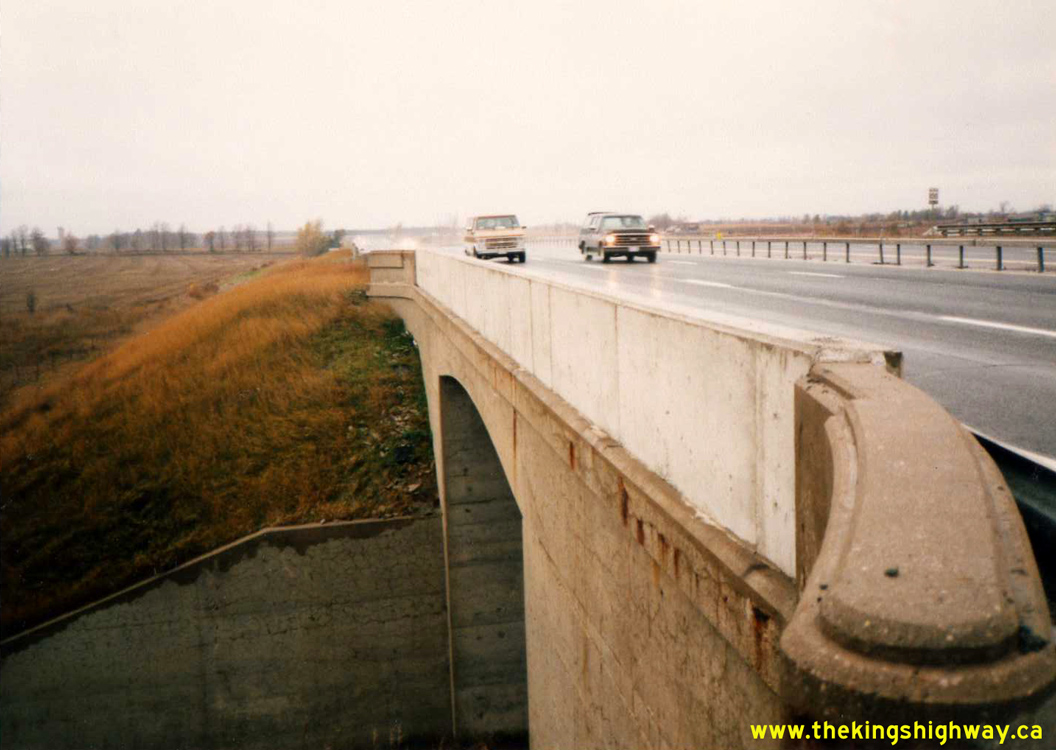
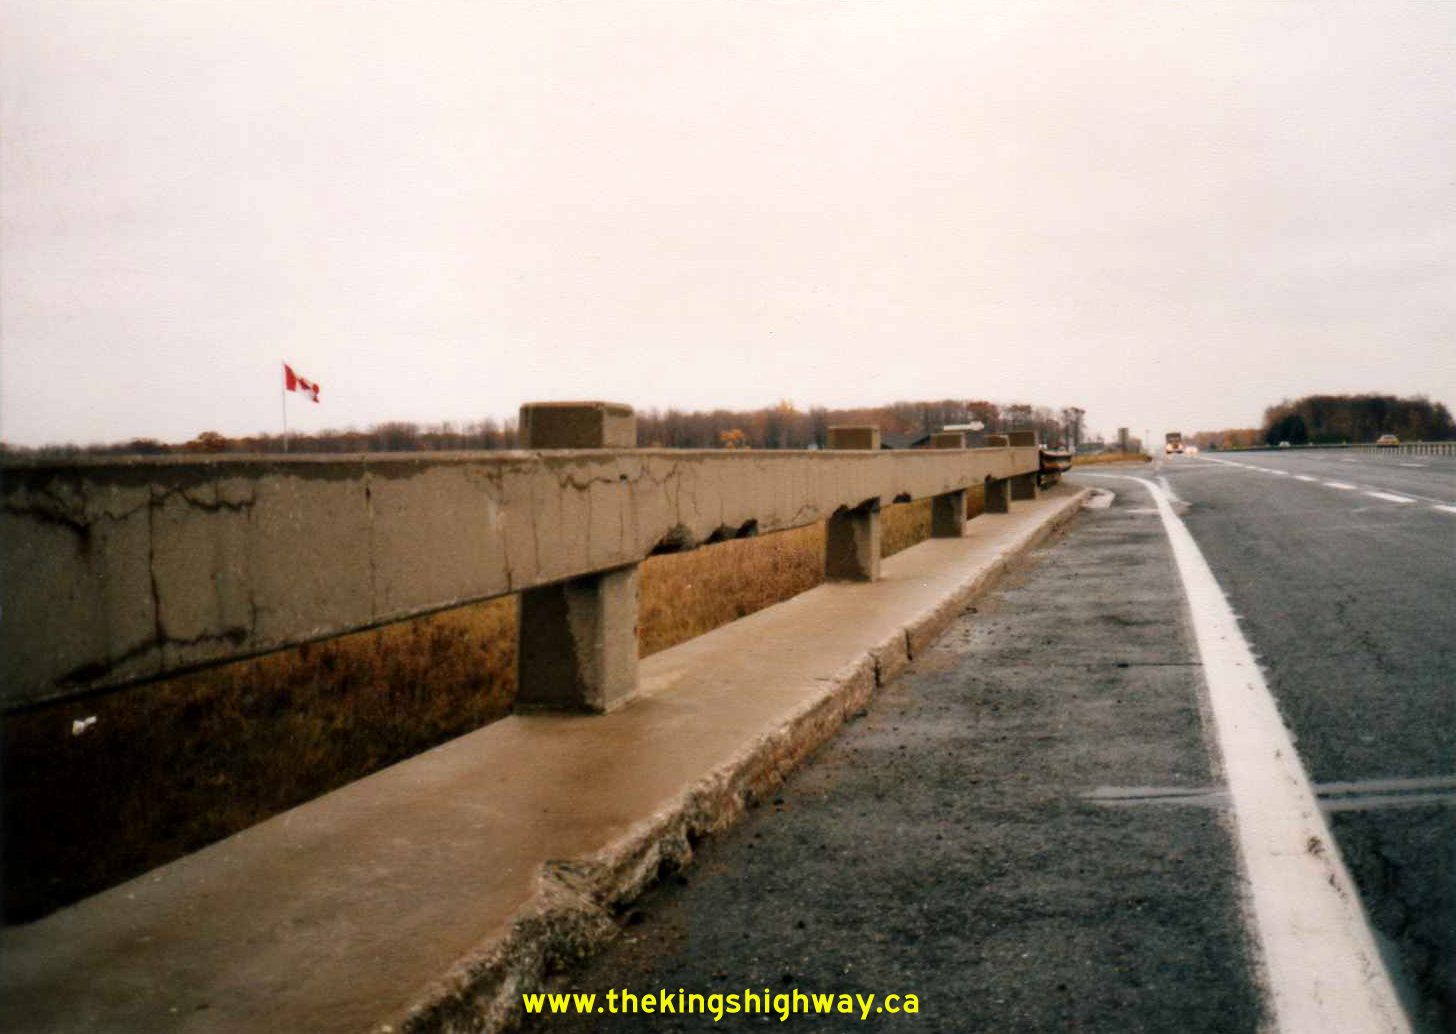
 Left - New concrete barrier wall on the Thornton Canadian National Railway (CNR) Overhead located north of the Innisfil Beach Road Interchange. Like many
underpass bridges built along Hwy 400, this structure originally had a concrete bar-and-post handrail. The old handrails were replaced by MTC's Bridge Maintenance
Crew in the mid-1980s shortly before this photo was taken. See an Enlarged Photo Here. Photo
taken in October 1987. Left - New concrete barrier wall on the Thornton Canadian National Railway (CNR) Overhead located north of the Innisfil Beach Road Interchange. Like many
underpass bridges built along Hwy 400, this structure originally had a concrete bar-and-post handrail. The old handrails were replaced by MTC's Bridge Maintenance
Crew in the mid-1980s shortly before this photo was taken. See an Enlarged Photo Here. Photo
taken in October 1987.(Photo courtesy of Ontario Ministry of Transportation - © King's Printer for Ontario, 2024) Right - Facing north along Hwy 400 towards Barrie from the Thornton CNR Overhead. See an
Enlarged Photo Here. Photo taken in October 1987.(Photo courtesy of Ontario Ministry of Transportation - © King's Printer for Ontario, 2024) 
Above - Aerial view of the reconstruction of the Hwy 400 and Hwy 7 Interchange in Vaughan in 1988. The original Hwy 7 Cloverleaf was replaced with a
new interchange and expanded structure in 1987-1988 in order to accommodate the future construction of new ramps to serve the proposed Hwy 407 Interchange. See an
Enlarged Photo Here. (Photo courtesy of Ontario Ministry of Transportation - © King's Printer for Ontario, 2009) 

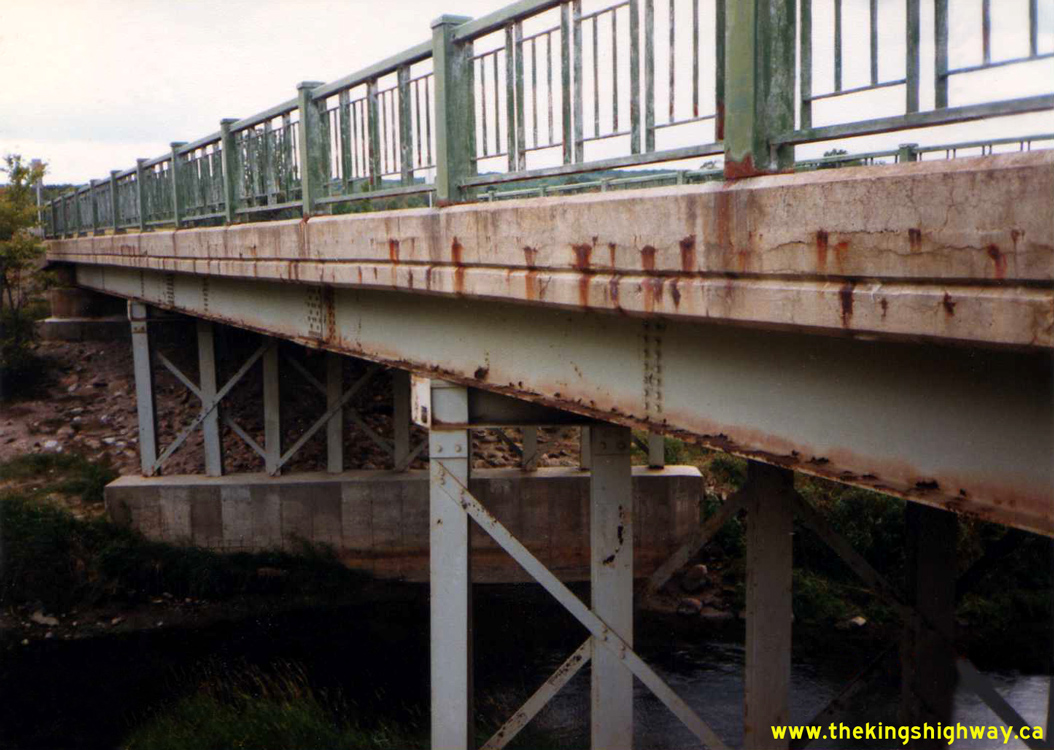
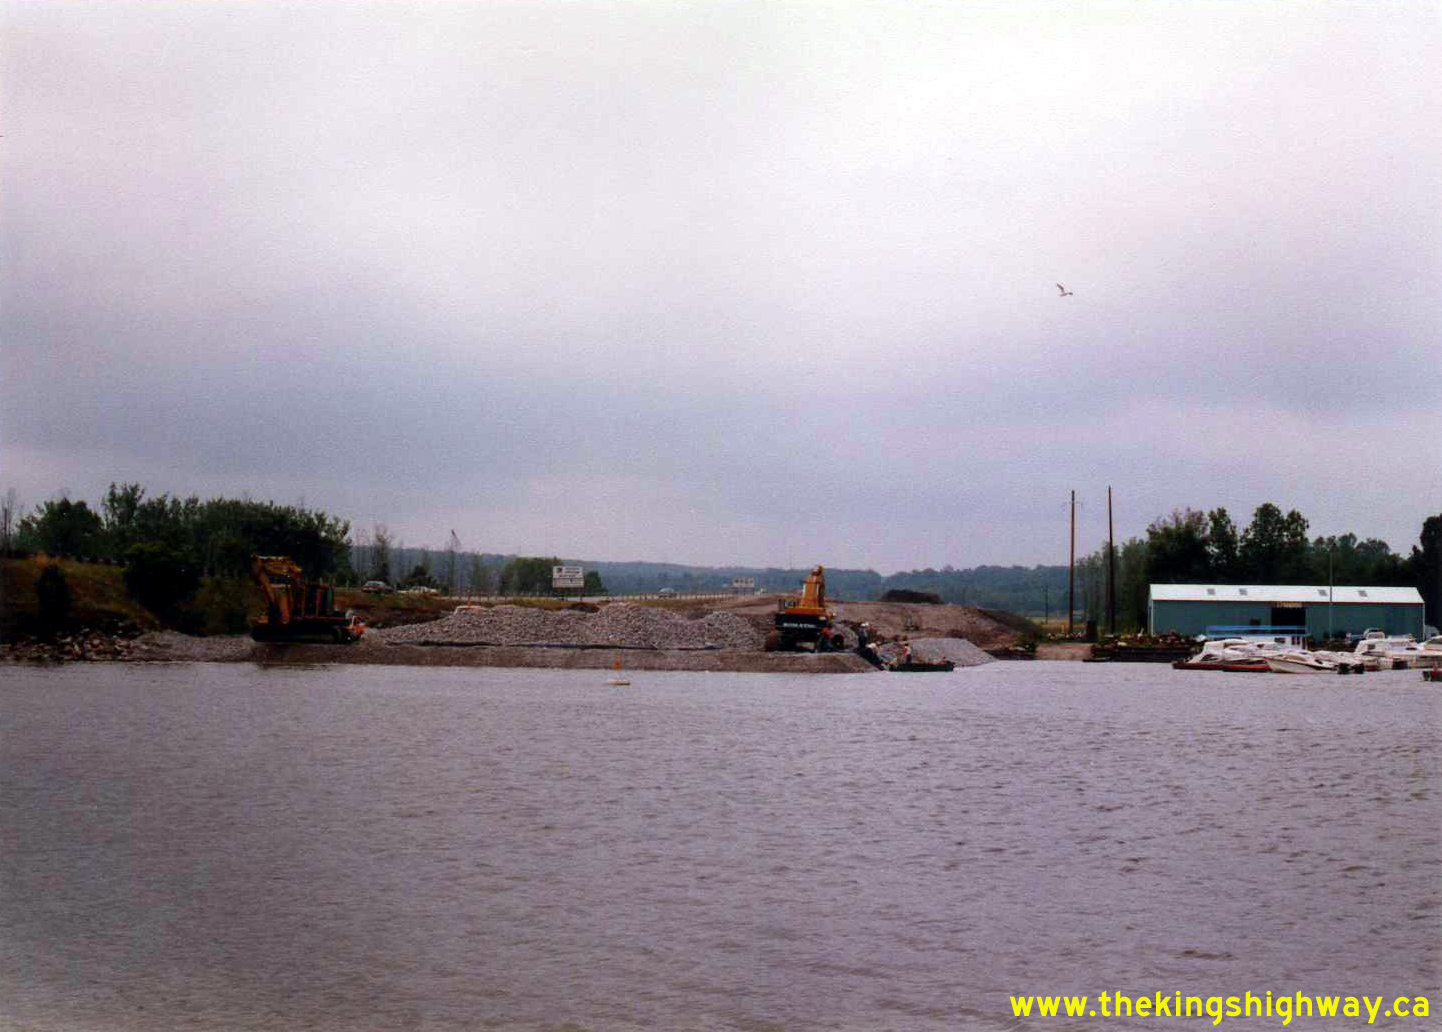
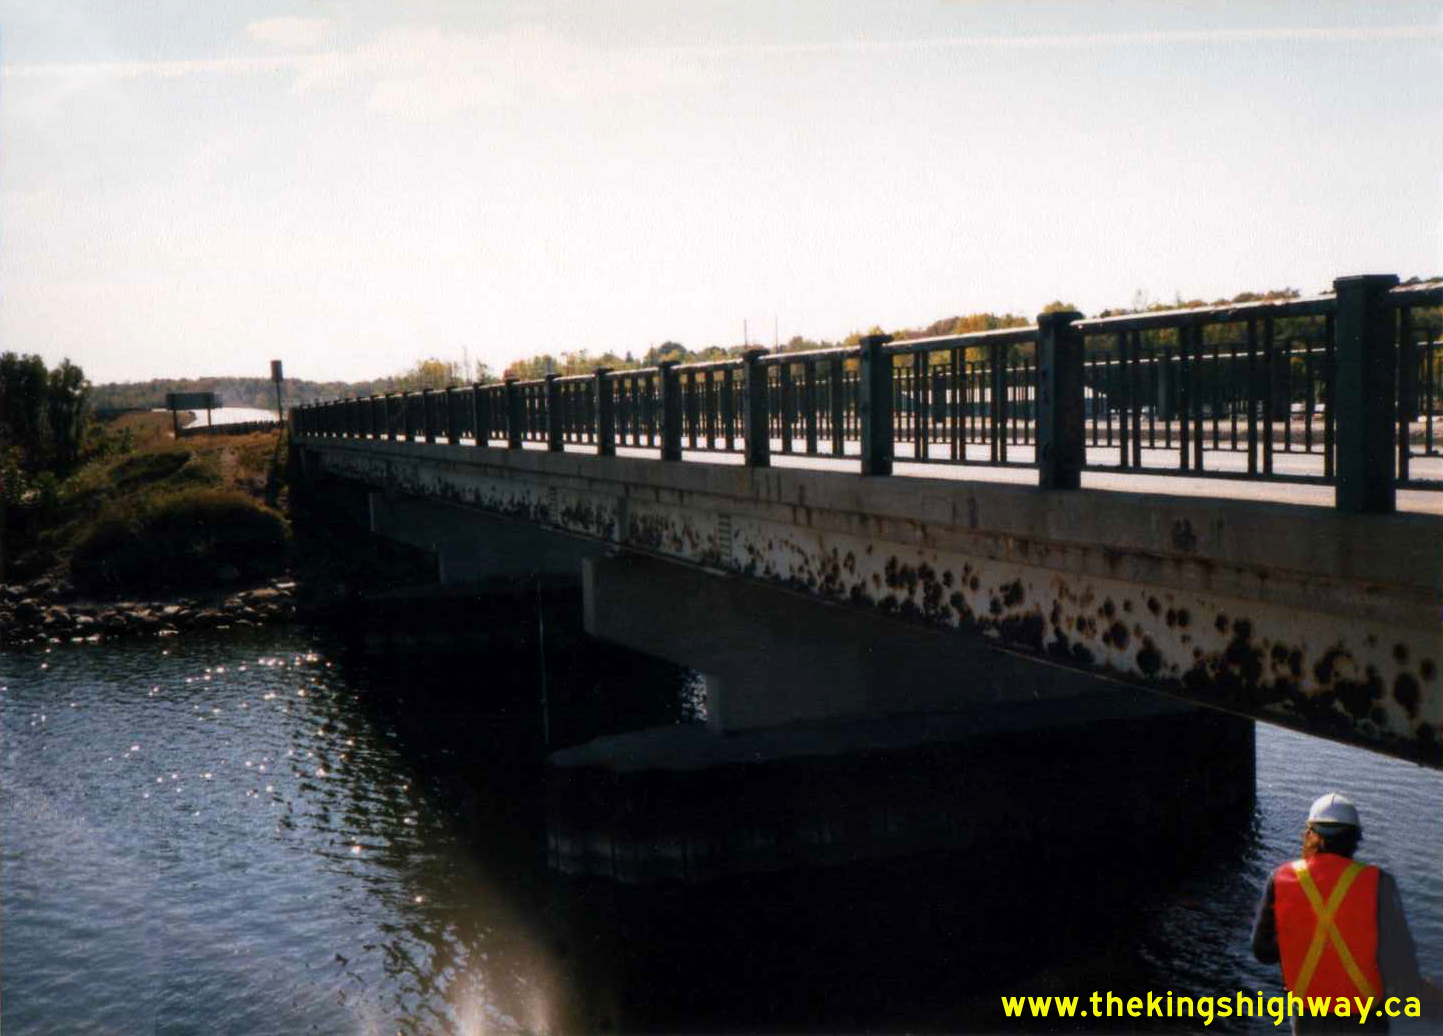
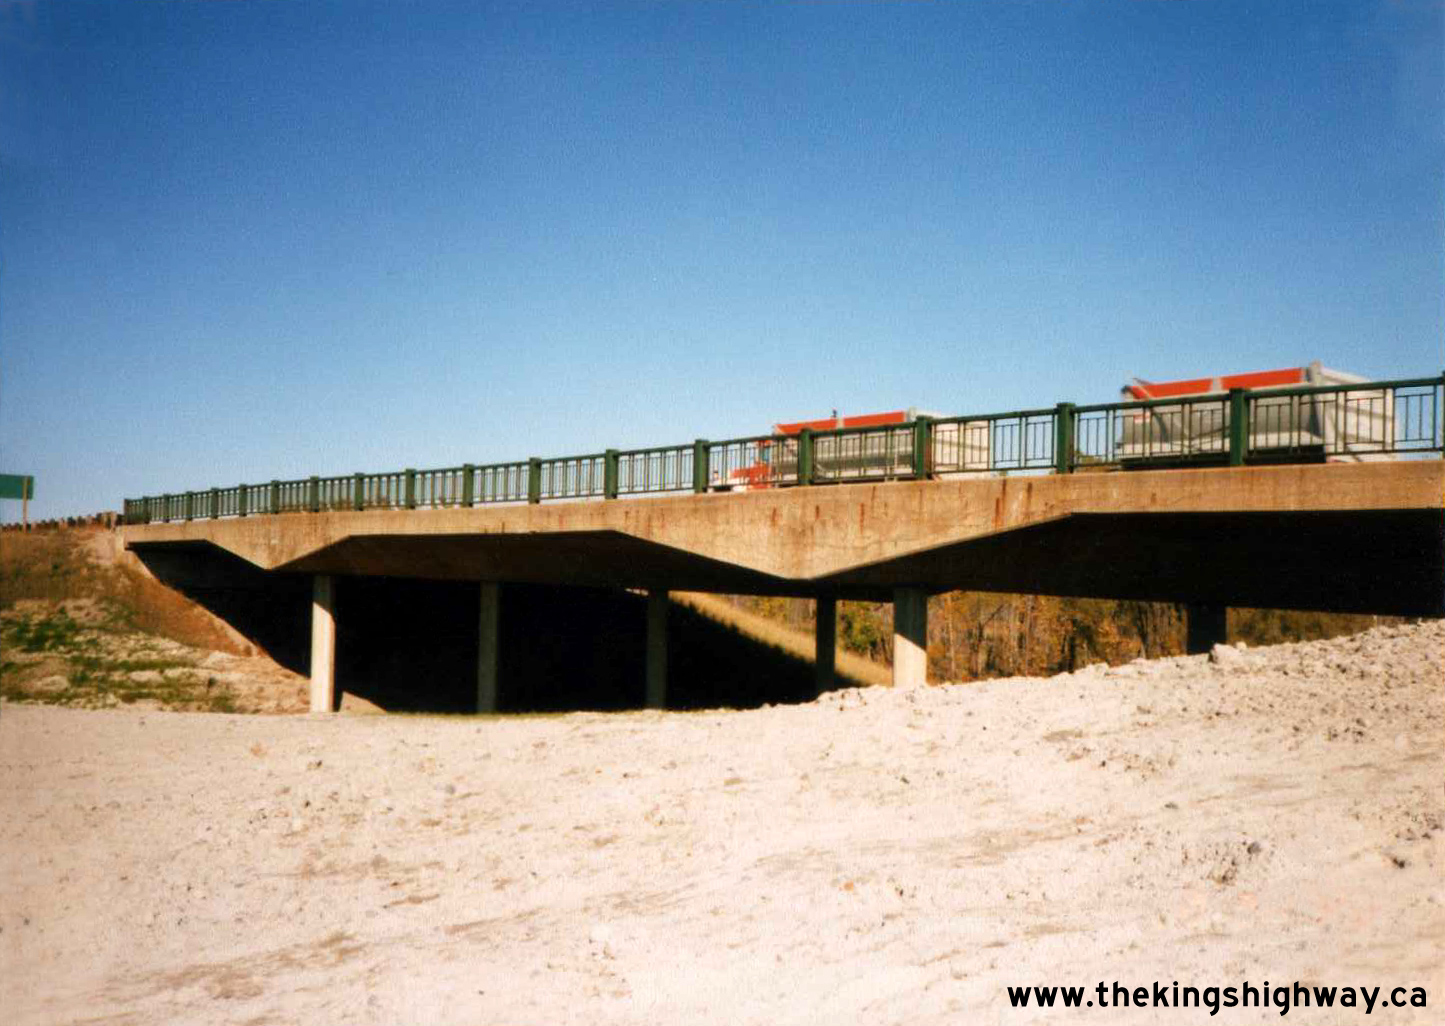
Left - Pier construction for the new southbound Hwy 69 & Hwy 400 structure at the Hwy 12 Interchange in Waubaushene, Contract #1987-04. This twin structure
was built beside an existing bridge which was constructed at this interchange in 1978. The original structure carried both directions of traffic on Hwy 69 &
Hwy 400 for many years. It was converted to carry northbound traffic only after the new southbound carriageway was opened to traffic in the early 1990s. See an
Enlarged Photo Here. Photo taken on May 11, 1988. (Photo courtesy of Ontario Ministry of Transportation - © King's Printer for Ontario, 2012) Right - New underpass construction at the Hwy 12 Interchange on Hwy 69 & Hwy 400 in Waubaushene, Contract #1987-04. See an Enlarged Photo Here. Photo taken on May 11, 1988. (Photo courtesy of Ontario Ministry of Transportation - © King's Printer for Ontario, 2012)  Above - Rehabilitation of the northbound Hwy 400 structure over Simcoe County Road 23 in Coldwater, Contract #1987-04. See an
Enlarged Photo Here. Photo taken on July 22, 1988. Above - Rehabilitation of the northbound Hwy 400 structure over Simcoe County Road 23 in Coldwater, Contract #1987-04. See an
Enlarged Photo Here. Photo taken on July 22, 1988.(Photo courtesy of Ontario Ministry of Transportation - © King's Printer for Ontario, 2024) 
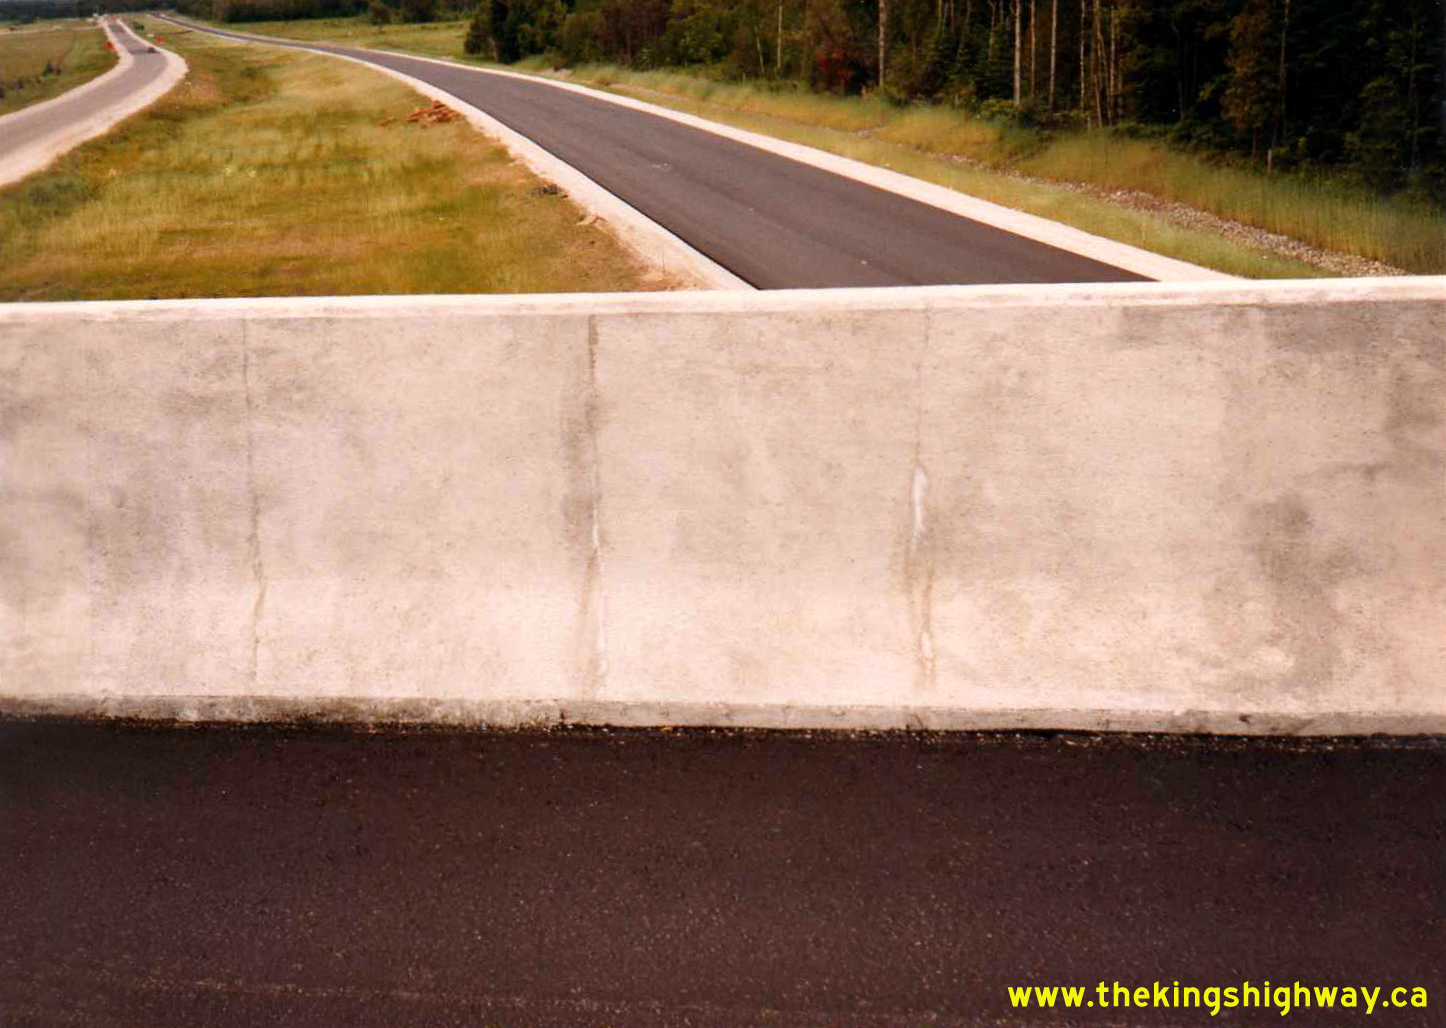
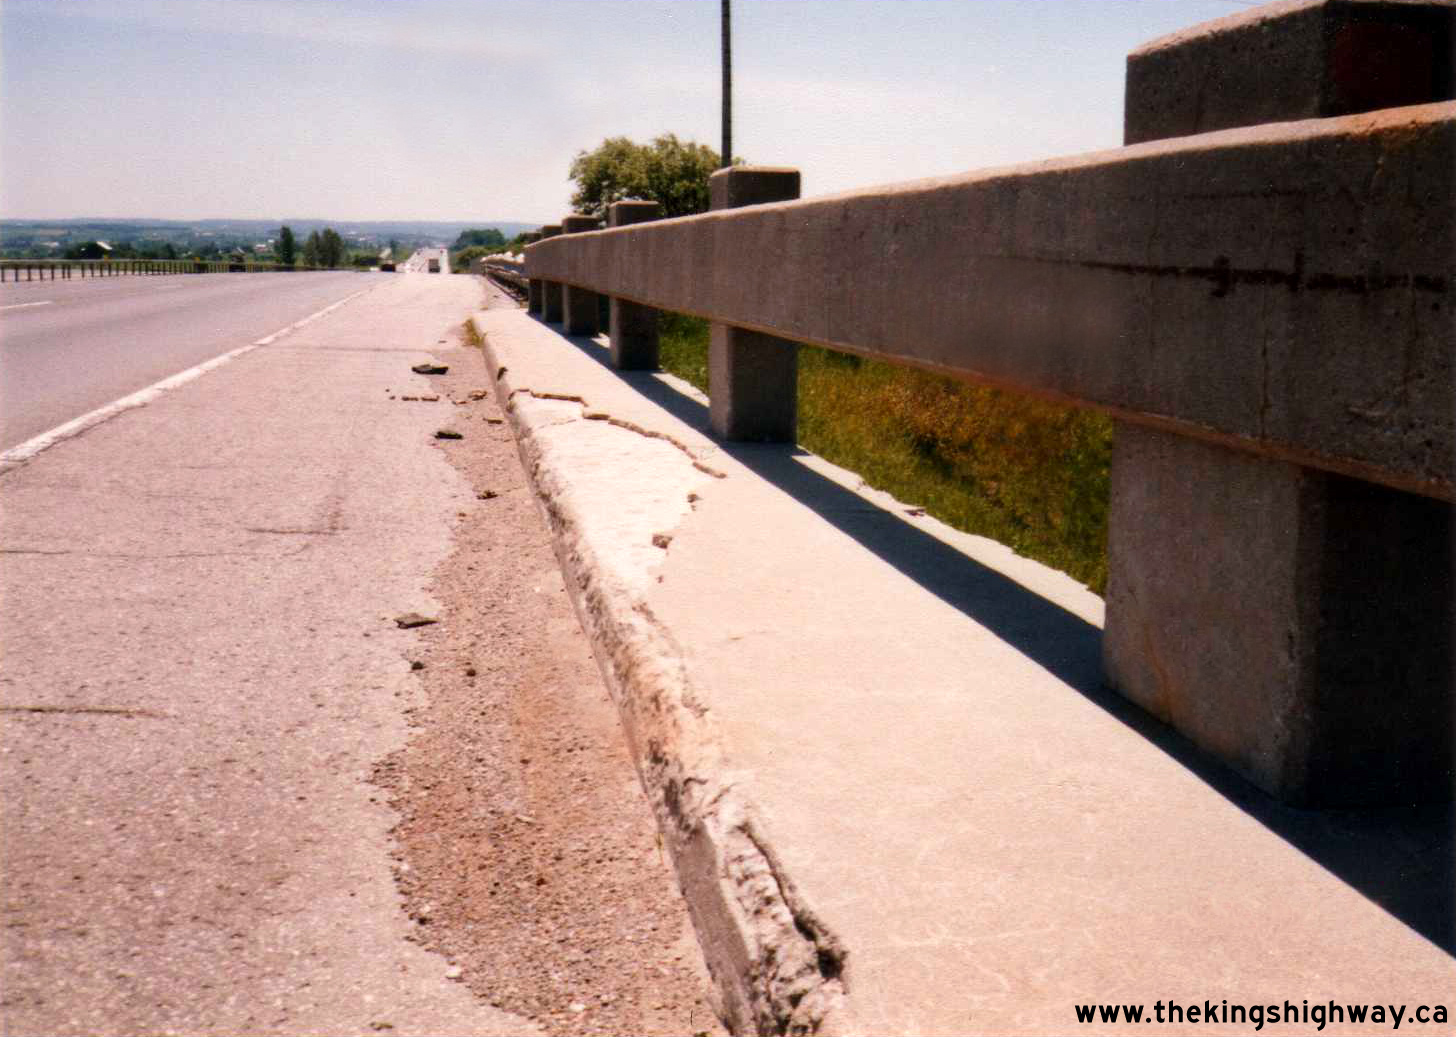
 Left - Eastern side of the Simcoe County Road 23 Underpass on Hwy 400 in Coldwater, showing the rehabilitated concrete barrier wall. See an
Enlarged Photo Here. Photo taken on July 22, 1988. Left - Eastern side of the Simcoe County Road 23 Underpass on Hwy 400 in Coldwater, showing the rehabilitated concrete barrier wall. See an
Enlarged Photo Here. Photo taken on July 22, 1988.(Photo courtesy of Ontario Ministry of Transportation - © King's Printer for Ontario, 2024) Right - Rehabilitated concrete barrier wall on the Simcoe County Road 23 Underpass on Hwy 400 in Coldwater. For some reason, this underpass did not age
particularly well and required rehabilitation only 10 years after it was initially constructed in 1978. Highway bridges typically have rehabilitation cycles in the
neighbourhood of 30-year intervals, although local site conditions may warrant rehabilitation work sooner than that, as was the case here. See an
Enlarged Photo Here. Photo taken on July 22, 1988.(Photo courtesy of Ontario Ministry of Transportation - © King's Printer for Ontario, 2024) 
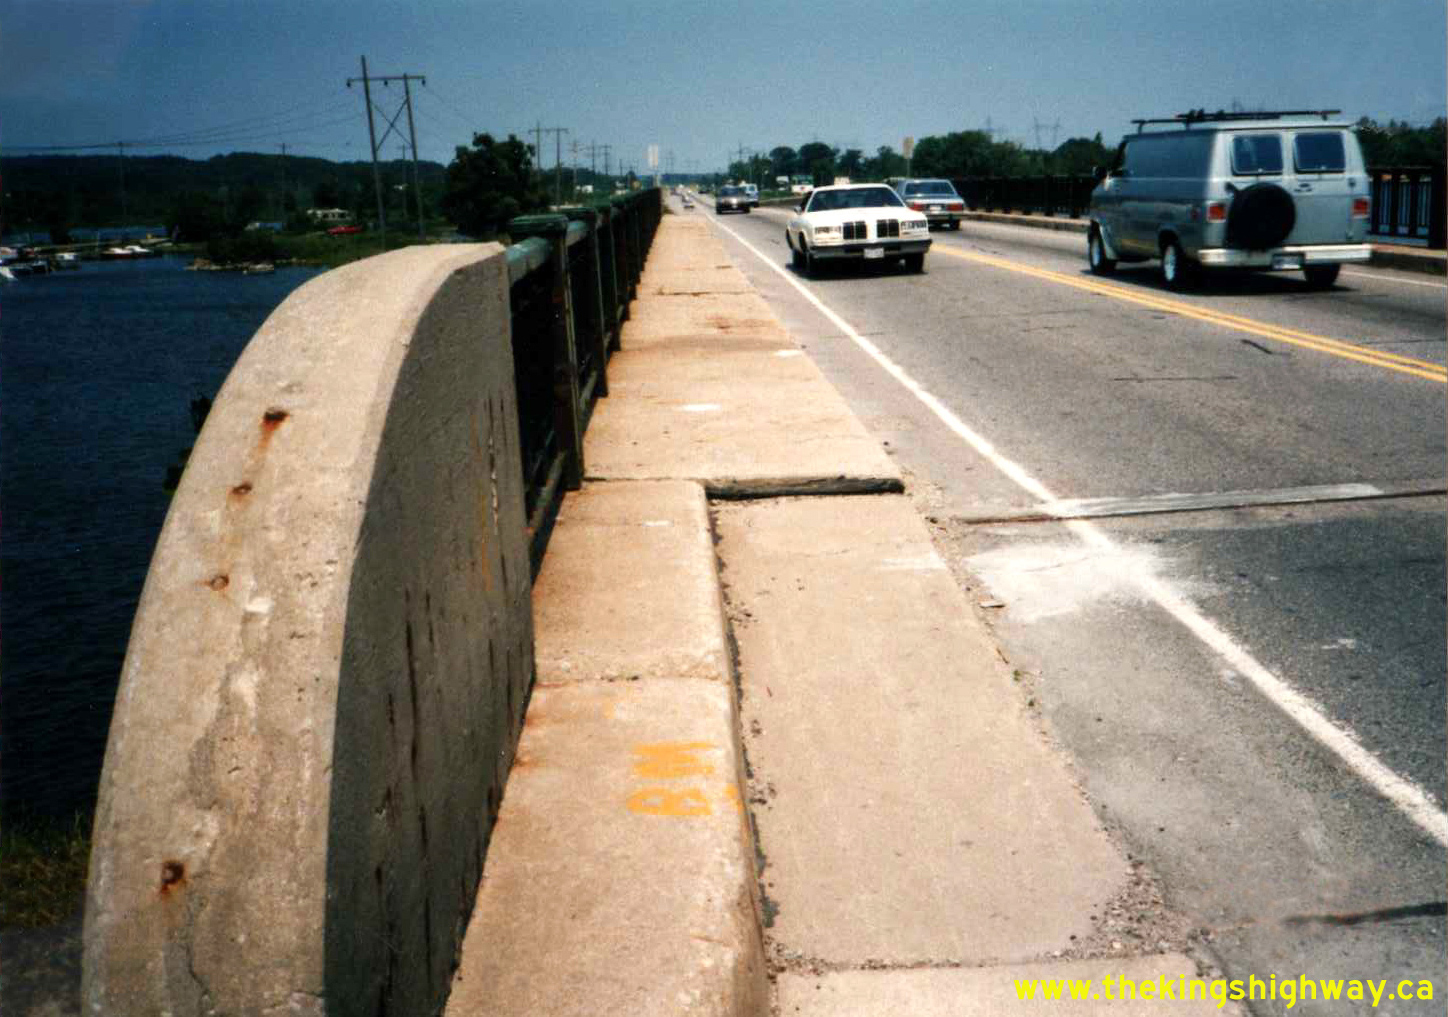
 Left - Disconnected steel beam guide rail run during the rehabilitation of the Simcoe County Road 23 Underpass on Hwy 400 in Coldwater, Contract #1987-04.
Bridges built during the 1970s and early 1980s typically had the steel beam guide rail embedded directly into the end of the concrete barrier walls. Newer bridges
have a steel beam guide rail connection plate which is bolted laterally into the face of the barrier wall. See an
Enlarged Photo Here. Photo taken on July 22, 1988. Left - Disconnected steel beam guide rail run during the rehabilitation of the Simcoe County Road 23 Underpass on Hwy 400 in Coldwater, Contract #1987-04.
Bridges built during the 1970s and early 1980s typically had the steel beam guide rail embedded directly into the end of the concrete barrier walls. Newer bridges
have a steel beam guide rail connection plate which is bolted laterally into the face of the barrier wall. See an
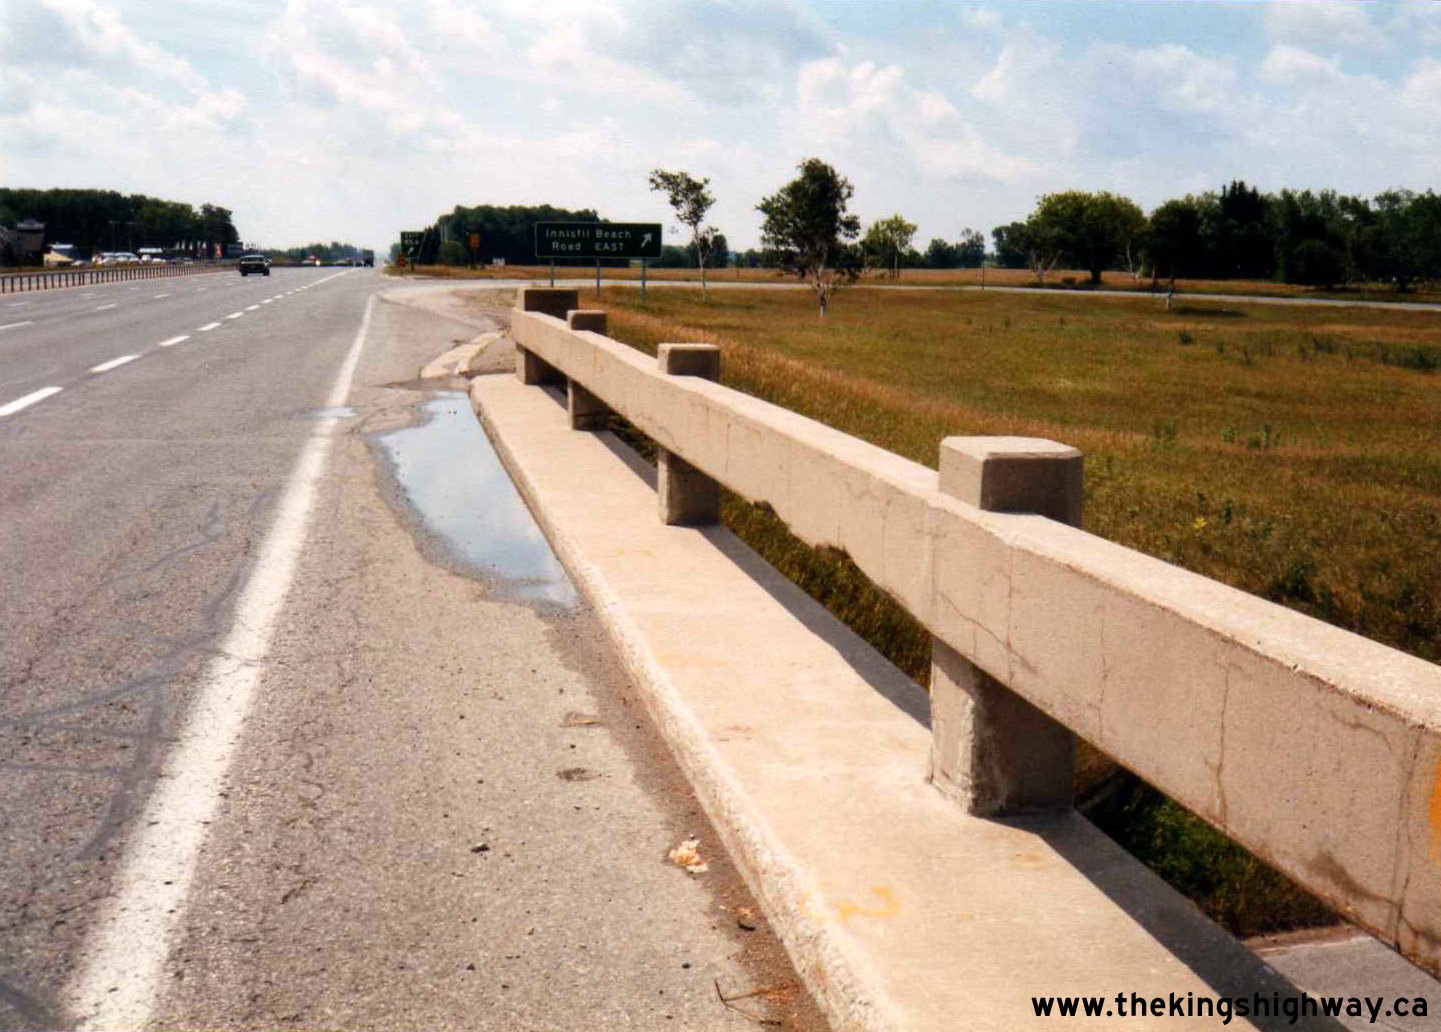
Enlarged Photo Here. Photo taken on July 22, 1988.(Photo courtesy of Ontario Ministry of Transportation - © King's Printer for Ontario, 2024) Right - Facing south along Hwy 400 at the Innisfil Beach Road Interchange near Thornton in 1988. One of the disadvantages of the full eight-ramp cloverleaf
interchange design is the fact that approaching motorists have to make two destination decisions on the freeway itself while approaching a cloverleaf interchange. In
this instance, freeway exit guide signs differentiate between these two exit ramps as either Innisfil Beach Road EAST or Innisfil Beach Road WEST. However, the
addition of that second decision point for motorists complicates the driving task, with the second decision point coming at a location within the interchange where
motorists also had to contend with finding gaps in slow-moving traffic entering the freeway from the opposing cloverleaf ramp while making their exit. Today, highway
engineers typically avoid creating these dual freeway ramp decision points for motorists within their designs, which is why there is usually only one exit ramp
serving most interchanges built today. Once the ramp has diverged off of the freeway, motorists can then focus on the decision of which direction they wish to take
along the intersecting road, rather than having to make that decision while they are still on the freeway. See an
Enlarged Photo Here. Photo taken on July 27, 1988.(Photo courtesy of Ontario Ministry of Transportation - © King's Printer for Ontario, 2024) 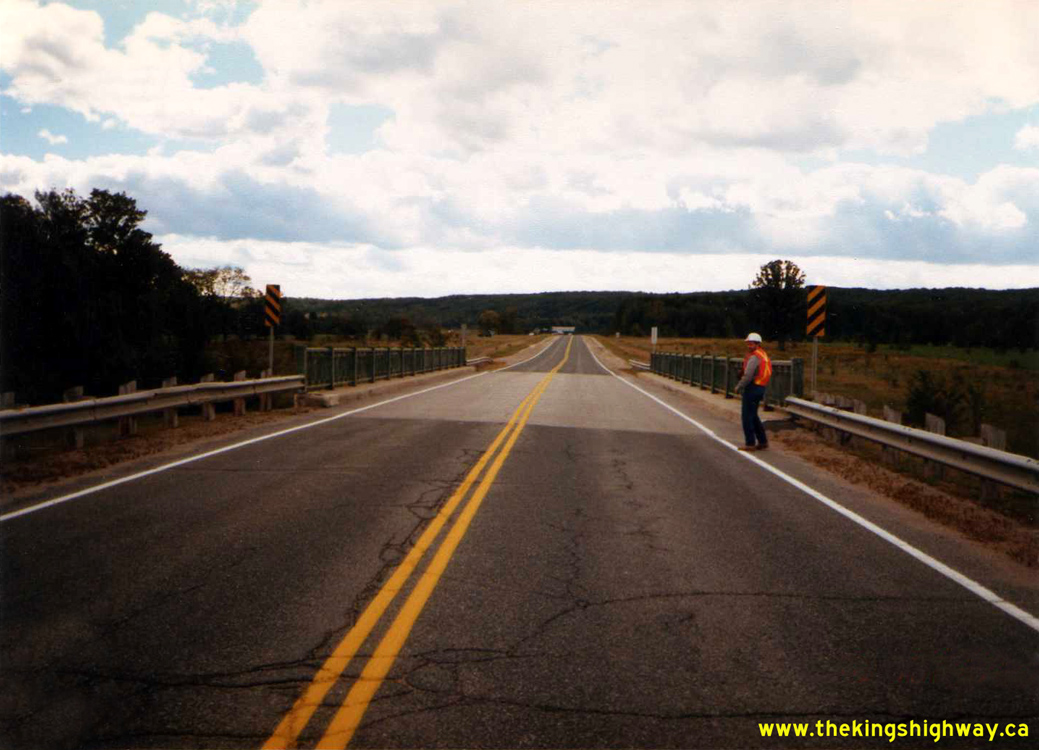
 Left - Facing north along Old Hwy 400 (Lower Big Chute Road) towards the Coldwater River Bridge near Coldwater in 1988. This bypassed section of Hwy 400 was
left behind after a new route for Hwy 400 was constructed around Coldwater and nearby Fesserton in the late 1970s, under Contract #1977-25. Prior to the completion of
the Hwy 400 Extension from Coldwater to Waubaushene in 1979, all traffic bound for Muskoka and Parry Sound which arrived at the end of Hwy 400 from Barrie had to
drive through Fesserton in order to reach Hwy 69 North. Like many bypassed sections of highways that are still under provincial jurisdiction, Lower Big Chute Road has
a 7000-series designation (Hwy 7174) which is merely used for inventory purposes and is not posted on highway signs. See an
Enlarged Photo Here. Photo taken on September 15, 1988. Left - Facing north along Old Hwy 400 (Lower Big Chute Road) towards the Coldwater River Bridge near Coldwater in 1988. This bypassed section of Hwy 400 was
left behind after a new route for Hwy 400 was constructed around Coldwater and nearby Fesserton in the late 1970s, under Contract #1977-25. Prior to the completion of
the Hwy 400 Extension from Coldwater to Waubaushene in 1979, all traffic bound for Muskoka and Parry Sound which arrived at the end of Hwy 400 from Barrie had to
drive through Fesserton in order to reach Hwy 69 North. Like many bypassed sections of highways that are still under provincial jurisdiction, Lower Big Chute Road has
a 7000-series designation (Hwy 7174) which is merely used for inventory purposes and is not posted on highway signs. See an
Enlarged Photo Here. Photo taken on September 15, 1988.(Photo courtesy of Ontario Ministry of Transportation - © King's Printer for Ontario, 2024) Right - Side view of the Coldwater River Bridge on Old Hwy 400 (Lower Big Chute Road) near Coldwater. See an
Enlarged Photo Here. Photo taken on September 15, 1988.(Photo courtesy of Ontario Ministry of Transportation - © King's Printer for Ontario, 2024) 

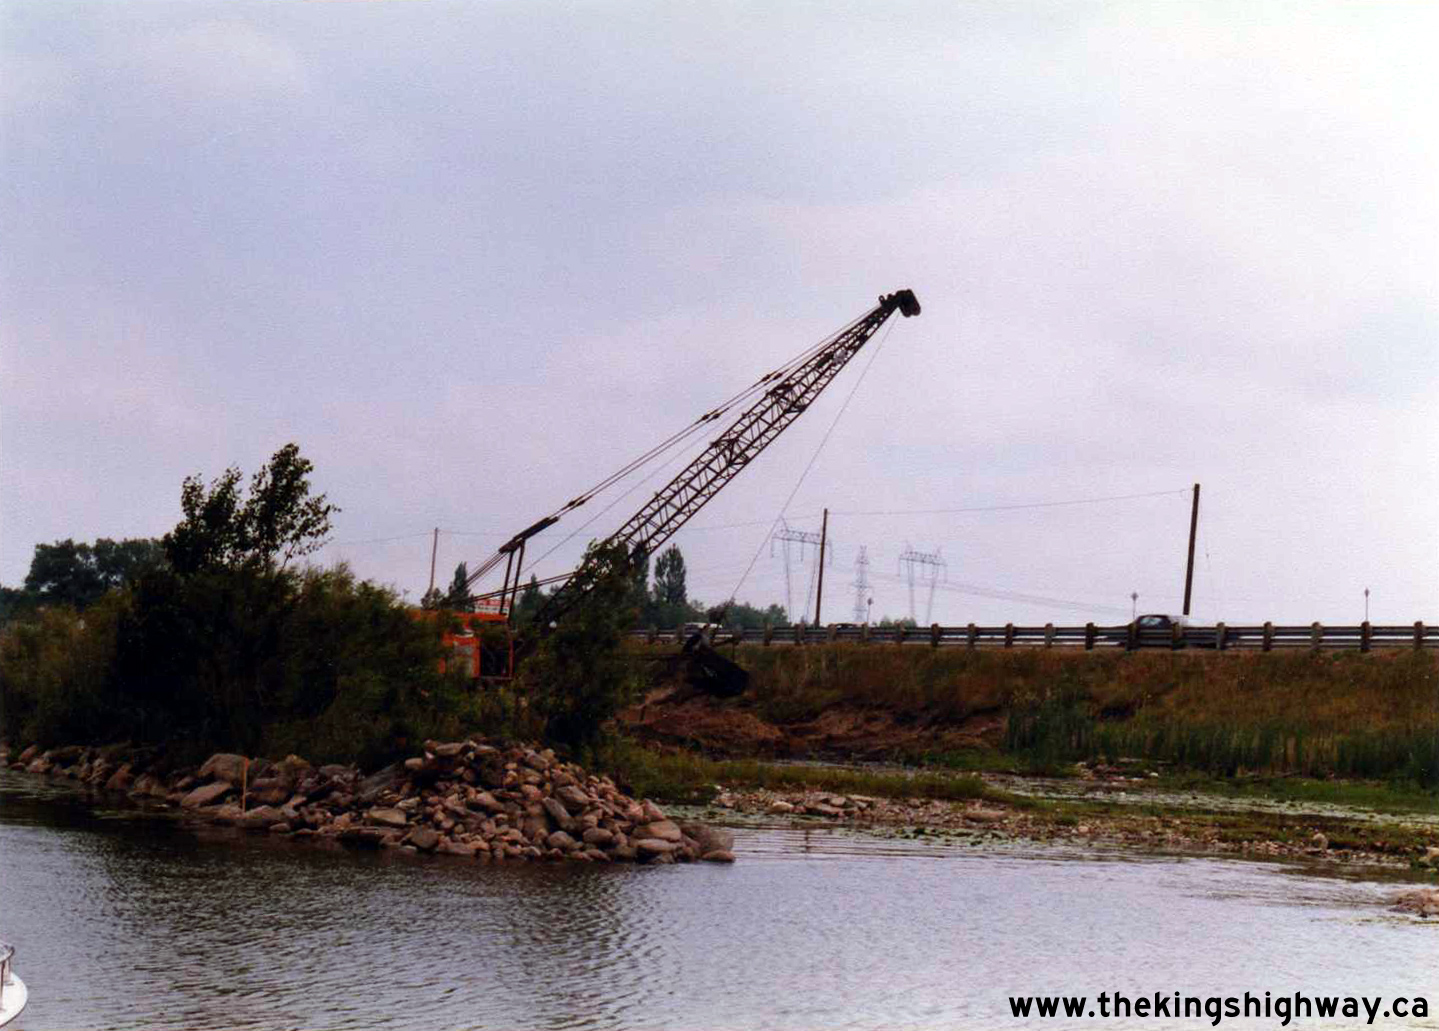
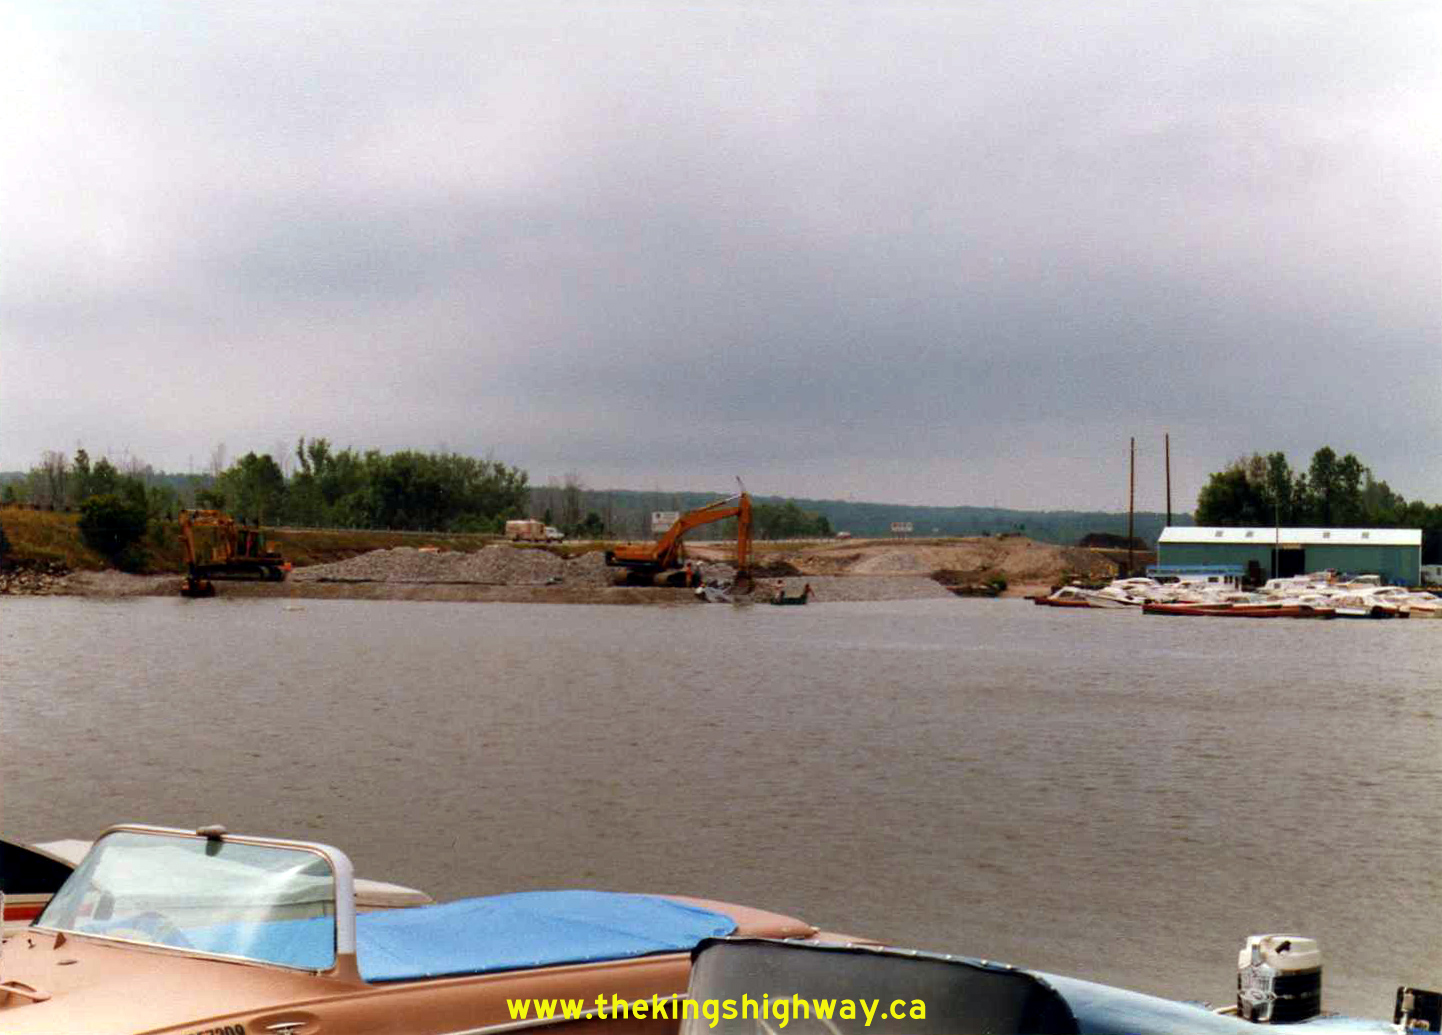
Left - Advance grading under Contract #1987-04 for the twin southbound Matchedash Bay Bridge on Hwy 69 (today's Hwy 400) in Waubaushene in 1988. Some of the
earth removed from the Waubaushene Hill Cut to the south was placed as fill for the twinned highway section from the Hwy 12 Interchange northerly to a point just
south of Quarry Road under this contract. Due to local soil conditions, geotechnical engineers determined that it would be necessary to let this fill settle for some
time before the highway was built on top of it. See an Enlarged Photo Here. Photo taken in 1988. (Photo courtesy of Ontario Ministry of Transportation - © King's Printer for Ontario, 2012) Right - Clearing and grubbing operations under Contract #1987-04 for the future southbound Hwy 400 structure over Matchedash Bay in Waubaushene in 1988. In the background, Hwy 69 traffic is still using the existing Matchedash Bay Bridge, which now forms today's northbound lanes of Hwy 400. Construction began on the southbound structure over Matchedash Bay under Contract #1989-58, just over a year after this photo was taken. See an Enlarged Photo Here. Photo taken in 1988. (Photo courtesy of Ontario Ministry of Transportation - © King's Printer for Ontario, 2012) 
Left - Advance grading for the proposed southbound structure over Matchedash Bay on Hwy 69 (today's Hwy 400) in Waubaushene in 1988. Following placement of the
approach fill to the bridge site, the fill was allowed to settle for about a year before any work commenced on the structure itself. See an
Enlarged Photo Here. Photo taken in 1988. (Photo courtesy of Ontario Ministry of Transportation - © King's Printer for Ontario, 2012) Right - Preparatory work and utility pole relocations for the future construction of the southbound Hwy 400 Matchedash Bay Bridge. See an Enlarged Photo Here. Photo taken in 1988. (Photo courtesy of Ontario Ministry of Transportation - © King's Printer for Ontario, 2012) 

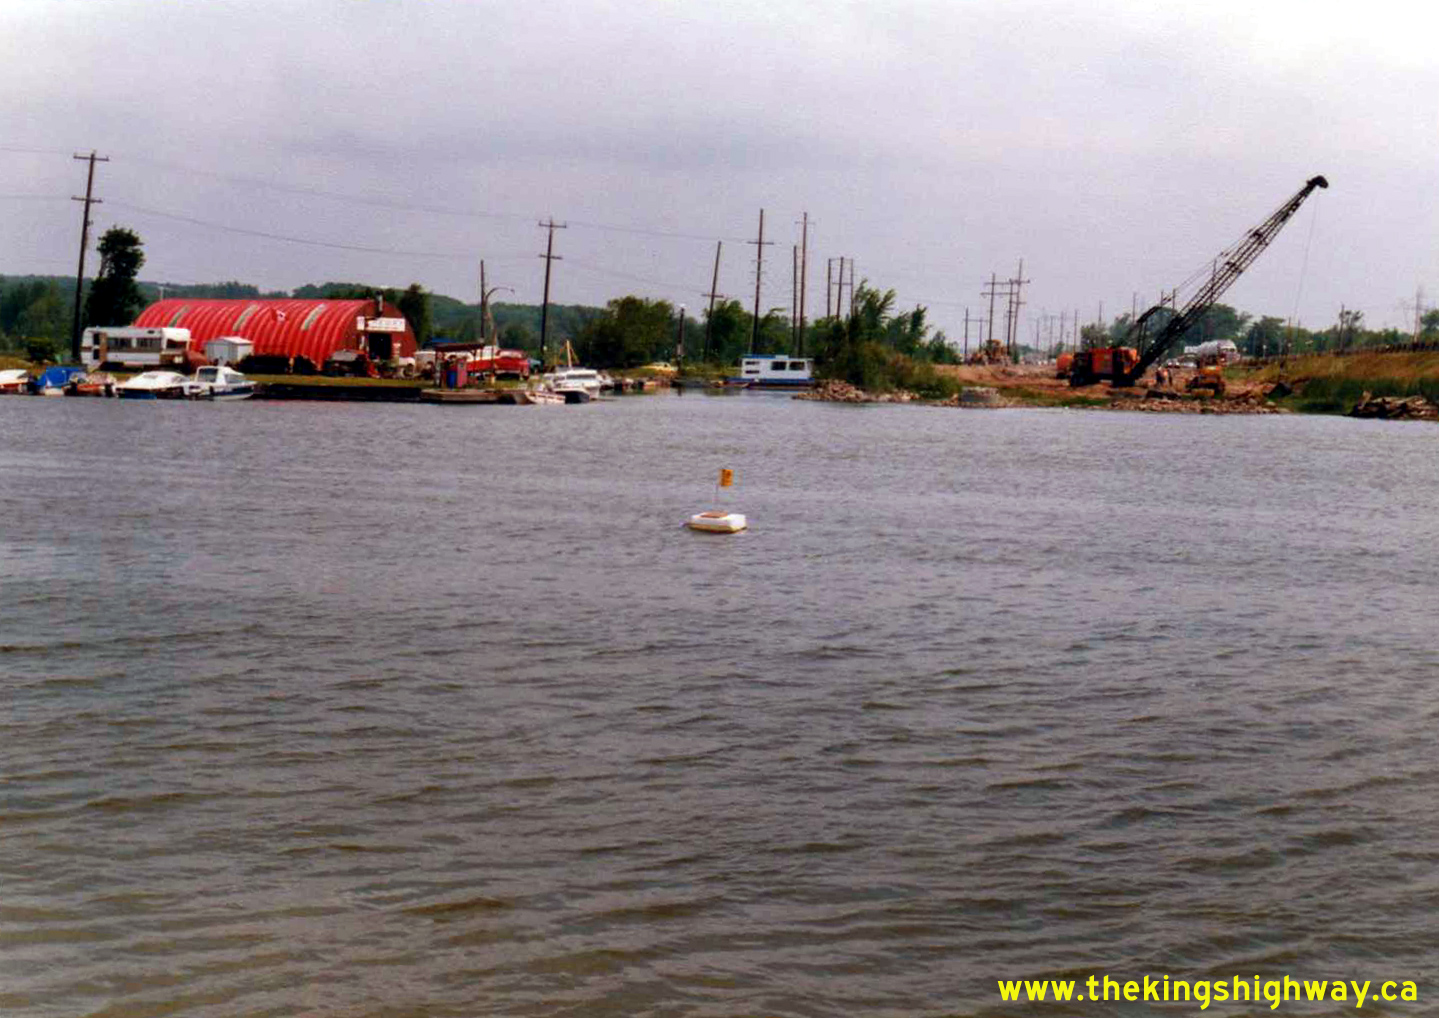
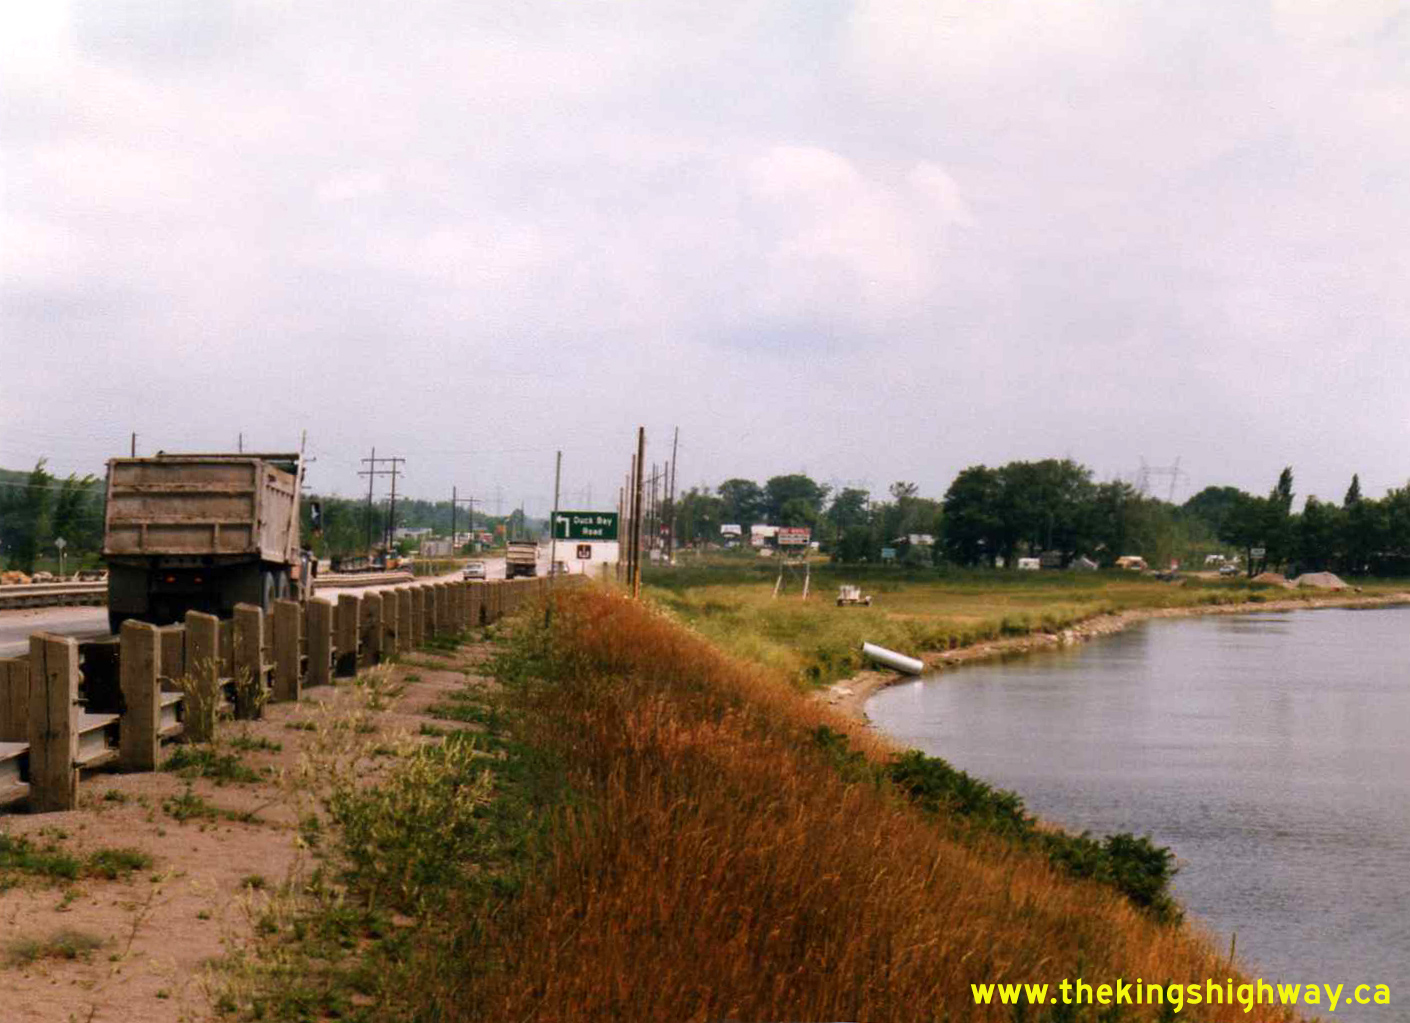
Left - Facing north along Hwy 69 (today's Hwy 400) towards Port Severn from the Matchedash Bay Bridge in Waubaushene in 1988. The existing two-lane highway was
twinned through Waubaushene in the early 1990s. The resulting four-lane Hwy 69 was renumbered as Hwy 400, effective April 1, 1997. Note the advance guide sign in the
background for Duck Bay Road. Prior to the twinning of Hwy 69, there was a connector road between Hwy 69 and adjacent Duck Bay Road. This connector road was closed in
the early 1990s, with local traffic diverted through a new interchange at Quarry Road located about 1 km to the north. Interestingly, Duck Bay Road was the original
route of the Waubaushene-Port Severn Highway (Hwy 103) prior to the construction of the relocated Trans-Canada Highway route in the late 1950s. See an
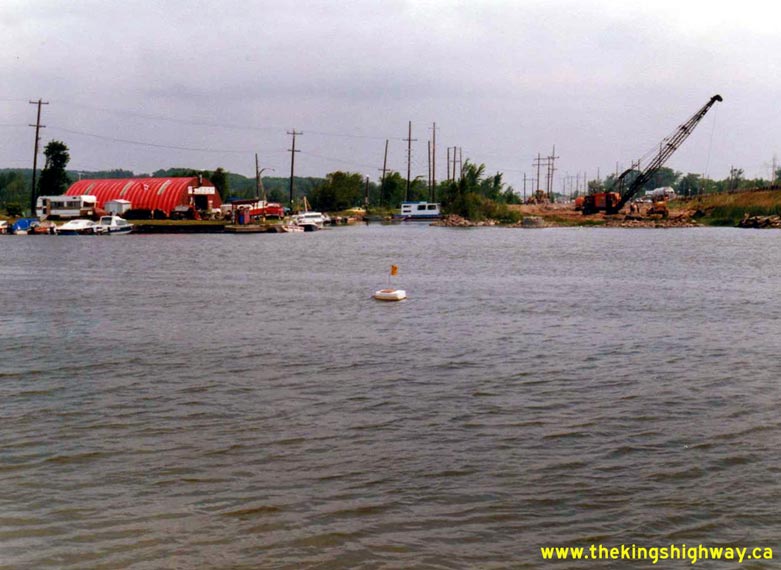
Enlarged Photo Here. Photo taken in 1988. (Photo courtesy of Ontario Ministry of Transportation - © King's Printer for Ontario, 2012) Right - View of Matchedash Bay from Hwy 69 (today's Hwy 400) in Waubaushene. See an Enlarged Photo Here. Photo taken on September 29, 1988. (Photo courtesy of Ontario Ministry of Transportation - © King's Printer for Ontario, 2012) 

Left - Facing north along Hwy 69 (today's Hwy 400) towards Port Severn at the Matchedash Bay Bridge in Waubaushene. See an
Enlarged Photo Here. Photo taken on September 29, 1988. (Photo courtesy of Ontario Ministry of Transportation - © King's Printer for Ontario, 2012) Right - Eastern side of the Matchedash Bay Bridge on Hwy 69 (today's Hwy 400) at Waubaushene in 1988. As part of the twinning of Hwy 69 between Waubaushene and Port Severn in the early 1990s, the entire superstructure of this bridge had to be replaced. This was due to a required crown shift on the highway pavement and a vertical alignment change necessitated by the vertical clearance requirements of the new northbound Waubaushene CNR Overhead located a short distance to the south. As a result, all Hwy 69 traffic had to be temporarily moved off of this structure and onto the newly-built twin southbound structure across Matchedash Bay, which was completed under Contract #1989-58. However, this temporary diversion of traffic onto the southbound Matchedash Bay structure couldn't take place until the new southbound Waubaushene CNR Overhead was completed. Once the superstructure of the existing Matchedash Bay Bridge had been replaced under Contract #1993-63, the bridge was reopened to carry northbound traffic only, while southbound traffic was left on the new twin southbound structure. The sequencing of construction operations along this section of Hwy 69 & Hwy 400 near Waubaushene was unbelievably complicated! See an Enlarged Photo Here. Photo taken on September 29, 1988. (Photo courtesy of Ontario Ministry of Transportation - © King's Printer for Ontario, 2012) 

Left - Facing south across the Waubaushene CNR Overhead on Hwy 69 (today's Hwy 400) towards the Hwy 12 Interchange. See an
Enlarged Photo Here. Photo taken on September 29, 1988. (Photo courtesy of Ontario Ministry of Transportation - © King's Printer for Ontario, 2012) Right - Western side of the Waubaushene CNR Overhead on Hwy 69 (today's Hwy 400) in 1988, before the highway was twinned. Note the graded fill for the proposed new southbound structure in the foreground. This advance fill placement took place under Contract #1987-04 and was allowed to settle for several years before the southbound carriageway was constructed on top of it. The southbound Waubaushene CNR Overhead was constructed four years later, under Contract #1992-15. Once all traffic had been shifted onto the new southbound structure, the old railway overhead seen here was demolished and replaced with a new structure. Following the completion of the new northbound structure under Contract #1993-63, all four lanes of the highway were opened to traffic between the Hwy 12 Interchange and a point just south of Quarry Road. See an Enlarged Photo Here. Photo taken on September 29, 1988. (Photo courtesy of Ontario Ministry of Transportation - © King's Printer for Ontario, 2012) 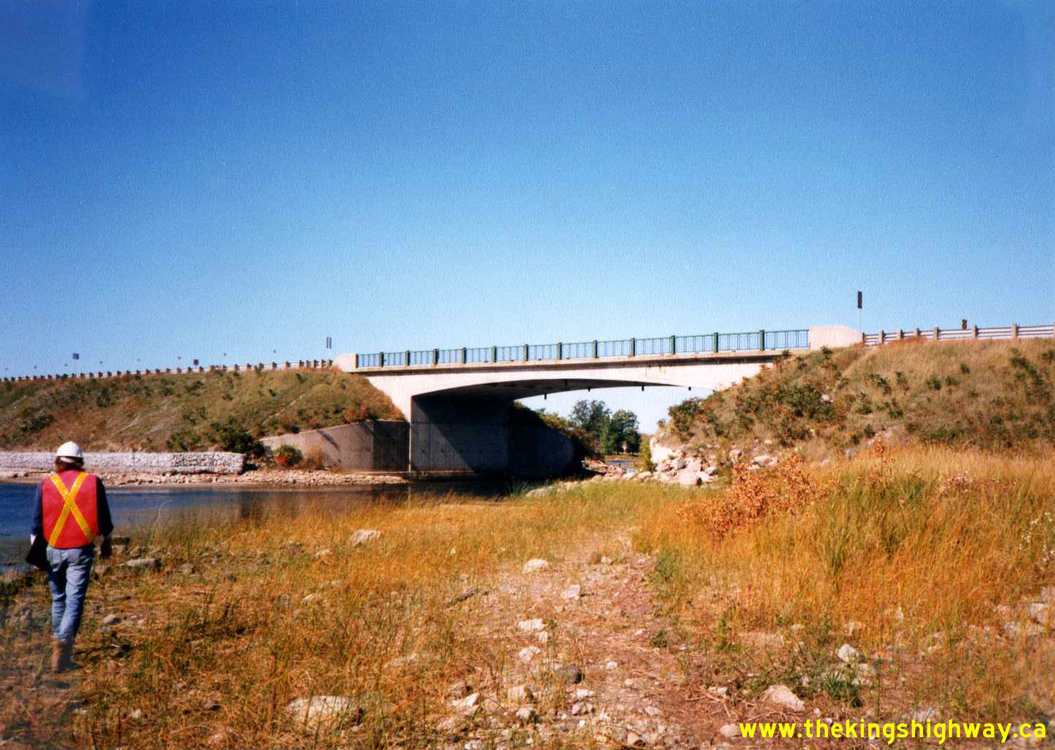
 Left - Western side of the Severn River Bridge on Hwy 69 at Port Severn in 1988, prior to twinning. This section of Hwy 69 was expanded to a four-lane divided
highway in the early 1990s and was renumbered as an extension of Hwy 400 in 1997. See an
Enlarged Photo Here. Photo taken on September 29, 1988. Left - Western side of the Severn River Bridge on Hwy 69 at Port Severn in 1988, prior to twinning. This section of Hwy 69 was expanded to a four-lane divided
highway in the early 1990s and was renumbered as an extension of Hwy 400 in 1997. See an
Enlarged Photo Here. Photo taken on September 29, 1988.(Photo courtesy of Ontario Ministry of Transportation - © King's Printer for Ontario, 2024) Right - Facing south along Hwy 69 (today's Hwy 400) at the Severn River Bridge. When the highway was twinned through Port Severn in the early 1990s, the
existing highway was converted to carry northbound traffic only, while a new carriageway was built on the western side of the existing highway to carry southbound
traffic. The resort in the background (Muskey's Landing) is still in operation today, although a handful of the resort's buildings closest to the highway had to be
demolished in the 1990s in order to make way for the expanded highway corridor. See an
Enlarged Photo Here. Photo taken on September 29, 1988.(Photo courtesy of Ontario Ministry of Transportation - © King's Printer for Ontario, 2024) 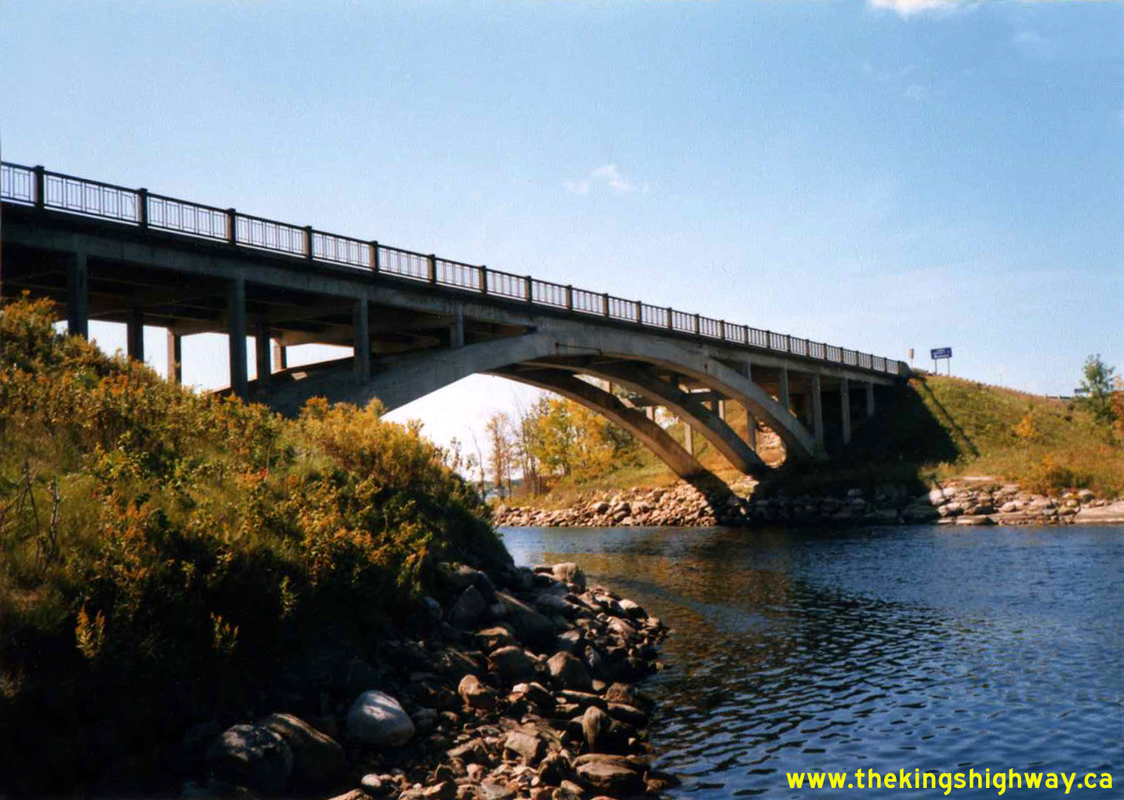
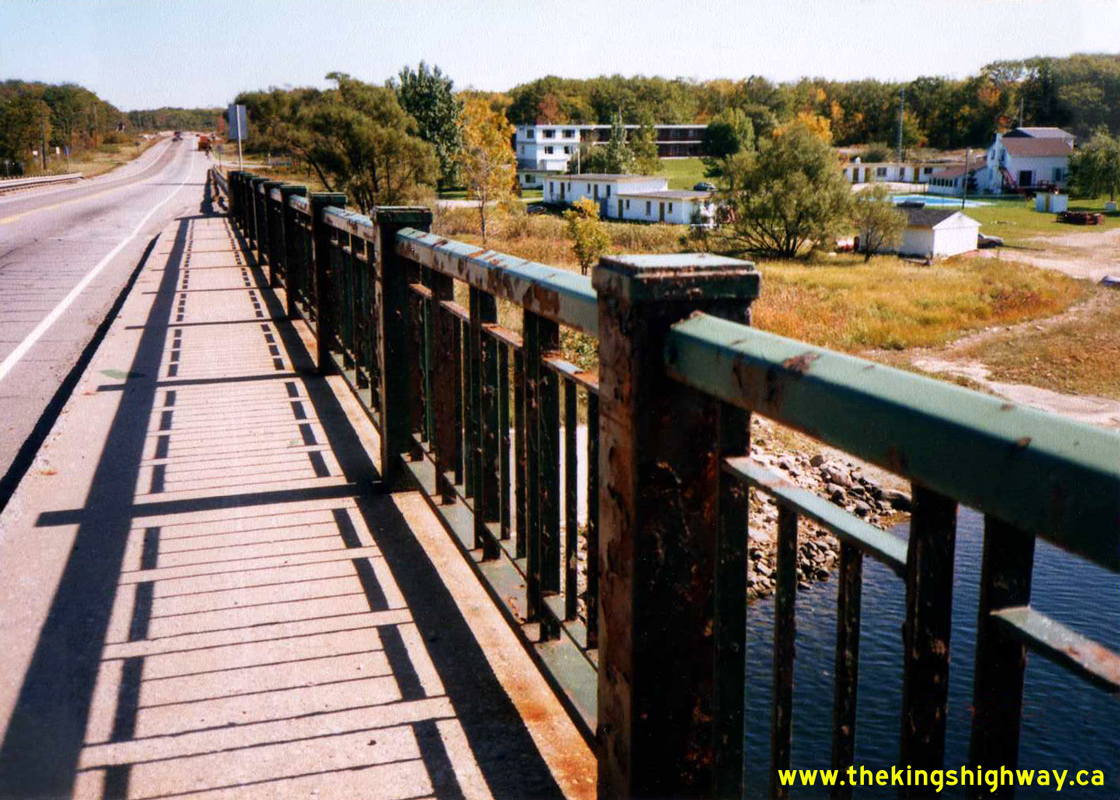
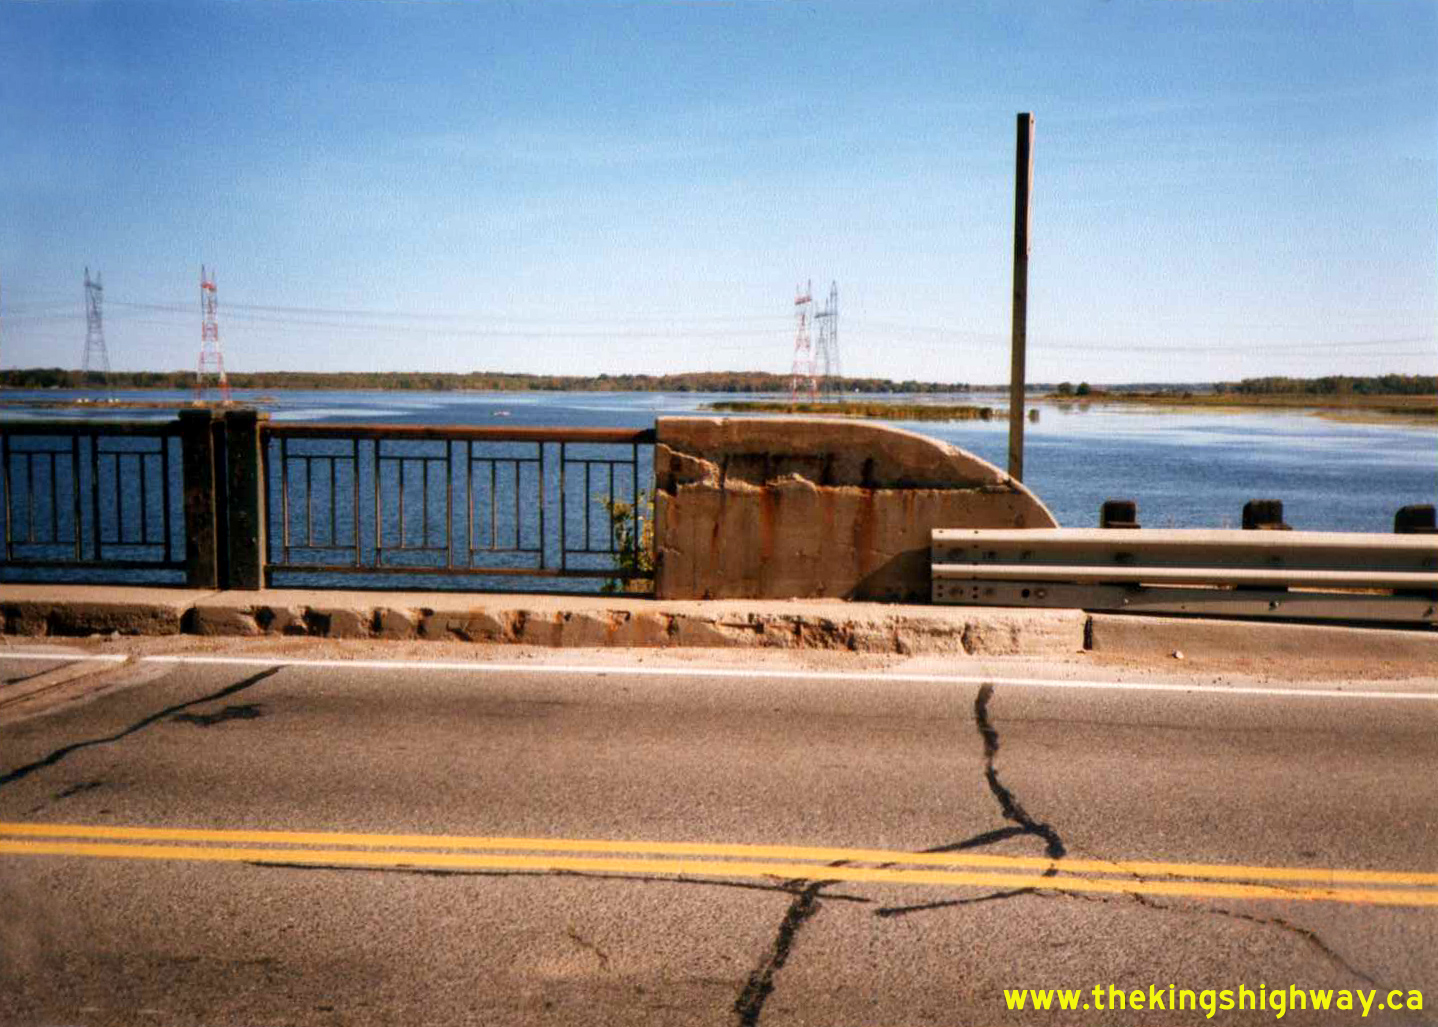
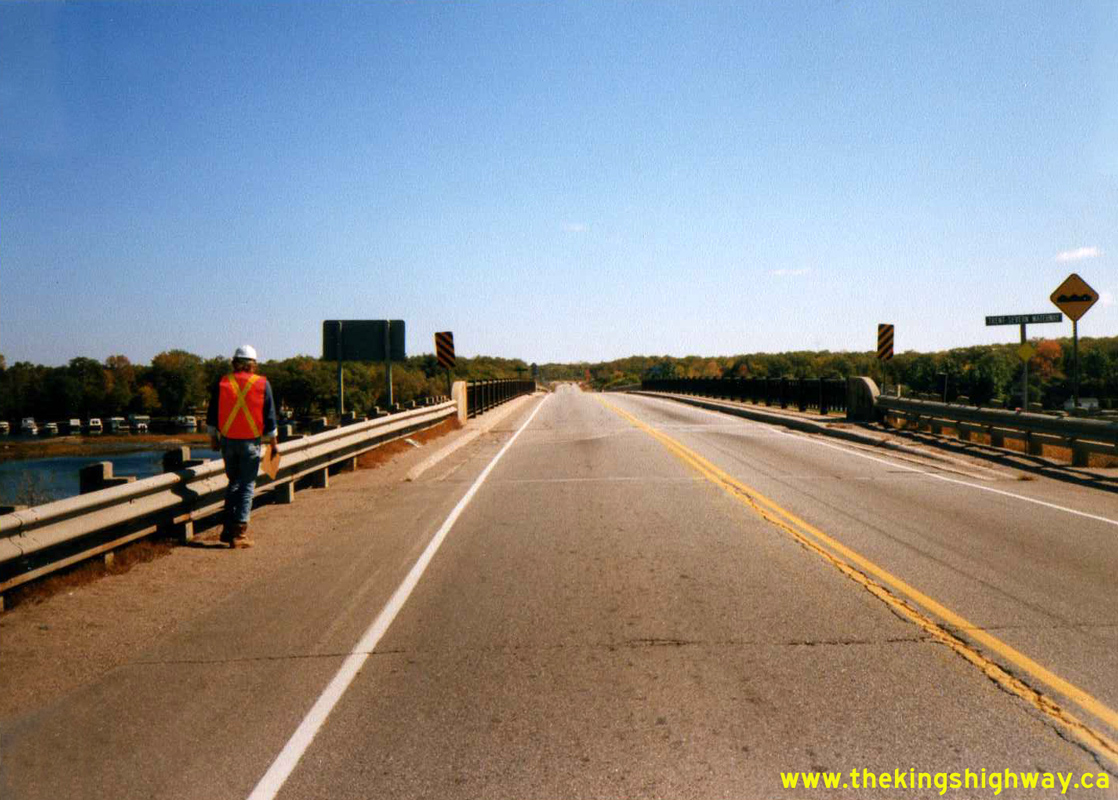 Left - Eastern side of the Port Severn Boat Channel Bridge on Hwy 69 across the Trent-Severn Waterway. This attractive concrete arch bridge was completed in
1958 as part of the Trans-Canada Highway's new Georgian Bay Route between Waubaushene and MacTier. This structure was replaced in 2017 as part of a highway
improvement project. See an Enlarged Photo Here. Photo taken on September 29, 1988. Left - Eastern side of the Port Severn Boat Channel Bridge on Hwy 69 across the Trent-Severn Waterway. This attractive concrete arch bridge was completed in
1958 as part of the Trans-Canada Highway's new Georgian Bay Route between Waubaushene and MacTier. This structure was replaced in 2017 as part of a highway
improvement project. See an Enlarged Photo Here. Photo taken on September 29, 1988.(Photo courtesy of Ontario Ministry of Transportation - © King's Printer for Ontario, 2024) Right - Facing south across the Port Severn Boat Channel Bridge on Hwy 69 (today's Hwy 400) at the Trent-Severn Waterway. See an
Enlarged Photo Here. Photo taken on September 29, 1988.(Photo courtesy of Ontario Ministry of Transportation - © King's Printer for Ontario, 2024) 
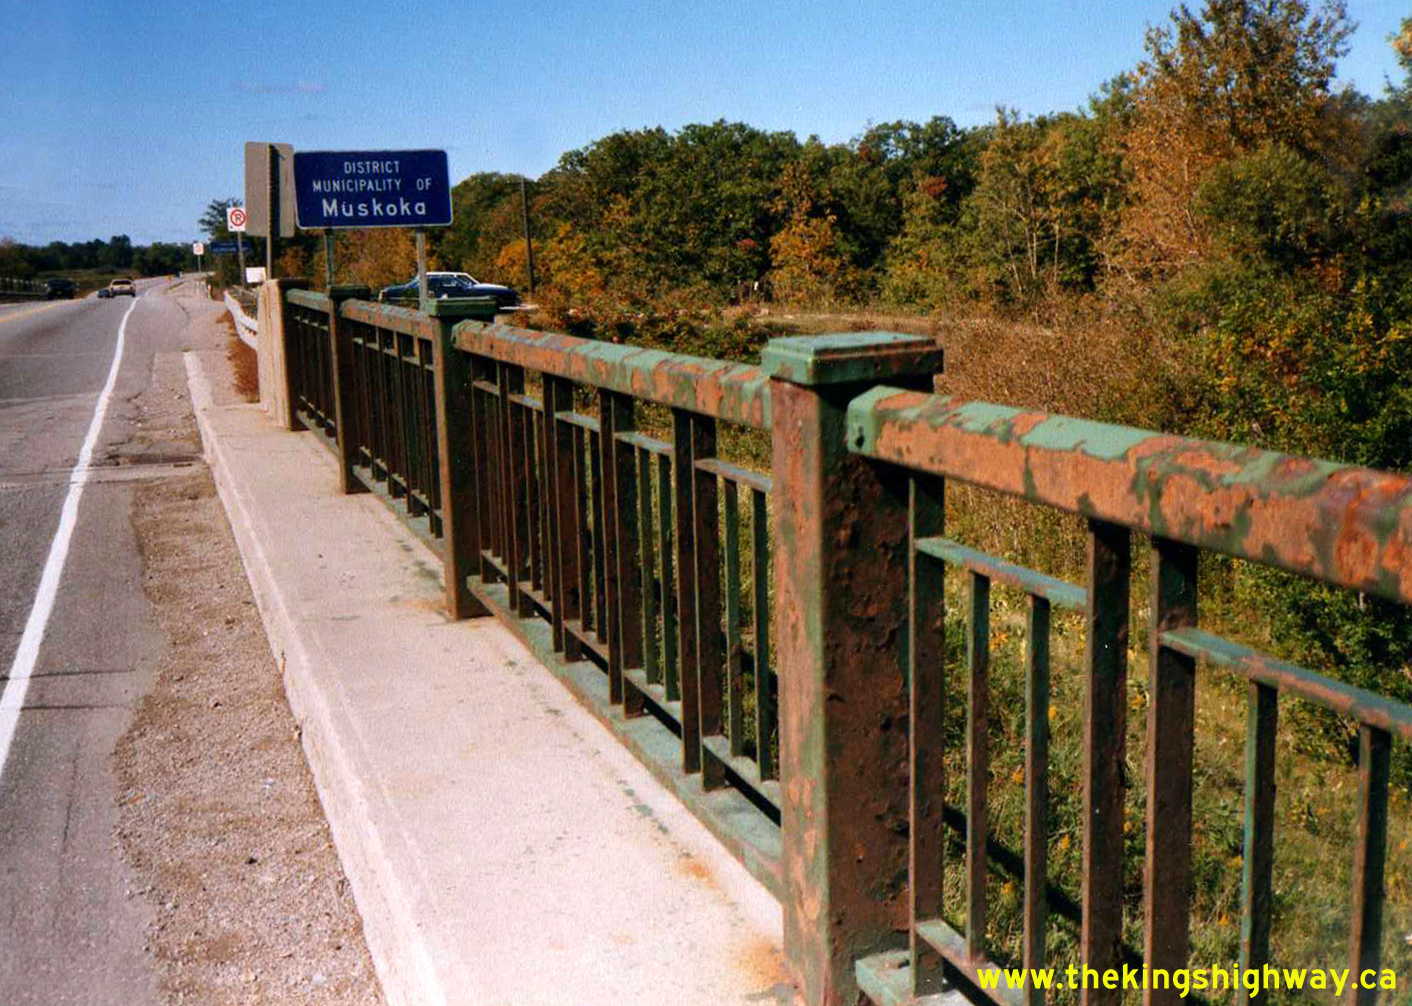
 Left - Blue-and-white District Municipality of Muskoka Boundary Sign facing northbound Hwy 69 traffic at Port Severn. See an
Enlarged Photo Here. Photo taken on September 29, 1988. Left - Blue-and-white District Municipality of Muskoka Boundary Sign facing northbound Hwy 69 traffic at Port Severn. See an
Enlarged Photo Here. Photo taken on September 29, 1988.(Photo courtesy of Ontario Ministry of Transportation - © King's Printer for Ontario, 2024) Right - Western side of the Hwy 27 (Essa Road) Underpass on Hwy 400 in Barrie. The Hwy 27 Underpass was among the very first structures built along the new Toronto-Barrie Highway after World War II. The bridge was constructed under Contract #1946-19 and was completed in 1947. See an Enlarged Photo Here. Photo taken on September 29, 1988. (Photo courtesy of Ontario Ministry of Transportation - © King's Printer for Ontario, 2010) 

Left - Rehabilitation of the Hwy 27 (Essa Road) Underpass on Hwy 400 in Barrie, Contract #1988-78. The original 1940s-era concrete bar-and-post handrail on the
Hwy 27 Underpass was replaced by a new concrete barrier wall during this project. See an
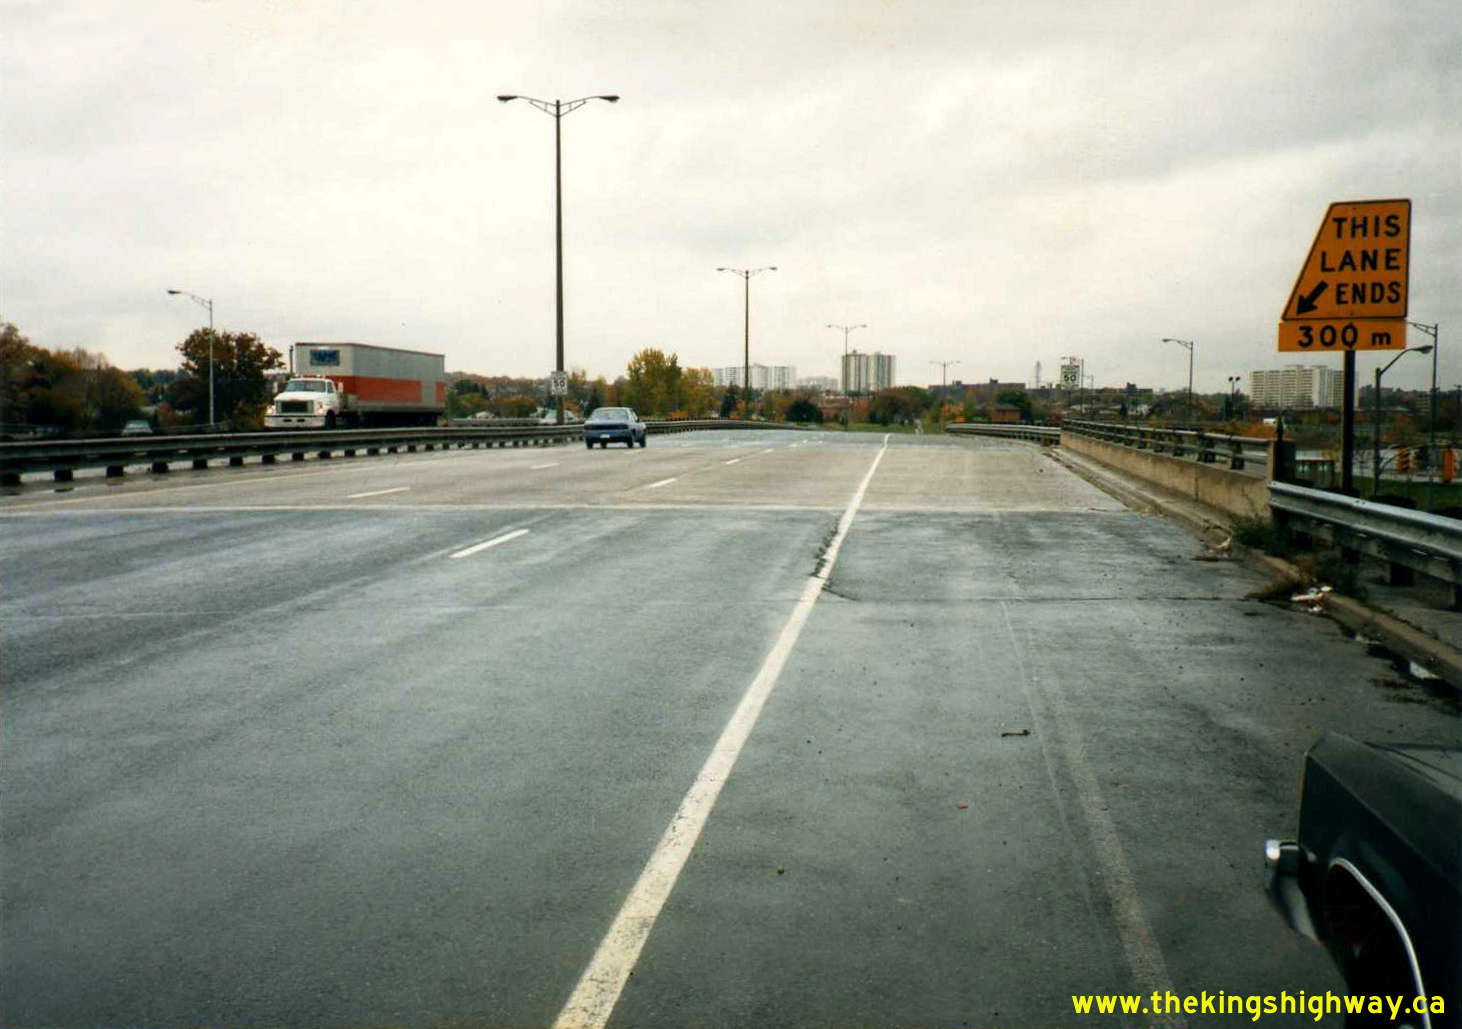
Enlarged Photo Here. Photo taken on September 29, 1988. (Photo courtesy of Ontario Ministry of Transportation - © King's Printer for Ontario, 2010) Right - Facing south along Hwy 400 at the Jane Street Underpass in Toronto in 1988. A vintage yellow-and-black "This Lane Ends 300 m" sign can be seen at
right. Although commonly seen along Ontario's freeways up until the 1980s, these unconventional warning signs were phased out and replaced with the current
diamond-shaped warning signs that we see out on the highways today. Instead of having the "Lane Ends" message conveyed in text, newer signs show this information
graphically. Over the decades, traffic engineers have attempted to minimize the use of text on signs whenever it can be substituted by a commonly-understood graphical
representation of the intended message. See an Enlarged Photo Here. Photo taken on October 26,
1988.(Photo courtesy of Ontario Ministry of Transportation - © King's Printer for Ontario, 2024) 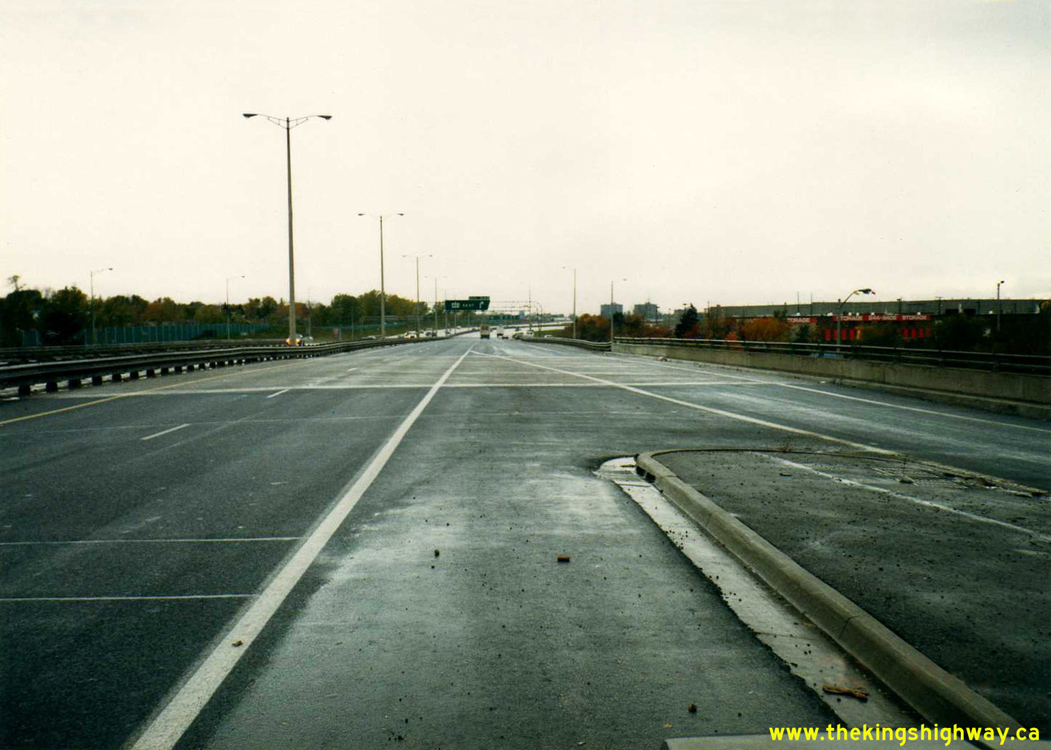
 Left - Facing north along Hwy 400 towards the Hwy 401 Interchange at the Jane Street Underpass in Toronto. See an
Enlarged Photo Here. Photo taken on October 26, 1988. Left - Facing north along Hwy 400 towards the Hwy 401 Interchange at the Jane Street Underpass in Toronto. See an
Enlarged Photo Here. Photo taken on October 26, 1988.(Photo courtesy of Ontario Ministry of Transportation - © King's Printer for Ontario, 2024) Right - View of the Black Creek Bridge on the ramp from northbound Jane Street to northbound Hwy 400 in Toronto. See an
Enlarged Photo Here. Photo taken on October 26, 1988.(Photo courtesy of Ontario Ministry of Transportation - © King's Printer for Ontario, 2024) 
 Left - View of the Black Creek Bridge on the ramp from southbound Jane Street to northbound Hwy 400 in Toronto in 1988. In the background, an older angled
advance exit sign for Hwy 401 can be seen over the northbound lanes of Hwy 400. These angled signs were designed to "point" towards the direction of the upcoming exit
ramp or transfer. On complex freeways such as Hwy 401, these signs were very helpful in differentiating left-hand exit ramps and transfer points from those appearing
on the right-hand side. At the time Hwy 401 was being widened across Toronto in the 1960s, it was felt that motorists would require extra guidance to navigate this
type of highway, as the complex Express-Collector configuration of Hwy 401 was a novel concept in highway design in Ontario. There was even some consideration during
the early 1960s of installing internally-illuminated overhead signs along urban sections of Hwy 401. However, by the 1990s, motorists had generally become accustomed
to the layout of Hwy 401 across Toronto and so these angled signs were phased out as part of a modernization of freeway signing practices. See an
Enlarged Photo Here. Photo taken on October 26, 1988. Left - View of the Black Creek Bridge on the ramp from southbound Jane Street to northbound Hwy 400 in Toronto in 1988. In the background, an older angled
advance exit sign for Hwy 401 can be seen over the northbound lanes of Hwy 400. These angled signs were designed to "point" towards the direction of the upcoming exit
ramp or transfer. On complex freeways such as Hwy 401, these signs were very helpful in differentiating left-hand exit ramps and transfer points from those appearing
on the right-hand side. At the time Hwy 401 was being widened across Toronto in the 1960s, it was felt that motorists would require extra guidance to navigate this
type of highway, as the complex Express-Collector configuration of Hwy 401 was a novel concept in highway design in Ontario. There was even some consideration during
the early 1960s of installing internally-illuminated overhead signs along urban sections of Hwy 401. However, by the 1990s, motorists had generally become accustomed
to the layout of Hwy 401 across Toronto and so these angled signs were phased out as part of a modernization of freeway signing practices. See an
Enlarged Photo Here. Photo taken on October 26, 1988.(Photo courtesy of Ontario Ministry of Transportation - © King's Printer for Ontario, 2024) Right - Facing south along Hwy 400 at the Wilson Street Underpass in Toronto in 1988. When Hwy 400 was first built after World War II, there was a partial
interchange at Wilson Avenue with north-oriented ramps. This partial interchange at Wilson Avenue had to be closed in the 1960s, when the adjacent Hwy 400 &
Hwy 401 Interchange was expanded to accommodate the new Express-Collector System on Hwy 401 across Toronto. See an
Enlarged Photo Here. Photo taken on October 27, 1988.(Photo courtesy of Ontario Ministry of Transportation - © King's Printer for Ontario, 2024) 

Left - Rehabilitation of the Hwy 89 Overpass on Hwy 400 east of Cookstown, Contract #1988-78. During the rehabilitation, the original steel handrail panels
were removed and replaced with galvanized steel panels which did not require painting. See an
Enlarged Photo Here. Photo taken in April 1989. (Photo courtesy of Ontario Ministry of Transportation - © King's Printer for Ontario, 2010) Right - During the rehabilitation of the Hwy 89 Overpass, the decorative Ontario coat-of-arms were removed from the bridge. See an Enlarged Photo Here. Photo taken in April 1989. (Photo courtesy of Ontario Ministry of Transportation - © King's Printer for Ontario, 2010) 

Left - Construction workers doing concrete removals during the rehabilitation of the Hwy 89 Overpass on Hwy 400 east of Cookstown. See an
Enlarged Photo Here. Photo taken in April 1989. (Photo courtesy of Ontario Ministry of Transportation - © King's Printer for Ontario, 2010) Right - The rehabilitation of the Hwy 89 Overpass under Contract #1988-78 was one of several bridge rehabilitation projects carried out on Hwy 400 in the 1980s and early 1990s. See an Enlarged Photo Here. Photo taken in April 1989. (Photo courtesy of Ontario Ministry of Transportation - © King's Printer for Ontario, 2010) 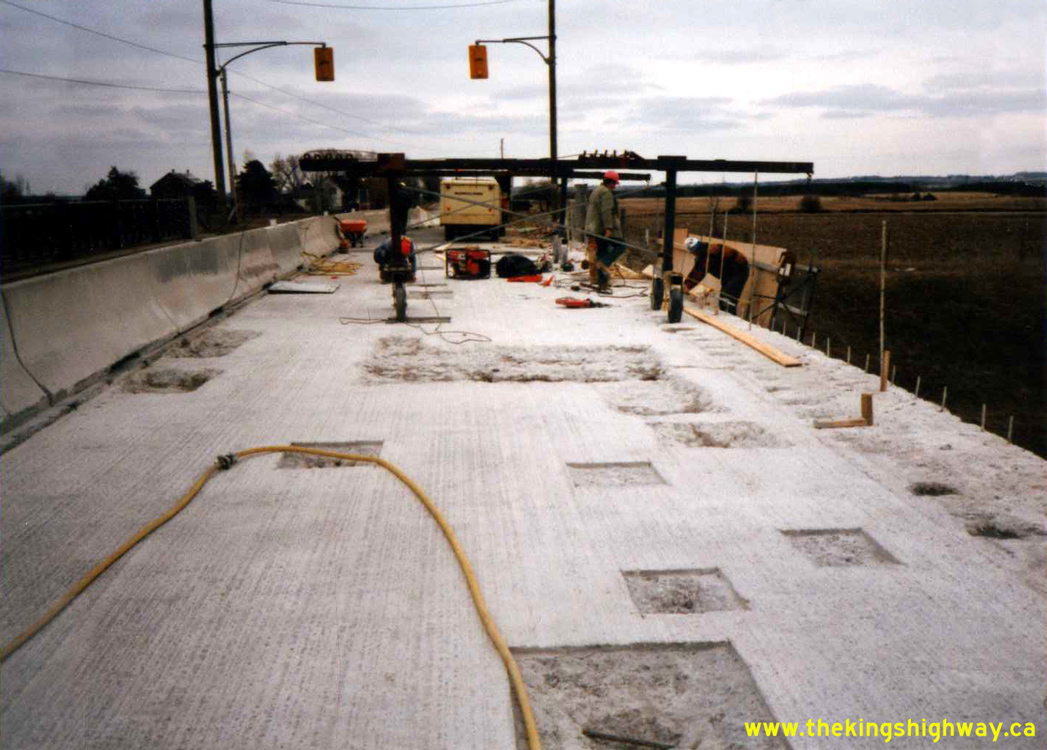
 Left - Rehabilitation of the bridge deck at the Stroud Sideroad (today's McKay Road) Overpass on Hwy 400, Contract #1988-78. See an
Enlarged Photo Here. Photo taken in April 1989. Left - Rehabilitation of the bridge deck at the Stroud Sideroad (today's McKay Road) Overpass on Hwy 400, Contract #1988-78. See an
Enlarged Photo Here. Photo taken in April 1989.(Photo courtesy of Ontario Ministry of Transportation - © King's Printer for Ontario, 2024) Right - Work crews removing areas of unsound concrete from the abutment walls of the Stroud Sideroad (today's McKay Road) Overpass on Hwy 400 south of Barrie.
During rehabilitation, the reinforcing steel below was cleaned and then the abutment wall patched with fresh concrete. The Stroud Sideroad Overpass was originally
constructed in 1947. It was among the first structures built along the new Toronto-Barrie Highway. See an
Enlarged Photo Here. Photo taken in April 1989.(Photo courtesy of Ontario Ministry of Transportation - © King's Printer for Ontario, 2024) 
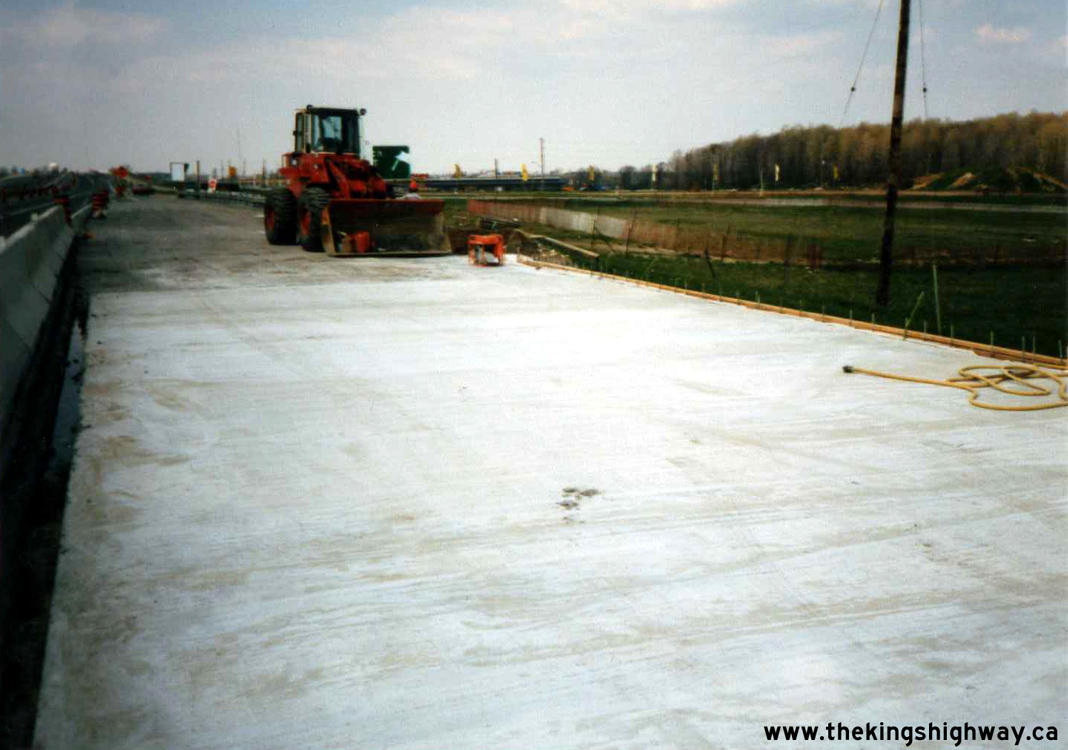
 Left - Facing south along Hwy 400 from the Stroud Sideroad (today's McKay Road) Overpass on Hwy 400 south of Barrie. This photo shows the lanes of Hwy 400 below the
structure in a staged configuration along with a new type of oversized construction barrels. Known as Temporary Conditions Traffic Control Device #54 (and typically
abbreviated as "TC-54"), these oversized construction barrels are now used exclusively on all freeway construction projects in Ontario. See an
Enlarged Photo Here. Photo taken in April 1989. Left - Facing south along Hwy 400 from the Stroud Sideroad (today's McKay Road) Overpass on Hwy 400 south of Barrie. This photo shows the lanes of Hwy 400 below the
structure in a staged configuration along with a new type of oversized construction barrels. Known as Temporary Conditions Traffic Control Device #54 (and typically
abbreviated as "TC-54"), these oversized construction barrels are now used exclusively on all freeway construction projects in Ontario. See an
Enlarged Photo Here. Photo taken in April 1989.(Photo courtesy of Ontario Ministry of Transportation - © King's Printer for Ontario, 2024) Right - Deck of the Thornton CNR Overhead on Hwy 400, after asphalt milling. During a bridge rehabilitation, it is necessary to first remove any asphalt and
waterproofing membrane applications on the concrete deck. Once the concrete deck is exposed, any unsound concrete can be removed and patched with new concrete. See an
Enlarged Photo Here. Photo taken in April 1989.(Photo courtesy of Ontario Ministry of Transportation - © King's Printer for Ontario, 2024) 
 Left - Removed handrail on the Innisfil Beach Road Underpass during rehabilitation, Contract #1988-78. See an
Enlarged Photo Here. Photo taken in April 1989. Left - Removed handrail on the Innisfil Beach Road Underpass during rehabilitation, Contract #1988-78. See an
Enlarged Photo Here. Photo taken in April 1989.(Photo courtesy of Ontario Ministry of Transportation - © King's Printer for Ontario, 2024) Right - Rehabilitated concrete deck on the Innisfil Beach Road Underpass on Hwy 400 south of Barrie. The bridge deck will now be waterproofed and then covered
by an asphalt wearing surface. Historically, many bridges in Ontario were built without an asphalt deck overlay, which left the concrete deck directly exposed to
traffic wear and the environment. In recent decades however, most bridges are built with an asphalt wearing surface to extend the service life of the concrete bridge
deck underneath. See an Enlarged Photo Here. Photo taken in April 1989.(Photo courtesy of Ontario Ministry of Transportation - © King's Printer for Ontario, 2024) 
 Left - Asphalt milling operation on the southbound lanes of Hwy 400 at the Innisfil Beach Road Underpass. See an
Enlarged Photo Here. Photo taken in April 1989. Left - Asphalt milling operation on the southbound lanes of Hwy 400 at the Innisfil Beach Road Underpass. See an
Enlarged Photo Here. Photo taken in April 1989.(Photo courtesy of Ontario Ministry of Transportation - © King's Printer for Ontario, 2024) Right - Western side of the Innisfil Beach Road Underpass on Hwy 400 at the start of rehabilitation. This structure was originally constructed under Contract
#1949-65 and was rehabilitated under Contract #1988-78. See an Enlarged Photo Here. Photo
taken in April 1989.(Photo courtesy of Ontario Ministry of Transportation - © King's Printer for Ontario, 2024) 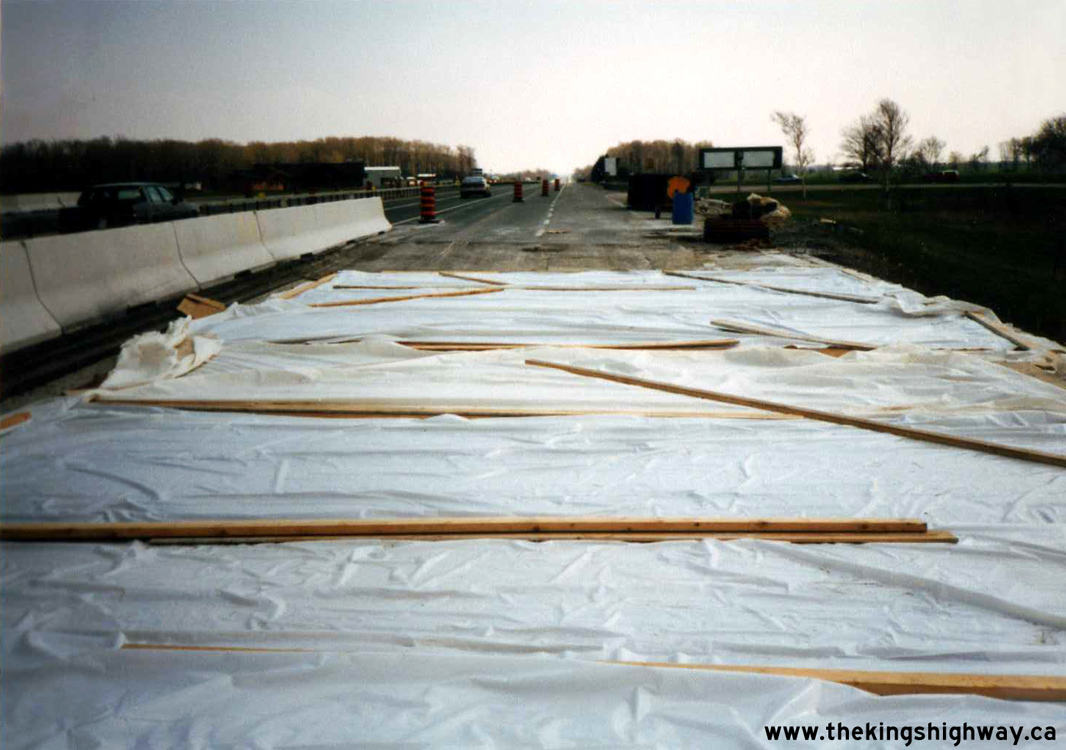
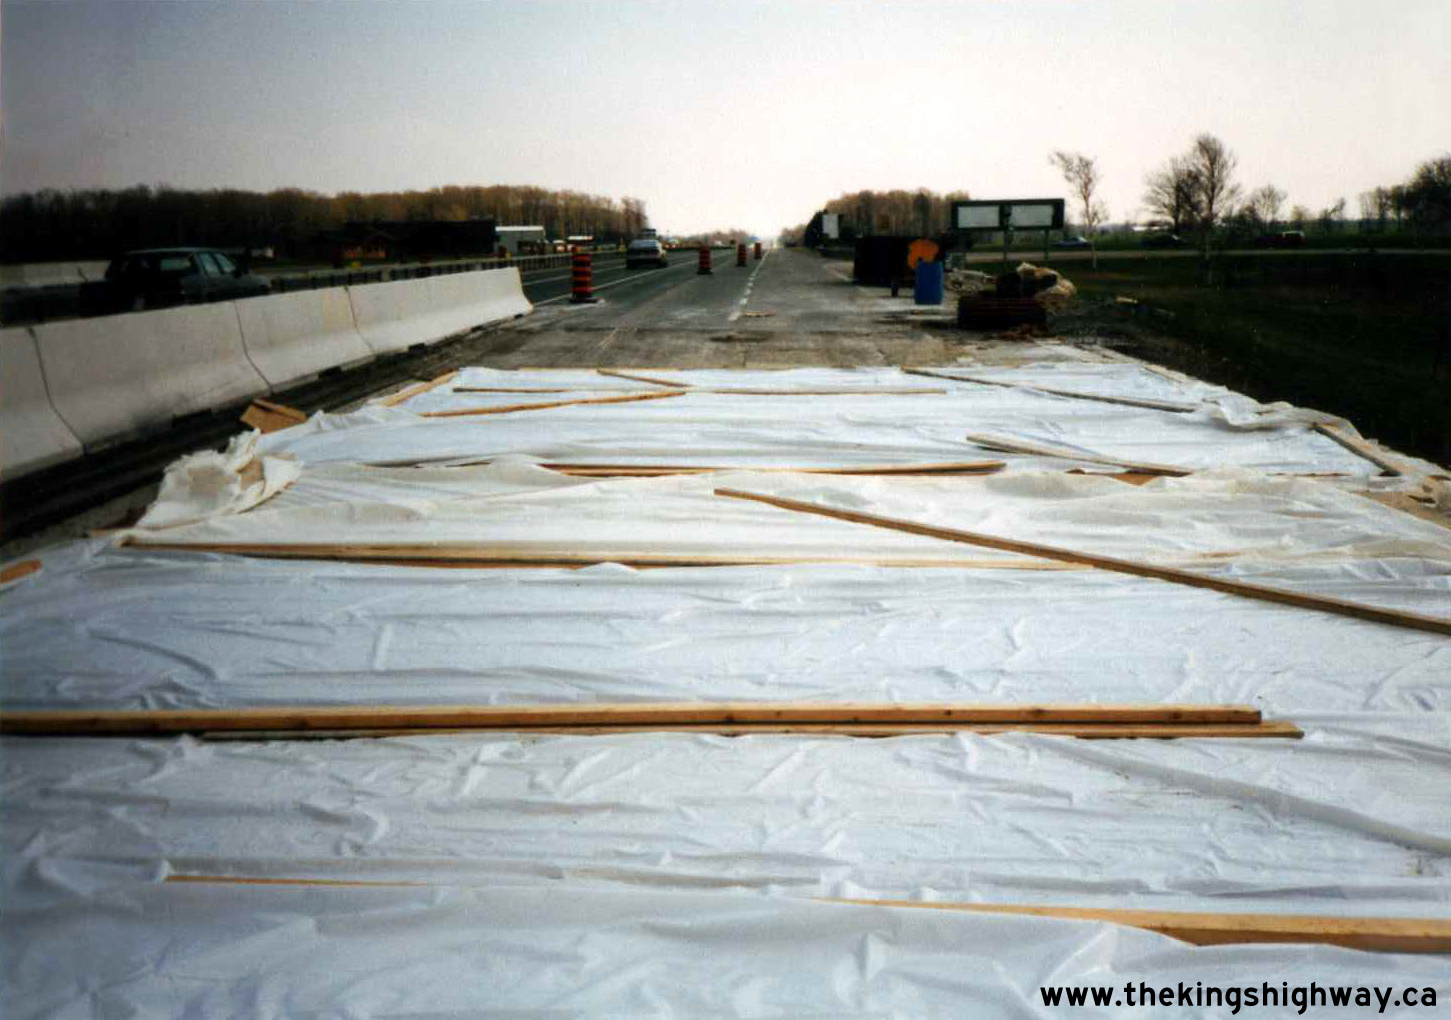
 Left - Tarps cover the newly-poured concrete deck on the Innisfil Beach Road Underpass. During late season and early season construction work when ambient
temperatures are less than ideal, tarps often need to be used to ensure that the concrete cures properly. See an
Enlarged Photo Here. Photo taken in April 1989. Left - Tarps cover the newly-poured concrete deck on the Innisfil Beach Road Underpass. During late season and early season construction work when ambient
temperatures are less than ideal, tarps often need to be used to ensure that the concrete cures properly. See an
Enlarged Photo Here. Photo taken in April 1989.(Photo courtesy of Ontario Ministry of Transportation - © King's Printer for Ontario, 2024) Right - Concrete patching work on the fascia of the Innisfil Beach Road Underpass on Hwy 400 near Thornton. See an
Enlarged Photo Here. Photo taken in April 1989.(Photo courtesy of Ontario Ministry of Transportation - © King's Printer for Ontario, 2024) 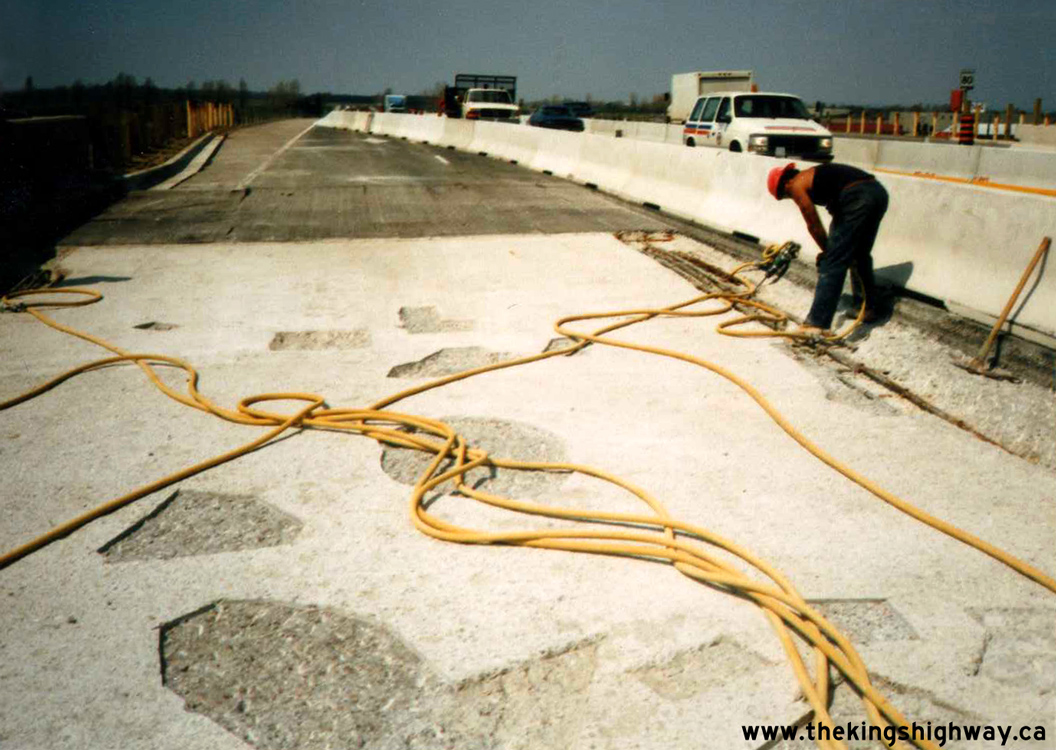
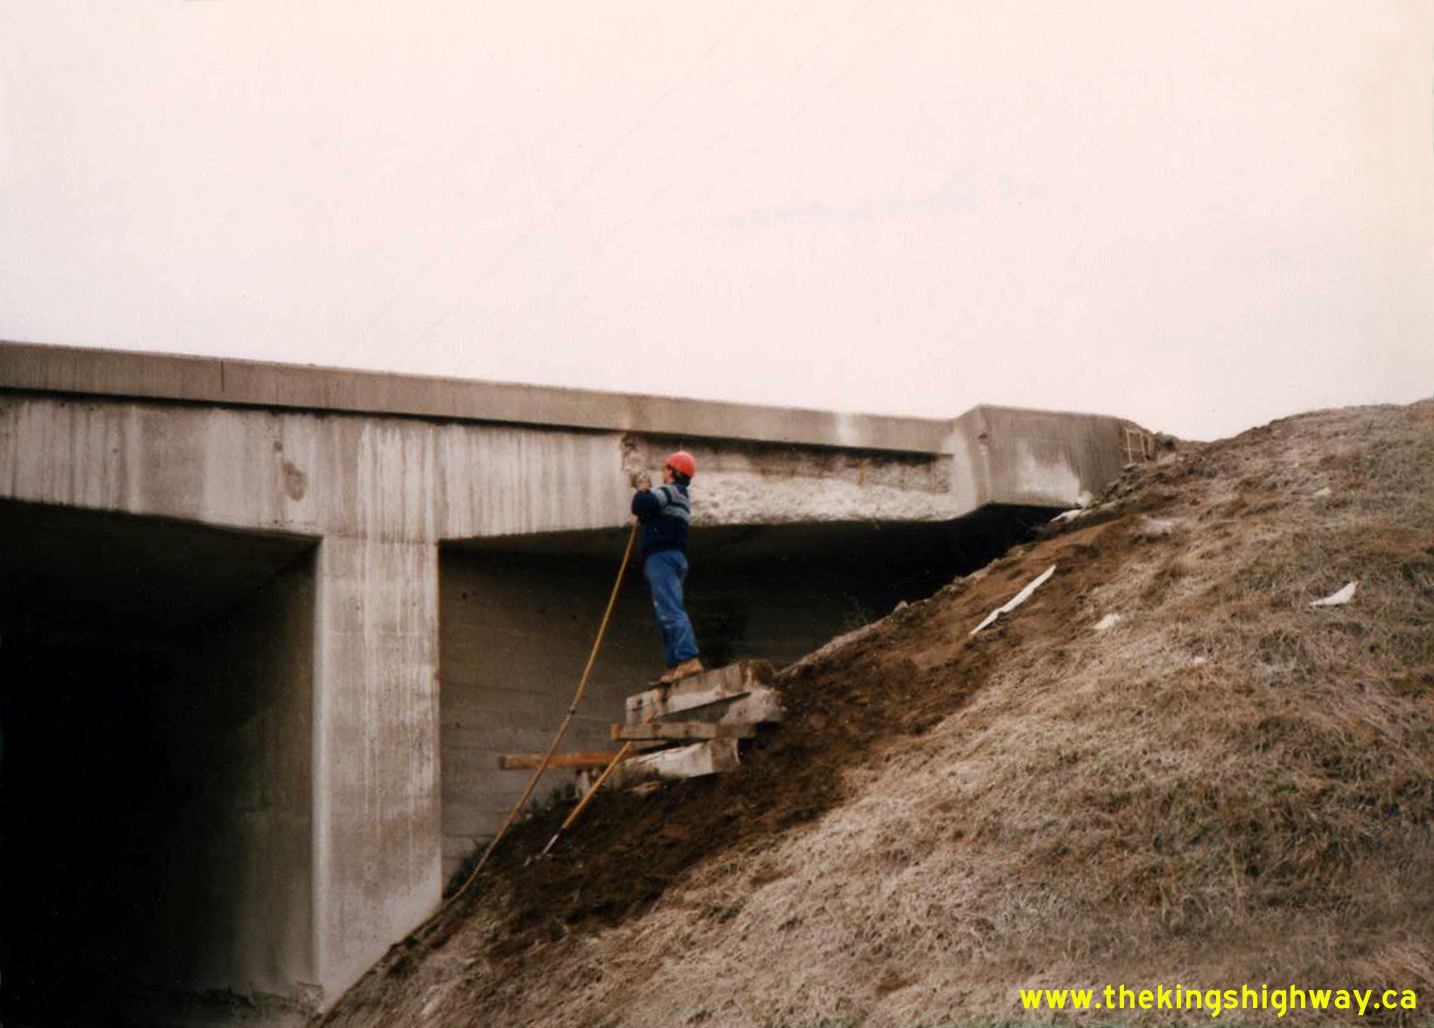
 Left - A construction worker removes sections of unsound concrete from the deck of the Thornton CNR Overhead on Hwy 400 south of Barrie. Following concrete
removals, the deck is then patched with fresh concrete and waterproofed. See an
Enlarged Photo Here. Photo taken in May 1989. Left - A construction worker removes sections of unsound concrete from the deck of the Thornton CNR Overhead on Hwy 400 south of Barrie. Following concrete
removals, the deck is then patched with fresh concrete and waterproofed. See an
Enlarged Photo Here. Photo taken in May 1989.(Photo courtesy of Ontario Ministry of Transportation - © King's Printer for Ontario, 2024) Right - Facing west along Rutherford Road from the Hwy 400 Interchange in Vaughan in 1989. This view of a two-lane Rutherford Road may surprise many York
Region residents, as it is certainly a far cry from the busy six-lane arterial road which exists today. As seen in this photo, there was once a sizeable rural area
between the urban fringe of Toronto at Steeles Avenue and Canada's Wonderland located at Hwy 400 and Rutherford Road. The city expanded rapidly northwards over a
period of 25 years, with the city eventually enveloping Canada's Wonderland into its urbanized area. See an
Enlarged Photo Here. Photo taken in May 11, 1989.(Photo courtesy of Ontario Ministry of Transportation - © King's Printer for Ontario, 2024) 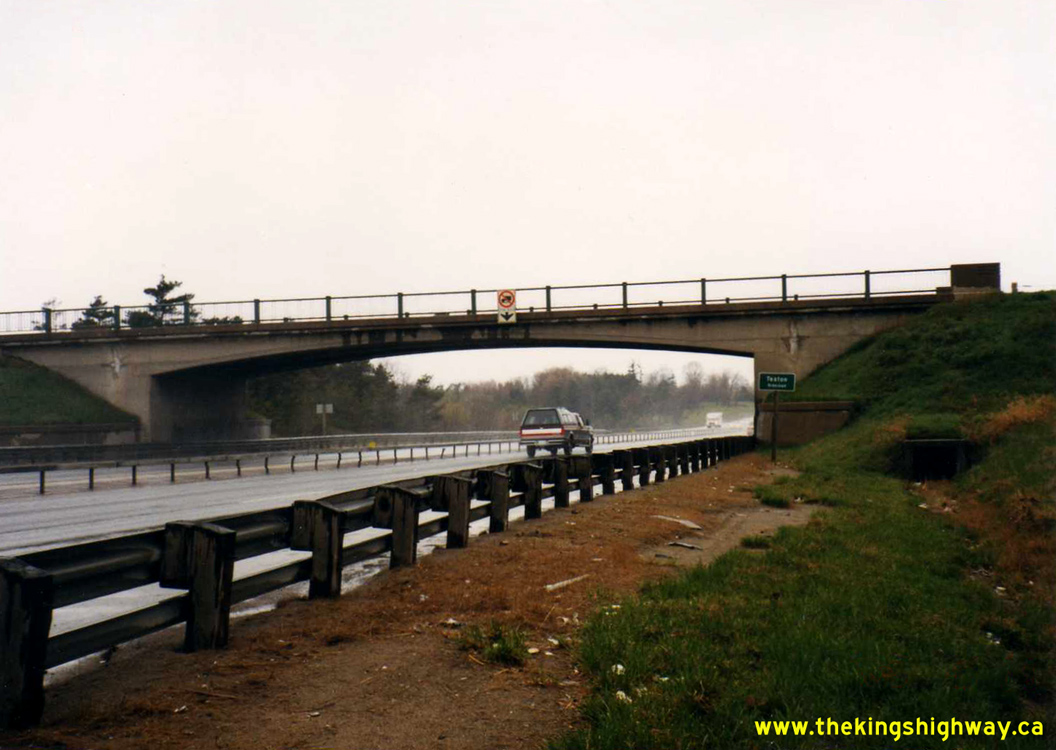
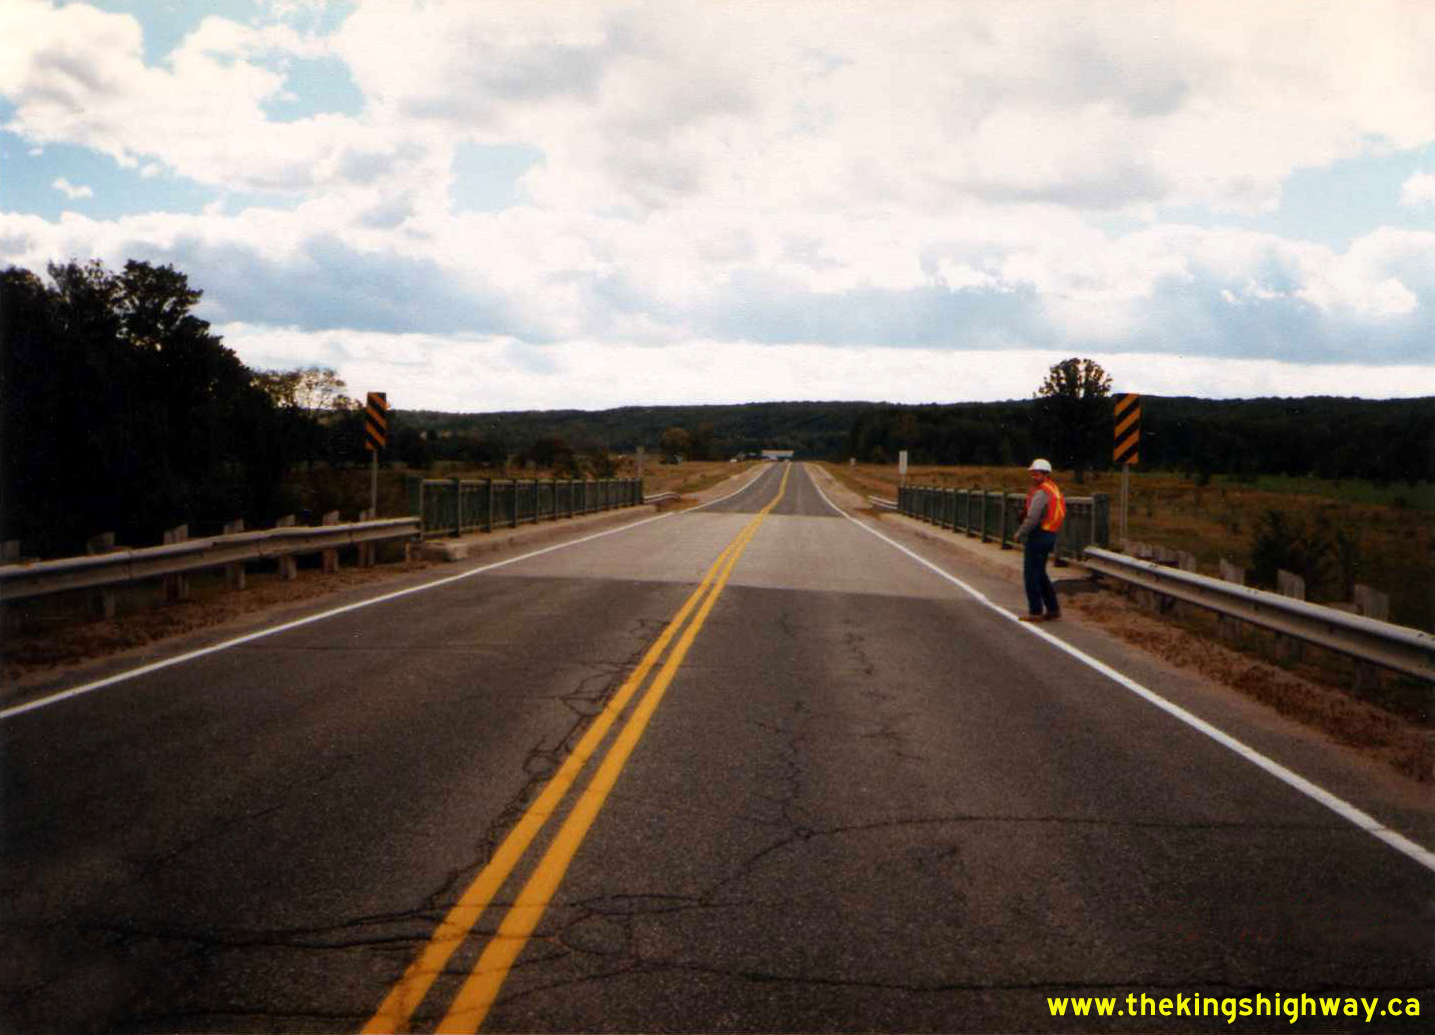
 Left - Southern side of the Teston Sideroad Overpass on Hwy 400 in Vaughan. See an
Enlarged Photo Here. Photo taken on May 11, 1989. Left - Southern side of the Teston Sideroad Overpass on Hwy 400 in Vaughan. See an
Enlarged Photo Here. Photo taken on May 11, 1989.(Photo courtesy of Ontario Ministry of Transportation - © King's Printer for Ontario, 2024) Right - Facing west across the Teston Sideroad Overpass on Hwy 400 in Vaughan. See an
Enlarged Photo Here. Photo taken on May 11, 1989.(Photo courtesy of Ontario Ministry of Transportation - © King's Printer for Ontario, 2024) 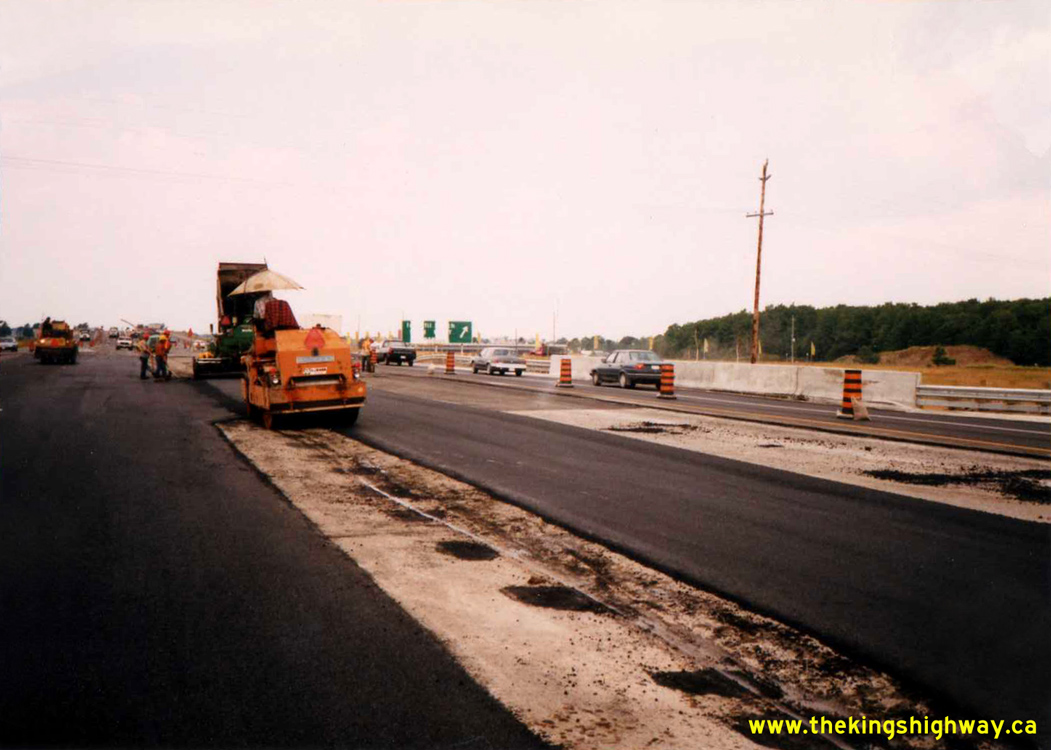
 Left - Hot-mix paving operations on Hwy 400 at the Innisfil Beach Road Interchange south of Barrie near Thornton, Contract #1988-78. See an
Enlarged Photo Here. Photo taken in July 1989. Left - Hot-mix paving operations on Hwy 400 at the Innisfil Beach Road Interchange south of Barrie near Thornton, Contract #1988-78. See an
Enlarged Photo Here. Photo taken in July 1989.(Photo courtesy of Ontario Ministry of Transportation - © King's Printer for Ontario, 2024) Right - Roller compacting fresh hot-mix asphalt pavement at the rehabilitated Innisfil Beach Road Underpass south of Barrie. See an
Enlarged Photo Here. Photo taken in July 1989.(Photo courtesy of Ontario Ministry of Transportation - © King's Printer for Ontario, 2024) 
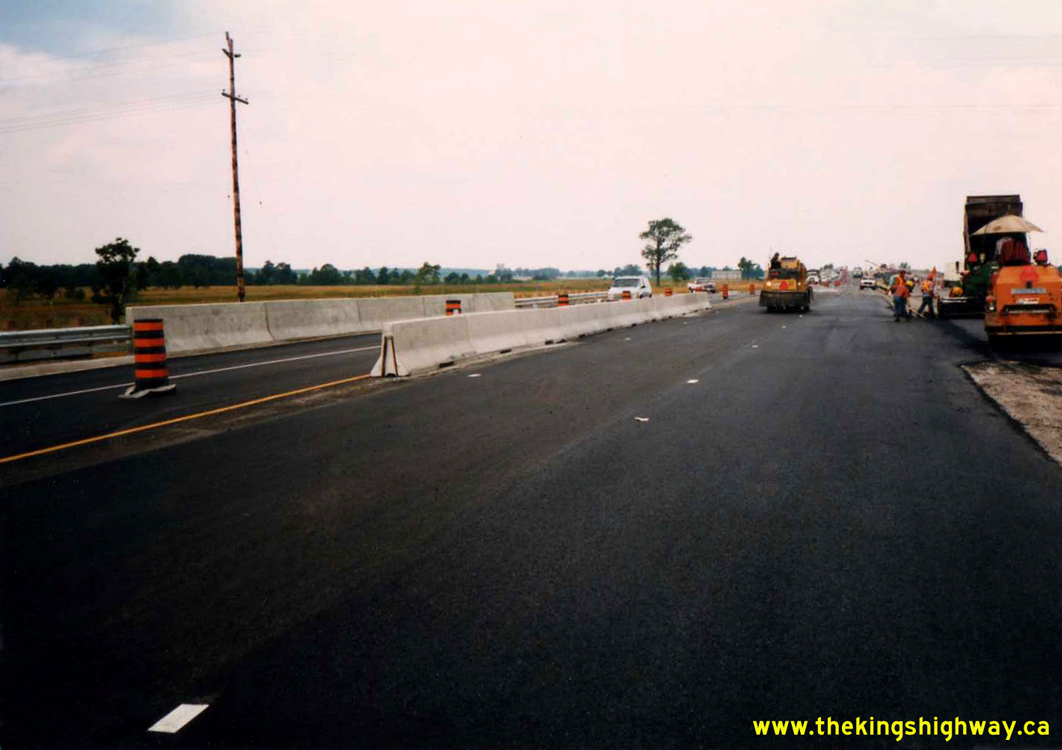
 Left - Western side of the rehabilitated Innisfil Beach Road Underpass on Hwy 400 south of Barrie. See an
Enlarged Photo Here. Photo taken in July 1989. Left - Western side of the rehabilitated Innisfil Beach Road Underpass on Hwy 400 south of Barrie. See an
Enlarged Photo Here. Photo taken in July 1989.(Photo courtesy of Ontario Ministry of Transportation - © King's Printer for Ontario, 2024) Right - A delivery of new steel box-beam median barrier awaits installation on Hwy 400 south of Barrie. Due to the traffic staging of the various bridge
rehabilitations carried out under Contract #1988-78, several temporary median crossovers had to be constructed to carry northbound traffic into the southbound
lanes and vice-versa. Following construction, the steel box-beam median barrier was reinstated along Hwy 400. See an
Enlarged Photo Here. Photo taken in July 1989.(Photo courtesy of Ontario Ministry of Transportation - © King's Printer for Ontario, 2024) 
 Left - Northern side of the rehabilitated Stroud Sideroad (today's McKay Road) Overpass on Hwy 400 south of Barrie, Contract #1988-78. See an
Enlarged Photo Here. Photo taken on August 17, 1989. Left - Northern side of the rehabilitated Stroud Sideroad (today's McKay Road) Overpass on Hwy 400 south of Barrie, Contract #1988-78. See an
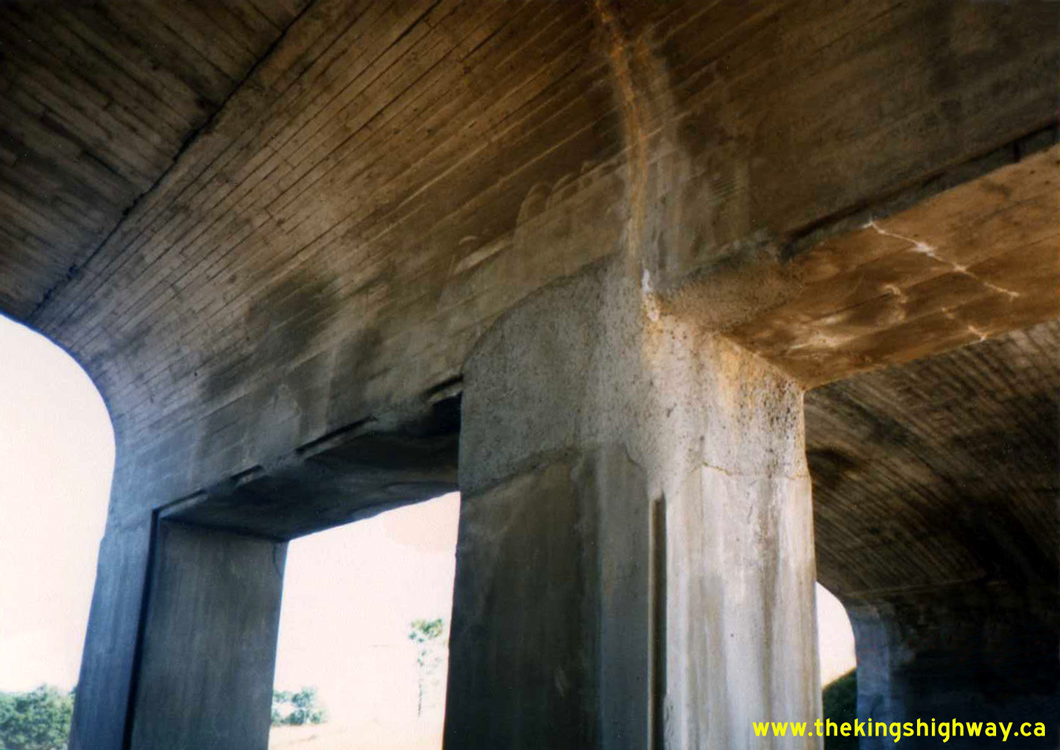
Enlarged Photo Here. Photo taken on August 17, 1989.(Photo courtesy of Ontario Ministry of Transportation - © King's Printer for Ontario, 2024) Right - Close-up view of a completed concrete patch repair area on the central pier of the Stroud Sideroad (today's McKay Road) Overpass on Hwy 400 south of
Barrie. Note the impressions of the timber planks used for falsework for this bridge during the original concrete pour. Bridges of this design use cast-in-place
concrete, with formwork required to support the wet concrete until it has properly cured and is self-supporting. The Stroud Sideroad Overpass was one of the very
first structures built along the new Toronto-Barrie Highway after World War II. The bridge was constructed under Contract #1946-18 and was completed in 1947. See an
Enlarged Photo Here. Photo taken on August 17, 1989.(Photo courtesy of Ontario Ministry of Transportation - © King's Printer for Ontario, 2024) 
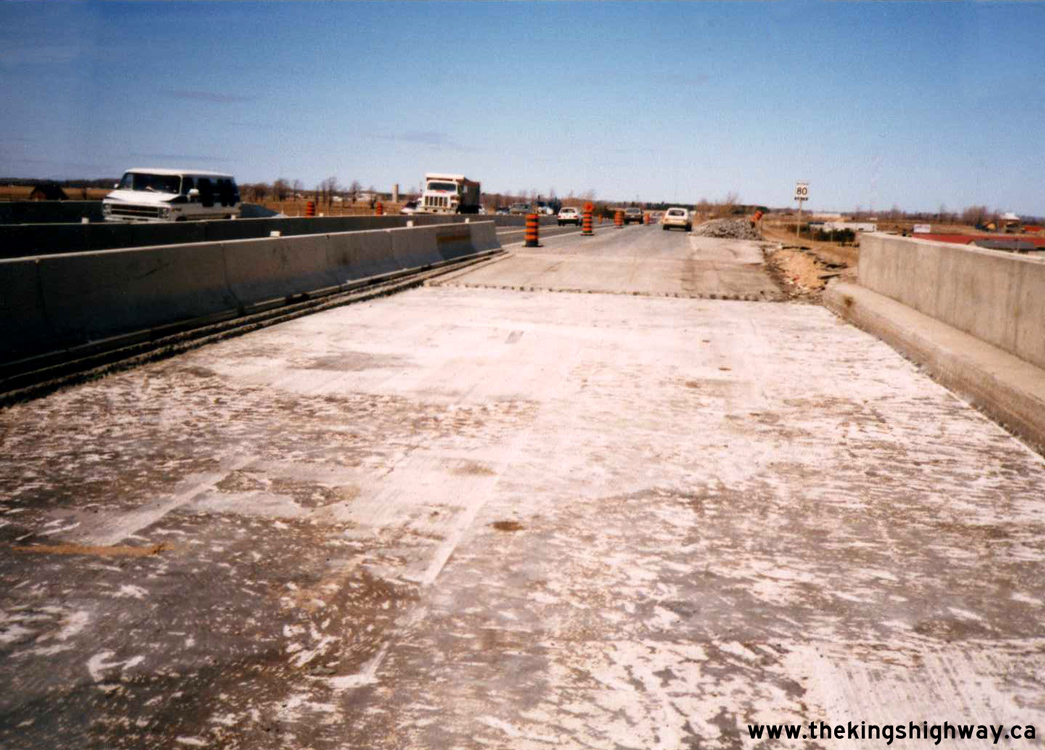
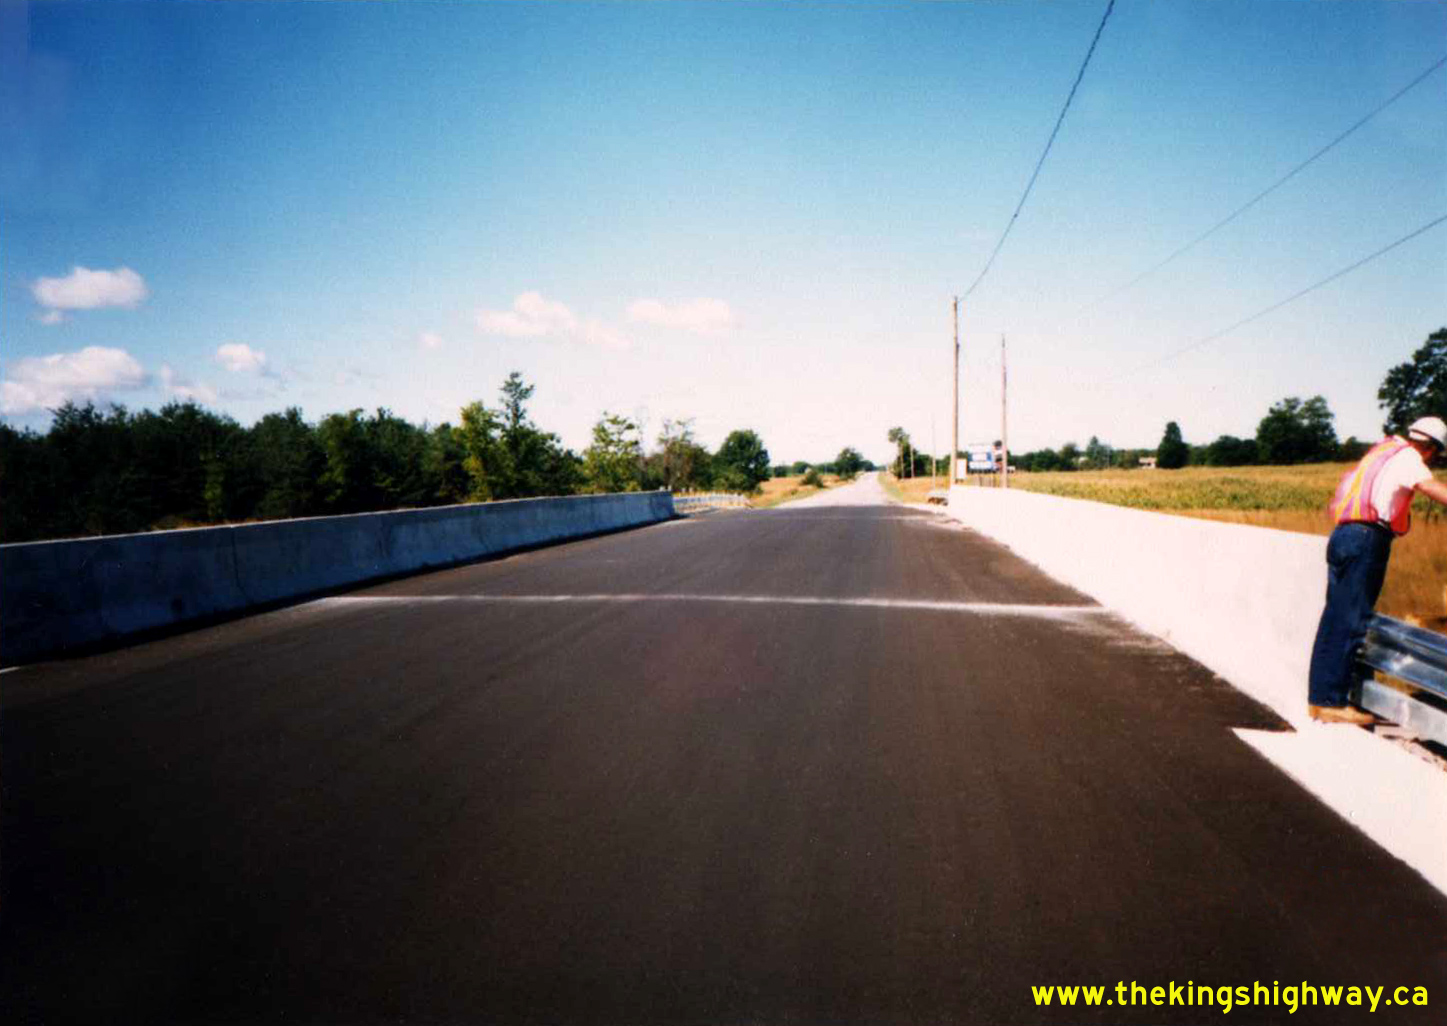
 Left - Completed rehabilitation and final paving of the Stroud Sideroad (today's McKay Road) Overpass on Hwy 400 south of Barrie, Contract #1988-78. See an
Enlarged Photo Here. Photo taken on August 17, 1989. Left - Completed rehabilitation and final paving of the Stroud Sideroad (today's McKay Road) Overpass on Hwy 400 south of Barrie, Contract #1988-78. See an
Enlarged Photo Here. Photo taken on August 17, 1989.(Photo courtesy of Ontario Ministry of Transportation - © King's Printer for Ontario, 2024) Right - Facing north along Hwy 400 from the St. Vincent Street Overpass in Barrie. See an Enlarged Photo Here. Photo taken on November 9, 1989. (Photo courtesy of Ontario Ministry of Transportation - © King's Printer for Ontario, 2010)
Continue on to King's Highway 400 Historical Photos: 1990-1999
|
|---|
Links to Adjacent King's Highway Photograph Pages:
Back to Hwy 400 - Historical Photos: 1980-1984
Hwy 400 Photo Index
On to Hwy 400 - Historical Photos: 1990-1999
Back to King's Highway 169 Photos /
King's Highway 400 History /
On to King's Highway 401 Photos
Ontario Highway History - Main Menu / Back to List of Highways Website contents, photos & text © 2002-2026, Cameron
Bevers (Webmaster) - All Rights Reserved / Contact Me
|
|---|