
| 
| |
|
|
This page contains historical photos of Ontario's King's Highway 400 dating from 2000 to 2004. All photographs displayed on
this page were taken by the Webmaster (Cameron Bevers), unless specifically noted otherwise. Click on any thumbnail to see a larger image!
Please note that all photographs displayed on this
website are protected by copyright. These photographs must not be reproduced, published,
electronically stored or copied, distributed, or posted onto other websites without
my written permission. If you want to use photos from this website, please
email me first for permission. Thank-you!
|
|---|
|
Page 8: Historical King's Highway 400 Photographs (2000 to 2004)
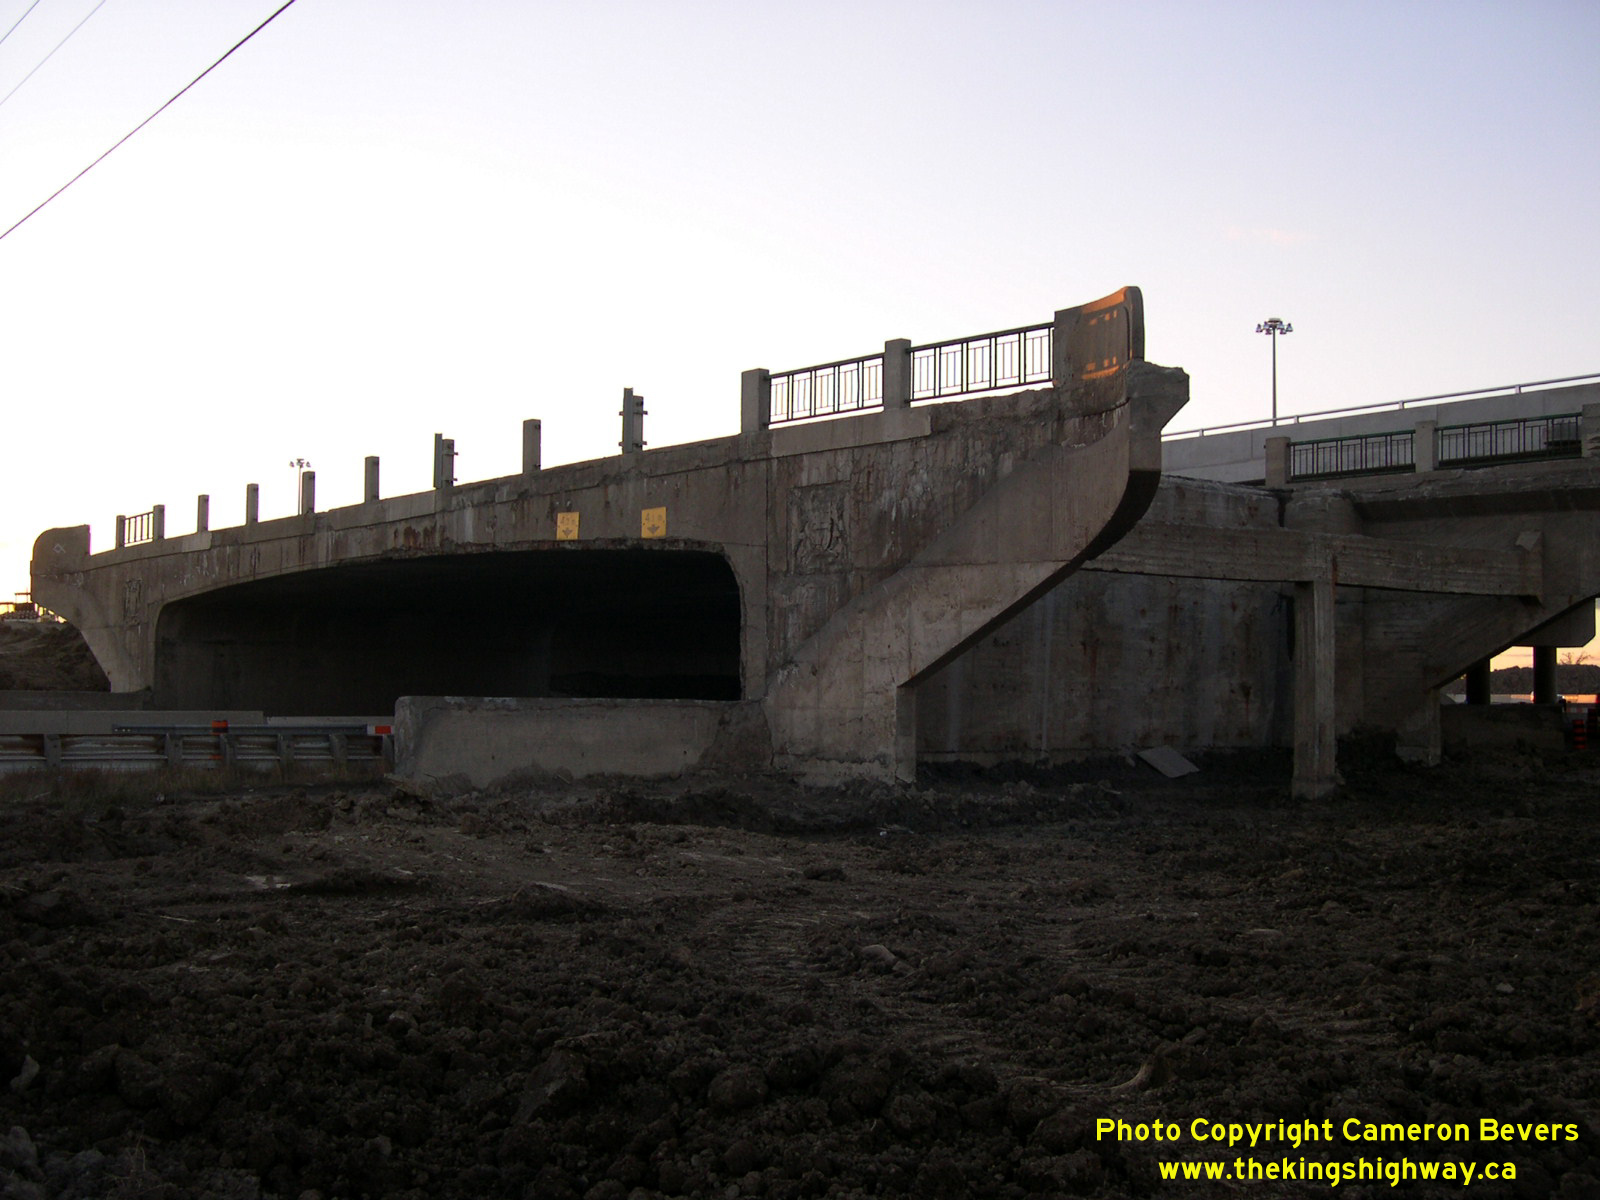
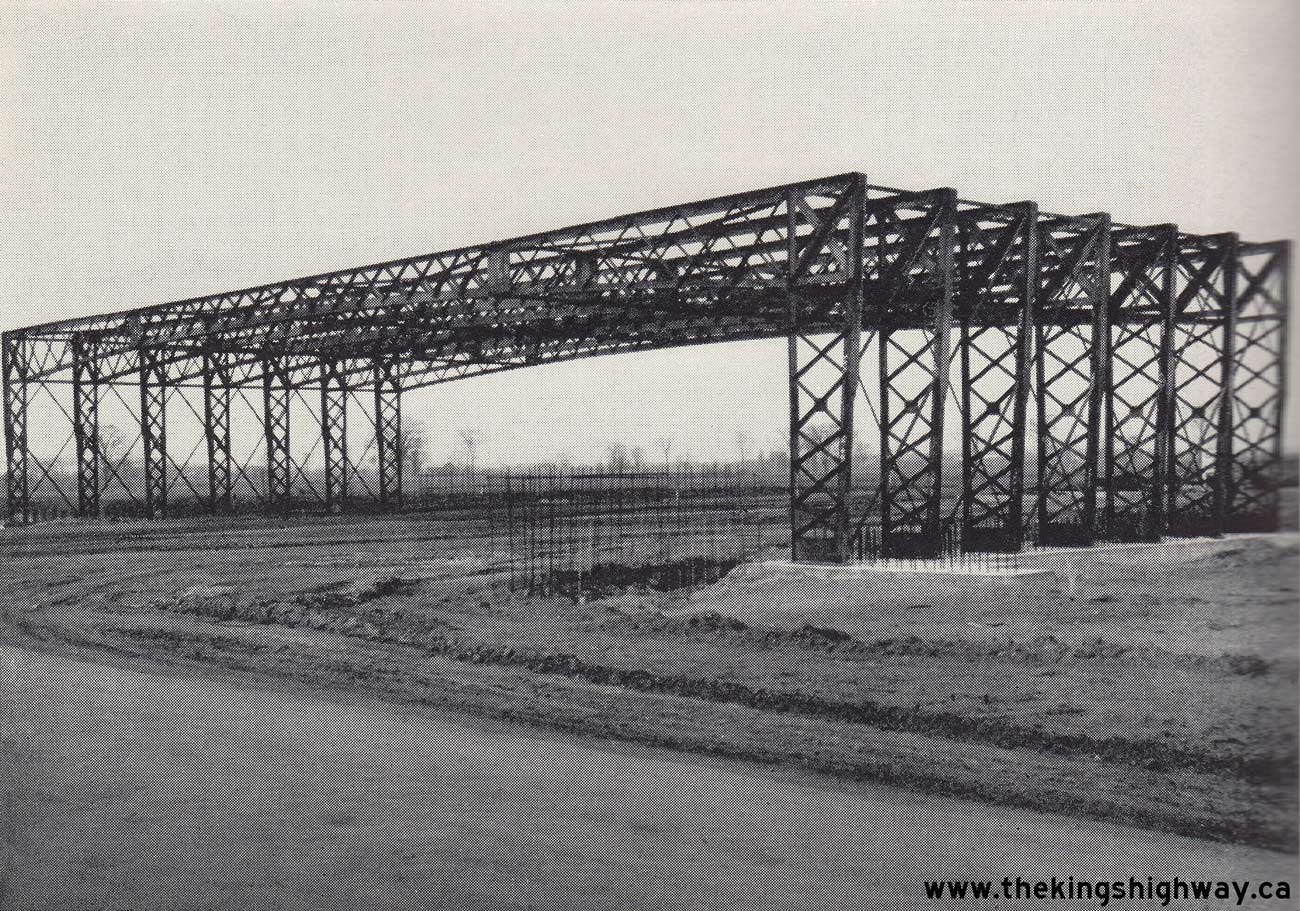
Above - Old Major Mackenzie Drive Bridge on Hwy 400 in Vaughan, shortly before being demolished on October 5, 2003. This is the same bridge which is shown
under construction in the Historical 1949 Photo. Note the new Major Mackenzie Bridge in the
background. See an Enlarged Photo Here. (Photograph taken on October 1, 2003 - © Cameron Bevers) 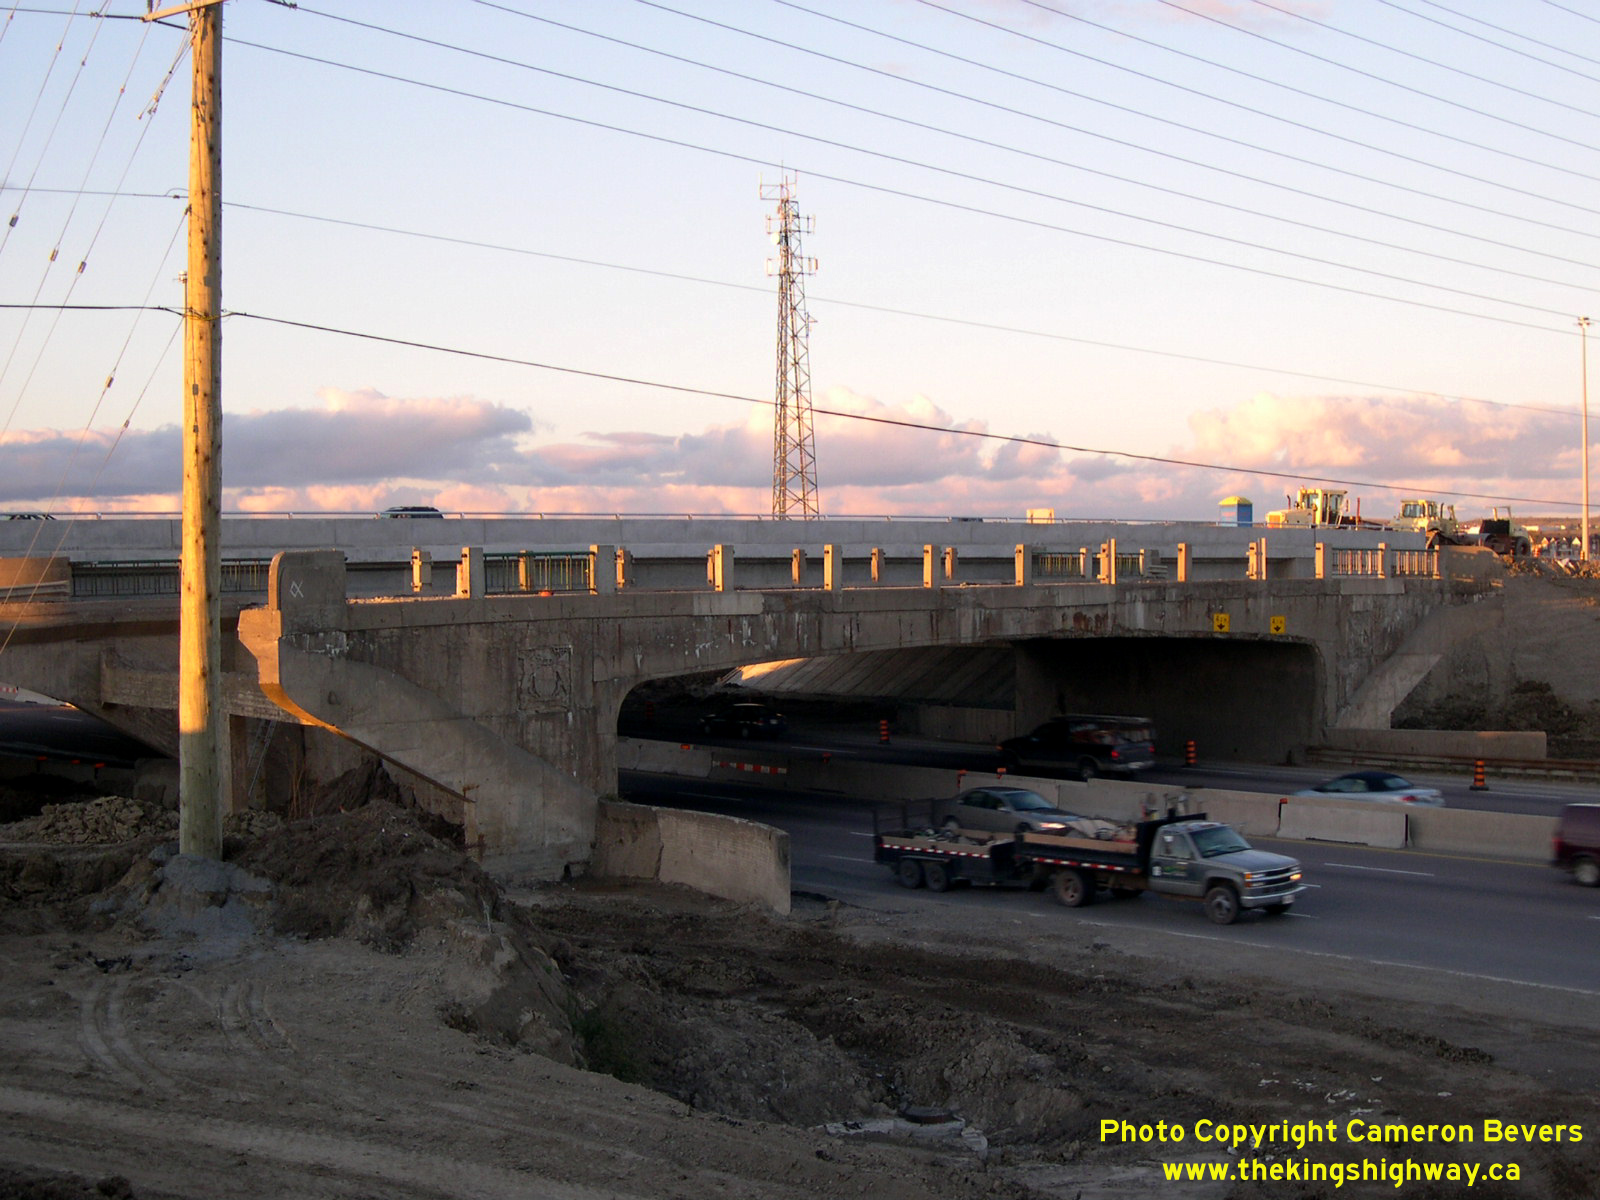
Left - Old Major Mackenzie Drive Bridge on Hwy 400 in Vaughan, shortly before its demolition on October 5, 2003. See an
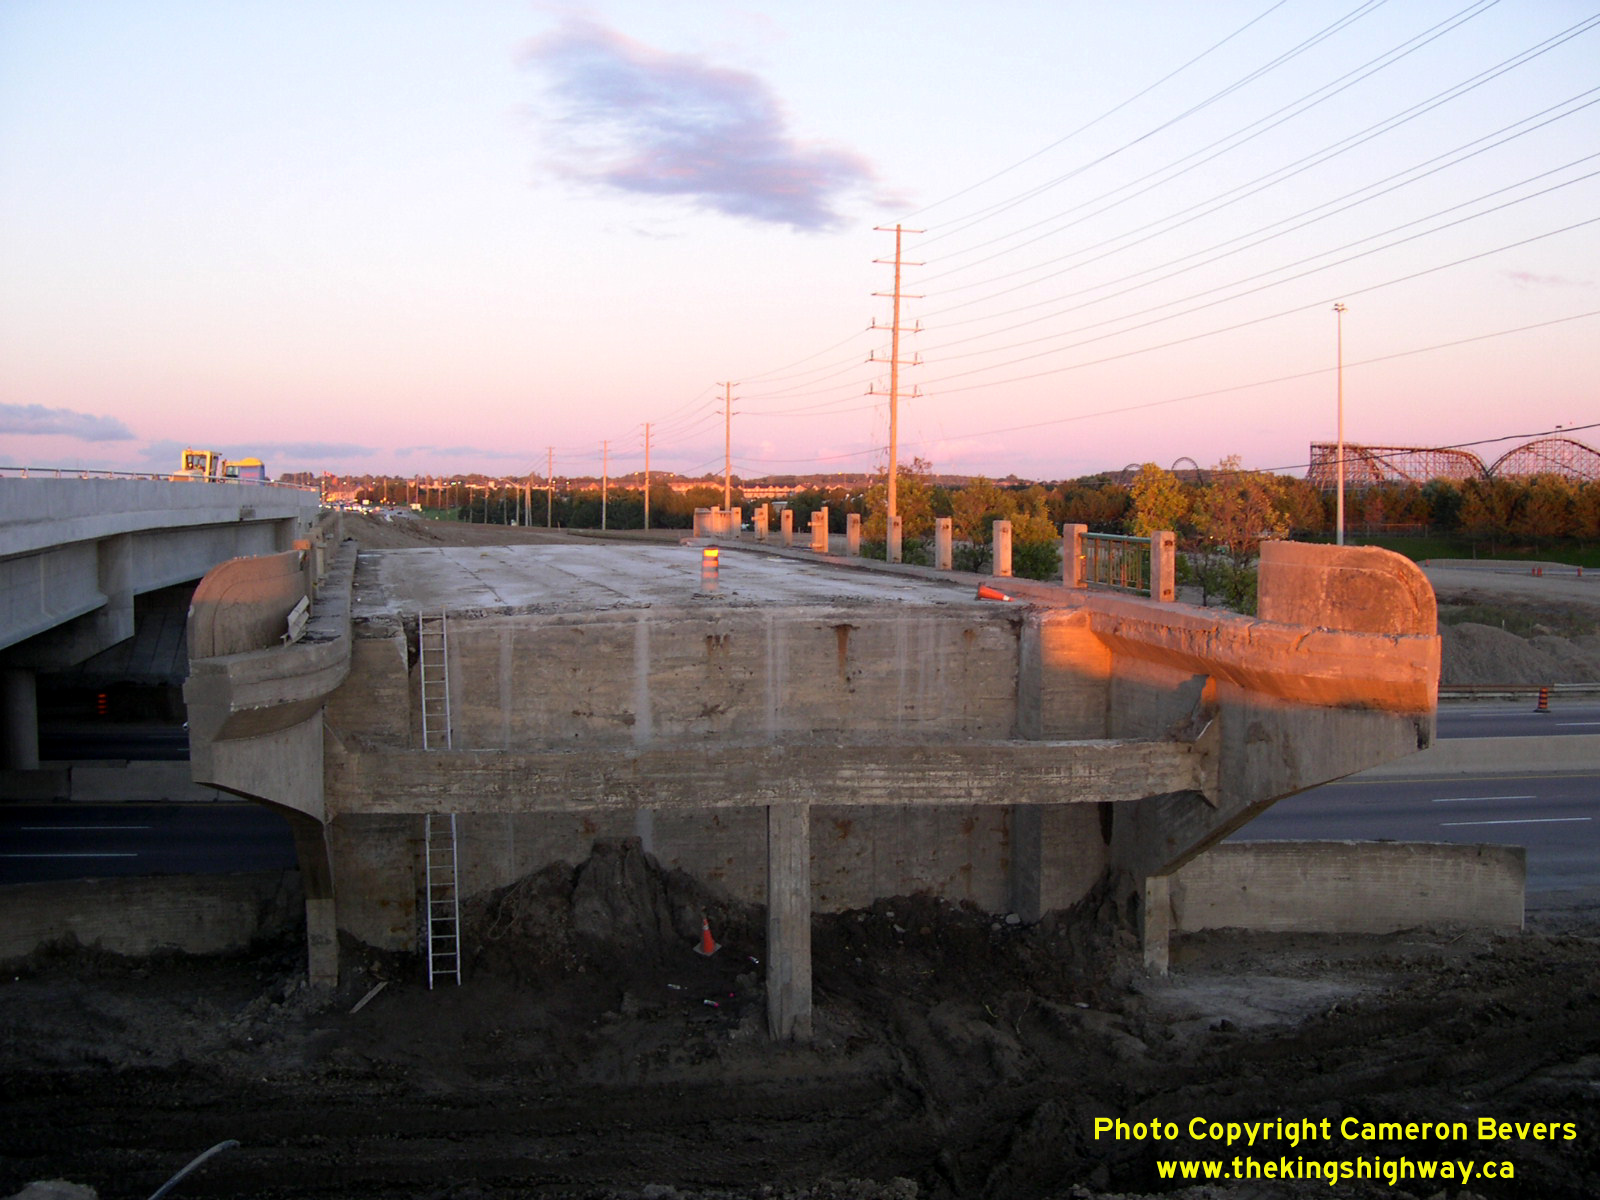
Enlarged Photo Here. (Photograph taken on October 1, 2003 - © Cameron Bevers) Right - Looking east across the old Major Mackenzie Drive Bridge on Hwy 400. Note the new span at left. See an Enlarged Photo Here. (Photograph taken on October 1, 2003 - © Cameron Bevers) 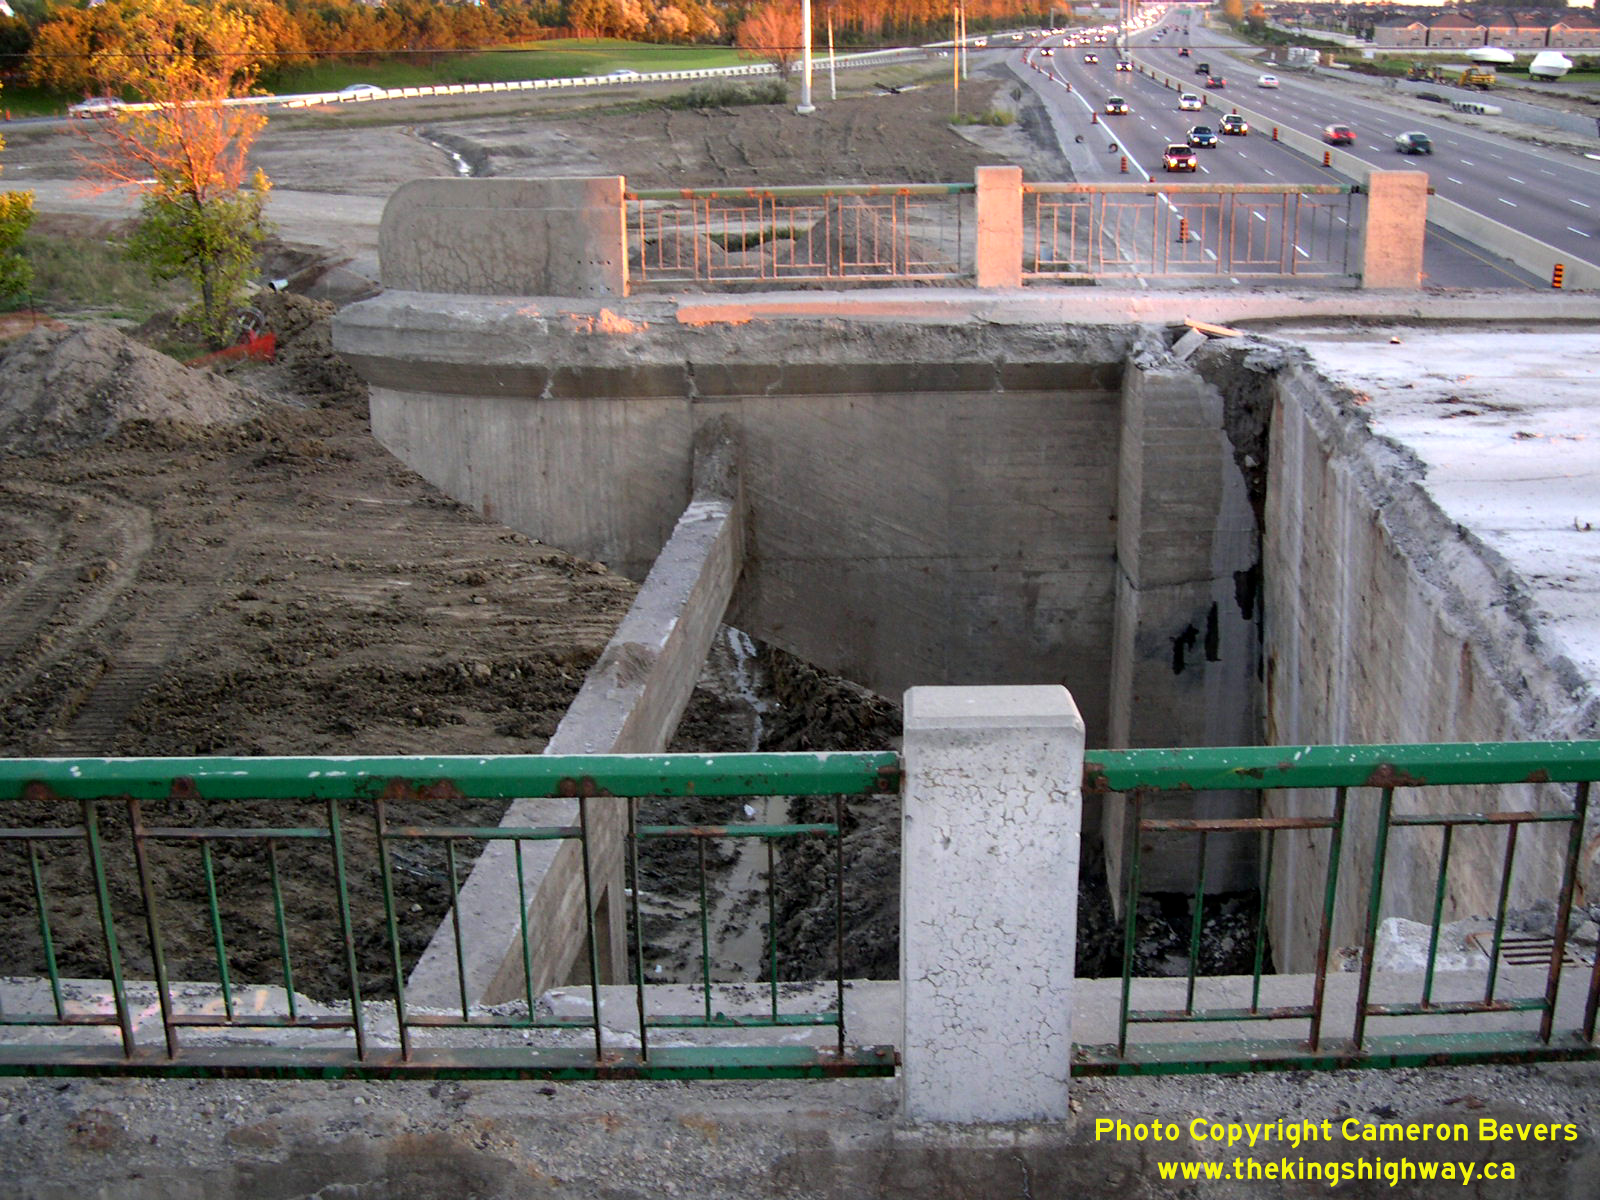
Left - Close-up of the steel handrails on the eastern side of the old Major Mackenzie Drive Bridge on Hwy 400. See an
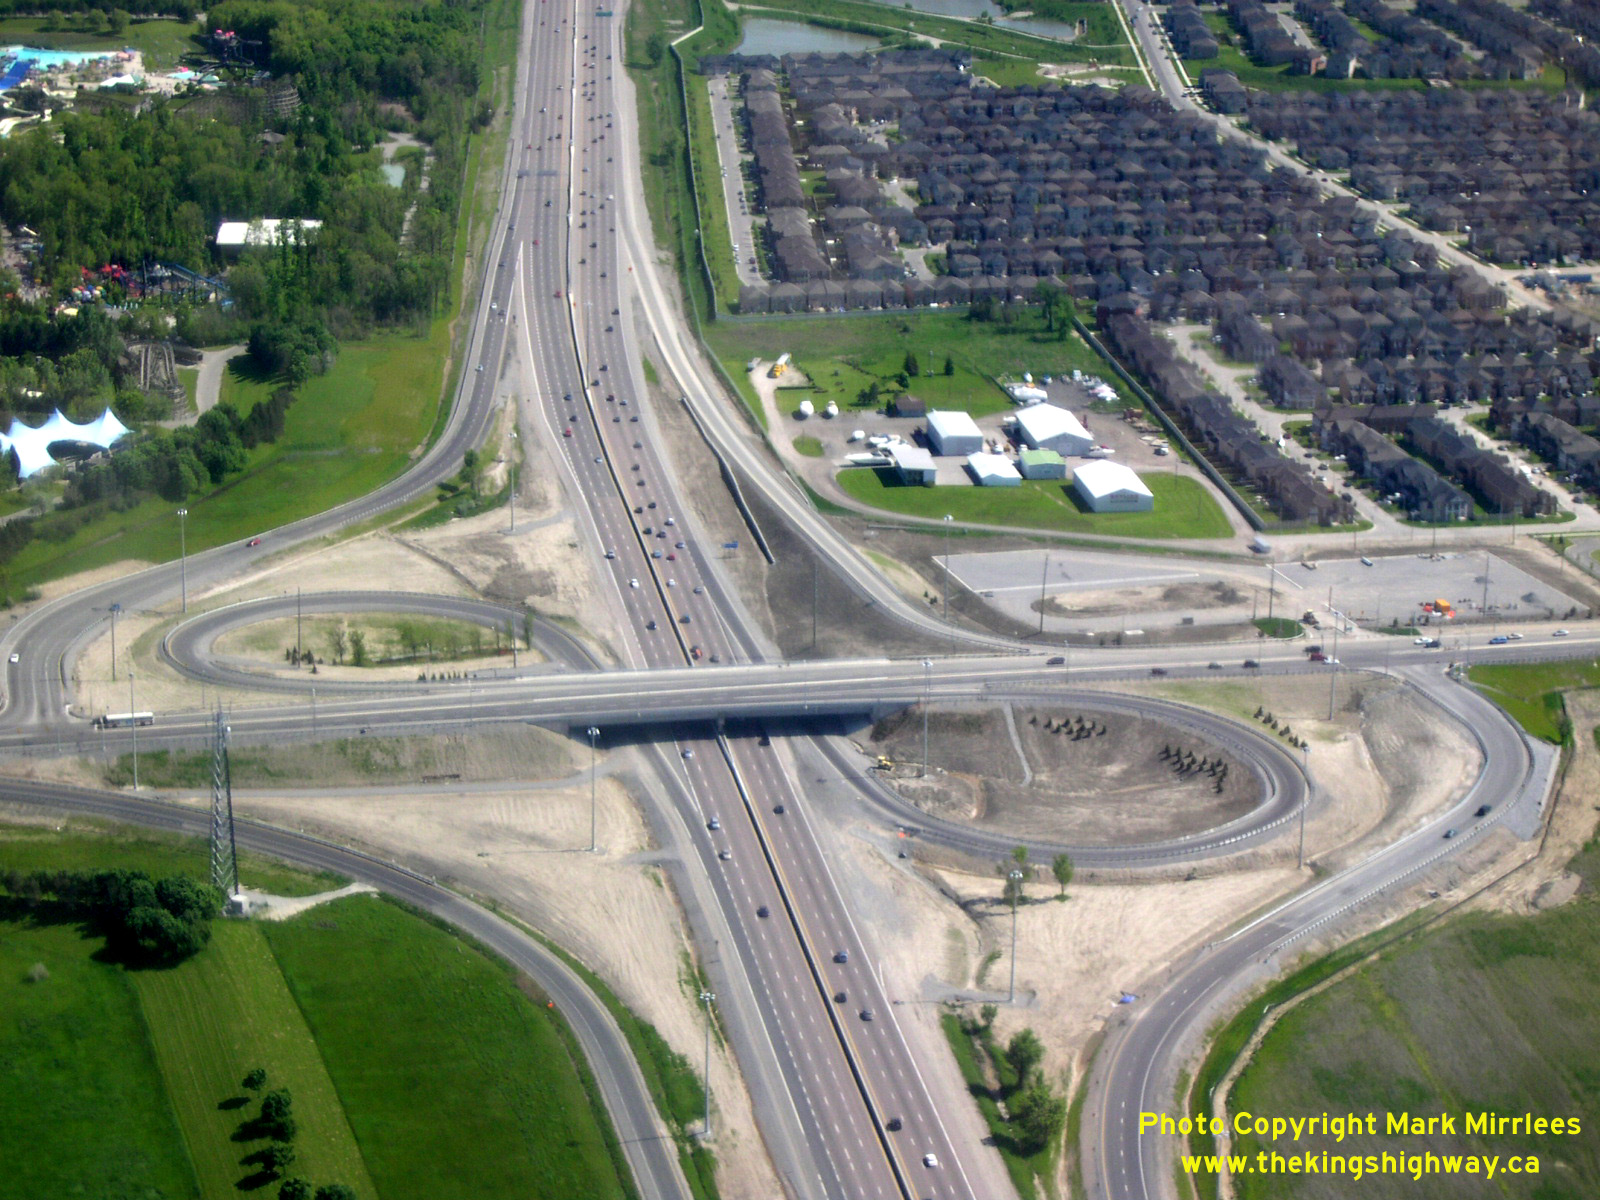
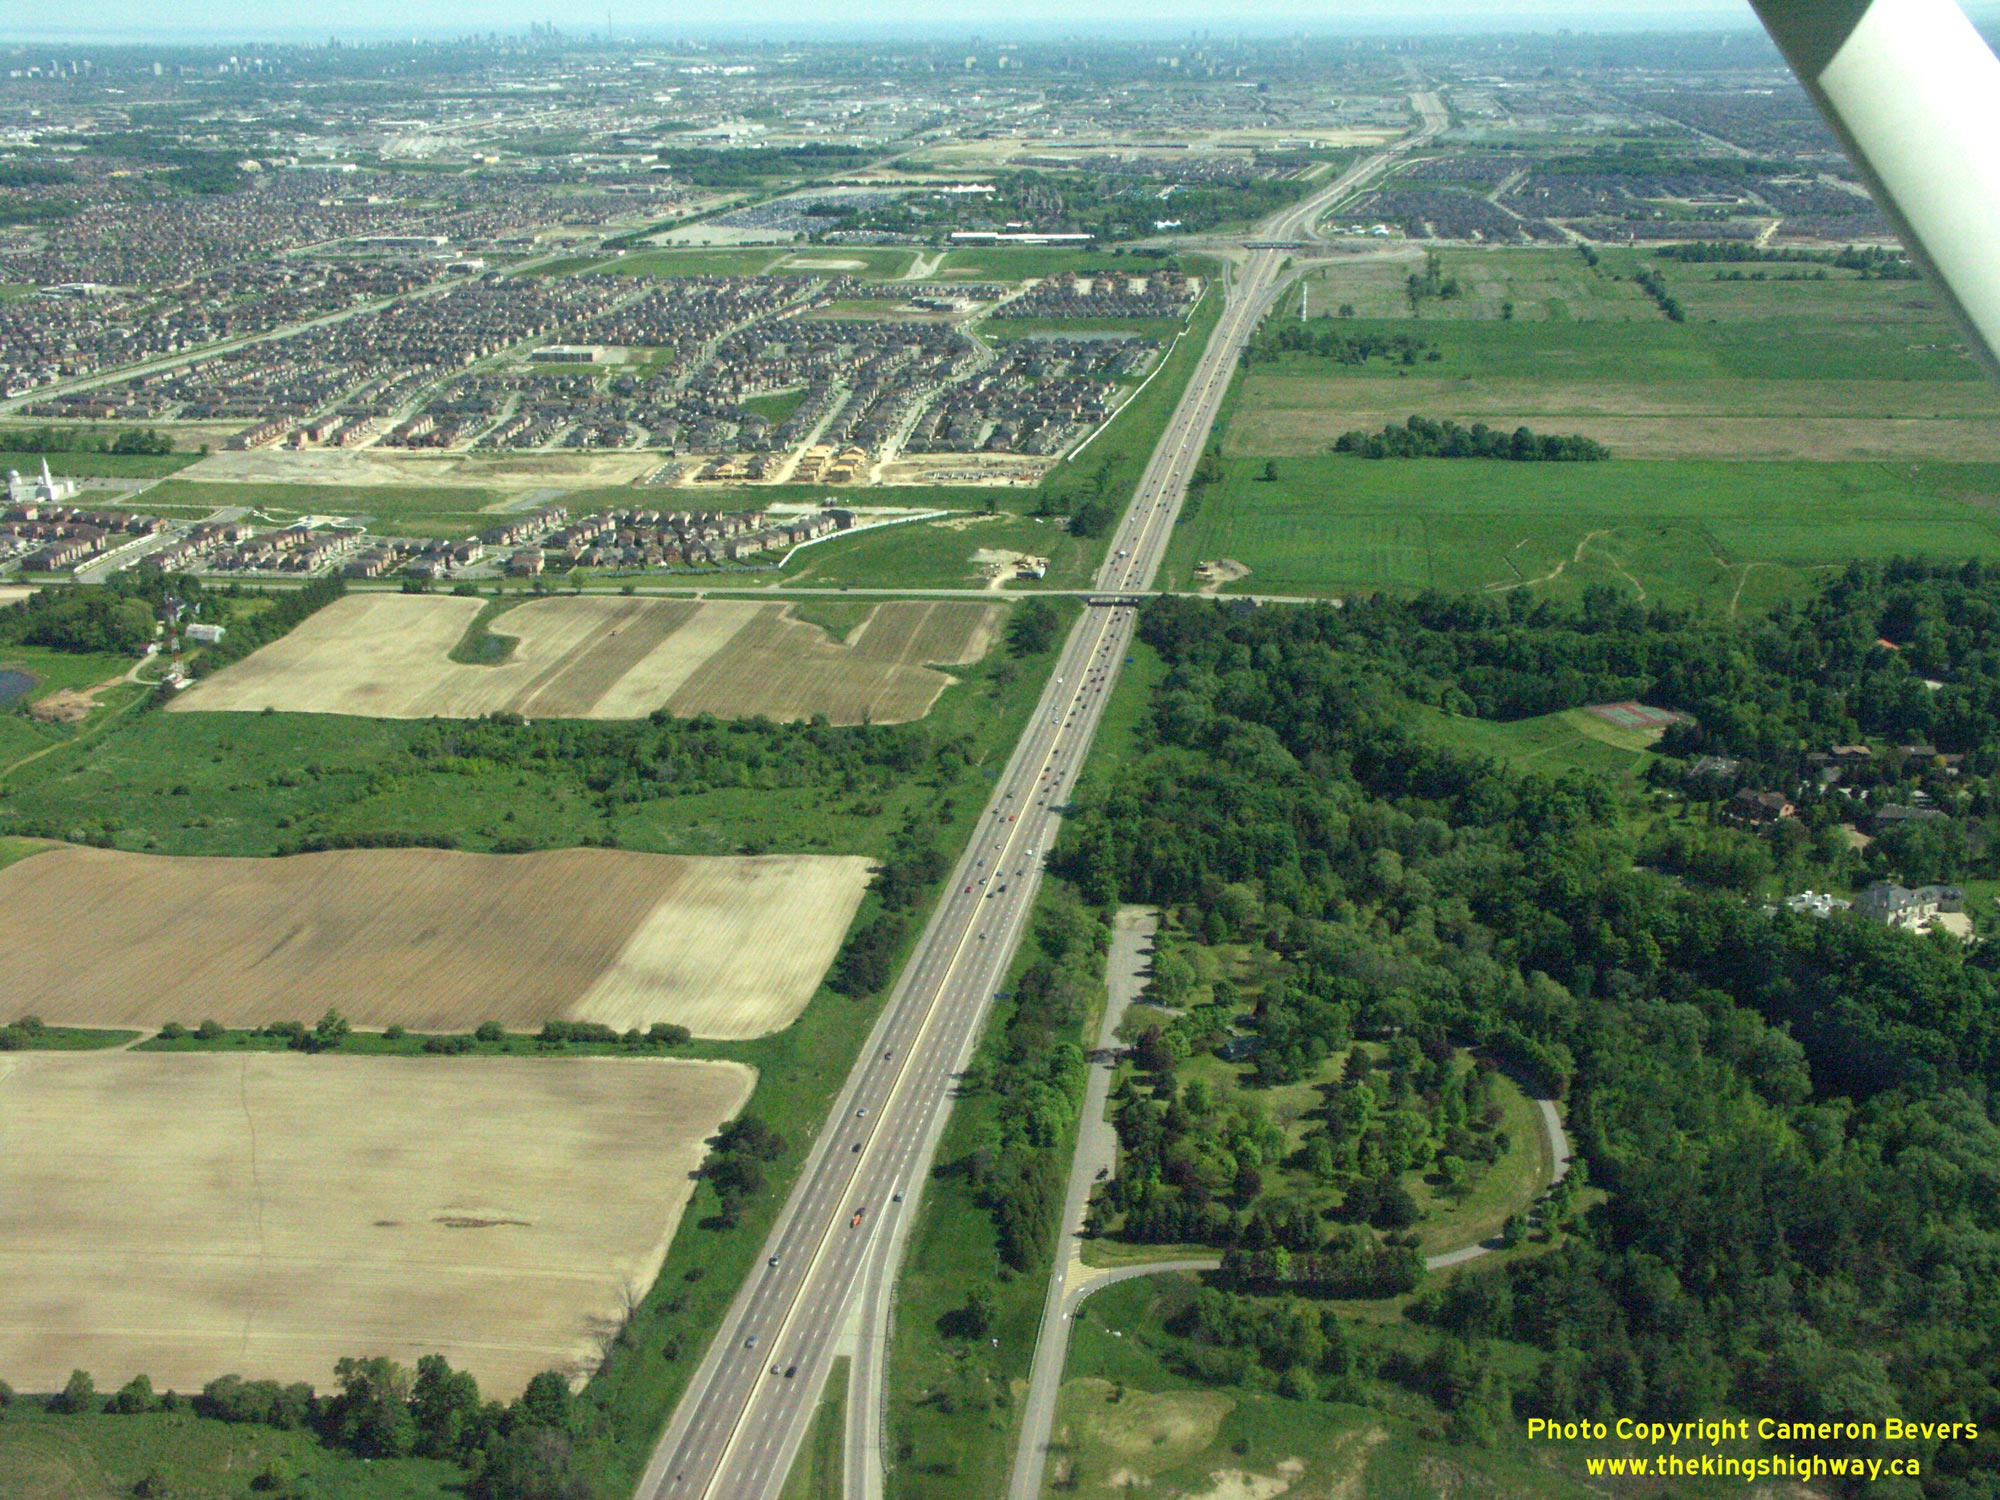
Enlarged Photo Here. (Photograph taken on October 1, 2003 - © Cameron Bevers) Right - Aerial view of the reconstructed Major Mackenzie Drive Interchange on Hwy 400 in Vaughan, facing south towards Toronto. See an Enlarged Photo Here. (Photograph taken on May 30, 2004 - © Mark Mirrlees) 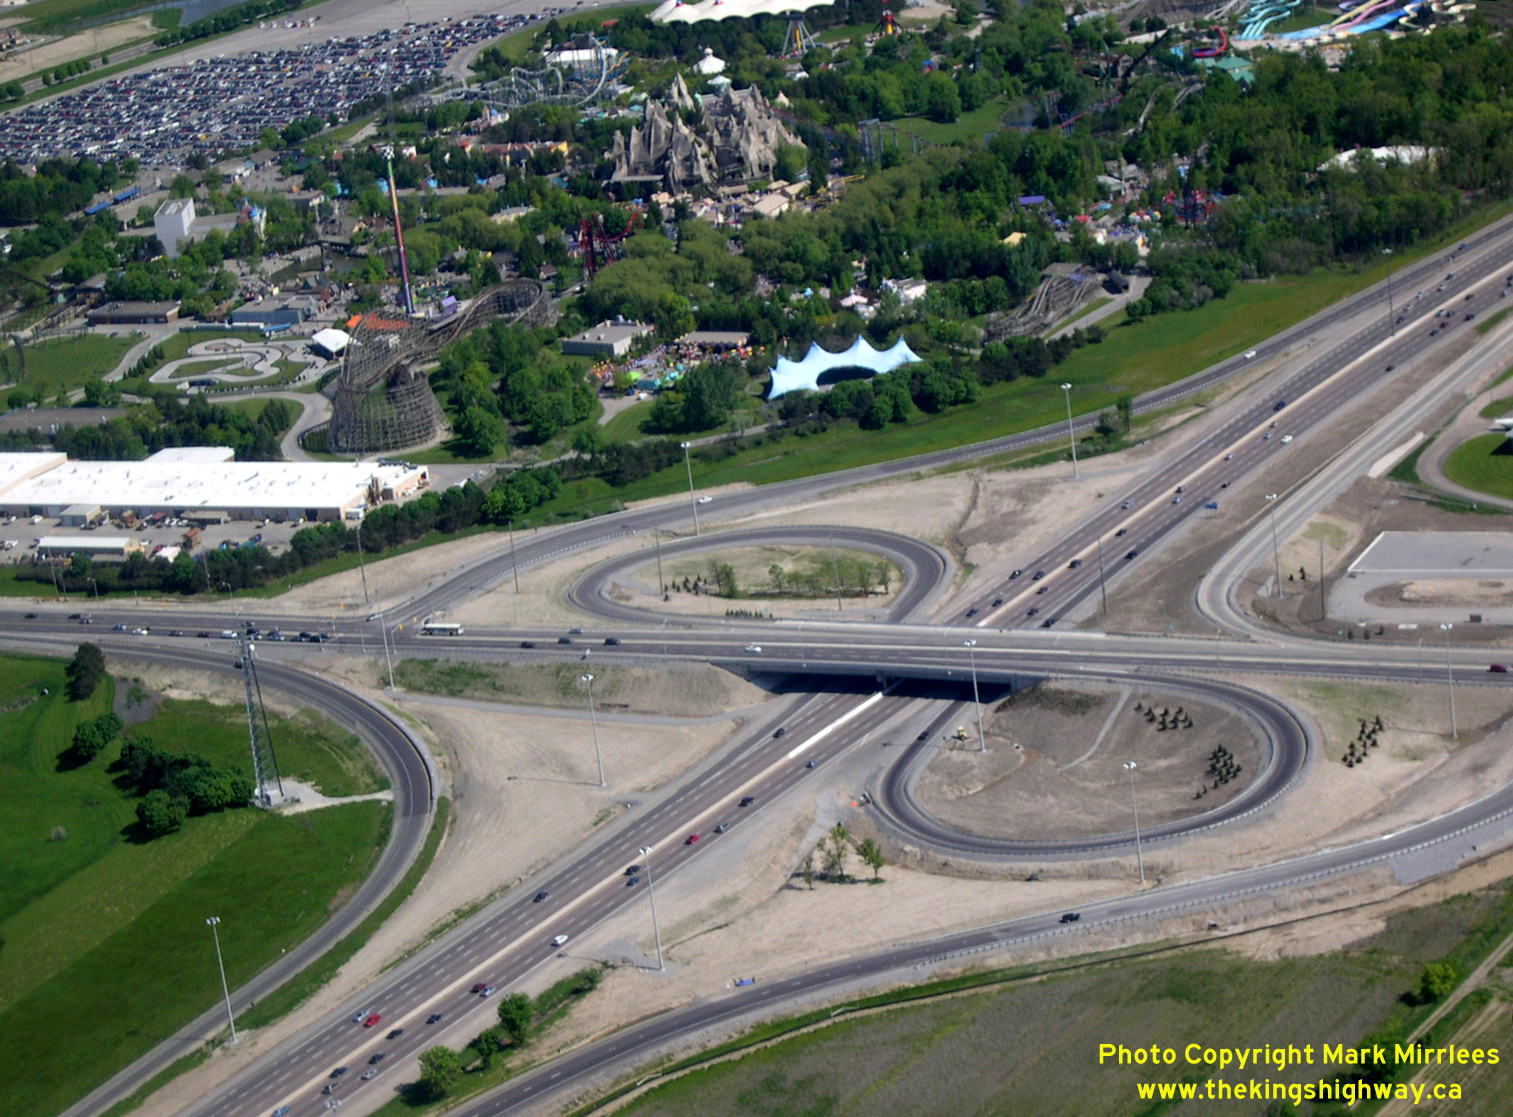
Left - Aerial view of the Major Mackenzie Drive Interchange at Hwy 400 in Vaughan, facing southeast. See an
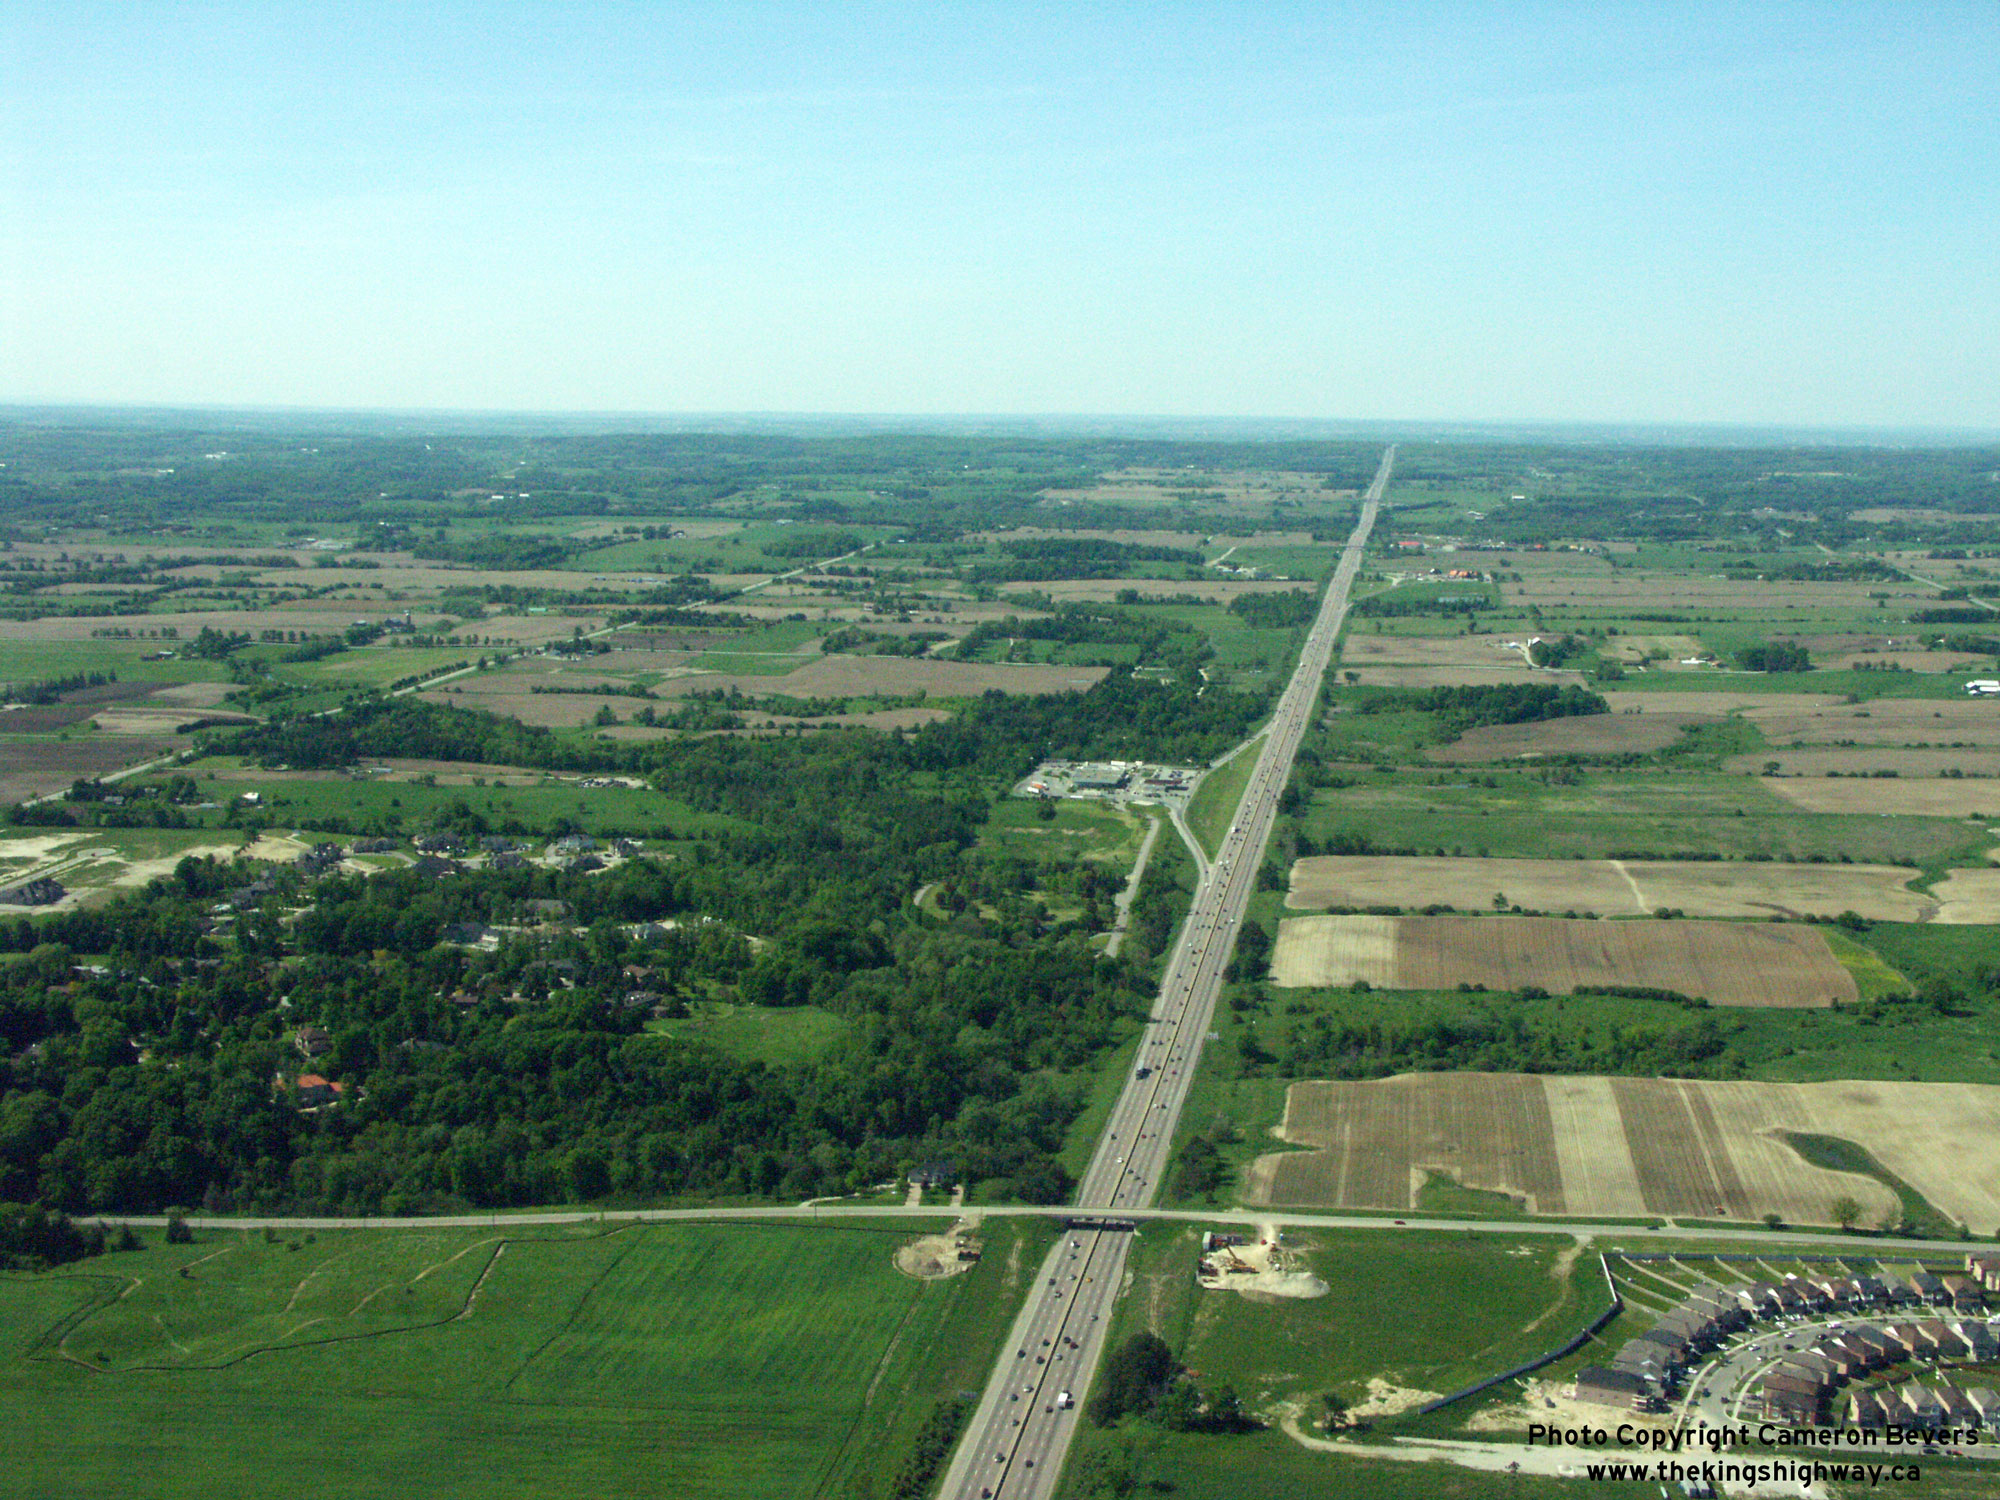
Enlarged Photo Here. (Photograph taken on May 30, 2004 - © Mark Mirrlees) Right - Aerial view of Hwy 400 at the Teston Road Overpass in Vaughan, facing north towards Barrie. A new interchange was completed at Teston Road in August 2009 to service the rapidly-expanding cities of York Region. See an Enlarged Photo Here. (Photograph taken on May 30, 2004 - © Cameron Bevers) 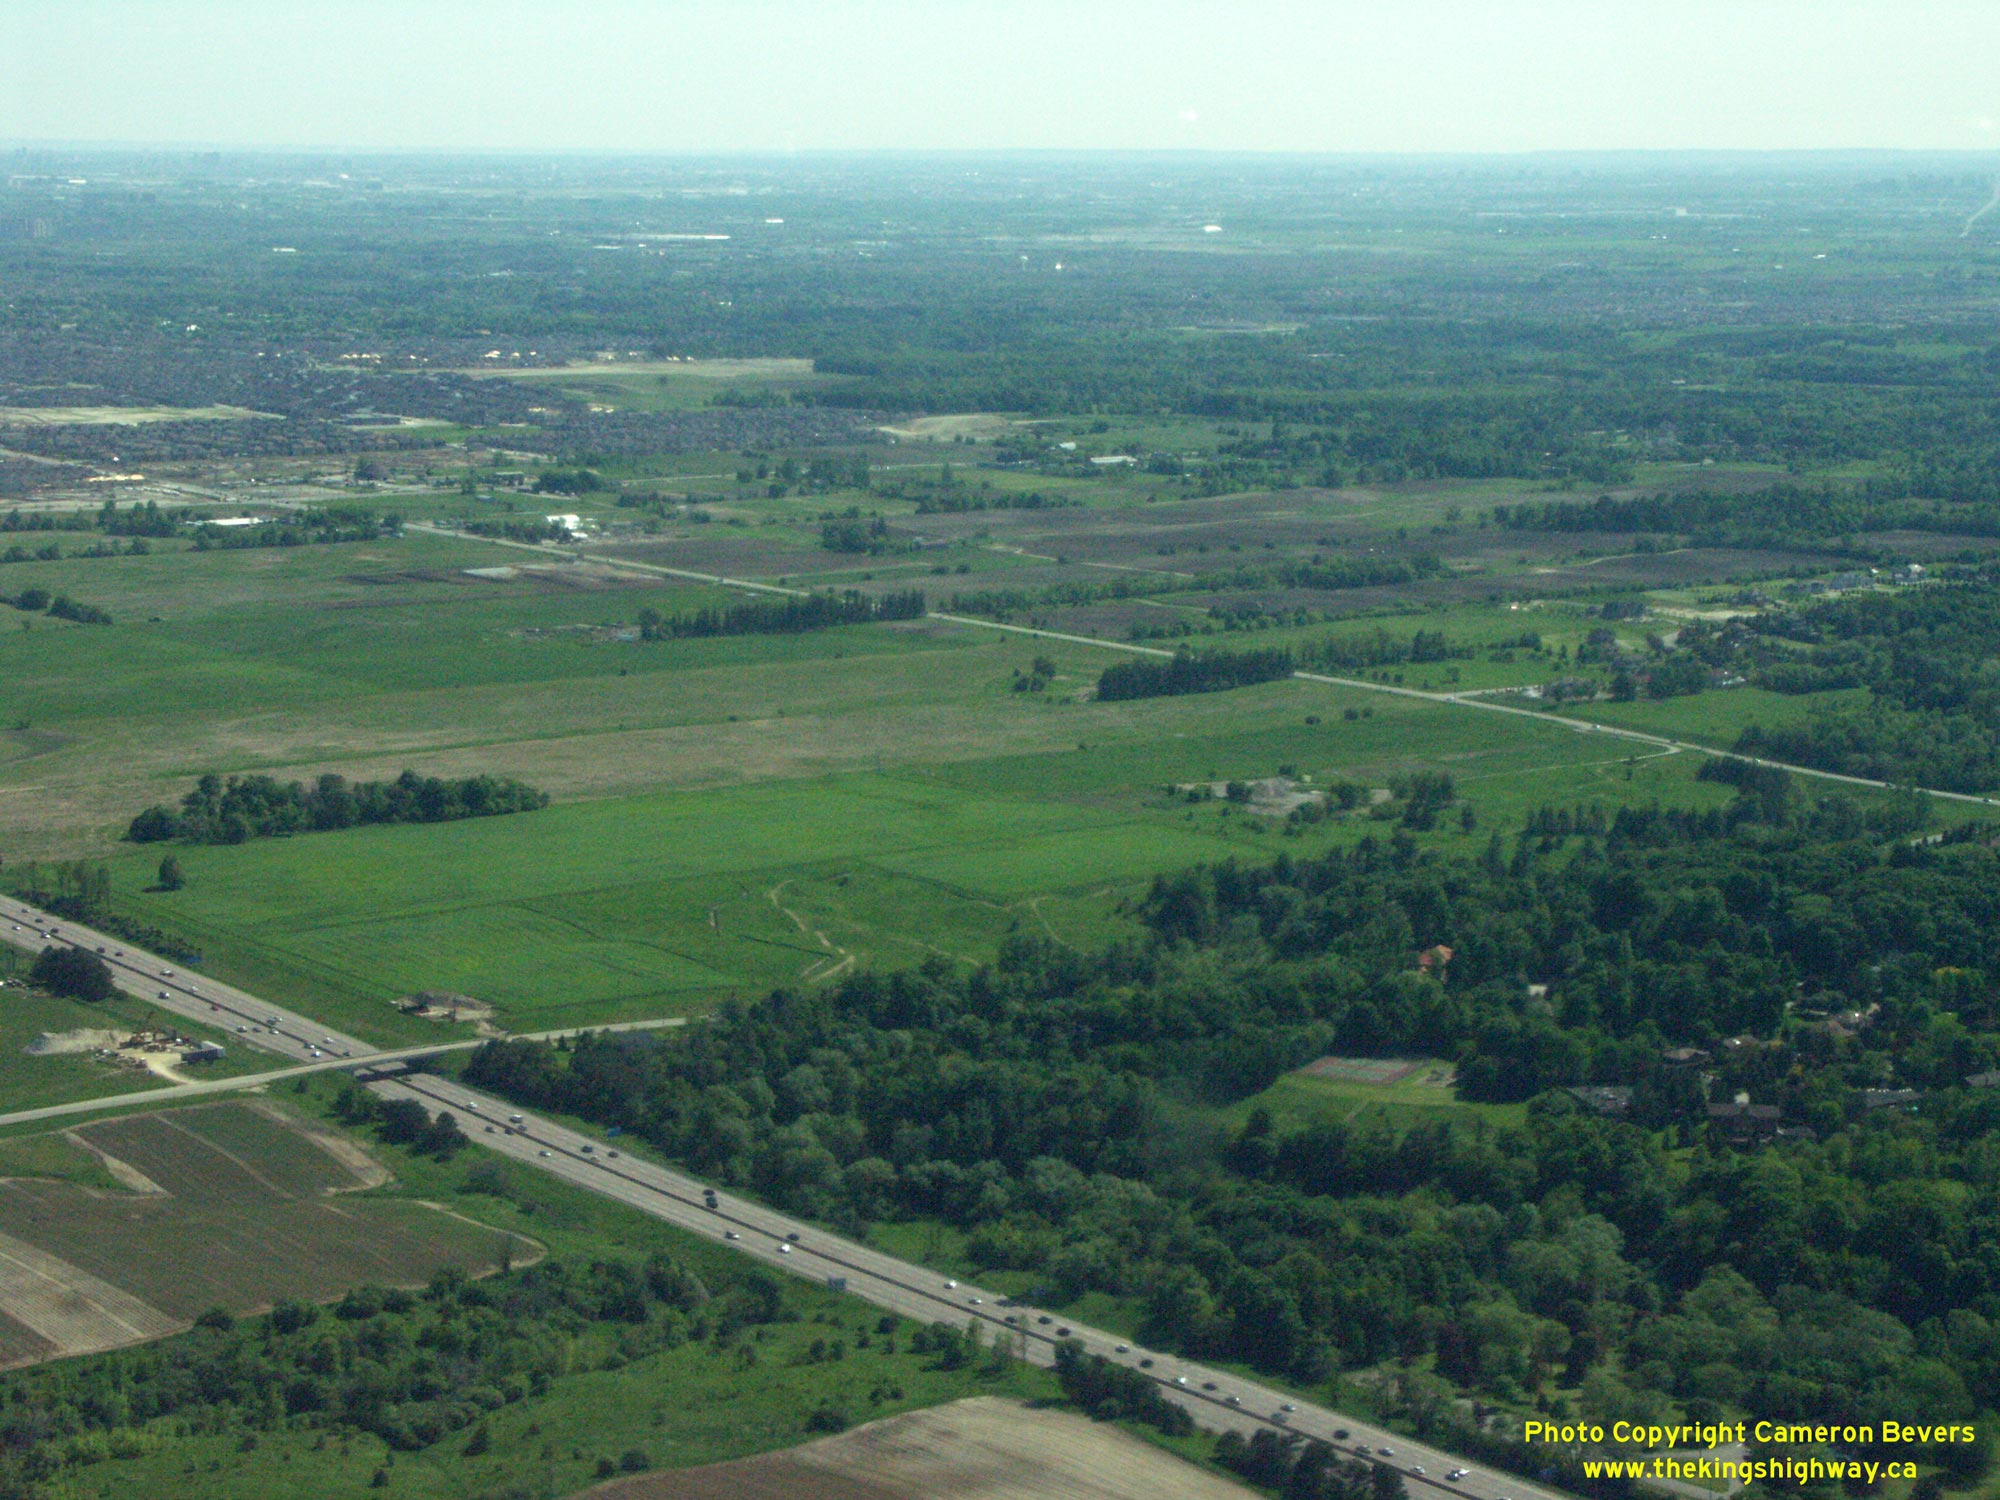
Left - Aerial view of Hwy 400 at the Teston Road Overpass in Vaughan, facing southwest. Since I took this photo in mid-2004, nearly all of the vacant
land adjacent to Hwy 400 on the south side of Teston Road has been developed. See an
Enlarged Photo Here. (Photograph taken on May 30, 2004 - © Cameron Bevers) Right - Aerial view of Hwy 400 facing south towards the Teston Road Overpass in Vaughan. See an Enlarged Photo Here. (Photograph taken on May 30, 2004 - © Cameron Bevers) 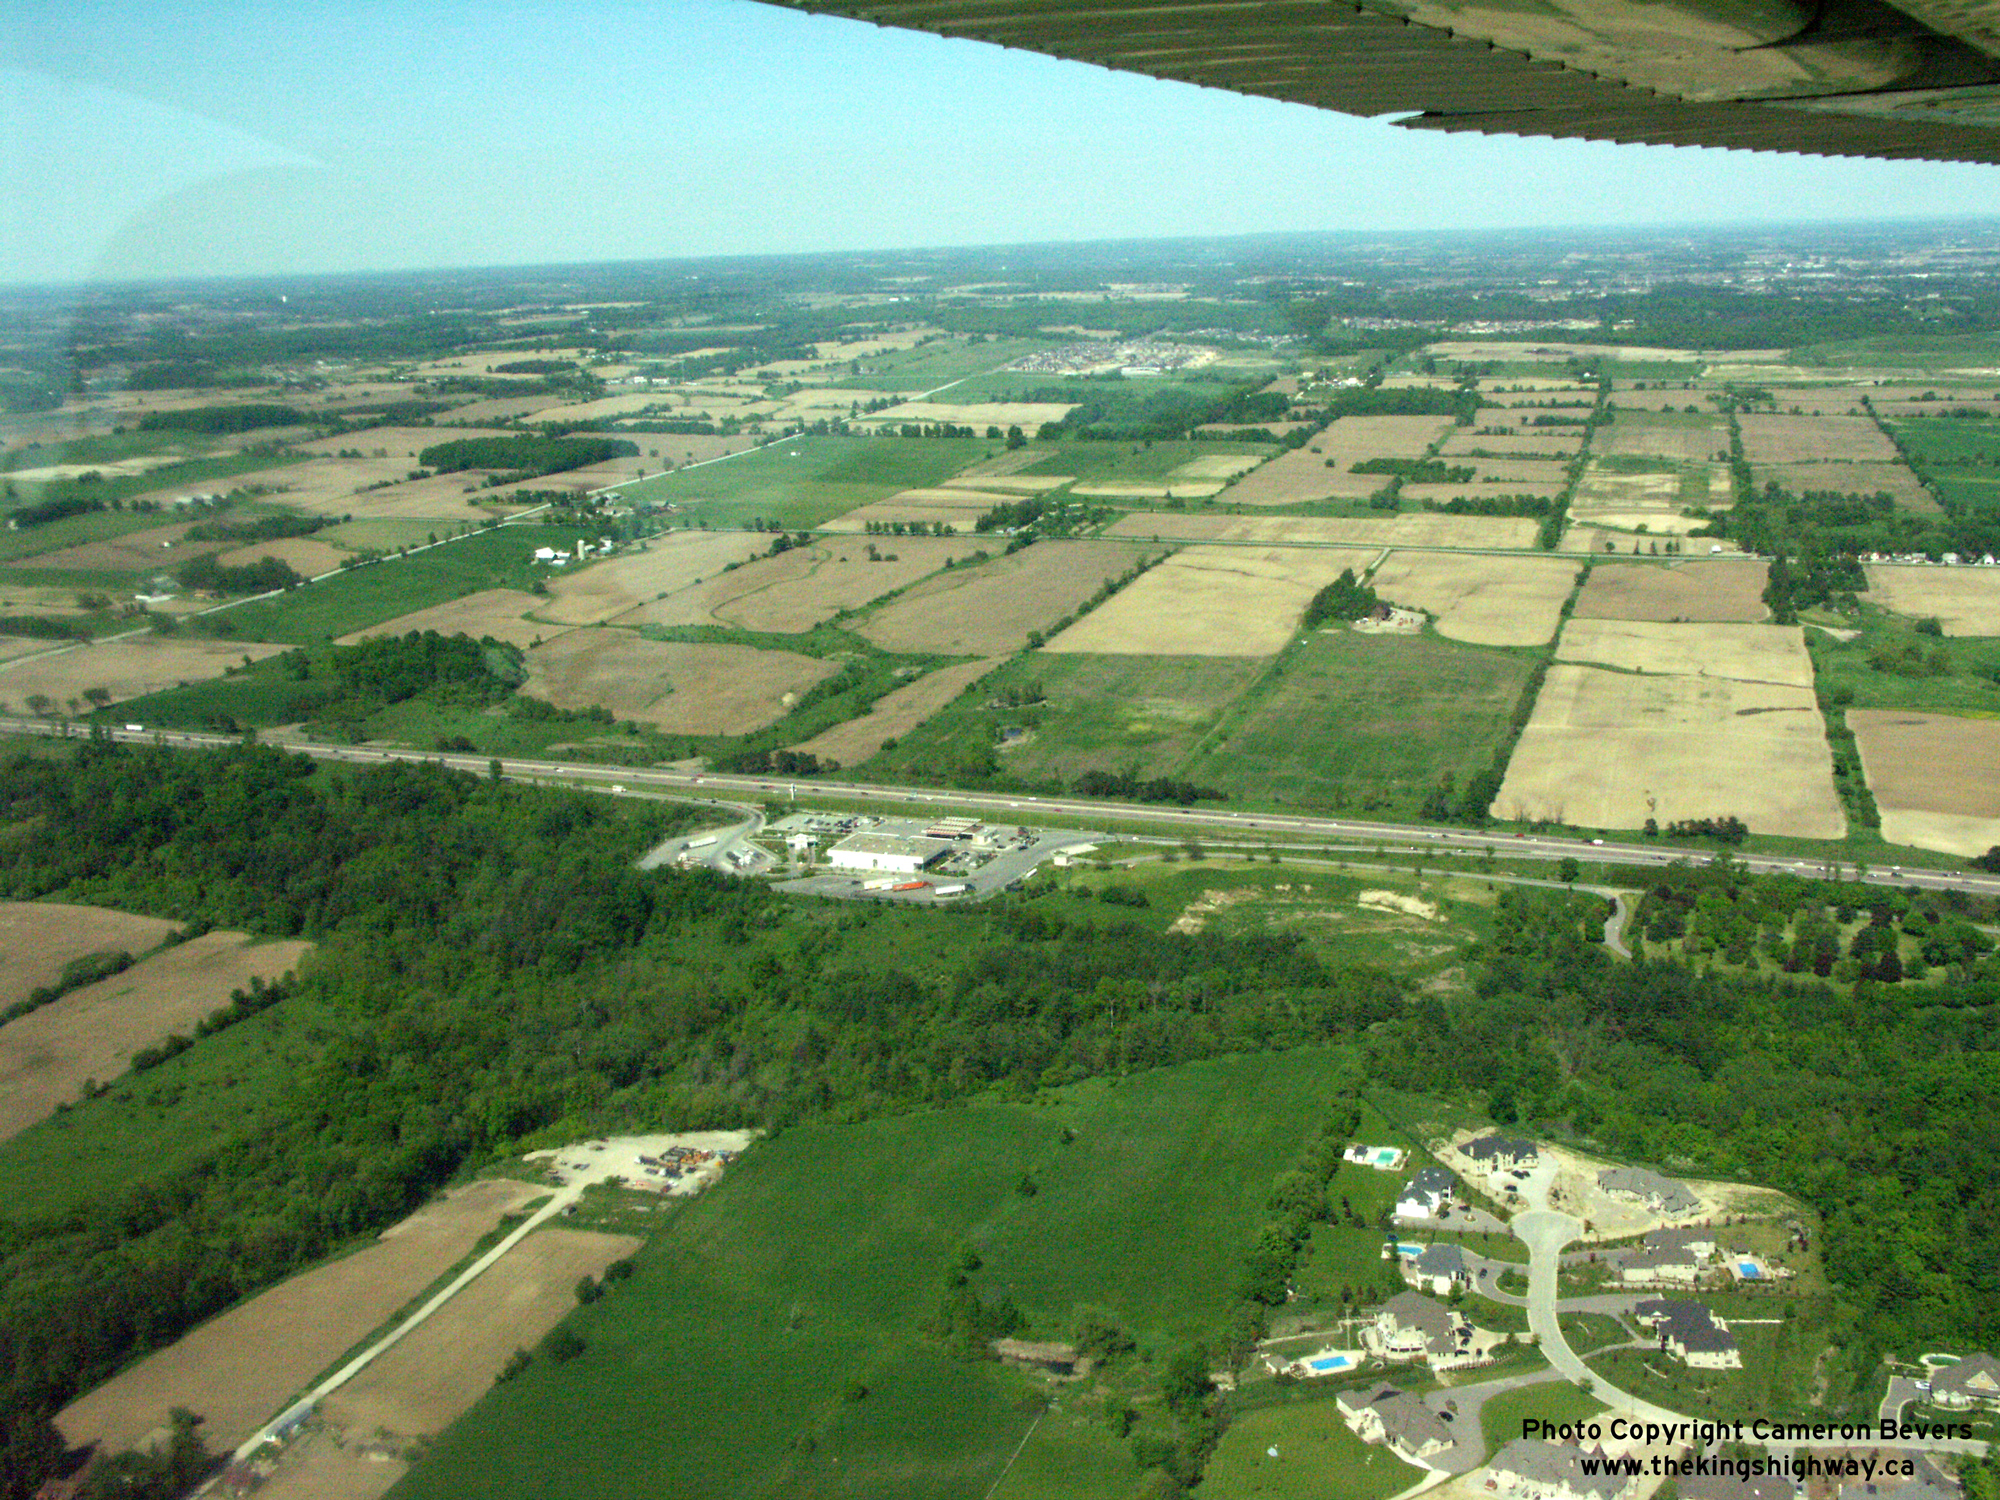
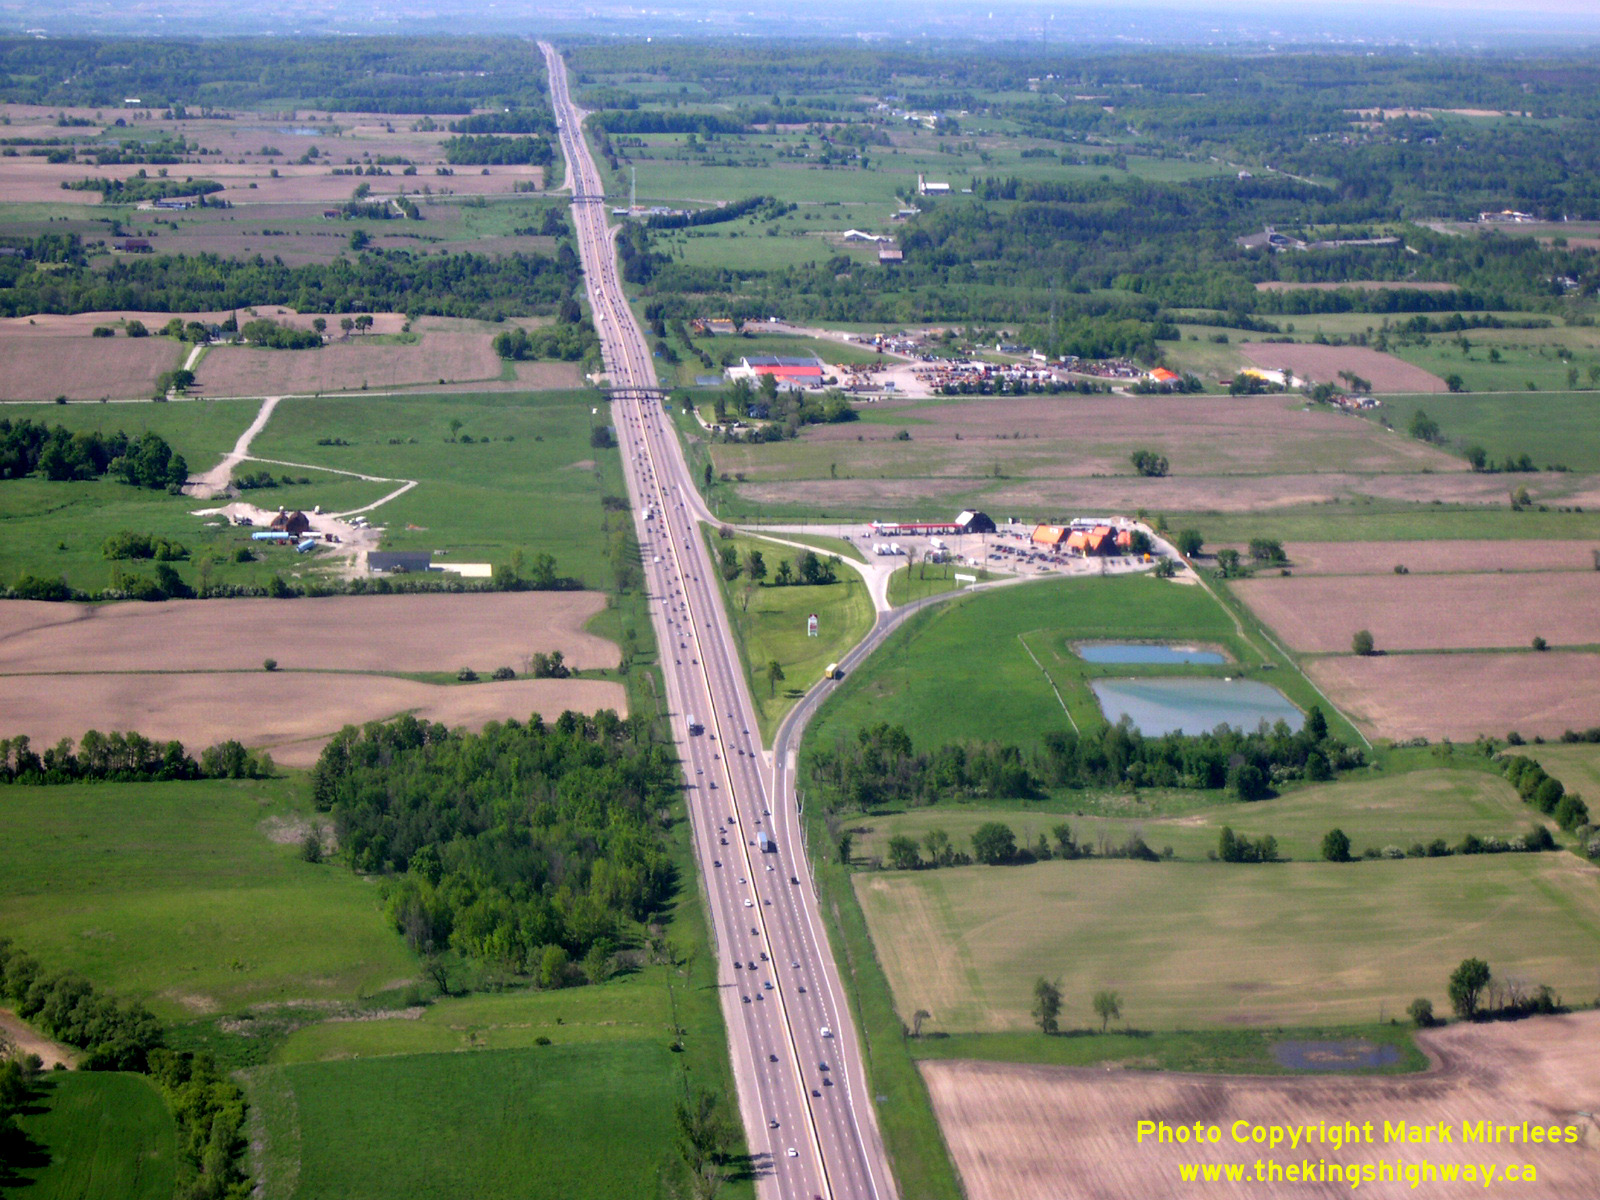
Left - Aerial view of the Southbound King City Service Centre on Hwy 400 near Teston Road. See an
Enlarged Photo Here. (Photograph taken on May 30, 2004 - © Cameron Bevers) Right - Aerial view of the Northbound King City Service Centre on Hwy 400 near King-Vaughan Road. See an Enlarged Photo Here. (Photograph taken on May 30, 2004 - © Mark Mirrlees) 

Left - Unopened Hwy 400 Extension just north of the Hwy 141 Interchange in 2003. The new Hwy 400 Extension from MacTier to Horseshoe Lake opened to traffic
roughly a month after this photo was taken. The Hwy 400 Extension resulted in the completion of Hwy 400 to Parry Sound. See an
Enlarged Photo Here. (Photograph taken on August 31, 2003 - © Cameron Bevers) Right - Facing south towards the Hwy 141 Interchange along an unopened section of the Hwy 400 Extension in 2003. See an Enlarged Photo Here. (Photograph taken on August 31, 2003 - © Cameron Bevers) 

Left - Unopened Hwy 400 Extension facing south towards MacTier from the Hwy 141 Overpass near Horseshoe Lake. See an
Enlarged Photo Here. (Photograph taken on August 31, 2003 - © Cameron Bevers) Right - Facing east along the Hwy 141 Extension from the new Hwy 400 Interchange south of Horseshoe Lake. As a result of the construction of the new Hwy 400 Extension, Hwy 141 was also extended west from Hwy 69 to connect with Hwy 400 in 2003. See an Enlarged Photo Here. (Photograph taken on August 31, 2003 - © Cameron Bevers) 

Left - Unopened Hwy 400 Extension facing north from the Hwy 141 Overpass near Horseshoe Lake. See an
Enlarged Photo Here. (Photograph taken on August 31, 2003 - © Cameron Bevers) Right - Approaching the Hwy 141 Interchange on the unopened Hwy 400 Extension in 2003, facing north. See an Enlarged Photo Here. (Photograph taken on August 31, 2003 - © Cameron Bevers) 

Left - Facing north along the unopened Hwy 400 Extension north of the Hwy 141 Interchange near Horseshoe Lake, about two weeks prior to opening. See an
Enlarged Photo Here. (Photograph taken on September 20, 2003 - © Cameron Bevers) Right - Facing north along the unopened Hwy 400 Extension towards the Blackstone-Crane Lake Road Overpass in 2003. See an Enlarged Photo Here. (Photograph taken on September 20, 2003 - © Cameron Bevers) 

Left - Facing north along the unopened Hwy 400 Extension south of the Blackstone-Crane Lake Road Overpass in 2003. See an
Enlarged Photo Here. (Photograph taken on September 20, 2003 - © Cameron Bevers) Right - New Hwy 400 & Hwy 69 Interchange at Horseshoe Lake in 2003, facing south. The new Hwy 400 Extension had not yet opened to traffic when this photo was taken. All traffic was still using the old alignment of Hwy 69, which can be seen at left. Note the unusual sign in the foreground, advising motorists that Hwy 69 can be used as an alternate route to reach Barrie and Toronto. See an Enlarged Photo Here. (Photograph taken on September 20, 2003 - © Cameron Bevers) 

Left - Facing north at the Hwy 400 & Hwy 69 Interchange at Horseshoe Lake, just prior to new Hwy 400 Extension opening in 2003. See an
Enlarged Photo Here. (Photograph taken on September 20, 2003 - © Cameron Bevers) Right - Facing south along the unopened Hwy 400 Extension from the Hwy 69 Overpass, two weeks prior to opening. The new Hwy 400 Extension was officially opened to traffic between MacTier and Horseshoe Lake on October 7, 2003. The new Hwy 400 Extension shortened the highway distance between MacTier and Parry Sound by about 5 km and significantly reduced traffic congestion on neighbouring Hwy 69. See an Enlarged Photo Here. (Photograph taken on September 20, 2003 - © Cameron Bevers)
Continue on to King's Highway 400 Historical Photos: 2005 to 2009
|
|---|
Links to Adjacent King's Highway Photograph Pages:
Back to Hwy 400 - Historical Photos: 1990-1999
Hwy 400 Photo Index
On to Hwy 400 - Historical Photos: 2005-2009
Back to King's Highway 169 Photos /
King's Highway 400 History /
On to King's Highway 401 Photos
Ontario Highway History - Main Menu / Back to List of Highways Website contents, photos & text © 2002-2026, Cameron
Bevers (Webmaster) - All Rights Reserved / Contact Me
|
|---|