
| 
| |
|
|
This page contains historical and present day photos of Ontario's King's Highway 67. All photographs displayed on this page
were taken by the Webmaster (Cameron Bevers), unless specifically noted otherwise. Historical photographs are arranged in approximate chronological order, while
present day photographs (Year 2000 to date) are arranged by location from south to north. Click on any thumbnail to see a larger image!
Please note that all photographs displayed on this
website are protected by copyright. These photographs must not be reproduced, published,
electronically stored or copied, distributed, or posted onto other websites without
my written permission. If you want to use photos from this website, please
email me first for permission. Thank-you!
|
|---|
|
Historical King's Highway 67 Photographs


Left - New concrete pavement on Hwy 67 near the Hollinger Gold Mine in Timmins. See an
Enlarged Photo Here. Photo taken on October 14, 1939. (Photo courtesy of Ontario Ministry of Transportation - © King's Printer for Ontario, 1939) Right - New concrete pavement on Hwy 67 near Porcupine. See an Enlarged Photo Here. Photo taken on October 14, 1939. (Photo courtesy of Ontario Ministry of Transportation - © King's Printer for Ontario, 1939)   Above - View of Hwy 67 about 1 mile east of Schumacher in 1939, facing east towards Porcupine. During 1938, concrete pavement was constructed along Hwy 67 for
a distance of about 7 miles between Timmins and Porcupine. To my knowledge, this was the only King's Highway ever built in this region of Ontario with a concrete
surface. See an Enlarged Photo Here. Photo taken on October 14, 1939. Above - View of Hwy 67 about 1 mile east of Schumacher in 1939, facing east towards Porcupine. During 1938, concrete pavement was constructed along Hwy 67 for
a distance of about 7 miles between Timmins and Porcupine. To my knowledge, this was the only King's Highway ever built in this region of Ontario with a concrete
surface. See an Enlarged Photo Here. Photo taken on October 14, 1939.(Photo courtesy of Ontario Ministry of Transportation - © King's Printer for Ontario, 1939)  Above - Facing west along Hwy 67 towards Timmins, about 1 mile west of South Porcupine. See an
Enlarged Photo Here. Photo taken in September 1946. Above - Facing west along Hwy 67 towards Timmins, about 1 mile west of South Porcupine. See an
Enlarged Photo Here. Photo taken in September 1946.(Photo courtesy of Ontario Ministry of Transportation - © King's Printer for Ontario, 1946) 
 Left - Placing granular material for shoulders along Hwy 67 between Porquis Junction and Iroquois Falls, Contract #1961-239. See an
Enlarged Photo Here. Photo taken in 1962. Left - Placing granular material for shoulders along Hwy 67 between Porquis Junction and Iroquois Falls, Contract #1961-239. See an
Enlarged Photo Here. Photo taken in 1962.(Photo courtesy of Ontario Ministry of Transportation - © King's Printer for Ontario, 1962) Right - Grading operations along Hwy 67 between Porquis Junction and Iroquois Falls, Contract #1963-113. See an
Enlarged Photo Here. Photo taken in 1963.(Photo courtesy of Ontario Ministry of Transportation - © King's Printer for Ontario, 1963)  Above - Reconstruction of Hwy 67 between the Hwy 610 Junction and the Hwy 101 Junction, Contract #1967-57. See an
Enlarged Photo Here. Photo taken in 1968. Above - Reconstruction of Hwy 67 between the Hwy 610 Junction and the Hwy 101 Junction, Contract #1967-57. See an
Enlarged Photo Here. Photo taken in 1968.(Photo courtesy of Ontario Ministry of Transportation - © King's Printer for Ontario, 1968)  Above - Rolling new hot-mix asphalt pavement on Hwy 67 east of Porquis Junction, Contract #1972-08. See an
Enlarged Photo Here. Photo taken in 1972. Above - Rolling new hot-mix asphalt pavement on Hwy 67 east of Porquis Junction, Contract #1972-08. See an
Enlarged Photo Here. Photo taken in 1972.(Photo courtesy of Ontario Ministry of Transportation - © King's Printer for Ontario, 1972) |
|---|
|
Present Day King's Highway 67 Photographs


Left - Porcupine River Bridge on Former Hwy 67 (Bruce Street) in South Porcupine. See an
Enlarged Photo Here. (Photograph taken on September 3, 2007 - © Cameron Bevers) Right - Facing east along Bruce Street (Former Hwy 67) towards South Porcupine at the Porcupine River Bridge. See an Enlarged Photo Here. (Photograph taken on September 3, 2007 - © Cameron Bevers) 

Left - The Porcupine River Bridge on Former Hwy 67 was built by the Department of Northern Development in the early 1930s. See an
Enlarged Photo Here. (Photograph taken on September 3, 2007 - © Cameron Bevers) Right - Facing west along Bruce Street (Former Hwy 67) towards Timmins at the Porcupine River Bridge. See an Enlarged Photo Here. (Photograph taken on September 3, 2007 - © Cameron Bevers) 

Left - An old abandoned Hwy 67 alignment lies below the current alignment of Hwy 101 near South Porcupine. See an
Enlarged Photo Here. (Photograph taken on August 18, 2003 - © Cameron Bevers) Right - This abandoned alignment of Hwy 67 west of Hoyle was closed to traffic during an expansion of the Pamour Gold Mine, which can be seen in the distance. See an Enlarged Photo Here. (Photograph taken on August 28, 2006 - © Cameron Bevers) 

Left - Old "2 Tracks" and "Stop on Red Signal" signs at the Ontario Northland Railway (ONR) crossing on Old Hwy 67 (Hwy 610) at Hoyle. See an
Enlarged Photo Here. (Photograph taken on August 28, 2006 - © Cameron Bevers) Right - Hwy 101 Junction sign assembly on Old Hwy 67 (Hwy 610) at Hoyle. See an Enlarged Photo Here. (Photograph taken on August 28, 2006 - © Cameron Bevers) 

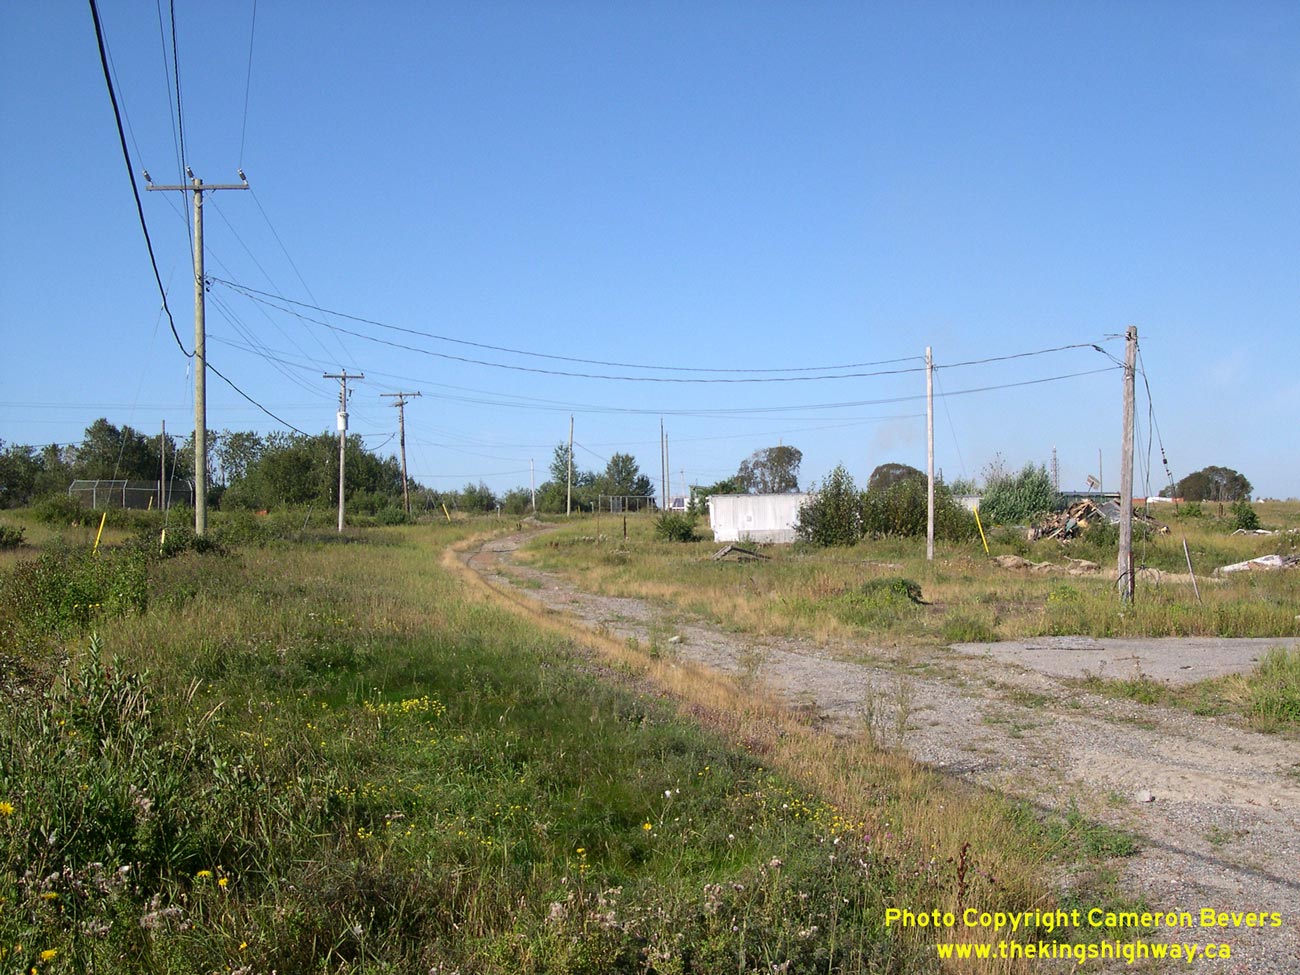
Left - Although it hasn't carried highway traffic in decades, the old route of Hwy 67 at Hoyle is still quite obvious. See an
Enlarged Photo Here. (Photograph taken on August 28, 2006 - © Cameron Bevers) Right - Facing north along Old Hwy 67 (Hwy 610) towards the Porcupine River Bridge from the Hwy 101 Junction at Hoyle. See an Enlarged Photo Here. (Photograph taken on August 28, 2006 - © Cameron Bevers) 

Left - The Porcupine River drifts lazily towards the Old Hwy 67 (Hwy 610) Bridge at Hoyle. See an
Enlarged Photo Here. (Photograph taken on August 28, 2006 - © Cameron Bevers) Right - Facing south along Old Hwy 67 (Hwy 610) across the Porcupine River Bridge at Hoyle. See an Enlarged Photo Here. (Photograph taken on August 28, 2006 - © Cameron Bevers) 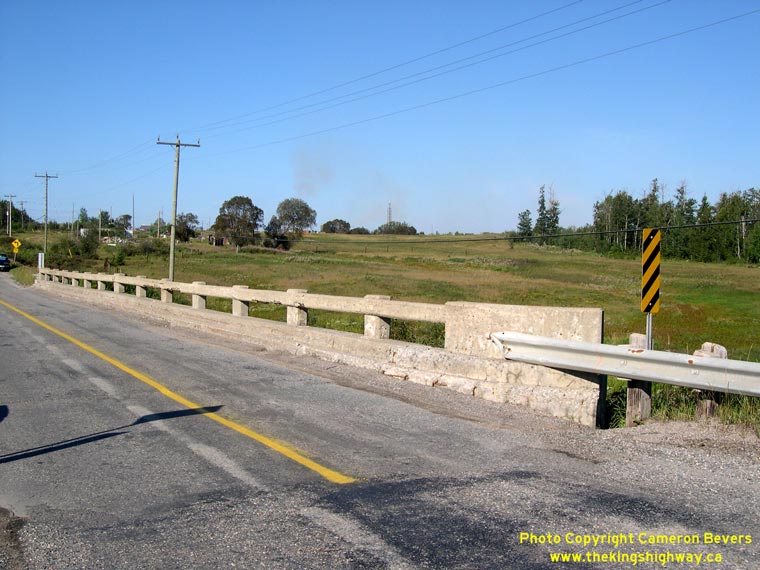

Left - The standard Department of Highways of Ontario (DHO) concrete bar-and-post handrail was used on the Porcupine River Bridge when it was built in 1948.
This handrail was used on many DHO-built bridges on Ontario's King's Highways constructed between 1942 and 1965. See an
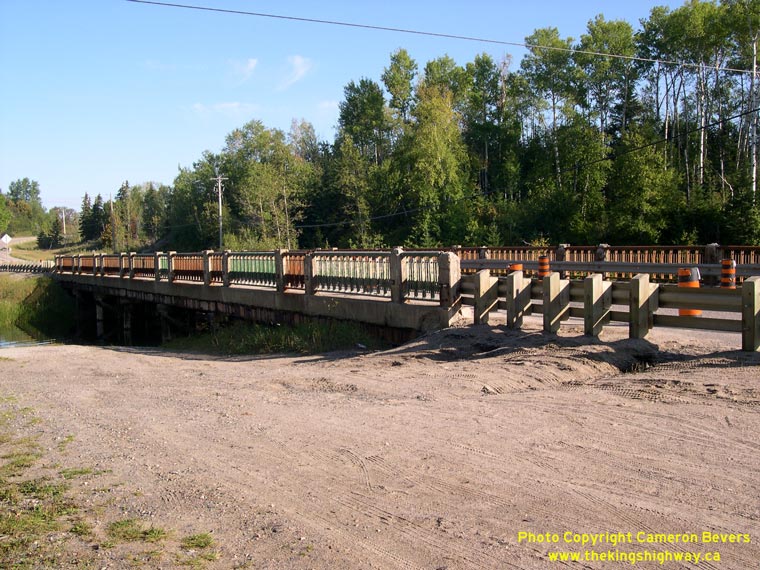
Enlarged Photo Here. (Photograph taken on August 28, 2006 - © Cameron Bevers) Right - Porcupine River Bridge on Old Hwy 67 (Hwy 610) at Hoyle. This two-span concrete rigid frame bridge was completed in 1948. This concrete bridge bypassed a deteriorated timber bridge, which was subsequently demolished. See an Enlarged Photo Here. (Photograph taken on August 28, 2006 - © Cameron Bevers) 

Left - Facing north along Old Hwy 67 (Hwy 610) towards Connaught at the Porcupine River Bridge at Hoyle. See an
Enlarged Photo Here. (Photograph taken on August 28, 2006 - © Cameron Bevers) Right - Green directional sign on Hwy 101 for Former King's Highway 67. Many northern municipalities that received downloaded highways from the Ontario Government in 1997-1998 simply renamed the former highways as "Municipal Road", because they did not have a lower-tier road numbering system in place. In the instance of Former Hwy 67 between Timmins and Iroquois Falls, it would have been a better idea to name the former highway as "Highway 67", since most Timmins-area residents still call this road by its former highway number. See an Enlarged Photo Here. (Photograph taken on August 28, 2006 - © Cameron Bevers) 
Left - Approaching the Hwy 101 and Former Hwy 67 (Municipal Road) Junction east of Hoyle. See an
Enlarged Photo Here. (Photograph taken on August 28, 2006 - © Cameron Bevers) Right - Western side of the Barber's Bay Bridge on Hwy 67 south of Porquis Junction. See an Enlarged Photo Here. (Photograph taken on August 28, 2006 - © Cameron Bevers) 

Left - Facing north along Hwy 67 towards Porquis Junction at the Barber's Bay Bridge. This aging 1930s-era structure was reduced to one lane at the time this
photo was taken, in order to minimize the potential for two concurrent heavy trucks on the bridge at one time. The old Barber's Bay Bridge was replaced by a new
structure in 2009-2010. See an Enlarged Photo Here. (Photograph taken on August 28, 2006 - © Cameron Bevers) Right - Eastern side of the Barber's Bay Bridge on Hwy 67. This 7-span steel beam and timber trestle bridge was completed in 1938, during construction of the new Barber's Bay Cut-Off Highway. See an Enlarged Photo Here. (Photograph taken on August 28, 2006 - © Cameron Bevers) 

Left - The Barber's Bay Bridge on Hwy 67 was one of several steel beam and timber trestle bridges built by the DHO in the Timmins area in the late 1930s. See
an Enlarged Photo Here. (Photograph taken on August 28, 2006 - © Cameron Bevers) Right - Facing south along Hwy 67 towards the Barber's Bay Bridge between Porquis Junction and the Hwy 101 Junction. See an Enlarged Photo Here. (Photograph taken on August 28, 2006 - © Cameron Bevers) 

Left - Below-deck view of the timber trestle bents supporting the Barber's Bay Bridge on Hwy 67. See an
Enlarged Photo Here. (Photograph taken on August 28, 2006 - © Cameron Bevers) Right - Hwy 67 skirts the shores of Barber's Bay on its route north towards Porquis Junction and Iroquois Falls. See an Enlarged Photo Here. (Photograph taken on August 28, 2006 - © Cameron Bevers) 

Left - This former Hwy 67 alignment near Barber's Bay is now a private driveway. See an
Enlarged Photo Here. (Photograph taken on September 4, 2007 - © Cameron Bevers) Right - Facing south along Hwy 67 towards Timmins near Frederickhouse Lake. See an Enlarged Photo Here. (Photograph taken on September 4, 2007 - © Cameron Bevers) 

Left - An abandoned asphalt-surfaced Hwy 67 alignment near Barber's Bay. See an
Enlarged Photo Here. (Photograph taken on September 4, 2007 - © Cameron Bevers) Right - Considerable portions of Hwy 67 between Barber's Bay and Porquis Junction were relocated during the 1950s and 1960s. Many sections of the original highway alignment now lie abandoned in the woods near the present highway. See an Enlarged Photo Here. (Photograph taken on September 4, 2007 - © Cameron Bevers) 

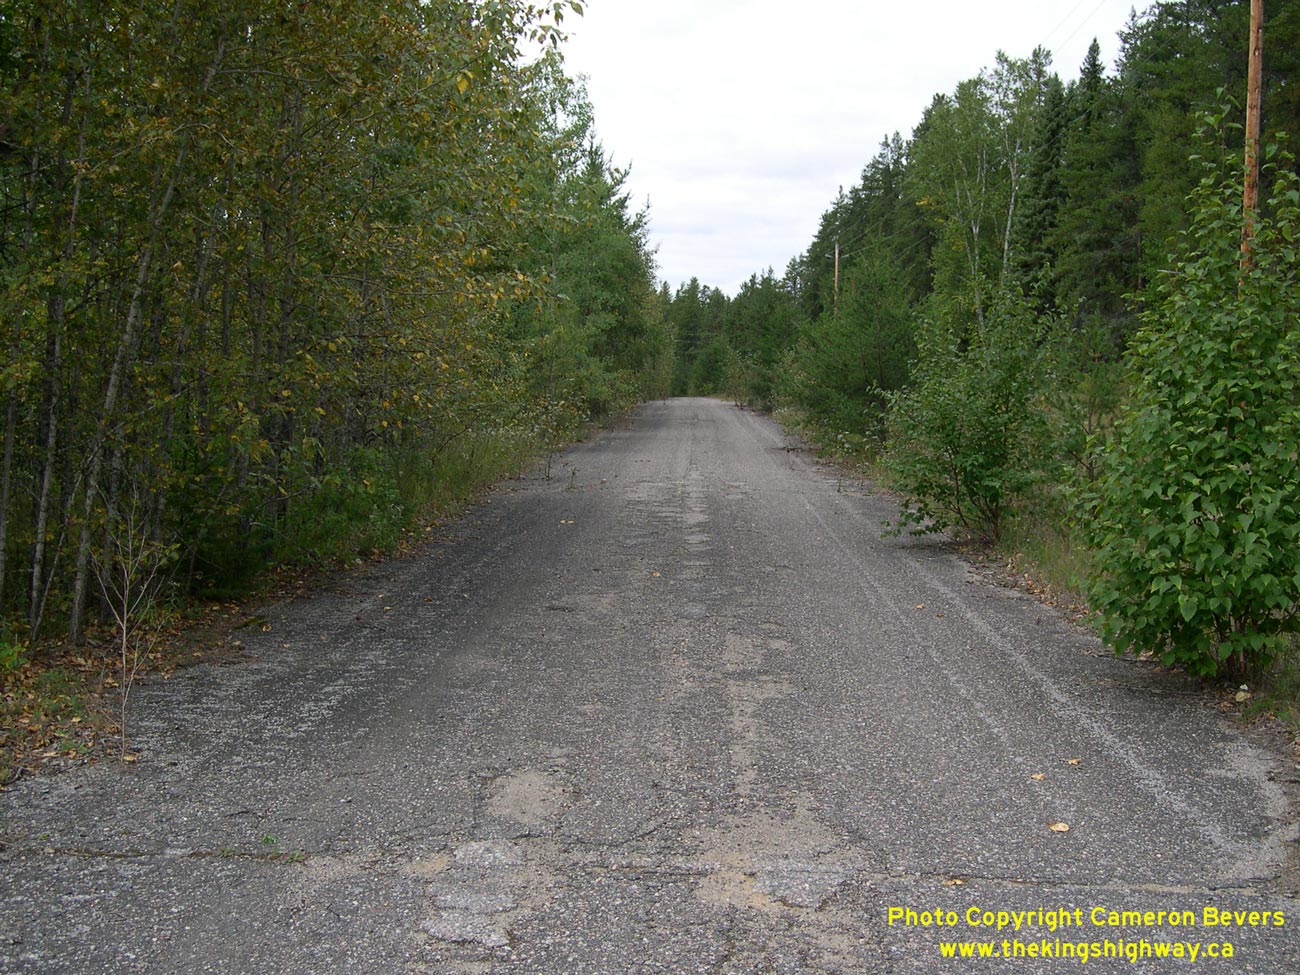
Left - The advancing forest is slowly reclaiming this abandoned Hwy 67 alignment near Barber's Bay. See an
Enlarged Photo Here. (Photograph taken on September 4, 2007 - © Cameron Bevers) Right - This patch of gravel marks the site of an abandoned railway crossing on Hwy 67 between Barber's Bay and Porquis Junction. See an Enlarged Photo Here. (Photograph taken on September 4, 2007 - © Cameron Bevers) 

Left - An abandoned superelevated curve leads to the site of the former railway crossing on Hwy 67. Note the railway cars passing by the overgrown crossing
location at left. The railway crossing was bypassed because motorists on Hwy 67 did not have adequate visibility of the tracks, due to the skewed angle of old
crossing. See an Enlarged Photo Here. (Photograph taken on September 4, 2007 - © Cameron Bevers) Right - Abandoned Hwy 67 alignment leading to the former railway crossing near Porquis Junction. See an Enlarged Photo Here. (Photograph taken on September 4, 2007 - © Cameron Bevers) 

Left - Facing north along the abandoned Hwy 67 alignment towards Porquis Junction. See an
Enlarged Photo Here. (Photograph taken on September 4, 2007 - © Cameron Bevers) Right - Abandoned Hwy 67 alignment near Porquis Junction. This part of the old highway is still used as a forest access road. See an Enlarged Photo Here. (Photograph taken on September 4, 2007 - © Cameron Bevers) 

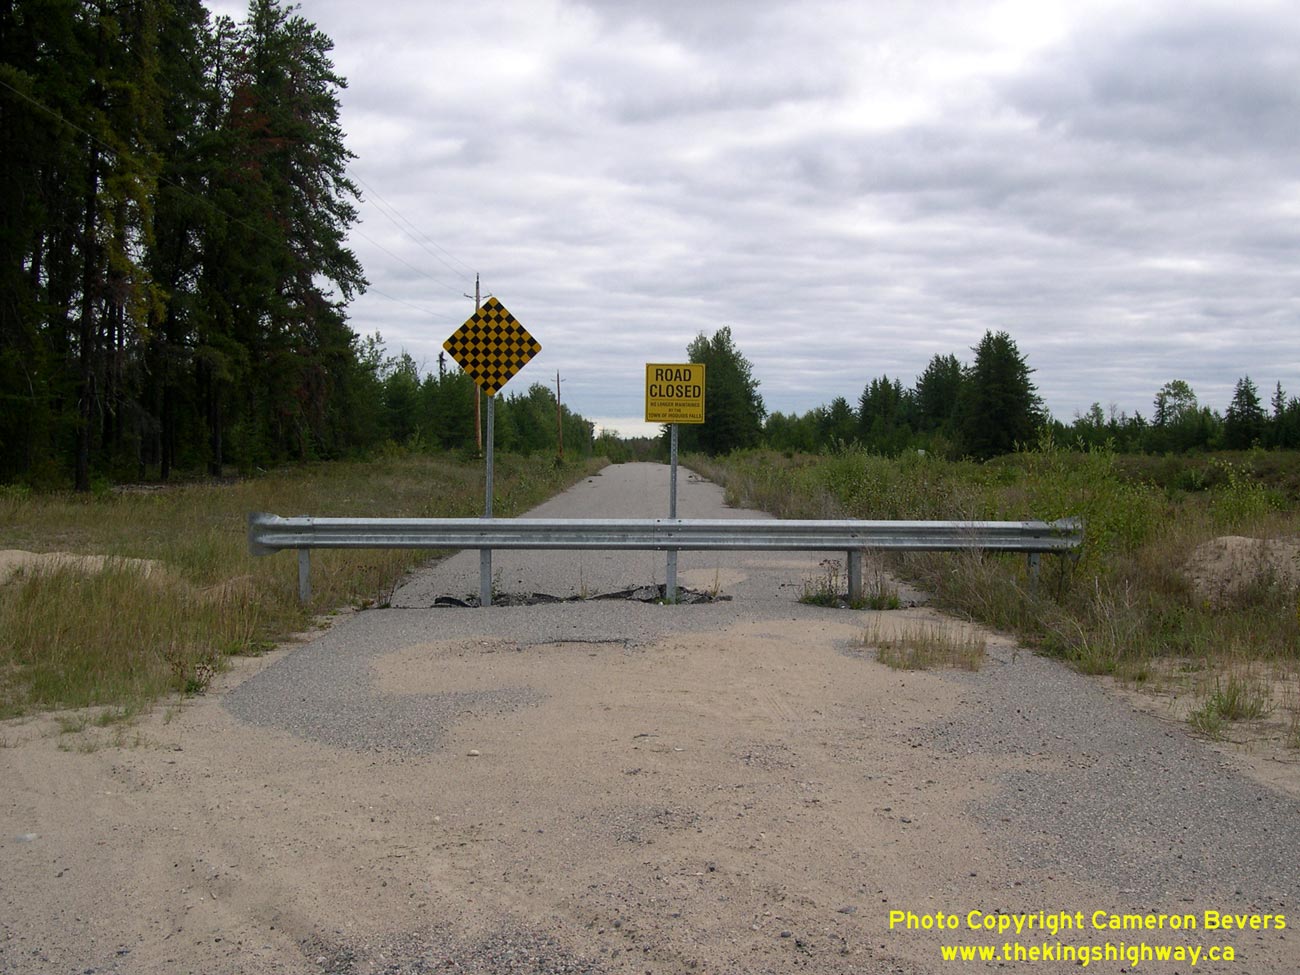
Left - The Town of Iroquois Falls has closed off a section of the old Hwy 67 alignment to through traffic. See an
Enlarged Photo Here. (Photograph taken on September 4, 2007 - © Cameron Bevers) Right - An abandoned Hwy 67 alignment at Porquis Junction. See an Enlarged Photo Here. (Photograph taken on August 18, 2003 - © Cameron Bevers) 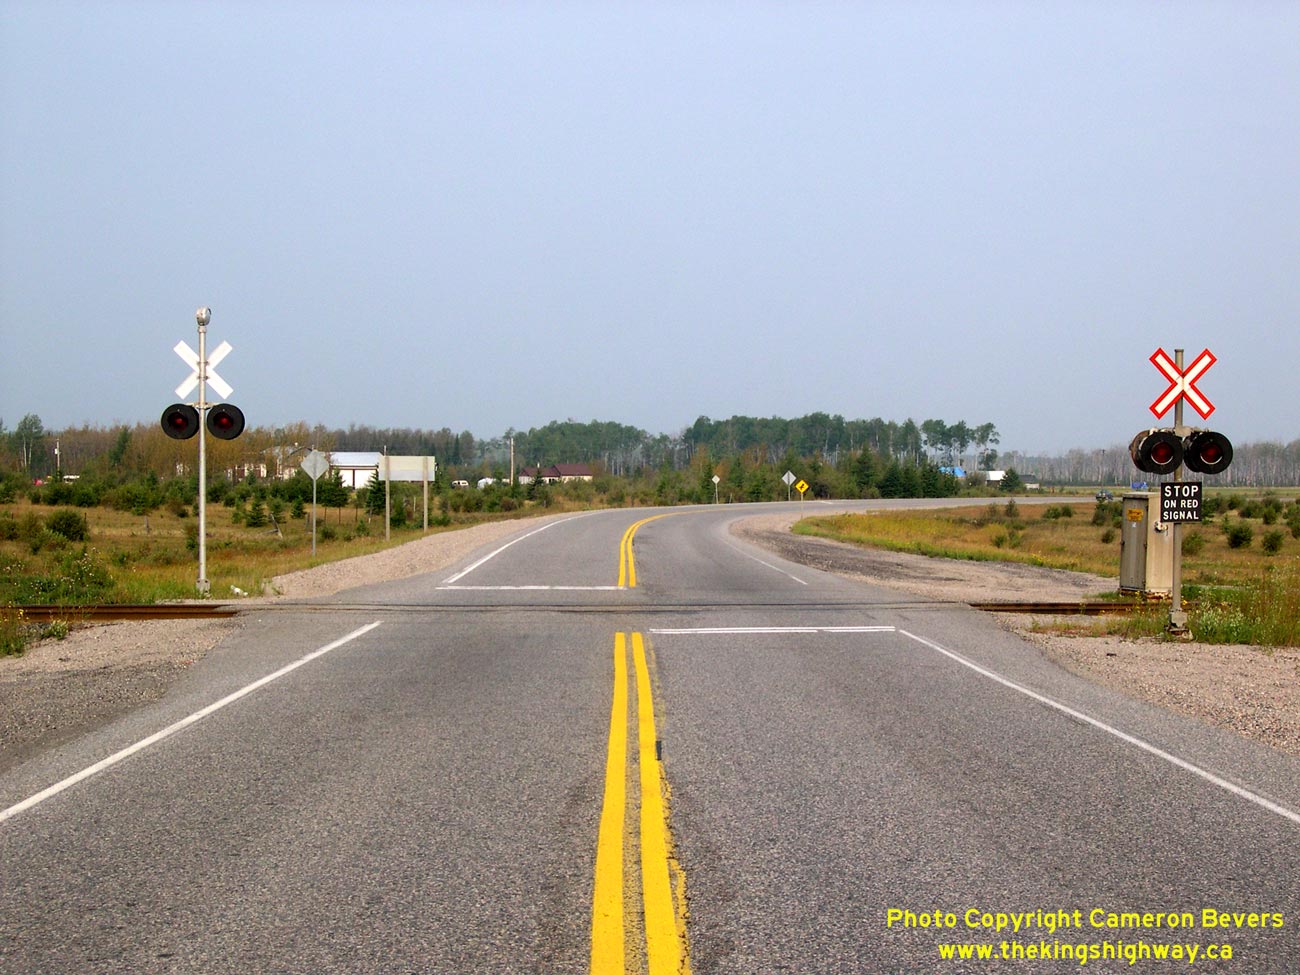

Left - Facing north along Hwy 11 towards the Ontario Northland Railway Crossing at Porquis Junction. See an
Enlarged Photo Here. (Photograph taken on September 6, 2007 - © Cameron Bevers) Right - Green guide sign marking the upcoming Hwy 67 Junction on northbound Hwy 11 at Porquis Junction. Hwy 67 serves at the main access highway into nearby Iroquois Falls. Hwy 11 and Hwy 67 were both established in 1937, when the Department of Highways of Ontario (DHO) took over the Department of Northern Development's trunk road system. See an Enlarged Photo Here. (Photograph taken on August 28, 2006 - © Cameron Bevers) 

Left - Approaching the Hwy 67 Junction on northbound Hwy 11 at Porquis Junction. Prior to 1997, there was both a north and south Hwy 67 Junction along Hwy 11.
The south junction of Hwy 67 led towards Timmins, while the north junction of Hwy 67 led to Iroquois Falls. The route of Hwy 67 overlapped with Hwy 11 for almost 3 km
between these two junctions. See an Enlarged Photo Here. (Photograph taken on August 28, 2006 - © Cameron Bevers) Right - Hwy 11 & Hwy 67 Junction at Porquis Junction, facing north towards Cochrane. See an Enlarged Photo Here. (Photograph taken on August 28, 2006 - © Cameron Bevers) 

Left - Current southern terminus of Hwy 67 at Porquis Junction. Prior to 1997, Hwy 67 turned left and continued south towards Timmins concurrently with Hwy 11.
See an Enlarged Photo Here. (Photograph taken on August 28, 2006 - © Cameron Bevers) Right - Facing north along Hwy 67 towards Iroquois Falls from the Hwy 11 Junction. Iroquois Falls' town centre lies about 10 km northeast of Hwy 11. See an Enlarged Photo Here. (Photograph taken on August 28, 2006 - © Cameron Bevers) 

Left - Old "2 Tracks" sign with glass reflectors on Hwy 67 at the ONR crossing at Porquis Junction. See an
Enlarged Photo Here. (Photograph taken on August 18, 2003 - © Cameron Bevers) Right - An older King's Highway 67 route marker in Iroquois Falls. See an
Enlarged Photo Here.(Photograph taken on August 28, 2006 - © Cameron Bevers)  Above - Remnants of the old junction assembly at the Hwy 67 & Hwy 578 Junction in Iroquois Falls. See an
Enlarged Photo Here. Above - Remnants of the old junction assembly at the Hwy 67 & Hwy 578 Junction in Iroquois Falls. See an
Enlarged Photo Here.(Photograph taken on August 28, 2006 - © Cameron Bevers)
More King's Highway 67 Photographs Coming Soon!
|
|---|
Links to Adjacent King's Highway Photograph Pages:
Back to King's Highway 66 Photos /
King's Highway 67 History /
Back to King's Highway 68 Photos
Ontario Highway History - Main Menu / Back to List of Highways Website contents, photos & text © 2002-2026, Cameron
Bevers (Webmaster) - All Rights Reserved / Contact Me
|
|---|