
| 
| |
|
|
This page contains present day photos (Year 2000 to date) of Ontario's King's Highway 6, arranged by location from Guelph
northerly to Mount Forest. All photographs displayed on this page were taken by the Webmaster
(Cameron Bevers), unless specifically noted otherwise. Click on any thumbnail to see a larger image!
Please note that all photographs displayed on this
website are protected by copyright. These photographs must not be reproduced, published,
electronically stored or copied, distributed, or posted onto other websites without
my written permission. If you want to use photos from this website, please
email me first for permission. Thank-you!
|
|---|
|
Page 10: Present Day King's Highway 6 Photographs (Guelph to Mount Forest)


Left - Approaching the northern entrance to Guelph on Hwy 6 (Woolwich Street), facing south towards Woodlawn Road. The route of Hwy 6 turns right onto Woodlawn
Road and briefly heads west across Guelph to join the Hanlon Parkway (Hwy 6 & Hwy 7). With the exception of the provincially-owned Hanlon Parkway, all sections
of Hwy 6 within the limits of the City of Guelph are under municipal jurisdiction. Provincial jurisdiction over Hwy 6 resumes where Woolwich Street passes the city
limits near this point, just north of Woodlawn Road. See an Enlarged Photo Here. (Photograph taken in October 11, 2015 - © Cameron Bevers) Right - Facing north along Hwy 6 towards Fergus, departing from Guelph. For about 4 km north of Guelph, Hwy 6 has a four-lane cross section with a painted centre median strip. This section of Hwy 6 was initially a two-lane highway, but it was widened to its current four-lane cross section during a highway improvement project that was carried out in 1999. See an Enlarged Photo Here. (Photograph taken in October 11, 2015 - © Cameron Bevers) 

Left - This "Stop for School Bus" sign is located on the four-lane section of Hwy 6 just north of Guelph. Signs such as this one are in place along most
four-lane highways without a physical median barrier to remind motorists that they have a legal obligation to stop for all school buses with their signal lights
flashing and the Stop sign displayed, regardless of which direction the school bus is travelling. See an
Enlarged Photo Here. (Photograph taken in October 11, 2015 - © Cameron Bevers) Right - Distance guide sign on northbound Hwy 6 departing Guelph. Although Owen Sound is shown as the most distant control city on this sign, the route of Hwy 6 continues well beyond Owen Sound. After travelling up the Bruce Peninsula to Tobermory, Hwy 6 crosses Georgian Bay via a seasonal ferry to Manitoulin Island. See an Enlarged Photo Here. (Photograph taken in October 11, 2015 - © Cameron Bevers) 

Left - View of Hwy 6 about 1 km north of Guelph, facing north towards Fergus. Hwy 6 is one of Ontario's most important King's Highways and is quite
heavily-travelled in places. This highway has been in service since 1920, when the Department of Public Highways of Ontario (DPHO) first assumed jurisdiction over
the road between Hamilton and Owen Sound. See an Enlarged Photo Here. (Photograph taken in October 11, 2015 - © Cameron Bevers) Right - This gradual horizontal curve on Hwy 6 located about 2 km north of Guelph exhibits a rather deceiving appearance of a diminishing radius as the highway approaches the crest of this grade. In reality, the radius is perfectly consistent throughout the entire length of the horizontal curve. It is the change in the highway's vertical grade along the curve which contributes to this optical illusion of a diminishing radius. See an Enlarged Photo Here. (Photograph taken in October 11, 2015 - © Cameron Bevers) 

Left - Guelph's urban skyline appears on the horizon as Hwy 6 descends this grade near Marden. Downtown Guelph lies about 5 km ahead, via Woolwich
Street. See an Enlarged Photo Here. (Photograph taken in October 11, 2015 - © Cameron Bevers) Right - Facing north along Hwy 6 towards the community of Marden, located about 3 km north of Guelph. Wellington Road 30 intersects with Hwy 6 at a signalized intersection in the centre of Marden. Wellington Road 30 heads west from Marden towards Maryhill, which is located in the Regional Municipality of Waterloo. See an Enlarged Photo Here. (Photograph taken in October 11, 2015 - © Cameron Bevers) 

Left - Approaching Marden on Hwy 6, facing south towards Guelph. See an
Enlarged Photo Here. (Photograph taken in October 11, 2015 - © Cameron Bevers) Right - This pleasant rural scene can be found along Hwy 6 about 4 km north of Guelph. See an Enlarged Photo Here. (Photograph taken in October 11, 2015 - © Cameron Bevers) 

Left - Approaching the Wellington Road 7 Junction on Hwy 6, facing north towards Fergus. Wellington Road 7 is an important and well-travelled county road which
connects to Elora and ultimately, Teviotdale. Motorists bound for Harriston and Walkerton from Guelph will find that the route offered by Wellington Road 7 is far
shorter than any of the provincial highway connections between these centres. Not surprisingly, Wellington Road 7 is one of the busiest roads in Wellington County's
road network. See an Enlarged Photo Here. (Photograph taken in October 11, 2015 - © Cameron Bevers) Right - Facing south along Hwy 6 about 5 km north of Guelph, approaching the Wellington Road 7 Junction. The highway narrows from four to two lanes at the junction. See an Enlarged Photo Here. (Photograph taken in October 11, 2015 - © Cameron Bevers) 

Left - Facing south along Hwy 6 approaching the Wellington County Road 38 (Victoria Road) Junction, about 6 km north of Guelph. Southbound motorists on Hwy 6
who are destined to travel east along Hwy 7 from the Guelph area towards Acton will find that Victoria Road is a very convenient cut-off route, since it bypasses
Downtown Guelph altogether. See an Enlarged Photo Here. (Photograph taken in October 11, 2015 - © Cameron Bevers) Right - Approaching Cox Creek on Hwy 6, facing north about 9 km north of Guelph. A southbound passing lane was built up this grade along Hwy 6. See an Enlarged Photo Here. (Photograph taken in October 11, 2015 - © Cameron Bevers) 

Left - The route of Hwy 6 through most of Wellington County curves its way through small hills and valleys such as this scene near Cox Creek. This terrain
treats motorists to sweeping rural vistas, which makes this section of Hwy 6 a rather pleasant drive. The southbound passing lane along Hwy 6 begins south of the
nearby community of Ennotville. See an Enlarged Photo Here. (Photograph taken in October 11, 2015 - © Cameron Bevers) Right - Facing north along Hwy 6 approaching the community of Ennotville, located about 5 km south of Fergus. See an Enlarged Photo Here. (Photograph taken in October 11, 2015 - © Cameron Bevers) 

Left - Approaching Ennotville on Hwy 6, facing south towards Guelph. In the upper left corner, a solitary yellow autumn leaf blows in the wind - a sign that
yet another season of my Ontario Highway photography is coming to an end! As visitors may have gathered from my website content, I rarely photograph Ontario's Highways
during the winter months. See an Enlarged Photo Here. (Photograph taken in October 11, 2015 - © Cameron Bevers) Right - Brilliant autumn colours along Hwy 6, just north of Ennotville. See an Enlarged Photo Here. (Photograph taken in October 11, 2015 - © Cameron Bevers) 

Left - A northbound passing lane appears along Hwy 6 north of Ennotville. Passing lanes such as this offer motorists assured passing opportunities on busy
two-lane highways. Passing lanes are especially beneficial on curvy highways such as Hwy 6, where a series of horizontal curves can severely restrict the number of
safe passing opportunities available. See an Enlarged Photo Here. (Photograph taken in October 11, 2015 - © Cameron Bevers) Right - Facing south along Hwy 6 from the Ennotville Truck Inspection Station, located about 3 km south of Fergus. See an Enlarged Photo Here. (Photograph taken in October 11, 2015 - © Cameron Bevers) 
Left - Facing north along Hwy 6 towards Fergus from the Ennotville Truck Inspection Station. Unlike some of the permanent truck scales seen along the
400-Series Highways, these truck lay-by areas are used for periodic commercial vehicle enforcement by the Ministry of Transportation of Ontario (MTO). The truck
lay-by area also serves as a roadside rest area whenever commercial vehicle enforcement activities are not taking place. See an
Enlarged Photo Here. (Photograph taken in October 11, 2015 - © Cameron Bevers) Right - Facing north along Hwy 6 approaching the southern entrance to Fergus. See an Enlarged Photo Here. (Photograph taken in October 11, 2015 - © Cameron Bevers) 

Left - Facing south along Hwy 6 towards Guelph from the southern entrance to Fergus. See an
Enlarged Photo Here. (Photograph taken in October 11, 2015 - © Cameron Bevers) Right - Sign marking the urbanized limits of Fergus. The route of Hwy 6 through Fergus is a non-assumed section of the King's Highway. Typically, provincial jurisdiction over a King's Highway will terminate at the entrances to a village, town or city. Day-to-day maintenance of the highway through these urbanized areas is the responsibility of the municipality. See an Enlarged Photo Here. (Photograph taken in October 11, 2015 - © Cameron Bevers) 

Left - Hwy 6 continues into Fergus as Tower Street. Most of Fergus' commercial development is located at the south entrance to the town on Tower Street. See
an Enlarged Photo Here. (Photograph taken in October 11, 2015 - © Cameron Bevers) Right - Facing north along Tower Street (Hwy 6) from Belsyde Avenue in Fergus. Belsyde Avenue forms part of an important county road link between Orangeville and Fergus (Wellington Road 18 and Dufferin Road 3), which is more commonly referred to as the Orangeville-Fergus Road. See an Enlarged Photo Here. (Photograph taken in October 11, 2015 - © Cameron Bevers) 

Left - Facing north along Tower Street approaching Bridge Street in Fergus. The route of Hwy 6 turns right at Bridge Street, as indicated by the large Hwy 6
sign at right. See an Enlarged Photo Here. (Photograph taken in October 11, 2015 - © Cameron Bevers) Right - Intersection of Bridge Street & Union Avenue on Tower Street (Hwy 6) in Fergus, facing northeast. This complicated five-leg intersection is controlled by a single set of traffic signals. The fifth leg of the intersection (the east leg of Union Street West) accommodates one-way traffic heading eastbound only. Westbound traffic on Union Street is diverted to a separate Stop-controlled intersection on Bridge Street a short distance to the east. Northbound Hwy 6 traffic turns right from Tower Street onto Bridge Street at this intersection. The red car in this photo is turning left (southbound) along Hwy 6 from Bridge Street onto Tower Street. See an Enlarged Photo Here. (Photograph taken in October 11, 2015 - © Cameron Bevers) 

Left - Facing south along Bridge Street (Hwy 6) at the intersection with Tower Street and Union Street in Fergus. Southbound traffic must turn left in order to
continue south along Hwy 6 towards Guelph. Traffic continuing straight ahead will end up on Union Street heading west towards Elora. See an
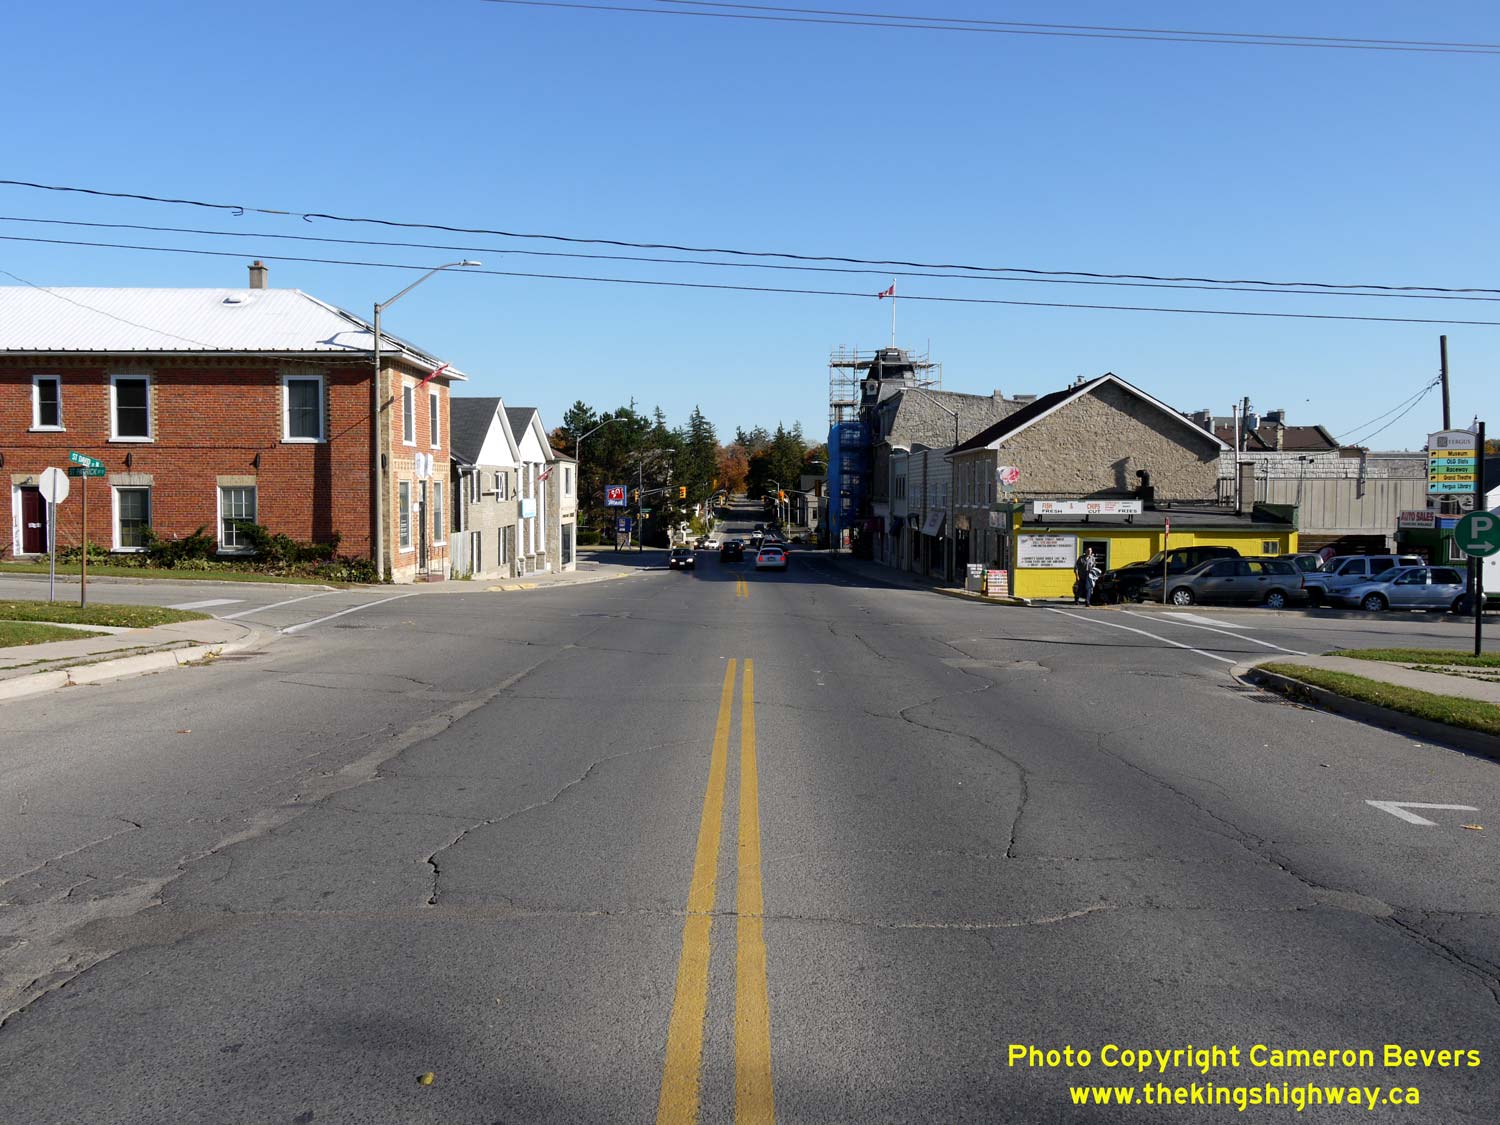
Enlarged Photo Here. (Photograph taken in October 11, 2015 - © Cameron Bevers) Right - Approaching St. David Street on Bridge Street (Hwy 6) in Downtown Fergus, facing northeast. At the traffic signals at St. David Street, the route of Hwy 6 turns left and continues north towards Arthur, Mount Forest and Owen Sound. See an Enlarged Photo Here. (Photograph taken in October 11, 2015 - © Cameron Bevers) 

Left - Intersection of Bridge Street and St. David Street (Hwy 6) in Downtown Fergus, facing north towards the Grand River Bridge. See an
Enlarged Photo Here. (Photograph taken in October 11, 2015 - © Cameron Bevers) Right - Facing south along St. David Street (Hwy 6) from the Grand River Bridge in Fergus. At Bridge Street, southbound traffic on Hwy 6 turns right and cuts across to Tower Street, which lies one block to the west. The beautiful stone facade of the Fergus Marketplace building can be seen at right. Fergus has many attractive 19th Century stone buildings. See an Enlarged Photo Here. (Photograph taken in October 11, 2015 - © Cameron Bevers) 

Left - A pair of older King's Highway 6 route markers on St. David Street in Downtown Fergus. See an
Enlarged Photo Here. (Photograph taken in October 11, 2015 - © Cameron Bevers) Right - Hwy 6 junction crown sign and North/South directional tab on St. Andrew Street approaching St. David Street (Hwy 6) in Downtown Fergus. See an Enlarged Photo Here. (Photograph taken in October 11, 2015 - © Cameron Bevers) 

Left - Grand River Bridge on Hwy 6 (St. David Street) in Downtown Fergus, facing north towards St. Andrew Street. See an
Enlarged Photo Here. (Photograph taken in October 11, 2015 - © Cameron Bevers) Right - Side view of the Grand River Bridge on Hwy 6 (St. David Street) in Downtown Fergus. This single-span prestressed concrete slab structure was completed in 1968. It replaced an earlier concrete bridge that was built by the Department of Public Highways back in 1924. The St. David Street Bridge seen here was replaced with a new structure in 2018-2019. See an Enlarged Photo Here. (Photograph taken in October 11, 2015 - © Cameron Bevers) 
Left - Facing south across the Grand River Bridge on St. David Street (Hwy 6) in Downtown Fergus. See an
Enlarged Photo Here. (Photograph taken in October 11, 2015 - © Cameron Bevers) Right - Approaching Downtown Fergus on St. David Street (Hwy 6), facing south near St. Patrick Street. See an Enlarged Photo Here. (Photograph taken in October 11, 2015 - © Cameron Bevers) 

Left - Facing north along Hwy 6 (St. David Street) near St. Patrick Street, departing Downtown Fergus. See an
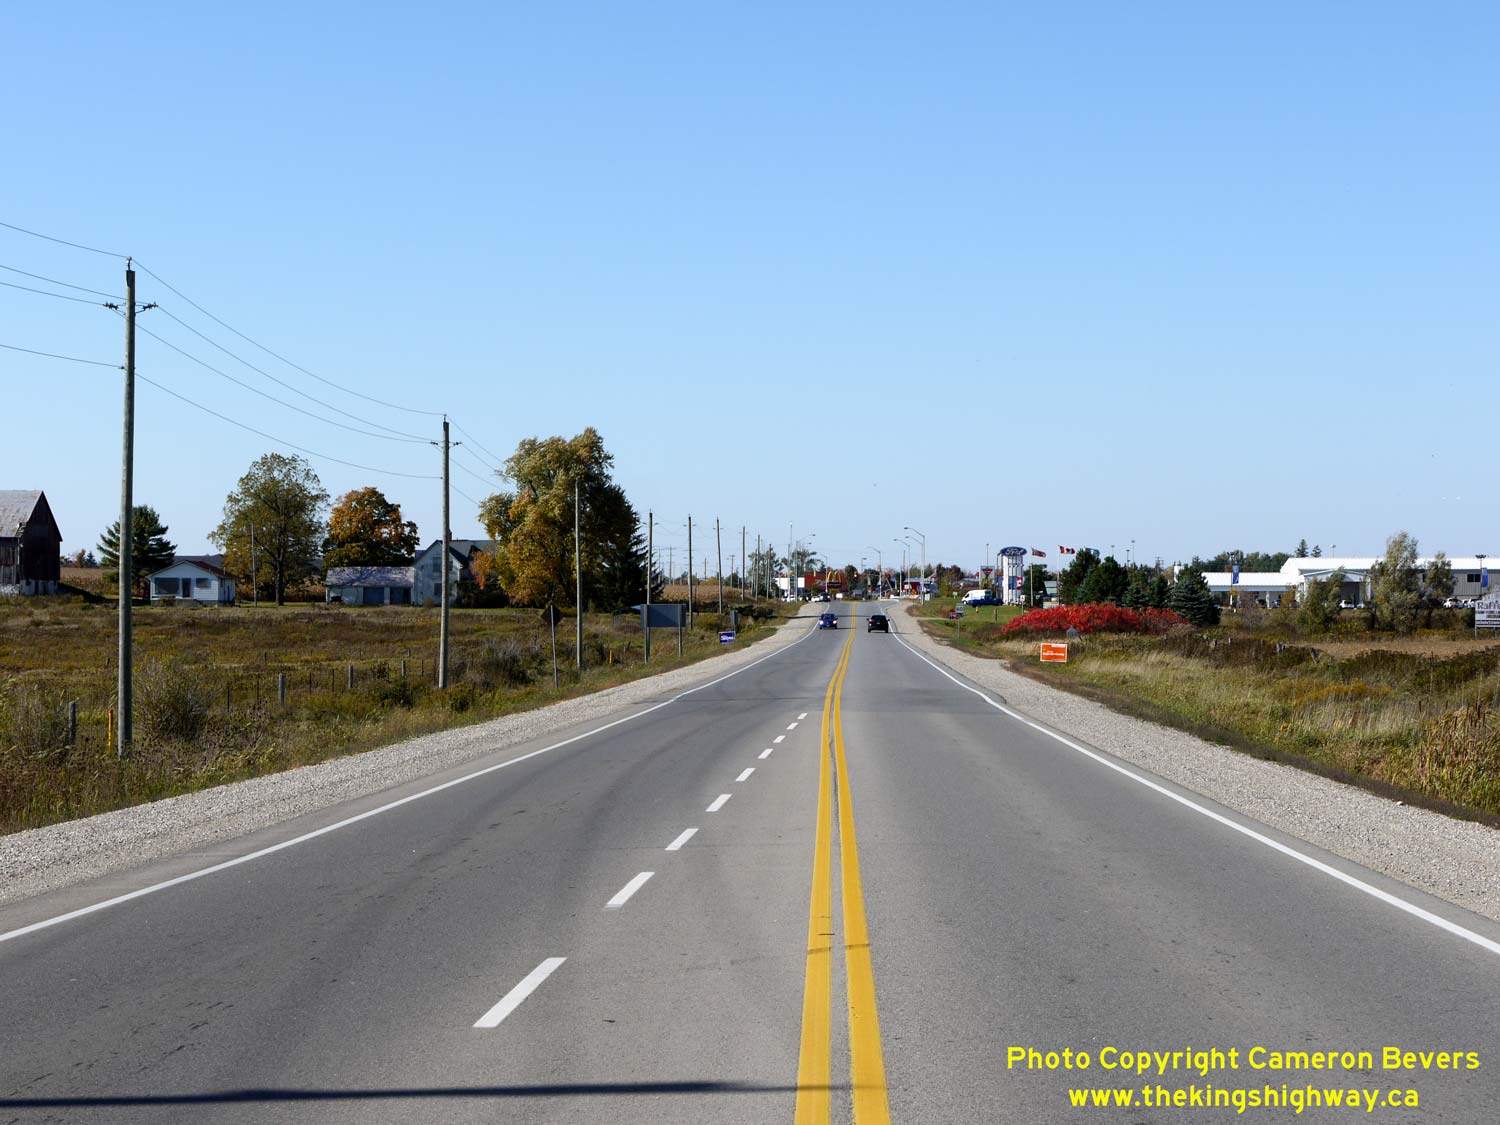
Enlarged Photo Here. (Photograph taken in October 11, 2015 - © Cameron Bevers) Right - Northern entrance to Fergus on Hwy 6 at Nichol Township Side Road 18, facing south. In recent years, a sizeable commercial district has developed along St. David Street (Hwy 6) at the northern entrance to Fergus. Provincial jurisdiction over Hwy 6 resumes at Nichol Township Side Road 19, located about 400 metres to the south. See an Enlarged Photo Here. (Photograph taken in October 11, 2015 - © Cameron Bevers) 
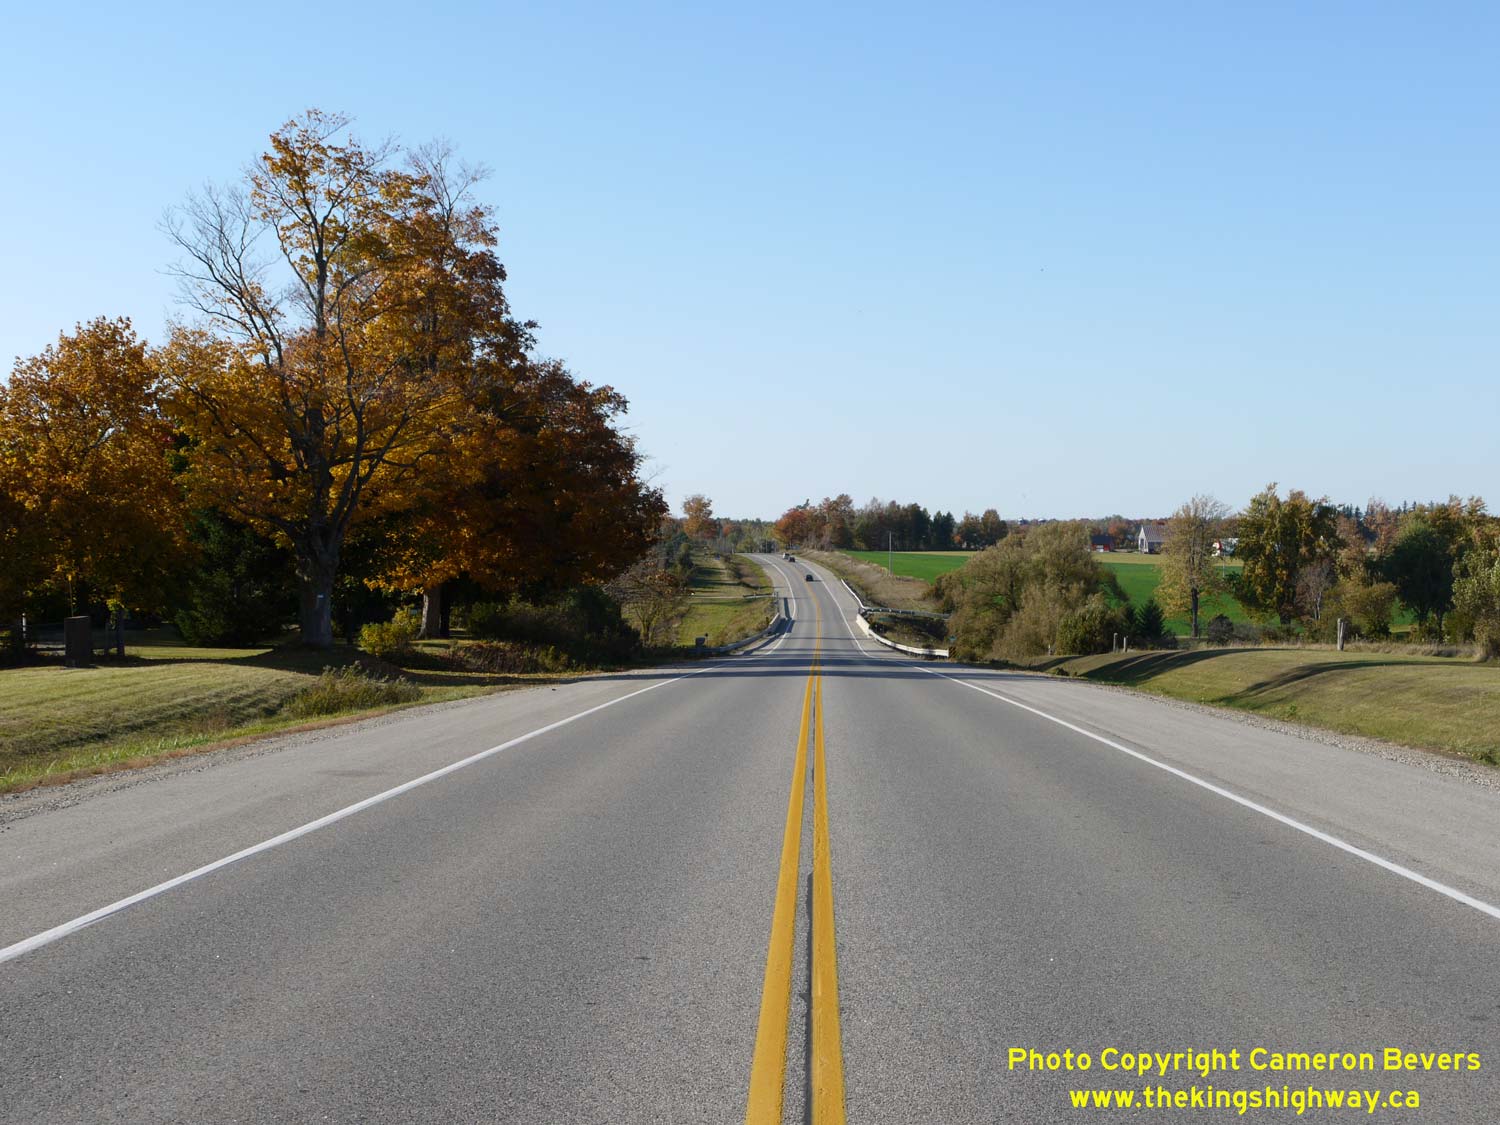
Left - Distance guide sign on northbound Hwy 6 departing Fergus. See an
Enlarged Photo Here. (Photograph taken in October 11, 2015 - © Cameron Bevers) Right - Approaching Irvine Creek on Hwy 6, facing north towards Arthur. See an Enlarged Photo Here. (Photograph taken in October 11, 2015 - © Cameron Bevers) 

Left - Facing south across the Irvine River Bridge on Hwy 6, located about 5 km north of Fergus. The Ministry of Transportation's official name for this
structure is the "Irvine River Bridge", as reflected on the highway sign at right. Locally, however, this watercourse is referred to as "Irvine Creek". See an
Enlarged Photo Here. (Photograph taken in October 11, 2015 - © Cameron Bevers) Right - Western side of the Irvine River Bridge on Hwy 6. This three-span continuous steel girder structure was completed in 1964. See an Enlarged Photo Here. (Photograph taken in October 11, 2015 - © Cameron Bevers) 

Left - Facing north towards Arthur at the Irvine River Bridge on Hwy 6. See an
Enlarged Photo Here. (Photograph taken in October 11, 2015 - © Cameron Bevers) Right - Eastern side of the Irvine River Bridge on Hwy 6 north of Fergus. See an Enlarged Photo Here. (Photograph taken in October 11, 2015 - © Cameron Bevers) 

Left - Wood's Creek Culvert on Hwy 6 north of Fergus. This new structural culvert was completed in 2007. It replaced a much older culvert that was built in
1930. See an Enlarged Photo Here. (Photograph taken in July 13, 2008 - © Cameron Bevers) Right - Structure identification number and date stamp (2007) on the Wood's Creek Culvert north of Fergus. See an Enlarged Photo Here. (Photograph taken in July 13, 2008 - © Cameron Bevers) 

Left - Facing north along Hwy 6 towards the Wood's Creek Culvert on Hwy 6 between Fergus and Arthur. See an
Enlarged Photo Here. (Photograph taken in July 13, 2008 - © Cameron Bevers) Right - Facing south along Hwy 6 towards Fergus from Wood's Creek. See an Enlarged Photo Here. (Photograph taken in July 13, 2008 - © Cameron Bevers) 
Left - Inscription on an old Hwy 6 culvert north of Fergus near Wellington Road 17 - "THE KING'S HIGHWAY 1933". See an
Enlarged Photo Here. (Photograph taken on November 22, 2003 - © Cameron Bevers) Right - This old culvert and embankment indicate a long-abandoned alignment of Hwy 6 north of Fergus. See an Enlarged Photo Here. (Photograph taken on November 22, 2003 - © Cameron Bevers) 

Left - Newly-paved section on Hwy 6 north of Wellington Road 17, between Fergus and Arthur. See an
Enlarged Photo Here. (Photograph taken in July 13, 2008 - © Cameron Bevers) Right - Facing south along Hwy 6 towards Fergus near Side Road 19. See an Enlarged Photo Here. (Photograph taken in July 13, 2008 - © Cameron Bevers) 

Left - Facing north along Hwy 6 towards Arthur near Side Road 18, showing a newly-paved section of the highway. See an
Enlarged Photo Here. (Photograph taken in July 13, 2008 - © Cameron Bevers) Right - Facing north along Hwy 6 towards Mount Forest at the Farley's Creek Bridge near Arthur. See an Enlarged Photo Here. (Photograph taken in May 16, 2004 - © Cameron Bevers) 

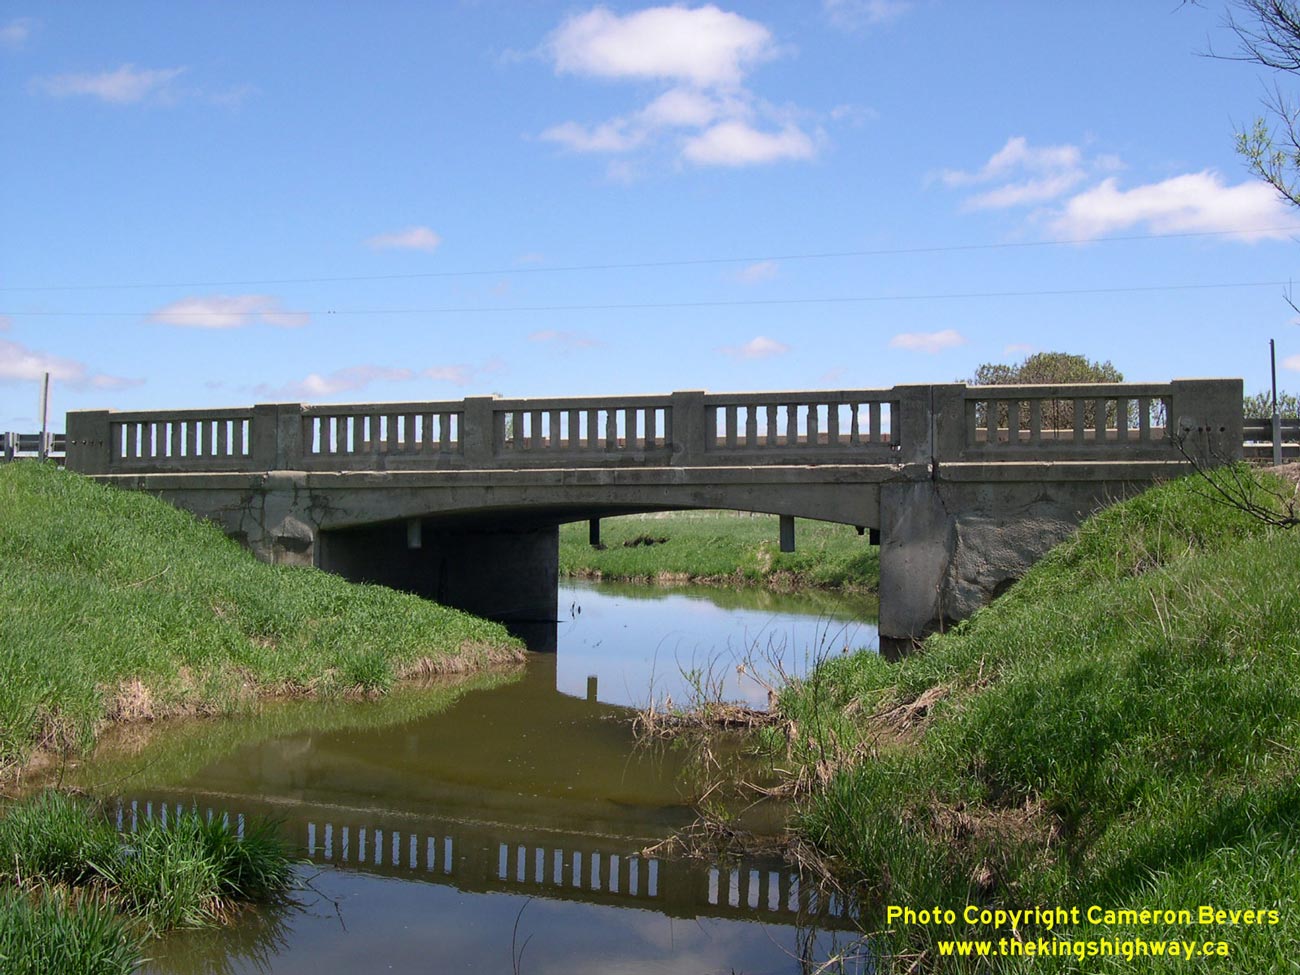
Left - Farley's Creek Bridge on Hwy 6 north of Arthur. This single-span concrete rigid frame structure was completed in 1932. See an
Enlarged Photo Here. (Photograph taken in May 16, 2004 - © Cameron Bevers) Right - Facing south along Hwy 6 towards Arthur at the Farley's Creek Bridge. See an Enlarged Photo Here. (Photograph taken in May 16, 2004 - © Cameron Bevers) 

Left - Western side of the Farley's Creek Bridge on Hwy 6 north of Arthur. The concrete handrail used on the Farley's Creek Bridge was a typical design seen on
most concrete bridges built by the Department of Highways between 1924 and 1934. See an
Enlarged Photo Here. (Photograph taken in May 16, 2004 - © Cameron Bevers) Right - Facing south along Hwy 6 towards Arthur at the Four Mile Creek Bridge. See an Enlarged Photo Here. (Photograph taken in May 16, 2004 - © Cameron Bevers) 

Left - Concrete arch bridge over Four Mile Creek on Hwy 6 north of Arthur. (Photograph taken in June, 2002 - © Cameron Bevers) Right - Inscription in the concrete curb of the Four Mile Creek Bridge on Hwy 6 - "THE KING'S HIGHWAY 1932". (Photograph taken in June, 2002 - © Cameron Bevers) 

Left - Eastern side of the Four Mile Creek Bridge on Hwy 6 between Arthur and Mount Forest. This closed-spandrel concrete arch bridge dates from approximately
1910, although the exact age of this bridge is not known. The bridge was originally constructed prior to the assumption of the Guelph-Mount Forest Road as a
Provincial Highway in 1920. Presumably, this bridge was built by Wellington County. The arch bridge was initially built with only a single traffic lane, but it was
expanded to its current width by the Department of Highways during a reconstruction project along Hwy 6 in 1932. See an
Enlarged Photo Here. (Photograph taken in May 16, 2004 - © Cameron Bevers) Right - Western side of the Four Mile Creek Bridge on Hwy 6 north of Arthur. The handsome arch design and tranquil rural setting made the Four Mile Creek Bridge one of the most photogenic bridges on the King's Highways of Southern Ontario. Sadly, age was taking its toll on the near century-old arch bridge. The Four Mile Creek Bridge was replaced with a new structure in 2009. See an Enlarged Photo Here. (Photograph taken in May 16, 2004 - © Cameron Bevers) 

Left - Facing north along Hwy 6 towards Mount Forest at the Four Mile Creek Bridge north of Arthur. See an
Enlarged Photo Here. (Photograph taken in May 16, 2004 - © Cameron Bevers) Right - Abandoned alignment of Hwy 6 at Bell's Creek. See an Enlarged Photo Here. (Photograph taken in May 16, 2004 - © Cameron Bevers) 

Left - Abandoned Hwy 6 alignment north of Bell's Creek, south of Mount Forest. See an
Enlarged Photo Here. (Photograph taken on November 22, 2003 - © Cameron Bevers) Right - South Saugeen River Bridge on Hwy 6 in Mount Forest. Structure completed in 1961. See an Enlarged Photo Here. (Photograph taken on September 18, 2005 - © Cameron Bevers) 

Left - Facing north along Hwy 6 towards Mount Forest at the South Saugeen River Bridge. See an
Enlarged Photo Here. (Photograph taken on September 18, 2005 - © Cameron Bevers) Right - The South Saugeen River Bridge is a Pratt-type deck truss, which is a very uncommon bridge design for a Southern Ontario highway. See an Enlarged Photo Here. (Photograph taken on September 18, 2005 - © Cameron Bevers) 

Left - Facing south across the South Saugeen River Bridge on Hwy 6 in Mount Forest. See an
Enlarged Photo Here. (Photograph taken on September 18, 2005 - © Cameron Bevers) Right - Facing south along Hwy 6 towards Arthur from the southern limits of Mount Forest. See an Enlarged Photo Here. (Photograph taken on September 18, 2005 - © Cameron Bevers) 

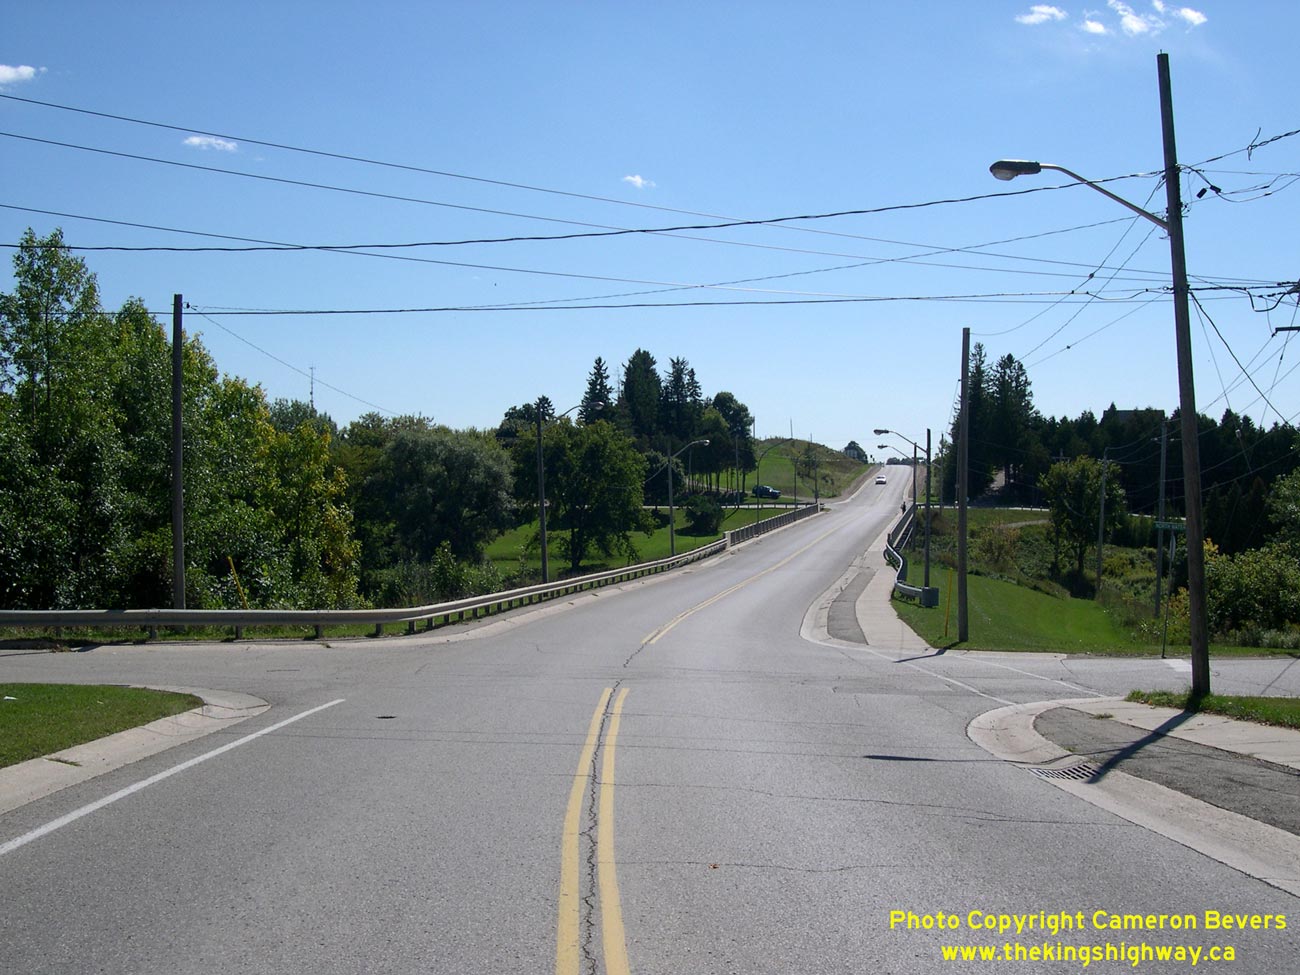
Left - A distant view of the South Saugeen River Bridge on Hwy 6 in Mount Forest, as seen from Hwy 89 (Queen Street). See an
Enlarged Photo Here. (Photograph taken on June 1, 2025 - © Cameron Bevers) Right - View of Hwy 6 (Main Street) facing south from Parkside Drive in Mount Forest. See an Enlarged Photo Here. (Photograph taken on June 1, 2025 - © Cameron Bevers)
Continue on to King's Highway 6 Photos: Mount Forest to Durham
|
|---|
Links to Adjacent King's Highway Photograph Pages:
Back to King's Highway 5 Photos /
King's Highway 6 History /
On to King's Highway 7 Photos
Ontario Highway History - Main Menu / Back to List of Highways Website contents, photos & text © 2002-2026, Cameron
Bevers (Webmaster) - All Rights Reserved / Contact Me
|
|---|