
| 
| |
|
|
All photographs displayed on this page were taken by the
Webmaster (Cameron Bevers). Photographs of Alaska Highway 1 are arranged by location from north
to south, heading outbound from Anchorage. To view
photos of other Alaska Highways, please select a highway number listed on the
Alaska Photograph Index Page.
Click on any thumbnail to see a larger image!
Please note that all photographs displayed on this
website are protected by copyright. These photographs must not be reproduced, published,
electronically stored or copied, distributed, or posted onto other websites without
my written permission. If you want to use photos from this website, please
email me first for permission. Thank-you!
|
|---|
|
Page 1S - Alaska Highway 1 (Seward Highway) Photographs: Anchorage to Rabbit Creek


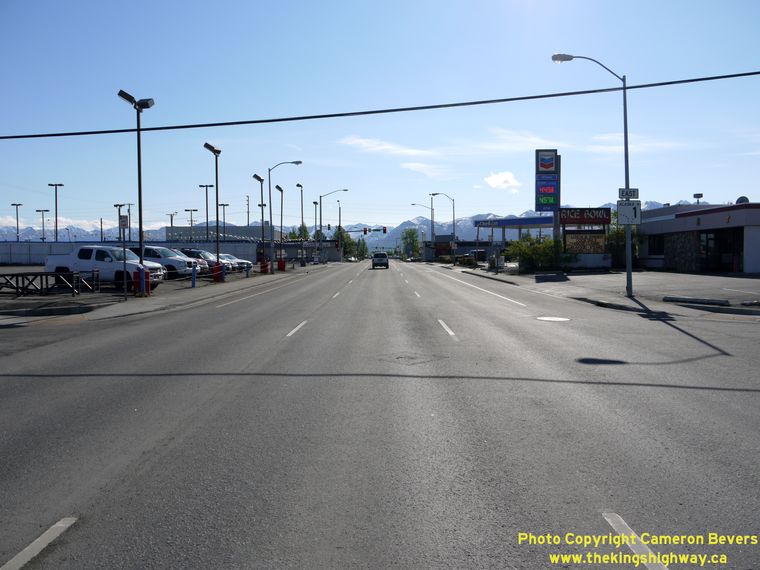
Left - Facing east along East 6th Avenue leaving Downtown Anchorage, approaching Gambell Street. At this point, motorists can either continue east along East
6th Avenue (Hwy 1 East) to join the Glenn Highway or turn south along Gambell Street (Hwy 1 South) to join the Seward Highway. Essentially, Hwy 1 provides the only
road access into and out of Anchorage. See an Enlarged Photo Here. (Photograph taken on May 28, 2012 - © Cameron Bevers) Right - Destination guide sign leaving Downtown Anchorage on East 6th Avenue. Hwy 1 East heads towards Palmer, while Hwy 1 South heads towards Seward. (Photograph taken on May 28, 2012 - © Cameron Bevers) 
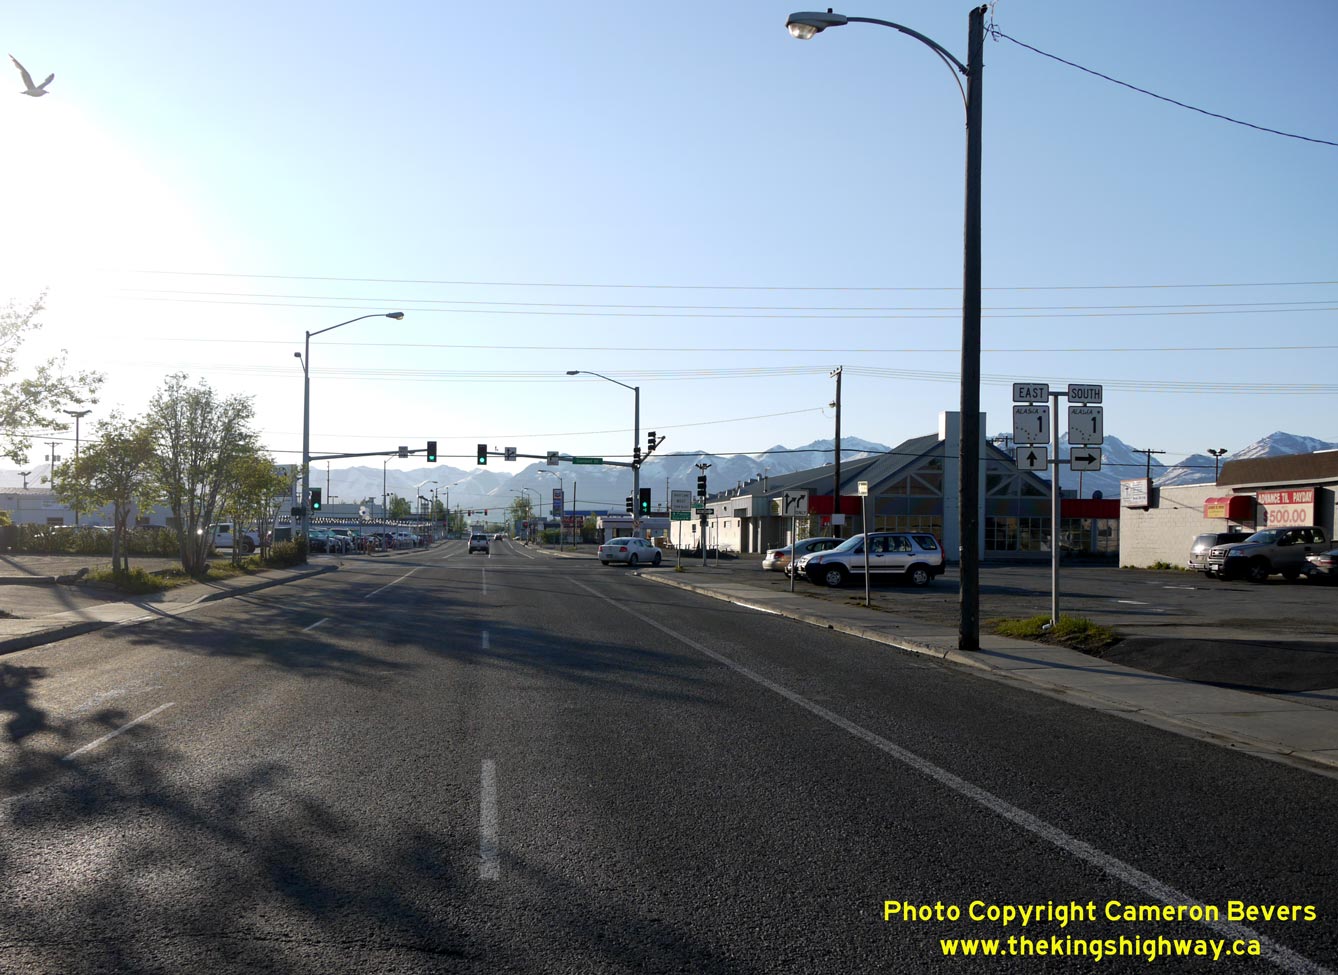
Left - Hwy 1 Junction Assembly on East 6th Avenue leaving Downtown Anchorage at Gambell Street (Seward Highway South). (Photograph taken on May 28, 2012 - © Cameron Bevers) Right - Facing east along East 6th Avenue (Hwy 1) in Anchorage, approaching Ingra Street (Seward Highway North). (Photograph taken on May 28, 2012 - © Cameron Bevers) 

Left - Facing north along Ingra Street (Hwy 1), approaching East 6th Avenue in Anchorage. Although the Seward Highway ends at this intersection, Hwy 1
continues east from this point towards Palmer via the Glenn Highway (East 6th Avenue). See an
Enlarged Photo Here. (Photograph taken on May 28, 2012 - © Cameron Bevers) Right - Alaska Hwy 1 route marker on Northbound Ingra Street in Anchorage, indicating the route's turn towards the east at East 6th Avenue. (Photograph taken on May 28, 2012 - © Cameron Bevers) 

Left - Overhead sign marking the turn-off to the Glenn Highway in Anchorage. It is interesting to note that Alaskans typically refer to their highways by
route names, rather than route numbers. Much to my dismay, Clearview highway sign fonts seem to have made their way to Alaska. (Photograph taken on May 28, 2012 - © Cameron Bevers) Right - Alaska Hwy 1 route marker on East 5th Avenue approaching Downtown Anchorage. (Photograph taken on May 28, 2012 - © Cameron Bevers) 

Left - Facing west along East 5th Avenue (Hwy 1) towards Downtown Anchorage, approaching Gambell Street. See an
Enlarged Photo Here. (Photograph taken on May 28, 2012 - © Cameron Bevers) Right - Facing west along East 5th Avenue towards Downtown Anchorage, at Gambell Street. The Glenn Highway ends at this intersection, although Hwy 1 continues south from this point towards Seward via the Seward Highway (Gambell Street). See an Enlarged Photo Here. (Photograph taken on May 28, 2012 - © Cameron Bevers) 

Left - Alaska Hwy 1 marker on Westbound East 5th Avenue in Anchorage, approaching Gambell Street. (Photograph taken on May 28, 2012 - © Cameron Bevers) Right - Alaska Hwy 1 marker on Westbound East 5th Avenue in Anchorage, indicating the route's turn towards the south at Gambell Street. (Photograph taken on May 28, 2012 - © Cameron Bevers) 

Left - Overhead sign marking the turn-off to the Seward Highway (Hwy 1) on East 5th Avenue in Anchorage. See an
Enlarged Photo Here. (Photograph taken on May 28, 2012 - © Cameron Bevers) Right - Start of the Seward Highway (Hwy 1 South), facing south from the intersection of Gambell Street and East 5th Avenue (Glenn Highway). (Photograph taken on May 28, 2012 - © Cameron Bevers) 

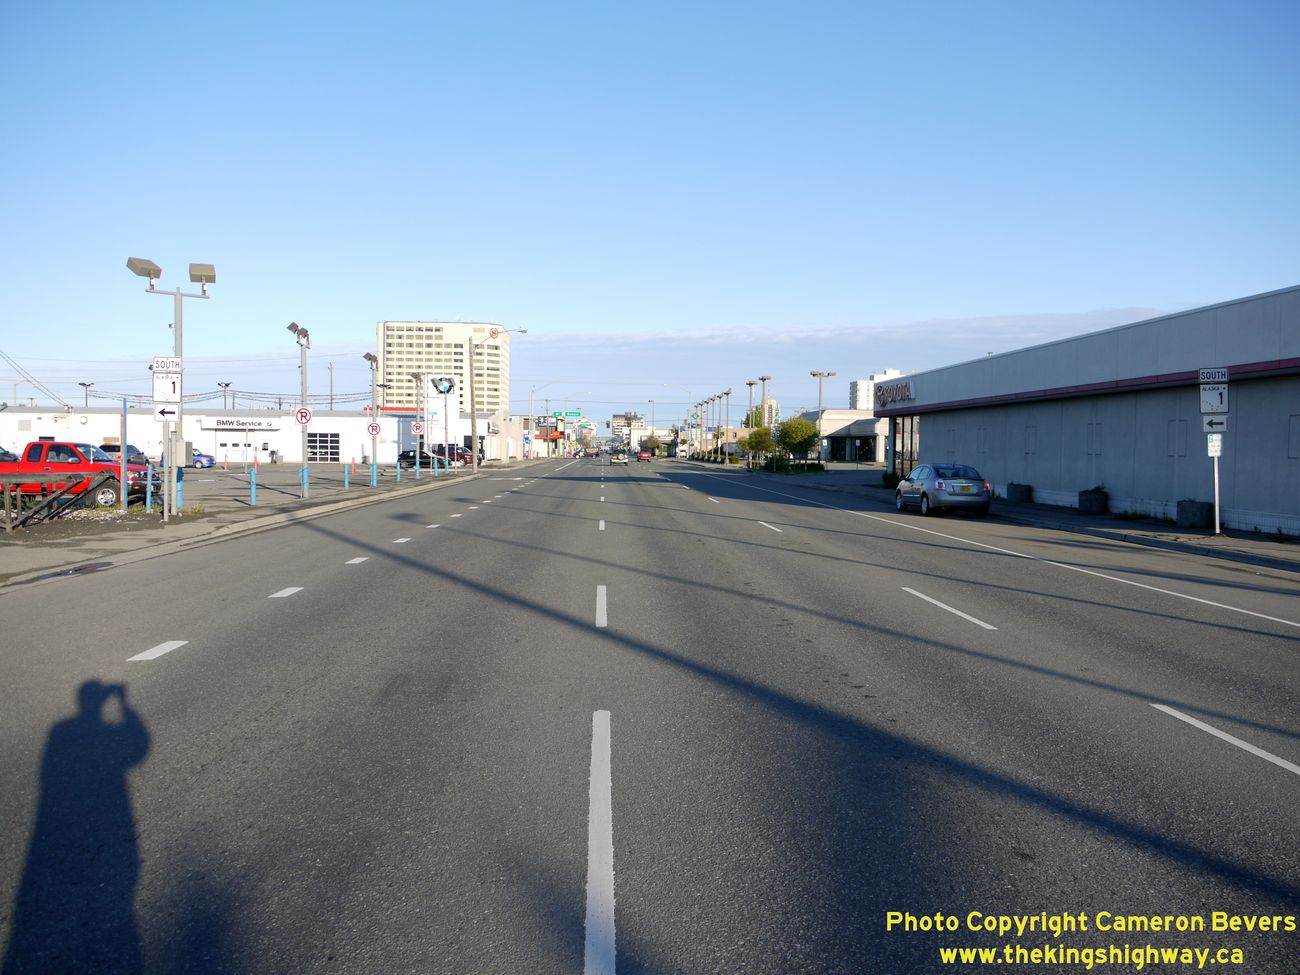
Left - Facing south along Hwy 1 (Gambell Street) from the intersection of East 9th Avenue in Anchorage. (Photograph taken on May 28, 2012 - © Cameron Bevers) Right - Gambell Street (Southbound Hwy 1), facing north towards the intersection of East 7th Avenue in Anchorage. (Photograph taken on May 28, 2012 - © Cameron Bevers) 

Left - Southbound Hwy 1 (Gambell Street), facing south from the intersection of East 9th Avenue in Anchorage. See an
Enlarged Photo Here. (Photograph taken on May 28, 2012 - © Cameron Bevers) Right - Facing south along Gambell Street (Hwy 1) near East 16th Avenue in Anchorage. Downtown Anchorage's one-way street system carrying Hwy 1 (Gambell Street Southbound and Ingra Street Northbound) terminates just south of East 16th Avenue. Beyond this reverse curve, Gambell Street and Ingra Street converge to form the Seward Highway. The route of Hwy 1 continues south via the Seward Highway through Anchorage and onto the Kenai Peninsula. The Seward Highway ends about 125 miles south of Anchorage in Seward, a town named after former U.S. Secretary of State William H. Seward, who pushed for the purchase of Alaska from Russia in 1867. See an Enlarged Photo Here. (Photograph taken on May 28, 2012 - © Cameron Bevers) 

Left - Southbound Hwy 1 (Gambell Street), facing north from the end of Anchorage's one-way street system near East 16th Avenue. See an
Enlarged Photo Here. (Photograph taken on May 28, 2012 - © Cameron Bevers) Right - Facing north along Northbound Hwy 1 (Ingra Street), at the end of Anchorage's one-way street system near East 16th Avenue. See an Enlarged Photo Here. (Photograph taken on May 28, 2012 - © Cameron Bevers) 

Left - The Seward Highway (Hwy 1) splits into separate northbound and southbound roadways just south of East 16th Avenue in Anchorage. The Seward Highway
continues north through Anchorage's one-way street system for about 1 mile, before it ends at the Glenn Highway (East 5th Avenue). See an
Enlarged Photo Here. (Photograph taken on May 28, 2012 - © Cameron Bevers) Right - Facing south along the Seward Highway (Hwy 1) near East 20th Avenue in Anchorage. See an Enlarged Photo Here. (Photograph taken on May 28, 2012 - © Cameron Bevers) 

Left - Facing south along the Seward Highway (Hwy 1) approaching the Northern Lights Boulevard intersection in Anchorage. See an
Enlarged Photo Here. (Photograph taken on May 28, 2012 - © Cameron Bevers) Right - Seward Highway (Hwy 1), facing north towards Downtown Anchorage from the Northern Lights Boulevard intersection. (Photograph taken on May 28, 2012 - © Cameron Bevers) 

Left - Facing north along the Seward Highway (Hwy 1) approaching the East Benson Boulevard intersection in Anchorage. The normally busy six-lane Seward Highway
may appear quite empty in this photo - but keep in mind that I took this photo around 5:30 am. See an
Enlarged Photo Here. (Photograph taken on May 28, 2012 - © Cameron Bevers) Right - Just beyond this curve, the Seward Highway passes through its final signalized at-grade intersection at 36th Avenue before turning into a fully controlled-access freeway through the southern portion of Anchorage. See an Enlarged Photo Here. (Photograph taken on May 28, 2012 - © Cameron Bevers) 

Left - About 8 miles of the Seward Highway was relocated onto a new alignment through Anchorage. The Old Seward Highway originally continued straight ahead.
The former highway can be seen continuing beyond the brown fence. The Old Seward Highway can be reached via 36th Avenue, or from 34th Avenue (Southbound only). (Photograph taken on May 28, 2012 - © Cameron Bevers) Right - Facing south along the Seward Highway (Hwy 1) at 36th Avenue. The freeway section of the Seward Highway begins just beyond the traffic signals. See an Enlarged Photo Here. (Photograph taken on May 28, 2012 - © Cameron Bevers) 

Left - Green guide sign marking the intersection of 36th Avenue on the Southbound Seward Highway (Hwy 1). (Photograph taken on May 28, 2012 - © Cameron Bevers) Right - Green guide sign marking the Tudor Road Interchange on the Southbound Seward Highway (Hwy 1). Tudor Road is the first interchange along the freeway section of the Seward Highway, heading south from Downtown Anchorage. (Photograph taken on May 28, 2012 - © Cameron Bevers) 

Left - Overhead sign marking the exit to Tudor Road on the Southbound Seward Highway (Hwy 1) in Anchorage. The right-most lane is a forced exit lane. Beyond
this interchange, the Seward Highway is a four lane freeway with two lanes per direction. (Photograph taken on May 27, 2012 - © Cameron Bevers) Right - Seward Highway (Hwy 1) facing south toward the Tudor Road Interchange in Anchorage. (Photograph taken on May 27, 2012 - © Cameron Bevers) 

Left - Northbound Seward Highway (Hwy 1) approaching the Tudor Road Overpass in Anchorage. Note the bridge-mounted sign, warning motorists that the freeway is
about to end. (Photograph taken on May 28, 2012 - © Cameron Bevers) Right - Facing north along the Northbound Seward Highway (Hwy 1) between the Tudor Road Interchange and East 36th Avenue in Anchorage. The freeway section of the Seward Highway ends at the signalized at-grade intersection at 36th Avenue. Some of Downtown Anchorage's office towers can be seen in the distance. See an Enlarged Photo Here. (Photograph taken on May 27, 2012 - © Cameron Bevers) 

Left - Facing north along the Seward Highway (Hwy 1) from the Tudor Road Overpass. The freeway ends just beyond the curve at 36th Avenue. See an
Enlarged Photo Here. (Photograph taken on May 28, 2012 - © Cameron Bevers) Right - Green guide sign marking the entrance ramp to the Southbound Seward Highway from Westbound Tudor Road. Note that the Hwy 1 route marker has been omitted from the sign. (Photograph taken on May 28, 2012 - © Cameron Bevers) 

Left - This green guide sign for the on-ramp to the Southbound Seward Highway (Hwy 1) from Tudor Road is mounted onto a traffic signal mast arm. (Photograph taken on May 28, 2012 - © Cameron Bevers) Right - The Chugach Mountains form a very scenic backdrop as one passes through the Seward Highway Interchange on Tudor Road. See an Enlarged Photo Here. (Photograph taken on May 28, 2012 - © Cameron Bevers) 

Left - Green guide sign on Eastbound Tudor Road, marking the Seward Highway Interchange. The ramps at the Tudor Road Interchange are in a simple diamond
configuration. (Photograph taken on May 28, 2012 - © Cameron Bevers) Right - Seward Highway (Hwy 1) guide sign on Eastbound Tudor Road in Anchorage. (Photograph taken on May 28, 2012 - © Cameron Bevers) 

Left - An older green guide sign for the Seward Highway on Eastbound Tudor Road. The inclusion of the state highway route number on guide signs seems to have
only been a recent development. Alaskans typically refer to state highways by their route name, rather than by their route number. (Photograph taken on May 28, 2012 - © Cameron Bevers) Right - Facing south along the Seward Highway (Hwy 1) from the Tudor Road Overpass. See an Enlarged Photo Here. (Photograph taken on May 28, 2012 - © Cameron Bevers) 

Left - This green guide sign for the on-ramp to the Northbound Seward Highway (Hwy 1) from Tudor Road is mounted onto a traffic signal mast arm. (Photograph taken on May 28, 2012 - © Cameron Bevers) Right - Green guide sign on Westbound Tudor Road, marking the upcoming Seward Highway (Hwy 1) Interchange. (Photograph taken on May 28, 2012 - © Cameron Bevers) 

Left - Approaching the Tudor Road Interchange on the Northbound Seward Highway (Hwy 1) in Anchorage. (Photograph taken on May 27, 2012 - © Cameron Bevers) Right - Facing south along the Seward Highway (Hwy 1) at the Dowling Road Interchange in Anchorage. (Photograph taken on May 27, 2012 - © Cameron Bevers) 

Left - Diagrammatic guide sign on the off-ramp from the Southbound Seward Highway (Hwy 1) at the Dowling Road Interchange. This ramp ends at a modern roundabout. (Photograph taken on May 28, 2012 - © Cameron Bevers) Right - Green guide sign marking the on-ramp to the Northbound Seward Highway (Hwy 1) at the Dowling Road Interchange. (Photograph taken on May 28, 2012 - © Cameron Bevers) 

Left - The Chugach Mountains form a dramatic backdrop for this modern roundabout on Dowling Road at the Seward Highway (Hwy 1) east ramp terminal. The
previously-signalized ramp terminals at the Dowling Road Interchange were both converted into modern roundabouts in 2004. The two roundabouts at Dowling Road and the
Seward Highway were the first modern roundabouts built on an Alaska state highway. See an
Enlarged Photo Here. (Photograph taken on June 13, 2012 - © Cameron Bevers) Right - Diagrammatic overhead guide sign on Westbound Dowling Road approaching the two roundabouts at the Seward Highway (Hwy 1) Interchange. The interchange at Dowling Road was originally a simple diamond interchange with traffic signals at each ramp terminal. Several signalized ramp terminals along the Seward Highway through Anchorage have recently been converted into modern roundabouts by Alaska's Department of Transportation. (Photograph taken on June 13, 2012 - © Cameron Bevers) 

Left - Seward Highway (Hwy 1) Interchange on Dowling Road in Anchorage, facing east. (Photograph taken on June 13, 2012 - © Cameron Bevers) Right - Facing west along Dowling Road at the Seward Highway (Hwy 1) Interchange. (Photograph taken on June 13, 2012 - © Cameron Bevers) 

Left - The previously-signalized ramp terminals at the Dowling Road Interchange on the Seward Highway (Hwy 1) were converted into modern roundabouts several
years ago. This roundabout is situated at the western ramp terminal. See an
Enlarged Photo Here. (Photograph taken on June 13, 2012 - © Cameron Bevers) Right - Diagrammatic overhead guide sign on Eastbound Dowling Road approaching the two roundabouts at the Seward Highway (Hwy 1) Interchange. (Photograph taken on June 13, 2012 - © Cameron Bevers) 

Left - Facing south along the Seward Highway (Hwy 1) from the Dowling Road Interchange. See an
Enlarged Photo Here. (Photograph taken on May 27, 2012 - © Cameron Bevers) Right - Northbound Seward Highway (Hwy 1) at the Lore Road On-Ramp in Anchorage. See an Enlarged Photo Here. (Photograph taken on May 27, 2012 - © Cameron Bevers) 

Left - Facing south along the Seward Highway (Hwy 1) approaching the 76th Avenue Exit in Anchorage. There is no grade separation across the freeway at 76th
Avenue, so this exit is only accessible from the Southbound Seward Highway. See an
Enlarged Photo Here. (Photograph taken on May 27, 2012 - © Cameron Bevers) Right - Southbound Seward Highway (Hwy 1) at the 76th Avenue Exit in Anchorage. (Photograph taken on May 27, 2012 - © Cameron Bevers) 

Left - Approaching the Dimond Boulevard and Abbott Road Interchange on the Southbound Seward Highway (Hwy 1) in Anchorage. See an
Enlarged Photo Here. (Photograph taken on May 27, 2012 - © Cameron Bevers) Right - Facing south along the Seward Highway (Hwy 1) at the Dimond Boulevard and Abbott Road Interchange. (Photograph taken on May 27, 2012 - © Cameron Bevers) 

Left - Seward Highway (Hwy 1), facing north from the Dimond Boulevard and Abbott Road Interchange in Anchorage. See an
Enlarged Photo Here. (Photograph taken on May 27, 2012 - © Cameron Bevers) Right - Overhead sign marking the upcoming Seward Highway (Hwy 1) Interchange on Eastbound Dimond Boulevard. (Photograph taken on May 27, 2012 - © Cameron Bevers) 

Left - Unusual overhead diagrammatic sign on Eastbound Dimond Boulevard, showing the ramp configuration at the Seward Highway (Hwy 1) Interchange. (Photograph taken on June 13, 2012 - © Cameron Bevers) Right - Green guide sign marking the entrance ramp to the Southbound Seward Highway (Hwy 1) at the Dimond Boulevard and Abbott Road Interchange in Anchorage. (Photograph taken on June 13, 2012 - © Cameron Bevers) 

Left - Facing east along Abbott Road at the Seward Highway (Hwy 1) Interchange in Anchorage. Dimond Boulevard ends at this interchange. (Photograph taken on June 13, 2012 - © Cameron Bevers) Right - Overhead sign marking the entrance ramp to the Northbound Seward Highway (Hwy 1) at the Dimond Boulevard and Abbott Road Interchange. This interchange seems to have originally been designed as a simple diamond. The East-to-North loop ramp appears to have been constructed fairly recently, presumably to better handle the large east-to-north traffic volumes that would have previously had to turn left to access the freeway. (Photograph taken on June 13, 2012 - © Cameron Bevers) 

Left - Facing west along Abbott Road at the Seward Highway (Hwy 1) Interchange in Anchorage. Beyond the underpass, Abbott Road becomes Dimond Boulevard. (Photograph taken on June 13, 2012 - © Cameron Bevers) Right - Green guide sign marking the Dimond Boulevard and Abbott Road Interchange on the Northbound Seward Highway (Hwy 1). (Photograph taken on May 27, 2012 - © Cameron Bevers) 

Left - Facing south along the Seward Highway (Hwy 1) from the Dimond Boulevard and Abbott Road Interchange in Anchorage. See an
Enlarged Photo Here. (Photograph taken on May 27, 2012 - © Cameron Bevers) Right - Facing north along the Seward Highway (Hwy 1) towards Downtown Anchorage from the O'Malley Road Interchange. See an Enlarged Photo Here. (Photograph taken on May 27, 2012 - © Cameron Bevers) 

Left - O'Malley Road Interchange on the Seward Highway (Hwy 1) in Anchorage, facing north. See an
Enlarged Photo Here. (Photograph taken on May 27, 2012 - © Cameron Bevers) Right - Green guide sign marking the upcoming Huffman Road Interchange on the Southbound Seward Highway (Hwy 1). The snow-capped mountains of the Kenai Peninsula begin to appear on the horizon. The Seward Highway passes through these scenic mountains along its route south from Anchorage towards Seward. See an Enlarged Photo Here. (Photograph taken on May 27, 2012 - © Cameron Bevers) 

Left - Facing south along the Seward Highway (Hwy 1) approaching the Huffman Road Interchange in Anchorage. (Photograph taken on May 27, 2012 - © Cameron Bevers) Right - Seward Highway (Hwy 1) at the Huffman Road Interchange in Anchorage, facing south. See an Enlarged Photo Here. (Photograph taken on May 27, 2012 - © Cameron Bevers) 

Left - Overhead guide sign on Eastbound Huffman Road approaching the two roundabouts at the Seward Highway (Hwy 1) Interchange. The interchange at Huffman Road
was originally a simple diamond interchange with traffic signals at each ramp terminal, but both ramp terminals were recently converted into modern roundabouts. (Photograph taken on May 27, 2012 - © Cameron Bevers) Right - This modern roundabout was recently constructed at the Huffman Road Interchange's west ramp terminal on the Seward Highway (Hwy 1). See an Enlarged Photo Here. (Photograph taken on June 13, 2012 - © Cameron Bevers) 

Left - The Huffman Road Interchange on the Seward Highway (Hwy 1) in Anchorage was recently reconstructed. Both signalized ramp terminals at this diamond
interchange were converted to modern roundabouts as part of this project. The roundabout shown here is situated at the east ramp terminal. See an
Enlarged Photo Here. (Photograph taken on June 13, 2012 - © Cameron Bevers) Right - Overhead sign on Westbound Huffman Road approaching the two roundabouts at the Seward Highway (Hwy 1) Interchange. (Photograph taken on June 13, 2012 - © Cameron Bevers) 

Left - Facing south along the Seward Highway (Hwy 1) from the Huffman Road Interchange in Anchorage. See an
Enlarged Photo Here. (Photograph taken on May 27, 2012 - © Cameron Bevers) Right - Northbound Seward Highway (Hwy 1) at the Huffman Road Interchange, facing north towards Downtown Anchorage. (Photograph taken on May 27, 2012 - © Cameron Bevers) 

Left - Facing north along the Seward Highway (Hwy 1) approaching the Huffman Road Interchange in Anchorage. See an
Enlarged Photo Here. (Photograph taken on May 27, 2012 - © Cameron Bevers) Right - Approaching the DeArmoun Road Interchange on the Southbound Seward Highway (Hwy 1). (Photograph taken on May 27, 2012 - © Cameron Bevers) 

Left - Facing north along the Seward Highway (Hwy 1) towards Downtown Anchorage from the DeArmoun Road Overpass. The ramps at the DeArmoun Road Interchange are
in a half-diamond configuration, with all ramps on the north side of the overpass. See an
Enlarged Photo Here. (Photograph taken on May 27, 2012 - © Cameron Bevers) Right - Green guide sign marking the turn-off for the on-ramp to the Northbound Seward Highway (Hwy 1) at the DeArmoun Road Interchange. Traffic wishing to enter the highway must first follow a service road (Brayton Drive) for a short distance before reaching the on-ramp. The turn-off to the Seward Highway is merely signed as "Anchorage". (Photograph taken on May 27, 2012 - © Cameron Bevers) 

Left - Green guide sign marking the on-ramp to the Northbound Seward Highway (Hwy 1) from Brayton Drive, just north of the DeArmoun Road Interchange. (Photograph taken on May 27, 2012 - © Cameron Bevers) Right - Facing south along the Seward Highway (Hwy 1) from the DeArmoun Road Overpass in Anchorage. The highway begins its descent towards the Pacific Ocean as the highway rounds this curve at the south end of Anchorage. Although the municipal limits of Anchorage cover a large geographic area, most of the urbanized portions of Anchorage are situated on a point of land that juts out into the Pacific Ocean (Cook Inlet). See an Enlarged Photo Here. (Photograph taken on May 27, 2012 - © Cameron Bevers) 

Left - Green guide sign for the upcoming Old Seward Highway and Rabbit Creek Road Interchange on the Southbound Seward Highway (Hwy 1). (Photograph taken on May 27, 2012 - © Cameron Bevers) Right - Facing south along the Seward Highway (Hwy 1) towards the Old Seward Highway and Rabbit Creek Road Interchange in Anchorage. After traveling several miles inland, the Seward Highway emerges at scenic Turnagain Arm, a long tidal inlet that extends east into mountains from Anchorage. See an Enlarged Photo Here. (Photograph taken on May 27, 2012 - © Cameron Bevers) 

Left - Approaching the Old Seward Highway and Rabbit Creek Road Interchange on the Southbound Seward Highway (Hwy 1). See an
Enlarged Photo Here. (Photograph taken on May 27, 2012 - © Cameron Bevers) Right - Facing south along the Seward Highway (Hwy 1) at the Old Seward Highway and Rabbit Creek Road Interchange in Anchorage. This is the last interchange on the freeway section of the Seward Highway. The divided highway ends about a mile ahead, as Hwy 1 leaves the urbanized portion of Anchorage. See an Enlarged Photo Here. (Photograph taken on May 27, 2012 - © Cameron Bevers)
Continue south along the Seward Highway (Hwy 1): Rabbit Creek to Alyeska Highway Junction |
|---|
Links to Other Ontario Highway History Website Sections:
Back to Alaska Highway 1 Photos /
Alaska Highways Photo Index /
On to Alaska Highway 2 Photos
Vacation Highway Photos - Main Menu / Ontario Highway History - Main Menu Website contents, photos & text © 2002-2026, Cameron
Bevers (Webmaster) - All Rights Reserved / Contact Me
|
|---|