
| 
| |
|
|
This page contains photographs of British Columbia's Highway 1 (Trans-Canada Highway), arranged by location from Revelstoke
westerly to Sicamous. All photographs displayed on this page were taken by the Webmaster (Cameron Bevers). To view photos of other British Columbia Highways, please
select a highway number listed on the British Columbia Photograph Index Page. Click on any
thumbnail to see a larger image!
Please note that all photographs displayed on this website are protected by copyright. These photographs must not be
reproduced, published, electronically stored or copied, distributed, or posted onto other websites without my written permission. If you want to use photos from this
website, please email me first for permission. Thank-you!
|
|---|
|
Page 3: BC Highway 1 (Trans-Canada Highway) Photographs: Revelstoke to Sicamous


Left - Approaching the Hwy 23 North Junction on the westbound Trans-Canada Highway (Hwy 1) in Revelstoke. There are actually two Hwy 23 Junctions along Hwy 1
in Revelstoke. Hwy 23 North to Mica Creek intersects with Hwy 1 near Downtown Revelstoke, while Hwy 23 South to Nakusp intersects with Hwy 1 just west of the Columbia
River Bridge. See an Enlarged Photo Here. (Photograph taken on June 6, 2015 - © Cameron Bevers) Right - Facing north along Hwy 23 (Big Bend Highway) from the Hwy 1 Junction in Revelstoke. With white-capped mountain peaks in the distance, the Frontier Motel located at the Hwy 1 & Hwy 23 North Junction looks right at home! See an Enlarged Photo Here. (Photograph taken on June 6, 2015 - © Cameron Bevers) 

Left - Facing south along Hwy 23 (Big Bend Highway) towards the Trans-Canada Highway (Hwy 1) Junction in Revelstoke. Prior to the completion of the current
Trans-Canada Highway through Rogers Pass east of Revelstoke in 1962, the Big Bend Highway (Hwy 23 North) served as a highway connection between Revelstoke and Golden.
The Big Bend Highway was a seasonal road along the Columbia River which was completed and officially opened to traffic on June 29, 1940. Once the Big Bend Highway was
bypassed by the new highway link through Rogers Pass, many sections of the Big Bend Highway were flooded during the subsequent construction of hydro-electric dams
along the Columbia River in the 1970s and early 1980s. See an Enlarged Photo Here. (Photograph taken on June 6, 2015 - © Cameron Bevers) Right - Approaching the Hwy 1 Junction on the southbound Big Bend Highway (Hwy 23) in Revelstoke. It appears that this highway junction was relocated at some point. Hwy 23 now curves sharply to the left as it approaches the traffic signals on the Trans-Canada Highway (Hwy 1). See an Enlarged Photo Here. (Photograph taken on June 6, 2015 - © Cameron Bevers) 

Left - Facing east along Hwy 1 & Hwy 23 in Revelstoke. At the traffic signals, Hwy 23 turns left and heads north to Mica Creek as the Big Bend Highway.
Mica Creek is the only settlement on the Big Bend Highway. Hwy 23 comes to a dead-end at the Mica Dam, located about 150 km north of Revelstoke. See an
Enlarged Photo Here. (Photograph taken on June 6, 2015 - © Cameron Bevers) Right - Facing west along Hwy 1 & Hwy 23 approaching Victoria Road in Revelstoke. Victoria Road is the main entrance to the Revelstoke City Centre. See an Enlarged Photo Here. (Photograph taken on June 6, 2015 - © Cameron Bevers) 

Left - Overhead guide sign on eastbound Hwy 1 & Hwy 23 in Revelstoke approaching Victoria Road. Hwy 23 is not marked on the sign, as it is a fairly
lightly-travelled highway which reaches a dead-end at the Mica Dam. The vast majority of the traffic continues straight through Revelstoke via Hwy 1 to Golden. See an
Enlarged Photo Here. (Photograph taken on June 6, 2015 - © Cameron Bevers) Right - Facing east along Hwy 1 & Hwy 23 from the Columbia River Bridge in Revelstoke. See an Enlarged Photo Here. (Photograph taken on June 6, 2015 - © Cameron Bevers) 

Left - "Woodenhead" carving on display beside Hwy 1 & Hwy 23 in Revelstoke. This curious wood carving dates from the 1930s, when the Big Bend Highway was
being built north of Revelstoke. The carving was created from the stump of a tree which was felled to make way for the Big Bend Highway. When it was first created, a
large sign was placed adjacent to Woodenhead, warning motorists "not to be a Woodenhead" and to drive safely on the narrow and winding Big Bend Highway. Originally,
the carving was located near Mile 80 on the Big Bend Highway, just south of the present-day Mica Creek townsite. Woodenhead was relocated to Revelstoke after the
Trans-Canada Highway was completed through Rogers Pass in 1962, which made the Big Bend Highway a redundant link in the provincial highway system. See an
Enlarged Photo Here. (Photograph taken on June 6, 2015 - © Cameron Bevers) Right - Interpretive panel describing the origins of the "Woodenhead" carving. It was created by Peter Fuoco of Revelstoke, who was one of the builders on the Big Bend Highway project. See an Enlarged Photo Here. (Photograph taken on June 6, 2015 - © Cameron Bevers) 

Left - Close-up of the Woodenhead carving in Revelstoke. The size of Woodenhead gives viewers some insight as to the diameter of the trees which were present
along the Big Bend Highway's route, as the carving was created entirely from a single tree trunk. This bizarre but colourful piece of early British Columbia
transportation history is located in a small roadside park beside the Columbia River Bridge on Hwy 1 & Hwy 23 in Revelstoke. See an
Enlarged Photo Here. (Photograph taken on June 6, 2015 - © Cameron Bevers) Right - Dual Hwy 1 & Hwy 23 route markers near the Columbia River Bridge in Revelstoke. See an Enlarged Photo Here. (Photograph taken on June 6, 2015 - © Cameron Bevers) 

Left - Columbia River Bridge on Hwy 1 & Hwy 23 in Revelstoke, facing west. See an
Enlarged Photo Here. (Photograph taken on June 6, 2015 - © Cameron Bevers) Right - Eastern approach to the Columbia River Bridge in Revelstoke. This "double-rail" steel handrail system seen here was also used extensively in my home province of Ontario. It is quite evident that the Department of Highways of Ontario (DHO) and British Columbia's Department of Highways shared many of their bridge design techniques with one another during the 1950s and 1960s, as both jurisdictions used very similar standards. See an Enlarged Photo Here. (Photograph taken on June 6, 2015 - © Cameron Bevers) 

Left - Bridge manufacturer's plaque on the Columbia River Bridge on Hwy 1 & Hwy 23 in Revelstoke. See an
Enlarged Photo Here. (Photograph taken on June 6, 2015 - © Cameron Bevers) Right - A transport truck crosses the Columbia River Bridge on Hwy 1 & Hwy 23 in Revelstoke. This structure consists of one main suspension span and several approach spans. See an Enlarged Photo Here. (Photograph taken on June 6, 2015 - © Cameron Bevers) 

Left - View of the Columbia River Bridge and Mount Revelstoke on Hwy 1 & Hwy 23. See an
Enlarged Photo Here. (Photograph taken on June 6, 2015 - © Cameron Bevers) Right - At the western end of the Columbia River Bridge, two small observation points were built on both the north and south sides of Hwy 1 & Hwy 23. The bridge can be easily viewed from the eastern side from the Woodenhead Roadside Park. See an Enlarged Photo Here. (Photograph taken on June 6, 2015 - © Cameron Bevers) 

Left - Plaque commemorating the completion of the Columbia River Bridge in 1961. This new two-lane structure bypassed a narrow one-lane steel through truss
structure on the original route of the Trans-Canada Highway (Wilson Street), which crosses the Columbia River a short distance downstream. See an
Enlarged Photo Here. (Photograph taken on June 6, 2015 - © Cameron Bevers) Right - Facing east along Hwy 1 & Hwy 23 at the Columbia River Bridge in Revelstoke. See an Enlarged Photo Here. (Photograph taken on June 6, 2015 - © Cameron Bevers) 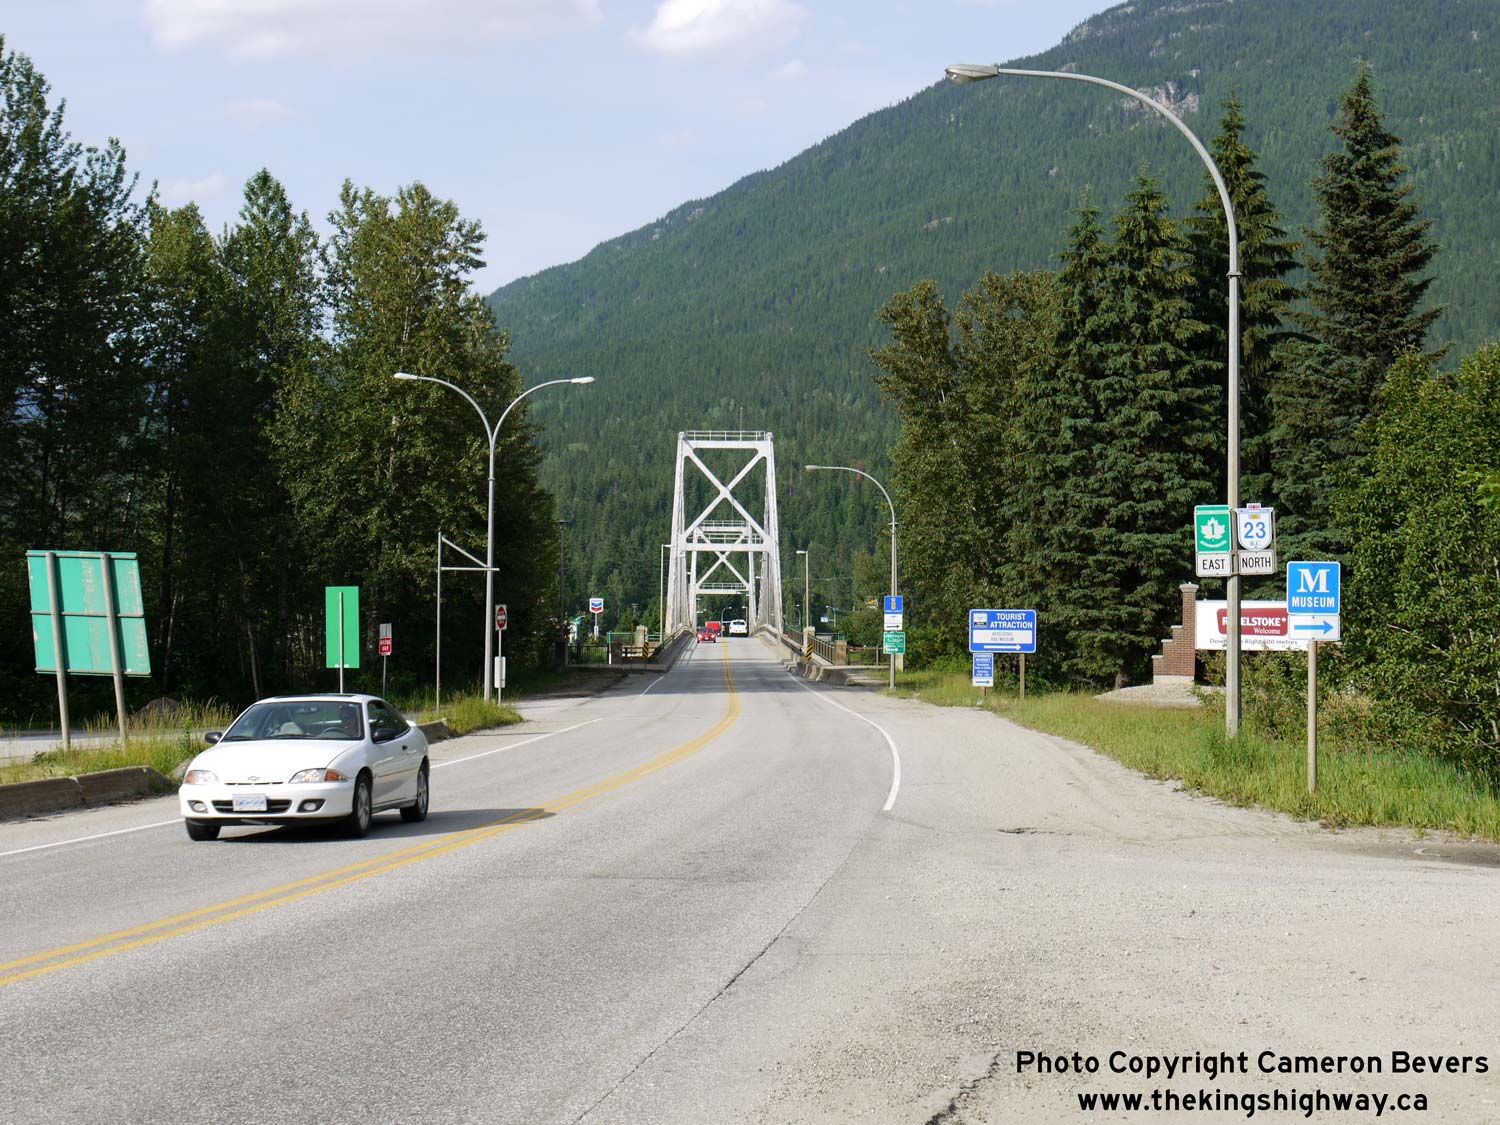

Left - Entering Revelstoke on the eastbound Trans-Canada Highway (Hwy 1 & Hwy 23). The City Centre lies a short distance south of the highway across the
bridge. See an Enlarged Photo Here. (Photograph taken on June 6, 2015 - © Cameron Bevers) Right - Distance guide sign on westbound Hwy 1 & Hwy 23 departing Revelstoke. See an Enlarged Photo Here. (Photograph taken on June 6, 2015 - © Cameron Bevers) 

Left - Overhead guide sign on the westbound Trans-Canada Highway (Hwy 1 & Hwy 23) approaching the turn-off to Hwy 23 South just west of Revelstoke. Hwy 23
is an important north-south highway link. Apart from Hwy 97 (the Okanagan Highway), Hwy 23 is the only north-south through route in the central part of British
Columbia. The route of Hwy 23 ends at the Hwy 6 Junction in Nakusp. From Nakusp, motorists can either continue south along Hwy 6 towards Nelson and Castlegar, or use
Hwy 6 as an alternate route to the Okanagan Valley via Vernon. See an
Enlarged Photo Here. (Photograph taken on June 6, 2015 - © Cameron Bevers) Right - Facing east along the Trans-Canada Highway (Hwy 1 & Hwy 23) from the Hwy 23 South turn-off to Nakusp. A large parking lot at left was built as a staging area for transport trucks and other vehicles, who are forced to stop in Revelstoke during unexpected road closures in the area. The highway through Rogers Pass is closed from time to time due to poor weather conditions and avalanche risks. See an Enlarged Photo Here. (Photograph taken on June 6, 2015 - © Cameron Bevers) 

Left - Facing north along Hwy 23 towards the Trans-Canada Highway (Hwy 1) Junction near Revelstoke. The route of Hwy 23 turns right at the traffic signals in
the background and briefly heads east through Revelstoke, concurrently with Hwy 1. Hwy 23 continues north from Revelstoke towards Mica Creek as the Big Bend Highway.
See an Enlarged Photo Here. (Photograph taken on June 6, 2015 - © Cameron Bevers) Right - Junction of Hwy 1 & Hwy 23 near Revelstoke, facing north. The exit from the truck staging area can be seen on the far side of the intersection. See an Enlarged Photo Here. (Photograph taken on June 6, 2015 - © Cameron Bevers) 

Left - Facing south along the Nakusp-Revelstoke Highway (Hwy 23 South) from the Hwy 1 Junction near Revelstoke. See an
Enlarged Photo Here. (Photograph taken on June 6, 2015 - © Cameron Bevers) Right - Sign at the Hwy 1 & Hwy 23 Junction, indicating the crossing times for the Arrow Lake Ferry between Galena Bay and Shelter Bay on Hwy 23. See an Enlarged Photo Here. (Photograph taken on June 6, 2015 - © Cameron Bevers) 

Left - Facing west along the Trans-Canada Highway (Hwy 1) from the Hwy 23 South Junction near Revelstoke. West of Revelstoke, Hwy 1 climbs up through the
Monashee Mountains towards Sicamous through Eagle Pass. See an Enlarged Photo Here. (Photograph taken on June 6, 2015 - © Cameron Bevers) Right - Approaching the Hwy 23 South Junction on Hwy 1, facing east towards Revelstoke. See an Enlarged Photo Here. (Photograph taken on June 6, 2015 - © Cameron Bevers) 

Left - Junction sign assembly on eastbound Hwy 1 approaching the Hwy 23 South Junction. See an
Enlarged Photo Here. (Photograph taken on June 6, 2015 - © Cameron Bevers) Right - Changeable message sign on westbound Hwy 1 departing Revelstoke. See an Enlarged Photo Here. (Photograph taken on June 6, 2015 - © Cameron Bevers) 

Left - Facing east along Hwy 1, about 6 km west of Revelstoke. The mountains along each side of Eagle Pass are extremely steep. See an
Enlarged Photo Here. (Photograph taken on June 3, 2017 - © Cameron Bevers) Right - This long eastbound passing lane on Hwy 1 comes to an end about 8 km west of Revelstoke. See an Enlarged Photo Here. (Photograph taken on June 3, 2017 - © Cameron Bevers) 

Left - Hwy 1 descends quickly from Eagle Pass, as the highway heads east towards Revelstoke. See an
Enlarged Photo Here. (Photograph taken on June 3, 2017 - © Cameron Bevers) Right - Hwy 1 briefly widens to a four-lane highway on the eastern approach to Eagle Pass. See an Enlarged Photo Here. (Photograph taken on June 3, 2017 - © Cameron Bevers) 

Left - View of Eagle Pass on the Trans-Canada Highway (Hwy 1), facing west towards Sicamous. The four-lane highway comes to an end at the summit of Eagle Pass.
This narrow pass is the only easily-traversable gap in the Monashee Mountains for over 100 km in either direction. The pass remained largely unknown until it was
discovered by a survey party in the 1860s, who observed numerous eagles flying into a particular canyon in the mountains. The surveyors suspected that this "Eagle
Pass" continued right through the mountain range, and upon further exploration, discovered that a traversable pass through the mountains did indeed exist. See an
Enlarged Photo Here. (Photograph taken on June 3, 2017 - © Cameron Bevers) Right - Facing west along Hwy 1 beside Summit Lake in Eagle Pass. This narrow pass is a critical transportation corridor, and accommodates both the Trans-Canada Highway as well as the Canadian Pacific Railway (CPR). A railway tunnel can be seen on the opposite side of the lake. See an Enlarged Photo Here. (Photograph taken on June 3, 2017 - © Cameron Bevers) 

Left - Facing east along the Trans-Canada Highway (Hwy 1) towards Revelstoke through Eagle Pass. See an
Enlarged Photo Here. (Photograph taken on June 3, 2017 - © Cameron Bevers) Right - Approaching Victor Lake on Hwy 1, about 13 km west of Revelstoke. See an Enlarged Photo Here. (Photograph taken on June 3, 2017 - © Cameron Bevers) 

Left - Facing east along Hwy 1 towards Revelstoke from Victor Lake. See an
Enlarged Photo Here. (Photograph taken on June 3, 2017 - © Cameron Bevers) Right - Snow-capped Mount Griffin appears as Hwy 1 winds its way west towards Sicamous through Three Valley Gap, about 18 km west of Revelstoke. See an Enlarged Photo Here. (Photograph taken on June 3, 2017 - © Cameron Bevers) 

Left - Traffic on the Trans-Canada Highway (Hwy 1) is dwarfed by the near-vertical cliffs along scenic Three Valley Lake. See an
Enlarged Photo Here. (Photograph taken on June 3, 2017 - © Cameron Bevers) Right - Approaching the avalanche closure gates on Hwy 1 at Three Valley Lake. See an Enlarged Photo Here. (Photograph taken on June 3, 2017 - © Cameron Bevers) 

Left - Facing east along Hwy 1 at Three Valley Lake, approaching the avalanche closure gates. The bright red roof of the Three Valley Lake Chateau Resort can
be seen in the background at the eastern end of the lake. See an Enlarged Photo Here. (Photograph taken on June 3, 2017 - © Cameron Bevers) Right - View of Three Valley Lake from a roadside turnout on Hwy 1 near Rutherford Beach. See an Enlarged Photo Here. (Photograph taken on June 3, 2017 - © Cameron Bevers) 

Left - This spectacular view of Griffin Lake and the scenic snow-capped mountain peaks beyond it can be found on Hwy 1, about 26 km west of Revelstoke. See an
Enlarged Photo Here. (Photograph taken on June 5, 2015 - © Cameron Bevers) Right - Eagle River Bridge on Hwy 1, about 31 km west of Revelstoke. See an Enlarged Photo Here. (Photograph taken on June 3, 2017 - © Cameron Bevers) 

Left - Southern side of the Eagle River Bridge on Hwy 1 west of Revelstoke. This single span steel beam structure was completed in 1958. See an
Enlarged Photo Here. (Photograph taken on June 3, 2017 - © Cameron Bevers) Right - Facing east along the Trans-Canada Highway (Hwy 1) towards Revelstoke at the Eagle River Bridge. See an Enlarged Photo Here. (Photograph taken on June 3, 2017 - © Cameron Bevers) 

Left - Facing west along the Trans-Canada Highway (Hwy 1) towards Sicamous at the Eagle River Bridge. See an
Enlarged Photo Here. (Photograph taken on June 3, 2017 - © Cameron Bevers) Right - Variable speed limit overhead signs along Hwy 1 near the Eagle River Bridge. British Columbia implemented variable speed limits on some of their highways a number of years ago. During adverse weather conditions, the speed limit along the highway can be adjusted downwards by displaying a revised lower speed limit on these signs. Jurisdictions which have implemented variable speed limits such as this often have difficulty in determining a speed which is appropriate for all vehicle types in poor weather conditions. In my personal opinion, implementing reduced speed limits such as this exposes the road authority to increased legal liability, and are thus ill-advised. The onus should be placed on the vehicle operator to drive with due care and attention and adjust their own speed based on prevailing road conditions and their vehicle's capabilities. See an Enlarged Photo Here. (Photograph taken on June 3, 2017 - © Cameron Bevers) 

Left - Facing east along the Trans-Canada Highway (Hwy 1), about 38 km east of Sicamous. See an
Enlarged Photo Here. (Photograph taken on June 3, 2017 - © Cameron Bevers) Right - Facing east along Hwy 1 from the Kay Falls Bridge, located about 36 km east of Sicamous. See an Enlarged Photo Here. (Photograph taken on June 5, 2015 - © Cameron Bevers) 

Left - Facing west along Hwy 1 towards Sicamous at the Kay Falls Bridge. See an
Enlarged Photo Here. (Photograph taken on June 5, 2015 - © Cameron Bevers) Right - Overhead steel through truss bridge on Hwy 1 over the Perry River, facing east towards Revelstoke. See an Enlarged Photo Here. (Photograph taken on June 5, 2015 - © Cameron Bevers) 

Left - The Perry River Bridge was constructed in 1958. The bridge was replaced with a new four-lane structure shortly after this photo was taken in 2015. See
an Enlarged Photo Here. (Photograph taken on June 5, 2015 - © Cameron Bevers) Right - Historical monument in a roadside park along Hwy 1 at Craigellachie marking the driving of "The Last Spike" in the CPR on November 7, 1885. See an Enlarged Photo Here. (Photograph taken on June 5, 2015 - © Cameron Bevers) 
Above - British Columbia Historical Plaque at the Craigellachie Roadside Park, noting the location of "The Last Spike". See an
Enlarged Photo Here. (Photograph taken on June 5, 2015 - © Cameron Bevers) 

Left - Mural depicting the driving of "The Last Spike" on the CPR by Sir Donald Mann on November 7, 1885. See an
Enlarged Photo Here. (Photograph taken on June 5, 2015 - © Cameron Bevers) Right - Facing east along the Trans-Canada Highway (Hwy 1) towards Revelstoke at the Gorge Creek Bridge at Craigellachie. See an Enlarged Photo Here. (Photograph taken on June 5, 2015 - © Cameron Bevers) 

Left - Southern side of the Gorge Creek Bridge on the Trans-Canada Highway (Hwy 1). See an
Enlarged Photo Here. (Photograph taken on June 5, 2015 - © Cameron Bevers) Right - The abutment of a much older bridge exists on the north side of the Gorge Creek Bridge on Hwy 1. See an Enlarged Photo Here. (Photograph taken on June 5, 2015 - © Cameron Bevers) 

Left - Facing west along Hwy 1 towards Sicamous at the Gorge Creek Bridge at Craigellachie. See an
Enlarged Photo Here. (Photograph taken on June 5, 2015 - © Cameron Bevers) Right - Newly-completed four-lane Trans-Canada Highway (Hwy 1) at the Eagle River Bridge in Malakwa, located about 20 km east of Sicamous. See an Enlarged Photo Here. (Photograph taken on June 3, 2017 - © Cameron Bevers) 

Left - The glacier-capped peaks of the Monashee Mountains are visible in this spectacular view of the Trans-Canada Highway (Hwy 1), about 15 km east of
Sicamous. From this viewpoint, it is hard to believe that a pass actually exists through these mountains. The discovery of Eagle Pass in 1865 played an important role
in linking the east and west coasts of Canada through the completion of the CPR in the 1880s, and ultimately, the Trans-Canada Highway decades later. See an
Enlarged Photo Here. (Photograph taken on June 5, 2015 - © Cameron Bevers) Right - Facing east along Hwy 1 towards Revelstoke, about 14 km east of Sicamous. See an Enlarged Photo Here. (Photograph taken on June 5, 2015 - © Cameron Bevers) 

Left - Facing west along the Trans-Canada Highway (Hwy 1), about 13 km east of Sicamous. See an
Enlarged Photo Here. (Photograph taken on June 5, 2015 - © Cameron Bevers) Right - Distance guide sign on westbound Hwy 1, about 13 km east of Sicamous. See an Enlarged Photo Here. (Photograph taken on June 5, 2015 - © Cameron Bevers) 

Left - Start of the divided four-lane highway, about 11 km east of Sicamous. See an
Enlarged Photo Here. (Photograph taken on June 5, 2015 - © Cameron Bevers) Right - Facing west along Hwy 1 from the end of the divided highway, about 11 km east of Sicamous. The balance of the Trans-Canada Highway from this point westerly to Sicamous is an undivided two-lane highway. See an Enlarged Photo Here. (Photograph taken on June 5, 2015 - © Cameron Bevers) 

Left - Sign marking the entrance to Sicamous on the westbound Trans-Canada Highway (Hwy 1). See an
Enlarged Photo Here. (Photograph taken on June 5, 2015 - © Cameron Bevers) Right - Distance guide sign on eastbound Hwy 1 departing Sicamous. See an Enlarged Photo Here. (Photograph taken on June 5, 2015 - © Cameron Bevers)
Continue west along BC Highway 1 from Sicamous to Highway 97 |
|---|
Links to Adjacent BC Highway Photograph Pages:
Back to BC Highway 395 Photos /
British Columbia Highways Photo Index /
On to BC Highway 3 Photos
Ontario Highway History - Main Menu / Vacation Highway Photos - Main Menu Website contents, photos & text © 2002-2026, Cameron
Bevers (Webmaster) - All Rights Reserved / Contact Me
|
|---|