
| 
| |
|
|
This page contains present day photos (Year 2000 to date) of Ontario's King's Highway 11, arranged by location from New
Liskeard northerly to Matheson. All photographs displayed on this page were taken by the Webmaster (Cameron Bevers), unless specifically noted otherwise. Click on any
thumbnail to see a larger image!
Please note that all photographs displayed on this
website are protected by copyright. These photographs must not be reproduced, published,
electronically stored or copied, distributed, or posted onto other websites without
my written permission. If you want to use photos from this website, please
email me first for permission. Thank-you!
|
|---|
|
Page 21: Present Day King's Highway 11 Photographs (New Liskeard to Matheson)

Left - Distance guide sign on northbound Hwy 11 departing New Liskeard. See an
Enlarged Photo here. (Photograph taken on August 3, 2012 - © Cameron Bevers) Right - The short four-lane section of Hwy 11 which begins at the Hwy 11B & Hwy 65 Junction comes to an end a short distance north of New Liskeard. See an Enlarged Photo here. (Photograph taken on August 3, 2012 - © Cameron Bevers) 

Left - Facing south along Hwy 11 towards New Liskeard near Uno Park Road. The flat, open rural scenery of the New Liskeard area is a dramatic change from the
forested scenery along Hwy 11 between North Bay and New Liskeard. See an Enlarged Photo here. (Photograph taken on August 3, 2012 - © Cameron Bevers) Right - Facing north along Hwy 11 towards Englehart from Uno Park Road, about 6 km north of New Liskeard. See an Enlarged Photo here. (Photograph taken on August 3, 2012 - © Cameron Bevers) 

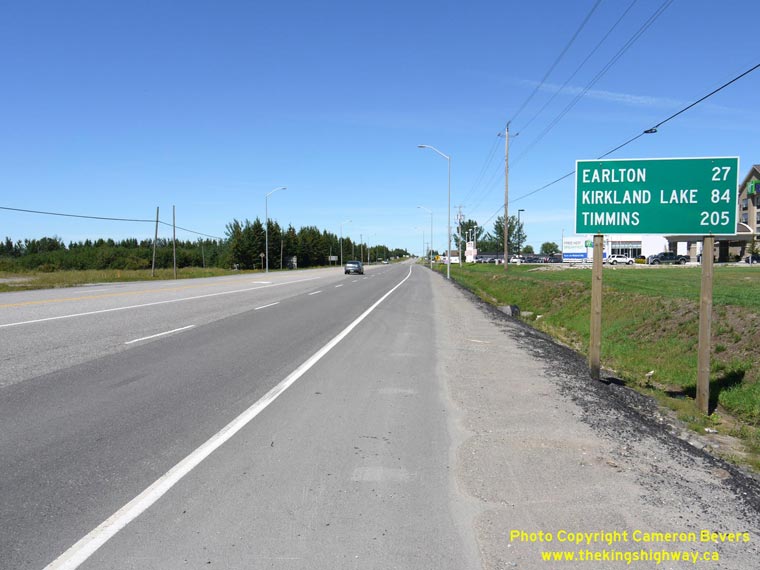
Left - This scenic rural view greets motorists on southbound Hwy 11, about 8 km north of New Liskeard. See an
Enlarged Photo here. (Photograph taken on August 3, 2012 - © Cameron Bevers) Right - Distance guide sign on southbound Hwy 11 at the Hwy 569 Junction between New Liskeard and Earlton. See an Enlarged Photo here. (Photograph taken on August 3, 2012 - © Cameron Bevers) 

Left - Facing north along Hwy 11 towards Earlton approaching the Hwy 569 Junction, about 15 km north of New Liskeard. See an
Enlarged Photo here. (Photograph taken on August 3, 2012 - © Cameron Bevers) Right - Guide sign for Hwy 569 on northbound Hwy 11 between New Liskeard and Earlton. See an Enlarged Photo here. (Photograph taken on August 3, 2012 - © Cameron Bevers) 

Left - The Hwy 569 Junction marks the start of the Thornloe Diversion on Hwy 11. This 15 km
diagonal highway diversion was constructed in 1938, in order to bypass the winding original route of the old Ferguson Highway between this point and Earlton. The
Thornloe Diversion shortened the highway distance between New Liskeard and Earlton by 6 km. See an
Enlarged Photo here. (Photograph taken on August 3, 2012 - © Cameron Bevers) Right - Junction assembly at the southern terminus of Hwy 569 at the Hwy 11 Junction between New Liskeard and Earlton. See an Enlarged Photo here. (Photograph taken on August 3, 2012 - © Cameron Bevers) 

Left - Approaching the Hwy 11 Junction on southbound Hwy 569 south of Hilliardton. See an
Enlarged Photo here. (Photograph taken on August 3, 2012 - © Cameron Bevers) Right - Facing north along Hwy 569 towards Hilliardton from the Hwy 11 Junction. The route of Hwy 569 loops through the rural eastern townships of the Timiskaming District, before reemerging at Hwy 11 about 5 km south of Englehart. This was one of several Ontario Secondary Highways designated in the Timiskaming District during 1956. See an Enlarged Photo here. (Photograph taken on August 3, 2012 - © Cameron Bevers) 

Left - Southern terminus of Hwy 569 at the Hwy 11 Junction between New Liskeard and Earlton. Due to the skewed intersection, the turn-off from northbound
Hwy 11 to northbound Hwy 569 is channelized. See an Enlarged Photo here. (Photograph taken on August 3, 2012 - © Cameron Bevers) Right - Facing north along Hwy 11 towards Earlton from the southern terminus of Hwy 569. Prior to the construction of the Thornloe Diversion in the late 1930s, the route of the old Ferguson Highway turned left onto Development Road just ahead. See an Enlarged Photo here. (Photograph taken on August 3, 2012 - © Cameron Bevers) 

Left - Facing south along Hwy 11 towards New Liskeard from the Hwy 569 Junction. See an
Enlarged Photo here. (Photograph taken on August 3, 2012 - © Cameron Bevers) Right - Approaching the Hwy 569 Junction on Hwy 11, facing south towards New Liskeard. See an Enlarged Photo here. (Photograph taken on August 3, 2012 - © Cameron Bevers) 

Left - The Thornloe Diversion curves to the northwest along its 15 km trek towards Earlton. Many diversions such as this one were constructed along Hwy 11
between New Liskeard and Matheson in the 1930s and 1940s, in an effort to reduce the highway distance from North Bay to larger northern towns such as Cochrane and Timmins. See an
Enlarged Photo here. (Photograph taken on August 3, 2012 - © Cameron Bevers) Right - Distance guide sign on southbound Hwy 11 at the Hwy 562 Junction near Thornloe. See an Enlarged Photo here. (Photograph taken on August 3, 2012 - © Cameron Bevers) 

Left - Approaching the Hwy 562 Junction on northbound Hwy 11 near Thornloe. See an
Enlarged Photo here. (Photograph taken on August 3, 2012 - © Cameron Bevers) Right - Guide sign for Hwy 562 on northbound Hwy 11 between New Liskeard and Earlton. Significant portions of the route of Hwy 562 were once part of the Ferguson Highway. In fact, the section of Hwy 562 through Thornloe was briefly part of Hwy 11 immediately following the Department of Highways' assumption of the Ferguson Highway in 1937. See an Enlarged Photo here. (Photograph taken on August 3, 2012 - © Cameron Bevers) 

Left - Facing south along Hwy 11 towards New Liskeard from the Hwy 562 Junction. See an
Enlarged Photo here. (Photograph taken on August 3, 2012 - © Cameron Bevers) Right - Approaching the Hwy 562 Junction on northbound Hwy 11 between New Liskeard and Earlton. The construction of the Thornloe Diversion in the late 1930s ultimately created an awkward six-legged intersection at this point. The route of Hwy 562 is a soft left turn, while the south leg of Garden Road (the Old Ferguson Highway) is a hard left turn. The two right hand turns are both lightly-travelled township roads. The section of the Old Ferguson Highway via Garden Road South and Development Road was transferred from the jurisdiction of the Department of Highways of Ontario (DHO) to the Township of Harley in 1941, shortly after the completion of the Thornloe Diversion on Hwy 11. See an Enlarged Photo here. (Photograph taken on August 3, 2012 - © Cameron Bevers) 

Left - Junction assembly at the eastern terminus of Hwy 562 at the Hwy 11 Junction east of Thornloe. See an
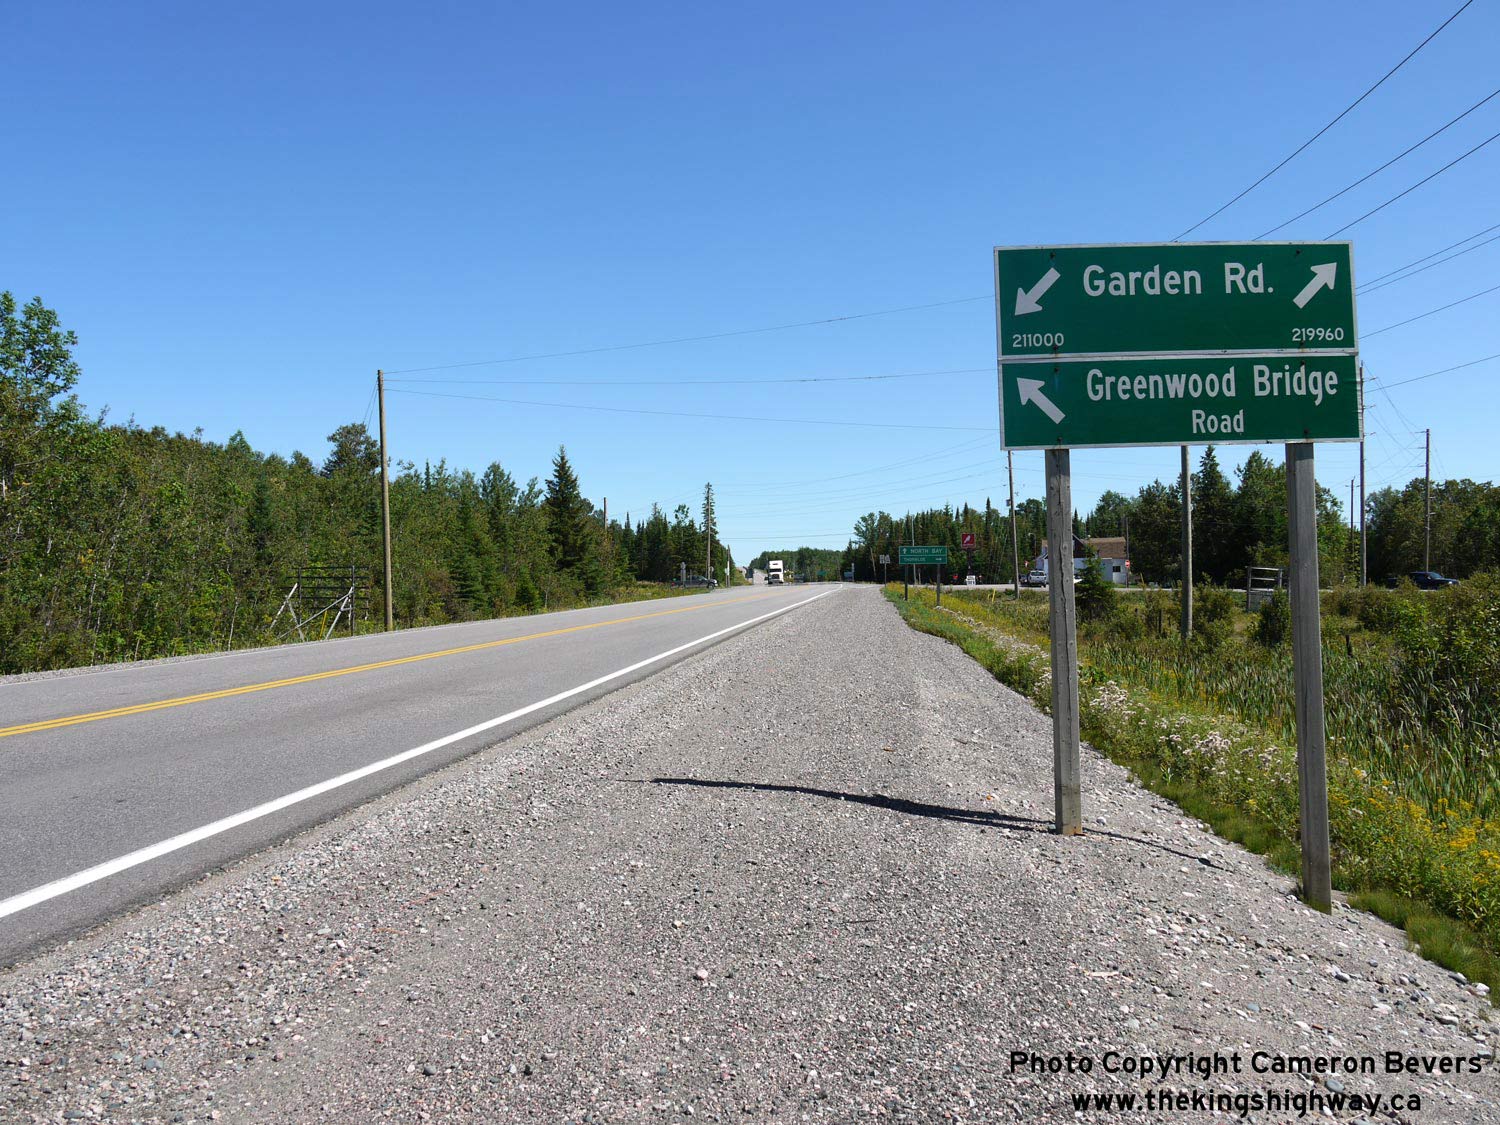
Enlarged Photo here. (Photograph taken on August 3, 2012 - © Cameron Bevers) Right - Guide signs on southbound Hwy 11 showing the township road legs at the awkward six-legged intersection east of Thornloe. Only Greenwood Bridge Road and the north leg of Garden Road have not been provincial highways at one time or another. Garden Road South was the original route of the Ferguson Highway (Hwy 11) prior to being bypassed in 1938, while the two Hwy 11 legs forming the Thornloe Diversion and the leg forming Hwy 562 are still active provincial highways today. See an Enlarged Photo here. (Photograph taken on August 3, 2012 - © Cameron Bevers) 

Left - Approaching the eastern terminus of Hwy 562 at the six-legged intersection east of Thornloe. Prior to the completion of the Thornloe Diversion in 1938,
Hwy 11 turned right at this intersection onto Garden Road South just beyond the gas station. See an
Enlarged Photo here. (Photograph taken on August 3, 2012 - © Cameron Bevers) Right - Facing west along Hwy 562 towards Thornloe from the Hwy 11 Junction. This section of Hwy 562 briefly served as the route for Hwy 11 in 1937 and 1938, after the Ferguson Highway was assumed by the DHO as a King's Highway. When the Thornloe Diversion was completed in 1938, the route of Hwy 11 bypassed the Village of Thornloe altogether. See an Enlarged Photo here. (Photograph taken on August 3, 2012 - © Cameron Bevers) 

Left - Facing south along Hwy 11 towards the complicated Hwy 562 Junction east of Thornloe. See an
Enlarged Photo here. (Photograph taken on August 3, 2012 - © Cameron Bevers) Right - Junction assembly on southbound Hwy 11 approaching the Hwy 562 Junction between New Liskeard and Earlton. See an Enlarged Photo here. (Photograph taken on August 3, 2012 - © Cameron Bevers) 

Left - Facing north along the Thornloe Diversion (Hwy 11) towards Earlton from the Hwy 562 Junction. See an
Enlarged Photo here. (Photograph taken on August 3, 2012 - © Cameron Bevers) Right - Distance guide sign on northbound Hwy 11 at the Hwy 562 Junction. See an Enlarged Photo here. (Photograph taken on August 3, 2012 - © Cameron Bevers) 

Left - Facing south along Hwy 11 at Younge Street near Thornloe, about 5 km south of Earlton. See an
Enlarged Photo here. (Photograph taken on August 3, 2012 - © Cameron Bevers) Right - Facing south along Hwy 11 towards New Liskeard from 10th Street (Formerly Hwy 11B) in Earlton. See an Enlarged Photo here. (Photograph taken on August 3, 2012 - © Cameron Bevers) 

Left - Distance guide sign on southbound Hwy 11 departing Earlton. See an
Enlarged Photo here. (Photograph taken on August 3, 2012 - © Cameron Bevers) Right - Facing north along Hwy 11 towards 10th Street in Earlton. Up until the completion of the Earlton Bypass in 1961, Hwy 11 turned left onto 10th Street and passed through Downtown Earlton. The old highway leading into Earlton via 10th Street then became a locally-signed business route (Hwy 11B). The route of Hwy 11B then returned to Hwy 11 via Hwy 571, which intersects Hwy 11 about 1 km ahead. Even today, northbound traffic bound for Earlton is directed to use 10th Street rather than Hwy 571. See an Enlarged Photo here. (Photograph taken on August 3, 2012 - © Cameron Bevers) 

Left - Eastern side of the Earlton Railway Overhead on Hwy 11. This 9-span prestressed concrete girder structure was completed in 1961. The 54 concrete girders
supporting the bridge deck were manufactured off-site at the contractor's yard in Kirkland Lake in 1960, and then transported to the bridge site for installation. See
an Enlarged Photo here. (Photograph taken on September 1, 2007 - © Cameron Bevers) Right - Western side of the Earlton Railway Overhead on Hwy 11. This impressive 443-foot (135 metre) structure spans a municipal road and the Ontario Northland Railway (ONR). Even though this bridge was only completed in 1961, it had always been the DHO's intention to grade separate the railway crossing near Earlton. When the initial surveying for the Thornloe Diversion was done in the late 1930s, land was acquired for a multiple-span railway overhead on the revised Hwy 11 alignment at Earlton. Unfortunately, the ambitious plans for the Earlton grade separation were shelved due to the outbreak of World War II in 1939. Post-War shortages of construction materials once again delayed construction of the railway overhead at Earlton once hostilities ended in 1945. In the end, the Earlton Bypass section of the highway remained incomplete for more than two decades, until it was finally opened to traffic in 1961. See an Enlarged Photo here. (Photograph taken on September 1, 2007 - © Cameron Bevers) 

Left - Facing north along Hwy 11 towards Englehart, approaching the Hwy 571 Junction north of Earlton. See an
Enlarged Photo here. (Photograph taken on August 3, 2012 - © Cameron Bevers) Right - Facing south along Hwy 11 (Earlton Bypass) from the Hwy 571 Junction. See an Enlarged Photo here. (Photograph taken on August 3, 2012 - © Cameron Bevers) 

Left - Junction assembly near Earlton at the northern terminus of Hwy 571 at the Hwy 11 Junction. Earlton is approximately the mid-point along Hwy 11 between
North Bay and Cochrane. A short section of Hwy 571 from Hwy 11 to Earlton was once part of Earlton's Hwy 11B Business Route in the 1960s. See an
Enlarged Photo here. (Photograph taken on August 3, 2012 - © Cameron Bevers) Right - Facing south along Hwy 571 towards Earlton from the Hwy 11 Junction. See an Enlarged Photo here. (Photograph taken on August 3, 2012 - © Cameron Bevers) 

Left - Approaching the Hwy 11 Junction on northbound Hwy 571 north of Earlton. See an
Enlarged Photo here. (Photograph taken on August 3, 2012 - © Cameron Bevers) Right - Facing south along Hwy 11 towards the Hwy 571 Junction. The Earlton Bypass (Hwy 11) curves off to the left, while Hwy 571 exits to the right and continues south into Earlton. Prior to the completion of the Earlton Bypass in 1961, Hwy 11 used to pass through Earlton. See an Enlarged Photo here. (Photograph taken on August 3, 2012 - © Cameron Bevers) 

Left - Guide sign marking the Hwy 571 Junction on southbound Hwy 11 near Earlton. See an
Enlarged Photo here. (Photograph taken on August 3, 2012 - © Cameron Bevers) Right - Facing north along Hwy 11 towards Englehart from the Hwy 571 Junction north of Earlton. See an Enlarged Photo here. (Photograph taken on August 3, 2012 - © Cameron Bevers) 

Left - Distance guide sign on northbound Hwy 11 departing Earlton. See an
Enlarged Photo here. (Photograph taken on August 3, 2012 - © Cameron Bevers) Right - Facing south along Hwy 11 towards Englehart from the Aidie Creek Bridge. See an Enlarged Photo here. (Photograph taken on September 6, 2007 - © Cameron Bevers) 

Left - Aidie Creek Bridge on Hwy 11 about 10 km north of Englehart. This single span concrete rigid frame structure was completed in 1939. See an
Enlarged Photo here. (Photograph taken on August 17, 2003 - © Cameron Bevers) Right - Western side of the Aidie Creek Bridge on Hwy 11 north of Englehart. This aging structure was replaced with a new bridge in 2008-2009. See an Enlarged Photo here. (Photograph taken on August 17, 2003 - © Cameron Bevers) 

Left - Another view of the western side of the Aidie Creek Bridge on Hwy 11 near Englehart. See an
Enlarged Photo here. (Photograph taken on September 6, 2007 - © Cameron Bevers) Right - Facing north along Hwy 11 towards Matheson at the Aidie Creek Bridge. See an Enlarged Photo here. (Photograph taken on September 6, 2007 - © Cameron Bevers) 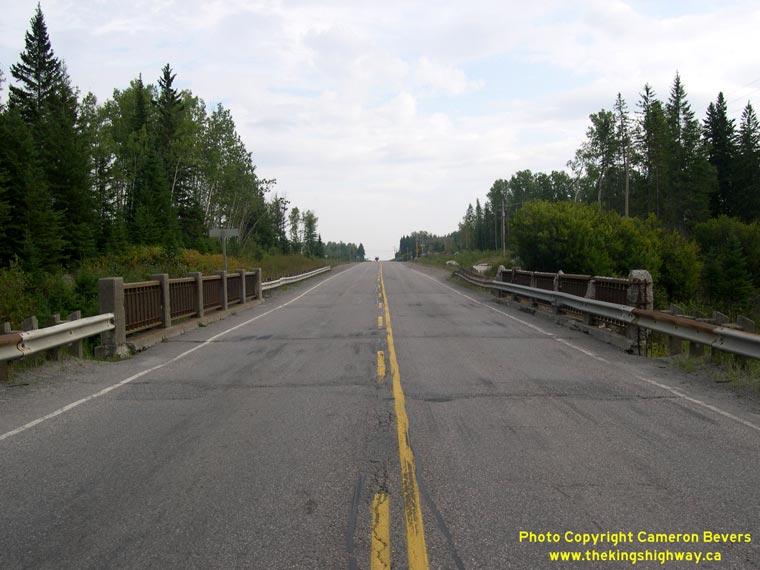

Left - Facing south along Hwy 11 towards Englehart at the Aidie Creek Bridge. See an
Enlarged Photo here. (Photograph taken on September 6, 2007 - © Cameron Bevers) Right - Eastern side of the Aidie Creek Bridge on Hwy 11 north of Englehart. See an Enlarged Photo here. (Photograph taken on September 6, 2007 - © Cameron Bevers) 

Left - Steel handrail design on the Aidie Creek Bridge. The eastern side of the bridge was repaired at one point during the bridge's history, as it is in much
better condition than the western handrail. See an Enlarged Photo here. (Photograph taken on September 6, 2007 - © Cameron Bevers) Right - Advance guide sign on westbound Hwy 66 approaching the Hwy 11 Junction at Kenogami Lake. See an Enlarged Photo here. (Photograph taken on September 2, 2007 - © Cameron Bevers) 

Left - Approaching the Hwy 11 Junction on Hwy 66, facing west. The route of Hwy 66 continues west beyond the Hwy 11 Junction towards Matachewan. Up until the
late 1970s, there were actually two junctions of Hwy 11 and Hwy 66, offset by approximately 500 metres. As a result, there was once a short overlapped route
between Hwy 11 & Hwy 66. See an Enlarged Photo Here. (Photograph taken on September 2, 2007 - © Cameron Bevers) Right - Junction signs at the Hwy 11 and Hwy 66 Junction at Kenogami Lake. See an Enlarged Photo Here. (Photograph taken on September 2, 2007 - © Cameron Bevers) 

Left - Facing north along Hwy 11 towards Matheson from the Hwy 66 Junction at Kenogami Lake. Up until the late 1970s, Hwy 11 & Hwy 66 shared a common route
for 500 metres. Originally, the turn-off for Hwy 66 to Kirkland Lake was located at the bottom of this hill. The offset junction between the east and west legs of
Hwy 66 was eliminated during a highway construction project in 1979, after which time the overlapped route of Hwy 11 & Hwy 66 was discontinued. See an
Enlarged Photo Here. (Photograph taken on September 2, 2007 - © Cameron Bevers) Right - Facing east along Hwy 66 towards Kirkland Lake from the Hwy 11 Junction. Originally, the east leg of Hwy 66 intersected with Hwy 11 just north of the west leg of Hwy 66 at an offset junction. The two offset intersections were consolidated into a single junction during a highway realignment project which took place here in 1979. Since 2004, the route of Hwy 66 from Kenogami Lake to the Ontario-Quebec Boundary has been signed as a Trans-Canada Highway route. See an Enlarged Photo Here. (Photograph taken on September 2, 2007 - © Cameron Bevers) 
Above - Hwy 11 and Trans-Canada Highway signs near the Hwy 66 Junction at Kenogami Lake. See an
Enlarged Photo Here. (Photograph taken on August 18, 2003 - © Cameron Bevers) 

Left - Facing north along Hwy 11 towards Matheson, about 4 km north of Kenogami Lake. A new northbound passing lane was constructed along this section of
Hwy 11 shortly after this photo was taken. See an Enlarged Photo Here. (Photograph taken on September 2, 2007 - © Cameron Bevers) Right - Facing north along Hwy 11 towards the Hwy 570 Junction at the Blanche River Bridge. See an Enlarged Photo Here. (Photograph taken on September 2, 2007 - © Cameron Bevers) 

Left - Eastern side of the creosoted timber trestle bridge on Hwy 11 over the Blanche River near the Hwy 570 Junction. See an
Enlarged Photo Here. (Photograph taken on September 2, 2007 - © Cameron Bevers) Right - Western side of the Blanche River Bridge on Hwy 11 near the Hwy 570 Junction. This six-span timber trestle structure was completed in 1952. See an Enlarged Photo Here. (Photograph taken on August 18, 2003 - © Cameron Bevers) 

Left - Timber beam superstructure of the Blanche River Bridge on Hwy 11 north of Kenogami Lake. Timber bridges such as this example were once fairly common on
Northern Ontario's highways. Over the past two decades, many of these old timber bridges have been replaced with concrete or steel bridges. The Blanche River Bridge
was replaced with a new structure in 2010-2011. See an Enlarged Photo Here. (Photograph taken on September 2, 2007 - © Cameron Bevers) Right - Facing south along Hwy 11 towards Kenogami Lake at the Blanche River Bridge. See an Enlarged Photo Here. (Photograph taken on September 2, 2007 - © Cameron Bevers) 

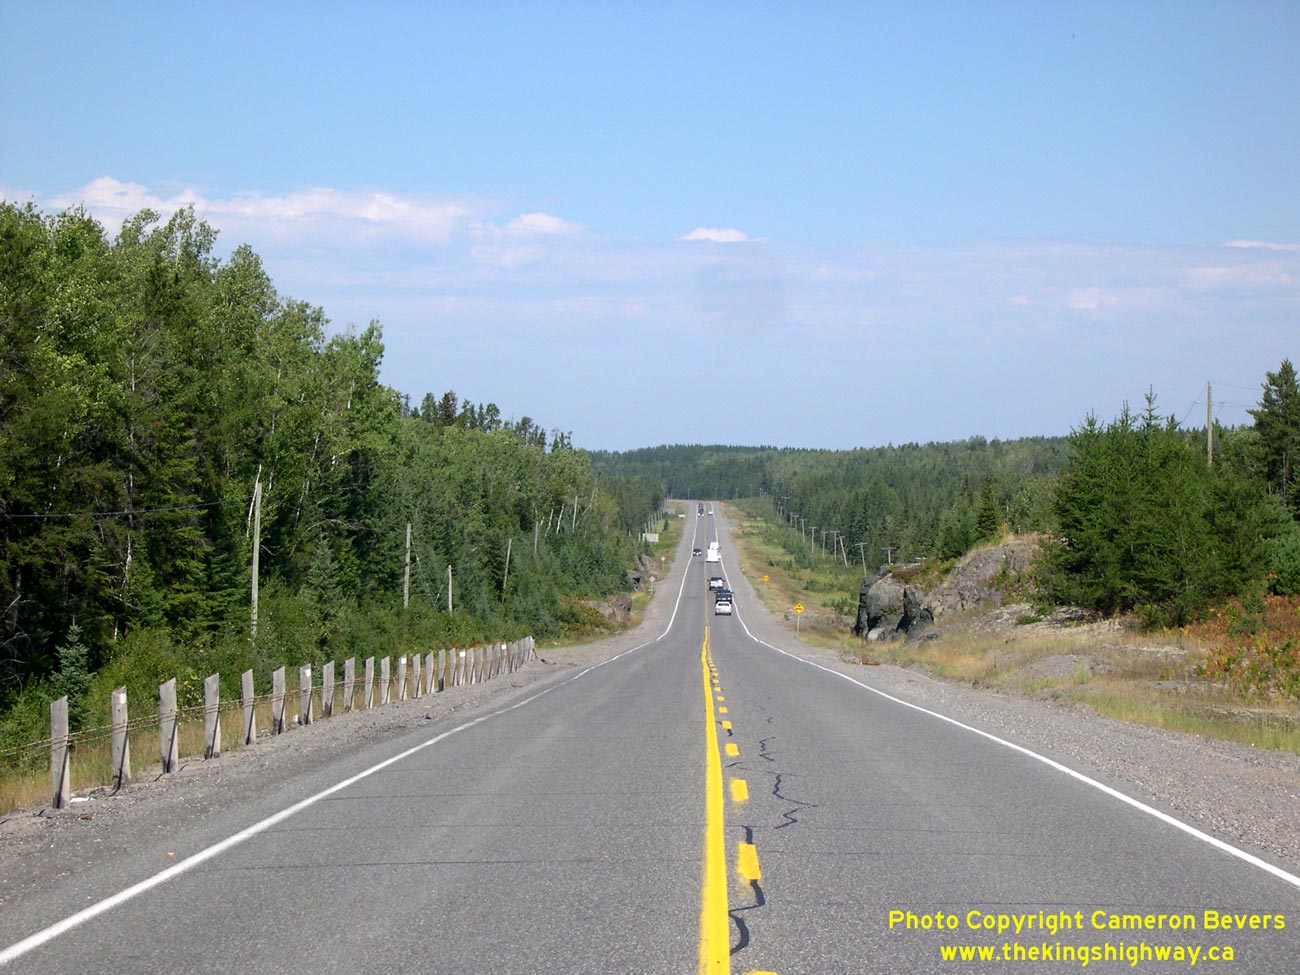
Left - These rock piles on the western side of Hwy 11 mark the site of an earlier timber bridge which carried the highway over the Blanche River prior to
1952. The route of Hwy 11 was realigned approaching the Blanche River in the early 1950s as part of the bridge replacement project. The original alignment of
Hwy 11 can be accessed via Rainbow Lake Road. See an Enlarged Photo Here. (Photograph taken on September 2, 2007 - © Cameron Bevers) Right - Facing south along Hwy 11 towards Kenogami Lake from the Arctic Watershed. Although this gradual hill on the highway may not seem like it has much significance, it actually divides two of the world's ocean watersheds. On the south side of this line, all watercourses run south towards the Great Lakes (and ultimately, the Atlantic Ocean) while watercourses north of this line run north into the Arctic Ocean. The height of land between the watersheds at this point on Hwy 11 is 318 metres (1,043 feet) above Sea Level. The Arctic Watershed is not actually the highest point of elevation along the route of Hwy 11, however. That point is reached in Northwestern Ontario between Thunder Bay and Atikokan, where Hwy 11 surpasses 500 metres (1,640 feet) in elevation above Sea Level in several locations. See an Enlarged Photo Here. (Photograph taken on September 2, 2007 - © Cameron Bevers) 

Left - Arctic Watershed sign facing northbound Hwy 11 traffic about 15 km north of Kenogami Lake. This large sign was constructed in the 1960s, replacing a
much smaller sign that was placed on the hill many years earlier. The original sign can be seen in this
Historic 1952 Photo, taken from the same location 55 years earlier. So why is there a slight
difference in elevation noted between the historic and current signs? The elevation displayed on the old sign was probably taken from the profile of the original
1930s highway alignment. The elevation displayed on the current sign likely reflects the revised alignment of Hwy 11 which we see today, which was built using a lower
profile across the hill. See an Enlarged Photo Here. (Photograph taken on September 2, 2007 - © Cameron Bevers) Right - Looking south along Hwy 11 at the White Clay River Bridge, about 17 km north of Kenogami Lake. See an Enlarged Photo Here. (Photograph taken on August 18, 2003 - © Cameron Bevers) 
Above - Eastern side of the White Clay River Bridge on Hwy 11 between Kenogami Lake and Ramore. This eight-span steel beam and timber trestle structure was
originally completed in 1951. The bridge was rehabilitated in 1986. The original bridge's design can be seen in this
Historic 1951 Photo, taken shortly after the bridge was completed. The White Clay River Bridge
was replaced with a new structure in 2012-2013. See an Enlarged Photo Here. (Photograph taken on August 18, 2003 - © Cameron Bevers)
Continue on to King's Highway 11 Photos: Matheson to Cochrane
|
|---|
Links to Adjacent King's Highway Photograph Pages:
Back to King's Highway 10 Photos /
King's Highway 11 History /
On to King's Highway 12 Photos
Ontario Highway History - Main Menu / Back to List of Highways Website contents, photos & text © 2002-2026, Cameron
Bevers (Webmaster) - All Rights Reserved / Contact Me
|
|---|