
| 
| |
|
|
This page contains present day photos (Year 2000 to date) of Ontario's King's Highway 11, arranged by location from Matheson
northerly to Cochrane. All photographs displayed on this page were taken by the Webmaster (Cameron Bevers), unless specifically noted otherwise. Click on any
thumbnail to see a larger image!
Please note that all photographs displayed on this
website are protected by copyright. These photographs must not be reproduced, published,
electronically stored or copied, distributed, or posted onto other websites without
my written permission. If you want to use photos from this website, please
email me first for permission. Thank-you!
|
|---|
|
Page 22: Present Day King's Highway 11 Photographs (Matheson to Cochrane)


Left - Watabeag River Bridge on Old Hwy 11 (Monahan Road), located about 6 km north of Matheson. This ten-span steel beam and creosoted timber trestle
structure was completed in 1951. Click here to see a Historical 1952 Photo of the Watabeag River
Bridge, taken shortly after it was built. See an Enlarged Photo Here. (Photograph taken on September 2, 2007 - © Cameron Bevers) Right - Facing south along Old Hwy 11 (Monahan Road) towards Matheson at the Watabeag River Bridge. See an Enlarged Photo Here. (Photograph taken on September 2, 2007 - © Cameron Bevers) 

Left - Facing north along Old Hwy 11 (Monahan Road) at the Watabeag River Bridge north of Matheson. See an
Enlarged Photo Here. (Photograph taken on September 2, 2007 - © Cameron Bevers) Right - The bridge deck of the Watabeag River Bridge was recently rehabilitated. See an Enlarged Photo Here. (Photograph taken on September 2, 2007 - © Cameron Bevers) 

Left - Close-up of the creosoted timber trestle portion of the Watabeag River Bridge north of Matheson. This bridge type saw considerable use in Northern Ontario. See
an Enlarged Photo Here. (Photograph taken on September 2, 2007 - © Cameron Bevers) Right - Facing north along Old Hwy 11 (Monahan Road) about 7 km north of Matheson. This narrow, old section of the original 1920s Ferguson Highway was bypassed by a new route for Hwy 11 (the Monteith Diversion) a short distance to the west in 1957. The old route of Hwy 11 seen here hasn't changed at all in many decades, which makes it a rather interesting historical drive. Old highway alignments such as this one provide a great insight as to how early motorists would have experienced the adventure of Ontario's King's Highways. See an Enlarged Photo Here. (Photograph taken on September 2, 2007 - © Cameron Bevers) 

Left - Facing south along Old Hwy 11 (Monahan Road) about 7 km north of Matheson. After the Monteith Diversion was completed in 1957, Old Hwy 11 was briefly
renumbered as Hwy 11B. The old highway was stripped of its King's Highway designation in 1961, but continued to serve as a provincial highway known as Secondary
Highway 626 for a number of years thereafter. Ultimately, jurisdiction over the old highway was transferred from the province to the municipal tier in 1974. See an
Enlarged Photo Here. (Photograph taken on September 2, 2007 - © Cameron Bevers) Right - Driftwood River Bridge on Old Hwy 11 (Rese Road) near Monteith. The Monteith Bridge has a rather odd history, in that it was rebuilt and/or retrofitted no fewer than three times during the 1950s - once in 1953, again in 1958 and yet again in 1959. While the historical reason for this repeated bridge work was previously unknown, it was recently discovered that the bridge built in 1953 was severely damaged during a fire which occurred here in the early months of 1958. The Monteith Bridge was initially a timber trestle structure with a 52-foot steel beam centre span. The fire led to the partial replacement of several of the bridge spans with a temporary Bailey Bridge, which was opened in August 1958. The permanent Warren-type steel deck truss centre span seen here was installed in 1959. See an Enlarged Photo Here. (Photograph taken on September 2, 2007 - © Cameron Bevers) 

Left - View of the steel deck truss superstructure of the Driftwood River Bridge on Old Hwy 11 near Monteith. This steel deck truss was constructed as part of
a retrofit and partial replacement of an earlier structure, built at this location in 1953. See an
Enlarged Photo Here. (Photograph taken on September 2, 2007 - © Cameron Bevers) Right - Facing north across the Driftwood River Bridge on Old Hwy 11 near Monteith. Historical photos of this bridge prove that the exposed concrete deck on the present day structure was not built as part of the original 1953 structure, nor were the steel tube handrails. It appears that the entire bridge deck and all appurtenances were replaced in 1959. What adds to this bridge's mystery is that the steel tube handrails used on the Monteith Bridge were of a design more commonly used on bridges built in the 1930s, which suggests that the materials may have been salvaged from a dismantled bridge site at another location and moved here. This type of material salvaging was a relatively common practice for steel bridges built on Ontario's Highways in the 1950s, particularly in the northern parts of the province where it was more difficult to find local suppliers of manufactured bridge parts. See an Enlarged Photo Here. (Photograph taken on September 6, 2007 - © Cameron Bevers) 

Left - Side view of the centre deck truss span and timber trestle approach spans of the Monteith Bridge on Old Hwy 11 (Rese Road). Note that the deck truss
span is slightly narrower than the approach spans. This strongly suggests that this steel deck truss span was not originally designed for use in this particular
location. In all likelihood, the deck truss span was salvaged and transported from another location and reassembled for use here. See an
Enlarged Photo Here. (Photograph taken on September 6, 2007 - © Cameron Bevers) Right - Facing south across the Monteith Bridge over the Driftwood River on Old Hwy 11 (Rese Road). See an Enlarged Photo Here. (Photograph taken on September 6, 2007 - © Cameron Bevers) 

Left - Eastern side of the Monteith Bridge over the Driftwood River on Old Hwy 11. This interesting and mysterious bridge only adds to the historical appeal of
the bypassed, original route of Hwy 11 between Matheson and Porquis Junction. See an
Enlarged Photo Here. (Photograph taken on September 6, 2007 - © Cameron Bevers) Right - Directional ramp to northbound Hwy 11 from Hwy 101 near Matheson. See an Enlarged Photo Here. (Photograph taken on August 17, 2003 - © Cameron Bevers) 

Left - Approaching the junction of Hwy 101 and Hwy 11 west of Matheson. See an
Enlarged Photo Here. (Photograph taken on August 28, 2006 - © Cameron Bevers) Right - Overhead guide signs at the Hwy 11 and Hwy 101 Junction. See an Enlarged Photo Here. (Photograph taken on August 28, 2006 - © Cameron Bevers) 

Left - Facing south along Hwy 11 towards the Hwy 101 Junction west of Matheson. See an
Enlarged Photo Here. (Photograph taken on August 28, 2006 - © Cameron Bevers) Right - Facing north along Hwy 11 towards Cochrane from the Hwy 101 Junction near Matheson. See an Enlarged Photo Here. (Photograph taken on August 28, 2006 - © Cameron Bevers) 

Left - Facing north along Hwy 11 between Matheson and Val Gagne, about 2 km north of the Hwy 101 Junction. A northbound passing lane was constructed on Hwy 11
in this area a few years after this photo was taken. See an Enlarged Photo Here. (Photograph taken on August 28, 2006 - © Cameron Bevers) Right - Facing north along Hwy 11 near Val Gagne, about 10 km north of the Hwy 101 Junction. This section of Hwy 11 is actually a relocation of the original Hwy 11 route. When the Monteith Diversion was completed and opened to traffic in 1957, it bypassed almost 20 miles of the original 1937 alignment of Hwy 11 between Matheson and Porquis Junction. The Monteith Diversion created a new through highway, which bypassed several towns along the original highway's route, including Val Gagne. The old route of Hwy 11 was briefly known as Hwy 11B, but it later became Hwy 626. Today, Old Hwy 11 is a municipal road. See an Enlarged Photo Here. (Photograph taken on August 28, 2006 - © Cameron Bevers) 

Left - Driftwood River Bridge on Hwy 11 & Hwy 577 near Monteith. This three-span steel structure was completed in 1956. See an
Enlarged Photo Here. (Photograph taken on September 6, 2007 - © Cameron Bevers) Right - Facing north along Hwy 11 & Hwy 577 towards Cochrane at the Driftwood River Bridge near Monteith. Immediately north of the bridge, Hwy 577 turns right and heads north towards Iroquois Falls. Since 1997, the north section of Hwy 577 has been under municipal jurisdiction. See an Enlarged Photo Here. (Photograph taken on September 6, 2007 - © Cameron Bevers) 
Left - Eastern side of the Driftwood River Bridge on Hwy 11 & Hwy 577 near Monteith. This structure consists of a single Warren-type steel deck truss span
and two steel beam approach spans. This bridge was built on the Monteith Diversion, a long realignment of Hwy 11 which bypassed the communities of Matheson, Monteith
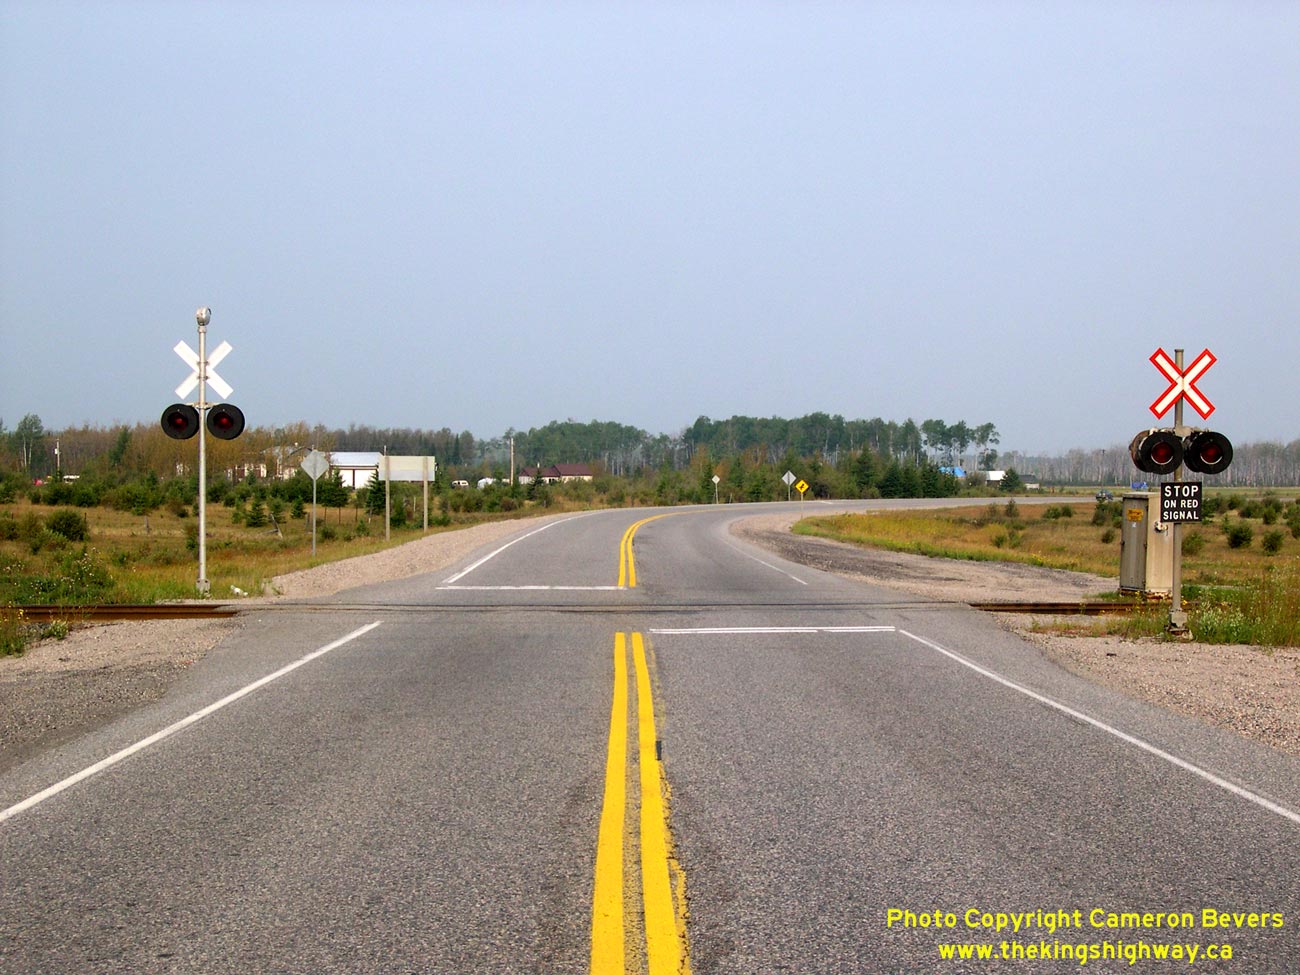
and Porquis Junction. See an Enlarged Photo Here. (Photograph taken on September 6, 2007 - © Cameron Bevers) Right - Facing north along Hwy 11 towards the Ontario Northland Railway Crossing at Porquis Junction. See an Enlarged Photo Here. (Photograph taken on September 6, 2007 - © Cameron Bevers) 

Left - Green guide sign marking the upcoming Hwy 67 Junction on northbound Hwy 11 at Porquis Junction. Hwy 67 serves at the main access highway into nearby
Iroquois Falls. Hwy 11 and Hwy 67 were both established in 1937, when the Department of Highways of Ontario (DHO) took over the Department of Northern Development's
trunk road system. See an Enlarged Photo Here. (Photograph taken on August 28, 2006 - © Cameron Bevers) Right - Approaching the Hwy 67 Junction on northbound Hwy 11 at Porquis Junction. Prior to 1997, there was both a north and south Hwy 67 Junction along Hwy 11. The south junction of Hwy 67 led towards Timmins, while the north junction of Hwy 67 led to Iroquois Falls. The route of Hwy 67 overlapped with Hwy 11 for almost 3 km between these two junctions. See an Enlarged Photo Here. (Photograph taken on August 28, 2006 - © Cameron Bevers) 

Left - Hwy 11 & Hwy 67 Junction at Porquis Junction, facing north towards Cochrane. See an
Enlarged Photo Here. (Photograph taken on August 28, 2006 - © Cameron Bevers) Right - Facing north along Hwy 67 towards Iroquois Falls from the Hwy 11 Junction. Iroquois Falls' town centre lies about 10 km northeast of Hwy 11. See an Enlarged Photo Here. (Photograph taken on August 28, 2006 - © Cameron Bevers) 
Above - Current southern terminus of Hwy 67 at Porquis Junction. Prior to 1997, Hwy 67 turned left and continued south towards Timmins concurrently with Hwy 11.
See an Enlarged Photo Here. (Photograph taken on August 28, 2006 - © Cameron Bevers) 

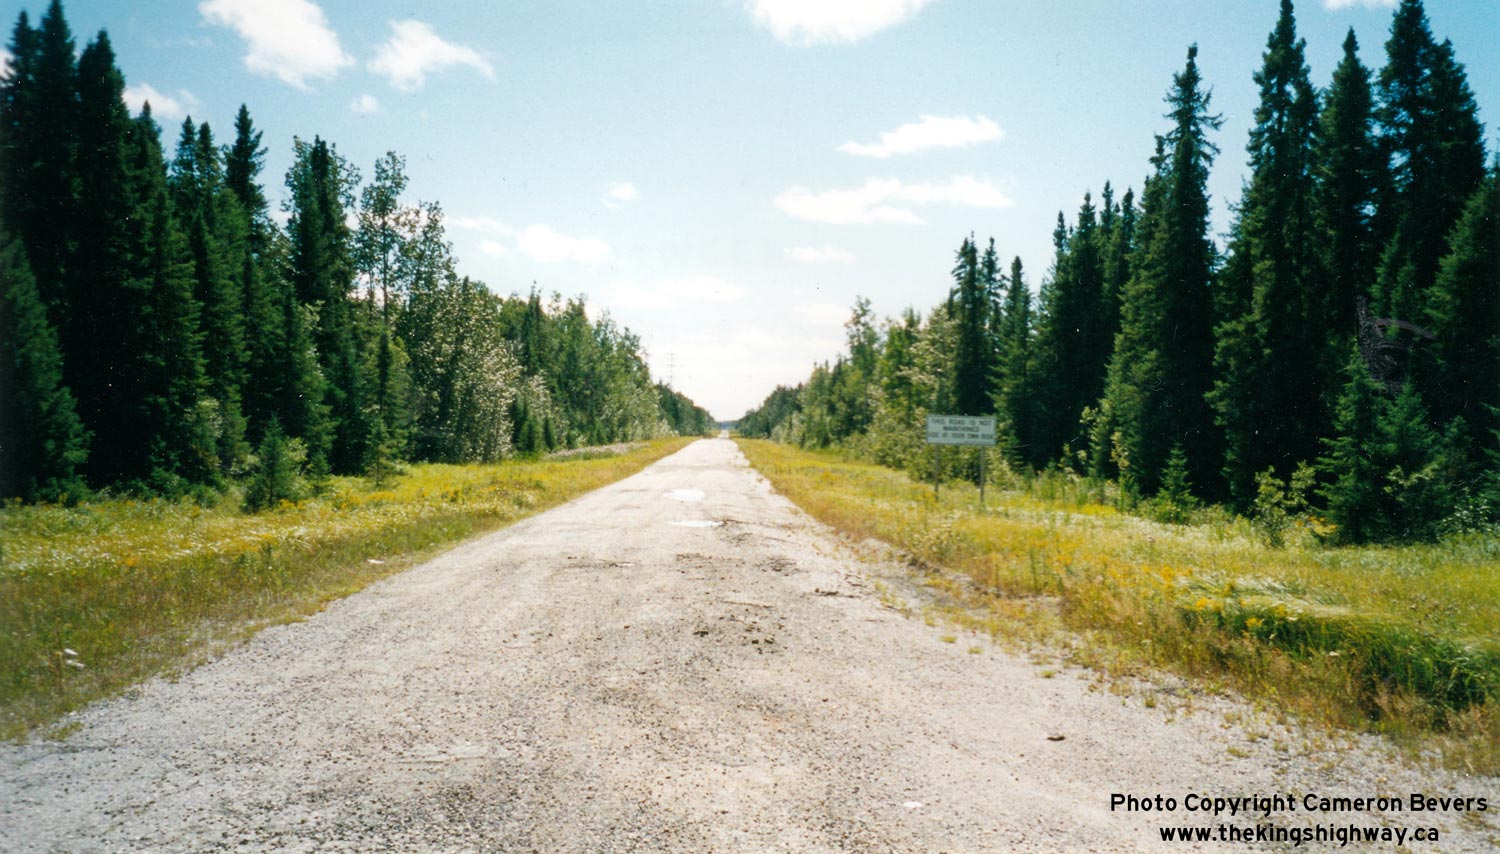
Left - Abandoned alignment of Hwy 11 at the Warrick Lake Picnic Area south of Cochrane. The new road alignment is on the embankment at left. This spot marks
the beginning of a 14 km abandoned section of the original Hwy 11, which was bypassed in 1963. This old alignment comes out at Hwy 7036 in Newmarket Township. See an
Enlarged Photo Here. (Photograph taken in August, 2002 - © Cameron Bevers) Right - Another section of the abandoned Hwy 11 south of Cochrane. Note the sign at right which reads "Road not maintained - Use at your own risk". This alignment comes out at Hwy 7036, 6 km away. See an Enlarged Photo Here. (Photograph taken in August, 2002 - © Cameron Bevers) 
Above - John I. Armstrong commemorative plaque at the Warrick Lake Picnic Area south of Cochrane. See an
Enlarged Photo Here. (Photograph taken in August, 2002 - © Cameron Bevers) 

Left - Hwy 11 at the Cochrane Town Limits, facing north. See an
Enlarged Photo Here. (Photograph taken on September 4, 2007 - © Cameron Bevers) Right - Hwy 11 approaching the 49th Parallel Road, just south of Cochrane. As the name suggests, this concession road follows the 49th Parallel. This particular degree of latitude is significant because it marks the southern boundary of most of Canada's western provinces. However, the most populated regions of Ontario are situated well below this degree of latitude. Toronto, for example, lies over 600 km south of the 49th Parallel. See an Enlarged Photo Here. (Photograph taken on September 4, 2007 - © Cameron Bevers)
Continue on to King's Highway 11 Photos: Cochrane to Driftwood
|
|---|
Links to Adjacent King's Highway Photograph Pages:
Back to King's Highway 10 Photos /
King's Highway 11 History /
On to King's Highway 12 Photos
Ontario Highway History - Main Menu / Back to List of Highways Website contents, photos & text © 2002-2026, Cameron
Bevers (Webmaster) - All Rights Reserved / Contact Me
|
|---|