
| 
| |
|
|
This page contains present day photos (Year 2000 to date) of Ontario's King's Highway 11, arranged by location from Cochrane
westerly to Driftwood. All photographs displayed on this page were taken by the Webmaster (Cameron Bevers), unless specifically noted otherwise. Click
on any thumbnail to see a larger image!
Please note that all photographs displayed on this
website are protected by copyright. These photographs must not be reproduced, published,
electronically stored or copied, distributed, or posted onto other websites without
my written permission. If you want to use photos from this website, please
email me first for permission. Thank-you!
|
|---|
|
Page 23: Present Day King's Highway 11 Photographs (Cochrane to Driftwood)


Left - Green guide signs on eastbound Hwy 11, marking the Hwy 579 and Hwy 652 Junction in Cochrane. Both of these Secondary Highways extend north from Cochrane.
Hwy 579 heads north to Gardiner, while Hwy 652 ends at the Kattawagami River Bridge, located over 150 km northeast of Cochrane. See an
Enlarged Photo Here. (Photograph taken on August 28, 2006 - © Cameron Bevers) Right - Approaching the Hwy 11 turn-off in Cochrane, facing east. Here, Hwy 11 turns right and heads south towards Iroquois Falls and Matheson. Turning left at this intersection leads into Downtown Cochrane via Third Avenue (Hwy 579 and Hwy 652). See an Enlarged Photo Here. (Photograph taken on August 28, 2006 - © Cameron Bevers) 

Left - Facing west along Hwy 11 towards Smooth Rock Falls and Kapuskasing from the Cochrane turn-off at the junction of Hwy 579 & Hwy 652. It is 1,170 km
(727 miles) from Cochrane to the end of Hwy 11 at Rainy River. See an Enlarged Photo Here. (Photograph taken on August 28, 2006 - © Cameron Bevers) Right - Facing east along Hwy 11 towards the Cochrane turn-off at the junction of Hwy 579 & Hwy 652. Both quadrants of this intersection have been channelized to facilitate right turning movements. See an Enlarged Photo Here. (Photograph taken on August 28, 2006 - © Cameron Bevers) 

Left - Green guide sign at the Cochrane turn-off marking Hwy 11 South to Iroquois Falls. See an
Enlarged Photo Here. (Photograph taken on August 28, 2006 - © Cameron Bevers) Right - Facing south along Hwy 11 towards Matheson from the Cochrane turn-off at the junction of Hwy 579 & Hwy 652. It is 615 km (382 miles) from Cochrane to the end of Hwy 11 at Barrie. See an Enlarged Photo Here. (Photograph taken on August 28, 2006 - © Cameron Bevers) 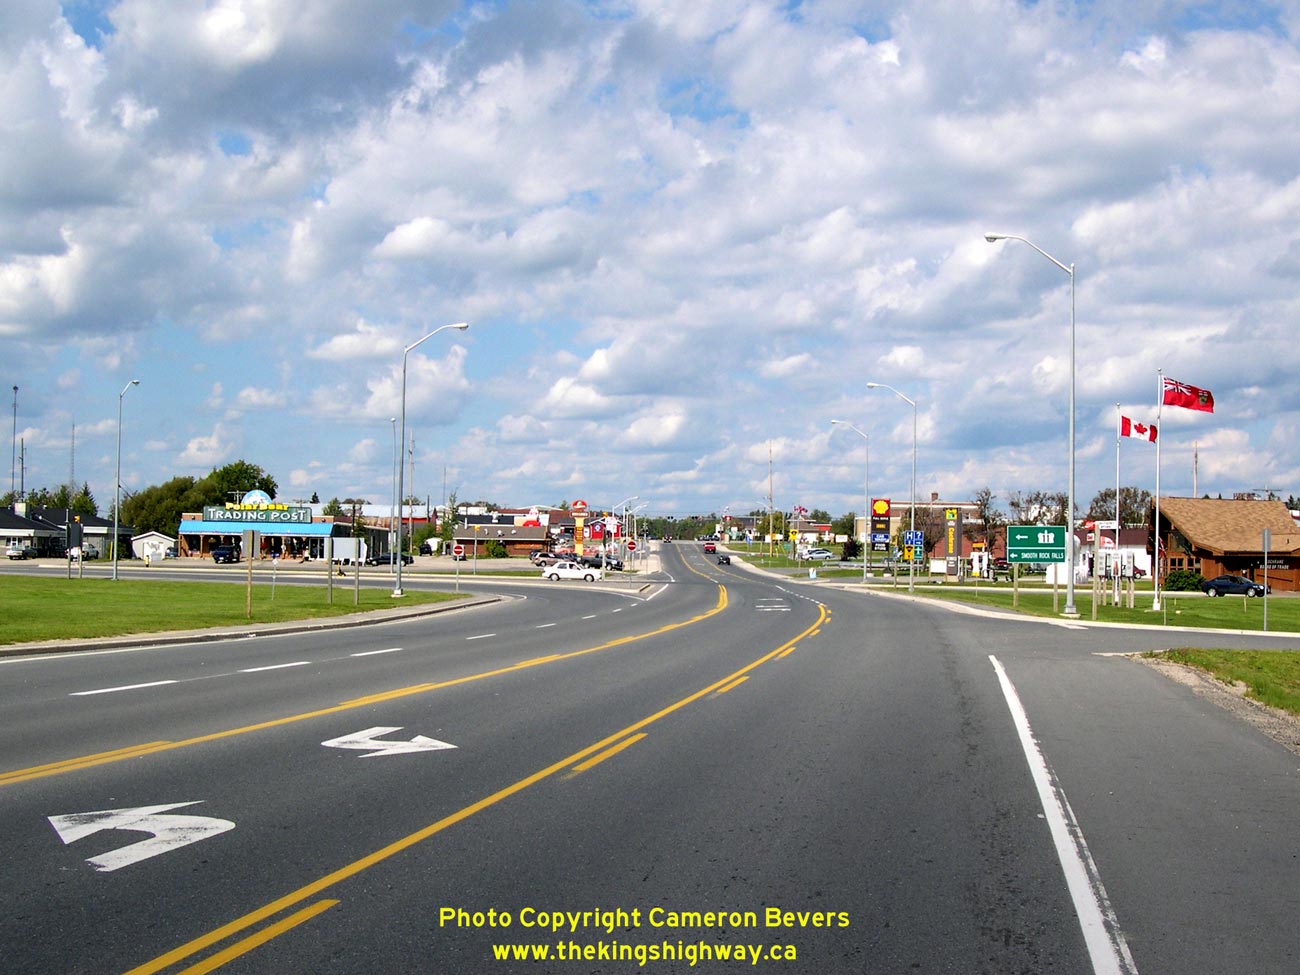

Left - Approaching the Hwy 11 turn-off in Cochrane, facing north. Here, Hwy 11 turns left to head west towards Smooth Rock Falls and Kapuskasing. The road that
continues straight through at the junction leads into Downtown Cochrane via Hwy 579 and Hwy 652 (Third Avenue). See an
Enlarged Photo Here. (Photograph taken on August 28, 2006 - © Cameron Bevers) Right - Green guide sign at the Cochrane turn-off marking Hwy 11 West to Smooth Rock Falls. See an Enlarged Photo Here. (Photograph taken on August 28, 2006 - © Cameron Bevers) 

Left - Facing south from Cochrane along Third Avenue (Hwy 579 & Hwy 652) towards the Hwy 11 turn-off. See an
Enlarged Photo Here. (Photograph taken on August 28, 2006 - © Cameron Bevers) Right - Facing west along Hwy 11 through Cochrane. This section of the highway was reconstructed and widened to a standard five-lane urban cross section in the mid-2000s. There is now a continuous two-way left-turn lane along Hwy 11 through Cochrane, as well as two through lanes in each direction. See an Enlarged Photo Here. (Photograph taken on August 28, 2006 - © Cameron Bevers) 
Above - Hwy 11 begins its westward journey in Cochrane, after travelling over 600 km north from Barrie. See an
Enlarged Photo Here. (Photograph taken on August 28, 2006 - © Cameron Bevers) 

Left - Distance guide sign on westbound Hwy 11 leaving Cochrane, showing the distances to major cities along the route. The trip along Hwy 11 between Cochrane and
Thunder Bay takes about 8 hours, if the posted speed limit of 90 km/h is observed. See an
Enlarged Photo Here. (Photograph taken on September 4, 2007 - © Cameron Bevers) Right - Facing west towards the Frederickhouse River Bridge on Hwy 11 west of Cochrane. This five-span steel deck truss structure was completed in 1949. See an Enlarged Photo Here. (Photograph taken on August 19, 2003 - © Cameron Bevers) 

Left - Southern side of the Frederickhouse River Bridge on Hwy 11 west of Cochrane. The structure has a total length of approximately 445 feet (136 metres).
Construction began on the new bridge in 1948 and it was completed and opened to traffic in late 1949. Previously, Hwy 11 crossed the Frederickhouse River on four timber
truss structures located at the valley floor. Click here to see a Historical 1949 Photo of the
Frederickhouse River Bridge while it was still under construction. See an Enlarged Photo Here. (Photograph taken on August 28, 2006 - © Cameron Bevers) Right - Northern side of the Frederickhouse River Bridge on Hwy 11. The Frederickhouse River Bridge is a Warren-type deck truss structure. See an Enlarged Photo Here. (Photograph taken on August 28, 2006 - © Cameron Bevers) 

Left - The Frederickhouse River Bridge consists of a continuous Warren-type deck truss structure across three spans, in addition to two single-span Warren-type
deck truss approach spans at either end of the bridge. Note the bevelled concrete piers, which are designed to deflect driftwood and other debris. See an
Enlarged Photo Here. (Photograph taken on August 28, 2006 - © Cameron Bevers) Right - Facing east along Hwy 11 towards Cochrane at the Frederickhouse River Bridge. See an Enlarged Photo Here. (Photograph taken on August 28, 2006 - © Cameron Bevers) 

Left - Facing east along Hwy 11 towards Cochrane near the Buskegon River Bridge. See an
Enlarged Photo Here. (Photograph taken on September 2, 2007 - © Cameron Bevers) Right - Abandoned Hwy 11 alignment near the Buskegon River Bridge west of Cochrane. See an Enlarged Photo Here. (Photograph taken on September 3, 2007 - © Cameron Bevers) 

Left - Abandoned highway alignment near the Buskegon River Bridge on Hwy 11 west of Cochrane. See an
Enlarged Photo Here. (Photograph taken on September 3, 2007 - © Cameron Bevers) Right - Buskegon River Bridge on Hwy 11 west of Cochrane. This modern structure was completed in 1998. It replaced an old deck truss bridge that was built in 1950. Click here to see a Historical 1951 Photo of the previous Buskegon River Bridge shortly after it was completed. See an Enlarged Photo Here. (Photograph taken on September 4, 2007 - © Cameron Bevers) 

Left - Date stamp (1998) and structure identification number on the Buskegon River Bridge on Hwy 11 west of Cochrane. See an
Enlarged Photo Here. (Photograph taken on September 4, 2007 - © Cameron Bevers) Right - Creosoted timber triple-box culvert under Hwy 11 near the Hwy 668 junction. This timber box culvert likely dates from about 1950. Timber was often used to construct culverts in Northern Ontario, particularly in locations where a local supply of concrete was not readily available. See an Enlarged Photo Here. (Photograph taken on August 19, 2003 - © Cameron Bevers) 

Left - Photo of Old Hwy 11 (now Hwy 668) north of Hunta. The old corner diversion at left leads back to the present alignment of Hwy 11 at Driftwood. This
section of Hwy 11 was bypassed in 1959. The present-day route of Hwy 668 continues straight ahead towards Greenwater Provincial Park. See an
Enlarged Photo Here. (Photograph taken on August 19, 2003 - © Cameron Bevers) Right - Advance green guide sign on westbound Hwy 11 marking the upcoming Hwy 655 Junction. See an Enlarged Photo Here. (Photograph taken on September 4, 2007 - © Cameron Bevers) 

Left - Facing west along Hwy 11 towards the Hwy 655 Junction near Driftwood. See an
Enlarged Photo Here. (Photograph taken on September 4, 2007 - © Cameron Bevers) Right - Northern terminus of Hwy 655 at the Hwy 11 Junction near Driftwood. The Hwy 11 & Hwy 655 Junction lies about half-way between Cochrane and Smooth Rock Falls. Until Hwy 655 was completed in late 1978, traffic heading between Timmins and Smooth Rock Falls had to use Hwy 67 and Hwy 11 via Porquis Junction, which added 60 km to the journey. See an Enlarged Photo Here. (Photograph taken on September 4, 2007 - © Cameron Bevers) 
Above - Facing south along Hwy 655 towards Timmins from the Hwy 11 Junction near Driftwood. Hwy 655 ends at Hwy 101 in Timmins, which lies 75 km to the south.
See an Enlarged Photo Here. (Photograph taken on September 4, 2007 - © Cameron Bevers)
Continue on to King's Highway 11 Photos: Driftwood to Smooth Rock Falls
|
|---|
Links to Adjacent King's Highway Photograph Pages:
Back to Hwy 11 - Matheson to Cochrane
Hwy 11 Photo Index
On to Hwy 11 - Driftwood to Smooth Rock Falls
Back to King's Highway 10 Photos /
King's Highway 11 History /
On to King's Highway 12 Photos
Ontario Highway History - Main Menu / Back to List of Highways Website contents, photos & text © 2002-2026, Cameron
Bevers (Webmaster) - All Rights Reserved / Contact Me
|
|---|