
| 
| |
|
|
This page contains present day photos (Year 2000 to date) of Ontario's King's Highway 11, arranged by location from Geraldton
westerly to the King's Highway 17 Junction near Nipigon. All photographs displayed on this page were taken by the Webmaster (Cameron Bevers), unless specifically
noted otherwise. Click on any thumbnail to see a larger image!
Please note that all photographs displayed on this
website are protected by copyright. These photographs must not be reproduced, published,
electronically stored or copied, distributed, or posted onto other websites without
my written permission. If you want to use photos from this website, please
email me first for permission. Thank-you!
|
|---|
|
Page 30: Present Day King's Highway 11 Photographs (Geraldton to Nipigon)

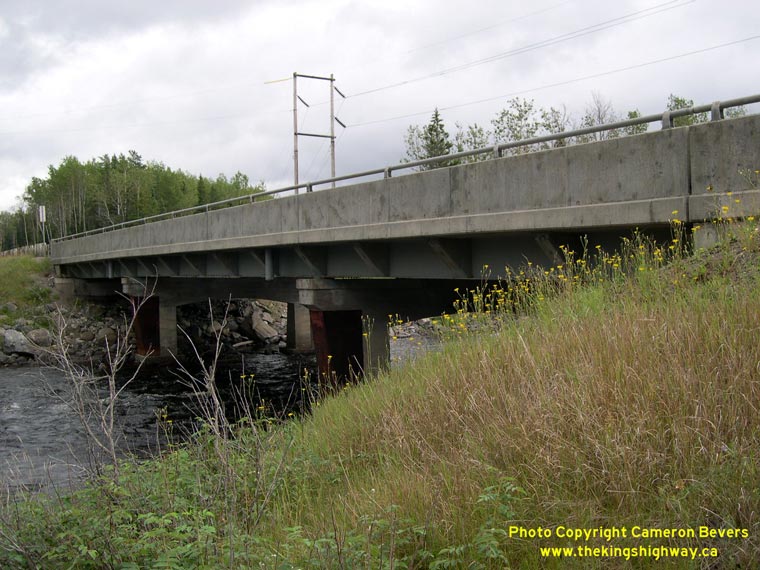
Left - Southern side of the Sturgeon River Bridge on Hwy 11 near Jellicoe. Structure completed in 1941. (Photograph taken on August 21, 2003 - © Cameron Bevers) Right - Northern side of the Sturgeon River Bridge on Hwy 11 west of Jellicoe. (Photograph taken on August 21, 2003 - © Cameron Bevers) 

Left - Southern side of the Blackwater River Bridge on Hwy 11 in Beardmore. Structure completed in 1950. See an
Enlarged Photo Here. (Photograph taken on August 21, 2003 - © Cameron Bevers) Right - Northern side of the Blackwater River Bridge on Hwy 11 in Beardmore. (Photograph taken on August 21, 2003 - © Cameron Bevers) 

Left - Facing east along Hwy 11 towards Jellicoe at the Blackwater River Bridge in Beardmore. (Photograph taken on August 21, 2003 - © Cameron Bevers) Right - Facing east along Hwy 11 towards Beardmore approaching the former entrance to Lake Nipigon Provincial Park. See an Enlarged Photo Here. (Photograph taken on August 30, 2011 - © Cameron Bevers) 

Left - Facing west along Hwy 11 approaching the Leonard Lake Picnic Area near Macdiarmid. (Photograph taken on August 30, 2011 - © Cameron Bevers) Right - Hwy 11 at Leonard Lake, facing east towards Beardmore. See an Enlarged Photo Here. (Photograph taken on August 30, 2011 - © Cameron Bevers) 

Left - Facing west along Hwy 11 towards Nipigon at Leonard Lake. (Photograph taken on August 30, 2011 - © Cameron Bevers) Right - Rock cut on Hwy 11 near Leonard Lake. (Photograph taken on August 30, 2011 - © Cameron Bevers) 

Left - Facing west along Hwy 11 approaching Hynrick Lake. See an
Enlarged Photo Here. (Photograph taken on August 30, 2011 - © Cameron Bevers) Right - Hwy 11 at Hynrick Lake near Macdiarmid, facing east towards Beardmore. See an Enlarged Photo Here. (Photograph taken on August 30, 2011 - © Cameron Bevers) 

Left - Facing west along Hwy 11 approaching the Postagoni River Bridge near Macdiarmid. See an
Enlarged Photo Here. (Photograph taken on August 30, 2011 - © Cameron Bevers) Right - Looking through the Postagoni River Bridge on Hwy 11 near Macdiarmid. Structure completed in 1939. (Photograph taken on August 30, 2011 - © Cameron Bevers) 

Left - Southern side of the Postagoni River Bridge. This is the only major watercourse crossing along Hwy 11 between Beardmore and the Hwy 17 Junction east of
Nipigon. (Photograph taken on August 30, 2011 - © Cameron Bevers) Right - The Postagoni River Bridge is a concrete barrel arch structure, with a maximum span length of 45 feet (14 metres). (Photograph taken on August 30, 2011 - © Cameron Bevers) 

Left - Northern side of the Postagoni River Bridge on Hwy 11 west of Macdiarmid. (Photograph taken on August 30, 2011 - © Cameron Bevers) Right - A scenic view of Hwy 11 at the Postagoni River Bridge. See an Enlarged Photo Here. (Photograph taken on August 30, 2011 - © Cameron Bevers) 

Left - Facing east along Hwy 11 towards Beardmore from the Postagoni River Bridge. See an
Enlarged Photo Here. (Photograph taken on August 30, 2011 - © Cameron Bevers) Right - Lake Nipigon starts to open up as Hwy 11 rounds this curve at Orient Bay. See an Enlarged Photo Here. (Photograph taken on August 30, 2011 - © Cameron Bevers) 

Left - View of Lake Nipigon from Hwy 11 at Orient Bay. Note the transport trucks on Hwy 11 on the opposite side of the bay. See an
Enlarged Photo Here. (Photograph taken on August 30, 2011 - © Cameron Bevers) Right - Approaching Mount Norma on Hwy 11 near Orient Bay, facing west. See an Enlarged Photo Here. (Photograph taken on August 30, 2011 - © Cameron Bevers) 

Left - Facing west along Hwy 11 at Orient Bay on Lake Nipigon. See an
Enlarged Photo Here. (Photograph taken on August 30, 2011 - © Cameron Bevers) Right - View of Orient Bay on Lake Nipigon from Hwy 11. Note the two transport trucks on Hwy 11 across the bay. See an Enlarged Photo Here. (Photograph taken on August 30, 2011 - © Cameron Bevers) 

Left - Facing east along Hwy 11 towards Beardmore near Orient Bay. Compare this present-day view of the highway to this
circa 1940 photo of the same section of highway, shortly after it was completed. See an
Enlarged Photo Here. (Photograph taken on August 30, 2011 - © Cameron Bevers) Right - Approaching Cove Inlet on Hwy 11 near Orient Bay, facing west towards Nipigon. (Photograph taken on August 30, 2011 - © Cameron Bevers) 

Left - Hwy 11 at Cove Inlet, facing east towards Beardmore. See an
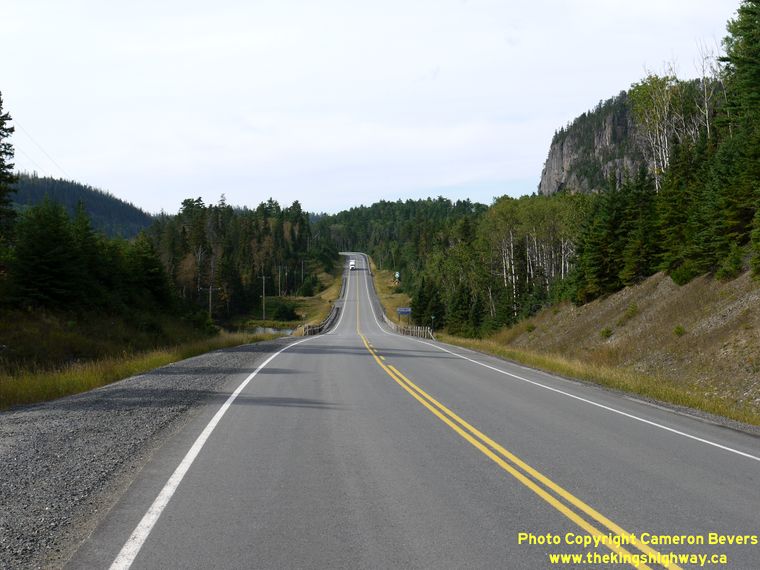
Enlarged Photo Here. (Photograph taken on August 30, 2011 - © Cameron Bevers) Right - Approaching Reflection Lake on Hwy 11, facing west towards Nipigon. The rocky Pijitawabik Palisades tower hundreds of feet over the highway. These impressive, near-vertical rock formations are fairly common around this area of Lake Nipigon. See an Enlarged Photo Here. (Photograph taken on August 30, 2011 - © Cameron Bevers) 

Left - View of scenic Pijitawabik Bay on Lake Nipigon from Hwy 11. See an
Enlarged Photo Here. (Photograph taken on August 30, 2011 - © Cameron Bevers) Right - Hwy 11 heads west towards Nipigon below the Reflection Mountains. (Photograph taken on August 30, 2011 - © Cameron Bevers) 

Left - Ontario heritage plaque at a rest area on Hwy 11 near Orient Bay, describing the Pijitawabik Palisades formation. (Photograph taken on August 30, 2011 - © Cameron Bevers) Right - Facing east along Hwy 11 approaching Reflection Lake. Note the rock fall warning sign at right. (Photograph taken on August 30, 2011 - © Cameron Bevers) 

Left - Hwy 11 briefly departs from the shoreline of Pijitawabik Bay on its route south towards Nipigon. (Photograph taken on August 30, 2011 - © Cameron Bevers) Right - Facing east along Hwy 11 approaching the Reflection Mountains. See an Enlarged Photo Here. (Photograph taken on August 30, 2011 - © Cameron Bevers) 

Left - The towering palisades of the Lake Nipigon area are an unforgettable sight for motorists driving this section of Hwy 11. (Photograph taken on August 30, 2011 - © Cameron Bevers) Right - Facing west along Hwy 11 towards Nipigon. The 80 km section of Hwy 11 from Nipigon to Beardmore is one of Ontario's most scenic highways. (Photograph taken on August 30, 2011 - © Cameron Bevers) 

Left - The long arm of Pijitawabik Bay stretches a considerable distance inland from the rest of Lake Nipigon. When Hwy 11 was first constructed in the 1930s,
the highway designers took the opportunity to utilize the shoreline of this long bay as a passage through the rugged mountains surrounding this area. (Photograph taken on August 30, 2011 - © Cameron Bevers) Right - Facing east along Hwy 11 towards Beardmore near Pijitawabik Bay. The highway passes through the narrow chasm occupied by Pijitawabik Bay and Keemle Creek. Had this narrow passage not been available, the route of Hwy 11 would never have been built here. Given the area's topography and the construction equipment available to road builders in the 1930s, it would have been far too difficult to construct the highway to Lake Nipigon if this route along Pijitawabik Bay was not available. See an Enlarged Photo Here. (Photograph taken on August 30, 2011 - © Cameron Bevers) 

Left - Scenic view of Pijitawabik Bay on Hwy 11, facing west towards Nipigon. See an
Enlarged Photo Here. (Photograph taken on August 30, 2011 - © Cameron Bevers) Right - Facing east along Hwy 11 towards Beardmore at Pijitawabik Bay. See an Enlarged Photo Here. (Photograph taken on August 30, 2011 - © Cameron Bevers) 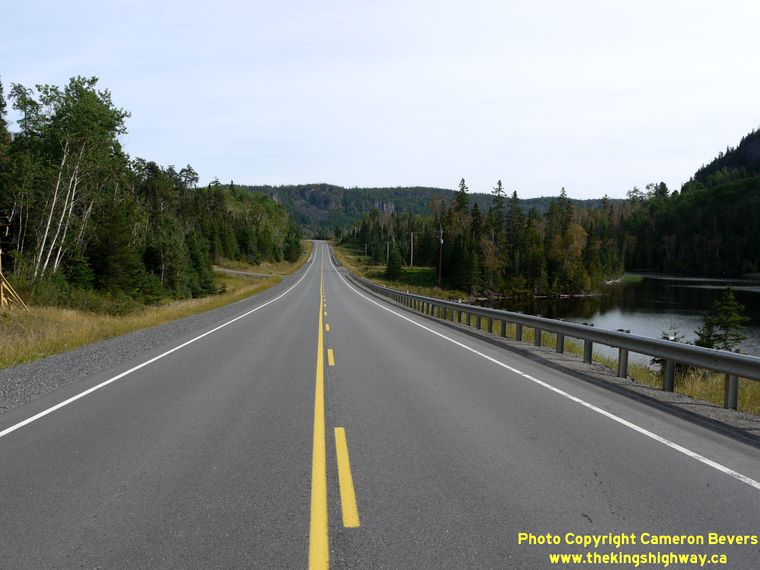
Left - Hwy 11 departs the Lake Nipigon basin as it climbs the small hill in the background. The Nipigon River flows south from Lake Nipigon into Lake Superior,
located about 40 km away. (Photograph taken on August 30, 2011 - © Cameron Bevers) Right - Approaching Pijitawabik Bay on Hwy 11, facing east towards Beardmore. Note the encroaching palisades at right. See an Enlarged Photo Here. (Photograph taken on August 30, 2011 - © Cameron Bevers) 

Left - Approaching the Kefkatikgwam Mountains on Hwy 11, facing west towards Nipigon. (Photograph taken on August 30, 2011 - © Cameron Bevers) Right - Facing west along Hwy 11 at the Kefkatikgwam Mountains, 40 km south of Beardmore. (Photograph taken on August 30, 2011 - © Cameron Bevers) 

Left - Distance sign on Eastbound Hwy 11, indicating the distance to Beardmore. These small distance reassurance signs are used extensively on remote Northern
Ontario Highways. They are typically placed every 20 km. (Photograph taken on August 30, 2011 - © Cameron Bevers) Right - Facing west along Hwy 11 towards Nipigon near North Sinclair Lake. (Photograph taken on August 30, 2011 - © Cameron Bevers) 

Left - Hwy 11 near Gorge Creek, facing west towards Nipigon. (Photograph taken on August 30, 2011 - © Cameron Bevers) Right - Reverse curve on Hwy 11 near Keemle Lake, facing east towards Beardmore. See an Enlarged Photo Here. (Photograph taken on August 30, 2011 - © Cameron Bevers) 

Left - Reverse curve on Hwy 11 near Keemle Lake, facing west towards Nipigon. See an
Enlarged Photo Here. (Photograph taken on August 30, 2011 - © Cameron Bevers) Right - Municipality of Greenstone boundary sign on Hwy 11 northeast of Nipigon. In 2001, the towns of Beardmore, Geraldton, Nakina, Longlac, and a number of townships were amalgamated into a single municipality. The Municipality of Greenstone stretches for about 200 km along Hwy 11. (Photograph taken on August 30, 2011 - © Cameron Bevers) 

Left - A transport truck on Hwy 11 is dwarfed by the mountains near Keemle Lake. See an
Enlarged Photo Here. (Photograph taken on August 30, 2011 - © Cameron Bevers) Right - Facing west along Hwy 11 towards Nipigon near Keemle Lake. See an Enlarged Photo Here. (Photograph taken on August 30, 2011 - © Cameron Bevers) 

Left - View of Keemle Lake from Hwy 11, between Beardmore and Nipigon. See an
Enlarged Photo Here. (Photograph taken on August 30, 2011 - © Cameron Bevers) Right - The scenic mountains beside near Keemle Lake are an imposing feature on the landscape. (Photograph taken on August 30, 2011 - © Cameron Bevers) 

Left - One of Ontario's most dramatic highway vistas unfolds on Hwy 11 near McKirdy Lake. See an
Enlarged Photo Here. (Photograph taken on August 30, 2011 - © Cameron Bevers) Right - Hwy 11 is Ontario's preferred long-distance truck route between Thunder Bay and Southern Ontario. The highway effectively bypasses the arduous, steep grades found along the Lake Superior section of Hwy 17. As is evident in this photo, commercial truck traffic on this section of Hwy 11 outnumbers passenger vehicles by a wide margin. See an Enlarged Photo Here. (Photograph taken on August 30, 2011 - © Cameron Bevers) 

Left - Hwy 11 snakes its way west towards Nipigon near McKirdy Lake. (Photograph taken on August 30, 2011 - © Cameron Bevers) Right - Approaching Bullrush Lake on Hwy 11, facing east towards Beardmore. (Photograph taken on August 30, 2011 - © Cameron Bevers) 

Left - Reverse curves on Hwy 11 approaching Bullrush Lake, northeast of Nipigon. See an
Enlarged Photo Here. (Photograph taken on August 30, 2011 - © Cameron Bevers) Right - Facing east along Hwy 11 towards Beardmore near Wanogu Lake. (Photograph taken on August 30, 2011 - © Cameron Bevers) 

Left - Facing west along Hwy 11 towards Nipigon near Mignet Lake. The highway slowly but steadily descends towards Helen Lake. See an
Enlarged Photo Here. (Photograph taken on August 30, 2011 - © Cameron Bevers) Right - Facing east along Hwy 11 towards Beardmore near Mignet Lake. See an Enlarged Photo Here. (Photograph taken on August 30, 2011 - © Cameron Bevers) 

Left - The scenery along Hwy 11 between Wanogu Lake and Helen Lake is considerably subdued, when compared to the dramatic mountains around Lake Nipigon. (Photograph taken on August 30, 2011 - © Cameron Bevers) Right - Facing west along Hwy 11 towards Nipigon near Mignet Creek. (Photograph taken on August 30, 2011 - © Cameron Bevers) 

Left - Hwy 11 near Polly Lake, 60 km south of Beardmore. (Photograph taken on August 30, 2011 - © Cameron Bevers) Right - The route of Hwy 11 follows the shoreline of scenic Helen Lake for about 10 km east of Nipigon. See an Enlarged Photo Here. (Photograph taken on August 30, 2011 - © Cameron Bevers) 

Left - Rock cut on Hwy 11 at Smith Bay on Helen Lake. When this section of Hwy 11 was constructed in the late 1930s, the route was literally notched out of
the cliffs beside Helen Lake. The scenery in the Helen Lake area is quite breathtaking. (Photograph taken on August 30, 2011 - © Cameron Bevers) Right - Approaching Smith Bay on Helen Lake, facing east towards Beardmore. See an Enlarged Photo Here. (Photograph taken on August 30, 2011 - © Cameron Bevers) 

Left - Facing east along Hwy 11 on the shores of Helen Lake near Nipigon. (Photograph taken on August 30, 2011 - © Cameron Bevers) Right - Hwy 11 at Helen Lake. The highway sits only a few feet above the elevation of the lake. Note that the beach almost touches the highway's edge. See an Enlarged Photo Here. (Photograph taken on August 30, 2011 - © Cameron Bevers) 

Left - View of Indian Bay on Westbound Hwy 11 at Helen Lake near Nipigon. (Photograph taken on August 30, 2011 - © Cameron Bevers) Right - Hwy 11 at Indian Bay, facing east towards Beardmore. A very scenic MTO picnic area is situated on the point at the north end of Indian Bay, which is well worth the stop. See an Enlarged Photo Here. (Photograph taken on August 30, 2011 - © Cameron Bevers) 

Left - Approaching Indian Bay on Hwy 11 at Helen Lake, facing east towards Beardmore. (Photograph taken on August 30, 2011 - © Cameron Bevers) Right - Another scenic view of Helen Lake greets motorists on Hwy 11 east of the Hwy 17 Junction. (Photograph taken on August 30, 2011 - © Cameron Bevers) 

Left - A lone Hwy 11 route marker stands beside the shoreline of Helen Lake. (Photograph taken on August 30, 2011 - © Cameron Bevers) Right - Hwy 11 winds its way along the shores of Helen Lake on its route east towards Beardmore. (Photograph taken on August 30, 2011 - © Cameron Bevers) 

Left - Hwy 11 at Helen Lake, facing west towards Nipigon. See an
Enlarged Photo Here. (Photograph taken on August 30, 2011 - © Cameron Bevers) Right - When this section of Hwy 11 was initially built in the late 1930s, the highway builders used the excavated rocks from the nearby cliffs to build up the road base along the lakeshore. The route of Hwy 11 follows the entire eastern shoreline of Helen Lake. (Photograph taken on August 30, 2011 - © Cameron Bevers) 

Left - The Nipigon-Geraldton Highway was completed in 1940, after several years of construction. The highway provided a vital transportation link from the
Thunder Bay area to Beardmore and Geraldton. Until Hwy 11 was completed, these two towns were only accessible by air or railway. (Photograph taken on August 30, 2011 - © Cameron Bevers) Right - Reverse curve on Hwy 11 at Helen Lake near Nipigon, facing east. (Photograph taken on August 30, 2011 - © Cameron Bevers) 

Left - Facing west along Hwy 11 towards Nipigon at Helen Lake. (Photograph taken on August 30, 2011 - © Cameron Bevers) Right - The cliffs on the eastern shores of Helen Lake climb to heights exceeding 300 feet. The transport truck approaching in the distance on Westbound Hwy 11 seems miniscule by comparison. See an Enlarged Photo Here. (Photograph taken on August 30, 2011 - © Cameron Bevers) 

Left - Facing east along Hwy 11 towards Beardmore from the community of Lake Helen. See an
Enlarged Photo Here. (Photograph taken on August 30, 2011 - © Cameron Bevers) Right - Facing west along Hwy 11 towards the community of Lake Helen near Nipigon. See an Enlarged Photo Here. (Photograph taken on August 30, 2011 - © Cameron Bevers) 

Left - The tiny church beside Hwy 11 at Helen Lake makes for a particularly photogenic scene. See an
Enlarged Photo Here. (Photograph taken on August 30, 2011 - © Cameron Bevers) Right - Hwy 11 rounds Mission Bay on Helen Lake as it heads east towards Beardmore. See an Enlarged Photo Here. (Photograph taken on August 30, 2011 - © Cameron Bevers) 

Left - Approaching the Hwy 17 Junction on Hwy 11 at the community of Lake Helen. From this highway junction, Hwy 11 and Hwy 17 run concurrently into Nipigon
and Thunder Bay along the same route. This is the first point at which these two highways have met since North Bay, located almost 1,000 km (620 miles) away. To put
that in perspective, that's almost the distance from Chicago, Illinois to Atlanta, Georgia. (Photograph taken on August 30, 2011 - © Cameron Bevers) Right - Facing east along Hwy 11 near the Hwy 17 Junction at the community of Lake Helen. (Photograph taken on August 30, 2011 - © Cameron Bevers) 
Above - Distance sign on Eastbound Hwy 11 near the Hwy 17 Junction at the community of Lake Helen. (Photograph taken on August 30, 2011 - © Cameron Bevers)
Continue on to King's Highway 11 Photos: Nipigon to Red Rock Corners
|
|---|
Links to Adjacent King's Highway Photograph Pages:
Back to King's Highway 10 Photos /
King's Highway 11 History /
On to King's Highway 12 Photos
Ontario Highway History - Main Menu / Back to List of Highways Website contents, photos & text © 2002-2026, Cameron
Bevers (Webmaster) - All Rights Reserved / Contact Me
|
|---|