
| 
| |
|
|
This page contains historical photos of Ontario's King's Highway 12 dating from 1990 to 1999. All photographs displayed on
this page were taken by the Ontario Ministry of Transportation, unless specifically noted otherwise. Historical photographs are arranged in approximate chronological
order. Click on any thumbnail to see a larger image!
Please note that all photographs displayed on this
website are protected by copyright. These photographs must not be reproduced, published,
electronically stored or copied, distributed, or posted onto other websites without
my written permission. If you want to use photos from this website, please
email me first for permission. Thank-you!
|
|---|
|
Page 3: Historical King's Highway 12 Photographs (1990-1999)


Left - Facing north along Hwy 69 towards Port Severn from the Hwy 12 Interchange in Waubaushene in 1990. Note the construction of the new structure
at left, that will carry the future southbound lanes of the highway. This point marked the southern terminus of Hwy 69 for almost 20 years. The Hwy 12
Interchange also marked the northern terminus of Hwy 400 up until 1997, when Hwy 400 was extended along the completed four-lane section of Hwy 69 from
Waubaushene to the McDonald River, north of Port Severn. See an
Enlarged Photo Here. Photo taken in May 1990. (Photo courtesy of Ontario Ministry of Transportation - © King's Printer for Ontario, 2011) Right - Facing west along Hwy 12 at the Hwy 69 & Hwy 400 Interchange at Waubaushene. Photo taken in May 1990. (Photo courtesy of Ontario Ministry of Transportation - © King's Printer for Ontario, 2011) 

Left - Canadian National Railway (CNR) Overhead on the South Orillia Bypass (Hwy 12), facing north towards Memorial Avenue. See an
Enlarged Photo Here. Photo taken in July 1990. (Photo courtesy of Ontario Ministry of Transportation - © King's Printer for Ontario, 2014) Right - Northern side of the Canadian National Railway (CNR) Overhead on the South Orillia Bypass (Hwy 12). See an Enlarged Photo Here. Photo taken in July 1990. (Photo courtesy of Ontario Ministry of Transportation - © King's Printer for Ontario, 2014) 

Left - Canadian Pacific Railway (CPR) Overhead on Hwy 12 near Coldwater, facing west towards Waubaushene. See an
Enlarged Photo Here. Photo taken in September 1990. (Photo courtesy of Ontario Ministry of Transportation - © King's Printer for Ontario, 2014) Right - Southern side of the Canadian Pacific Railway (CPR) Overhead near Coldwater. See an Enlarged Photo Here. Photo taken in September 1990. (Photo courtesy of Ontario Ministry of Transportation - © King's Printer for Ontario, 2014) 

Left - Facing south along the future southbound lanes of Hwy 69 & Hwy 400 from the Hwy 12 Interchange in Waubaushene. Photo taken on October 17, 1990. (Photo courtesy of Ontario Ministry of Transportation - © King's Printer for Ontario, 2011) Right - Dual structures on Hwy 69 & Hwy 400 at the Hwy 12 Interchange in Waubaushene. Photo taken on October 17, 1990. (Photo courtesy of Ontario Ministry of Transportation - © King's Printer for Ontario, 2011) 

Left - Completed southbound Hwy 69 & Hwy 400 Overpass at the Hwy 12 Interchange in Waubaushene. Photo taken on October 17, 1990. (Photo courtesy of Ontario Ministry of Transportation - © King's Printer for Ontario, 2011) Right - Future southbound lanes of Hwy 69 & Hwy 400, facing north from the Hwy 12 Interchange in Waubaushene. See an Enlarged Photo Here. Photo taken on October 17, 1990. (Photo courtesy of Ontario Ministry of Transportation - © King's Printer for Ontario, 2011) 

Left - Facing north along Hwy 12 approaching the Atherley Narrows Bridge in Orillia in 1991, shortly before the structure was replaced. Growing traffic
pressure on this strategic highway link between Lake Simcoe and Lake Couchiching forced the Ministry of Transportation to replace the existing two-lane structure
across Atherley Narrows with a four-lane highway bridge in 1998-1999. See an
Enlarged Photo Here. Photo taken on May 6, 1991. (Photo courtesy of Ontario Ministry of Transportation - © King's Printer for Ontario, 2014) Right - Lake Couchiching side of the Atherley Narrows Bridge on Hwy 12 in Orillia. See an Enlarged Photo Here. Photo taken on May 6, 1991. (Photo courtesy of Ontario Ministry of Transportation - © King's Printer for Ontario, 2014) 

Left - Facing east along Hwy 12 towards the completed Hwy 69 & Hwy 400 Interchange in Waubaushene. Photo taken on August 17, 1992. (Photo courtesy of Ontario Ministry of Transportation - © King's Printer for Ontario, 2011) Right - Facing south along the new southbound lanes of Hwy 69 & Hwy 400 approaching the Hwy 12 Interchange in Waubaushene. Photo taken on August 17, 1992. (Photo courtesy of Ontario Ministry of Transportation - © King's Printer for Ontario, 2011) 

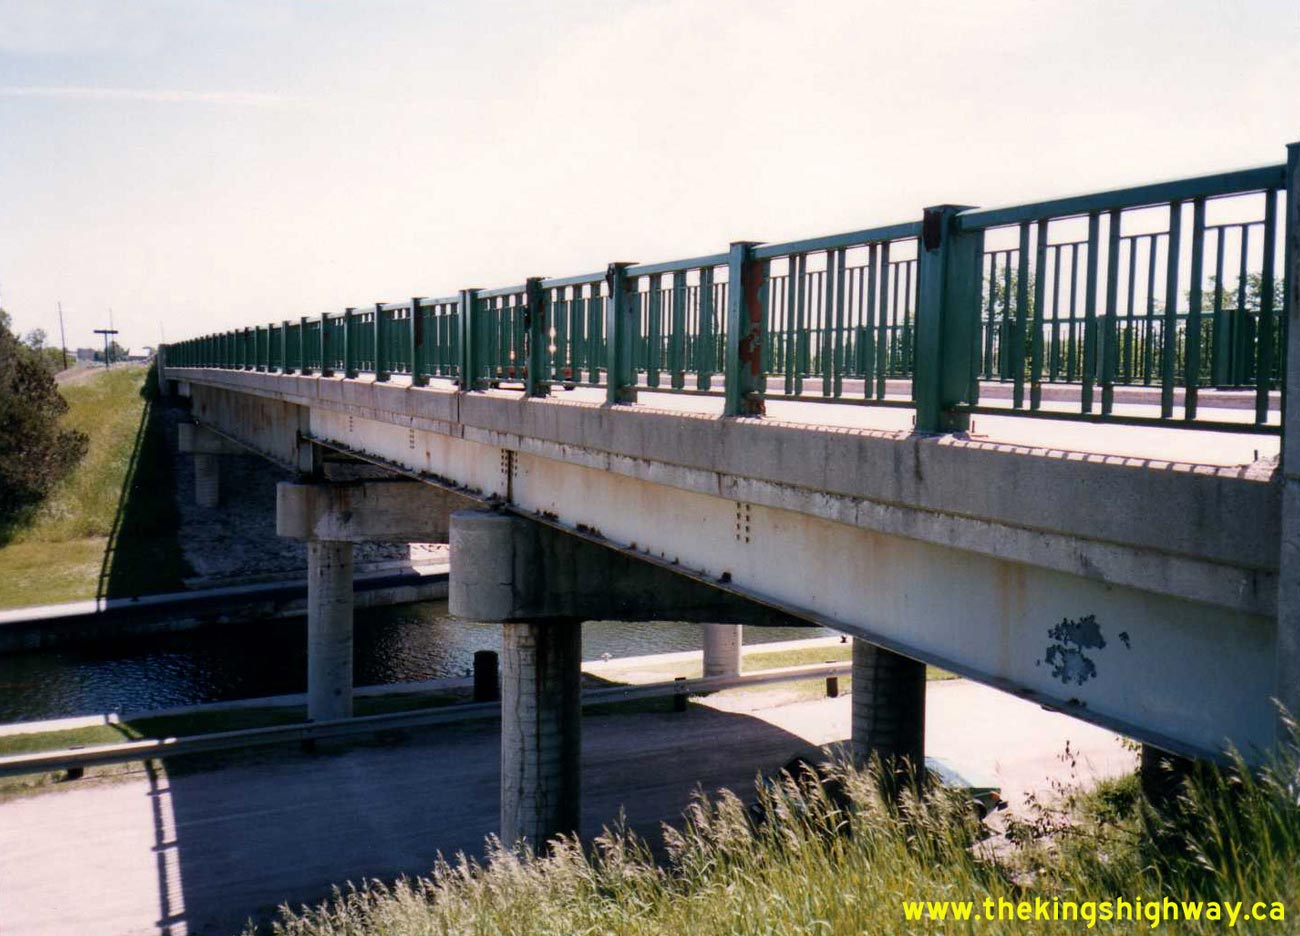
Left - Facing north along Hwy 12 towards Orillia at the Trent Canal Bridge at Gamebridge. See an
Enlarged Photo Here. Photo taken on June 16, 1993. (Photo courtesy of Ontario Ministry of Transportation - © King's Printer for Ontario, 2014) Right - Eastern side of the Trent Canal Bridge on Hwy 12 at Gamebridge. See an Enlarged Photo Here. Photo taken on June 16, 1993. (Photo courtesy of Ontario Ministry of Transportation - © King's Printer for Ontario, 2014) 

Left - Rehabilitation of the Talbot River Bridge on Hwy 12 near Gamebridge. See an
Enlarged Photo Here. Photo taken on May 15, 1995. (Photo courtesy of Ontario Ministry of Transportation - © King's Printer for Ontario, 2014) Right - During rehabilitation of the Talbot River Bridge in 1994-1995, temporary traffic signals alternated northbound and southbound traffic flow on Hwy 12. See an Enlarged Photo Here. Photo taken on May 15, 1995. (Photo courtesy of Ontario Ministry of Transportation - © King's Printer for Ontario, 2014) 

Left - Reconstructed northbound side of the Talbot River Bridge on Hwy 12 near Gamebridge. As part of this bridge rehabilitation, the old steel handrails were
removed and replaced by concrete handrails. See an Enlarged Photo Here. Photo taken on May 15,
1995. (Photo courtesy of Ontario Ministry of Transportation - © King's Printer for Ontario, 2014) Right - Upon completion of the northbound side of the Talbot River Bridge, the southbound lane of Hwy 12 was closed for reconstruction. See an Enlarged Photo Here. Photo taken on May 24, 1995. (Photo courtesy of Ontario Ministry of Transportation - © King's Printer for Ontario, 2014) 

Left - As part of the rehabilitation of the Talbot River Bridge on Hwy 12, the asphalt roadway surface was removed in order to allow repairs to be made to the
concrete deck and steel reinforcing bars. See an Enlarged Photo Here. Photo taken on May 24,
1995. (Photo courtesy of Ontario Ministry of Transportation - © King's Printer for Ontario, 2014) Right - Concrete deck restoration on the Talbot River Bridge on Hwy 12 near Gamebridge. See an Enlarged Photo Here. Photo taken on May 24, 1995. (Photo courtesy of Ontario Ministry of Transportation - © King's Printer for Ontario, 2014) 

Left - Completed Talbot River Bridge on Hwy 12, facing north towards Orillia. See an
Enlarged Photo Here. Photo taken on September 27, 1995. (Photo courtesy of Ontario Ministry of Transportation - © King's Printer for Ontario, 2014) Right - Rehabilitated Talbot River Bridge on Hwy 12 near Gamebridge. See an Enlarged Photo Here. Photo taken on September 27, 1995. (Photo courtesy of Ontario Ministry of Transportation - © King's Printer for Ontario, 2014) 

Left - Eastern side of the Trent Canal Bridge on Hwy 12 at Gamebridge. See an
Enlarged Photo Here. Photo taken on May 15, 1995. (Photo courtesy of Ontario Ministry of Transportation - © King's Printer for Ontario, 2014) Right - During 1995, an extensive rehabilitation project was carried out on the Trent Canal Bridge on Hwy 12 near Gamebridge. See an Enlarged Photo Here. Photo taken on May 15, 1995. (Photo courtesy of Ontario Ministry of Transportation - © King's Printer for Ontario, 2014) 

Left - Pier enclosure at the southern end of the Trent Canal Bridge on Hwy 12 at Gamebridge. During the bridge rehabilitation project, the piers were
reconstructed. See an Enlarged Photo Here. Photo taken on May 15, 1995. (Photo courtesy of Ontario Ministry of Transportation - © King's Printer for Ontario, 2014) Right - View of the Trent Canal Bridge on Hwy 12 near Gamebridge, facing south from the northern side of the Trent Canal. See an Enlarged Photo Here. Photo taken on May 15, 1995. (Photo courtesy of Ontario Ministry of Transportation - © King's Printer for Ontario, 2014) 

Left - The north pier was removed and replaced during the rehabilitation of the Trent Canal Bridge on Hwy 12. Temporary steel piers were installed to support
the bridge during the pier replacement phase. See an Enlarged Photo Here. Photo taken on May 24,
1995. (Photo courtesy of Ontario Ministry of Transportation - © King's Printer for Ontario, 2014) Right - Concrete form installation at the Trent River Bridge, in preparation for the concrete pour. See an Enlarged Photo Here. Photo taken on May 24, 1995. (Photo courtesy of Ontario Ministry of Transportation - © King's Printer for Ontario, 2014) 

Left - The original north pier of the Trent Canal Bridge was replaced virtually in-kind with a new pier during the bridge rehabilitation project. See an
Enlarged Photo Here. Photo taken on May 24, 1995. (Photo courtesy of Ontario Ministry of Transportation - © King's Printer for Ontario, 2014) Right - The ingenious temporary steel pier system was designed so that Hwy 12 could remain open to traffic during the replacement of the north pier. See an Enlarged Photo Here. Photo taken on May 24, 1995. (Photo courtesy of Ontario Ministry of Transportation - © King's Printer for Ontario, 2014) 

Left - The north pier was completely replaced during the reconstruction of the Trent Canal Bridge on Hwy 12. The temporary steel piers were removed shortly
after this photo was taken. See an Enlarged Photo Here. Photo taken on June 29, 1995. (Photo courtesy of Ontario Ministry of Transportation - © King's Printer for Ontario, 2014) Right - The pier immediately north of the Trent Canal was encased with a new thicker layer of concrete. The concrete was pumped into customized steel forms surrounding the original bridge piers. See an Enlarged Photo Here. Photo taken on June 29, 1995. (Photo courtesy of Ontario Ministry of Transportation - © King's Printer for Ontario, 2014) 

Left - Deck rehabilitation of the Trent Canal Bridge on Hwy 12. See an
Enlarged Photo Here. Photo taken on June 29, 1995. (Photo courtesy of Ontario Ministry of Transportation - © King's Printer for Ontario, 2014) Right - Replaced north pier of the Trent Canal Bridge at the end of the construction project. See an Enlarged Photo Here. Photo taken on September 27, 1995. (Photo courtesy of Ontario Ministry of Transportation - © King's Printer for Ontario, 2014) 
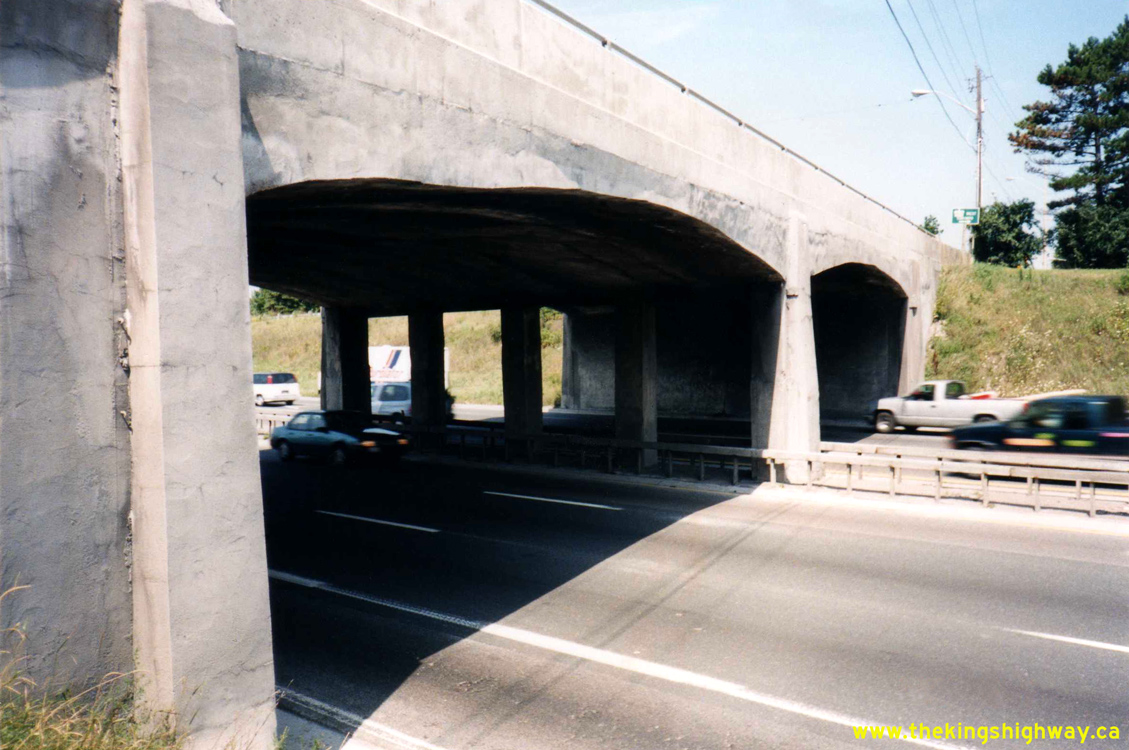
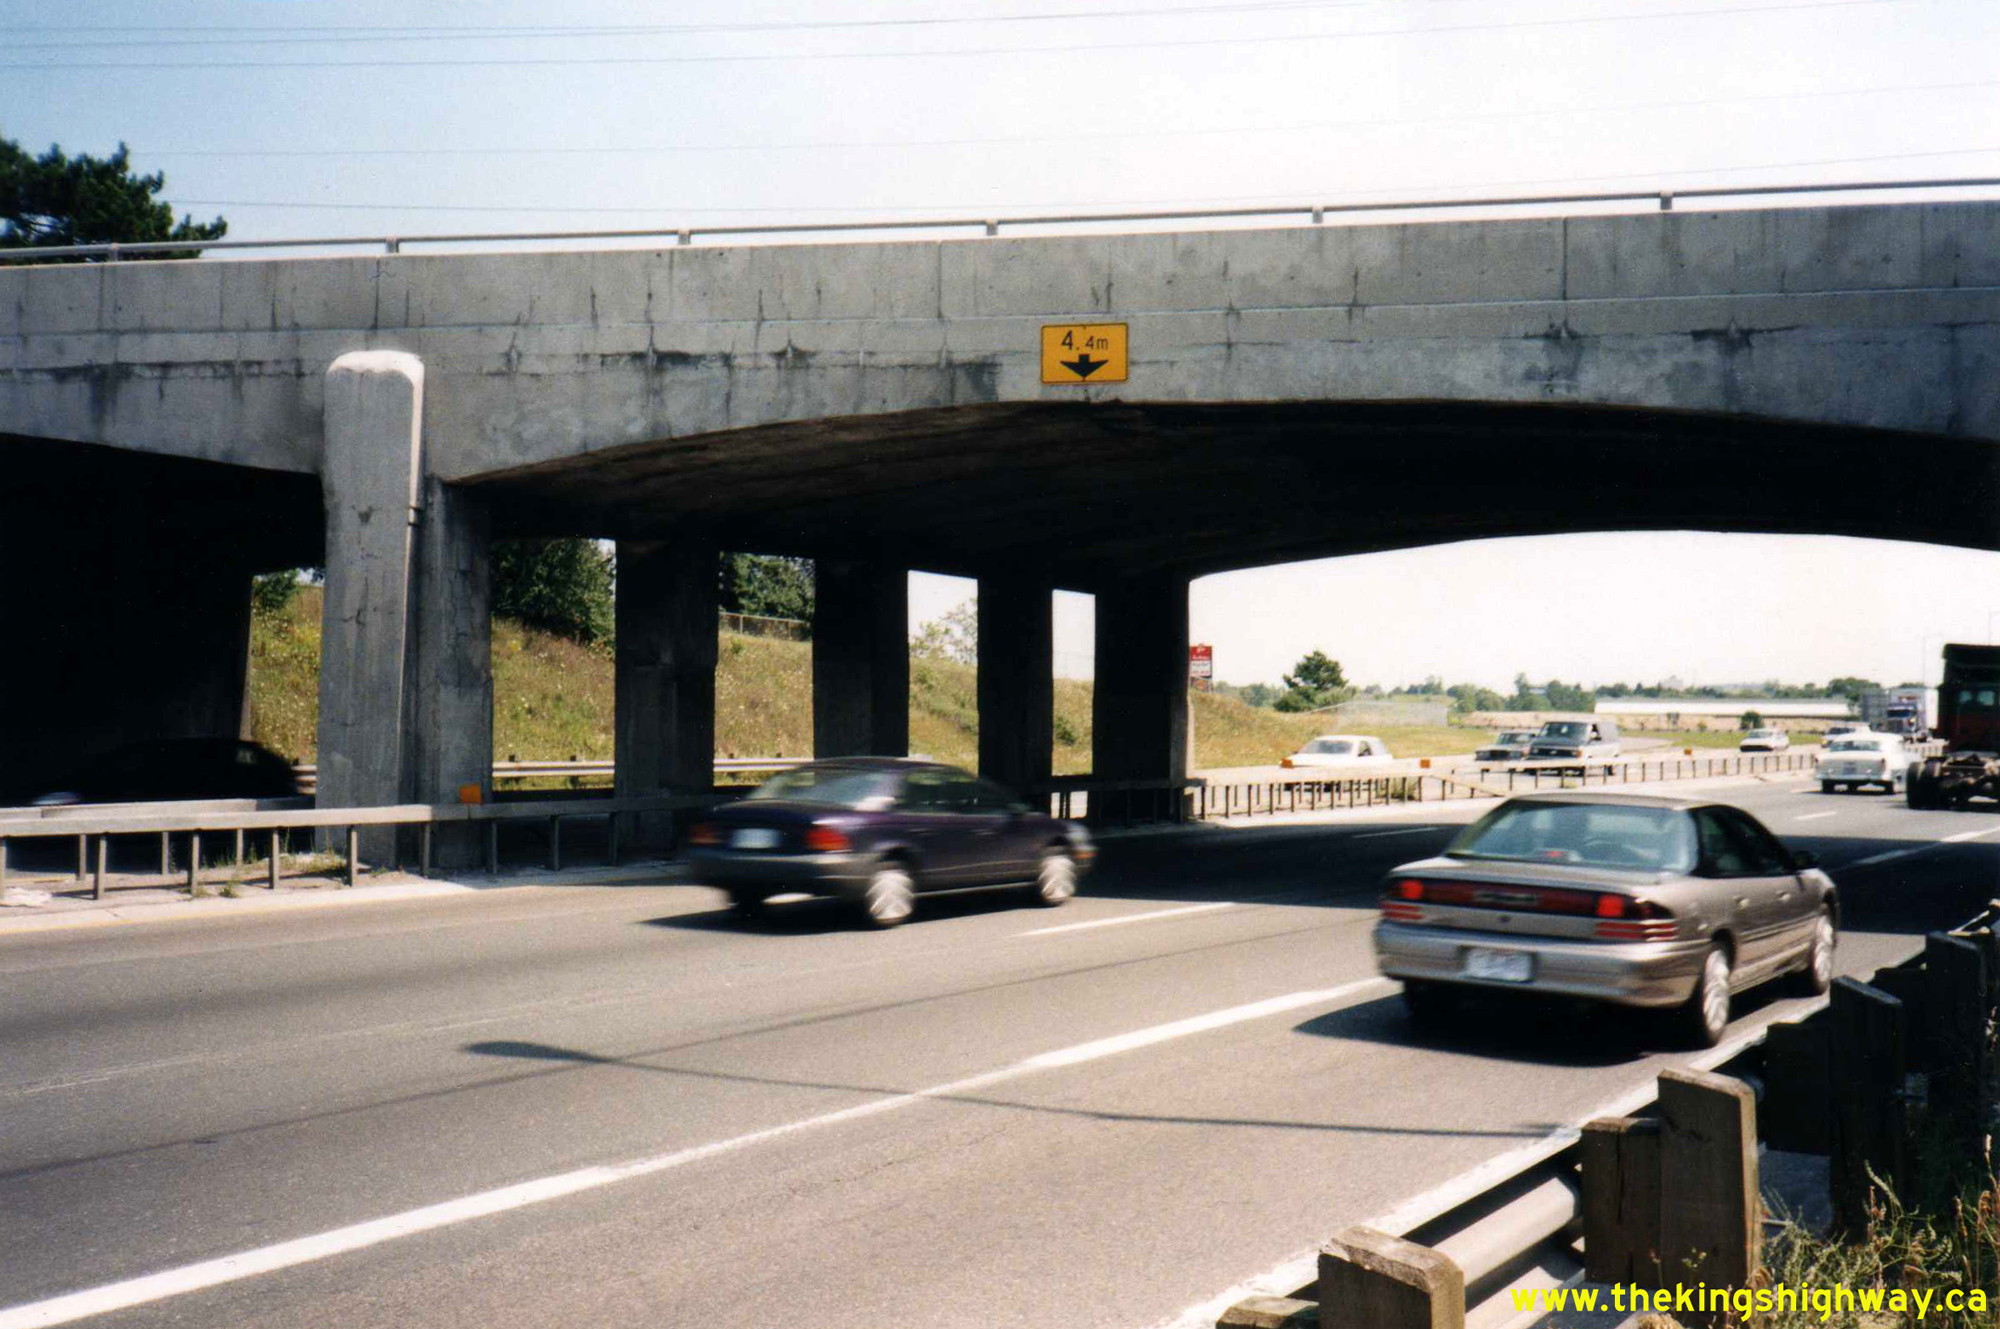
Left - Western side of the Brock Street Overpass (Site #22-151) on Hwy 401 in Whitby, following rehabilitation. See an
Enlarged Photo Here. Photo taken on August 14, 1998. (Photo courtesy of Ontario Ministry of Transportation - © King's Printer for Ontario, 2026) Right - Eastern side of the Hwy 12 (Brock Street) Overpass on Hwy 401 in Whitby in 1998, following bridge rehabilitation under Contract #1995-59. Throughout the 1990s, many of the bridges built as part of the Toronto-Oshawa Dual Highway during the 1940s were rehabilitated. The Brock Street Overpass was originally built under Contract #1940-148 and was completed in 1941. See an Enlarged Photo Here. Photo taken on August 14, 1998. (Photo courtesy of Ontario Ministry of Transportation - © King's Printer for Ontario, 2026)
Continue to King's Highway 12 Present Day Photos: Whitby to Brooklin
|
|---|
Links to Adjacent King's Highway Photograph Pages:
Back to Hwy 12 - Historical Photos (1980 to 1989)
Hwy 12 Photo Index
On to Hwy 12 - Whitby to Brooklin
Back to King's Highway 11 Photos /
King's Highway 12 History /
On to King's Highway 14 Photos
Ontario Highway History - Main Menu / Back to List of Highways Website contents, photos & text © 2002-2026, Cameron
Bevers (Webmaster) - All Rights Reserved / Contact Me
|
|---|