Hwy 169 Sign Graphic Hwy 169 Title Graphic Hwy 169 Sign Graphic   

Back to Hwy 169 - Washago to Gravenhurst      Hwy 169 Photo Index

This page contains present day photos (Year 2000 to date) of Ontario's King's Highway 169, arranged by location from Gravenhurst northerly to Foot's Bay. Please note that Highway 169 was known as Highway 69 prior to 1976. All photographs displayed on this page were taken by the Webmaster (Cameron Bevers), unless specifically noted otherwise. Click on any thumbnail to see a larger image!

Please note that all photographs displayed on this website are protected by copyright. These photographs must not be reproduced, published, electronically stored or copied, distributed, or posted onto other websites without my written permission. If you want to use photos from this website, please email me first for permission. Thank-you!

Page 4: Present Day King's Highway 169 Photographs (Gravenhurst to Foot's Bay)


HWY 169 #88 - © Cameron Bevers             HWY 169 #95 - © Cameron Bevers

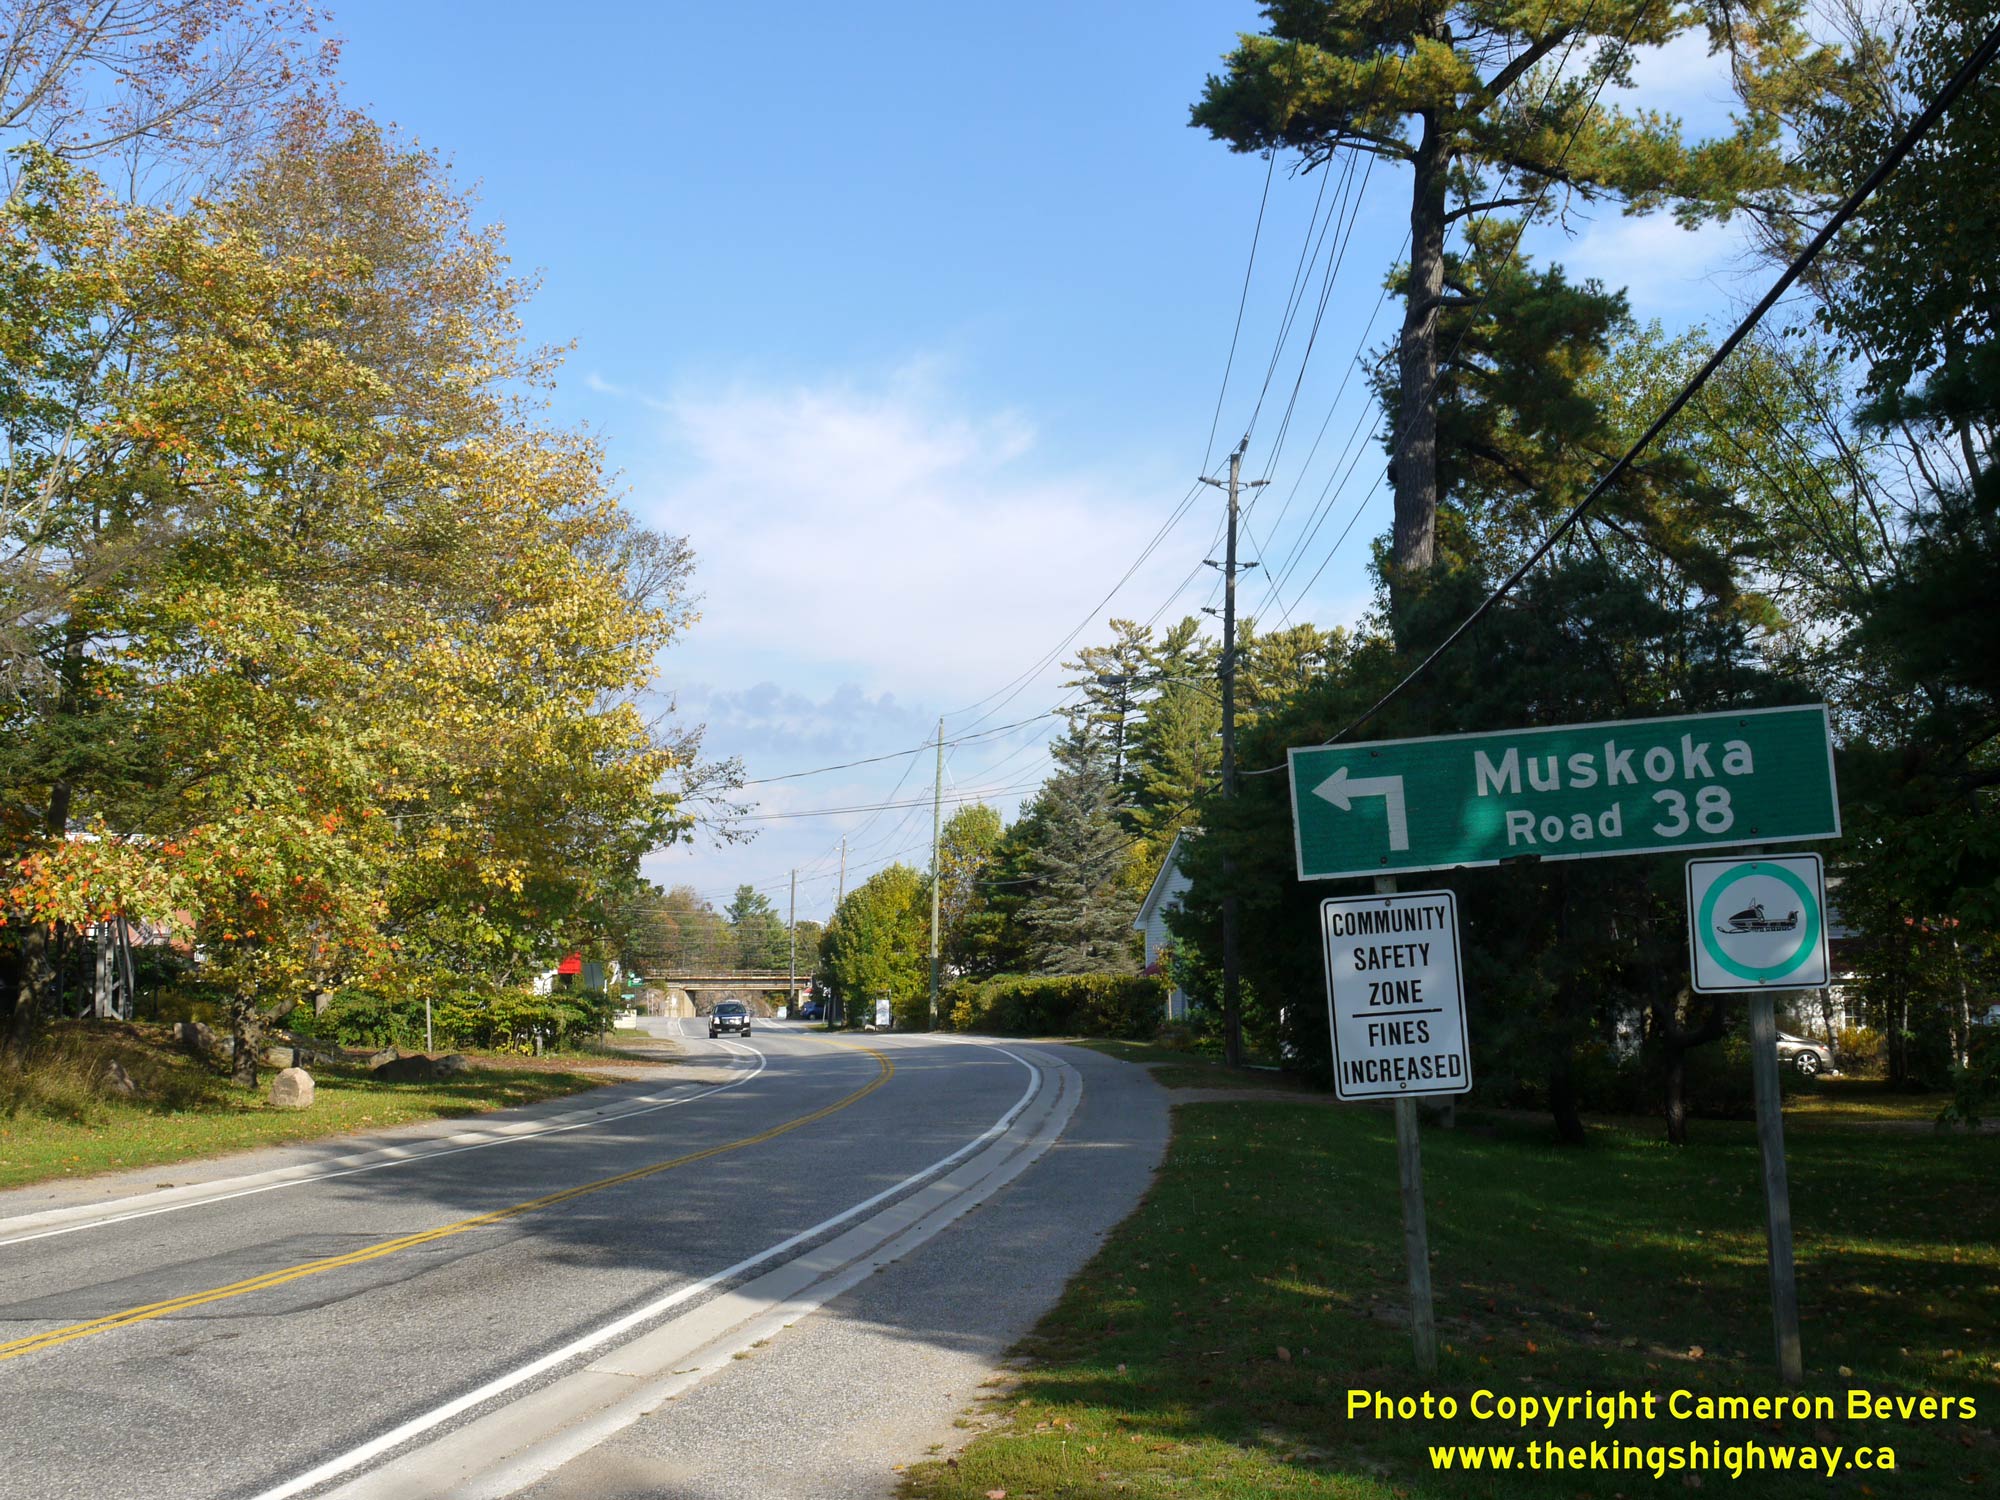
Left - An older MTO green guide sign on northbound Hwy 169 marking the upcoming junction of Muskoka Road 38 in Bala. See an Enlarged Photo Here.
(Photograph taken on September 29, 2013  -  © Cameron Bevers)

Right - Approaching the eastern terminus of Muskoka Road 38 (Former Hwy 660) at the Hwy 169 Junction in Bala. See an Enlarged Photo Here.
(Photograph taken on September 29, 2013  -  © Cameron Bevers)


HWY 169 #94 - © Cameron Bevers             HWY 169 #89 - © Cameron Bevers

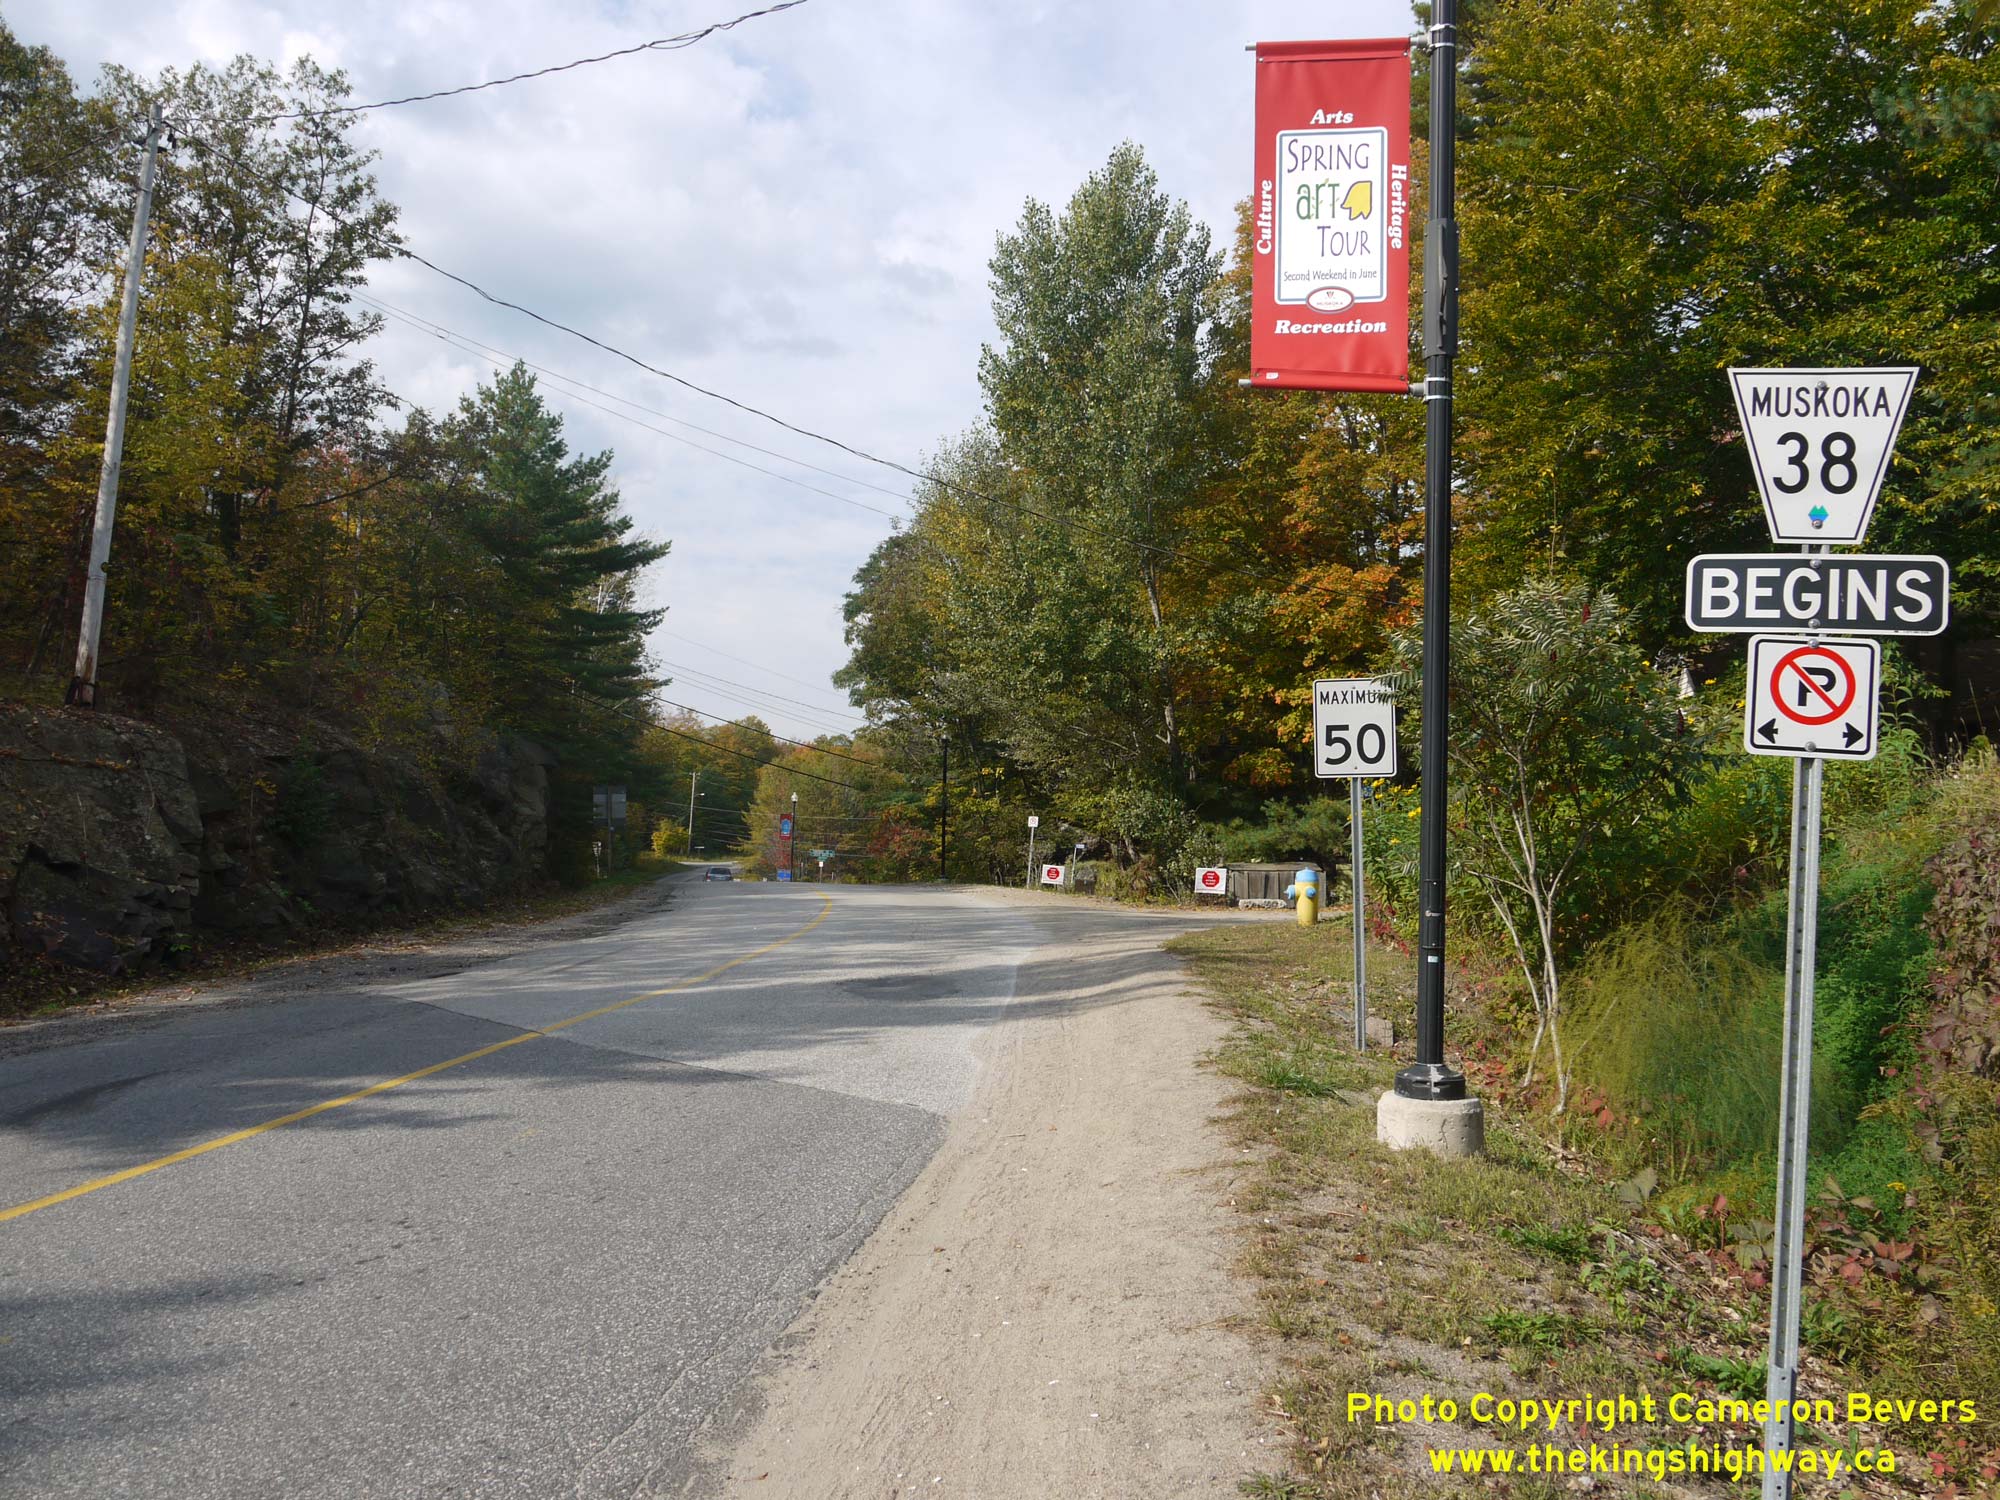
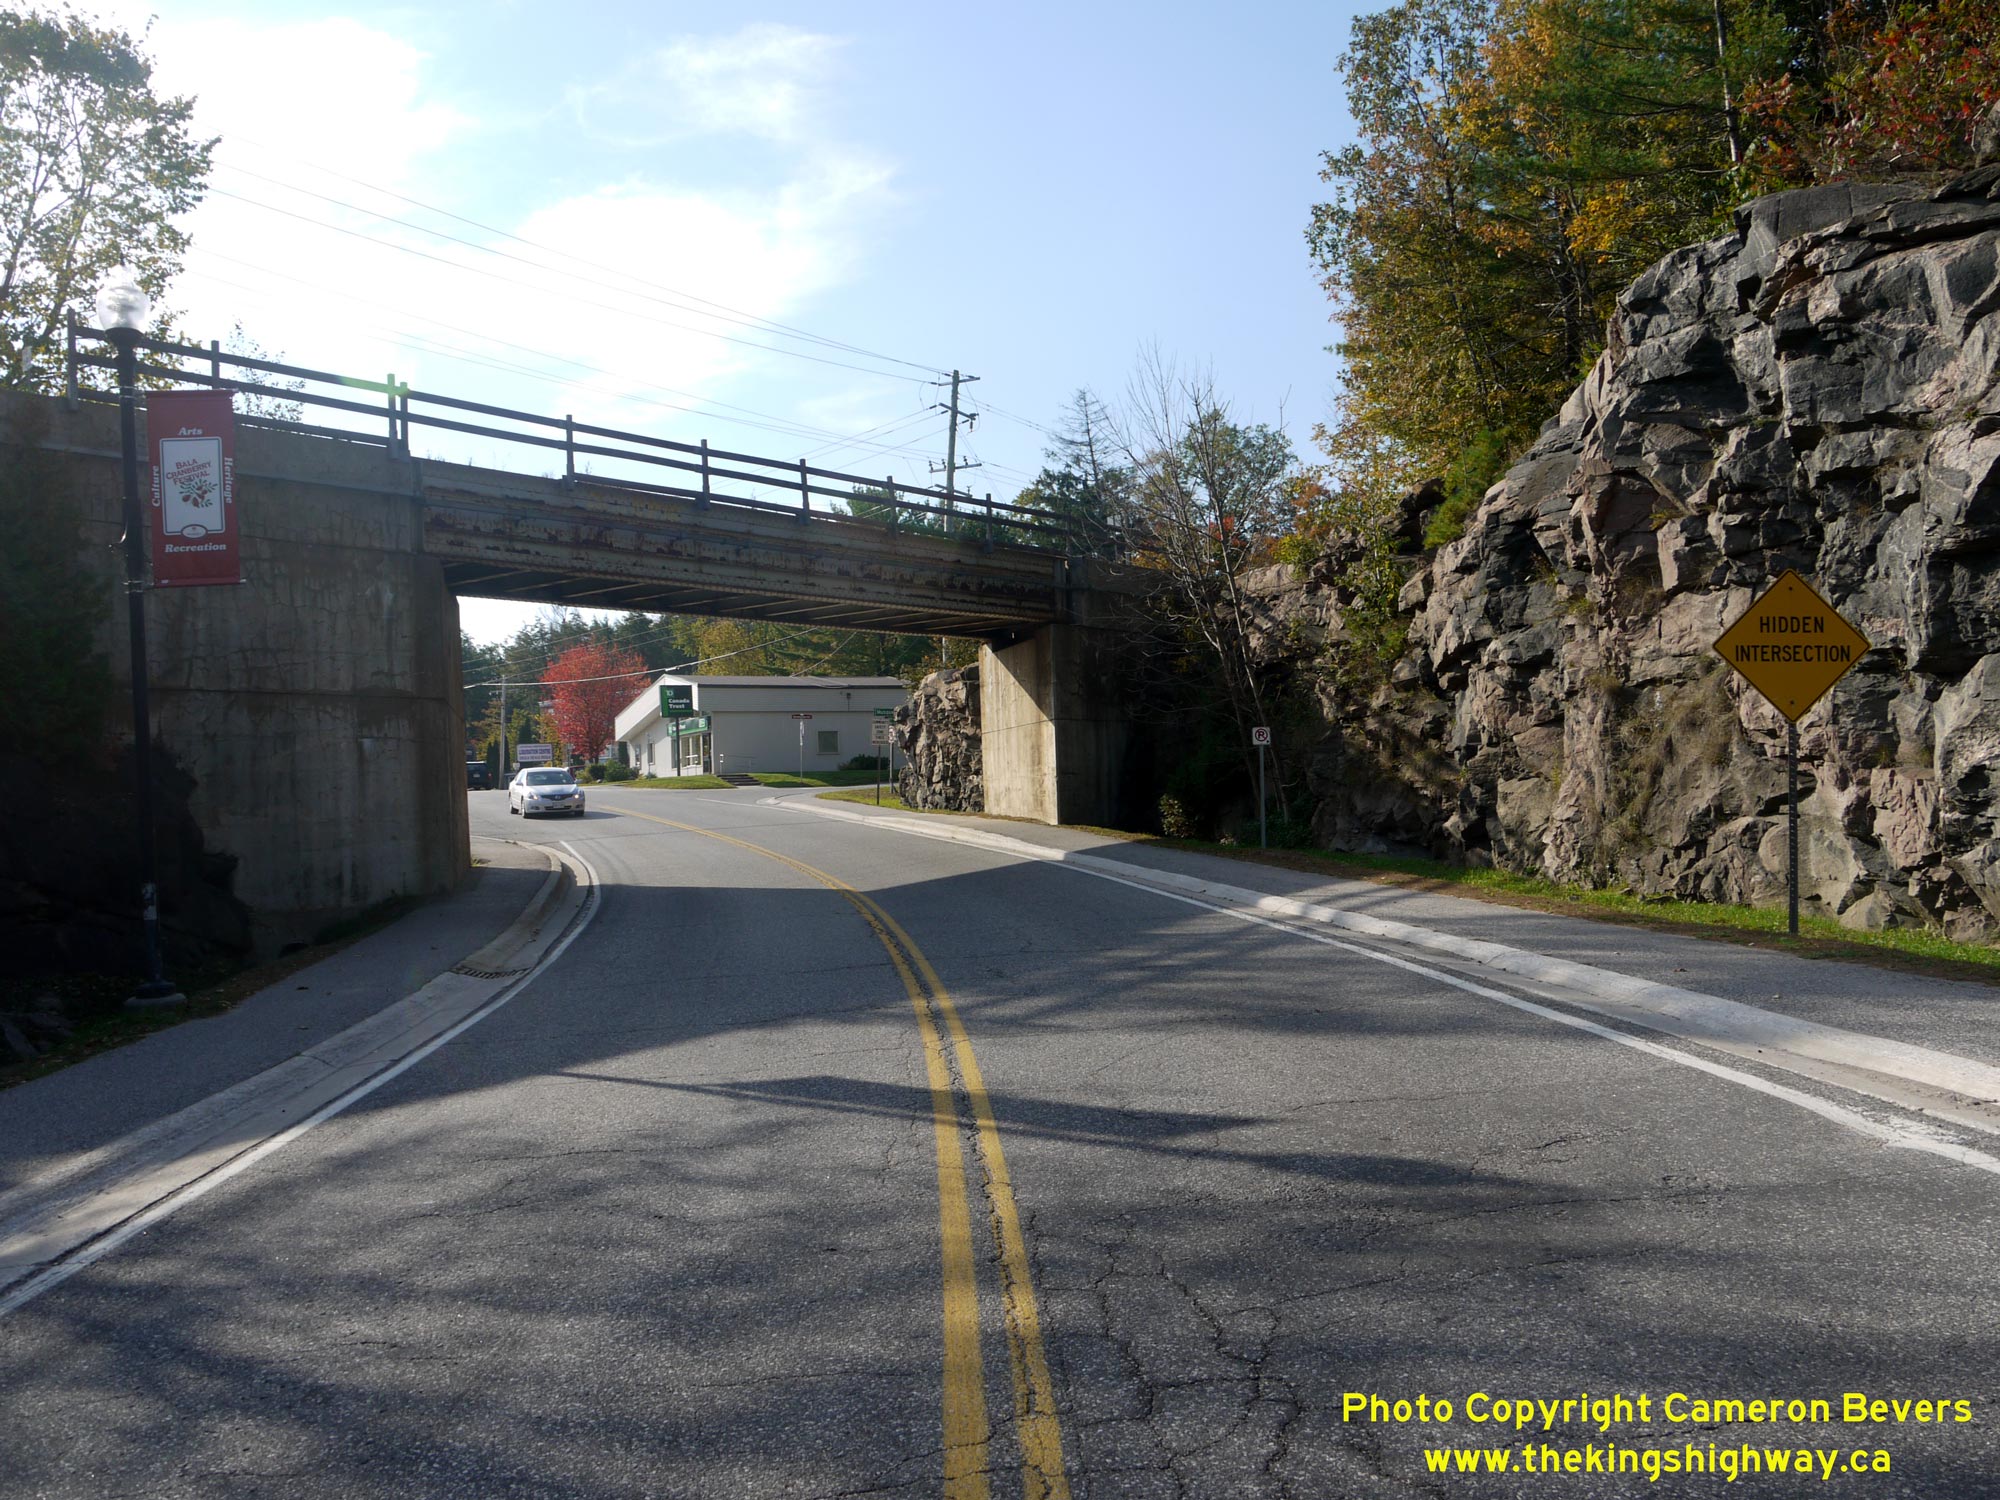
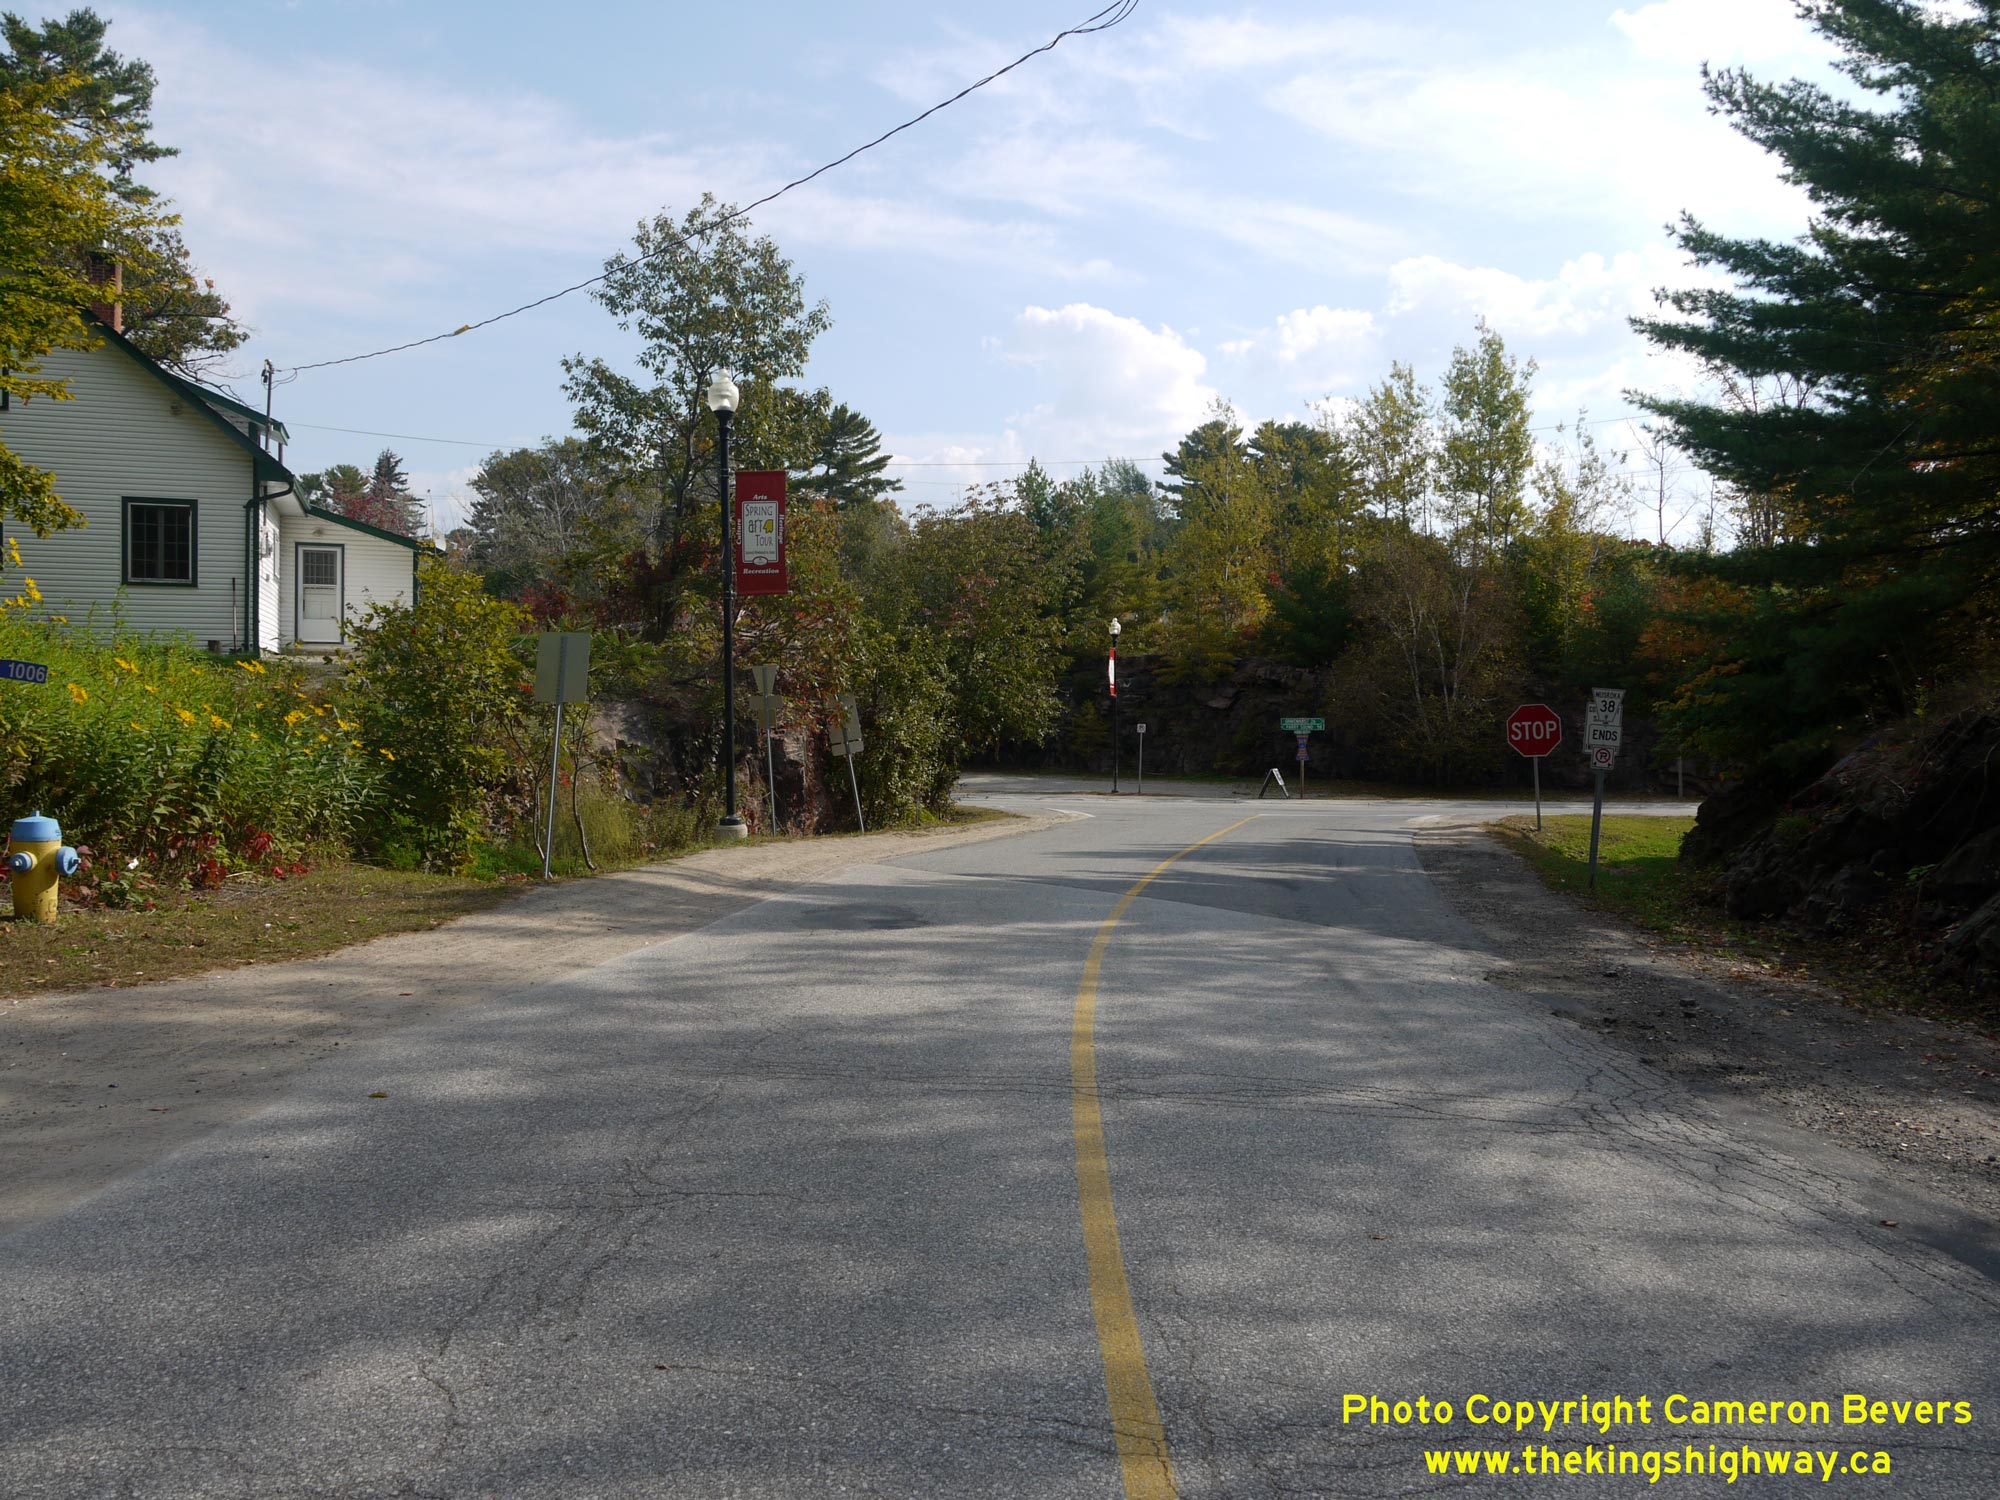
Left - Facing west along Muskoka Road 38 (Former Hwy 660) from the Hwy 169 Junction in Bala. See an Enlarged Photo Here.
(Photograph taken on September 29, 2013  -  © Cameron Bevers)

Right - Facing south along Hwy 169 from the Muskoka Road 38 Junction towards the Canadian Pacific Railway (CPR) Subway. This two-lane subway was completed in 1965 along the new highway diversion through Bala. The Bala CPR Subway lies immediately to the south of the Hwy 169 and Muskoka Road 38 (Former Hwy 660) Junction. See an Enlarged Photo Here.
(Photograph taken on September 29, 2013  -  © Cameron Bevers)


HWY 169 #90 - © Cameron Bevers             HWY 169 #91 - © Cameron Bevers

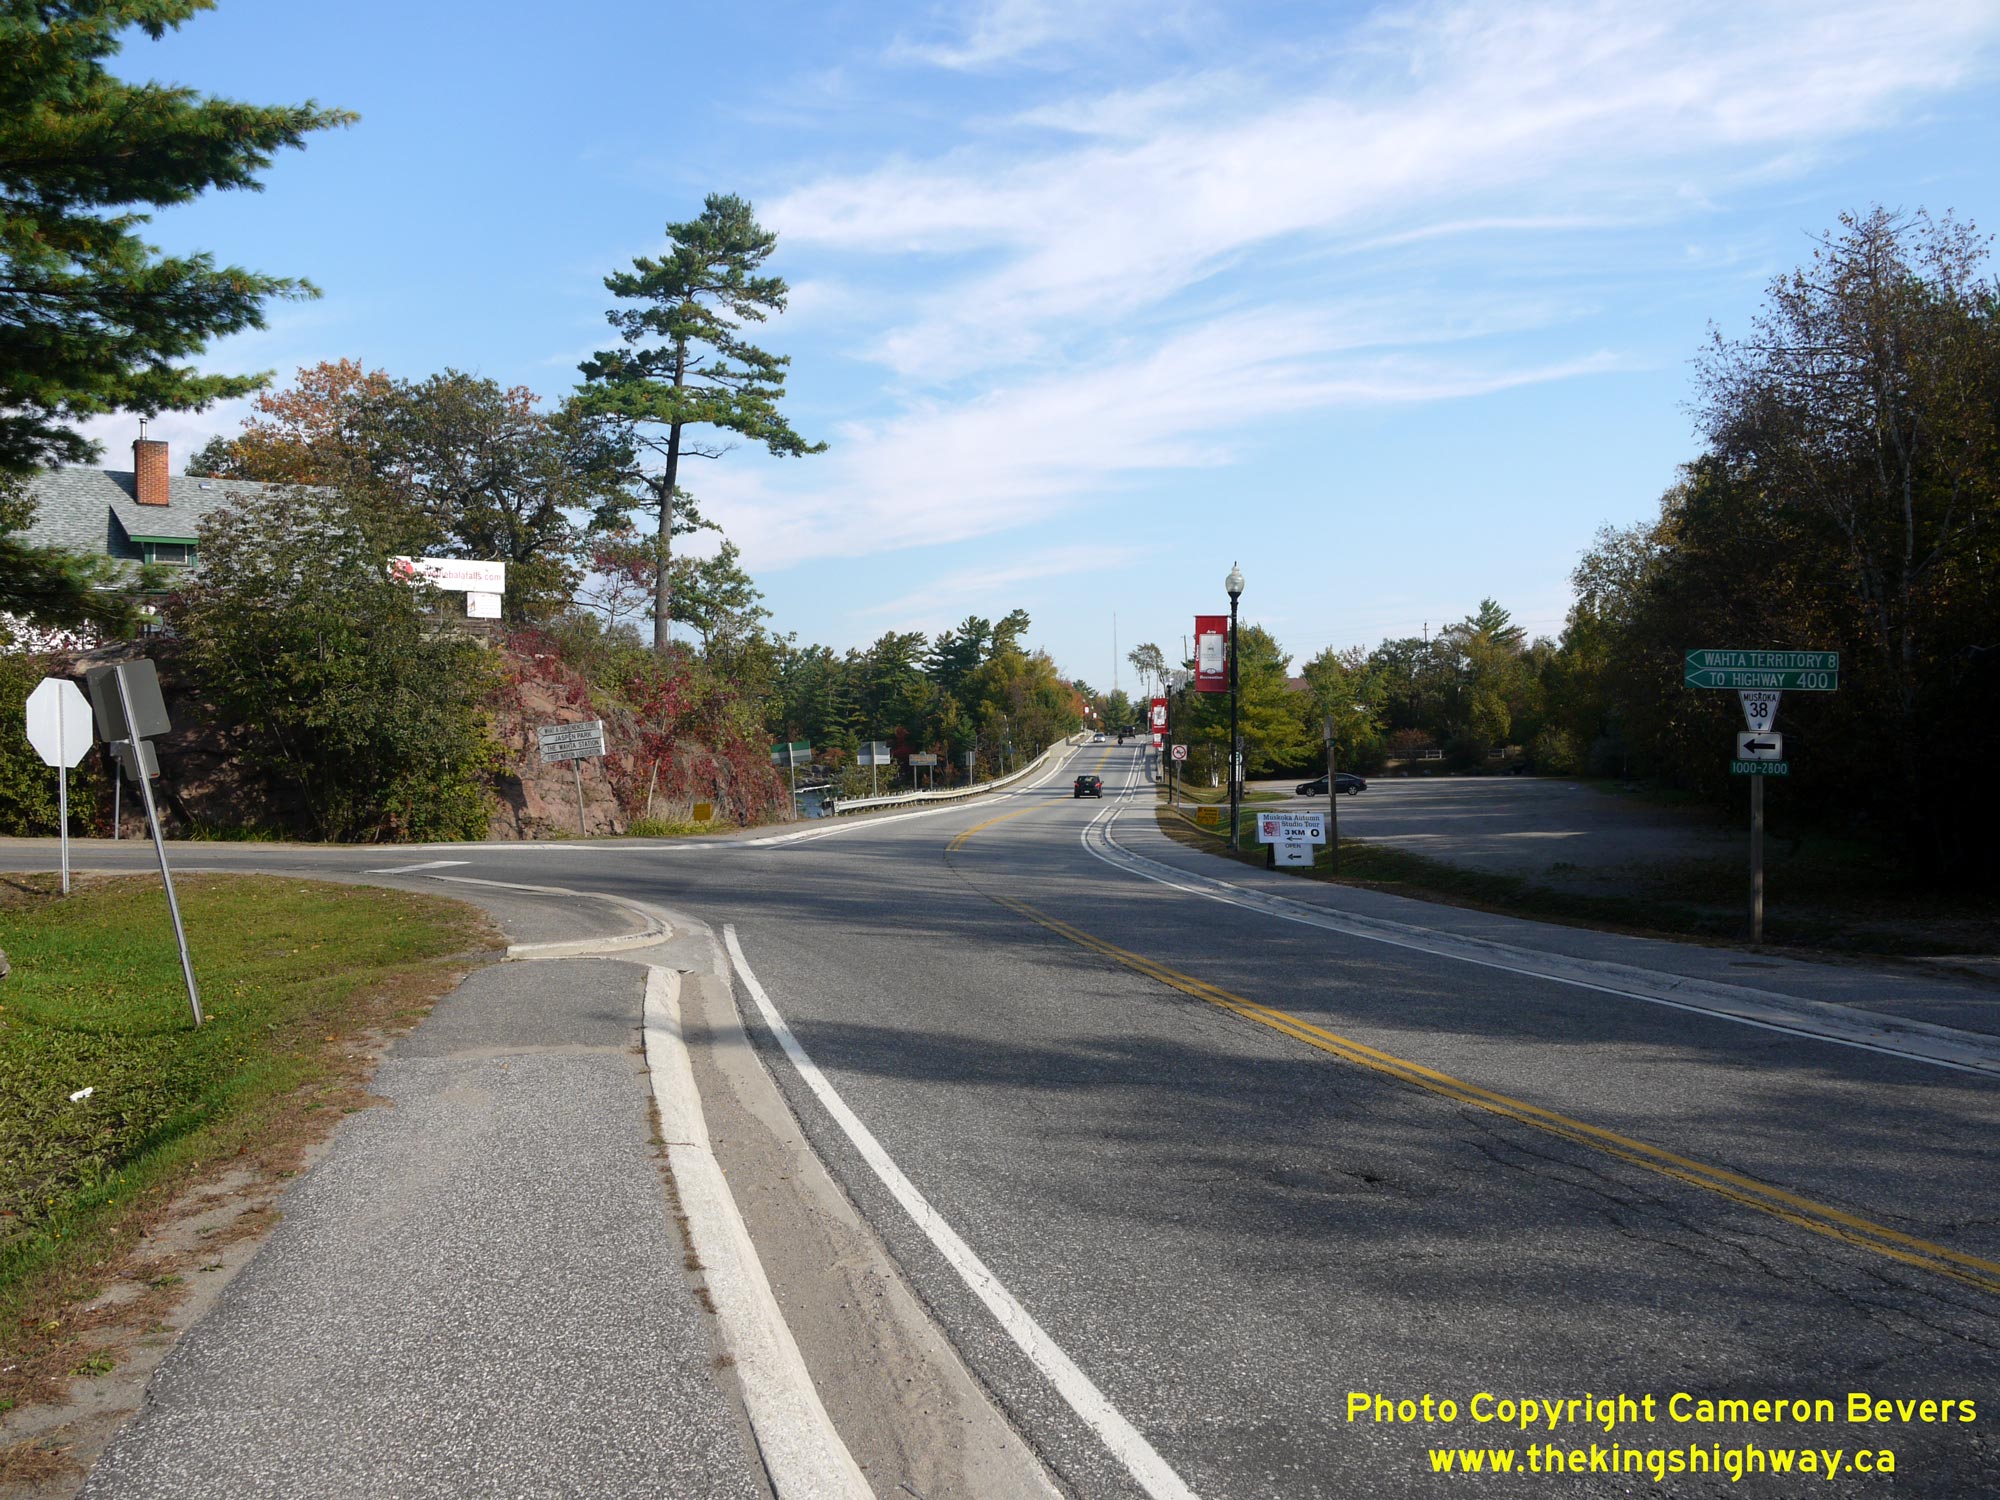
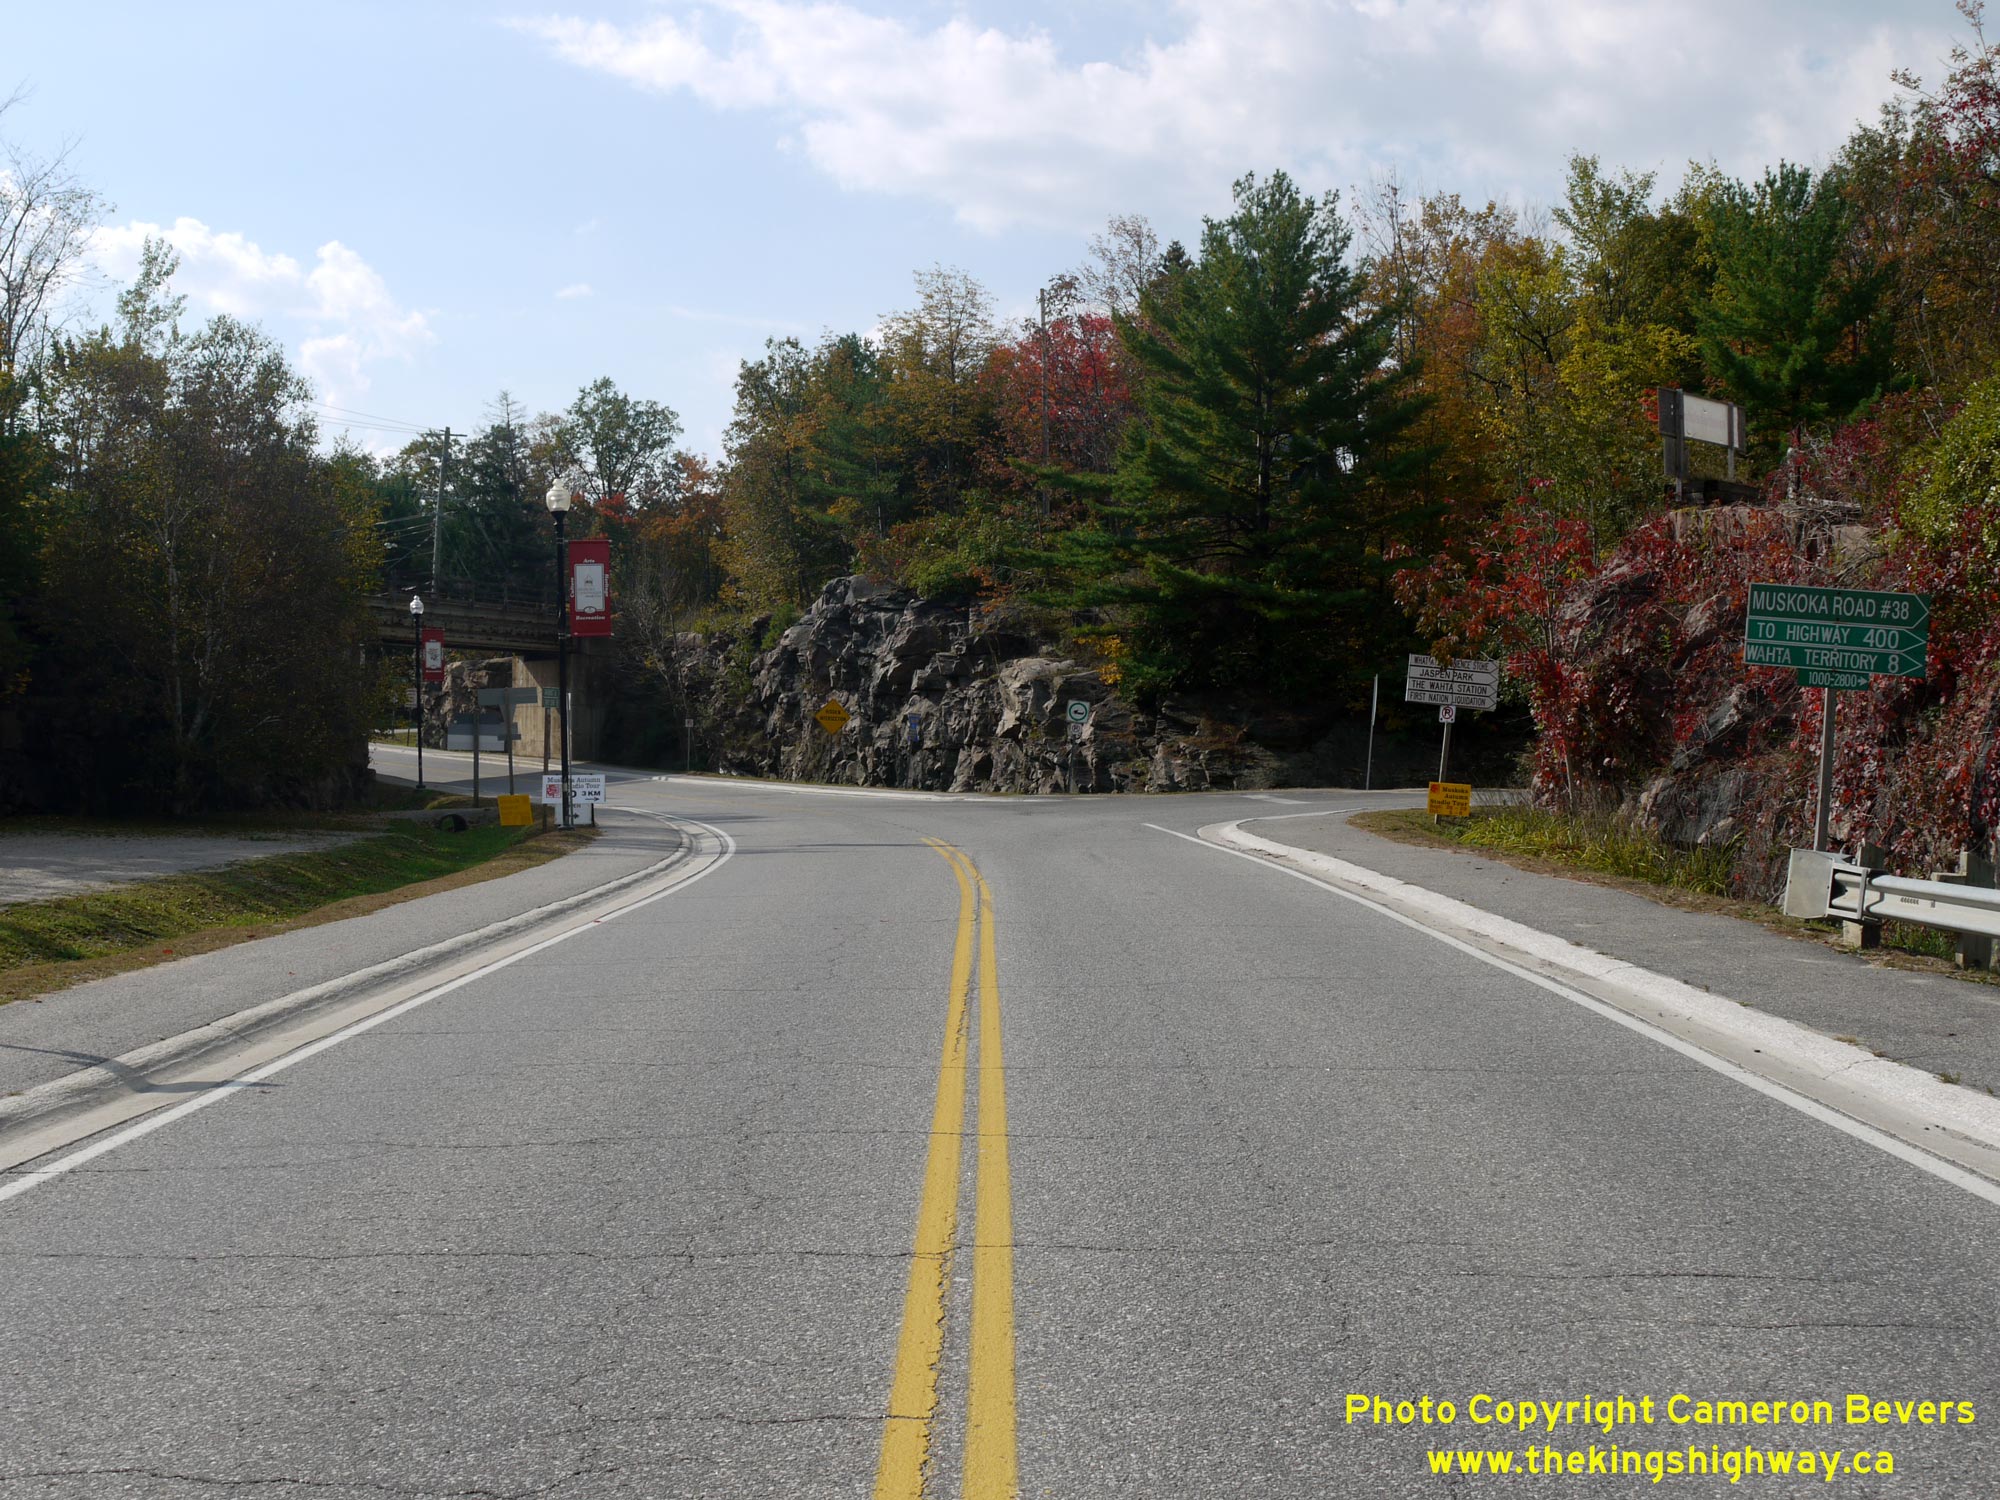
Left - Junction of Muskoka Road 38 (Former Hwy 660) and Hwy 169 in Bala, facing north. Compare this 2013 photo above to this Historical 1965 Photo, which was taken shortly after the Bala Diversion and Moon River Bridge was completed through Bala. See an Enlarged Photo Here.
(Photograph taken on September 29, 2013  -  © Cameron Bevers)

Right - Facing south along Hwy 169 towards Gravenhurst approaching the Muskoka Road 38 Junction. See an Enlarged Photo Here.
(Photograph taken on September 29, 2013  -  © Cameron Bevers)


HWY 169 #92 - © Cameron Bevers             HWY 169 #93 - © Cameron Bevers

Left - Facing north along Hwy 169 from the Muskoka Road 38 Junction towards the Moon River Bridge in Bala. This section of Hwy 169 was actually a diversion which was built in the mid-1960s. Previously, through traffic followed Bala Falls Road through Bala. See an 
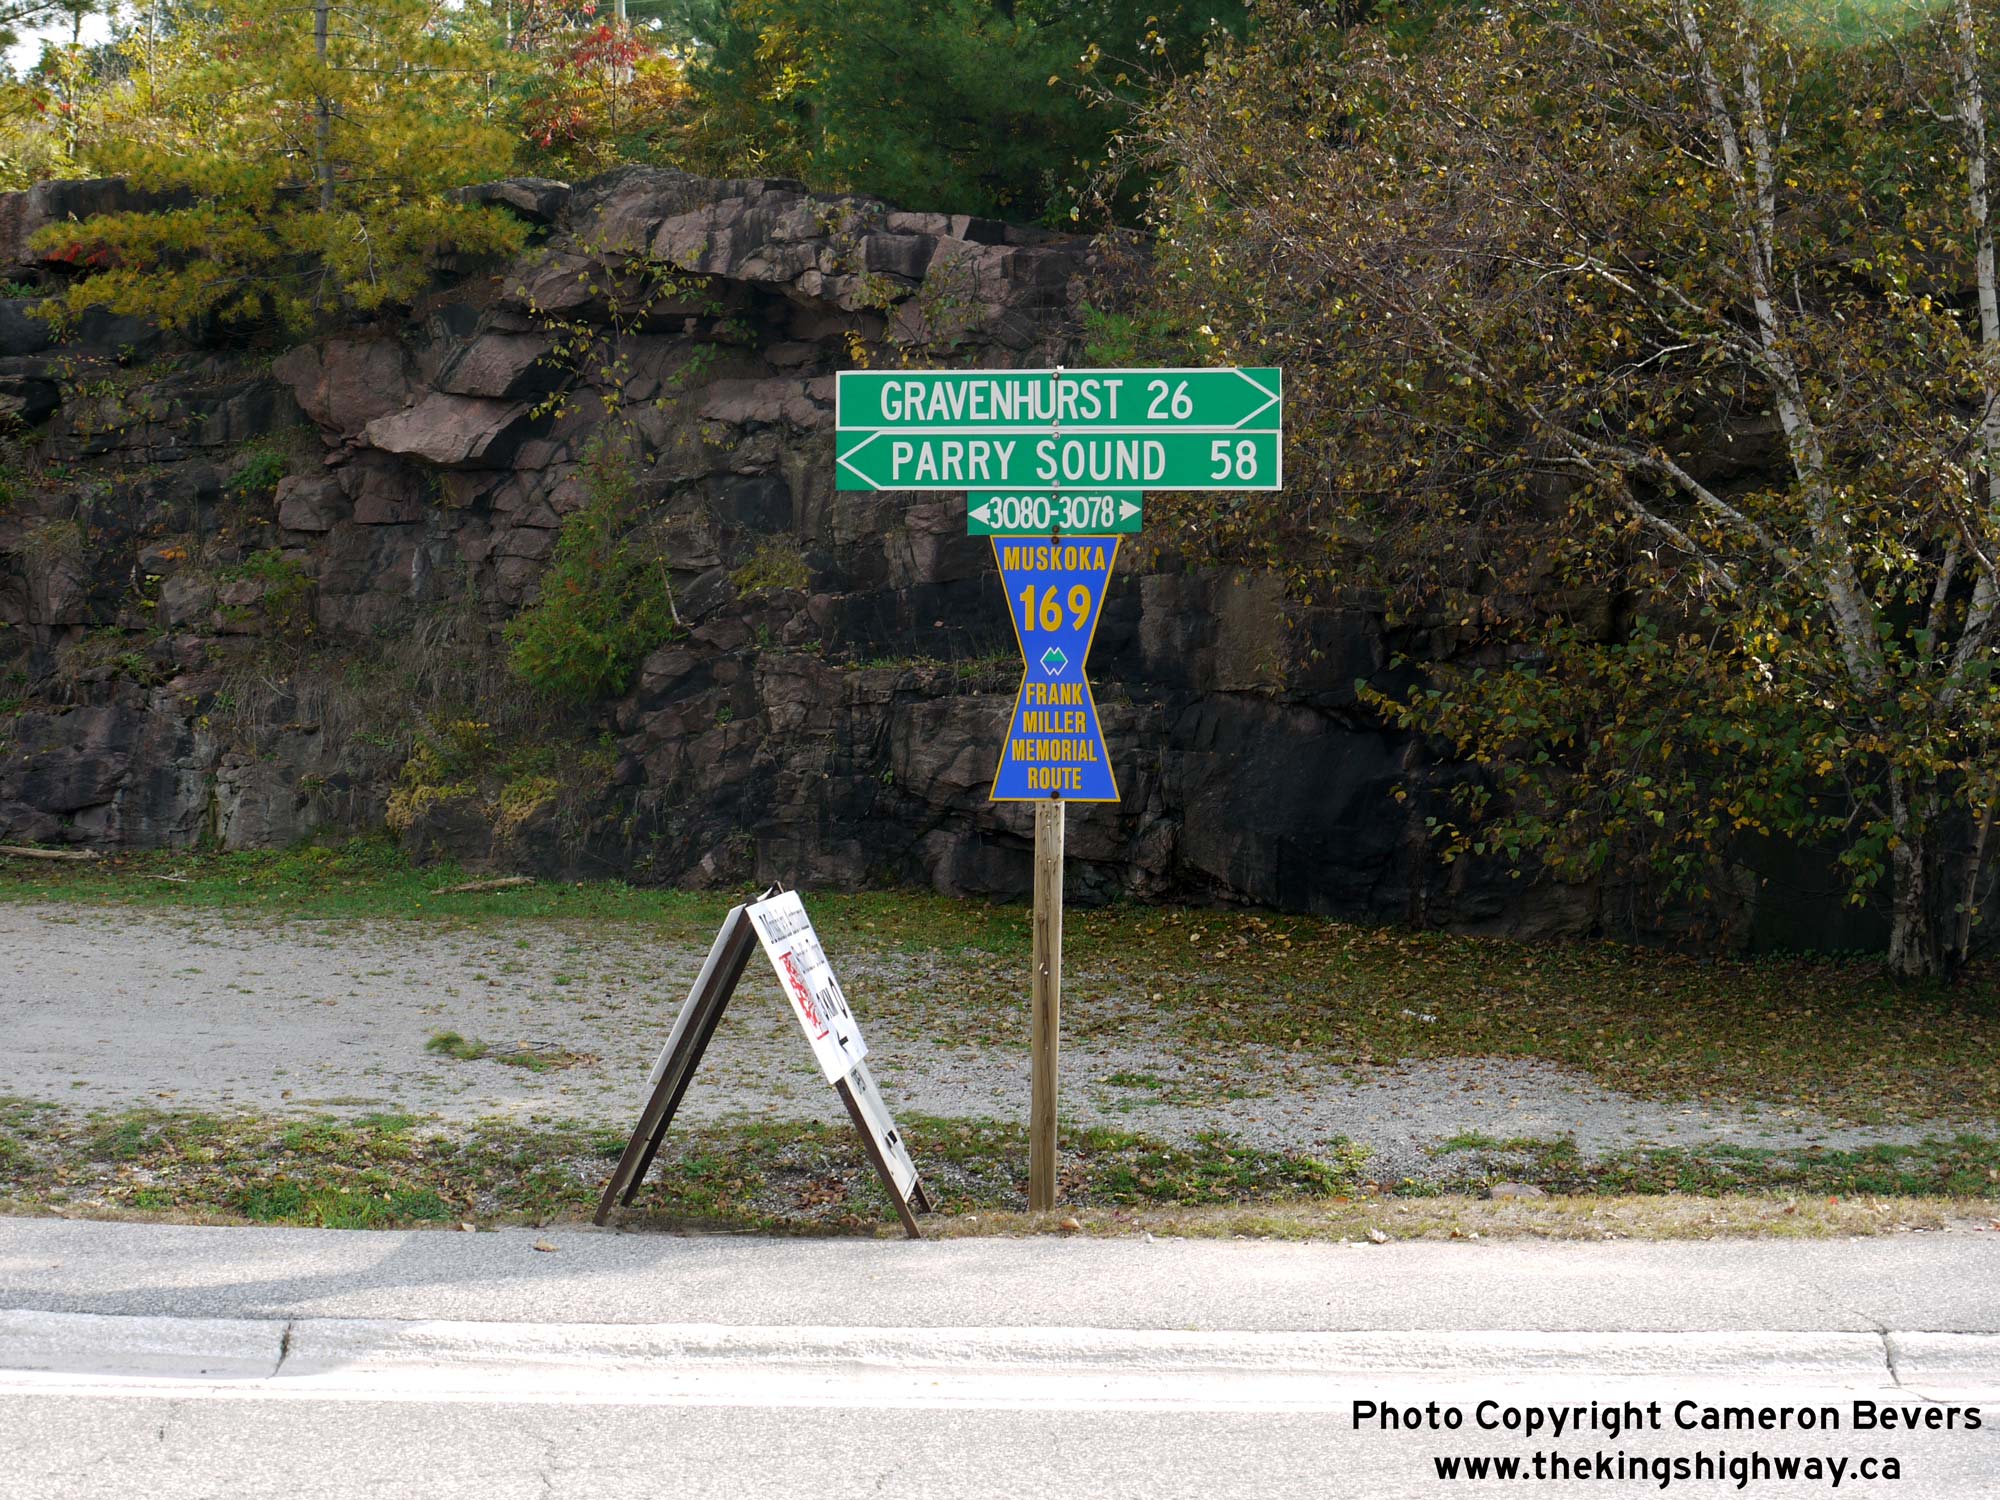
Enlarged Photo Here.
(Photograph taken on September 29, 2013  -  © Cameron Bevers)

Right - Fingerboard guide signs at the eastern terminus of Muskoka Road 38 (Former Hwy 660) in Bala. The control cities of Gravenhurst and Parry Sound are vestiges from the past, when Hwy 169 was still a King's Highway under MTO jurisdiction. Today, the local community of Port Carling is shown as the northbound control city at this highway junction. See an Enlarged Photo Here.
(Photograph taken on September 29, 2013  -  © Cameron Bevers)


HWY 169 #24 - © Cameron Bevers

Above - Old Bala Falls Bridge on Bala Falls Road (Old Hwy 169, previously known as Hwy 69) in Downtown Bala. This steel beam and timber deck structure was built by the Ontario Department of Highways in 1951, replacing a timber Howe through truss structure that was built on the original Gravenhurst-Parry Sound Road. The entire Muskoka Lakes Watershed drains westerly towards Georgian Bay, through a single outlet at Bala. The Moon River, Go Home River and Musquash River all drain the Muskoka Lakes watershed downstream of the outlet at Bala Falls. See an Enlarged Photo Here.
(Photograph taken on September 12, 2007  -  © Cameron Bevers)


HWY 169 #20 - © Cameron Bevers              HWY 169 #21 - © Cameron Bevers

Left - Old Bala Falls Bridge on Bala Falls Road (formerly Hwy 69) in Downtown Bala. See an Enlarged Photo Here.
(Photograph taken on June 4, 2005  -  © Cameron Bevers)

Right - Facing south along Bala Falls Road (formerly Hwy 69) at the Bala Falls Bridge.
(Photograph taken on June 4, 2005  -  © Cameron Bevers)


HWY 169 #22 - © Cameron Bevers              HWY 169 #23 - © Cameron Bevers

Left - Old Bala Canadian Pacific Railway (CPR) Subway on Bala Falls Road. Up until 1965, Hwy 169 (then known as Hwy 69) passed through this narrow one-lane subway in Downtown Bala. With a vertical clearance of less than 10 feet, this tiny railway subway prevented trucks from using Hwy 69 between Gravenhurst and the Hwy 118 Junction at Glen Orchard for decades. See an Enlarged Photo Here.
(Photograph taken on June 4, 2005  -  © Cameron Bevers)

Right - Facing north along Bala Falls Road (Old Hwy 69) at the Bala Canadian Pacific Railway (CPR) Subway. When the Bala Subway was constructed around 1915, the vertical clearance of the subway was deemed to be sufficient for the types of vehicles using the Gravenhurst-Parry Sound Road at that time. However, as highway transportation became more prevalent in the following decades, vehicle heights steadily increased. By the late 1930s, the Bala Subway posed a significant barrier for trucks along the Hwy 69 corridor between Gravenhurst and Parry Sound. Overheight trucks had to follow a long detour through Bracebridge and Port Carling (via today's Hwy 118) in order to bypass the Bala Subway. In the mid-1960s, the Department of Highways built a new route for Hwy 69 (later Hwy 169) through Bala, including a new railway subway with an improved vertical clearance.
(Photograph taken on June 4, 2005  -  © Cameron Bevers)


HWY 169 #15 - © Cameron Bevers              HWY 169 #16 - © Cameron Bevers

Left - New Bala Falls Bridge on Hwy 169 (previously Hwy 69) in Bala, facing south towards Gravenhurst. This bridge carried a short but very important diversion of Hwy 69 through Bala. Completed in 1965, this diversion bypassed a narrow, low clearance railway subway on Bala's main street, finally opening up Hwy 69 to truck traffic. Previously, overheight trucks had to detour via Hwy 11 and Hwy 118 through Bracebridge and Port Carling in order to bypass the Bala Subway. See an Enlarged Photo Here.
(Photograph taken on September 12, 2007  -  © Cameron Bevers)

Right - New Bala Falls Bridge on Hwy 169 (previously Hwy 69) in Bala. This single-span steel girder structure was completed in 1965.
(Photograph taken on September 12, 2007  -  © Cameron Bevers)


HWY 169 #17 - © Cameron Bevers              HWY 169 #18 - © Cameron Bevers

Left - Structure identification number and date stamp (1965) on the New Bala Falls Bridge on Hwy 169 (previously Hwy 69) in Bala.
(Photograph taken on September 12, 2007  -  © Cameron Bevers)

Right - Facing north along Hwy 169 (previously Hwy 69) at the New Bala Falls Bridge in Bala.
(Photograph taken on September 12, 2007  -  © Cameron Bevers)


HWY 169 #19 - © Cameron Bevers              HWY 169 #11 - © Cameron Bevers

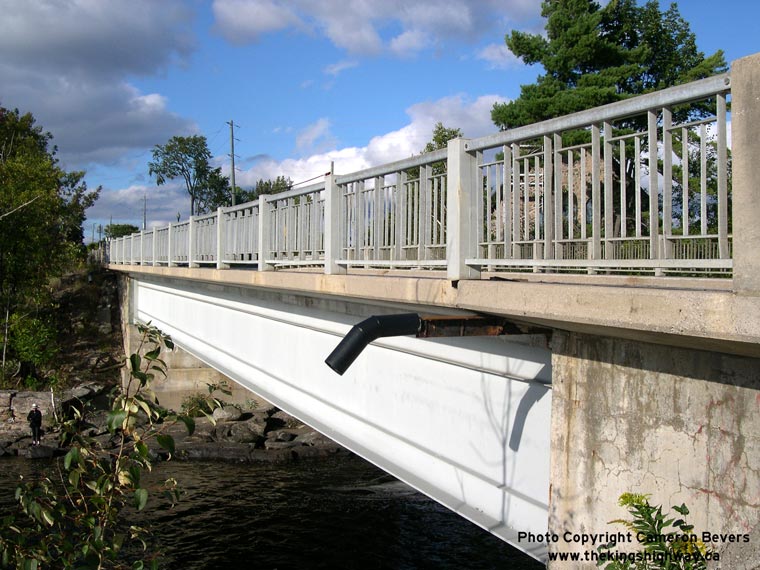
Left - Western side of the New Bala Falls Bridge on Hwy 169 (previously Hwy 69) in Bala.
(Photograph taken on September 12, 2007  -  © Cameron Bevers)

Right - Moon River (North Falls) Bridge on Hwy 169 in Bala. Structure completed in 1955.
(Photograph taken on September 12, 2007  -  © Cameron Bevers)


HWY 169 #12 - © Cameron Bevers              HWY 169 #13 - © Cameron Bevers

Left - Facing north along Hwy 169 at the Moon River (North Falls) Bridge in Bala.
(Photograph taken on September 12, 2007  -  © Cameron Bevers)

Right - Eastern side of the Moon River (North Falls) Bridge on Hwy 169 in Bala. Up until 1955, Hwy 69 crossed a narrow one-lane steel truss bridge over the Moon River. The one-lane truss bridge at Bala was replaced by a two-lane welded steel plate girder structure in 1955.
(Photograph taken on September 12, 2007  -  © Cameron Bevers)


HWY 169 #14 - © Cameron Bevers              HWY 169 #3 - © Cameron Bevers

Left - Facing south along Hwy 169 at the Moon River (North Falls) Bridge in Bala. Until 1965, Hwy 69 (which later became Hwy 169) turned sharply to the left where the truck is situated in the background of this photo. The completion of the diversion through Bala in 1965 substantially improved the alignment of the highway through town.
(Photograph taken on September 12, 2007  -  © Cameron Bevers)

Right - Former Hwy 169 alignment (Medora Lake Road) north of Bala approaching the Medora Creek Bridge. This section of Hwy 169 was bypassed by a new highway many years ago.
(Photograph taken on June 4, 2005  -  © Cameron Bevers)


HWY 169 #4 - © Cameron Bevers              HWY 169 #5 - © Cameron Bevers

Left - Close-up of the narrow one-lane bridge over Medora Creek on the old Hwy 169 alignment (Medora Lake Road) near Bala.
(Photograph taken on June 4, 2005  -  © Cameron Bevers)

Right - Side view of the Medora Creek Bridge on the old Hwy 169 alignment (Medora Lake Road). This narrow bridge was constructed long before the Department of Highways assumed responsibility for the Gravenhurst to MacTier Highway in 1937.
(Photograph taken on June 4, 2005  -  © Cameron Bevers)


HWY 118 #93 - © Cameron Bevers             HWY 118 #91 - © Cameron Bevers

Left - Facing south along Hwy 169 towards Bala from the Hwy 118 Junction at Glen Orchard. All three approaches to the Hwy 169 & Hwy 118 Junction at Glen Orchard were extensively realigned in the 1970s, as part of an improvement project to replace an inconspicuous junction where these two highways initially intersected. This broad, sweeping curve beside Butterfly Lake bypassed a series of sharp curves on the original 1937 route of Hwy 69 (later Hwy 169). See an Enlarged Photo Here.
(Photograph taken on September 27, 2013  -  © Cameron Bevers)

Right - Approaching the Hwy 118 Junction on Hwy 169 at Glen Orchard, facing north towards MacTier. See an Enlarged Photo Here.
(Photograph taken on September 27, 2013  -  © Cameron Bevers)


HWY 118 #92 - © Cameron Bevers             HWY 118 #90 - © Cameron Bevers

Left - Green guide sign for Muskoka Road 118 West (Former Hwy 118) on northbound Hwy 169 at Glen Orchard. Provincial ownership of Hwy 118 west of Bracebridge ceased in 1998, when the Ministry of Transportation of Ontario (MTO) transferred jurisdiction over the western leg of Hwy 118 to the District Municipality of Muskoka. Today, Former Hwy 118 from the Hwy 169 Junction at Glen Orchard to the Hwy 11 Interchange in Bracebridge is officially known as Muskoka Road 118 West. See an Enlarged Photo Here.
(Photograph taken on September 27, 2013  -  © Cameron Bevers)

Right - Scenic Butterfly Lake appears on the eastern side of the Hwy 118 & Hwy 169 Junction. This is one of many lakes in the popular Muskoka Lakes tourist area. See an Enlarged Photo Here.
(Photograph taken on September 27, 2013  -  © Cameron Bevers)


HWY 118 #89 - © Cameron Bevers             HWY 118 #86 - © Cameron Bevers

Left - When the Hwy 169 & Hwy 118 Junction was reconstructed in 1974, new channelized right turn ramps were installed. Note the old "Ramp Speed 50" warning sign on the left side of the ramp. In recent years, these Ramp Speed signs have been phased out and replaced with new plain yellow signs which just post the numerical advisory speed only. See an Enlarged Photo Here.
(Photograph taken on September 27, 2013  -  © Cameron Bevers)

Right - Western terminus of Hwy 118 at the Hwy 169 Junction at Glen Orchard. This interesting 1970s-vintage highway junction was constructed under Contract #1974-15. It even features white chevron pavement hatch markings approaching the raised traffic islands, which are not commonly used in Ontario anymore. See an Enlarged Photo Here.
(Photograph taken on September 27, 2013  -  © Cameron Bevers)


HWY 118 #87 - © Cameron Bevers             HWY 118 #80 - © Cameron Bevers

Left - Green guide signs on westbound Hwy 118 approaching Muskoka Road 169 (Former Hwy 169) at Glen Orchard. See an Enlarged Photo Here.
(Photograph taken on September 27, 2013  -  © Cameron Bevers)

Right - Destination guide sign at the western terminus of Hwy 118 at the Hwy 169 Junction at Glen Orchard. The incorporated towns of Gravenhurst and Parry Sound were typically used as the destination control cities along Hwy 169 through Muskoka. Although the Town of Bala hasn't been an incorporated municipality in its own right in many decades, it is still a very popular Muskoka tourist destination and is still signed today at the Hwy 118 Junction. Bala was also the junction of two provincial highways (Hwy 169 & Hwy 660) up until 1982, which might further explain why Bala remained signed as a destination even though the town is no longer an incorporated municipal entity. See an Enlarged Photo Here.
(Photograph taken on September 27, 2013  -  © Cameron Bevers)


HWY 118 #79 - © Cameron Bevers             HWY 118 #83 - © Cameron Bevers

Left - General view of the current Hwy 169 & Hwy 118 Junction, facing east towards Port Carling. This photo was taken from the approximate site of the original highway junction, prior to the intersection's reconstruction in 1974. The vertical profile of Hwy 169 was lowered by several metres as a result of the reconstruction, which allowed the two highways to intersect at a comparatively level grade. Previously, Hwy 118 would have ascended a steep uphill grade just before reaching Hwy 169, which would have resulted in an inconspicuous intersection with poor sight lines. Given the magnitude of the reconstruction efforts displayed here, it is quite probable that the old highway junction at Glen Orchard had a dubious safety record prior to the 1970s. See an Enlarged Photo Here.
(Photograph taken on September 27, 2013  -  © Cameron Bevers)

Right - Green guide sign for Muskoka Road 118 West (Former Hwy 118) on southbound Hwy 169 at Glen Orchard. See an Enlarged Photo Here.
(Photograph taken on September 27, 2013  -  © Cameron Bevers)


HWY 118 #84 - © Cameron Bevers             HWY 118 #85 - © Cameron Bevers

Left - View of the channelized right turn ramp from westbound Hwy 118 to northbound Hwy 169. The Department of Highways of Ontario (DHO) and its successor, the Ministry of Transportation and Communications (MTC), rebuilt many highway junctions with channelized right turn ramps such as this during the 1950s, 1960s and 1970s. This right turn ramp allows vehicles approaching on Hwy 118 to bypass the stop sign at Hwy 169. This intersection feature is particularly advantageous for heavy trucks. If they had to pass through the intersection and come to a full stop, it would take a considerable amount of time for the trucks to get back up to highway speeds. See an Enlarged Photo Here.
(Photograph taken on September 27, 2013  -  © Cameron Bevers)

Right - Facing east along Hwy 118 from the Hwy 169 Junction at Glen Orchard. When Hwy 118 was first established in the mid-1950s, the highway followed the aerial hydro lines onto West White's Road rather then continue straight ahead. This former alignment of Hwy 118 can be seen at right, departing from the current route of Hwy 118 and following the north shore of Butterfly Lake. A newer diversion of Hwy 118 can be seen straight ahead, which was built under Contract #1969-223 and completed in 1970. The diversion removed a sharp curve on the original 1955 route of Hwy 118 approaching Glen Orchard. See an Enlarged Photo Here.
(Photograph taken on September 27, 2013  -  © Cameron Bevers)


HWY 118 #82 - © Cameron Bevers             HWY 118 #81 - © Cameron Bevers

Left - Facing north along Hwy 169 towards MacTier from the Hwy 118 Junction at Glen Orchard. A substantial relocation of the highway took place here in 1974. Originally, the highway followed Carl's Road, located a short distance to the west. The relocation of Hwy 169 at Glen Orchard greatly improved the sight lines for traffic approaching the Hwy 118 Junction. See an Enlarged Photo Here.
(Photograph taken on September 27, 2013  -  © Cameron Bevers)

Right - Approaching the Hwy 118 Junction on Hwy 169 at Glen Orchard, facing south towards Bala. See an Enlarged Photo Here.
(Photograph taken on September 27, 2013  -  © Cameron Bevers)


HWY 118 #77 - © Cameron Bevers             HWY 118 #78 - © Cameron Bevers

Left - Approaching the Hwy 169 Junction on Hwy 118 at Glen Orchard. A 1 km section of Hwy 118 was relocated east of the highway junction at Glen Orchard in the early 1970s. The original 1955 route of Hwy 118 followed the north shore of Butterfly Lake, via West White's Road. See an Enlarged Photo Here.
(Photograph taken on September 27, 2013  -  © Cameron Bevers)

Right - Junction sign assembly at Hwy 118 & Hwy 169 at Glen Orchard. Although the old King's Highway crown signs have long since been removed at this junction, it is still rather noteworthy to see two municipal roads with three-digit route numbers intersect at a common junction. When the District of Muskoka acquired Hwy 118 & Hwy 169 from the province as a result of the municipal highway transfers in 1998, they made a wise decision to retain the Hwy 118 and Hwy 169 route numbers, rather than attempting to introduce new route numbers to these otherwise familiar highways. Old Hwy 118 (West White's Road) can be seen at left. See an Enlarged Photo Here.
(Photograph taken on September 27, 2013  -  © Cameron Bevers)


HWY 118 #74 - © Cameron Bevers             HWY 118 #75 - © Cameron Bevers

Left - Approaching the Hwy 169 Junction at Glen Orchard on Hwy 118, facing west. See an Enlarged Photo Here.
(Photograph taken on September 27, 2013  -  © Cameron Bevers)

Right - Advance green guide signs on westbound Hwy 118 approaching Muskoka Road 169 (Former Hwy 169) at Glen Orchard. See an Enlarged Photo Here.
(Photograph taken on September 27, 2013  -  © Cameron Bevers)


HWY 169 #1 - © Cameron Bevers              HWY 169 #2 - © Cameron Bevers

Left - Abandoned Hwy 169 alignment just east of Foot's Bay.
(Photograph taken on June 4, 2005  -  © Cameron Bevers)

Right - Another view of the abandoned Hwy 169 alignment near Foot's Bay.
(Photograph taken on June 4, 2005  -  © Cameron Bevers)


HWY 69 #252 - © Cameron Bevers             HWY 69 #251 - © Cameron Bevers

Left - Approaching the Hwy 169 Junction on Hwy 69 (Lake Joseph Road) at Foot's Bay, facing north towards Parry Sound. See an Enlarged Photo Here.
(Photograph taken on April 12, 2012  -  © Cameron Bevers)

Right - Junction sign assembly marking the upcoming Hwy 169 Junction on northbound Hwy 69 at Foot's Bay. Hwy 169 was one of many Ontario King's Highways which was transferred from the province to municipalities during provincial service restructuring in the late 1990s. Officially, Hwy 169 through Muskoka is now known as Muskoka District Road 169. Hwy 169 ceased to be a provincial highway in 1998. See an Enlarged Photo Here.
(Photograph taken on April 12, 2012  -  © Cameron Bevers)


HWY 69 #118 - © Cameron Bevers             HWY 69 #119 - © Cameron Bevers

Left - Facing north along Hwy 69 towards the Foot's Bay Railway Subway near MacTier. The subway is situated immediately to the south of the Hwy 169 Junction. See an Enlarged Photo Here.
(Photograph taken on June 10, 2007  -  © Cameron Bevers)

Right - Facing south along Hwy 69 towards the Foot's Bay Railway Subway. This single span steel plate girder structure was completed in 1957. See an Enlarged Photo Here.
(Photograph taken on June 10, 2007  -  © Cameron Bevers)


HWY 69 #120 - © Cameron Bevers             HWY 69 #121 - © Cameron Bevers

Left - Close-up of the date stamp (1957) on the Foot's Bay Railway Subway on Hwy 69 (Lake Joseph Road). See an Enlarged Photo Here.
(Photograph taken on June 10, 2007  -  © Cameron Bevers)

Right - Facing north along Hwy 69 at the Hwy 169 Junction at Foot's Bay. From here, Hwy 169 heads southeasterly towards Bala and Gravenhurst, while Hwy 69 continues north towards Parry Sound and Sudbury. Hwy 169 connects to Hwy 118 east of Foot's Bay, which provides access to Port Carling and Bracebridge. See an Enlarged Photo Here.
(Photograph taken on June 10, 2007  -  © Cameron Bevers)


HWY 69 #253 - © Cameron Bevers             HWY 69 #254 - © Cameron Bevers

Left - Junction assembly and fingerboard destination guide signs at the Hwy 69 & Hwy 169 Junction at Foot's Bay. See an Enlarged Photo Here.
(Photograph taken on April 12, 2012  -  © Cameron Bevers)

Right - Facing south along Hwy 69 towards MacTier from the Hwy 169 Junction at Foot's Bay. See an Enlarged Photo Here.
(Photograph taken on April 12, 2012  -  © Cameron Bevers)


HWY 69 #255 - © Cameron Bevers             HWY 69 #257 - © Cameron Bevers

Left - Facing north along Hwy 69 towards Parry Sound from the Hwy 169 Junction at Foot's Bay. See an Enlarged Photo Here.
(Photograph taken on April 12, 2012  -  © Cameron Bevers)

Right - Northern terminus of Hwy 169 at the Hwy 69 Junction at Foot's Bay. From here, traffic can either turn left and follow Hwy 69 south to Barrie (via Hwy 400) or turn right and follow Hwy 69 north to Parry Sound and Sudbury. Both right turn lanes at the Hwy 69 & Hwy 169 Junction are channelized. See an Enlarged Photo Here.
(Photograph taken on April 12, 2012  -  © Cameron Bevers)


HWY 69 #256 - © Cameron Bevers             HWY 69 #258 - © Cameron Bevers

Left - Highway guide signs at the northern terminus of Hwy 169 at the Hwy 69 Junction at Foot's Bay. The bypassed route of Hwy 69 via MacTier, Foot's Bay and Horseshoe Lake was renamed Lake Joseph Road in September, 2012. Although Lake Joseph Road is still maintained by the province, it is no longer officially known as Hwy 69. The route of Hwy 69 now begins where Hwy 400 ends north of Nobel. See an Enlarged Photo Here.
(Photograph taken on April 12, 2012  -  © Cameron Bevers)

Right - Approaching the northern terminus of Hwy 169 at the Hwy 69 Junction at Foot's Bay. The route of Hwy 169 once extended southeasterly for over 90 km via Gravenhurst and Washago, where it connected with Hwy 12 just outside of Brechin. When Hwy 169 was still a provincial highway prior to 1998, it was signed concurrently with Hwy 11 between Gravenhurst and Washago. Once this overlapped route of Hwy 11 & Hwy 169 was removed between Gravenhurst and Washago in 1998, Hwy 169 was broken into distinct northern and southern sections, maintained by the District Municipality of Muskoka and the County of Simcoe, respectively. See an Enlarged Photo Here.
(Photograph taken on April 12, 2012  -  © Cameron Bevers)


HWY 69 #259 - © Cameron Bevers             HWY 69 #260 - © Cameron Bevers

Left - Highway guide signs approaching the northern terminus of Hwy 169 at the Hwy 69 Junction at Foot's Bay. Since September, 2012, the bypassed route of Hwy 69 has been known as Lake Joseph Road. Accordingly, there are no longer any references to Hwy 69 at this junction anymore. See an Enlarged Photo Here.
(Photograph taken on April 12, 2012  -  © Cameron Bevers)

Right - Junction assembly on northbound Hwy 169 approaching the Hwy 69 Junction at Foot's Bay. The route of Hwy 400 is trailblazed with green signs at this highway junction. The new route of Hwy 400 opened to traffic in October, 2003, bypassing about 28 km of Hwy 69 via MacTier, Foot's Bay and Horseshoe Lake. See an Enlarged Photo Here.
(Photograph taken on April 12, 2012  -  © Cameron Bevers)


HWY 69 #261 - © Cameron Bevers             HWY 69 #262 - © Cameron Bevers

Left - Facing south along Hwy 69 towards the Hwy 169 Junction at Foot's Bay. Historically, Hwy 69 used to turn left at this highway junction and follow the route of what is now Hwy 169 to Gravenhurst. The through highway at this junction used to be known as Hwy 103, which connected the Port Severn area to MacTier. At the time this highway junction was built in the 1950s, little thought was given to the logic of the route numbers departing from this junction. In recent decades, Human Factors research has demonstrated that it is generally a better highway design practice to ensure that the through highway maintains its route name or number at a junction, as this is what motorists would typically expect. The sudden departure of Hwy 69 onto another roadway at this junction likely confused many southbound motorists. In an effort to simplify the highway numbering in the area, the through highway at this junction was renumbered from Hwy 103 to Hwy 69 in 1976. The existing route of Hwy 69 via Gravenhurst and Washago was renumbered as Hwy 169. See an Enlarged Photo Here.
(Photograph taken on April 12, 2012  -  © Cameron Bevers)

Right - Junction assembly on southbound Hwy 69 approaching the Hwy 169 Junction at Foot's Bay. At one time, a large freeway-style overhead sign structure used to mark this junction. The overhead sign structure was installed long before the route renumbering of 1976, to advise southbound motorists who wished to stay on Hwy 69 that they had to turn left onto a different roadway in order to continue along Hwy 69. Following the 1976 route renumbering, Hwy 69 became the through highway at this junction, which would have been more in line with drivers' expectations. The change in highway numbers also complemented the predominant north-south traffic movement between Port Severn and Parry Sound. The overhead sign structure was left in place at this junction for more than two decades after the highway renumbering, even though the new route numbering introduced in 1976 was far more logical. Once the new Hwy 400 opened to traffic in 2003, the existing route of Hwy 69 began to serve a more local traffic function. The overhead sign structure was subsequently removed. See an Enlarged Photo Here.
(Photograph taken on April 12, 2012  -  © Cameron Bevers)


More King's Highway 169 Photographs Coming Soon!


Links to Adjacent King's Highway Photograph Pages:


Back to Hwy 169 - Washago to Gravenhurst      Hwy 169 Photo Index


Back to King's Highway 148 Photos    /     King's Highway 169 History    /     On to King's Highway 400 Photos

Ontario Highway History - Main Menu    /     Back to List of Highways


Website contents, photos & text © 2002-2025, Cameron Bevers (Webmaster) - All Rights Reserved  /  Contact Me


Valid HTML 4.01!   Valid CSS!