
| 
| |
|
|
This page contains present day photos (Year 2005 to date) of Ontario's King's Highway 169, arranged by location from Bala
northerly to Foot's Bay. Please note that Highway 169 was known as Highway 69 prior to 1976. All photographs displayed on this page were taken by the
Webmaster (Cameron Bevers), unless specifically noted otherwise. Click on any thumbnail to see a larger image!
Please note that all photographs displayed on this
website are protected by copyright. These photographs must not be reproduced, published,
electronically stored or copied, distributed, or posted onto other websites without
my written permission. If you want to use photos from this website, please
email me first for permission. Thank-you!
|
|---|
|
Page 5: Present Day King's Highway 169 Photographs (Bala to Foot's Bay)

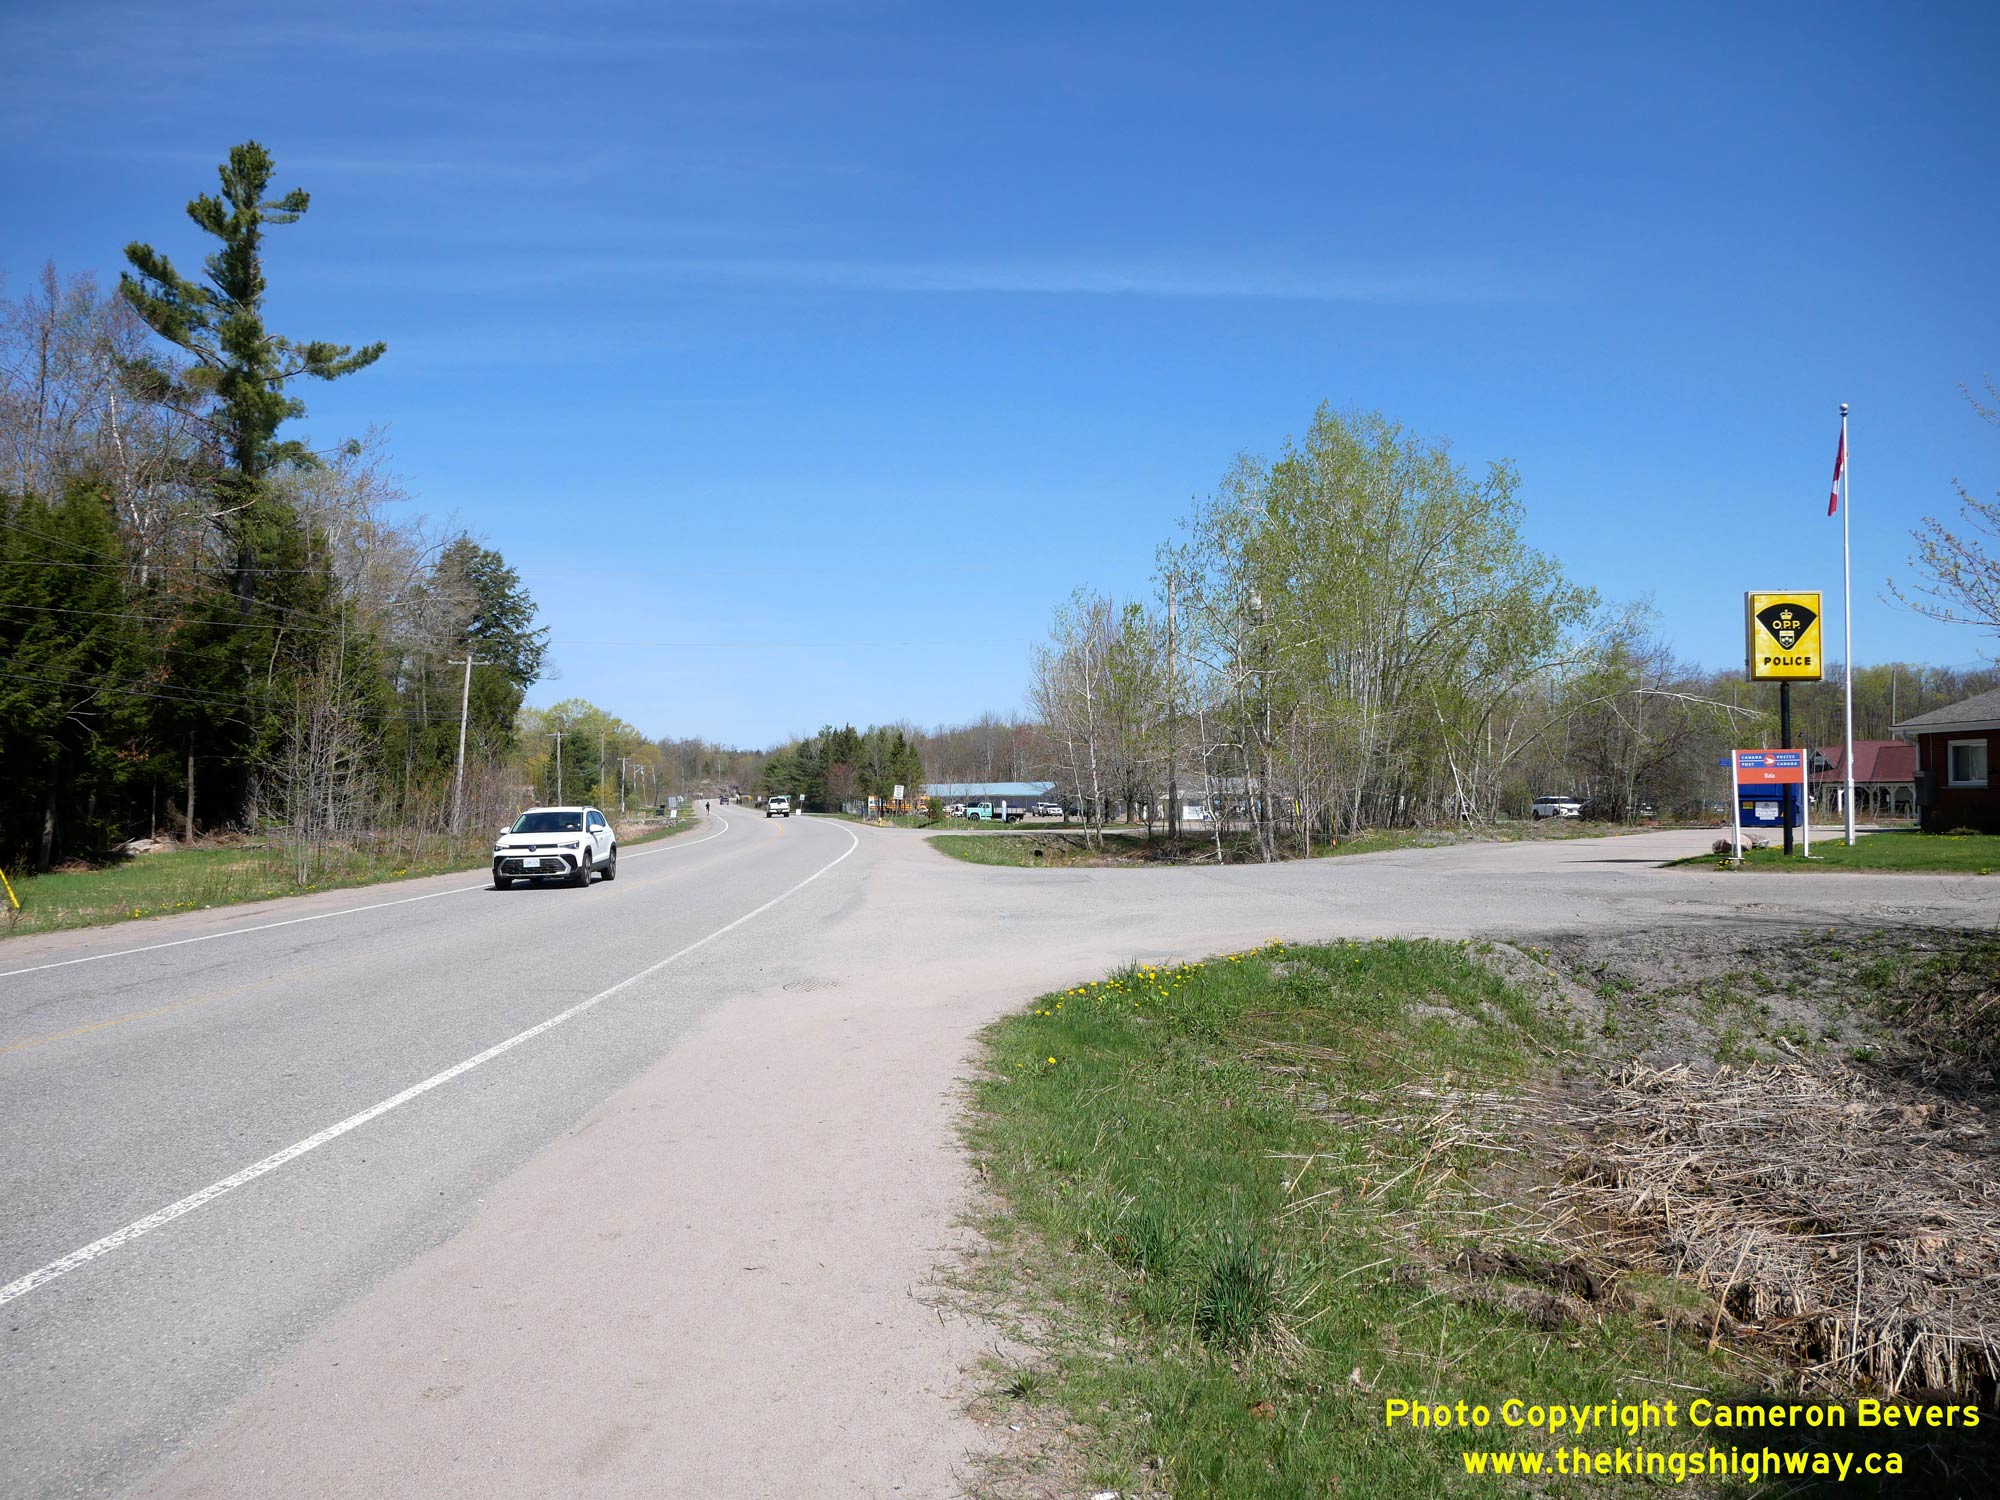  Left - Facing south along Hwy 169 at the northern entrance to Bala. This small unincorporated Muskoka town is located about 25 km north of Gravenhurst. See an
Enlarged Photo Here. Left - Facing south along Hwy 169 at the northern entrance to Bala. This small unincorporated Muskoka town is located about 25 km north of Gravenhurst. See an
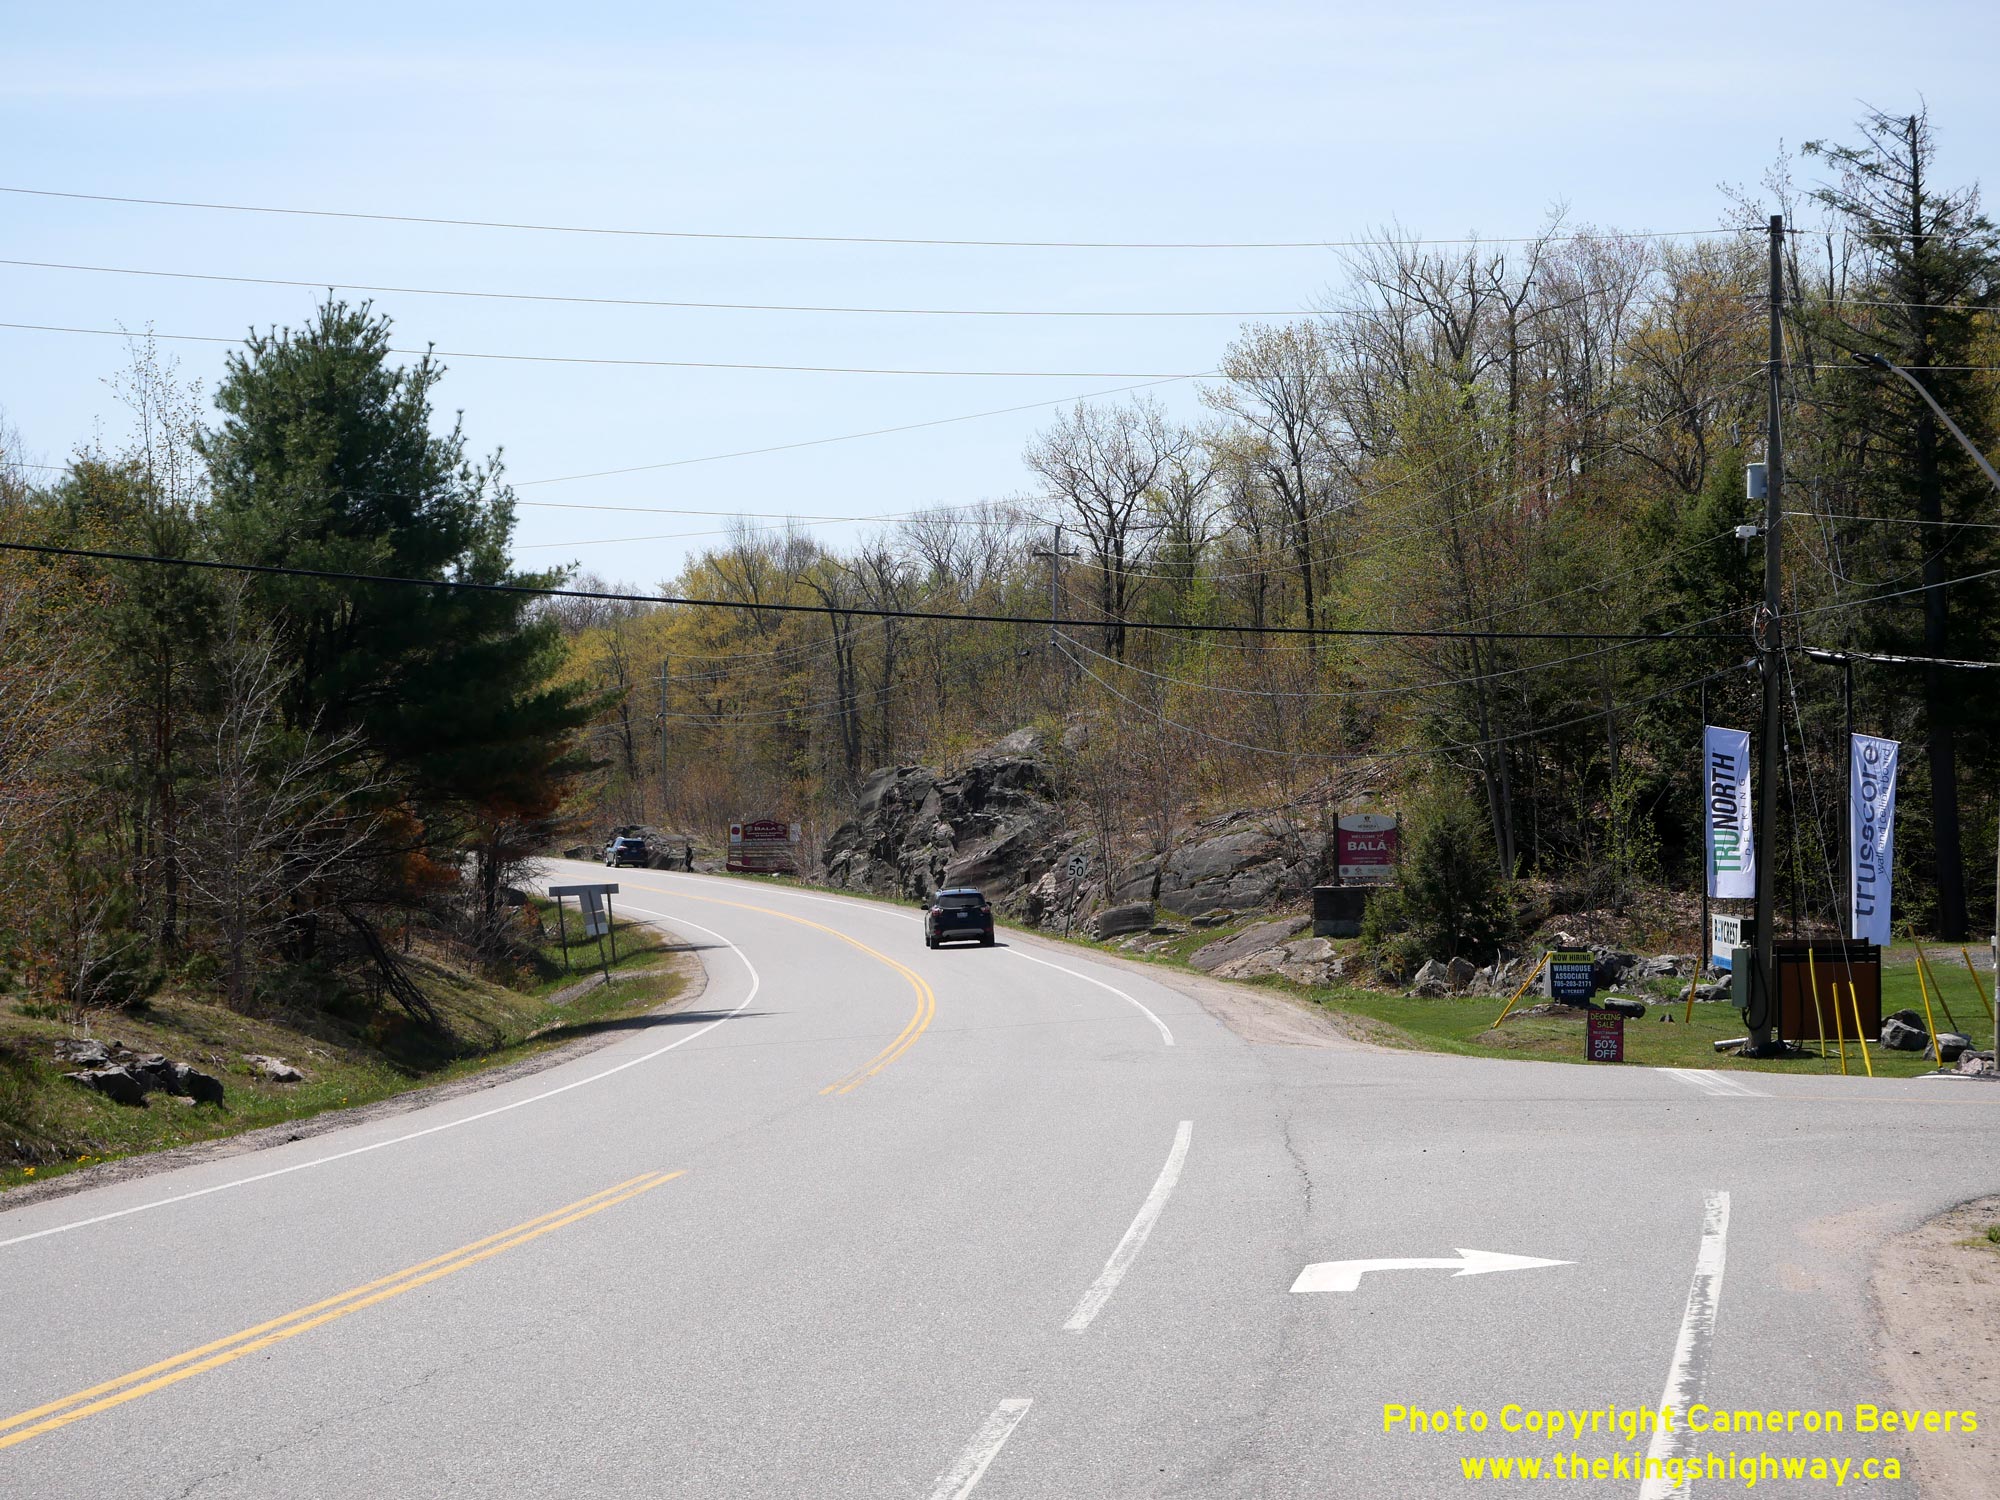
Enlarged Photo Here.(Photograph taken on May 17, 2026 - © Cameron Bevers) Right - View of Hwy 169 at the northern entrance to Bala, facing north towards Foot's Bay. Originally, Bala was connected to both Gravenhurst and Foot's Bay by
Hwy 69. As a result of a highway renumbering which took place in this area in 1976, Hwy 69 was renumbered as Hwy 169. Foot's Bay lies about 20 km ahead. See an
Enlarged Photo Here.(Photograph taken on May 17, 2026 - © Cameron Bevers) 
 Left - Sign marking the entrance to Bala on Hwy 169. Historically, Bala was an incorporated town in its own right, but it was later amalgamated with
surrounding townships and villages as part of a municipal restructuring undertaken during the 1970s. Today, Bala is part of the Township of Muskoka Lakes. See an
Enlarged Photo Here. Left - Sign marking the entrance to Bala on Hwy 169. Historically, Bala was an incorporated town in its own right, but it was later amalgamated with
surrounding townships and villages as part of a municipal restructuring undertaken during the 1970s. Today, Bala is part of the Township of Muskoka Lakes. See an
Enlarged Photo Here.(Photograph taken on May 17, 2026 - © Cameron Bevers) Right - Facing south along Hwy 169 at Moon River Road north of Bala. The large rock cut in the background is actually a diversion of the original highway,
which was built in the early 1970s. The original highway was situated a short distance to the east, but it was abandoned decades ago. See an
Enlarged Photo Here.(Photograph taken on May 17, 2026 - © Cameron Bevers) 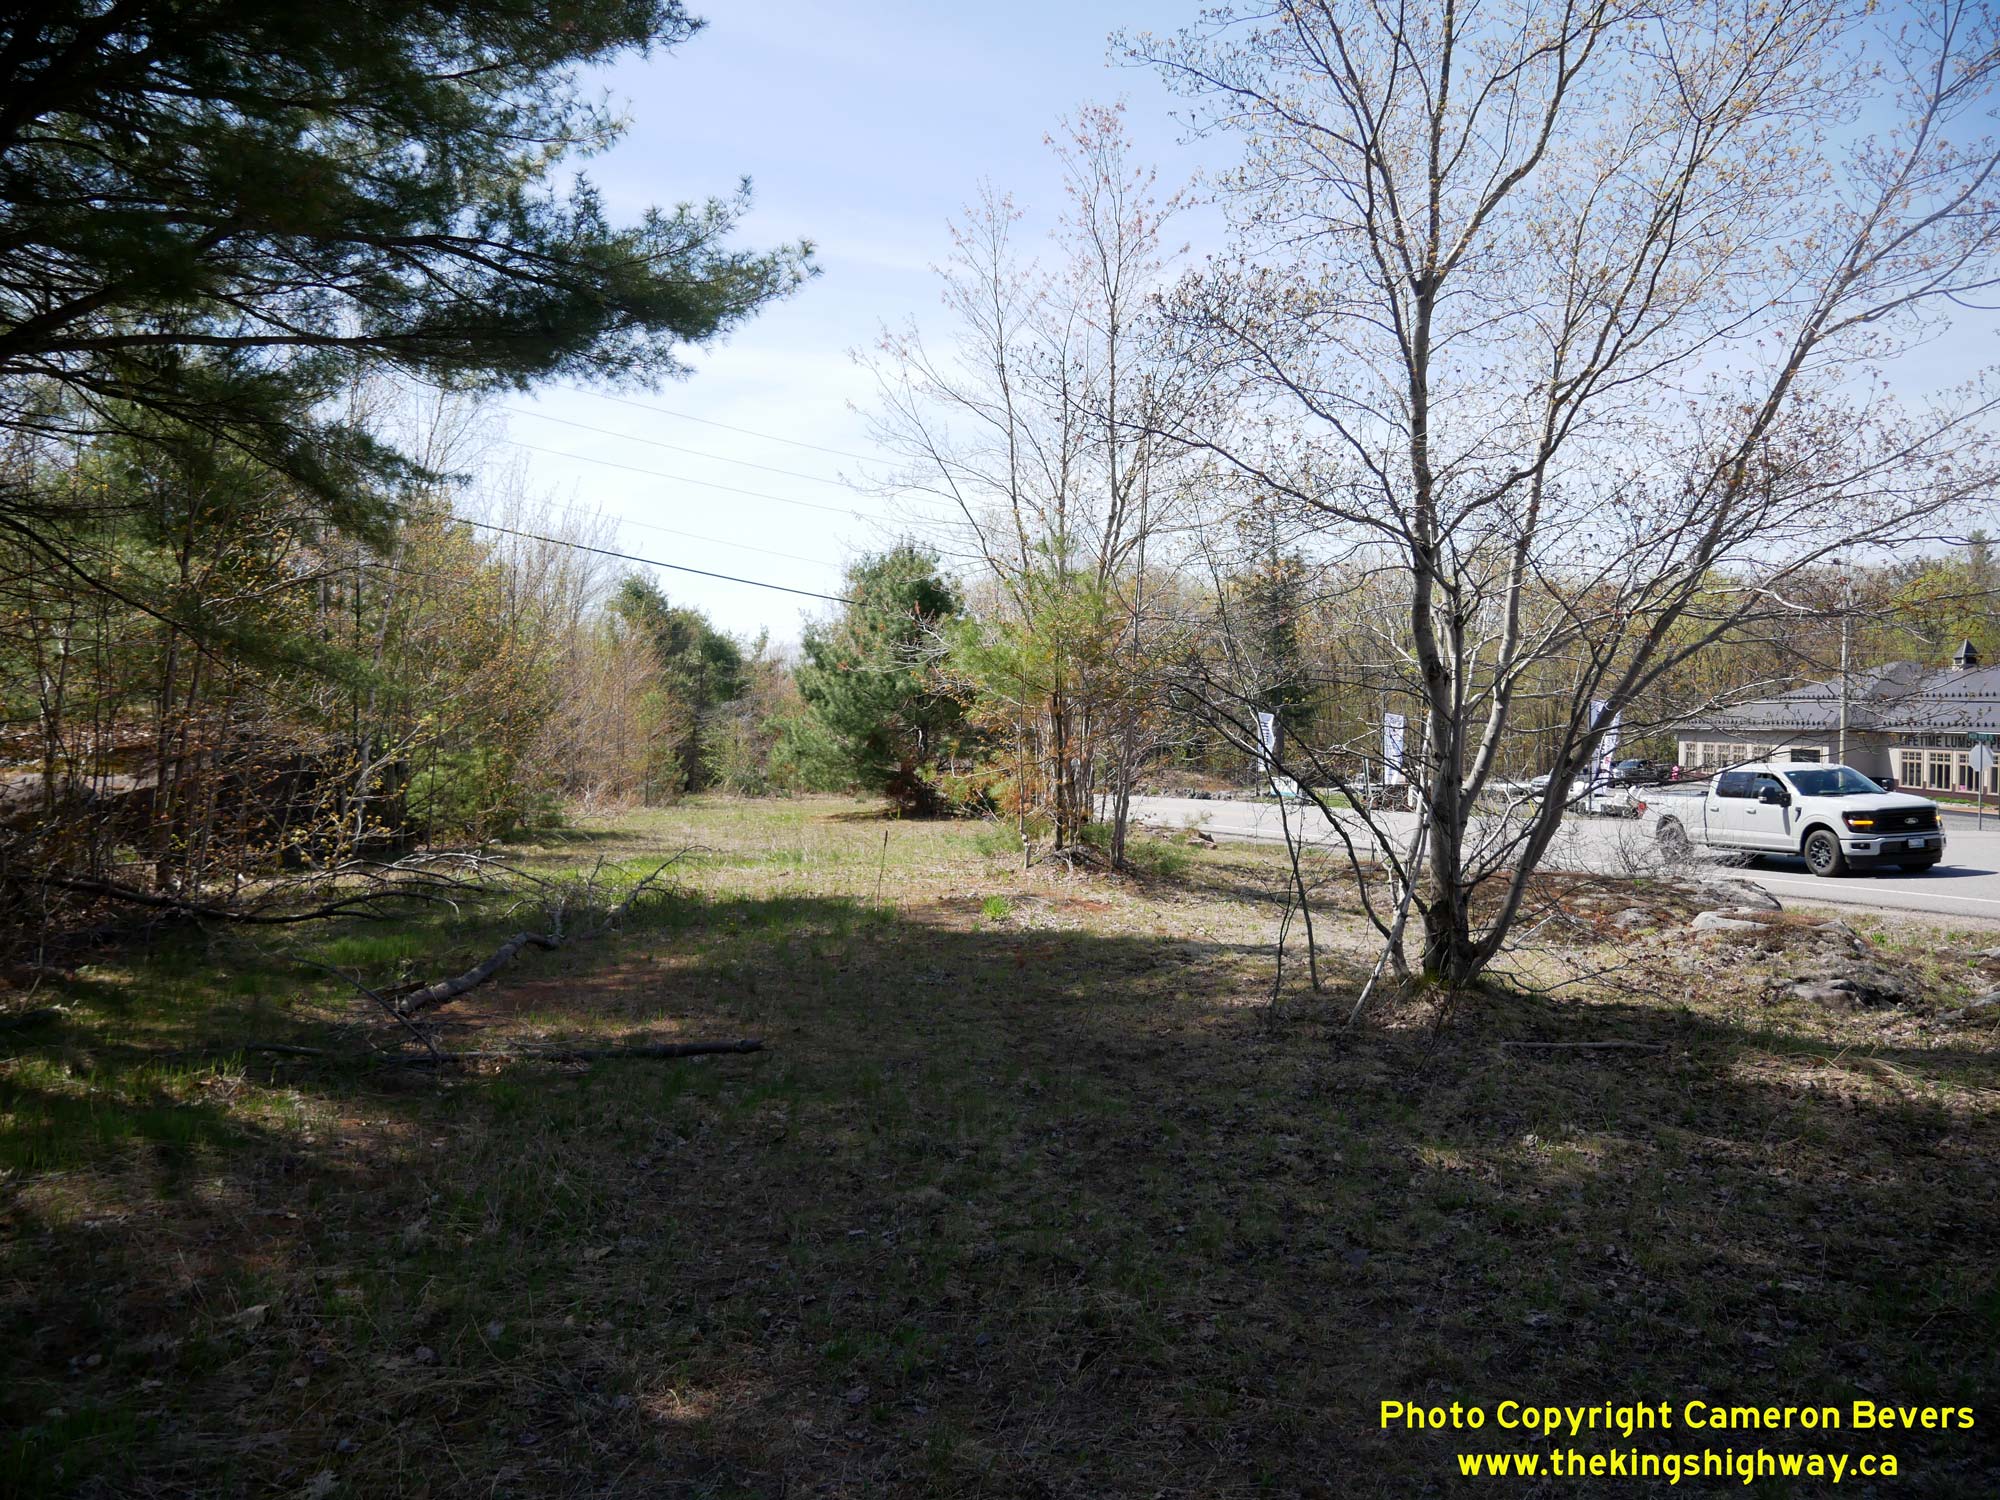
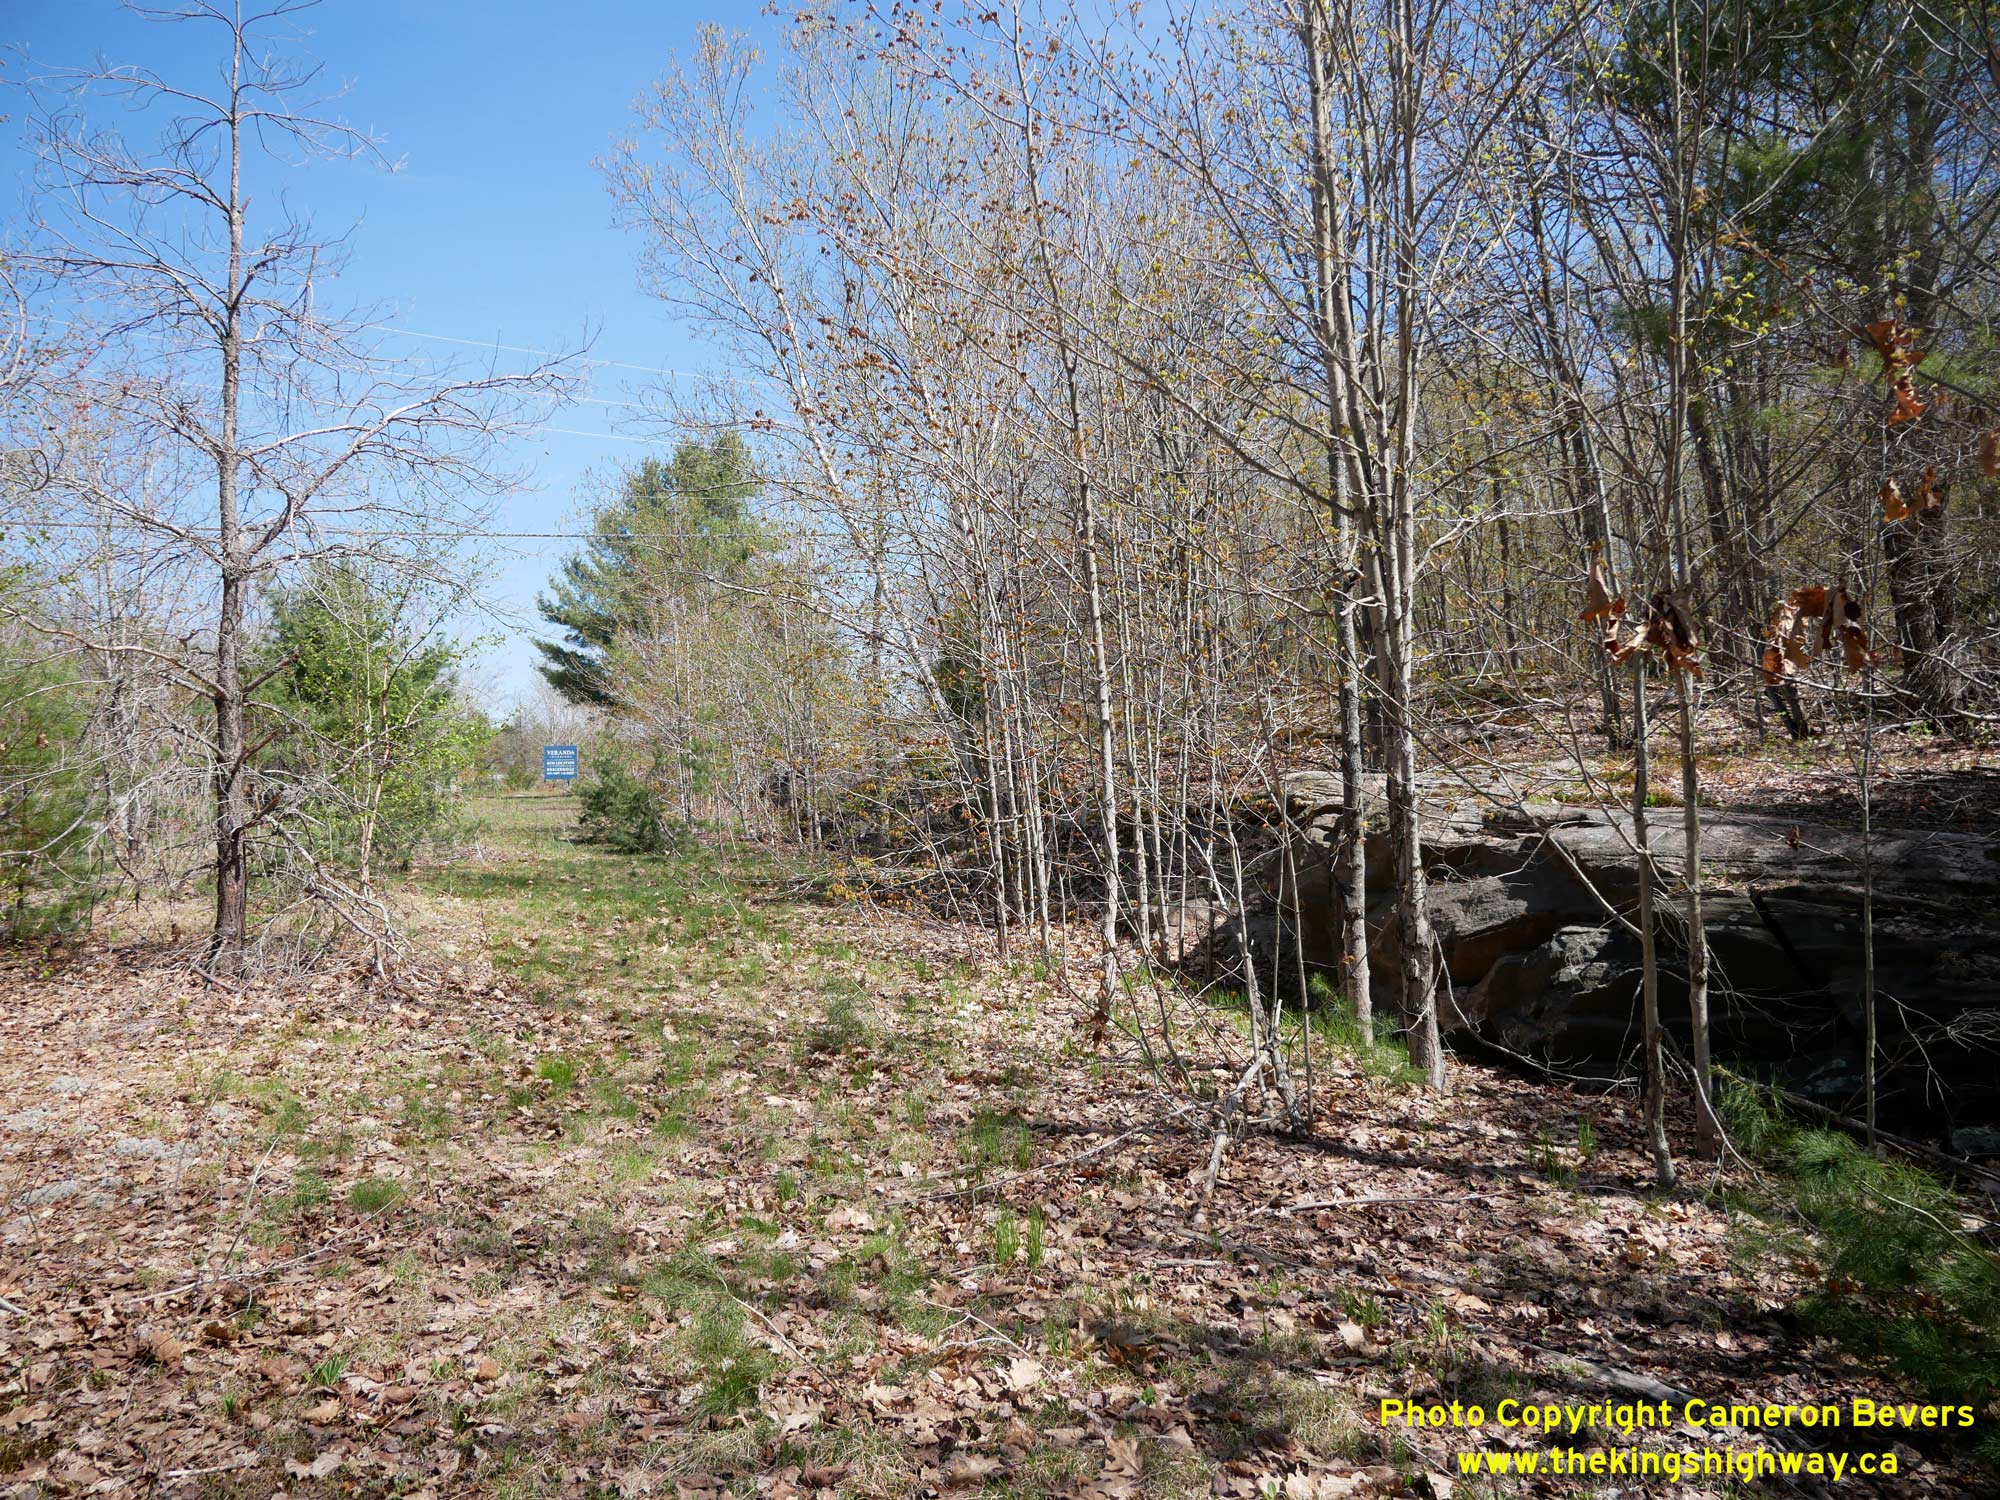 Left - This section of the old highway was abandoned in the 1970s. The asphalt was stripped off as part of abandonent, leaving only the graded roadbed behind.
See an Enlarged Photo Here. Left - This section of the old highway was abandoned in the 1970s. The asphalt was stripped off as part of abandonent, leaving only the graded roadbed behind.
See an Enlarged Photo Here.(Photograph taken on May 17, 2026 - © Cameron Bevers) Right - Another view of the abandoned highway near Moon River Road. A series of shallow rock cuts line the original highway. When Hwy 69 (today's Hwy 169) was
originally constructed in the 1930s, many of the rock cuts were excavated by hand. To mitigate the terrible economic effects of the Great Depression, many road
projects in the 1930s were built using manual labour wherever possible. This was done as an unemployment relief measure, in order to put as many people to work as
possible. See an Enlarged Photo Here.(Photograph taken on May 17, 2026 - © Cameron Bevers) 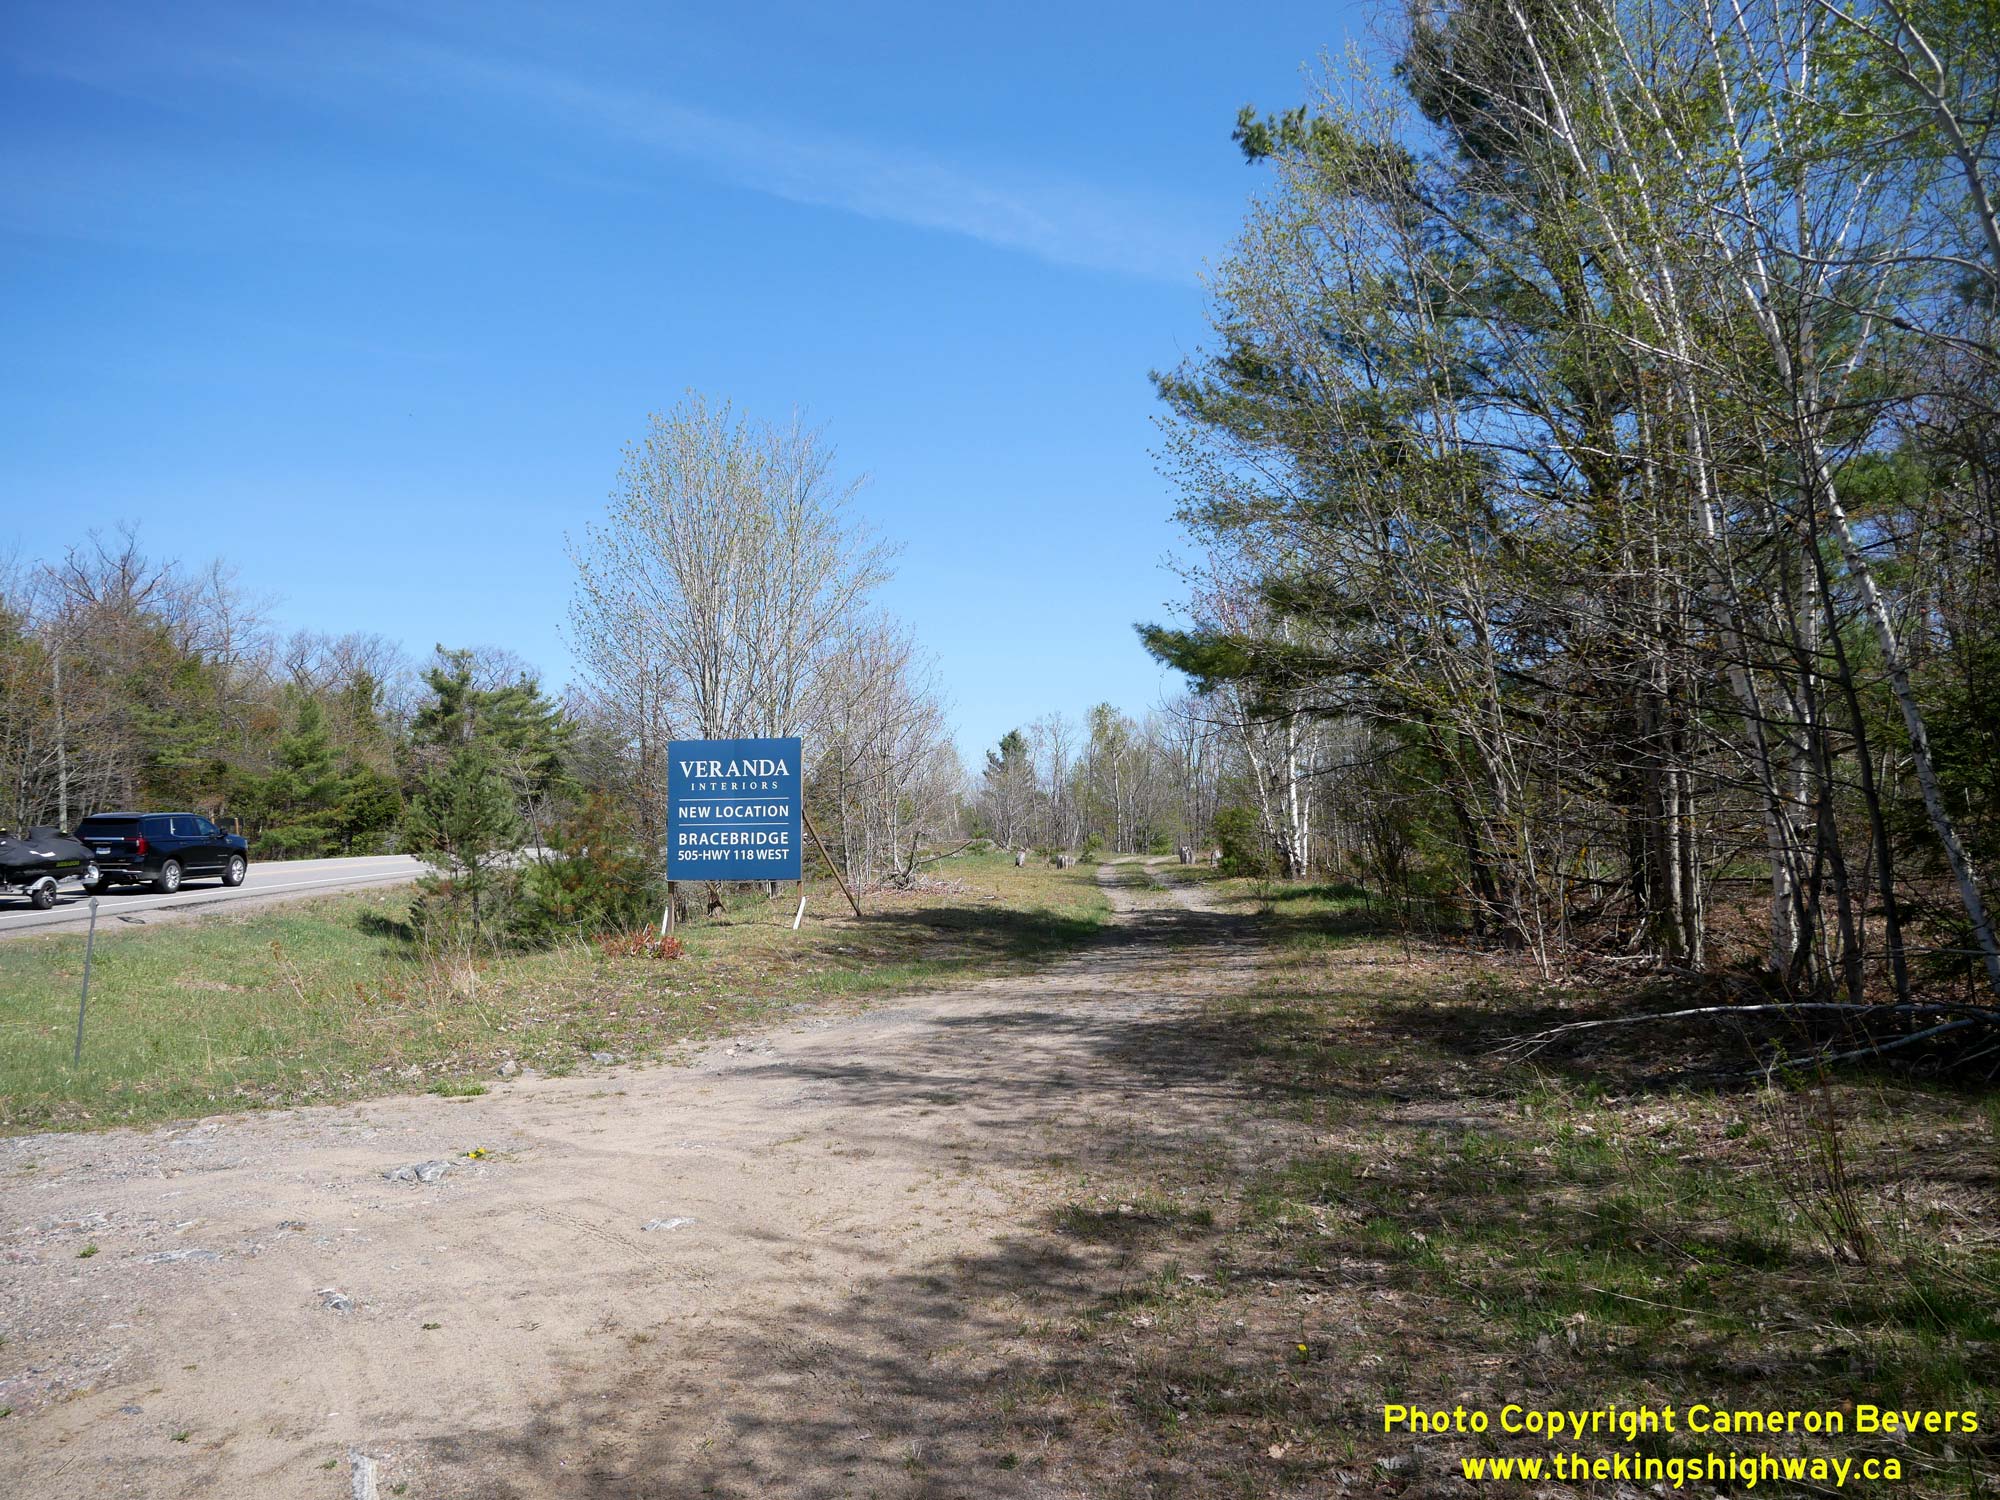
 Left - The former alignment of Hwy 69 curves off to the right on the southern approach to the Canadian Pacific Railway (CPR) crossing. The relocated highway
(today's Hwy 169) can be seen at left. Under Contract #1969-222, Hwy 69 was completely reconstructed on a new alignment from the north entrance to Bala northerly to
Dudley. Included in this work were the construction of two new railway grade separations. See an
Enlarged Photo Here. Left - The former alignment of Hwy 69 curves off to the right on the southern approach to the Canadian Pacific Railway (CPR) crossing. The relocated highway
(today's Hwy 169) can be seen at left. Under Contract #1969-222, Hwy 69 was completely reconstructed on a new alignment from the north entrance to Bala northerly to
Dudley. Included in this work were the construction of two new railway grade separations. See an
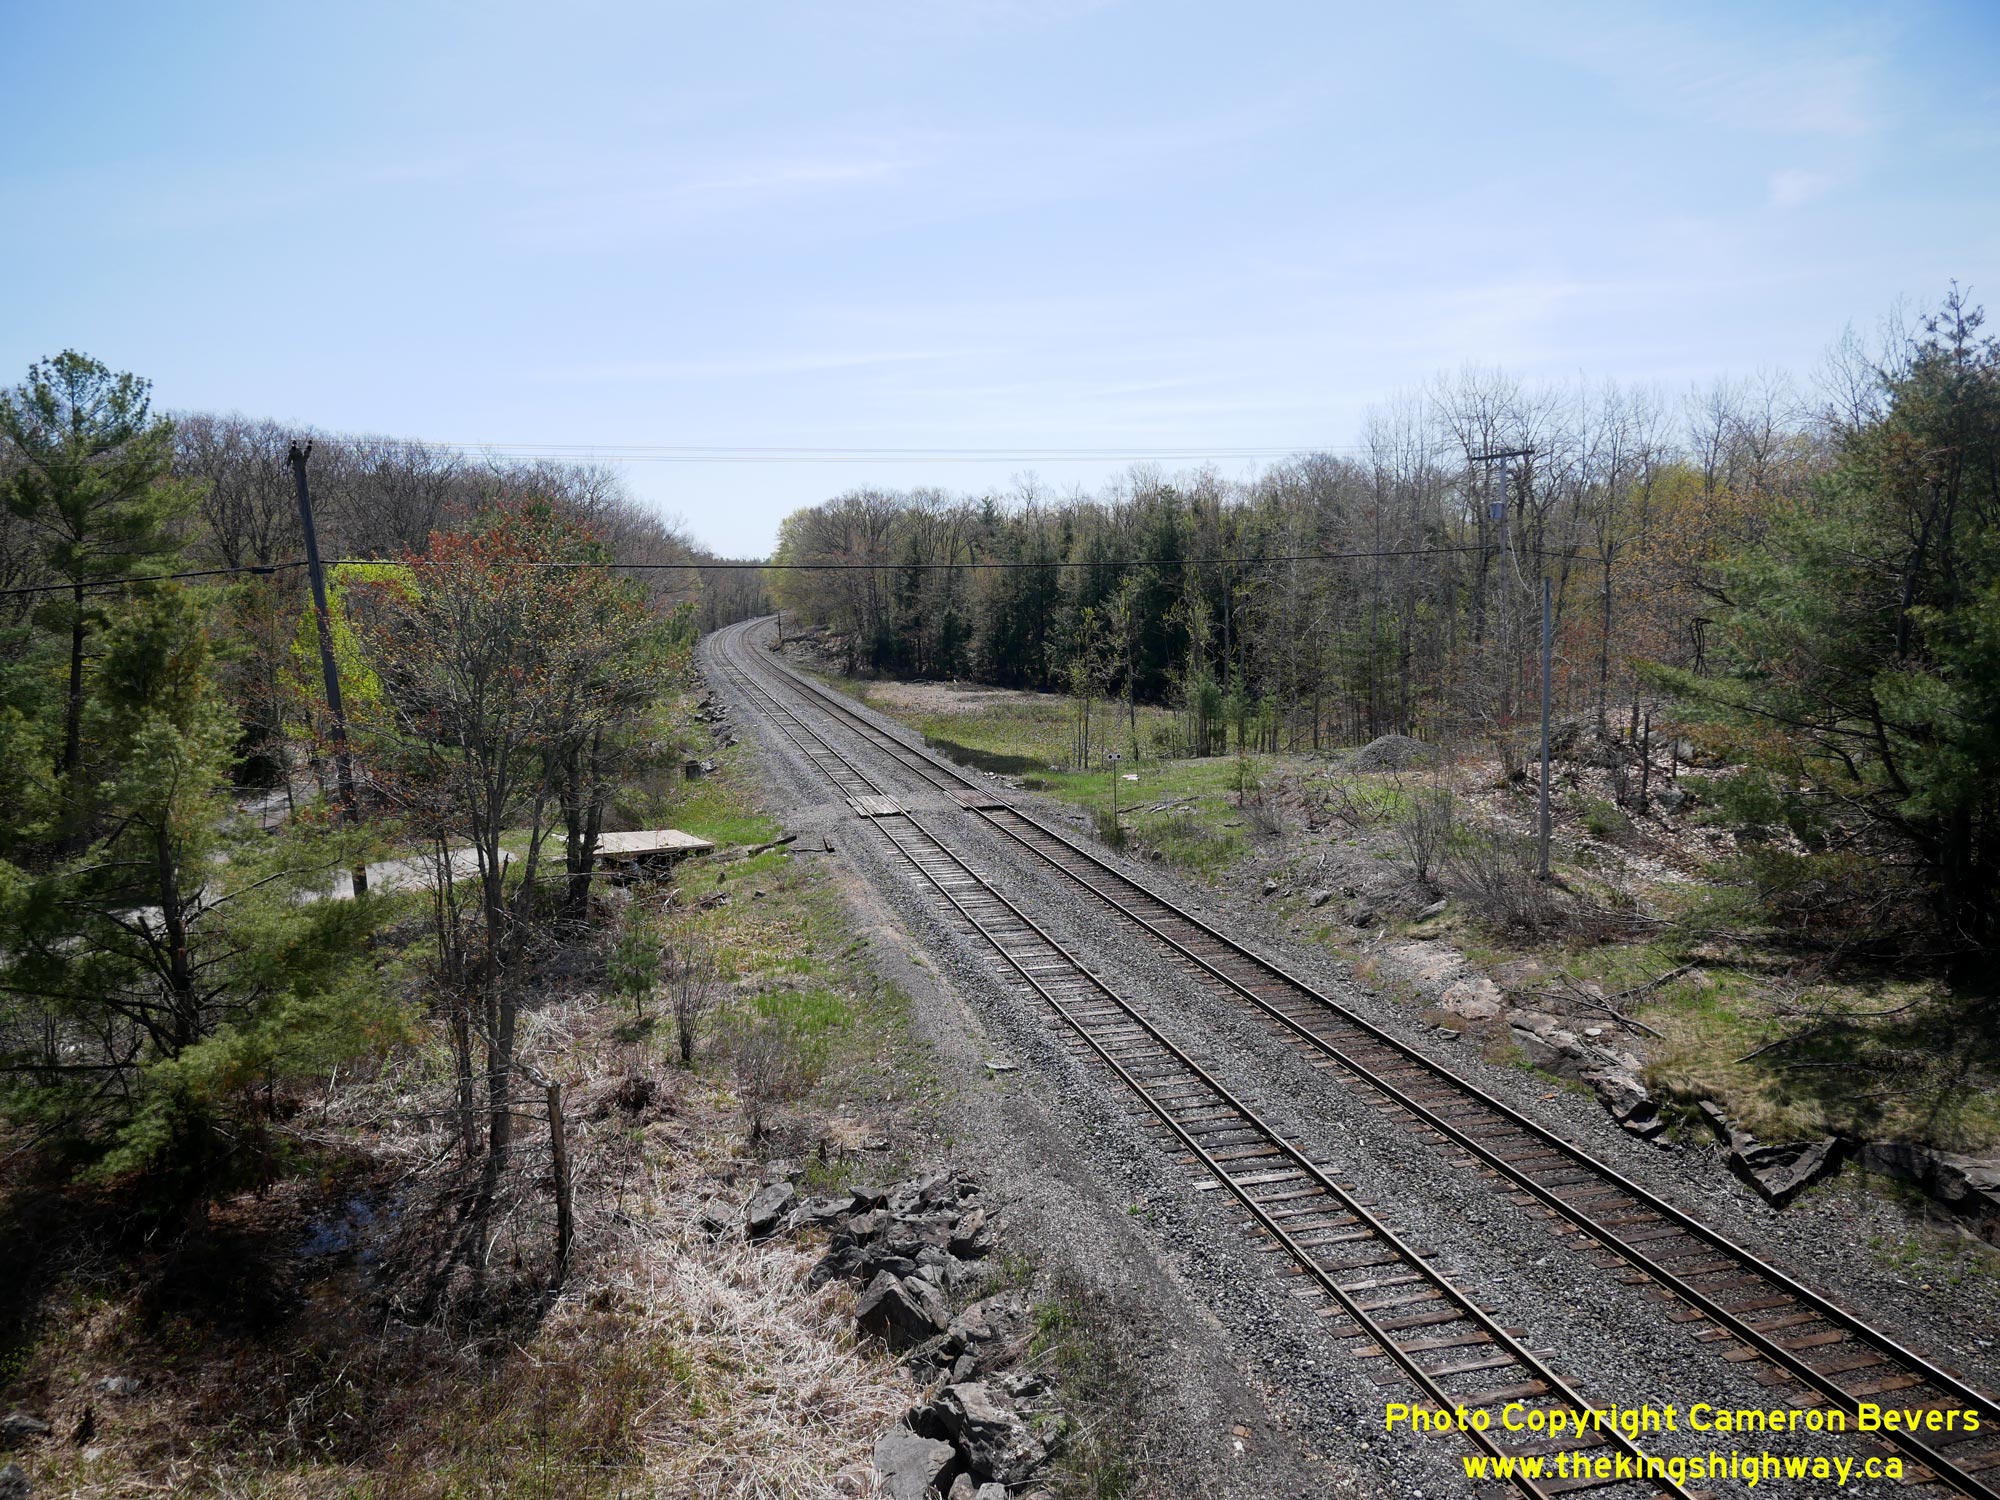
Enlarged Photo Here.(Photograph taken on May 17, 2026 - © Cameron Bevers) Right - View of the former location of the at-grade railway crossing on Hwy 69 at the CPR north of Bala. While this railway crossing did have warning lights,
both the horizontal and vertical approach alignments on Hwy 69 were undesirable with poor visibility of the crossing location. Under Contract #1969-222, a new CPR
Overhead was built a short distance to the west in order to eliminate this at-grade railway crossing. Today, the old highway's alignment is part of a winter
snowmobile trail, but the crossing is no longer used by highway traffic. See an Enlarged Photo Here.(Photograph taken on May 17, 2026 - © Cameron Bevers) 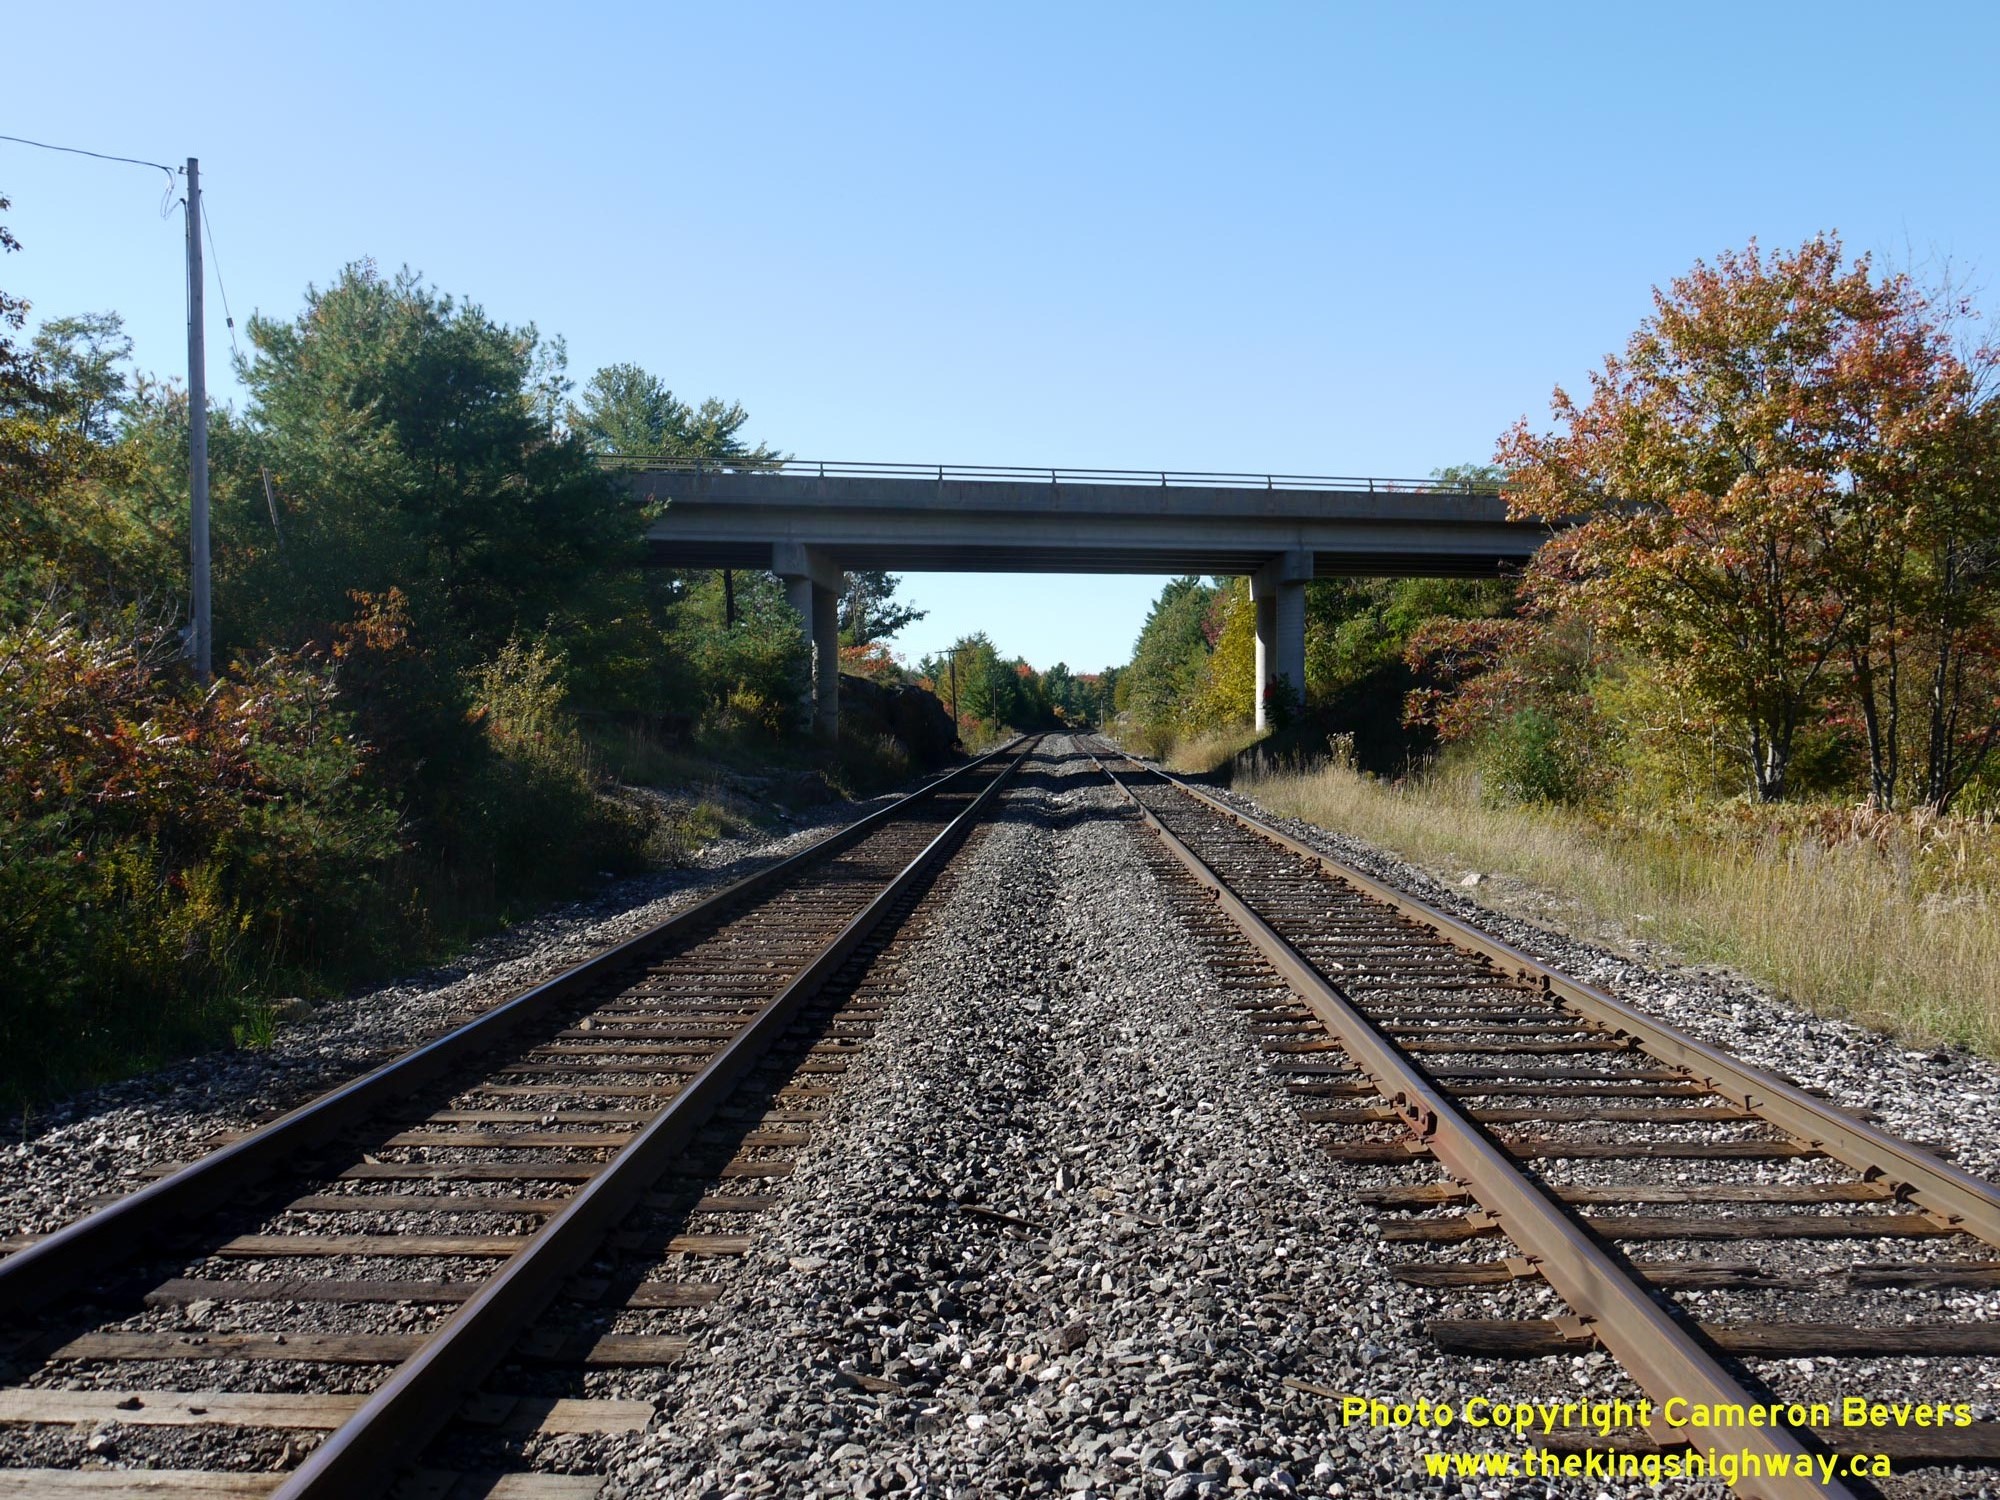
 Left - Eastern side of the Bala CPR Overhead (Site #42-125) on Hwy 169, as seen from the old at-grade railway crossing location. When the Bala CPR Overhead was
first built in 1970, it only spanned a single railway line (the one visible at left). A second twin railway line was built at right in subsequent decades. See an
Enlarged Photo Here. Left - Eastern side of the Bala CPR Overhead (Site #42-125) on Hwy 169, as seen from the old at-grade railway crossing location. When the Bala CPR Overhead was
first built in 1970, it only spanned a single railway line (the one visible at left). A second twin railway line was built at right in subsequent decades. See an
Enlarged Photo Here.(Photograph taken on September 27, 2013 - © Cameron Bevers) Right - Facing north along Hwy 169 towards Foot's Bay at the Bala CPR Overhead, located about 1 km north of Bala. See an
Enlarged Photo Here.(Photograph taken on September 27, 2013 - © Cameron Bevers) 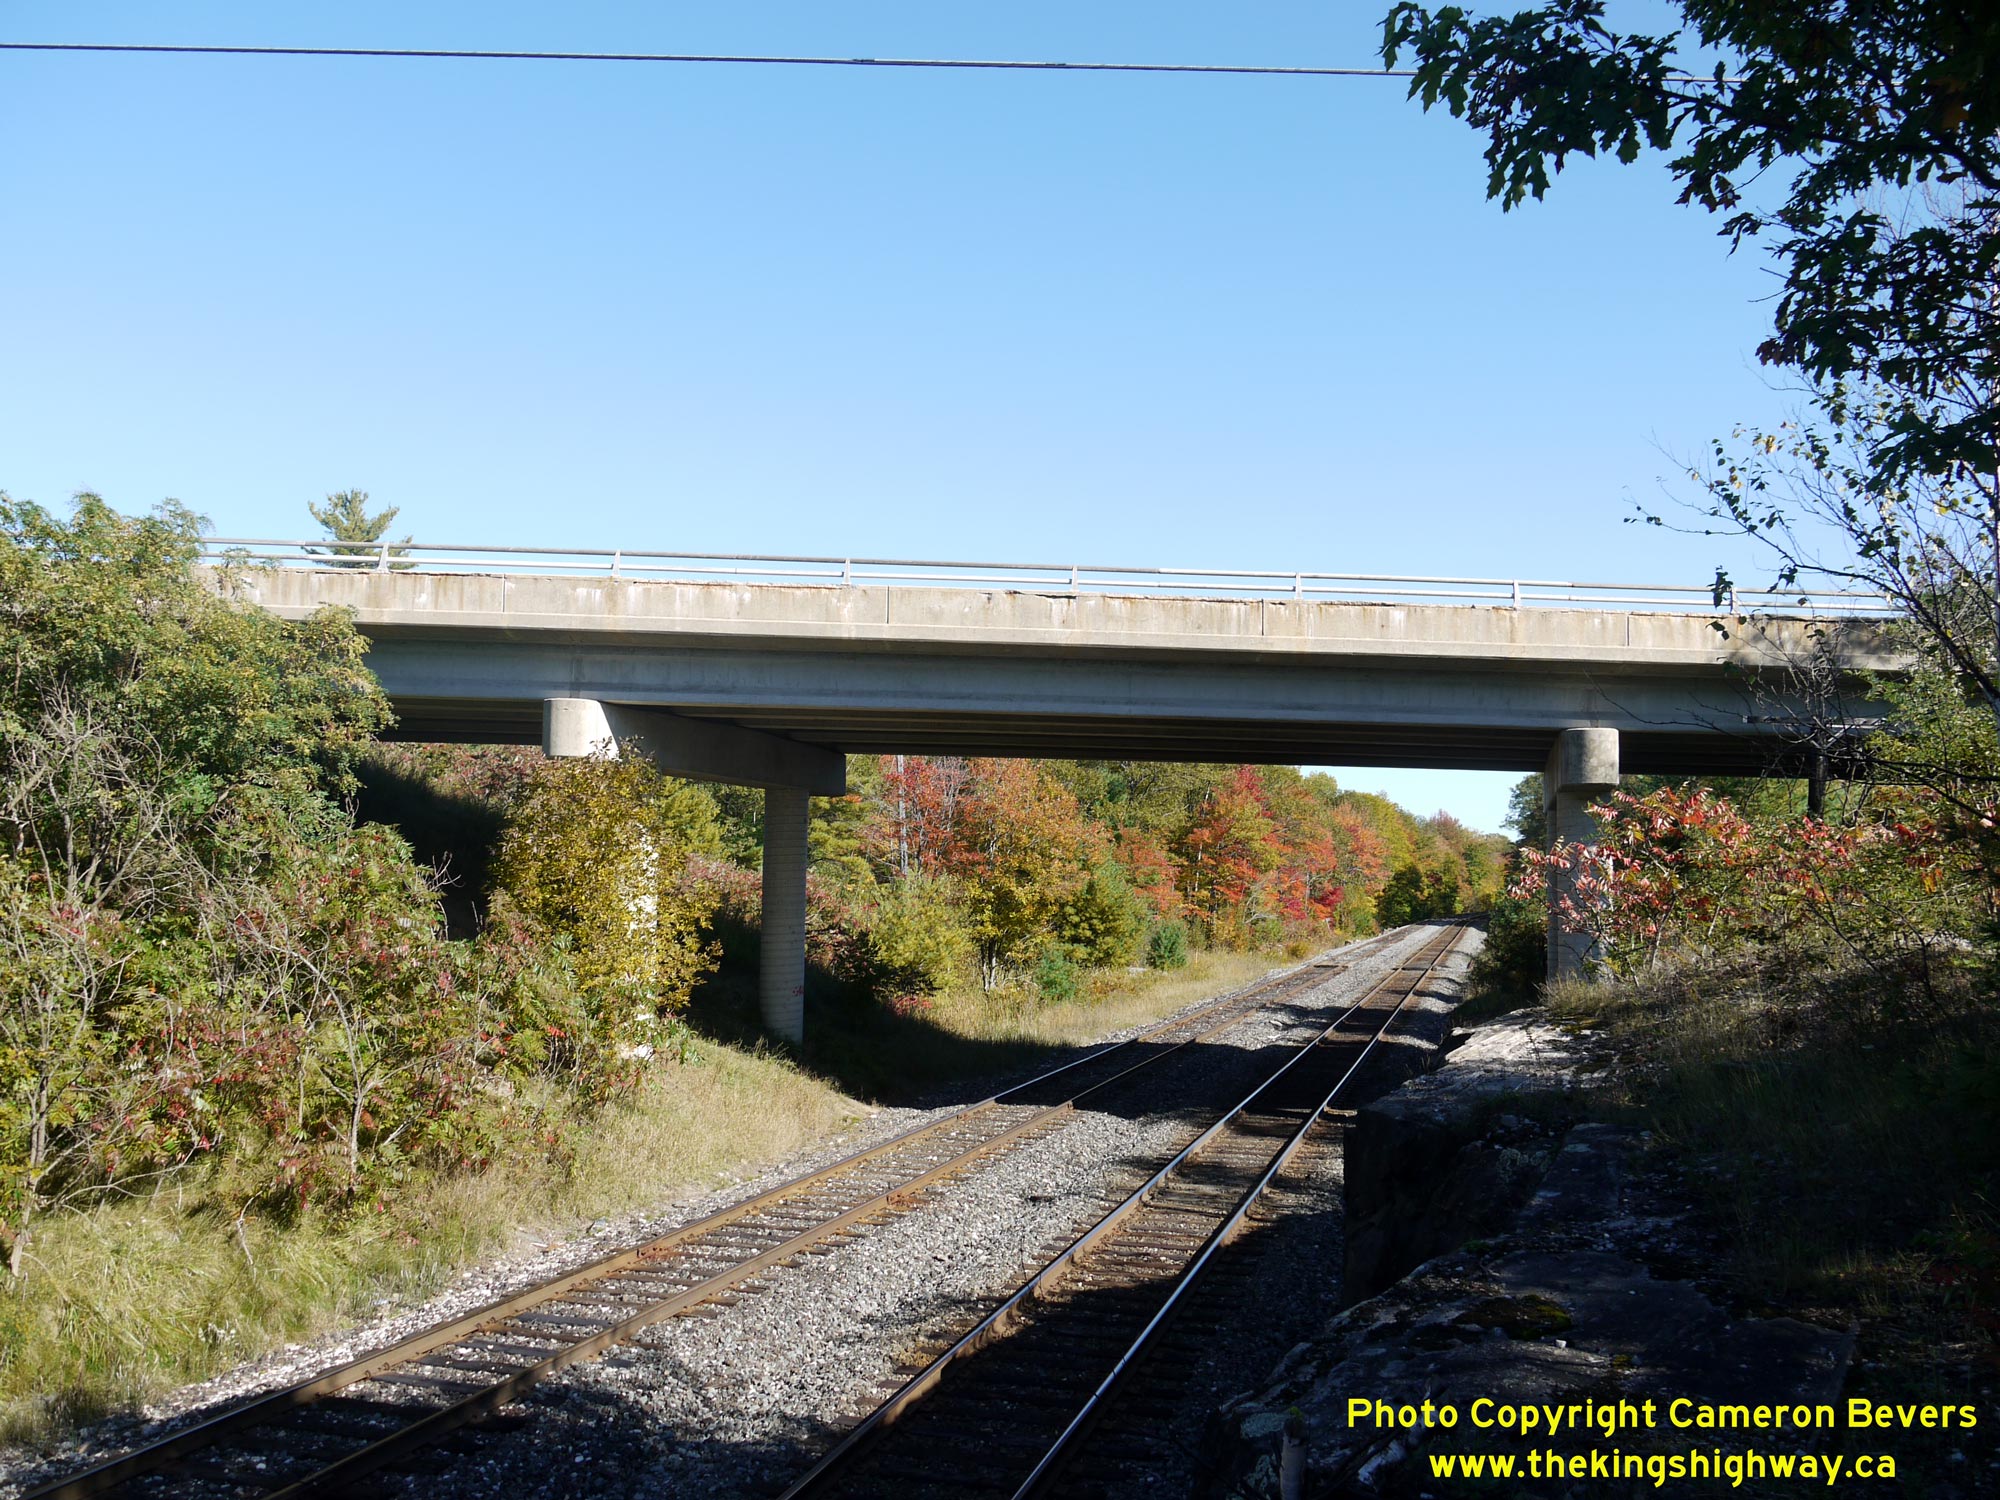
 Left - Western side of the Bala CPR Overhead on Hwy 169. This three-span concrete girder structure was completed in 1970. See an
Enlarged Photo Here. Left - Western side of the Bala CPR Overhead on Hwy 169. This three-span concrete girder structure was completed in 1970. See an
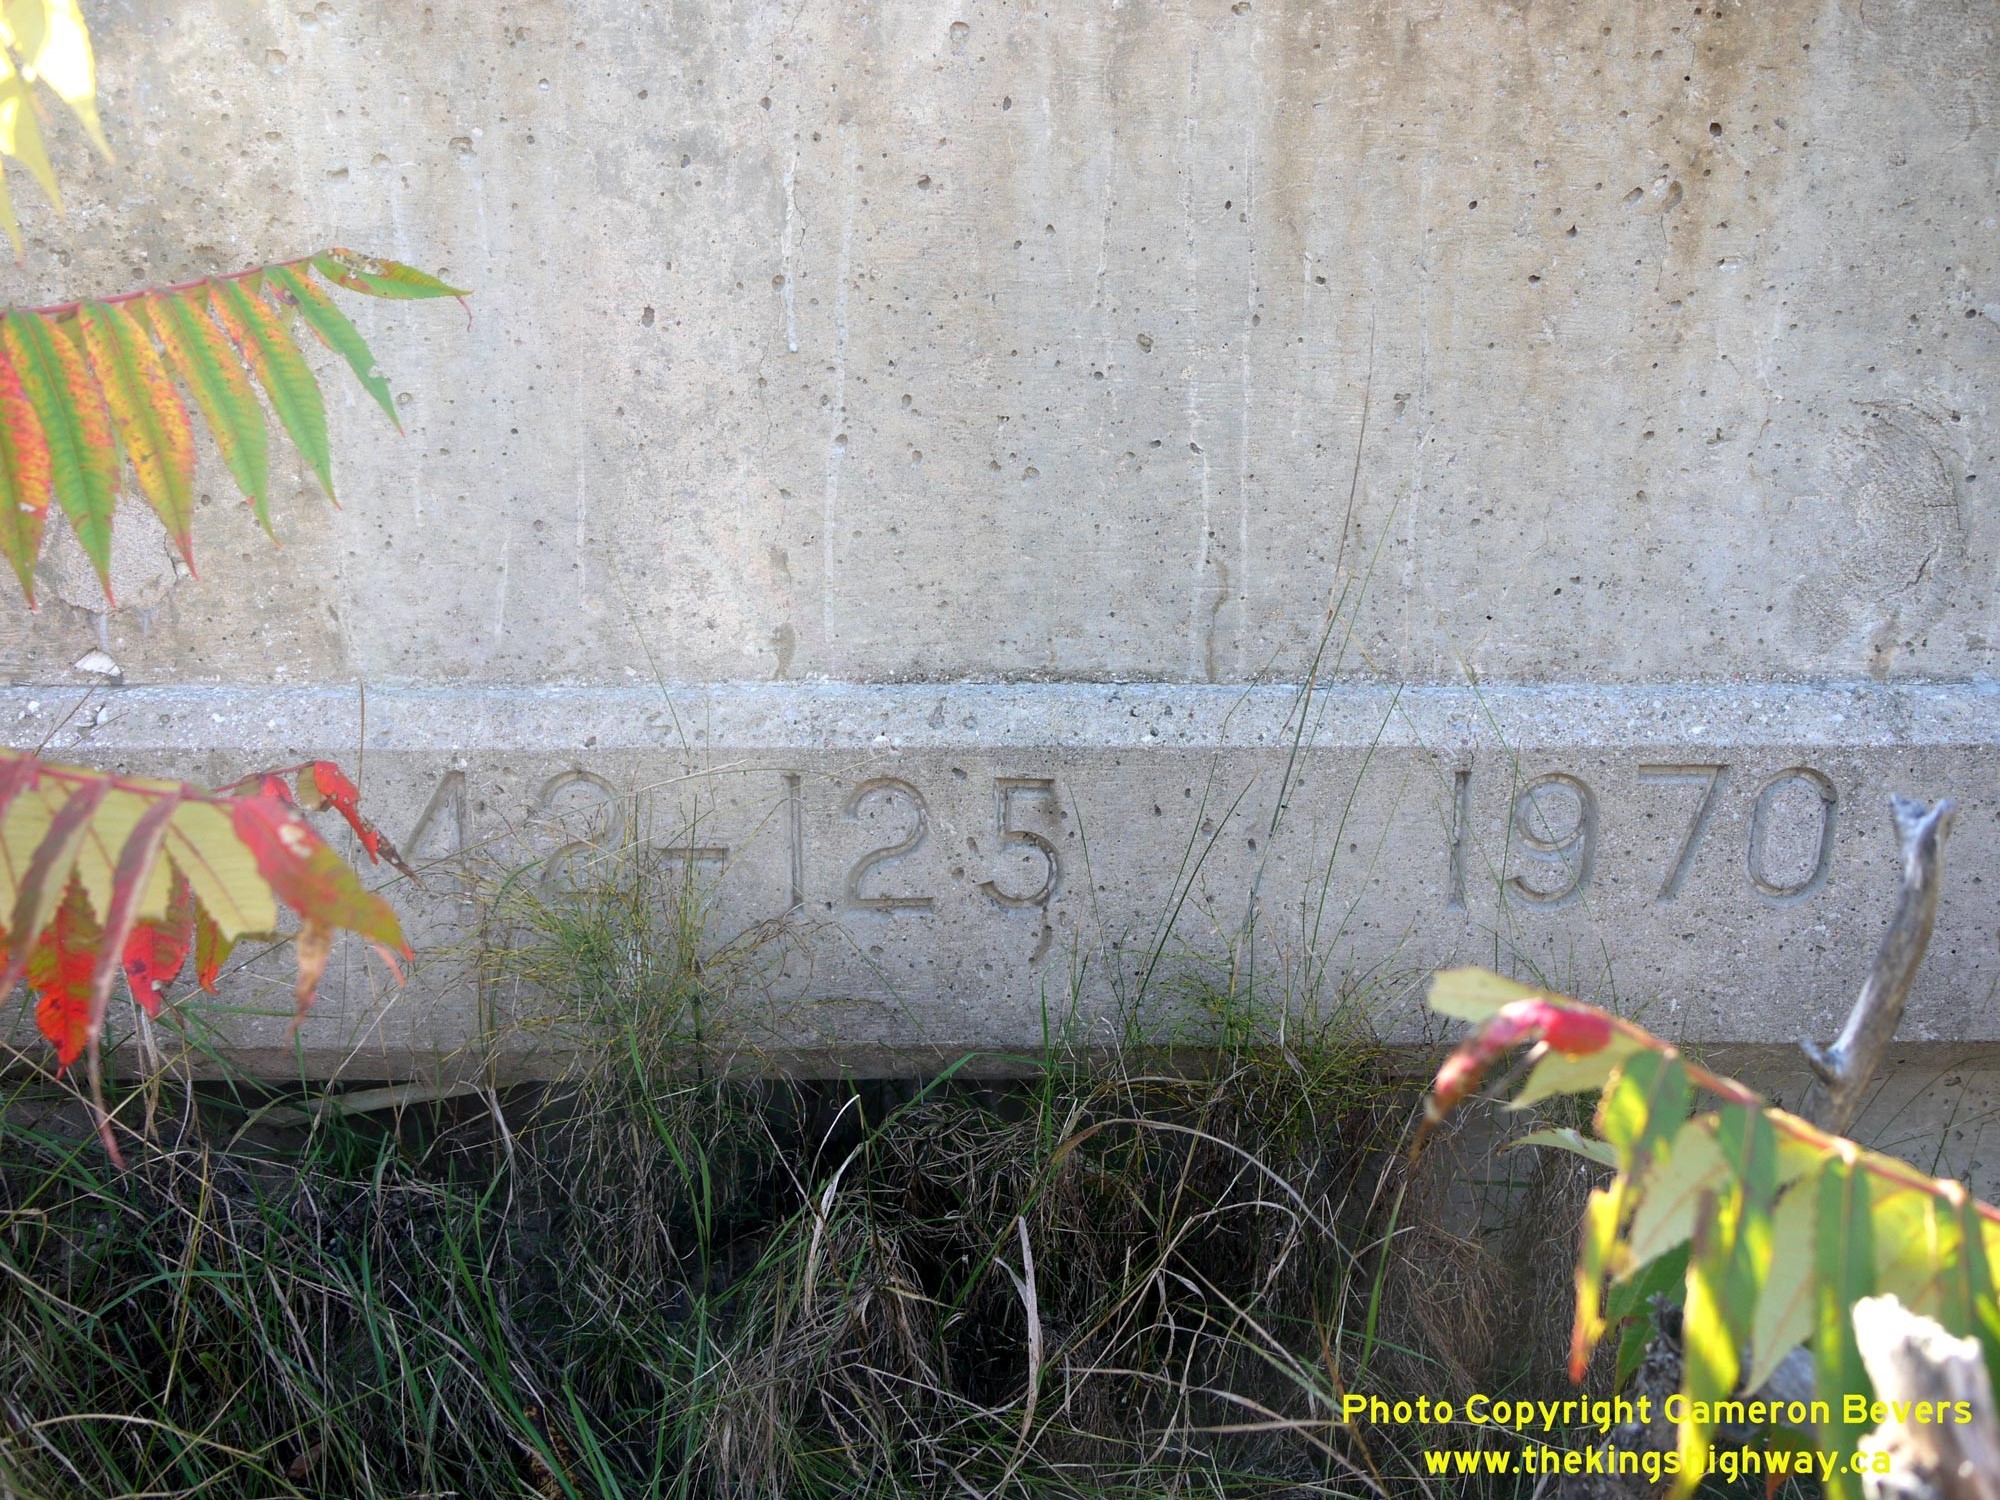
Enlarged Photo Here.(Photograph taken on September 27, 2013 - © Cameron Bevers) Right - Date stamp (1970) and structure identification number (Site #42-125) on the Bala CPR Overhead on Hwy 169. See an
Enlarged Photo Here.(Photograph taken on September 27, 2013 - © Cameron Bevers) 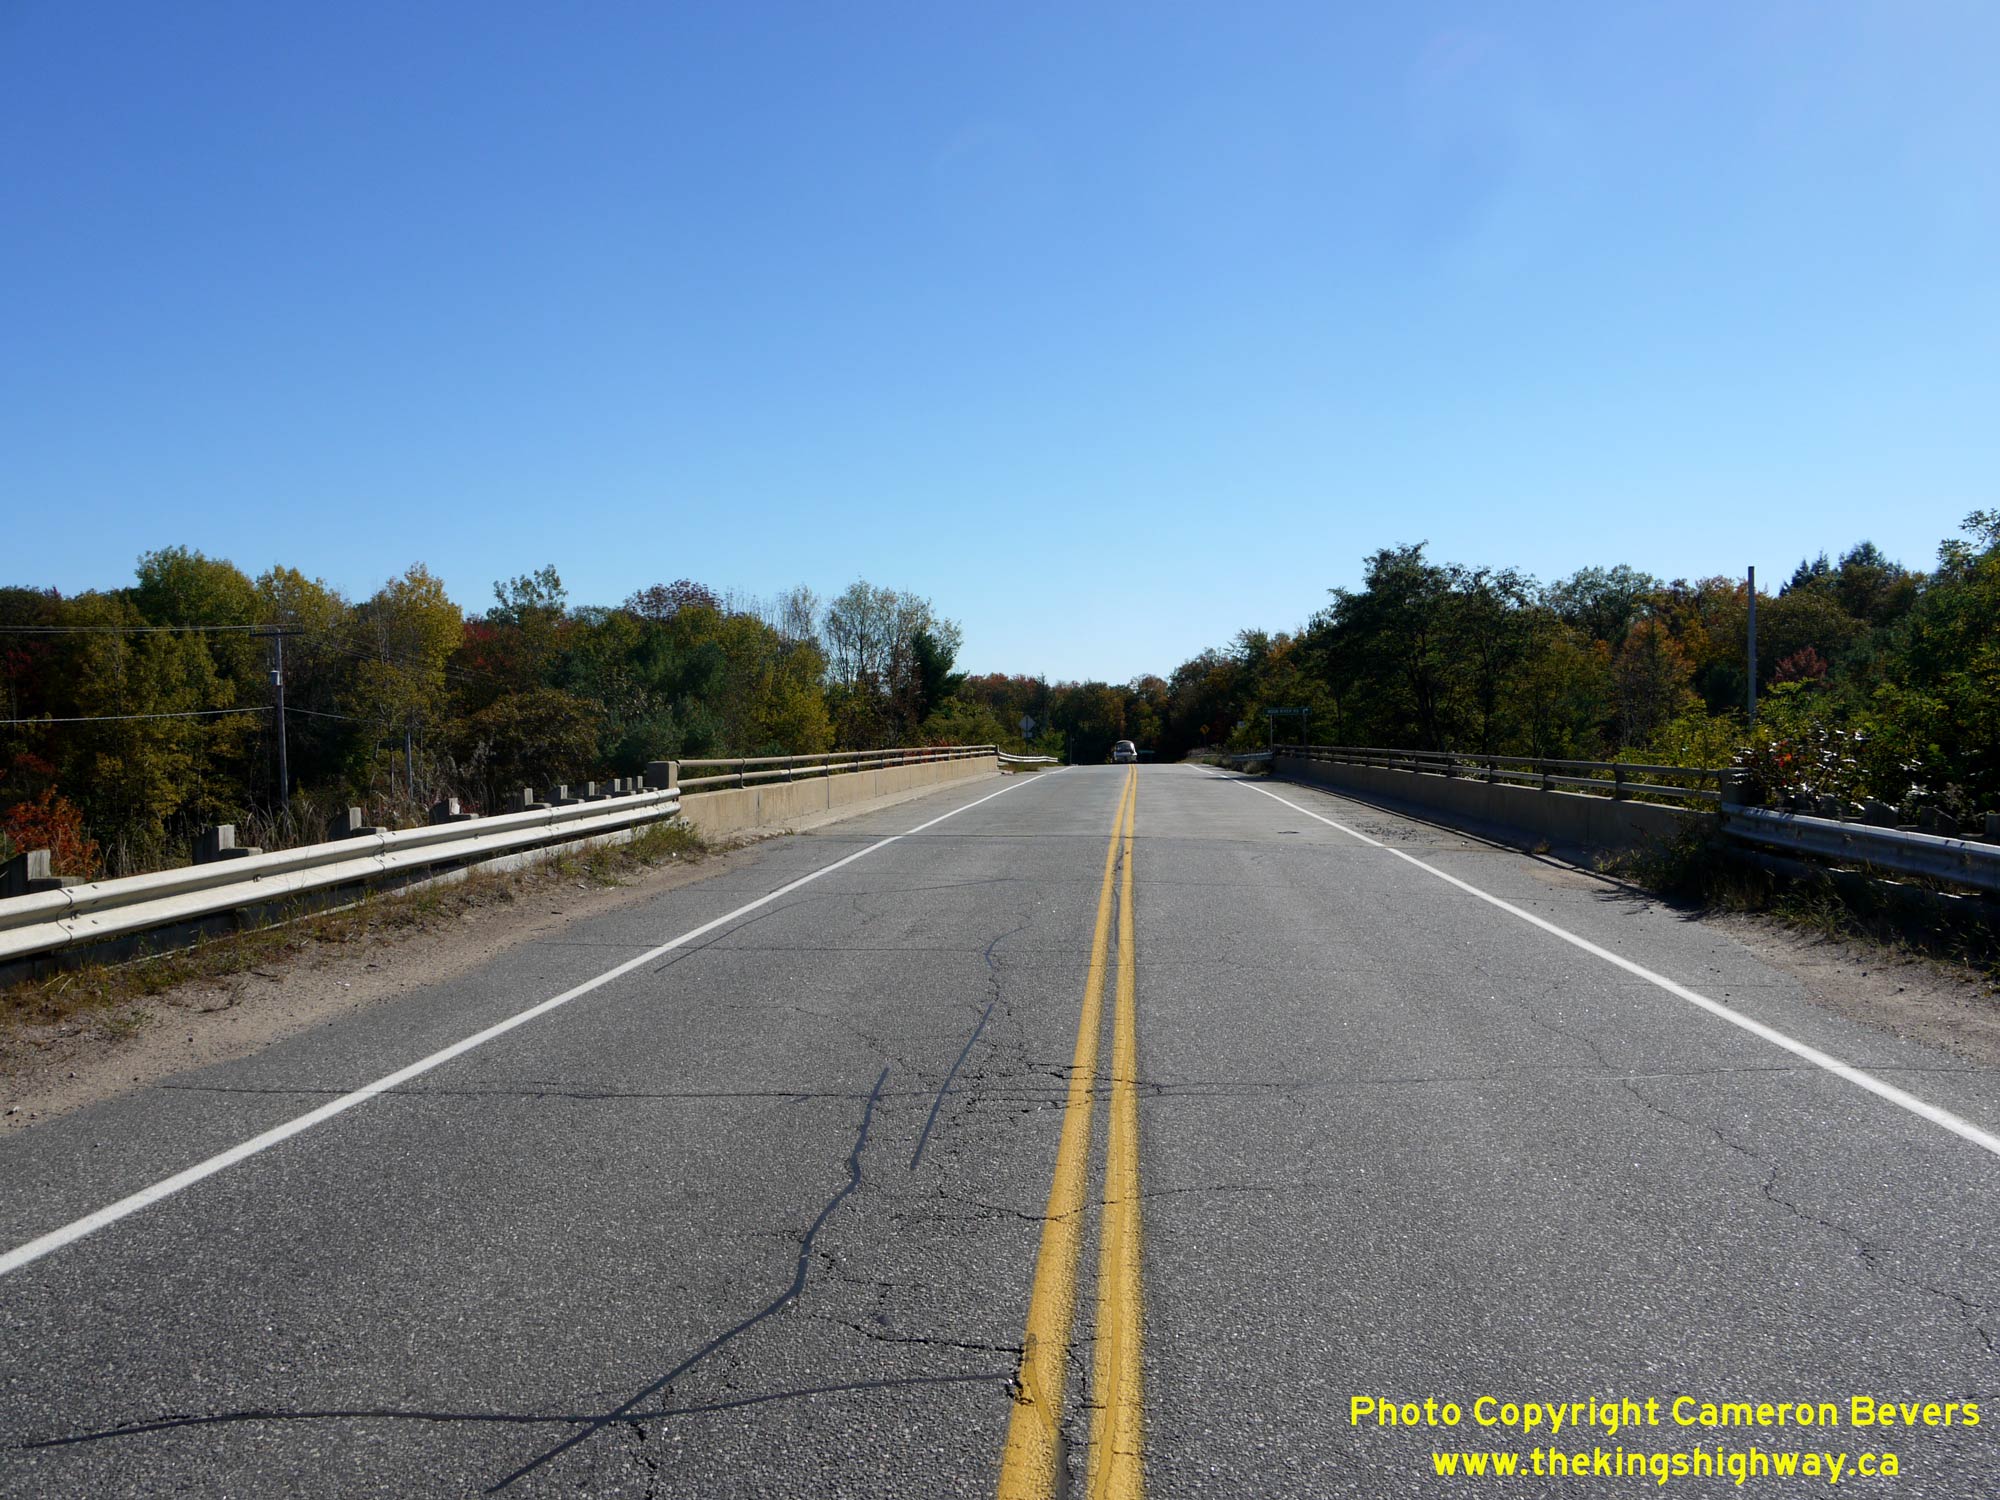
 Left - Facing south along Hwy 169 towards Bala at the Bala CPR Overhead. See an
Enlarged Photo Here. Left - Facing south along Hwy 169 towards Bala at the Bala CPR Overhead. See an
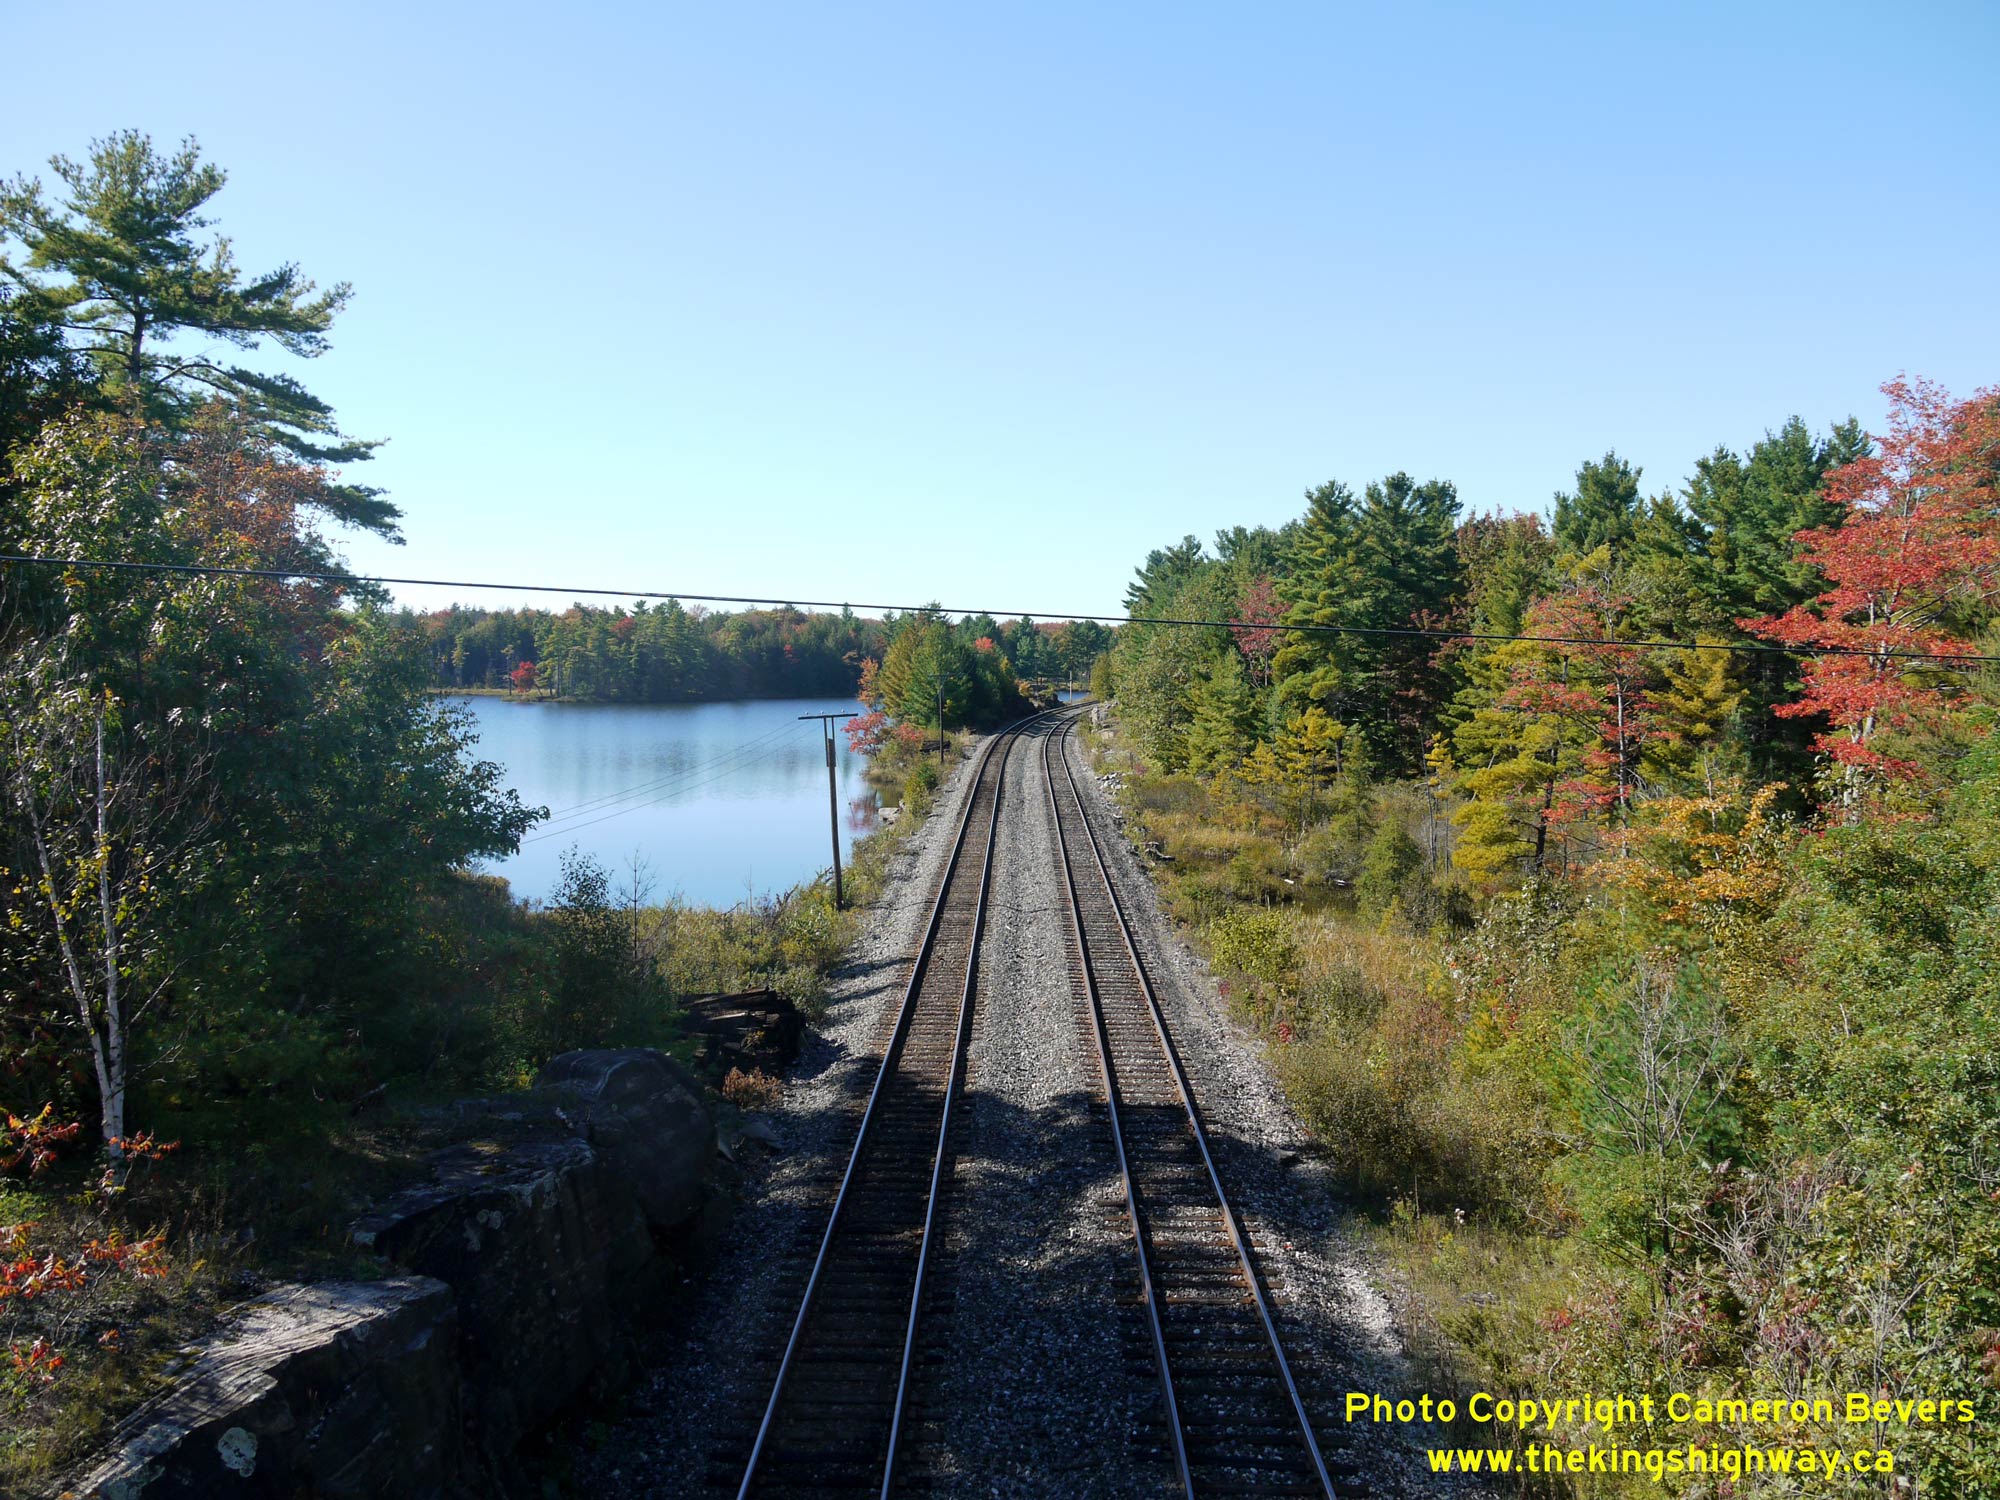
Enlarged Photo Here.(Photograph taken on September 27, 2013 - © Cameron Bevers) Right - View of the CPR and Spiers Lake from the Hwy 169 Overhead, facing west. See an
Enlarged Photo Here.(Photograph taken on September 27, 2013 - © Cameron Bevers) 
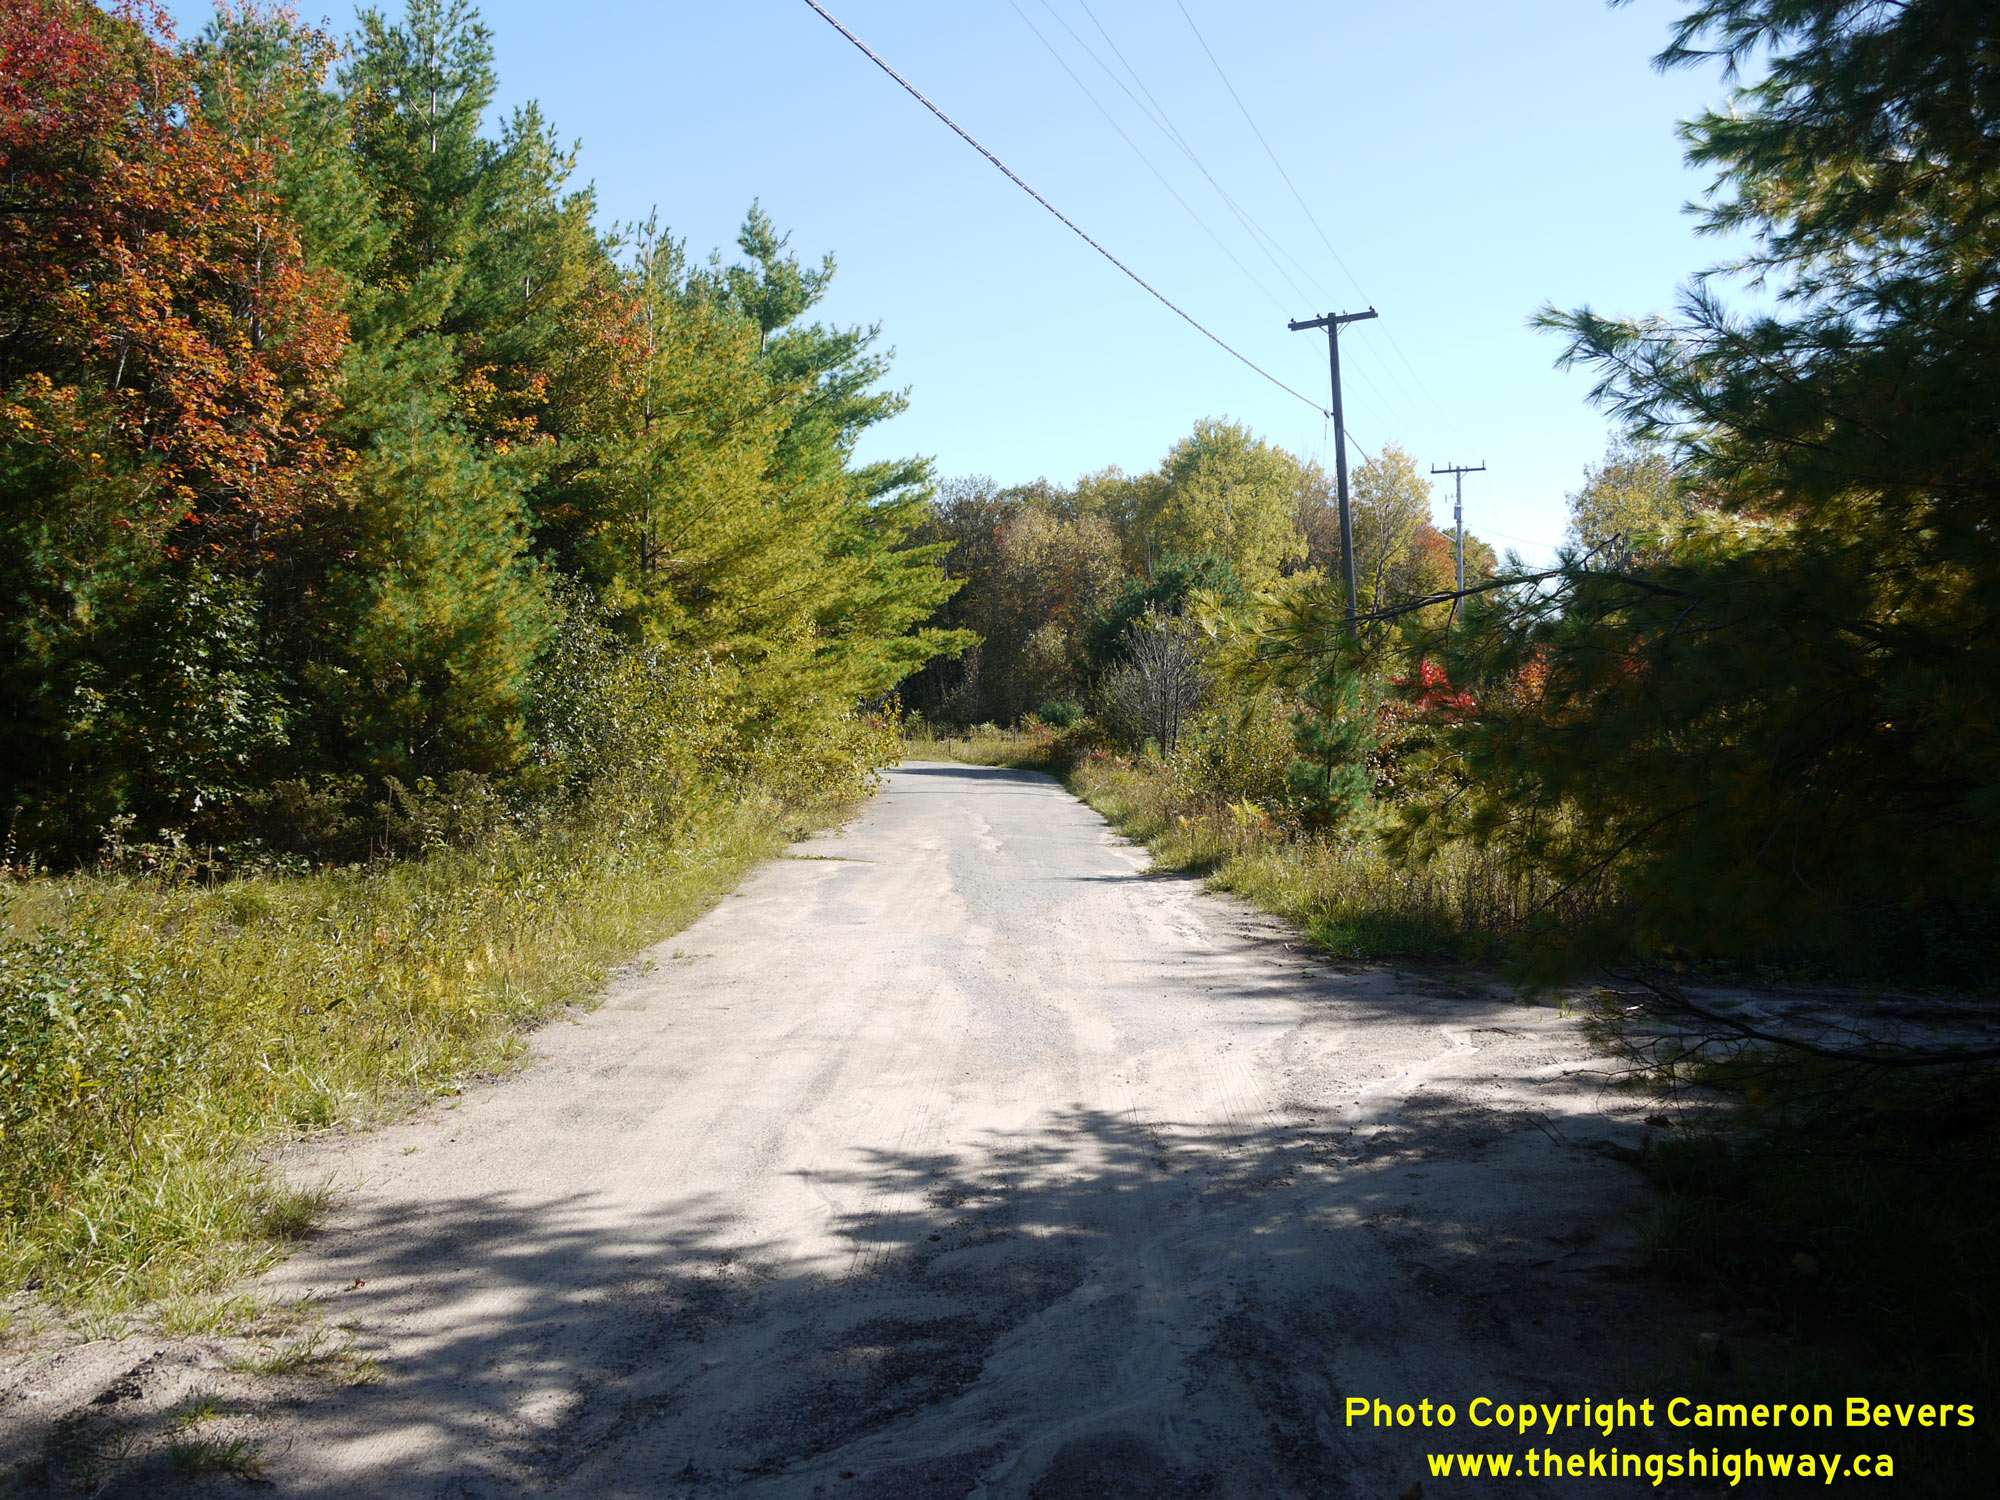 Left - This abandoned section of highway pavement was left behind when the Bala CPR Overhead was built in 1970. This former alignment of Hwy 69 was kept open
as a driveway to a number of area cottages situated on nearby Lake Muskoka and also as an access road to the railway. See an
Enlarged Photo Here. Left - This abandoned section of highway pavement was left behind when the Bala CPR Overhead was built in 1970. This former alignment of Hwy 69 was kept open
as a driveway to a number of area cottages situated on nearby Lake Muskoka and also as an access road to the railway. See an
Enlarged Photo Here.(Photograph taken on September 27, 2013 - © Cameron Bevers) Right - Facing south along the abandoned section of Hwy 69 approaching the former site of the CPR crossing. Historically, Hwy 69 curved quite sharply to the
right at the bottom of this grade, where it crossed the railway on its route south towards Bala. See an
Enlarged Photo Here.(Photograph taken on September 27, 2013 - © Cameron Bevers) 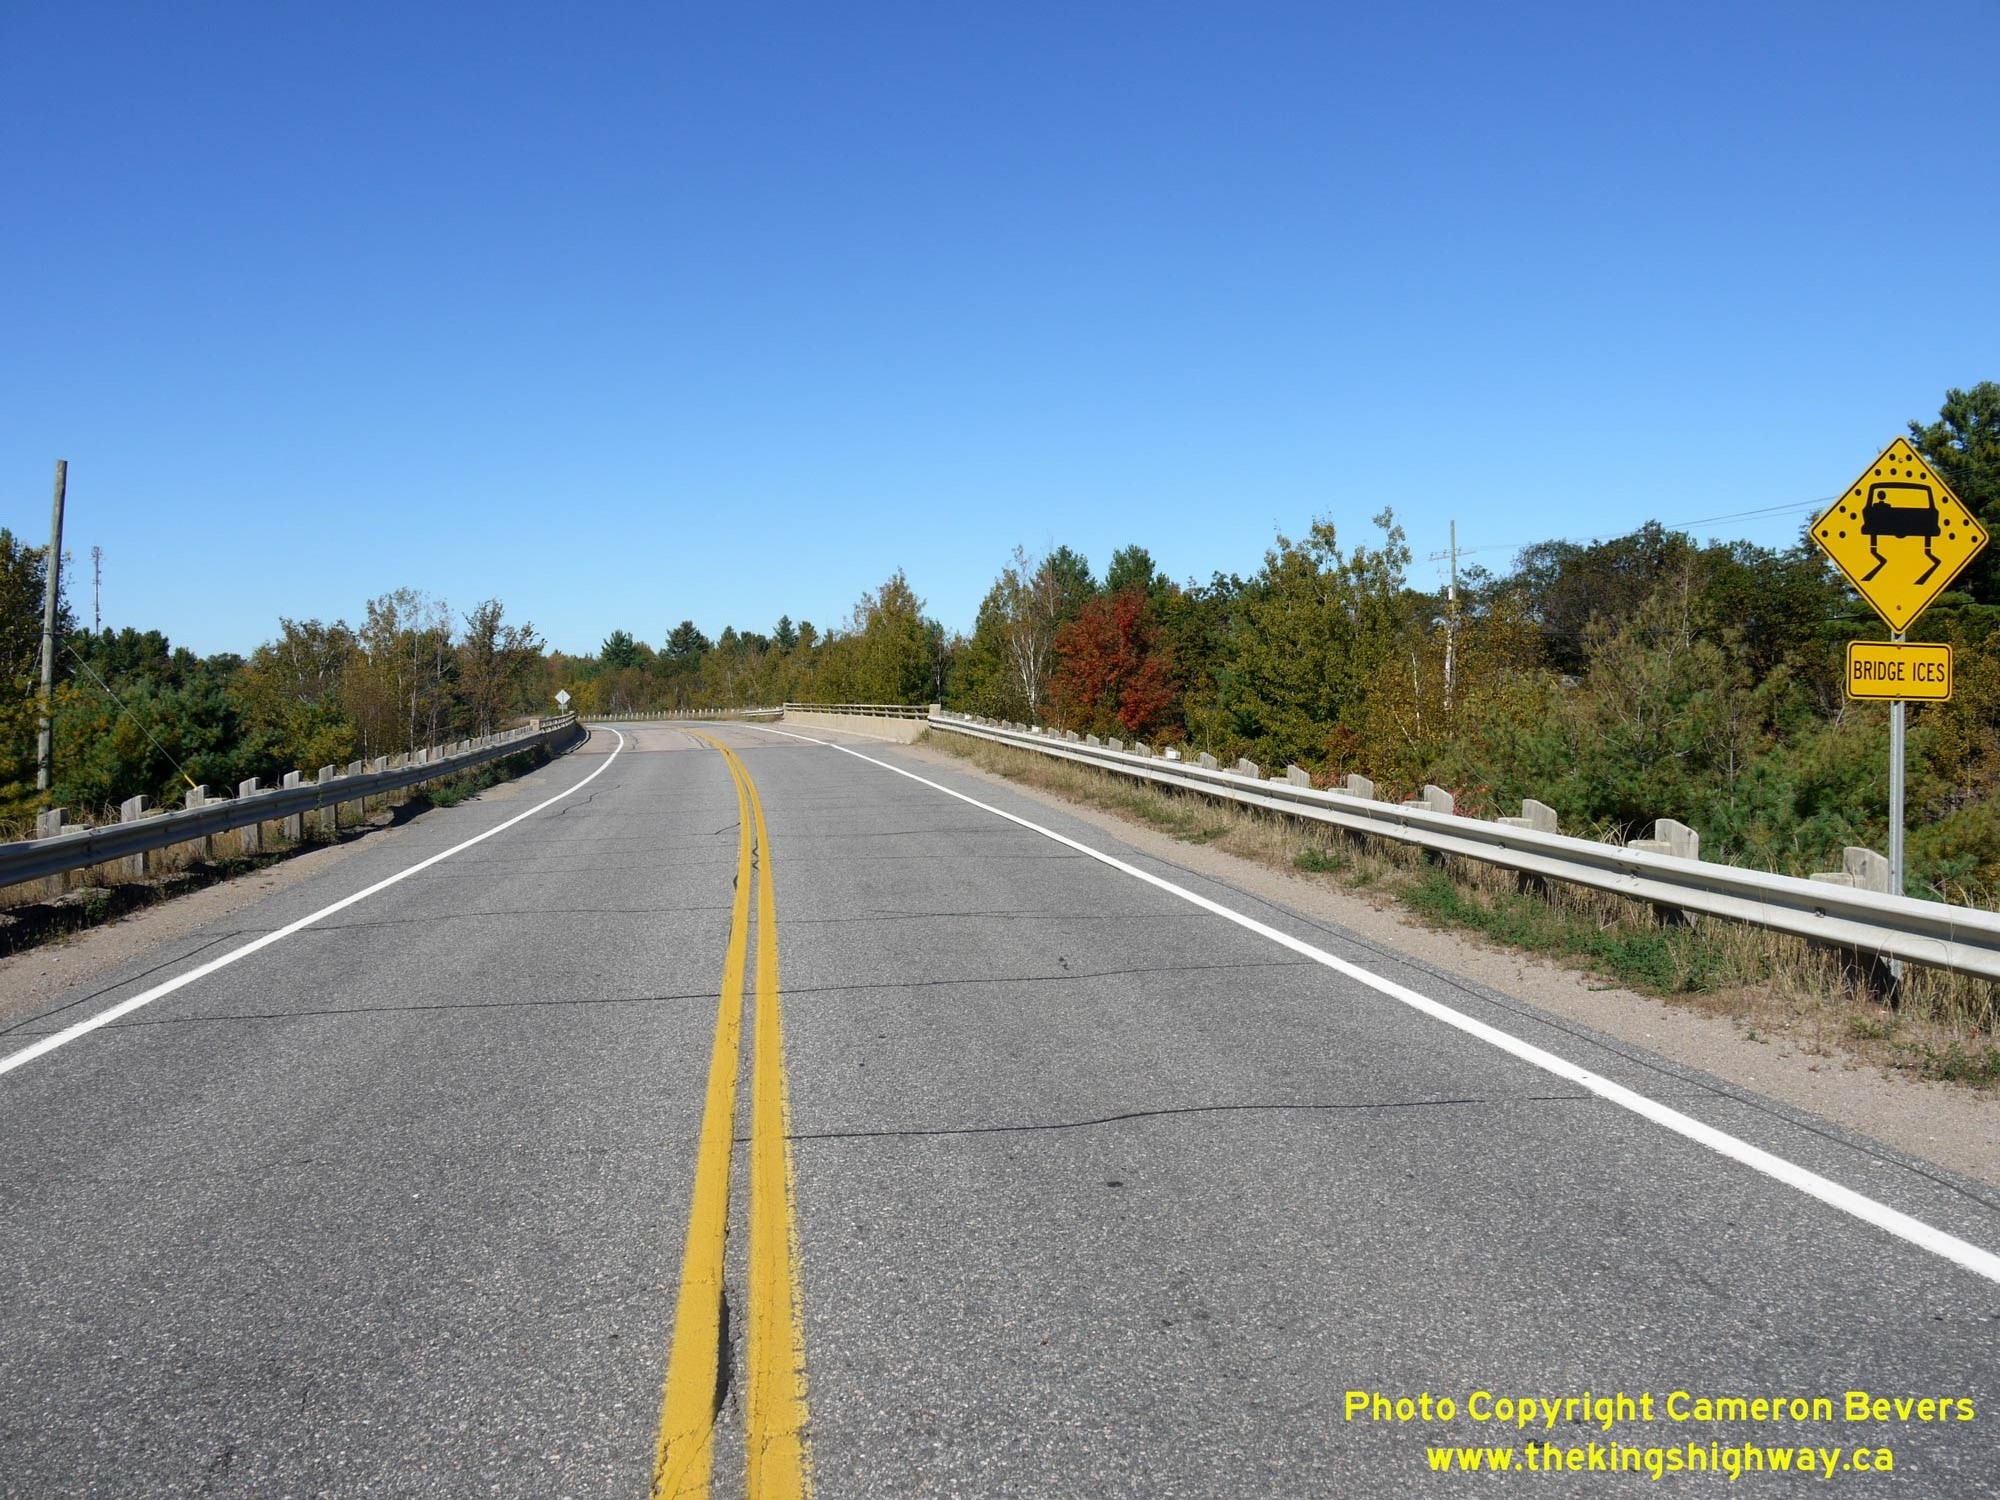
 Left - Facing north along Hwy 169 towards Foot's Bay at the Bala Canadian National Railway (CNR) Overhead. See an
Enlarged Photo Here. Left - Facing north along Hwy 169 towards Foot's Bay at the Bala Canadian National Railway (CNR) Overhead. See an
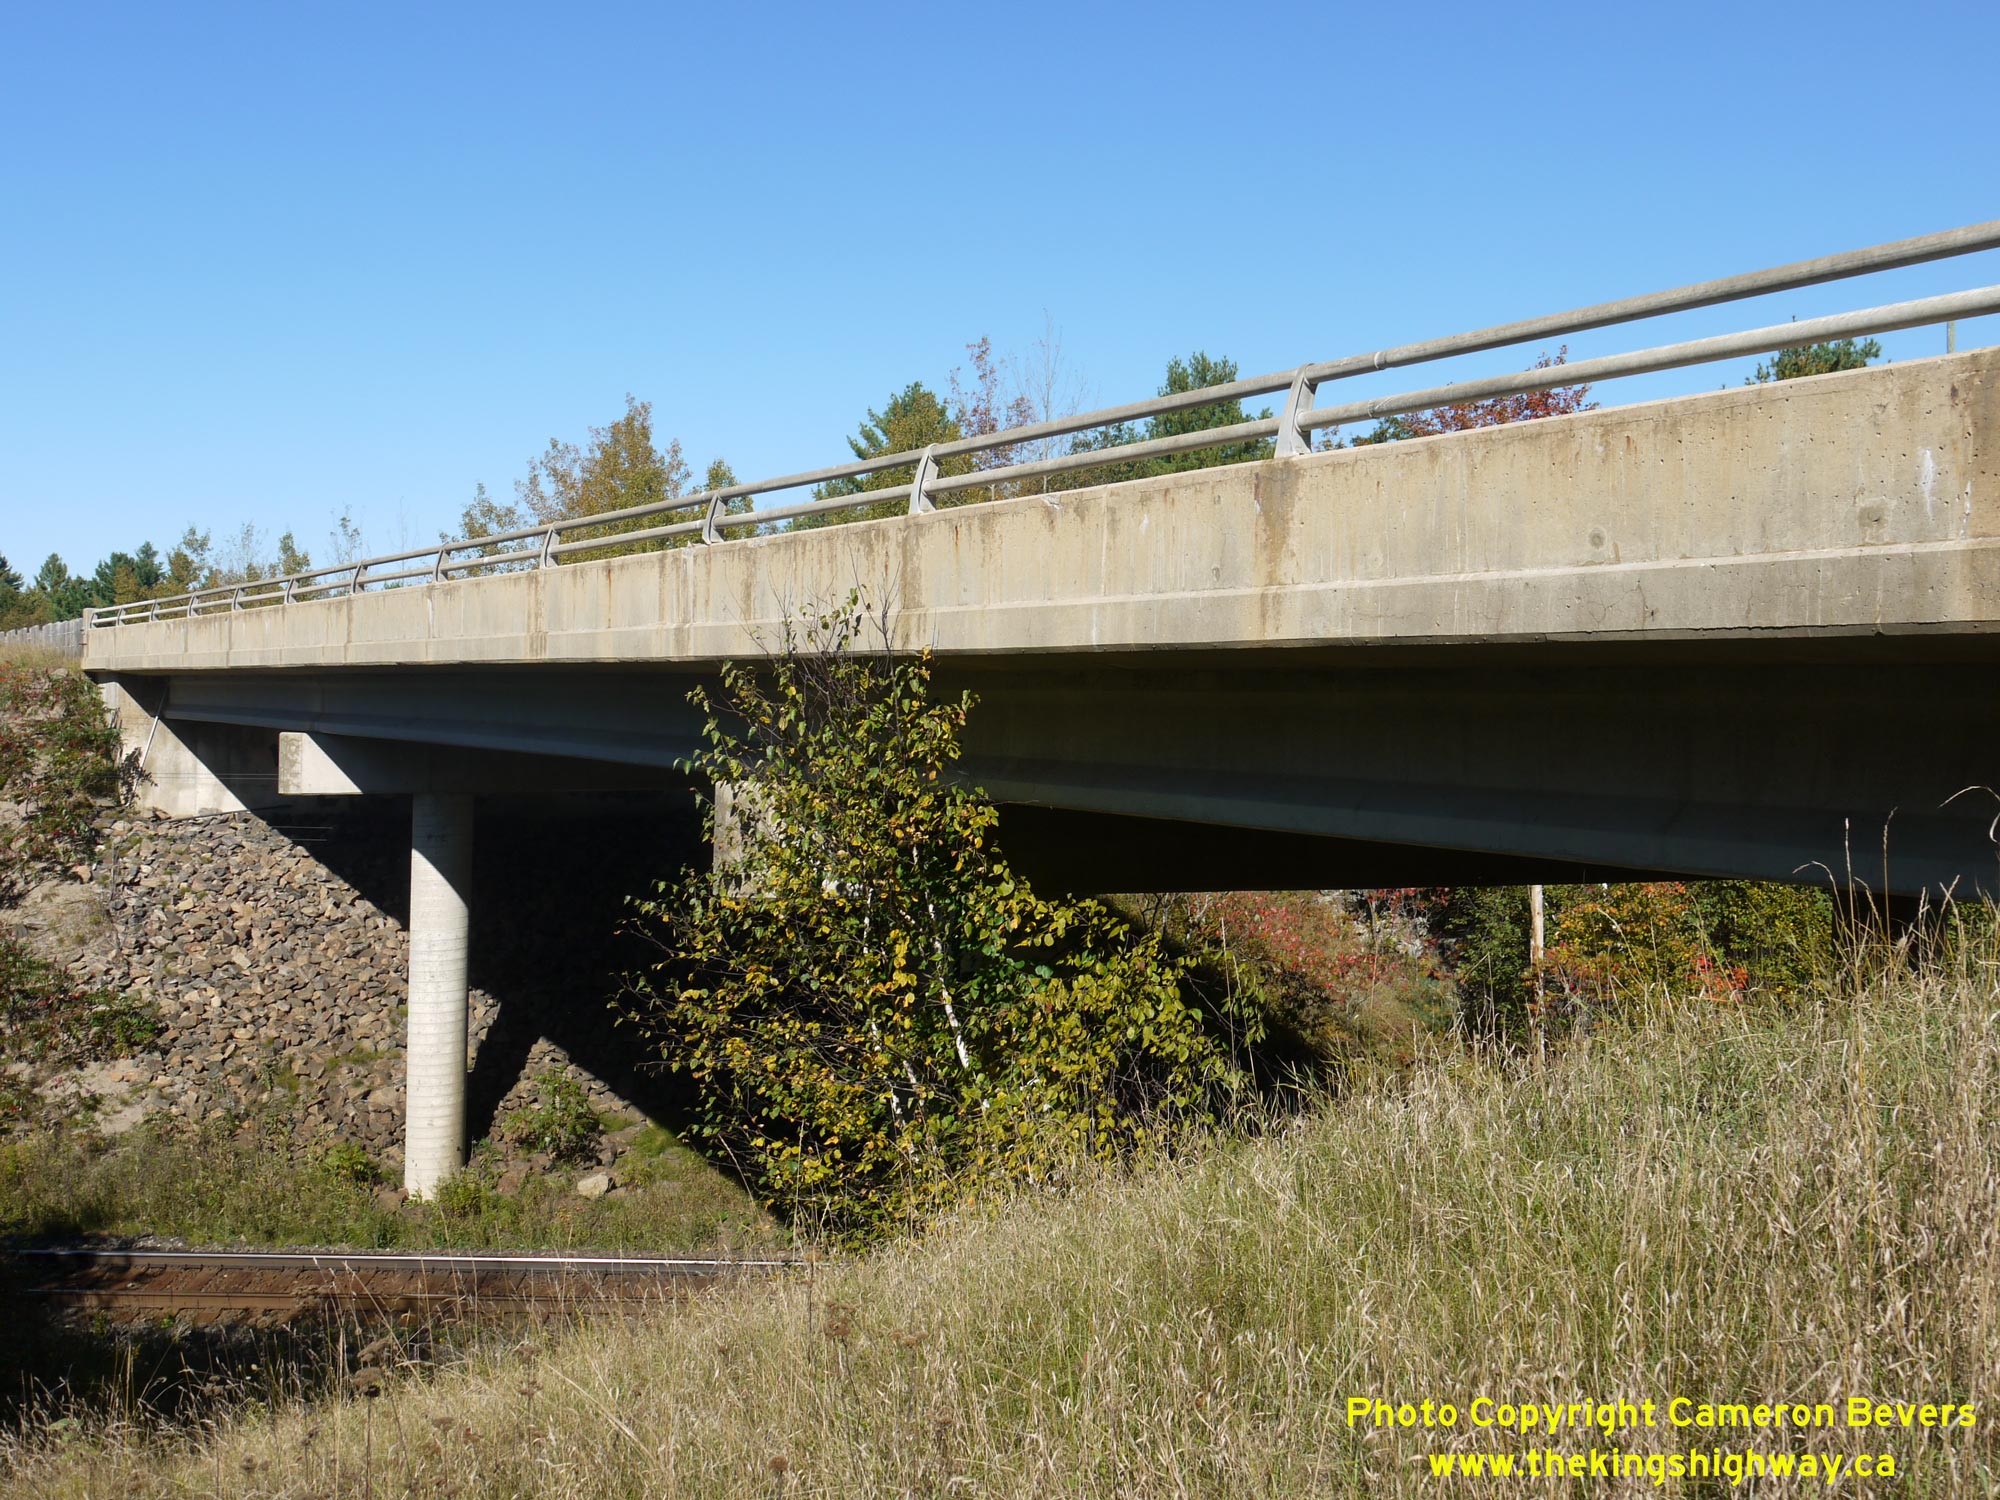
Enlarged Photo Here.(Photograph taken on September 27, 2013 - © Cameron Bevers) Right - Western side of the Bala CNR Overhead on Hwy 169. This three-span concrete girder structure is located a short distance north of the Bala CPR Overhead.
See an Enlarged Photo Here.(Photograph taken on September 27, 2013 - © Cameron Bevers) 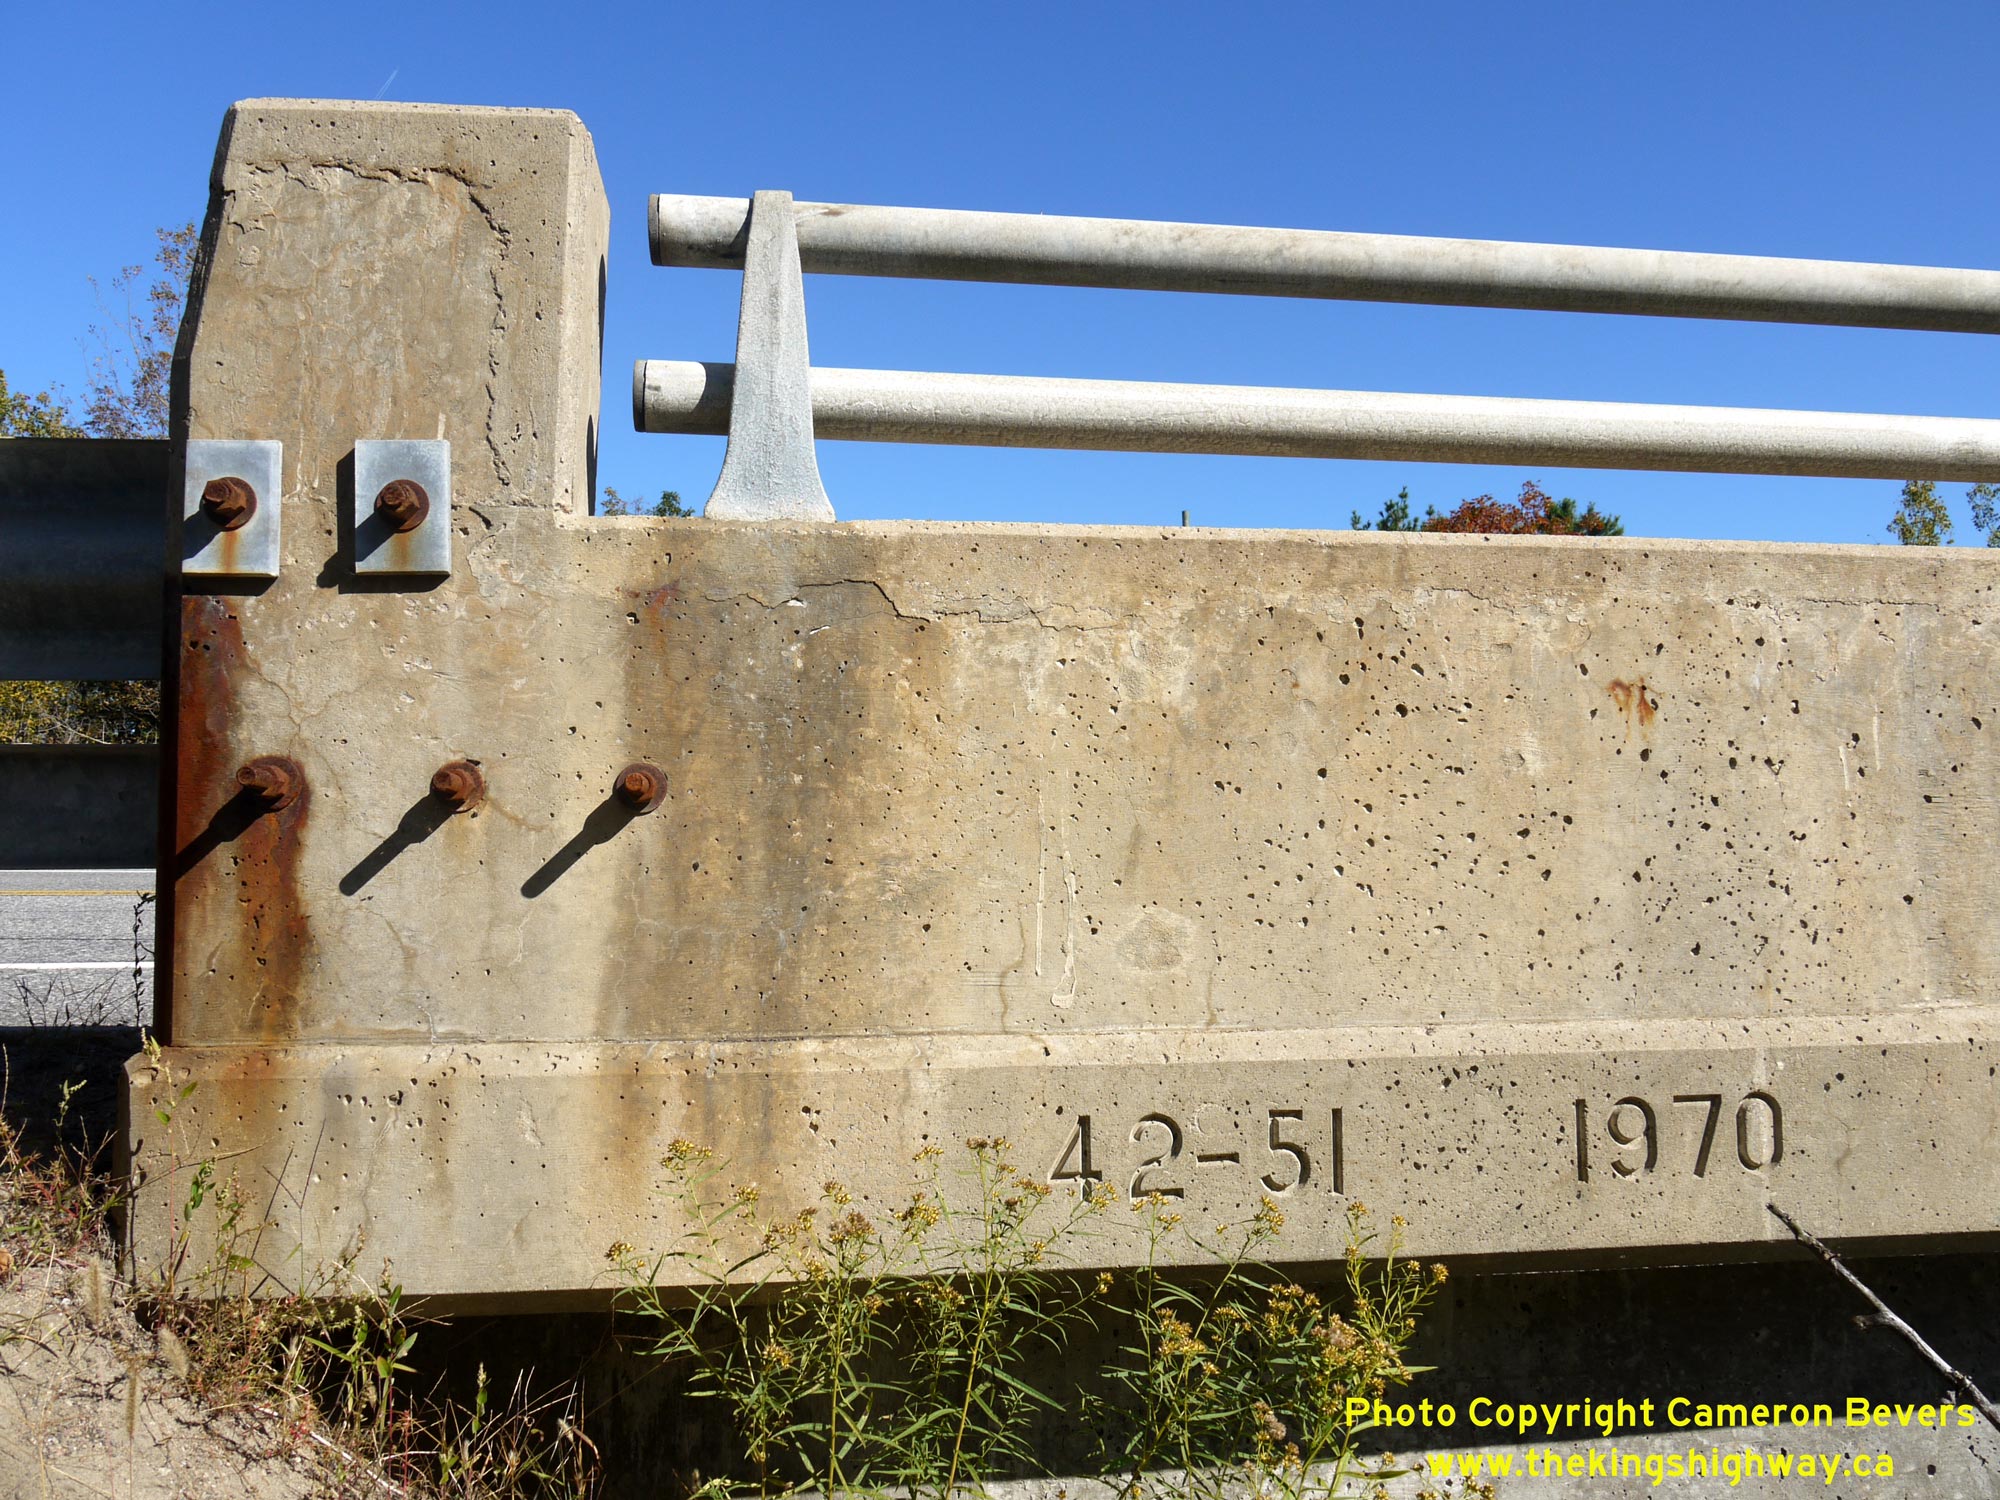
 Left - Date stamp (1970) and structure identification number (Site #42-51) on the Bala CNR Overhead on Hwy 169. See an
Enlarged Photo Here. Left - Date stamp (1970) and structure identification number (Site #42-51) on the Bala CNR Overhead on Hwy 169. See an
Enlarged Photo Here.(Photograph taken on September 27, 2013 - © Cameron Bevers) Right - Facing south along Hwy 169 towards Bala at the Bala CNR Overhead. This new concrete structure was completed in 1970. It replaced a much earlier timber
overhead crossing, which once stood immediately to the east of the current bridge. The old CNR Overhead north of Bala was narrow, in poor condition, and had very
dangerous approaches. With a curb-to-curb roadway width of only 18 feet (about 5.5 metres), the old timber overhead had roughly half the curb-to-curb roadway width of
the current highway bridge (34 feet, or 10.4 metres). Once completed in 1970, the new highway diversion north of Bala carried Hwy 69 safely across the CNR as well as
the CPR located a short distance to the south. See an Enlarged Photo Here.(Photograph taken on September 27, 2013 - © Cameron Bevers) 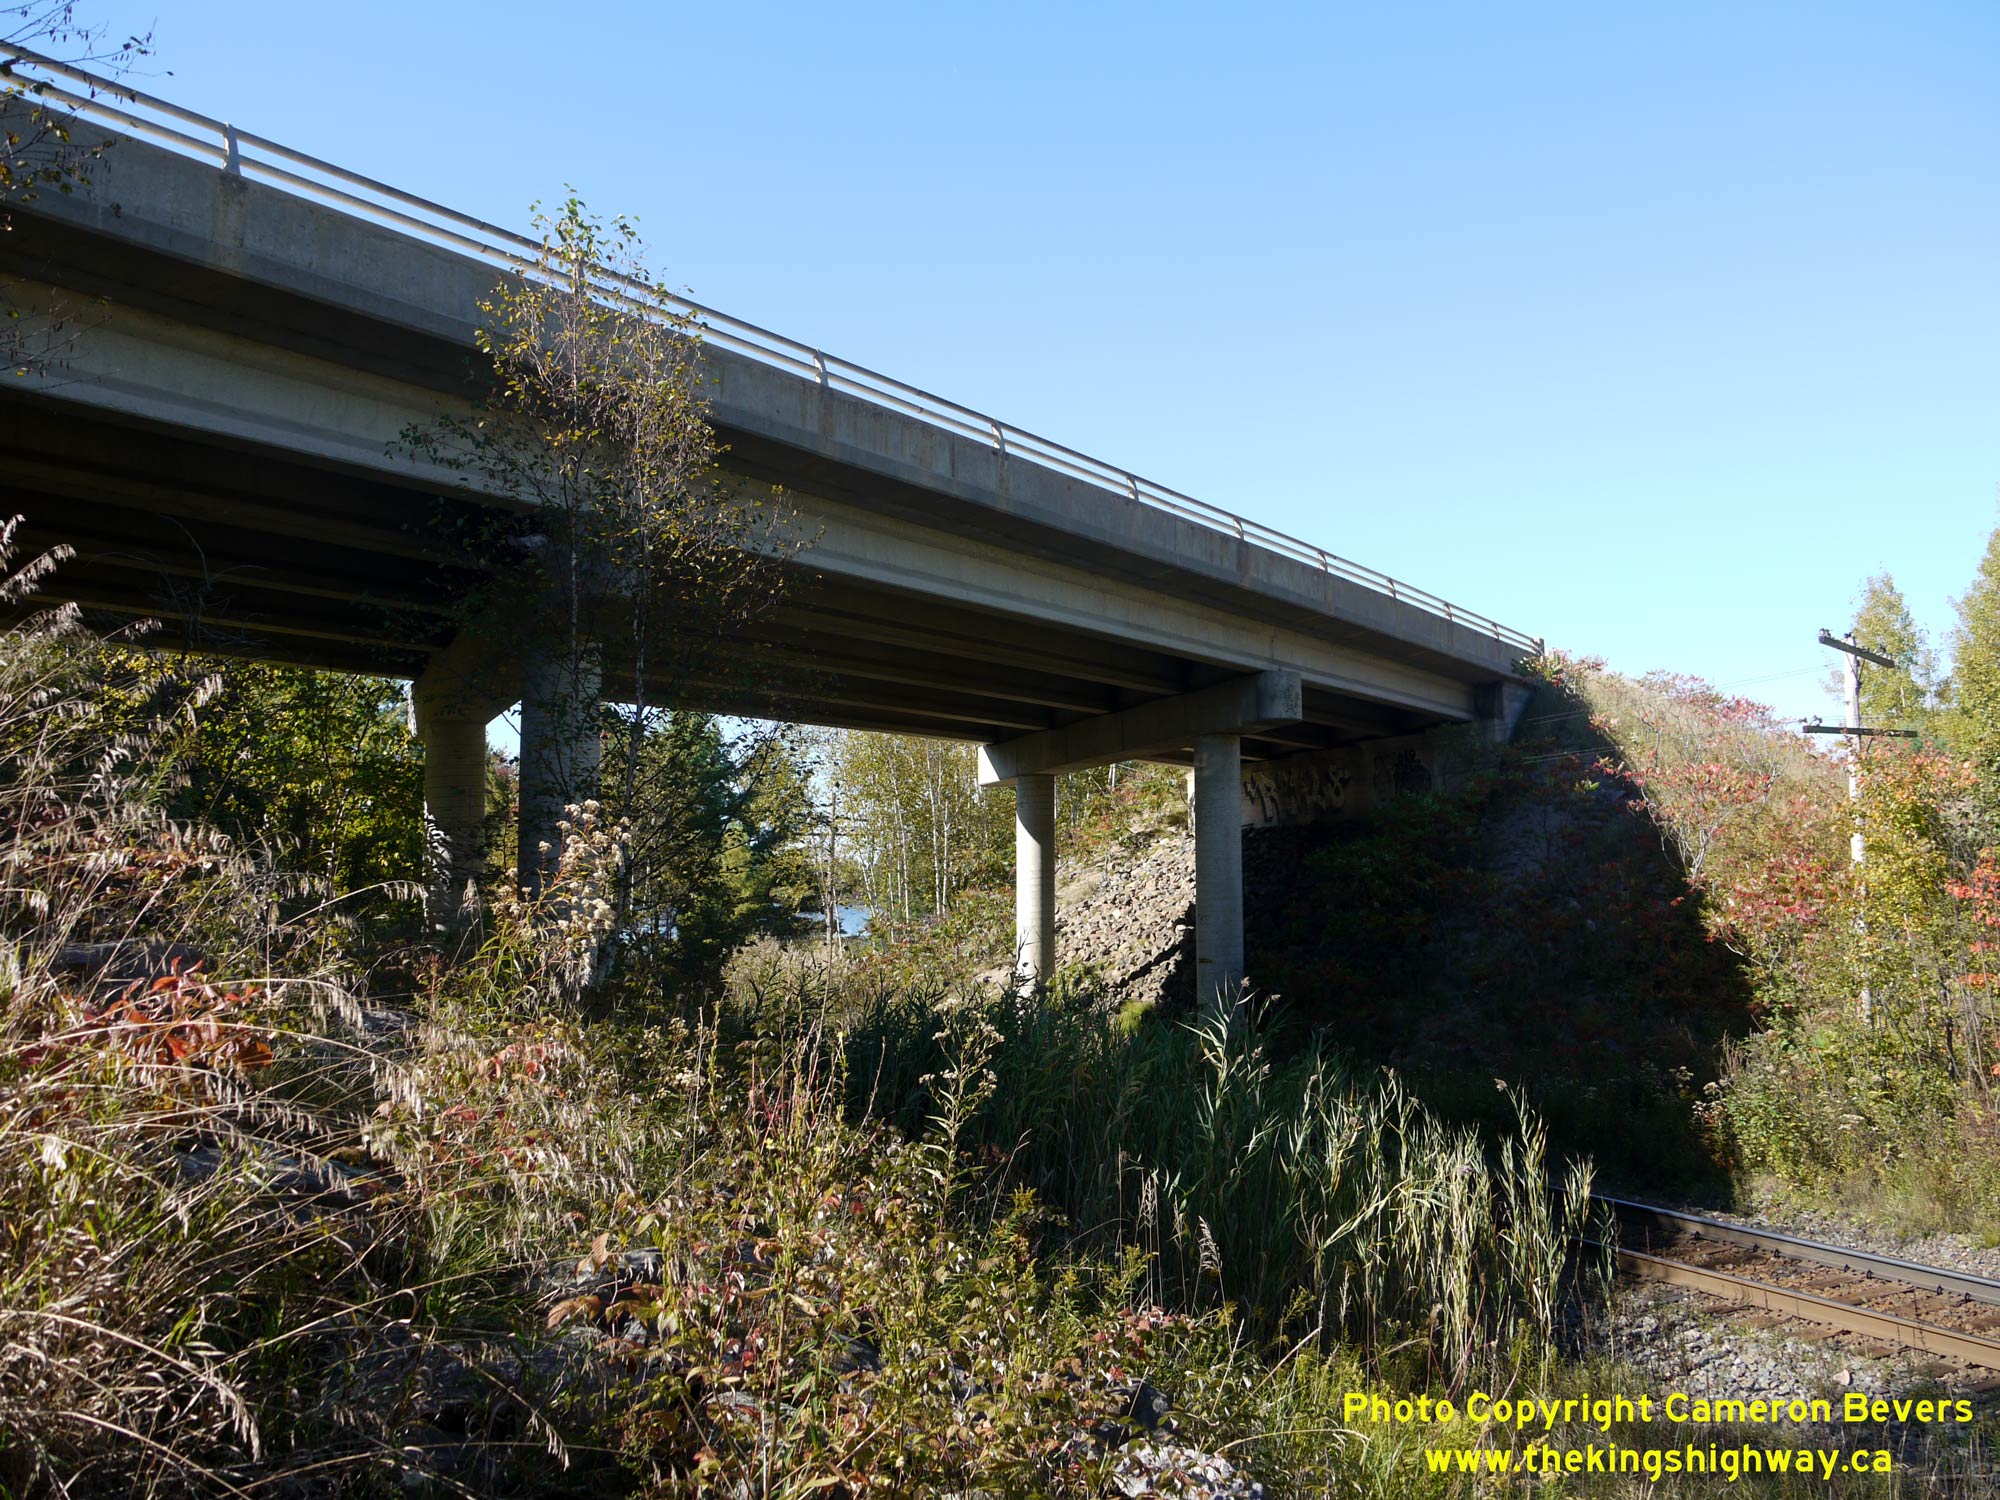
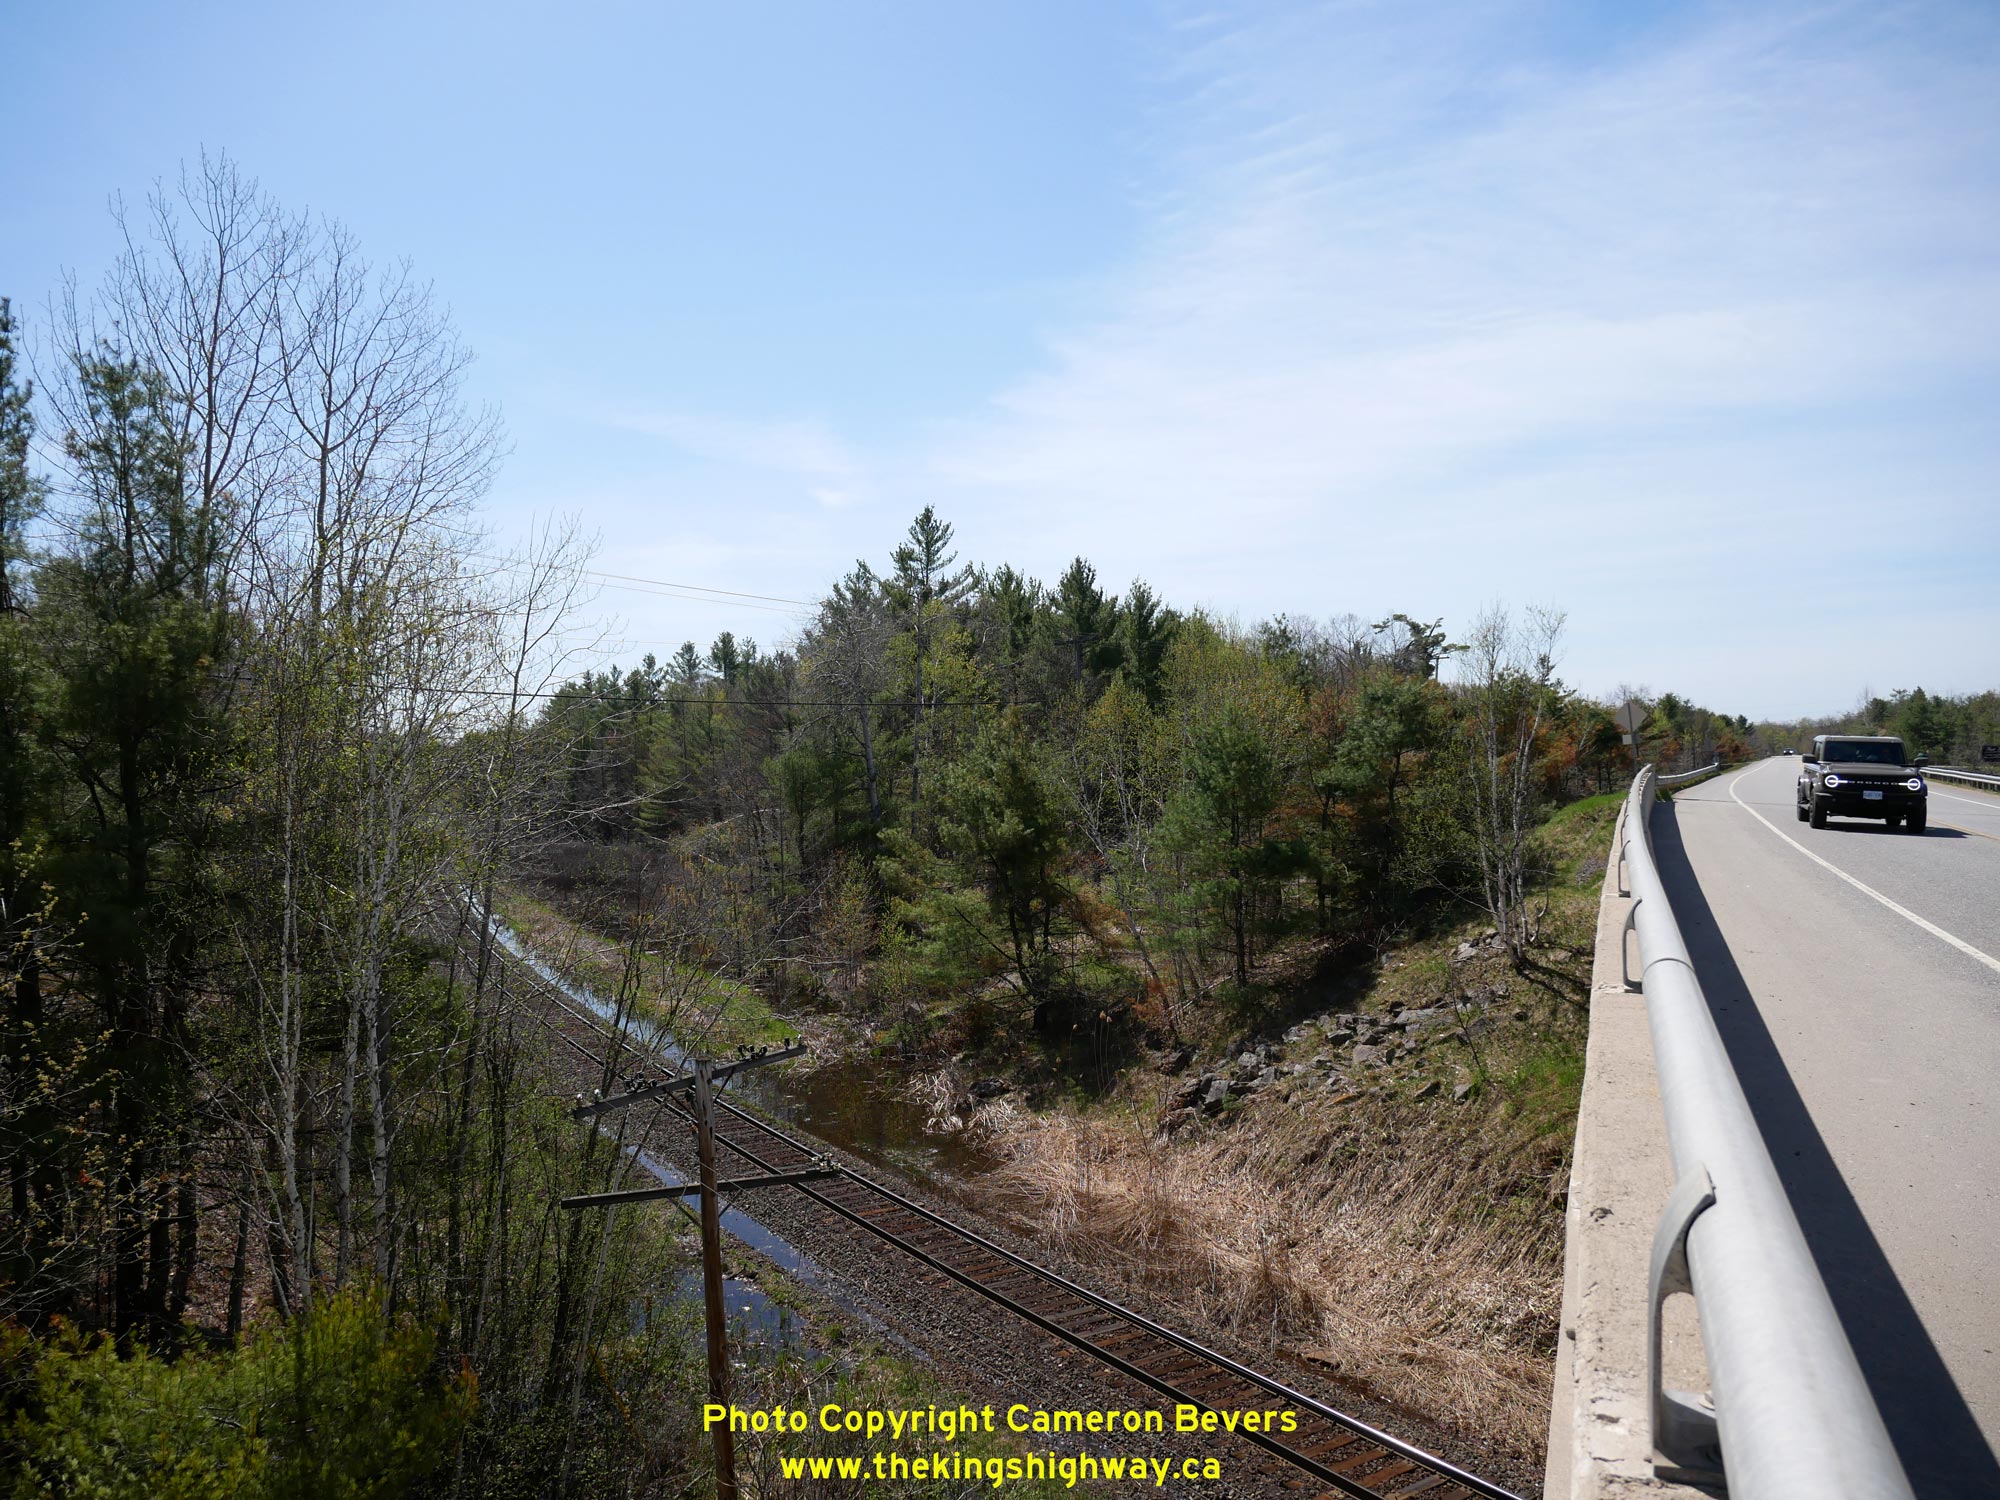 Left - Eastern side of the Bala CNR Overhead on Hwy 169, as seen from the site of the old timber overhead bridge. See an
Enlarged Photo Here. Left - Eastern side of the Bala CNR Overhead on Hwy 169, as seen from the site of the old timber overhead bridge. See an
Enlarged Photo Here.(Photograph taken on September 27, 2013 - © Cameron Bevers) Right - Site of the old Bala CNR Overhead beside the current Hwy 169 structure. The old timber overhead crossing carried traffic up until 1970, when it was
replaced with the new concrete structure seen at right. The south abutment of the timber bridge was situated immediately to the left of the south abutment of the
current bridge. The timber bridge crossed the railway perpendicularly. Apart from some residual grading visible along the abandoned northern approach, there is no
trace anymore that there ever was a previous bridge crossing here. See an
Enlarged Photo Here.(Photograph taken on May 17, 2026 - © Cameron Bevers) 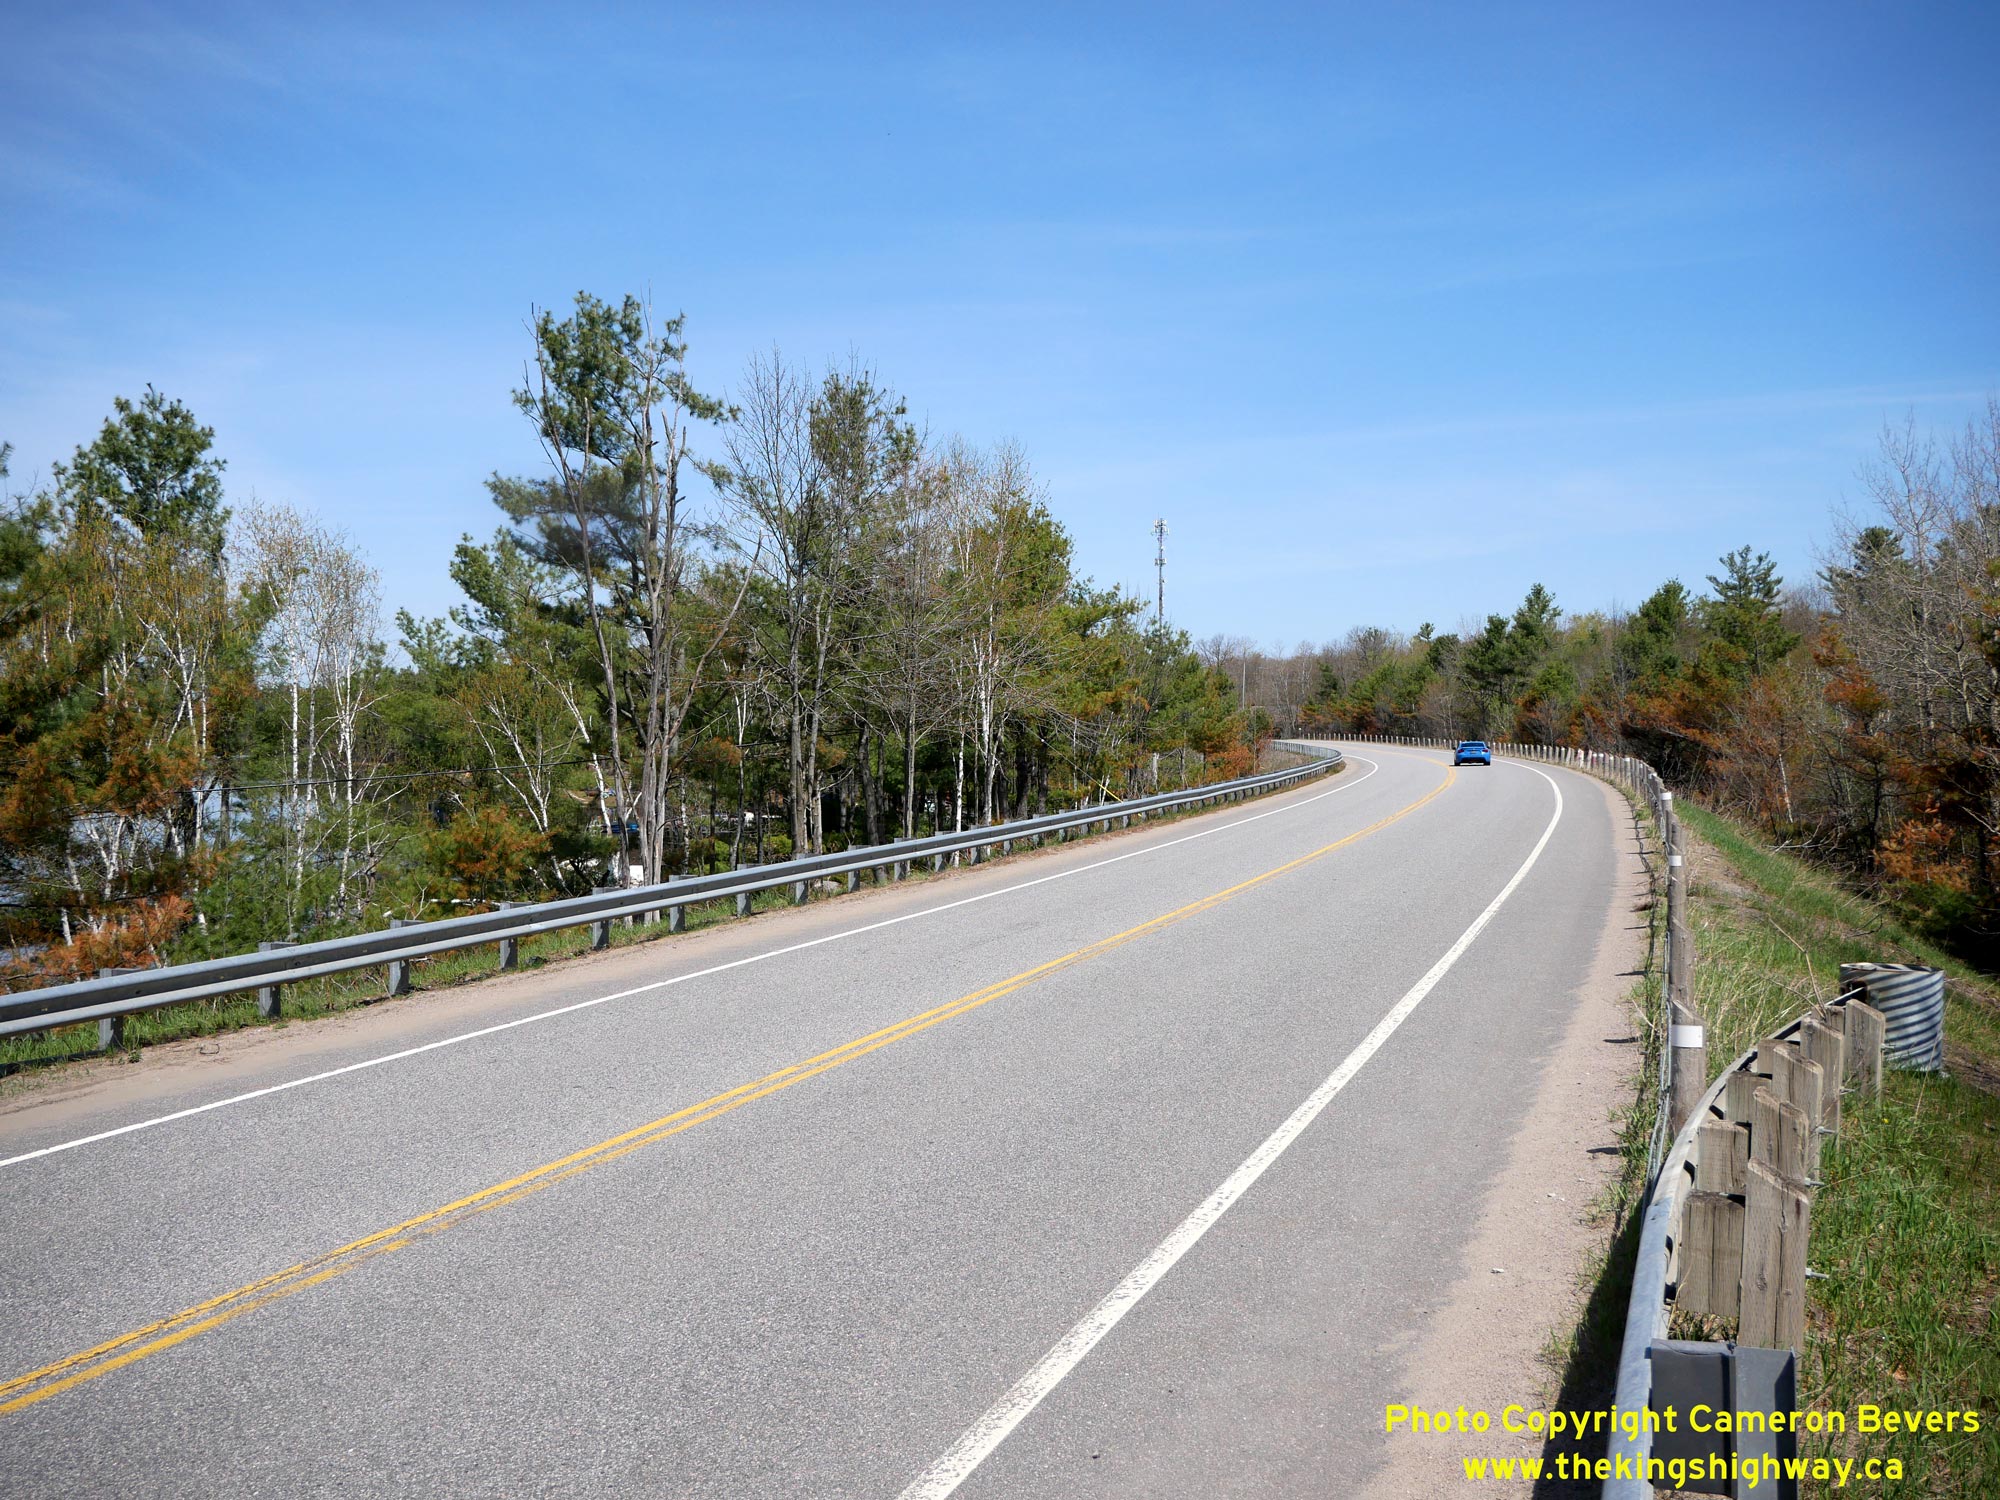
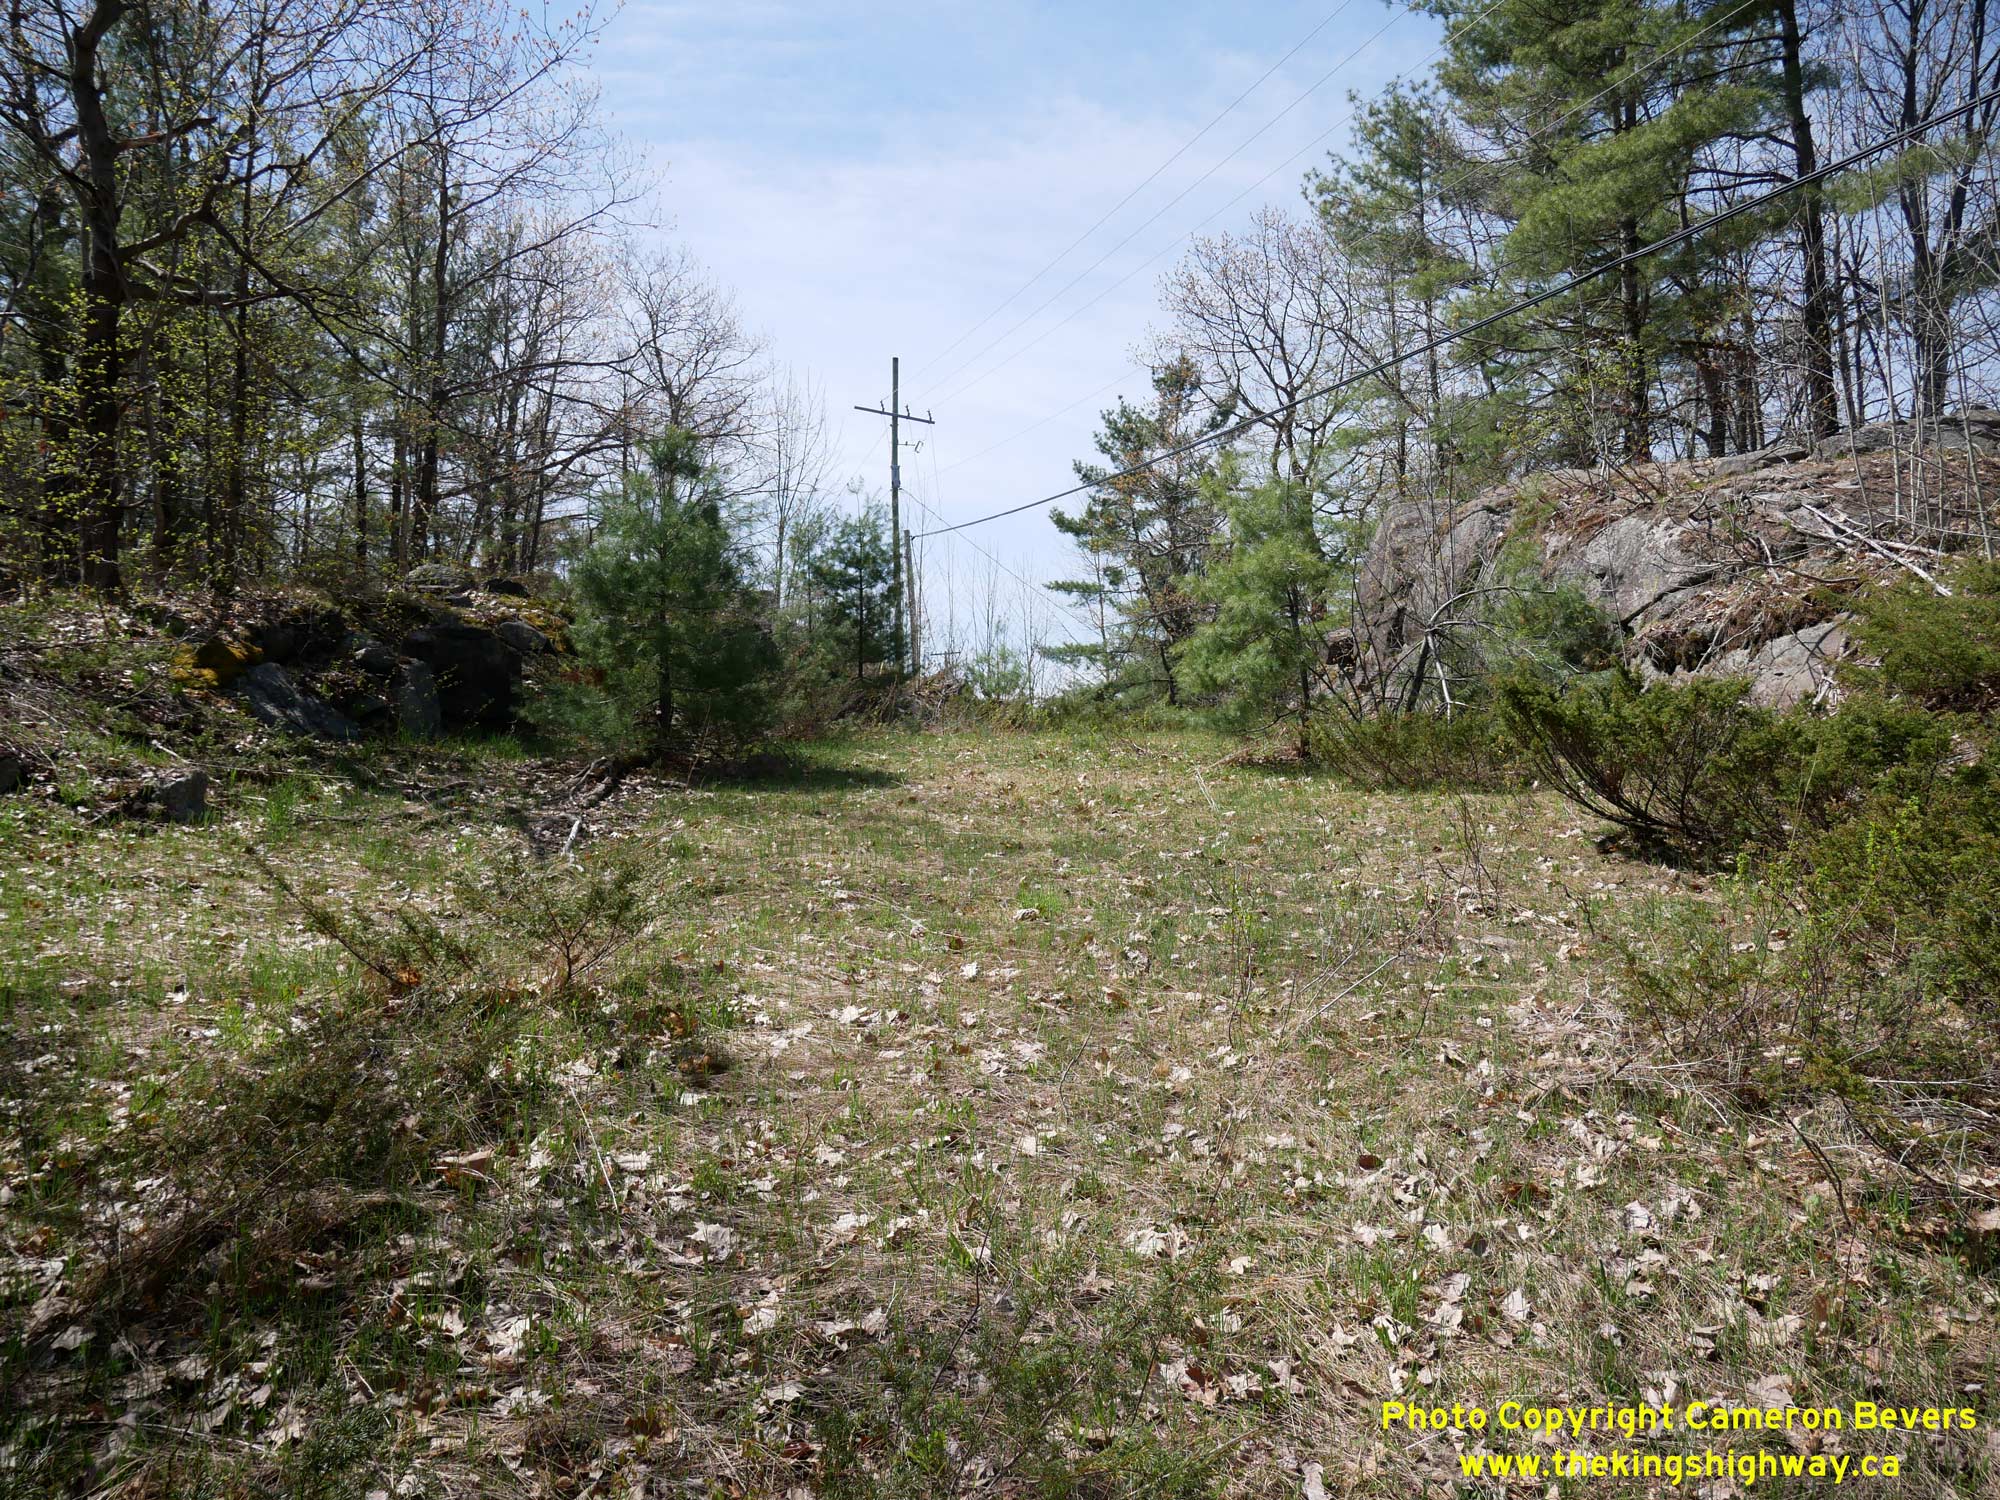 Left - Facing north along Hwy 169 on the new diversion at Barrett Lake. The old route of Hwy 69 north of Bala was so poor, that virtually the entire route of
the highway between Bala and Dudley was rebuilt on a new alignment under Contract #1969-222. This work included the two railway grade separations over the CNR and CPR
north of Bala, significant highway alignment improvements and a new hot-mix asphalt pavement structure. All works under this contract, including final paving, were
completed in June 1971. See an Enlarged Photo Here. Left - Facing north along Hwy 169 on the new diversion at Barrett Lake. The old route of Hwy 69 north of Bala was so poor, that virtually the entire route of
the highway between Bala and Dudley was rebuilt on a new alignment under Contract #1969-222. This work included the two railway grade separations over the CNR and CPR
north of Bala, significant highway alignment improvements and a new hot-mix asphalt pavement structure. All works under this contract, including final paving, were
completed in June 1971. See an Enlarged Photo Here.(Photograph taken on May 17, 2026 - © Cameron Bevers). Right - View of the abandoned highway approaching the old Bala CNR Overhead. Both the horizontal and vertical geometry of Hwy 69 approaching the old Bala CNR
Overhead were severely deficient prior to reconstruction. Although the asphalt pavement was removed during the old highway's abandonment in the early 1970s, it it
obvious just looking at the residual grading that motorists had extremely poor visibility of the approaching overhead bridge. The old overhead bridge was quite narrow
with a curb-to-curb roadway width of only 18 feet. While smaller vehicles could cross the overhead simultaneously, larger vehicles and trucks typically had to take
turns crossing the old overhead bridge. Accordngly, motorists would always have to be prepared to stop before crossing the overhead bridge, in case a truck was coming
the other way. See an Enlarged Photo Here.(Photograph taken on May 17, 2026 - © Cameron Bevers) 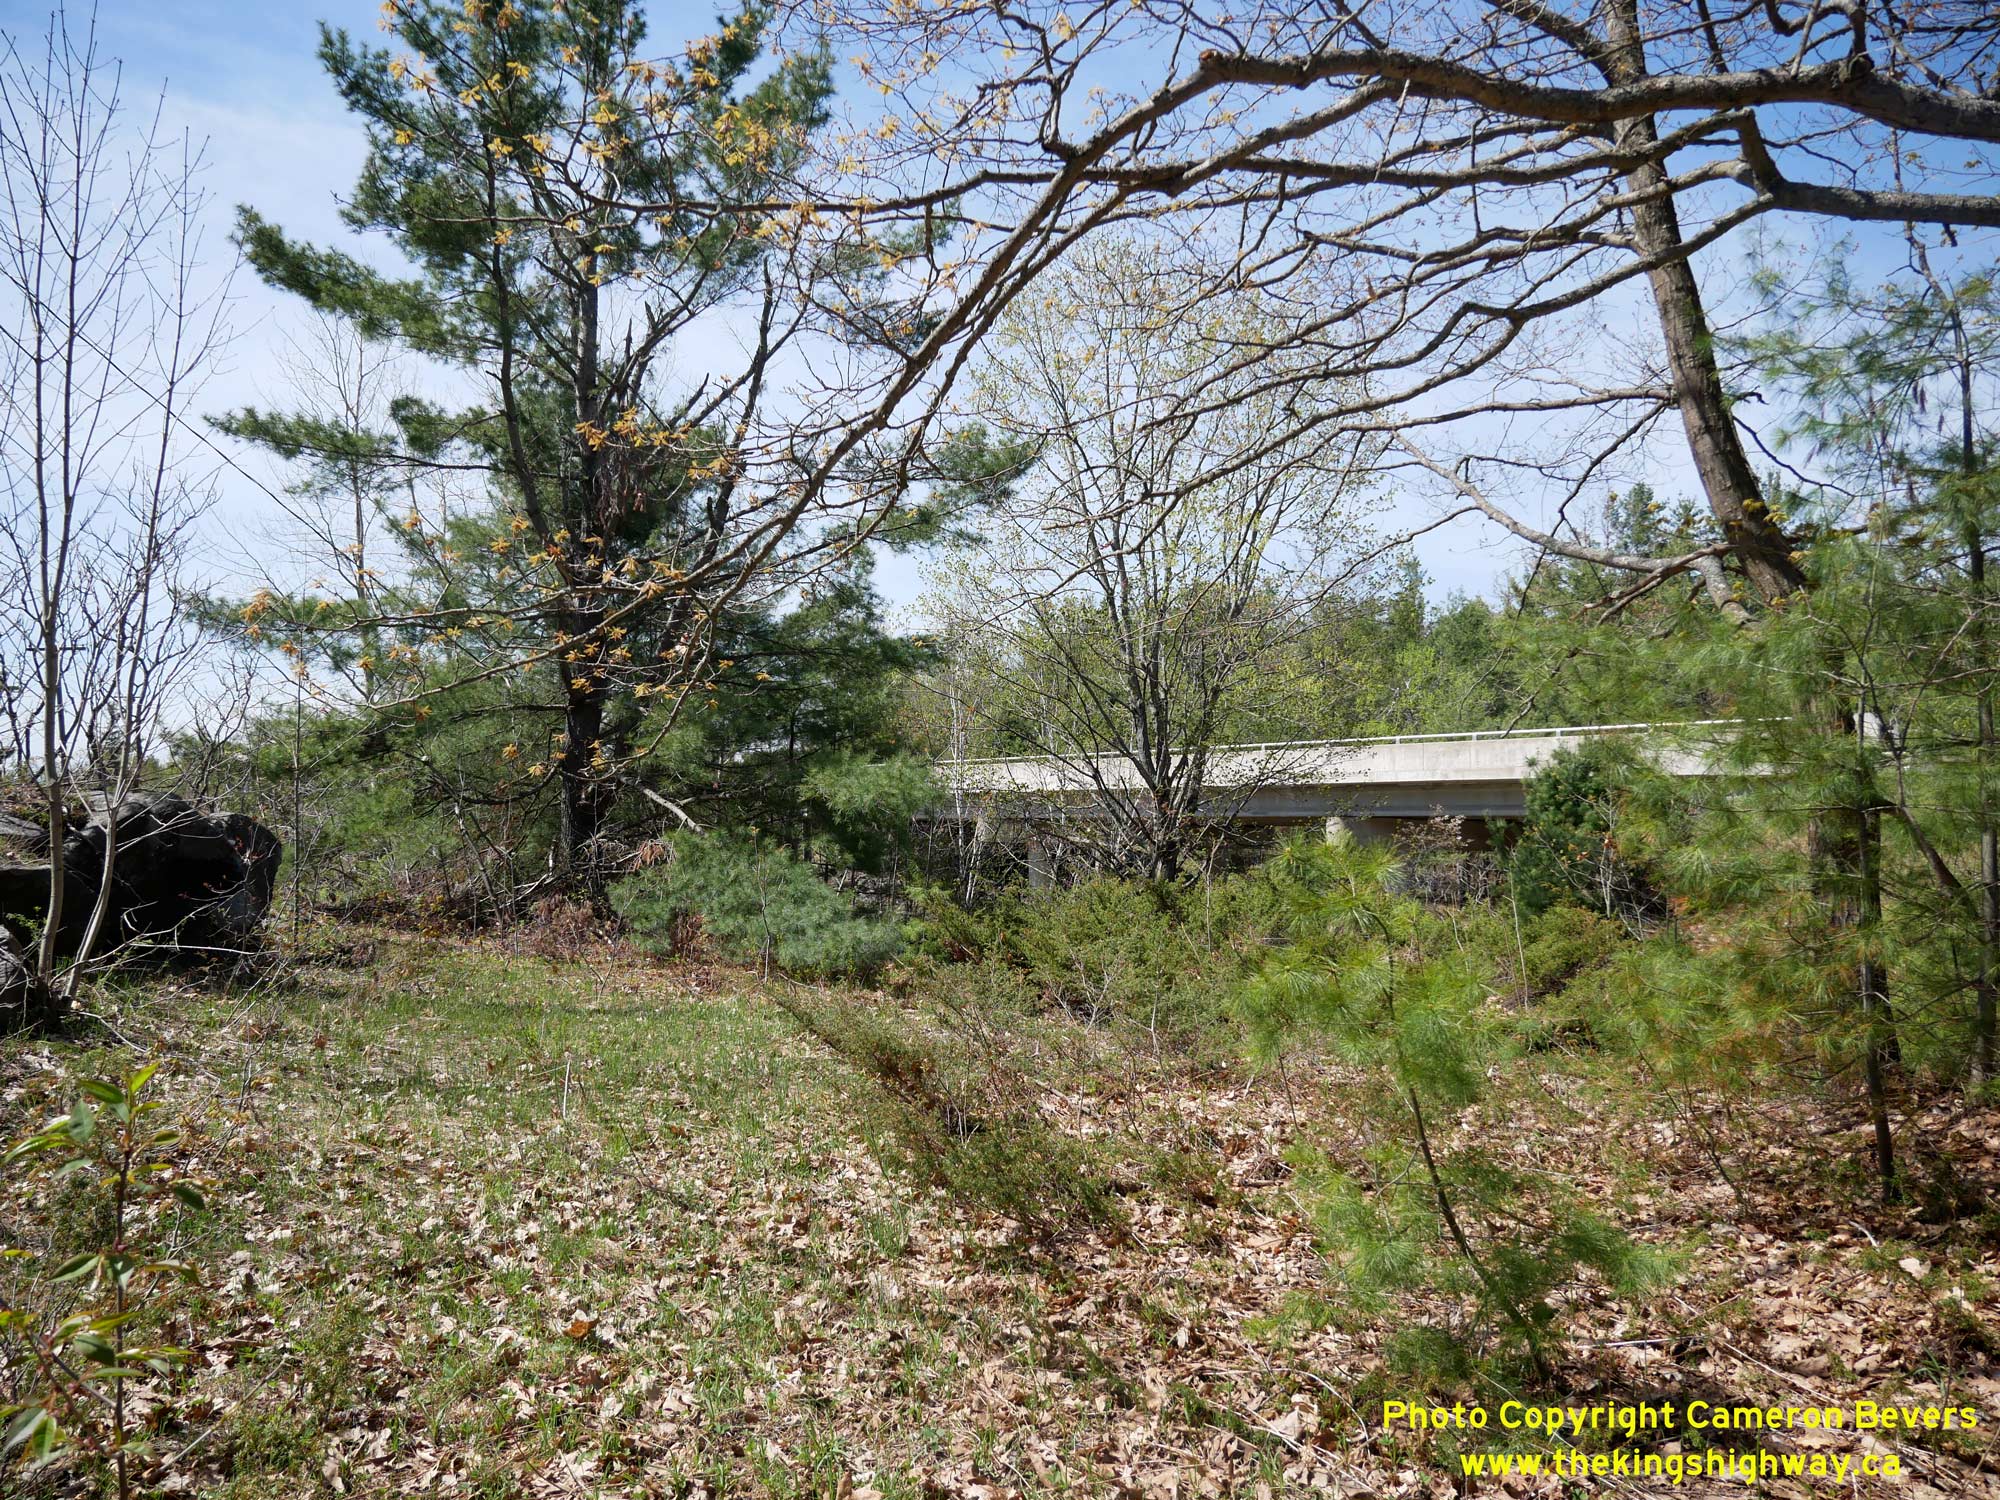
 Left - Site of the old Bala CNR Overhead, facing south from the north approach. While the southern approach to the old Bala CNR Overhead was largely
obliterated during construction of the new highway in the early 1970s, there was also a fairly sharp horizontal curve situated just beyond the bridge. This added yet
another hazard to an already notorious section of the highway. The replacement bridge over the CNR can be seen in the background. See an
Enlarged Photo Here. Left - Site of the old Bala CNR Overhead, facing south from the north approach. While the southern approach to the old Bala CNR Overhead was largely
obliterated during construction of the new highway in the early 1970s, there was also a fairly sharp horizontal curve situated just beyond the bridge. This added yet
another hazard to an already notorious section of the highway. The replacement bridge over the CNR can be seen in the background. See an
Enlarged Photo Here.(Photograph taken on May 17, 2026 - © Cameron Bevers) Right - Facing north along the abandoned alignment of Hwy 69 from the northern end of the old Bala CNR Overhead. Apart from a series of deep rock cuts and
residual traces of grading, nothing else remains of the old highway. From here, the old highway rounded a sharp horizontal curve to the left, and then descended a
steep downhill grade on its route north towards Foot's Bay. The relocated highway near Barrett Lake eliminated these steep grades on the original highway and provided
much safer crossings of the two railways. See an Enlarged Photo Here.(Photograph taken on May 17, 2026 - © Cameron Bevers) 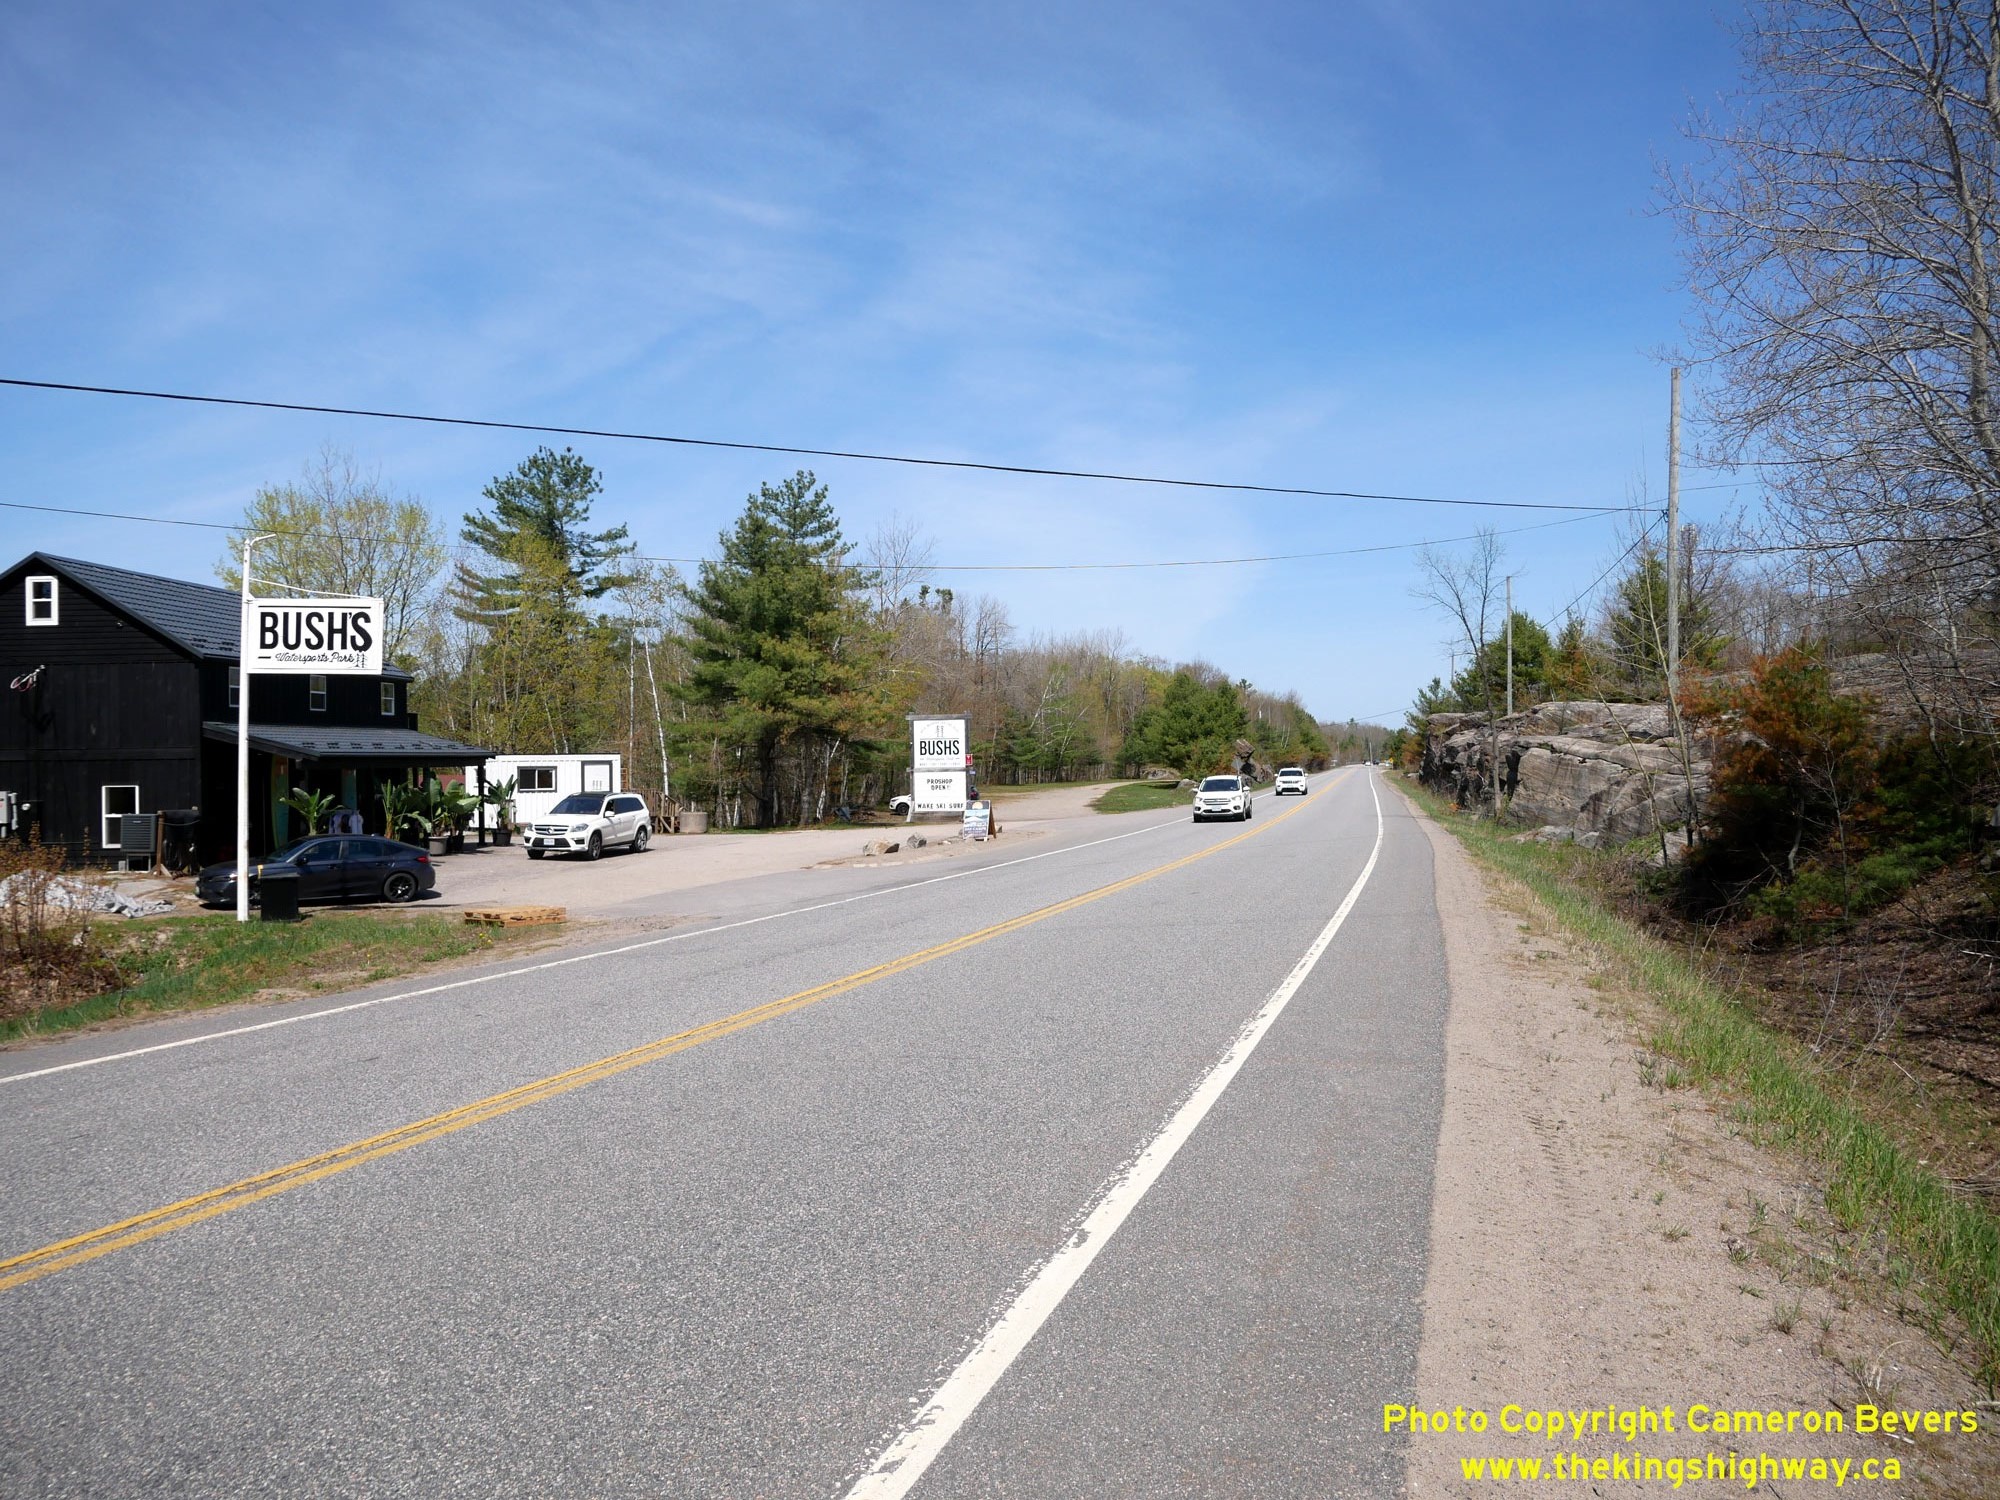
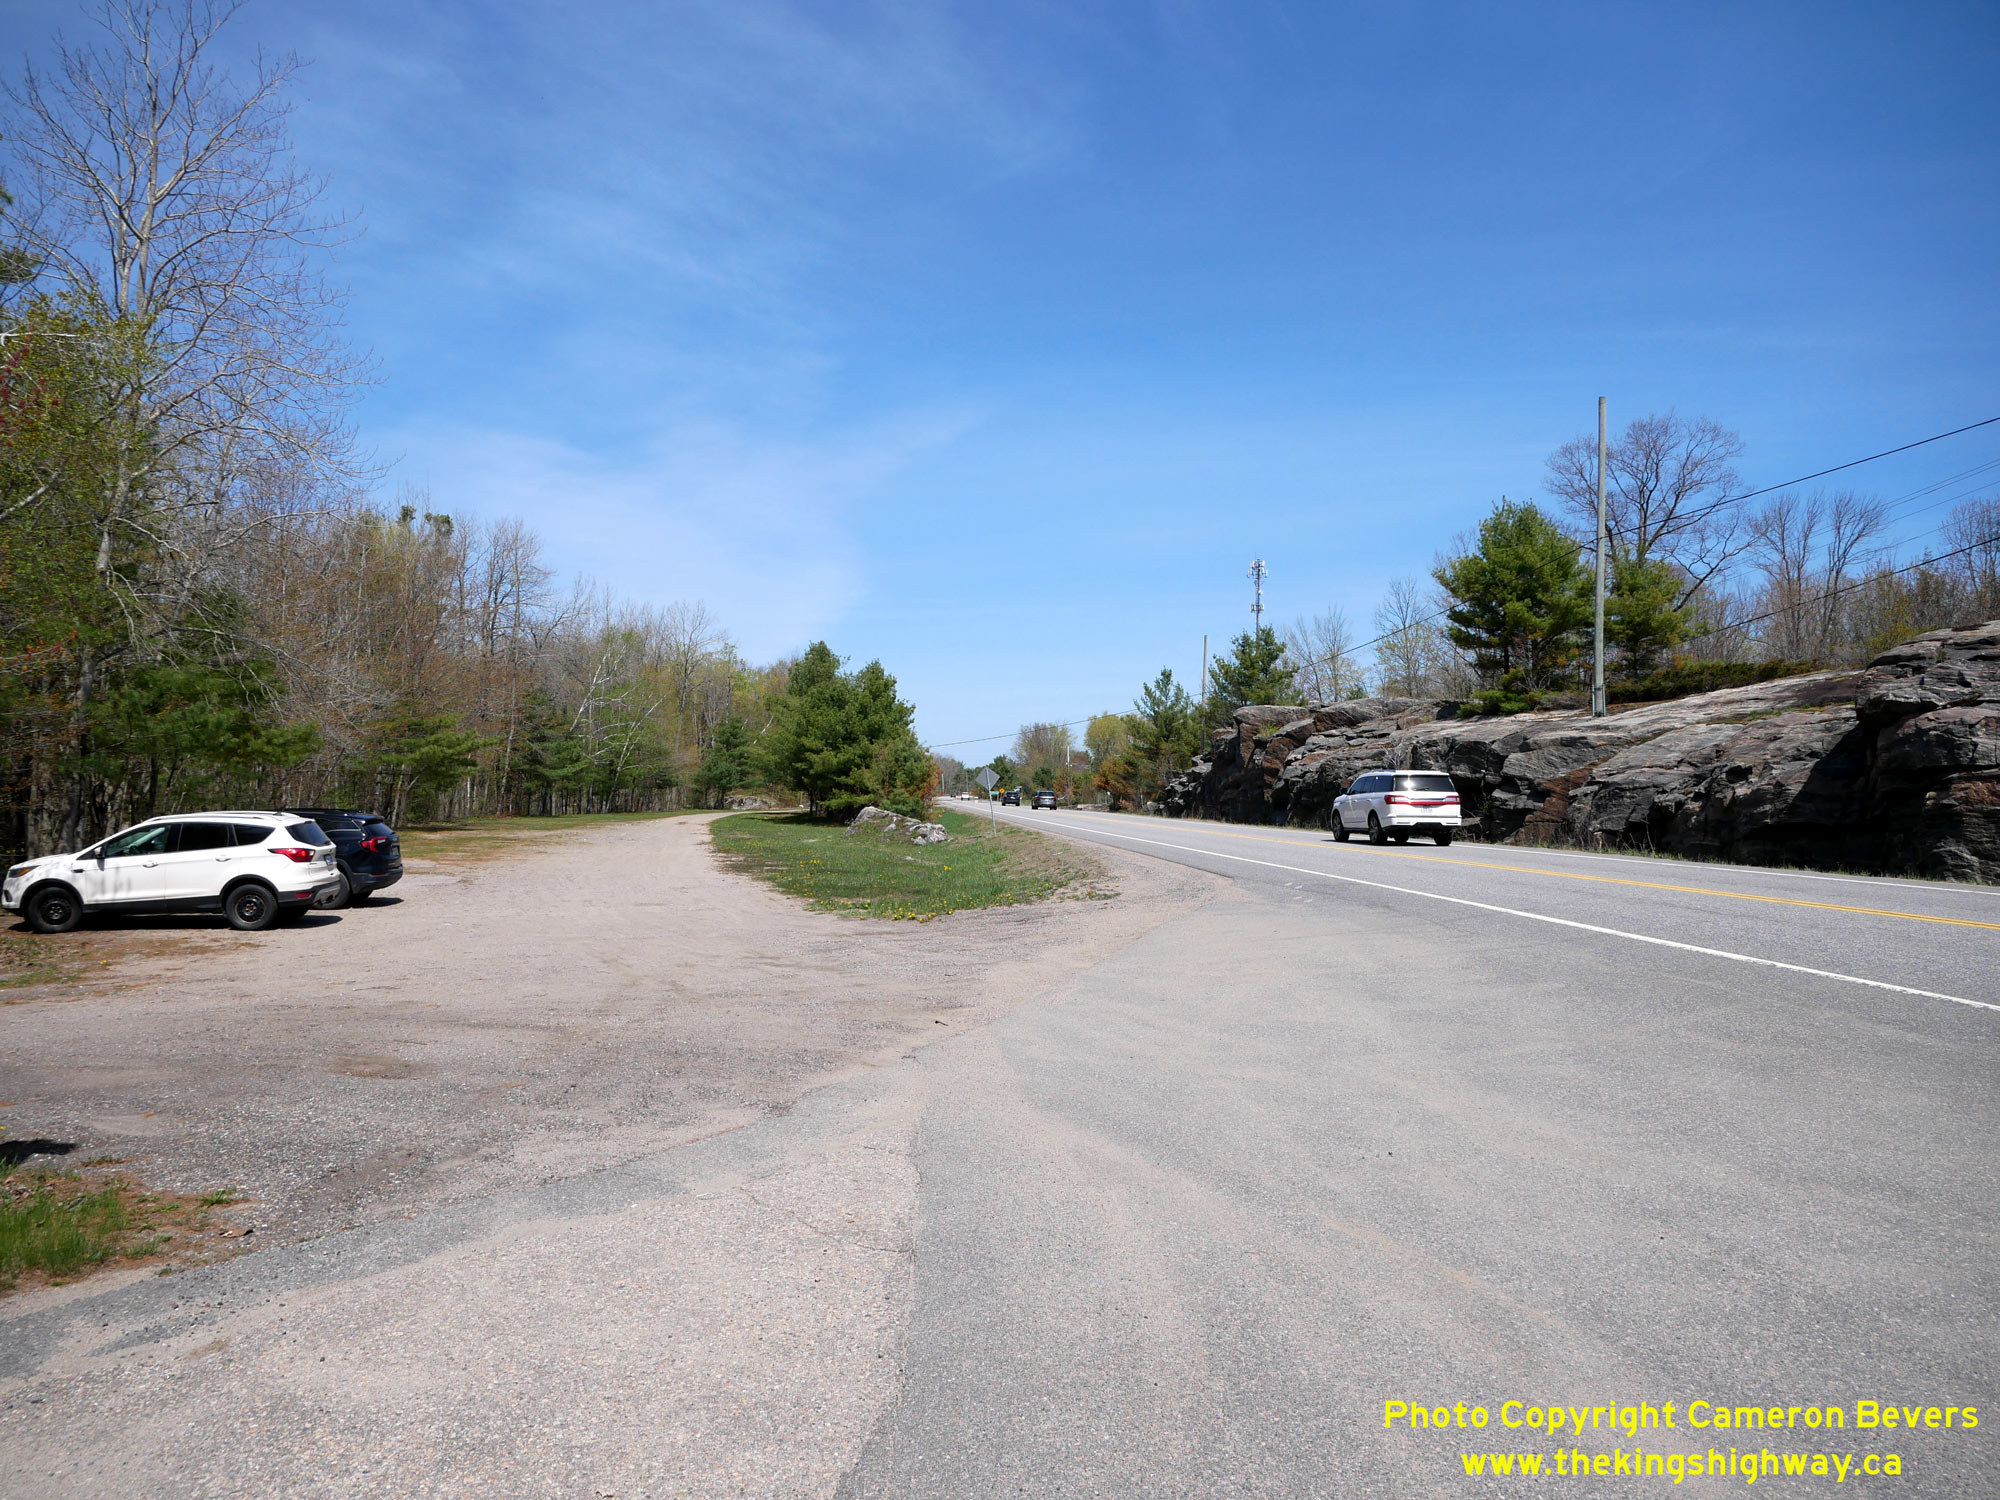 Left - View of Hwy 169 facing north from Barrett Lake, about 2 km north of Bala. A deep rock cut was excavated here in the early 1970s in order to straighten
out the highway and to obtain the fill material required for the new highway diversion. Note the old highway alignment to the left of the rock cut, which is now a
private driveway. See an Enlarged Photo Here. Left - View of Hwy 169 facing north from Barrett Lake, about 2 km north of Bala. A deep rock cut was excavated here in the early 1970s in order to straighten
out the highway and to obtain the fill material required for the new highway diversion. Note the old highway alignment to the left of the rock cut, which is now a
private driveway. See an Enlarged Photo Here.(Photograph taken on May 17, 2026 - © Cameron Bevers) Right - View of the old and new highways near Barrett Lake. Originally, Hwy 69 continued to curve towards the lower right corner of this photo, crossing the
relocated highway on its route south towards the old Bala CNR Overhead. A rock cut was blasted through the nearby hill in the early 1970s, with much of of the
blasted rock removed from the cut used to build up the north approach to the current Bala CNR Overhead beside Barrett Lake. Highway engineers need to ensure that "cut"
and "fill" quantities remain reasonably balanced on highway construction projects, as transporting excavated or required fill material any great distance can become
very costly. See an Enlarged Photo Here.(Photograph taken on May 17, 2026 - © Cameron Bevers) 
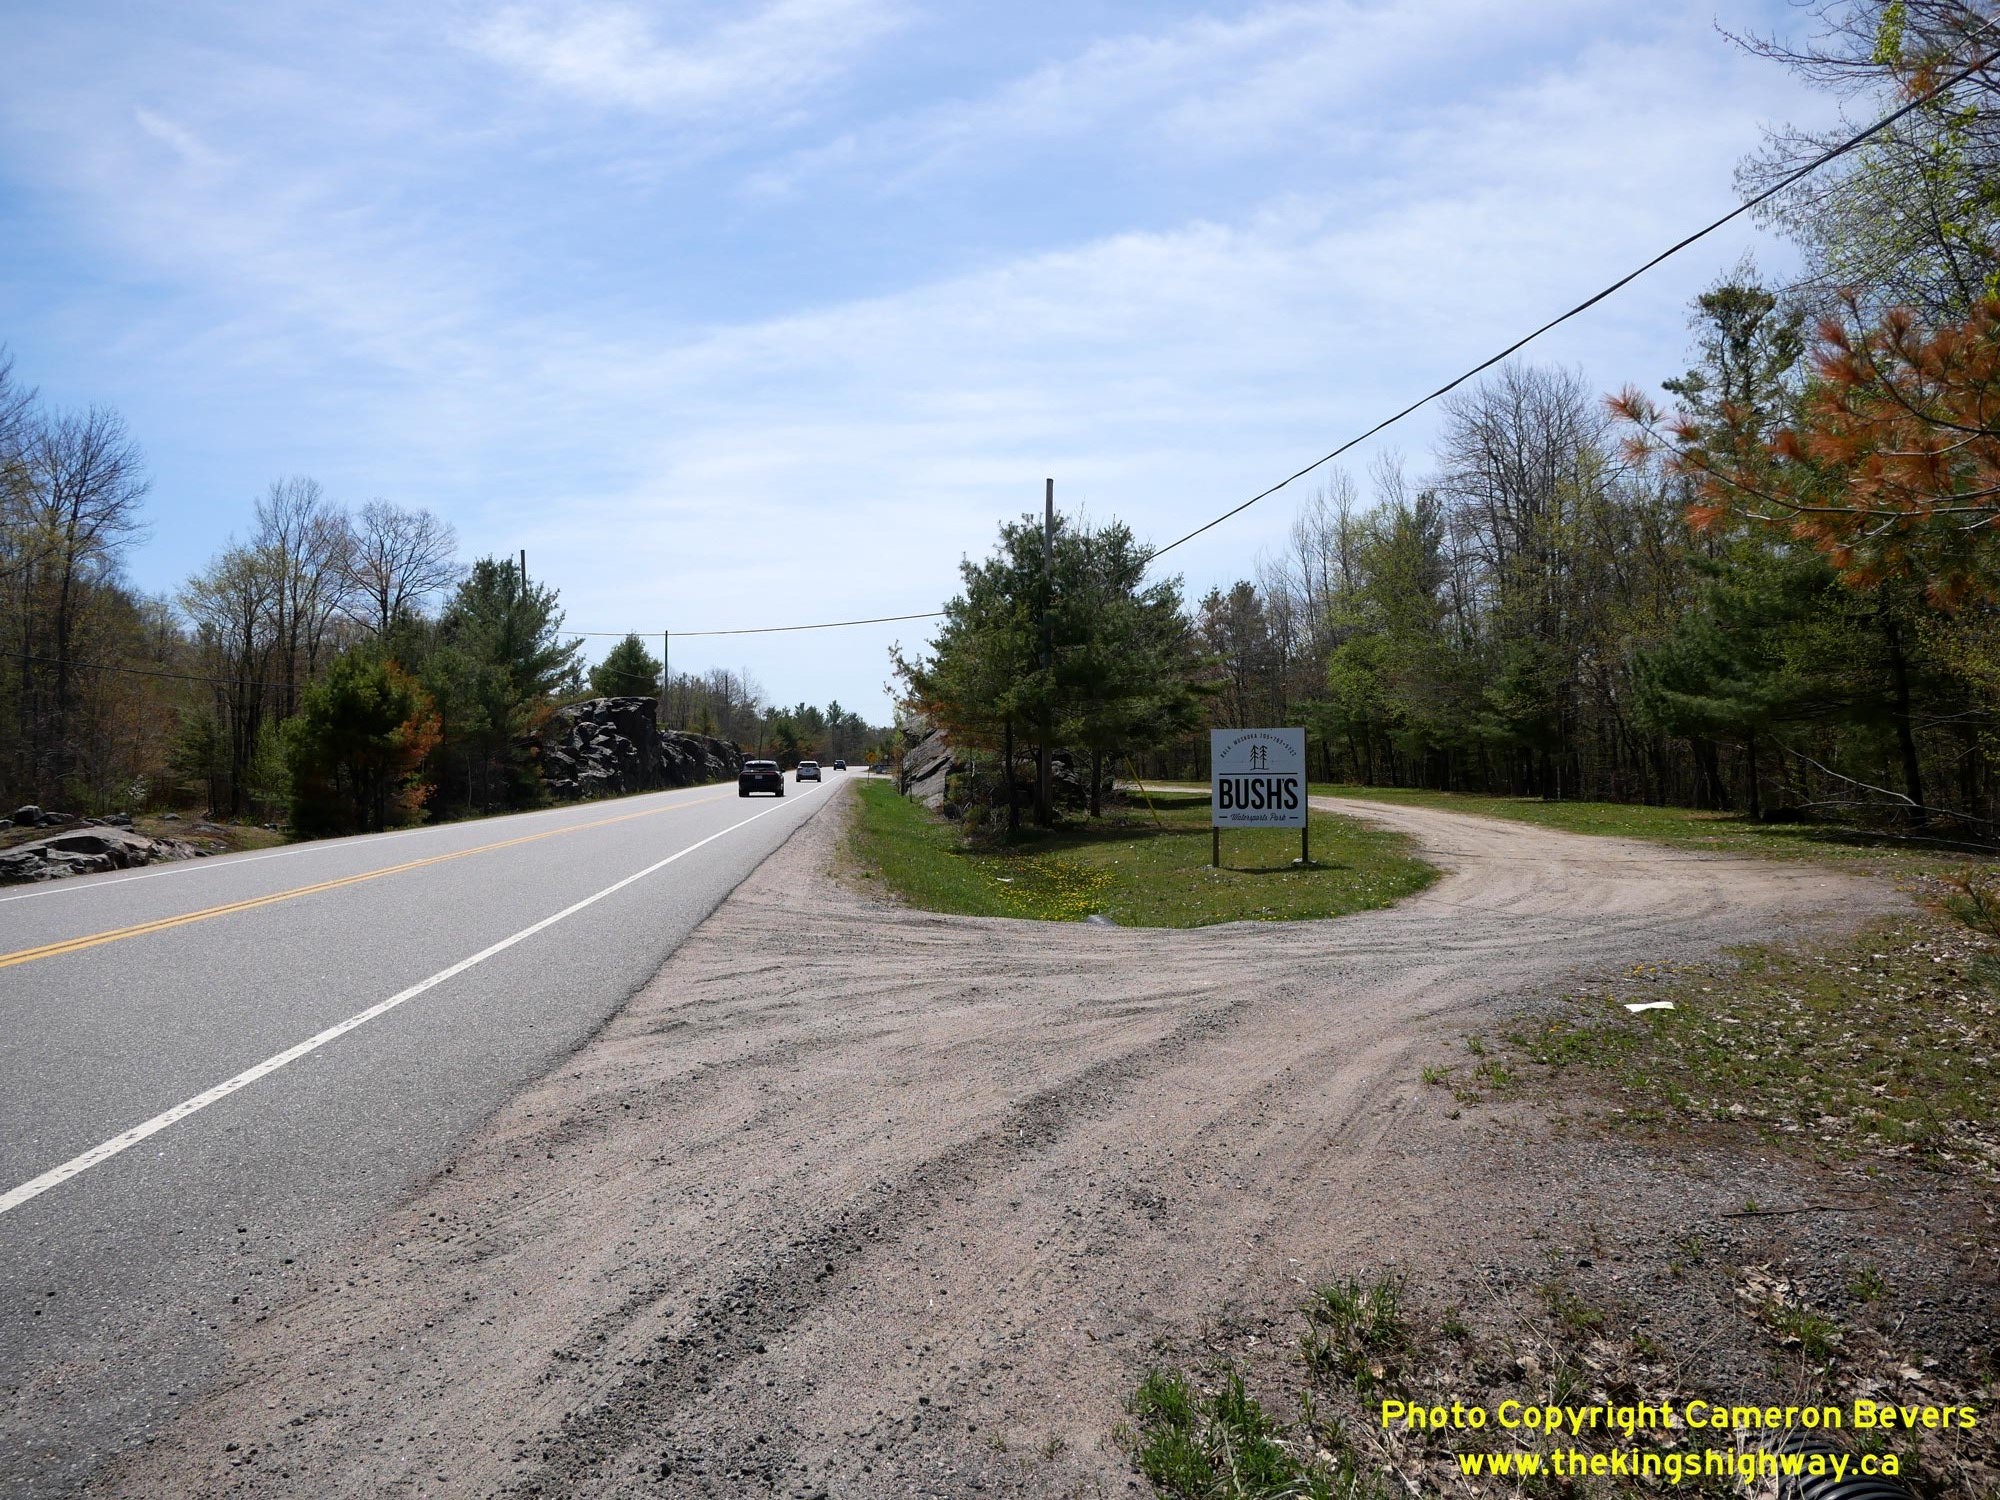 Left - The geometry of this old horizontal curve on the original highway was fairly good, but it was still bypassed anyways - likely due to the need for
additional fill to construct the northern approach to the Bala CNR Overhead. The high rock fill carrying the relocated highway measures about 30 feet (9 metres) in
height above Barrett Lake. There was also a requirement to displace muskeg to a depth of about 10 feet (3 metres) below the ground level along the revised highway's
alignment, in order to construct this fill on top of the underlying bedrock. The volume of rock blasted, hauled and placed in order to build the new highway beside
Barrett Lake is quite remarkable! See an Enlarged Photo Here. Left - The geometry of this old horizontal curve on the original highway was fairly good, but it was still bypassed anyways - likely due to the need for
additional fill to construct the northern approach to the Bala CNR Overhead. The high rock fill carrying the relocated highway measures about 30 feet (9 metres) in
height above Barrett Lake. There was also a requirement to displace muskeg to a depth of about 10 feet (3 metres) below the ground level along the revised highway's
alignment, in order to construct this fill on top of the underlying bedrock. The volume of rock blasted, hauled and placed in order to build the new highway beside
Barrett Lake is quite remarkable! See an Enlarged Photo Here.(Photograph taken on May 17, 2026 - © Cameron Bevers) Right - Facing south along Hwy 169 towards Bala near Barrett Lake, showing both the old and relocated highways. The old highway at right was closed to through
traffic in the early 1970s. The relocated highway at left offered a much more direct route to Bala, along with two new railway grade separations at the nearby CNR and
CPR. See an Enlarged Photo Here.(Photograph taken on May 17, 2026 - © Cameron Bevers) 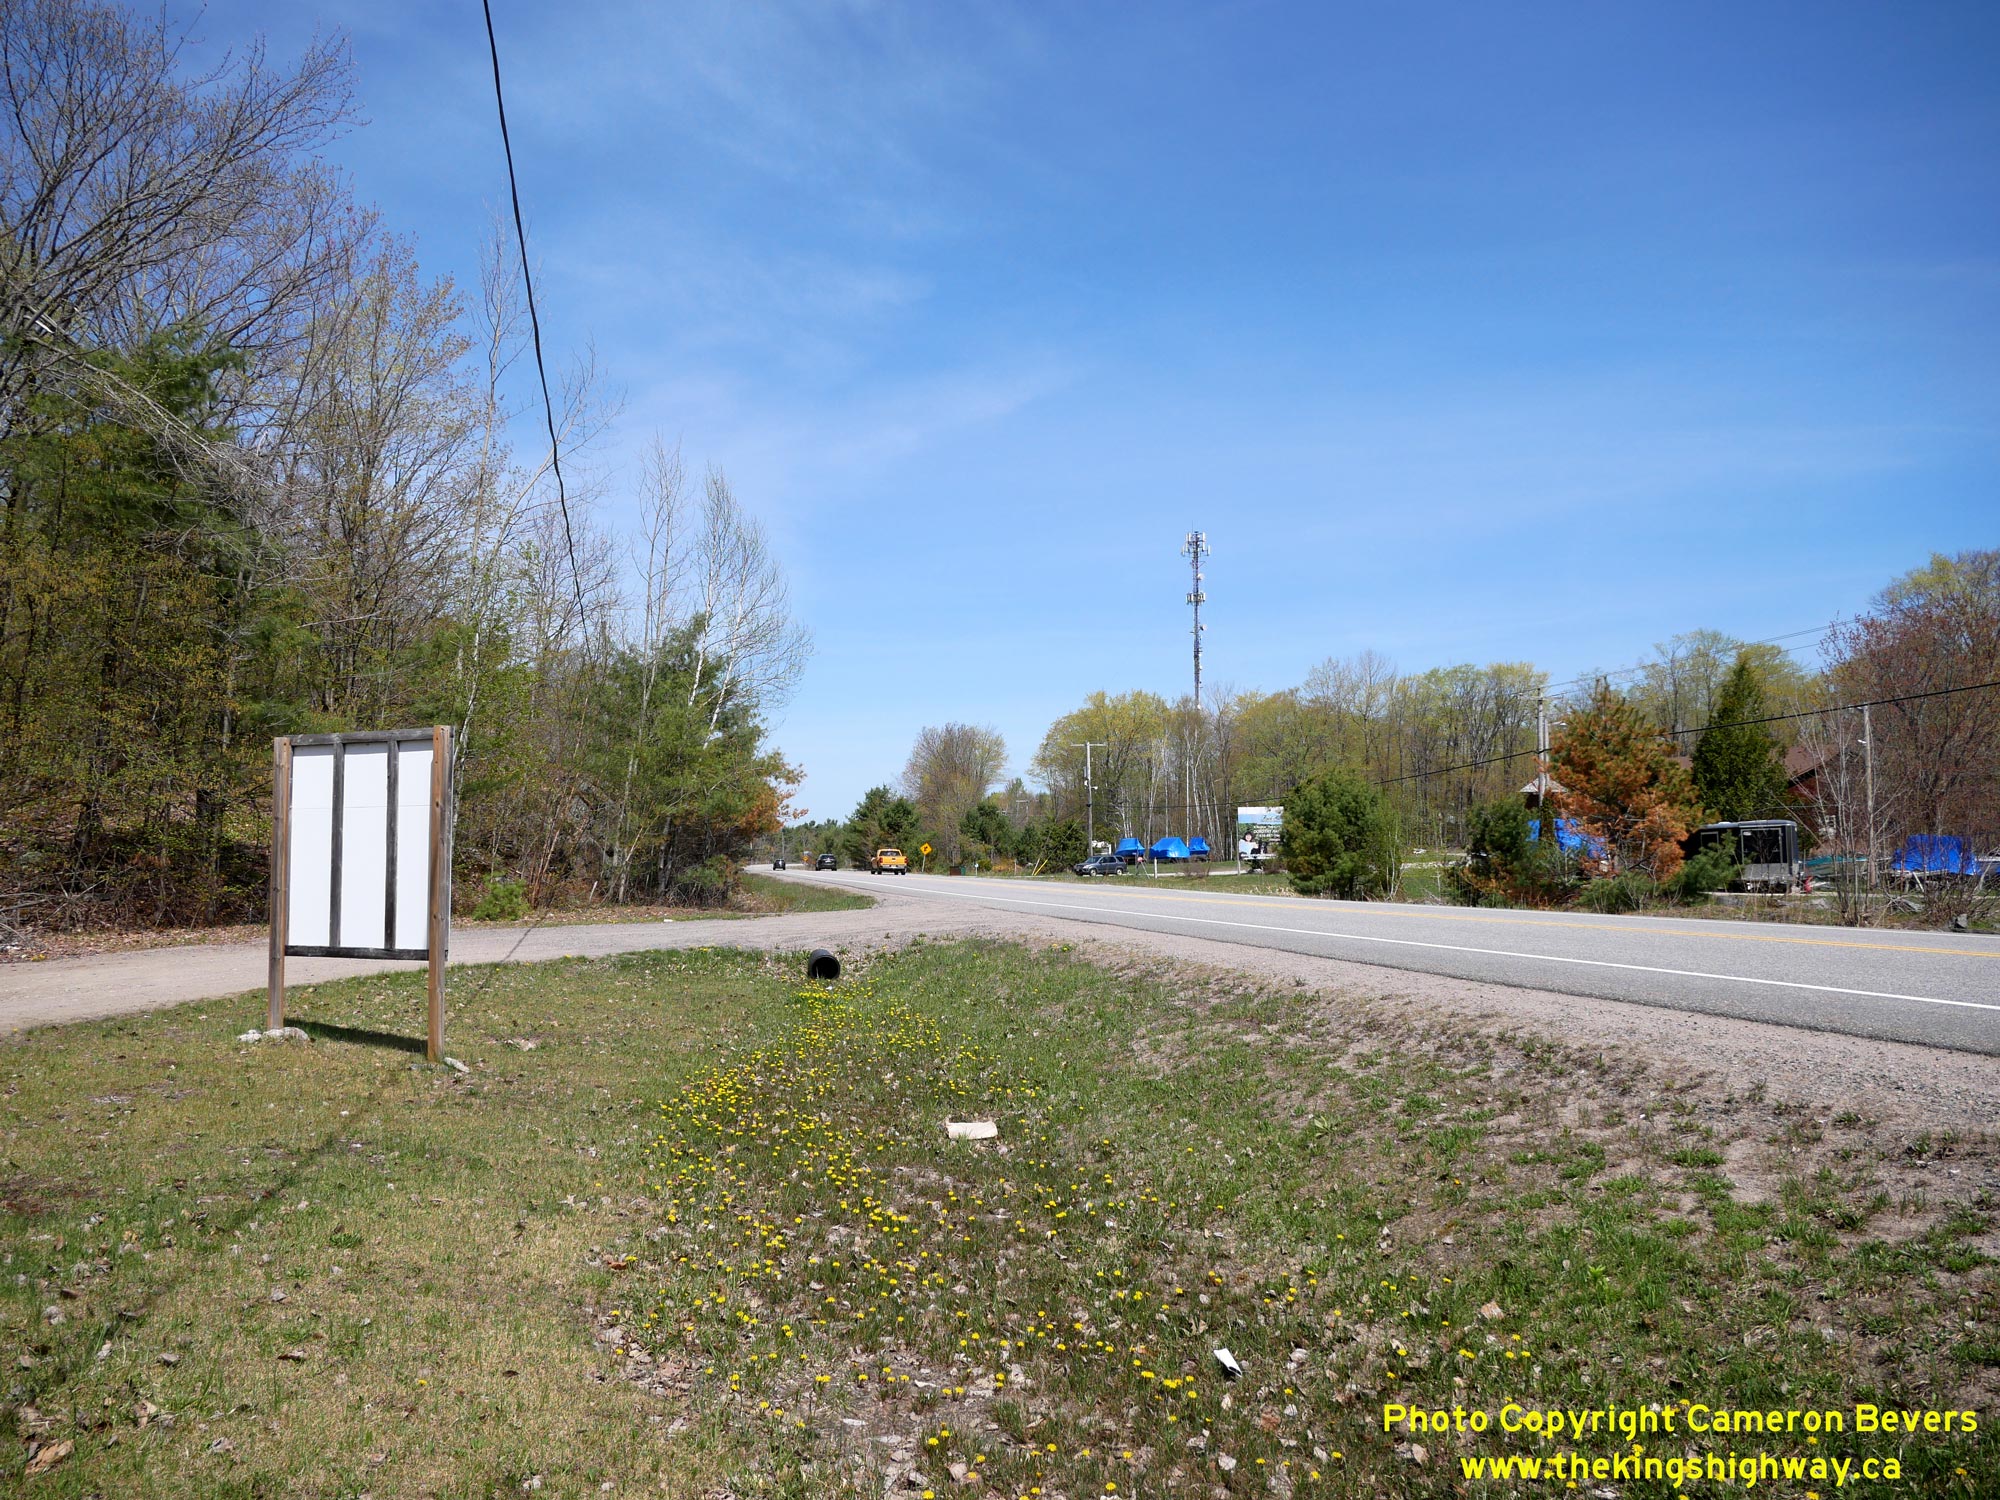
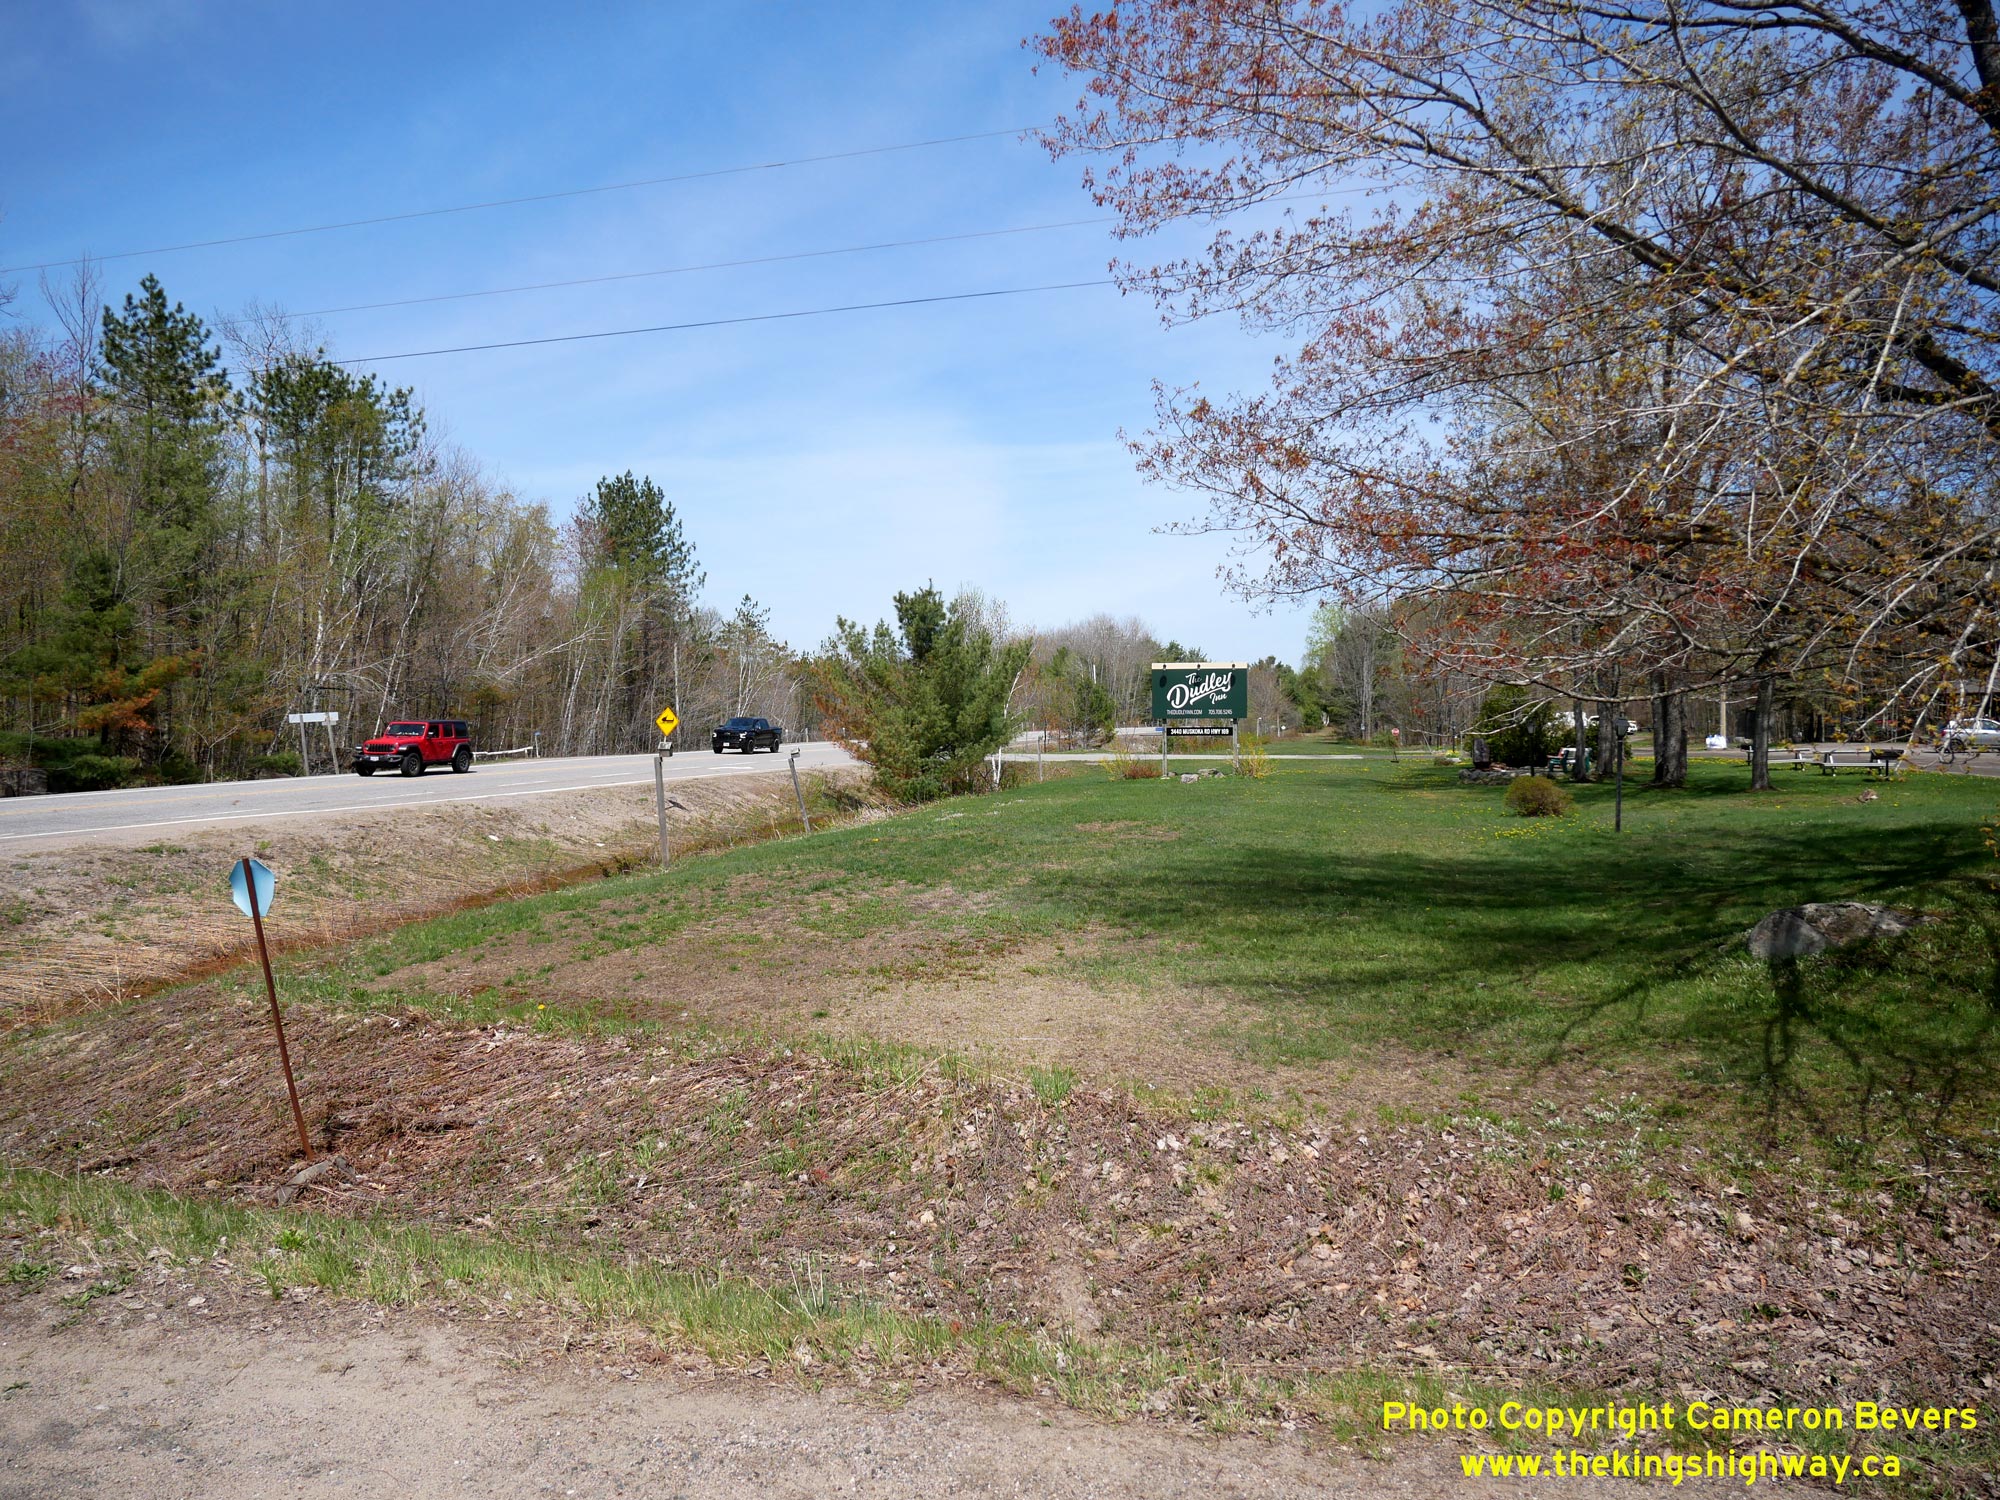 Left - The original highway alignment crosses back over to the east side of Hwy 169 approaching Dudley. The old highway was mostly graded out in front of the
marine dealership across the road and is no longer apparent today. This point marks the new construction limits of Contract #1969-222, where the relocated highway
tied back into the existing highway - albeit temporarily. Under Contract #1972-11, further realignments were made to Hwy 69 from the Barrett Lake Rock Cut northerly
to Butterfly Lake at Glen Orchard. See an Enlarged Photo Here. Left - The original highway alignment crosses back over to the east side of Hwy 169 approaching Dudley. The old highway was mostly graded out in front of the
marine dealership across the road and is no longer apparent today. This point marks the new construction limits of Contract #1969-222, where the relocated highway
tied back into the existing highway - albeit temporarily. Under Contract #1972-11, further realignments were made to Hwy 69 from the Barrett Lake Rock Cut northerly
to Butterfly Lake at Glen Orchard. See an Enlarged Photo Here.(Photograph taken on May 17, 2026 - © Cameron Bevers) Right - View of the grading for the original highway at Dudley, with the current route of Hwy 169 at left. Under Contract #1972-11, only selected sections of
Hwy 69 were reconstructed on a new alignment, including this section in front of the Dudley Inn. However, a fair portion of today's Hwy 169 from Dudley to Glen
Orchard still follows the same alignment which has been in use since the late 1930s. See an
Enlarged Photo Here.(Photograph taken on May 17, 2026 - © Cameron Bevers) 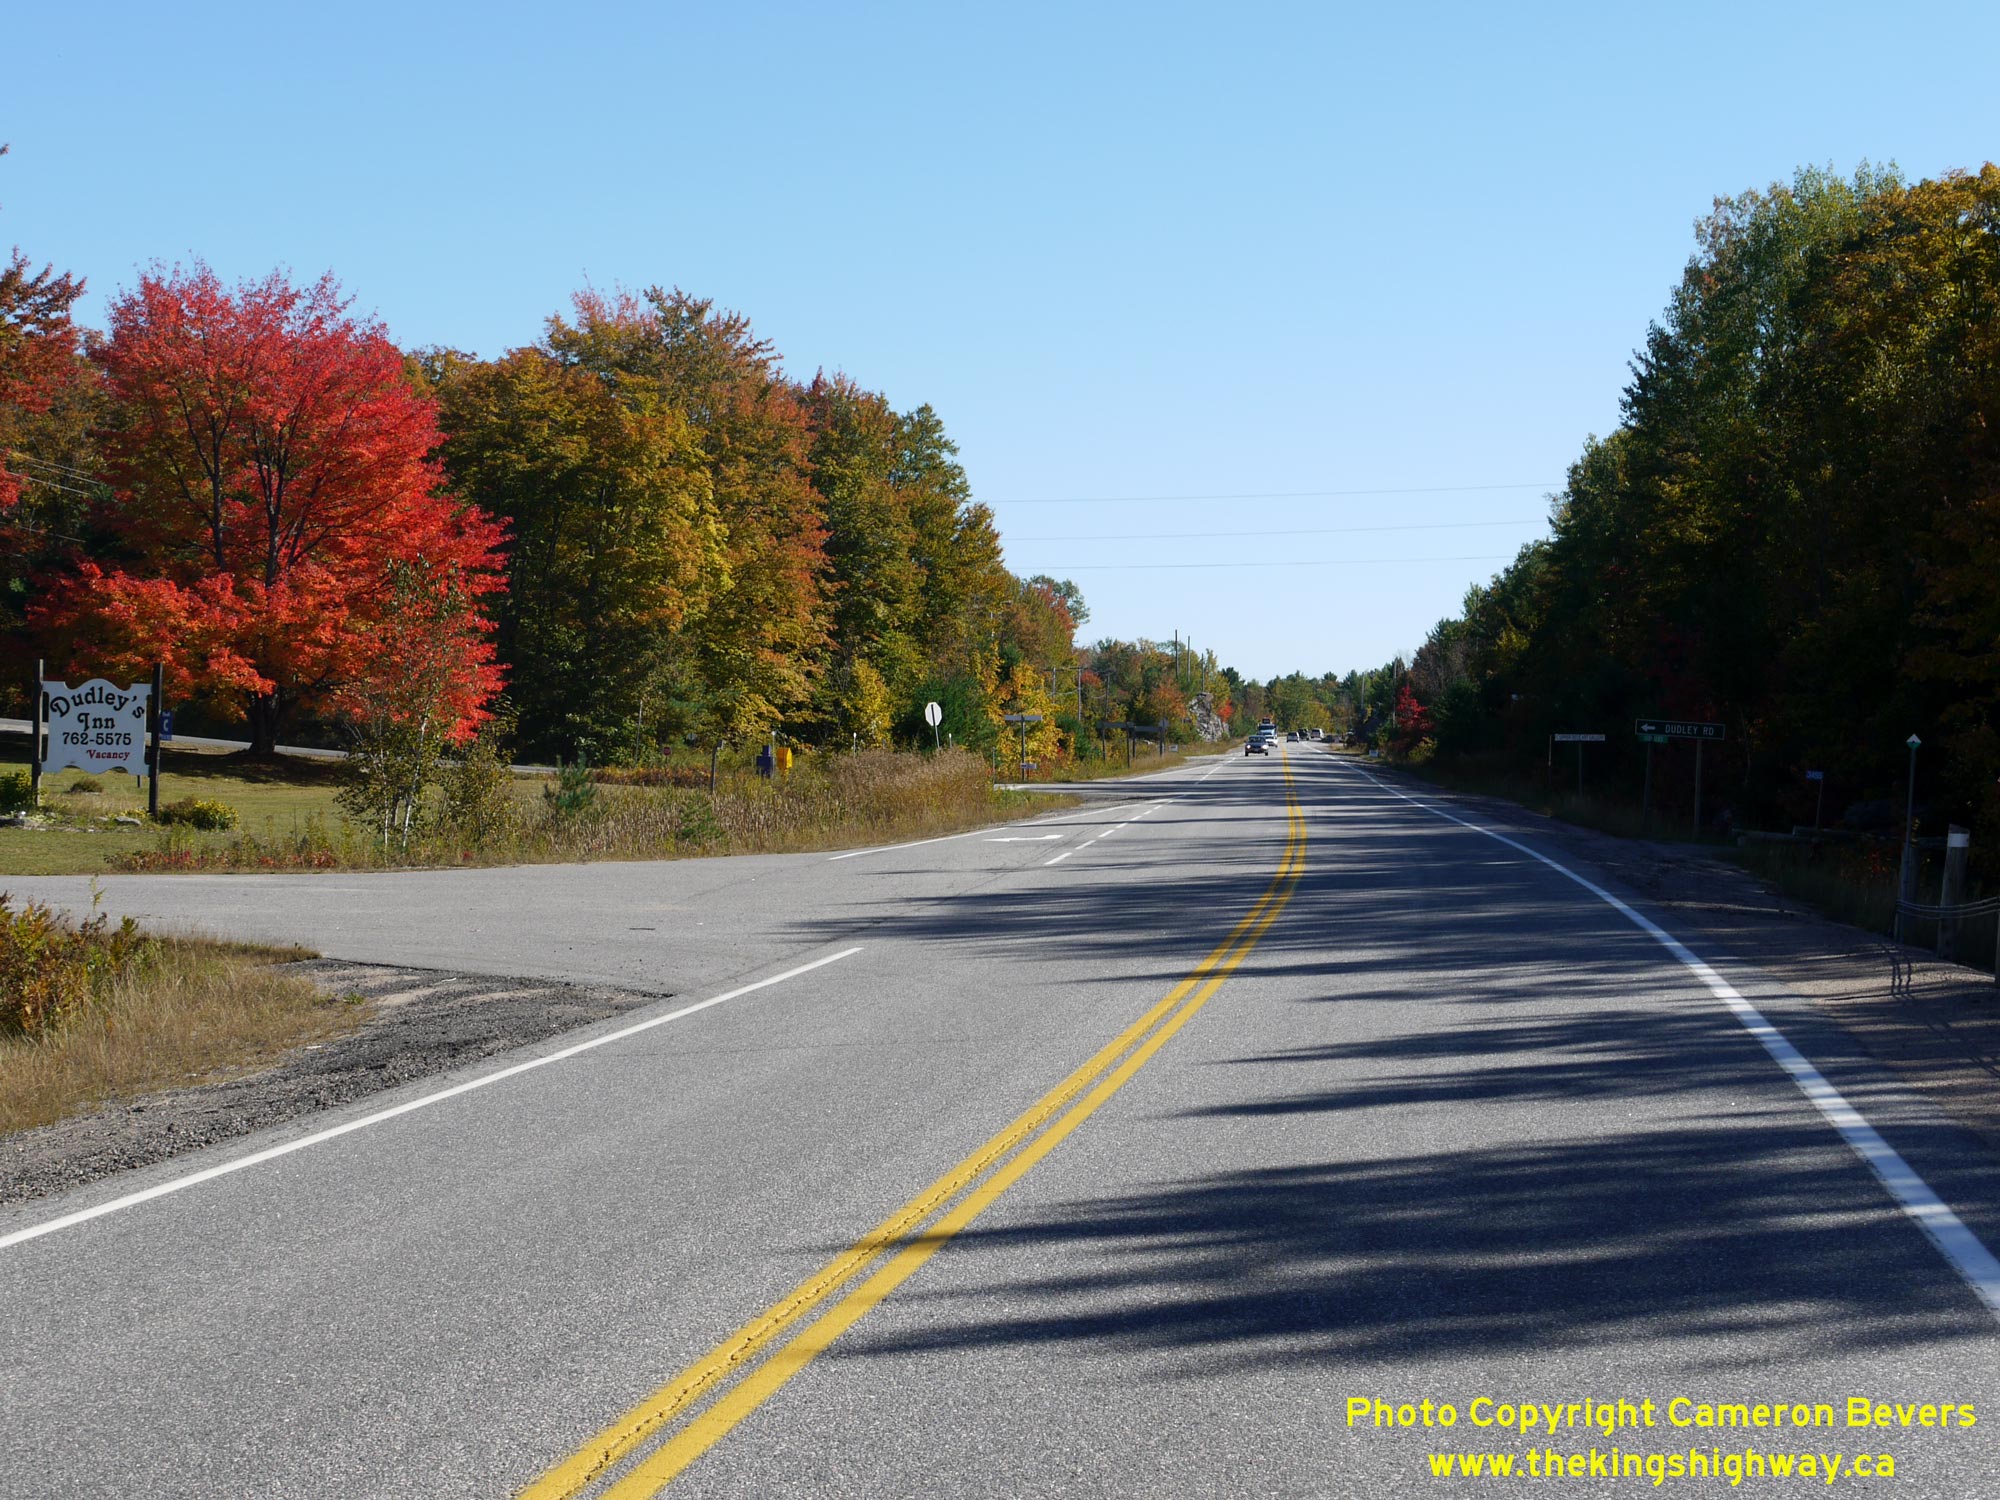
 Left - Fall colours along Hwy 169 near Dudley, located about 2 km north of Bala. See an
Enlarged Photo Here. Left - Fall colours along Hwy 169 near Dudley, located about 2 km north of Bala. See an
Enlarged Photo Here.(Photograph taken on September 27, 2013 - © Cameron Bevers) Right - Facing north along Hwy 169 approaching the start of the Medora Lake Diversion beween Dudley and Glen Orchard. A 3 km section of Hwy 69 was relocated
onto an improved alignment between 1936 and 1938. This was done to bypass a narrow and winding part of the original highway and also to marginally shorten the highway
distance to Parry Sound. The distance from Bala to Parry Sound was reduced by about 1 km as a result of the Medora Lake Diversion. The new highway diversion was
constructed under Contract #1936-118, soon after the Department of Highways of Ontario (DHO) began to take over construction responsibilities for main roads in
Northern Ontario. See an Enlarged Photo Here.(Photograph taken on May 17, 2026 - © Cameron Bevers) 
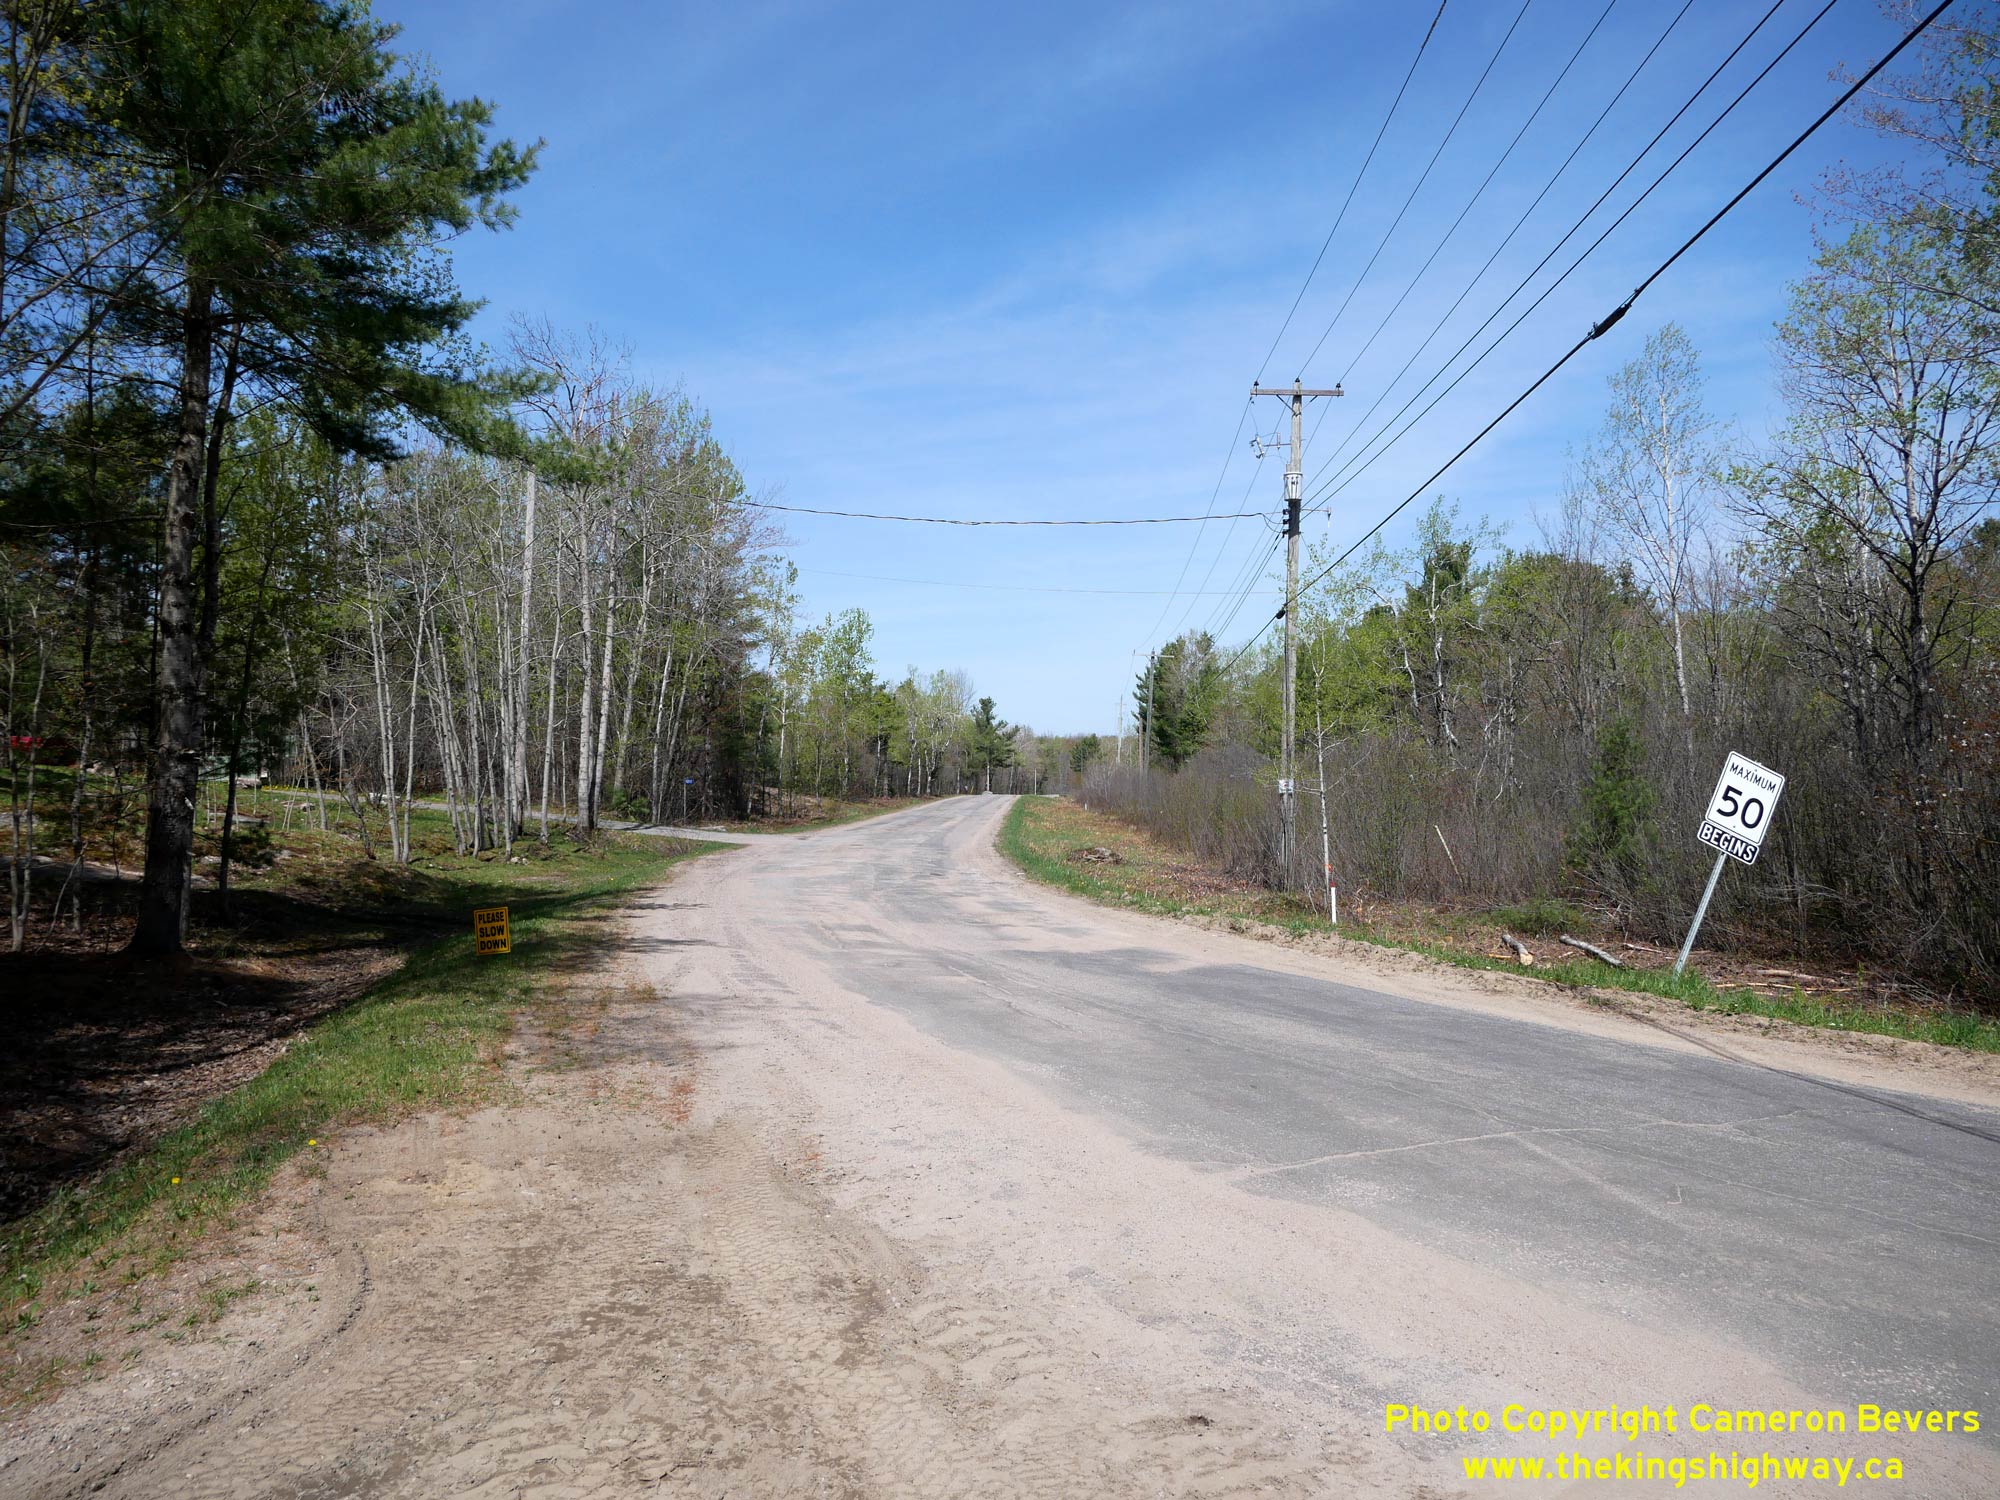 Left - Facing south along Hwy 169 towards Bala near Medora Lake Road. The relocated highway can be seen at right, while traces of the original highway's route
can be seen straight ahead. As trees continue to grow in the years ahead, there will eventually be no obvious trace of the old highway's grading. See an
Enlarged Photo Here. Left - Facing south along Hwy 169 towards Bala near Medora Lake Road. The relocated highway can be seen at right, while traces of the original highway's route
can be seen straight ahead. As trees continue to grow in the years ahead, there will eventually be no obvious trace of the old highway's grading. See an
Enlarged Photo Here.(Photograph taken on May 17, 2026 - © Cameron Bevers) Right - Facing north along Medora Lake Road (Old Hwy 69) from the south junction of the relocated highway (the Medora Lake Diversion) near Dudley. Medora Lake
Road forms a complete loop and returns back to Hwy 169 about 3 km to the north. In additition to the bypassed loop of Hwy 69 on the western side of the current
highway, another shorter loop follows Acton Island Road on the eastern side of the current highway. See an
Enlarged Photo Here.(Photograph taken on May 17, 2026 - © Cameron Bevers) 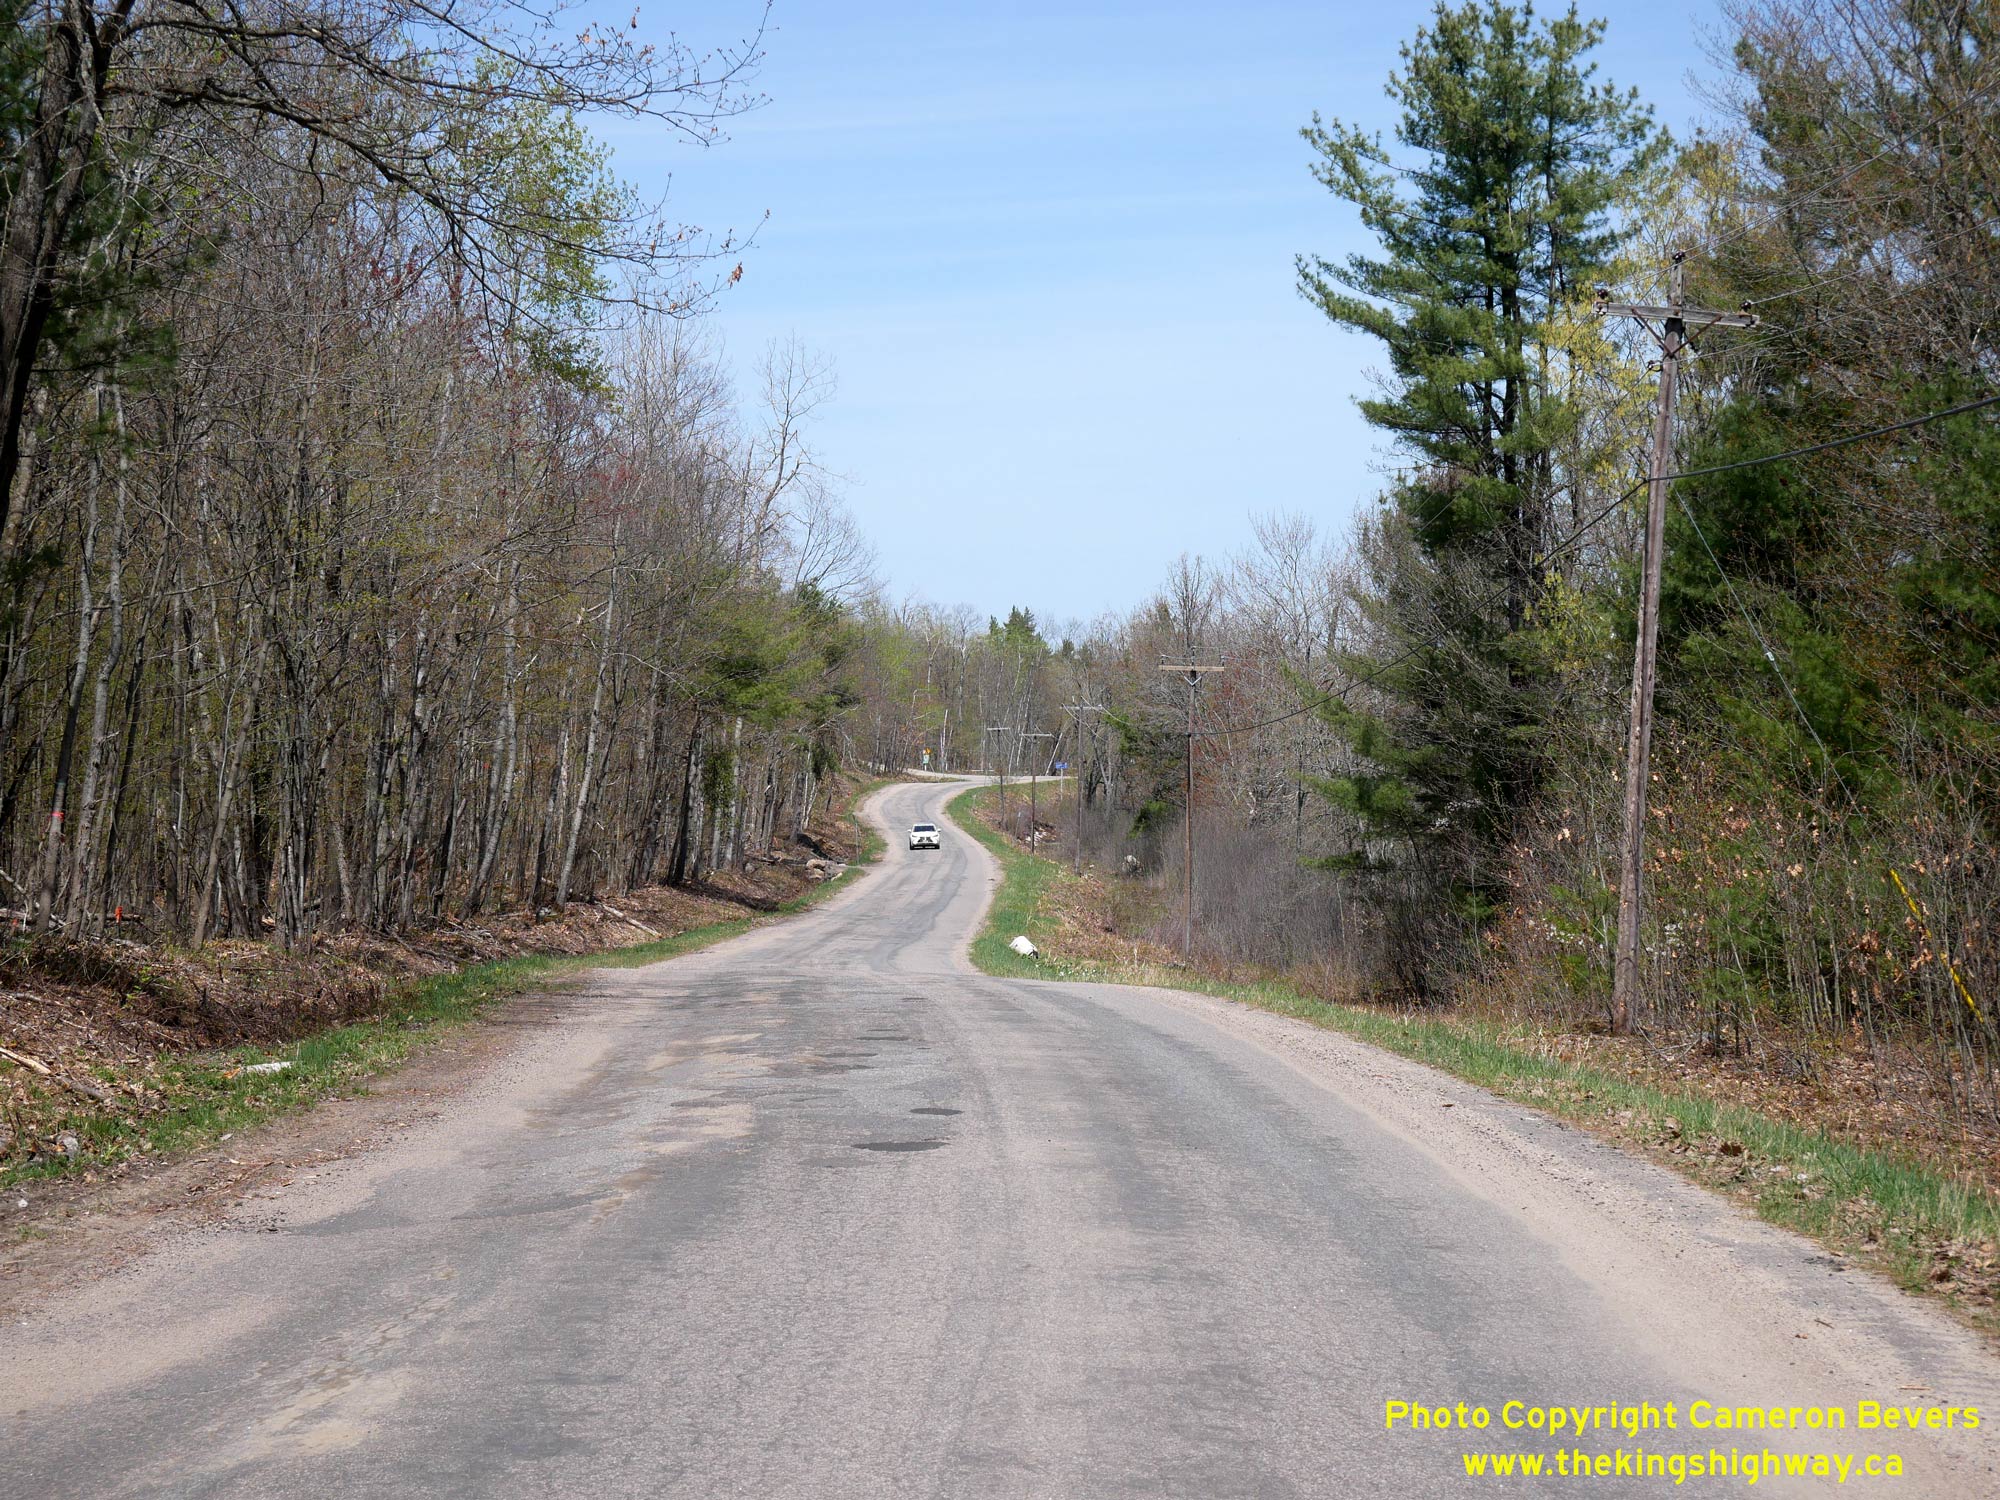
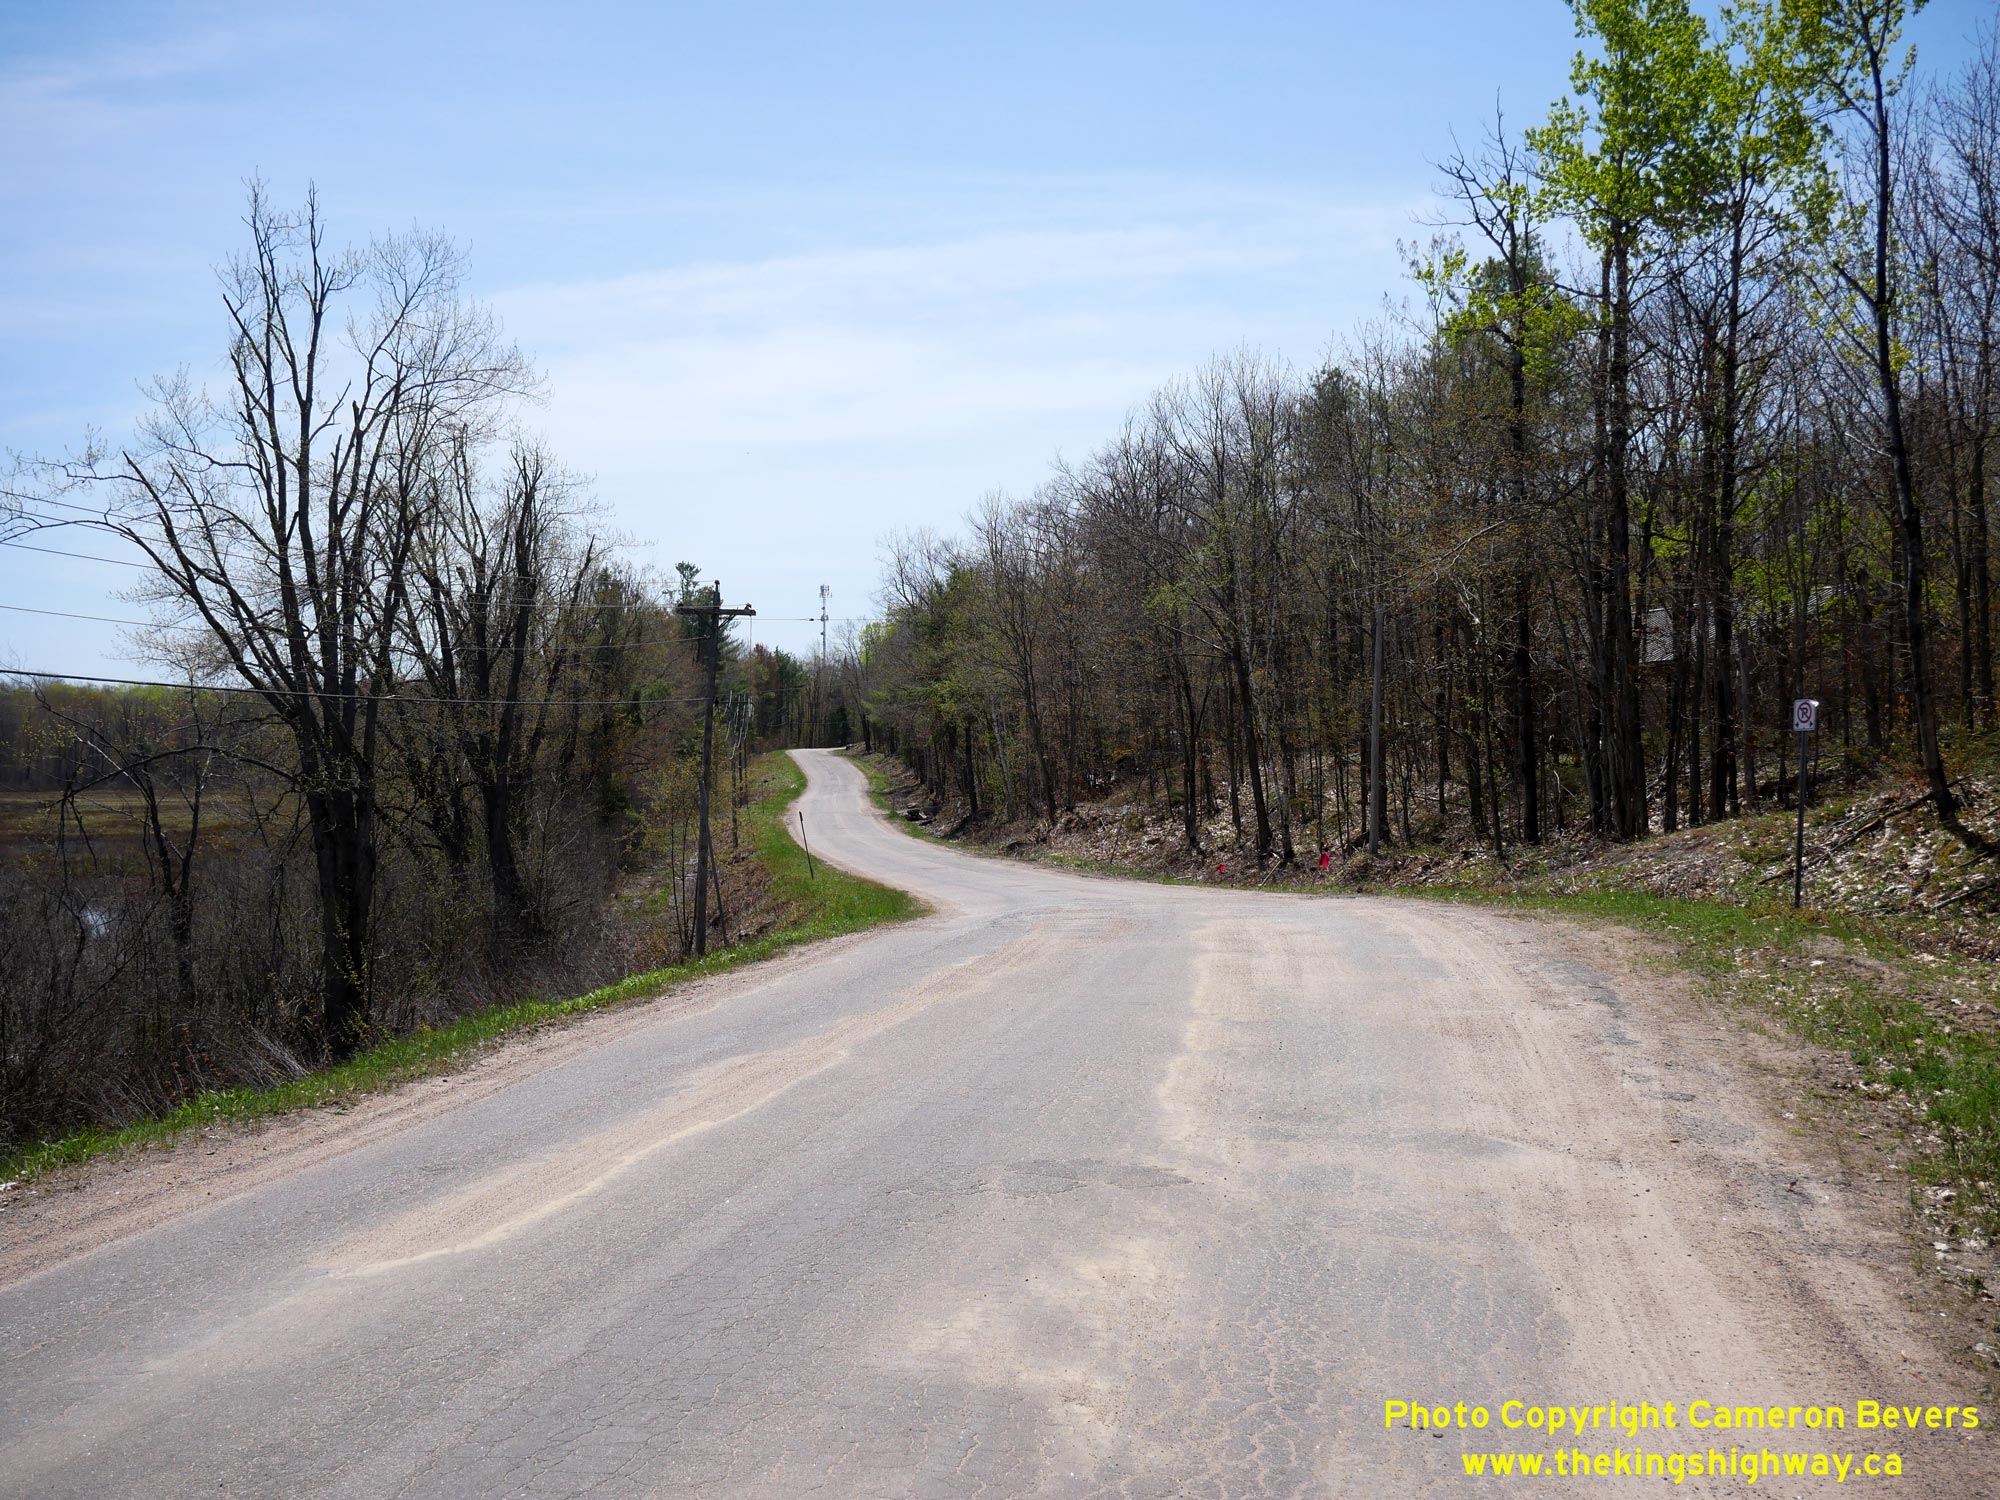 Left - View of Medora Lake Road (Old Hwy 69) between Dudley and Glen Orchard. For several years following the completion of the Medora Lake Diversion in 1938,
the DHO operated both the old and revised routes of Hwy 69. Provincial jurisdiction over Old Hwy 69 ended in the 1940s, when it was transferred back over to
municipal control, effective January 6, 1945. See an Enlarged Photo Here. Left - View of Medora Lake Road (Old Hwy 69) between Dudley and Glen Orchard. For several years following the completion of the Medora Lake Diversion in 1938,
the DHO operated both the old and revised routes of Hwy 69. Provincial jurisdiction over Old Hwy 69 ended in the 1940s, when it was transferred back over to
municipal control, effective January 6, 1945. See an Enlarged Photo Here.(Photograph taken on May 17, 2026 - © Cameron Bevers) Right - The old route of Hwy 69 north of Dudley was rather winding and indirect. The old highway was replaced by a new, more direct highway in 1938. See an
Enlarged Photo Here.(Photograph taken on May 17, 2026 - © Cameron Bevers) 

Left - Former route of Hwy 69 (Medora Lake Road) approaching the Medora Creek Bridge, facing north towards Glen Orchard. This section of the original highway
north of Bala was bypassed by a new highway many decades ago. The old bridge still carries local traffic today. See an
Enlarged Photo Here. (Photograph taken on June 4, 2005 - © Cameron Bevers) Right - Close-up of the narrow one-lane bridge over Medora Creek on the former route of Hwy 69 (Medora Lake Road), facing south towards Bala. See an Enlarged Photo Here. (Photograph taken on June 4, 2005 - © Cameron Bevers) 
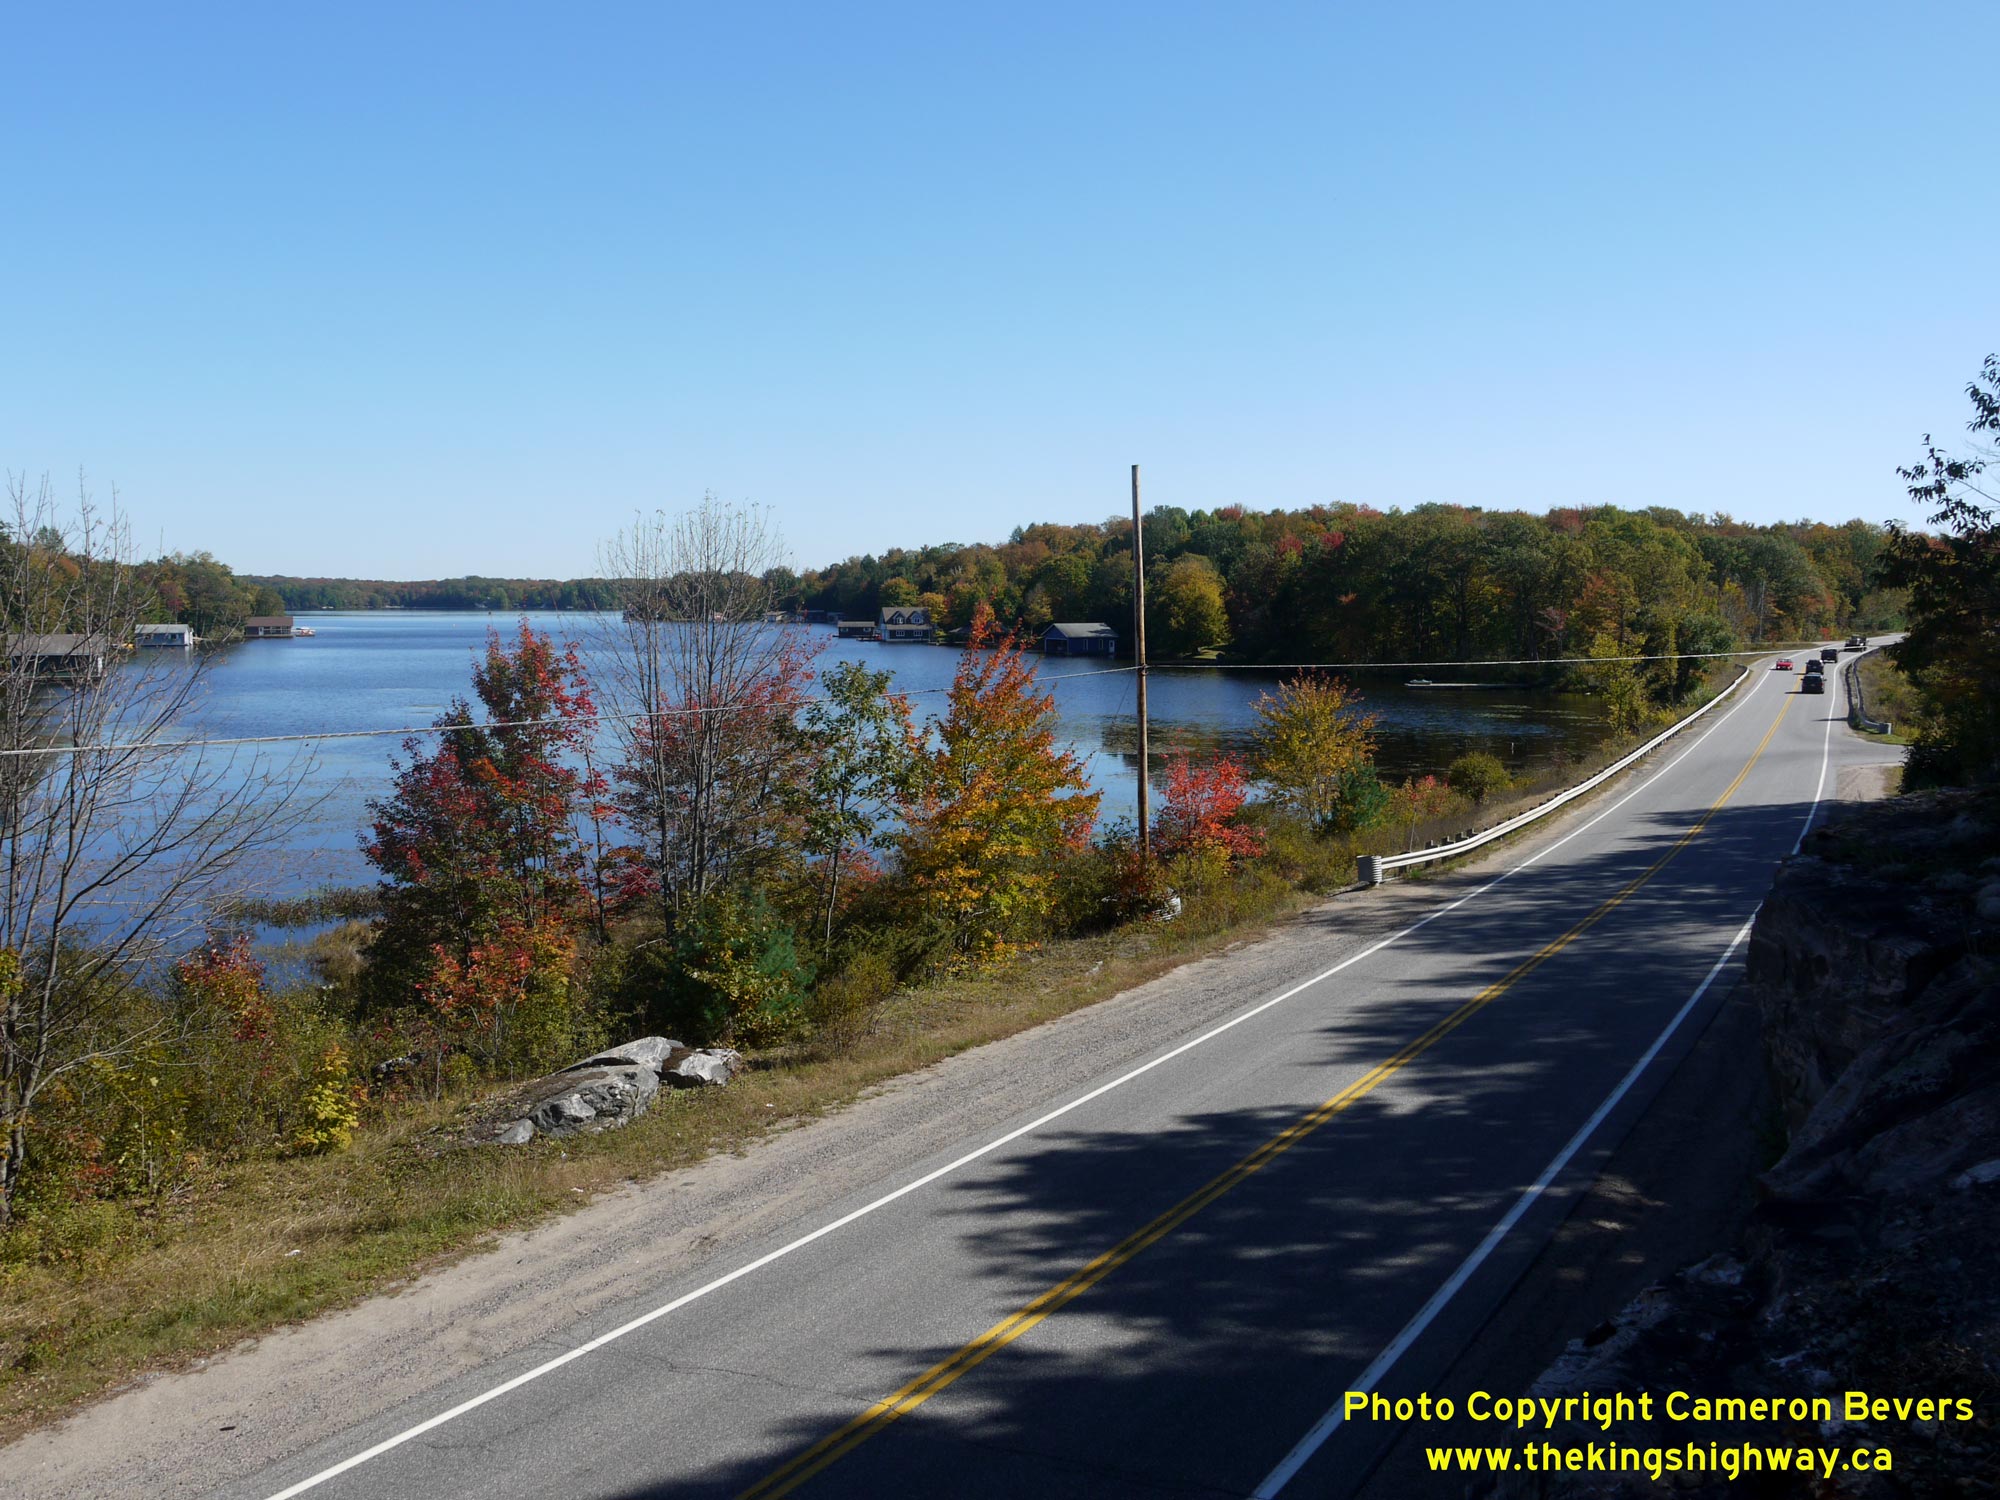
Left - Side view of the Medora Creek Bridge on Old Hwy 69 (Medora Lake Road). This narrow bridge was constructed long before the DHO assumed responsibility for
the Gravenhurst to Foot's Bay Highway in 1937. This structure likely dates from the 1920s. By constructing the new highway (Medora Lake Diversion) in the 1930s, the
DHO avoided having to do a replacement of this bridge, which wouldn't have been that old at the time. See an
Enlarged Photo Here. (Photograph taken on June 4, 2005 - © Cameron Bevers) Right - View of Sunset Bay (Lake Muskoka) and the Medora Lake Diversion (Hwy 169), facing south towards Bala. The completion of the Medora Lake Diversion north
of Dudley in 1938 provided motorists with a much more direct through route to Foot's Bay, MacTier and Parry Sound. See an
Enlarged Photo Here.(Photograph taken on September 27, 2013 - © Cameron Bevers) 
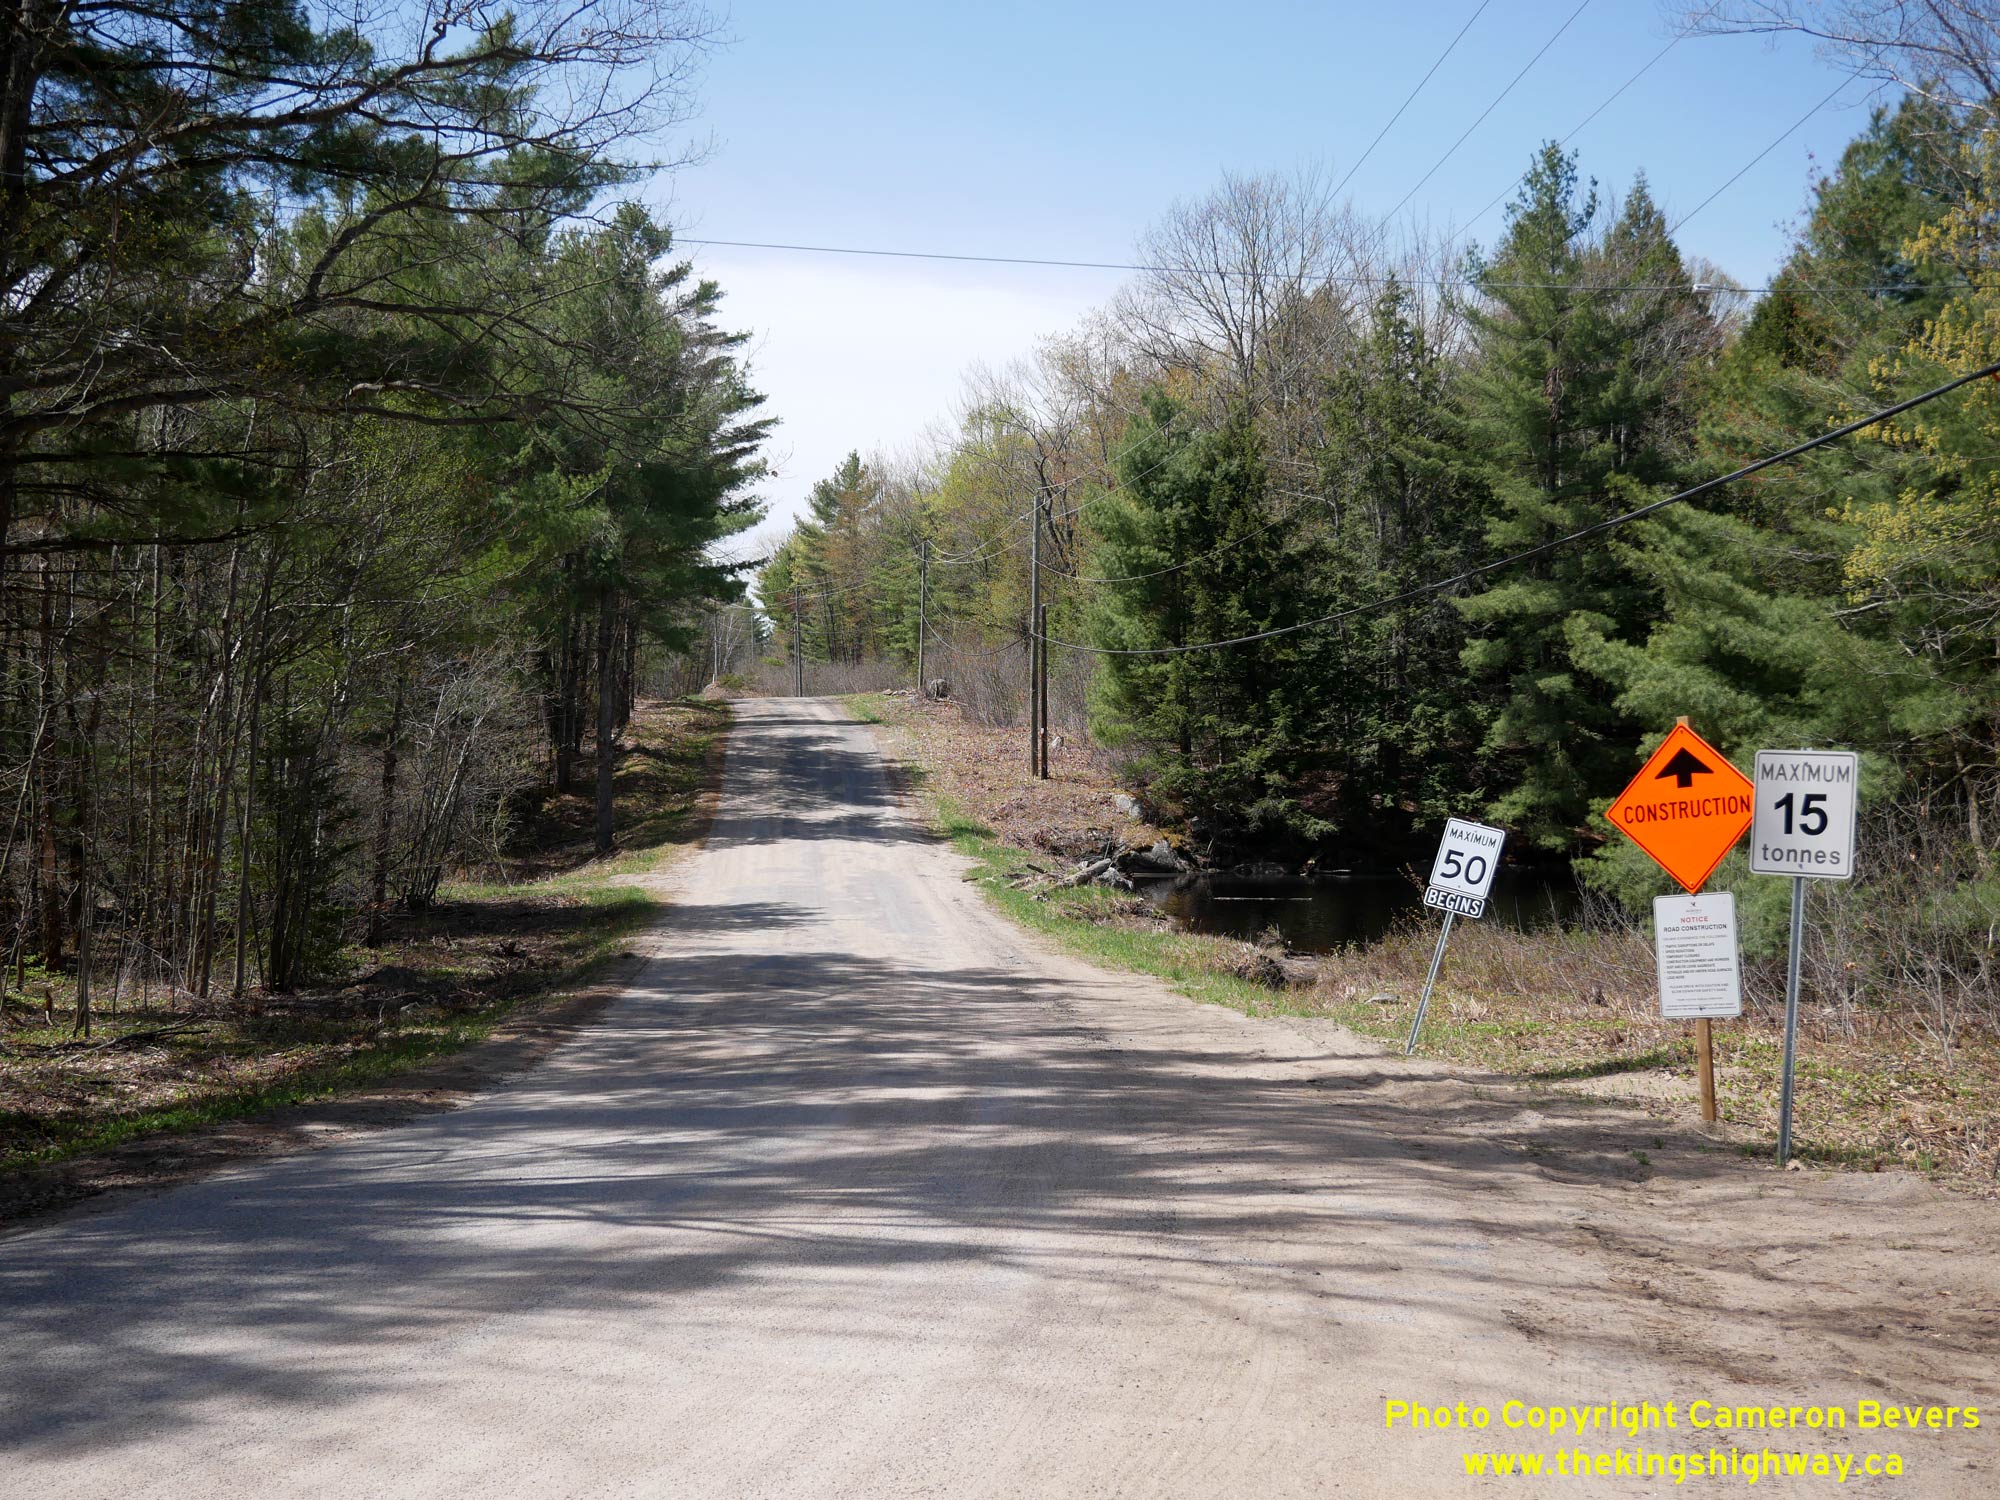 Left - View of the Medora Lake Diversion (Hwy 169) facing north towards Glen Orchard from Sunset Bay. See an
Enlarged Photo Here. Left - View of the Medora Lake Diversion (Hwy 169) facing north towards Glen Orchard from Sunset Bay. See an
Enlarged Photo Here.(Photograph taken on September 27, 2013 - © Cameron Bevers) Right - Facing south along Medora Lake Road (Old Hwy 69) from the relocated highway (Medora Lake Diversion). At this intersection, the old and new highways
cross over each other. Old Hwy 69 continues along the eastern side of the relocated highway via Acton Island Road. See an
Enlarged Photo Here.(Photograph taken on May 17, 2026 - © Cameron Bevers) 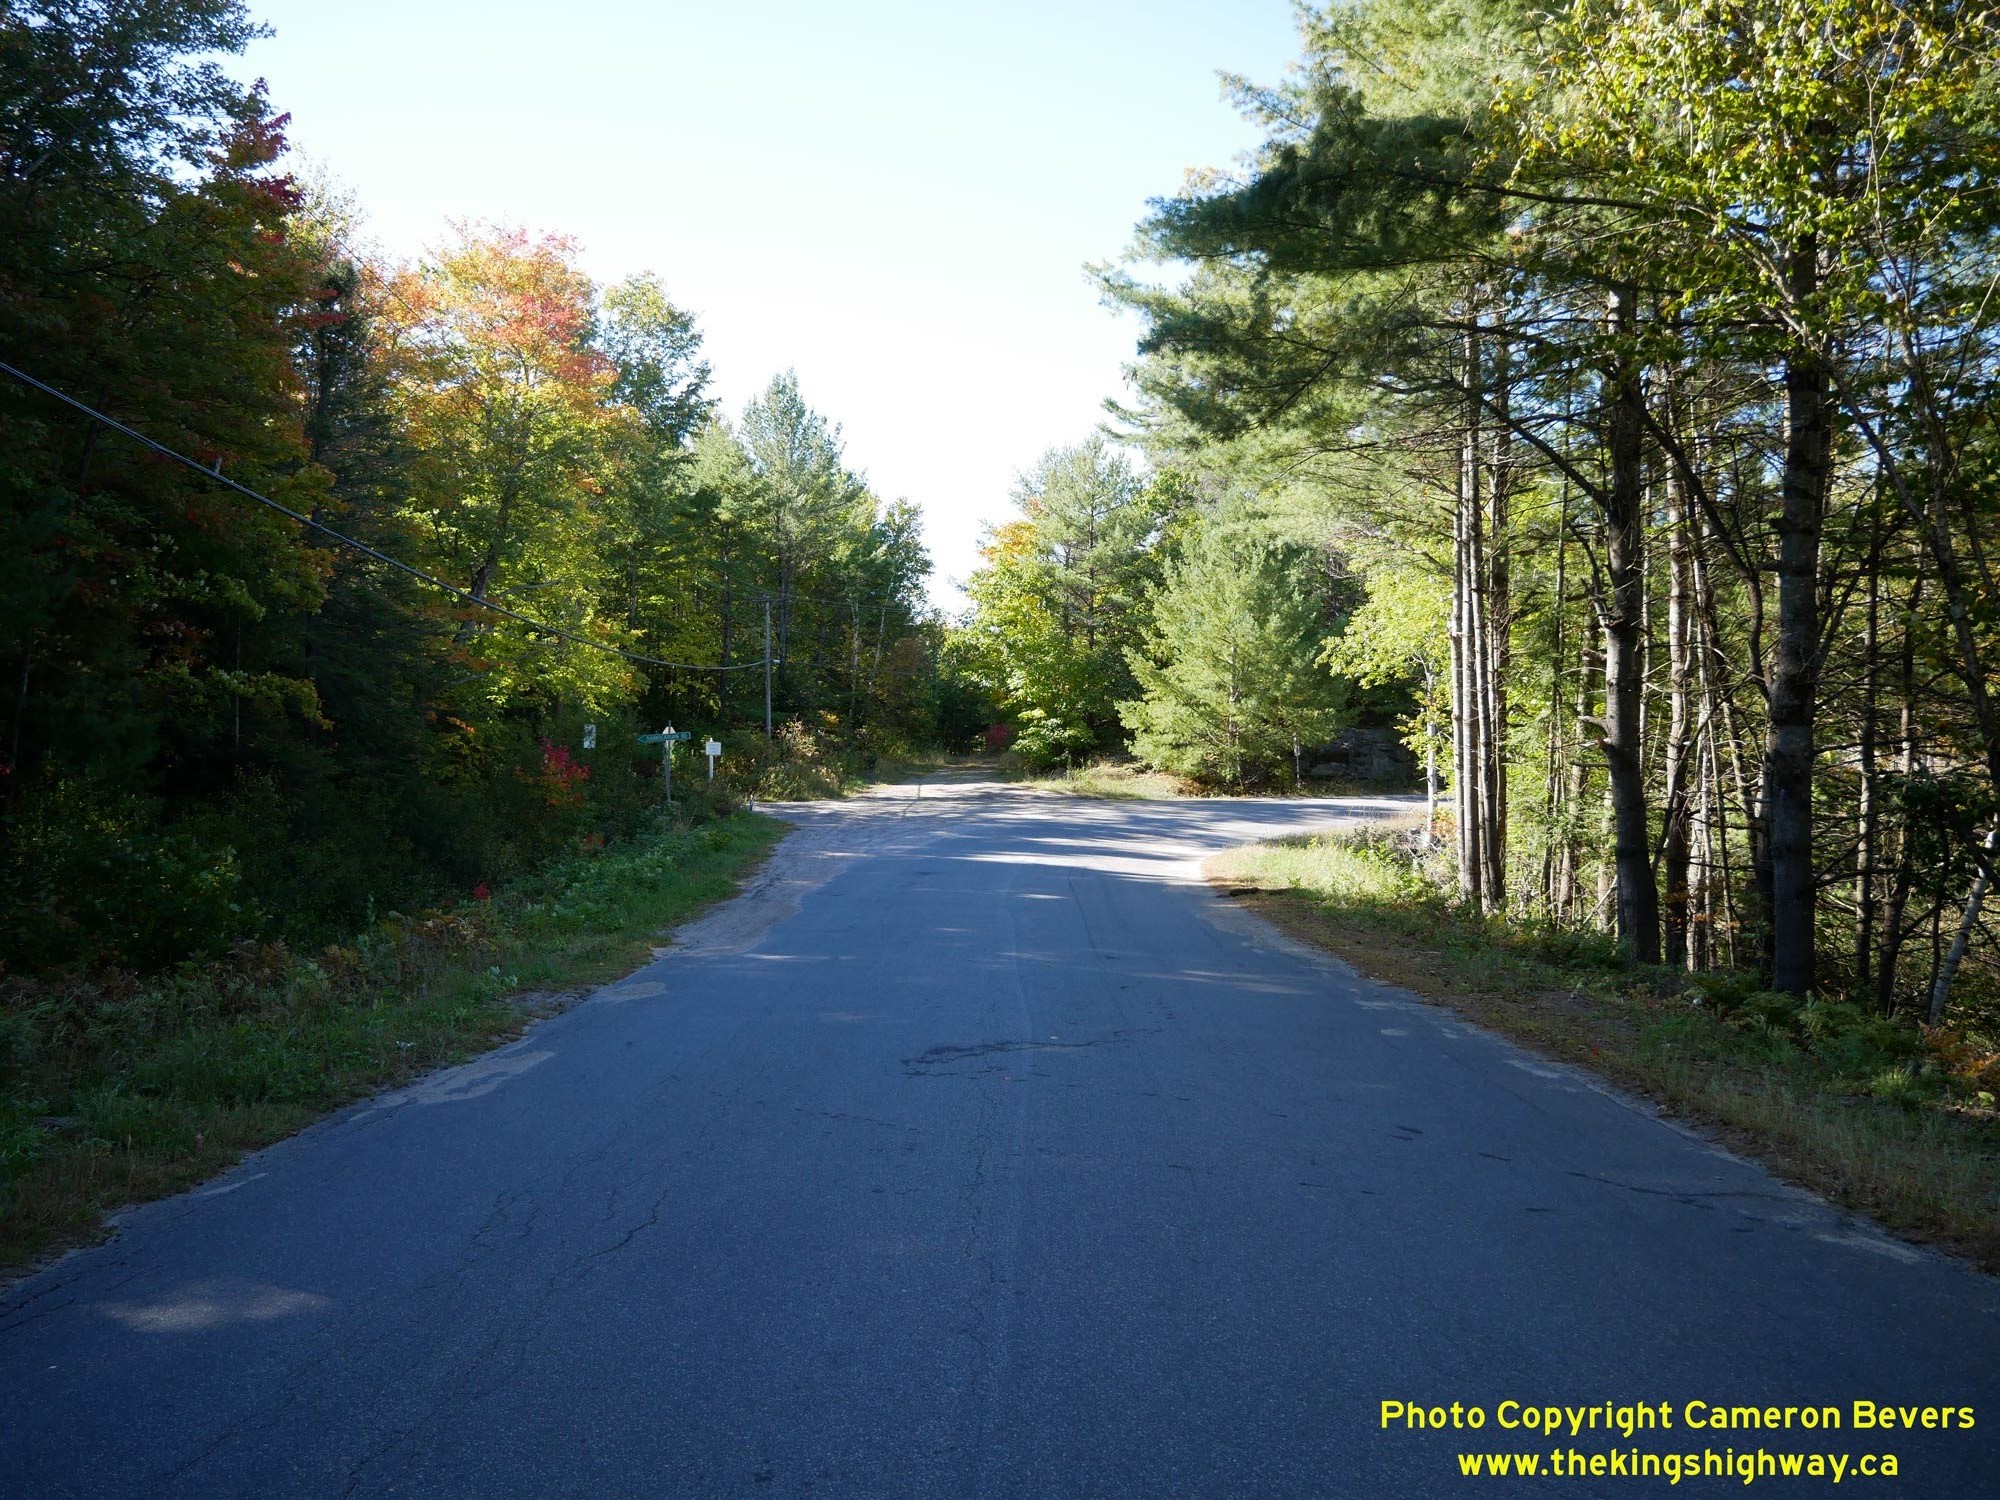
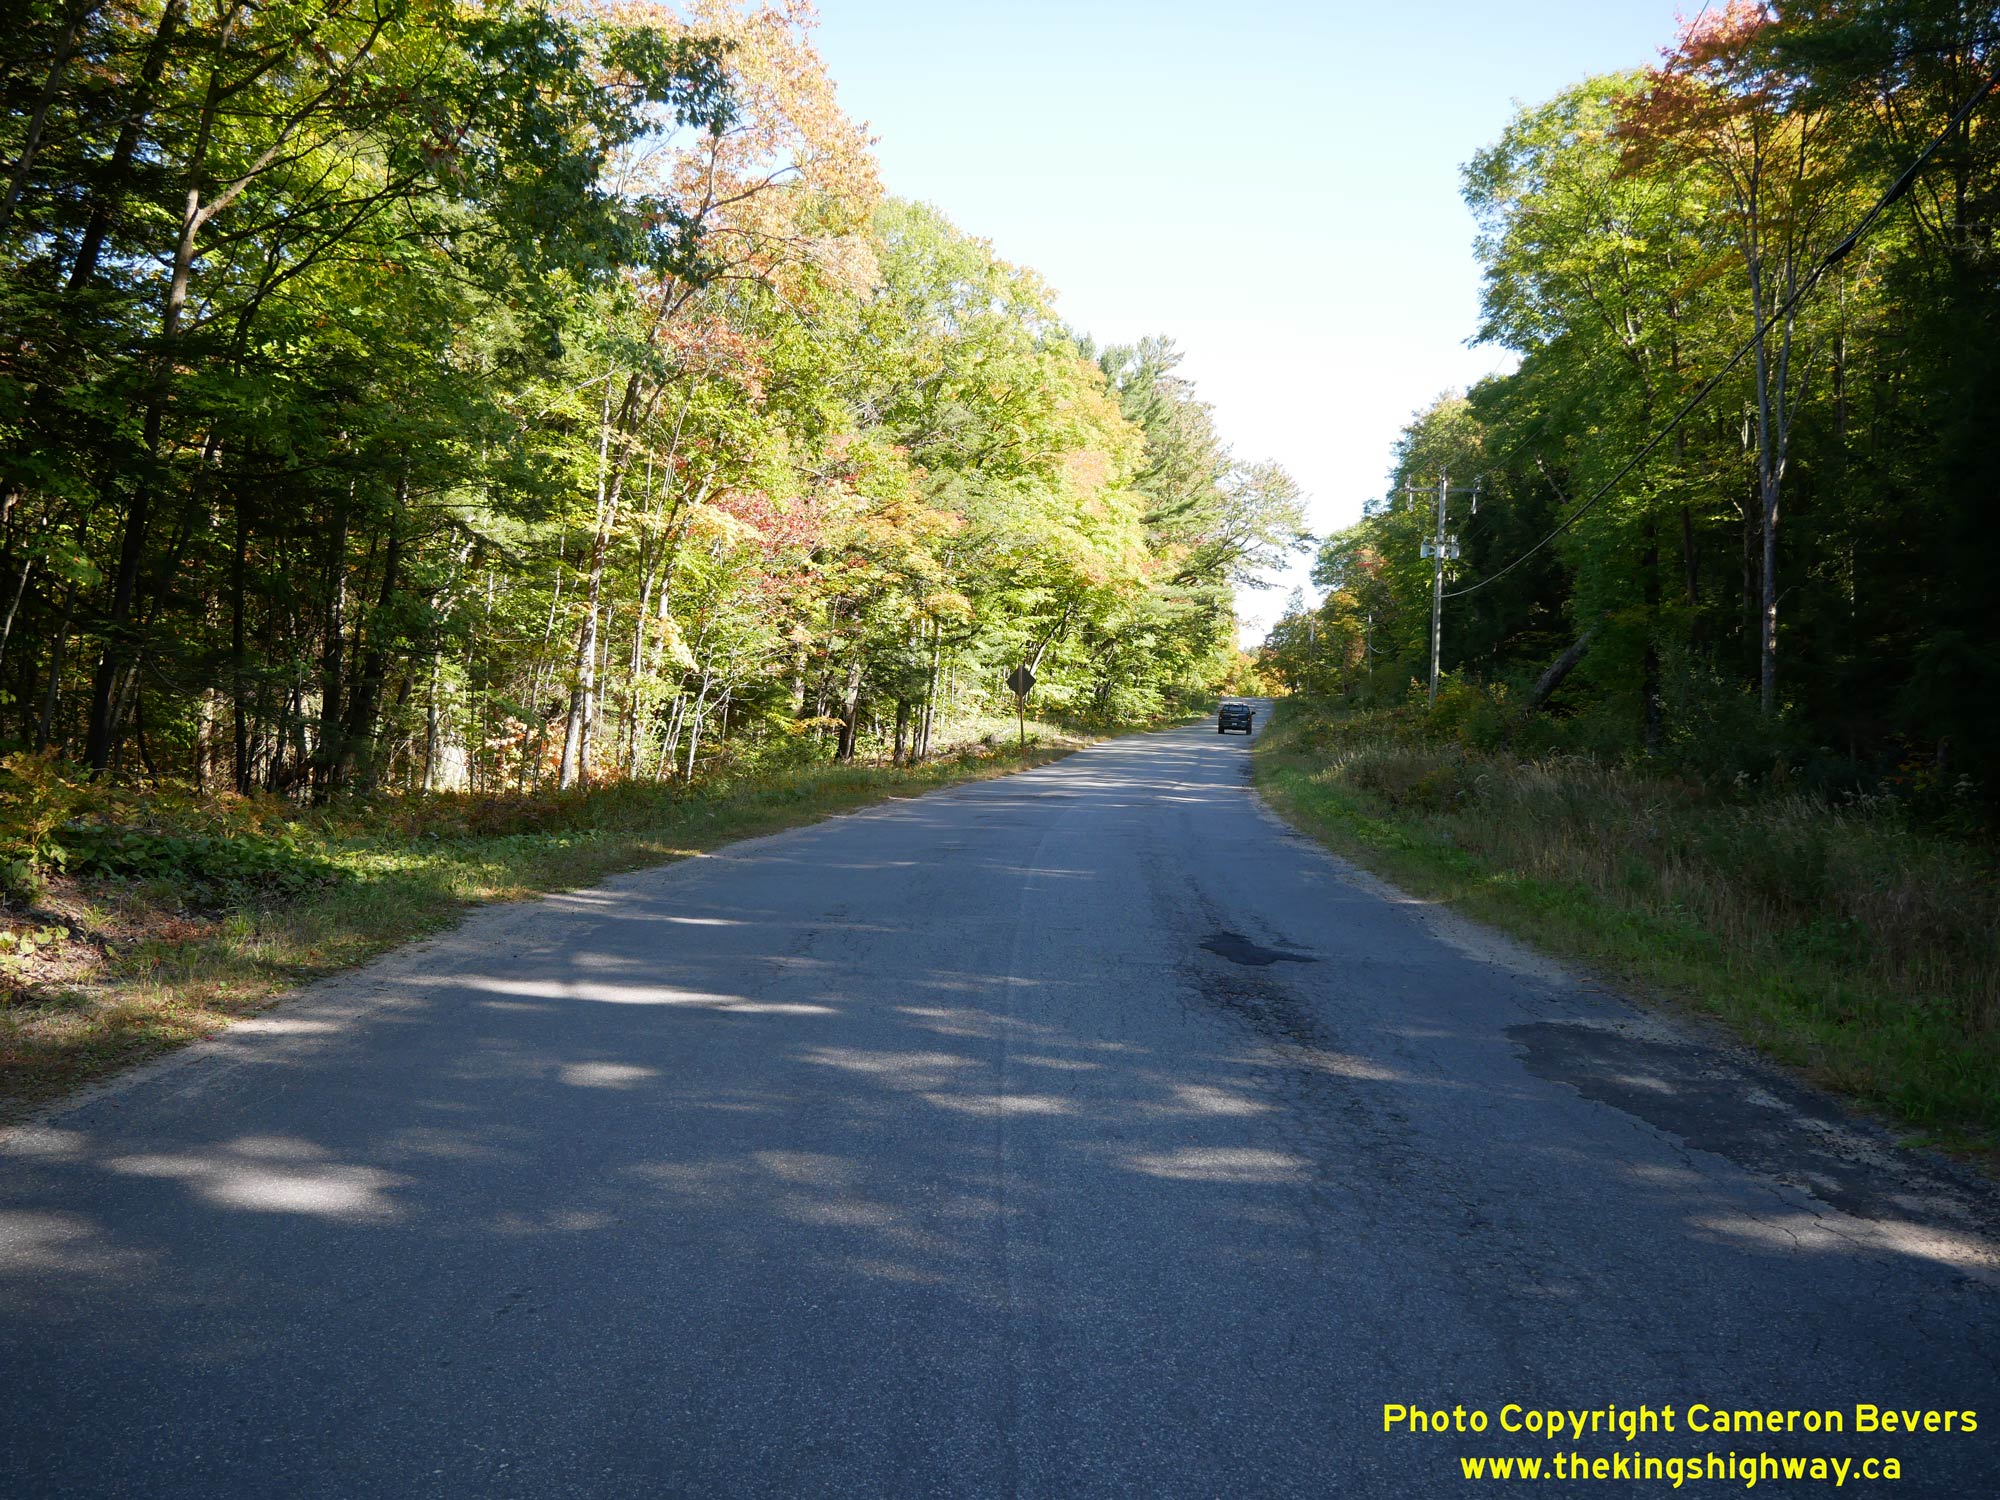 Left - Old Hwy 69 (Acton Island Road) approaching the relocated highway (Medora Lake Diversion). This bypassed loop of Old Hwy 69 has been under local
jurisdiction since the 1940s. The old highway was upgraded somewhat in the 1970s, as the road needed to be used as a temporary detour route for traffic during the
reconstruction of the relocated Hwy 69. See an Enlarged Photo Here. Left - Old Hwy 69 (Acton Island Road) approaching the relocated highway (Medora Lake Diversion). This bypassed loop of Old Hwy 69 has been under local
jurisdiction since the 1940s. The old highway was upgraded somewhat in the 1970s, as the road needed to be used as a temporary detour route for traffic during the
reconstruction of the relocated Hwy 69. See an Enlarged Photo Here.(Photograph taken on October 2, 2022 - © Cameron Bevers) Right - Facing north along Old Hwy 69 (Acton Island Road) from the relocated highway (Medora Lake Diversion). See an
Enlarged Photo Here.(Photograph taken on October 2, 2022 - © Cameron Bevers) 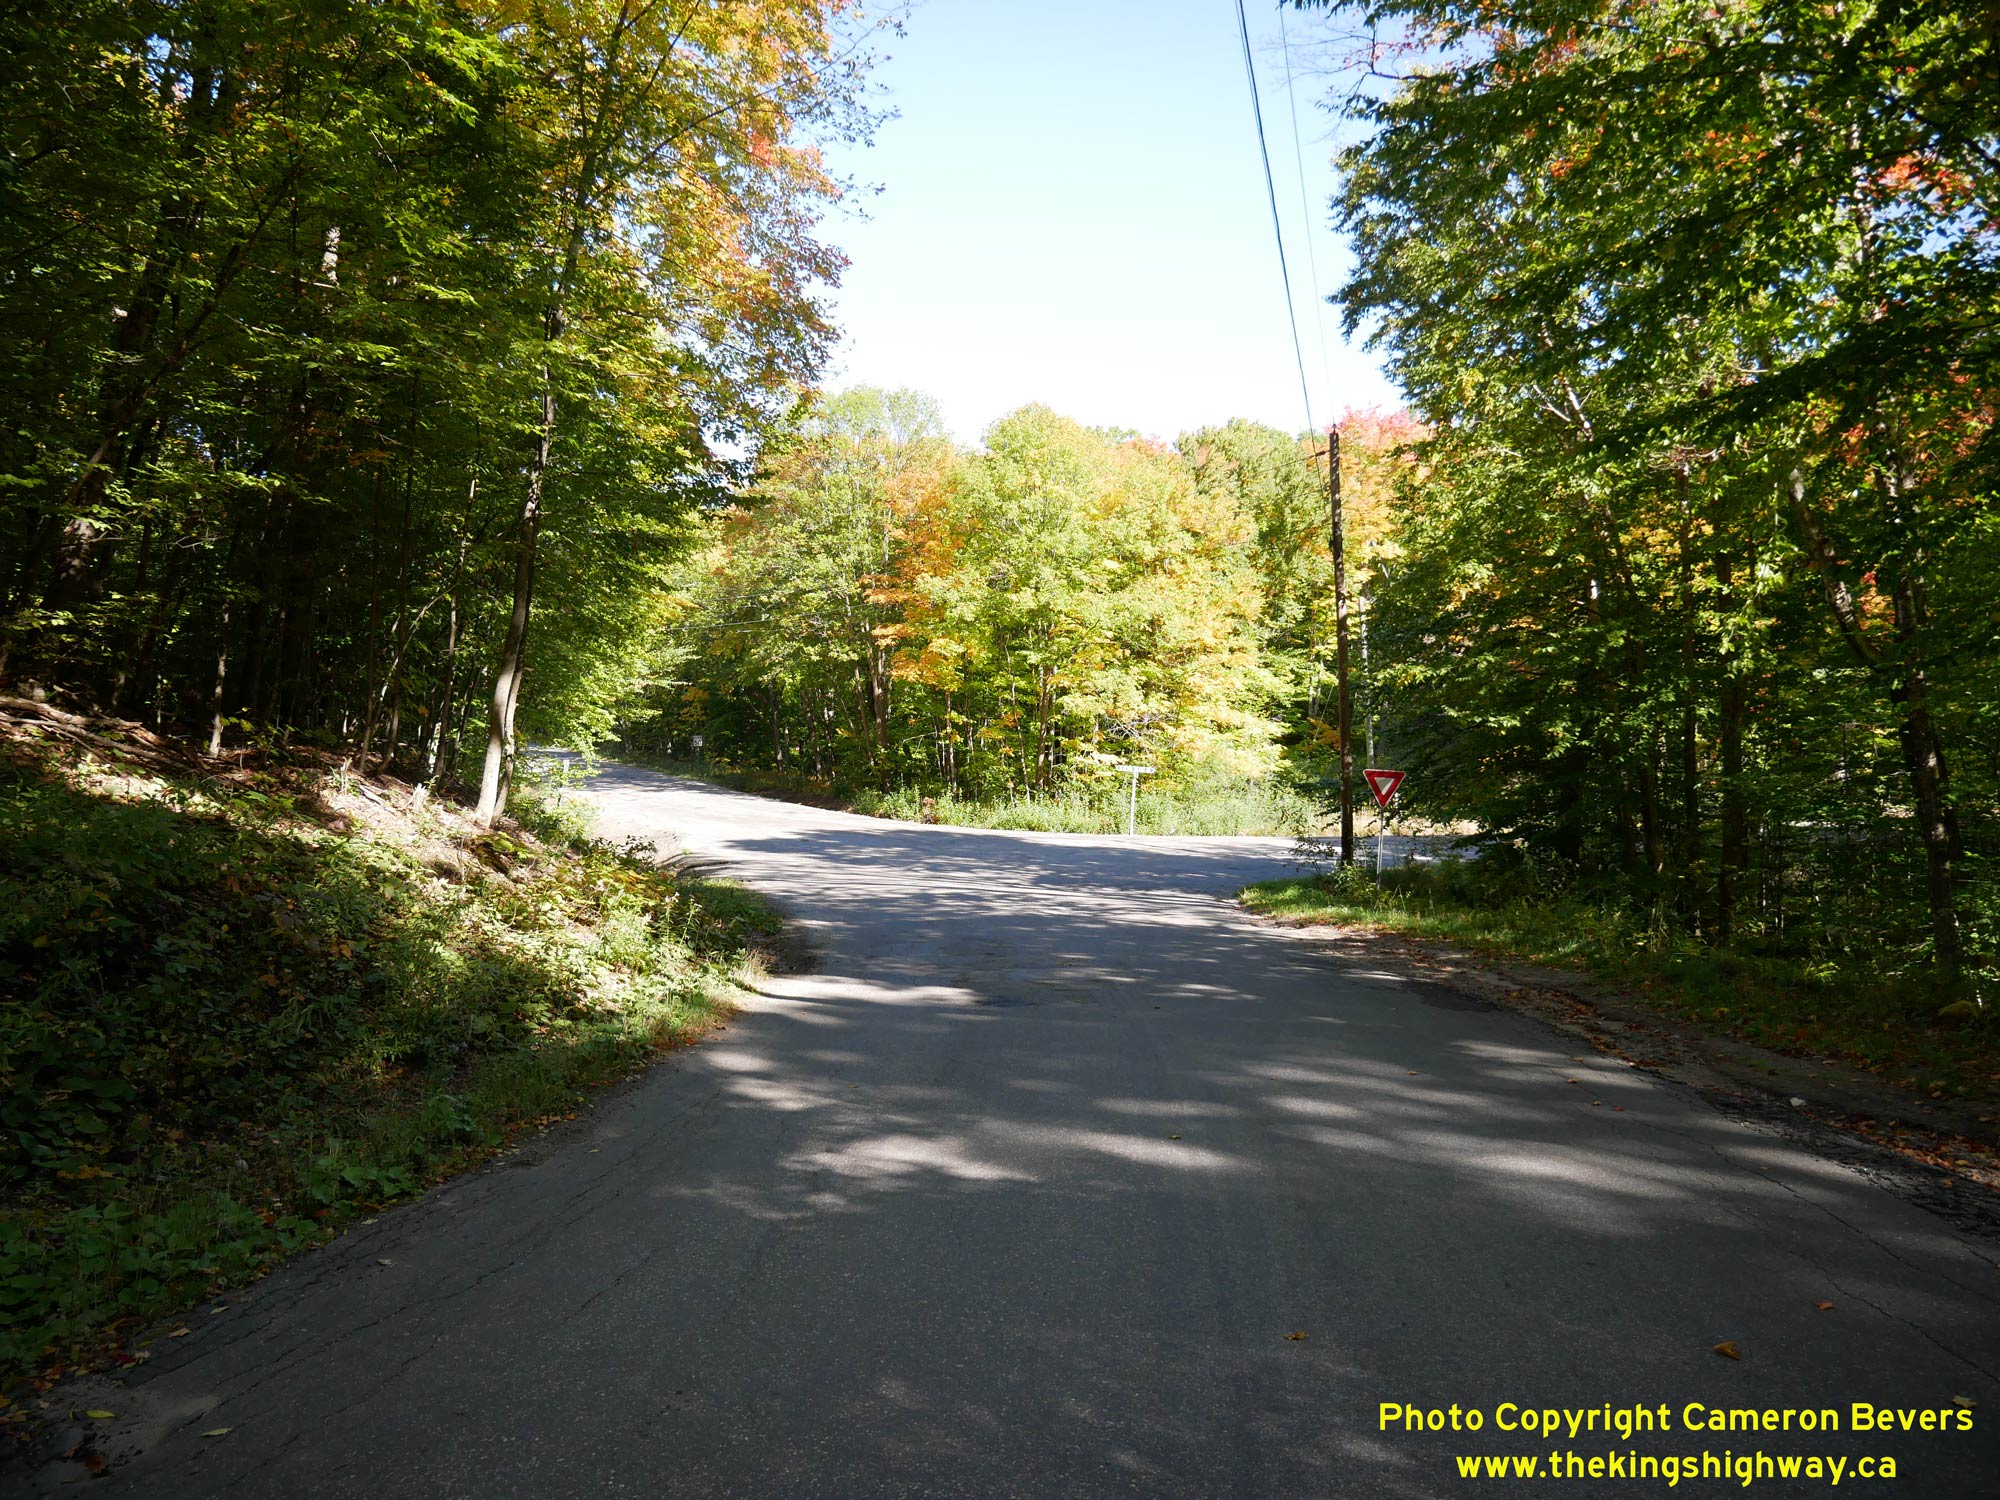
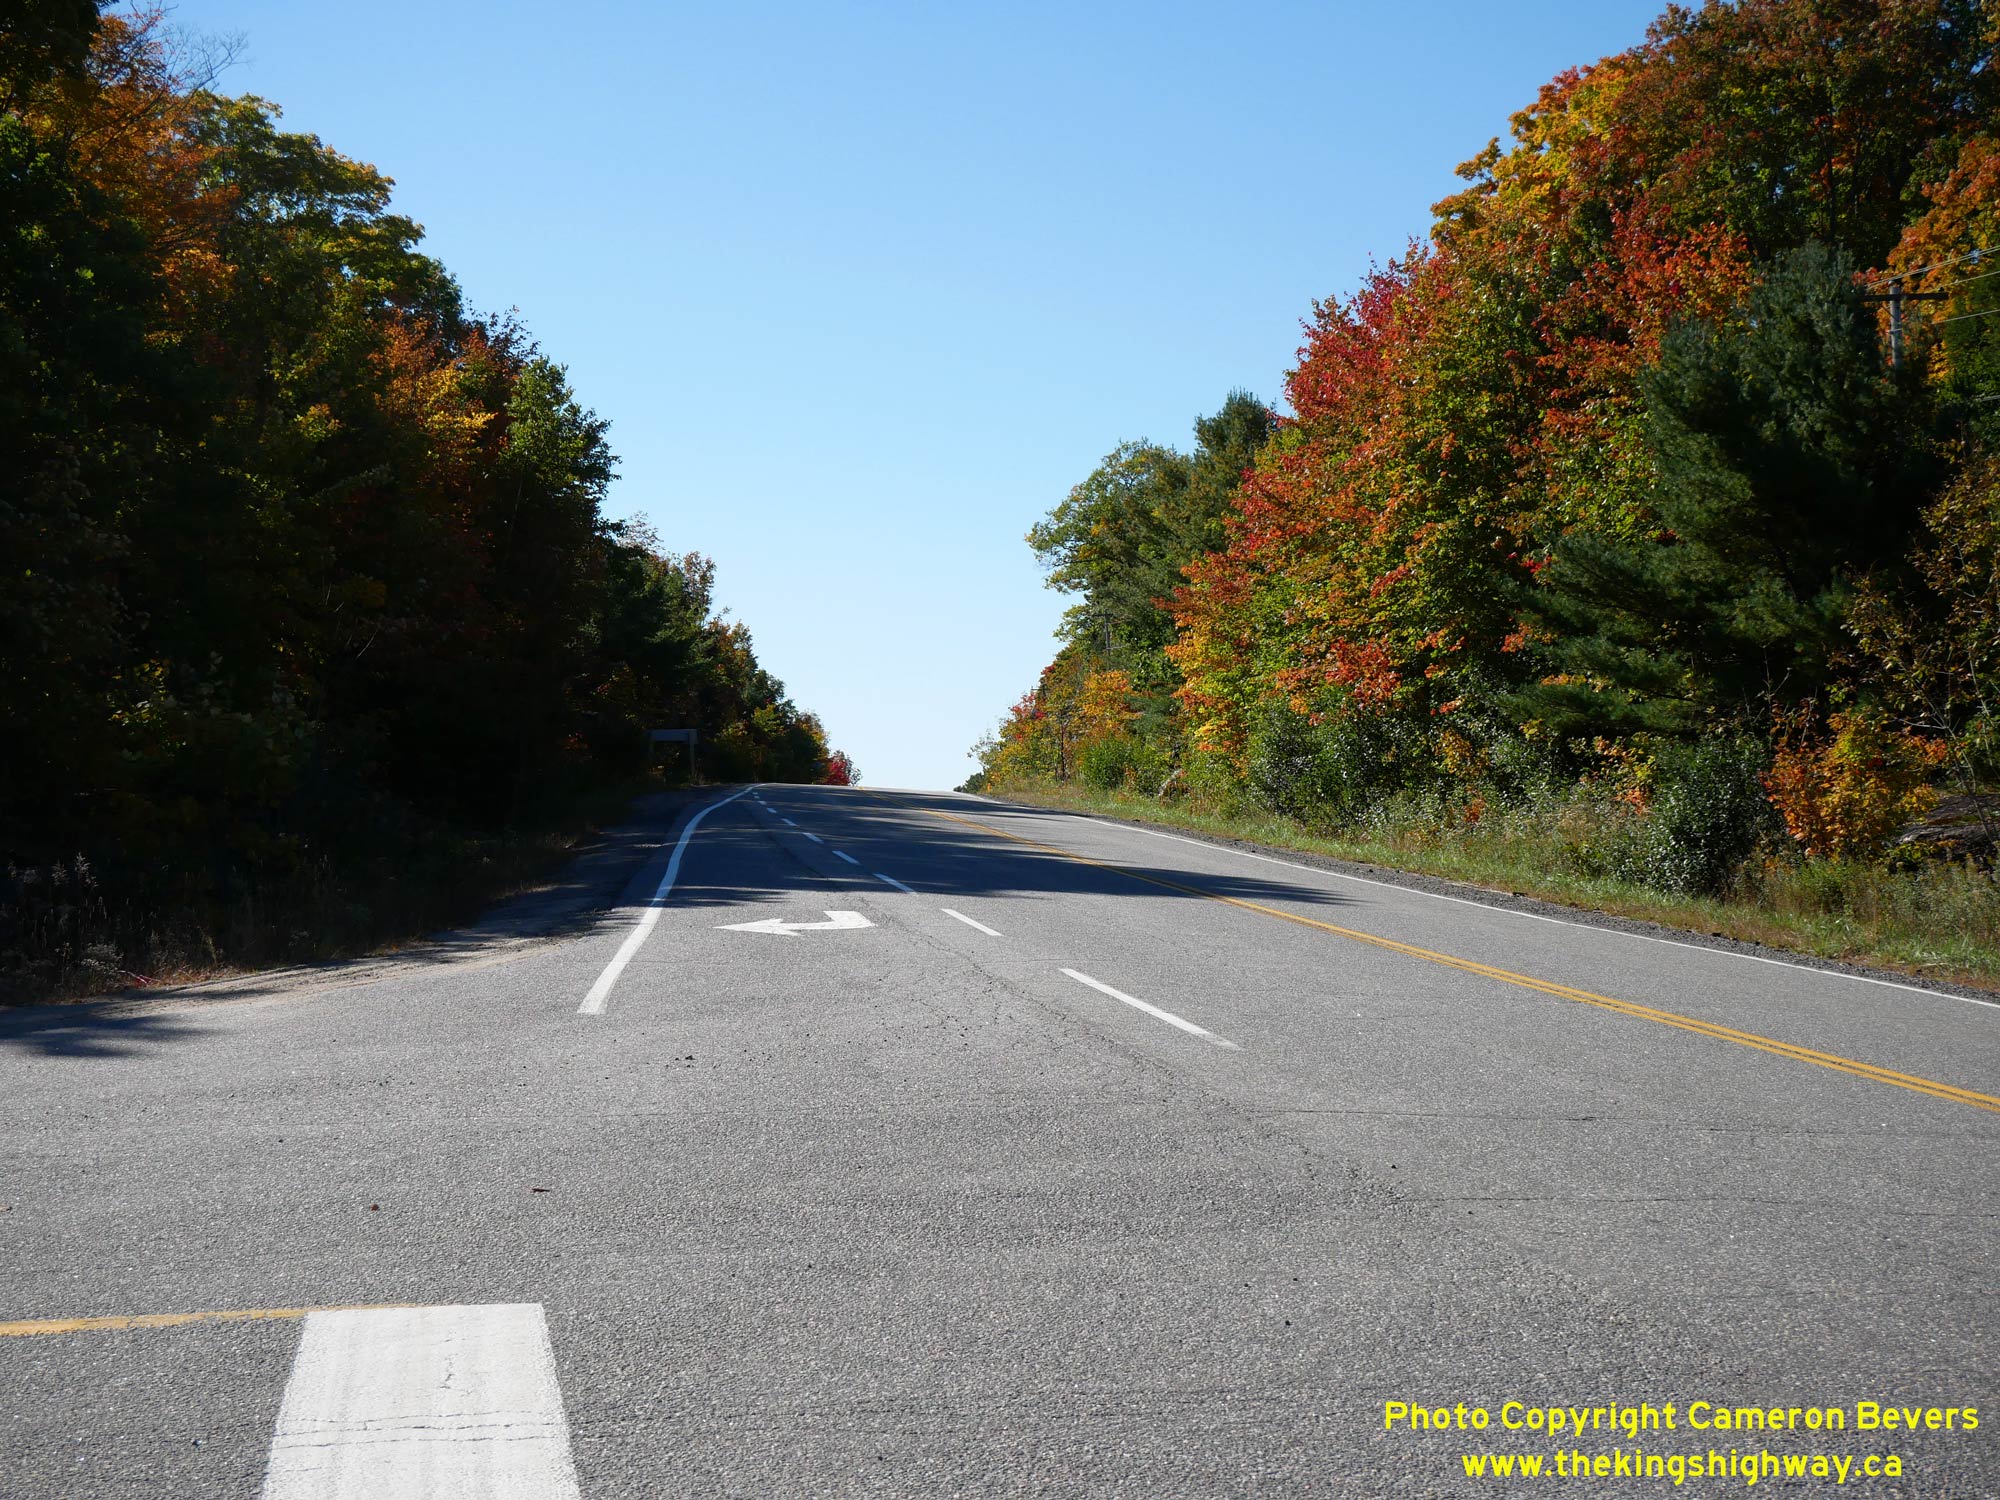 Left - View of Old Hwy 69 (Acton Island Road), facing north at the turn-off to Acton Island. Old Hwy 69 continues north (to the left) around the bypassed loop
via North Acton Island Road and returns back to the current highway about 400 metres ahead. Acton Island is one of two large islands in Lake Muskoka which are linked
to the mainland by a highway bridge. See an Enlarged Photo Here. Left - View of Old Hwy 69 (Acton Island Road), facing north at the turn-off to Acton Island. Old Hwy 69 continues north (to the left) around the bypassed loop
via North Acton Island Road and returns back to the current highway about 400 metres ahead. Acton Island is one of two large islands in Lake Muskoka which are linked
to the mainland by a highway bridge. See an Enlarged Photo Here.(Photograph taken on October 2, 2022 - © Cameron Bevers) Right - Facing south along Hwy 169 towards Bala from the intersection of North Acton Island Road. This point marks the northern end of the Medora Lake
Diversion, where about 2 miles of the highway were relocated in the 1930s. Due to a vertical profile correction near this intersection, the highway had to be
temporarily closed in 1972, with highway traffic detoured via the old highway loop (Acton Island Road). See an
Enlarged Photo Here.(Photograph taken on October 2, 2022 - © Cameron Bevers) 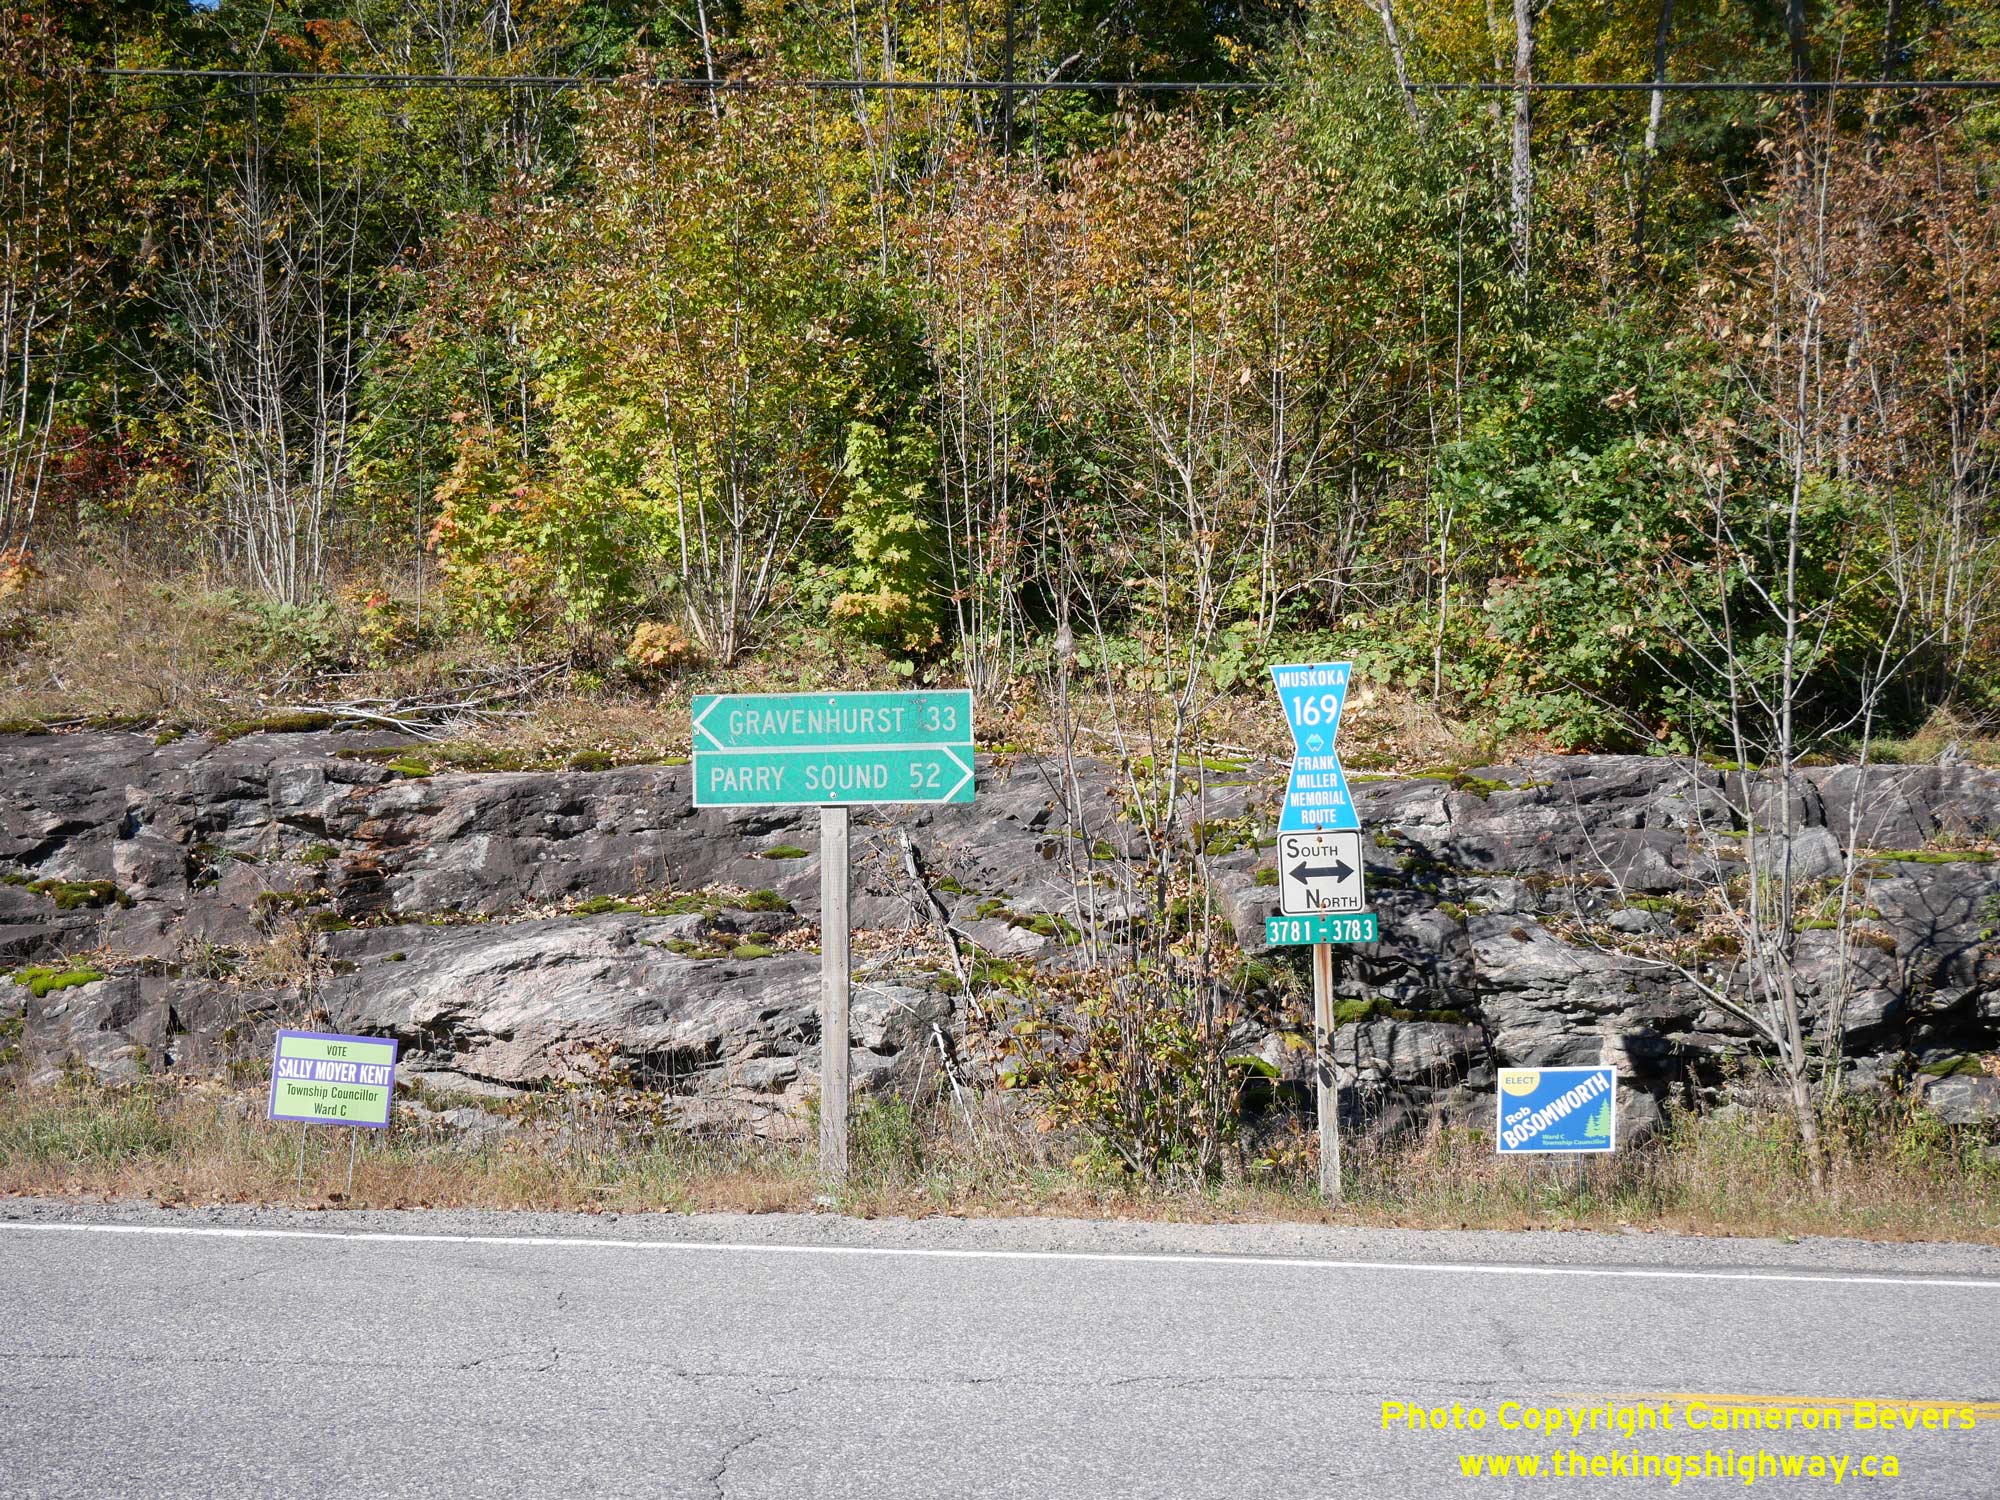
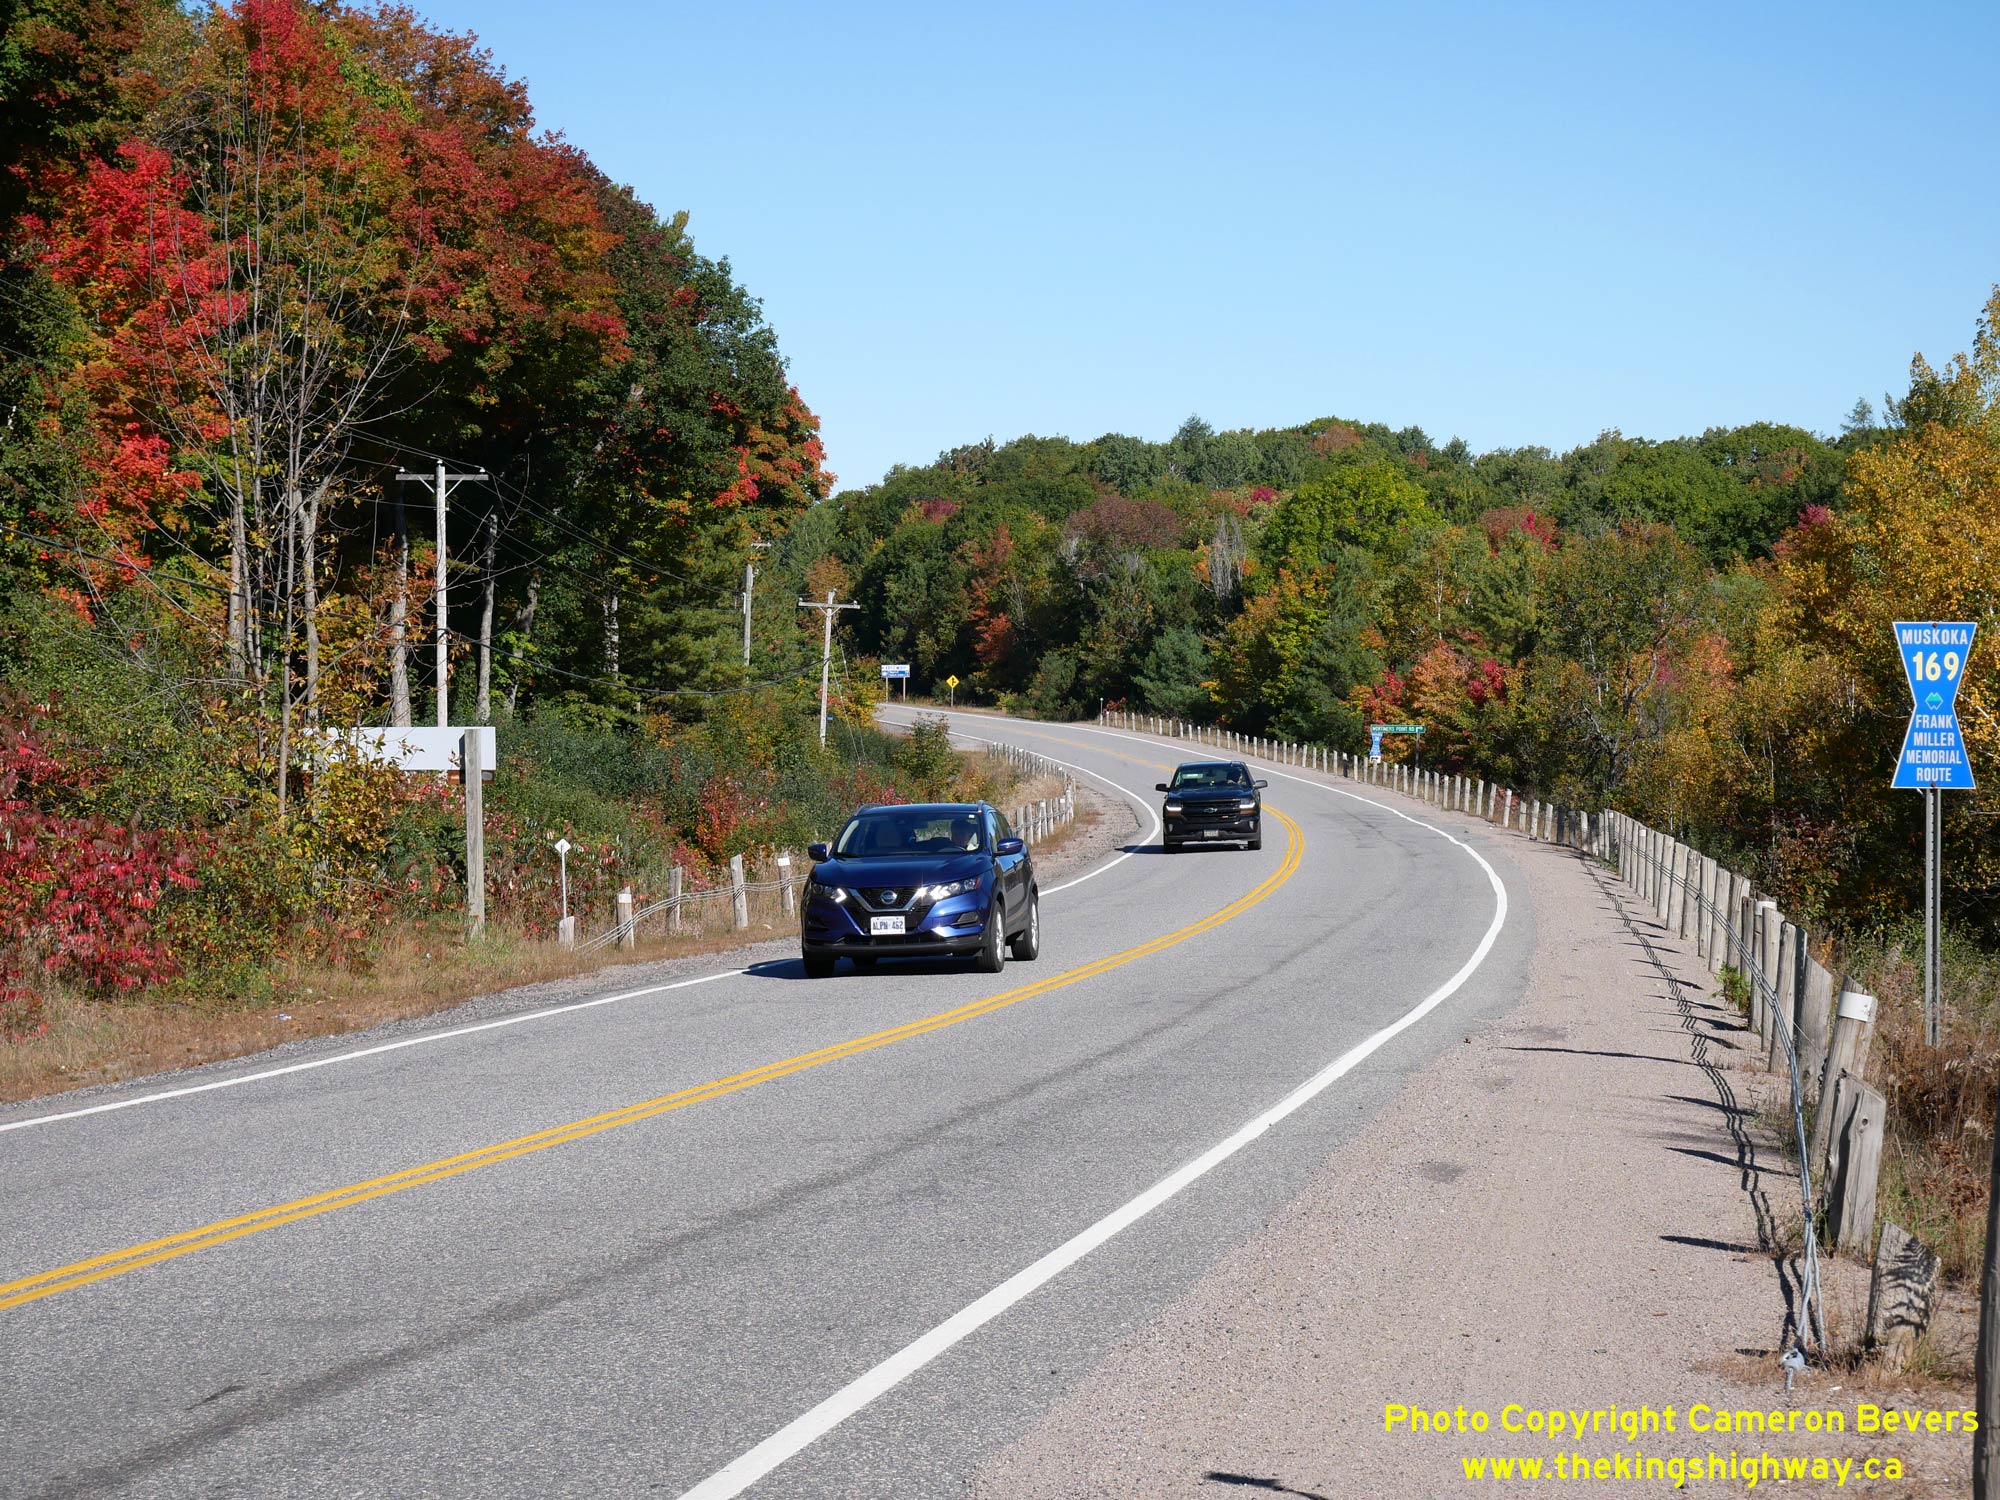 Left - This older pair of green-and-white MTO fingerboard guide signs from the 1990s still stand at the intersection of Hwy 169 and North Acton Island Road.
Provincial ownership of Hwy 169 between Gravenhurst and Foot's Bay ended in 1998, when jurisdiction over the highway was transferred over to the District Municipality
of Muskoka. See an Enlarged Photo Here. Left - This older pair of green-and-white MTO fingerboard guide signs from the 1990s still stand at the intersection of Hwy 169 and North Acton Island Road.
Provincial ownership of Hwy 169 between Gravenhurst and Foot's Bay ended in 1998, when jurisdiction over the highway was transferred over to the District Municipality
of Muskoka. See an Enlarged Photo Here.(Photograph taken on October 2, 2022 - © Cameron Bevers) Right - Facing north along Hwy 169 towards Glen Orchard from the intersection of North Acton Island Road. See an
Enlarged Photo Here.(Photograph taken on October 2, 2022 - © Cameron Bevers) 
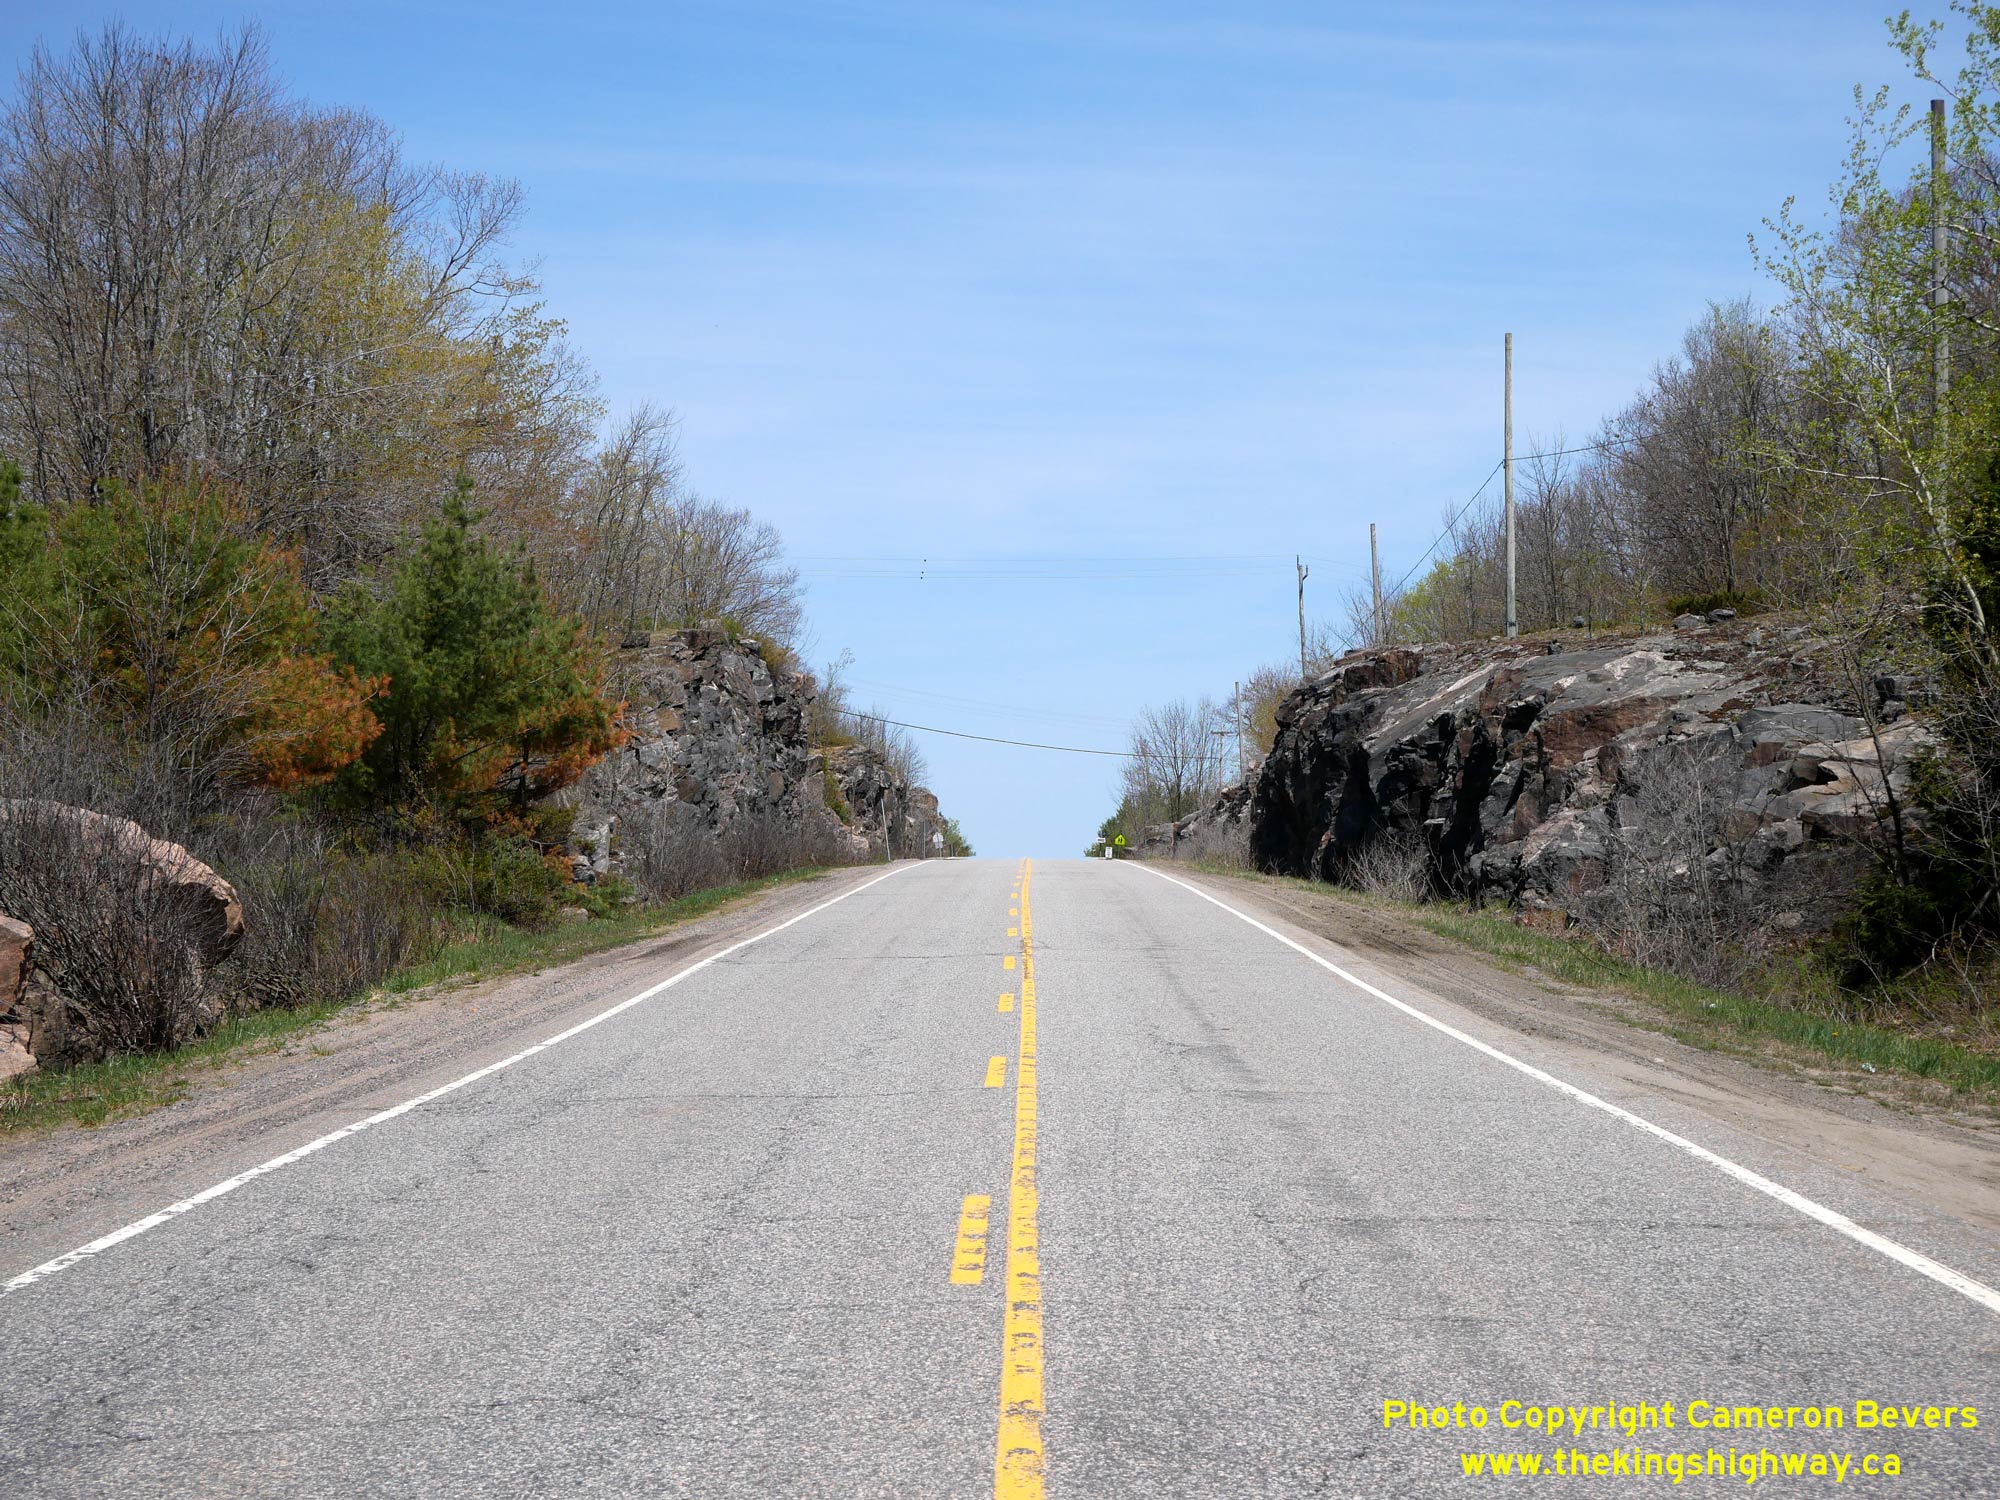 Left - Facing north along Hwy 169 approaching the Glen Orchard Rock Cut, located about 7 km north of Bala. During the early 1970s, Hwy 69 was relocated onto an
improved alignment in this area, including the excavation of this large rock cut on the southern approach to Glen Orchard. See an
Enlarged Photo Here. Left - Facing north along Hwy 169 approaching the Glen Orchard Rock Cut, located about 7 km north of Bala. During the early 1970s, Hwy 69 was relocated onto an
improved alignment in this area, including the excavation of this large rock cut on the southern approach to Glen Orchard. See an
Enlarged Photo Here.(Photograph taken on October 2, 2022 - © Cameron Bevers) Right - View of the Glen Orchard Rock Cut on Hwy 169, facing north. This deep rock cut was constructed under Contract #1972-11, as part of a systematic
multi-year reconstruction of Hwy 69 from Gravenhurst northerly to Foot's Bay. This rock cut removed what was originally a very steep grade on Hwy 69 at the southern
approach to Glen Orchard. See an Enlarged Photo Here.(Photograph taken on May 17, 2026 - © Cameron Bevers) 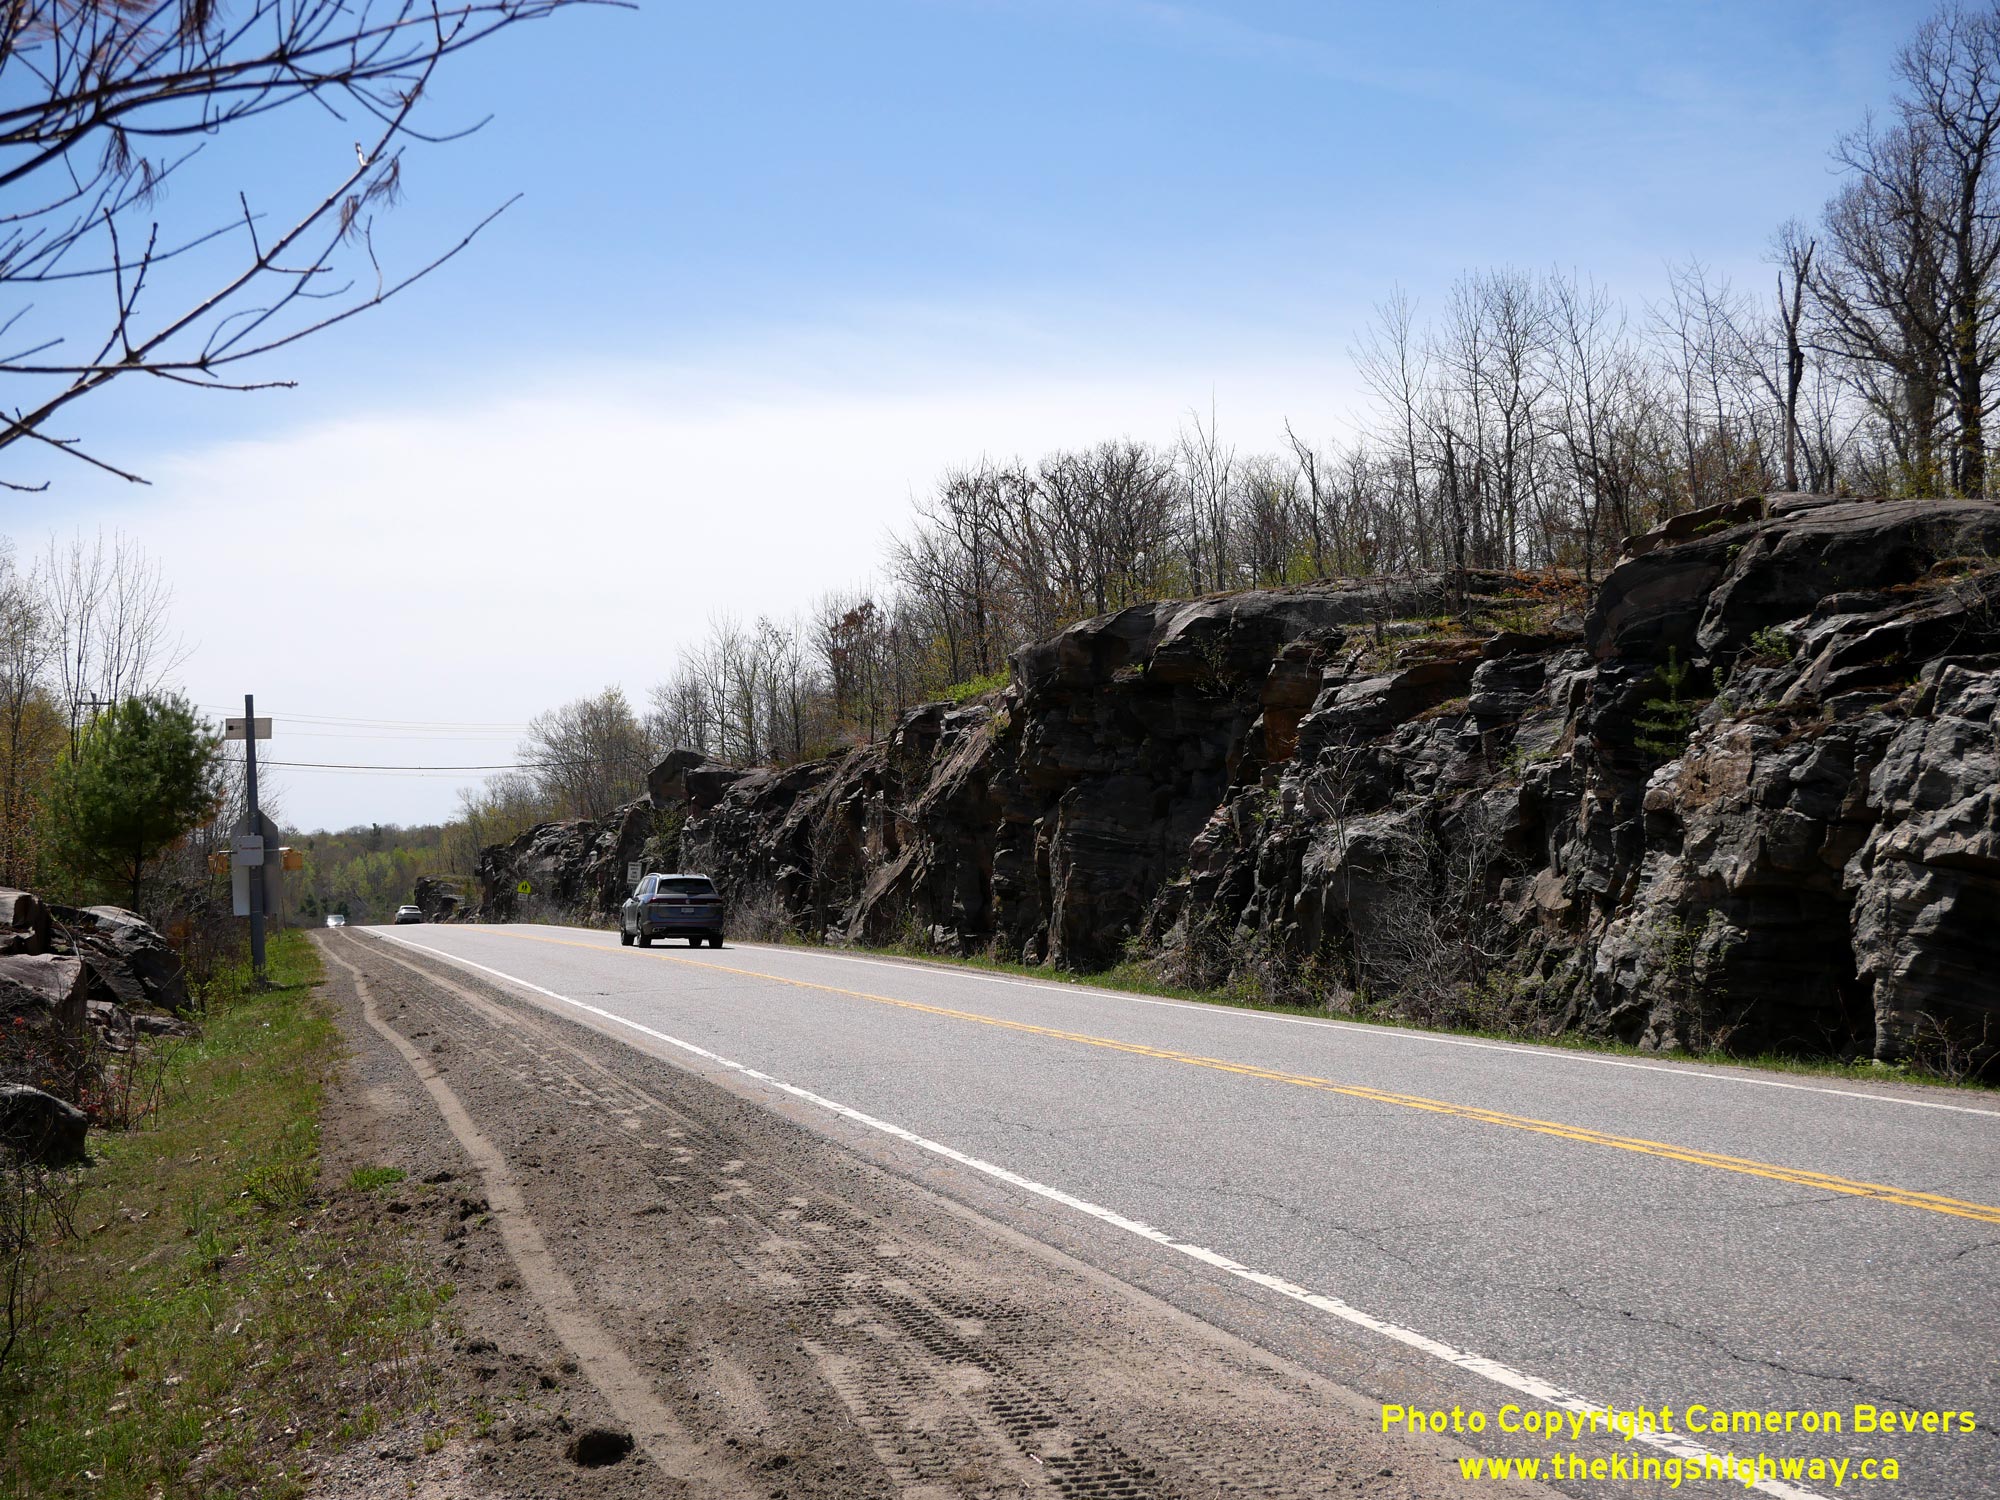
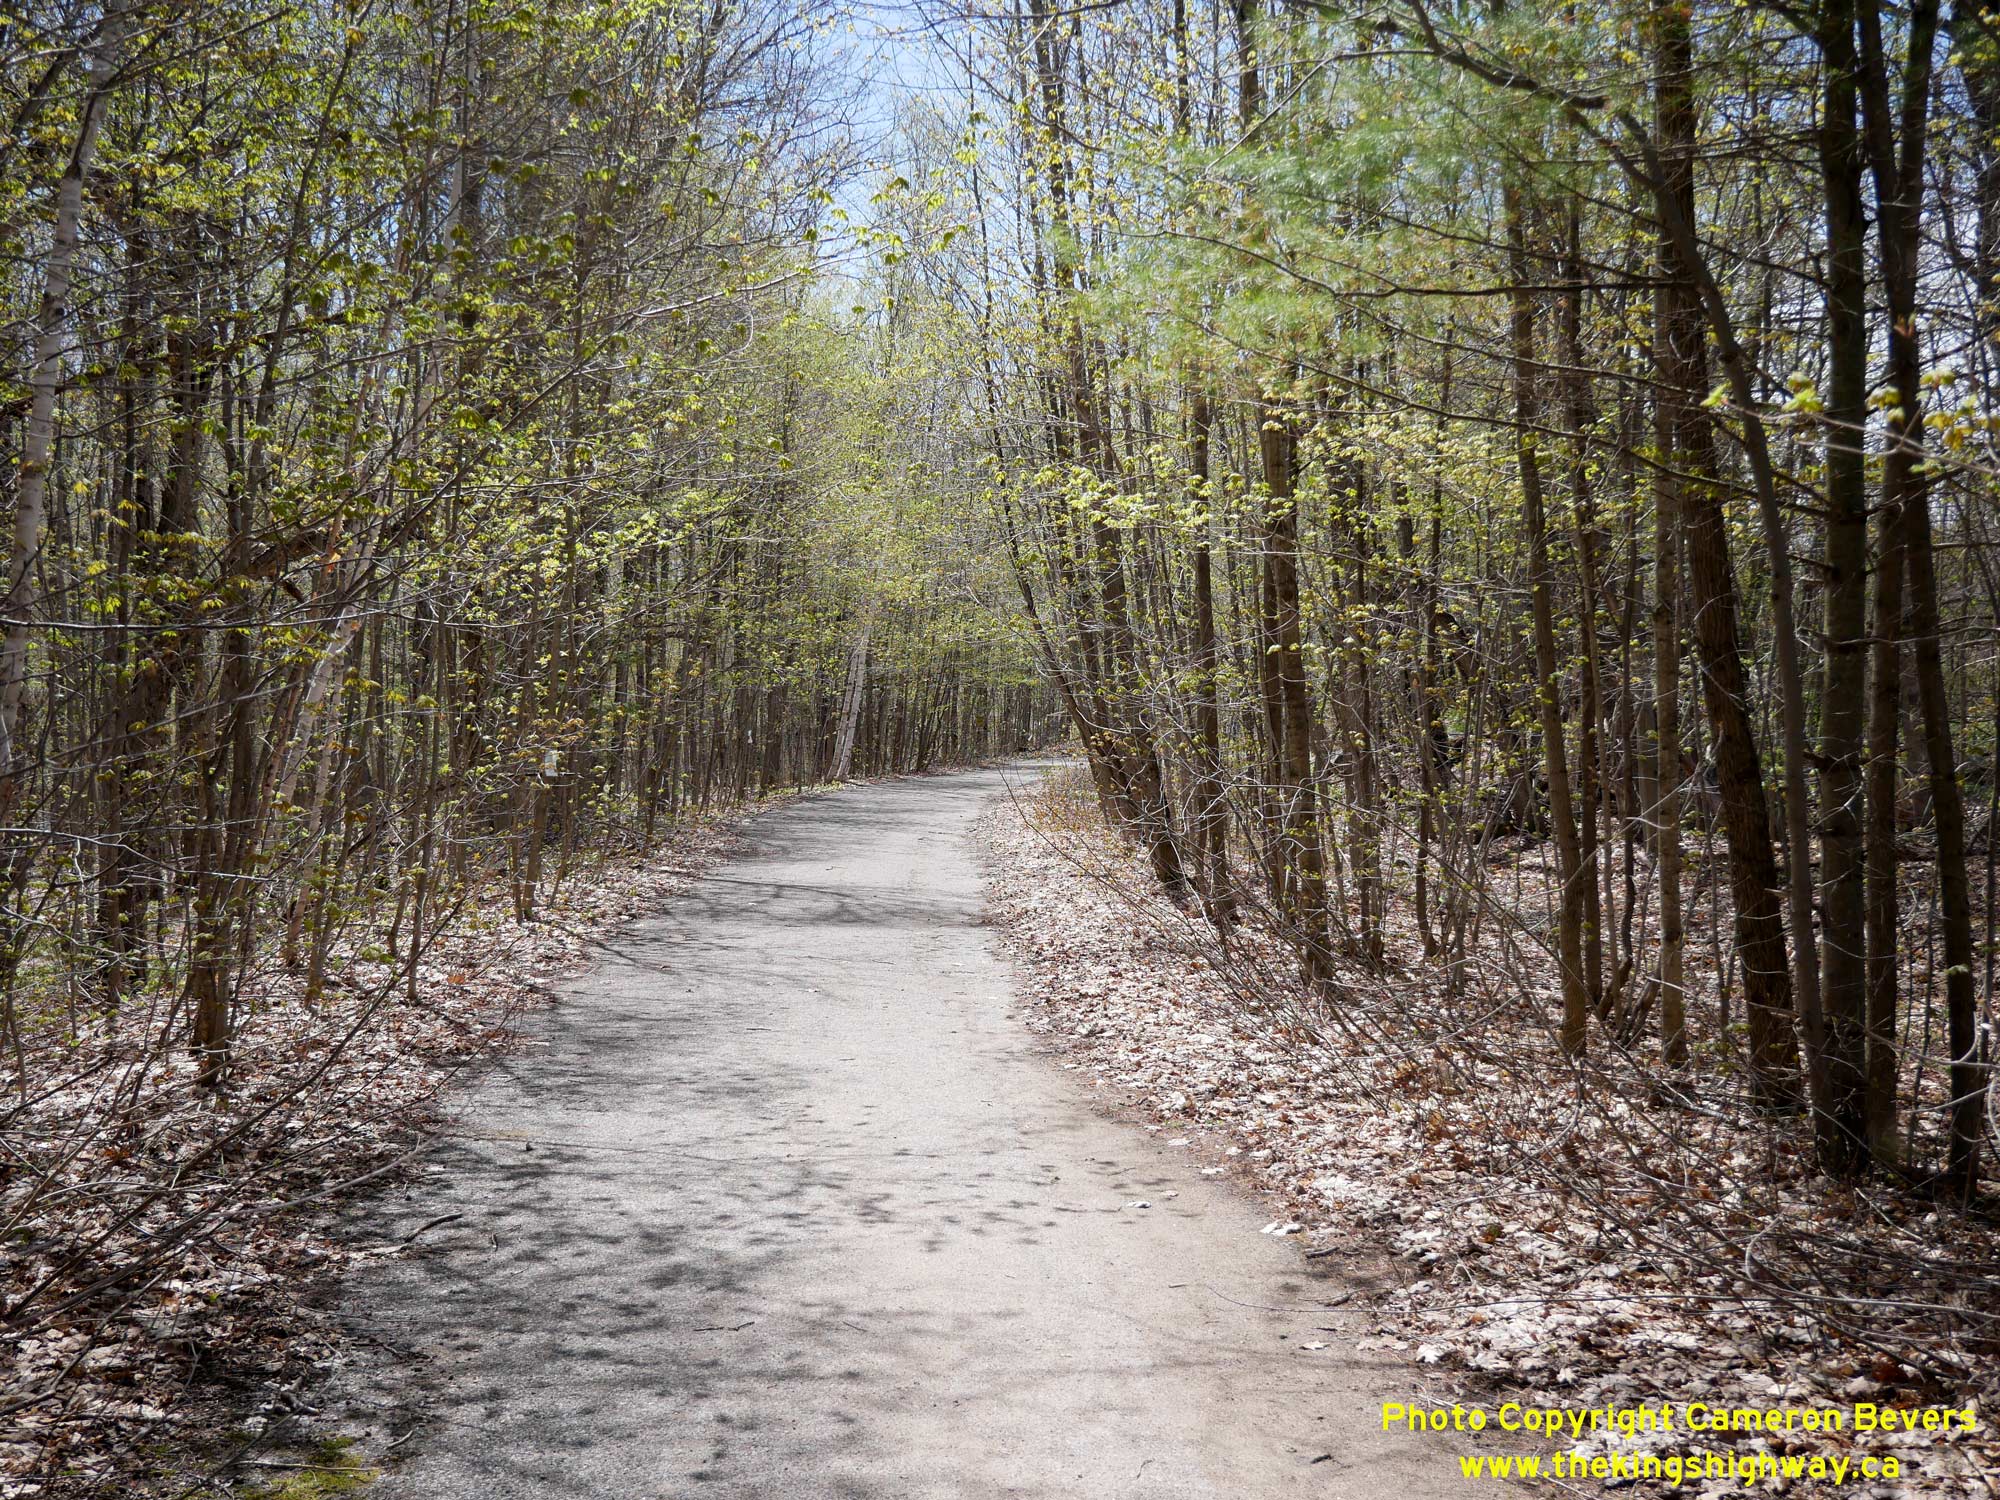 Left - Facing south through the Glen Orchard Rock Cut on Hwy 169. The highway's grade approaching Glen Orchard was substantially reduced as a result of this
deep rock cut, which measures about 25 feet in depth at its deepest point. The original route of Hwy 69 passed over the top of this hill, with the highway's alignment
closely following the aerial utility line which can be seen crossing over the top of the cut in the background. See an
Enlarged Photo Here. Left - Facing south through the Glen Orchard Rock Cut on Hwy 169. The highway's grade approaching Glen Orchard was substantially reduced as a result of this
deep rock cut, which measures about 25 feet in depth at its deepest point. The original route of Hwy 69 passed over the top of this hill, with the highway's alignment
closely following the aerial utility line which can be seen crossing over the top of the cut in the background. See an
Enlarged Photo Here.(Photograph taken on May 17, 2026 - © Cameron Bevers) Right - This abandoned section of pavement was left behind as a result of the Glen Orchard Rock Cut's construction in 1972-1973. The relocated highway lies at
the bottom of the cut, situated a short distance to the west. See an
Enlarged Photo Here.(Photograph taken on May 17, 2026 - © Cameron Bevers) 
 Left - View of the abandoned section of Hwy 69 south of Glen Orchard. This old highway curve has survived reasonably well since being taken out of service in
the early 1970s. The pavement on the old highway was constructed as part of a much earlier highway improvement project carried out in 1956. See an
Enlarged Photo Here. Left - View of the abandoned section of Hwy 69 south of Glen Orchard. This old highway curve has survived reasonably well since being taken out of service in
the early 1970s. The pavement on the old highway was constructed as part of a much earlier highway improvement project carried out in 1956. See an
Enlarged Photo Here.(Photograph taken on May 17, 2026 - © Cameron Bevers) Right - The strip of abandoned pavement comes to an end as the old highway's alignment approaches, and then passes below, the relocated highway as it exits
from the north end of the Glen Orchard Rock Cut. The abandoned highway emerges again along the western side of Hwy 169. See an
Enlarged Photo Here.(Photograph taken on May 17, 2026 - © Cameron Bevers) 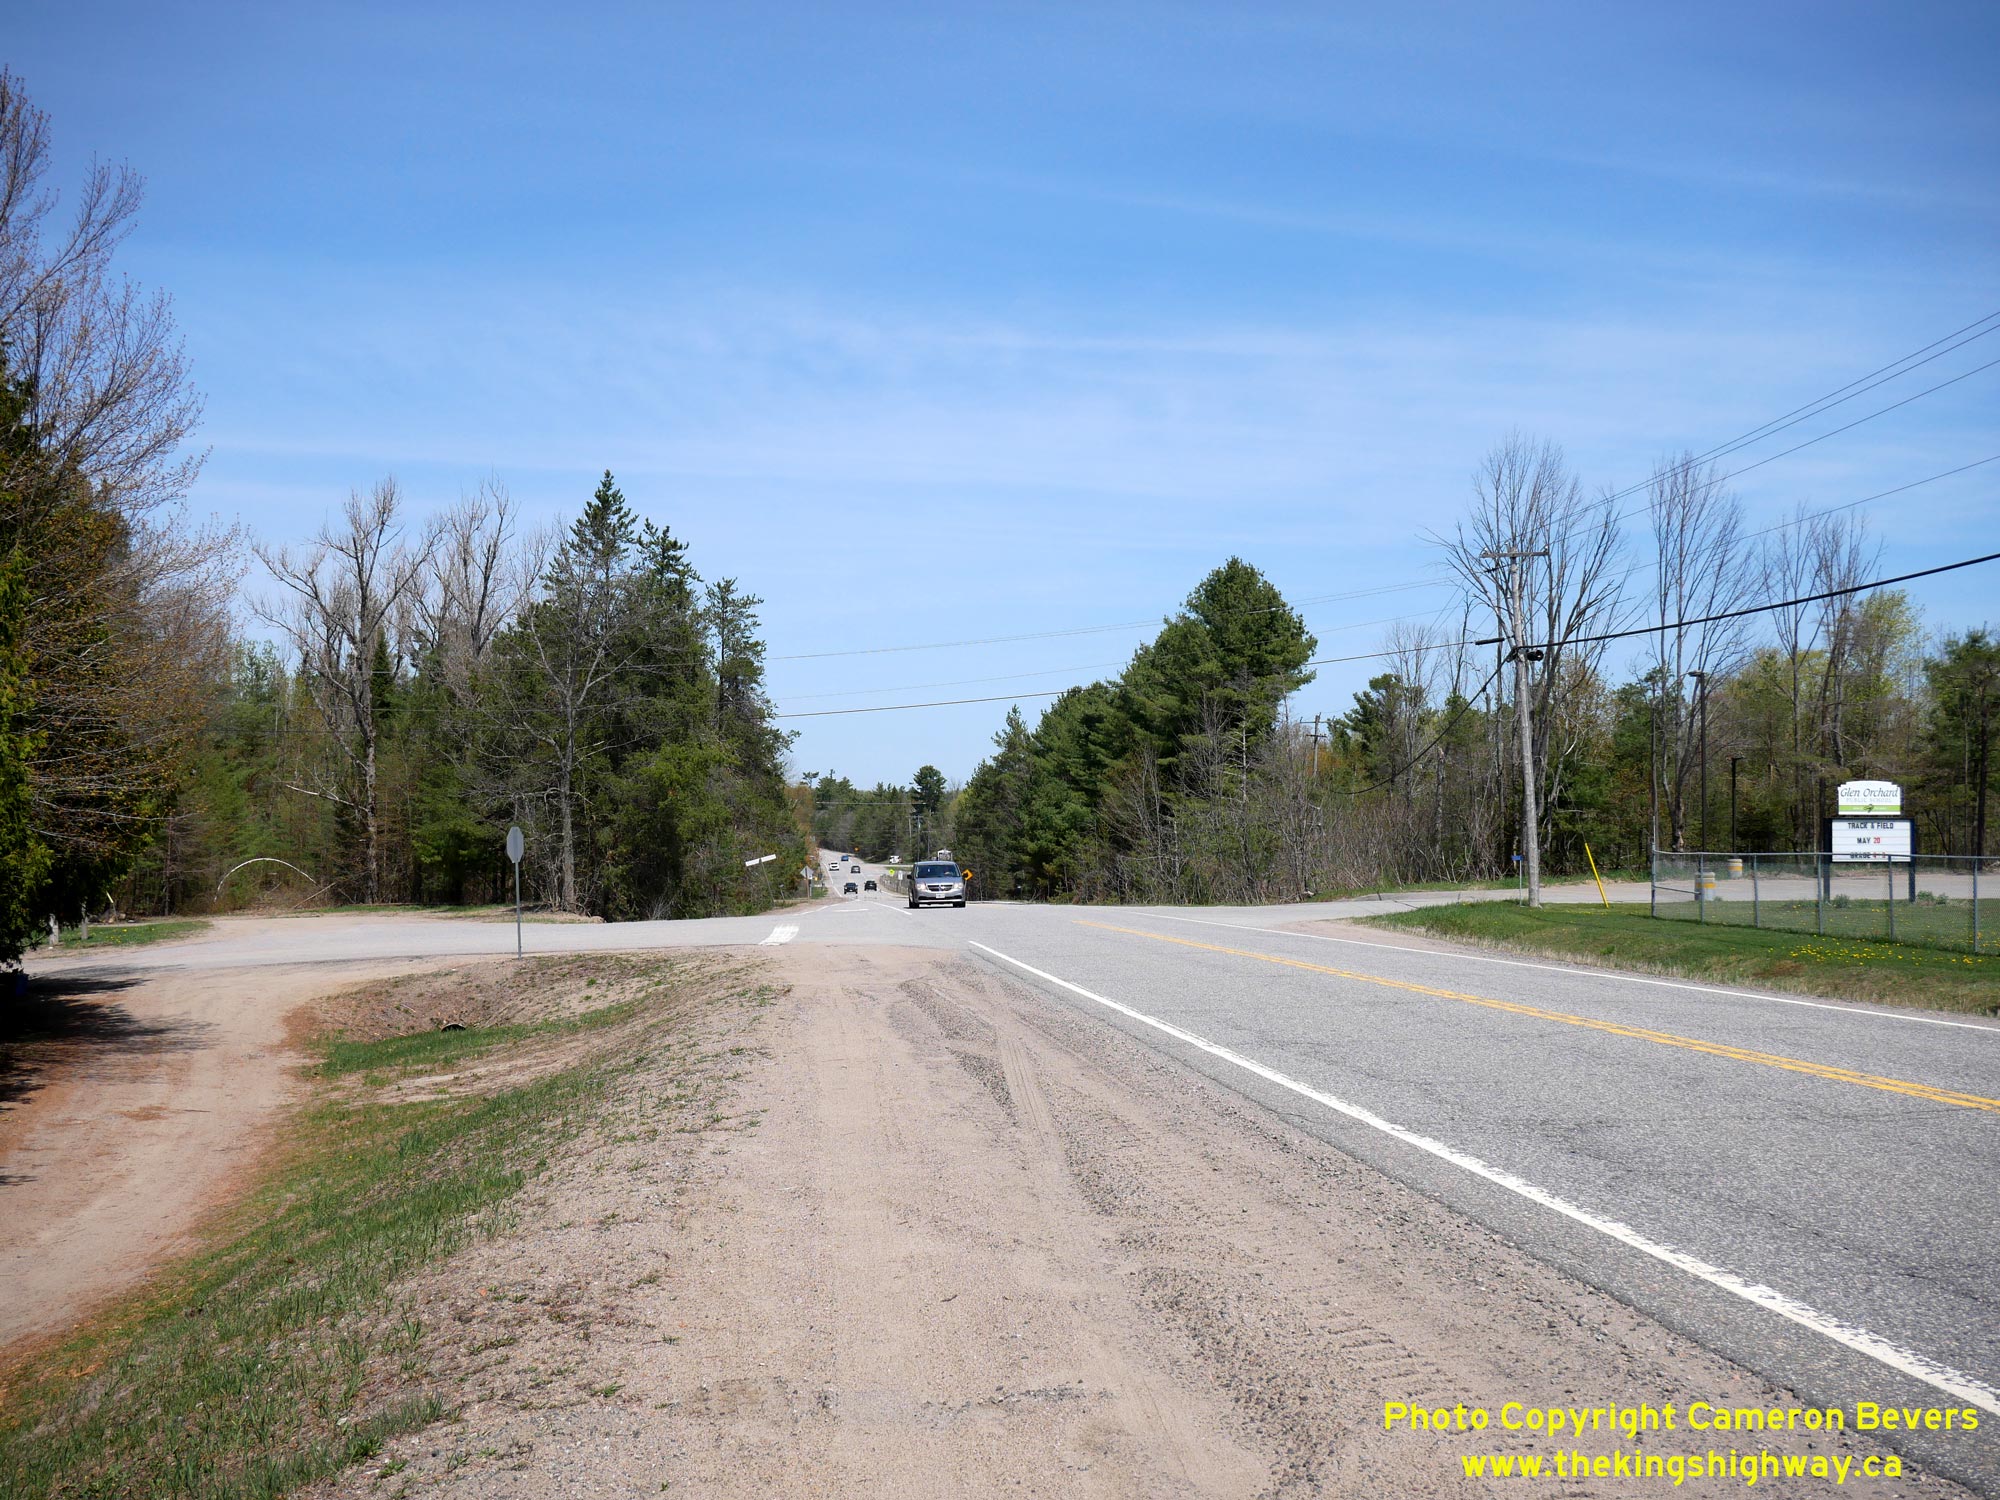
 Left - View of the current and former alignments of the highway at Glen Orchard. The original highway's alignment at left glides off into the forest, while the
current highway, built in the early 1970s, continues north at right towards the Hwy 118 Junction. Under Contract #1972-11, a 4-mile section of Hwy 69 was reconstucted
with improved horizontal and vertical geometry. Grading work was completed in September 1973, with final paving being carried out under Contract #1974-15. See an
Enlarged Photo Here. Left - View of the current and former alignments of the highway at Glen Orchard. The original highway's alignment at left glides off into the forest, while the
current highway, built in the early 1970s, continues north at right towards the Hwy 118 Junction. Under Contract #1972-11, a 4-mile section of Hwy 69 was reconstucted
with improved horizontal and vertical geometry. Grading work was completed in September 1973, with final paving being carried out under Contract #1974-15. See an
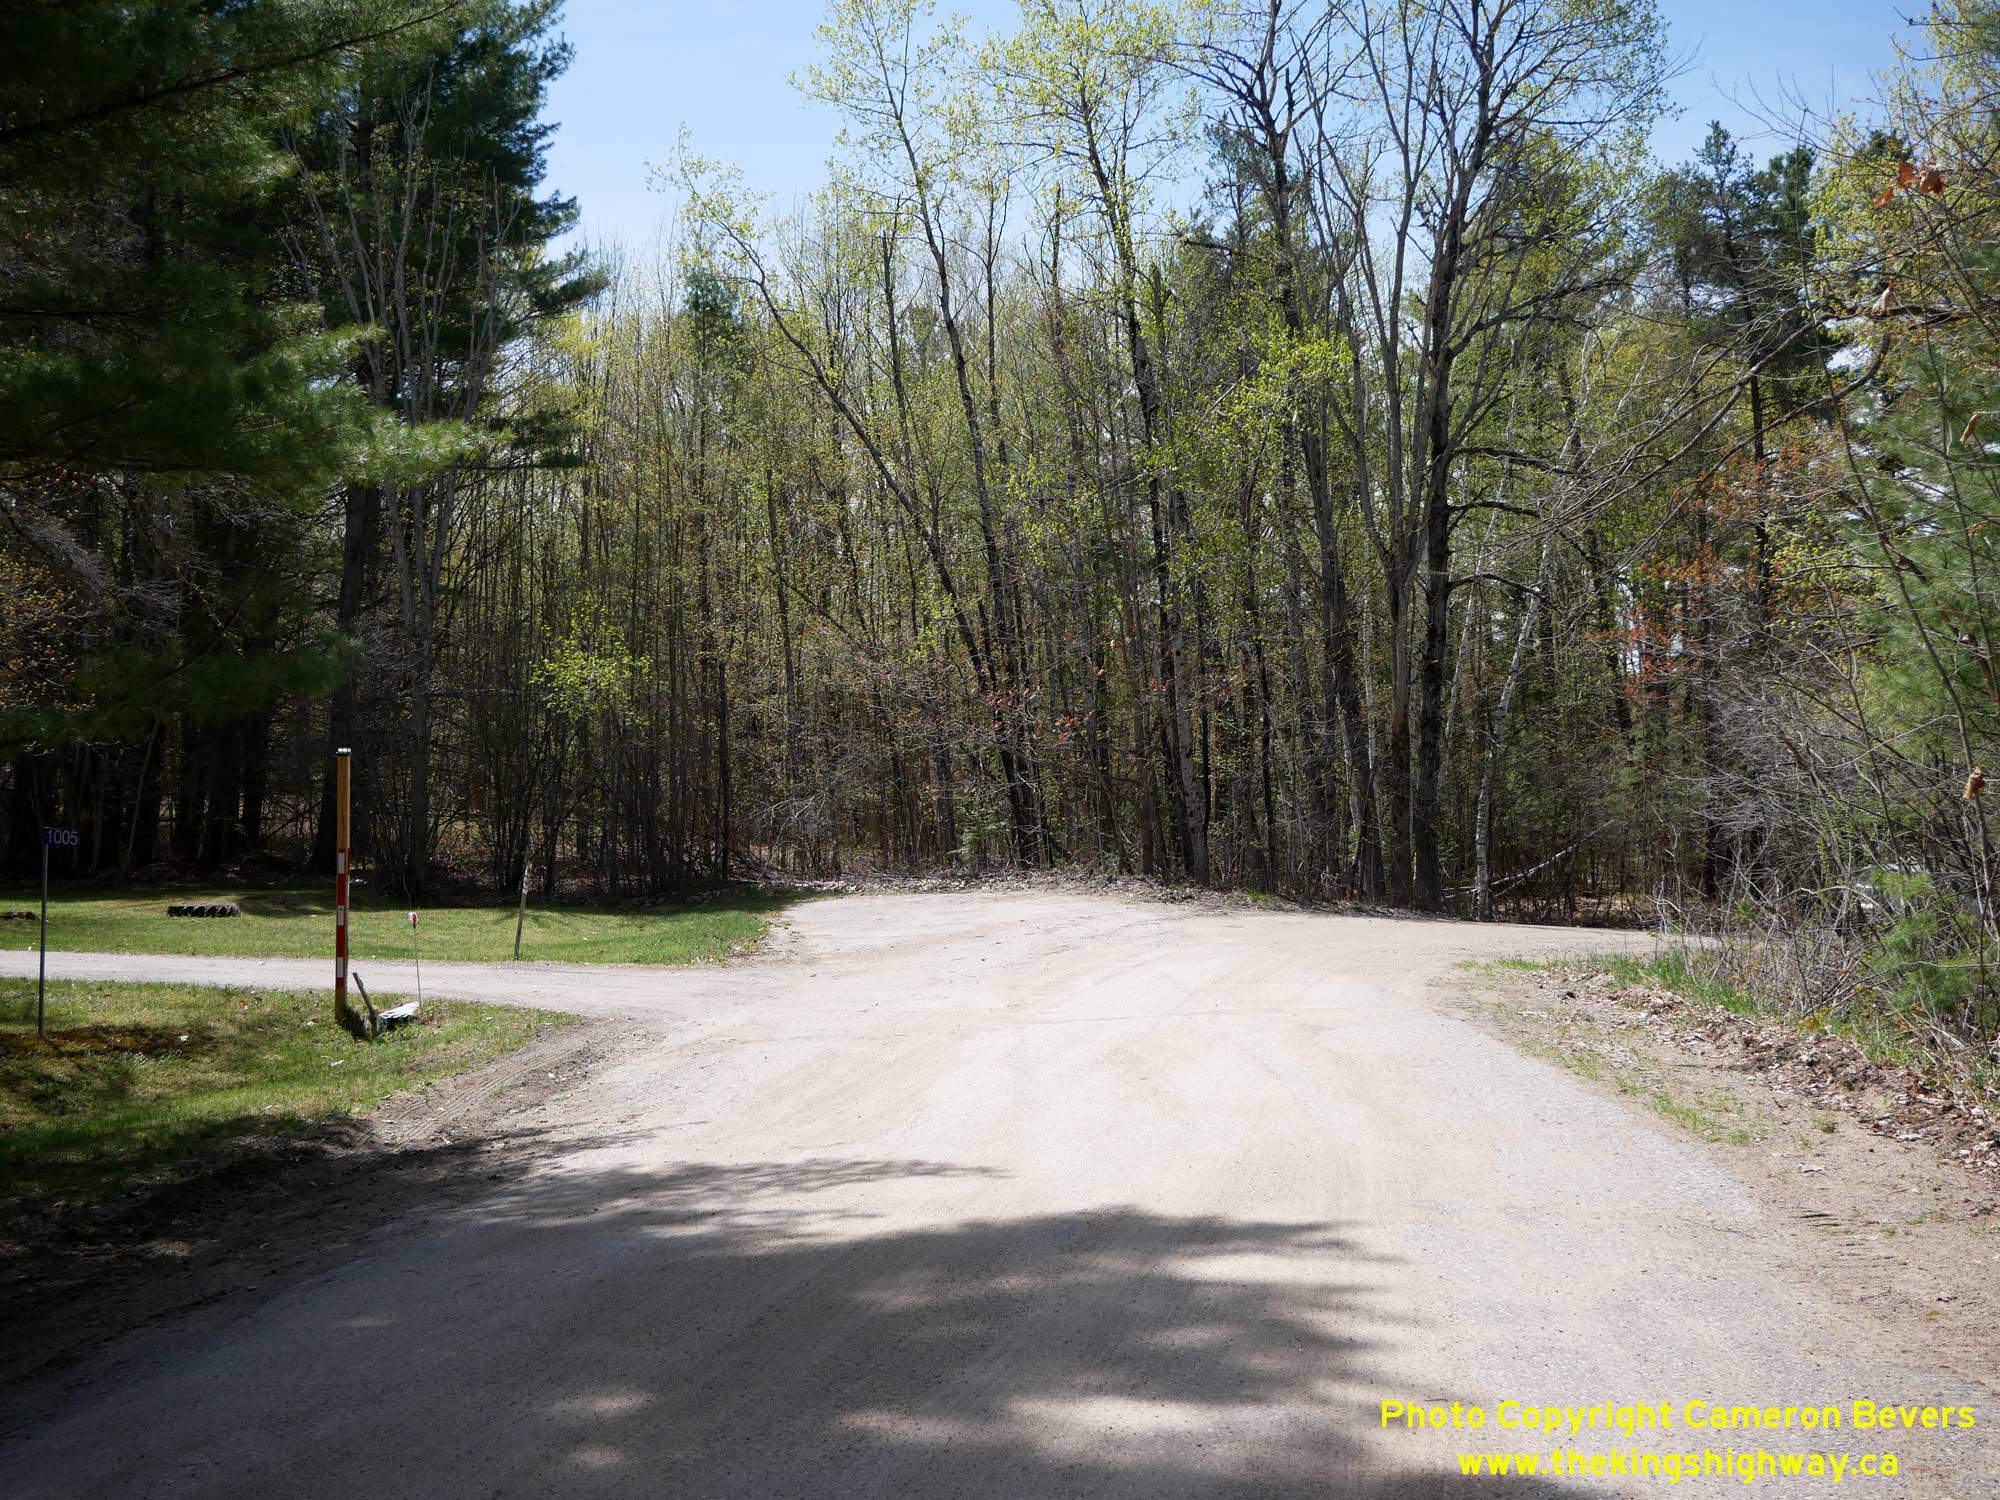
Enlarged Photo Here.(Photograph taken on May 17, 2026 - © Cameron Bevers) Right - A short section of Young's Road at Glen Orchard follows a bypassed portion of Hwy 69. The old highway pavement was left in place up until the turn-off,
after which point it was removed as part of the highway's abandonment. Traces of the old highway curve's grading are still visible in the forest beyond the end of the
pavement. See an Enlarged Photo Here.(Photograph taken on May 17, 2026 - © Cameron Bevers) 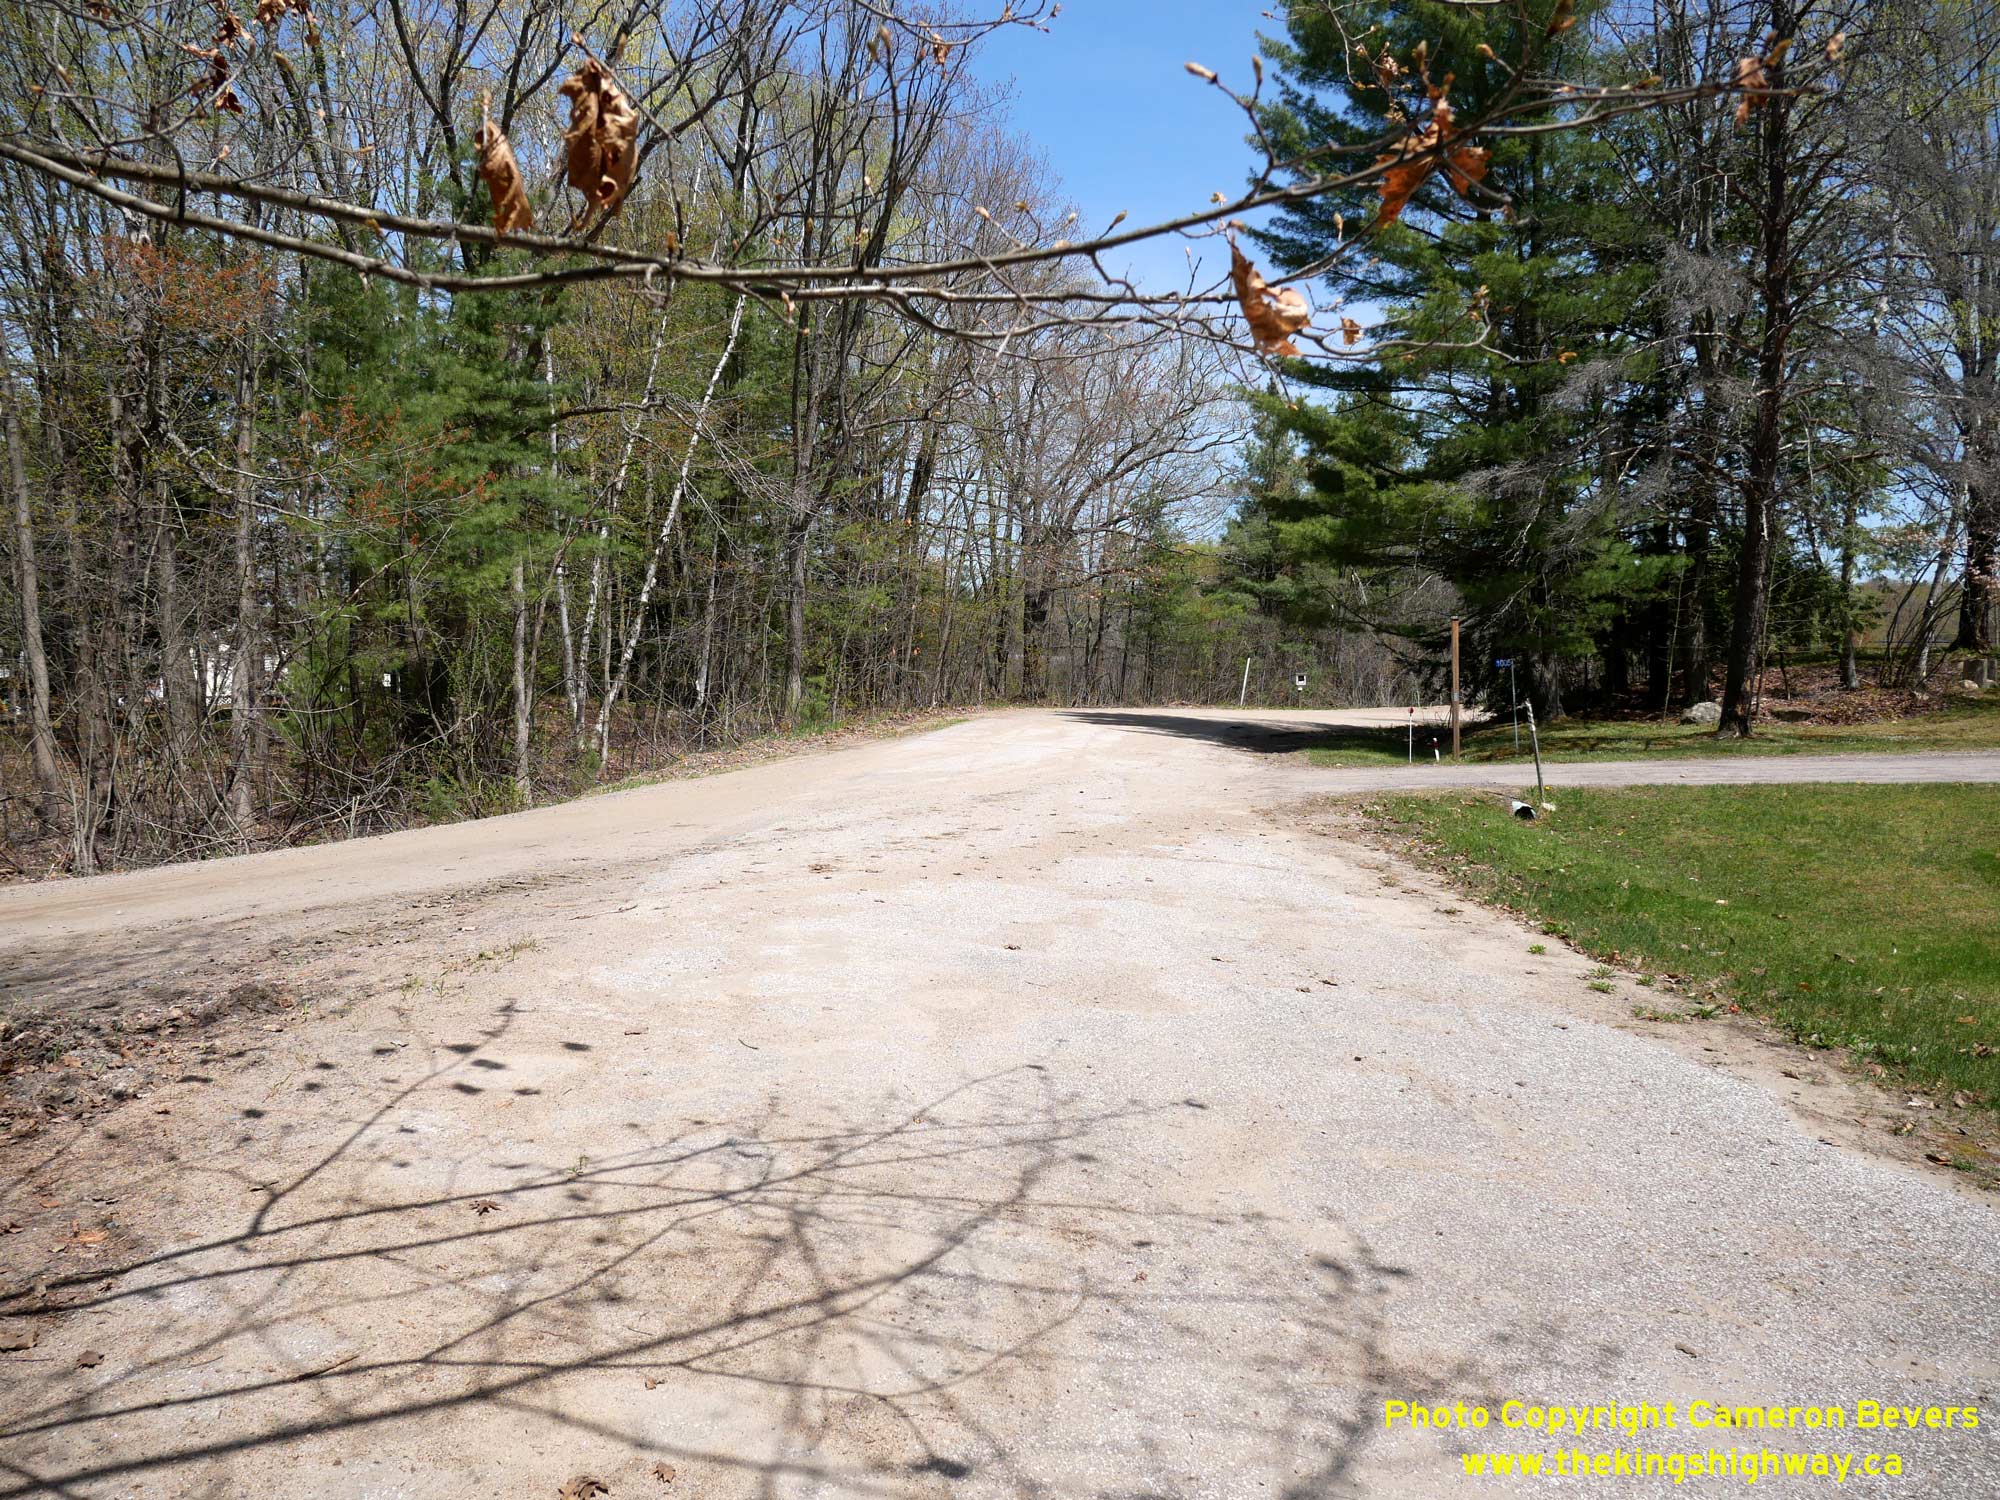
 Left - This section of superelevated pavement on Young's Road is a telltale sign that this was once the main highway. Historically, Hwy 69 curved to the right
here, before rounding a long curve to the left in front of Glen Orchard's General Store. Both loops were bypassed when the highway was reconstructed through Glen
Orchard in the early 1970s, under Contract #1972-11. See an Enlarged Photo Here. Left - This section of superelevated pavement on Young's Road is a telltale sign that this was once the main highway. Historically, Hwy 69 curved to the right
here, before rounding a long curve to the left in front of Glen Orchard's General Store. Both loops were bypassed when the highway was reconstructed through Glen
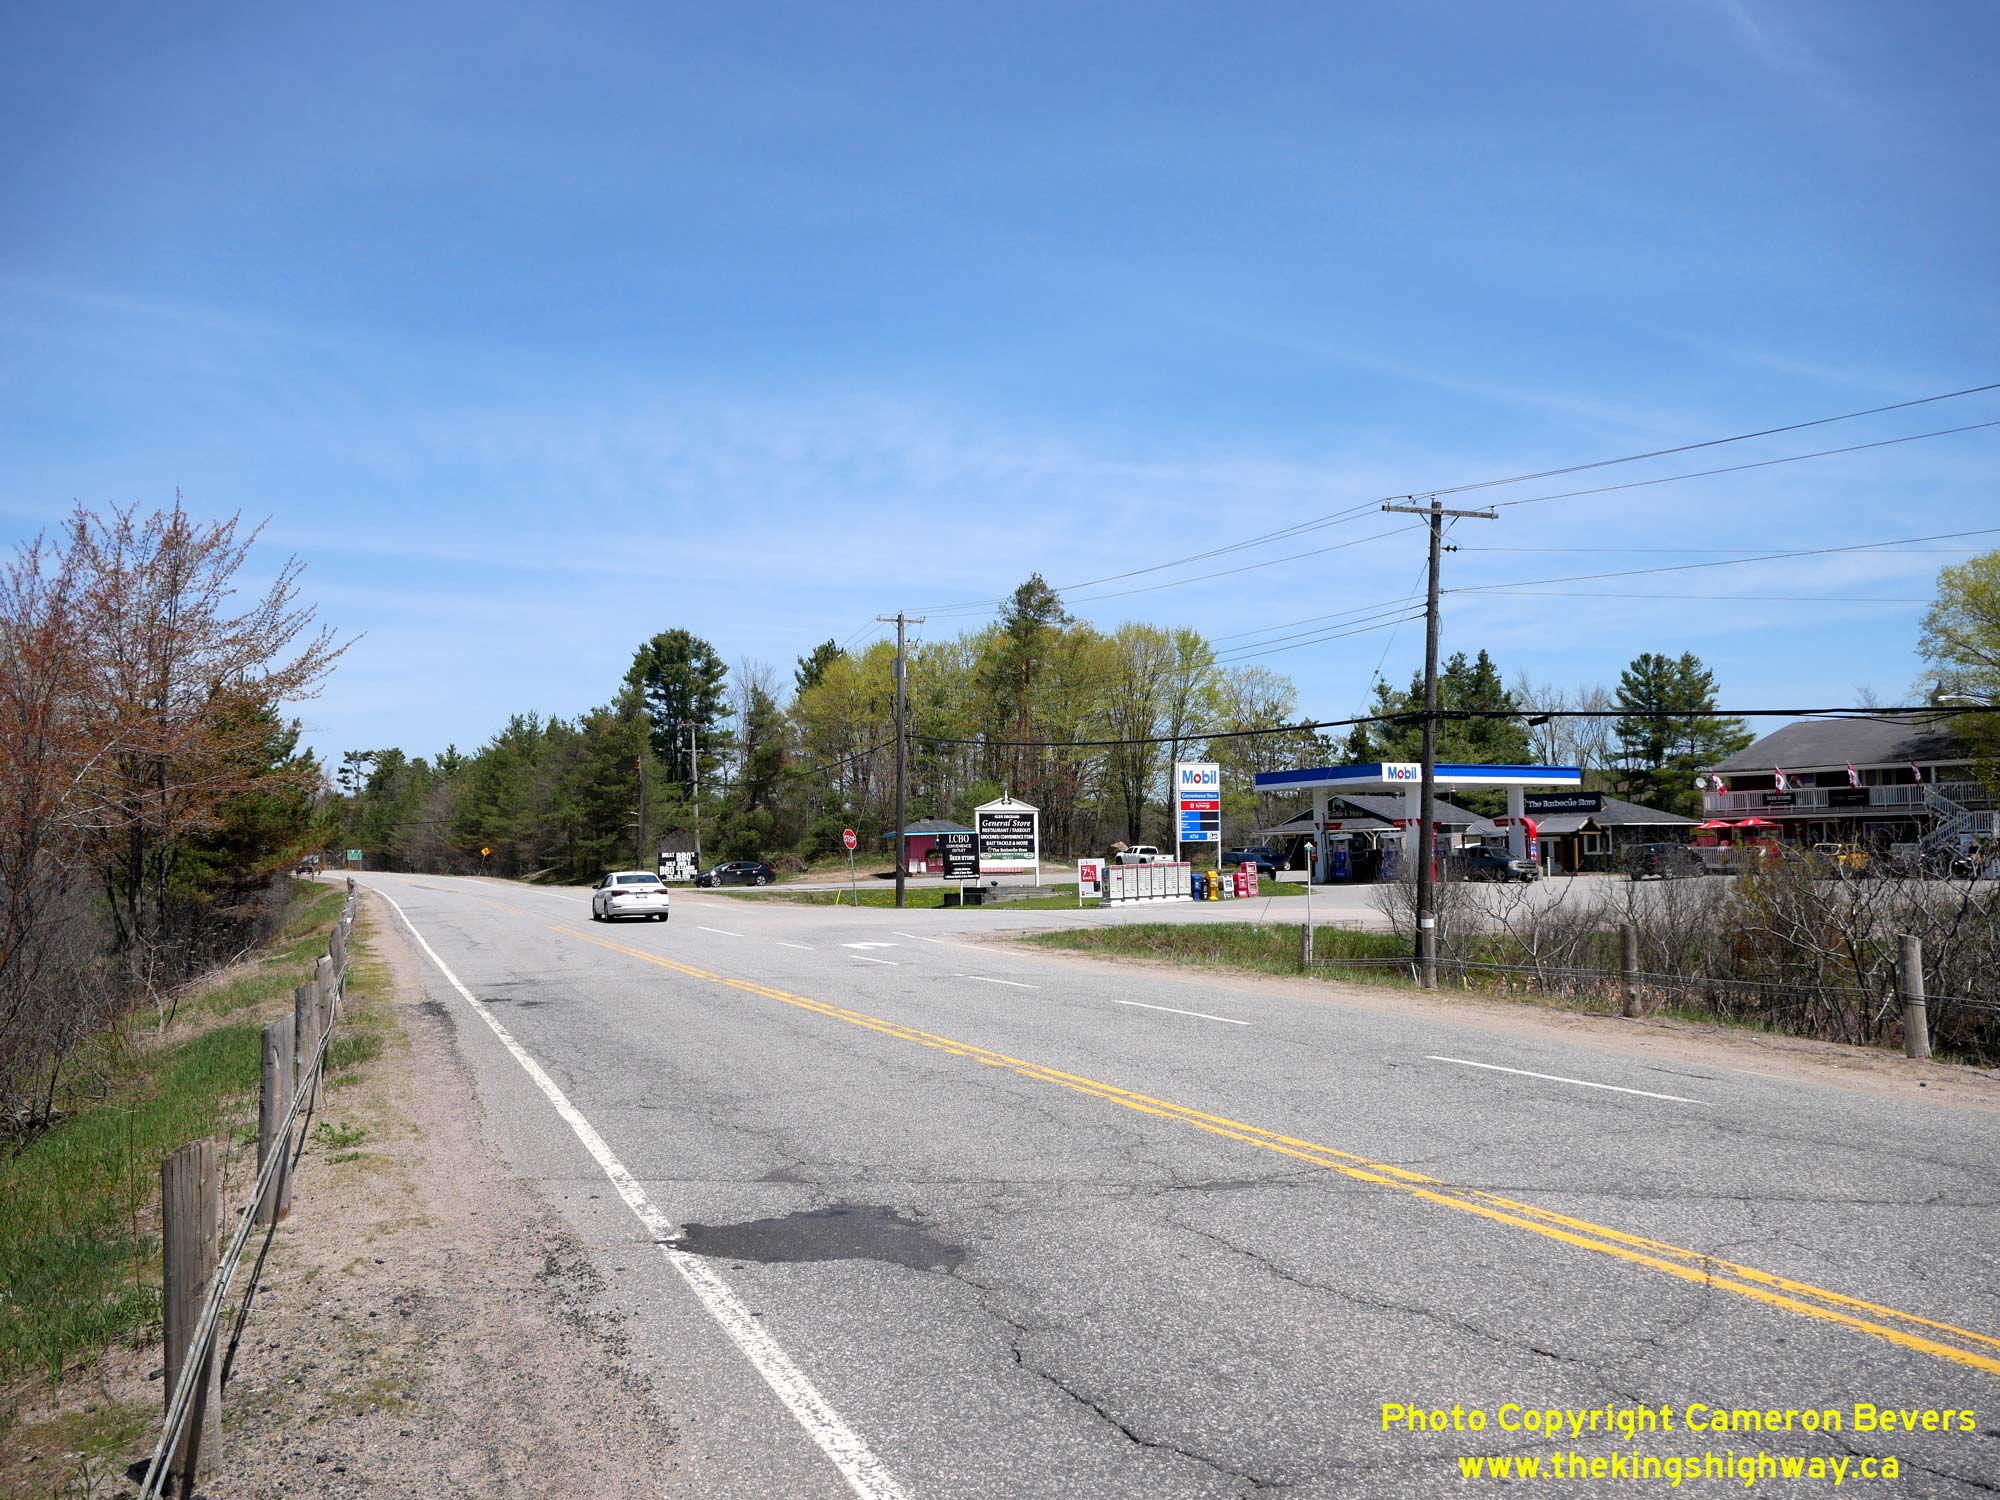
Orchard in the early 1970s, under Contract #1972-11. See an Enlarged Photo Here.(Photograph taken on May 17, 2026 - © Cameron Bevers) Right - View of the relocated highway at Glen Orchard, facing north towards the Hwy 118 Junction. The old highway curve in front of the Glen Orchard General
Store was removed and is no longer visible today. Historically, the highway passed much closer to the store's entrance than it does today. See an
Enlarged Photo Here.(Photograph taken on May 17, 2026 - © Cameron Bevers) 

Left - Facing south along Hwy 169 towards Bala from the Hwy 118 Junction at Glen Orchard. All three approaches to the Hwy 169 & Hwy 118 Junction at Glen
Orchard were extensively realigned in the 1970s, as part of an improvement project to replace an inconspicuous junction where these two highways initially intersected.
This broad, sweeping curve beside Butterfly Lake bypassed a series of sharp curves on the original 1937 route of Hwy 69 (later Hwy 169). See an
Enlarged Photo Here. (Photograph taken on September 27, 2013 - © Cameron Bevers) Right - Approaching the Hwy 118 Junction on Hwy 169 at Glen Orchard, facing north towards MacTier. See an Enlarged Photo Here. (Photograph taken on September 27, 2013 - © Cameron Bevers) 

Left - Green guide sign for Muskoka Road 118 West (Former Hwy 118) on northbound Hwy 169 at Glen Orchard. Provincial ownership of Hwy 118 west of Bracebridge
ceased in 1998, when the Ministry of Transportation of Ontario (MTO) transferred jurisdiction over the western leg of Hwy 118 to the District Municipality of Muskoka.
Today, Former Hwy 118 from the Hwy 169 Junction at Glen Orchard to the Hwy 11 Interchange in Bracebridge is officially known as Muskoka Road 118 West. See an
Enlarged Photo Here. (Photograph taken on September 27, 2013 - © Cameron Bevers) Right - Scenic Butterfly Lake appears on the eastern side of the Hwy 118 & Hwy 169 Junction. This is one of many lakes in the popular Muskoka Lakes tourist area. See an Enlarged Photo Here. (Photograph taken on September 27, 2013 - © Cameron Bevers) 

Left - When the Hwy 169 & Hwy 118 Junction was reconstructed in 1974, new channelized right turn ramps were installed. Note the old "Ramp Speed 50" warning
sign on the left side of the ramp. In recent years, these Ramp Speed signs have been phased out and replaced with new plain yellow signs which just post the numerical
advisory speed only. See an Enlarged Photo Here. (Photograph taken on September 27, 2013 - © Cameron Bevers) Right - Western terminus of Hwy 118 at the Hwy 169 Junction at Glen Orchard. This interesting 1970s-vintage highway junction was constructed under Contract #1974-15. It even features white chevron pavement hatch markings approaching the raised traffic islands, which are not commonly used in Ontario anymore. See an Enlarged Photo Here. (Photograph taken on September 27, 2013 - © Cameron Bevers) 

Left - Green guide signs on westbound Hwy 118 approaching Muskoka Road 169 (Former Hwy 169) at Glen Orchard. See an
Enlarged Photo Here. (Photograph taken on September 27, 2013 - © Cameron Bevers) Right - Destination guide sign at the western terminus of Hwy 118 at the Hwy 169 Junction at Glen Orchard. The incorporated towns of Gravenhurst and Parry Sound were typically used as the destination control cities along Hwy 169 through Muskoka. Although the Town of Bala hasn't been an incorporated municipality in its own right in many decades, it is still a very popular Muskoka tourist destination and is still signed today at the Hwy 118 Junction. Bala was also the junction of two provincial highways (Hwy 169 & Hwy 660) up until 1982, which might further explain why Bala remained signed as a destination even though the town is no longer an incorporated municipal entity. See an Enlarged Photo Here. (Photograph taken on September 27, 2013 - © Cameron Bevers) 

Left - General view of the current Hwy 169 & Hwy 118 Junction, facing east towards Port Carling. This photo was taken from the approximate site of the
original highway junction, prior to the intersection's reconstruction in 1974. The vertical profile of Hwy 169 was lowered by several metres as a result of the
reconstruction, which allowed the two highways to intersect at a comparatively level grade. Previously, Hwy 118 would have ascended a steep uphill grade just before
reaching Hwy 169, which would have resulted in an inconspicuous intersection with poor sight lines. Given the magnitude of the reconstruction efforts displayed here,
it is quite probable that the old highway junction at Glen Orchard had a dubious safety record prior to the 1970s. See an
Enlarged Photo Here. (Photograph taken on September 27, 2013 - © Cameron Bevers) Right - Green guide sign for Muskoka Road 118 West (Former Hwy 118) on southbound Hwy 169 at Glen Orchard. See an Enlarged Photo Here. (Photograph taken on September 27, 2013 - © Cameron Bevers) 

Left - View of the channelized right turn ramp from westbound Hwy 118 to northbound Hwy 169. The Department of Highways of Ontario (DHO) and its successor, the
Ministry of Transportation and Communications (MTC), rebuilt many highway junctions with channelized right turn ramps such as this during the 1950s, 1960s and 1970s.
This right turn ramp allows vehicles approaching on Hwy 118 to bypass the stop sign at Hwy 169. This intersection feature is particularly advantageous for heavy
trucks. If they had to pass through the intersection and come to a full stop, it would take a considerable amount of time for the trucks to get back up to highway
speeds. See an Enlarged Photo Here. (Photograph taken on September 27, 2013 - © Cameron Bevers) Right - Facing east along Hwy 118 from the Hwy 169 Junction at Glen Orchard. When Hwy 118 was first established in the mid-1950s, the highway followed the aerial hydro lines onto West White's Road rather then continue straight ahead. This former alignment of Hwy 118 can be seen at right, departing from the current route of Hwy 118 and following the north shore of Butterfly Lake. A newer diversion of Hwy 118 can be seen straight ahead, which was built under Contract #1969-223 and completed in 1970. The diversion removed a sharp curve on the original 1955 route of Hwy 118 approaching Glen Orchard. See an Enlarged Photo Here. (Photograph taken on September 27, 2013 - © Cameron Bevers) 

Left - Facing north along Hwy 169 towards MacTier from the Hwy 118 Junction at Glen Orchard. A substantial relocation of the highway took place here in 1974.
Originally, the highway followed Carl's Road, located a short distance to the west. The relocation of Hwy 169 at Glen Orchard greatly improved the sight lines for
traffic approaching the Hwy 118 Junction. See an Enlarged Photo Here. (Photograph taken on September 27, 2013 - © Cameron Bevers) Right - Approaching the Hwy 118 Junction on Hwy 169 at Glen Orchard, facing south towards Bala. See an Enlarged Photo Here. (Photograph taken on September 27, 2013 - © Cameron Bevers) 

Left - Approaching the Hwy 169 Junction on Hwy 118 at Glen Orchard. A 1 km section of Hwy 118 was relocated east of the highway junction at Glen Orchard in
the early 1970s. The original 1955 route of Hwy 118 followed the north shore of Butterfly Lake, via West White's Road. See an
Enlarged Photo Here. (Photograph taken on September 27, 2013 - © Cameron Bevers) Right - Junction sign assembly at Hwy 118 & Hwy 169 at Glen Orchard. Although the old King's Highway crown signs have long since been removed at this junction, it is still rather noteworthy to see two municipal roads with three-digit route numbers intersect at a common junction. When the District of Muskoka acquired Hwy 118 & Hwy 169 from the province as a result of the municipal highway transfers in 1998, they made a wise decision to retain the Hwy 118 and Hwy 169 route numbers, rather than attempting to introduce new route numbers to these otherwise familiar highways. Old Hwy 118 (West White's Road) can be seen at left. See an Enlarged Photo Here. (Photograph taken on September 27, 2013 - © Cameron Bevers) 

Left - Approaching the Hwy 169 Junction at Glen Orchard on Hwy 118, facing west. See an
Enlarged Photo Here. (Photograph taken on September 27, 2013 - © Cameron Bevers) Right - Advance green guide signs on westbound Hwy 118 approaching Muskoka Road 169 (Former Hwy 169) at Glen Orchard. See an Enlarged Photo Here. (Photograph taken on September 27, 2013 - © Cameron Bevers) 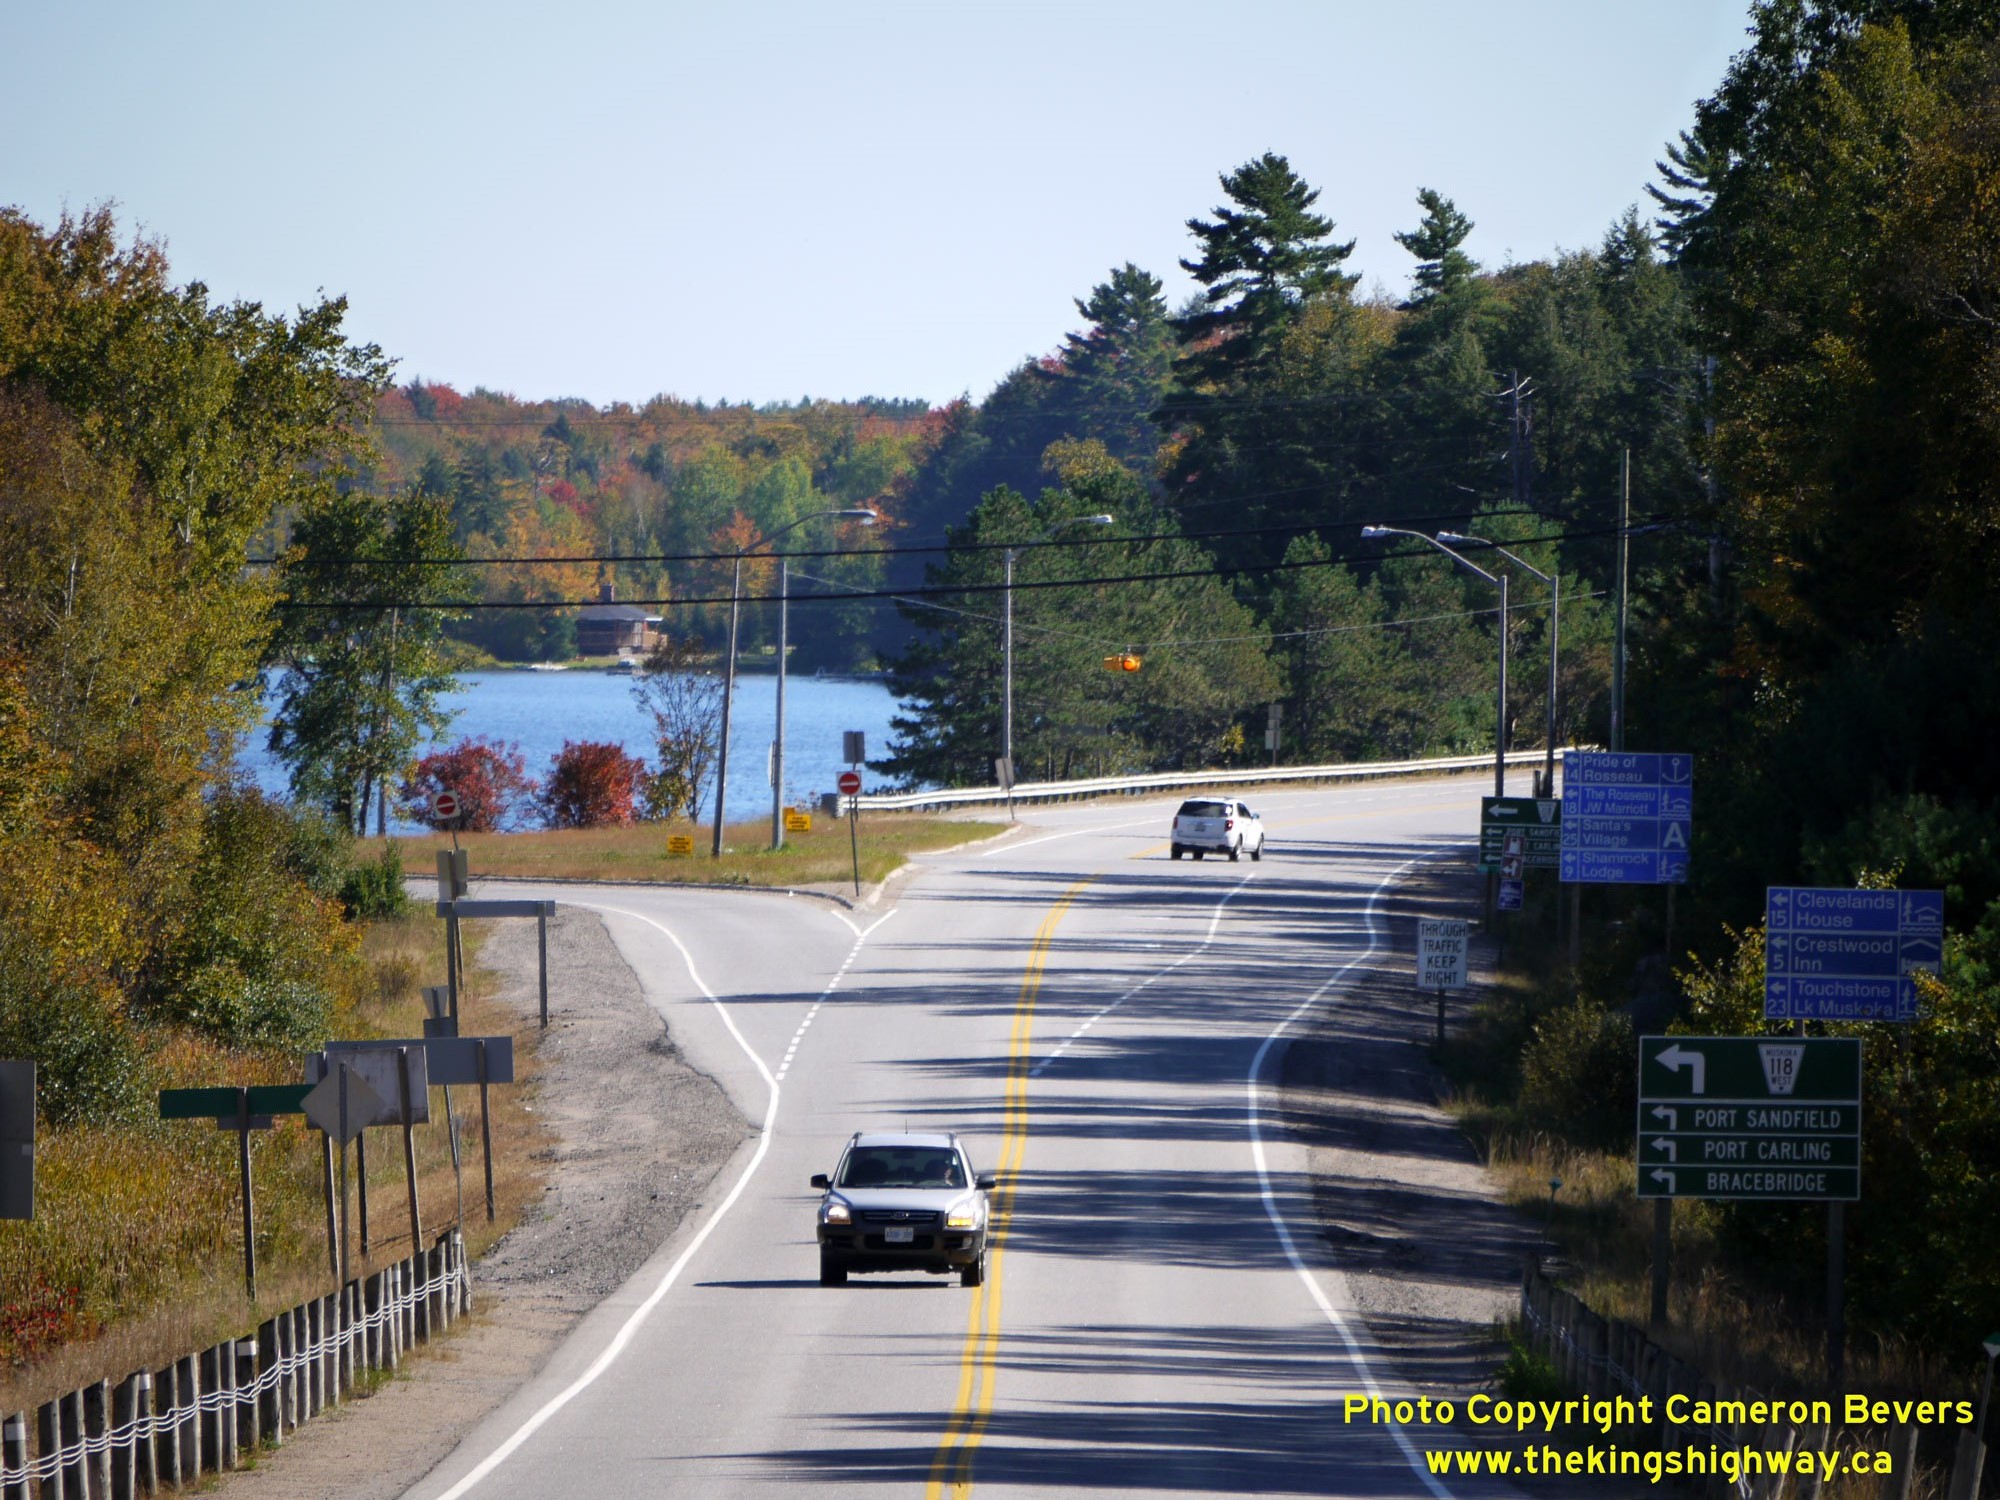
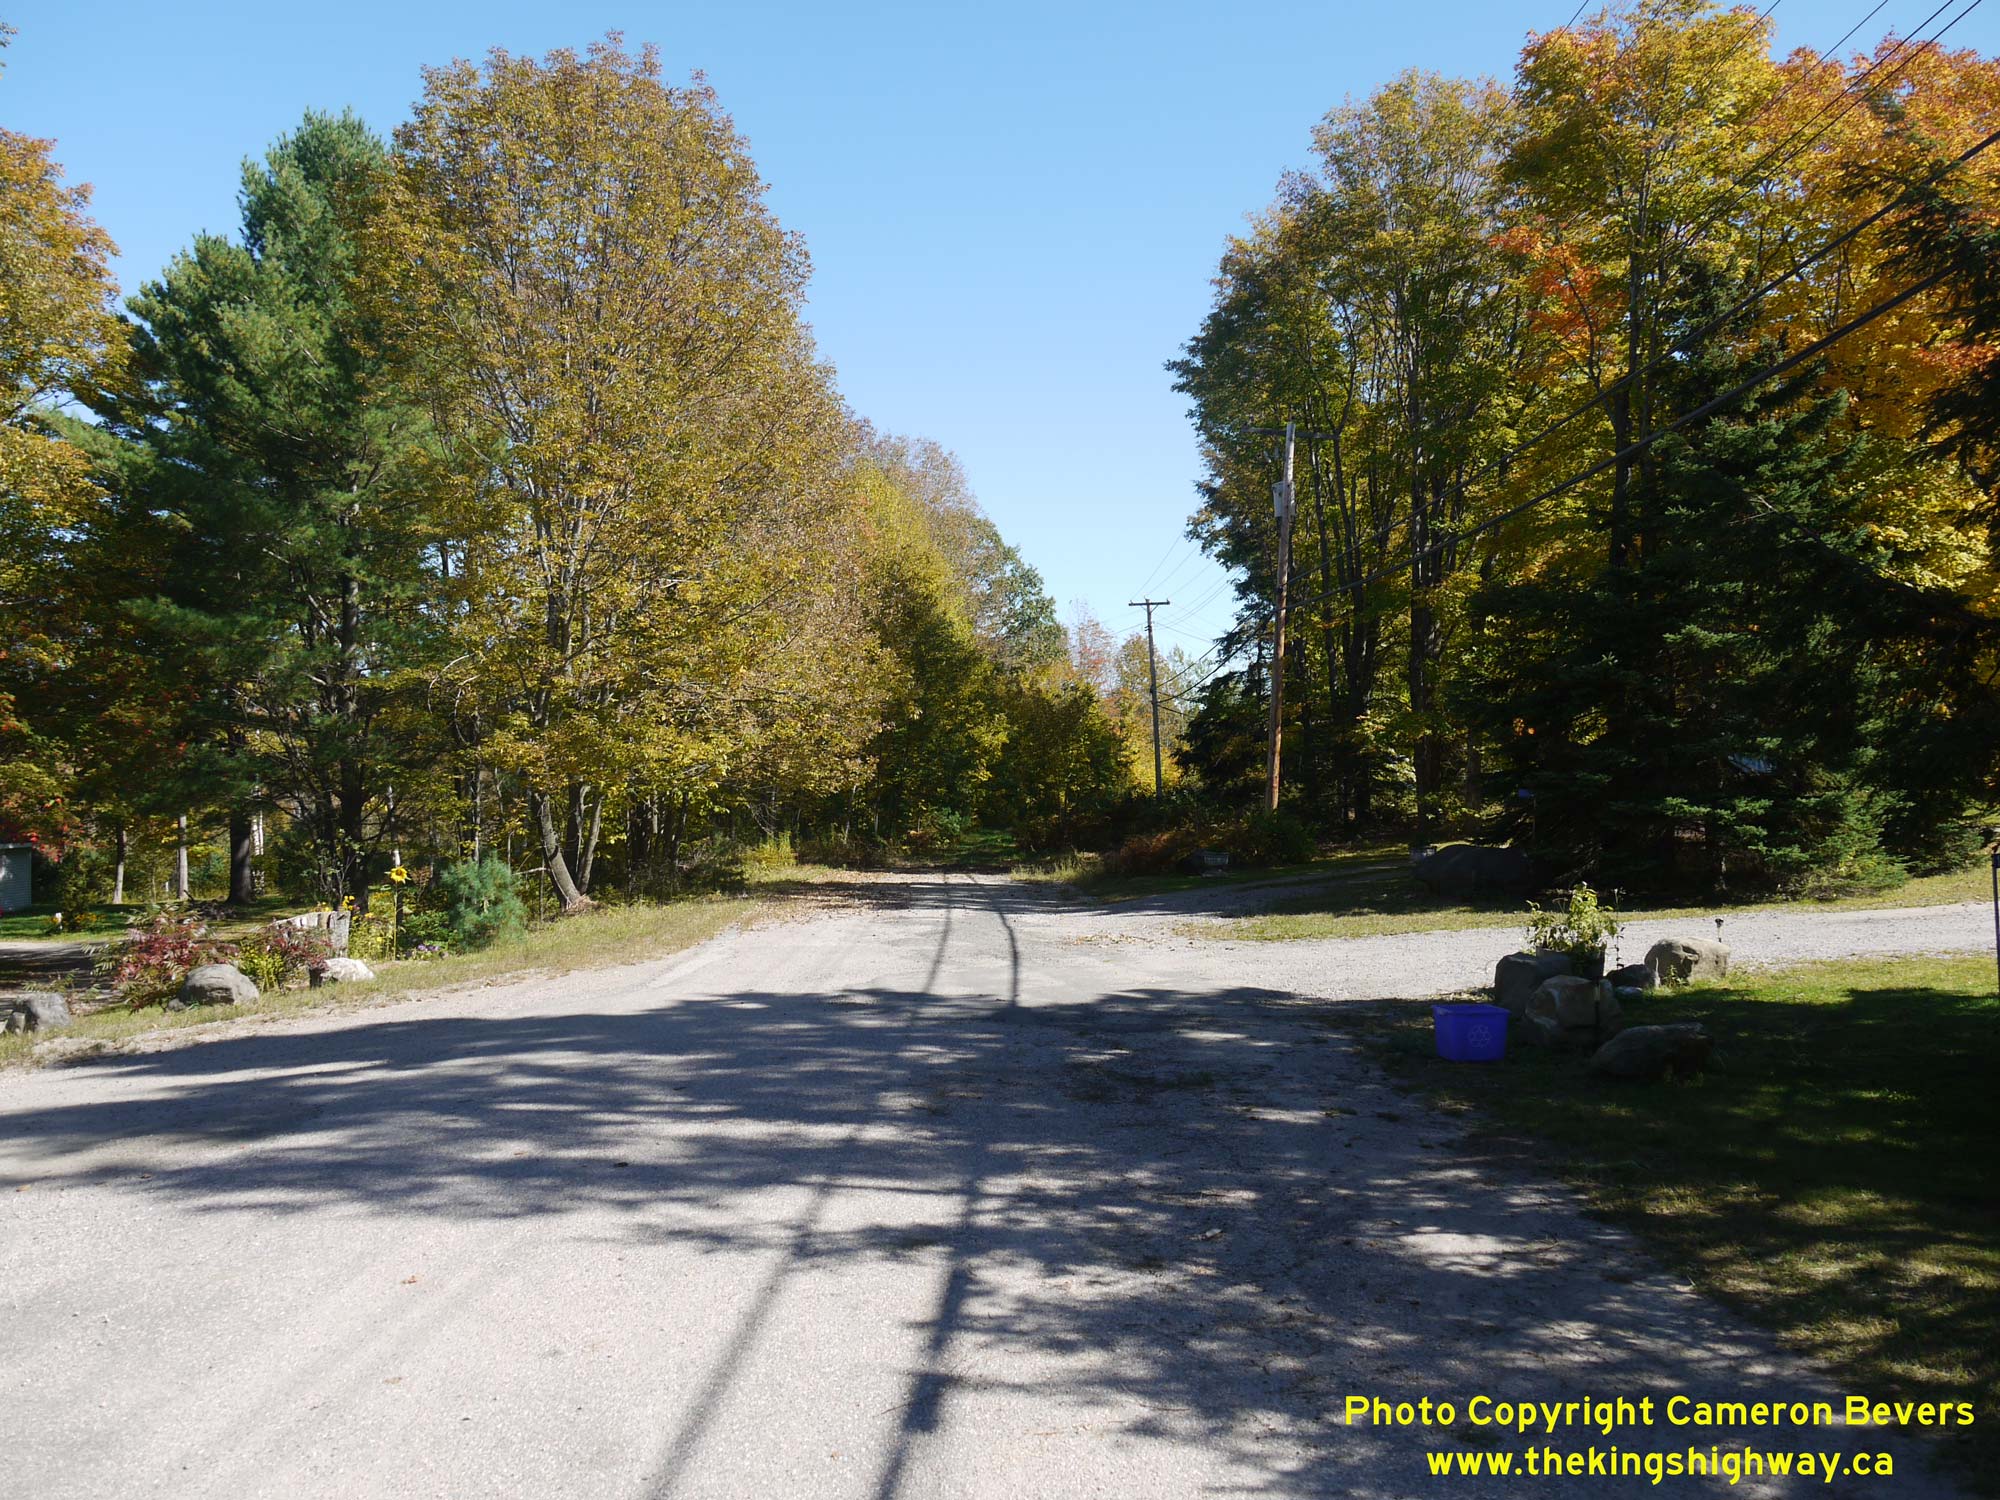 Left - View of Hwy 169 near Sherwood Road, facing south towards the Hwy 118 Junction at Glen Orchard. This entire section of Hwy 169 is a diversion of the
original highway, which was relocated under Contract #1974-15. The original junction of Hwy 118 and Hwy 169 at Glen Orchard had poor sightlines on all of the
approaches, but particularly the north approach. By comparison, the new highway junction can be seen from about 500 metres away when approaching from the north, as
this photo demonstrates. See an Enlarged Photo Here. Left - View of Hwy 169 near Sherwood Road, facing south towards the Hwy 118 Junction at Glen Orchard. This entire section of Hwy 169 is a diversion of the
original highway, which was relocated under Contract #1974-15. The original junction of Hwy 118 and Hwy 169 at Glen Orchard had poor sightlines on all of the
approaches, but particularly the north approach. By comparison, the new highway junction can be seen from about 500 metres away when approaching from the north, as
this photo demonstrates. See an Enlarged Photo Here.(Photograph taken on September 27, 2013 - © Cameron Bevers) Right - End of Carl's Road (Old Hwy 69) at the point where it was closed off just north of the Hwy 118 Junction's old location. The original highway followed
the aerial hydro lines and rounded a sharp curve to the right just before connecting with Hwy 118, which resulted in an inconspicuous intersection. See an
Enlarged Photo Here.(Photograph taken on September 27, 2013 - © Cameron Bevers) 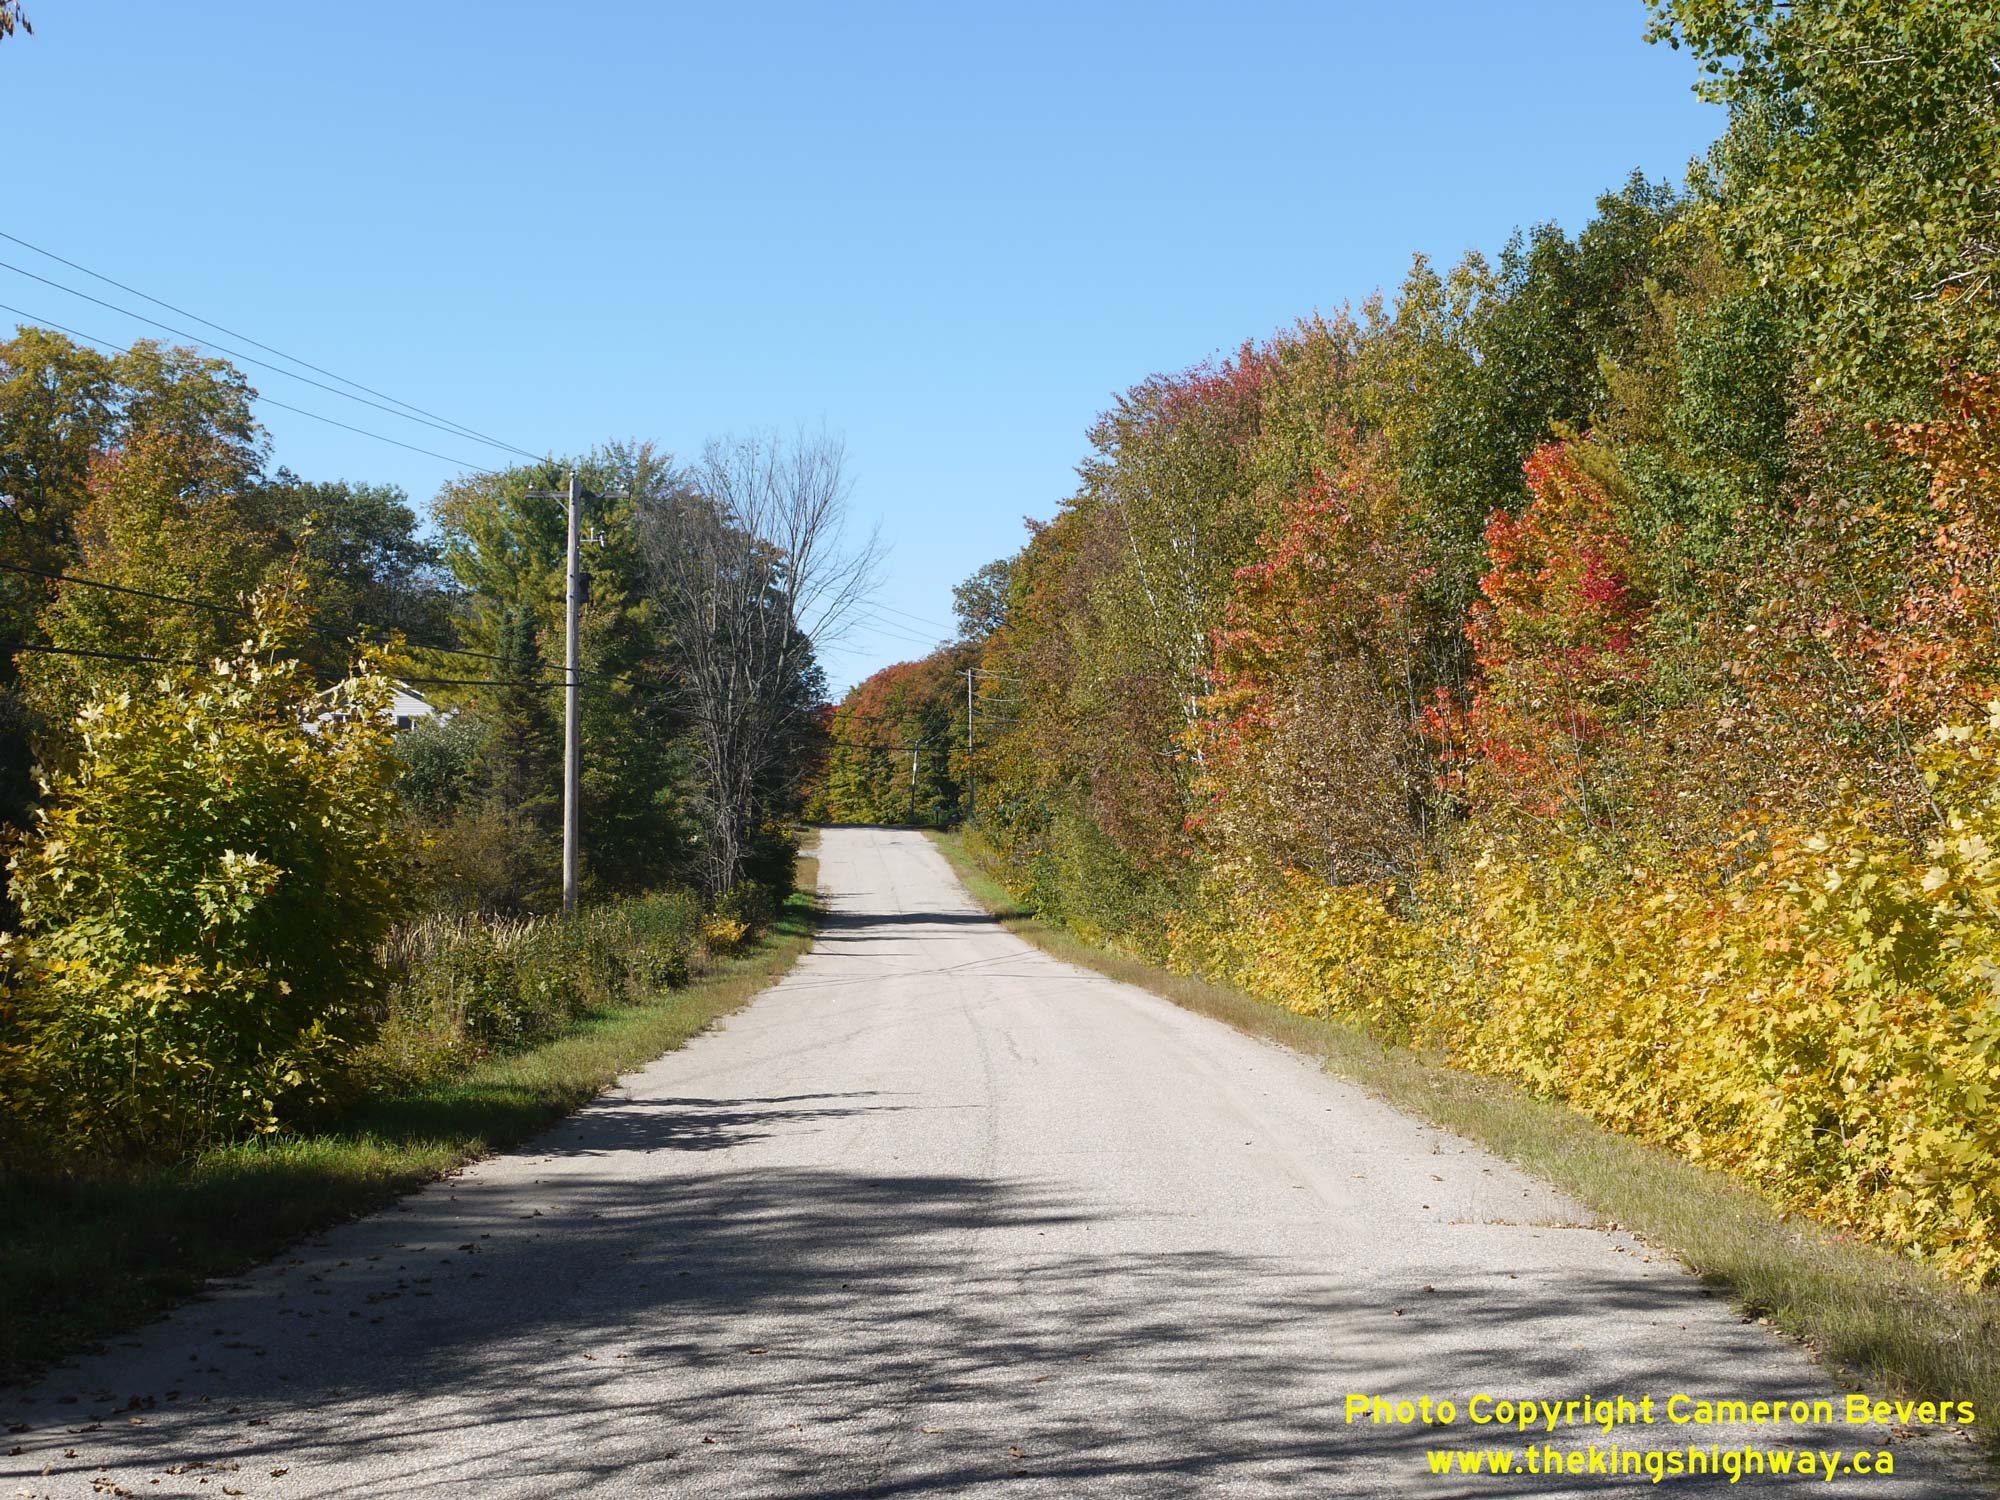
 Left - Facing north along Carl's Road (Old Hwy 69) near Glen Orchard. This old section of the highway was left behind in the mid-1970s, following the
relocation of the highway onto an improved alignment nearby. Jurisdiction over the old highway was transferred from the province over to municipal control,
effective October 27, 1976. See an Enlarged Photo Here. Left - Facing north along Carl's Road (Old Hwy 69) near Glen Orchard. This old section of the highway was left behind in the mid-1970s, following the
relocation of the highway onto an improved alignment nearby. Jurisdiction over the old highway was transferred from the province over to municipal control,
effective October 27, 1976. See an Enlarged Photo Here.(Photograph taken on September 27, 2013 - © Cameron Bevers) Right - Facing south along Hwy 169 towards Glen Orchard at Bass Lake, located about 3 km south of Foot's Bay. During the 1930s, a short diversion about 1/4
mile in length was constructed at Bass Lake which removed two very hazardous curves in the original route of Hwy 69. The resulting highway crossed two short causeways
built across the northern end of Bass Lake and the southern end of Stills Bay (Lake Joseph). The relocation of Hwy 69 through this area was carried out under Contract
#1937-41, when about 3 1/2 miles of grading were completed from Foot's Bay southerly. See an
Enlarged Photo Here.(Photograph taken on October 2, 2022 - © Cameron Bevers) 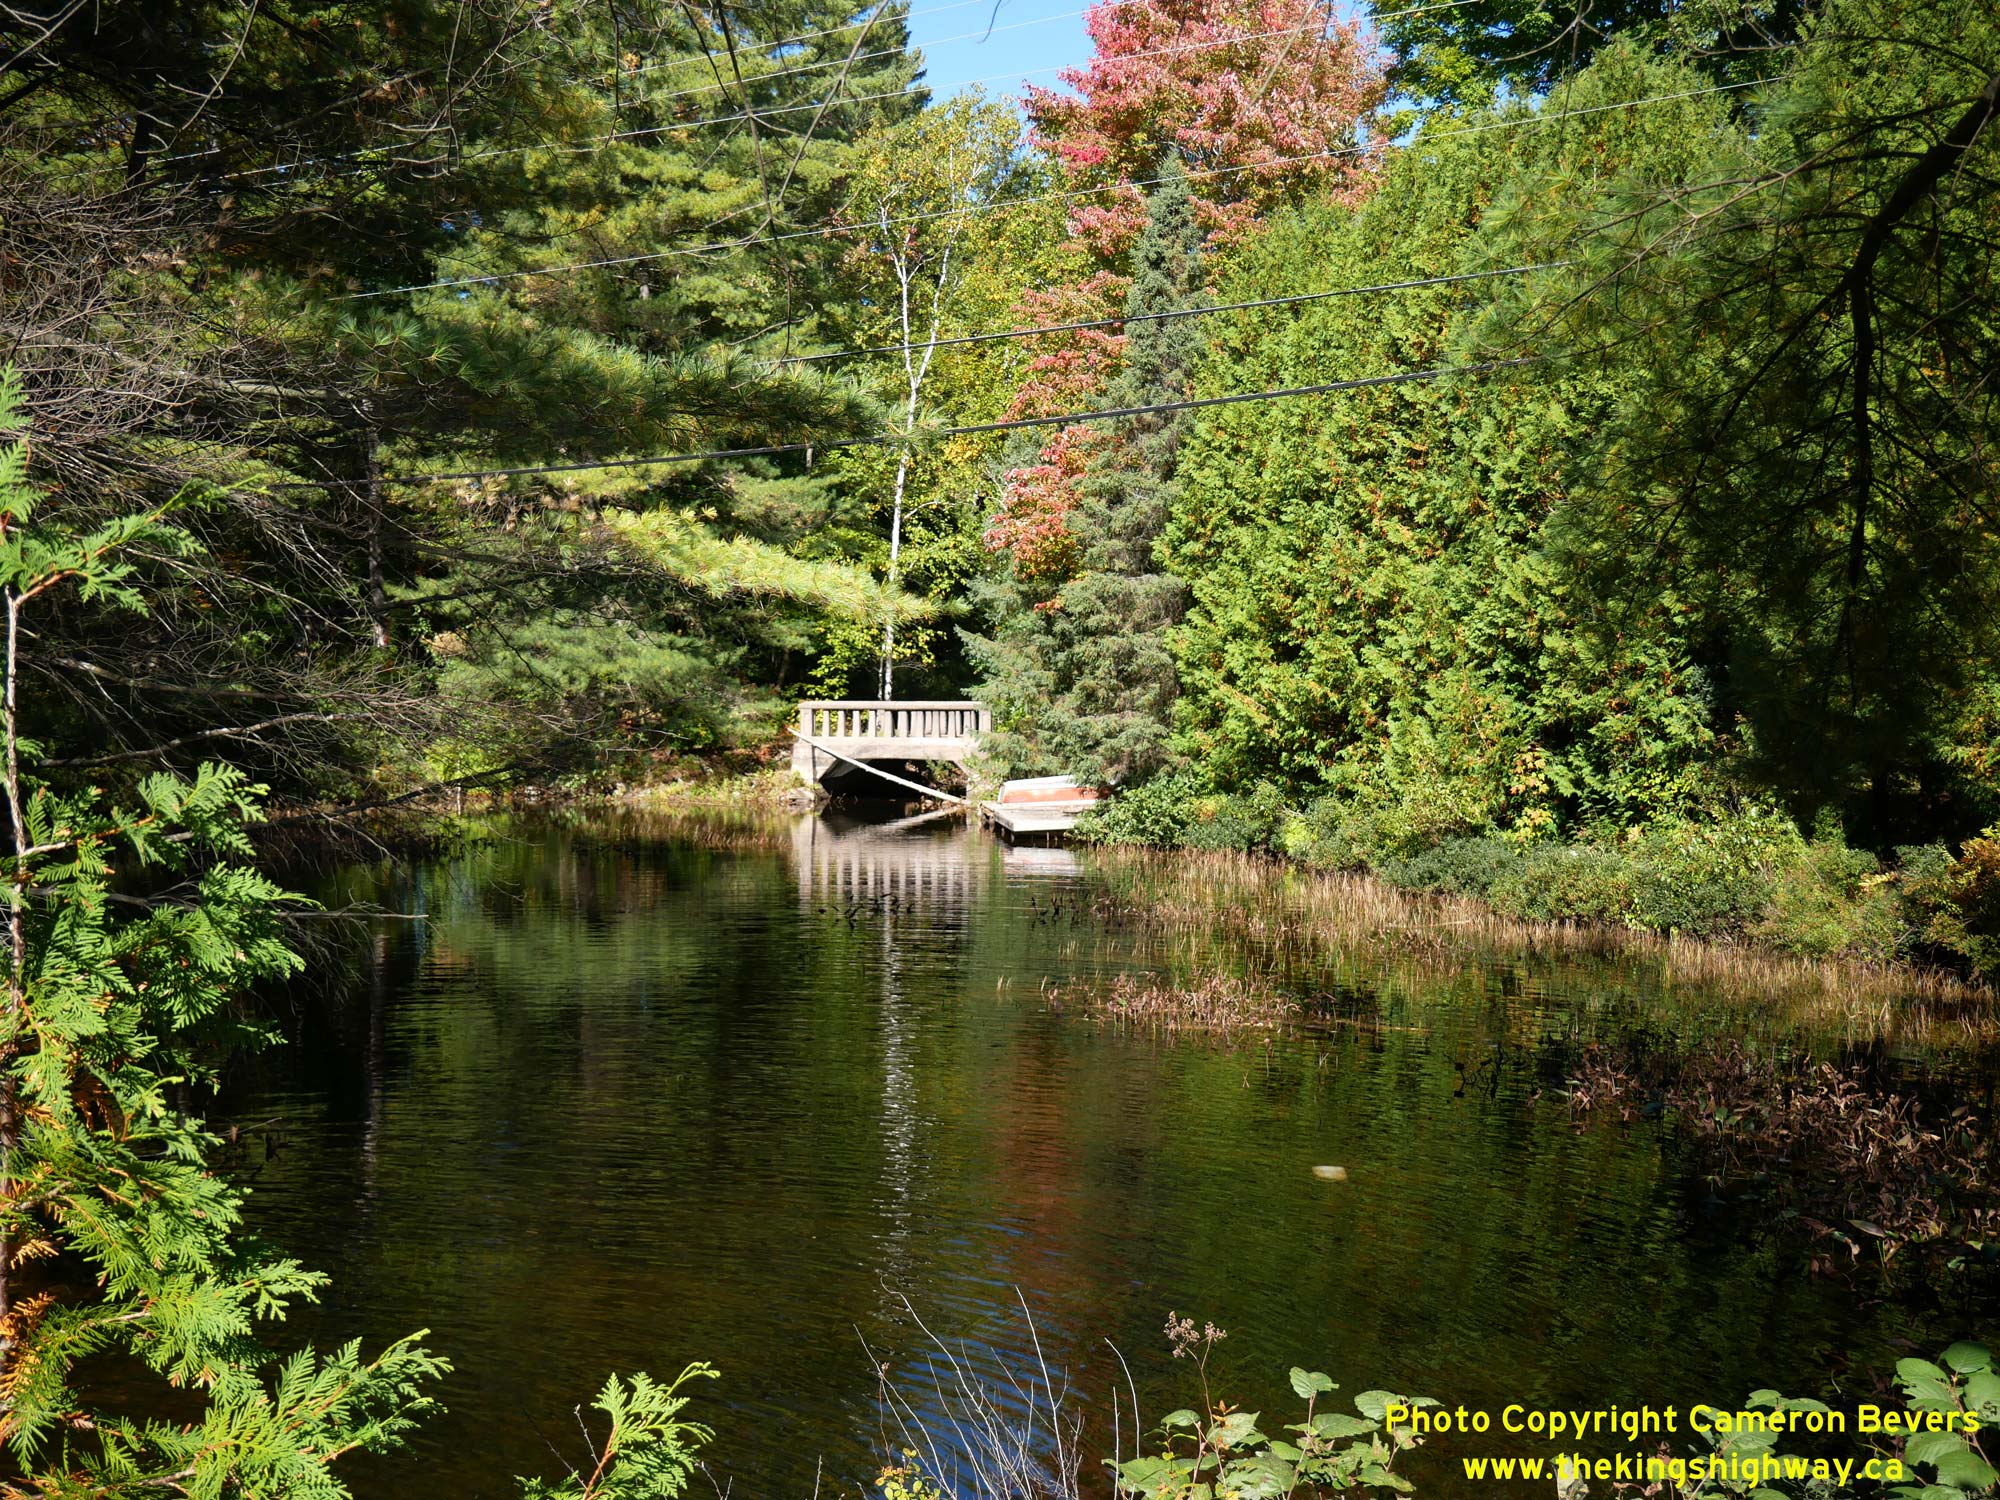
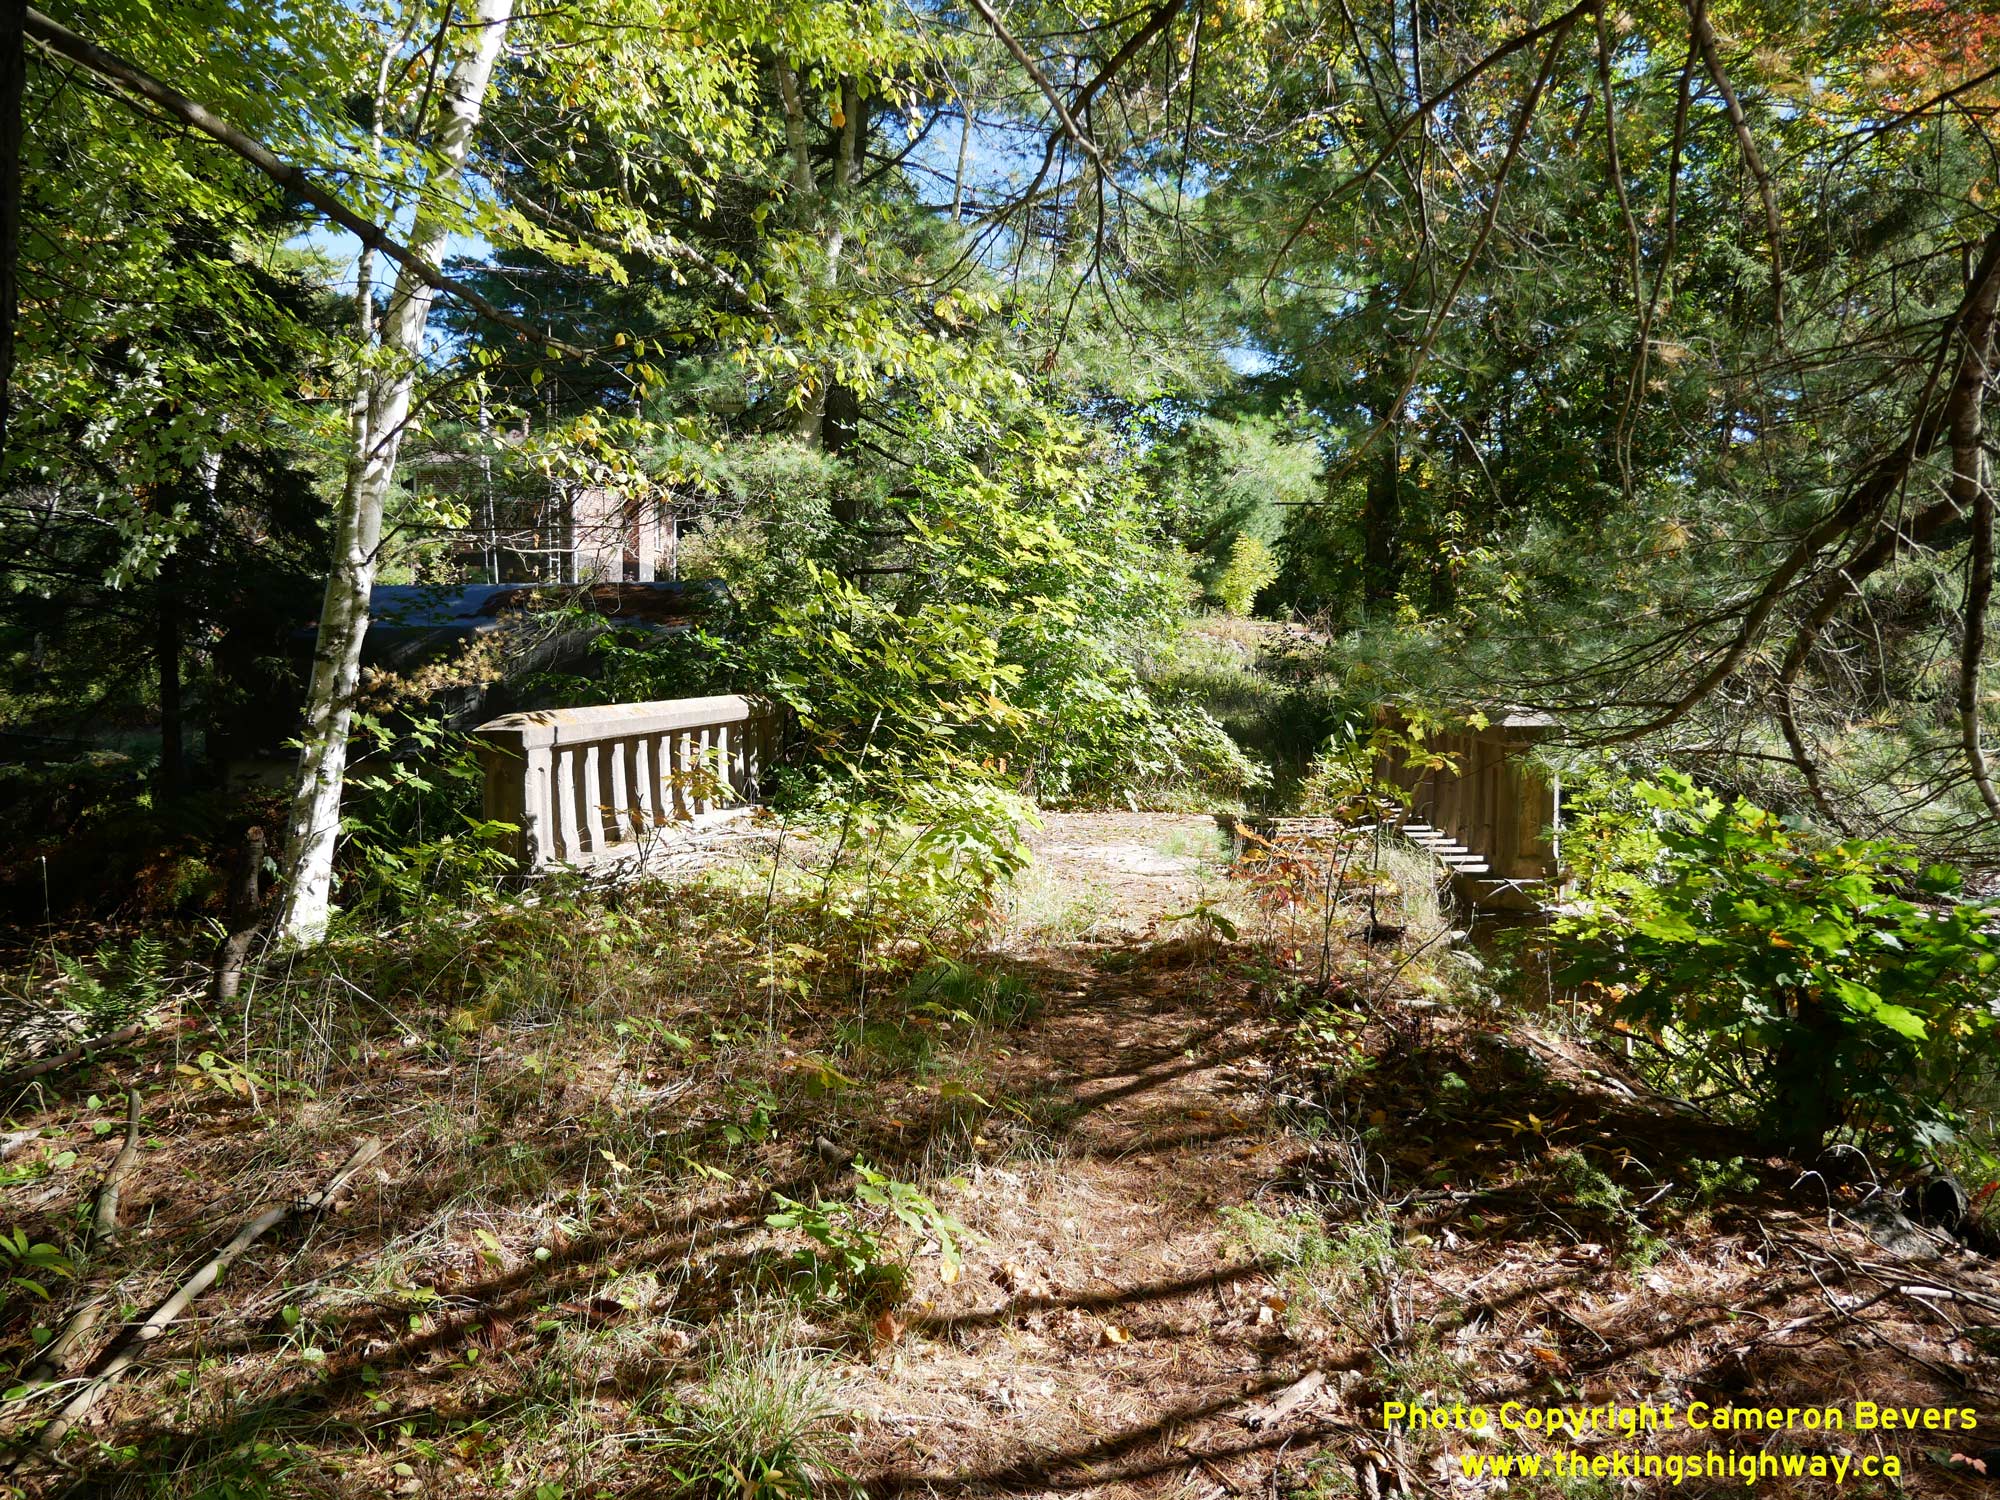 Left - This small bridge located east of the present day highway at Bass Lake once carried Hwy 69 traffic. A short section of the highway was relocated in the
late 1930s, which left behind this old bridge over Stills Creek on the original route of the highway. The old bridge has been closed to traffic for many decades. See
an Enlarged Photo Here. Left - This small bridge located east of the present day highway at Bass Lake once carried Hwy 69 traffic. A short section of the highway was relocated in the
late 1930s, which left behind this old bridge over Stills Creek on the original route of the highway. The old bridge has been closed to traffic for many decades. See
an Enlarged Photo Here.(Photograph taken on October 2, 2022 - © Cameron Bevers) Right - Facing south across the closed highway bridge over Stills Creek. The bridge was taken out of service many years ago and now lies abandoned in the
forest. See an Enlarged Photo Here.(Photograph taken on October 2, 2022 - © Cameron Bevers) 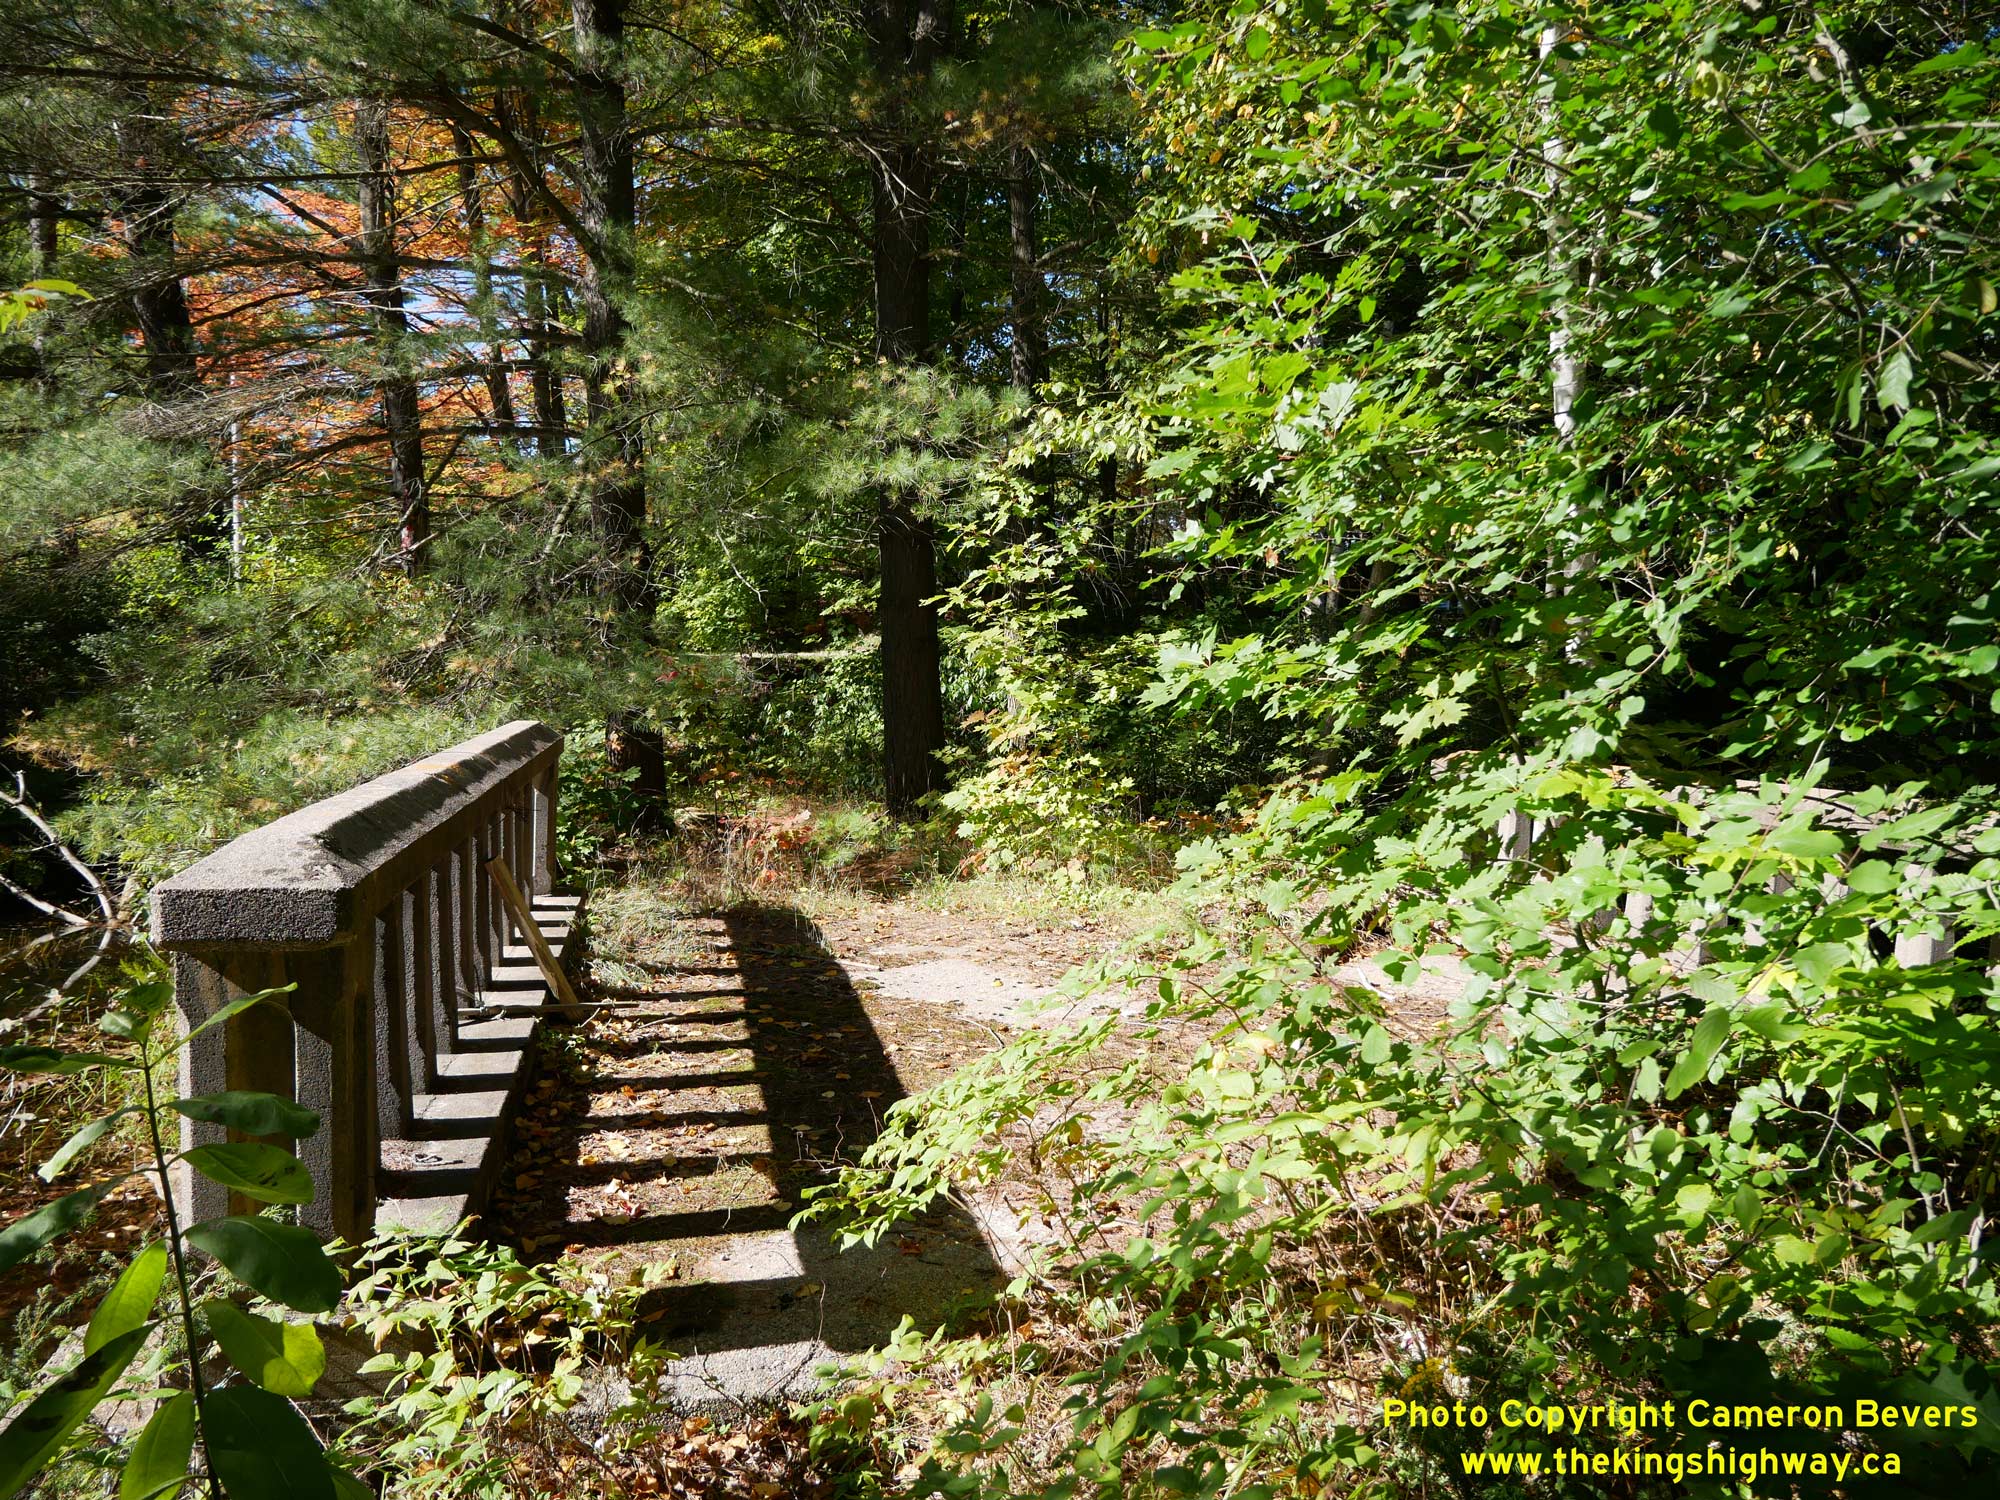
 Left - Facing north across the old bridge over Stills Creek. This bridge crosses the outlet from Bass Lake, where it drains into adjacent Lake Joseph. Prior to
the completion of the Bass Lake Diversion in 1938, Hwy 69 rounded a very sharp turn to the left at the northern end of this bridge. Apart from the concrete structure
itself, there are no longer any traces of the old highway due to decades of overgrowth and advancing forests. See an
Enlarged Photo Here. Left - Facing north across the old bridge over Stills Creek. This bridge crosses the outlet from Bass Lake, where it drains into adjacent Lake Joseph. Prior to
the completion of the Bass Lake Diversion in 1938, Hwy 69 rounded a very sharp turn to the left at the northern end of this bridge. Apart from the concrete structure
itself, there are no longer any traces of the old highway due to decades of overgrowth and advancing forests. See an
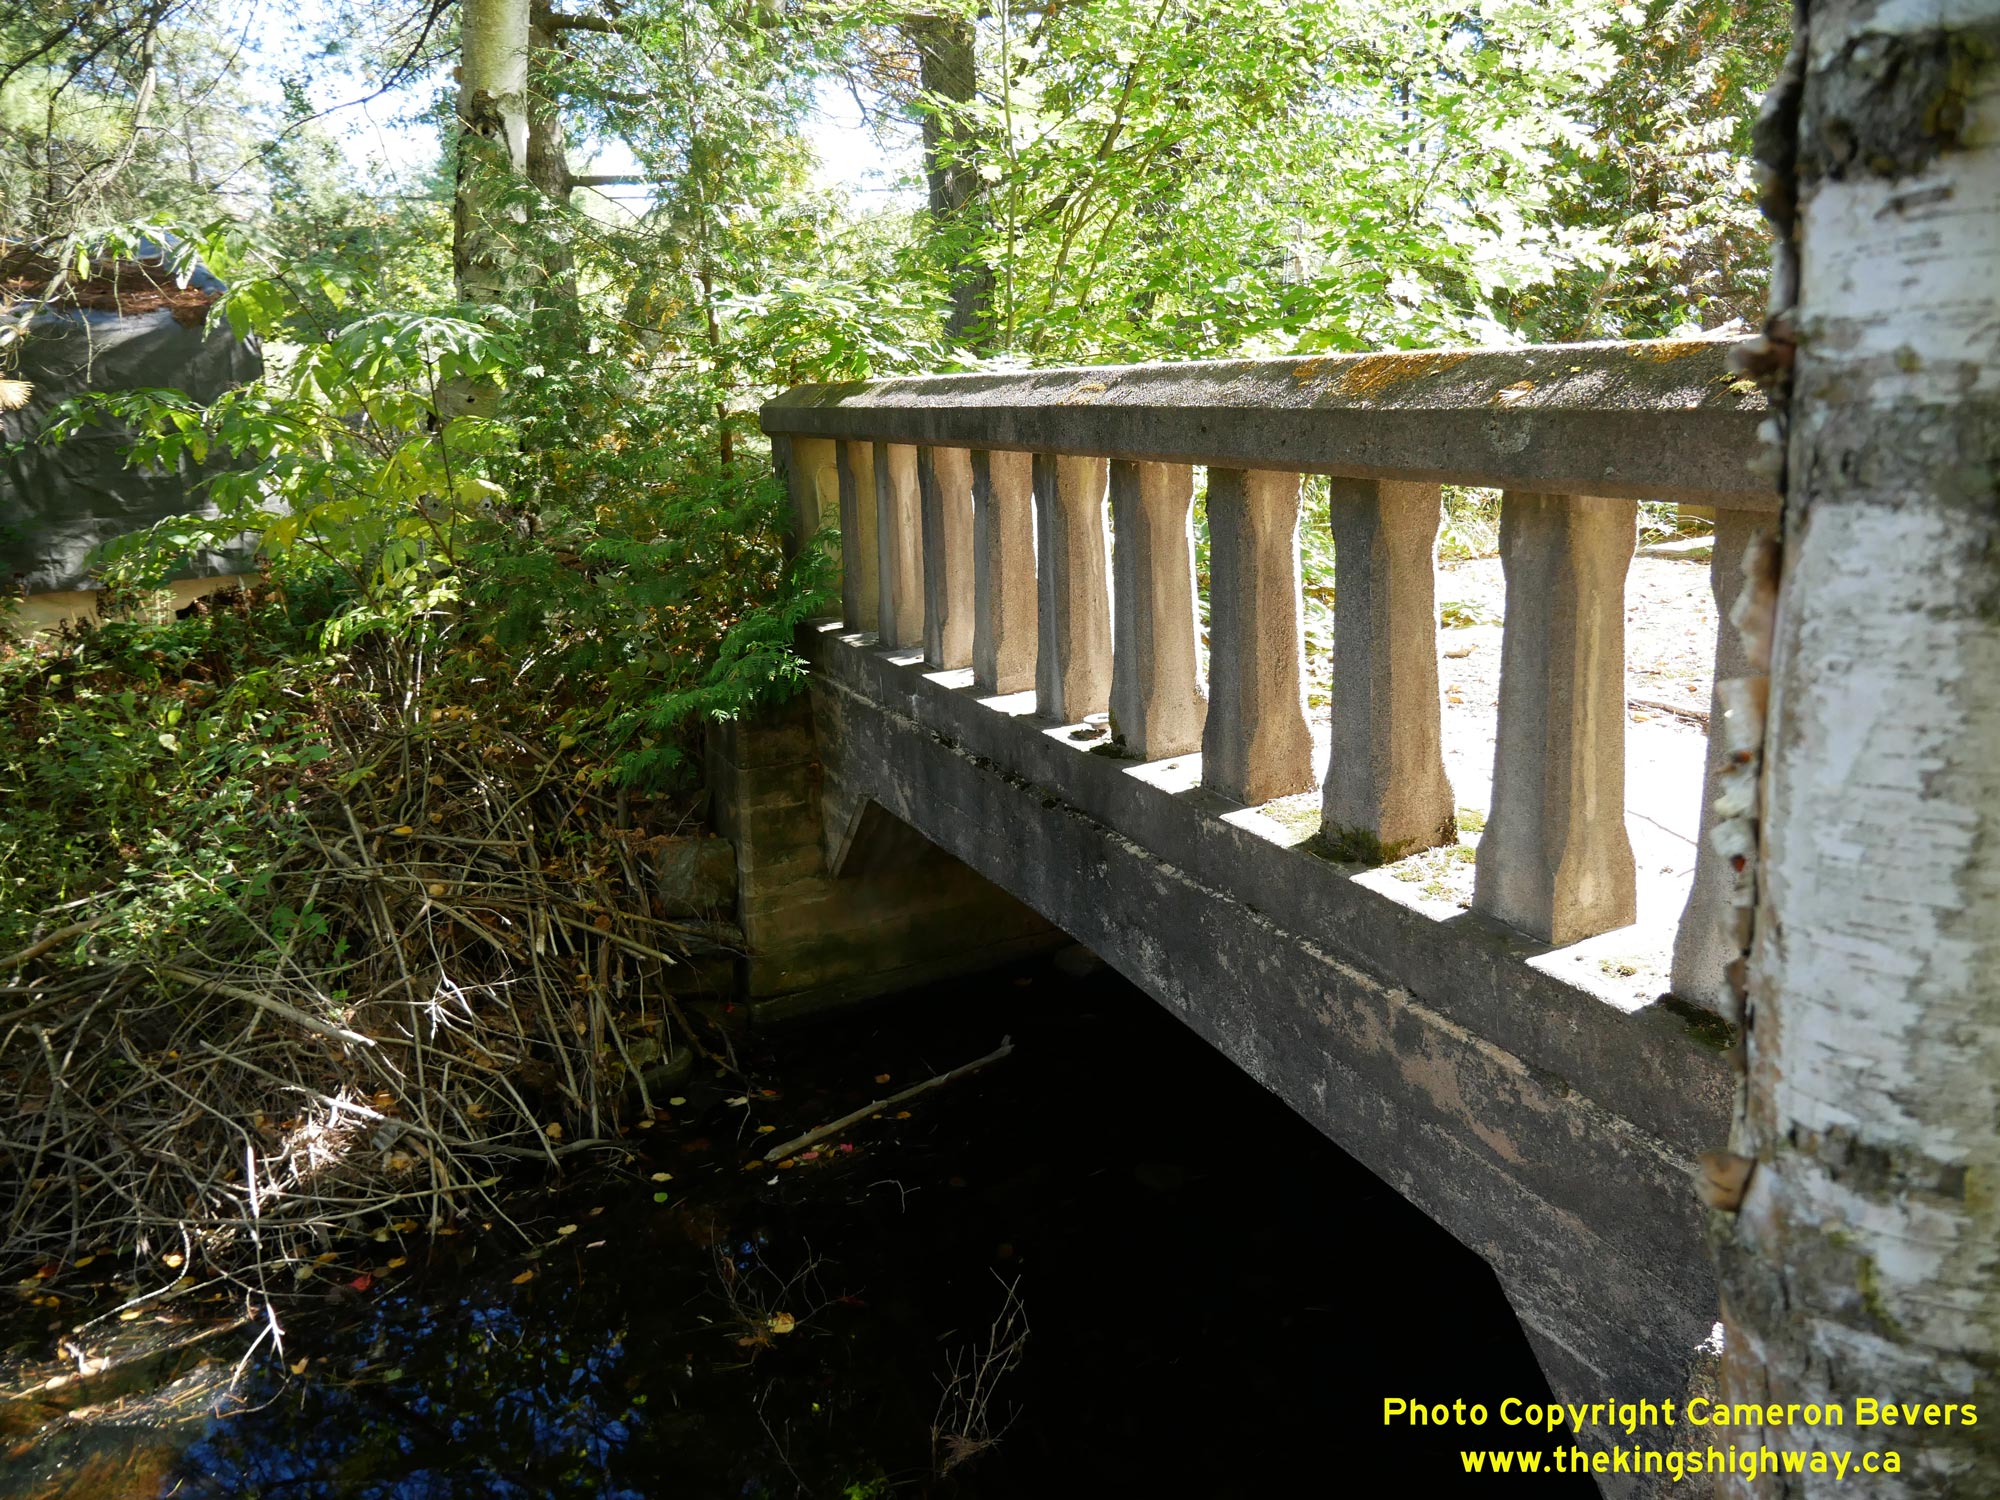
Enlarged Photo Here.(Photograph taken on October 2, 2022 - © Cameron Bevers) Right - Eastern side of the abandoned bridge over Stills Creek on the bypassed alignment of Hwy 69. This structure was built by the Department of Northern
Development well before the Bala-Foot's Bay Trunk Road was assumed by the DHO as King's Highway 69 in 1937. This bridge was built around 1930, and is in remarkably
good condition for its age! See an Enlarged Photo Here.(Photograph taken on October 2, 2022 - © Cameron Bevers) 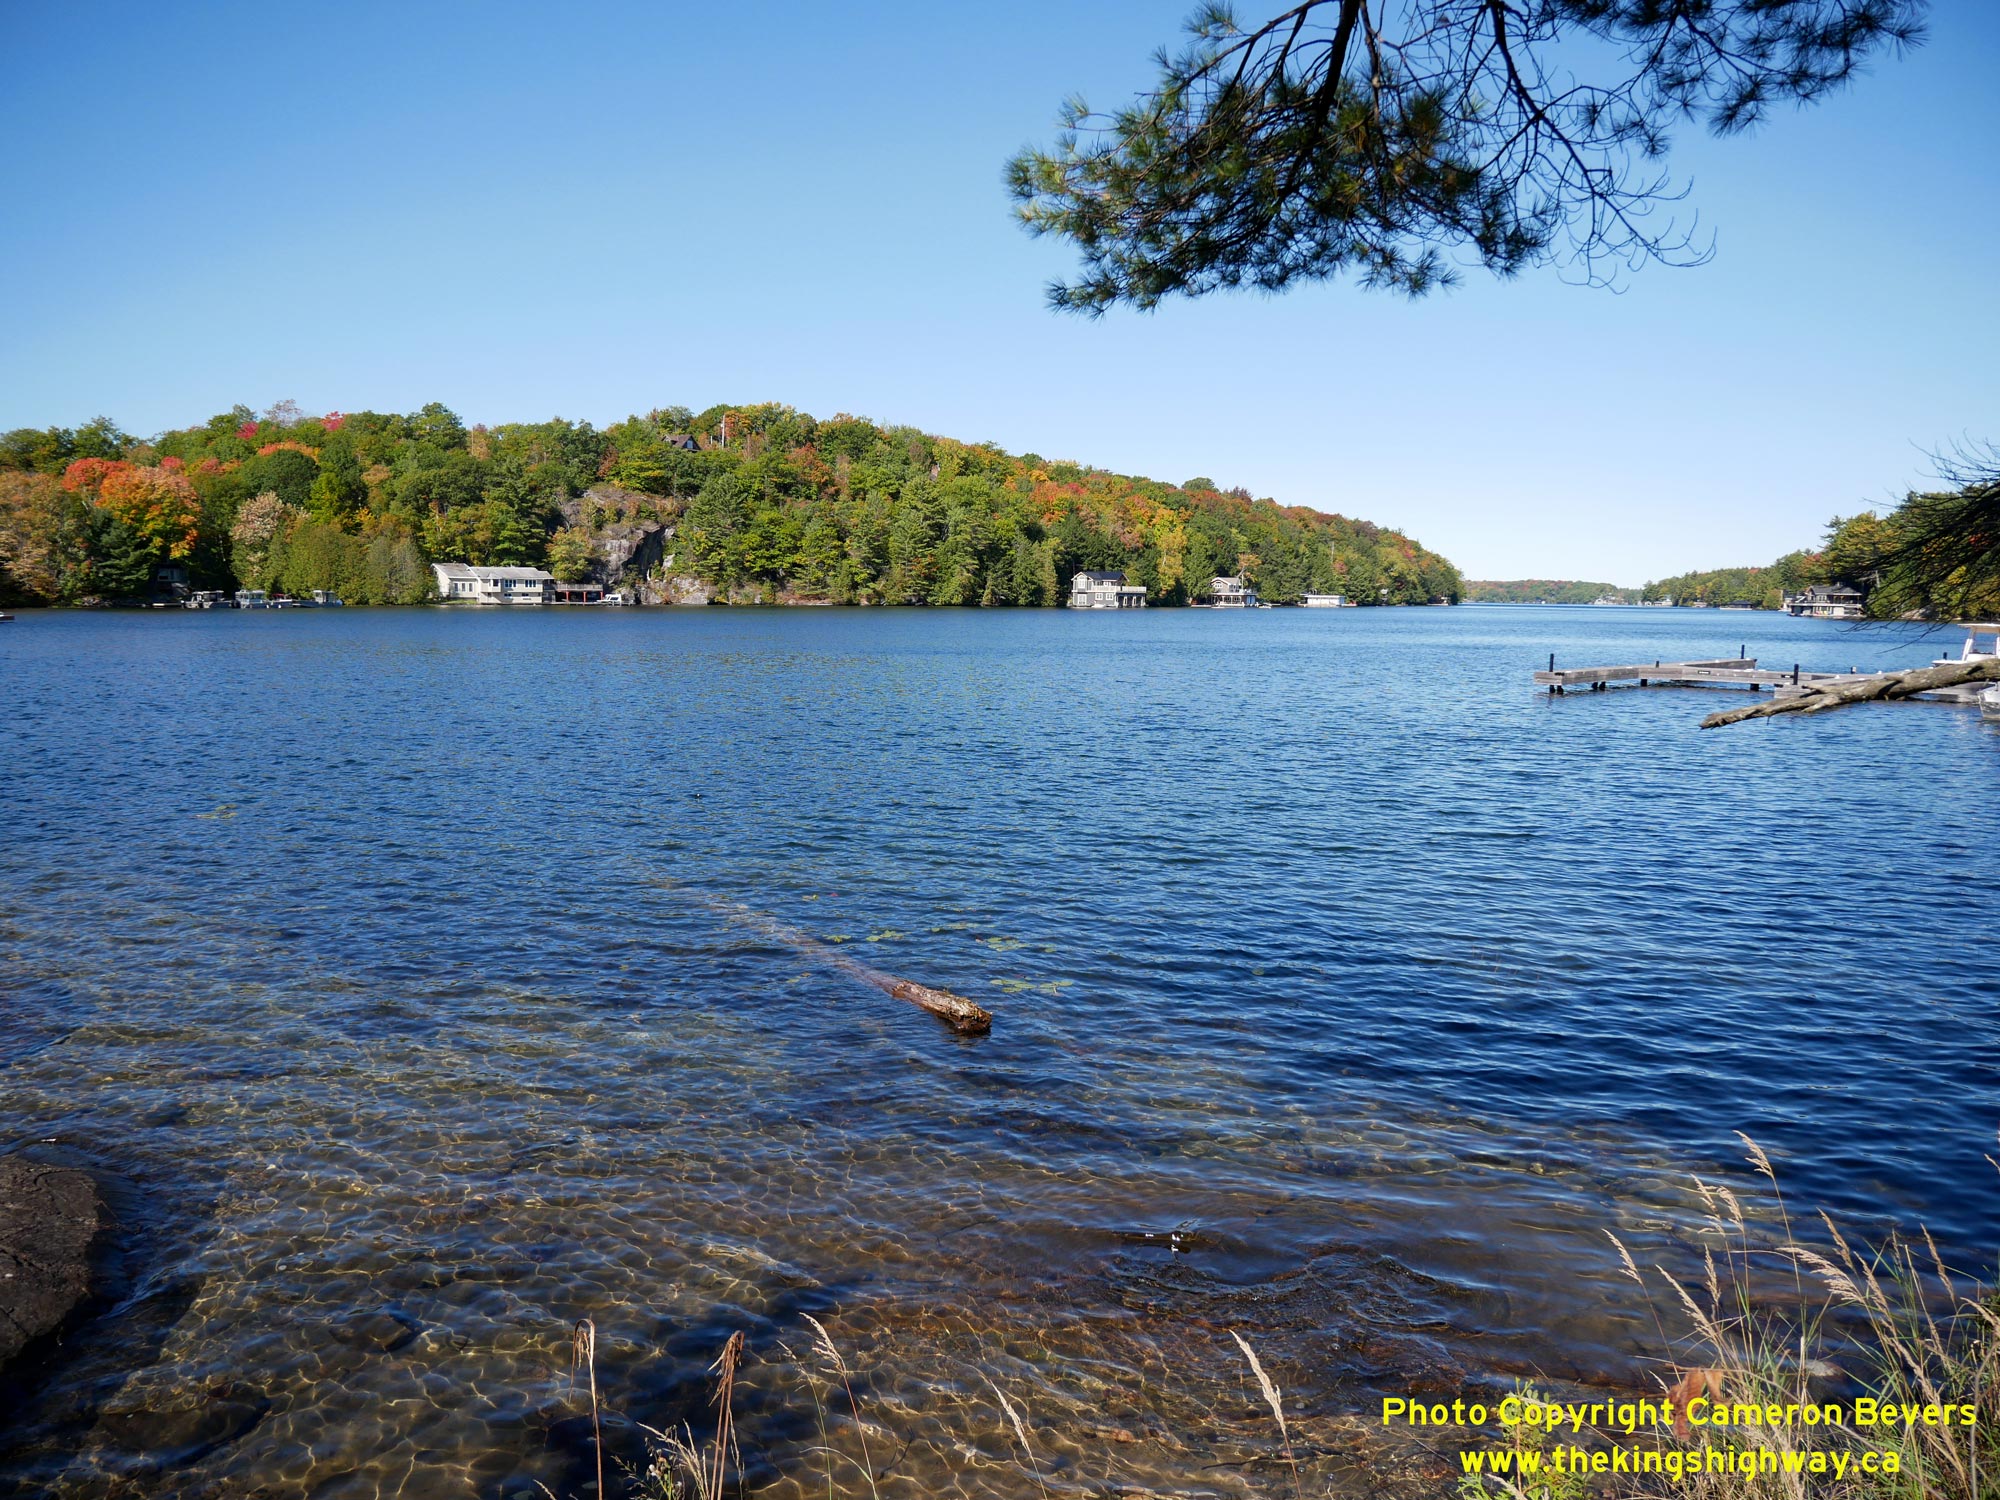
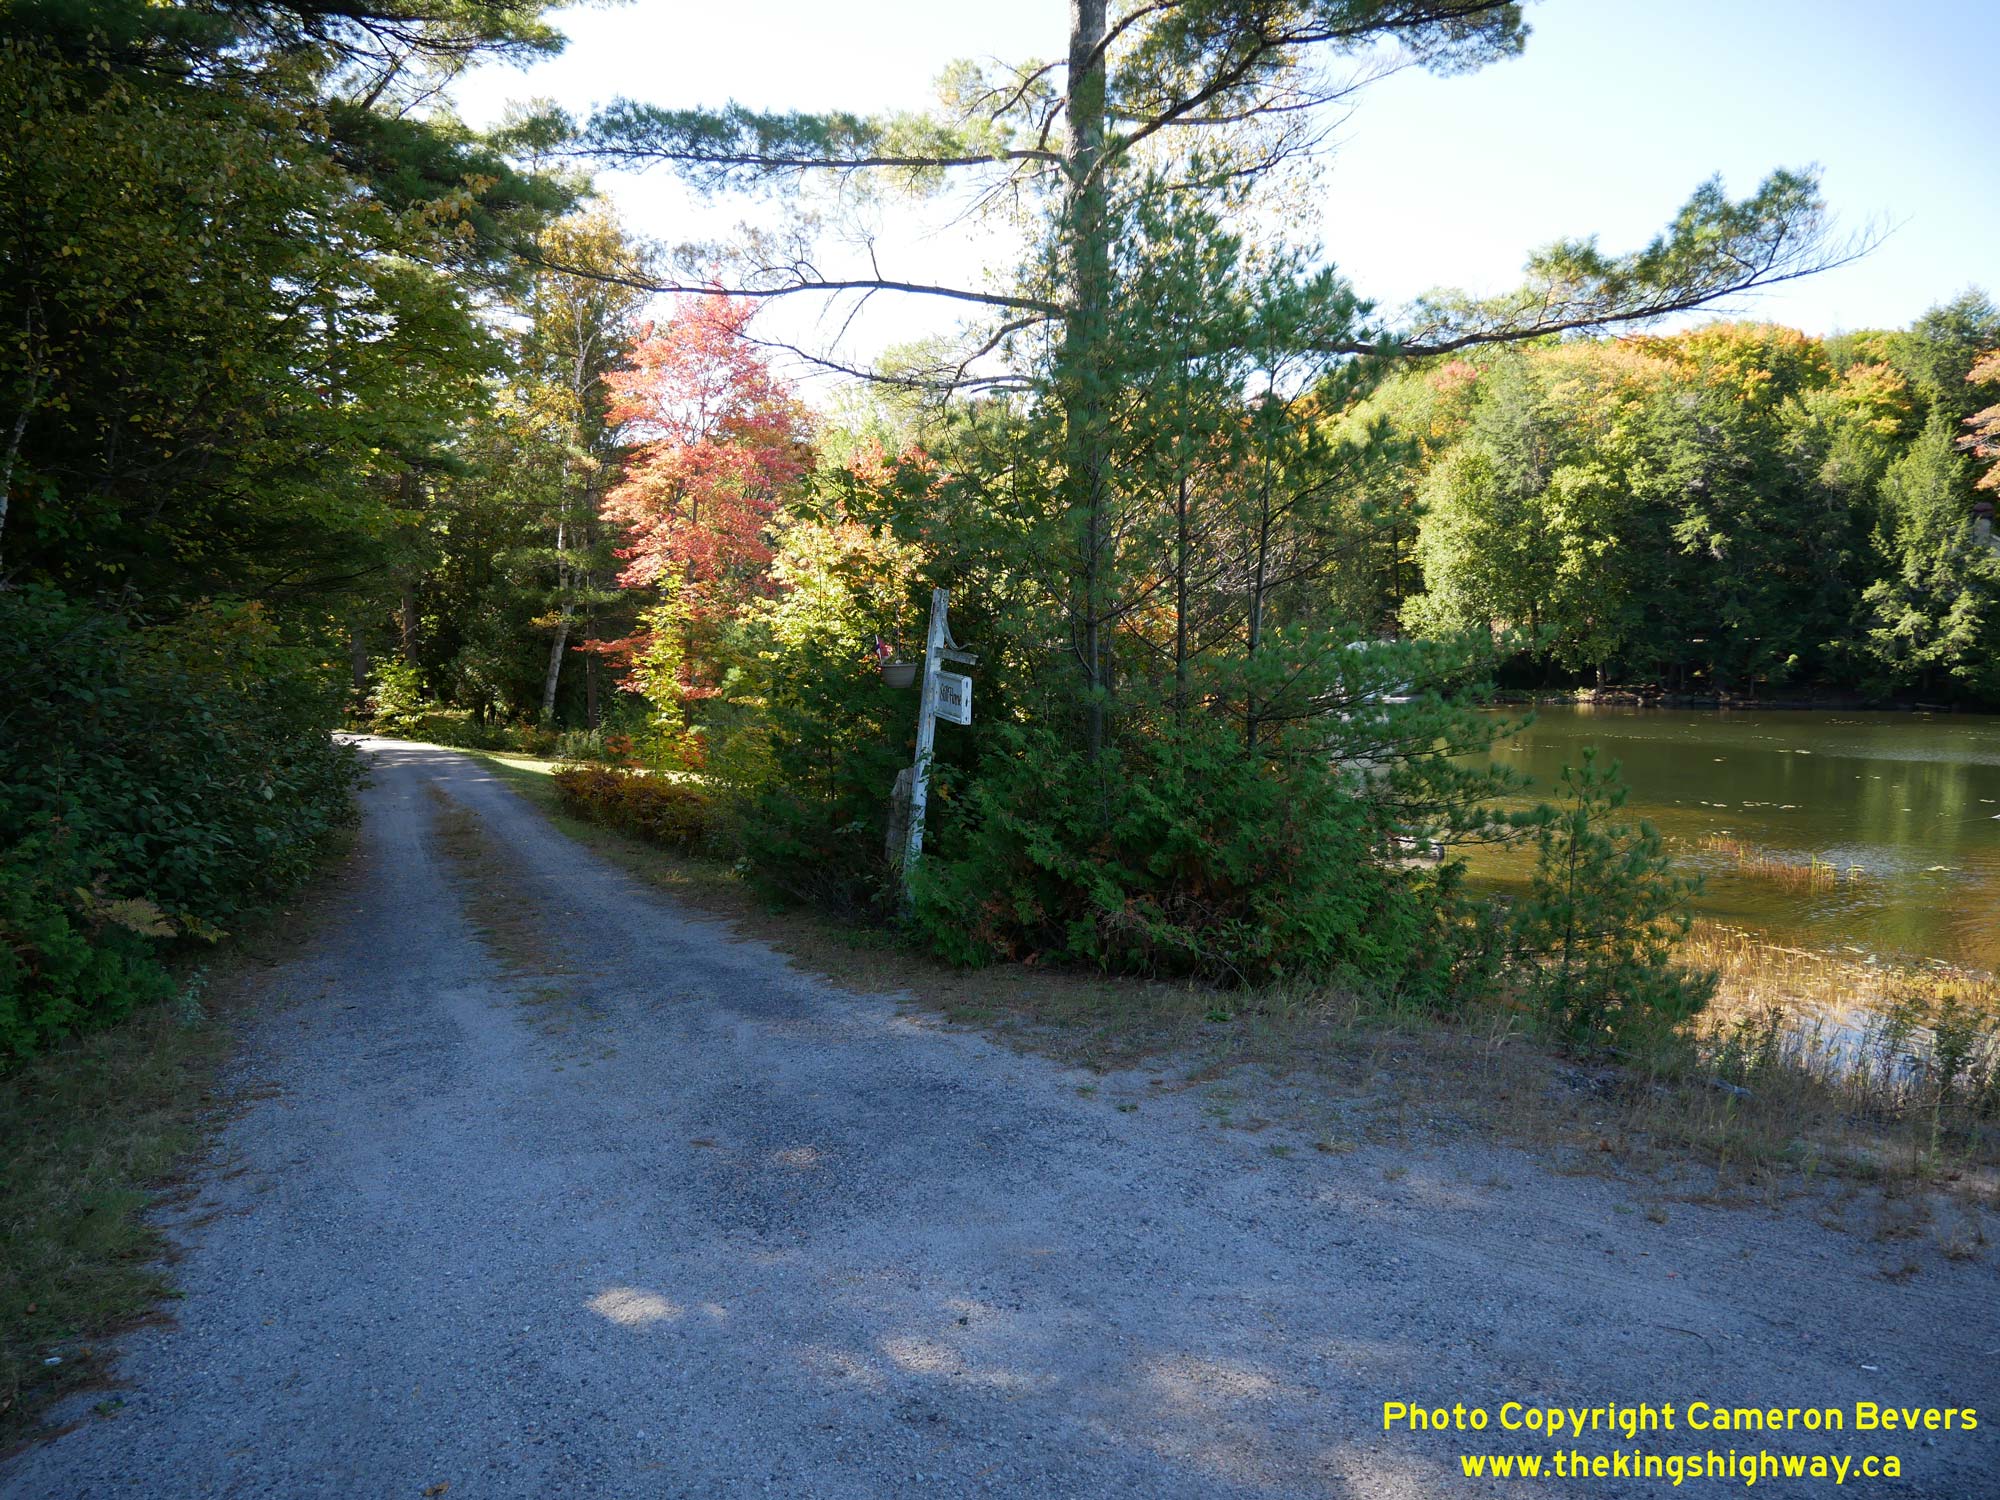 Left - Scenic view of Stills Bay from Hwy 169, about 3 km south of Foot's Bay. Despite the massive size of Lake Joseph, this brief view of Stills Bay is
actually the only vantage point of Lake Joseph along Hwy 169's entire route. Lake Joseph is roughly 25 km in length and has a surface area of about 70 square-km,
making it one of the biggest lakes in Muskoka. See an Enlarged Photo Here. Left - Scenic view of Stills Bay from Hwy 169, about 3 km south of Foot's Bay. Despite the massive size of Lake Joseph, this brief view of Stills Bay is
actually the only vantage point of Lake Joseph along Hwy 169's entire route. Lake Joseph is roughly 25 km in length and has a surface area of about 70 square-km,
making it one of the biggest lakes in Muskoka. See an Enlarged Photo Here.(Photograph taken on October 2, 2022 - © Cameron Bevers) Right - This private driveway at Stills Bay was once Hwy 69. Originally, the highway entered a hazardous horseshoe-shaped curve at the southern end of Stills
Bay. In 1938, a short causeway was built across Stills Bay to carry the relocated highway. The old highway was then taken out of service and the highway lands
transferred over to municipal control, effective April 12, 1951. See an Enlarged Photo Here.(Photograph taken on October 2, 2022 - © Cameron Bevers) 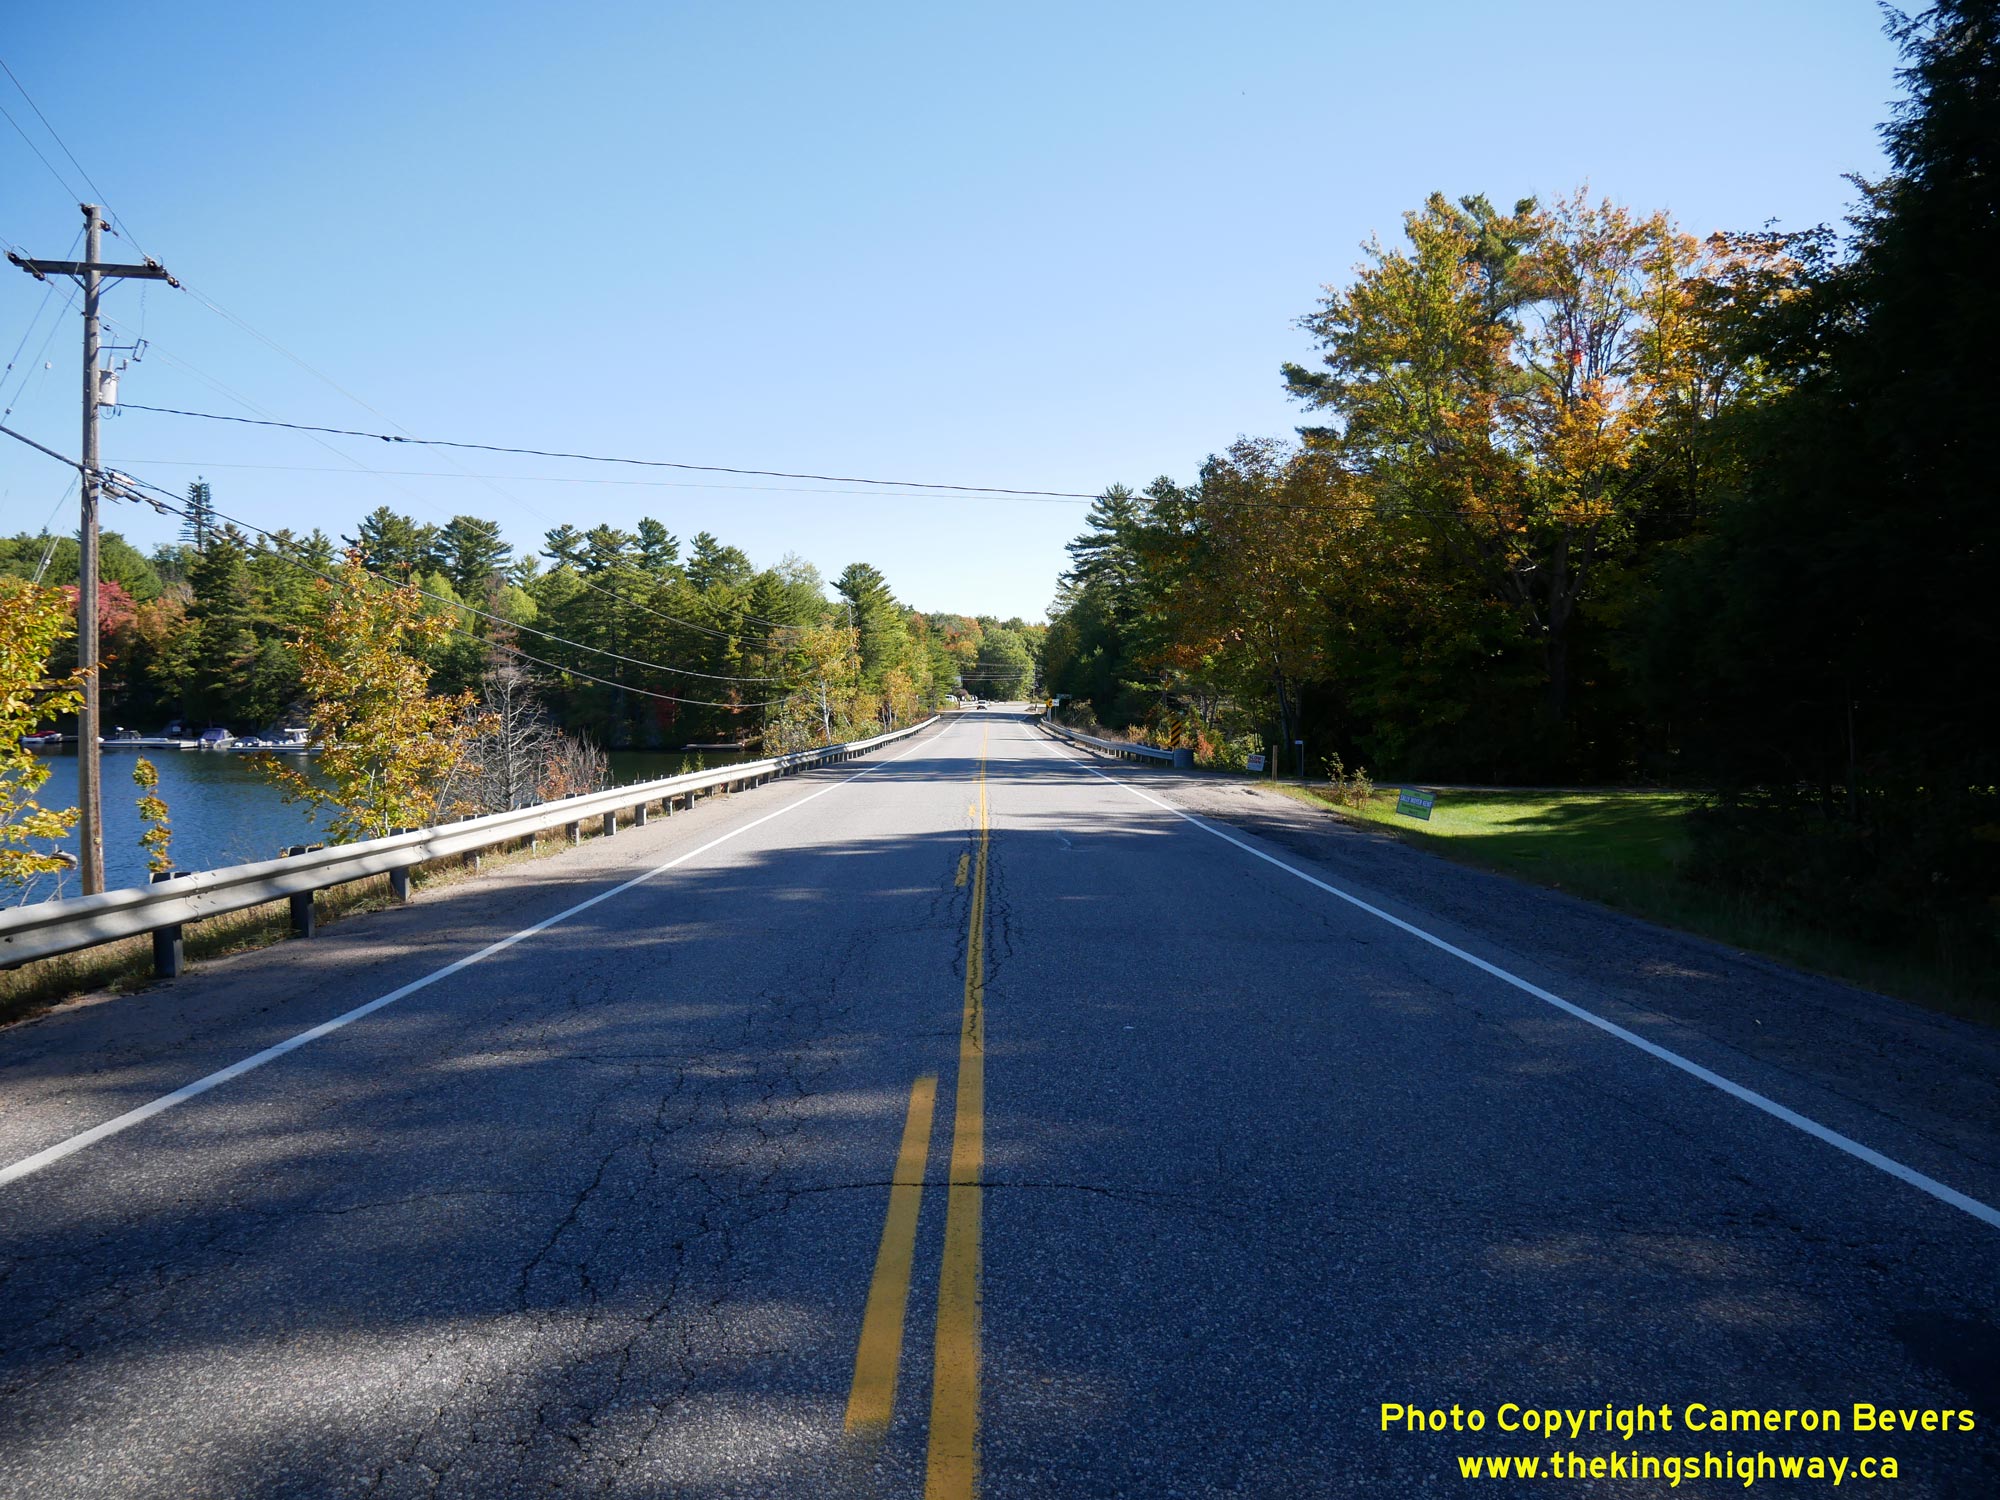
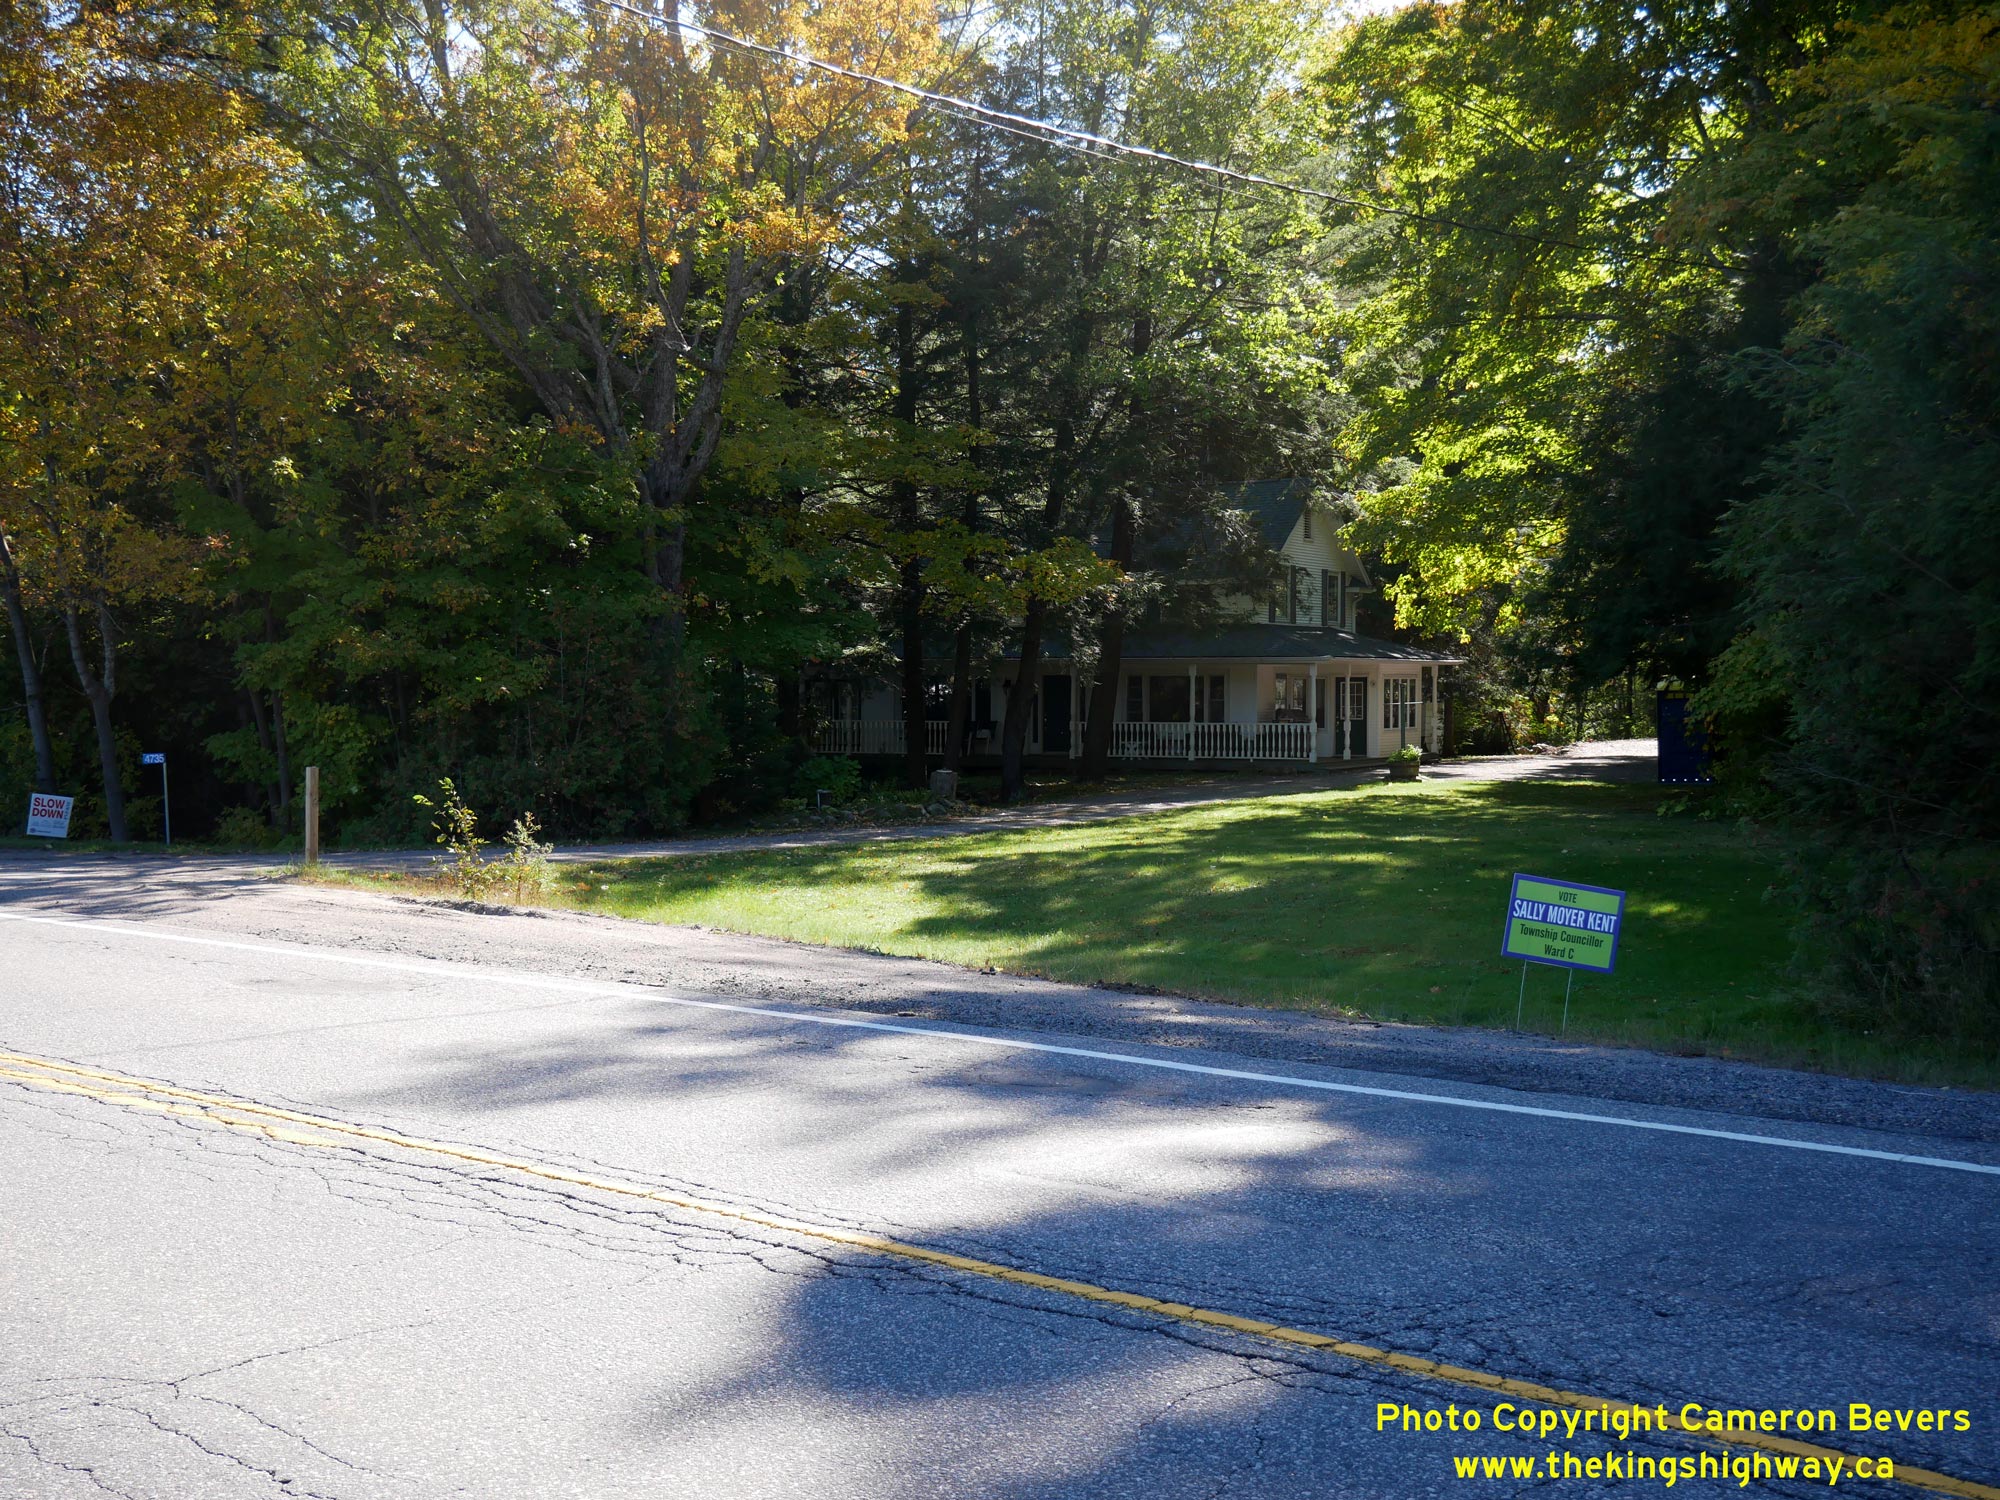 Left - Approaching the causeway over Stills Bay on Hwy 169, facing south towards Glen Orchard. Originally, the highway turned sharply to the right as it
curved around Stills Bay. When the new causeway was built across Stills Bay in the 1930s, a small concrete tunnel was built underneath the highway, so that small
boats could still reach the end of the bay. The original concrete tunnel from 1938 was extended slightly on the Lake Joseph side of the highway in 1974, to
accommodate highway shoulder widening. See an Enlarged Photo Here. Left - Approaching the causeway over Stills Bay on Hwy 169, facing south towards Glen Orchard. Originally, the highway turned sharply to the right as it
curved around Stills Bay. When the new causeway was built across Stills Bay in the 1930s, a small concrete tunnel was built underneath the highway, so that small
boats could still reach the end of the bay. The original concrete tunnel from 1938 was extended slightly on the Lake Joseph side of the highway in 1974, to
accommodate highway shoulder widening. See an Enlarged Photo Here.(Photograph taken on October 2, 2022 - © Cameron Bevers) Right - View of the old highway curve at Stills Bay. The highway once turned 90 degrees to the right here, as it rounded Stills Bay. Once completed in 1938,
the Bass Lake Diversion removed this curve, and other hazardous nearby curves, which initially plagued the highway's route. See an
Enlarged Photo Here.(Photograph taken on October 2, 2022 - © Cameron Bevers) 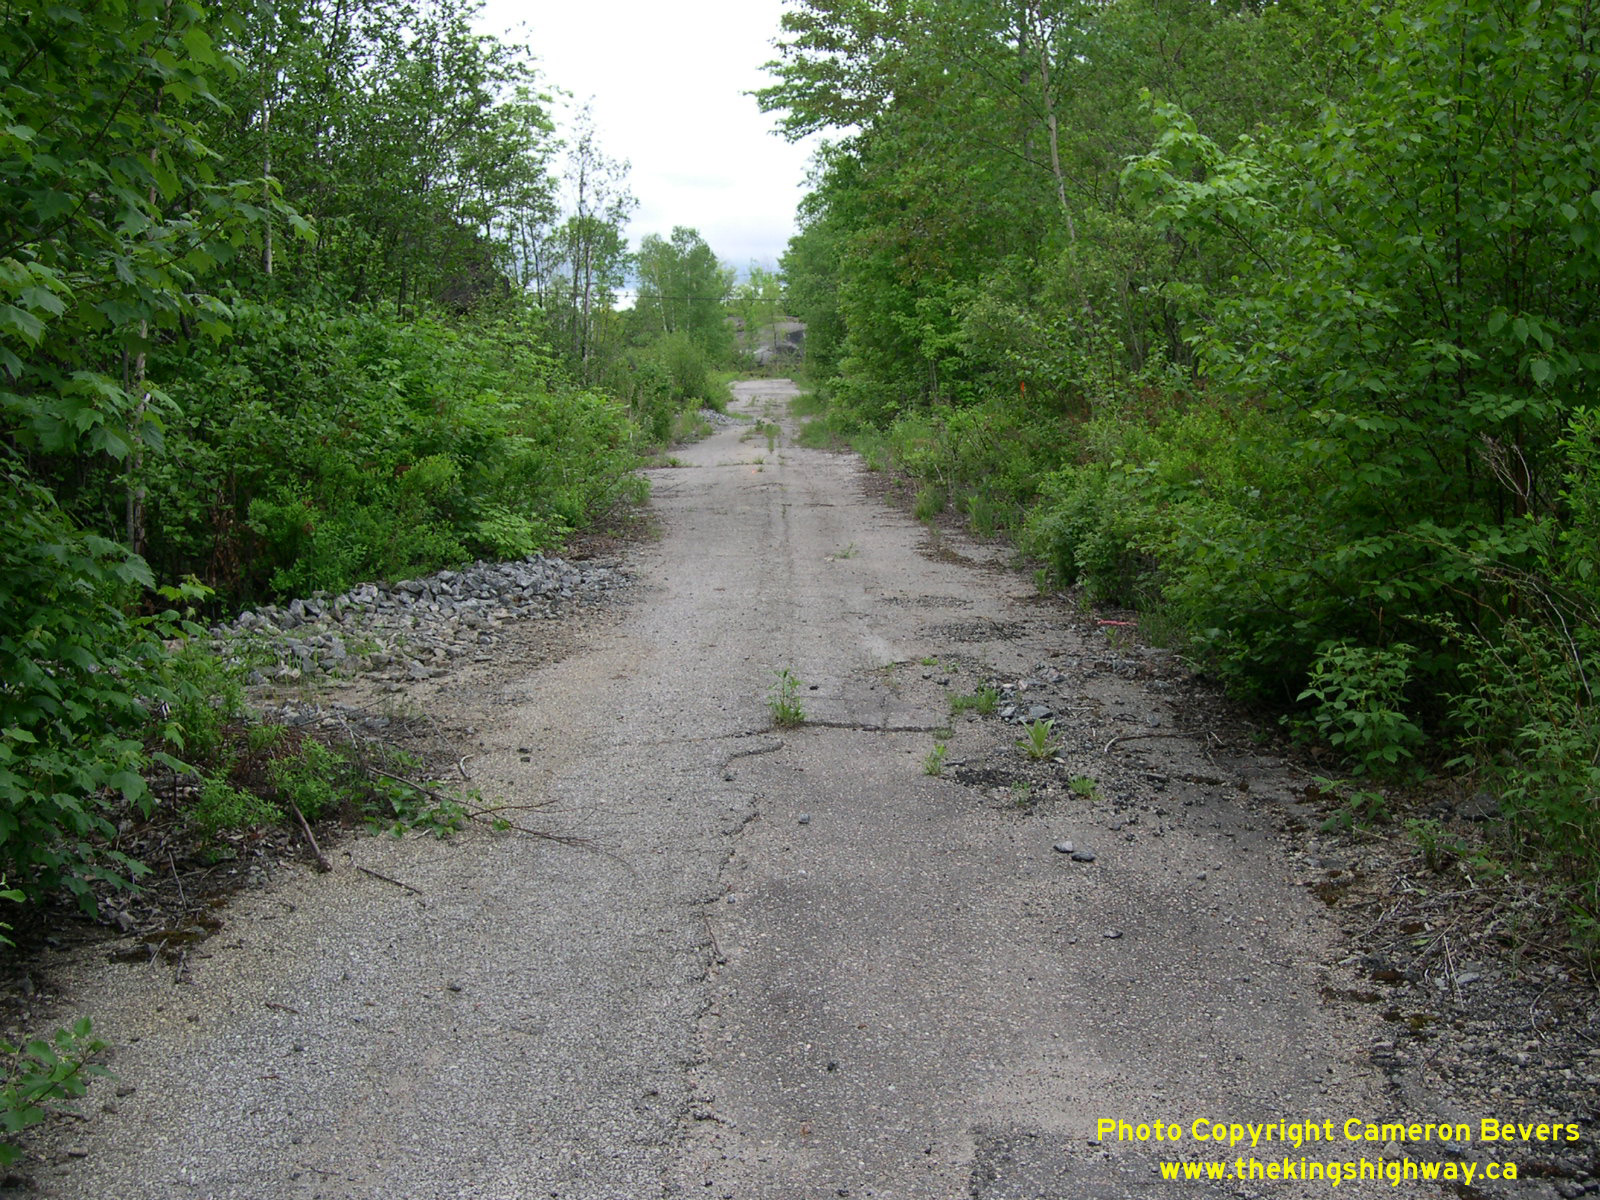

Left - Abandoned Hwy 69 alignment located about 2 km south of Foot's Bay. See an
Enlarged Photo Here. (Photograph taken on June 4, 2005 - © Cameron Bevers) Right - Another view of the abandoned Hwy 69 alignment south of Foot's Bay. This section of the highway was abandoned in the mid-1970s, when Hwy 69 was rebuilt on an improved alignment under Contract #1974-15. This old section of the highway hasn't carried traffic in more than 50 years. See an Enlarged Photo Here. (Photograph taken on June 4, 2005 - © Cameron Bevers) 

Left - Approaching the Hwy 169 Junction on Hwy 69 (Lake Joseph Road) at Foot's Bay, facing north towards Parry Sound. See an
Enlarged Photo Here. (Photograph taken on April 12, 2012 - © Cameron Bevers) Right - Junction sign assembly marking the upcoming Hwy 169 Junction on northbound Hwy 69 at Foot's Bay. Hwy 169 was one of many Ontario King's Highways which was transferred from the province to municipalities during provincial service restructuring in the late 1990s. Officially, Hwy 169 through Muskoka is now known as Muskoka District Road 169. Hwy 169 ceased to be a provincial highway in 1998. See an Enlarged Photo Here. (Photograph taken on April 12, 2012 - © Cameron Bevers) 

Left - Facing north along Hwy 69 towards the Foot's Bay Railway Subway near MacTier. The subway is situated immediately to the south of the Hwy 169 Junction.
See an Enlarged Photo Here. (Photograph taken on June 10, 2007 - © Cameron Bevers) Right - Facing south along Hwy 69 towards the Foot's Bay Railway Subway. This single span steel plate girder structure was completed in 1957. See an Enlarged Photo Here. (Photograph taken on June 10, 2007 - © Cameron Bevers) 

Left - Close-up of the date stamp (1957) on the Foot's Bay Railway Subway on Hwy 69 (Lake Joseph Road). See an
Enlarged Photo Here. (Photograph taken on June 10, 2007 - © Cameron Bevers) Right - Facing north along Hwy 69 at the Hwy 169 Junction at Foot's Bay. From here, Hwy 169 heads southeasterly towards Bala and Gravenhurst, while Hwy 69 continues north towards Parry Sound and Sudbury. Hwy 169 connects to Hwy 118 east of Foot's Bay, which provides access to Port Carling and Bracebridge. See an Enlarged Photo Here. (Photograph taken on June 10, 2007 - © Cameron Bevers) 

Left - Junction assembly and fingerboard destination guide signs at the Hwy 69 & Hwy 169 Junction at Foot's Bay. See an
Enlarged Photo Here. (Photograph taken on April 12, 2012 - © Cameron Bevers) Right - Facing south along Hwy 69 towards MacTier from the Hwy 169 Junction at Foot's Bay. See an Enlarged Photo Here. (Photograph taken on April 12, 2012 - © Cameron Bevers) 

Left - Facing north along Hwy 69 towards Parry Sound from the Hwy 169 Junction at Foot's Bay. See an
Enlarged Photo Here. (Photograph taken on April 12, 2012 - © Cameron Bevers) Right - Northern terminus of Hwy 169 at the Hwy 69 Junction at Foot's Bay. From here, traffic can either turn left and follow Hwy 69 south to Barrie (via Hwy 400) or turn right and follow Hwy 69 north to Parry Sound and Sudbury. Both right turn lanes at the Hwy 69 & Hwy 169 Junction are channelized. See an Enlarged Photo Here. (Photograph taken on April 12, 2012 - © Cameron Bevers) 

Left - Highway guide signs at the northern terminus of Hwy 169 at the Hwy 69 Junction at Foot's Bay. The bypassed route of Hwy 69 via MacTier, Foot's Bay and
Horseshoe Lake was renamed Lake Joseph Road in September, 2012. Although Lake Joseph Road is still maintained by the province, it is no longer officially known as
Hwy 69. The route of Hwy 69 now begins where Hwy 400 ends north of Nobel. See an
Enlarged Photo Here. (Photograph taken on April 12, 2012 - © Cameron Bevers) Right - Approaching the northern terminus of Hwy 169 at the Hwy 69 Junction at Foot's Bay. The route of Hwy 169 once extended southeasterly for over 90 km via Gravenhurst and Washago, where it connected with Hwy 12 just outside of Brechin. When Hwy 169 was still a provincial highway prior to 1998, it was signed concurrently with Hwy 11 between Gravenhurst and Washago. Once this overlapped route of Hwy 11 & Hwy 169 was removed between Gravenhurst and Washago in 1998, Hwy 169 was broken into distinct northern and southern sections, maintained by the District Municipality of Muskoka and the County of Simcoe, respectively. See an Enlarged Photo Here. (Photograph taken on April 12, 2012 - © Cameron Bevers) 

Left - Highway guide signs approaching the northern terminus of Hwy 169 at the Hwy 69 Junction at Foot's Bay. Since September, 2012, the bypassed route of
Hwy 69 has been known as Lake Joseph Road. Accordingly, there are no longer any references to Hwy 69 at this junction anymore. See an
Enlarged Photo Here. (Photograph taken on April 12, 2012 - © Cameron Bevers) Right - Junction assembly on northbound Hwy 169 approaching the Hwy 69 Junction at Foot's Bay. The route of Hwy 400 is trailblazed with green signs at this highway junction. The new route of Hwy 400 opened to traffic in October, 2003, bypassing about 28 km of Hwy 69 via MacTier, Foot's Bay and Horseshoe Lake. See an Enlarged Photo Here. (Photograph taken on April 12, 2012 - © Cameron Bevers) 

Left - Facing south along Hwy 69 towards the Hwy 169 Junction at Foot's Bay. Historically, Hwy 69 used to turn left at this highway junction and follow the
route of what is now Hwy 169 to Gravenhurst. The through highway at this junction used to be known as Hwy 103, which connected the Port Severn area to MacTier. At the
time this highway junction was built in the 1950s, little thought was given to the logic of the route numbers departing from this junction. In recent decades, Human
Factors research has demonstrated that it is generally a better highway design practice to ensure that the through highway maintains its route name or number at a
junction, as this is what motorists would typically expect. The sudden departure of Hwy 69 onto another roadway at this junction likely confused many southbound
motorists. In an effort to simplify the highway numbering in the area, the through highway at this junction was renumbered from Hwy 103 to Hwy 69 in 1976. The
existing route of Hwy 69 via Gravenhurst and Washago was renumbered as Hwy 169. See an
Enlarged Photo Here. (Photograph taken on April 12, 2012 - © Cameron Bevers) Right - Junction assembly on southbound Hwy 69 approaching the Hwy 169 Junction at Foot's Bay. At one time, a large freeway-style overhead sign structure used to mark this junction. The overhead sign structure was installed long before the route renumbering of 1976, to advise southbound motorists who wished to stay on Hwy 69 that they had to turn left onto a different roadway in order to continue along Hwy 69. Following the 1976 route renumbering, Hwy 69 became the through highway at this junction, which would have been more in line with drivers' expectations. The change in highway numbers also complemented the predominant north-south traffic movement between Port Severn and Parry Sound. The overhead sign structure was left in place at this junction for more than two decades after the highway renumbering, even though the new route numbering introduced in 1976 was far more logical. Once the new Hwy 400 opened to traffic in 2003, the existing route of Hwy 69 began to serve a more local traffic function. The overhead sign structure was subsequently removed. See an Enlarged Photo Here. (Photograph taken on April 12, 2012 - © Cameron Bevers)
More King's Highway 169 Photographs Coming Soon!
|
|---|
Links to Adjacent King's Highway Photograph Pages:
Back to Hwy 169 - Gravenhurst to Bala
Hwy 169 Photo Index
Back to King's Highway 148 Photos /
King's Highway 169 History /
On to King's Highway 400 Photos
Ontario Highway History - Main Menu / Back to List of Highways Website contents, photos & text © 2002-2026, Cameron
Bevers (Webmaster) - All Rights Reserved / Contact Me
|
|---|