
| 
| |
|
|
This page contains present day photos (Year 2000 to date) of Ontario's King's Highway 17, arranged by location from the King's
Highway 17B Junction westerly to Verner. All photographs displayed on this page were taken by the Webmaster (Cameron Bevers), unless specifically noted otherwise.
Click on any thumbnail to see a larger image!
Please note that all photographs displayed on this
website are protected by copyright. These photographs must not be reproduced, published,
electronically stored or copied, distributed, or posted onto other websites without
my written permission. If you want to use photos from this website, please
email me first for permission. Thank-you!
|
|---|
|
Page 16: Present Day King's Highway 17 Photographs (Hwy 17B to Verner)


Left - Facing east along the North Bay Bypass (Hwy 17) from the Hwy 17B Junction. When the North Bay Bypass was completed and opened to traffic in 1953, it
provided instant traffic relief to a very congested section of Hwy 11 & Hwy 17 which passed through Downtown North Bay. Today, Hwy 11 & Hwy 17 pass through
the city via this limited-access arterial highway, as opposed to the former highway routes which followed downtown city streets. The North Bay Bypass widens from two
to four lanes in the background, just beyond Duchesnay Creek. See an Enlarged Photo Here. (Photograph taken on July 20, 2012 - © Cameron Bevers) Right - Facing east along Hwy 17B (Main Street) from the North Bay Bypass (Hwy 17). Up until the completion of the North Bay Bypass in 1953, all Hwy 17 traffic had to pass through the city centre. The old route of Hwy 17 through North Bay was ultimately renumbered as Hwy 17B in 1958. See an Enlarged Photo Here. (Photograph taken on July 20, 2012 - © Cameron Bevers) 

Left - Approaching the North Bay Bypass (Hwy 17) Junction on Hwy 17B in Commanda Township, facing west. From this photo, it is very obvious that the highway
used to continue to curve west on its route towards Sturgeon Falls and Sudbury. Once the North Bay Bypass was completed, westbound traffic departing from North Bay
on Hwy 17B had to make a sharp turn to the right in order to access Hwy 17 and the North Bay Bypass. See an
Enlarged Photo Here. (Photograph taken on July 20, 2012 - © Cameron Bevers) Right - Junction sign assembly at the western terminus of Hwy 17B at the Hwy 17 Junction west of North Bay. See an Enlarged Photo Here. (Photograph taken on July 20, 2012 - © Cameron Bevers) 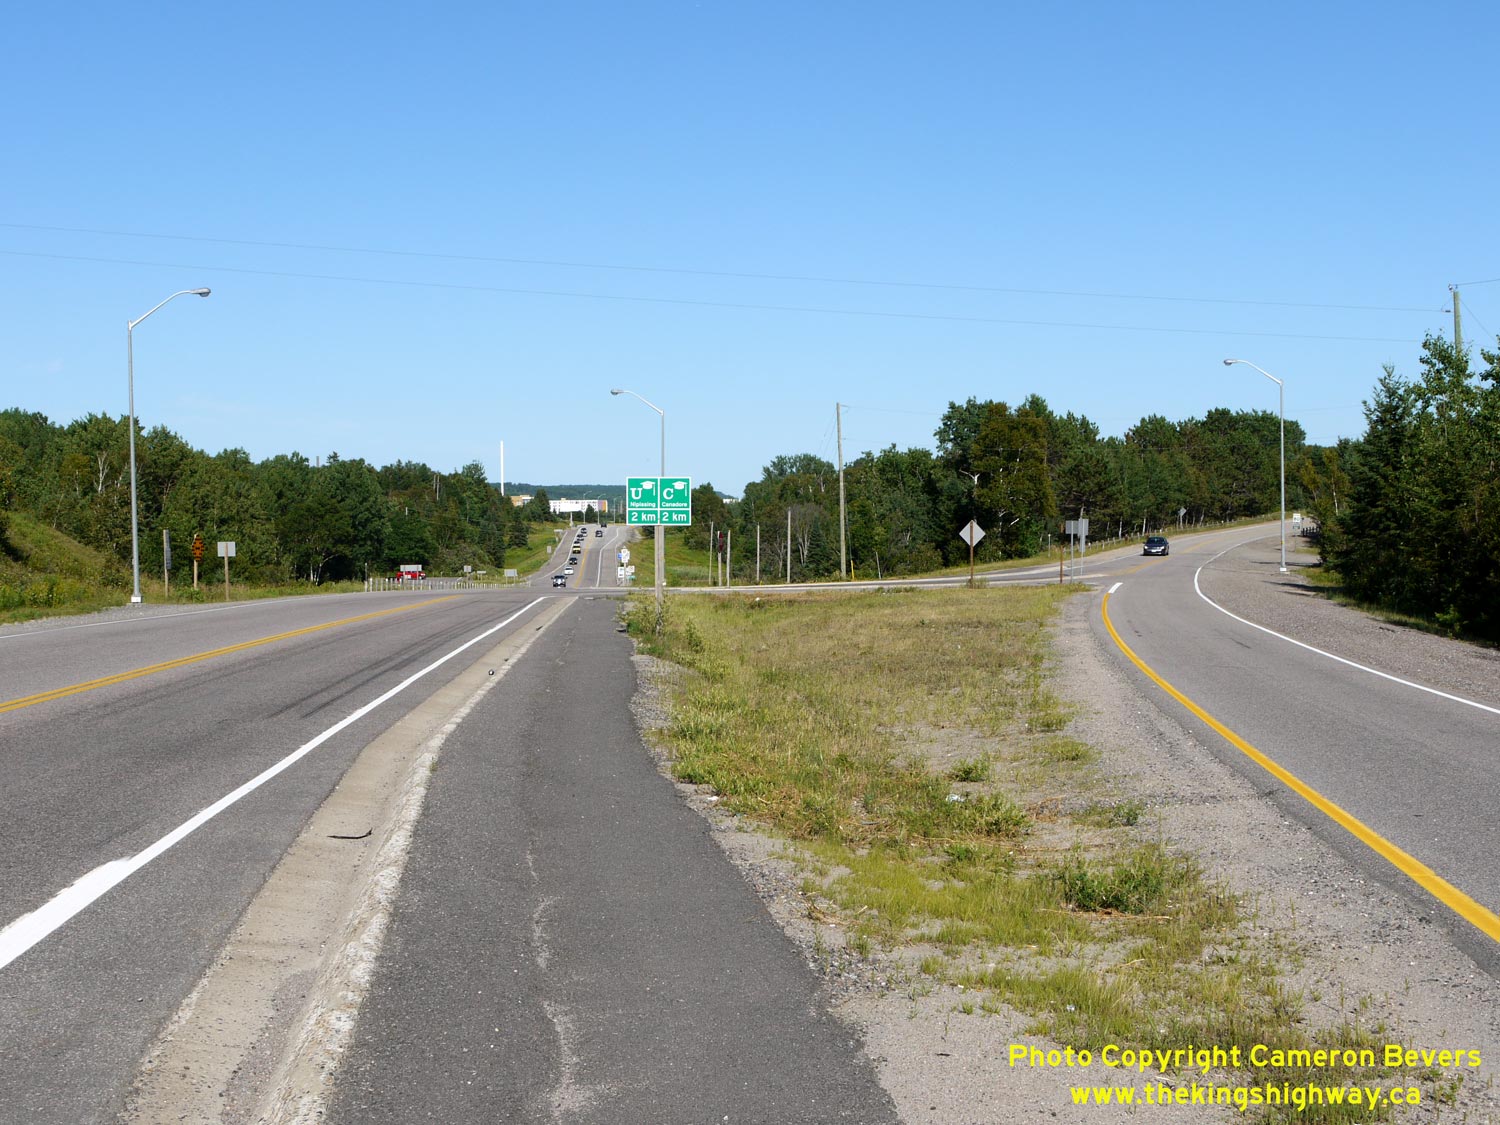

Left - Facing east along Hwy 17 at the Hwy 17B Junction west of North Bay. At this location, the North Bay Bypass (at left) tied into the original 1937 route
of Hwy 17, seen at right. The original westbound lane of Hwy 17 departing from North Bay was realigned so that it met the new North Bay Bypass at a right angle. The
original eastbound lane of Hwy 17 was left in place and now serves as a channelized right turn lane from the North Bay Bypass to eastbound Hwy 17B. See an
Enlarged Photo Here. (Photograph taken on July 20, 2012 - © Cameron Bevers) Right - Green guide sign marking the exit to Hwy 17B (Main Street) on eastbound Hwy 17. See an Enlarged Photo Here. (Photograph taken on July 20, 2012 - © Cameron Bevers) 

Left - Facing east along Hwy 17 towards the Hwy 17B Junction west of North Bay. Originally, Hwy 17 curved to the right and headed into Downtown North Bay via
the present-day route of Hwy 17B. The right turn lane is channelized to provide easier access to Hwy 17B from eastbound Hwy 17. See an
Enlarged Photo Here. (Photograph taken on July 20, 2012 - © Cameron Bevers) Right - Western terminus of Hwy 17B at the Hwy 17 (North Bay Bypass) Junction in Commanda Township, west of North Bay. See an Enlarged Photo Here. (Photograph taken on July 20, 2012 - © Cameron Bevers) 

Left - View of Lake Nipissing from the roadside park and lookout on Hwy 17, about 17 km west of North Bay. See an
Enlarged Photo Here. (Photograph taken on July 20, 2012 - © Cameron Bevers) Right - Facing east along Old Hwy 17 (Beaucage Park Road) from the current route of Hwy 17, about 19 km west of North Bay. Construction began on a 3 mile diversion of Hwy 17 east of Laronde Creek in 1948. Hwy 17 was relocated onto this new alignment in order to improve the highway's grade and bypass an at-grade railway crossing with poor alignment on the approaches. The new Hwy 17 alignment east of Laronde Creek was completed and opened to traffic in 1950. See an Enlarged Photo Here. (Photograph taken on July 21, 2012 - © Cameron Bevers) 

Left - Facing west along Old Hwy 17 (Beaucage Park Road) west of North Bay. The western section of Old Hwy 17 was kept open to traffic, since the former
highway route provided access to a beachfront community on the shores of Lake Nipissing. See an
Enlarged Photo Here. (Photograph taken on July 21, 2012 - © Cameron Bevers) Right - It may seem hard to believe, but Hwy 17 once continued straight ahead at this curve on Beaucage Park Road. The eastern section of the old highway was closed to traffic and abandoned in the 1950s. Traffic can only access the current Hwy 17 from the western end of the diversion near Laronde Creek. See an Enlarged Photo Here. (Photograph taken on July 21, 2012 - © Cameron Bevers) 

Left - The old route of Hwy 17 east of Beaucage Park Road was officially closed to through traffic in 1958 and is now an ATV trail. See an
Enlarged Photo Here. (Photograph taken on July 21, 2012 - © Cameron Bevers) Right - Facing west along Hwy 17 at the Laronde Creek Bridge between North Bay and Sturgeon Falls. See an Enlarged Photo Here. (Photograph taken on July 21, 2012 - © Cameron Bevers) 

Left - Facing east along Hwy 17 towards North Bay at the Laronde Creek Bridge, located 15 km east of Sturgeon Falls. See an
Enlarged Photo Here. (Photograph taken on July 20, 2012 - © Cameron Bevers) Right - Northern side of the Laronde Creek Bridge on Hwy 17. This single-span concrete rigid frame structure was completed in 1937. See an Enlarged Photo Here. (Photograph taken on July 20, 2012 - © Cameron Bevers) 

Left - Southern side of the Laronde Creek Bridge on Hwy 17. A sidewalk was recently added to the bridge. See an
Enlarged Photo Here. (Photograph taken on July 20, 2012 - © Cameron Bevers) Right - Facing east along Hwy 17 towards North Bay at the Little Sturgeon River Bridge at Meadowside. See an Enlarged Photo Here. (Photograph taken on July 20, 2012 - © Cameron Bevers) 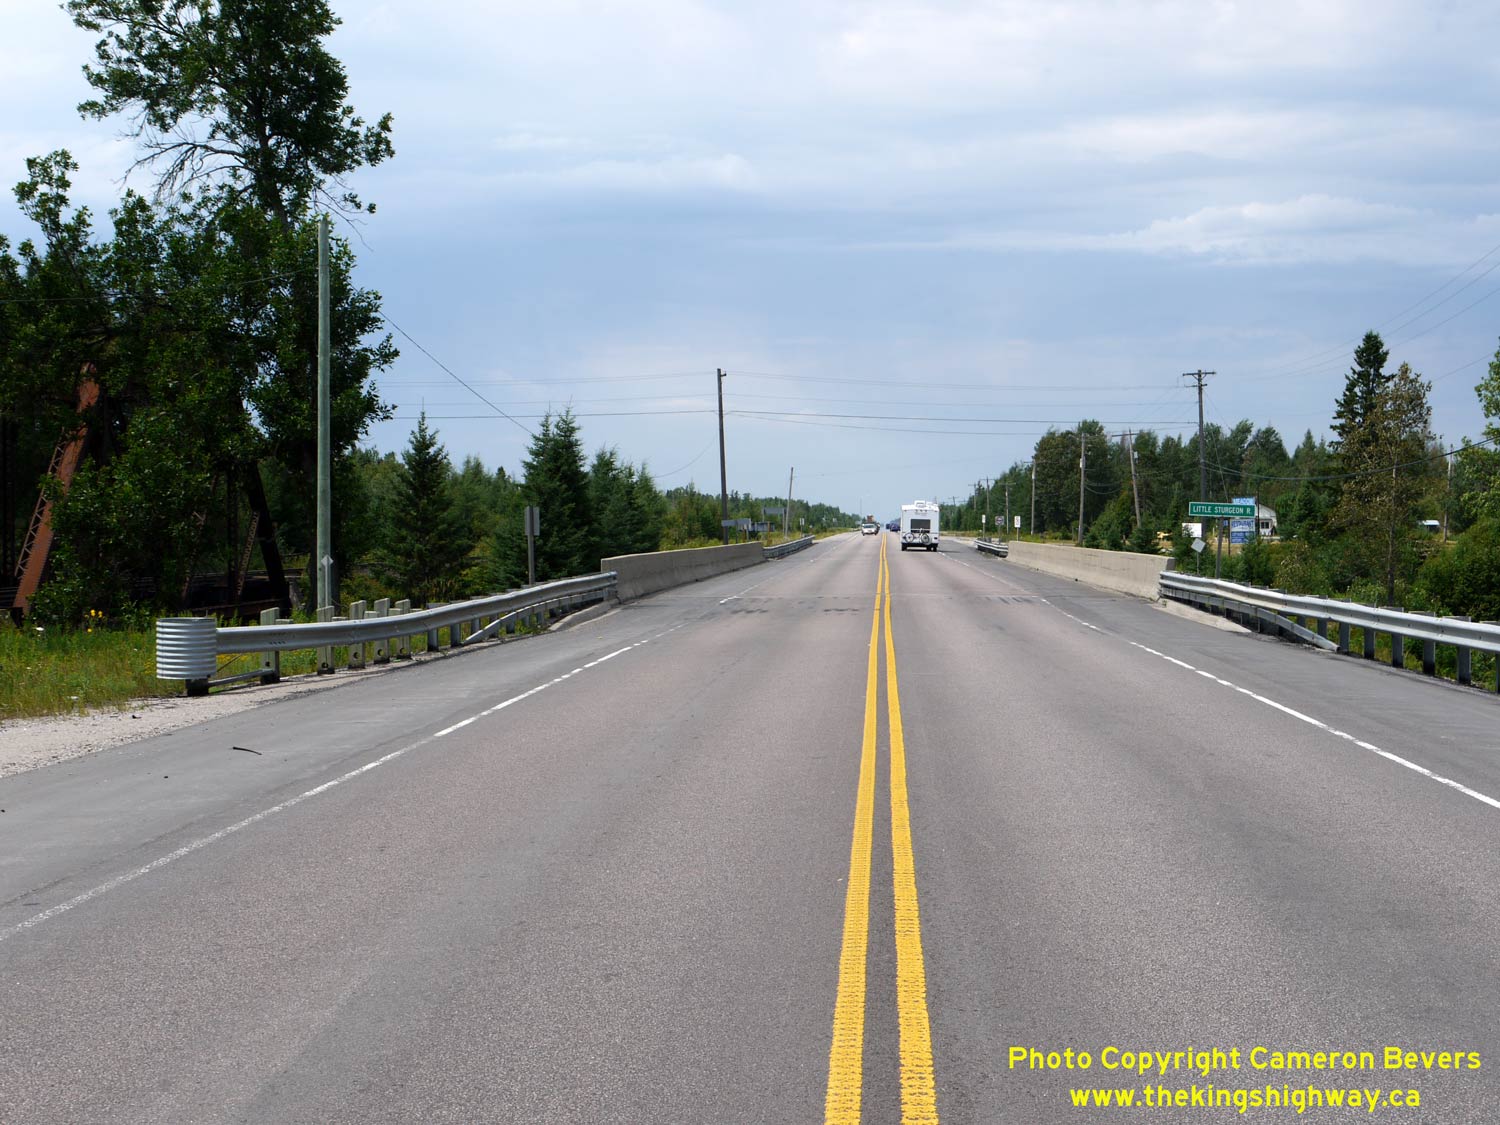

Left - Facing west along Hwy 17 at the Little Sturgeon River Bridge at Meadowside, located 12 km east of Sturgeon Falls. See an
Enlarged Photo Here. (Photograph taken on July 21, 2012 - © Cameron Bevers) Right - Little Sturgeon River Bridge on Hwy 17 at Meadowside. This three span steel girder structure was completed in 1982. It replaced a steel deck truss structure that had been built in 1937. In order to keep this section of the highway on its arrow-straight alignment, the Little Sturgeon River Bridge was replaced by installing a temporary Bailey Bridge on the north side of the highway during the bridge reconstruction project. The Bailey Bridge would have been situated at the point from which this photo was taken. See an Enlarged Photo Here. (Photograph taken on July 20, 2012 - © Cameron Bevers) 

Left - Date stamp (1982) and structure identification number on the Little Sturgeon River Bridge on Hwy 17. See an
Enlarged Photo Here. (Photograph taken on July 20, 2012 - © Cameron Bevers) Right - An old stone bridge abutment can be seen beside the current Hwy 17 Bridge over the Sturgeon River in Downtown Sturgeon Falls. The stone abutment used to support a 19th Century steel truss bridge, until the bridge was demolished in the 1950s. The old bridge carried Hwy 17 traffic until 1954, when the current bridge was opened. See an Enlarged Photo Here. (Photograph taken on June 18, 2006 - © Cameron Bevers) 
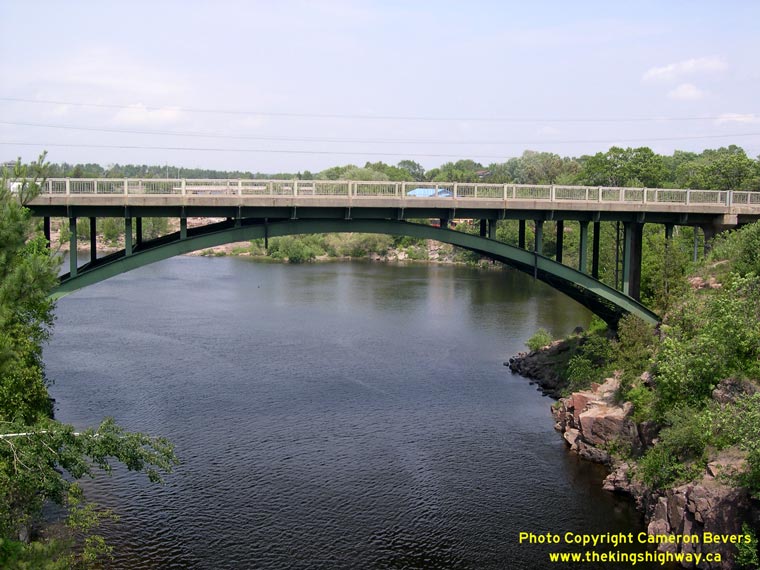
Left - Champlain Bridge on Hwy 17 in Sturgeon Falls. This steel arch bridge spans the Sturgeon River. See an
Enlarged Photo Here. (Photograph taken on June 18, 2006 - © Cameron Bevers) Right - South side of the Champlain Bridge on Hwy 17. Structure completed in 1954. See an Enlarged Photo Here. (Photograph taken on June 18, 2006 - © Cameron Bevers) 

Left - View of the Sturgeon River (Champlain) Bridge from the east bank. See an
Enlarged Photo Here. (Photograph taken on June 18, 2006 - © Cameron Bevers) Right - Facing east towards North Bay along Hwy 17 at the Sturgeon River (Champlain) Bridge. See an Enlarged Photo Here. (Photograph taken on June 18, 2006 - © Cameron Bevers) 
 Left - Close-up view of the steel and concrete handrail design on the Champlain Bridge on Hwy 17 in Sturgeon Falls. See an Enlarged Photo Here. (Photograph taken on June 18, 2006 - © Cameron Bevers) Right - Commemorative plaque marking the completion of the Champlain Bridge on Hwy 17 in 1954. See an Enlarged Photo Here. (Photograph taken on June 18, 2006 - © Cameron Bevers) 

Left - View of the steel arch superstructure of the Champlain Bridge spanning the Sturgeon River. This structure was one of the last steel arch bridges ever
constructed on the Ontario highway system. Unfortunately, this aesthetically pleasing bridge design never saw widespread use in Ontario, making examples such as this
one rather rare. Only a handful of similar bridges can be found on Ontario's provincial highways. See an
Enlarged Photo Here. (Photograph taken on June 18, 2006 - © Cameron Bevers) Right - An older King's Highway 17 Junction signpost with "JCT" tab in Sturgeon Falls. This type of highway sign assembly is now becoming rather scarce in Ontario. See an Enlarged Photo Here. (Photograph taken on June 18, 2006 - © Cameron Bevers) 

Left - Dual Hwy 17 & Hwy 64 route markers near Sturgeon Falls. These two highways share a concurrent route for approximately 16 km between Verner and
Sturgeon Falls. The overlapped route was created in 1956, when Hwy 64 was extended south from its original 1937 southern terminus in Sturgeon Falls to the Hwy 69
Junction near Alban. See an Enlarged Photo Here. (Photograph taken on July 21, 2012 - © Cameron Bevers) Right - Facing west along Hwy 17 & Hwy 64 about 4 km east of Verner. This area of Northern Ontario is unusual, in that it has comparatively good soil which supports a fairly extensive agricultural industry. See an Enlarged Photo Here. (Photograph taken on July 21, 2012 - © Cameron Bevers) 

Left - Approaching the Hwy 64 South Junction on Hwy 17 in Verner, facing west towards Sudbury. See an
Enlarged Photo Here. (Photograph taken on July 21, 2012 - © Cameron Bevers) Right - Dual Hwy 17 & Hwy 64 route markers facing eastbound traffic in Verner. See an Enlarged Photo Here. (Photograph taken on July 21, 2012 - © Cameron Bevers) 

Left - Junction sign assembly and distance guide signs at the Hwy 64 South Junction on Hwy 17 in Verner. At this junction, Hwy 64 turns right and heads east
towards Sturgeon Falls concurrently with Hwy 17. At Sturgeon Falls, Hwy 64 turns left from Hwy 17 and continues its route north towards Marten River. See an
Enlarged Photo Here. (Photograph taken on July 21, 2012 - © Cameron Bevers) Right - Facing east along Hwy 17 & Hwy 64 towards Sturgeon Falls from the Hwy 64 South Junction in Verner. See an Enlarged Photo Here. (Photograph taken on July 21, 2012 - © Cameron Bevers) 

Left - Facing west along Hwy 17 towards Sudbury from the Hwy 64 South Junction. See an
Enlarged Photo Here. (Photograph taken on July 21, 2012 - © Cameron Bevers) Right - Facing south along Hwy 64 towards Lavigne from the Hwy 17 Junction in Verner. Hwy 64 resumes its journey south towards the French River area, after a brief journey west between Verner and Sturgeon Falls alongside Hwy 17. See an Enlarged Photo Here. (Photograph taken on July 21, 2012 - © Cameron Bevers) 

Left - Approaching the Hwy 17 Junction in Verner on Hwy 64, facing north. See an
Enlarged Photo Here. (Photograph taken on July 21, 2012 - © Cameron Bevers) Right - Facing east along Hwy 17 approaching the Hwy 64 South Junction in Verner. See an Enlarged Photo Here. (Photograph taken on July 21, 2012 - © Cameron Bevers) 

Left - Facing west along Hwy 17 between the Hwy 64 and Hwy 575 Junctions in Verner. The route of Hwy 17 through Verner is actually a bypass of the original
highway. When Hwy 17 was first established in this area in 1937, it passed through Downtown Verner along Principal Street. The Verner Bypass was completed and
opened to traffic in 1946. See an Enlarged Photo Here. (Photograph taken on July 21, 2012 - © Cameron Bevers) Right - Approaching the Hwy 575 Junction on Hwy 17, facing west towards Sudbury. See an Enlarged Photo Here. (Photograph taken on July 21, 2012 - © Cameron Bevers) 

Left - Facing east along Hwy 17 towards North Bay from the Hwy 575 Junction. The Hwy 64 South Junction lies about 1 km to the east of the Hwy 575 Junction.
See an Enlarged Photo Here. (Photograph taken on July 21, 2012 - © Cameron Bevers) Right - Approaching the Hwy 575 Junction on Hwy 17 in Verner, facing east. See an Enlarged Photo Here. (Photograph taken on July 21, 2012 - © Cameron Bevers) 

Left - Approaching the Hwy 17 Junction on Hwy 575 in Verner, facing south. See an
Enlarged Photo Here. (Photograph taken on July 21, 2012 - © Cameron Bevers) Right - Facing north along Hwy 575 towards Field from the Hwy 17 Junction. The route of Hwy 575 from Verner to Field was a relatively new addition to the Ontario Highway System. The highway was first designated in 1974, decades after most of the area's highways were established. See an Enlarged Photo Here. (Photograph taken on July 21, 2012 - © Cameron Bevers) 

Left - Junction sign assembly and destination guide signs at the southern terminus of Hwy 575 in Verner. See an
Enlarged Photo Here. (Photograph taken on July 21, 2012 - © Cameron Bevers) Right - Facing west along Hwy 17 towards Sudbury from Verner. See an Enlarged Photo Here. (Photograph taken on July 21, 2012 - © Cameron Bevers)
Continue on to King's Highway 17 Photos: Verner to Sudbury
|
|---|
Links to Adjacent King's Highway Photograph Pages:
Back to King's Highway 16 Photos /
King's Highway 17 History /
On to King's Highway 18 Photos
Ontario Highway History - Main Menu / Back to List of Highways Website contents, photos & text © 2002-2026, Cameron
Bevers (Webmaster) - All Rights Reserved / Contact Me
|
|---|