
| 
| |
|
|
This page contains present day photos (Year 2000 to date) of Ontario's King's Highway 17, arranged by location from Thessalon
westerly to the Secondary Highway 548 Junction. All photographs displayed on this page were taken by the Webmaster (Cameron Bevers), unless specifically noted
otherwise. Click on any thumbnail to see a larger image!
Please note that all photographs displayed on this
website are protected by copyright. These photographs must not be reproduced, published,
electronically stored or copied, distributed, or posted onto other websites without
my written permission. If you want to use photos from this website, please
email me first for permission. Thank-you!
|
|---|
|
Page 23: Present Day King's Highway 17 Photographs (Thessalon to Hwy 548 Junction)


Left - Approaching the Hwy 129 & Hwy 17B Junction in Thessalon, facing west. Until the Thessalon Bypass was completed in 1958, Hwy 17 passed through
Downtown Thessalon. The former alignment of Hwy 17 leading into Thessalon was converted into a long right-turn channelization from northbound Hwy 17B to eastbound
Hwy 17. See an Enlarged Photo Here. (Photograph taken on August 28, 2011 - © Cameron Bevers) Right - Facing west along Hwy 17 (Thessalon Bypass) at the Hwy 129 & Hwy 17B Junction. Compare this present day photo to this 1959 Photo, taken shortly after the Thessalon Bypass was completed and opened to traffic. Not much has changed here since the 1950s. See an Enlarged Photo Here. (Photograph taken on August 28, 2011 - © Cameron Bevers) 

Left - Northern terminus of Hwy 17B at the Hwy 17 & Hwy 129 Junction in Thessalon. Note the right-turn channelization, which leads to eastbound Hwy 17. See
an Enlarged Photo Here. (Photograph taken on August 28, 2011 - © Cameron Bevers) Right - Facing east along Hwy 17 towards Blind River from the Hwy 129 & Hwy 17B Junction in Thessalon. See an Enlarged Photo Here. (Photograph taken on August 28, 2011 - © Cameron Bevers) 

Left - Green guide sign marking the Hwy 129 Junction on westbound Hwy 17 in Thessalon. What this sign doesn't tell you is that it is a very lonely 220 km
journey to Chapleau along Hwy 129. While Hwy 129 is a spectacular route in terms of scenery, it is also extremely isolated. There are no communities along the entire
highway of any significant size other than Chapleau, which lies at Hwy 129's northern terminus. See an
Enlarged Photo Here. (Photograph taken on August 28, 2011 - © Cameron Bevers) Right - Facing east along Hwy 17 towards the Hwy 129 & Hwy 17B Junction in Thessalon. See an Enlarged Photo Here. (Photograph taken on August 28, 2011 - © Cameron Bevers) 

Left - Facing east along Hwy 17 towards the Thessalon River Bridge at the Hwy 129 & Hwy 17B Junction. See an
Enlarged Photo Here. (Photograph taken on August 28, 2011 - © Cameron Bevers) Right - Green guide sign approaching the Hwy 129 Junction in Thessalon. At Chapleau, Hwy 129 connects to Hwy 101, an important east-west highway link across Northeastern Ontario. It is also possible to reconnect with Hwy 17 at Wawa, via Hwy 129 and Hwy 101. This creates a useful alternate route to Hwy 17, in the event that Hwy 17 is closed due to collisions or poor weather conditions. See an Enlarged Photo Here. (Photograph taken on August 28, 2011 - © Cameron Bevers) 

Left - Southern side of the Thessalon River Bridge. The bridge is immediately adjacent to the Hwy 129 & Hwy 17B Junction. (Photograph taken on August 28, 2011 - © Cameron Bevers) Right - Northern side of the Thessalon River Bridge on Hwy 17. Structure completed in 1958. (Photograph taken on August 28, 2011 - © Cameron Bevers) 

Left - Facing west along Hwy 17 towards the Thessalon River Bridge from the Hwy 17B & Hwy 129 Junction. See an
Enlarged Photo Here. (Photograph taken on August 28, 2011 - © Cameron Bevers) Right - Junction sign assembly at the southern terminus of Hwy 129 at the Hwy 17 & Hwy 17B Junction in Thessalon. See an Enlarged Photo Here. (Photograph taken on August 28, 2011 - © Cameron Bevers) 


Left - Advance junction sign assembly on northbound Hwy 17B departing from Thessalon. See an
Enlarged Photo Here. (Photograph taken on August 28, 2011 - © Cameron Bevers) Centre - Junction sign assembly at the northern terminus of Hwy 17B at the Hwy 17 & Hwy 129 Junction in Thessalon. See an Enlarged Photo Here. (Photograph taken on August 28, 2011 - © Cameron Bevers) Right - Advance sign junction assembly on southbound Hwy 129 approaching the Hwy 17 & Hwy 129 Junction in Thessalon. See an Enlarged Photo Here. (Photograph taken on July 1, 2006 - © Cameron Bevers) 
Above - Facing south along Hwy 129 approaching the Hwy 17 & Hwy 17B Junction. See an
Enlarged Photo Here. (Photograph taken on August 21, 2022 - © Cameron Bevers) 

Left - Distance sign on Westbound Hwy 17 just west of the Hwy 129 & Hwy 17B Junction at Thessalon. (Photograph taken on August 28, 2011 - © Cameron Bevers) Right - Approaching the Hwy 17B Junction at the western end of the Thessalon Bypass. (Photograph taken on August 28, 2011 - © Cameron Bevers) 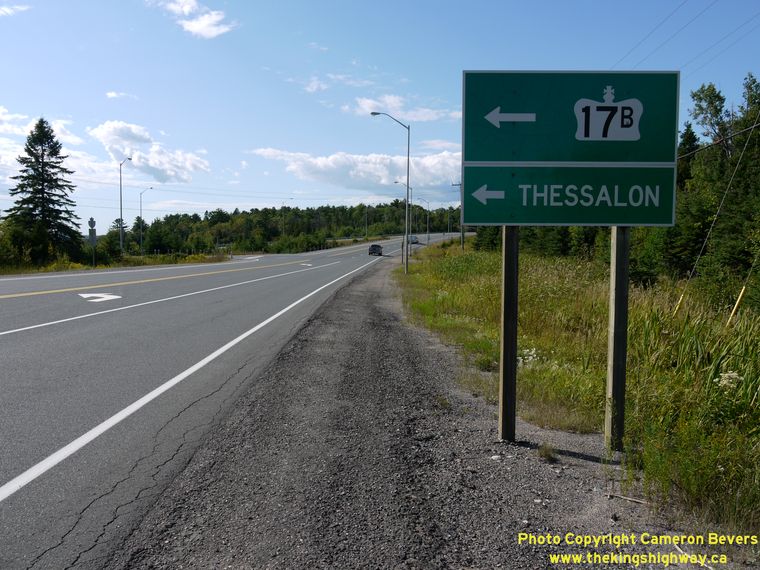

Left - Green guide sign marking the Hwy 17B Junction on Westbound Hwy 17 west of Thessalon. (Photograph taken on August 28, 2011 - © Cameron Bevers) Right - Facing west along Hwy 17 at the Hwy 17B Junction west of Thessalon. (Photograph taken on August 28, 2011 - © Cameron Bevers) 

Left - Facing west along Hwy 17 towards Bruce Mines from the Hwy 17B Junction west of Thessalon. (Photograph taken on August 28, 2011 - © Cameron Bevers) Right - Facing east along Hwy 17 towards Blind River from the Hwy 17B Junction west of Thessalon. (Photograph taken on August 28, 2011 - © Cameron Bevers) 

Left - Approaching the Hwy 17 Junction on Hwy 17B. Note the long ramp leading onto Hwy 17B from Eastbound Hwy 17. This ramp was the original route
of Hwy 17, but during the construction of the Thessalon Bypass, the road was rebuilt to allow one-way traffic only. Although the ramp is tangential to both
Hwy 17 and Hwy 17B, it effectively acts as a "right turn" channelization. See an
Enlarged Photo here. (Photograph taken on August 28, 2011 - © Cameron Bevers) Right - Junction assembly at the end of Hwy 17B at the Hwy 17 Junction in Thessalon. (Photograph taken on August 28, 2011 - © Cameron Bevers) 

Left - Facing east along Hwy 17 at the Hwy 17B Junction, showing the tangential "ramp" from Eastbound Hwy 17 to Hwy 17B. When the Thessalon Bypass
was built in 1958, there was little understanding about driver behaviour in terms of how drivers interpret and react to their driving environment. Since the
1950s, "Human Factors" research has led to greatly improved highway design principles across North American jurisdictions, by discouraging designs that
would violate driver expectations of what the road ahead looks like. The practice of designing "right turn" channelizations that are tangential to both the
through highway and the intersecting highway, as is the case here, is discouraged today. Road agencies have found that intersection designs such as this
can confuse drivers, who normally wouldn't expect that by going straight ahead, they are actually "turning off" of the through highway and onto another
route. Note the unusual use of the freeway "EXIT" sign, which was placed in the gore area to reiterate the fact that the supposed "through" lane here
actually exits onto a different highway. See an Enlarged Photo here. (Photograph taken on August 28, 2011 - © Cameron Bevers) Right - Facing east along Hwy 17 approaching the Hwy 17B Junction west of Thessalon. See an Enlarged Photo here. (Photograph taken on August 28, 2011 - © Cameron Bevers) 

Left - Green diagrammatic sign on Eastbound Hwy 17 approaching the Hwy 17B Junction west of Thessalon. Since the ramp leading to Hwy 17B is tangential to
Hwy 17 itself, some motorists may inadvertently take the ramp thinking that they are actually following Hwy 17. This sign does an excellent job of
illustrating the fact that motorists must keep left in order to stay on Hwy 17. (Photograph taken on August 28, 2011 - © Cameron Bevers) Right - Facing east along Hwy 17 approaching Range Lights Road near Desbarats. (Photograph taken on August 28, 2011 - © Cameron Bevers) 

Left - Facing west along Hwy 17 at the beginning of the divided highway near Desbarats. A 17 km section of Hwy 17 from Desbarats to Echo Bay was
twinned and widened to four lanes during the late 1970s, in order to improve passing opportunities for traffic. (Photograph taken on August 28, 2011 - © Cameron Bevers) Right - Start of the divided highway near Desbarats. Just beyond this point, the highway widens to four lanes. (Photograph taken on August 28, 2011 - © Cameron Bevers) 

Left - Facing east along Hwy 17 towards Desbarats from the end of the divided highway. (Photograph taken on August 28, 2011 - © Cameron Bevers) Right - For most of the divided highway section between Desbarats and Echo Bay, the original 1937 highway alignment forms the eastbound lanes of Hwy 17. The new twinned carriageway carries the westbound lanes of Hwy 17. (Photograph taken on September 1, 2008 - © Cameron Bevers)
Continue on to King's Highway 17 Photos: Hwy 548 to Sault Ste. Marie
|
|---|
Links to Adjacent King's Highway Photograph Pages:
Back to Hwy 17 - Blind River to Thessalon
Hwy 17 Photo Index
On to Hwy 17 - Hwy 548 to Sault Ste. Marie
Back to King's Highway 16 Photos /
King's Highway 17 History /
On to King's Highway 18 Photos
Ontario Highway History - Main Menu / Back to List of Highways Website contents, photos & text © 2002-2026, Cameron
Bevers (Webmaster) - All Rights Reserved / Contact Me
|
|---|