
| 
| |
|
|
This page contains present day photos (Year 2000 to date) of Ontario's King's Highway 2, arranged by location from
Port Hope easterly to Trenton. All photographs displayed on this page were taken by the Webmaster (Cameron Bevers), unless specifically noted otherwise. Click on
any thumbnail to see a larger image!
Please note that all photographs displayed on this
website are protected by copyright. These photographs must not be reproduced, published,
electronically stored or copied, distributed, or posted onto other websites without
my written permission. If you want to use photos from this website, please
email me first for permission. Thank-you!
|
|---|
|
Page 15: Present Day King's Highway 2 Photographs (Port Hope to Trenton)


Left - King's Highway 2 and "To 401" trailblazer on Toronto Road in Port Hope. The function of Hwy 2 as a long-distance through highway was greatly diminished
by the completion of Hwy 401 across Eastern Ontario during the 1960s. By 1968, the route of Hwy 2 had effectively been bypassed in its entirety by Hwy 401
from Toronto to the Ontario-Quebec Boundary. The once-important route of Hwy 2 began to serve more as a collector highway, carrying mostly local traffic. The
vast majority of the route of Hwy 2 was transferred by the province to local municipalities during the 1990s. See an
Enlarged Photo here. (Photograph taken on July 24, 2004 - © Cameron Bevers) Right - Route markers on Ridout Street approaching Toronto Road in Port Hope. The route of Hwy 2 through Port Hope is now signed as Northumberland Road 2. See an Enlarged Photo here. (Photograph taken on August 31, 2012 - © Cameron Bevers) 

Left - Facing north along Toronto Road (Hwy 2) towards Welcome from Ridout Street in Port Hope. The meandering route of Hwy 2 through Port Hope made the route
rather impractical for long-distance travel. By the late 1930s, highway engineers were already looking at bypassing Port Hope with a new four-lane highway. The Port
Hope Bypass was ultimately constructed as Hwy 401 in the early 1960s. See an
Enlarged Photo here. (Photograph taken on August 31, 2012 - © Cameron Bevers) Right - Heading eastbound, the route of Hwy 2 turned left from Toronto Road onto Ridout Street in Port Hope. Left turns such as this one would often cause significant traffic delays along Hwy 2 in the days before the completion of Hwy 401 in the 1960s. See an Enlarged Photo here. (Photograph taken on August 31, 2012 - © Cameron Bevers) 

Left - Facing west along Ridout Street (Hwy 2) approaching Toronto Road. From here, Hwy 2 turns right onto Toronto Road and briefly heads northwest towards
Welcome, where the route turns again and continues west towards Toronto. See an Enlarged Photo here. (Photograph taken on August 31, 2012 - © Cameron Bevers) Right - Traffic signals at the intersection of Ridout Street and Toronto Road in Port Hope. Note the secondary signal head at left, which features three 8 inch (20 cm) display lenses. It is becoming increasingly rare in Ontario to see traffic signal heads with an 8 inch (20 cm) red display lens. Most jurisdictions use a 12 inch (30 cm) red display lens and 8 inch (20 cm) amber and green display lenses for all traffic signals. In fact, many jurisdictions in Ontario are adopting 12 inch (30 cm) display lenses for all three signal indications, as they are more conspicuous to motorists. See an Enlarged Photo here. (Photograph taken on August 31, 2012 - © Cameron Bevers) 

Left - Motorists who do choose to take the more leisurely-paced route of Hwy 2 across Eastern Ontario will be treated to many delightful small town street
scenes such as this one in Port Hope. Ridout Street (Hwy 2) curves slightly to the right as it descends this hill towards the Hwy 28 Junction, creating a very
photogenic main street scene. See an Enlarged Photo here. (Photograph taken on August 31, 2012 - © Cameron Bevers) Right - Junction of Hwy 2 and Hwy 28 in Downtown Port Hope. Historically, the route of Hwy 28 began at this intersection and continued north to Peterborough, where the highway turned northeasterly towards Bancroft and Denbigh. Since the mass Ontario Highway downloading spree of the late 1990s, the route of Hwy 28 has officially ended in the Peterborough area. The southern sections of Hwy 28 from Port Hope to Peterborough are now maintained by Northumberland and Peterborough Counties. See an Enlarged Photo here. (Photograph taken on July 9, 2006 - © Cameron Bevers) 
Above - Highway signs at the junction of Hwy 2 and Hwy 28 in Port Hope. See an
Enlarged Photo here. (Photograph taken on July 9, 2006 - © Cameron Bevers) 

Left - Facing east along Peter Street (Hwy 2) towards Cobourg at Rose Hill Road. Many undivided four-lane sections of highway such as this one were built by
the Department of Highways of Ontario (DHO) on the approaches to towns in Eastern Ontario. This roadway configuration works best when the traffic volumes are fairly
low and the majority of the traffic continues straight through. See an
Enlarged Photo here. (Photograph taken on August 31, 2012 - © Cameron Bevers) Right - An inherent problem with this type of four lane design is that left-turning traffic shares one of the through lanes, as this view facing west from Hamilton Road on Hwy 2 clearly illustrates. Although traffic volumes are fairly low here, a stopped left-turning vehicle in a through lane would likely catch motorists by surprise. The provision of a separate left turn lane allows vehicles waiting for a gap in opposing traffic to remain out of potential conflict areas with through traffic. See an Enlarged Photo here. (Photograph taken on August 31, 2012 - © Cameron Bevers) 

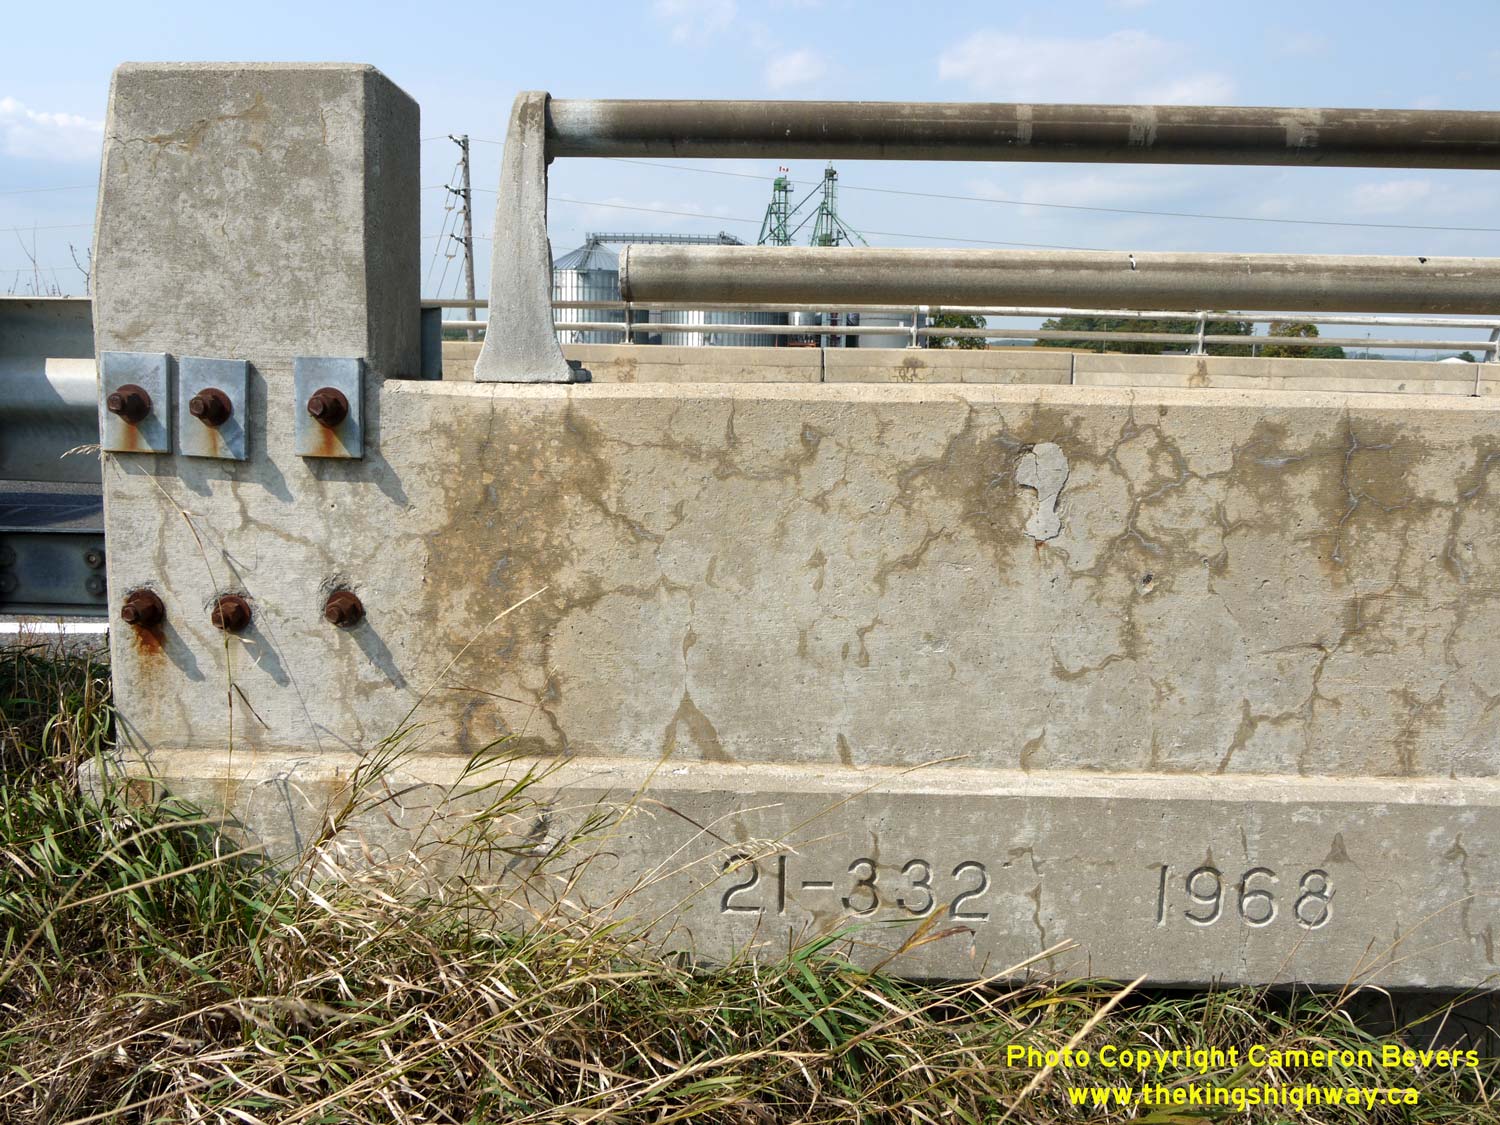
Left - Gages Creek Bridge on Hwy 2 east of Port Hope near Hamilton Road. This single-span concrete girder structure was completed in 1986. It replaced a small
steel bridge that had been constructed across Gages Creek by the Department of Public Highways back in 1920. See an
Enlarged Photo here. (Photograph taken on August 31, 2012 - © Cameron Bevers) Right - Structure identification number and date stamp (1986) on the Gages Creek Bridge on Hwy 2. See an Enlarged Photo here. (Photograph taken on August 31, 2012 - © Cameron Bevers) 

Left - Facing west along Hwy 2 towards the Gages Creek Bridge and Hamilton Road near Port Hope. See an
Enlarged Photo here. (Photograph taken on August 31, 2012 - © Cameron Bevers) Right - The four-lane highway ends just beyond the Gages Creek Bridge. From here to Cobourg, Hwy 2 is a conventional two-lane highway. See an Enlarged Photo here. (Photograph taken on August 31, 2012 - © Cameron Bevers) 

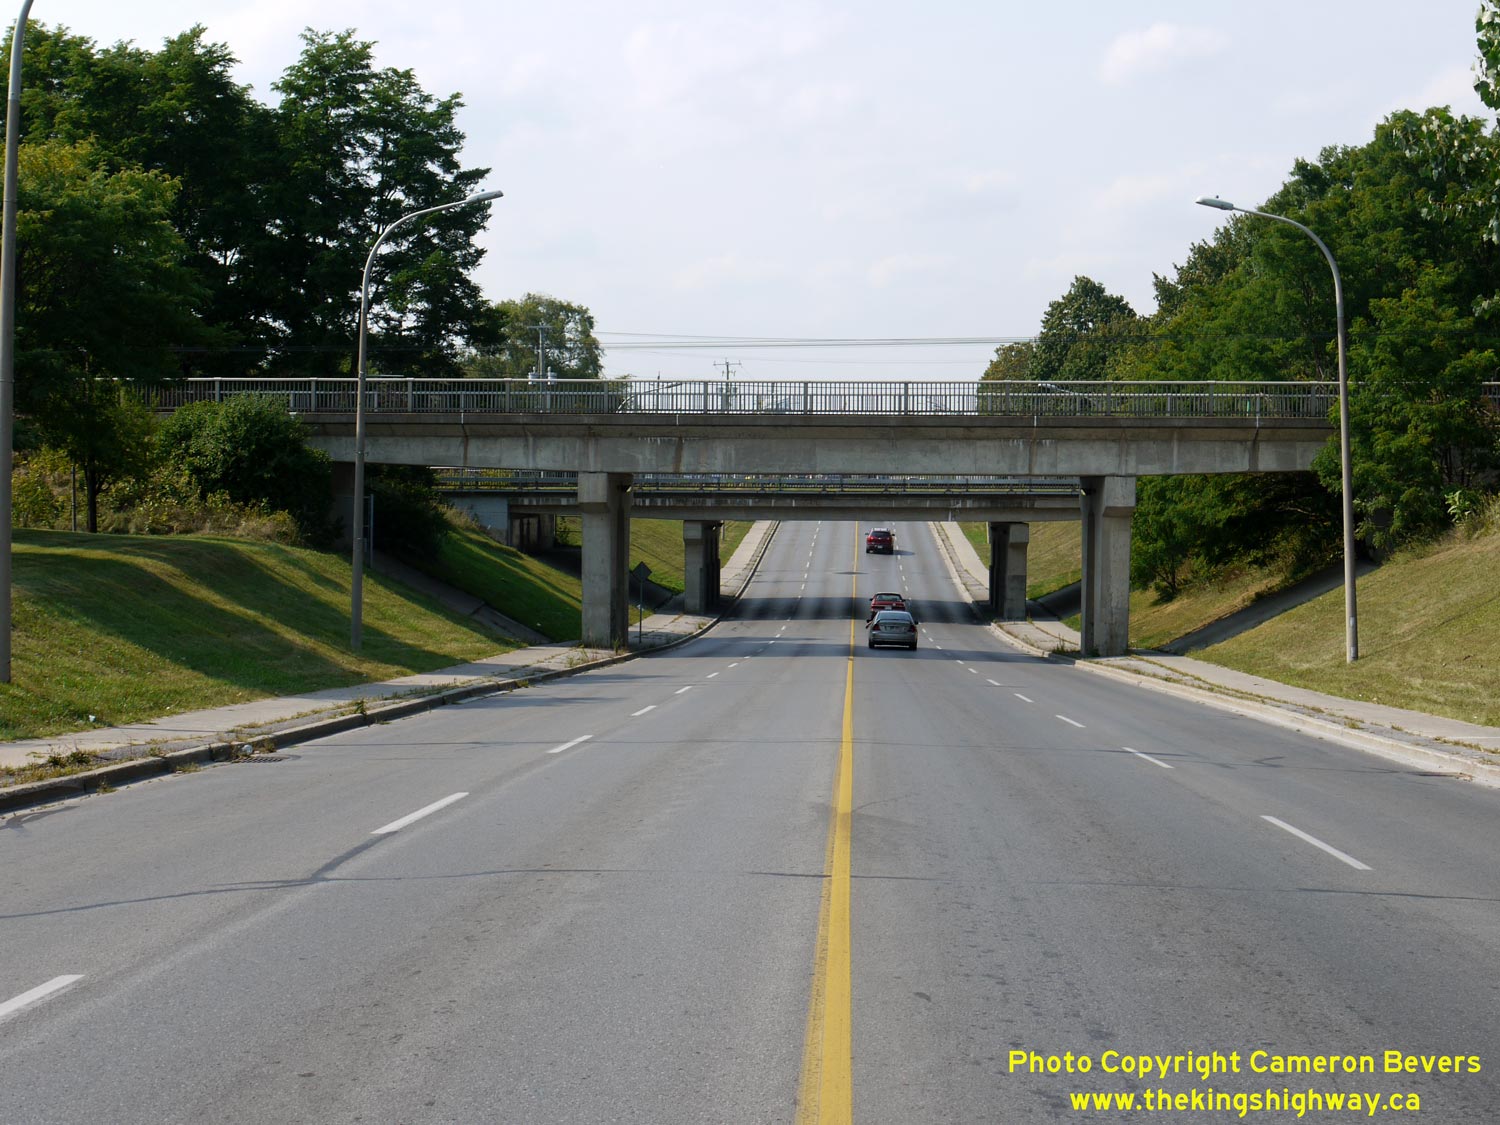
Left - Southern side of the Port Hope Canadian Pacific Railway (CPR) Overhead on Hwy 2. See an
Enlarged Photo here. (Photograph taken on August 31, 2012 - © Cameron Bevers) Right - Northern side of the Port Hope CPR Overhead on Hwy 2. This three span post-tensioned concrete structure was constructed in 1968, and officially opened to traffic in 1970. See an Enlarged Photo here. (Photograph taken on August 31, 2012 - © Cameron Bevers) 

Left - Facing west across the Port Hope CPR Overhead on Hwy 2. See an
Enlarged Photo here. (Photograph taken on August 31, 2012 - © Cameron Bevers) Right - Facing east along Hwy 2 towards Cobourg at the Port Hope CPR Overhead. See an Enlarged Photo here. (Photograph taken on August 31, 2012 - © Cameron Bevers) 

Left - Structure identification number and date stamp (1968) on the Port Hope CPR Overhead on Hwy 2. See an
Enlarged Photo here. (Photograph taken on August 31, 2012 - © Cameron Bevers) Right - Below-deck view of the post-tensioned construction of the Port Hope CPR Overhead. By the late 1960s, this emerging bridge construction technology allowed the DHO to build skewed railway overhead bridges such as this one with the use of minimal intermediate piers. See an Enlarged Photo here. (Photograph taken on August 31, 2012 - © Cameron Bevers) 

Left - A temporary alignment of Hwy 2 was constructed on the south side of the Port Hope CPR Overhead, so that the new bridge could be constructed on the
existing highway alignment. Following construction, the temporary alignment of Hwy 2 became a service road to provide access to neighbouring properties. See an
Enlarged Photo here. (Photograph taken on August 31, 2012 - © Cameron Bevers) Right - This view of the Port Hope CPR Overhead shows the bad skew of the tracks below the Hwy 2 structure. This would have been a very dangerous at-grade railway crossing at one point, with poor visibility. See an Enlarged Photo here. (Photograph taken on August 31, 2012 - © Cameron Bevers) 

Left - Temporary alignment of Hwy 2 at the Port Hope CPR Overhead. This road carried Hwy 2 traffic for nearly three years while the adjacent bridge was
constructed. See an Enlarged Photo here. (Photograph taken on August 31, 2012 - © Cameron Bevers) Right - Facing east along Hwy 2 towards Cobourg from the Port Hope CPR Overhead. See an Enlarged Photo here. (Photograph taken on August 31, 2012 - © Cameron Bevers) 

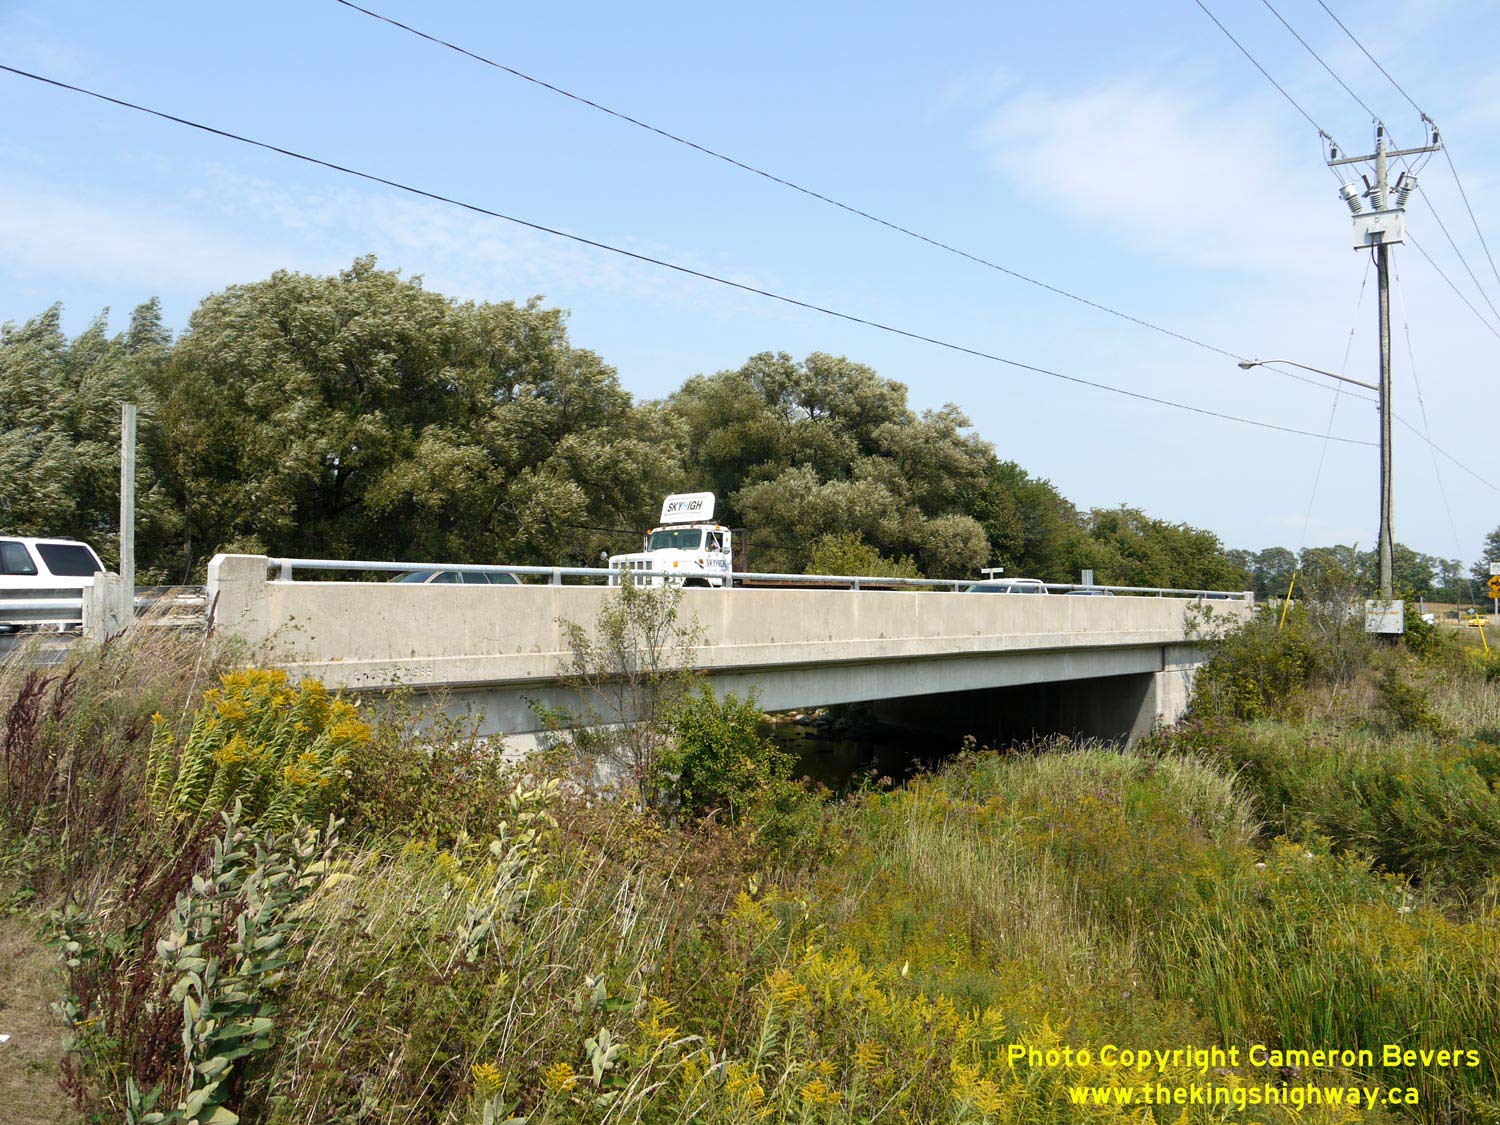
Left - Approaching Cobourg on Hwy 2, facing east. The towns of Port Hope and Cobourg are only separated by about 5 km along Hwy 2. See an
Enlarged Photo here. (Photograph taken on August 31, 2012 - © Cameron Bevers) Right - William Street Bridge on Hwy 2 in Cobourg, facing west. This structure spans Cobourg Brook and was completed in 1966. See an Enlarged Photo here. (Photograph taken on August 31, 2012 - © Cameron Bevers) 

Left - Commemorative plaque on the William Street Bridge marking the bridge's dedication to William Weller, the first mayor of Cobourg. See an
Enlarged Photo here. (Photograph taken on August 31, 2012 - © Cameron Bevers) Right - Facing east across the William Street Bridge towards Downtown Cobourg on Hwy 2. See an Enlarged Photo here. (Photograph taken on August 31, 2012 - © Cameron Bevers) 

Left - View underneath the William Street Bridge over Cobourg Brook. Prior to the construction of this bridge in 1965-1966, a concrete bowstring arch bridge
used to carry Hwy 2 across Cobourg Brook. The bowstring arch bridge had to be removed to accommodate an expansion of William Street from two to four lanes. See an
Enlarged Photo here. (Photograph taken on August 31, 2012 - © Cameron Bevers) Right - The William Street Bridge features decorative handrails, made from local fieldstones. See an Enlarged Photo here. (Photograph taken on August 31, 2012 - © Cameron Bevers) 

Left - Facing west along Hwy 2 (William Street) at the Cobourg Canadian National Railway & Canadian Pacific Railway (CNR & CPR) Subways. See an
Enlarged Photo here. (Photograph taken on August 31, 2012 - © Cameron Bevers) Right - Southern side of the Cobourg CPR Subway on William Street (Hwy 2). Structure completed in 1968. See an Enlarged Photo here. (Photograph taken on August 31, 2012 - © Cameron Bevers) 

Left - Northern side of the Cobourg CPR Subway on William Street (Hwy 2). See an
Enlarged Photo here. (Photograph taken on August 31, 2012 - © Cameron Bevers) Right - Date stamp (1968) on the Cobourg CPR Subway on William Street (Hwy 2). See an Enlarged Photo here. (Photograph taken on August 31, 2012 - © Cameron Bevers) 

Left - Facing east along Hwy 2 (William Street) towards Downtown Cobourg at the CNR & CPR Subways. See an
Enlarged Photo here. (Photograph taken on August 31, 2012 - © Cameron Bevers) Right - Northern side of the Cobourg CNR Subway. This structure carries dual tracks, and is significantly larger than the neighbouring CPR Subway. See an Enlarged Photo here. (Photograph taken on August 31, 2012 - © Cameron Bevers) 

Left - Date stamp (1968) on the Cobourg CNR Subway on William Street (Hwy 2). See an
Enlarged Photo here. (Photograph taken on August 31, 2012 - © Cameron Bevers) Right - Southern side of the Cobourg CNR Subway on William Street (Hwy 2). See an Enlarged Photo here. (Photograph taken on August 31, 2012 - © Cameron Bevers) 

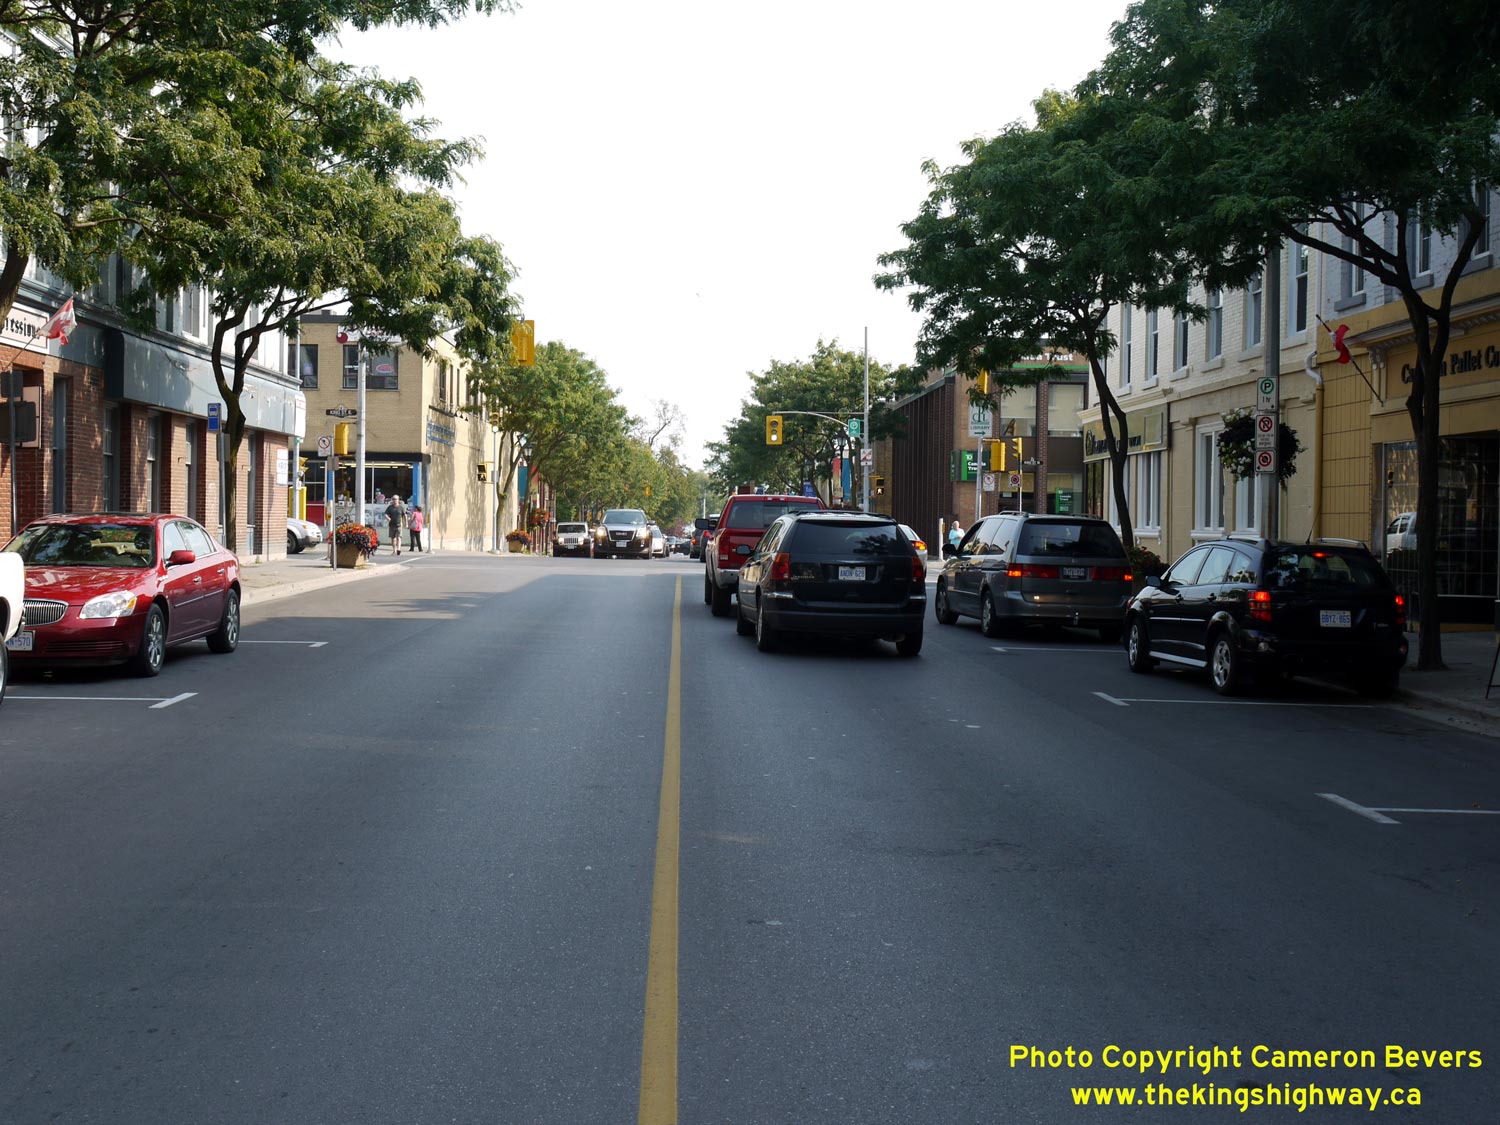
Left - Facing east along King Street (Hwy 2) towards Division Street (Hwy 45) in Downtown Cobourg. See an
Enlarged Photo here. (Photograph taken on August 31, 2012 - © Cameron Bevers) Right - Division Street (Hwy 45), facing north from King Street (Hwy 2). Hwy 45 was one of several new highways in Eastern Ontario assumed by the DHO during the 1930s to connect Hwy 2 with the new Peterborough-Perth Highway (Hwy 7), which was completed in 1932. The entire route of Hwy 45 was transferred to Northumberland and Peterborough Counties during the mass Ontario Highway downloading spree of 1997-1998. See an Enlarged Photo here. (Photograph taken on August 31, 2012 - © Cameron Bevers) 

Left - Approaching the southern terminus of Hwy 45 at the Hwy 2 Junction in Downtown Cobourg, at the intersection of Division Street and King Street. See an
Enlarged Photo here. (Photograph taken on August 31, 2012 - © Cameron Bevers) Right - Facing west along Hwy 2 (King Street) from Hwy 45 (Division Street) in Downtown Cobourg. Like nearby Port Hope, Downtown Cobourg has a vibrant "main street" feel to it that is sadly lacking in many other Ontario towns and cities. See an Enlarged Photo here. (Photograph taken on August 31, 2012 - © Cameron Bevers) 

Left - Facing east along King Street (Hwy 2) from Division Street (Hwy 45) in Downtown Cobourg. See an
Enlarged Photo here. (Photograph taken on August 31, 2012 - © Cameron Bevers) Right - Junction of Hwy 2 & Hwy 45 in Downtown Cobourg, facing west. The cupola of Cobourg's truly grand Victoria Hall (completed in 1860) crowns the downtown skyline. This historic building now houses the Cobourg Municipal Offices, the Art Gallery of Northumberland and a concert hall. The building is a major focal point in Downtown Cobourg. See an Enlarged Photo here. (Photograph taken on August 31, 2012 - © Cameron Bevers) 

Left - Facing east along Old Hwy 2 (Benlock Road) approaching the Shelter Valley Creek Bridge east of Grafton. See an
Enlarged Photo here. (Photograph taken on May 20, 2005 - © Cameron Bevers) Right - Facing east along Old Hwy 2 across the Shelter Valley Creek Bridge east of Grafton. See an Enlarged Photo here. (Photograph taken on May 20, 2005 - © Cameron Bevers) 

Left - Shelter Valley Creek Bridge on the former Hwy 2 alignment. This steel plate girder structure was completed in 1920. Until it was replaced with a new bridge a
few years ago, the Shelter Valley Creek Bridge on Old Hwy 2 was one of the earliest surviving bridges built by the Department of Public Highways of Ontario. See an
Enlarged Photo here. (Photograph taken on May 20, 2005 - © Cameron Bevers) Right - Facing west along Old Hwy 2 (Benlock Road) at the Shelter Valley Creek Bridge. See an Enlarged Photo here. (Photograph taken on May 20, 2005 - © Cameron Bevers) 

Left - Facing east towards Colborne from the Shelter Valley Creek Bridge on Old Hwy 2. See an
Enlarged Photo here. (Photograph taken on May 20, 2005 - © Cameron Bevers) Right - Inscription on a concrete culvert between Grafton and Colborne - "ONTARIO PROVINCIAL HIGHWAY 1920". See an Enlarged Photo here. (Photograph taken on May 20, 2005 - © Cameron Bevers) 

Left - During the 1950s, a substantial relocation of Hwy 2 took place at Shelter Valley east of Grafton. The revised route of Hwy 2 can be seen in the
background, while the original route of Hwy 2 continued off to the left. Nearly one mile of the original route of Hwy 2 was bypassed as a result of the construction
of the Shelter Valley Diversion. See an Enlarged Photo here. (Photograph taken on August 16, 2008 - © Cameron Bevers) Right - Facing west along Old Hwy 2 (Benlock Road) from the start of the Shelter Valley Diversion. See an Enlarged Photo here. (Photograph taken on August 16, 2008 - © Cameron Bevers) 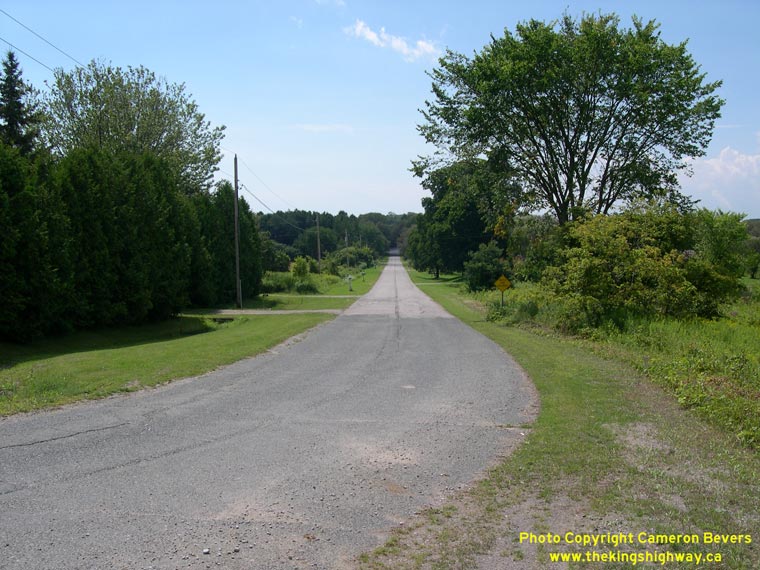

Left - Old Hwy 2 (Benlock Road), facing west towards the Shelter Valley Creek Bridge. This long downhill tangent was followed by a sharp, hidden curve at the
bottom of the grade, which likely caught many westbound motorists by surprise. Accordingly, the route of Hwy 2 was relocated onto a new, improved alignment in the
late 1950s. See an Enlarged Photo here. (Photograph taken on August 16, 2008 - © Cameron Bevers) Right - Facing west along the Shelter Valley Diversion on Hwy 2 east of Grafton. The revised alignment featured a conspicuous reverse curve that was more easily negotiated by high speed through traffic. See an Enlarged Photo here. (Photograph taken on August 16, 2008 - © Cameron Bevers) 

Left - The original route of Hwy 2 was partially buried during construction of the Shelter Valley Diversion in the 1950s. Note the old pavement extending
beyond the curve in the background. See an Enlarged Photo here. (Photograph taken on August 16, 2008 - © Cameron Bevers) Right - The old twin-slab concrete pavement disappears beneath the current Hwy 2 alignment about 3 km east of Grafton. See an Enlarged Photo here. (Photograph taken on August 16, 2008 - © Cameron Bevers) 

Left - Abandoned twin-slab concrete highway beside Hwy 2, about 4 km west of Brighton. The concrete on this former alignment of Hwy 2 was constructed in 1926.
See an Enlarged Photo here. (Photograph taken on August 16, 2008 - © Cameron Bevers) Right - Approximately 200 metres of Hwy 2 was bypassed by a new highway alignment with improved geometry during the 1940s. See an Enlarged Photo here. (Photograph taken on August 16, 2008 - © Cameron Bevers) 

Left - The old twin-slab concrete pavement disappears underneath the current alignment of Hwy 2 west of Brighton. See an
Enlarged Photo here. (Photograph taken on August 16, 2008 - © Cameron Bevers) Right - Advance load restriction warning sign on eastbound Hwy 2 at Brighton for the Trenton Railway Overhead. See an Enlarged Photo here. (Photograph taken on October 9, 2003 - © Cameron Bevers) 

Left - Inscription on a concrete culvert on Old Hwy 2 west of the Trenton Railway Overhead - "ONTARIO PROVINCIAL HIGHWAY 1920". See an
Enlarged Photo here. (Photograph taken on May 20, 2005 - © Cameron Bevers) Right - Southern side of the Trenton Railway Overhead on Hwy 2 between Brighton and Trenton. This impressive six-span steel Warren truss structure was completed in 1930. The new railway flyover replaced an older timber structure with dangerous right-angle curves at each end of the structure. See an Enlarged Photo here. (Photograph taken on October 9, 2003 - © Cameron Bevers) 

Left - View underneath the Trenton Railway Overhead on Hwy 2 between Trenton and Brighton. When the Trenton Overhead was constructed in 1930, it was the
longest railway flyover in the Ontario Provincial Highway system, with a total length of 520 feet (158 metres). See an
Enlarged Photo here. (Photograph taken on October 9, 2003 - © Cameron Bevers) Right - Hamilton Bridge Company manufacturer's plaque on the Trenton Railway Overhead's easternmost span. See an Enlarged Photo here. (Photograph taken on October 9, 2003 - © Cameron Bevers) 

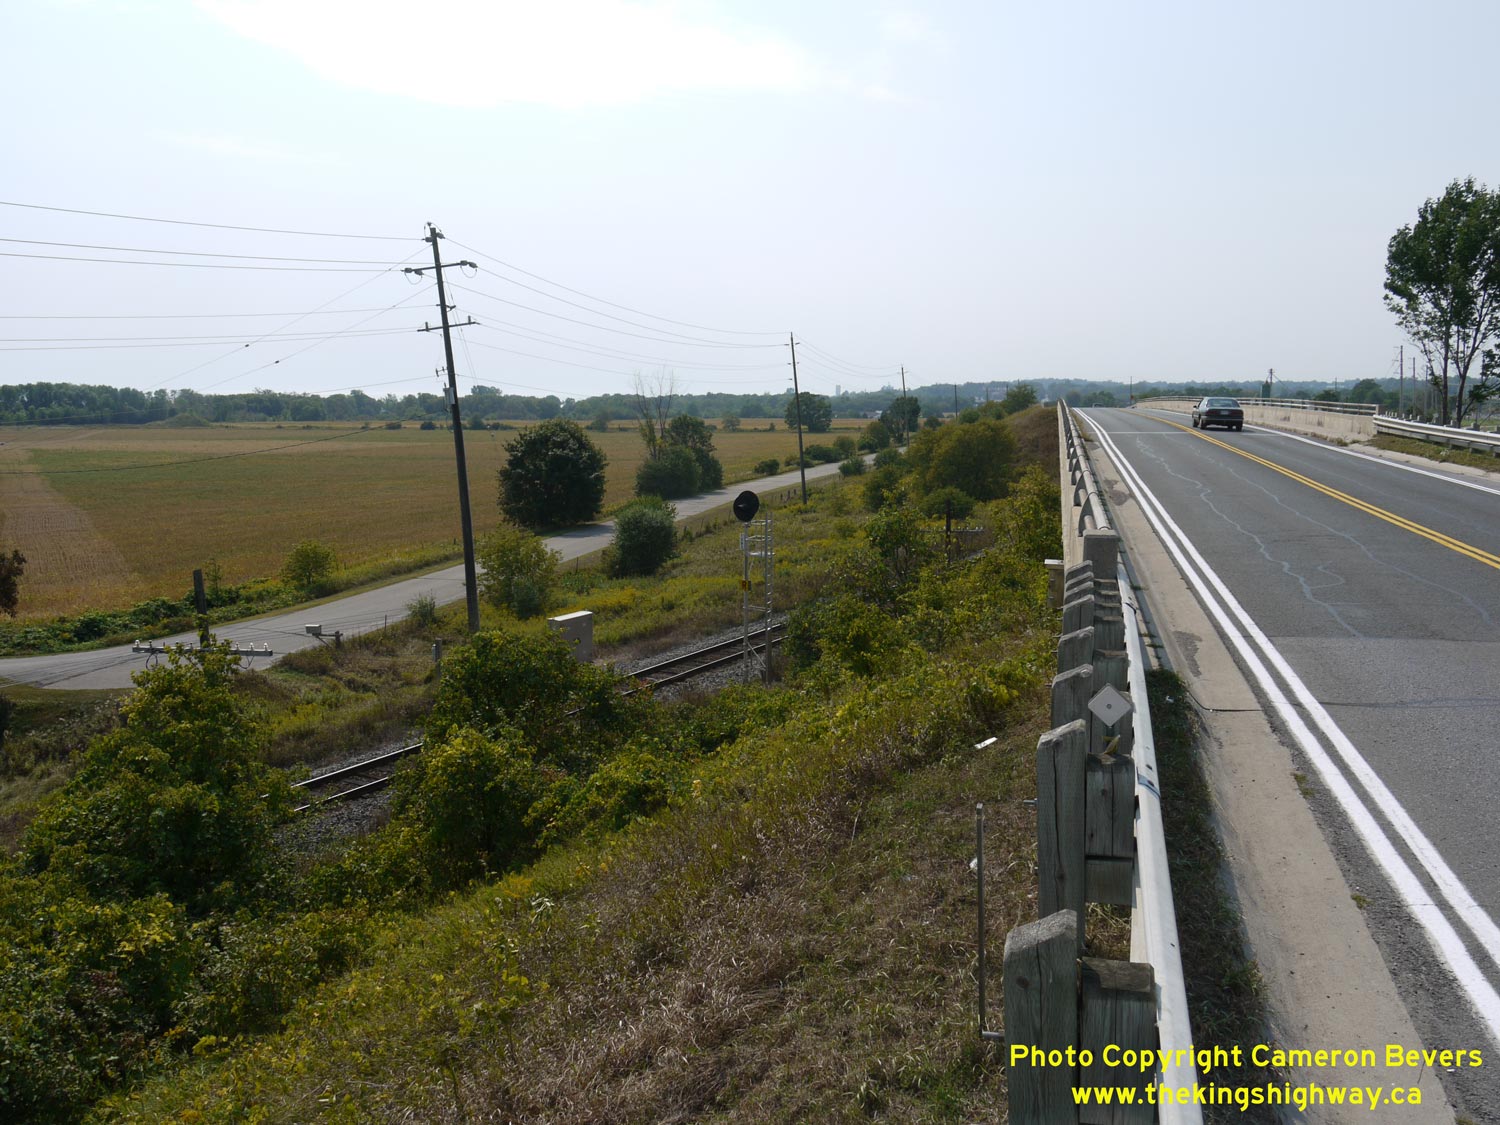
Left - Facing east along Hwy 2 across the Trenton Railway Overhead. The overhead spans both the CNR and CPR. See an
Enlarged Photo here. (Photograph taken on October 9, 2003 - © Cameron Bevers) Right - A high speed VIA train passes below the Trenton Railway Overhead on Hwy 2. See an Enlarged Photo here. (Photograph taken on October 9, 2003 - © Cameron Bevers) 

Left - Facing west along Hwy 2 towards Brighton at the Trenton Railway Overhead. See an
Enlarged Photo here. (Photograph taken on October 9, 2003 - © Cameron Bevers) Right - Close-up of the Warren truss design of the Trenton Railway Overhead on Hwy 2. See an Enlarged Photo here. (Photograph taken on October 9, 2003 - © Cameron Bevers) 
Above - Facing east along Hwy 2 towards Trenton from the Trenton Overhead. See an
Enlarged Photo here. (Photograph taken on August 16, 2008 - © Cameron Bevers)
Continue on to King's Highway 2 Present Day Photos: Trenton to Belleville
|
|---|
Links to Adjacent King's Highway Photograph Pages:
Back to Tertiary Highway 812 Photos /
King's Highway 2 History /
On to King's Highway 3 Photos
Ontario Highway History - Main Menu / Back to List of Highways Website contents, photos & text © 2002-2026, Cameron
Bevers (Webmaster) - All Rights Reserved / Contact Me
|
|---|