
| 
| |
|
|
This page contains present day photos (Year 2000 to date) of Ontario's King's Highway 2, arranged by location from
Newcastle easterly to Port Hope. All photographs displayed on this page were taken by the Webmaster (Cameron Bevers), unless specifically noted otherwise. Click on
any thumbnail to see a larger image!
Please note that all photographs displayed on this
website are protected by copyright. These photographs must not be reproduced, published,
electronically stored or copied, distributed, or posted onto other websites without
my written permission. If you want to use photos from this website, please
email me first for permission. Thank-you!
|
|---|
|
Page 14: Present Day King's Highway 2 Photographs (Newcastle to Port Hope)


Left - Facing east along Hwy 2 towards the Wilmot Creek Bridge west of Newcastle. See an
Enlarged Photo here. (Photograph taken on September 24, 2016 - © Cameron Bevers) Right - Northern side of the Wilmot Creek Bridge on Hwy 2. See an Enlarged Photo here. (Photograph taken on September 24, 2016 - © Cameron Bevers) 

Left - Facing west along Hwy 2 at the Wilmot Creek Bridge near Newcastle. The Hwy 35 & Hwy 115 Interchange lies just beyond the curve. Up until the late
1940s, Hwy 2 continued straight ahead. However, a diversion was built in 1948 which bypassed a section of Hwy 2 west of Newcastle with a new straighter alignment.
See an Enlarged Photo here. (Photograph taken on September 24, 2016 - © Cameron Bevers) Right - Southern side of the Wilmot Creek Bridge on Hwy 2. This single span concrete rigid frame structure was completed in 1987. It replaced a small steel and concrete bridge that had been built by the Department of Public Highways of Ontario back in 1920. Wilmot Creek itself was diverted into a new channel during the bridge reconstruction project. The original Wilmot Creek Bridge was located a short distance to the east of the present-day structure. See an Enlarged Photo here. (Photograph taken on September 24, 2016 - © Cameron Bevers) 

Left - Structure identification number and date stamp (1987) on the Wilmot Creek Bridge on Hwy 2. See an
Enlarged Photo here. (Photograph taken on September 24, 2016 - © Cameron Bevers) Right - Approaching Newcastle on Hwy 2, facing east towards Massey Drive. See an Enlarged Photo here. (Photograph taken on September 24, 2016 - © Cameron Bevers) 

Left - Facing east towards Downtown Newcastle on King Avenue (Hwy 2). See an
Enlarged Photo here. (Photograph taken on September 24, 2016 - © Cameron Bevers) Right - Facing east along King Avenue (Hwy 2) towards Mill Street (Old Hwy 35) in Downtown Newcastle. Hwy 2 passes through numerous town centres along its route across Ontario. At one time, Hwy 2 was the province's main east-west traffic artery. The function on Hwy 2 as a through highway in Central and Eastern Ontario was greatly diminished once the various phases of Hwy 401 were completed and opened to traffic between 1947 and 1968. See an Enlarged Photo here. (Photograph taken on September 24, 2016 - © Cameron Bevers) 

Left - Facing west towards Oshawa along King Avenue (Hwy 2) from Mill Street (Old Hwy 35) in Downtown Newcastle. See an
Enlarged Photo here. (Photograph taken on September 24, 2016 - © Cameron Bevers) Right - Facing north along Mill Street (Old Hwy 35) from King Avenue (Hwy 2) in Newcastle. For many years, Hwy 35 ended in Downtown Newcastle. However, in the mid-1950s, a diversion was completed along the western side of Newcastle which bypassed the town entirely. The old route of Hwy 35 from the Newcastle Diversion to Hwy 2 ceased to be a provincial highway in 1955. Today, the old route of Hwy 35 is known as Durham Road 17 (Mill Street). See an Enlarged Photo here. (Photograph taken on September 24, 2016 - © Cameron Bevers) 

Left - Approaching King Avenue (Hwy 2) on Mill Street (Old Hwy 35), facing south. From 1938 until 1955, this intersection marked the southern terminus of
Hwy 35. Today, Hwy 35 ends alongside Hwy 115 at the Hwy 401 Interchange about 3 km west of Newcastle. See an
Enlarged Photo here. (Photograph taken on September 24, 2016 - © Cameron Bevers) Right - Facing west along King Avenue (Hwy 2) at Mill Street (Old Hwy 35) in Downtown Newcastle. See an Enlarged Photo here. (Photograph taken on September 24, 2016 - © Cameron Bevers) 

Left - Facing east towards Port Hope along King Avenue (Hwy 2) from Mill Street (Old Hwy 35) in Downtown Newcastle. See an
Enlarged Photo here. (Photograph taken on September 24, 2016 - © Cameron Bevers) Right - Facing east towards Port Hope along Hwy 2 from Newcastle. See an Enlarged Photo here. (Photograph taken on May 20, 2005 - © Cameron Bevers) 

Left - Western approach to the narrow Newcastle Subway on Hwy 2. See an
Enlarged Photo here. (Photograph taken on May 20, 2005 - © Cameron Bevers) Right - Warning sign indicating the narrow roadway ahead at the Newcastle Subway. See an Enlarged Photo here. (Photograph taken on May 20, 2005 - © Cameron Bevers) 

Left - Facing west along Hwy 2 at the Graham Creek Bridge east of Newcastle. See an
Enlarged Photo here. (Photograph taken on September 24, 2016 - © Cameron Bevers) Right - Graham Creek Bridge on Hwy 2 just east of Newcastle. Structure completed in 1980. See an Enlarged Photo here. (Photograph taken on May 20, 2005 - © Cameron Bevers) 

Left - Structure identification number and date stamp (1980) on the Graham Creek Bridge on Hwy 2. See an
Enlarged Photo here. (Photograph taken on September 24, 2016 - © Cameron Bevers) Right - Southern side of the Graham Creek Bridge on Hwy 2 east of Newcastle. This single span concrete rigid frame structure was completed in 1980, replacing a large concrete culvert. Like nearby Wilmot Creek, Graham Creek was diverted into a new channel during the bridge reconstruction project. The original Graham Creek Culvert was located immediately to the east of the present-day structure. See an Enlarged Photo here. (Photograph taken on September 24, 2016 - © Cameron Bevers) 

Left - Western side of the Newcastle Subway on Hwy 2. This narrow railway underpass is barely wide enough for two cars to pass through at once and can only
accommodate one truck at a time. Until Hwy 401 opened to traffic between Newcastle and Port Hope in 1960, this narrow structure was a major traffic bottleneck on the
provincial highway system. By the late 1950s, roughly 8,000 vehicles per day had to squeeze through this narrow subway. See an
Enlarged Photo here. (Photograph taken on May 20, 2005 - © Cameron Bevers) Right - Date stamp on the Newcastle Subway. Structure completed in 1912. See an Enlarged Photo here. (Photograph taken on May 20, 2005 - © Cameron Bevers) 

Left - Eastern approach to the Newcastle Subway on Hwy 2. See an
Enlarged Photo here. (Photograph taken on May 20, 2005 - © Cameron Bevers) Right - Eastern side of the Newcastle Subway on Hwy 2. See an Enlarged Photo here. (Photograph taken on May 20, 2005 - © Cameron Bevers) 
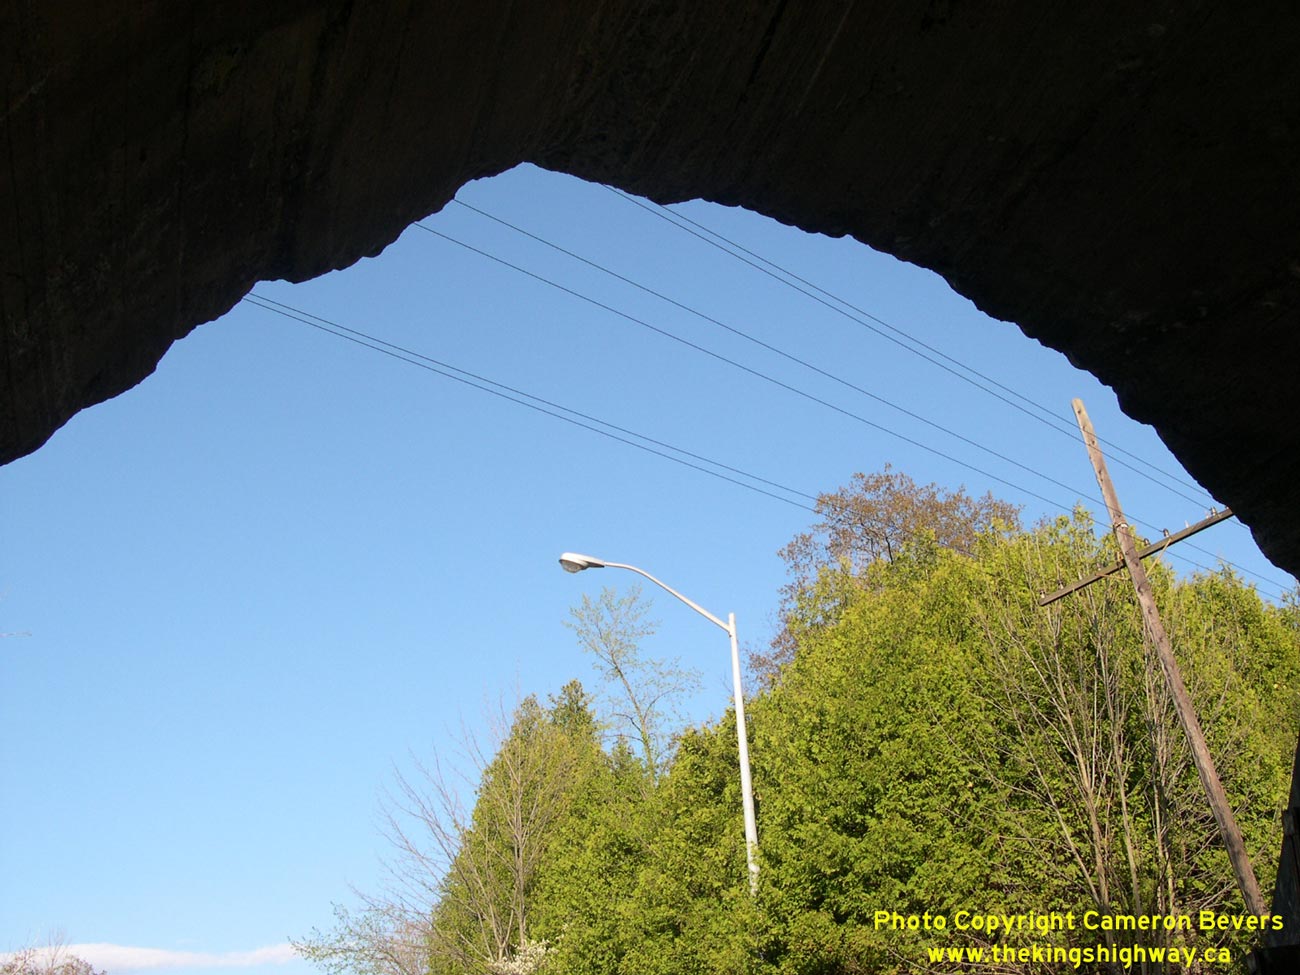
Above - Close-up of the top of the concrete arch showing the damage caused by oversized trucks. See an
Enlarged Photo here. (Photograph taken on May 20, 2005 - © Cameron Bevers) 

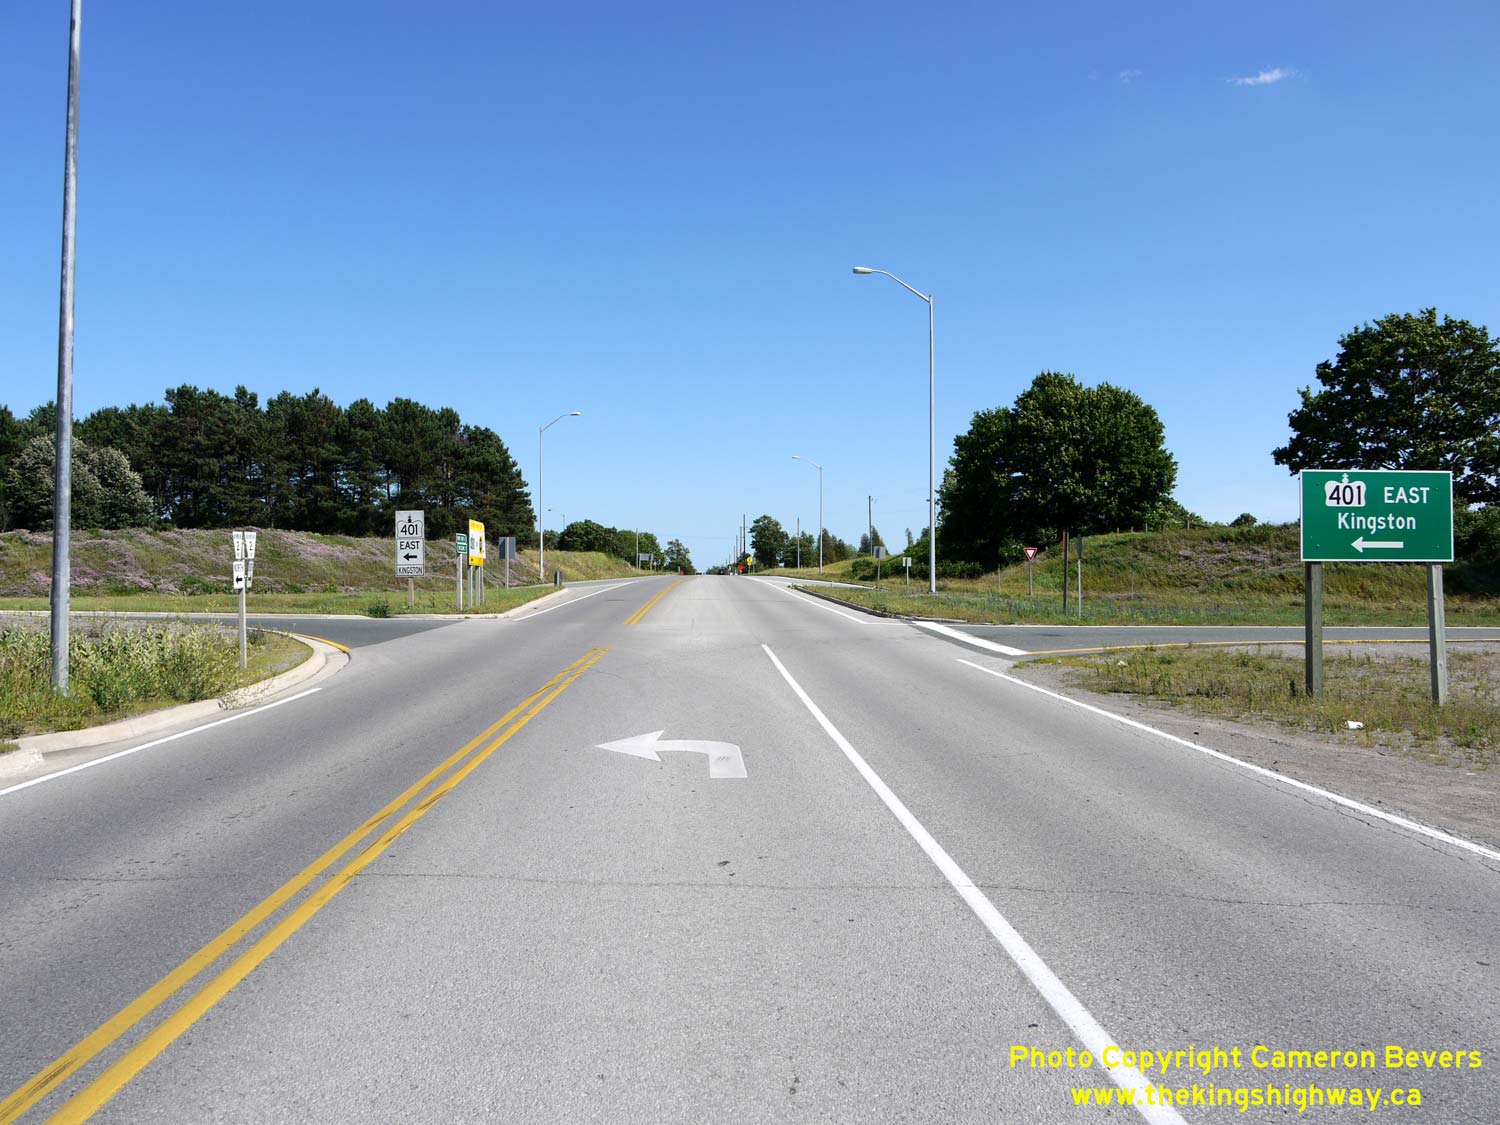
Left - Facing west along Hwy 2, about 1 km east of Newcastle. The arch of the Newcastle Subway can be seen in the distance. Until the completion of Hwy 401
between Newcastle and Port Hope in 1960, all long-distance traffic bound for Kingston and Belleville from Toronto had to pass through this narrow structure. Today,
this section of Hwy 2 only carries a fraction of the traffic volumes it carried back in the 1950s. See an
Enlarged Photo here. (Photograph taken on September 24, 2016 - © Cameron Bevers) Right - Start of a diversion on Hwy 2, located about 4 km east of Newcastle. The original highway can be seen continuing straight ahead from a dead-end located at the top of the earth cut. The highway diversion at right was completed in 1948. See an Enlarged Photo here. (Photograph taken on September 24, 2016 - © Cameron Bevers) 

Left - Facing west along a bypassed section of Hwy 2, located about 4 km east of Newcastle. This section of Hwy 2 was bypassed during a highway improvement
project carried out in the late 1940s. Several sections of Hwy 2 were rebuilt between Toronto and Port Hope during that time, in response to a surge in Post-War
traffic volumes on Hwy 2. See an Enlarged Photo here. (Photograph taken on September 24, 2016 - © Cameron Bevers) Right - Bypassed section of Hwy 2 east of Newcastle, facing east towards Port Hope. Until it was bypassed by a new straighter alignment in 1948, this section of Concession Road 2 served as Hwy 2. Although this road was paved on one time, it has since reverted to a gravel surface. See an Enlarged Photo here. (Photograph taken on September 24, 2016 - © Cameron Bevers) 
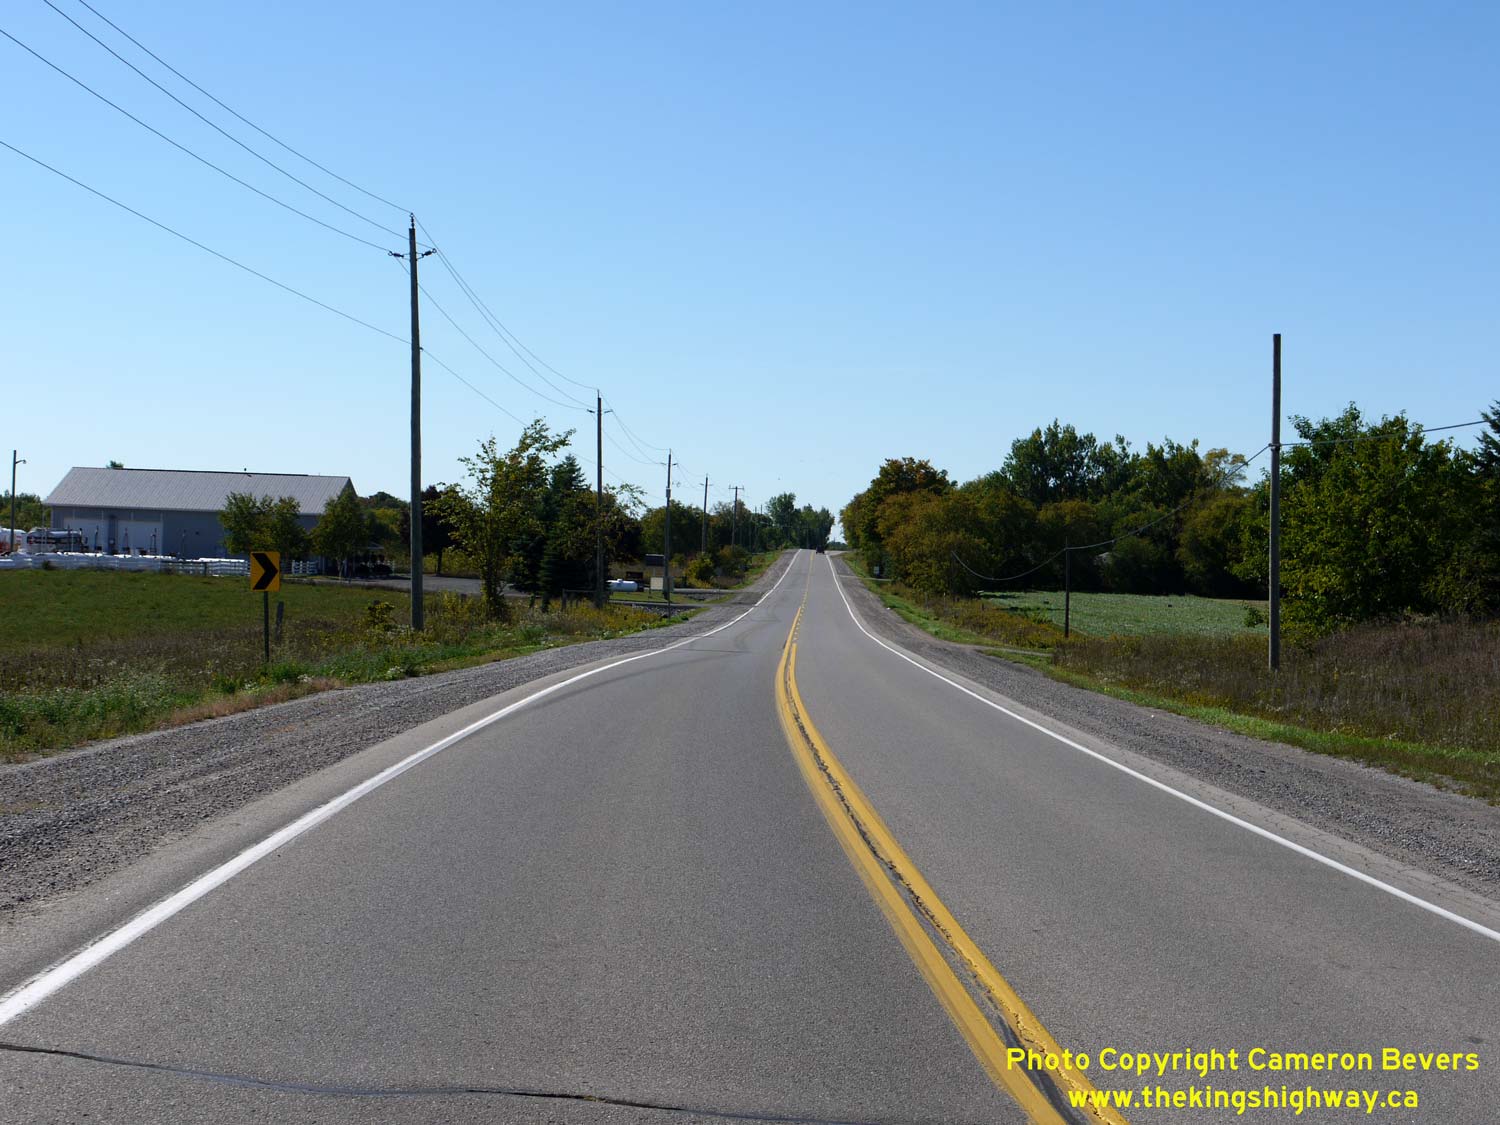
Left - This superelevated curve on Concession Road 2 (Old Hwy 2) is a tell-tale sign that this was once a provincial highway. It was likely because of this
sharp curve that the Hwy 2 diversion was constructed in the first place. The diversion was designed with much gentler curves that could be negotiated by vehicles at
much higher speeds. See an Enlarged Photo here. (Photograph taken on September 24, 2016 - © Cameron Bevers) Right - Facing west along Hwy 2 towards Newcastle, about 1 km west of Newtonville. See an Enlarged Photo here. (Photograph taken on September 24, 2016 - © Cameron Bevers) 

Left - Approaching Newtonville on Hwy 2, facing east towards Port Hope. See an
Enlarged Photo here. (Photograph taken on September 24, 2016 - © Cameron Bevers) Right - This curve on the western approach to Newtonville has been superelevated to allow for faster through traffic. When this section of Hwy 2 was first established as a provincial highway in 1917, little thought was given to the accommodation of fast vehicular traffic. Early vehicles could seldom achieve any substantial rates of speed. However, as vehicles became more powerful and speed limits were raised, highway curves such as this one had to be reconstructed to allow for faster traffic. See an Enlarged Photo here. (Photograph taken on September 24, 2016 - © Cameron Bevers) 

Left - An old Heritage Highway route marker from the 1980s on westbound Hwy 2 in Newtonville. The Province of Ontario maintained jurisdiction over this section
of Hwy 2 from 1917 up until 1995. Since that time, the road has been under the jurisdiction of the Regional Municipality of Durham. The old King's Highway route
markers were removed along Hwy 2 in the 1990s and replaced with flowerpot-shaped municipal road route markers such as this one. See an
Enlarged Photo here. (Photograph taken on September 24, 2016 - © Cameron Bevers) Right - Facing east towards Port Hope along Hwy 2 in Newtonville. See an Enlarged Photo here. (Photograph taken on September 24, 2016 - © Cameron Bevers) 
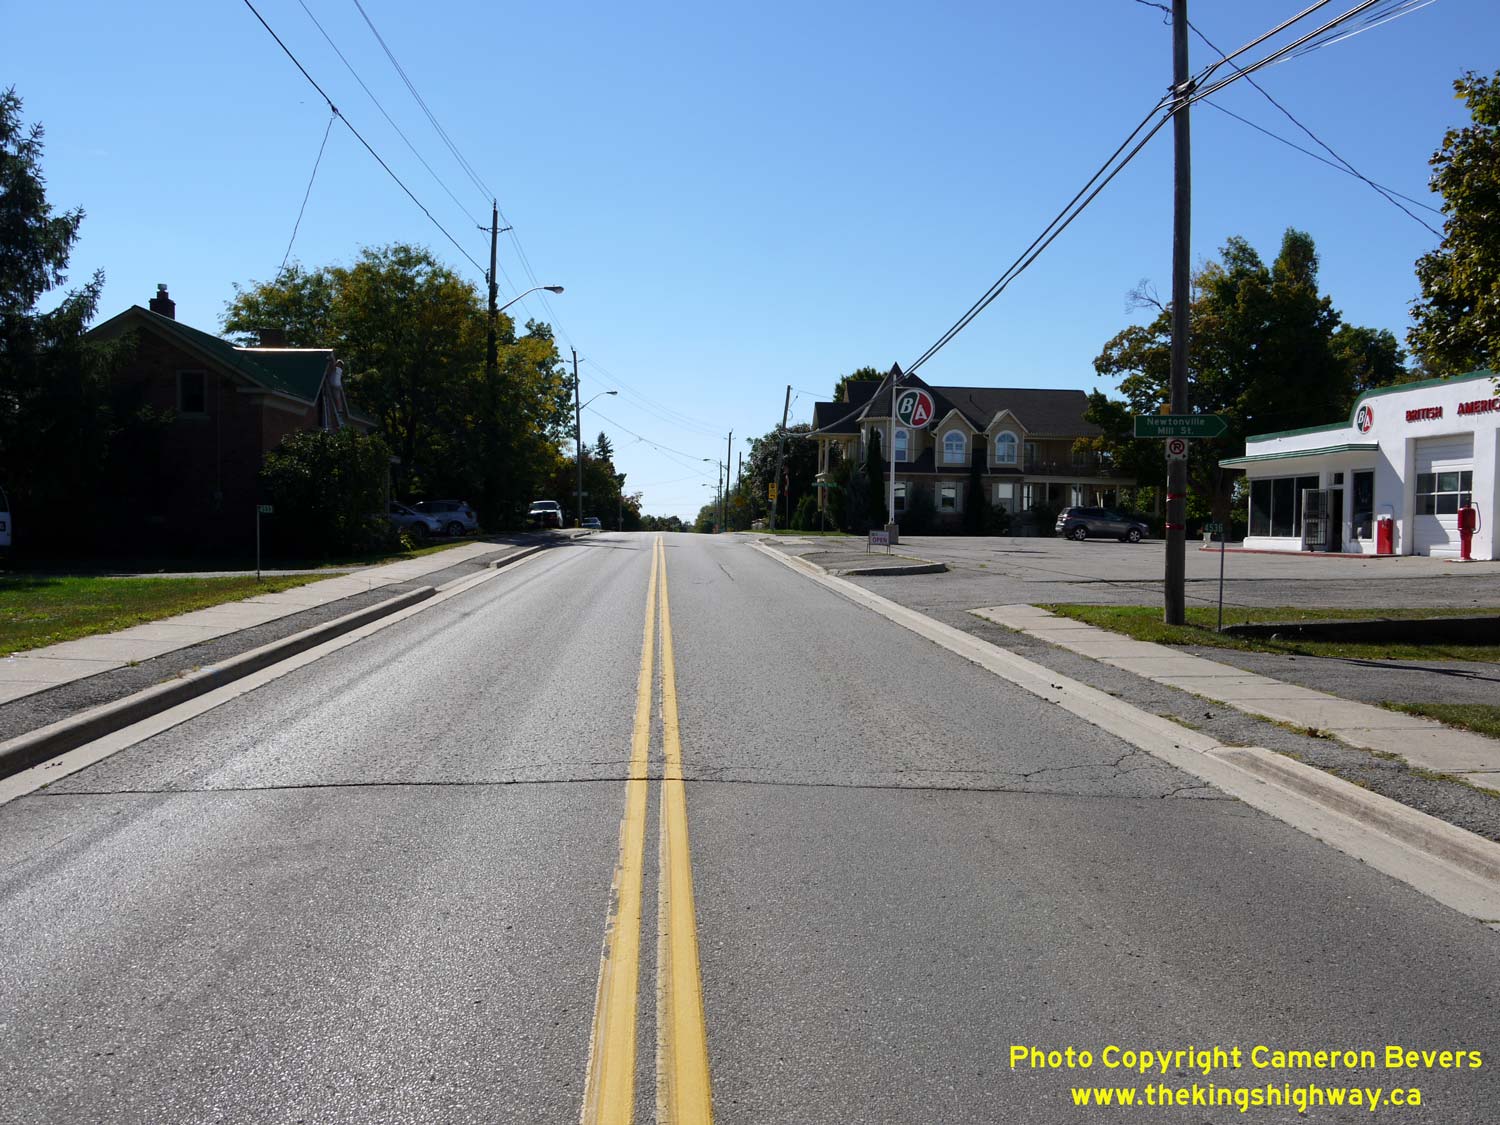
Left - A piece of historical oil company memorabilia still stands on Hwy 2 in Newtonville. This former British American Oil Station is now home to an antique
and collectibles auction house. Service stations such as this one were constructed by the hundreds along Hwy 2 during the highway's early decades, to meet the demand
for services by the travelling public. See an Enlarged Photo here. (Photograph taken on September 24, 2016 - © Cameron Bevers) Right - Facing west towards Newcastle along Hwy 2 in Newtonville. See an Enlarged Photo here. (Photograph taken on September 24, 2016 - © Cameron Bevers) 

Left - Approaching Newtonville on Hwy 2, facing west towards Newcastle. See an
Enlarged Photo here. (Photograph taken on September 24, 2016 - © Cameron Bevers) Right - Bypassed alignment of Hwy 2 near the Northumberland-Durham Boundary, located about 2 km east of Newtonville. See an Enlarged Photo here. (Photograph taken on September 24, 2016 - © Cameron Bevers) 

Left - Part of this former Hwy 2 alignment east of Newtonville serves as a private driveway today. The old highway alignment joins the present-day highway just
beyond the trees in the background. See an Enlarged Photo here. (Photograph taken on September 24, 2016 - © Cameron Bevers) Right - Facing east along McCullough Road (Old Hwy 2), east of Newtonville. The highway was actually relocated twice in this area over the years. McCullough Road forms a portion of the first route of Hwy 2, which was in use from 1917 up until 1928. See an Enlarged Photo here. (Photograph taken on September 24, 2016 - © Cameron Bevers) 

Left - An abandoned concrete-surfaced section of Hwy 2, located about 3 km east of Newtonville. See an
Enlarged Photo here. (Photograph taken on September 24, 2016 - © Cameron Bevers) Right - Another view of the abandoned concrete alignment of Hwy 2 east of Newtonville. This section of the highway was part of a diversion built to bypass a curvy and low-lying section of the original 1917 route of Hwy 2. The concrete on this section of the highway was constructed in 1928. The highway was bypassed yet again by the present-day route of Hwy 2 in 1948. See an Enlarged Photo here. (Photograph taken on September 24, 2016 - © Cameron Bevers) 

Left - This section of the abandoned concrete alignment was overlaid with a thin layer of bituminous material. During the 1940s and early 1950s, many old
concrete highway surfaces were topped with a thin bituminous layer to improve the ride quality and restore pavement friction. See an
Enlarged Photo here. (Photograph taken on September 24, 2016 - © Cameron Bevers) Right - The 1928 diversion of Hwy 2 joins a second diversion of the highway, which can be seen in use at right. The second Hwy 2 diversion was constructed in 1948. See an Enlarged Photo here. (Photograph taken on September 24, 2016 - © Cameron Bevers) 

Left - As McCullough Road curves to the north, the original 1917 route of Hwy 2 disappears into the forest virtually without a trace. It has been almost 90
years since the highway continued straight ahead. In 1928, a new concrete-surfaced diversion was built to bypass the original highway seen here. See an
Enlarged Photo here. (Photograph taken on September 24, 2016 - © Cameron Bevers) Right - Facing west towards Newcastle along the Hwy 2 diversion from Townline Road. The current highway alignment seen here was completed in 1948. It bypassed the old concrete-surfaced sections of the highway seen in the previous photos. See an Enlarged Photo here. (Photograph taken on September 24, 2016 - © Cameron Bevers) 

Left - Facing east along Hwy 2 towards Port Hope at the Northumberland-Durham Boundary at Townline Road. See an
Enlarged Photo here. (Photograph taken on September 24, 2016 - © Cameron Bevers) Right - The 1948 Diversion of Hwy 2 was built with long sweeping curves to bypassed the sharp curves on the old highway. The 1928 Diversion of Hwy 2 disappears back into the forest at this location behind the signpost at left. See an Enlarged Photo here. (Photograph taken on September 24, 2016 - © Cameron Bevers) 

Left - The old signpost on the abandoned 1928 Diversion is faded out, but presumably read "Road Closed". This former Hwy 2 alignment disappears into the forest
ahead. See an Enlarged Photo here. (Photograph taken on September 24, 2016 - © Cameron Bevers) Right - The 1928 Diversion used to have a very sharp curve where it joined Townline Road. The newer 1948 Diversion replaced the sharp curve with a gentler curve that could accommodate vehicles at faster speeds. The old highway curve on the 1928 alignment was completely obliterated during construction of the present highway route. See an Enlarged Photo here. (Photograph taken on September 24, 2016 - © Cameron Bevers) 

Left - The Department of Highways once used this abandoned section of Hwy 2 east of Newtonville to test their line painting equipment. Judging by the colour of
the double directional dividing lines, the last equipment test was done here in the early 1970s. Since that time, directional dividing lines on Ontario's
highways have always been painted yellow, rather than white. See an
Enlarged Photo here. (Photograph taken on September 24, 2016 - © Cameron Bevers) Right - Facing west along the abandoned section of Hwy 2, where it disappears into the forest. From this point easterly, the old highway alignment serves as an access road to abutting properties. The original 1917 Hwy 2 alignment and the 1928 Diversion join together again near this point. The original 1917 alignment is now so overgrown, that it is very difficult to spot. See an Enlarged Photo here. (Photograph taken on September 24, 2016 - © Cameron Bevers) 

Left - Facing east along the former route of Hwy 2, about 4 km east of Newtonville. The 1948 Diversion can be seen approaching from the right, on a
much improved vertical alignment. Roughly 2 km of Hwy 2 at the Northumberland-Durham Boundary was bypassed by the 1948 Diversion. See an
Enlarged Photo here. (Photograph taken on September 24, 2016 - © Cameron Bevers) Right - The 1948 Hwy 2 diversion ties into the original highway alignment about 4 km east of Newtonville. See an Enlarged Photo here. (Photograph taken on September 24, 2016 - © Cameron Bevers) 

Left - Facing west along Hwy 2, about 5 km east of Newtonville. The diversion at the Northumberland-Durham Boundary can be seen starting in the distance. See
an Enlarged Photo here. (Photograph taken on September 24, 2016 - © Cameron Bevers) Right - Facing east towards Port Hope along Hwy 2 near Roseberry Hill Road, located about 6 km east of Newtonville. There are some surprisingly long grades along this section of Hwy 2. See an Enlarged Photo here. (Photograph taken on September 24, 2016 - © Cameron Bevers) 

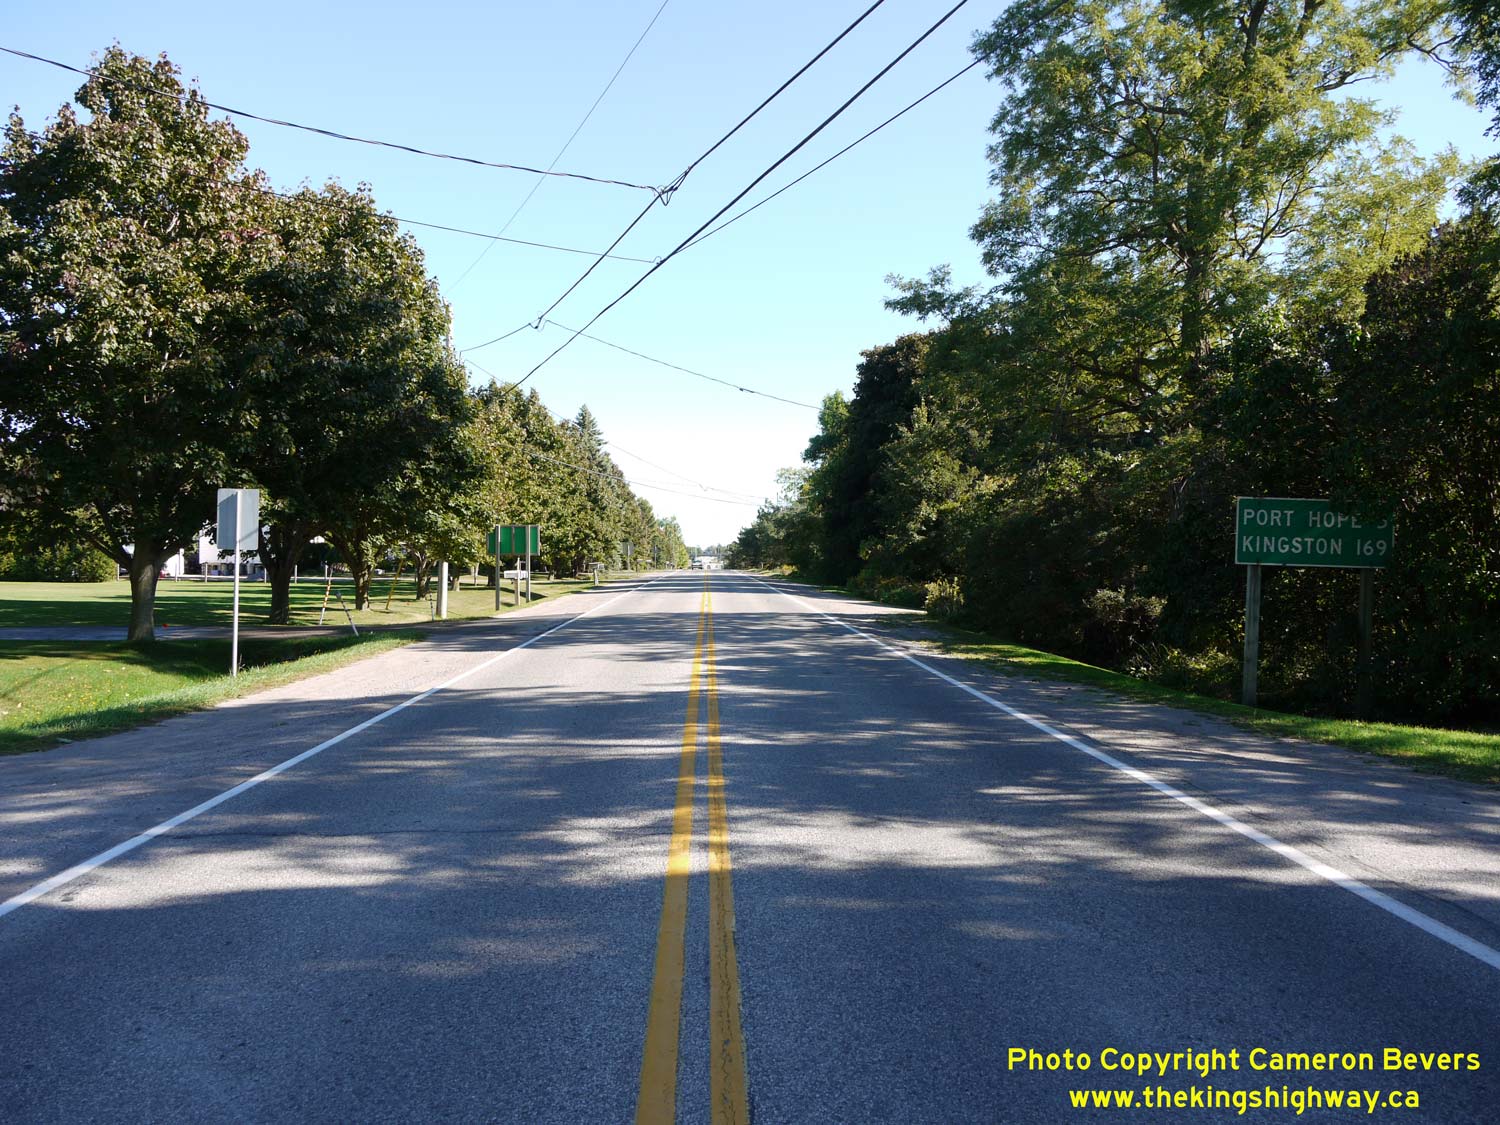
Left - Facing east towards Port Hope along Hwy 2 near Sawmill Road, located about 5 km west of Welcome. The route of Hwy 2 through Northumberland County is
particularly pleasant to drive. The highway provides a more leisurely alternative to busy Hwy 401, which runs more or less parallel to Hwy 2 throughout the county.
See an Enlarged Photo here. (Photograph taken on September 24, 2016 - © Cameron Bevers) Right - Scenic view of Hwy 2 near Clark Road, facing east towards Port Hope. The section of Hwy 2 between the Rouge River and Port Hope was actually Ontario's very first provincial highway. The route was first assumed by the Department of Public Highways of Ontario as a provincial highway on August 21, 1917. See an Enlarged Photo here. (Photograph taken on September 24, 2016 - © Cameron Bevers) 

Left - Facing east towards Port Hope along Hwy 2 near Morrish Church Road, located about 4 km west of Welcome. See an
Enlarged Photo here. (Photograph taken on September 24, 2016 - © Cameron Bevers) Right - Facing west towards Newcastle along Hwy 2 near Deer Park Road, located about 3 km west of Welcome. See an Enlarged Photo here. (Photograph taken on September 24, 2016 - © Cameron Bevers) 

Left - Approaching Welcome on Hwy 2, facing east from Kellogg Road. See an
Enlarged Photo here. (Photograph taken on September 24, 2016 - © Cameron Bevers) Right - Historically, the small community of Welcome was also known as "Welcome Corners". See an Enlarged Photo here. (Photograph taken on September 24, 2016 - © Cameron Bevers) 

Left - Green guide sign marking the upcoming eastbound Hwy 2 turn-off to Port Hope at Welcome. See an
Enlarged Photo here. (Photograph taken on September 24, 2016 - © Cameron Bevers) Right - Guide sign marking the Northumberland County Road 74 Junction on eastbound Hwy 2 at Welcome. Until the late 1980s, County Road 74 was known as King's Highway 106. This short provincial highway connected Hwy 2 at Welcome to Hwy 28 at Dale. Historically, the route of Hwy 106 formed an important link in the highway route between Toronto and Peterborough. After the completion of the (much shorter) route of Hwy 115 to Peterborough in 1954, Hwy 106 become significantly less travelled. Ultimately, ownership of Hwy 106 was transferred from the province to the County of Northumberland in 1989, who subsequently renamed the former King's Highway as County Road 74. See an Enlarged Photo here. (Photograph taken on September 24, 2016 - © Cameron Bevers) 

Left - Facing east along Hwy 2 at Welcome. At the intersection, Hwy 2 turns right and continues east towards Port Hope, while Former Hwy 106 (now County Road 74)
continues straight ahead towards Hwy 28 at Dale. The right-of-way at this highway junction is rather unusual. The eastbound movement on Hwy 2 seen here is not under
Stop control, but all other approaches to the junction are required to stop and yield right-of-way to others before entering the intersection. See an
Enlarged Photo here. (Photograph taken on September 24, 2016 - © Cameron Bevers) Right - Facing west along Hwy 2 towards Newcastle from the Former Hwy 106 Junction at Welcome. See an Enlarged Photo here. (Photograph taken on September 24, 2016 - © Cameron Bevers) 

Left - Approaching Welcome on Former Hwy 106 (County Road 74), facing west towards the Hwy 2 Junction. See an
Enlarged Photo here. (Photograph taken on September 24, 2016 - © Cameron Bevers) Right - Facing east towards Dale along Former Hwy 106 (County Road 74) from Welcome. This road was first assumed by the province as a provincial highway in 1922. The highway served as an important cut-off route for Hwy 2 traffic bound for Peterborough via Hwy 28. The Welcome-Dale Road was ultimately assigned the Hwy 106 route number in the early 1950s. See an Enlarged Photo here. (Photograph taken on September 24, 2016 - © Cameron Bevers) 
Above - In 1943, a small stone monument was erected north of Port Hope in the hamlet of Welcome, as a memorial to Harry Martyn, the first patrolman
on Ontario's Highways. The pink granite boulder was engraved with the Department of Highways shield, and a special tribute to Harry Martyn. The Department
of Highways placed this monument on the southeast corner of the Hwy 2 and Hwy 106 (Now County Road 74) intersection in Welcome. I would like to take this
opportunity to extend special thanks to Larry Paradis for first informing me of the existence of this interesting historic monument. See an
Enlarged Photo here. (Photograph taken on May 20, 2005 - © Cameron Bevers)
Below - Close-up of the tribute to Harry Martyn. The text reads:
"IN MEMORY OF
HARRY MARTYN 1865-1937 THE FIRST PATROLMAN ON THE KING'S HIGHWAYS OF ONTARIO 1918-1934" 
(Photograph taken on May 20, 2005 - © Cameron Bevers) 

Left - View of Welcome Corners from the Harry Martyn Monument. Although it is a relatively sleepy crossroads hamlet today, Welcome was once the gateway to
Eastern Ontario. Until the completion of Hwy 115 to Peterborough in 1954 and Hwy 401 to Port Hope in 1960, virtually all traffic from Toronto bound for Eastern
Ontario passed through this highway junction. See an Enlarged Photo here. (Photograph taken on September 24, 2016 - © Cameron Bevers) Right - Approaching the highway junction at Welcome on westbound Hwy 2. At the intersection, Hwy 2 turns left, while Former Hwy 106 (County Road 74) turns right. See an Enlarged Photo here. (Photograph taken on September 24, 2016 - © Cameron Bevers) 
Left - Green guide sign marking the westbound Hwy 2 turn-off to Newcastle at Welcome. See an
Enlarged Photo here. (Photograph taken on September 24, 2016 - © Cameron Bevers) Right - Facing east along Hwy 2 towards Port Hope from Welcome. See an Enlarged Photo here. (Photograph taken on September 24, 2016 - © Cameron Bevers) 

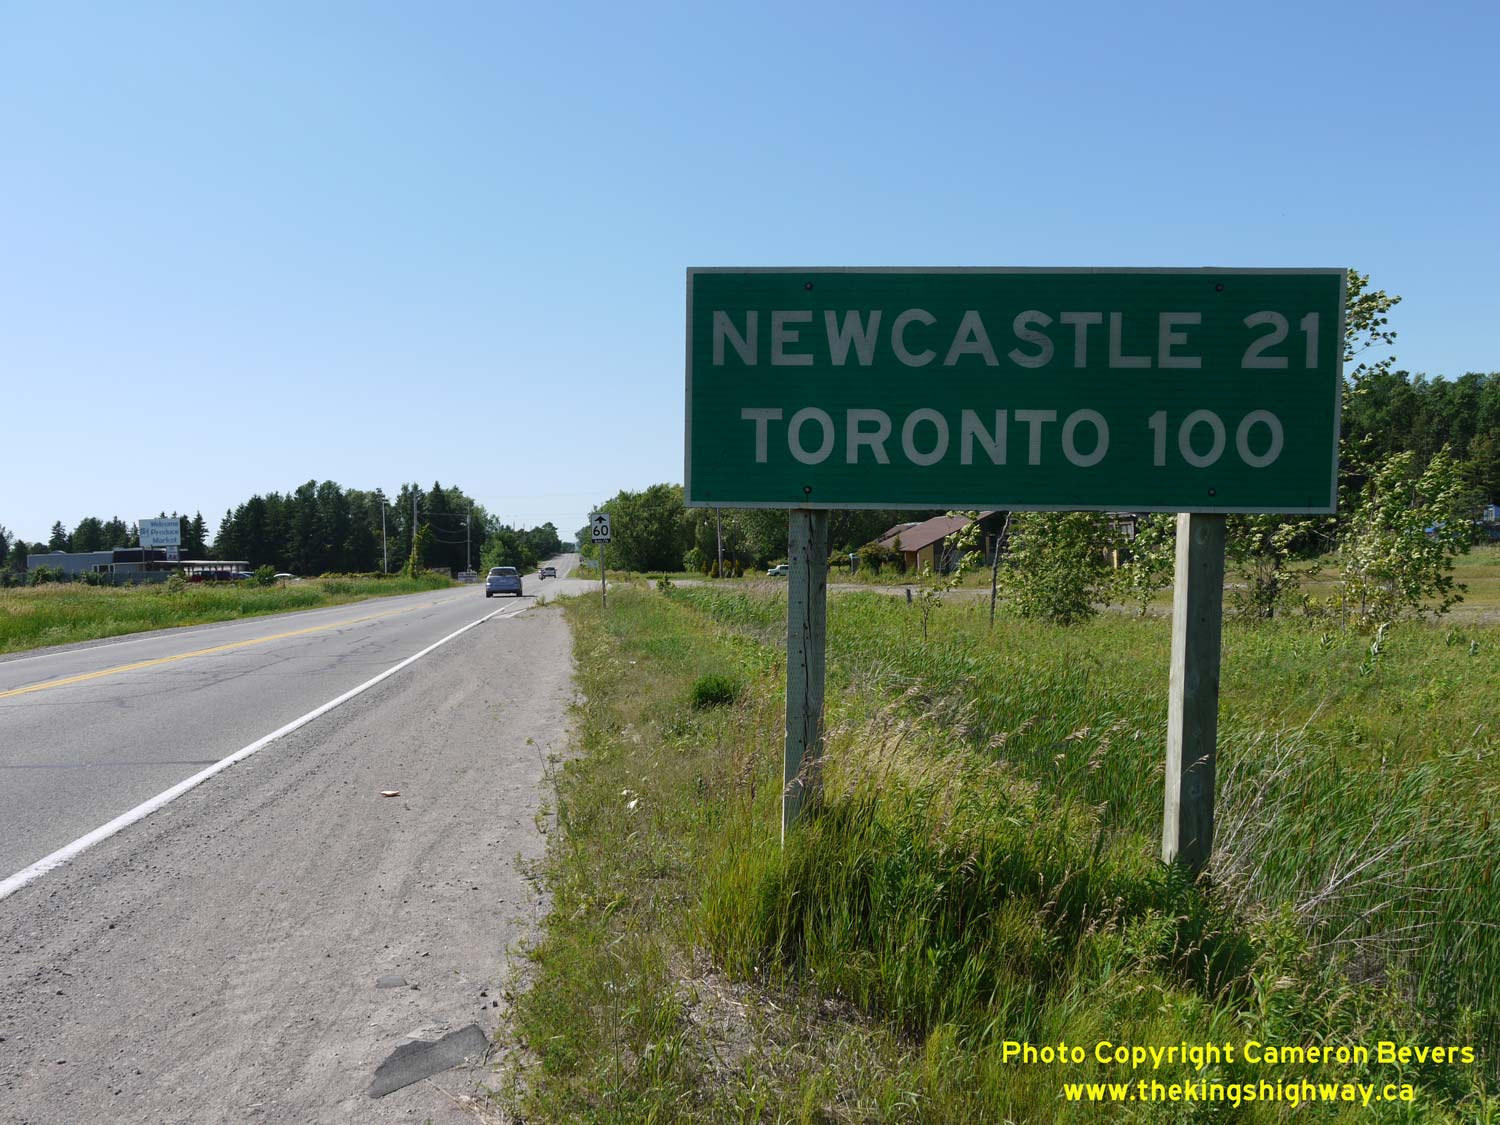
Left - Distance guide sign on eastbound Hwy 2 at Welcome. See an
Enlarged Photo here. (Photograph taken on September 24, 2016 - © Cameron Bevers) Right - Approaching Welcome on Hwy 2, facing west towards the Former Hwy 106 Junction. Compare this present-day photo of Welcome with this Historic 1986 Photo, taken from the same location roughly 30 years earlier before Hwy 2 and Hwy 106 were decommissioned as King's Highways. See an Enlarged Photo here. (Photograph taken on September 24, 2016 - © Cameron Bevers) 

Left - Southern side of the Hwy 2 Underpass (Hope Township Bridge #11) on Hwy 401 near Port Hope. See an
Enlarged Photo here. (Photograph taken on September 24, 2016 - © Cameron Bevers) Right - Northern side of the Hwy 2 Underpass on Hwy 401. This single-span concrete rigid frame girder structure was completed in 1959. Although Hwy 2 crosses Hwy 401 several times throughout Southern, Central and Eastern Ontario, this is the only location where Hwy 401 intersects with the original "Provincial Highway". This 46-mile route between the Rouge River and Port Hope became Ontario's very first provincially-maintained highway when it was established back in 1917. This part of the Provincial Highway became a part of Hwy 2 once route numbers were assigned to the province's highways in 1925. See an Enlarged Photo here. (Photograph taken on September 24, 2016 - © Cameron Bevers) 
Left - Facing west along Hwy 2 from the Hwy 401 Interchange near Port Hope. See an
Enlarged Photo here. (Photograph taken on September 24, 2016 - © Cameron Bevers) Right - Distance guide sign on westbound Hwy 2 at the Hwy 401 Interchange near Port Hope. See an Enlarged Photo here. (Photograph taken on September 24, 2016 - © Cameron Bevers) 
Left - Below-deck view of the concrete rigid frame girder superstructure of the Hwy 2 Underpass near Port Hope. See an
Enlarged Photo here. (Photograph taken on September 24, 2016 - © Cameron Bevers) Right - Facing east along Hwy 2 towards Port Hope from the Hwy 401 Interchange. See an Enlarged Photo here. (Photograph taken on September 24, 2016 - © Cameron Bevers)
Continue on to King's Highway 2 Present Day Photos: Port Hope to Trenton
|
|---|
Links to Adjacent King's Highway Photograph Pages:
Back to Tertiary Highway 812 Photos /
King's Highway 2 History /
On to King's Highway 3 Photos
Ontario Highway History - Main Menu / Back to List of Highways Website contents, photos & text © 2002-2026, Cameron
Bevers (Webmaster) - All Rights Reserved / Contact Me
|
|---|