
| 
| |
|
|
This page contains present day photos (Year 2000 to date) of Ontario's King's Highway 33, arranged by location from Trenton
easterly to Picton. All photographs displayed on this page were taken by the Webmaster (Cameron Bevers), unless specifically noted otherwise. Click on any
thumbnail to see a larger image!
Please note that all photographs displayed on this
website are protected by copyright. These photographs must not be reproduced, published,
electronically stored or copied, distributed, or posted onto other websites without
my written permission. If you want to use photos from this website, please
email me first for permission. Thank-you!
|
|---|
|
Page 3: Present Day King's Highway 33 Photographs (Trenton to Picton)


Left - Facing east along Hwy 2 (Dundas Street) approaching the Hwy 33 South Junction at Dufferin Avenue in Trenton. See an
Enlarged Photo here. (Photograph taken on August 13, 2017 - © Cameron Bevers) Right - Hwy 2 and Hwy 33 South Junction in Trenton, facing east. These two highways have joined together at the intersection of Dundas Street and Dufferin Avenue ever since Hwy 33 was first assumed as a new King's Highway between Trenton and Bloomfield in 1934. Like many King's Highways in Central Ontario, both Hwy 2 and Hwy 33 in the Trenton area were transferred to municipal levels of government during the 1990s. The sections of Hwy 2 and Hwy 33 through the urbanized parts of Trenton itself have always been under municipal jurisdiction. See an Enlarged Photo here. (Photograph taken on August 13, 2017 - © Cameron Bevers) 

Left - Facing west along Hwy 2 towards Brighton from the Hwy 33 South Junction in Trenton. See an
Enlarged Photo here. (Photograph taken on August 13, 2017 - © Cameron Bevers) Right - Junction assembly on eastbound Hwy 2 marking the Hwy 33 South Junction in Trenton. Until the 1990s, both Hwy 2 and Hwy 33 in the Trenton area were provincial highways. Jurisdiction over both routes was subsequently transferred from the province to the municipal tier between 1996 and 1998. Provincial jurisdiction over Hwy 33 now begins at the Hwy 62 Junction in Bloomfield, located about 45 km southeast of Trenton. See an Enlarged Photo here. (Photograph taken on August 13, 2017 - © Cameron Bevers) 

Left - Junction assembly on northbound Hwy 33 at the Hwy 2 Junction in Trenton. Hwy 33 briefly follows a concurrent route with Hwy 2 for approximately 500
metres. Traffic bound for Hwy 401 is directed to use Hwy 33 North via Downtown Trenton. Motorists can also access Hwy 401 by turning left and following westbound
Hwy 2 to Wooler Road. In fact, the vast majority of Hwy 33 motorists actually prefer Wooler Road to access Hwy 401, since it is much faster and bypasses Trenton
entirely. See an Enlarged Photo here. (Photograph taken on August 13, 2017 - © Cameron Bevers) Right - Facing east along Hwy 2 & Hwy 33 towards Downtown Trenton from Dufferin Avenue (Hwy 33 South). See an Enlarged Photo here. (Photograph taken on August 13, 2017 - © Cameron Bevers) 

Left - Facing west along Hwy 2 & Hwy 33 approaching Dufferin Avenue. At the traffic signals, Hwy 33 turns left and resumes its route south towards
Wellington. See an Enlarged Photo here. (Photograph taken on August 13, 2017 - © Cameron Bevers) Right - Junction assembly on westbound Hwy 2 & Hwy 33 approaching Dufferin Avenue (Hwy 33 South) in Trenton. Sadly, the old King's Highway route markers through Trenton were removed in 2003 and replaced with municipal "flowerpot" route markers. See an Enlarged Photo here. (Photograph taken on August 13, 2017 - © Cameron Bevers) 

Left - Junction assembly at the Hwy 2 & Hwy 33 South Junction in Trenton, facing west. See an
Enlarged Photo here. (Photograph taken on August 13, 2017 - © Cameron Bevers) Right - Facing north along Hwy 33 (Dufferin Avenue) approaching the Hwy 2 Junction (Dundas Street). At the traffic signals, Hwy 33 turns right and heads into Downtown Trenton concurrently with Hwy 2. Beyond Trenton, Hwy 33 continues north to join Hwy 401. The route ultimately ends at Hwy 14 in Stirling. See an Enlarged Photo here. (Photograph taken on August 13, 2017 - © Cameron Bevers) 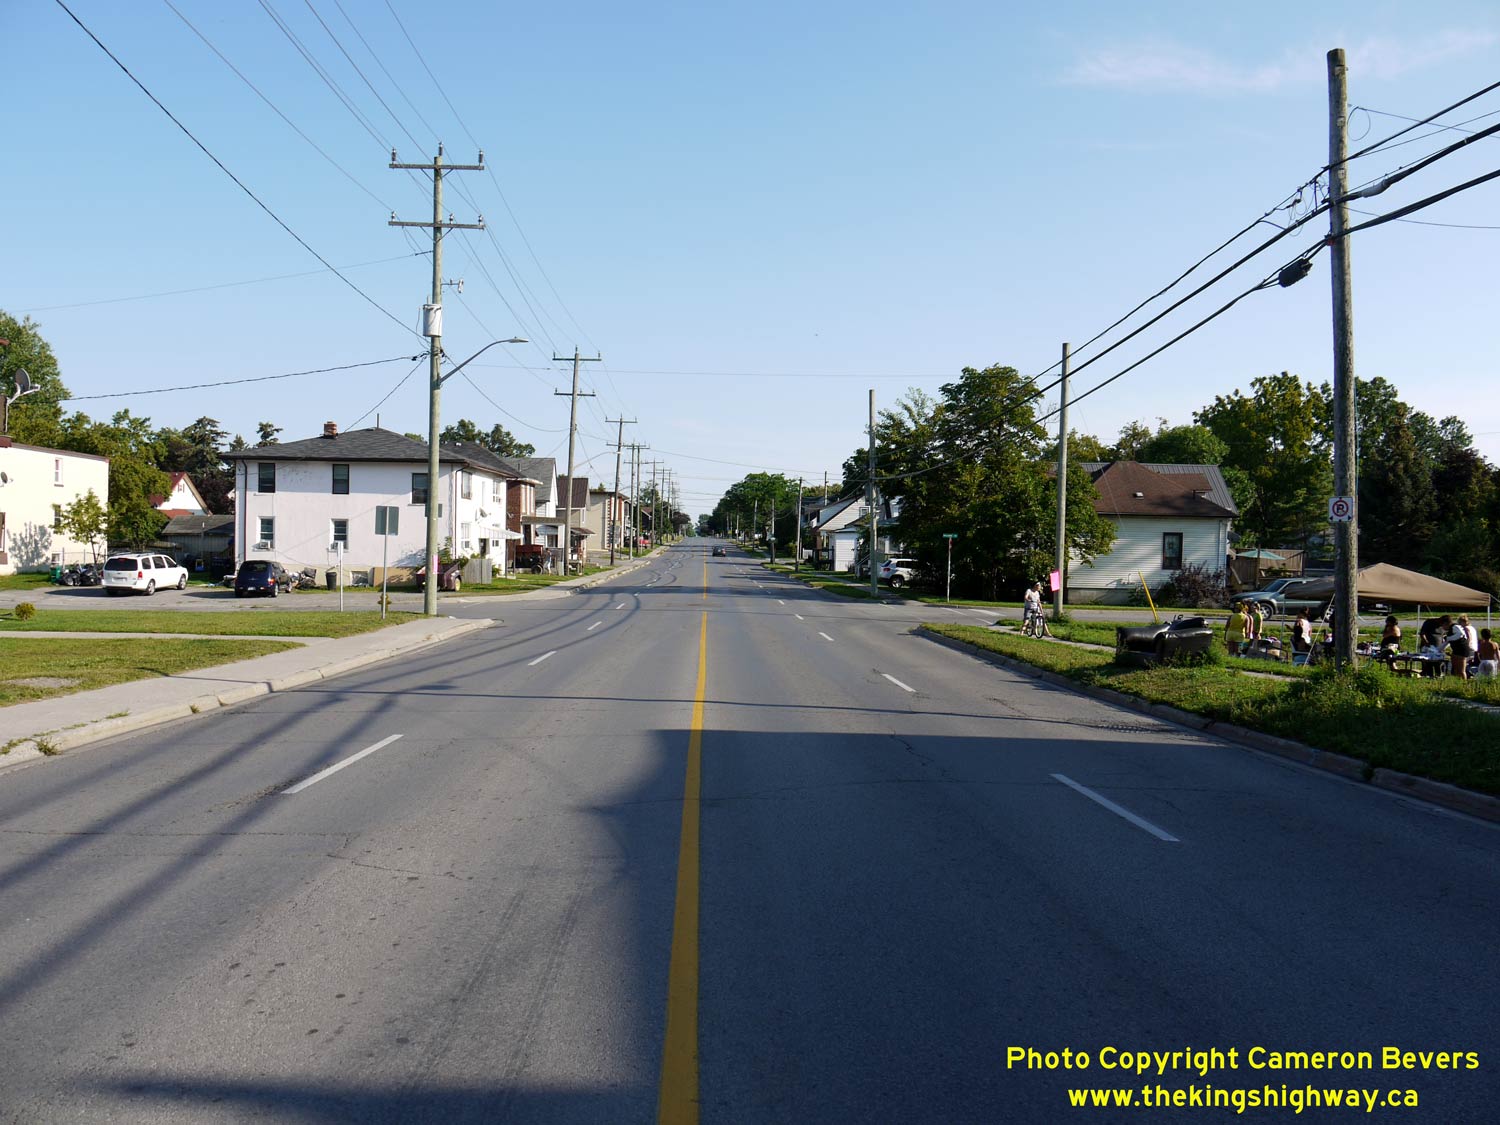

Left - Facing south along Hwy 33 towards Wellington from the Hwy 2 Junction in Trenton. For those who have extra time on their journey, Hwy 33 forms a very
pleasant and leisurely alternate route between Trenton and Kingston through Prince Edward County. See an
Enlarged Photo here. (Photograph taken on August 13, 2017 - © Cameron Bevers) Right - View of Trenton from the Mount Pelion Lookout. Hwy 33 can be the seen in the background heading south out of Trenton towards Wellington. See an Enlarged Photo here. (Photograph taken on August 13, 2017 - © Cameron Bevers) 

Left - Western side of the Murray Canal Swing Bridge on the Loyalist Parkway (Hwy 33) south of Trenton. See an
Enlarged Photo here. (Photograph taken on May 7, 2006 - © Cameron Bevers) Right - Eastern side of the Murray Canal Swing Bridge on Hwy 33. This interesting structure was completed by the Department of Highways of Ontario (DHO) in 1936. See an Enlarged Photo here. (Photograph taken on May 7, 2006 - © Cameron Bevers) 
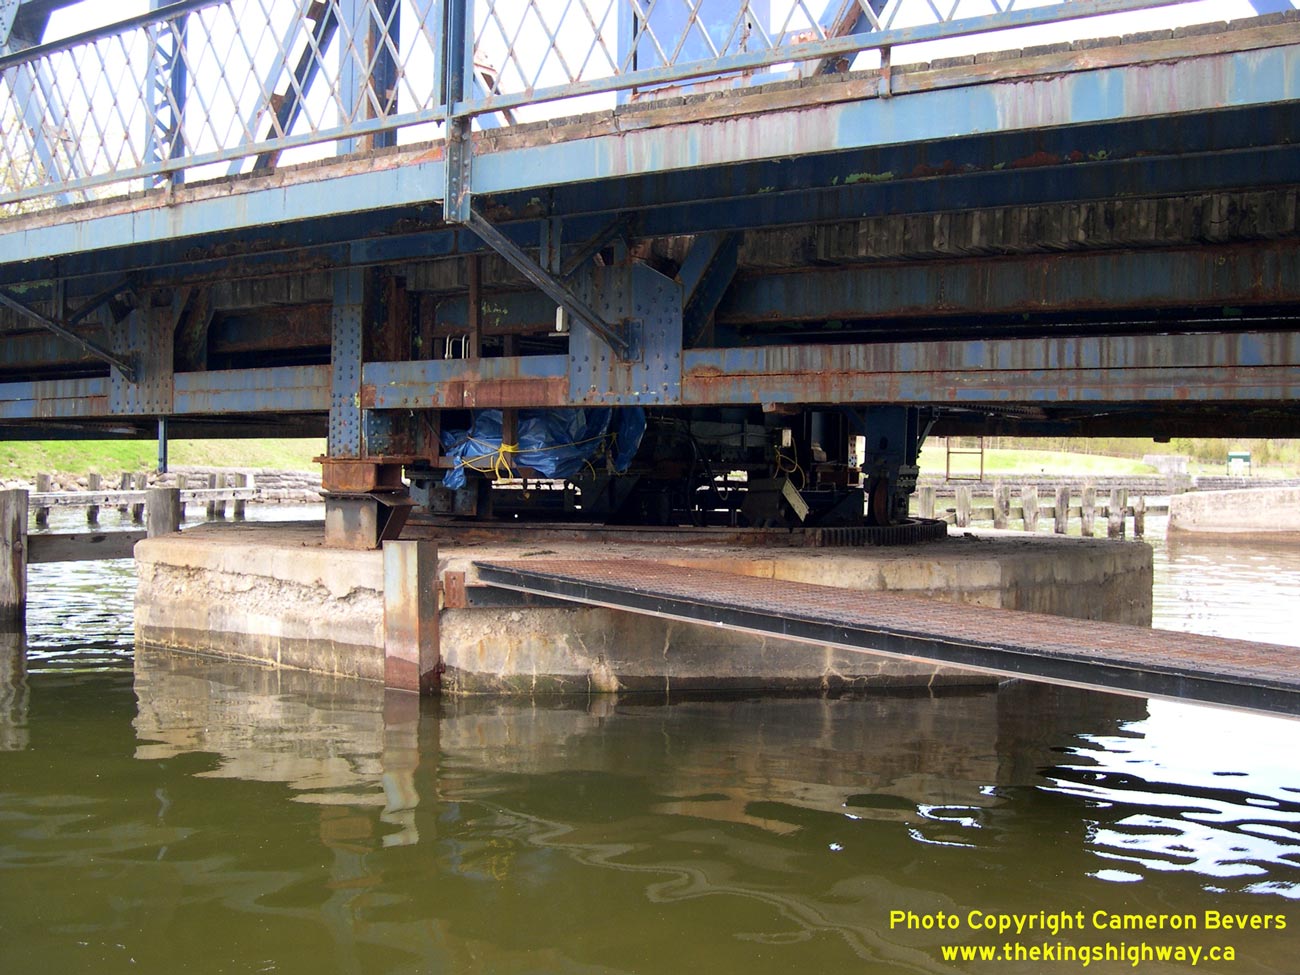
Left - Facing south along Hwy 33 across the Murray Canal Swing Bridge at Carrying Place. See an
Enlarged Photo here. (Photograph taken on May 7, 2006 - © Cameron Bevers) Right - The rotary mechanism of the Murray Canal Swing Bridge is located on a concrete pier in the channel. See an Enlarged Photo here. (Photograph taken on May 7, 2006 - © Cameron Bevers) 

Left - Close-up of the Murray Canal Swing Bridge's rotary mechanism and turning plate. See an
Enlarged Photo here. (Photograph taken on May 7, 2006 - © Cameron Bevers) Right - The Murray Canal Swing Bridge on Hwy 33 at Carrying Place is a steel Warren-type truss span. This new concrete and steel bridge replaced an old timber structure which used to stand a short distance west of the present-day Hwy 33 bridge. The old timber bridge was insufficient for heavy traffic and crossed the canal on a very poor alignment. Construction of the new bridge at Carrying Place got underway in early 1935 and the bridge was completed and opened to traffic in 1936. See an Enlarged Photo here. (Photograph taken on July 27, 2003 - © Cameron Bevers) 

Left - Bridge manufacturer's plaque on the Murray Canal Swing Bridge. The steel truss span portion of the bridge was manufactured in 1935. See an
Enlarged Photo here. (Photograph taken on July 27, 2003 - © Cameron Bevers) Right - A small portion of the original 1930s concrete handrails remain on the northern approach to the Carrying Place Bridge on Hwy 33. See an Enlarged Photo here. (Photograph taken on July 27, 2003 - © Cameron Bevers) 

Left - The Hwy 33 bridge at Carrying Place has a laminated timber plank deck below the asphalt wearing surface. The steel swing span has a total length of 146
feet, 3 inches. See an Enlarged Photo here. (Photograph taken on July 27, 2003 - © Cameron Bevers) Right - The northern approach to the Murray Canal Swing Bridge on Hwy 33 at Carrying Place retains its original appearance to this day. The southern approach span was reconstructed during the 1970s and was altered considerably. See an Enlarged Photo here. (Photograph taken on July 27, 2003 - © Cameron Bevers) 

Left - Facing north along Hwy 33 towards the Murray Canal Swing Bridge at Carrying Place. The cable-mounted traffic signal heads are quite unusual,
especially considering that this is a permanent traffic signal installation at an opening bridge. Most permanent traffic signals in Ontario are
pole-mounted. See an
Enlarged Photo here. (Photograph taken on May 7, 2006 - © Cameron Bevers) Right - A former Hwy 33 alignment (Danforth Road) just east of Hillier. Approximately 6 miles of the original 1934 route of Hwy 33 was bypassed by a new diversion between Hillier and Wellington in 1952. The new highway bypassed a narrow and winding section of the old highway, as seen in this (and subsequent) photos. See an Enlarged Photo here. (Photograph taken on May 7, 2006 - © Cameron Bevers) 

Left - Narrow pavements such as this were very common on early King's Highways. Most of Ontario's Highways were widened during extensive road reconstruction
programs in the 1950s and 1960s. Fortunately, some sections of Ontario highways were bypassed altogether, such as this former section of Hwy 33 near Hillier, which
still retains most of its original design characteristics and charm. See an Enlarged Photo here. (Photograph taken on May 7, 2006 - © Cameron Bevers) Right - The Danforth Road (Old Hwy 33) snakes its way across southwestern Prince Edward County near Wellington. See an Enlarged Photo here. (Photograph taken on May 7, 2006 - © Cameron Bevers) 

Left - This former section of Hwy 33 near Wellington was likely bypassed due to this awkward intersection with limited right-of-way. See an
Enlarged Photo here. (Photograph taken on May 7, 2006 - © Cameron Bevers) Right - Hallowell Creek (Haight's) Bridge on the Loyalist Parkway (Hwy 33) east of Wellington. This single span concrete rigid frame structure was completed in 1949. See an Enlarged Photo here. (Photograph taken on May 7, 2006 - © Cameron Bevers) 

Left - Facing east along Hwy 33 towards Picton at the Hallowell Creek Bridge. See an
Enlarged Photo here. (Photograph taken on May 7, 2006 - © Cameron Bevers) Right - Northern side of the Hallowell Creek Bridge on Hwy 33 near Wellington. See an Enlarged Photo here. (Photograph taken on May 7, 2006 - © Cameron Bevers) 

Left - Facing west along the Loyalist Parkway (Hwy 33) towards Wellington at the Hallowell Creek Bridge. See an
Enlarged Photo here. (Photograph taken on May 7, 2006 - © Cameron Bevers) Right - Close-up of the concrete and steel handrail design of the Hallowell Creek Bridge on Hwy 33. The stylish embossed vertical stripes on the concrete stanchions appear on many Ontario highway bridges built by the DHO in the 1930s and 1940s. See an Enlarged Photo here. (Photograph taken on May 7, 2006 - © Cameron Bevers) 

Left - Facing east towards Bloomfield along the Loyalist Parkway (Hwy 33). See an
Enlarged Photo here. (Photograph taken on May 7, 2006 - © Cameron Bevers) Right - This abandoned Hwy 33 alignment diverges off of the current highway east of Wellington. See an Enlarged Photo here. (Photograph taken on May 7, 2006 - © Cameron Bevers) 

Left - The abandoned highway goes to a former railway crossing location, where the highway once crossed the tracks at a poor angle. A diversion was constructed
on Hwy 33 to improve the crossing approaches and to allow drivers greater visibility of any approaching rail traffic. See an
Enlarged Photo here. (Photograph taken on May 7, 2006 - © Cameron Bevers) Right - Approaching the Hwy 62 Junction on Hwy 33 in Bloomfield, facing east. See an Enlarged Photo here. (Photograph taken on September 17, 2009 - © Cameron Bevers) 

Left - A "JCT" Hwy 62 Junction sign on eastbound Hwy 33 approaching Bloomfield. See an
Enlarged Photo here. (Photograph taken on September 17, 2009 - © Cameron Bevers) Right - Destination guide signs on eastbound Hwy 33 at the Hwy 62 Junction in Bloomfield. From this highway junction, Hwy 33 turns right and continues east towards Picton and Kingston. Belleville is accessible via Hwy 62, at left. See an Enlarged Photo here. (Photograph taken on September 17, 2009 - © Cameron Bevers) 

Left - Facing east at the Hwy 33 & Hwy 62 Junction in Bloomfield. Motorists who turn left here can follow Hwy 62 north to Belleville. Hwy 33 turns right at
this junction and continues east towards Picton. This stop-controlled intersection has an unusual configuration with separated left and right turn lanes. This lane
arrangement is typically only used at signalized or all-way stop controlled intersections. See an
Enlarged Photo here. (Photograph taken on September 17, 2009 - © Cameron Bevers) Right - Southern terminus of Hwy 62 at the Hwy 33 Junction in Bloomfield. Hwy 33 continues straight ahead via Main Street. See an Enlarged Photo here. (Photograph taken on September 17, 2009 - © Cameron Bevers) 

Left - Junction assembly at the Hwy 33 & Hwy 62 Junction in Bloomfield. Although the section of Hwy 33 lying west of Bloomfield was transferred to Prince
Edward County in the 1990s, the route of Hwy 33 lying to the east of Bloomfield was retained in the provincial highway system. The highway from Belleville to Picton
has been a provincial highway since 1921. Originally, the route was known as Hwy 14, although in later years the eastern and northern parts of the route were
renumbered as Hwy 33 and Hwy 62, respectively. See an Enlarged Photo here. (Photograph taken on September 17, 2009 - © Cameron Bevers) Right - Facing north along Hwy 62 towards Belleville from the Hwy 33 Junction in Bloomfield. See an Enlarged Photo here. (Photograph taken on September 17, 2009 - © Cameron Bevers) 

Left - Approaching the Hwy 62 Junction on westbound Hwy 33 (Main Street) in Bloomfield. See an
Enlarged Photo here. (Photograph taken on September 17, 2009 - © Cameron Bevers) Right - Destination guide signs at the Hwy 33 & Hwy 62 Junction in Bloomfield, facing west. See an Enlarged Photo here. (Photograph taken on September 17, 2009 - © Cameron Bevers) 

Left - Facing east along Hwy 33 towards Picton from the Hwy 62 Junction in Bloomfield. See an
Enlarged Photo here. (Photograph taken on September 17, 2009 - © Cameron Bevers) Right - Facing west along Hwy 33 towards Warings Corners, west of Picton. See an Enlarged Photo here. (Photograph taken on May 7, 2006 - © Cameron Bevers) 

Left - Junction of Hwy 33 and Prince Edward Road 1 at Warings Corners, facing west towards Bloomfield. Traffic between Picton and Belleville often bypasses
Bloomfield by using Prince Edward Road 1. In fact, so much traffic uses the Bloomfield cut-off that a right-turn channelization was constructed on Hwy 33 to
facilitate turning movements (seen here at right). See an Enlarged Photo here. (Photograph taken on May 7, 2006 - © Cameron Bevers) Right - Junction of Prince Edward Road 1 and Hwy 33, facing south. Note the other end of the channelization from Hwy 33 at left. See an Enlarged Photo here. (Photograph taken on May 7, 2006 - © Cameron Bevers) 

Left - Junction of Hwy 33 and Prince Edward Road 1 at Warings Corners, facing east towards Picton. See an
Enlarged Photo here. (Photograph taken on May 7, 2006 - © Cameron Bevers) Right - Junction of Prince Edward Road 1 and Hwy 33, facing north. Note the green guide sign at right, which correctly indicates the intersecting road as the Loyalist Parkway, but does not indicate the highway's route number. The entire intersection was reconstructed as a modern roundabout in 2009. See an Enlarged Photo here. (Photograph taken on May 7, 2006 - © Cameron Bevers) 
Above - Facing east along the Loyalist Parkway (Hwy 33) towards Picton from Warings Corners. From this point into Picton, Hwy 33 has a four-lane
undivided cross section. See an
Enlarged Photo here. (Photograph taken on May 7, 2006 - © Cameron Bevers)
Continue on to King's Highway 33 Photos: Picton to Kingston
|
|---|
Links to Adjacent King's Highway Photograph Pages:
Back to King's Highway 32 Photos /
King's Highway 33 History /
Back to King's Highway 34 Photos
Ontario Highway History - Main Menu / Back to List of Highways Website contents, photos & text © 2002-2026, Cameron
Bevers (Webmaster) - All Rights Reserved / Contact Me
|
|---|