
| 
| |
|
|
This page contains historical photos of Ontario's King's Highway 35 dating from 1931 to 1979. All photographs displayed on
this page were taken by the Ontario Ministry of Transportation, unless specifically noted otherwise. Historical photographs are arranged in approximate chronological
order. Click on any thumbnail to see a larger image!
Please note that all photographs displayed on this
website are protected by copyright. These photographs must not be reproduced, published,
electronically stored or copied, distributed, or posted onto other websites without
my written permission. If you want to use photos from this website, please
email me first for permission. Thank-you!
|
|---|
|
Page 1: Historical King's Highway 35 Photographs (1931-1979)


Left - Circa 1937 postcard view of Hwy 35 at Boshkung Lake, facing south towards Minden. See an
Enlarged Photo Here. (Photo courtesy of Thatcher Studios, Bracebridge) Right - Facing north along Hwy 35 at Cameron Lake. Photo taken on August 10, 1940. See an Enlarged Photo Here. (Photo courtesy of Ontario Ministry of Transportation - © King's Printer for Ontario, 1941) 

Left - Hwy 35 at Halls Lake in the District of Haliburton. Photo taken on October 2, 1939. (Photo courtesy of Ontario Ministry of Transportation - © King's Printer for Ontario, 1939) Right - New mulch pavement on Hwy 35 at Boshkung Lake (1942) (Photo courtesy of Ontario Ministry of Transportation - © King's Printer for Ontario, 1942) 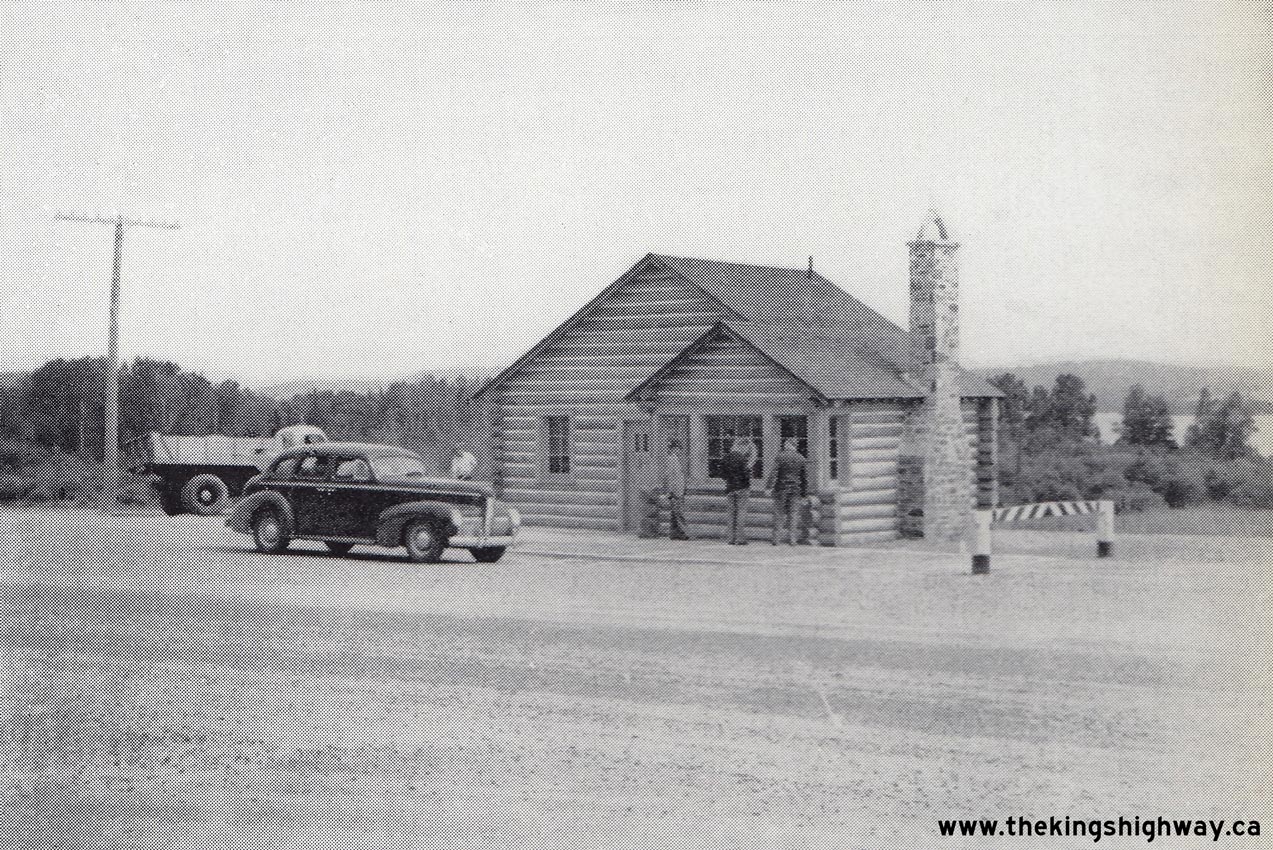
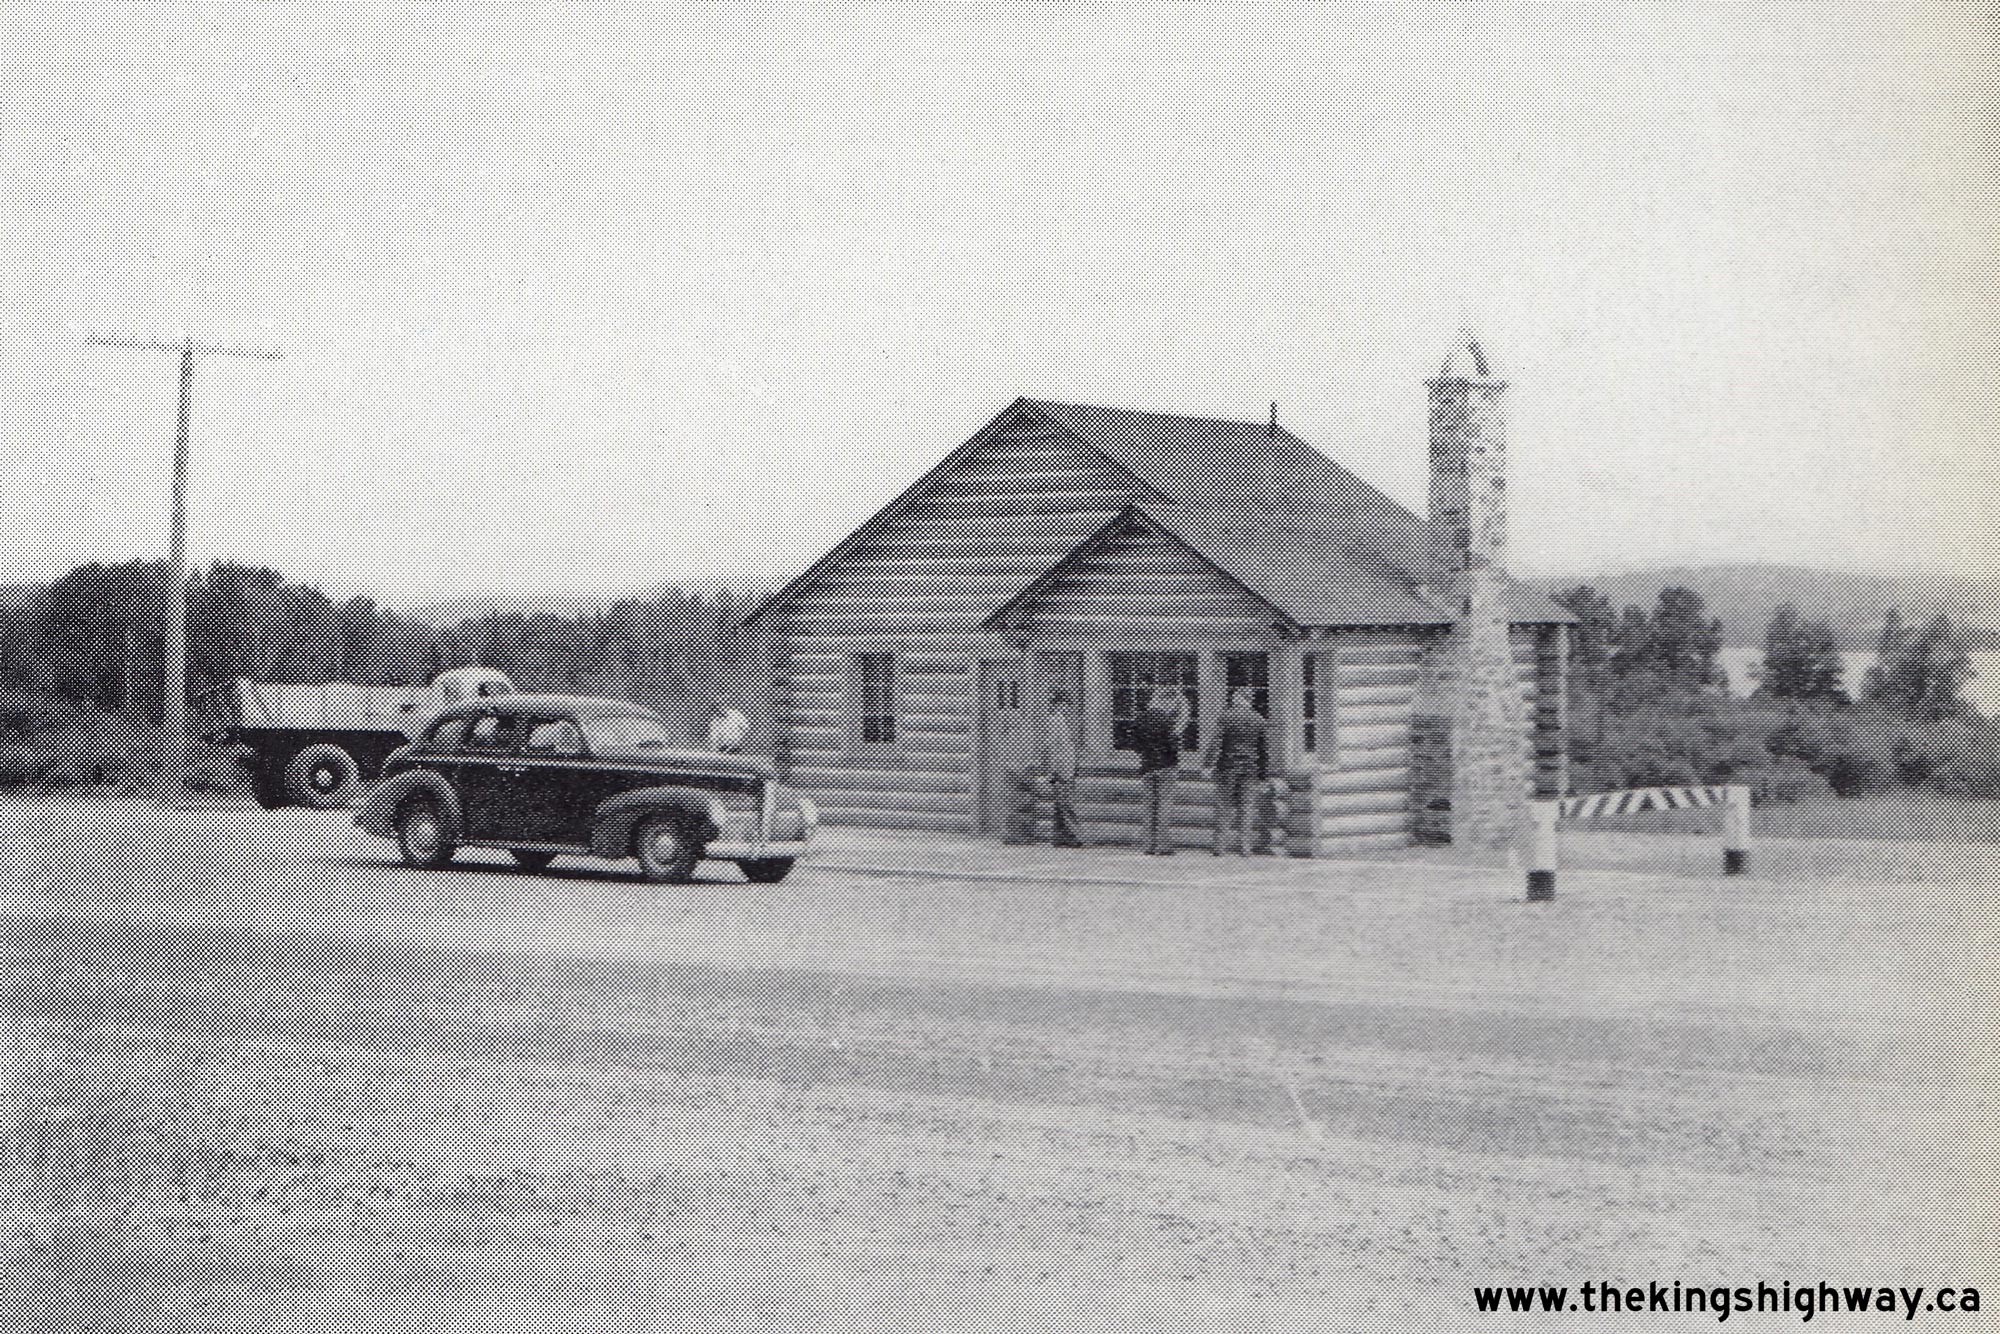
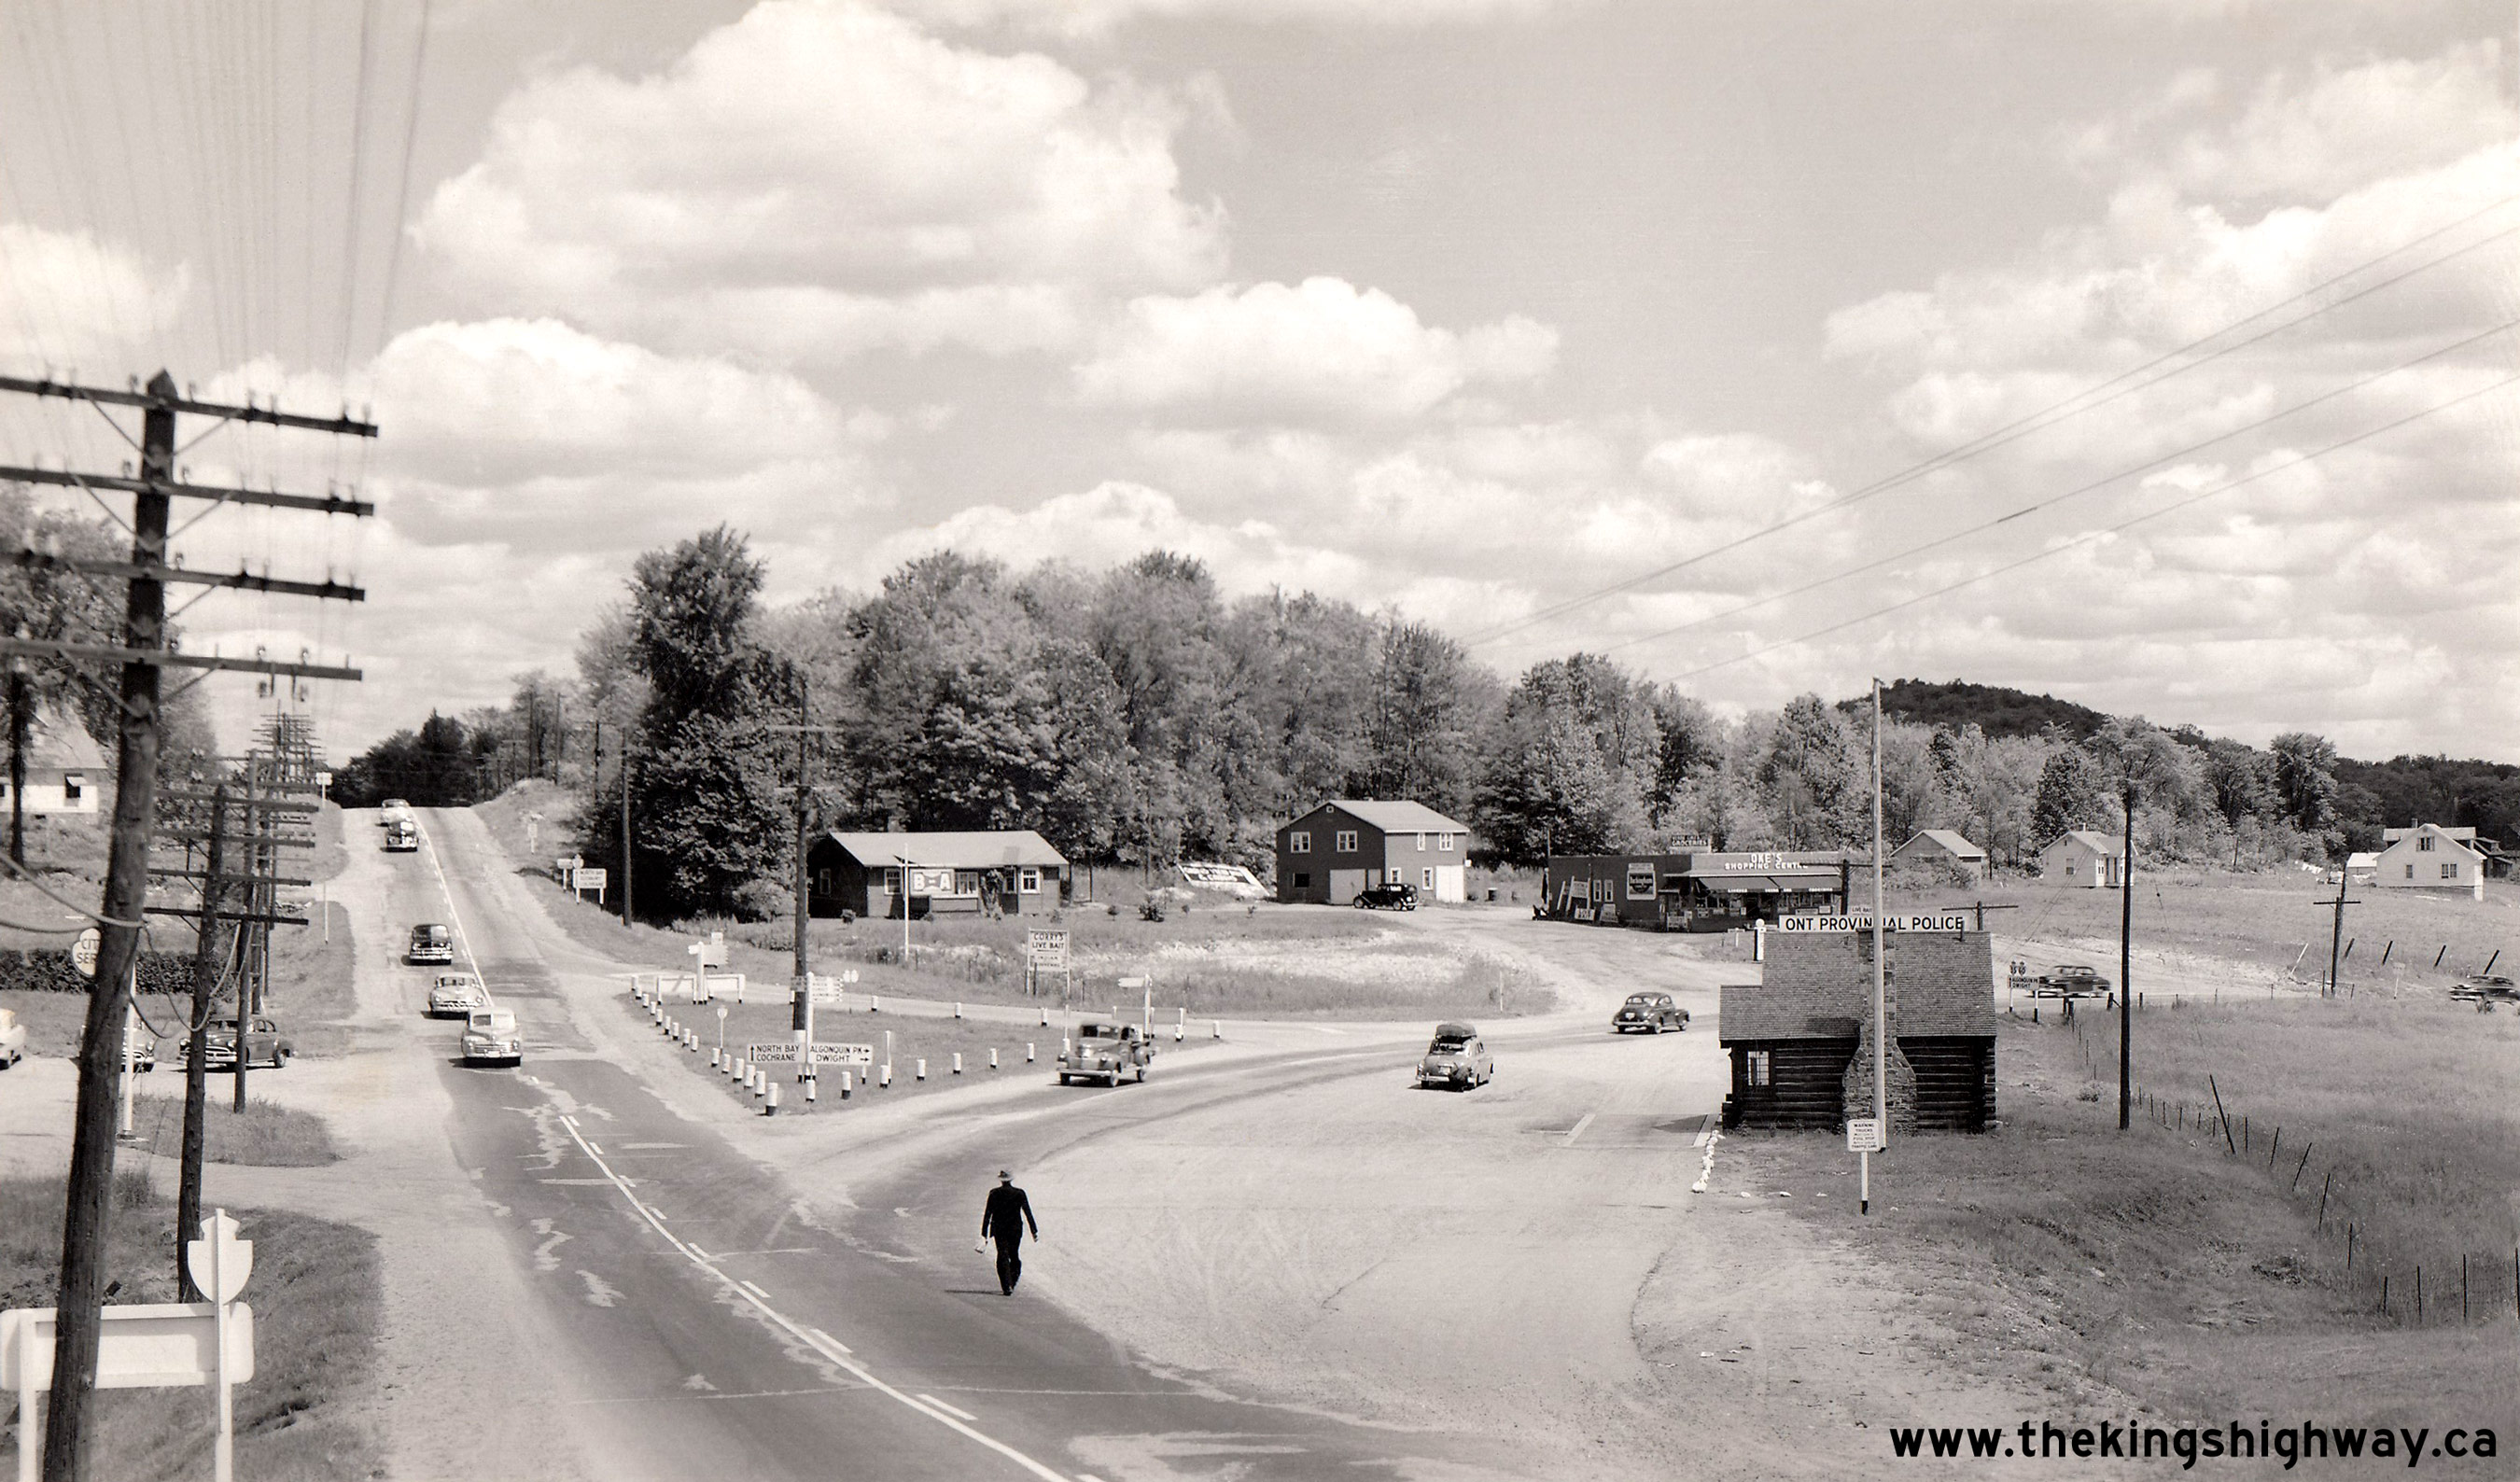
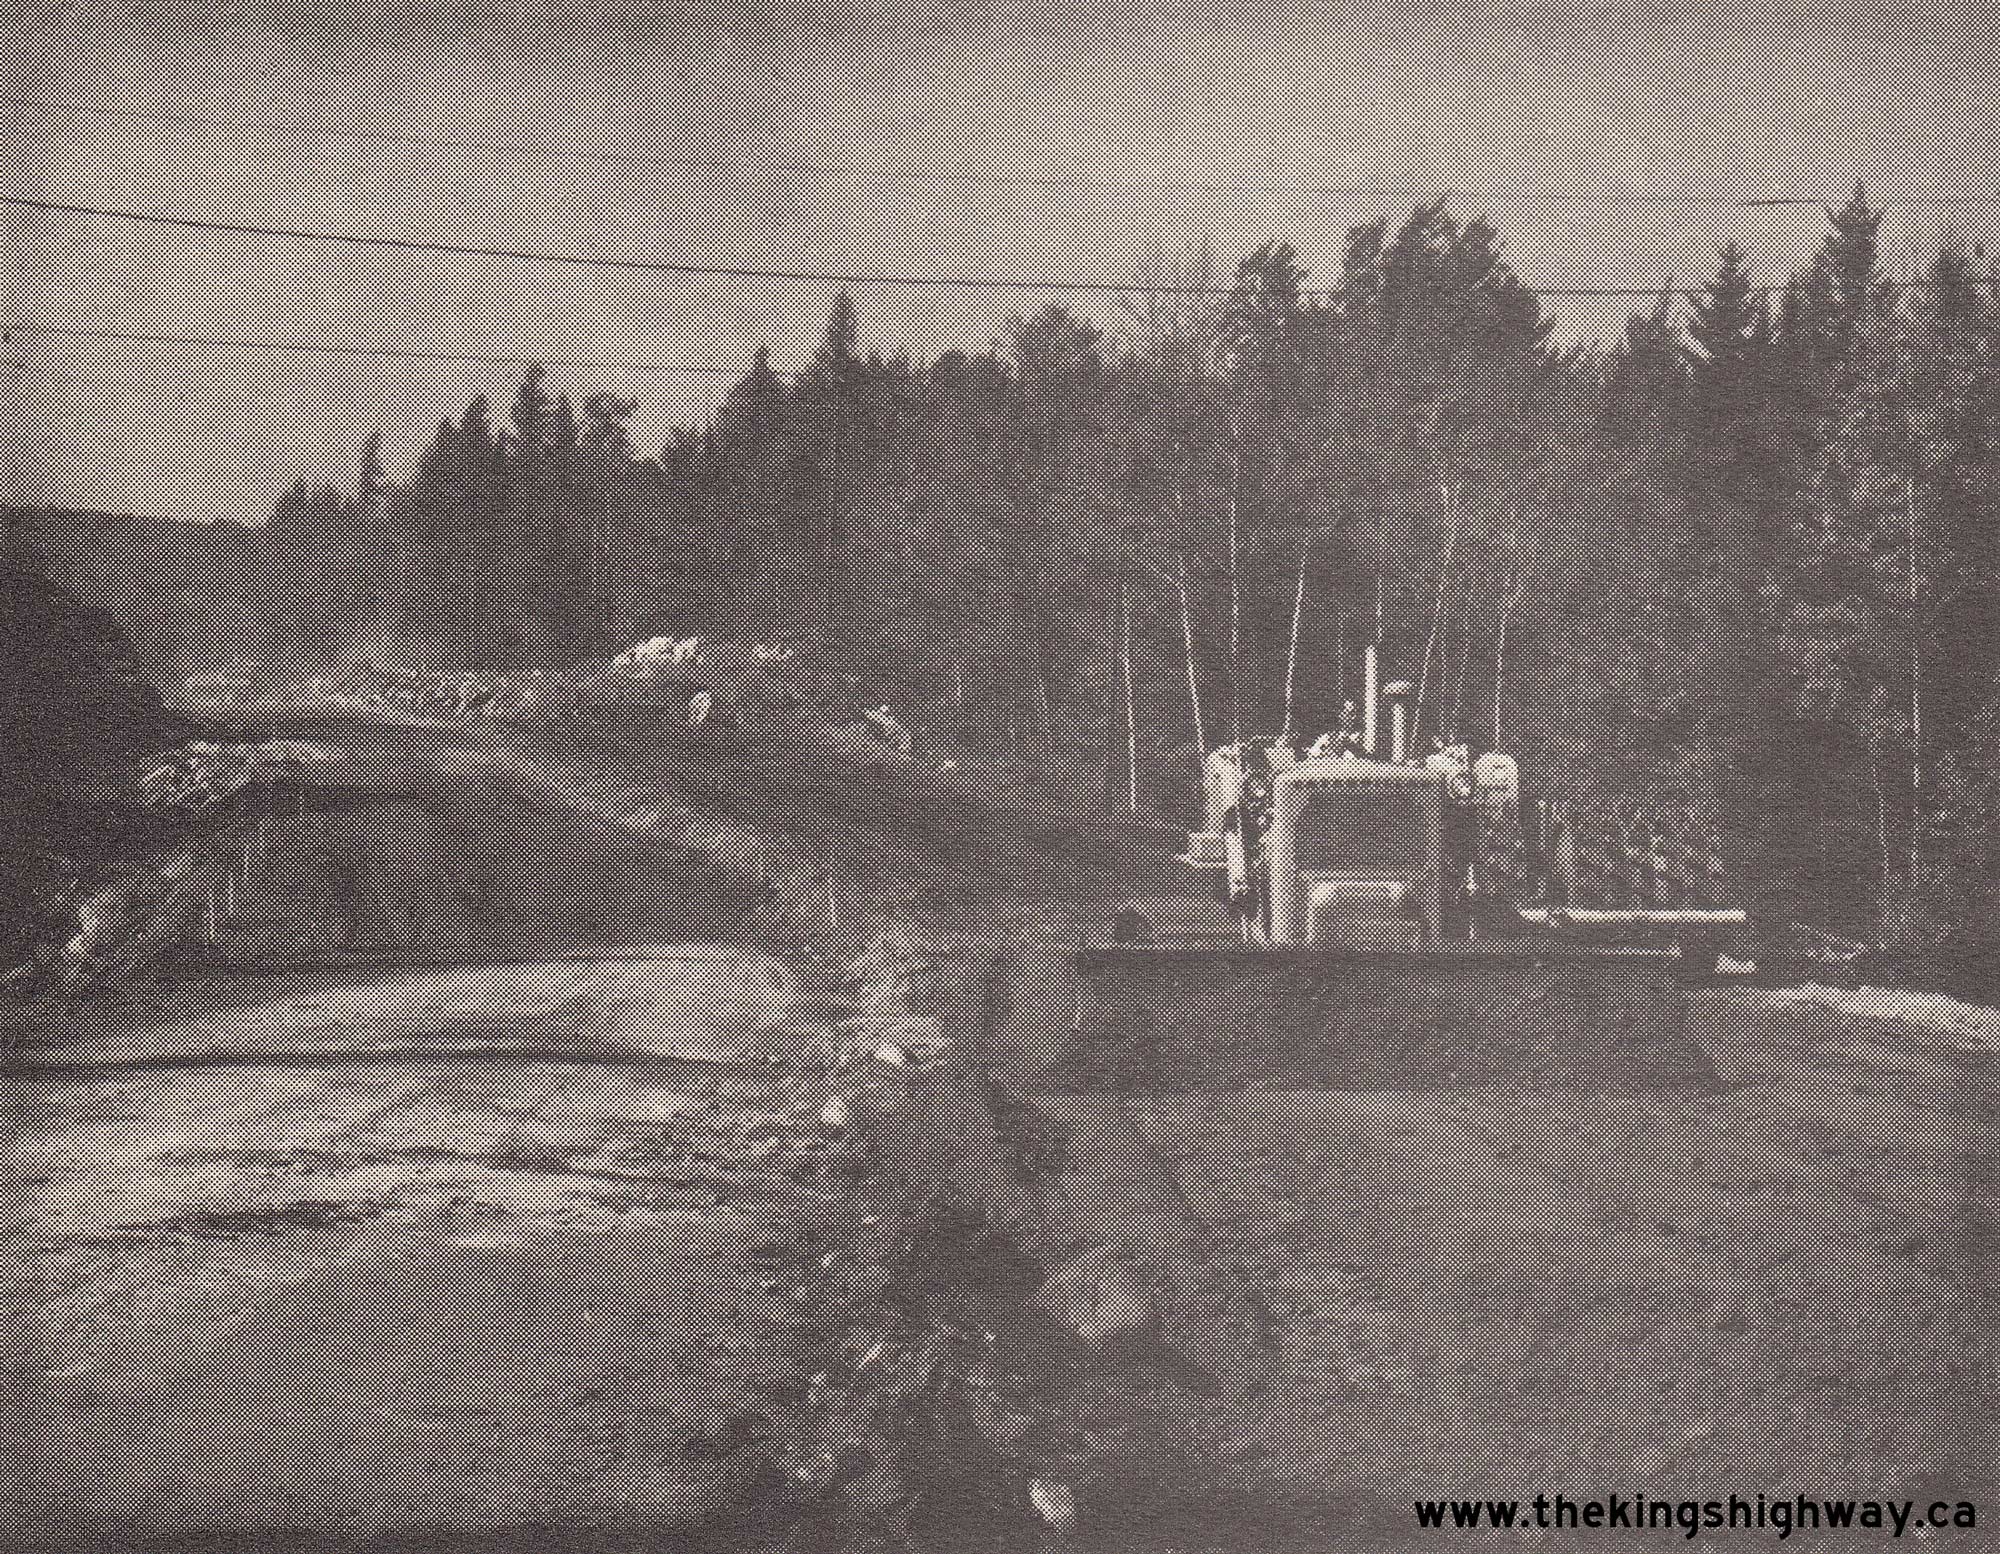
Above - New DHO Truck Weigh Scale at the Hwy 35 & Hwy 60 Junction on Hwy 11 north of Huntsville in 1941. This new truck weigh scale was constructed in 1941.
It was one of several similar facilities built at strategic points along Ontario's King's Highway System in the late 1930s and early 1940s to enforce truck loading
regulations. For many years, this building also housed an Ontario Provincial Police detachment. See an
Enlarged Photo Here. Photo taken in 1941. (Photo courtesy of Ontario Ministry of Transportation - © King's Printer for Ontario, 1941) 
Above - Circa 1945 postcard view of the original Marsh's Falls Bridge on Hwy 35 near Dwight. This steel truss bridge was demolished after a new Hwy 35 bridge
was completed over the Oxtongue River in 1971. See an Enlarged Photo Here. (Photo Courtesy of the Huntsville Forester Press) 
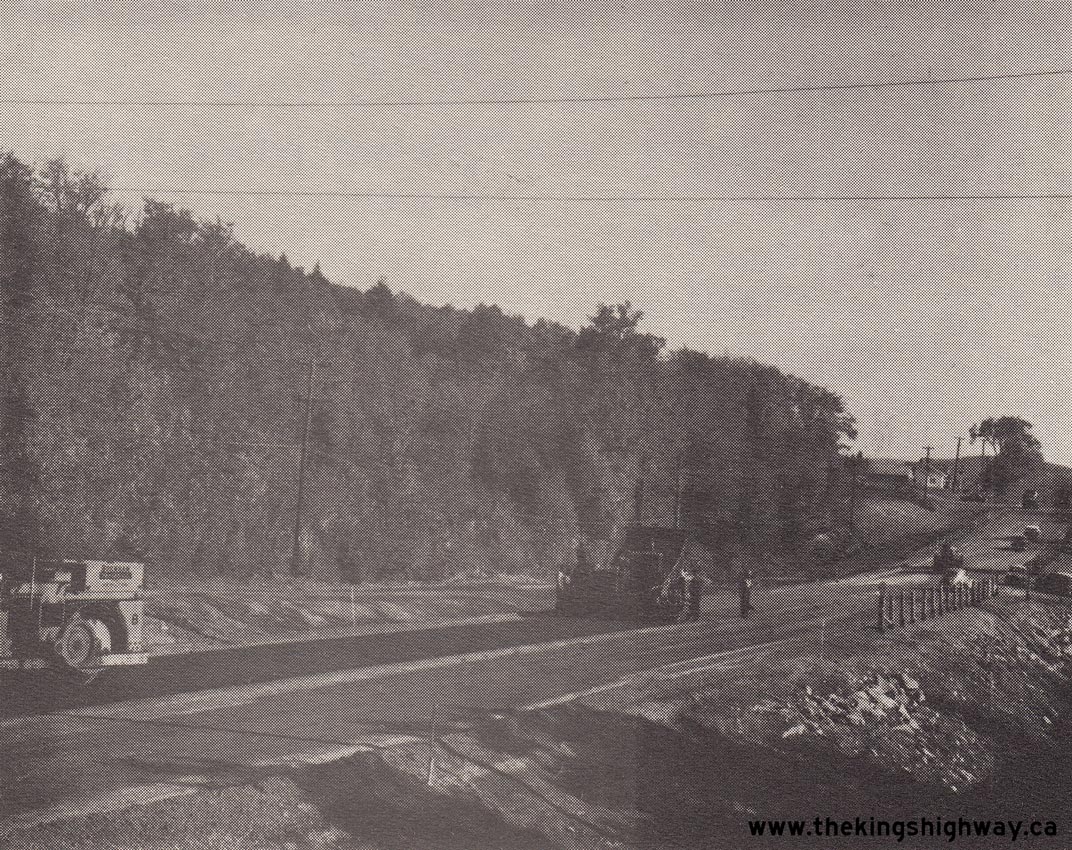
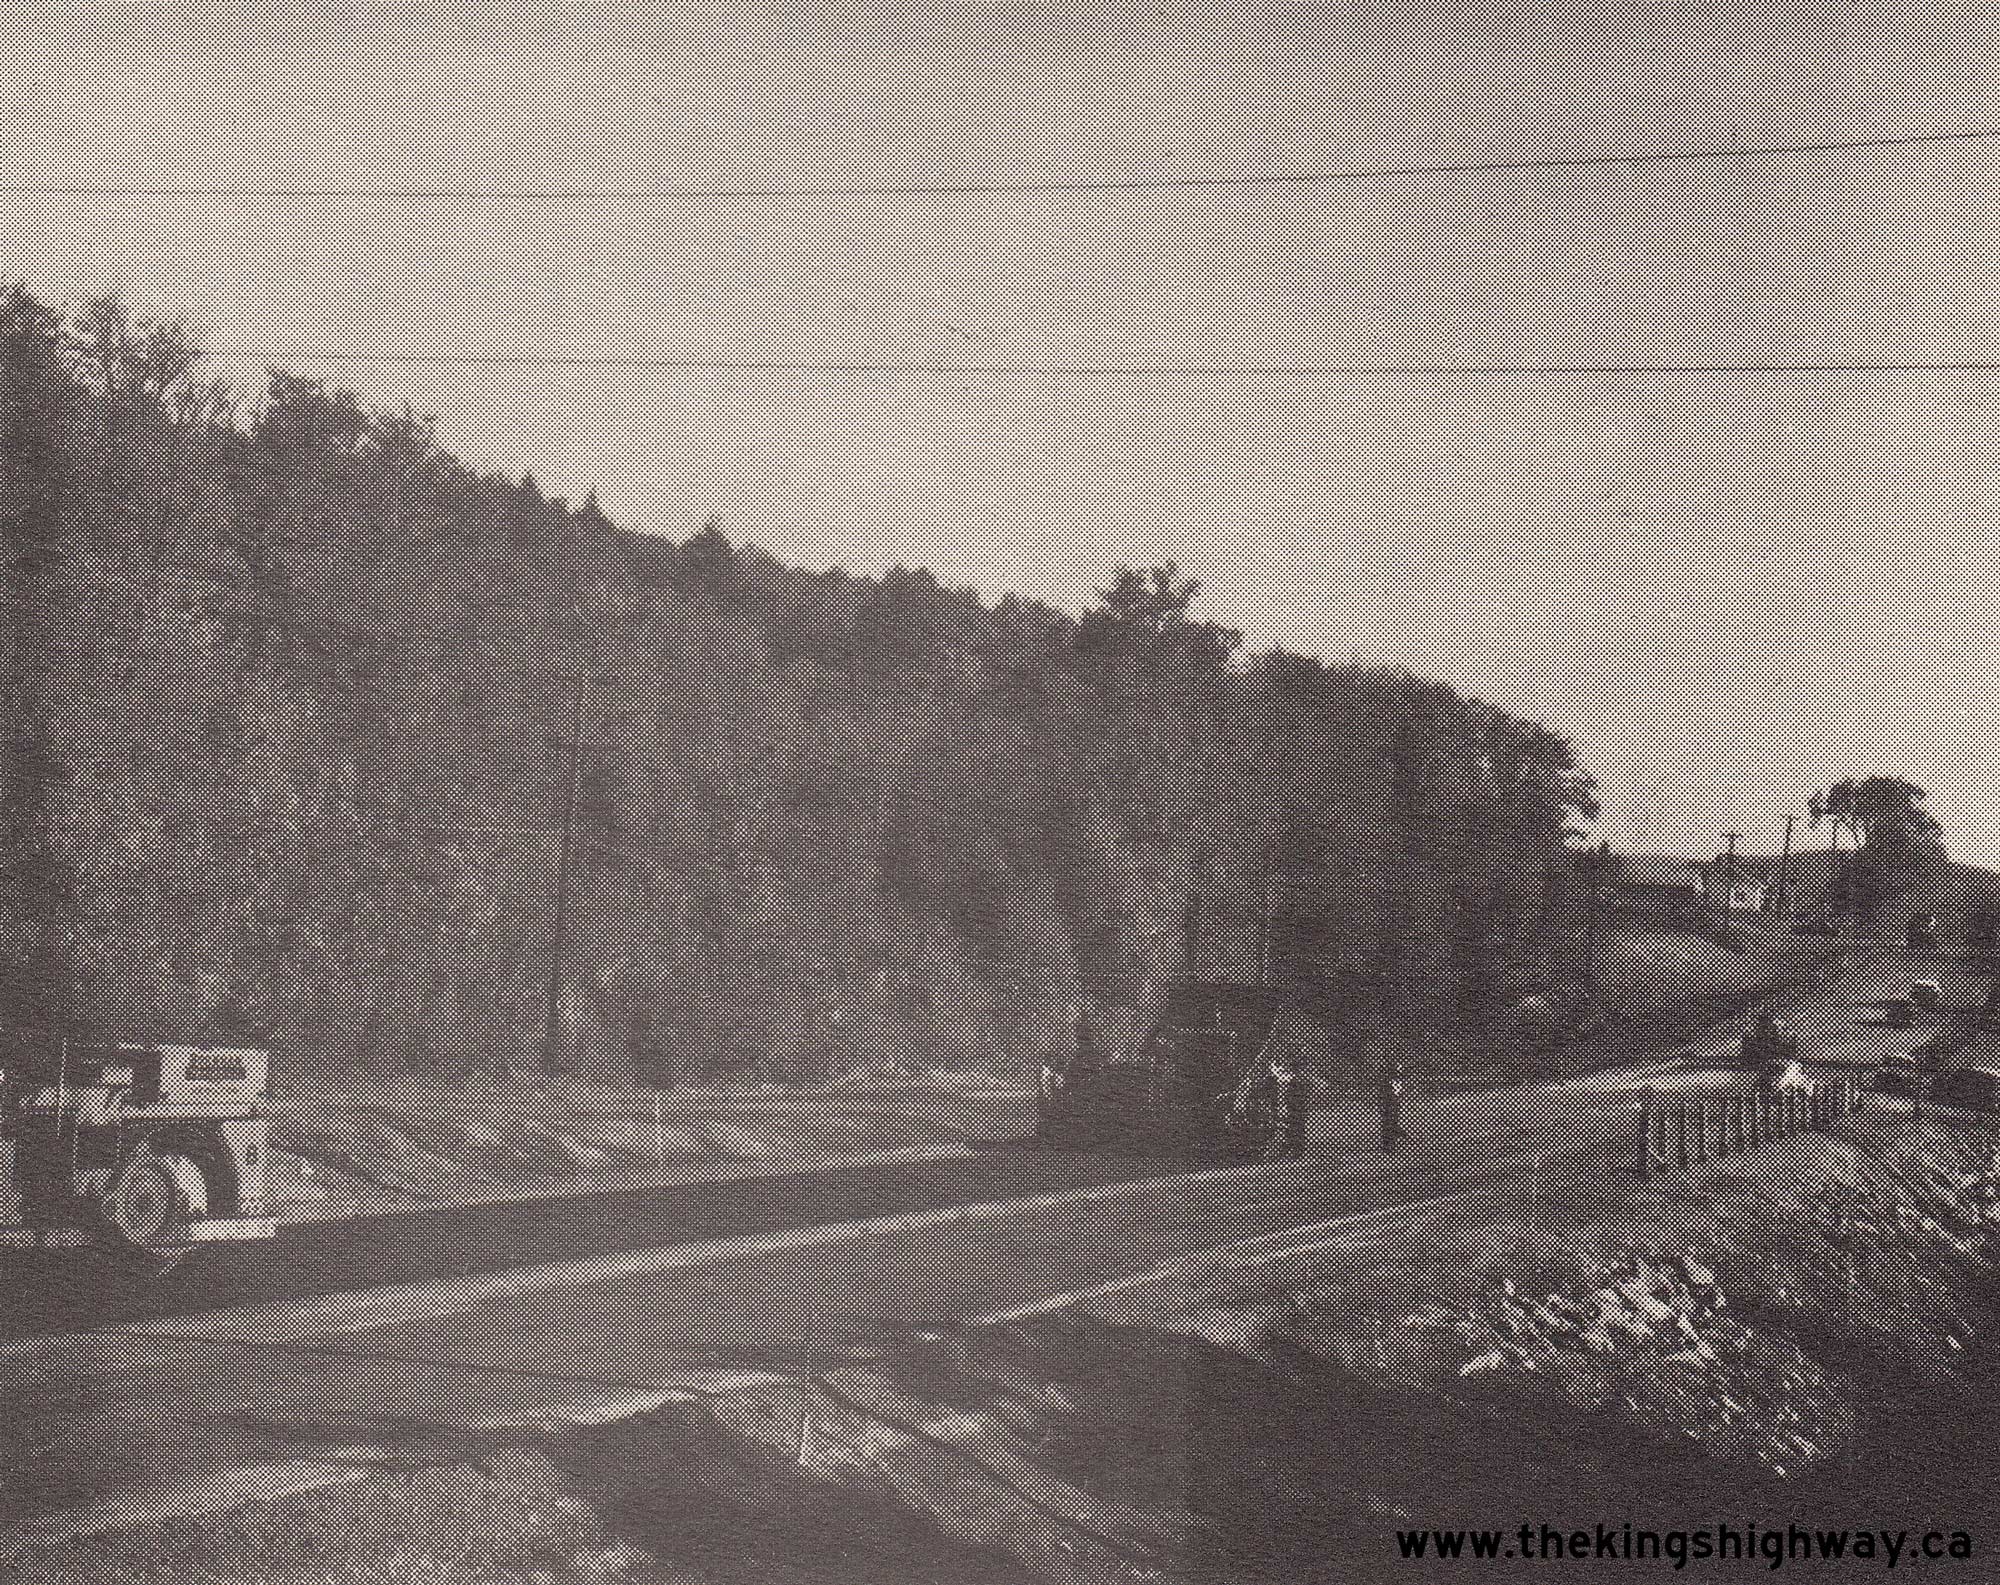
Above - New hot-mix asphalt pavement and zone striping on Hwy 35, 3 miles south of Rosedale. Photo taken on September 15, 1948. (Photo courtesy of Ontario Ministry of Transportation - © King's Printer for Ontario, 1948) 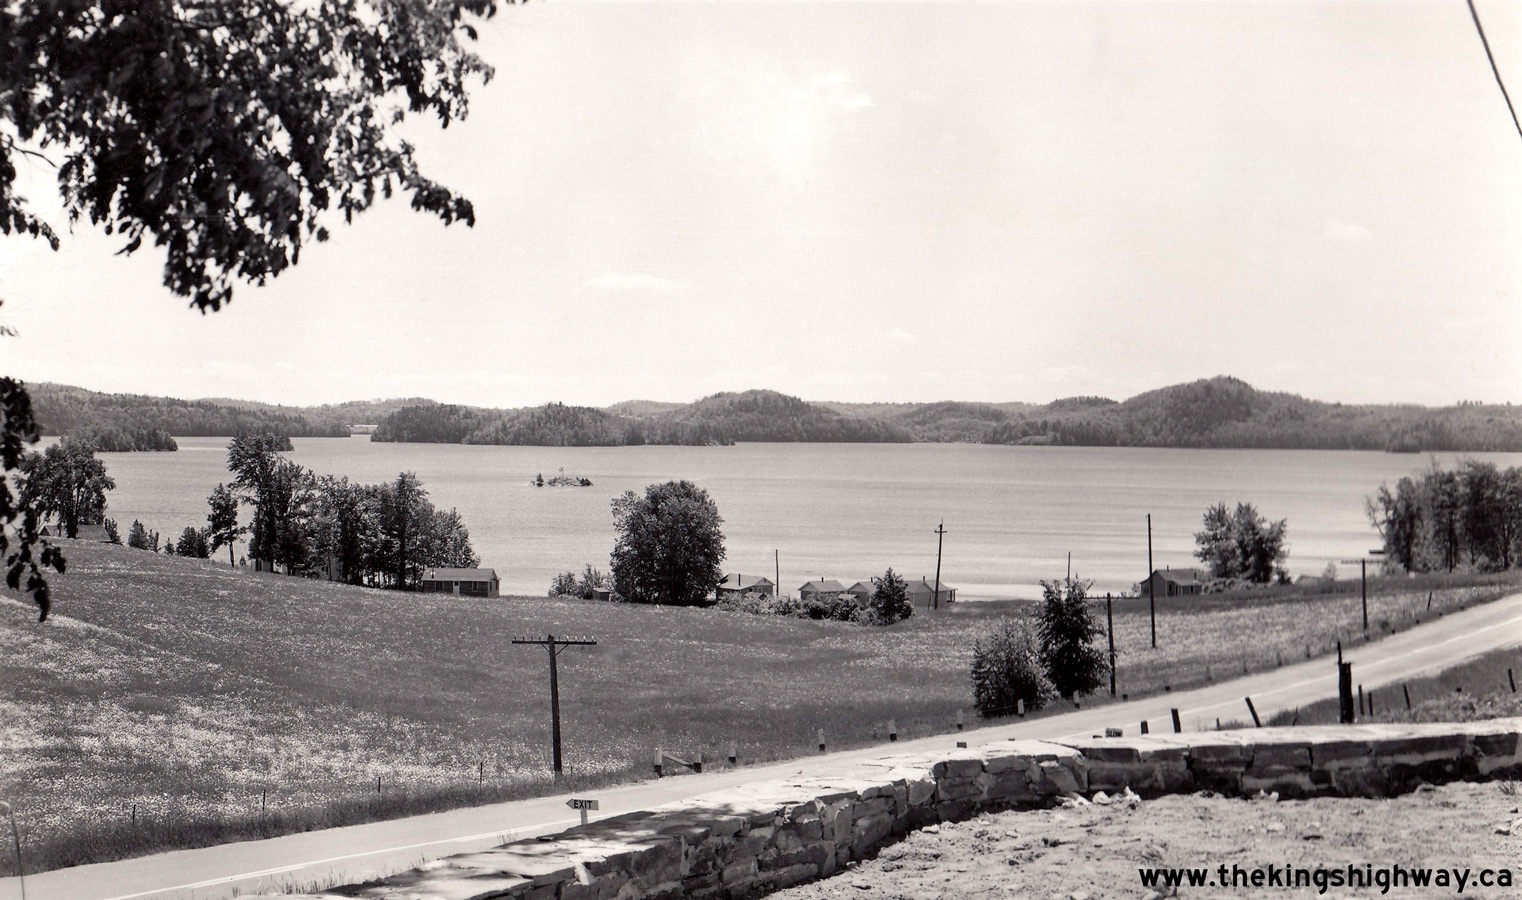
Left - Circa 1950 postcard view of the Fairy Lake Scenic Lookout on Hwy 35 & Hwy 60, located about 2 miles east of Huntsville. This small roadside lookout
was constructed in 1946 on the top of a rock outcrop along the north side of the highway overlooking Fairy Lake. The roadside park included picnic tables and litter
disposal barrels for the convenience of motorists using the highway. The scenic lookout closed many years ago and the former site is now occupied by a private
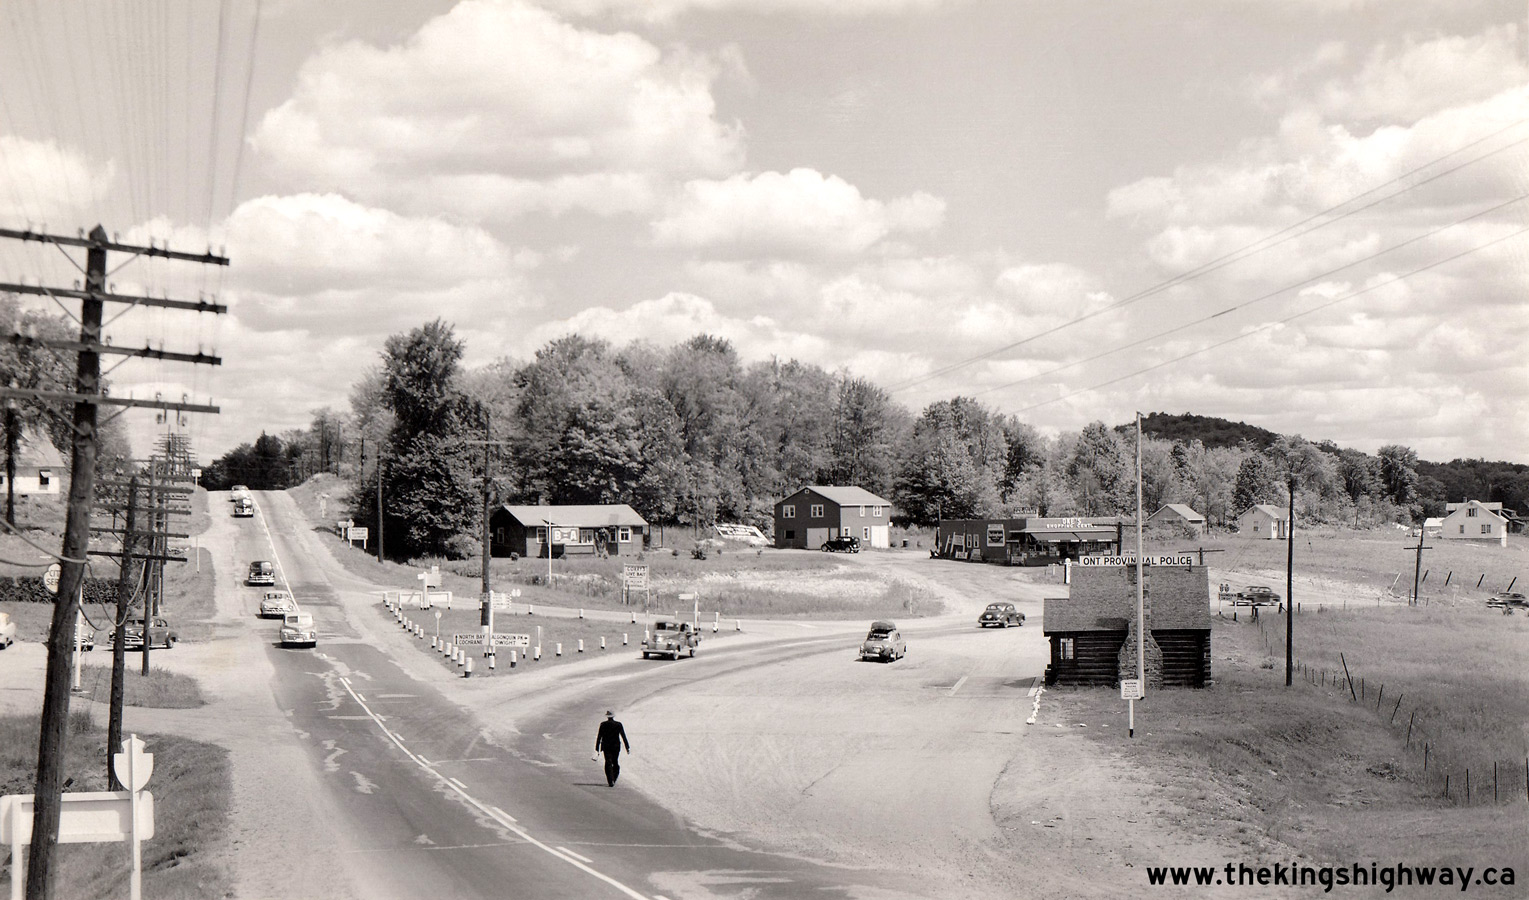
residence. See an Enlarged Photo Here. Photo taken circa 1950. (Photo courtesy of Winger Studio) Right - Circa 1952 postcard view of the Hwy 35 & Hwy 60 Junction on Hwy 11 at the northern entrance to Huntsville, facing north towards North Bay. As originally constructed in the 1930s, this highway junction was in a directional "Y" intersection configuration, with two separate curved roadways uniting Hwy 35 & Hwy 60 together with Hwy 11. At one time, Hwy 35 and Hwy 60 both reached their western terminus in Huntsville. The overlapped route of Hwy 35 & Hwy 60 between Huntsville and Dwight was discontinued in 1966, after which time the route became known as Hwy 60 only. This highway junction, located at today's King William Street (Muskoka Road 3) and Hwy 60, was bypassed in the late 1950s when Hwy 11 was relocated out onto a new bypass route across Vernon Lake Narrows. This photo also shows an interesting overlap of old "totem pole" fingerboard directional sign assemblies which were used up until the late 1940s and the new large enhanced guide signs with selected key destinations painted in much larger letter sizes for improved visibility. It was common practice in the 1950s to install additional King's Highway route markers directly above the reassurance destination signs beyond major highway junctions, so that motorists could easily confirm that they were on the correct highway. Careful observers may also note that the northbound destination guide sign beyond the highway junction lists Sudbury as a control city, along with North Bay and Cochrane. Prior to the completion of the Trans-Canada Highway at the French River in 1953, Hwy 69 came to a dead-end about 50 miles north of Parry Sound. There was no direct highway link between Parry Sound and Sudbury until that time. Accordingly, all traffic from Southern Ontario bound for Sudbury had to access the city on Hwy 11 via Huntsville and Hwy 17 via North Bay and Sturgeon Falls. See an Enlarged Photo Here. Photo taken circa 1952. (Photo courtesy of Annabelle Studio) 

Left - Grading for the new route of Hwy 35 & Hwy 115 at Enterprise Hill north of Newcastle in 1953. Note the original alignment of Hwy 35 at right. Photo
taken on November 20, 1953. (Photo courtesy of Ontario Ministry of Transportation - © King's Printer for Ontario, 1953) Right - The new alignment of Hwy 35 & Hwy 115 nears completion at Enterprise Hill, north of Newcastle. Photo taken on July 27, 1954. (Photo courtesy of Ontario Ministry of Transportation - © King's Printer for Ontario, 1954) 

Left - Construction of the Newcastle Bypass portion of Hwy 35 & Hwy 115 at Wilmot Creek. Photo taken on July 12, 1955. (Photo courtesy of Ontario Ministry of Transportation - © King's Printer for Ontario, 1955) Right - Construction of the Canadian Pacific Railway (CPR) Overhead on the Newcastle Bypass portion of Hwy 35 & Hwy 115. Photo taken on July 12, 1955. (Photo courtesy of Ontario Ministry of Transportation - © King's Printer for Ontario, 1955) 
Above - Circa 1955 postcard view of the Hwy 35 & Hwy 60 Junction on Hwy 11 at the northern entrance to Huntsville, facing north towards North Bay. Until
the early 1970s, it wasn't possible to reach Hwy 60 directly from the Huntsville Bypass (the relocated route of Hwy 11). This highway junction was extensively
reconfigured in 1973, when Hwy 60 was extended west from Old Hwy 11 out to the Huntsville Bypass. Both highways were realigned approaching this junction so that the
two roads intersected closer to a right angle. Significant re-grading also took place to improve the vertical grades approaching the intersection from the north.
Click here to see a 2006 View of the Hwy 60 Junction on Old Hwy 11 (now known as Muskoka Road 3)
in Huntsville. See an Enlarged Photo Here. Photo taken circa 1955. (Photo courtesy of Newt Winger) 
Above - Grading for the new route of Hwy 35, 8 miles south of Lindsay in 1956. A substantial
section of Hwy 35 between the Hwy 7A Junction and Lindsay was relocated onto a new route during the 1950s. Photo taken on August 1, 1956. (Photo courtesy of Ontario Ministry of Transportation - © King's Printer for Ontario, 1956) 

Left - New hot-mix asphalt pavement and zone striping on Hwy 35, facing north towards the Gull River Bridge from the Hwy 121 Junction in Minden (1956) (Photo courtesy of Ontario Ministry of Transportation - © King's Printer for Ontario, 1956) Right - Completed grading on a section of the Lindsay Bypass (Hwy 7 & Hwy 35) in September, 1957. (Photo courtesy of Ontario Ministry of Transportation - © King's Printer for Ontario, 1957) 
Above - Construction of a new Hwy 35 diversion, 9 miles south of Lindsay (1957) (Photo courtesy of Ontario Ministry of Transportation - © King's Printer for Ontario, 1957) 
Above - Facing north along the new Dorset Bypass (Hwy 35) in 1958. Note the old route of Hwy 35 at left, which heads into the village. Photo taken in 1958. (Photo courtesy of Ontario Ministry of Transportation - © King's Printer for Ontario, 1958) 
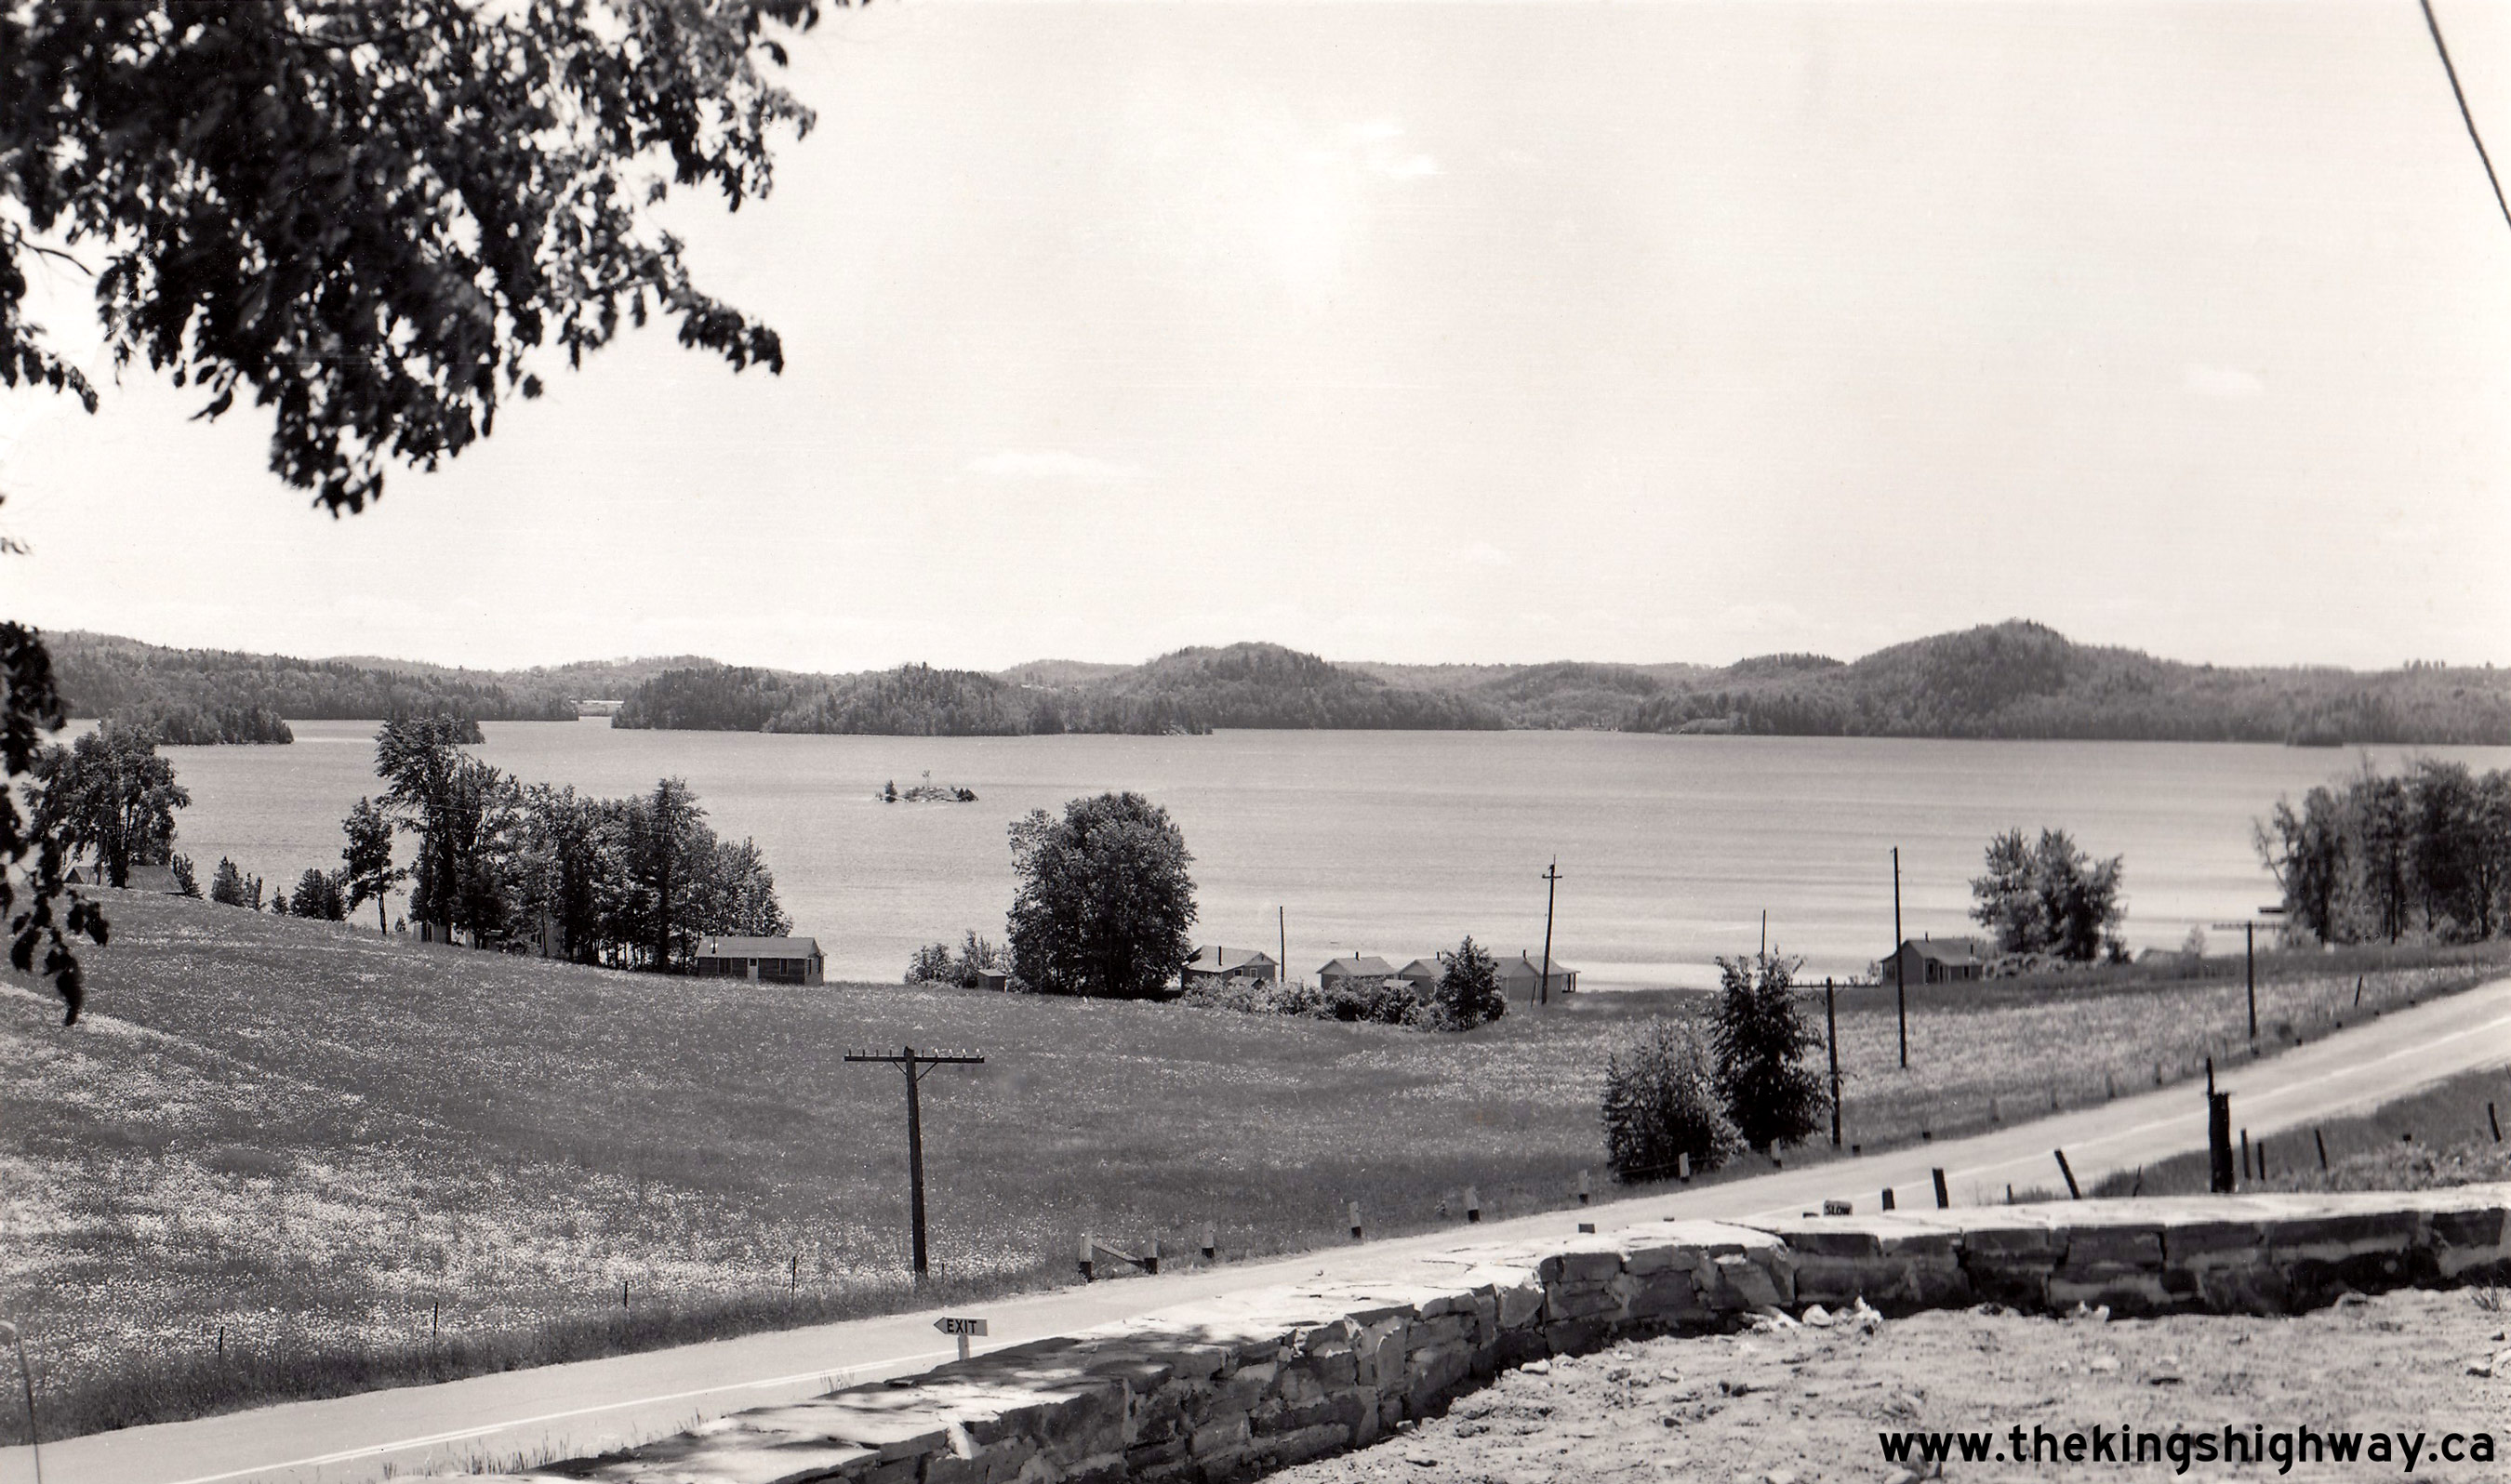
Above - View of Hwy 35 from the Dorset Lookout in 1958. See an
Enlarged Photo Here. (Photo courtesy of Ontario Ministry of Transportation - © King's Printer for Ontario, 1959) 
Above - Autumn view of Hwy 35 near Dorset in 1959. See an
Enlarged Photo Here. (Photo courtesy of Ontario Ministry of Transportation - © King's Printer for Ontario, 1959) 
Above - Completed Scugog River Bridge on the Lindsay Bypass (Hwy 7 & Hwy 35) in 1959, facing west. (Photo courtesy of Ontario Ministry of Transportation - © King's Printer for Ontario, 1959) 
Above - Circa 1960 postcard view of the Main Street (Hwy 35B) Bridge at Dorset, showing the new Hwy 35 Dorset Bypass Bridge in the background. See an
Enlarged Photo Here. (Photo Courtesy of H.R. Oakman) 

Left - Facing east along Hwy 2 towards Newcastle at the Hwy 35 & Hwy 115 Interchange in 1961. Until the Newcastle-Port Hope section of Hwy 401 was opened
to traffic about a year before this photo was taken, virtually all east-west traffic between Toronto and Eastern Ontario passed through this interchange. Hwy 401
temporarily ended here for about 8 years between 1952 and 1960. Traffic volumes on Hwy 2 through Newcastle dropped precipitously once Hwy 401 was opened between the
Hwy 35 & Hwy 115 Interchange near Newcastle and the Hwy 28 Interchange near Port Hope on June 30, 1960. It is interesting to note in this 1961 photo that this
highway interchange was once fully illuminated. The majority of the luminaires seen here were removed by the end of the 1960s. See an
Enlarged Photo Here. Photo taken on June 12, 1961. (Photo courtesy of Ontario Ministry of Transportation - © King's Printer for Ontario, 2021) Right - View of the Hwy 2 Interchange on Hwy 35 & Hwy 115 near Newcastle, facing north. This photo shows the original two-lane highway before it was widened to the current four-lane expressway in the early 1980s. Note the King's Highway route markers at right, which point ahead to Hwy 35 & Hwy 115. Until a year prior, this interchange also marked the eastern terminus of the Toronto-Newcastle section of Hwy 401. These two route markers served as a notification to motorists that although the road itself continued straight ahead, they were no longer following Hwy 401. See an Enlarged Photo Here. Photo taken on June 12, 1961. (Photo courtesy of Ontario Ministry of Transportation - © King's Printer for Ontario, 2021) 

Left - Facing north along the Newcastle Bypass (Hwy 35 & Hwy 115) at the Canadian Pacific Railway (CPR) Overhead north of the Hwy 2 Interchange in 1961.
Motorists who are used to today's frenetic pace along the expressway portion of Hwy 35 & Hwy 115 may find it soothing to admire the more leisurely pace depicted
in this view of the original highway from the early 1960s, when it was only two lanes and carried little traffic. See an
Enlarged Photo Here. Photo taken on June 12, 1961. (Photo courtesy of Ontario Ministry of Transportation - © King's Printer for Ontario, 2021) Right - Eastern side of the Canadian Pacific Railway (CPR) Overhead on the Newcastle Bypass portion of Hwy 35 & Hwy 115. See an Enlarged Photo Here. Photo taken on June 12, 1961. (Photo courtesy of Ontario Ministry of Transportation - © King's Printer for Ontario, 2021) 
Above - Wilmot Creek Culvert on the Newcastle Bypass (Hwy 35 & Hwy 115). Photo taken on June 12, 1961. (Photo courtesy of Ontario Ministry of Transportation - © King's Printer for Ontario, 2018) 

Left - Deck view of the Canadian Pacific Railway (CPR) Overhead on the Newcastle Bypass portion of Hwy 35 & Hwy 115. See an
Enlarged Photo Here. Photo taken in May 1963. (Photo courtesy of Ontario Ministry of Transportation - © King's Printer for Ontario, 2021) Right - Side view of the Canadian Pacific Railway (CPR) Overhead on Hwy 35 & Hwy 115 west of Newcastle. See an Enlarged Photo Here. Photo taken in May 1963. (Photo courtesy of Ontario Ministry of Transportation - © King's Printer for Ontario, 2021) 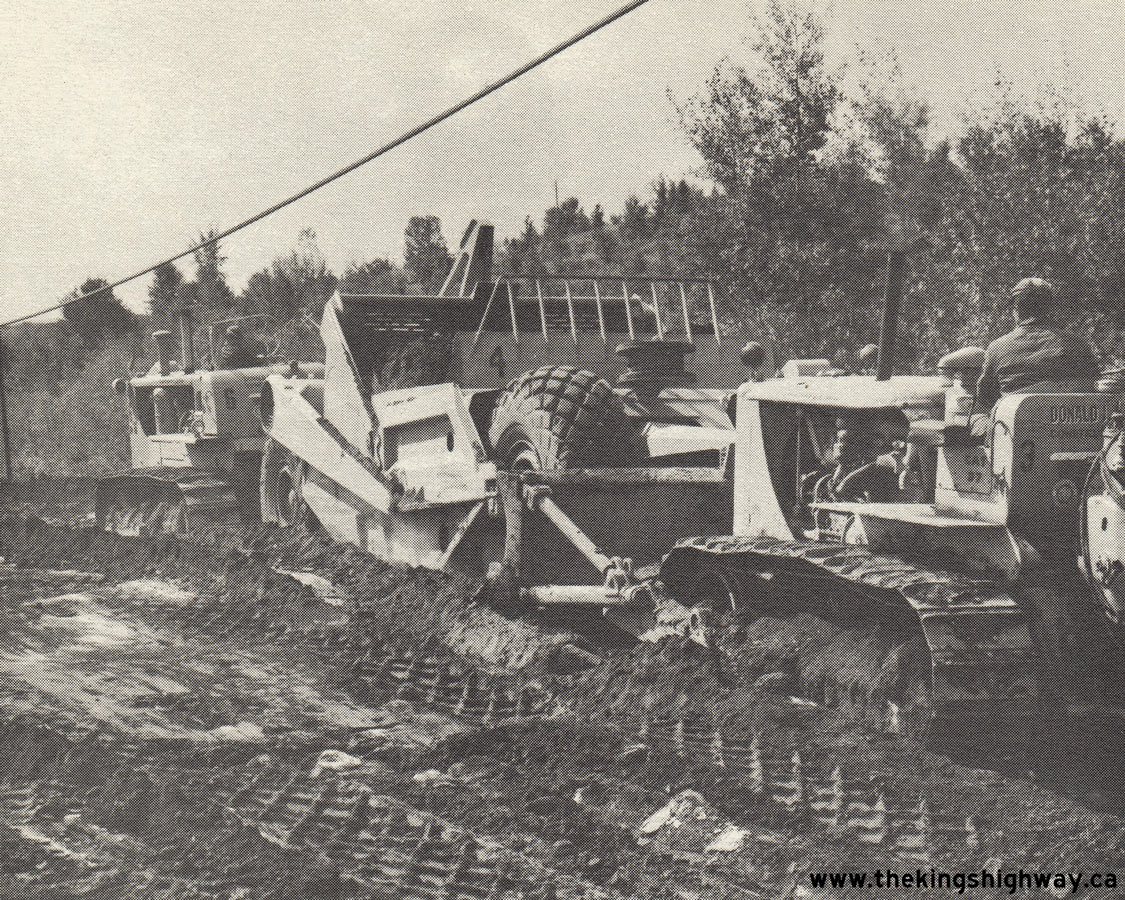
Above - Reconstruction of Hwy 35 & Hwy 60 between Huntsville and Hillside, Contract #1962-62. See an
Enlarged Photo Here. Photo taken in 1962. (Photo courtesy of Ontario Ministry of Transportation - © King's Printer for Ontario, 1962) 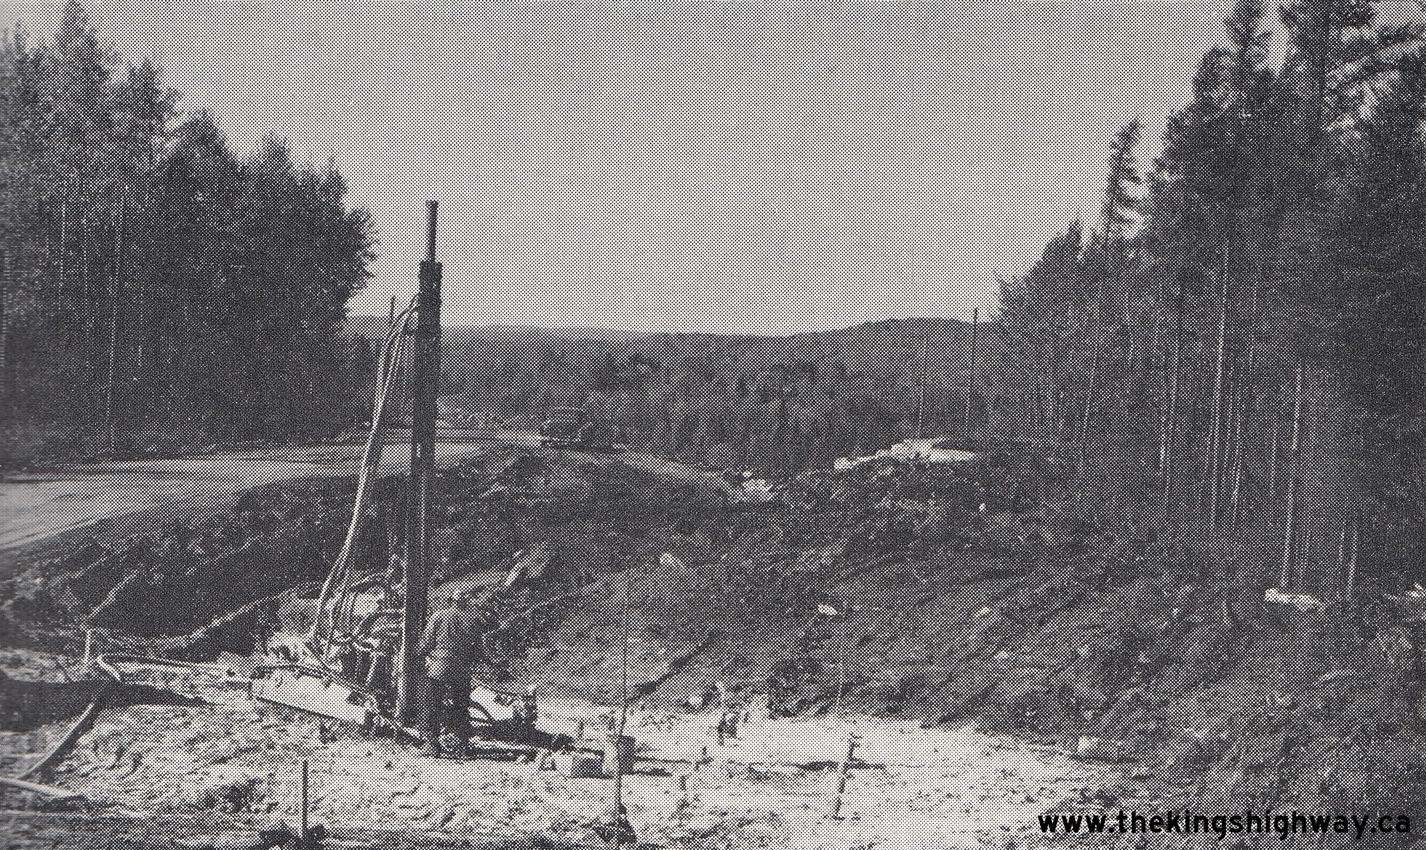
Above - Grading and reconstruction of Hwy 35 & Hwy 60 between Dwight and Huntsville. See an
Enlarged Photo Here. Photo taken in 1963. (Photo courtesy of Ontario Ministry of Transportation - © King's Printer for Ontario, 1963) 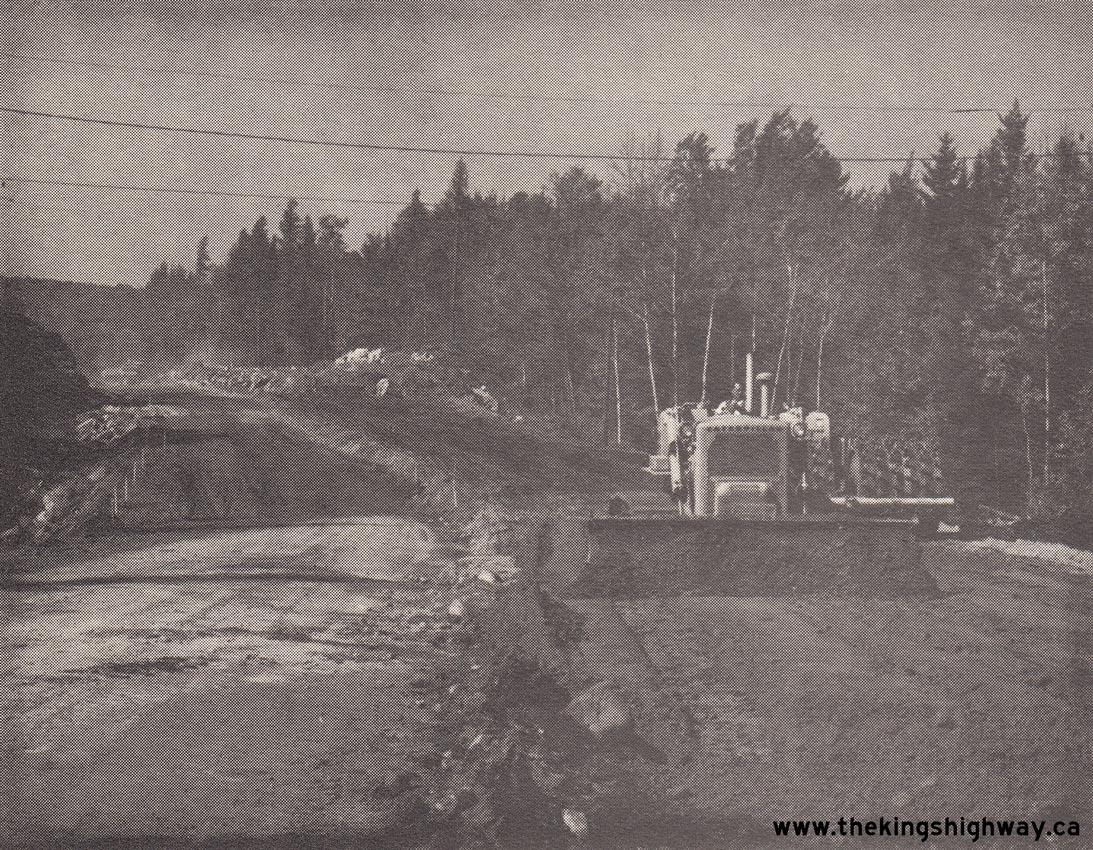
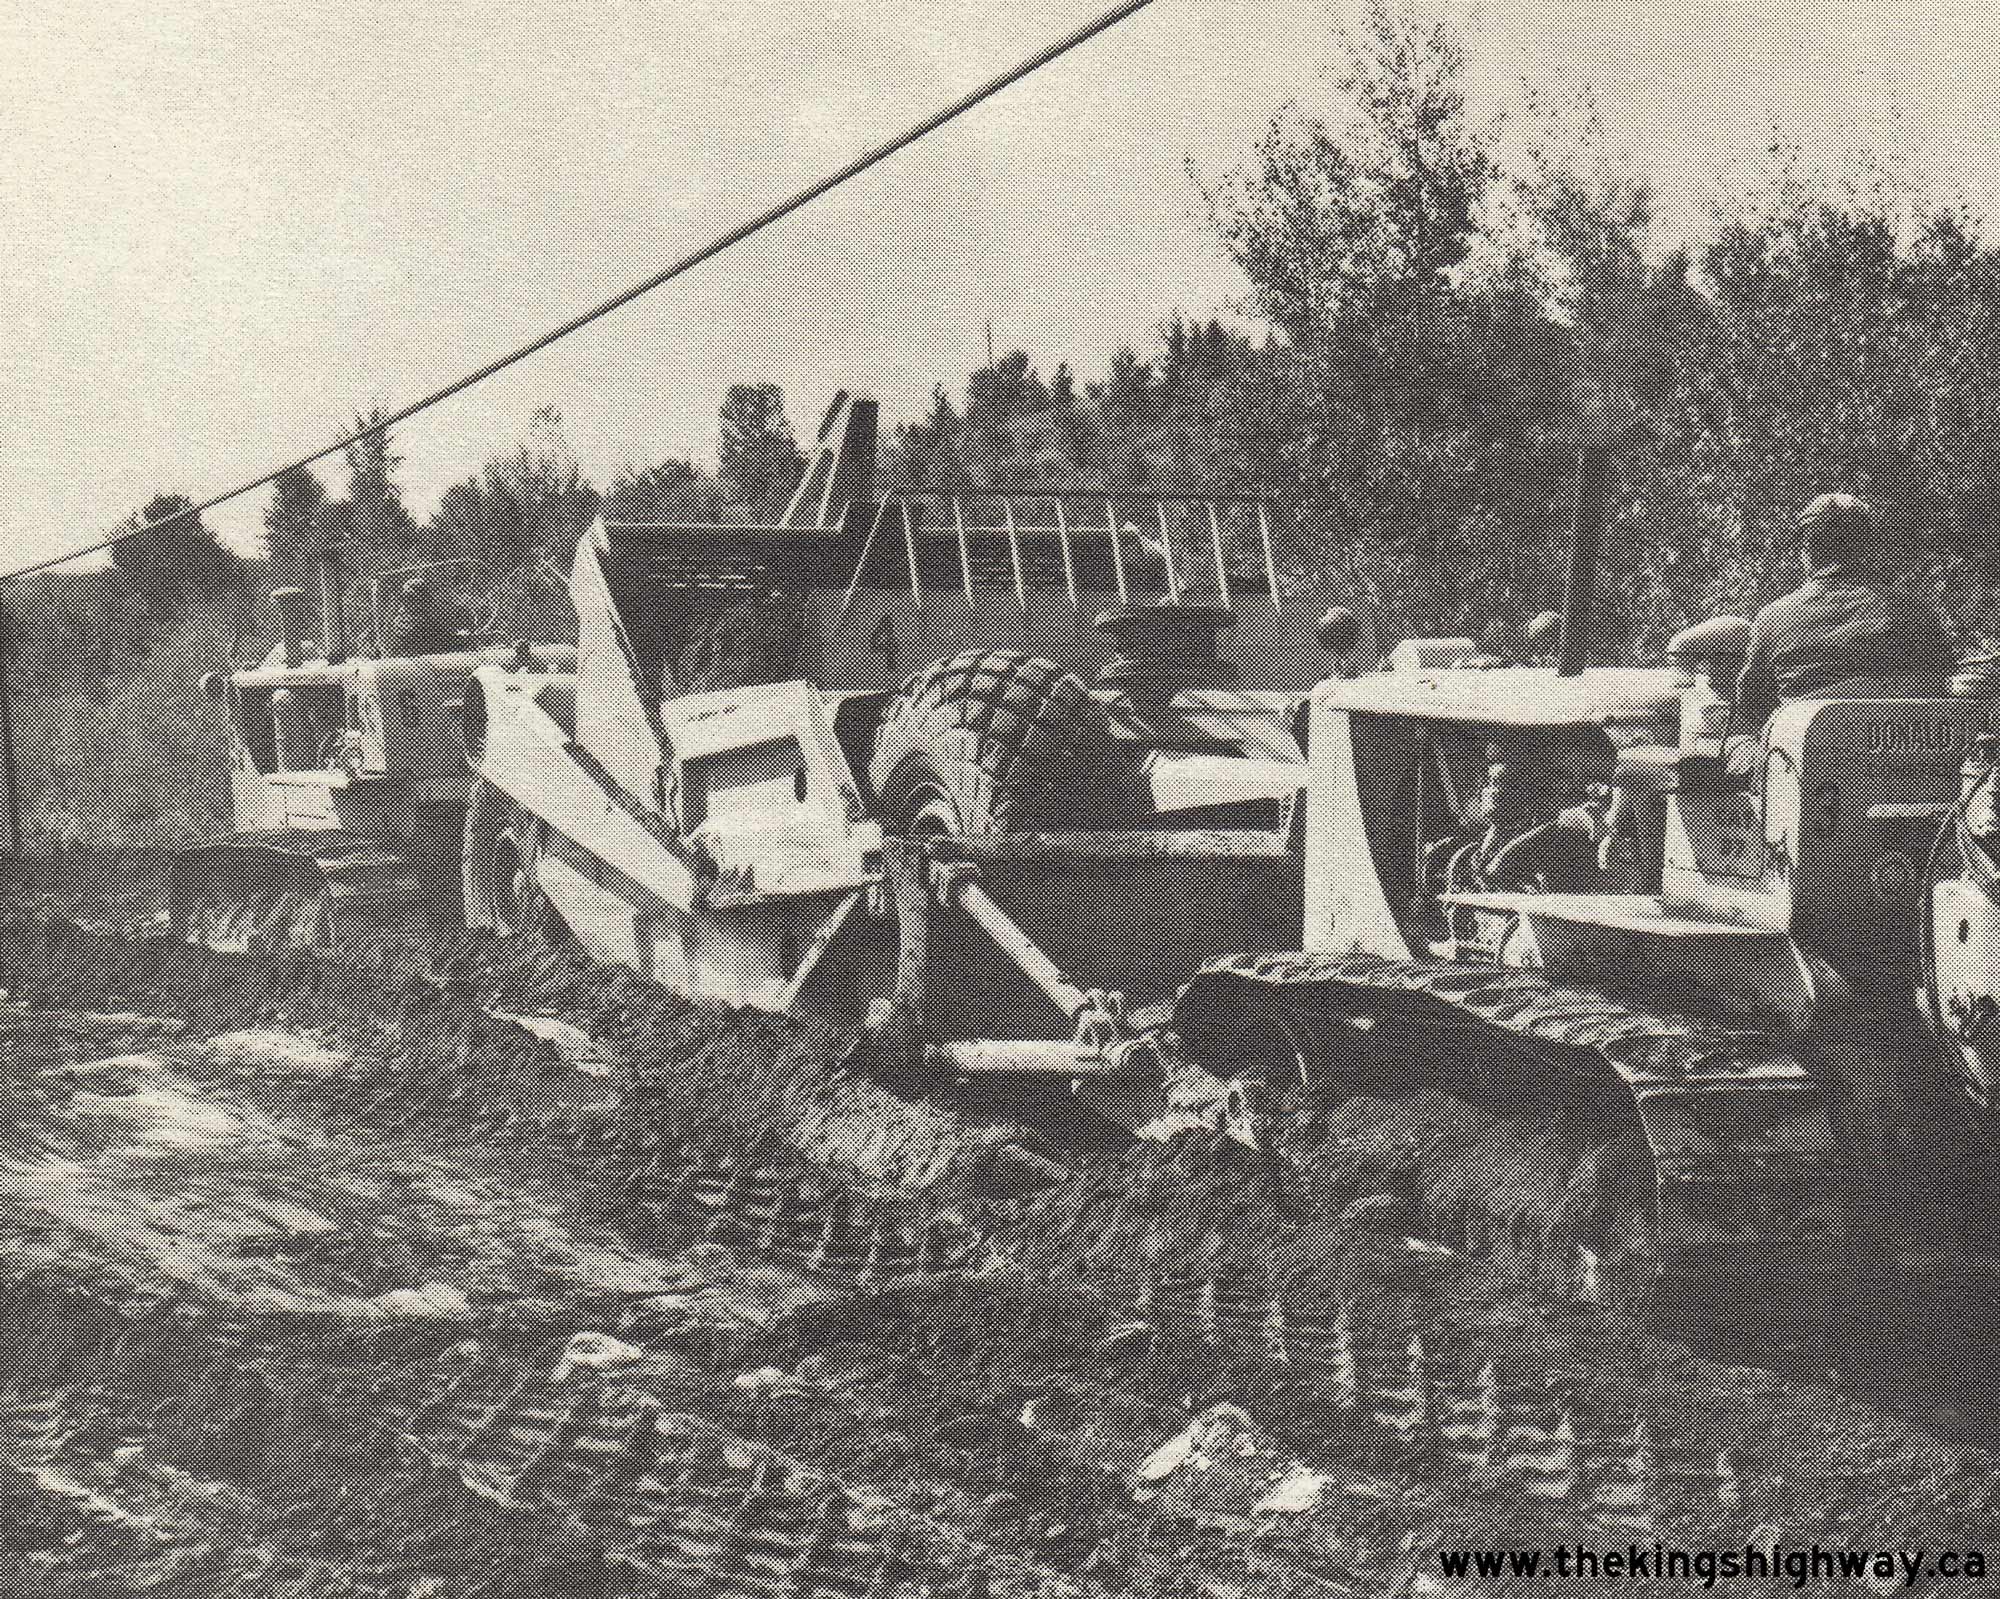
Left - Grading operations on Hwy 35 & Hwy 60 between Hillside and Dwight, Contract #1963-35. See an
Enlarged Photo Here. Photo taken in 1963. (Photo courtesy of Ontario Ministry of Transportation - © King's Printer for Ontario, 1963) Right - Hot-mix paving operations on Hwy 35 & Hwy 60 between Hillside and Huntsville, Contract #1963-47. See an Enlarged Photo Here. Photo taken in 1963. (Photo courtesy of Ontario Ministry of Transportation - © King's Printer for Ontario, 1963) 

Left - Hwy 401 at the Hwy 35 & Hwy 115 Interchange, facing east towards Newcastle. See an
Enlarged Photo Here. Photo taken in June 1965. (Photo courtesy of Ontario Ministry of Transportation - © King's Printer for Ontario, 2012) Right - Facing north along Hwy 35 & Hwy 115 at the Hwy 401 Interchange near Newcastle. Photo taken in June 1965. (Photo courtesy of Ontario Ministry of Transportation - © King's Printer for Ontario, 2012) 

Left - Completed Gull River Bridge on Hwy 35 in Coboconk (1965) (Photo courtesy of Ontario Ministry of Transportation - © King's Printer for Ontario, 1965) Right - Pier construction for the new Kushog Lake Narrows (Ox Narrows) Bridge on Hwy 35 south of Dorset (1968) (Photo courtesy of Ontario Ministry of Transportation - © King's Printer for Ontario, 1968) 

Left - Hwy 2 at the Hwy 35 & Hwy 115 Interchange, facing east towards Newcastle. Photo taken in June 1968. See an
Enlarged Photo Here. (Photo courtesy of Ontario Ministry of Transportation - © King's Printer for Ontario, 2018) Right - Facing north along Hwy 35 & Hwy 115 at the Hwy 2 Interchange near Newcastle in 1968. At the time, Hwy 35 & Hwy 115 was an undivided two-lane highway. A project got underway in 1982 to construct a centre median barrier and widen the highway from two to four lanes. Photo taken in June 1968. See an Enlarged Photo Here. (Photo courtesy of Ontario Ministry of Transportation - © King's Printer for Ontario, 2018) 

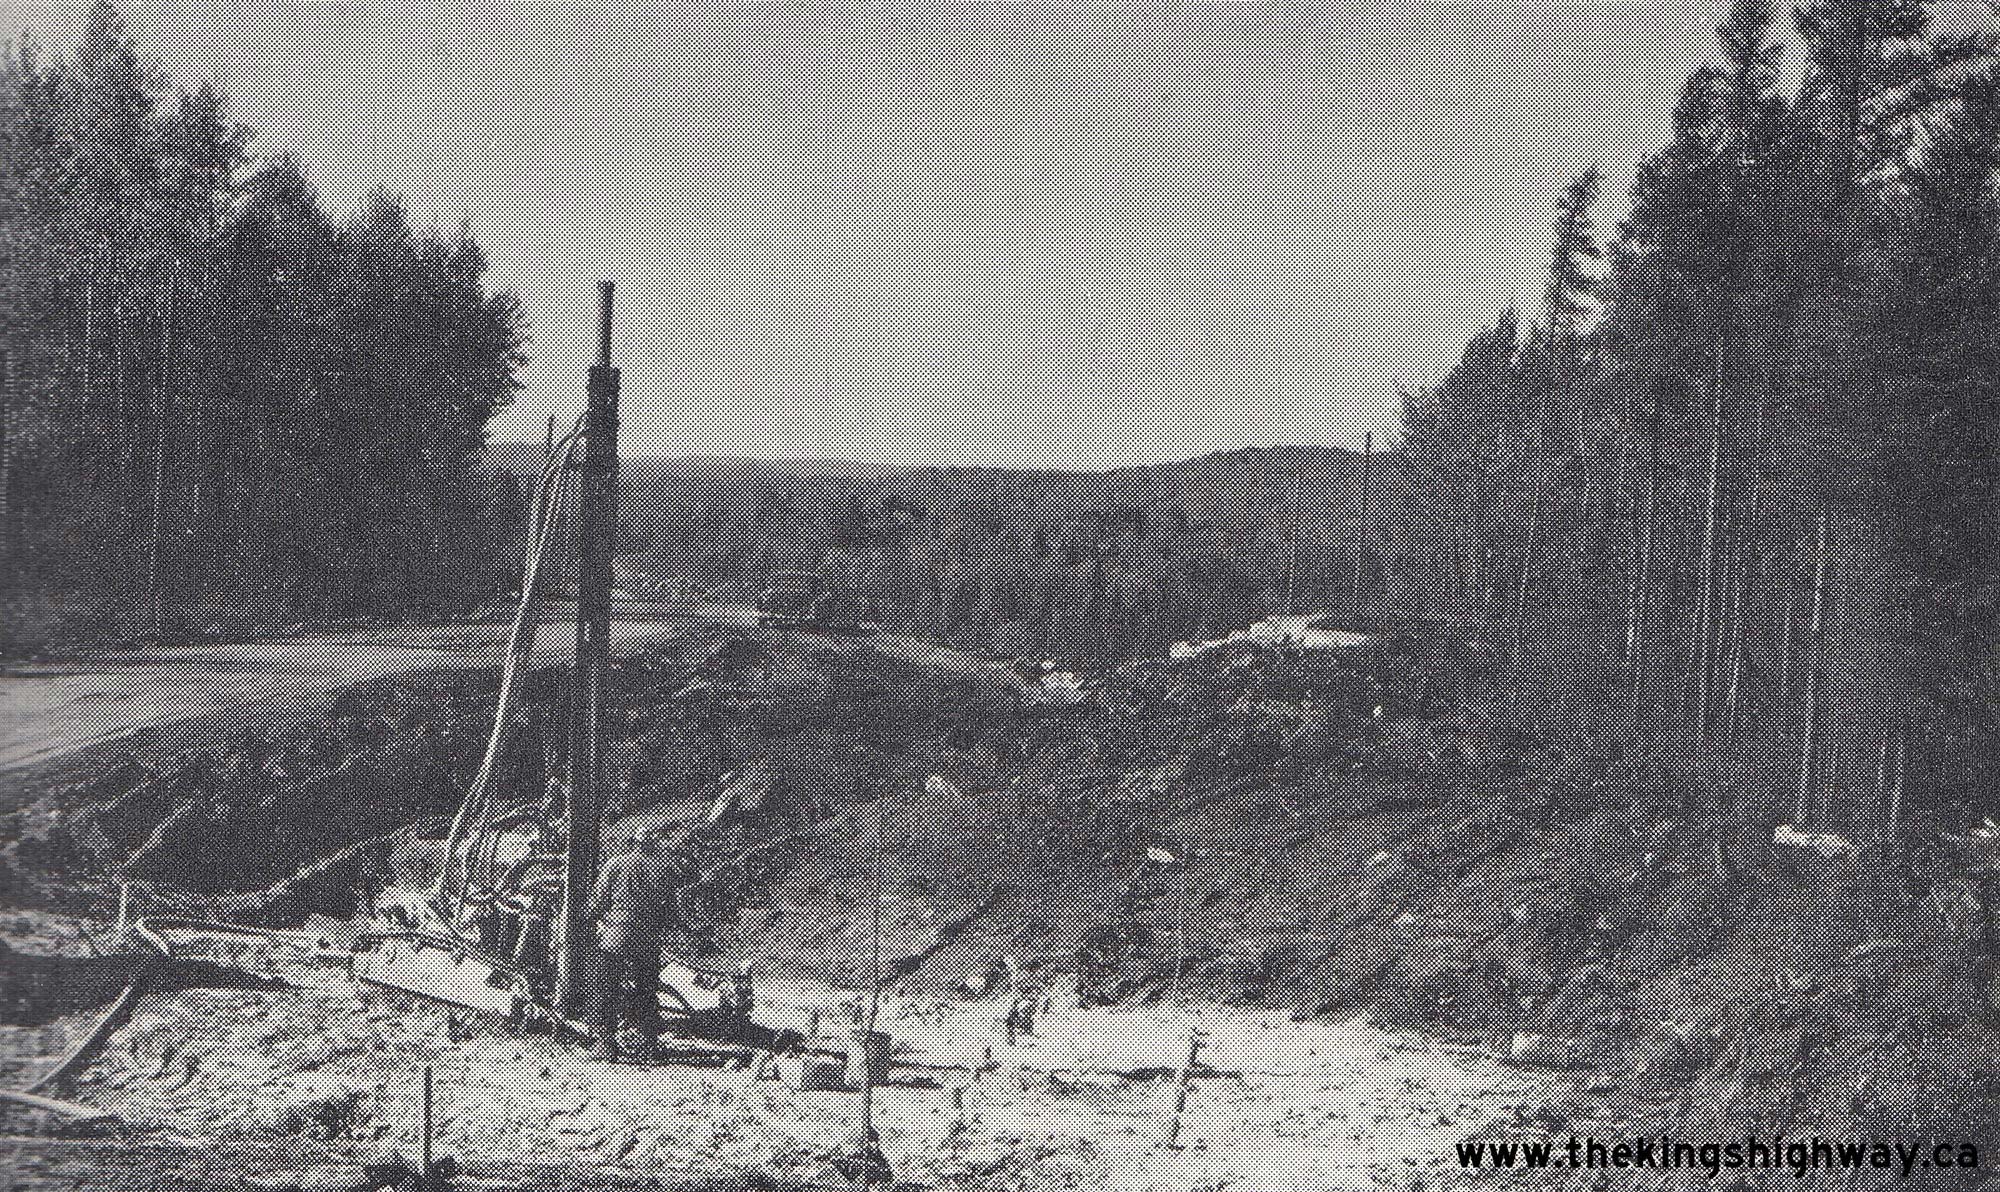
Left - Widening a rock cut on Hwy 35 south of Minden (1970) (Photo courtesy of Ontario Ministry of Transportation - © King's Printer for Ontario, 1970) Right - Construction of the new Birkendale Rock Cut on Hwy 35 south of Dwight (1971) (Photo courtesy of Ontario Ministry of Transportation - © King's Printer for Ontario, 1971) 

Left - A Department of Highways' staff photographer captured this instantaneous moment of a rock blasting operation for Contract #1970-229 on Hwy 35 near
Dorset, along with a rather unfortunate traffic flagman running for cover in the foreground. Apparently, the detonation was much larger than anticipated, and the
flagman felt he was a bit too close to the show! Photo taken on May 28, 1971. (Photo courtesy of Ontario Ministry of Transportation - © King's Printer for Ontario, 1971) Right - Completed Marsh's Falls Bridge over the Oxtongue River south of Dwight (1971) (Photo courtesy of Ontario Ministry of Transportation - © King's Printer for Ontario, 1971) 

Left - Southern terminus of Hwy 35 & Hwy 115 at Hwy 401 near Newcastle in 1971. At the time this photo was taken, Hwy 35 & Hwy 115 was only two lanes.
Note that the divided highway ends immediately north of the Hwy 401 Interchange. A "butterfly" overhead sign structure points the way to Hwy 401 East Kingston and
Hwy 401 West Toronto. Erected in 1960, this overhead sign was installed as part of a general trend by the DHO towards the placement of overhead signs at major freeway
interchanges. See an Enlarged Photo Here. Photo taken in July 1971. (Photo courtesy of Ontario Ministry of Transportation - © King's Printer for Ontario, 2021) Right - Facing east along Hwy 401 towards Newcastle from the Hwy 35 & Hwy 115 Interchange. See an Enlarged Photo Here. Photo taken in July 1971. (Photo courtesy of Ontario Ministry of Transportation - © King's Printer for Ontario, 2021) 
Above - Aerial view of the Hwy 35 Junction on Hwy 115 at Enterprise Hill north of Newcastle in 1972. This at-grade intersection remained in place until the
late 1980s, when it was replaced by a new grade-separated interchange on an improved alignment. Prior to the completion of the interchange, traffic continuing north
on Hwy 35 towards Lindsay from Enterprise Hill had to turn left across the southbound lane of Hwy 115. The new Hwy 35 Interchange was completed and opened to traffic
in 1988, coinciding with the conversion of Hwy 35 & Hwy 115 to a four-lane limited-access expressway at Enterprise Hill. See an
Enlarged Photo Here. (Photo courtesy of Ontario Ministry of Transportation - © King's Printer for Ontario, 2013) 
Above - Widening an earth cut on Hwy 35 immediately north of Coboconk (1972) (Photo courtesy of Ontario Ministry of Transportation - © King's Printer for Ontario, 1972) 

Left - Facing east along Hwy 2 towards Newcastle at the Hwy 35 & Hwy 115 Interchange. In the early 1980s, the loop ramp to northbound Hwy 35 & Hwy 115
at right was removed and the interchange ramps were converted to a diamond configuration. Today, traffic has to turn left in order to access northbound Hwy 35 &
Hwy 115. See an Enlarged Photo Here. Photo taken on August 8, 1977. (Photo courtesy of Ontario Ministry of Transportation - © King's Printer for Ontario, 2018) Right - Northern side of the Hwy 2 Overpass on Hwy 35 & Hwy 115, facing south. See an Enlarged Photo Here. Photo taken on August 8, 1977. (Photo courtesy of Ontario Ministry of Transportation - © King's Printer for Ontario, 2018) 

Left - Facing west along Hwy 2 towards Bowmanville at the Hwy 35 & Hwy 115 Interchange. See an
Enlarged Photo Here. Photo taken on September 6, 1979. (Photo courtesy of Ontario Ministry of Transportation - © King's Printer for Ontario, 2018) Right - Completed intersection improvements at Durham Road 17 and two-way centre left turn lane along Hwy 35 & Hwy 115 north of Newcastle, Contract #1979-367. This short-term highway improvement was constructed in 1979 only a few years prior to the highway expansion in this area in the 1980s. See an Enlarged Photo Here. Photo taken in 1979. (Photo courtesy of Ontario Ministry of Transportation - © King's Printer for Ontario, 1979)
Continue on to King's Highway 35 Photos: Historical Photos (1980-1999)
|
|---|
Links to Adjacent King's Highway Photograph Pages:
Back to King's Highway 34 Photos /
King's Highway 35 History /
On to King's Highway 36 Photos
Ontario Highway History - Main Menu / Back to List of Highways Website contents, photos & text © 2002-2026, Cameron
Bevers (Webmaster) - All Rights Reserved / Contact Me
|
|---|