
| 
| |
|
|
This page contains present day photos (Year 2000 to date) of Ontario's King's Highway 3, arranged by location from St. Thomas
easterly to Tillsonburg. All photographs displayed on this page were taken by the Webmaster (Cameron Bevers), unless specifically noted otherwise. Click on any
thumbnail to see a larger image!
Please note that all photographs displayed on this
website are protected by copyright. These photographs must not be reproduced, published,
electronically stored or copied, distributed, or posted onto other websites without
my written permission. If you want to use photos from this website, please
email me first for permission. Thank-you!
|
|---|
|
Page 5: Present Day King's Highway 3 Photographs (St. Thomas to Tillsonburg)


Left - Northern side of the Kettle Creek Bridge on Hwy 3 in St. Thomas. This three-span concrete girder structure was completed in 1979. See an
Enlarged Photo Here. (Photograph taken on September 10, 2010 - © Cameron Bevers) Right - Facing west along Hwy 3 towards Talbotville at the Kettle Creek Bridge. See an Enlarged Photo Here. (Photograph taken on September 10, 2010 - © Cameron Bevers) 

Left - Southern side of the Kettle Creek Bridge on Hwy 3 in St. Thomas. See an
Enlarged Photo Here. (Photograph taken on September 10, 2010 - © Cameron Bevers) Right - Date stamp (1979) and structure identification number on the Kettle Creek Bridge on Hwy 3. See an Enlarged Photo Here. (Photograph taken on September 10, 2010 - © Cameron Bevers) 

Left - Approaching St. Thomas on Hwy 3, facing east from the Kettle Creek Bridge. See an
Enlarged Photo Here. (Photograph taken on September 10, 2010 - © Cameron Bevers) Right - Canadian National (CN) Railway Subway on the St. Thomas Expressway (Hwy 3), facing west towards Talbotville. See an Enlarged Photo Here. (Photograph taken on September 10, 2010 - © Cameron Bevers) 

Left - Date stamp (1978) on the CN Railway Subway on the St. Thomas Expressway (Hwy 3). See an
Enlarged Photo Here. (Photograph taken on September 10, 2010 - © Cameron Bevers) Right - Facing west along the on the St. Thomas Expressway (Hwy 3) near Balaclava Street. Hwy 3 was relocated onto a new bypass route through St. Thomas in 1981. The St. Thomas Expressway was built as a staged freeway, with a single two-lane roadway carrying both directions of traffic as an interim measure. However, enough right-of-way was acquired so that the highway could be expanded to a four-lane divided highway in the future, if traffic conditions warranted such improvements. The future westbound lanes of Hwy 3 would make use of the space to the north of the existing highway. See an Enlarged Photo Here. (Photograph taken on September 10, 2010 - © Cameron Bevers) 

Left - Facing east along the on the St. Thomas Expressway (Hwy 3) towards Balaclava Street. See an
Enlarged Photo Here. (Photograph taken on September 10, 2010 - © Cameron Bevers) Right - St. Thomas Expressway (Hwy 3), facing west from the Balaclava Street Overpass. See an Enlarged Photo Here. (Photograph taken on September 10, 2010 - © Cameron Bevers) 

Left - Facing east along the St. Thomas Expressway (Hwy 3) from the Balaclava Street Overpass. See an
Enlarged Photo Here. (Photograph taken on September 10, 2010 - © Cameron Bevers) Right - Approaching the Balaclava Street Overpass on the St. Thomas Expressway (Hwy 3), facing west. The Balaclava Street Overpass is a two-span post-tensioned concrete structure that was completed in 1975. All crossing roads along Hwy 3 through St. Thomas are grade-separated except for Centennial Avenue, located at the eastern end of the expressway. See an Enlarged Photo Here. (Photograph taken on September 10, 2010 - © Cameron Bevers) 

Left - Green guide signs approaching the First Avenue Interchange on the St. Thomas Expressway (Hwy 3), facing east. See an
Enlarged Photo Here. (Photograph taken on September 10, 2010 - © Cameron Bevers) Right - Facing south across the First Avenue Overpass on Hwy 3. This is the only interchange located on the St. Thomas Expressway. See an Enlarged Photo Here. (Photograph taken on September 10, 2010 - © Cameron Bevers) 

Left - Facing west along the St. Thomas Expressway (Hwy 3) from the First Avenue Interchange. See an
Enlarged Photo Here. (Photograph taken on September 10, 2010 - © Cameron Bevers) Right - Green guide sign marking the entrance ramp to westbound Hwy 3 at the First Avenue Interchange on the St. Thomas Expressway. See an Enlarged Photo Here. (Photograph taken on September 10, 2010 - © Cameron Bevers) 

Left - Green guide sign marking the entrance ramp to eastbound Hwy 3 at the First Avenue Interchange on the St. Thomas Expressway. See an
Enlarged Photo Here. (Photograph taken on September 10, 2010 - © Cameron Bevers) Right - Western side of the First Avenue Overpass on the St. Thomas Expressway (Hwy 3). This two-span post-tensioned concrete structure was completed in 1974. See an Enlarged Photo Here. (Photograph taken on September 10, 2010 - © Cameron Bevers) 

Left - Structure identification number and date stamp (1974) on the First Avenue Overpass on the St. Thomas Expressway (Hwy 3). For some reason, many bridges
in Southwestern Ontario use a two-digit date code ("74", as is the case here) rather than a full four-digit date denoting the year of construction. See an
Enlarged Photo Here. (Photograph taken on September 10, 2010 - © Cameron Bevers) Right - Facing east along the St. Thomas Expressway (Hwy 3) from the First Avenue Interchange. See an Enlarged Photo Here. (Photograph taken on September 10, 2010 - © Cameron Bevers) 

Left - Eastern side of the First Avenue Overpass on the St. Thomas Expressway (Hwy 3). See an
Enlarged Photo Here. (Photograph taken on September 10, 2010 - © Cameron Bevers) Right - Facing north across the First Avenue Overpass on Hwy 3. See an Enlarged Photo Here. (Photograph taken on September 10, 2010 - © Cameron Bevers) 

Left - Facing west along the St. Thomas Expressway (Hwy 3) from the Burwell Road Overpass. See an
Enlarged Photo Here. (Photograph taken on September 10, 2010 - © Cameron Bevers) Right - Eastern side of the Burwell Road Overpass on the St. Thomas Expressway (Hwy 3). This two-span post-tensioned concrete structure was completed in 1974. Like all overpass structures along the St. Thomas Expressway, the Burwell Road Overpass was designed to accommodate a future four-lane divided highway. See an Enlarged Photo Here. (Photograph taken on September 10, 2010 - © Cameron Bevers) 

Left - Facing south across the Burwell Road Overpass on Hwy 3 in St. Thomas. See an
Enlarged Photo Here. (Photograph taken on September 10, 2010 - © Cameron Bevers) Right - Structure identification number and date stamp (1974) on the Burwell Road Overpass on the St. Thomas Expressway (Hwy 3). See an Enlarged Photo Here. (Photograph taken on September 10, 2010 - © Cameron Bevers) 

Left - Facing north across the Burwell Road Overpass on Hwy 3 in St. Thomas. See an
Enlarged Photo Here. (Photograph taken on September 10, 2010 - © Cameron Bevers) Right - St. Thomas Expressway (Hwy 3), facing east from the Burwell Road Overpass. See an Enlarged Photo Here. (Photograph taken on September 10, 2010 - © Cameron Bevers) 

Left - Aerial view of the First Avenue Interchange on the St. Thomas Expressway (Hwy 3), facing southwest. See an
Enlarged Photo Here. (Photograph taken on April 28, 2006 - © Cameron Bevers) Right - Aerial view of the St. Thomas Expressway (Hwy 3) facing west towards the First Avenue Interchange. The St. Thomas Expressway is an undivided two-lane arterial highway, but all of the bridges were designed to allow for the construction of a second twin roadway in the future. See an Enlarged Photo Here. (Photograph taken on April 28, 2006 - © Cameron Bevers) 

Left - Aerial view of the St. Thomas Expressway (Hwy 3) facing west from Centennial Avenue. Note the wide right-of-way to the right of the existing two-lane
highway, which was reserved so that the highway can be widened at a later date. The St. Thomas Expressway was officially opened to traffic on September 7, 1981, after
nearly 8 years of construction. See an Enlarged Photo Here. (Photograph taken on April 28, 2006 - © Cameron Bevers) Right - Western side of the St. Thomas Railway Overhead on Talbot Street (Old Hwy 3). This single span concrete rigid frame structure was completed in 1958. See an Enlarged Photo Here. (Photograph taken on April 28, 2006 - © Cameron Bevers) 

Left - Eastern side of the St. Thomas Railway Overhead on Talbot Street (Old Hwy 3). The railway tracks were removed several years ago. See an
Enlarged Photo Here. (Photograph taken on April 28, 2006 - © Cameron Bevers) Right - View of the deteriorated superstructure of the St. Thomas Railway Overhead. Note the sign at right which reads "Falling Debris", warning pedestrians of concrete that is slowly delaminating from the rebar above and falling to the ground. See an Enlarged Photo Here. (Photograph taken on April 28, 2006 - © Cameron Bevers) 

Left - Facing east along Talbot Street (Old Hwy 3) at the St. Thomas Railway Overhead. The two outermost lanes were closed to traffic temporarily, until repair
work could be undertaken at the bridge. The St. Thomas Railway Overhead was rehabilitated in 2007-2008, shortly after these photos were taken. See an
Enlarged Photo Here. (Photograph taken on April 28, 2006 - © Cameron Bevers) Right - Facing west along Talbot Street (Old Hwy 3) at the St. Thomas Overhead. See an Enlarged Photo Here. (Photograph taken on April 28, 2006 - © Cameron Bevers) 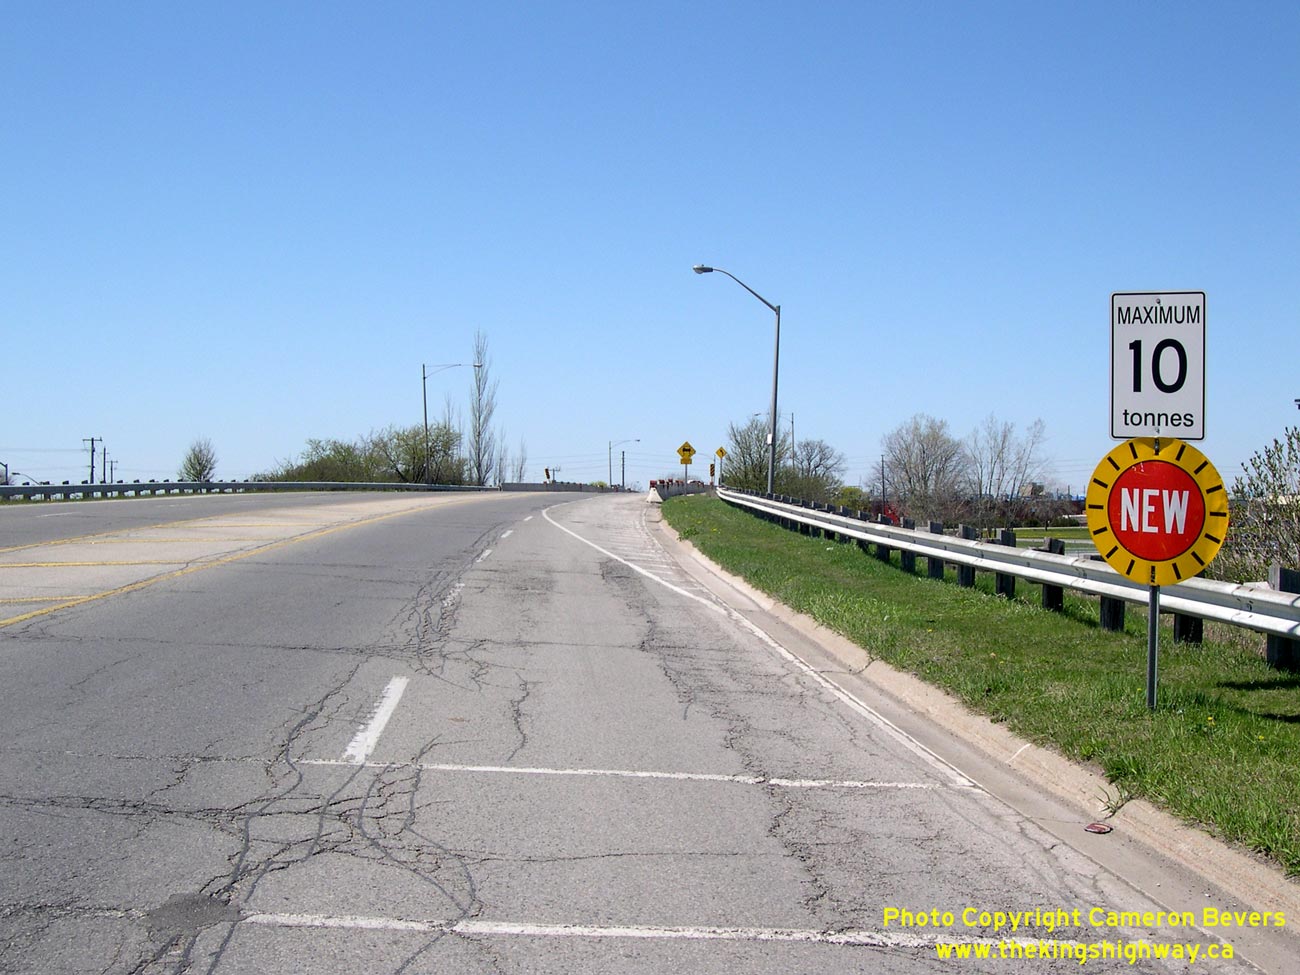

Left - A 10 Tonne maximum load limit was recently imposed on the St. Thomas Overhead, but was lifted after the bridge was reconstructed. See an
Enlarged Photo Here. (Photograph taken on April 28, 2006 - © Cameron Bevers) Right - Facing west along Hwy 3 towards New Sarum at the Nineteen Mile Creek Culvert. See an Enlarged Photo Here. (Photograph taken on June 24, 2007 - © Cameron Bevers) 

Left - Northern side of the Nineteen Mile Creek Culvert on Hwy 3 west of New Sarum. This large concrete arch structure was completed in 1939. See an
Enlarged Photo Here. (Photograph taken on June 24, 2007 - © Cameron Bevers) Right - Southern side of the Nineteen Mile Creek Culvert on Hwy 3 west of New Sarum. See an Enlarged Photo Here. (Photograph taken on June 24, 2007 - © Cameron Bevers) 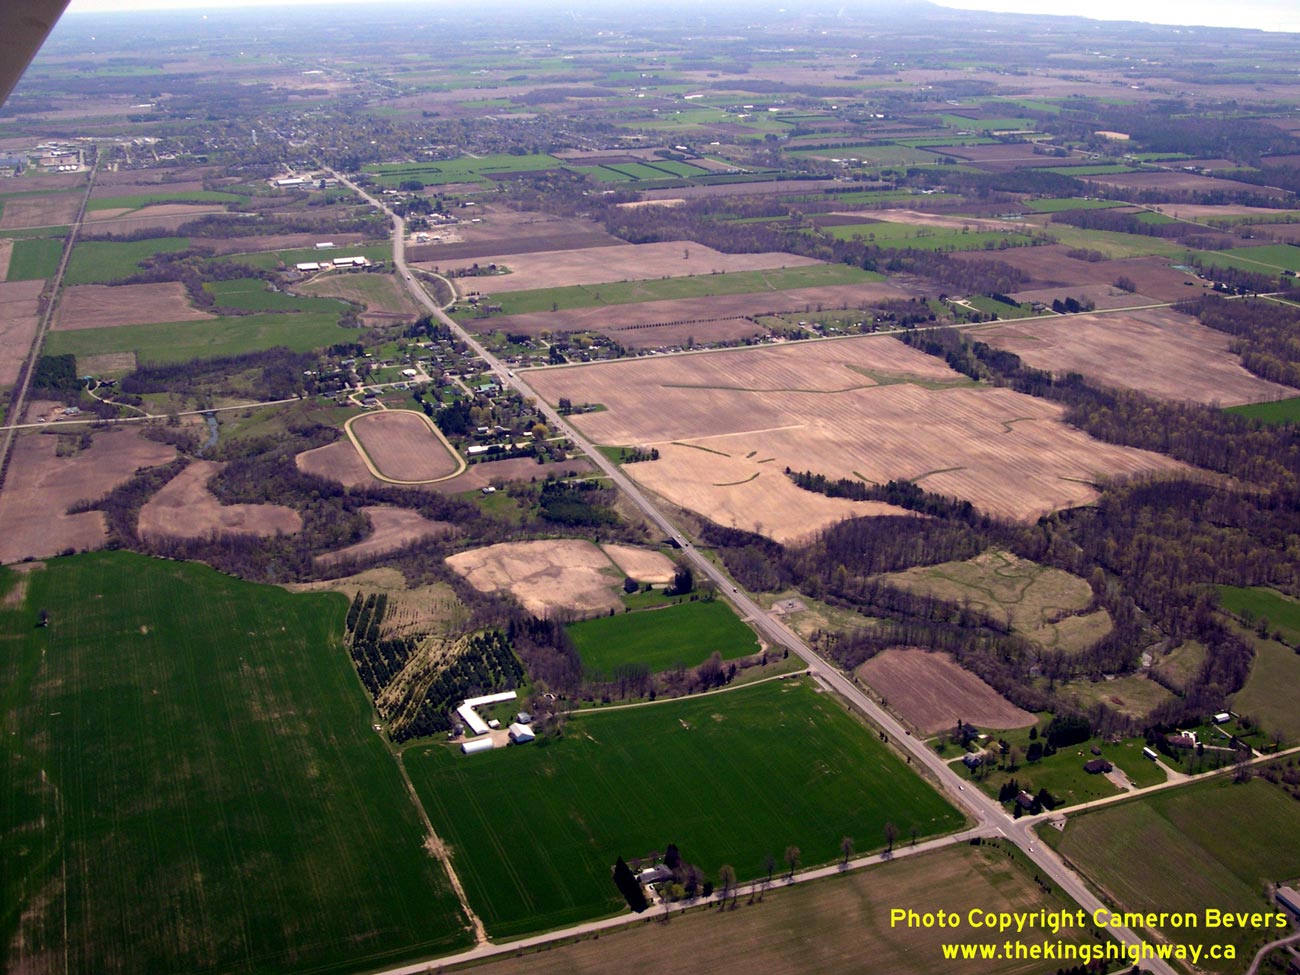

Left - Aerial view of Hwy 3 between St. Thomas and Aylmer, facing east. See an
Enlarged Photo Here. (Photograph taken on April 28, 2006 - © Cameron Bevers) Right - Facing east along Hwy 3 towards Catfish Creek from New Sarum. See an Enlarged Photo Here. (Photograph taken on March 26, 2005 - © Cameron Bevers) 

Left - Culvert inscription on Hwy 3 east of New Sarum - "ONTARIO PROVINCIAL HIGHWAY 1924". See an
Enlarged Photo Here. (Photograph taken on March 26, 2005 - © Cameron Bevers) Right - A large 1920s-era culvert still stands directly beside the current Hwy 3 east of New Sarum. See an Enlarged Photo Here. (Photograph taken on March 26, 2005 - © Cameron Bevers) 

Left - The old graded alignment of Hwy 3 is still clearly visible, despite being bypassed in the late 1930s. See an
Enlarged Photo Here. (Photograph taken on March 26, 2005 - © Cameron Bevers) Right - Old bridge abutments for the original Catfish Creek Bridge on Hwy 3. This concrete structure was completed by the Department of Public Highways of Ontario (DPHO) in 1924, but it was washed away during a severe flood in 1937. The highway was diverted a short distance to the south, where a new bridge was constructed. See an Enlarged Photo Here. (Photograph taken on March 26, 2005 - © Cameron Bevers) 

Left - Close-up of the old concrete bridge handrail at Catfish Creek. The remains of the old 1924 structure are now very overgrown. See an
Enlarged Photo Here. (Photograph taken on March 26, 2005 - © Cameron Bevers) Right - Northern side of the former bridge abutment at Catfish Creek on Hwy 3 near New Sarum. See an Enlarged Photo Here. (Photograph taken on March 26, 2005 - © Cameron Bevers) 

Left - The surviving Catfish Creek Bridge abutment has fared reasonably well against the elements, considering its age. It has been many decades since a
vehicle last crossed this bridge. See an Enlarged Photo Here. (Photograph taken on March 26, 2005 - © Cameron Bevers) Right - Northern side of the Catfish Creek Bridge at Orwell. This single span concrete rigid frame structure was completed in 1962. See an Enlarged Photo Here. (Photograph taken on March 26, 2005 - © Cameron Bevers) 

Left - Facing east along Hwy 3 towards the Catfish Creek Bridge at Orwell. See an
Enlarged Photo Here. (Photograph taken on March 26, 2005 - © Cameron Bevers) Right - Southern side of the Catfish Creek Bridge at Orwell. See an Enlarged Photo Here. (Photograph taken on March 26, 2005 - © Cameron Bevers) 

Left - Facing east along Hwy 3 towards Aylmer at the Catfish Creek Bridge at Orwell. See an
Enlarged Photo Here. (Photograph taken on March 26, 2005 - © Cameron Bevers) Right - Junction assembly at the Hwy 3 & Hwy 19 Junction in Tillsonburg. Note the "Hwy 19 Ends" sign, marking the present-day southern terminus of Hwy 19. Prior to the mass highway downloading of 1997-1998, Hwy 19 used to continue south from the Hwy 3 Junction in Tillsonburg to Port Burwell. Since Hwy 19 does not intersect with any other provincial highways south of Hwy 3, this 26 km section of Hwy 19 was deemed to serve only a local purpose and was transferred to the Counties of Oxford, Norfolk and Elgin. (Photograph taken on May 10, 2012 - © Cameron Bevers) 

Left - Facing north along Hwy 19 approaching the Hwy 3 Junction in Tillsonburg. See an
Enlarged Photo Here. (Photograph taken on May 10, 2012 - © Cameron Bevers) Right - Junction assembly approaching the Hwy 3 Junction on Northbound Hwy 19 in Tillsonburg. The route of Hwy 3 was relocated onto a new alignment in the 1970s. Prior to that time, Hwy 3 & Hwy 19 met at an offset highway junction in Downtown Tillsonburg. As a result of the new bypass construction un the 1970s, Downtown Tillsonburg actually lies a short distance to the north of the present-day Hwy 3 & Hwy 19 Junction. (Photograph taken on May 10, 2012 - © Cameron Bevers) 

Left - Facing south along Hwy 19 towards Port Burwell from the Hwy 3 Junction in Tillsonburg. See an
Enlarged Photo Here. (Photograph taken on May 10, 2012 - © Cameron Bevers) Right - Approaching the Hwy 3 Junction at Tillsonburg on Northbound Hwy 19. (Photograph taken on May 10, 2012 - © Cameron Bevers) 

Left - Facing east along Hwy 3 at the Hwy 19 Junction in Tillsonburg. This intersection in rather unusual because it does not have separate left-turn lanes. The
Ministry of Transportation is considering the construction of a modern roundabout to replace this older signalized intersection. The new roundabout is expected to
increase traffic safety and reduce overall delays for motorists. See an
Enlarged Photo Here. (Photograph taken on May 10, 2012 - © Cameron Bevers) Right - Approaching the Hwy 19 Junction on Eastbound Hwy 3 in Tillsonburg. The section of Hwy 19 leading south from Tillsonburg is also known as Vienna Road. (Photograph taken on May 10, 2012 - © Cameron Bevers) 

Left - Junction assembly and destination guide signs at the Hwy 3 & Hwy 19 Junction in Tillsonburg. Up until the late 1990s, several King's Highways
intersected Hwy 3 between St. Thomas and Simcoe (Hwy 4, Hwy 74, Hwy 73, Hwy 19, Hwy 59 and Hwy 24). Today, only Hwy 4, Hwy 19 and Hwy 24 remain under provincial
jurisdiction. The rest of these highways were transferred to municipalities in 1997-1998, along with the sections of Hwy 4, Hwy 19 and Hwy 24 lying south of Hwy 3. (Photograph taken on May 10, 2012 - © Cameron Bevers) Right - Facing east along Hwy 3 towards Simcoe from the Hwy 19 Junction in Tillsonburg. Note the wide right-of-way set aside along the Tillsonburg Bypass. Clearly, it was anticipated that this route would become a four-lane divided highway at some point in the future. See an Enlarged Photo Here. (Photograph taken on May 10, 2012 - © Cameron Bevers) 

Left - Facing south along Hwy 19 towards the Hwy 3 Junction in Tillsonburg. See an
Enlarged Photo Here. (Photograph taken on May 10, 2012 - © Cameron Bevers) Right - Facing north along Hwy 19 towards Tillsonburg from the Hwy 3 Junction. See an Enlarged Photo Here. (Photograph taken on May 10, 2012 - © Cameron Bevers)
Continue on to King's Highway 3 Present Day Photos: Tillsonburg to Cayuga
|
|---|
Links to Adjacent King's Highway Photograph Pages:
Back to King's Highway 2 Photos /
King's Highway 3 History /
On to King's Highway 4 Photos
Ontario Highway History - Main Menu / Back to List of Highways Website contents, photos & text © 2002-2026, Cameron
Bevers (Webmaster) - All Rights Reserved / Contact Me
|
|---|