
| 
| |
|
|
This page contains present day photos (Year 2000 to date) of Ontario's King's Highway 403, arranged by location from Woodstock
easterly to Hamilton. All photographs displayed on this page were taken by the Webmaster (Cameron Bevers), unless specifically noted otherwise. Click on any
thumbnail to see a larger image!
Please note that all photographs displayed on this
website are protected by copyright. These photographs must not be reproduced, published,
electronically stored or copied, distributed, or posted onto other websites without
my written permission. If you want to use photos from this website, please
email me first for permission. Thank-you!
|
|---|
|
Page 4: Present Day King's Highway 403 Photographs (Woodstock to Hamilton)


Left - Aerial view of Hwy 401 in Woodstock, facing east towards the Hwy 59 Interchange. The Hwy 403 Interchange can also be seen in the upper
left corner of this photo, marking the western terminus of Hwy 403. See an Enlarged Photo here. (Photograph taken on April 28, 2006 - © Cameron Bevers) Right - Aerial view of the Hwy 401 and Hwy 403 Interchange in Woodstock, facing east. From this point, eastbound traffic heading towards Toronto can either use Hwy 401 via Kitchener-Waterloo or Hwy 403 via Hamilton. The two freeways join together again in Mississauga, immediately west of Toronto's Pearson Airport. The route offered by Hwy 401 is a slightly shorter distance than the route offered by Hwy 403. See an Enlarged Photo here. (Photograph taken on April 28, 2006 - © Cameron Bevers) 

Left - Aerial view of the Hwy 401 and Hwy 403 Interchange in Woodstock, facing south See an
Enlarged Photo here. (Photograph taken on April 28, 2006 - © Cameron Bevers) Right - Aerial view of the Hwy 401 and Hwy 403 Interchange in Woodstock, facing west. At this interchange, access is only provided from Westbound Hwy 403 to Westbound 401 and from Eastbound Hwy 401 to Eastbound Hwy 403. Motorists who wish to proceed in the opposing directions can utilize the adjacent Hwy 59 Interchange to turn around. See an Enlarged Photo here. (Photograph taken on April 28, 2006 - © Cameron Bevers) 
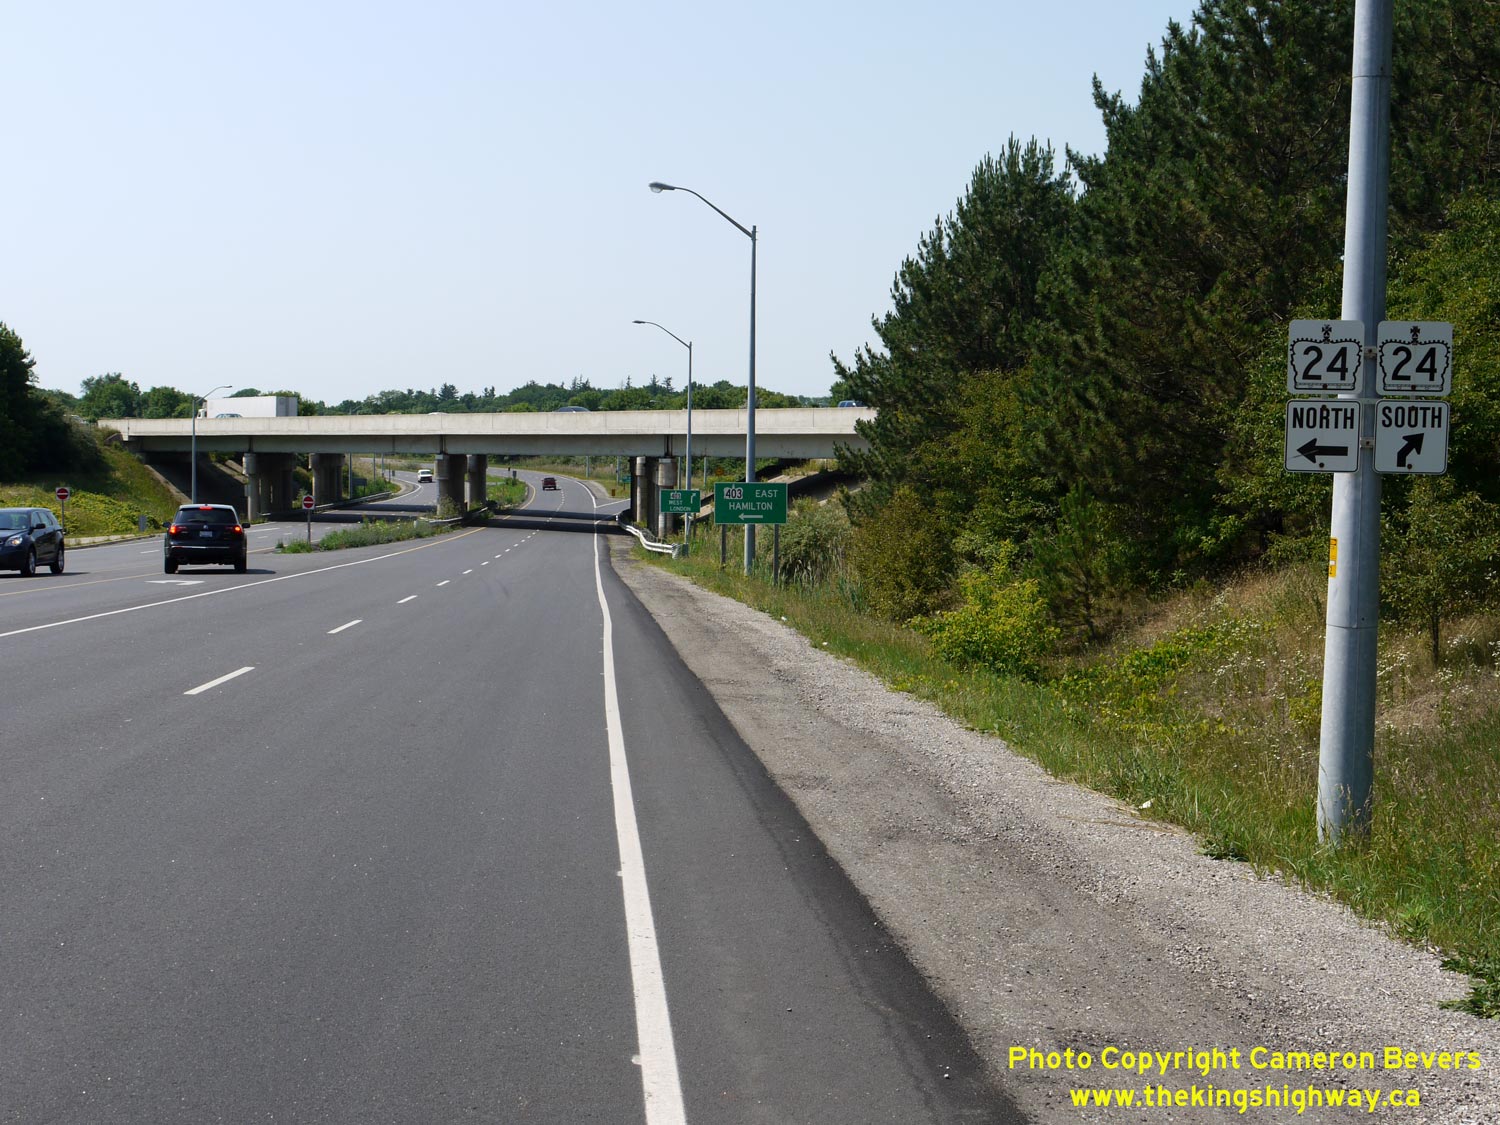
Left - Dual King's Highway route markers on eastbound Hwy 403 & Hwy 24 at Oak Park Road in Brantford. These two highways share a 9 km overlapped route
between Paris and Brantford. See an Enlarged Photo here. (Photograph taken on June 28, 2012 - © Cameron Bevers) Right - Western side of the Oak Park Road Overpass on Hwy 403 & Hwy 24 in Brantford. See an Enlarged Photo here. (Photograph taken on June 28, 2012 - © Cameron Bevers) 

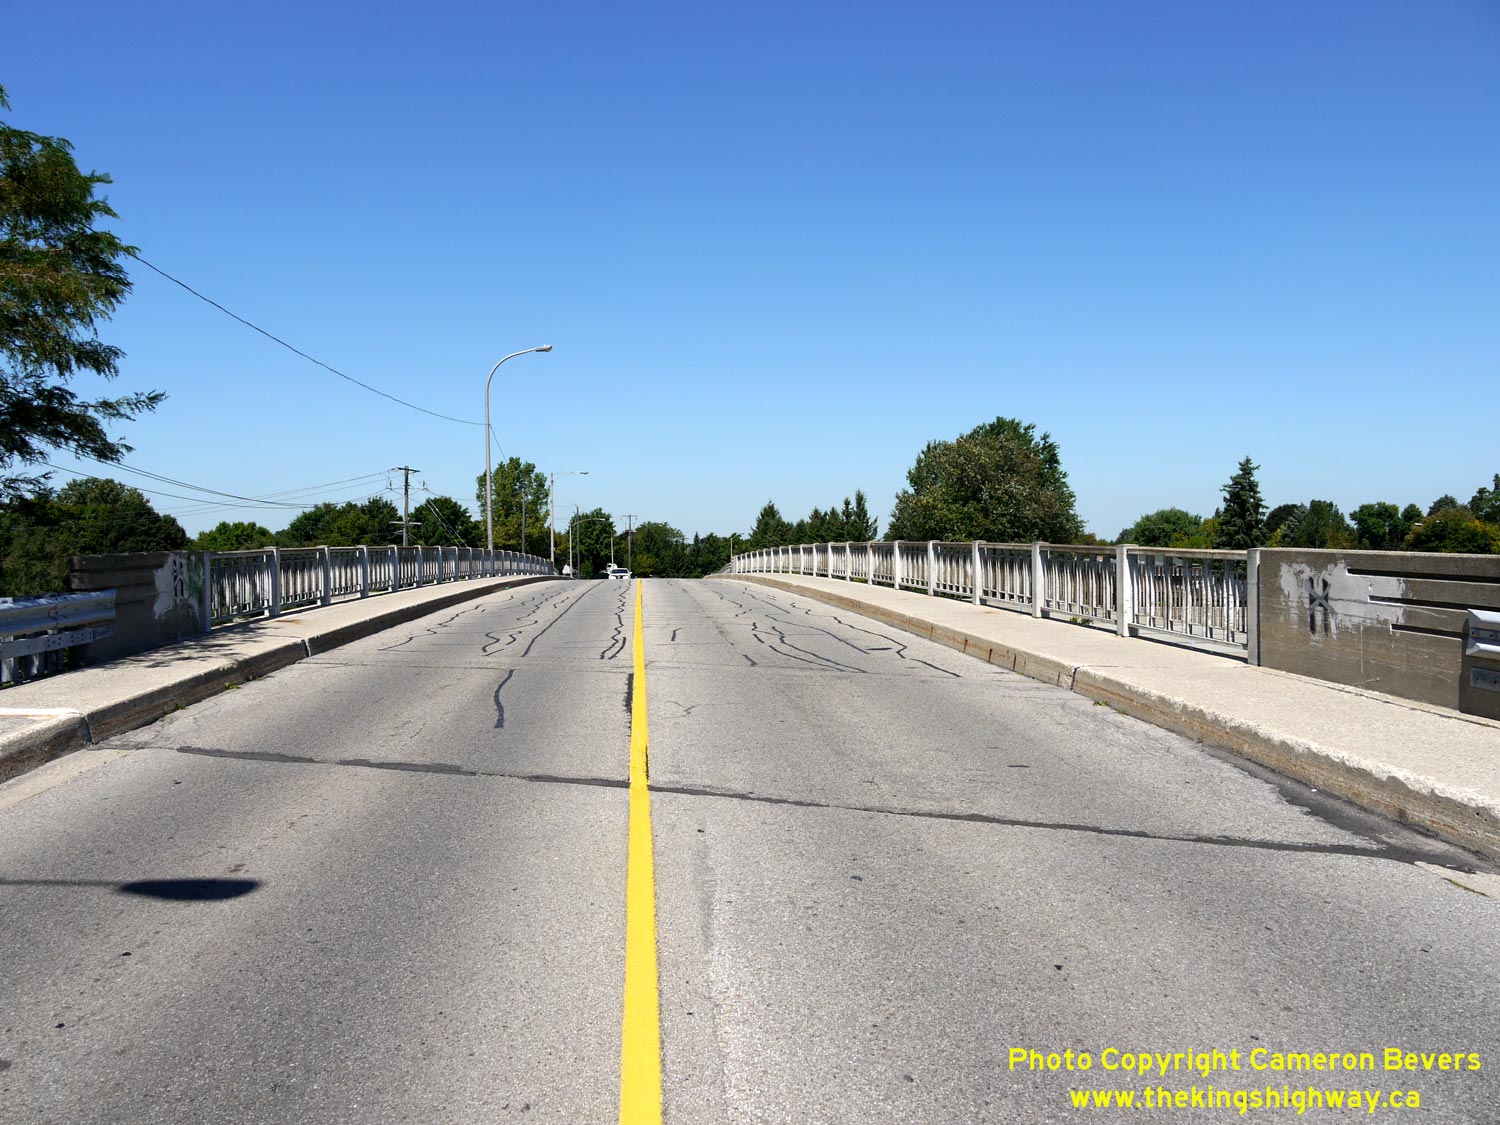
Left - Facing south across the Oak Park Road Overpass on Hwy 403 & Hwy 24 in Brantford. See an
Enlarged Photo here. (Photograph taken on June 28, 2012 - © Cameron Bevers) Right - Structure identification number and date stamp (1976) on the Oak Park Road Overpass in Brantford. See an Enlarged Photo here. (Photograph taken on June 28, 2012 - © Cameron Bevers) 

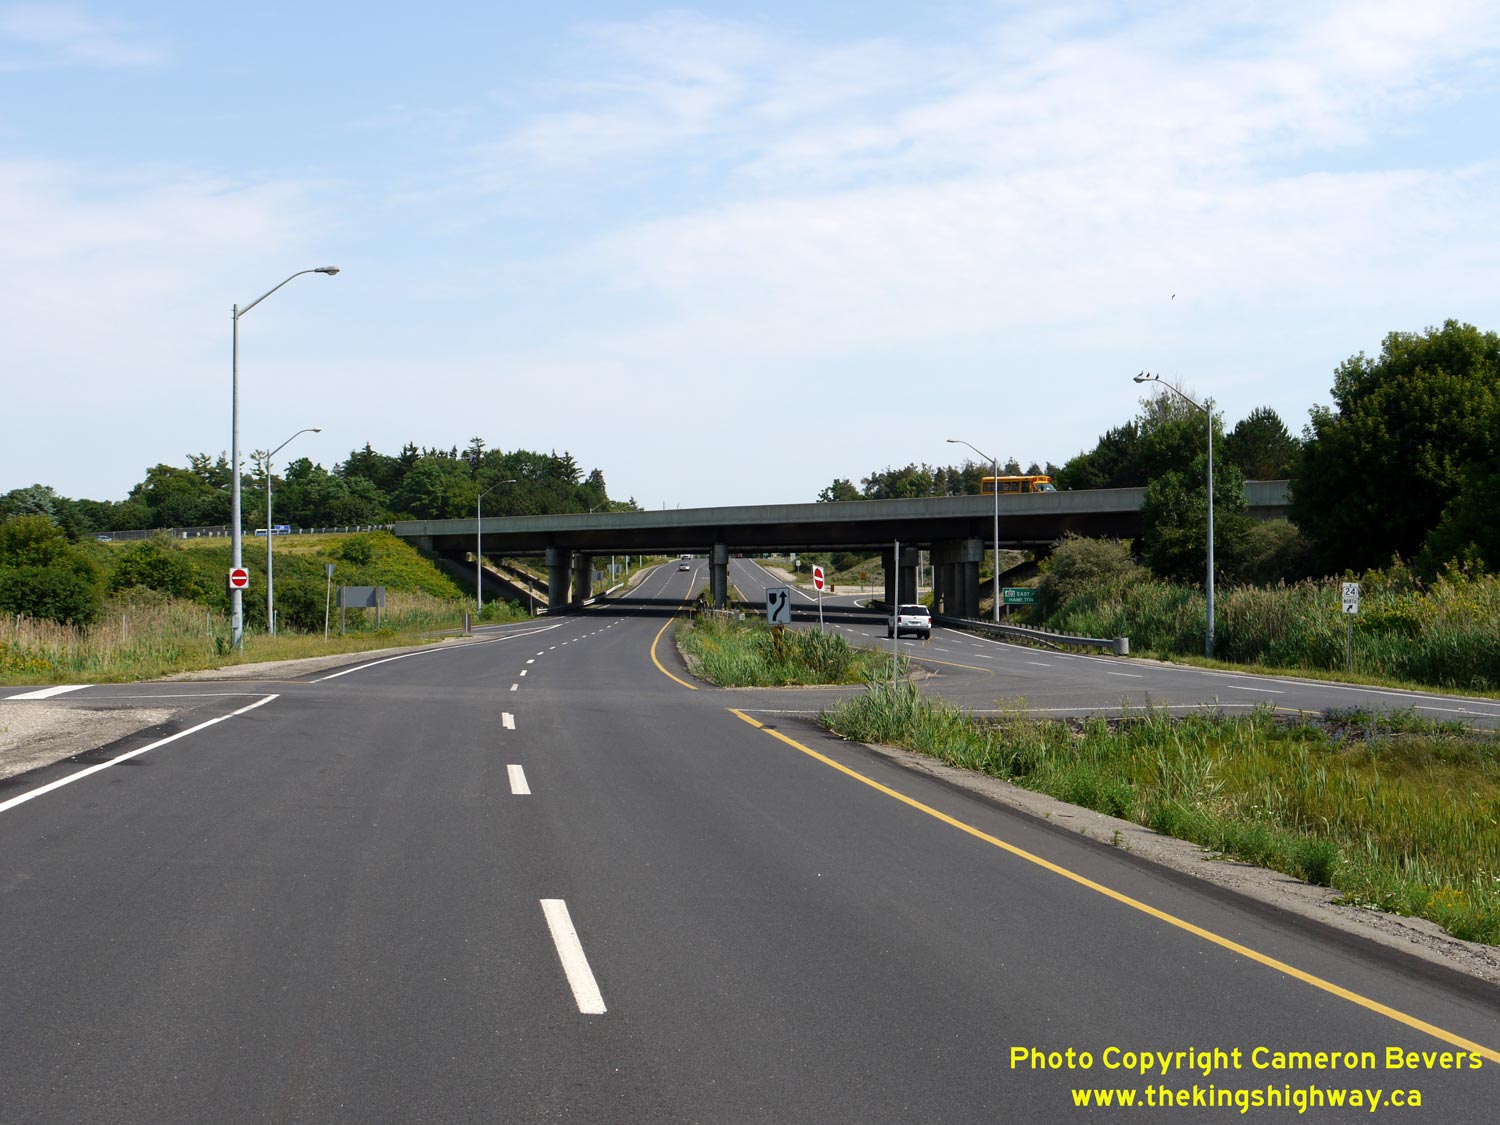
Left - Facing west along Hwy 403 & Hwy 24 towards Paris from the Oak Park Road Overpass in Brantford. See an
Enlarged Photo here. (Photograph taken on June 28, 2012 - © Cameron Bevers) Right - View of Hwy 403 & Hwy 24 in Brantford, facing east from the Oak Park Road Overpass. The interchange ramps at the Oak Park Road Interchange are in a diamond configuration. Diamond interchanges are relatively uncommon in Ontario. This is the only full interchange of this design found on Hwy 403, although a partial diamond interchange was constructed at nearby King George Road (Hwy 24 North) during the 1960s. See an Enlarged Photo here. (Photograph taken on June 28, 2012 - © Cameron Bevers) 

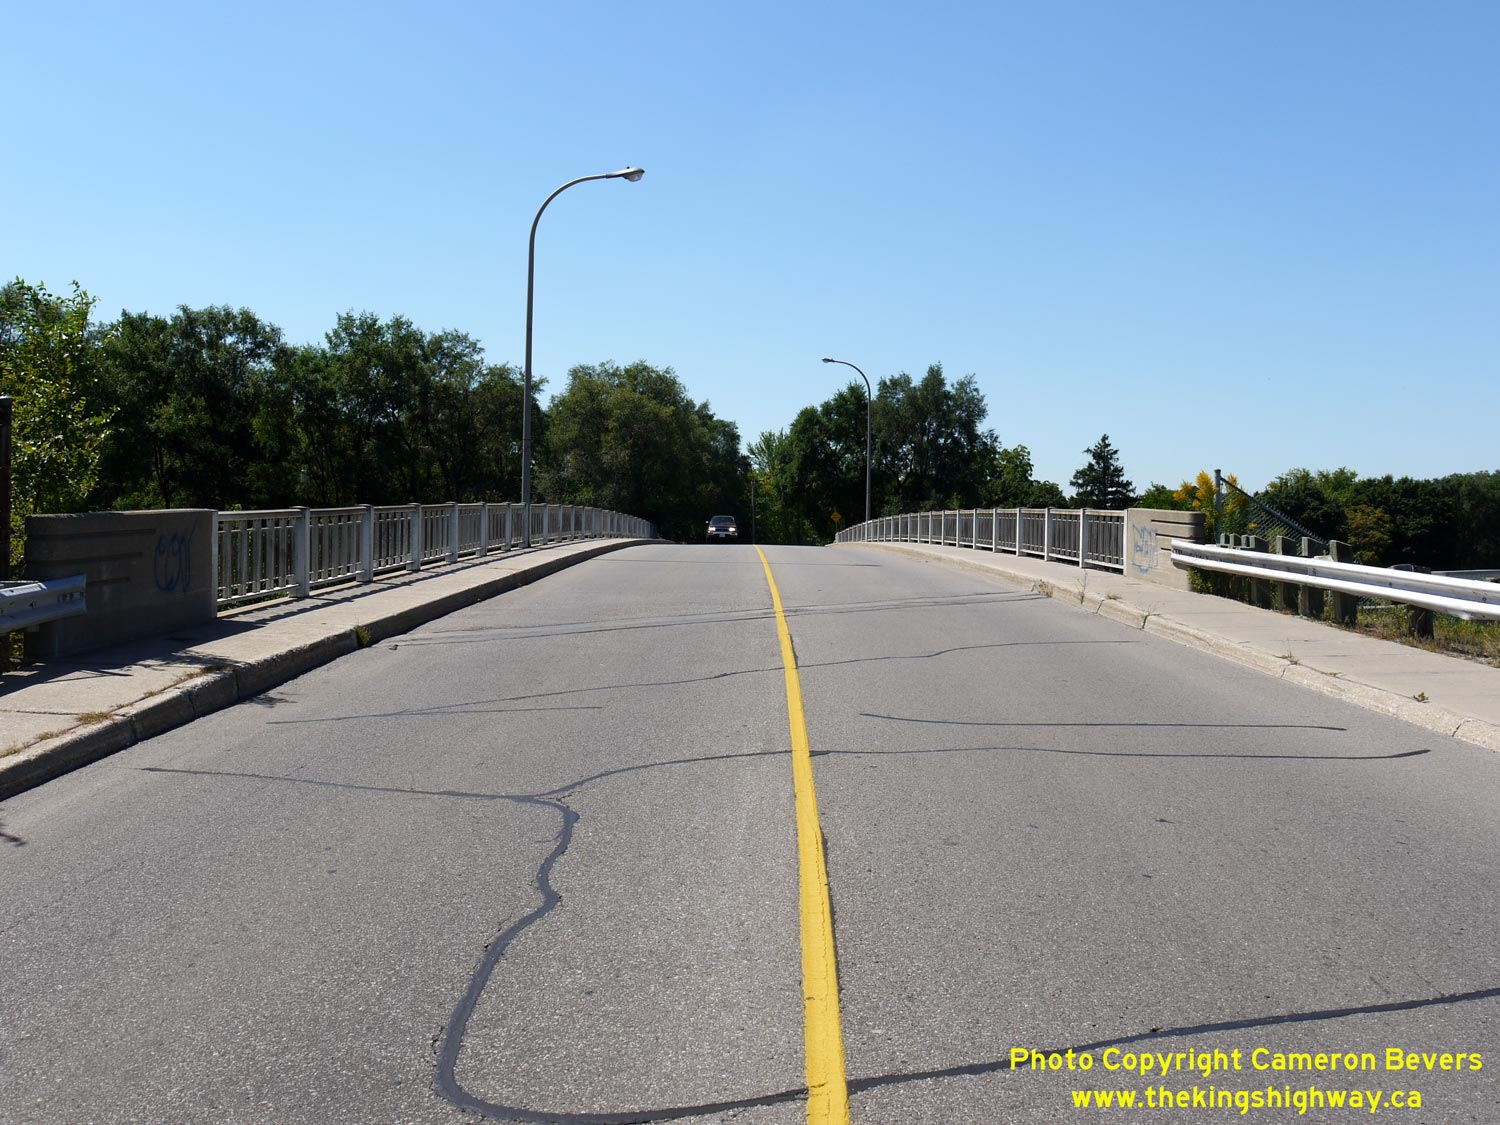
Left - Facing north across the Oak Park Road Overpass on Hwy 403 & Hwy 24 in Brantford. See an
Enlarged Photo here. (Photograph taken on June 28, 2012 - © Cameron Bevers) Right - Eastern side of the Oak Park Road Overpass on Hwy 403 & Hwy 24. This two-span post-tensioned concrete structure was completed in 1976. See an Enlarged Photo here. (Photograph taken on June 28, 2012 - © Cameron Bevers) 
Above - Older green guide sign on Hwy 2 indicating the upcoming Brantford Bypass (Hwy 403) Interchange. See an
Enlarged Photo here. (Photograph taken in February, 2003 - © Cameron Bevers) 

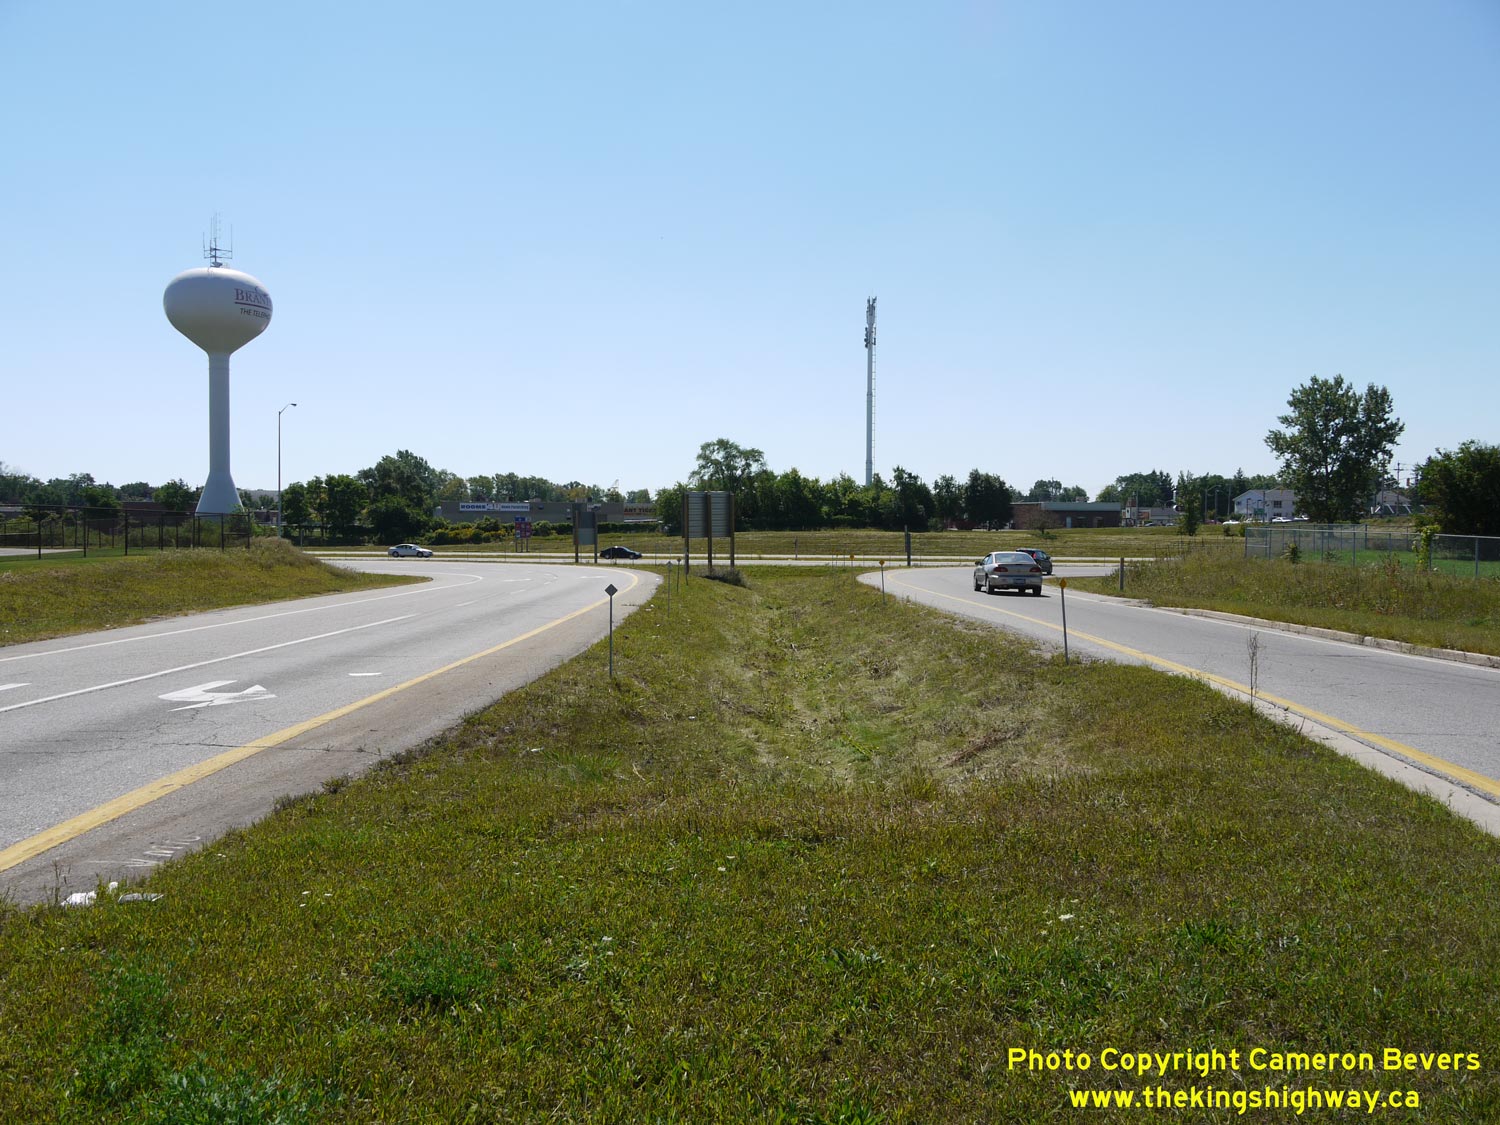
Left - Older green guide sign on Hwy 2 near Brantford directing through traffic to use Hwy 403 to Hamilton. See an
Enlarged Photo here. (Photograph taken on August 13, 2006 - © Cameron Bevers) Right - Facing north along Paris Road (Hwy 2) towards the Hwy 403 & Hwy 24 Interchange in Brantford. Hwy 2 briefly widens into a four lane divided highway through the interchange. See an Enlarged Photo here. (Photograph taken on June 28, 2012 - © Cameron Bevers) 

Left - Signs for Hwy 24 at the Paris Road (Hwy 2) Interchange on Hwy 403 & Hwy 24. The route of Hwy 24 runs concurrently with Hwy 403 between Paris and
Brantford. See an Enlarged Photo here. (Photograph taken on June 28, 2012 - © Cameron Bevers) Right - Facing south along Paris Road (Hwy 2) from the Hwy 403 & Hwy 24 Interchange. The sign at right marks the distance to Downtown Brantford from the Brantford Bypass. Signs like this one are rarely seen in urban areas. Typically, these signs are installed on King's Highways as they depart from an urban area. See an Enlarged Photo here. (Photograph taken on June 28, 2012 - © Cameron Bevers) 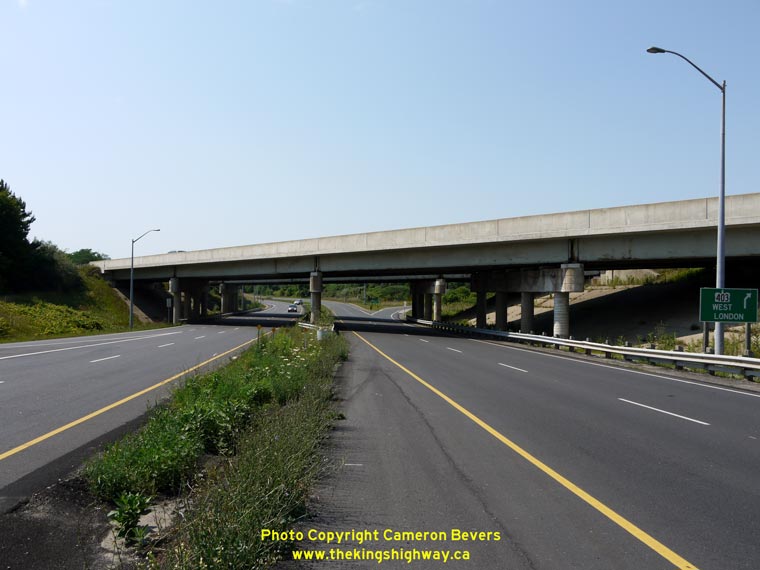

Left - Dual underpass structures at the Hwy 2 Interchange on Hwy 403 & Hwy 24 in Brantford. These twin four-span steel girder structures were both
completed in 1965. See an Enlarged Photo here. (Photograph taken on June 28, 2012 - © Cameron Bevers) Right - Facing south along Hwy 2 towards the Hwy 403 & Hwy 24 Interchange in Brantford. Up until the mid-1960s, all through traffic between Woodstock and Hamilton had to pass through Downtown Brantford. The completion of the Brantford Bypass between this point and Cainsville in 1966 greatly relieved traffic congestion through Brantford. See an Enlarged Photo here. (Photograph taken on June 28, 2012 - © Cameron Bevers) 

Left - Facing north along a divided section of Hwy 2 at the Hwy 403 & Hwy 24 Interchange in Brantford. Although this route is fairly quiet today, it once
carried the majority of the through traffic between Hamilton and Woodstock. The completion of Hwy 403 to Rest Acres Road (Hwy 24 South) in 1978 bypassed the
Brantford-Paris section of Hwy 2 seen here. See an Enlarged Photo here. (Photograph taken on June 28, 2012 - © Cameron Bevers) Right - Facing south across the Ewing Drive Overpass on Hwy 403 & Hwy 24 in Brantford. See an Enlarged Photo here. (Photograph taken on August 29, 2010 - © Cameron Bevers) 

Left - View of the Brantford Bypass, facing west from the Ewing Drive Overpass. When the Brantford Bypass was first opened to traffic in 1966, the highway came
to an end at the adjacent Paris Road (Hwy 2) Interchange. All westbound traffic on Hwy 403 was forced to exit the freeway at Hwy 2 up until 1978, when Hwy 403 was
extended west from Hwy 2 to Rest Acres Road in Paris. See an Enlarged Photo here. (Photograph taken on August 29, 2010 - © Cameron Bevers) Right - Facing east along Hwy 403 & Hwy 24 from the Ewing Drive Overpass in Brantford. The advance exit sign for Hwy 24 North (King George Road) can be seen at right. See an Enlarged Photo here. (Photograph taken on August 29, 2010 - © Cameron Bevers) 

Left - Ewing Drive Overpass on Hwy 403 & Hwy 24, facing north. Structure completed in 1965. See an
Enlarged Photo here. (Photograph taken on August 29, 2010 - © Cameron Bevers) Right - Facing north across the Toll Gate Road Overpass on Hwy 403 & Hwy 24 in Brantford. See an Enlarged Photo here. (Photograph taken on August 29, 2010 - © Cameron Bevers) 
Left - Facing west along the Brantford Bypass from the Toll Gate Road Overpass. This freeway was originally constructed in the 1960s with an open depressed
grass median. A steel beam guide rail median barrier was installed along the freeway through Brantford in 2011-2012, shortly after this photo was taken. See
an Enlarged Photo here. (Photograph taken on August 29, 2010 - © Cameron Bevers) Right - Facing east along Hwy 403 & Hwy 24 towards the Hwy 24 North (King George Road) Interchange from the Toll Gate Road Overpass in Brantford. See an Enlarged Photo here. (Photograph taken on August 29, 2010 - © Cameron Bevers) 

Left - Facing south across the Toll Gate Road Overpass on Hwy 403 & Hwy 24. Structure completed in 1965. See
an Enlarged Photo here. (Photograph taken on August 29, 2010 - © Cameron Bevers) Right - Eastern side of the Toll Gate Road Overpass on Hwy 403 & Hwy 24. See an Enlarged Photo here. (Photograph taken on August 29, 2010 - © Cameron Bevers) 

Left - Western side of the Hwy 24 North (King George Road) Overpass on Hwy 403 in Brantford. See
an Enlarged Photo here. (Photograph taken on August 29, 2010 - © Cameron Bevers) Right - Sign marking the route to Hwy 24 from the north ramp terminal at the King George Road Interchange on Hwy 403 in Brantford. See an Enlarged Photo here. (Photograph taken on August 29, 2010 - © Cameron Bevers) 

Left - Ramps to and from westbound Hwy 403 from Fairview Drive in Brantford. Due to space constraints, the north ramp terminal at the Hwy 24 (King George Road)
Interchange ties into Fairview Drive. Traffic must use a short section of Fairview Drive in order to access Hwy 24 North from the westbound lanes of Hwy 403. See an
Enlarged Photo here. (Photograph taken on August 29, 2010 - © Cameron Bevers) Right - Facing west along Fairview Drive towards King George Road from the Hwy 403 Interchange in Brantford. This short section of Fairview Drive forms a link between the westbound Hwy 403 ramps and Hwy 24 North (King George Road). See an Enlarged Photo here. (Photograph taken on August 29, 2010 - © Cameron Bevers) 

Left - Signs marking the entrance ramp to westbound Hwy 403 and southbound Hwy 24 on Fairview Drive. See an
Enlarged Photo here. (Photograph taken on August 29, 2010 - © Cameron Bevers) Right - Facing west along Fairview Drive approaching King George Road (Hwy 24 North) in Brantford. Here, traffic coming from westbound Hwy 403 must turn right in order to proceed northbound on Hwy 24 towards Cambridge. See an Enlarged Photo here. (Photograph taken on August 29, 2010 - © Cameron Bevers) 

Left - Signs marking the turn-off to southbound Hwy 24 and westbound Hwy 403 on northbound King George Road at Fairview Drive. Traffic must follow Fairview
Drive for a short distance east of King George Road in order to access the freeway. See an
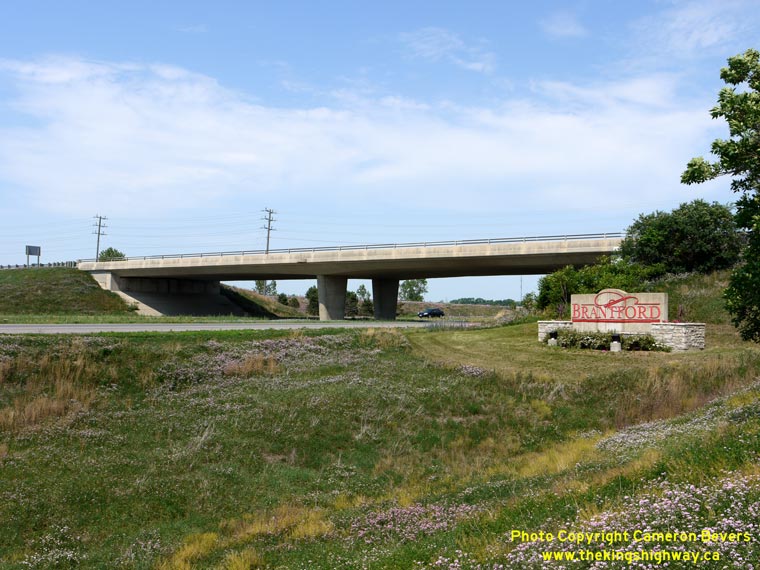
Enlarged Photo here. (Photograph taken on August 29, 2010 - © Cameron Bevers) Right - Facing east along the Brantford Bypass (Hwy 403) from the Hwy 24 (King George Road) Overpass in Brantford. The Brantford Bypass was completed and officially opened to traffic on October 31, 1966. The new highway provided immediate traffic relief to Brantford, which had previously been burdened by heavy through traffic travelling between Hamilton and Woodstock. Approximately 5,000 vehicles per day used the new Brantford Bypass during its first year of operation. Today, traffic on the Brantford Bypass now exceeds 30,000 vehicles per day. See an Enlarged Photo here. (Photograph taken on August 29, 2010 - © Cameron Bevers) 

Left - Facing north across the Hwy 24 (King George Road) Overpass on Hwy 403 in Brantford. See an
Enlarged Photo here. (Photograph taken on August 29, 2010 - © Cameron Bevers) Right - Structure identification number and date stamp (1965) on the Hwy 24 (King George Road) Overpass in Brantford. See an Enlarged Photo here. (Photograph taken on August 29, 2010 - © Cameron Bevers) 

Left - Ramps at the Hwy 403 & Hwy 24 Interchange, connecting to the north ramp terminal at Fairview Drive in Brantford. See an
Enlarged Photo here. (Photograph taken on August 29, 2010 - © Cameron Bevers) Right - Eastern side of the Hwy 24 (King George Road) Overpass on Hwy 403 in Brantford. This four-span prestressed concrete girder structure was completed in 1965. See an Enlarged Photo here. (Photograph taken on August 29, 2010 - © Cameron Bevers) 

Left - An old green fingerboard sign marks the distance to Cambridge via Hwy 24 at the Hwy 403 Interchange in Brantford. See an
Enlarged Photo here. (Photograph taken on August 29, 2010 - © Cameron Bevers) Right - South ramp terminal at the Hwy 403 & Hwy 24 Interchange in Brantford. The ramps in the south half of the Hwy 24 Interchange are in a diamond configuration. See an Enlarged Photo here. (Photograph taken on August 29, 2010 - © Cameron Bevers) 

Left - Facing south along Hwy 24 (King George Road) from the Hwy 403 Interchange in Brantford. Up until 1997, Hwy 24 continued south from the Hwy 403
Interchange through Downtown Brantford. As a result of the mass provincial highway downloading which took place in 1997-1998, the old route of Hwy 24 through Downtown
Brantford was decommissioned. In 1997, Hwy 24 was rerouted to Rest Acres Road between Burford and Paris. The new Hwy 24 route established a more efficient and direct
connection between Hwy 403 and Hwy 24 South to Simcoe. See an Enlarged Photo here. (Photograph taken on August 29, 2010 - © Cameron Bevers) Right - Facing west along Hwy 403 & Hwy 24 from the King George Road Overpass in Brantford. See an Enlarged Photo here. (Photograph taken on August 29, 2010 - © Cameron Bevers) 

Left - View of King George Road (Hwy 24) from the Hwy 403 Interchange, facing north towards Fairview Drive. See an
Enlarged Photo here. (Photograph taken on August 29, 2010 - © Cameron Bevers) Right - Facing south across the Hwy 24 (King George Road) Overpass on Hwy 403 in Brantford. See an Enlarged Photo here. (Photograph taken on August 29, 2010 - © Cameron Bevers) 

Left - Facing south along Hwy 24 (King George Road) approaching Fairview Drive and the Hwy 403 Interchange in Brantford. See an
Enlarged Photo here. (Photograph taken on August 29, 2010 - © Cameron Bevers) Right - Former alignment of Hwy 403 east of Brantford. This undivided four-lane highway used to be a portion of Hwy 403 until 1997, when the final stage of Hwy 403 between Ancaster and Brantford was opened to traffic. Old Hwy 403 was later turned over to the City of Brantford. It is now known as Garden Avenue. See an Enlarged Photo here. (Photograph taken on August 13, 2006 - © Cameron Bevers) 

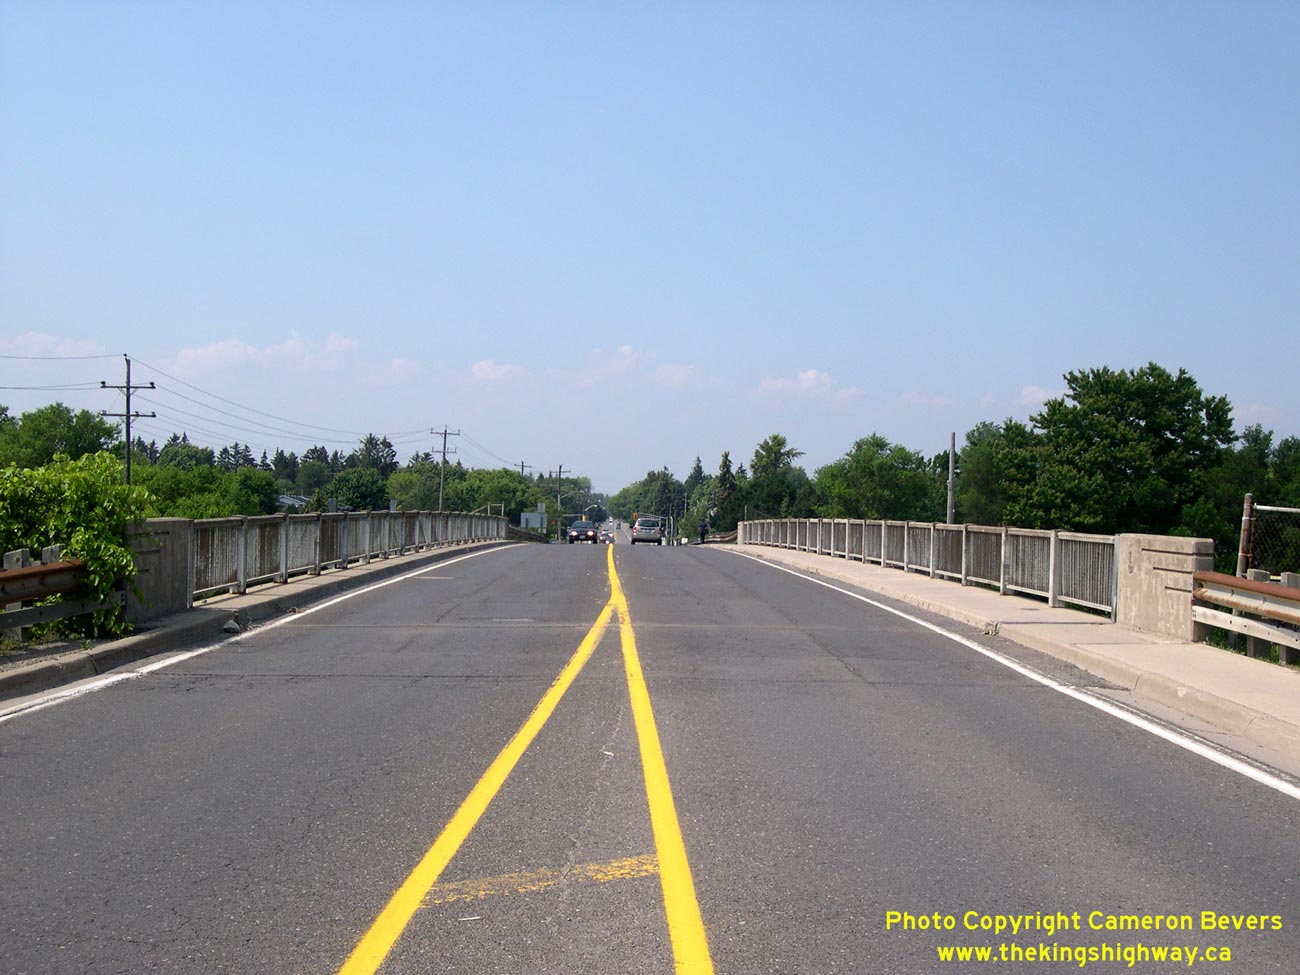
Left - Facing north across the Fiddlers Green Road Overpass on Hwy 403 in Ancaster. See an
Enlarged Photo here. (Photograph taken on June 24, 2006 - © Cameron Bevers) Right - Facing south across the Fiddlers Green Road Overpass on Hwy 403 in Ancaster. See an Enlarged Photo here. (Photograph taken on June 24, 2006 - © Cameron Bevers) 

Left - Western side of the Fiddlers Green Road Overpass on Hwy 403 in Ancaster. Structure completed in 1967. See an
Enlarged Photo here. (Photograph taken on June 24, 2006 - © Cameron Bevers) Right - Structure identification number and date stamp (1967) on the Fiddlers Green Road Overpass on Hwy 403. See an Enlarged Photo here. (Photograph taken on June 24, 2006 - © Cameron Bevers) 

Left - Older green guide sign for Hwy 403 Hamilton in Ancaster. See an
Enlarged Photo here. (Photograph taken on June 24, 2006 - © Cameron Bevers) Right - Older green guide sign for Hwy 403 Hamilton in Ancaster. See an Enlarged Photo here. (Photograph taken on June 24, 2006 - © Cameron Bevers) 

Left - Facing east along Hwy 403 from the Fiddlers Green Road Overpass in Ancaster. Note the wide gravel area along the right side of the highway,
which used to be a lane taper for the on-ramp from Fiddlers Green Road. See an
Enlarged Photo here. (Photograph taken on June 24, 2006 - © Cameron Bevers) Right - Site of the former on-ramp from Fiddlers Green Road. During the 1990s, the on-ramp was realigned so that it merged with the freeway before the overpass. This was done to allow construction to proceed on the adjacent Hwy 6 South Interchange, which can be seen in the distance. See an Enlarged Photo here. (Photograph taken on June 24, 2006 - © Cameron Bevers) 

Left - Close-up of the abandoned on-ramp from Fiddlers Green Road. The relocation of this ramp was required to allow adequate merging space between
the Fiddlers Green Road and Hwy 6 South Interchanges. See an
Enlarged Photo here. (Photograph taken on June 24, 2006 - © Cameron Bevers) Right - Facing west along Hwy 403 towards Brantford from the Fiddlers Green Road Overpass. See an Enlarged Photo here. (Photograph taken on June 24, 2006 - © Cameron Bevers) 

Left - Facing east along Hwy 403 from the Hwy 6 South Interchange in Ancaster. See an
Enlarged Photo here. (Photograph taken on June 24, 2006 - © Cameron Bevers) Right - Facing south across the Southcote Road Overpass on Hwy 403 in Ancaster. See an Enlarged Photo here. (Photograph taken on June 24, 2006 - © Cameron Bevers) 

Left - Facing east along Hwy 403 from the Southcote Road Overpass in Ancaster. Since this photo was taken, a continuous high-mast lighting system was installed
along this section of Hwy 403. This once-rural freeway has suddenly become very urbanized, due to the rapid growth of Ancaster since the 1990s. See an
Enlarged Photo here. (Photograph taken on June 24, 2006 - © Cameron Bevers) Right - Facing west along Hwy 403 towards Brantford from the Southcote Road Overpass in Ancaster. See an Enlarged Photo here. (Photograph taken on June 24, 2006 - © Cameron Bevers) 

Left - Facing north across the Southcote Road Overpass on Hwy 403 in Ancaster. Structure completed in 1967. See an
Enlarged Photo here. (Photograph taken on June 24, 2006 - © Cameron Bevers) Right - Close-up of the parapet design of the Southcote Road Overpass. This simplified steel handrail design was used on many Ontario bridges built in the late 1960s. See an Enlarged Photo here. (Photograph taken on June 24, 2006 - © Cameron Bevers) 

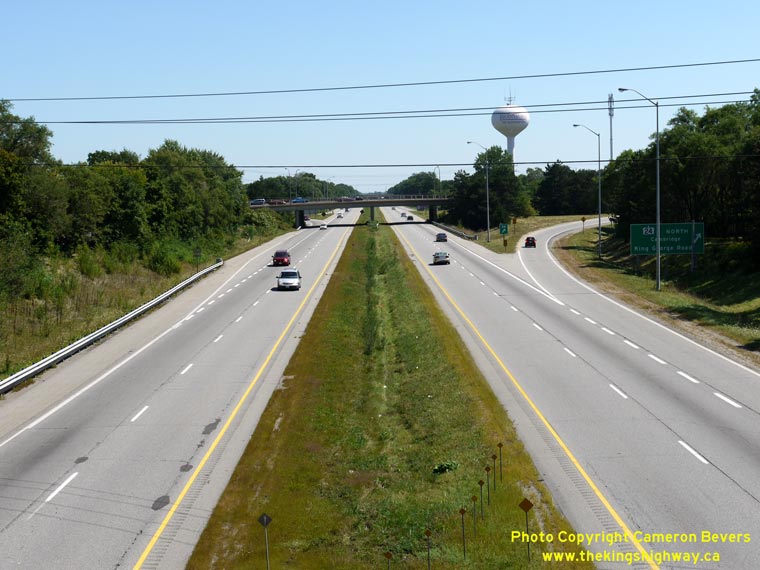
Left - Golf Links Road Overpass on Hwy 403 in Ancaster. Structure completed in 1967. See an
Enlarged Photo here. (Photograph taken on June 24, 2006 - © Cameron Bevers) Right - Facing east along Hwy 403 towards the Lincoln Alexander Parkway Interchange from the Golf Links Road Overpass. The existing high-mast lighting system in place at the Hwy 403 and Lincoln Alexander Parkway Interchange was recently extended westerly to the Hwy 6 South Interchange. See an Enlarged Photo here. (Photograph taken on June 24, 2006 - © Cameron Bevers) 

Left - Facing west along Hwy 403 towards Brantford from the Golf Links Road Overpass, prior to the installation of the high-mast lighting system. See an
Enlarged Photo here. (Photograph taken on June 24, 2006 - © Cameron Bevers) Right - Facing east across the Golf Links Road Overpass. This structure is slightly curved to minimize the length of the skewed crossing over Hwy 403. See an Enlarged Photo here. (Photograph taken on June 24, 2006 - © Cameron Bevers) 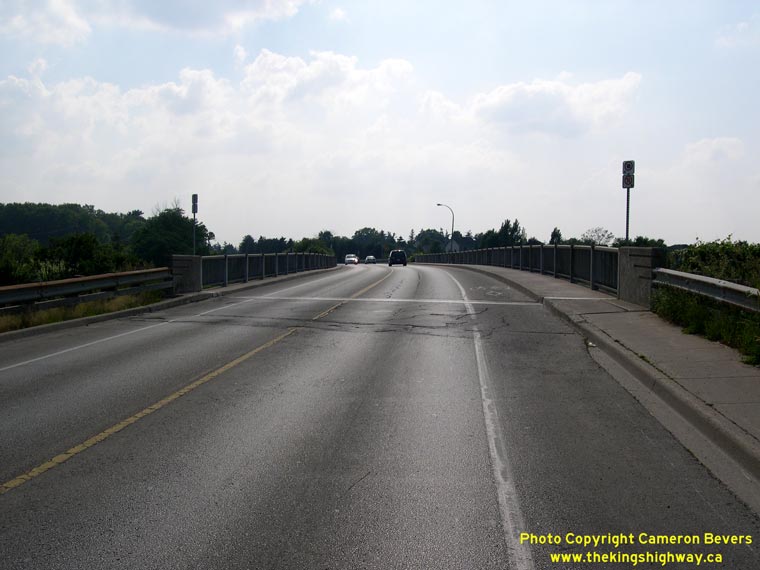

Left - Facing west across the Golf Links Road Overpass in Ancaster. See an
Enlarged Photo here. (Photograph taken on June 24, 2006 - © Cameron Bevers) Right - Structure identification number and date stamp (1967) on the Golf Links Road Overpass. See an Enlarged Photo here. (Photograph taken on June 24, 2006 - © Cameron Bevers) 

Left - Aerial view of the Hwy 403 and Lincoln Alexander Parkway interchange in Hamilton, facing north. See an
Enlarged Photo here. (Photograph taken on November 3, 2006 - © Cameron Bevers) Right - Aerial view of the Hwy 403 and Lincoln Alexander Parkway interchange in Hamilton, facing east. See an Enlarged Photo here. (Photograph taken on November 3, 2006 - © Cameron Bevers) 

Left - Mohawk Road Overpass on Hwy 403 in Hamilton. Mohawk Road used to be the main east-west arterial road across Hamilton Mountain. However, the construction
of the Lincoln Alexander Parkway in the 1990s severed Mohawk Road, leaving a short section of Mohawk Road in Ancaster disconnected from the rest of the road. Today,
the Mohawk Road Overpass essentially serves as a ramp to the Lincoln Alexander Parkway from the discontinuous section of Mohawk Road and adjacent Rousseaux Street in
Ancaster. See an Enlarged Photo here. (Photograph taken on June 24, 2006 - © Cameron Bevers) Right - Facing east across the Mohawk Road Overpass towards the beginning of the Lincoln Alexander Parkway in Hamilton. See an Enlarged Photo here. (Photograph taken on June 24, 2006 - © Cameron Bevers) 

Left - Western side of the Mohawk Road Overpass in Hamilton. Structure completed in 1968. See an
Enlarged Photo here. (Photograph taken on June 24, 2006 - © Cameron Bevers) Right - Close-up of the handrail and parapet design of the Mohawk Road Overpass on Hwy 403. See an Enlarged Photo here. (Photograph taken on June 24, 2006 - © Cameron Bevers) 

Left - Facing west across the Mohawk Road Overpass towards Ancaster. See an
Enlarged Photo here. (Photograph taken on June 24, 2006 - © Cameron Bevers) Right - Date stamp (1968) and structure identification number on the Mohawk Road Overpass. See an Enlarged Photo here. (Photograph taken on June 24, 2006 - © Cameron Bevers) 

Left - Facing west along Hwy 403 from the Mohawk Road Overpass. The freeway-to-freeway ramp from Westbound Hwy 403 to the Lincoln Alexander Parkway can be seen
in the background. The ramp from Westbound Hwy 403 merges with the Lincoln Alexander Parkway just before the Golf Links Road Interchange. See an
Enlarged Photo here. (Photograph taken on June 24, 2006 - © Cameron Bevers) Right - Facing east along Hwy 403 from the Mohawk Road Overpass. The overpass in the foreground is the ramp from the Lincoln Alexander Parkway to Westbound Hwy 403. Until recently, the ramp to Westbound Hwy 403 was not a freeway-to-freeway ramp connection. All traffic heading to Westbound Hwy 403 had to turn left onto the Hwy 403 ramp at a signalized at-grade intersection. This resulted in long delays for traffic on the Lincoln Alexander Parkway. The new ramp shown in the photo offers a free-flow connection between the two freeways. See an Enlarged Photo here. (Photograph taken on June 24, 2006 - © Cameron Bevers) 

Left - Hwy 403 and Lincoln Alexander Parkway Interchange in Ancaster, facing west. Often abbreviated as "The Linc", the Lincoln Alexander Parkway is a
municipal freeway owned by the City of Hamilton. It is not a provincial highway, although a short section of the freeway between Hwy 403 and Upper James Street was
temporarily signed as Hwy 6 after the old route of Hwy 6 through Downtown Hamilton was decommissioned, but before the new route of Hwy 6 South was completed. See an
Enlarged Photo here. (Photograph taken on June 24, 2006 - © Cameron Bevers) Right - Ramp leading from Westbound Hwy 403 to the Lincoln Alexander Parkway in Ancaster. This ramp also serves Rousseaux Street (Old Mohawk Road). See an Enlarged Photo here. (Photograph taken on June 24, 2006 - © Cameron Bevers) 

Left - Facing east along Hwy 403 towards Hamilton from the top of Ancaster Hill. The entrance ramp from the Lincoln Alexander Parkway was recently extended to
allow high-speed traffic to enter Eastbound Hwy 403 more easily. Note the lighter pavement colour on the outermost freeway lane where the highway goes around the bend
in the background. Despite the extension of this lane, morning rush hour traffic congestion is a recurring problem on Eastbound Hwy 403 in this area. See an
Enlarged Photo here. (Photograph taken on June 24, 2006 - © Cameron Bevers) Right - Facing east along Hwy 403 towards Hamilton from the pedestrian overpass at the top of Ancaster Hill. See an Enlarged Photo here. (Photograph taken on June 24, 2006 - © Cameron Bevers) 
Above - Aerial view of Hwy 403 at the Ancaster Hill in Hamilton, facing east. See an
Enlarged Photo here. (Photograph taken on November 3, 2006 - © Cameron Bevers)
Continue on to King's Highway 403 Photos: Hamilton to Burlington
|
|---|
Links to Adjacent King's Highway Photograph Pages:
Back to Hwy 403 Historical Photos (1990-1999)
Hwy 403 Photo Index
On to Hwy 403 Photos - Hamilton to Burlington
Back to King's Highway 402 Photos /
King's Highway 403 History /
On to King's Highway 404 Photos
Ontario Highway History - Main Menu / Back to List of Highways Website contents, photos & text © 2002-2026, Cameron
Bevers (Webmaster) - All Rights Reserved / Contact Me
|
|---|