
| 
| |
|
|
This page contains present day photos (Year 2000 to date) of Ontario's King's Highway 60, arranged by location from Whitney
easterly to Barry's Bay. All photographs displayed on this page were taken by the Webmaster (Cameron Bevers), unless specifically noted otherwise. Click on any
thumbnail to see a larger image!
Please note that all photographs displayed on this
website are protected by copyright. These photographs must not be reproduced, published,
electronically stored or copied, distributed, or posted onto other websites without
my written permission. If you want to use photos from this website, please
email me first for permission. Thank-you!
|
|---|
|
Page 5: Present Day King's Highway 60 Photographs (Whitney to Barry's Bay)


Left - Facing west across the Madawaska River Bridge on Hwy 60 in Whitney. See an
Enlarged Photo Here. (Photograph taken on August 5, 2008 - © Cameron Bevers) Right - Madawaska River Bridge on Hwy 60 in Whitney, facing west. When the Madawaska River Bridge was first built in 1941, it has no sidewalks. A sidewalk extension was cantilevered off of the south side of the bridge years after the structure was first built. See an Enlarged Photo Here. (Photograph taken on August 5, 2008 - © Cameron Bevers) 

Left - The Hwy 60 bridge over the Madawaska River in Whitney is a closed-spandrel concrete arch structure. See an
Enlarged Photo Here. (Photograph taken on August 5, 2008 - © Cameron Bevers) Right - Facing east across the Madawaska River Bridge on Hwy 60 in Whitney. See an Enlarged Photo Here. (Photograph taken on August 5, 2008 - © Cameron Bevers) 
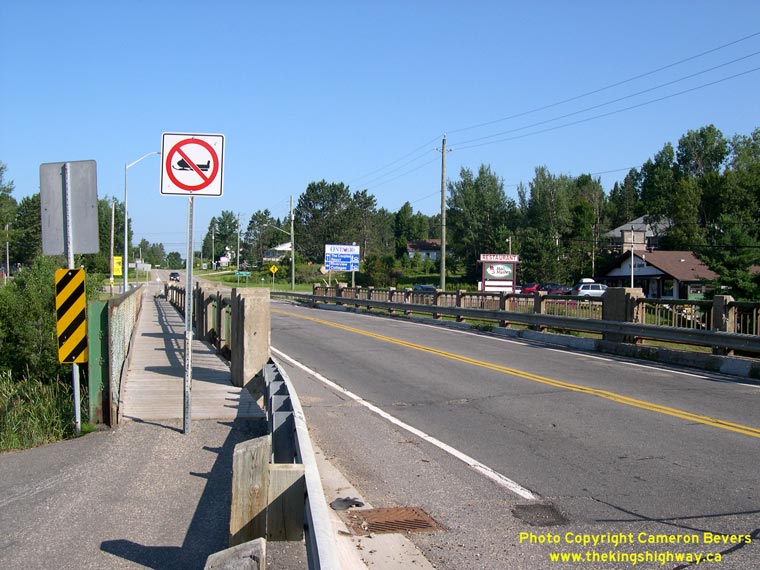
Left - A sidewalk was added to the Madawaska River Bridge in Whitney years after the structure was first built. See an
Enlarged Photo Here. (Photograph taken on August 5, 2008 - © Cameron Bevers) Right - Motorized vehicles such as snowmobiles are not permitted to the use the sidewalk on the Madawaska River Bridge in Whitney. See an Enlarged Photo Here. (Photograph taken on August 5, 2008 - © Cameron Bevers) 

Left - The earth-filled closed spandrel concrete arch bridge at Whitney was a rather uncommon bridge design on the King's Highways of Ontario. Only a handful
of these bridges were ever built by Ontario's Department of Highways. Other examples of this bridge design in Eastern Ontario include the Skootamatta River Bridge on
Hwy 7 near Actinolite (built in 1933) and the Salmon River Bridge on Hwy 41 near Roblin (built in 1949). See an
Enlarged Photo Here. (Photograph taken on August 5, 2008 - © Cameron Bevers) Right - Close-up of the concrete and steel handrails on the Madawaska River Bridge on Hwy 60 in Whitney. See an Enlarged Photo Here. (Photograph taken on August 5, 2008 - © Cameron Bevers) 

Left - Southern side of the Madawaska River Bridge at Whitney. Structure completed in 1941. See an
Enlarged Photo Here. (Photograph taken on August 2, 2004 - © Cameron Bevers) Right - Approaching Whitney on Hwy 60, facing west towards Algonquin Park's East Gate. The tiny community of Whitney is the first settlement on Hwy 60 east of Algonquin Park. It is also the first opportunity for motorists to purchase fuel after exiting from the park. See an Enlarged Photo Here. (Photograph taken on August 5, 2008 - © Cameron Bevers) 

Left - Facing west along Hwy 60 towards Whitney from the Hwy 127 Junction. These two highways meet at a rural highway junction located about 3 km east of
Whitney. See an Enlarged Photo Here. (Photograph taken on August 5, 2008 - © Cameron Bevers) Right - Junction assembly and fingerboard guide signs at the northern terminus of Hwy 127 at the Hwy 60 Junction. See an Enlarged Photo Here. (Photograph taken on August 5, 2008 - © Cameron Bevers) 

Left - Distance guide sign on westbound Hwy 60 at the Hwy 127 Junction. Apart from Whitney, there are no other communities between this point and the Eastern
Gate to Algonquin Park. The next major centre along Hwy 60 is Huntsville, although the two small communities of Oxtongue Lake and Dwight exist beyond Algonquin Park's
West Gate. See an Enlarged Photo Here. (Photograph taken on August 5, 2008 - © Cameron Bevers) Right - Facing east along Hwy 60 towards Madawaska from the Hwy 127 Junction. Madawaska is another small community on Hwy 60 which lies about 19 km to the east of the Hwy 127 Junction. Generally speaking, the area to the east of Algonquin Provincial Park is a rather sparsely populated region of Ontario. See an Enlarged Photo Here. (Photograph taken on August 5, 2008 - © Cameron Bevers) 

Left - Northern terminus of Hwy 127 at the Hwy 60 Junction east of Whitney. See an
Enlarged Photo Here. (Photograph taken on August 5, 2008 - © Cameron Bevers) Right - Facing west along Hwy 60 at the Hwy 127 Junction. Note the overhead flashing beacon to alert motorists of the junction. There are very few major intersections along Hwy 60 between Huntsville and Barry's Bay, so this junction might not be expected by motorists, given the nature of the overall highway corridor. See an Enlarged Photo Here. (Photograph taken on August 5, 2008 - © Cameron Bevers) 
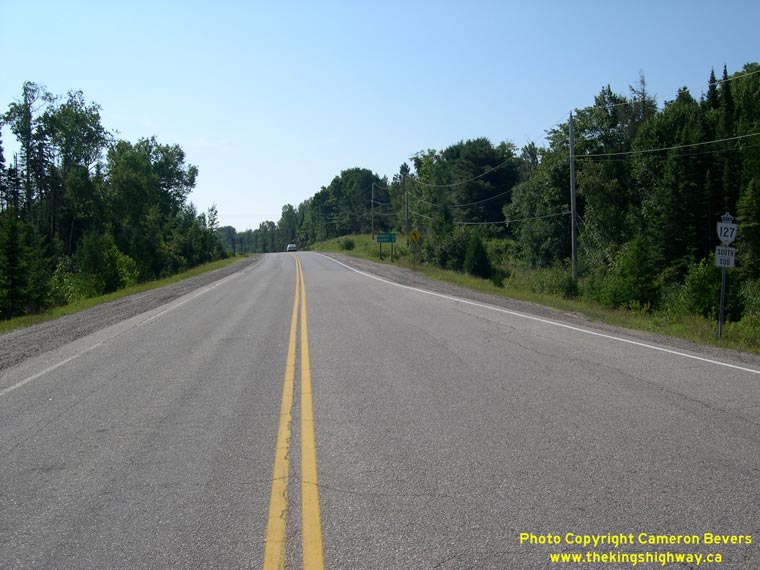
Left - Destination guide sign on westbound Hwy 60 approaching the Hwy 127 Junction. Although Hwy 127 does not actually go to Bancroft, the route does connect
to Hwy 62 which leads south to Bancroft, and eventually, Belleville. See an Enlarged Photo Here. (Photograph taken on August 5, 2008 - © Cameron Bevers) Right - Facing south along Hwy 127 from the highway's northern terminus at the Hwy 60 Junction near Whitney. From here, Hwy 127 continues south for almost 40 km to Maynooth, where it connects to Hwy 62 South to Bancroft. This is the first north-south highway link east of Algonquin Provincial Park. See an Enlarged Photo Here. (Photograph taken on August 5, 2008 - © Cameron Bevers) 

Left - Hwy 60 at the Hwy 127 Junction, facing east towards Madawaska. When Hwy 127 was first established as a new King's Highway along the eastern side of
Algonquin Park in 1955, it met Hwy 60 at Poverty Lake just outside of Whitney. As a result of a highway improvement project in the early 1960s, the northernmost
section of Hwy 127 was relocated further to the east, which bypassed the original 1955 highway terminus at Poverty Lake. Since 1962, Hwy 127 and Hwy 60 have met at
this relocated junction. See an Enlarged Photo Here. (Photograph taken on August 5, 2008 - © Cameron Bevers) Right - Approaching the Hwy 127 Junction on Hwy 60, facing west towards Whitney. See an Enlarged Photo Here. (Photograph taken on August 5, 2008 - © Cameron Bevers) 

Left - Facing east along Hwy 60 through Madawaska. Madawaska is the only settlement along Hwy 60 between Whitney and Barry's Bay. See an
Enlarged Photo Here. (Photograph taken on September 1, 2012 - © Cameron Bevers) Right - A Tourism-Oriented Destination Sign on eastbound Hwy 60 erroneously identifies the upcoming Secondary Highway 523 Junction in a King's Highway crown. See an Enlarged Photo Here. (Photograph taken on September 1, 2012 - © Cameron Bevers) 

Left - Junction assembly on eastbound Hwy 60 in Madawaska, indicating the upcoming Hwy 523 Junction. See an
Enlarged Photo Here. (Photograph taken on September 1, 2012 - © Cameron Bevers) Right - Facing east along Hwy 60 approaching the Hwy 523 Junction. See an Enlarged Photo Here. (Photograph taken on September 1, 2012 - © Cameron Bevers) 

Left - Distance guide sign on westbound Hwy 60 at the Hwy 523 Junction. See an
Enlarged Photo Here. (Photograph taken on September 1, 2012 - © Cameron Bevers) Right - Facing west along Hwy 60 towards Whitney from the Hwy 523 Junction. See an Enlarged Photo Here. (Photograph taken on September 1, 2012 - © Cameron Bevers) 

Left - Junction of Hwy 60 and Hwy 523, facing east. The route of Hwy 523 extends south from Madawaska to Cross Lake, where the highway ends at the Hastings
County Boundary. A municipal road extends south from Hwy 523 towards Maynooth and Hwy 127. See an
Enlarged Photo Here. (Photograph taken on September 1, 2012 - © Cameron Bevers) Right - Older highway markers at the Hwy 60 and Hwy 523 Junction in Madawaska. As a result of the mass highway downloading spree of 1997-1998, Hwy 523 is now the only Secondary Highway which intersects with Hwy 60. It is also the last junction with a provincial highway until Hwy 60 meets Hwy 41 near Eganville. Prior to 1998, Hwy 62 and Hwy 512 also connected to Hwy 60 at various points between Madawaska and Eganville. See an Enlarged Photo Here. (Photograph taken on September 1, 2012 - © Cameron Bevers) 

Left - Northern terminus of Hwy 523 at the Hwy 60 Junction in Madawaska. These two highways have met at this intersection ever since Hwy 523 was first
designated as a Secondary Highway in 1956. See an Enlarged Photo Here. (Photograph taken on September 1, 2012 - © Cameron Bevers) Right - Junction assembly at the Hwy 60 and Hwy 523 Junction in Madawaska. See an Enlarged Photo Here. (Photograph taken on September 1, 2012 - © Cameron Bevers) 

Left - Facing east along Hwy 60 towards Barry's Bay from the Hwy 523 Junction in Madawaska. See an
Enlarged Photo Here. (Photograph taken on September 1, 2012 - © Cameron Bevers) Right - Distance guide sign on eastbound Hwy 60 at the Hwy 523 Junction. See an Enlarged Photo Here. (Photograph taken on September 1, 2012 - © Cameron Bevers) 

Left - Hwy 60 at Bark Lake, showing the southern side of the Madawaska River Bridge. See an
Enlarged Photo Here. (Photograph taken on August 2, 2004 - © Cameron Bevers) Right - Northern side of the Madawaska River Bridge on Hwy 60 east of Madawaska. Structure completed in 1942. See an Enlarged Photo Here. (Photograph taken on August 2, 2004 - © Cameron Bevers) 

Left - Opeongo River Bridge on Hwy 60 east of Madawaska. Structure completed in 1942. See an
Enlarged Photo Here. (Photograph taken on August 2, 2004 - © Cameron Bevers) Right - Bark Lake Diversion on Hwy 60, facing east towards Barry's Bay. This significant highway diversion east of Madawaska was built in the early 1940s. It bypassed a section of Hwy 60 that was flooded after the Hydro-Electric Power Commission constructed a nearby dam across the Madawaska River. See an Enlarged Photo Here. (Photograph taken on September 1, 2012 - © Cameron Bevers) 

Left - Nipissing District boundary sign on westbound Hwy 60 between Madawaska and Barry's Bay. See an
Enlarged Photo Here. (Photograph taken on September 1, 2012 - © Cameron Bevers) Right - Renfrew County boundary sign on eastbound Hwy 60 between Madawaska and Barry's Bay. See an Enlarged Photo Here. (Photograph taken on September 1, 2012 - © Cameron Bevers) 

Left - The Bark Lake Diversion bypassed almost 14 km of the original 1937 route of Hwy 60, which was flooded behind the Bark Lake Hydro-Electric Dam in the
1940s. The Bark Lake Diversion was completed in 1942, after two years of construction. See an
Enlarged Photo Here. (Photograph taken on September 1, 2012 - © Cameron Bevers) Right - The Bark Lake Diversion (Hwy 60) skirts this small lake on its way west towards Madawaska. See an Enlarged Photo Here. (Photograph taken on September 1, 2012 - © Cameron Bevers) 

Left - Eastern terminus of the Bark Lake Diversion, approaching Cameron Track Road. Up until 1942, Hwy 60 curved to the left and followed the Madawaska River
for approximately 9 miles. In the 1940s, the Hydro-Electric Power Commission built a dam across the Madawaska River southwest of Barry's Bay and flooded the valley
behind the dam. As a result, a new highway diversion was built to the north of the newly-created Bark Lake to carry Hwy 60 traffic around the flooded section of the
original highway. See an Enlarged Photo Here. (Photograph taken on September 1, 2012 - © Cameron Bevers) Right - Old Hwy 60 alignment at Bark Lake between Barry's Bay and Madawaska. The original 1930s alignment of Hwy 60 was flooded in 1942 during the construction of a nearby hydro-electric dam. This photo shows the point where the original highway was inundated by the floodwaters. The area is now a popular boat launch. See an Enlarged Photo Here. (Photograph taken on August 1, 2004 - © Cameron Bevers) 

Left - Facing east along Hwy 60 from the end of the Bark Lake Diversion. From this point easterly to Barry's Bay, the route of Hwy 60 more or less follows its
original 1937 route, except in a few places where a steep grade on the highway was bypassed near Carson Lake. See an
Enlarged Photo Here. (Photograph taken on September 1, 2012 - © Cameron Bevers) Right - Long grade on Hwy 60 west of Carson Lake. An eastbound passing lane was constructed here to allow faster traffic to pass trucks and other slower vehicles. See an Enlarged Photo Here. (Photograph taken on September 1, 2012 - © Cameron Bevers) 

Left - Approaching the crest of the hill on Hwy 60 west of Carson Lake. During the 1940s, the route of Hwy 60 was relocated across this hill. Originally, the
highway curved to the left towards the hydro pole and followed Opeongo Road. The former intersection of Opeongo Road (Old Hwy 60) was realigned and now joins the
revised alignment of Hwy 60 a short distance to the east. See an Enlarged Photo Here. (Photograph taken on September 1, 2012 - © Cameron Bevers) Right - Facing west along Hwy 60 from Opeongo Road (Old Hwy 60) from the top of the grade near Carson Lake. See an Enlarged Photo Here. (Photograph taken on September 1, 2012 - © Cameron Bevers) 

Left - A very scenic view of Trout Lake appears as Hwy 60 descends the hill towards Carson Lake. See an
Enlarged Photo Here. (Photograph taken on September 1, 2012 - © Cameron Bevers) Right - Hwy 60 curves around Trout Lake and Carson Lake on its route east towards Barry's Bay. Compare this present-day photo and the one at left to this Historic 1968 Photo, showing the same section of the highway 44 years earlier. It is quite remarkable to see just how much the trees have grown over the past several decades. Motorists can barely see Trout Lake from this point along Hwy 60 anymore. See an Enlarged Photo Here. (Photograph taken on September 1, 2012 - © Cameron Bevers) 

Left - Facing east along Hwy 60 towards Barry's Bay from the former entrance to Carson Lake Provincial Park. The highway crosses a short causeway which
separates Carson Lake from Trout Lake. Unfortunately, motorists only catch a brief glimpse of beautiful Carson Lake from Hwy 60. Luckily, the views of Trout Lake
from the highway are far more substantial, since Hwy 60 runs along the entire north shore of Trout Lake. See an
Enlarged Photo Here. (Photograph taken on September 1, 2012 - © Cameron Bevers) Right - Facing east along Hwy 60 towards Barry's Bay near Martin Siding Road. A westbound passing lane was constructed up a long grade which exists between Carson Lake and Barry's Bay. See an Enlarged Photo Here. (Photograph taken on September 1, 2012 - © Cameron Bevers) 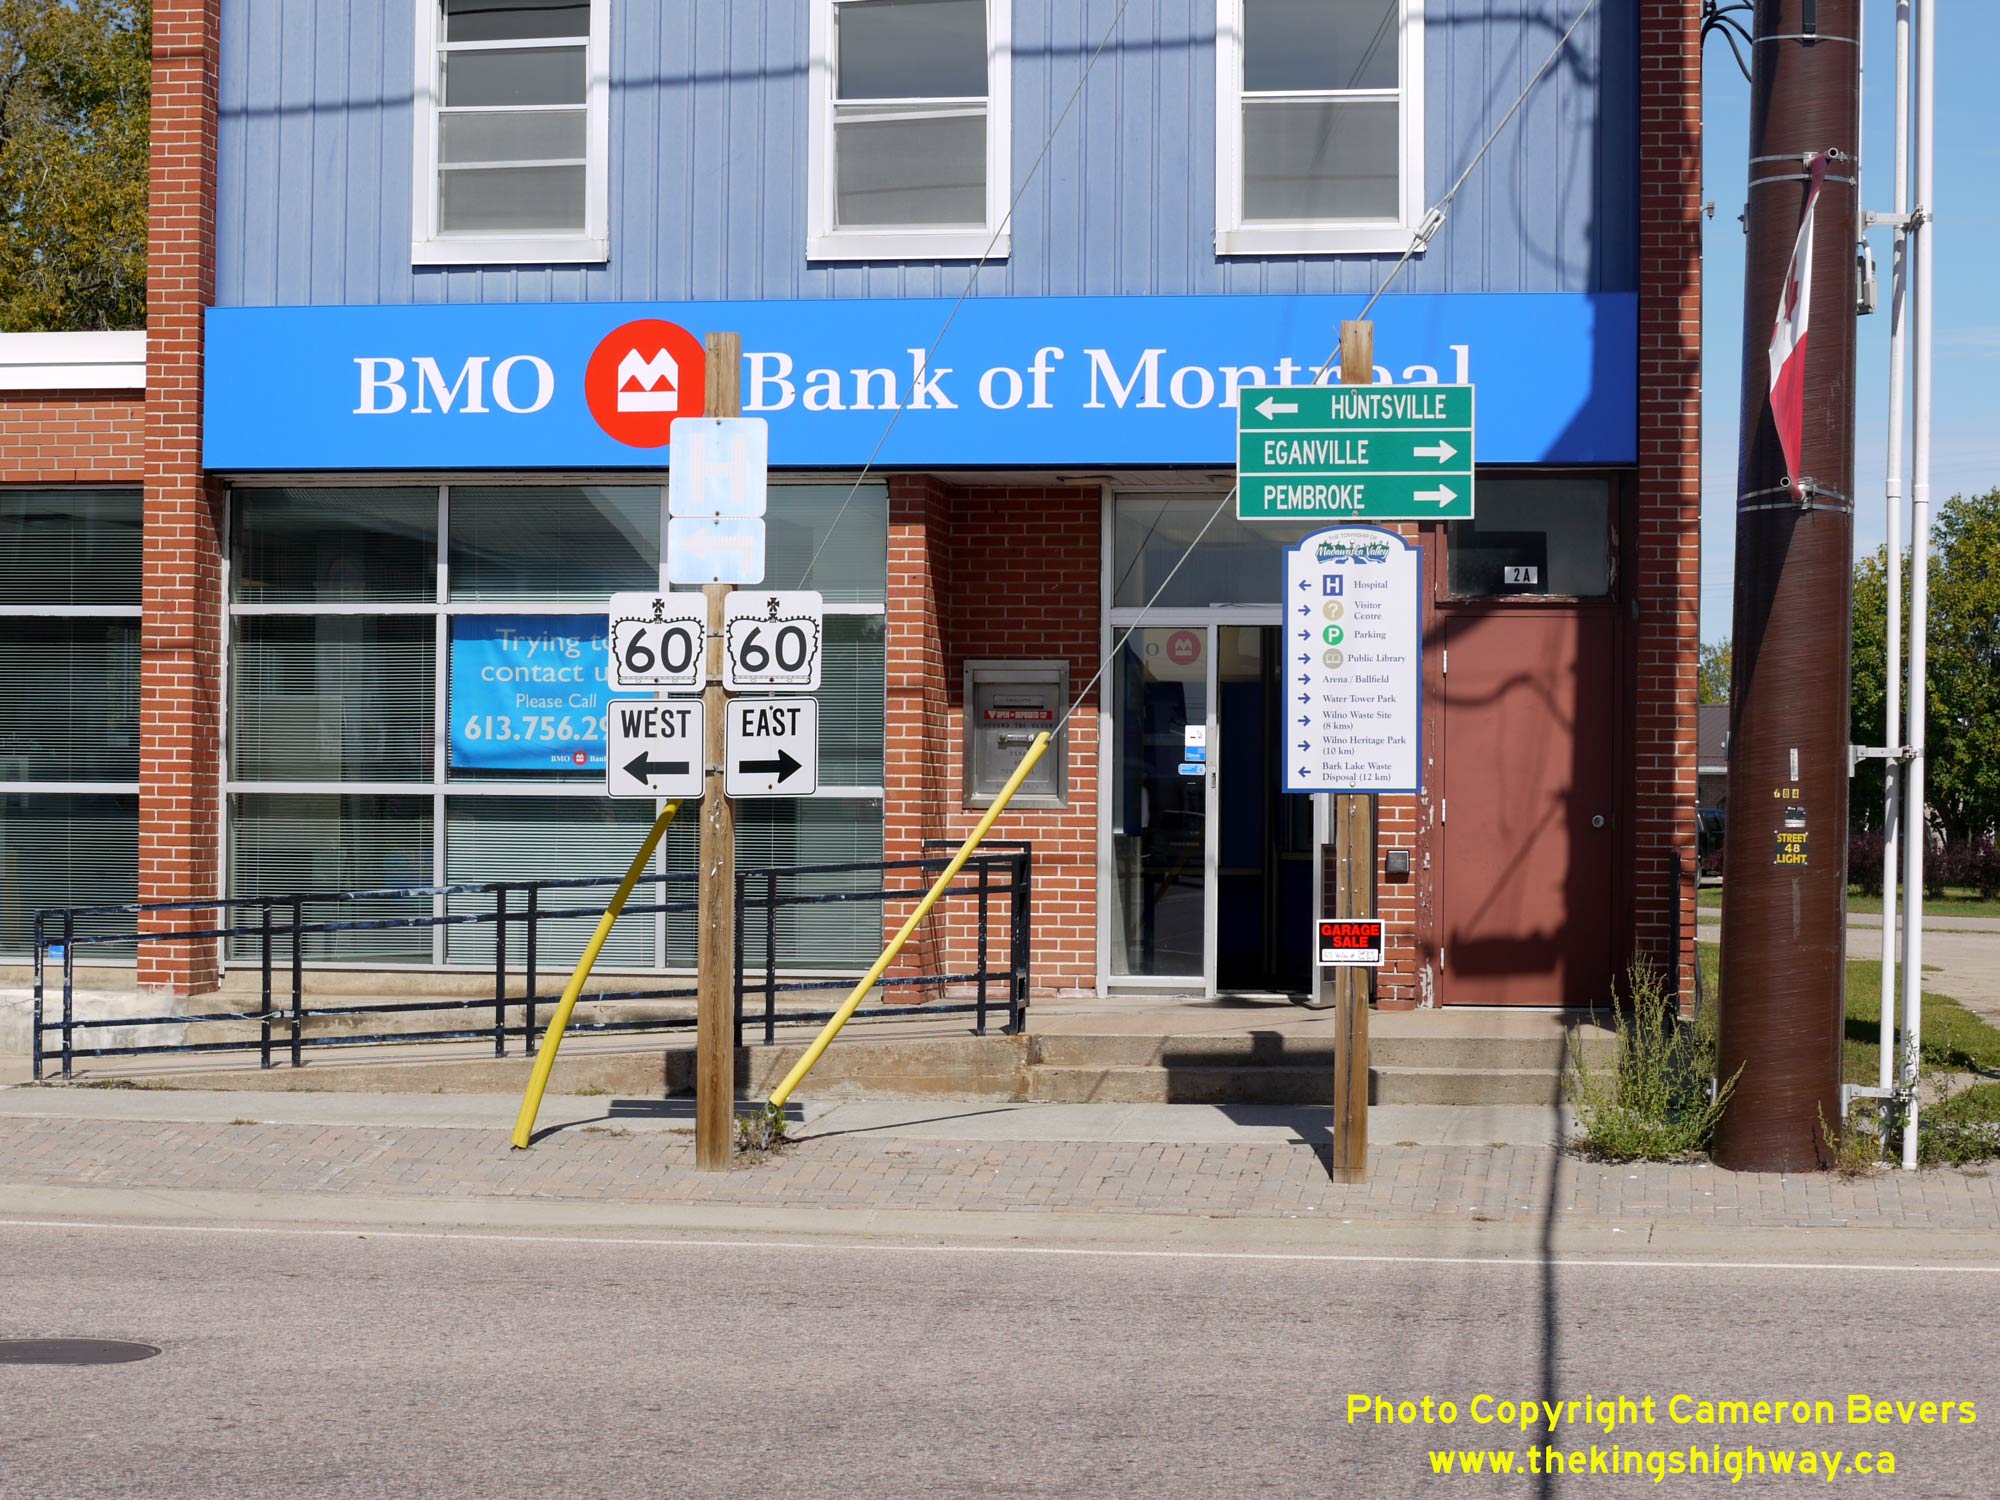
Left - Junction sign assembly at the Hwy 60 & Hwy 62 Junction in Barry's Bay. During the late 1990s, many changes were made to the provincial highway
network in this part of Ontario. Provincial jurisdiction over Hwy 62 ceased between Maynooth and Barry's Bay, along with a second section of Hwy 62 between Killaloe
and Pembroke. Prior to the 1990s, Hwy 62 turned right and headed east towards Killaloe, concurrently with Hwy 60. After provincial jurisdiction over Hwy 62 ended in
this area in 1997-1998, the highway from the Combermere area northerly to Barry's Bay was transferred over to the County of Renfrew, who renamed the road Renfrew
County Road 62. Rather than continue the route of Renfrew County Road 62 northeasterly from the Barry's Bay area to the Pembroke area, Renfrew County instead decided
to terminate Renfrew County Road 62 at Barry's Bay. The northeastern leg of Hwy 62 from Killaloe to Pembroke via Round Lake was renamed as Renfrew County Road 58.
Accordingly, the overlapped route of Hwy 60 & Hwy 62 between Barry's Bay and Killaloe was discontinued. Today, the highway from Barry's Bay to Killaloe is known
as Hwy 60 only, with all references to Hwy 62 removed. See an Enlarged Photo Here. (Photograph taken on September 12, 2020 - © Cameron Bevers) Right - Facing south along Hwy 62 (Bay Street) towards Combermere from the Hwy 60 Junction in Barry's Bay. See an Enlarged Photo Here. (Photograph taken on September 12, 2020 - © Cameron Bevers) 
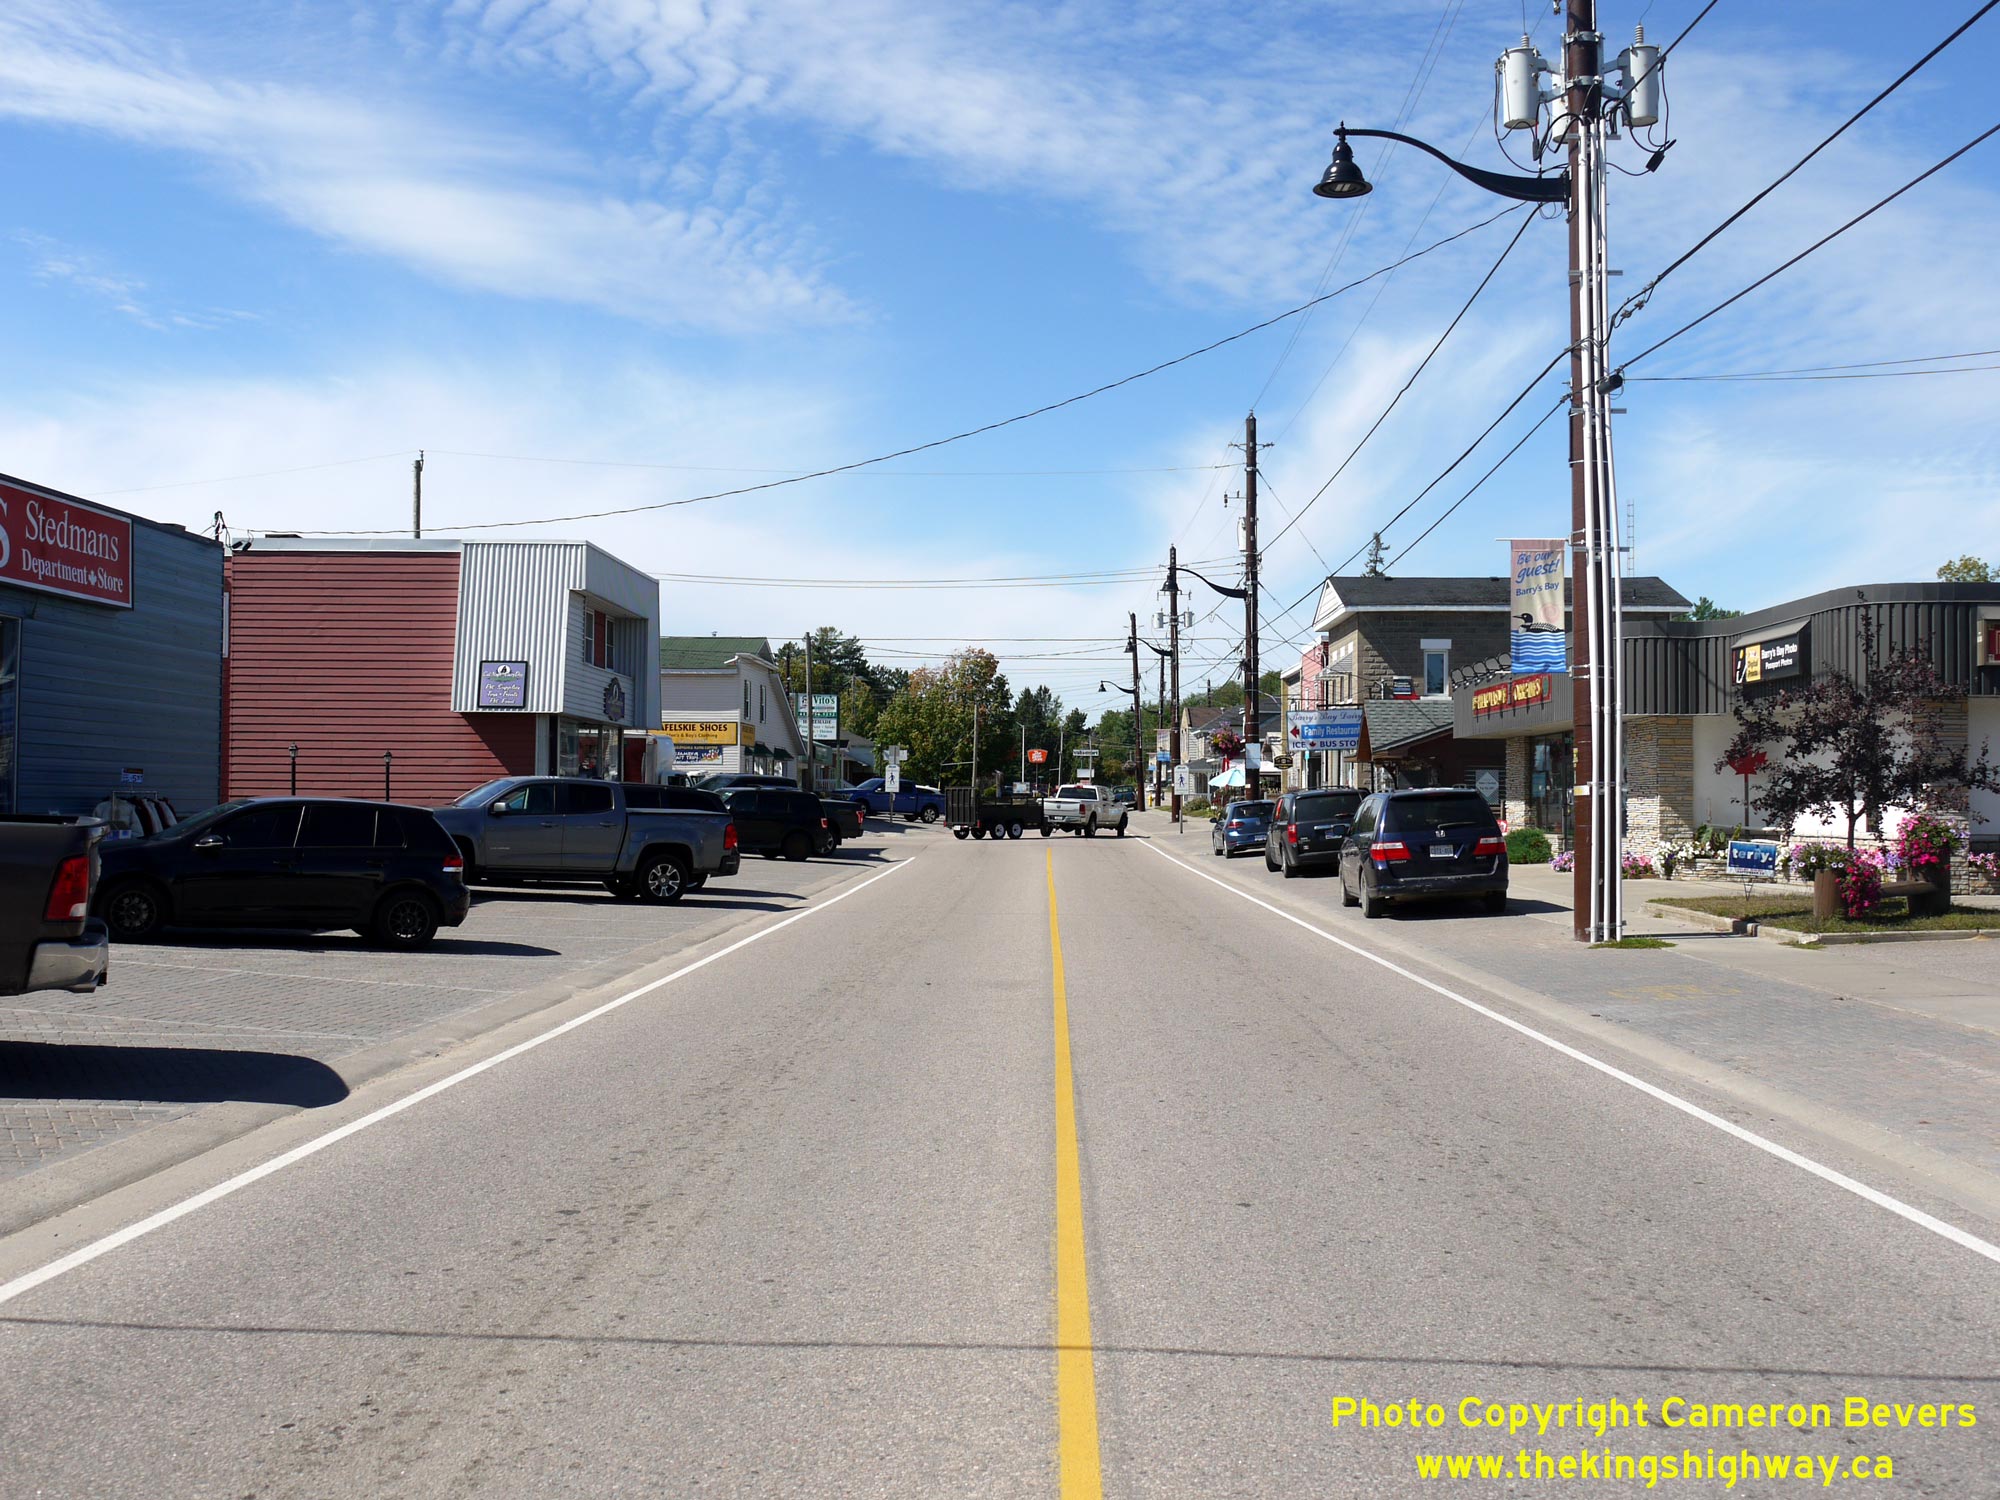
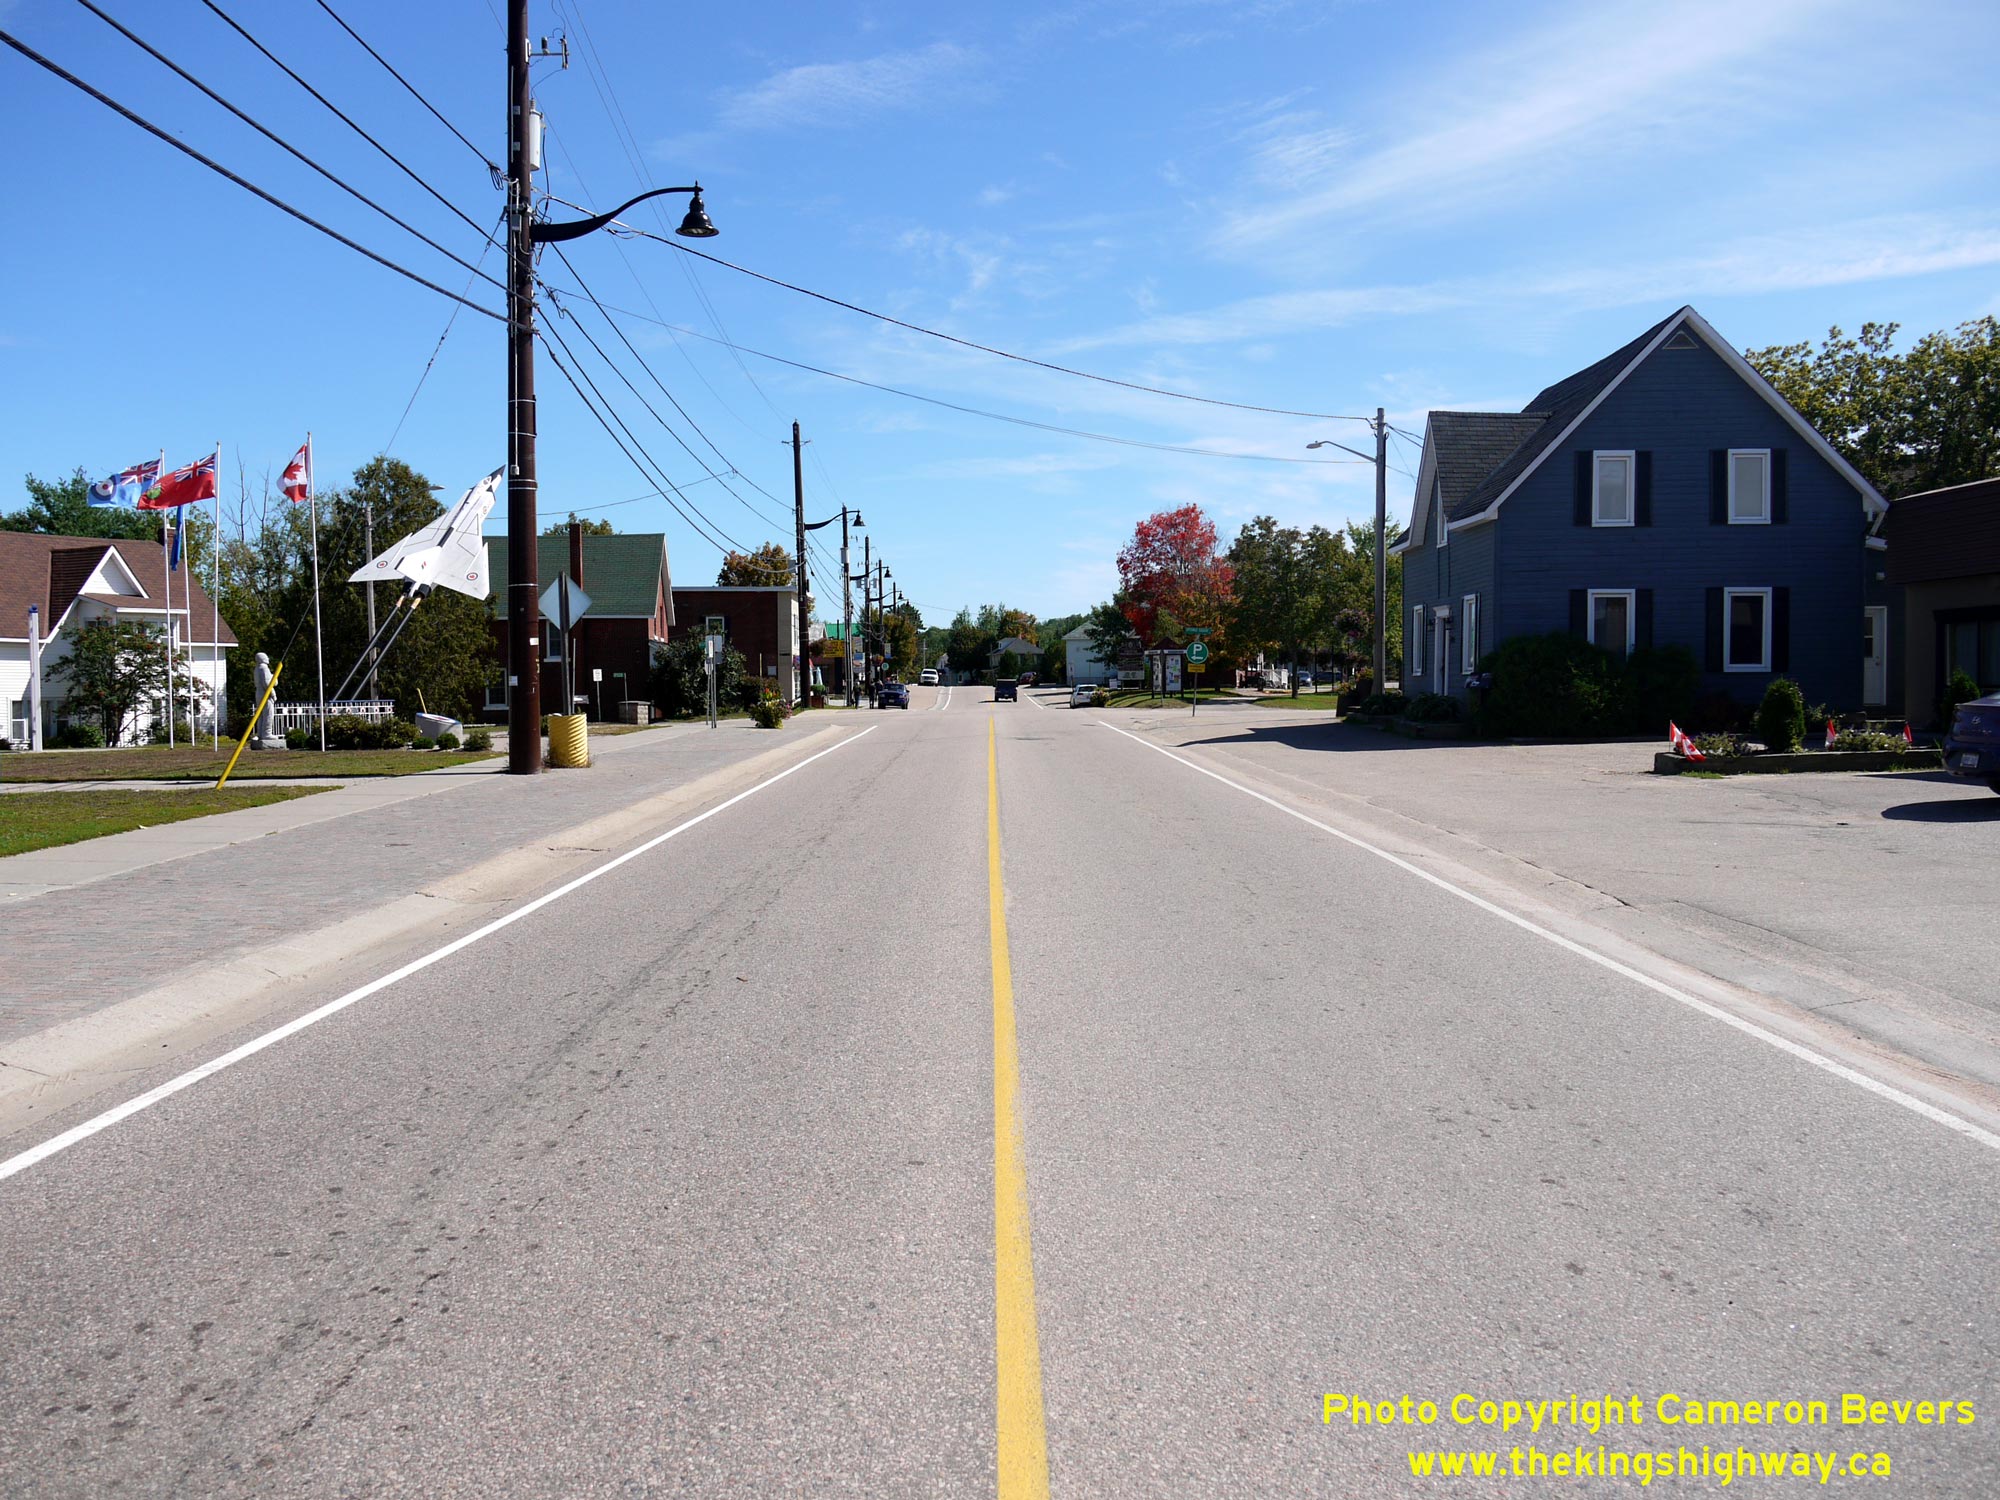
Left - Facing east along Hwy 60 (Opeongo Line) towards the Hwy 62 Junction at Bay Street in Barry's Bay. Ever since the initial establishment of King's
Highways in this part of Ontario in 1937, Barry's Bay has formed a key link in the provincial highway system. No matter where you travel in this part of Ontario,
chances are you will have to drive through Barry's Bay! See an Enlarged Photo Here. (Photograph taken on September 12, 2020 - © Cameron Bevers) Right - View of Hwy 60 (Opeongo Line) facing west towards Madawaska from the Hwy 62 Junction in Barry's Bay. See an Enlarged Photo Here. (Photograph taken on September 12, 2020 - © Cameron Bevers) 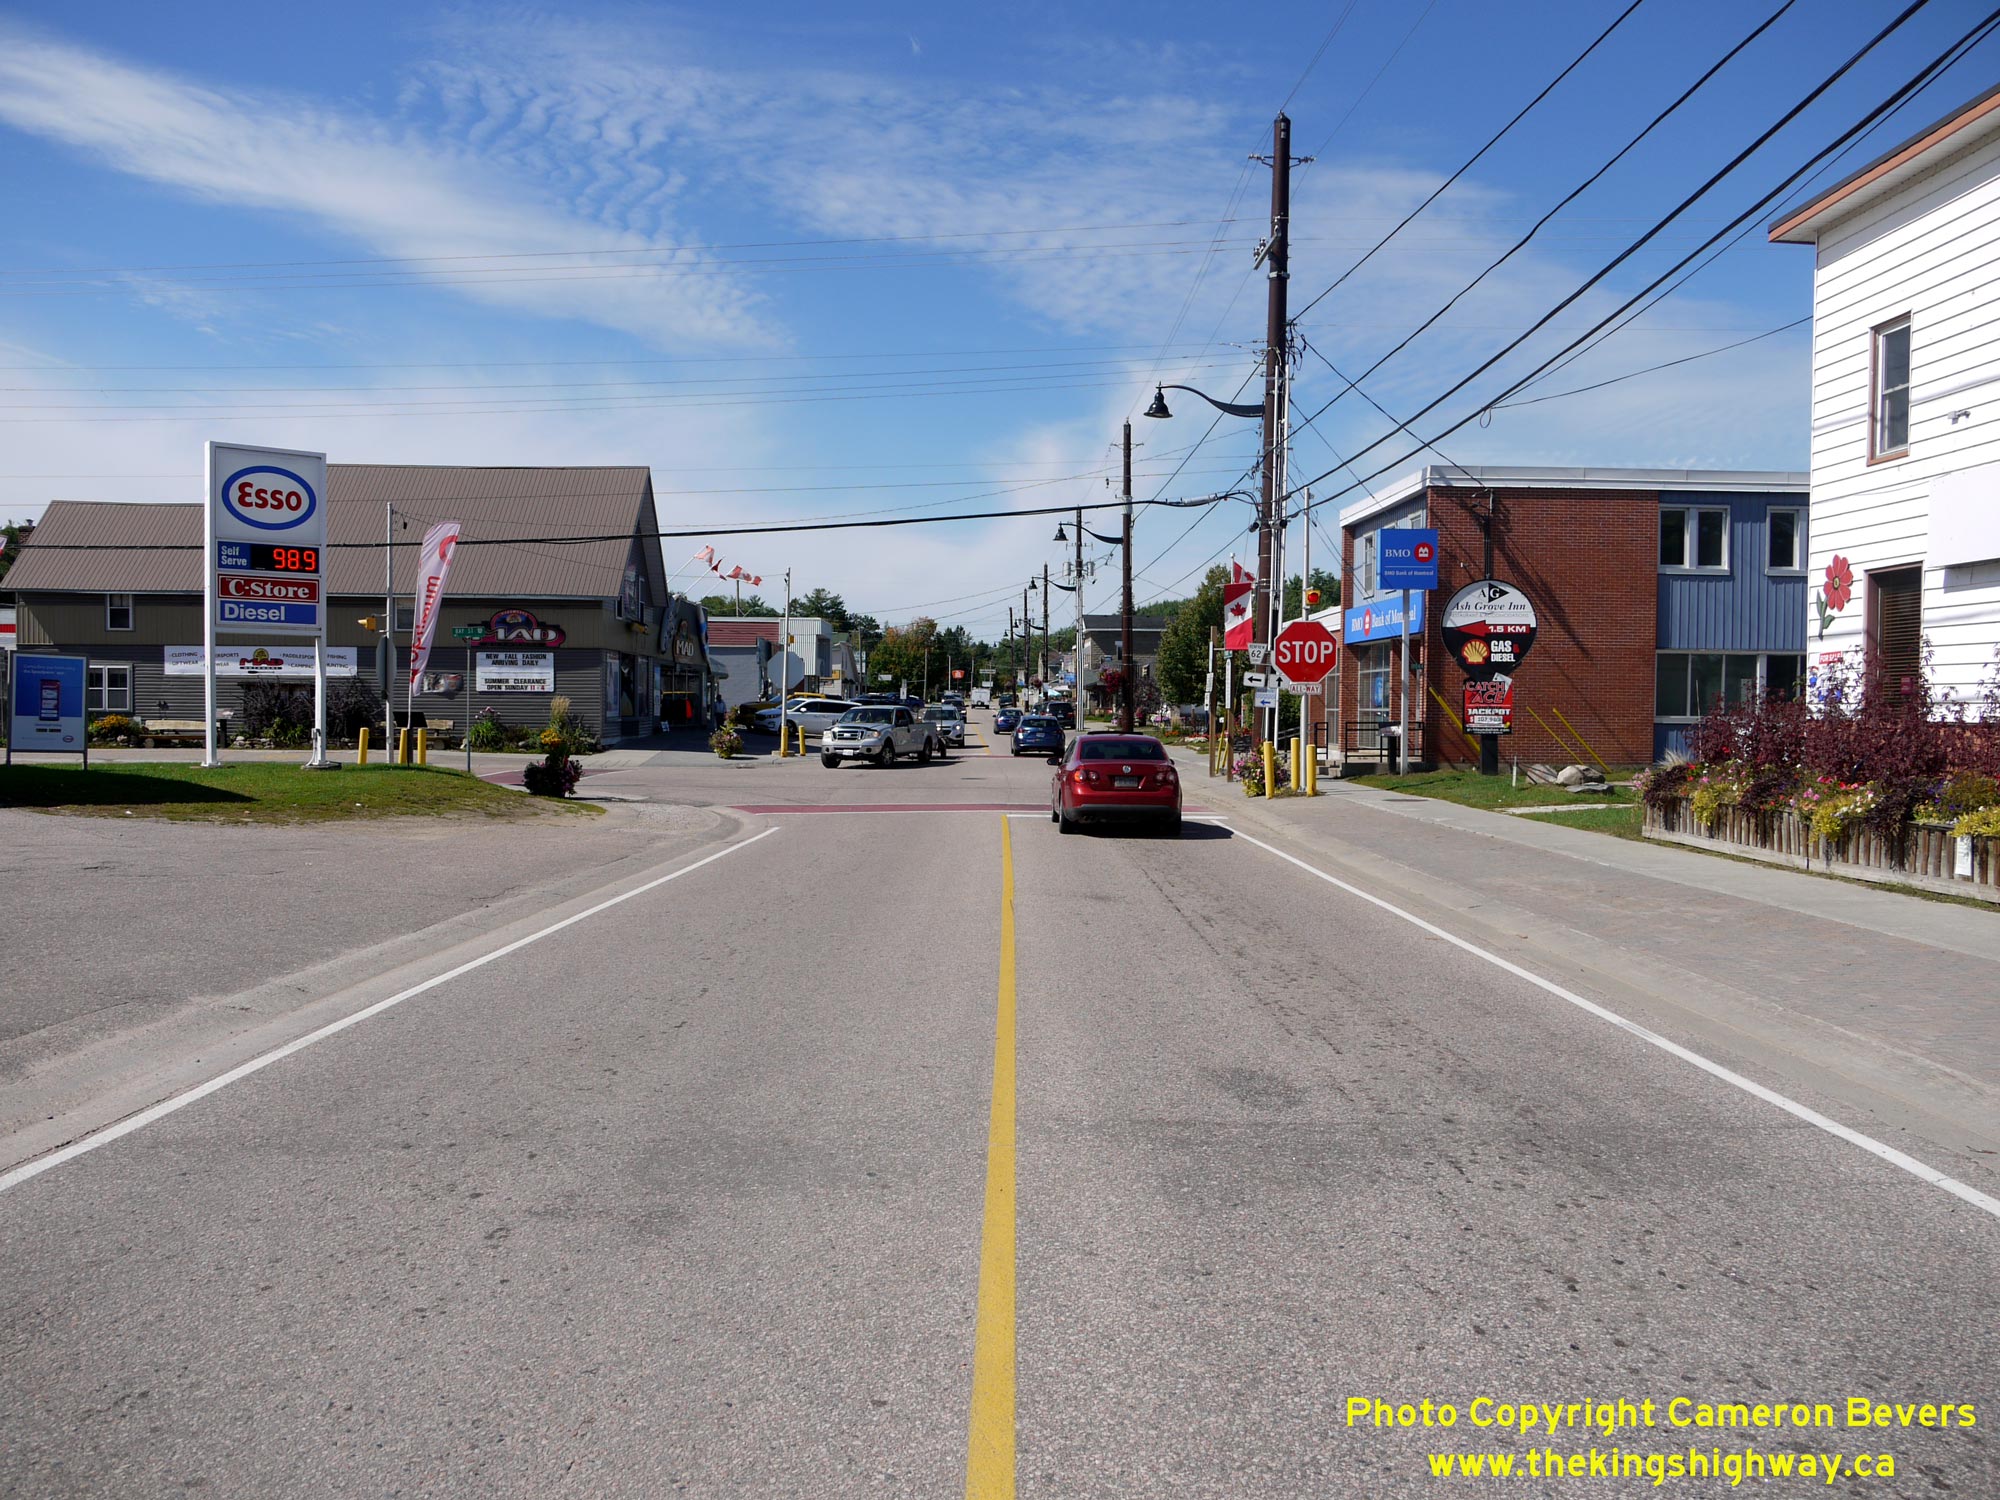
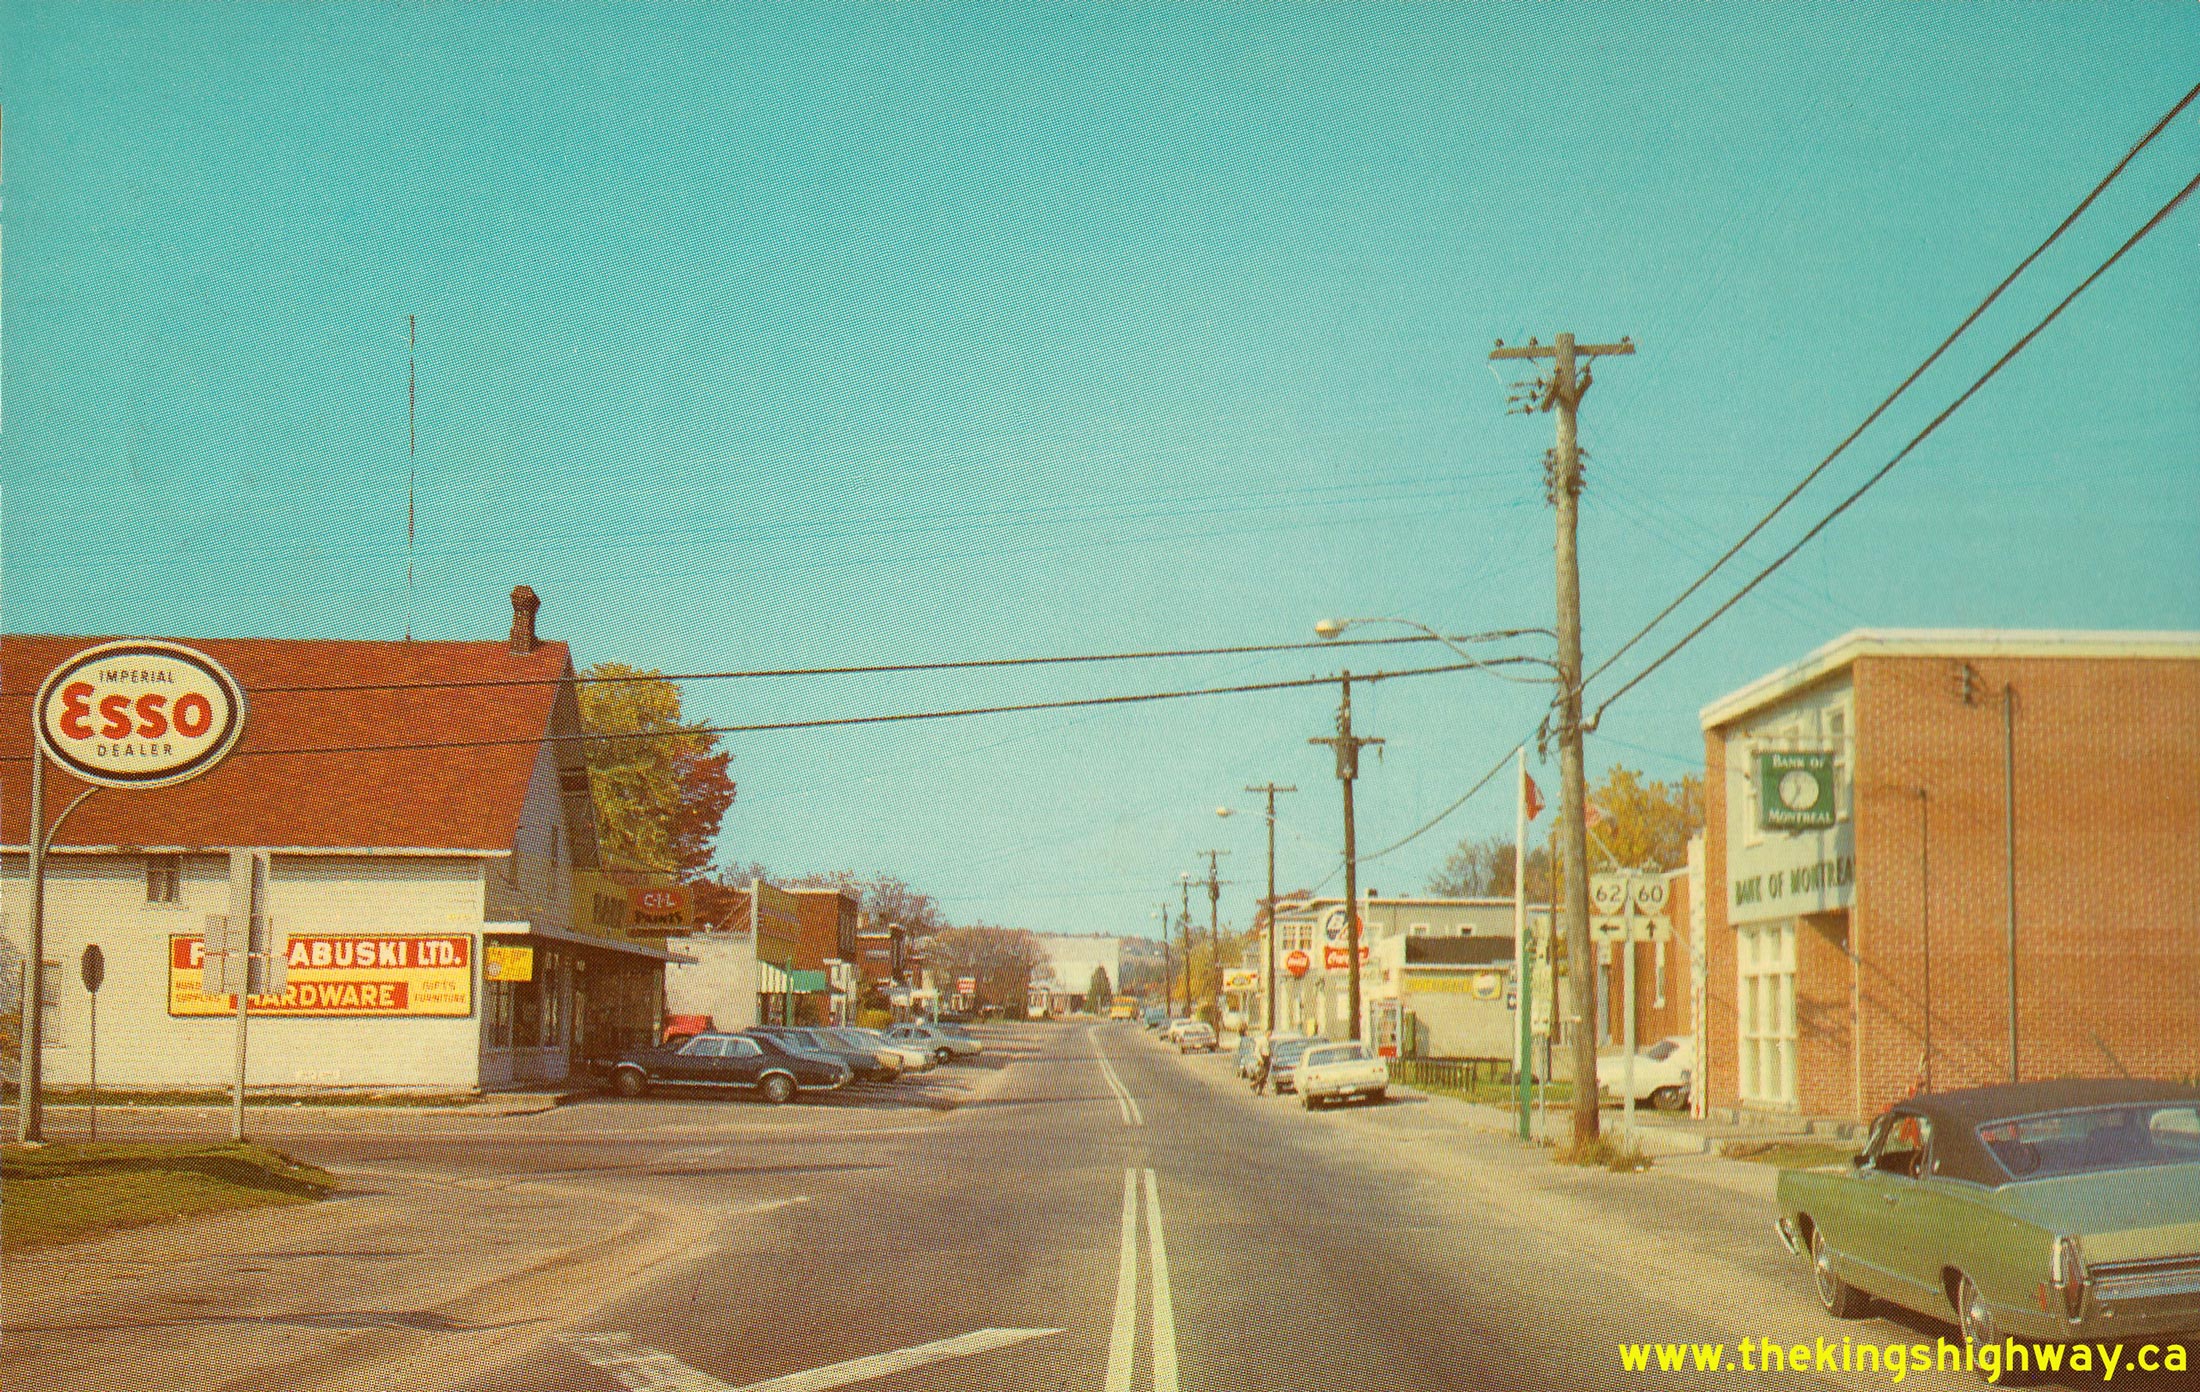
Left - View of the Hwy 60 & Hwy 62 Junction at the intersection of Opeongo Line and Bay Street in Barry's Bay, facing west. Prior to the 1990s, Hwy 62
turned left at this junction and headed south towards Combermere, Maynooth and Bancroft. By continuing west via Hwy 60, motorists can reach Madawaska, Algonquin Park
and Huntsville. For an interesting historical comparison, have a look at this Circa 1970 Photo
of this highway junction taken from roughly the same location about 50 years later. See an
Enlarged Photo Here. (Photograph taken on September 12, 2020 - © Cameron Bevers) Right - Facing east along Hwy 60 (Opeongo Line) from the Hwy 62 Junction at Bay Street in Barry's Bay. See an Enlarged Photo Here. (Photograph taken on September 12, 2020 - © Cameron Bevers) 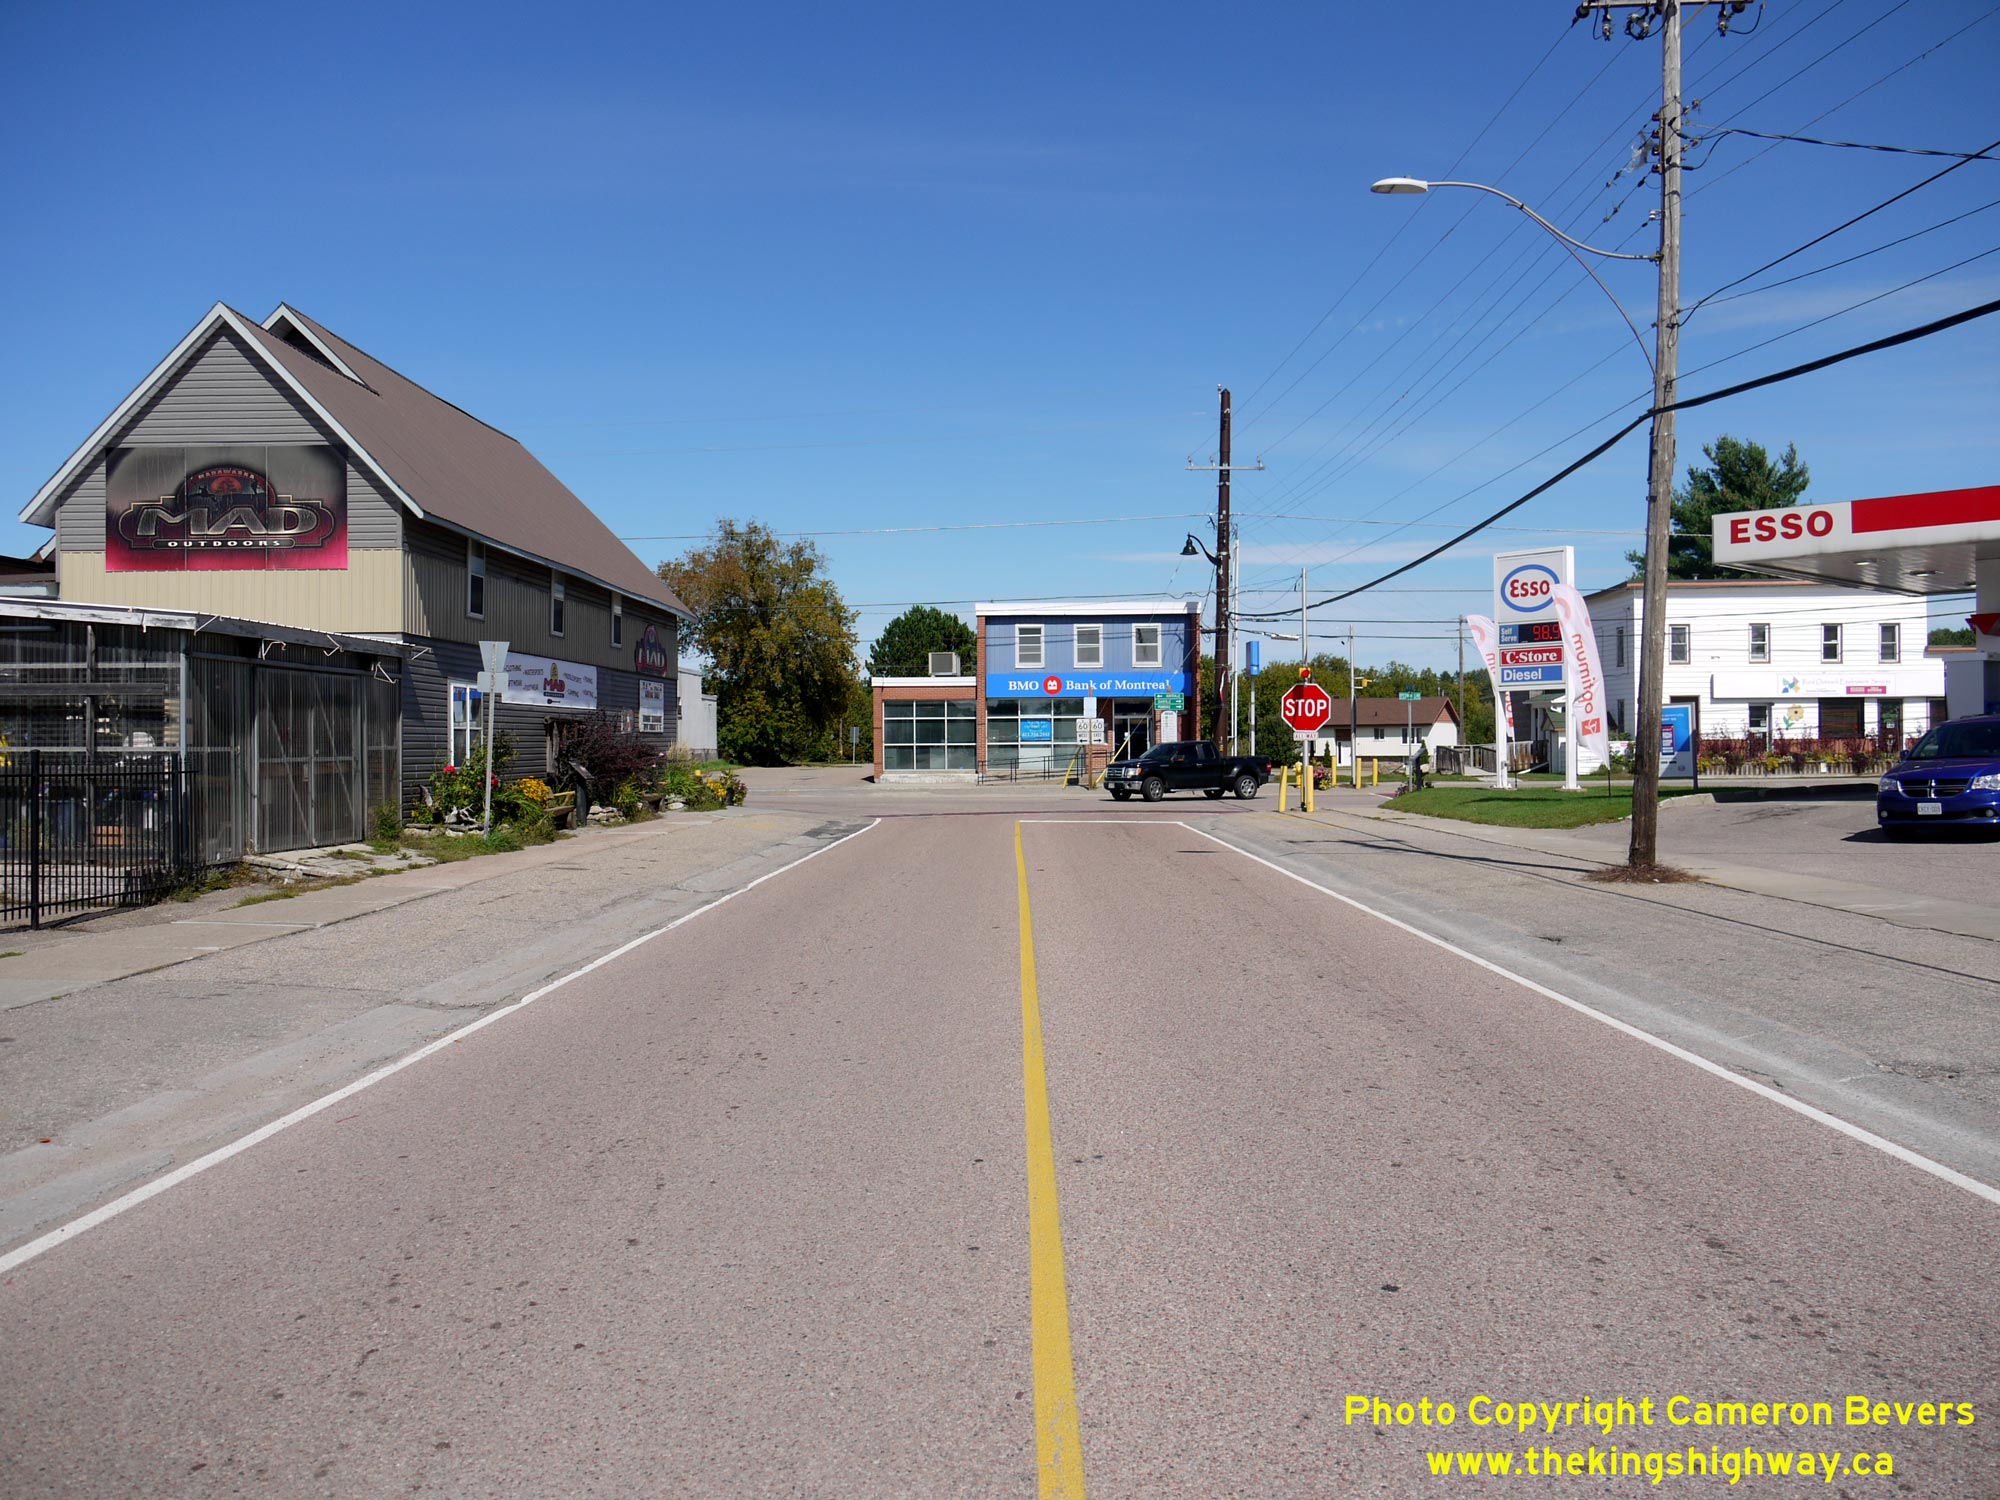
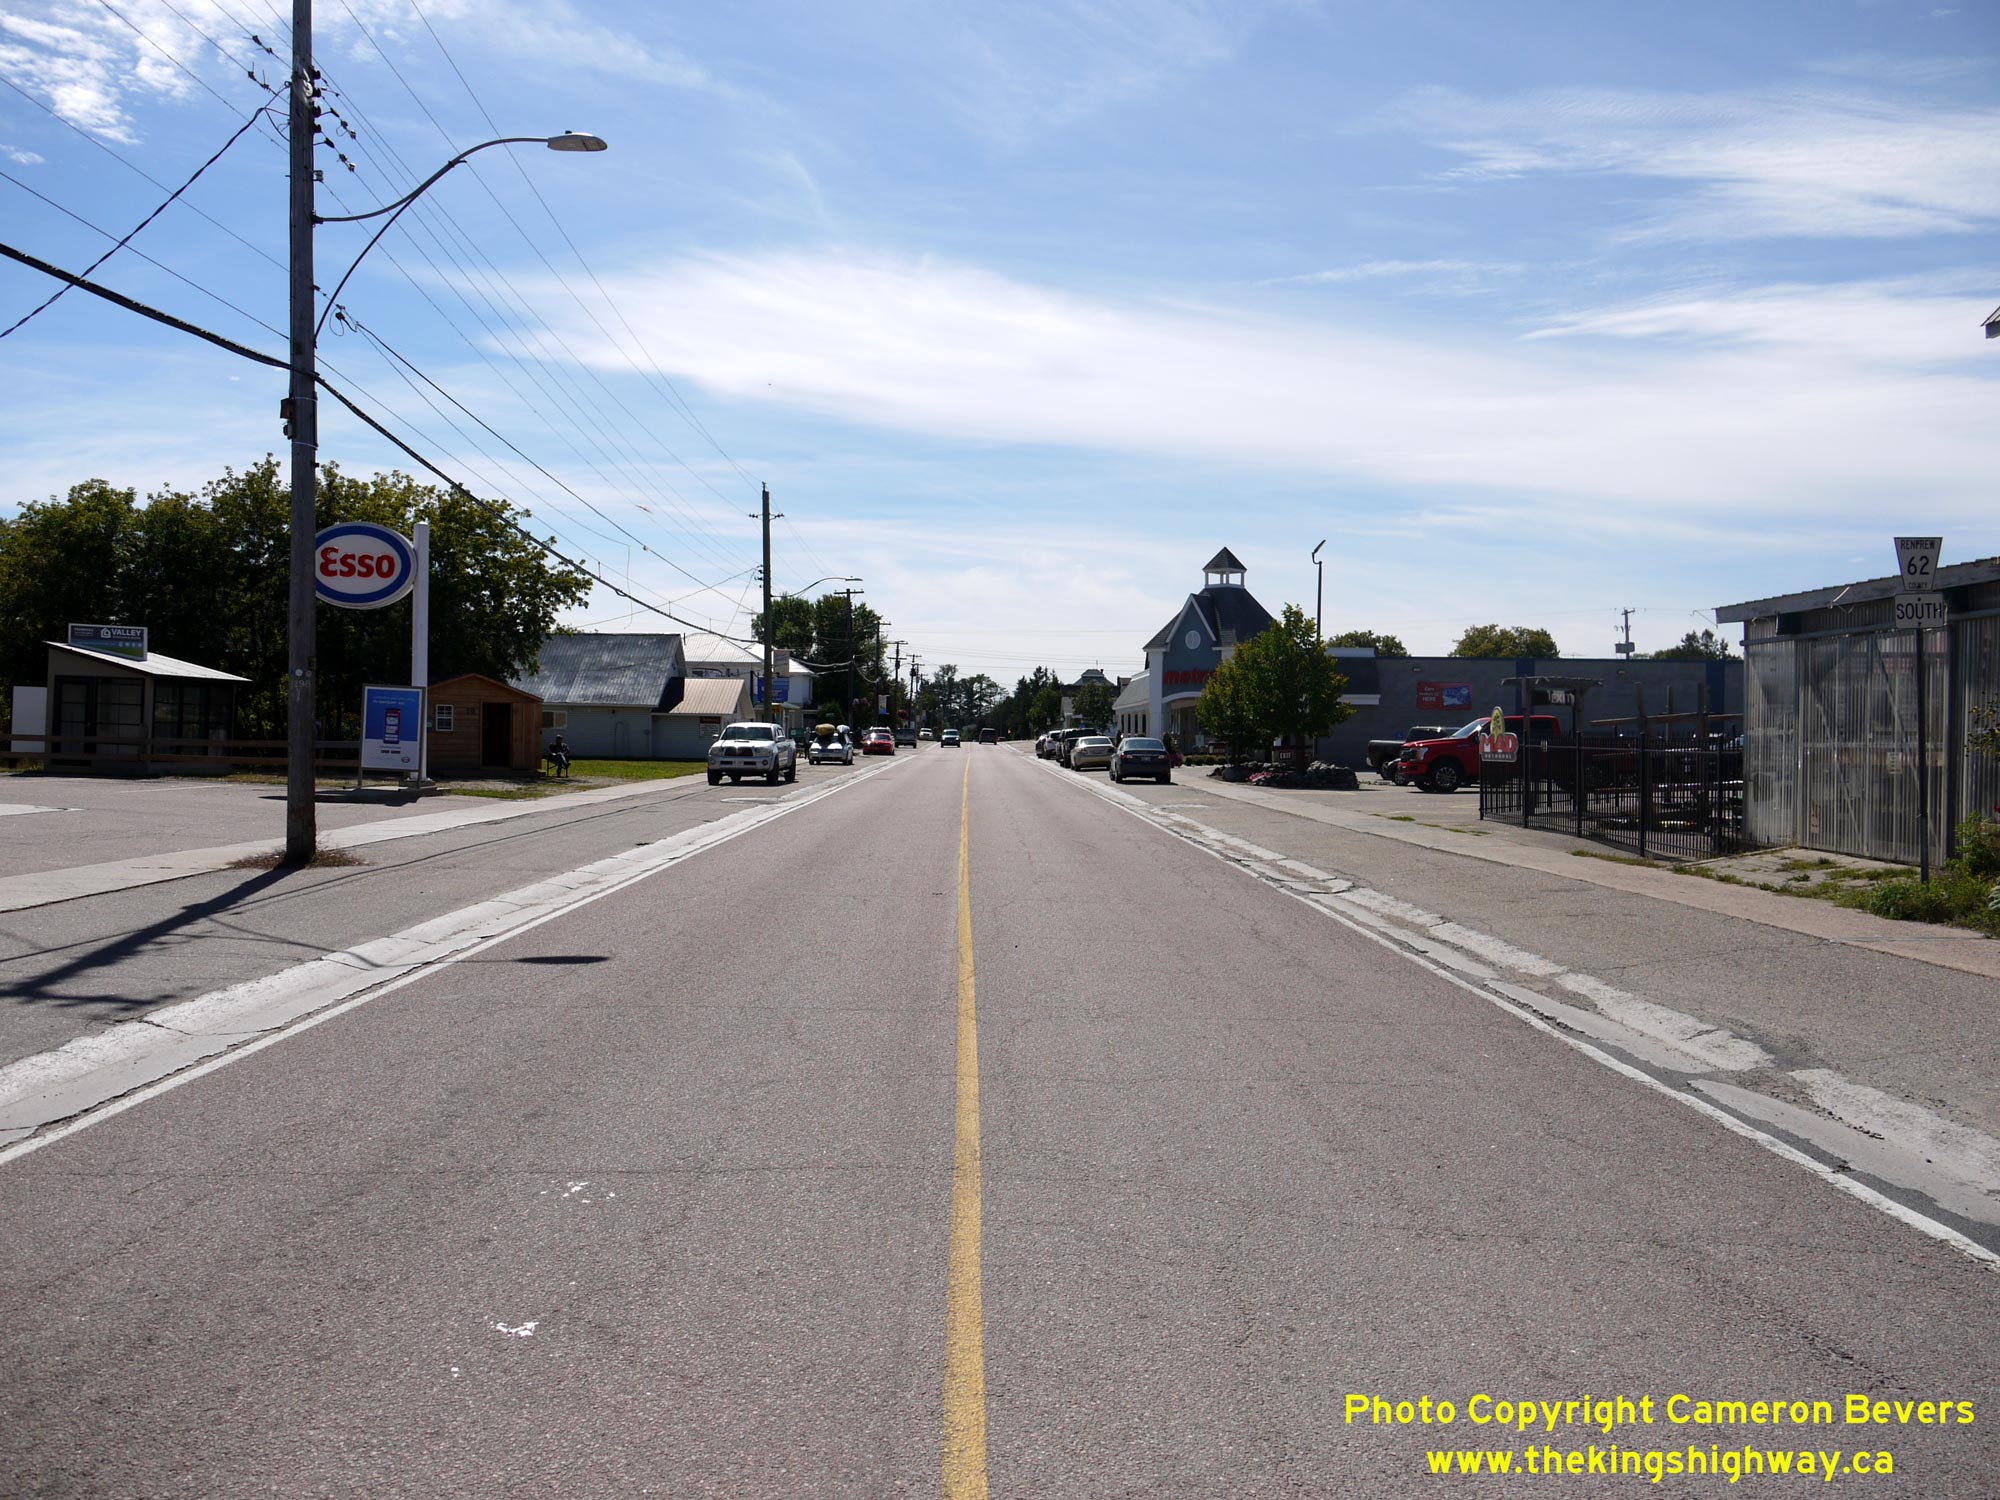
Above - Facing north along Hwy 62 (Bay Street) approaching the Hwy 60 Junction in Barry's Bay. Up until the 1990s, motorists who wished to continue north along
Hwy 62 to Pembroke would have had to turn right just ahead at the Hwy 60 Junction. From there, Hwy 60 & Hwy 62 continued easterly towards Killaloe via an
overlapped, concurrent route. See an Enlarged Photo Here. (Photograph taken on September 12, 2020 - © Cameron Bevers)
Continue on to King's Highway 60 Photos: Barry's Bay to Hwy 41
|
|---|
Links to Adjacent King's Highway Photograph Pages:
Back to Hwy 60 - Algonquin Park West Gate to Whitney
Hwy 60 Photo Index
On to Hwy 60 - Barry's Bay to Hwy 41
Back to King's Highway 59 Photos /
King's Highway 60 History /
Back to King's Highway 61 Photos
Ontario Highway History - Main Menu / Back to List of Highways Website contents, photos & text © 2002-2026, Cameron
Bevers (Webmaster) - All Rights Reserved / Contact Me
|
|---|