
| 
| |
|
|
This page contains present day photos (Year 2000 to date) of Ontario's King's Highway 69, arranged by location from Waubaushene
northerly to the Highway 169 Junction at Foot's Bay. All photographs displayed on this page were taken by the Webmaster (Cameron Bevers), unless specifically noted
otherwise. Click on any thumbnail to see a larger image!
Please note that all photographs displayed on this
website are protected by copyright. These photographs must not be reproduced, published,
electronically stored or copied, distributed, or posted onto other websites without
my written permission. If you want to use photos from this website, please
email me first for permission. Thank-you!
|
|---|
|
Page 4: Present Day King's Highway 69 Photographs (Waubaushene to Hwy 169)
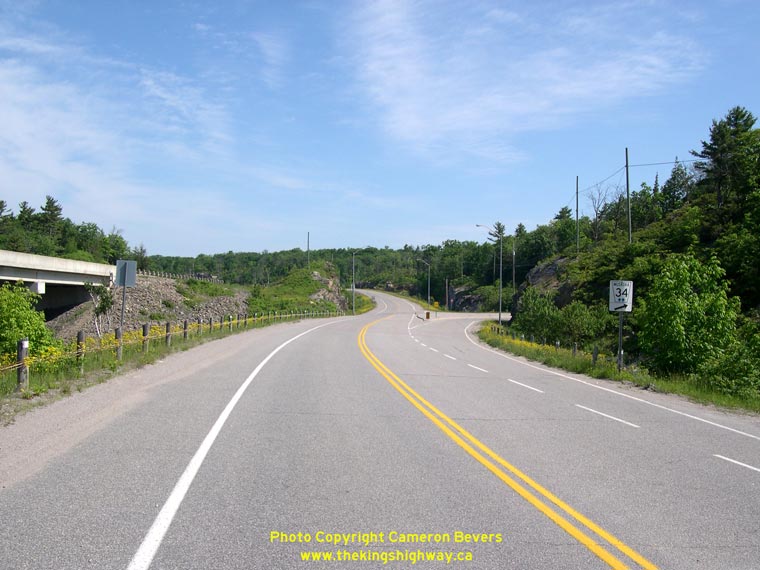

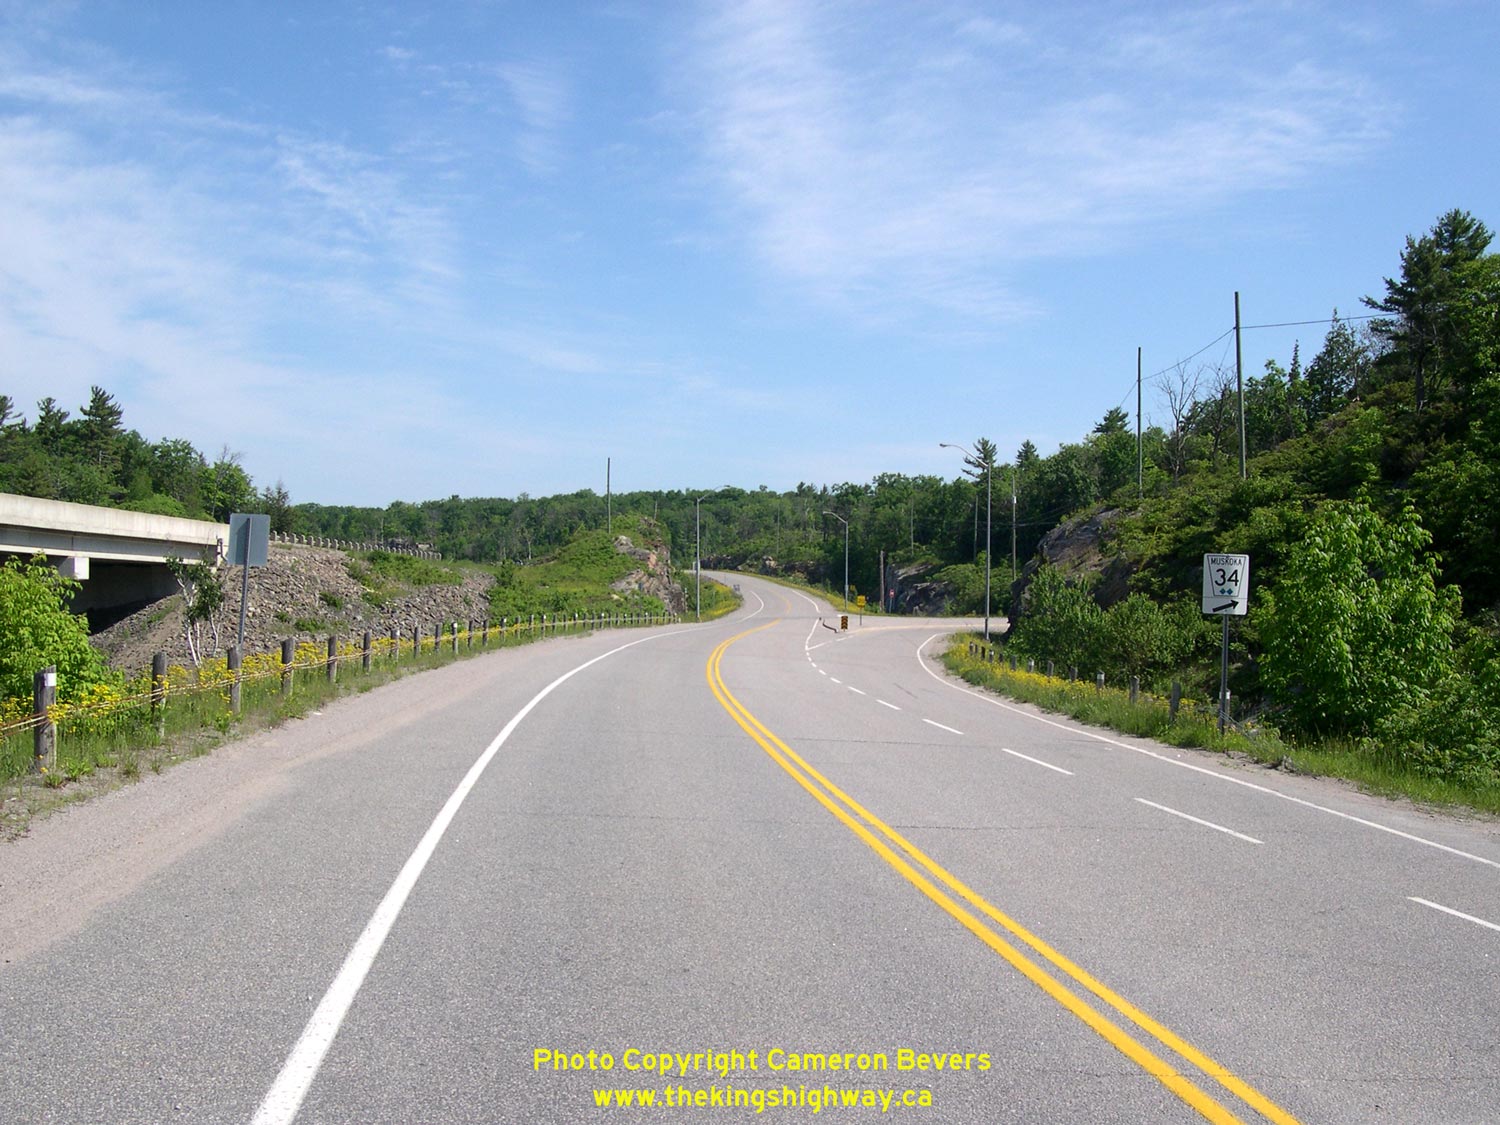
Left - Bypassed Hwy 69 alignment at Six Mile Lake, approaching the White's Falls Road turn-off to Big Chute. See an
Enlarged Photo here. (Photograph taken on June 10, 2007 - © Cameron Bevers) Right - A former section of Hwy 69 emerges beside Hwy 400 near Six Mile Lake. Most sections of Hwy 69 south of MacTier were simply twinned in the 1990s to create the new Hwy 400, but some parts of the old highway were bypassed altogether and now serve as access roads. See an Enlarged Photo here. (Photograph taken on June 10, 2007 - © Cameron Bevers) 
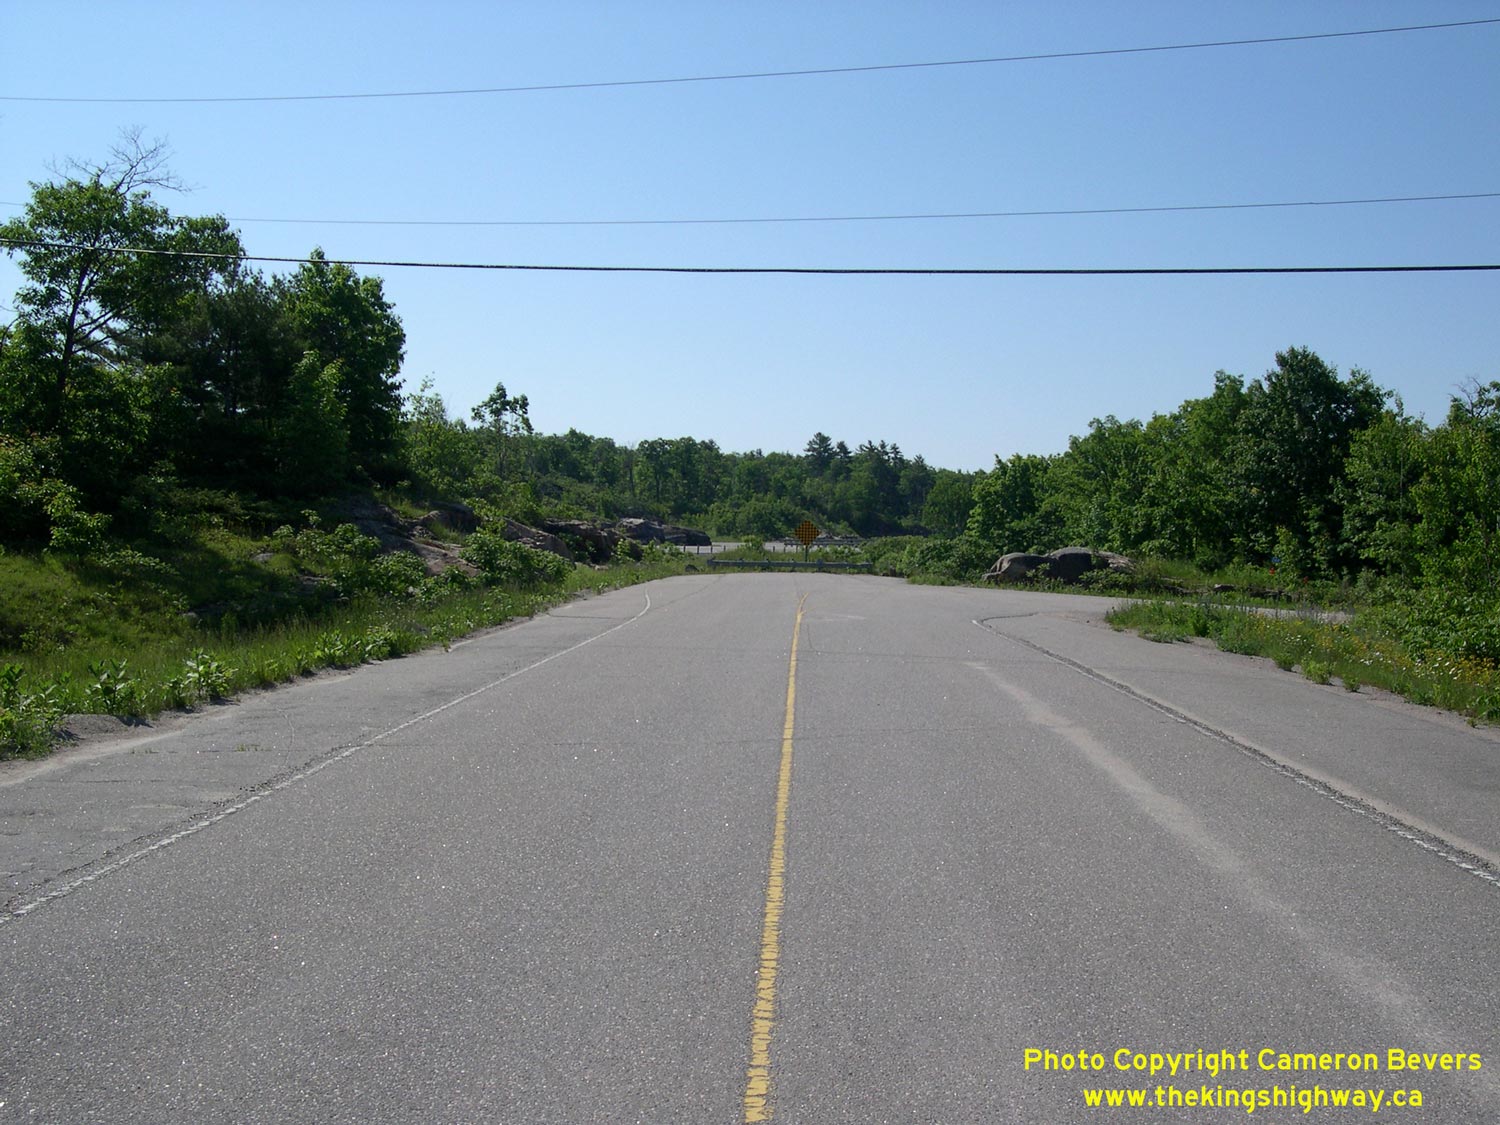
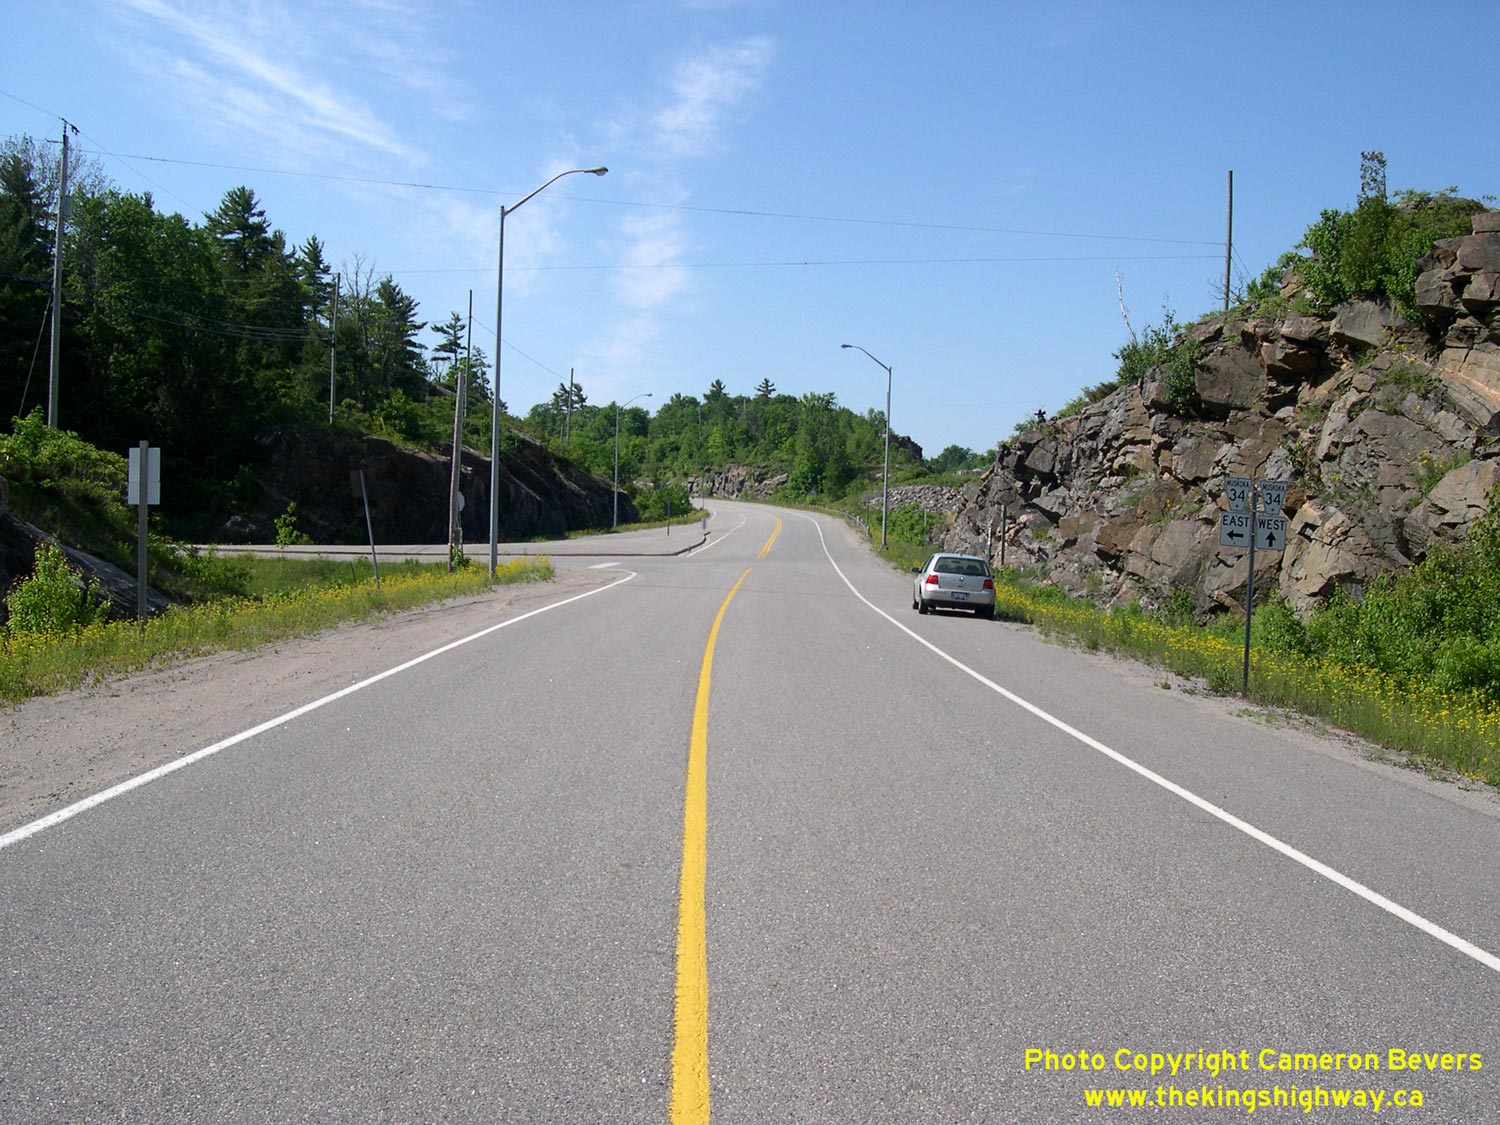
Left - Bypassed section of former Hwy 69 at Muskoka Road 34 (White's Falls Road). This section of Hwy 69 was bypassed in 1995 by the new four-lane Hwy 69 (now
Hwy 400). See an Enlarged Photo here. (Photograph taken on June 10, 2007 - © Cameron Bevers) Right - View of a bypassed Hwy 69 alignment (Lake Road) near Baxter Lake. This section of highway was severed from the rest of the former Hwy 69 alignment near Six Mile Lake when the new four-lane highway was built in the 1990s. Note the fully-paved shoulders, which were characteristic of the original Hwy 69 in this area. See an Enlarged Photo here. (Photograph taken on June 10, 2007 - © Cameron Bevers) 

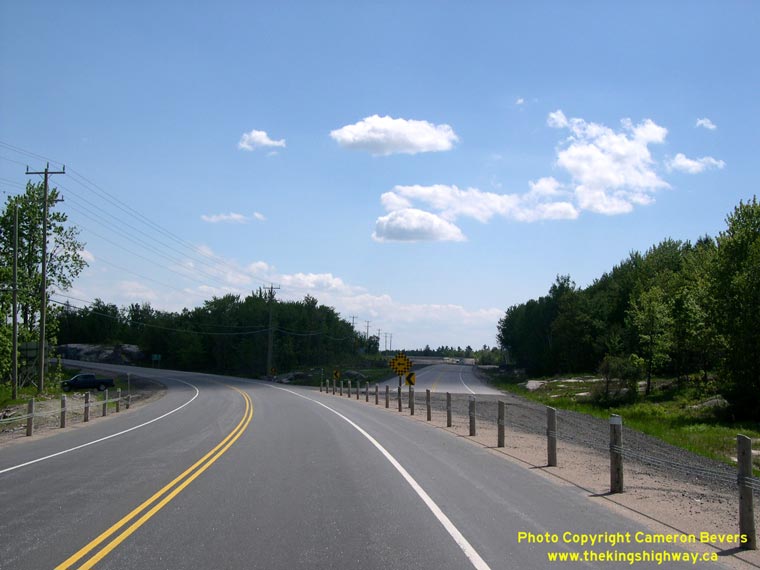
Left - End of Hwy 69 near Musquash River in June 2004, facing north towards MacTier. Hwy 400 & Hwy 69 continue northerly towards Parry Sound from this
point as a two-lane highway. The two-lane portion of Hwy 69 from the Musquash River to the Moon River will be widened to four lanes by 2008. See an
Enlarged Photo here. (Photograph taken on June 5, 2004 - © Cameron Bevers) Right - Same view in June 2007, showing conversion of Hwy 400 & Hwy 69 to a four-lane highway. Note the completed Musquash River Bridge at left, which will eventually carry southbound traffic only. A new bridge is now under construction for the northbound lanes. See an Enlarged Photo here. (Photograph taken on June 10, 2007 - © Cameron Bevers) 
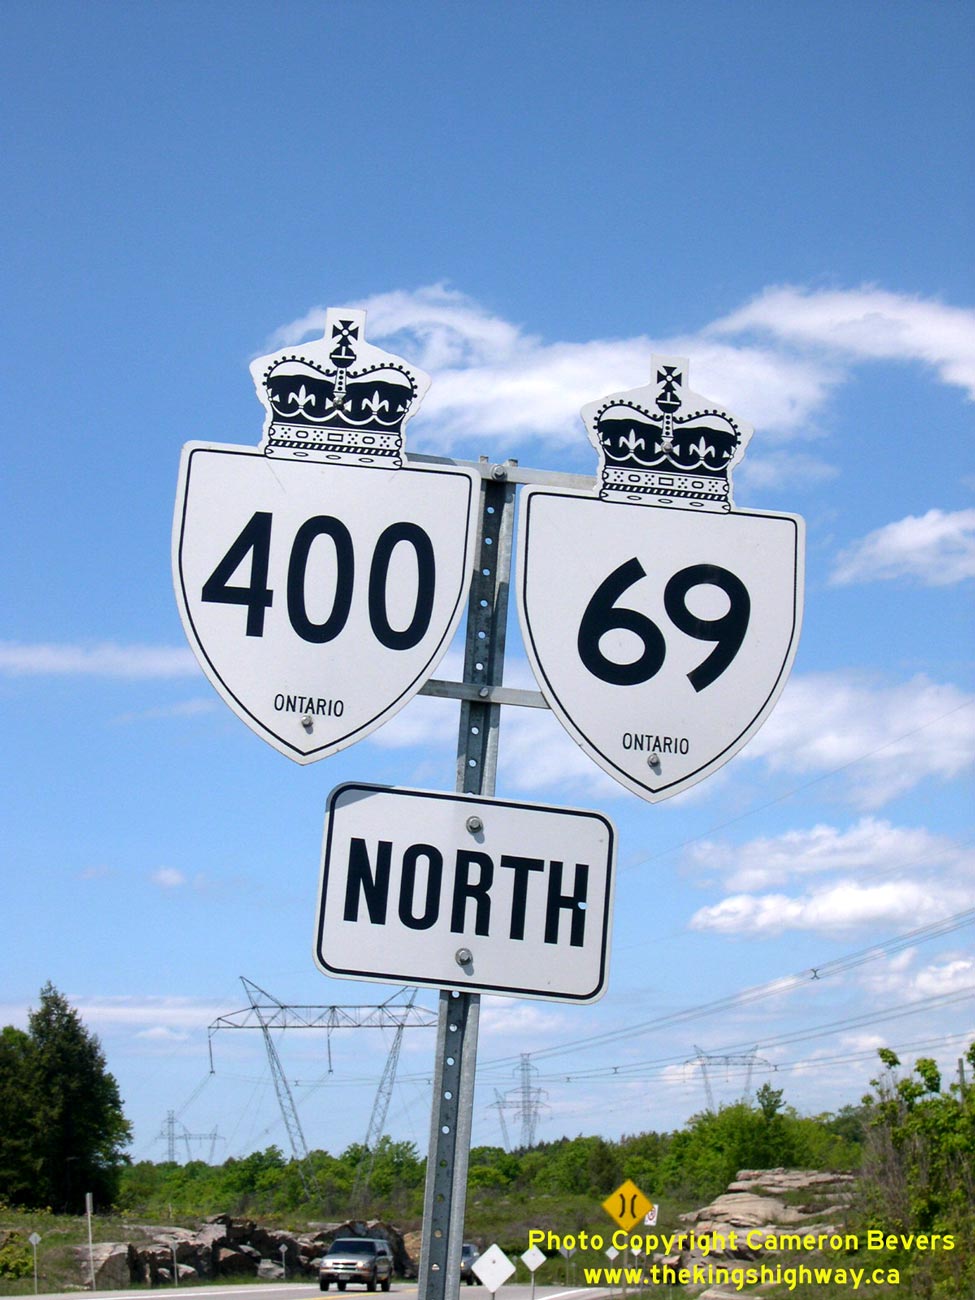
Above - Dual Hwy 400 & Hwy 69 route marker signs just south of the Moon River Bridge. See an
Enlarged Photo here. (Photograph taken on June 5, 2004 - © Cameron Bevers) 

Left - Facing south along Hwy 400 & Hwy 69 towards Port Severn from Twelve Mile Bay Road. Note the advance tree and shrub clearing for the future four-lane
highway taking place at right. See an Enlarged Photo here. (Photograph taken on June 5, 2004 - © Cameron Bevers) Right - Facing north along Hwy 400 & Hwy 69 towards Moon River Bridge from Twelve Mile Bay Road. See an Enlarged Photo here. (Photograph taken on June 5, 2004 - © Cameron Bevers) 

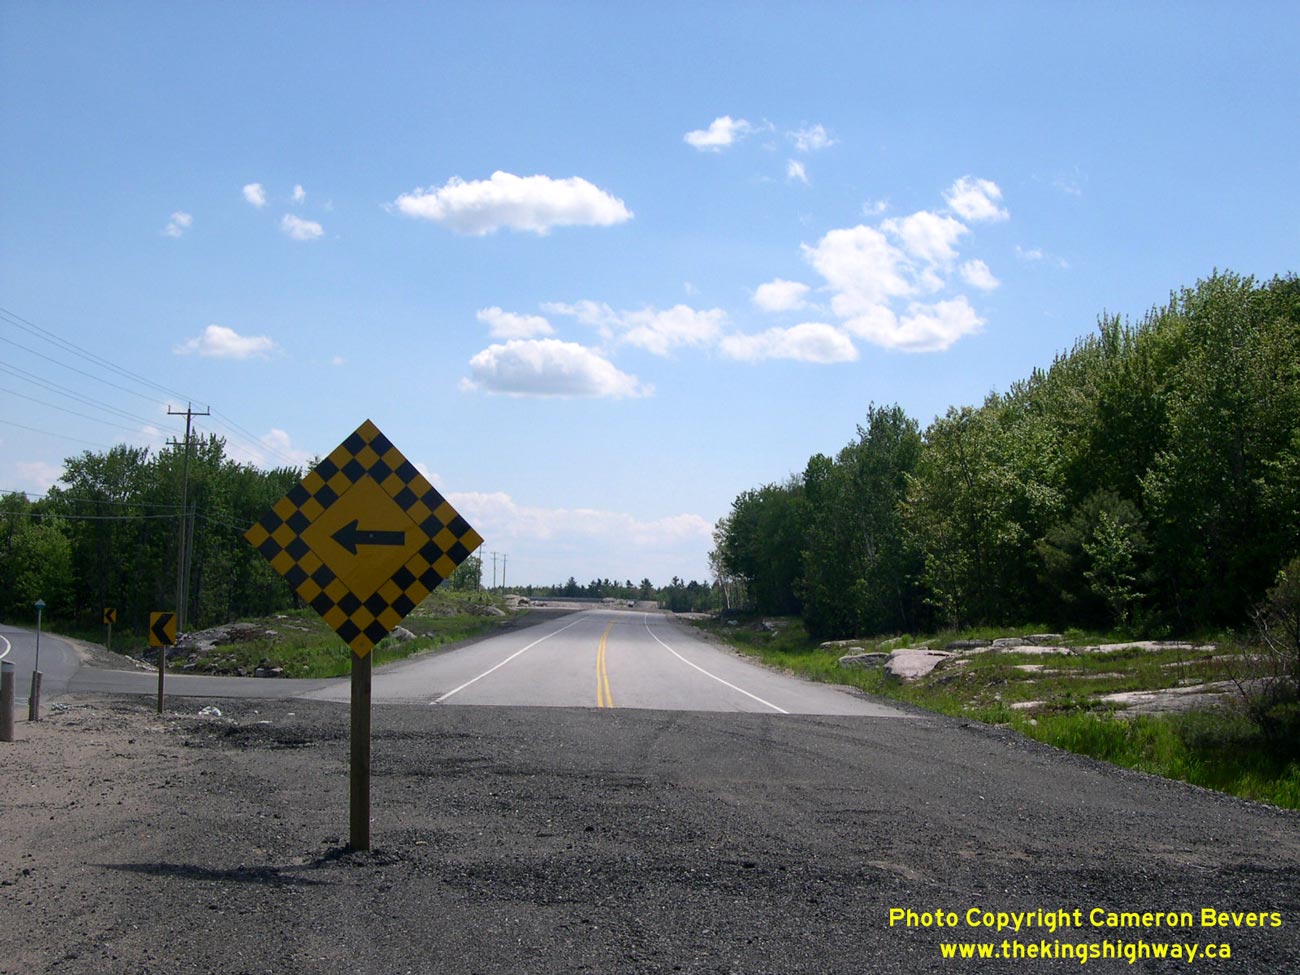
Left - In the mid-1950s, the Department of Highways embarked on an ambitious project to link Hwy 103 at Port Severn to MacTier. The route of Hwy 103
(later known as Hwy 69) was diverted around the proposed site of a bridge across the Moon River. The soil conditions at the bridge site were not adequately
tested during the highway's design phase, reportedly as a result of an engineering oversight. Contracts were tendered and construction of the new highway
began. When the results of the soil tests became available, engineers learned that the proposed bridge would have to be moved due to unfavourable soil
conditions at the initial bridge site. As a result, a considerable portion of the planned highway was rendered useless. This aborted Hwy 103 alignment
south of Moon River is now a Jeep trail. (Photograph taken in September, 2002 - © Cameron Bevers) Right - The construction of Hwy 103 progressed to the point that culverts had been constructed underneath the proposed highway. Had the soil tests been carried out early in the design phase, construction would not have proceeded. An abandoned concrete culvert (centre of photo) is visible from the current highway. (Photograph taken in September, 2002 - © Cameron Bevers) 

Left - Another view of the aborted alignment south of the cancelled Moon River Bridge on Hwy 103. Note the disused concrete culvert to the right of
the hydro pole. (Photograph taken in September, 2002 - © Cameron Bevers) Right - Several rock cuts were blasted, and the grading was practically completed before the oversight was discovered. This is a small rock cut on the aborted Hwy 103 alignment north of Moon River. (Photograph taken in September, 2002 - © Cameron Bevers) 

Left - A large rock cut on the aborted Hwy 103 alignment. Note the height of the truck for scale. The soil conditions at the Moon River Bridge site
resulted in the relocation of almost 2 km of the proposed highway. (Photograph taken in September, 2002 - © Cameron Bevers) Right - Grading was halted after the proposed bridge at Moon River was cancelled due to unfavourable soil conditions. What makes this situation so unique is that the highway approaches were almost complete when engineers decided to relocate the bridge site. While the exact sequence of these events will never be known for sure, it can be said with great certainty that the Department of Highways would not have allowed construction to proceed if the soil tests were in fact carried out properly. By the time the results of the soil condition tests were known, it was too late to salvage the planned highway. This unfortunate oversight likely cost the Department of Highways millions of dollars to rectify. (Photograph taken in September, 2002 - © Cameron Bevers) 

Left - View of aborted Hwy 103 alignment immediately north of the proposed Moon River Bridge (Photograph taken in September, 2002 - © Cameron Bevers) Right - North end of aborted Hwy 103 alignment at Moon River. The actual Hwy 103 (later known as Hwy 69) is seen in the background. (Photograph taken in September, 2002 - © Cameron Bevers) 

Left - Facing north along Hwy 400 & Hwy 69 at Moon River Bridge south of MacTier. See an
Enlarged Photo here. (Photograph taken on June 5, 2004 - © Cameron Bevers) Right - Facing south along Hwy 400 & Hwy 69 across Moon River Bridge. Structure completed in 1959. See an Enlarged Photo here. (Photograph taken on June 5, 2004 - © Cameron Bevers) 

Left - Facing south towards Moon River Bridge along Hwy 400 & Hwy 69. When Hwy 69 was twinned in 2006-2007, the steel truss bridge across the Moon River
was replaced with two new structures. See an Enlarged Photo here. (Photograph taken on June 5, 2004 - © Cameron Bevers) Right - Facing south along Hwy 400 & Hwy 69 towards Port Severn north of the Moon River Bridge. See an Enlarged Photo here. (Photograph taken on June 5, 2004 - © Cameron Bevers) 
Left - Facing north along Hwy 400 & Hwy 69 towards MacTier north of the Moon River Bridge. See an
Enlarged Photo here. (Photograph taken on June 5, 2004 - © Cameron Bevers) Right - Hwy 69 realignment near the Hwy 400 Interchange south of MacTier. See an Enlarged Photo here. (Photograph taken on June 5, 2004 - © Cameron Bevers) 
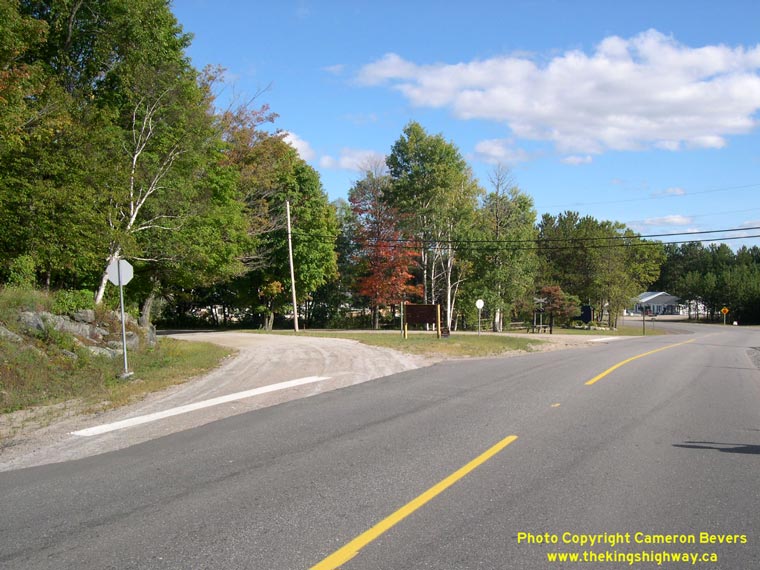
Left - Close-up of abandoned Hwy 69 alignment near the Hwy 400 Interchange. This short section of Hwy 69 was bypassed entirely when the new Hwy 400 Extension
was completed and opened to traffic in October, 2003. See an Enlarged Photo here. (Photograph taken on June 5, 2004 - © Cameron Bevers) Right - Old 1930s alignment of Hwy 69 in MacTier (at left), facing south towards Bala. See an Enlarged Photo here. (Photograph taken on September 20, 2003 - © Cameron Bevers) 

Left - Facing south along Hwy 400 towards Port Severn from the Lake Joseph Road (Old Hwy 69) Overpass near MacTier. This interchange marks the beginning of an
entirely new highway alignment for Hwy 400 between MacTier and Horseshoe Lake, which was constructed in the early 2000s. Previously, the two-lane Hwy 69 curved
easterly towards MacTier just north of this interchange. The proposed four-lane Hwy 69 (today's Hwy 400) connected to existing Hwy 69 via a grade-separated
interchange here, before narrowing back to a two-lane highway about 1 km south of this interchange. For several years, Hwy 69 & Hwy 400 was a two-lane undivided
highway from a point just south of the Musquash River Bridge to a point north of the Moon River Bridge. See an
Enlarged Photo Here. (Photograph taken on October 2, 2022 - © Cameron Bevers) Right - Lake Joseph Road (Old Hwy 69) Overpass near MacTier, facing west. The ramps at the Lake Joseph Road Interchange are in a "Trumpet-B" configuration. On the far side of this bridge, the road divides. All westbound traffic from Lake Joseph Road is forced onto southbound Hwy 400 towards Barrie and Toronto. See an Enlarged Photo Here. (Photograph taken on October 2, 2022 - © Cameron Bevers) 

Left - Southern side of the Lake Joseph Road (Old Hwy 69) Overpass near MacTier. This two-span concrete girder structure was built under Contract #2000-0235
and was completed in 2001. This bridge carries traffic from Old Hwy 69 and feeds it into the southbound lanes of Hwy 400. There is also a lightly-used "B" inner loop
ramp which carries traffic from southbound Hwy 400 to nearby MacTier via Lake Joseph Road. See an
Enlarged Photo Here. (Photograph taken on October 2, 2022 - © Cameron Bevers) Right - Date stamp (2001) and structure identification number (Site #42-320) on the Lake Joseph Road (Old Hwy 69) Overpass near MacTier. See an Enlarged Photo Here. (Photograph taken on October 2, 2022 - © Cameron Bevers) 

Left - Western terminus of Lake Joseph Road (Old Hwy 69) at the Hwy 400 Interchange. At right, an outer directional ramp carries traffic to southbound Hwy 400,
while at left, the "B" inner loop ramp carries traffic from southbound Hwy 400 to Lake Joseph Road. Trumpet-B interchanges are characterized by having the inner
loop ramp exiting from the freeway on the downstream side of the grade separation, whereas in a Trumpet-A configuration, the inner loop ramp enters the freeway
upstream of the grade separation. Trumpet-A configurations are generally more desirable in highway design for a variety of technical reasons, but in this case, the
"B" configuration offers superior operations for the predominant traffic movement towards Barrie and Toronto. See an
Enlarged Photo Here. (Photograph taken on October 2, 2022 - © Cameron Bevers) Right - Lake Joseph Road (Old Hwy 69) Overpass, facing east towards MacTier. This bridge was designed with a wide painted flush median rather than a raised traffic island across Hwy 400. See an Enlarged Photo Here. (Photograph taken on October 2, 2022 - © Cameron Bevers) 

Left - Facing north along Hwy 400 towards Parry Sound from the Lake Joseph Road (Old Hwy 69) Overpass. The original two-lane Hwy 69 formed the northbound
carriageway of the current highway. The section of Hwy 69 through the interchange was "twinned" under Contract #2000-0235, through the construction of a new
southbound carriageway. Just north of the interchange, Hwy 69 curved to the east into MacTier, while the new four-lane Hwy 69 was constructed straight ahead. The
abandoned remnants of the old connection to Hwy 69 can be seen just above the northbound transport truck. The new four-lane highway was completed and officially
opened to traffic as part of a northerly extension of Hwy 400 on October 7, 2003. The completion of Hwy 400 from MacTier to Horseshoe Lake took four full construction
seasons and spanned three separate construction contracts. The construction of this highway was a significant undertaking! See an
Enlarged Photo Here. (Photograph taken on October 2, 2022 - © Cameron Bevers) Right - Northern side of the Lake Joseph Road (Old Hwy 69) Overpass near MacTier. See an Enlarged Photo Here. (Photograph taken on October 2, 2022 - © Cameron Bevers)
Continue on to King's Highway 69 Photos: Hwy 169 to Horseshoe Lake
|
|---|
Links to Adjacent King's Highway Photograph Pages:
Back to Hwy 69 Historical Photos (1980-1999)
Hwy 69 Photo Index
On to Hwy 69 - Hwy 169 to Horseshoe Lake
Back to King's Highway 68 Photos /
King's Highway 69 History /
On to King's Highway 70 Photos
Ontario Highway History - Main Menu / Back to List of Highways Website contents, photos & text © 2002-2026, Cameron
Bevers (Webmaster) - All Rights Reserved / Contact Me
|
|---|