
| 
| |
|
|
This page contains present day photos (Year 2000 to date) of Ontario's King's Highway 69, arranged by location from the
Highway 124 Interchange in Parry Sound northerly to the Highway 526 Junction in Britt. All photographs displayed on this page were taken by the Webmaster (Cameron
Bevers), unless specifically noted otherwise. Click on any thumbnail to see a larger image!
Please note that all photographs displayed on this
website are protected by copyright. These photographs must not be reproduced, published,
electronically stored or copied, distributed, or posted onto other websites without
my written permission. If you want to use photos from this website, please
email me first for permission. Thank-you!
|
|---|
|
Page 7: Present Day King's Highway 69 Photographs (Parry Sound to Britt)


Left - Facing south along Hwy 69 (today's Hwy 400) at the Hwy 124 Interchange near Parry Sound. See an
Enlarged Photo here. (Photograph taken on June 5, 2004 - © Cameron Bevers) Right - Facing north along Hwy 69 (today's Hwy 400) towards the Hwy 124 Interchange near Parry Sound. See an Enlarged Photo here. (Photograph taken on June 5, 2004 - © Cameron Bevers) 

Left - Heavy grading for the future four-lane Hwy 69 & Hwy 400 at Lake Forest Drive in 2006, facing north between the Hwy 124 Interchange and Nobel. (Photograph taken on August 5, 2006 - © Cameron Bevers) Right - The future four-lane Hwy 69 & Hwy 400 starts to take form between Nobel and the Hwy 124 Interchange in 2007. See an Enlarged Photo here. (Photograph taken on July 3, 2007 - © Cameron Bevers) 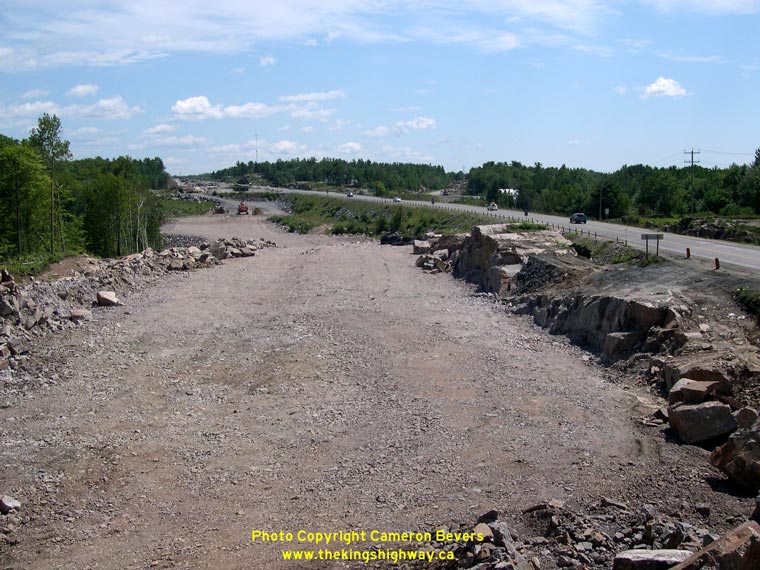

Left - Facing south along the future four-lane Hwy 69 & Hwy 400 in 2006, between Nobel and the Hwy 124 Interchange. See an
Enlarged Photo here. (Photograph taken on August 5, 2006 - © Cameron Bevers) Right - New Lake Forest Drive Underpass on the future four-lane Hwy 69 & Hwy 400 near Nobel. A new southbound structure was built after the completed northbound structure (at left) was opened to traffic. (Photograph taken on July 3, 2007 - © Cameron Bevers) 
Left - Facing north along the future Northbound lanes of Hwy 69 approaching Nobel in 2008. See an
Enlarged Photo here. (Photograph taken on September 21, 2008 - © Cameron Bevers) Right - Nearly-complete Northbound lanes of Hwy 69 at Lake Forest Drive near Nobel. During 2009 and 2010, these lanes were used for two-way traffic to accommodate the construction staging for the Southbound Lake Forest Drive Underpass. The current highway alignment at right will form the future Southbound lanes of the four-lane Hwy 69 & Hwy 400 once the highway is completed. (Photograph taken on September 21, 2008 - © Cameron Bevers) 

Left - Future Northbound lanes of Hwy 69 approaching Nobel in 2008, facing north. (Photograph taken on September 21, 2008 - © Cameron Bevers) Right - End of the graded four-lane highway at the southern entrance to Nobel in 2008. Separate construction contracts were awarded for the completion of the Nobel Bypass section of Hwy 69 & Hwy 400. The Nobel Bypass was completed and opened to traffic on October 26, 2010. See an Enlarged Photo here. (Photograph taken on September 21, 2008 - © Cameron Bevers) 

Left - Facing north along Hwy 69 approaching Nobel, north of Parry Sound. The small community of Nobel was bypassed in 2010 by the new four-lane
Hwy 69 & Hwy 400. This photo shows the southern entrance to the community in 2006, before construction of the bypass got underway. See an
Enlarged Photo here. (Photograph taken on August 5, 2006 - © Cameron Bevers) Right - View of the future four-lane highway location at the southern entrance to Nobel in 2006, prior to construction. (Photograph taken on August 5, 2006 - © Cameron Bevers) 

Left - Facing south along Hwy 69 at Nobel in 2006. Until the Nobel Bypass was completed in 2010, the highway widened to a four-lane undivided
cross section through town. The outer lanes of the highway were removed once the Nobel Bypass was completed and opened to traffic in 2010. See an
Enlarged Photo here. (Photograph taken on August 5, 2006 - © Cameron Bevers) Right - Approaching Nobel on Hwy 69, facing south towards Parry Sound. See an Enlarged Photo here. (Photograph taken on August 5, 2006 - © Cameron Bevers) 

Left - Facing north along Hwy 69 between Nobel and the Hwy 559 Junction. (Photograph taken on August 5, 2006 - © Cameron Bevers) Right - Facing south along Hwy 69 towards Parry Sound from the Hwy 559 Junction near Nobel. See an Enlarged Photo here. (Photograph taken on August 5, 2006 - © Cameron Bevers) 

Left - Junction of Hwy 69 and Hwy 559 near Nobel, facing north towards Sudbury. See an
Enlarged Photo here. (Photograph taken on August 5, 2006 - © Cameron Bevers) Right - Green guide sign marking the Hwy 559 Junction on Hwy 69 north of Nobel. (Photograph taken on August 5, 2006 - © Cameron Bevers) 

Left - Facing west along Hwy 559 from the Hwy 69 Junction north of Nobel. This short secondary highway provides access to nearby Killbear Provincial
Park, in addition to serving a number of small communities along Georgian Bay. Killbear Provincial Park is one of Ontario's most popular summer vacation
destinations, so Hwy 559 carries an extraordinary amount of tourist traffic during the summer. (Photograph taken on August 5, 2006 - © Cameron Bevers) Right - Guide signs at the eastern terminus of Hwy 559 at the Hwy 69 Junction north of Nobel. (Photograph taken on August 5, 2006 - © Cameron Bevers) 

Left - Eastern terminus of Hwy 559 at the Hwy 69 Junction north of Nobel in 2006. During construction of the new four-lane Hwy 69 & Hwy 400, a
new interchange was built at Hwy 559 and the new highway about 2 km to the north. This intersection no longer carries Hwy 559 or Hwy 69 traffic. (Photograph taken on August 5, 2006 - © Cameron Bevers) Right - Junction signs marking the Hwy 559 Junction on Southbound Hwy 69 north of Nobel. (Photograph taken on August 5, 2006 - © Cameron Bevers) 

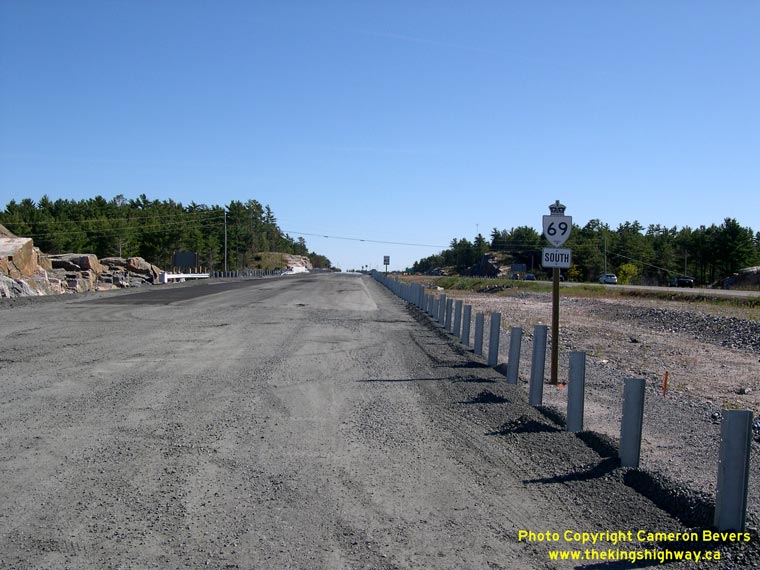
Left - A "Can't See? Don't Pass!" advisory sign on Hwy 69 north of Parry Sound. While this may seem like a perfectly prudent and sensible notion, it
never fails to amaze me just how stupid drivers can be on this highway. (Photograph taken on August 5, 2006 - © Cameron Bevers) Right - Facing south along Hwy 69 towards the Hwy 559 Junction near Nobel in 2006. See an Enlarged Photo here. (Photograph taken on August 5, 2006 - © Cameron Bevers) 

Left - Facing north towards Pointe-au-Baril along Hwy 69 at the Blair Creek Bridge. (Photograph taken on August 5, 2006 - © Cameron Bevers) Right - Blair Creek Bridge on Hwy 69 north of Nobel. Structure completed in 1958. (Photograph taken on August 5, 2006 - © Cameron Bevers) 

Left - Eastern side of the Blair Creek Bridge on Hwy 69 north of Nobel. (Photograph taken on August 5, 2006 - © Cameron Bevers) Right - Facing south towards Nobel along Hwy 69 at the Blair Creek Bridge. See an Enlarged Photo here. (Photograph taken on August 5, 2006 - © Cameron Bevers) 

Left - Facing south along Hwy 69 towards Nobel in 2006, about 2 km north of Hwy 559. When Hwy 69 was widened to four lanes in 2010, Hwy 559 was
realigned so that it met the new highway at an interchange which was constructed roughly at this point. See an
Enlarged Photo here. (Photograph taken on August 5, 2006 - © Cameron Bevers) Right - Facing north along Hwy 69 towards Pointe-au-Baril in 2006, from the proposed new junction of Hwy 559. (Photograph taken on August 5, 2006 - © Cameron Bevers) 

Left - Junction signs at the eastern terminus of Hwy 644 at the Hwy 69 Junction in Pointe-au-Baril. (Photograph taken on August 5, 2006 - © Cameron Bevers) Right - Oversized junction sign on Northbound Hwy 69 at the Hwy 644 Junction in Pointe-au-Baril. (Photograph taken on August 5, 2006 - © Cameron Bevers) 

Left - Facing south along Hwy 69 towards the Hwy 644 junction in Pointe-au-Baril. See an
Enlarged Photo here. (Photograph taken on August 5, 2006 - © Cameron Bevers) Right - Harris River Bridge on Hwy 69 north of Pointe-au-Baril. This massive concrete barrel arch structure was completed in 1959. (Photograph taken on August 5, 2006 - © Cameron Bevers) 

Left - Facing north along Hwy 69 towards Britt from the Harris River Bridge. See an
Enlarged Photo here. (Photograph taken on August 5, 2006 - © Cameron Bevers) Right - Facing south along Hwy 69 towards Pointe-au-Baril from the Harris River MTO Picnic Area. (Photograph taken on August 5, 2006 - © Cameron Bevers) 

Left - The beautiful Magnetawan River Bridge on Hwy 69 between Byng Inlet and Britt was completed in 1959. This bridge is one of Ontario's most
picturesque highway structures. It was also the last new open-spandrel concrete arch bridge constructed on the King's Highway System. See an
Enlarged Photo here. (Photograph taken on August 5, 2006 - © Cameron Bevers) Right - Facing north along Hwy 69 towards Sudbury at the Magnetawan River Bridge. (Photograph taken on August 5, 2006 - © Cameron Bevers) 

Left - Western side of the Magnetawan River Bridge on Hwy 69. Structure completed in 1959. (Photograph taken on August 5, 2006 - © Cameron Bevers) Right - Eastern side of the Magnetawan River Bridge on Hwy 69 near Britt. (Photograph taken on August 5, 2006 - © Cameron Bevers) 

Left - An abandoned Hwy 69 alignment departs the current Hwy 69 at the Hwy 529 Junction near Byng Inlet. (Photograph taken on August 5, 2006 - © Cameron Bevers) Right - This old Hwy 69 alignment near Byng Inlet is now a private driveway. This road eventually leads to the site of the original Hwy 69 bridge across the Magnetawan River, a short distance east of the current arch bridge. (Photograph taken on August 5, 2006 - © Cameron Bevers) 

Left - View of the Magnetawan River from the current Hwy 69 bridge. In 1936, highway builders bridged the narrow rocky portion of the river in the
background with a large timber truss structure. (Photograph taken on August 5, 2006 - © Cameron Bevers) Right - Site of the former Magnetawan River Bridge on Hwy 69. The original bridge was a two-span timber truss (Howe type) with a timber pile trestle approach. The timber truss bridge was demolished shortly after the concrete arch bridge was completed in 1959. (Photograph taken on August 5, 2006 - © Cameron Bevers) 

Left - The concrete piers for the bridge are still intact, along with the bottom members of the trestle structure. Unfortunately, the rest of this
magnificent timber truss bridge is gone, a fate shared by so many other timber truss bridges in Ontario. This once common bridge design is now practically
extinct in this province, thanks to thoughtless "progress" and weak heritage conservation laws. (Photograph taken on August 5, 2006 - © Cameron Bevers) Right - A rock fill approach on the north side of the Magnetawan River. These rocks were likely blasted from a rock cut a short distance to the north, and hauled down to the bridge site entirely by manual labour. This part of Hwy 69 was built as an unemployment relief project during the Great Depression of the 1930s. The use of mechanical road graders was deliberately kept to a minimum, in order to ensure employment opportunities for as many people as possible. (Photograph taken on August 5, 2006 - © Cameron Bevers) 

Left - View of the former Magnetawan River Bridge site from the north shore. Compare this present day photo to a
1953 photo of the original 1936 timber truss bridge, taken from approximately the same
location. (Photograph taken on August 5, 2006 - © Cameron Bevers) Right - The old overgrown alignment of Hwy 69 glides away into the bush towards the original Magnetawan River Bridge site, about 4 km south of the Hwy 526 junction near Britt. (Photograph taken on August 5, 2006 - © Cameron Bevers) 
Above - Site of the original Hwy 69 bridge across the Still River near Britt. This short steel truss bridge was originally constructed in 1941. In
1954, it was bypassed when the new Still River Bridge was built a short distance to the east on the relocated Hwy 69. The old Still River Bridge remained
in service for several years as an access road to Britt Station, but the bridge was eventually closed to traffic and removed. Only the timber pilings of
the old bridge remain today. (Photograph taken on August 5, 2006 - © Cameron Bevers)
Continue on to King's Highway 69 Photos: Britt to Hwy 64
|
|---|
Links to Adjacent King's Highway Photograph Pages:
Back to King's Highway 68 Photos /
King's Highway 69 History /
On to King's Highway 70 Photos
Ontario Highway History - Main Menu / Back to List of Highways Website contents, photos & text © 2002-2026, Cameron
Bevers (Webmaster) - All Rights Reserved / Contact Me
|
|---|