
| 
| |
|
|
This page contains present day photos (Year 2000 to date) of Ontario's King's Highway 6, arranged by location from Hamilton
northerly to Freelton. All photographs displayed on this page were taken by the Webmaster
(Cameron Bevers), unless specifically noted otherwise. Click on any thumbnail to see a larger image!
Please note that all photographs displayed on this
website are protected by copyright. These photographs must not be reproduced, published,
electronically stored or copied, distributed, or posted onto other websites without
my written permission. If you want to use photos from this website, please
email me first for permission. Thank-you!
|
|---|
|
Page 7: Present Day King's Highway 6 Photographs (Hamilton to Freelton)

Above - Facing north along Hwy 2 (York Boulevard) towards Aldershot at the Ramp "N" Underpass. See an
Enlarged Photo here. (Photograph taken on June 23, 2011 - © Cameron Bevers) 

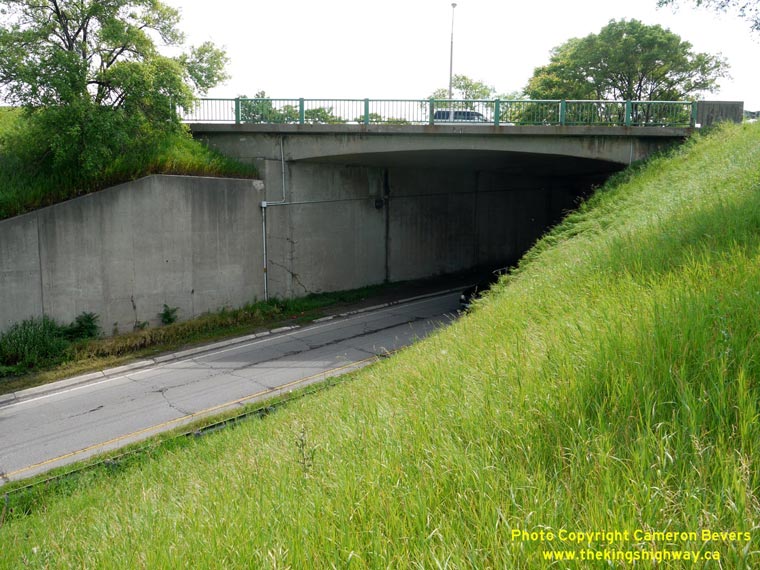
Left - Ramp "N" Underpass on Hwy 2 (York Boulevard), facing south towards Downtown Hamilton. See an
Enlarged Photo here. (Photograph taken on June 23, 2011 - © Cameron Bevers) Right - The concrete and steel handrail design used on the Ramp "N" structure was used on virtually all bridges along Hwy 403 through Downtown Hamilton. See an Enlarged Photo here. (Photograph taken on June 23, 2011 - © Cameron Bevers) 
Left - Eastern side of the Ramp "N" Underpass on Hwy 403. This single span concrete rigid frame structure was completed in 1962. See an
Enlarged Photo here. (Photograph taken on June 23, 2011 - © Cameron Bevers) Right - Western side of the Ramp "N" Underpass on Hwy 403 at the York Boulevard Interchange in Hamilton. See an Enlarged Photo here. (Photograph taken on June 23, 2011 - © Cameron Bevers) 

Left - View of Ramp "N" from Hwy 2 (York Boulevard), facing north. Ramp "N" carries traffic on northbound York Boulevard to eastbound Hwy 403. See an
Enlarged Photo here. (Photograph taken on June 23, 2011 - © Cameron Bevers) Right - Ramp "M" Overpass on Hwy 403 in Hamilton. This ramp carries traffic from westbound Hwy 403 to southbound York Boulevard. See an Enlarged Photo here. (Photograph taken on June 23, 2011 - © Cameron Bevers) 

Left - Facing north across the Ramp "M" Overpass at the York Boulevard Interchange on Hwy 403 in Hamilton. Structure completed in 1964. See an
Enlarged Photo here. (Photograph taken on June 23, 2011 - © Cameron Bevers) Right - Aerial view of the York Boulevard Interchange on Hwy 403 in Hamilton. This exit used to carry Hwy 6 traffic into Downtown Hamilton via York Boulevard and the McQuesten Bridge until Hwy 6 was rerouted in the late 1990s. The Ramp "N" Underpass can be seen at left, while the Ramp "M" Overpass can be seen at right. See an Enlarged Photo here. (Photograph taken on November 3, 2006 - © Cameron Bevers) 

Left - Facing west along Hwy 403 from the York Boulevard Interchange. This section of Hwy 403 features some rather constrained road geometry, primarily due to
the limited space available between the railway and the adjacent lake (Cootes Paradise). See an
Enlarged Photo here. (Photograph taken on November 3, 2006 - © Cameron Bevers) Right - Overhead pre-advance guide sign on eastbound Hwy 403, indicating the upcoming exit to Hwy 6 North. Note that the "74" exit tab is aligned with the left-hand side of the sign, instead of its normal position on the right-hand side. This was done deliberately, in order to provide positive guidance to drivers that they are approaching an unusual left-hand exit. See an Enlarged Photo here. (Photograph taken on April 12, 2011 - © Cameron Bevers) 

Left - This newer overhead diagrammatic sign was installed during reconstruction of Hwy 403 in 1997. It graphically illustrates to drivers that the upcoming
exit to Hwy 6 North is a left-hand exit. This newer sign is an improvement over the original overhead highway sign, which can be seen in the background of this
Historic 1984 Photo. The old sign merely described the left-hand exit using the following text:
"6 North Exits Left 1 km". See an Enlarged Photo here. (Photograph taken on April 12, 2011 - © Cameron Bevers) Right - Advance overhead guide sign on eastbound Hwy 403 approaching the Hwy 6 North Interchange in Hamilton. The "74"exit tab on this sign is also left-justified, consistent with this left-hand exit. Although left-hand exits did see some limited use in the early days of freeway construction in Ontario, highway engineers quickly learned that these interchange configurations were confusing to drivers and often led to undesirable traffic operations. Accordingly, the use of left-hand exits from freeways to intersecting roads is strongly discouraged today, unless geometric or physical constraints dictate their use. See an Enlarged Photo here. (Photograph taken on April 12, 2011 - © Cameron Bevers) 

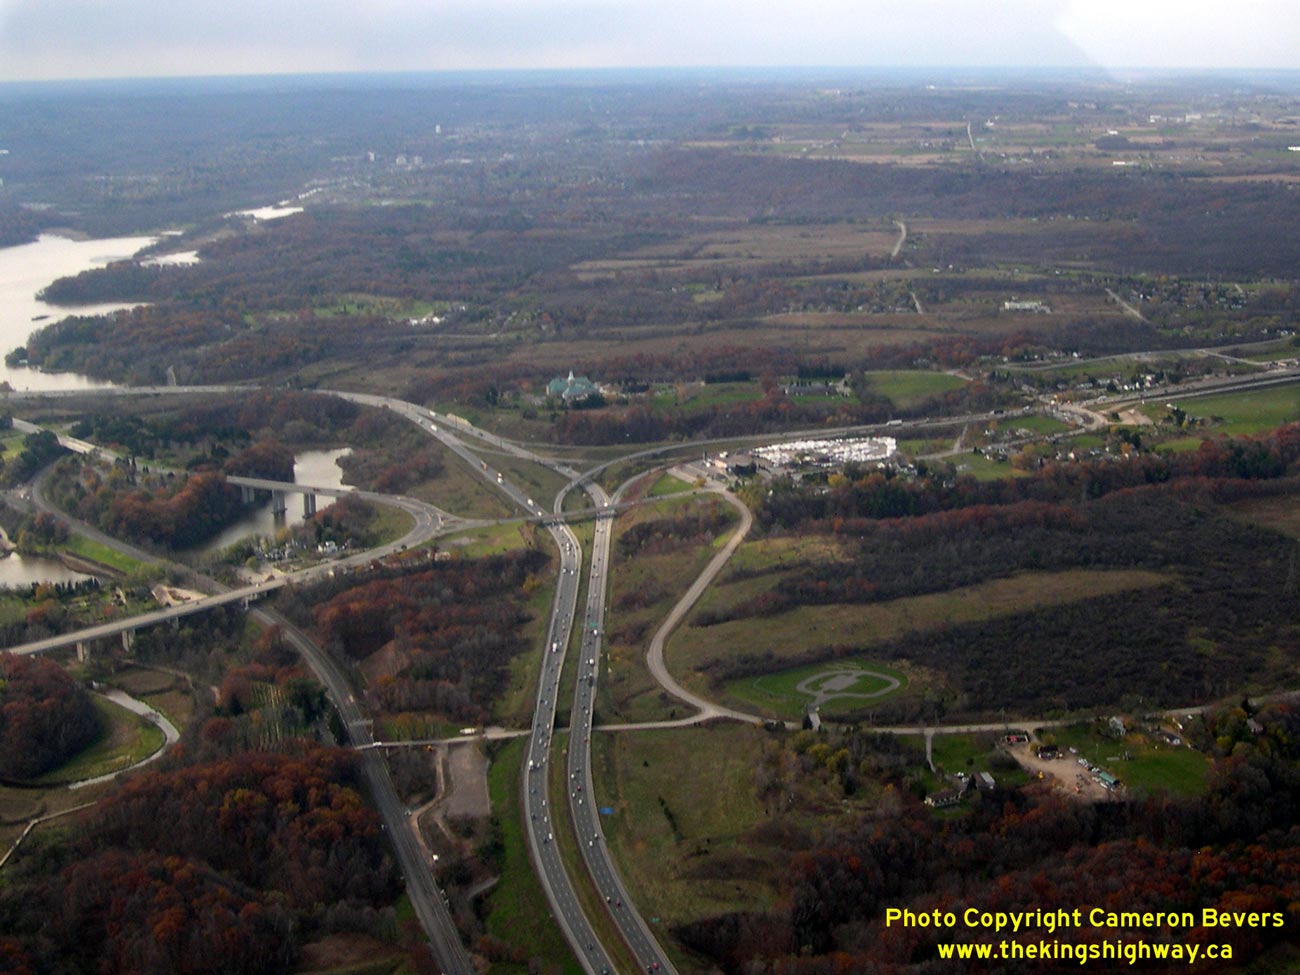
Left - Aerial view of the Hwy 6 North Interchange on Hwy 403 between Hamilton and Burlington. This interesting junction is one of the only fully-directional
3-leg freeway interchanges ever built in Ontario. The ramps connecting Hwy 6 to Eastbound Hwy 403 are left-hand exit and entrance ramps, which often confuse or
surprise drivers who are not familiar with the highway's operations. Left-hand exits are very rare in Ontario. A similar interchange used to exist a short distance to
the east at Hwy 403 and the Queen Elizabeth Way, but the interchange was replaced in the early 1990s in preparation for the Hwy 407 ETR construction. (Photograph taken on November 3, 2006 - © Cameron Bevers) Right - Facing west along Hwy 403 towards the Hwy 6 North Junction between Hamilton and Burlington. See an Enlarged Photo here. (Photograph taken on November 3, 2006 - © Cameron Bevers) 

Left - Overhead exit sign on eastbound Hwy 403 at Hwy 6 North. A pre-advance sign at right indicates the distance to the Queen Elizabeth Way. The two freeways
meet at the Freeman Interchange in Burlington, located approximately 7 km to the east. This Aluminum Rectangular Leg (ARL) overhead sign structure was one of several
such structures installed along Hwy 403 during a median reconstruction project in the 1990s. See an
Enlarged Photo here. (Photograph taken on April 12, 2011 - © Cameron Bevers) Right - Facing south along Hwy 6 towards the Hwy 403 Interchange between Hamilton and Burlington. See an Enlarged Photo here. (Photograph taken on September 27, 2005 - © Cameron Bevers) 

Left - Overhead guide signs on southbound Hwy 6 at the Hwy 403 Interchange between Hamilton and Burlington. At this point, traffic can either follow Hwy 403
East to the Queen Elizabeth Way or Hwy 403 West to Hamilton. The route of Hwy 6 actually continues south of Hamilton and can be accessed via Hwy 403 West. This old "Type 1" overhead sign
structure was removed in 2006 shortly after this photo was taken as part of the reconstruction of Hwy 6 through the Clappison's Cut. It has since been replaced with
a new "tri-chord" overhead sign structure. See an Enlarged Photo here. (Photograph taken on September 27, 2005 - © Cameron Bevers) Right - Ramps to Hwy 403 from southbound Hwy 6. The ramp to Hwy 403 East exists to the left while the ramp to Hwy 403 West exits to the right. See an Enlarged Photo here. (Photograph taken on September 27, 2005 - © Cameron Bevers) 

Left - Bridge-mounted overhead sign marking the Hwy 6 North Interchange on Hwy 403 between Hamilton and Burlington. See an
Enlarged Photo here. (Photograph taken on April 12, 2011 - © Cameron Bevers) Right - Advance exit sign for the Hwy 6 North Interchange on westbound Hwy 403 between Hamilton and Burlington. See an Enlarged Photo here. (Photograph taken on April 12, 2011 - © Cameron Bevers) 

Left - Clappison Cut on Hwy 6 north of Hamilton. This large rock cut was excavated to reduce the steep grade on Hwy 6 at the Niagara Escarpment. See an
Enlarged Photo here. (Photograph taken on April 19, 2006 - © Cameron Bevers) Right - Looking north through the Clappison Cut on Hwy 6 in Hamilton. See an Enlarged Photo here. (Photograph taken on April 19, 2006 - © Cameron Bevers) 

Left - The intersection half-way down the escarpment is actually a former alignment of Hwy 6. The old highway had a steep grade and a tight switchback which
was bypassed in the 1920s. See an Enlarged Photo here. (Photograph taken on April 19, 2006 - © Cameron Bevers) Right - Junction of the Old Guelph Road and Hwy 6 at the base of the Clappison Cut. This sideroad was closed permanently in 2006 as part of a multi-year reconstruction project to improve Hwy 6 between Hwy 403 and Clappison Corners. See an Enlarged Photo here. (Photograph taken on April 19, 2006 - © Cameron Bevers) 

Left - Facing south along the eastern side of Hwy 6 from Old Guelph Road. See an
Enlarged Photo here. (Photograph taken on April 19, 2006 - © Cameron Bevers) Right - View of Hwy 6 from the top of the Niagara Escarpment, facing south towards Hamilton. The reconstruction project saw Hwy 6 converted into a divided highway from Hwy 403 to Hwy 5 and included a new interchange at York Road, which can be seen here at the base of the hill. The project was completed in 2009. See an Enlarged Photo here. (Photograph taken on April 19, 2006 - © Cameron Bevers)
Continue on to King's Highway 6 Photos: Freelton to Hwy 401
|
|---|
Links to Adjacent King's Highway Photograph Pages:
Back to King's Highway 5 Photos /
King's Highway 6 History /
On to King's Highway 7 Photos
Ontario Highway History - Main Menu / Back to List of Highways Website contents, photos & text © 2002-2026, Cameron
Bevers (Webmaster) - All Rights Reserved / Contact Me
|
|---|