
| 
| |
|
|
This page contains present day photos (Year 2000 to date) of Ontario's King's Highway 6, arranged by location from Freelton
northerly to Highway 401 East Interchange. All photographs displayed on this page were taken by the Webmaster
(Cameron Bevers), unless specifically noted otherwise. Click on any thumbnail to see a larger image!
Please note that all photographs displayed on this
website are protected by copyright. These photographs must not be reproduced, published,
electronically stored or copied, distributed, or posted onto other websites without
my written permission. If you want to use photos from this website, please
email me first for permission. Thank-you!
|
|---|
|
Page 8: Present Day King's Highway 6 Photographs (Freelton to Highway 401)
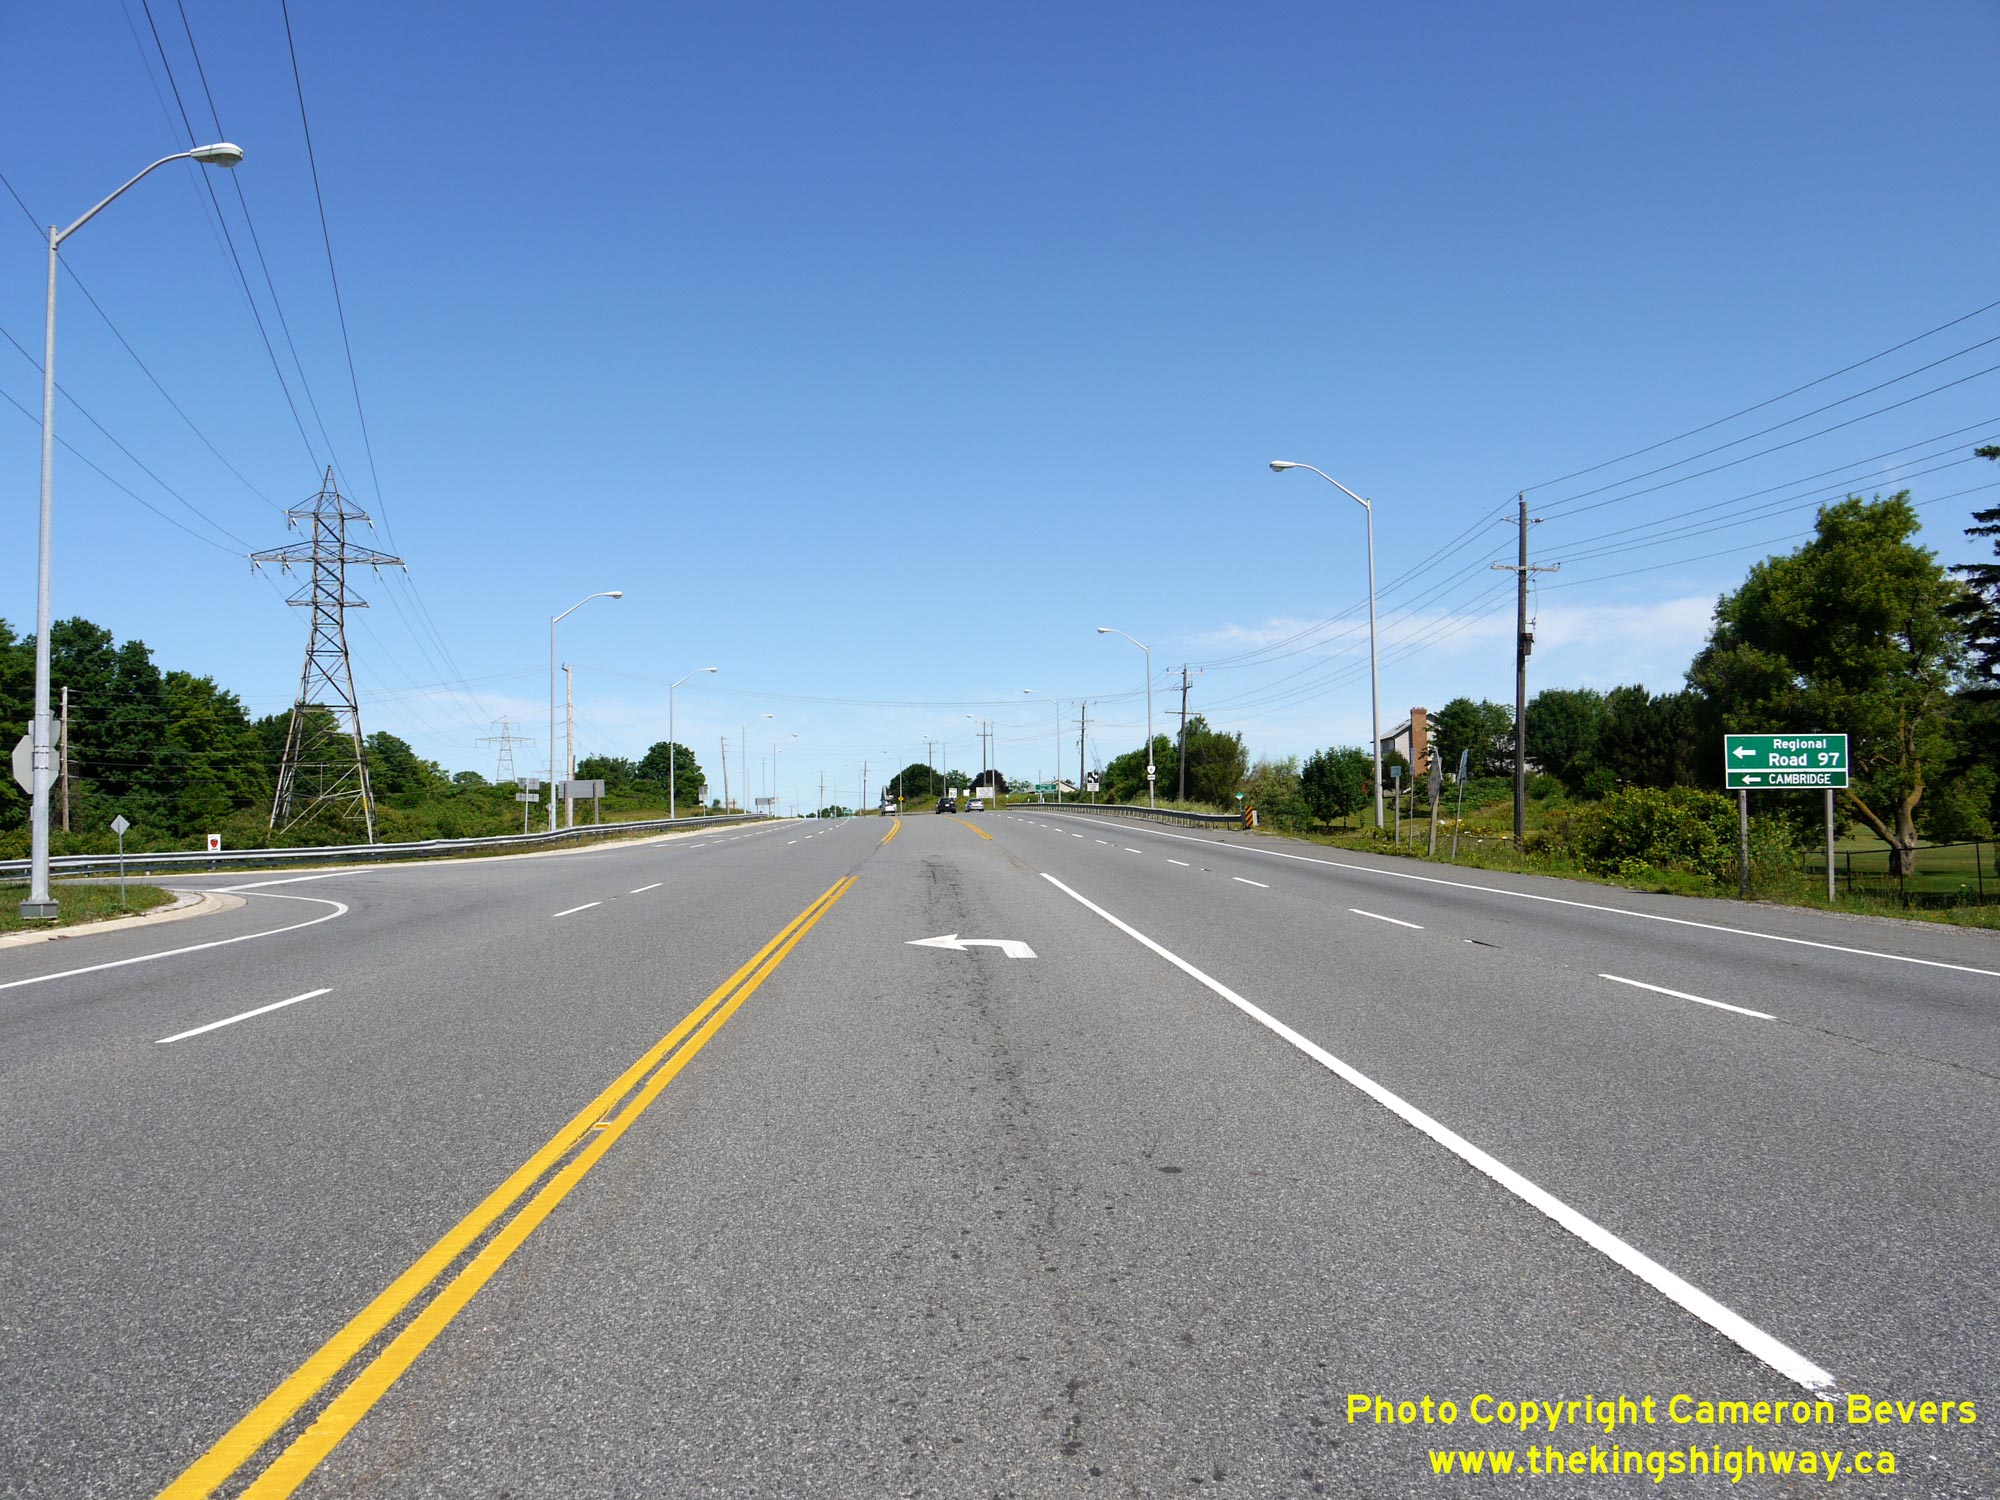
Left - Facing north along Hwy 6 towards Guelph at the Hamilton Road 97 (Former Hwy 97) Junction at Freelton. See an
Enlarged Photo Here. (Photograph taken on July 12, 2009 - © Cameron Bevers) Right - View of Former Hwy 97 at Freelton, facing west from the Hwy 6 Junction towards Cambridge. Although it has been several decades since Hwy 97 was a King's Highway under provincial jurisdiction, this road has retained its old highway number to this day. Today, Former Hwy 97 within the incorporated limits of the City of Hamilton is signed as Hamilton Road 97. Provincial jurisdiction over this part of Hwy 97 ended in 1984, when the last provincially-owned section of this King's Highway was transferred to the Regional Municipality of Hamilton-Wentworth. See an Enlarged Photo Here. (Photograph taken on July 12, 2009 - © Cameron Bevers) 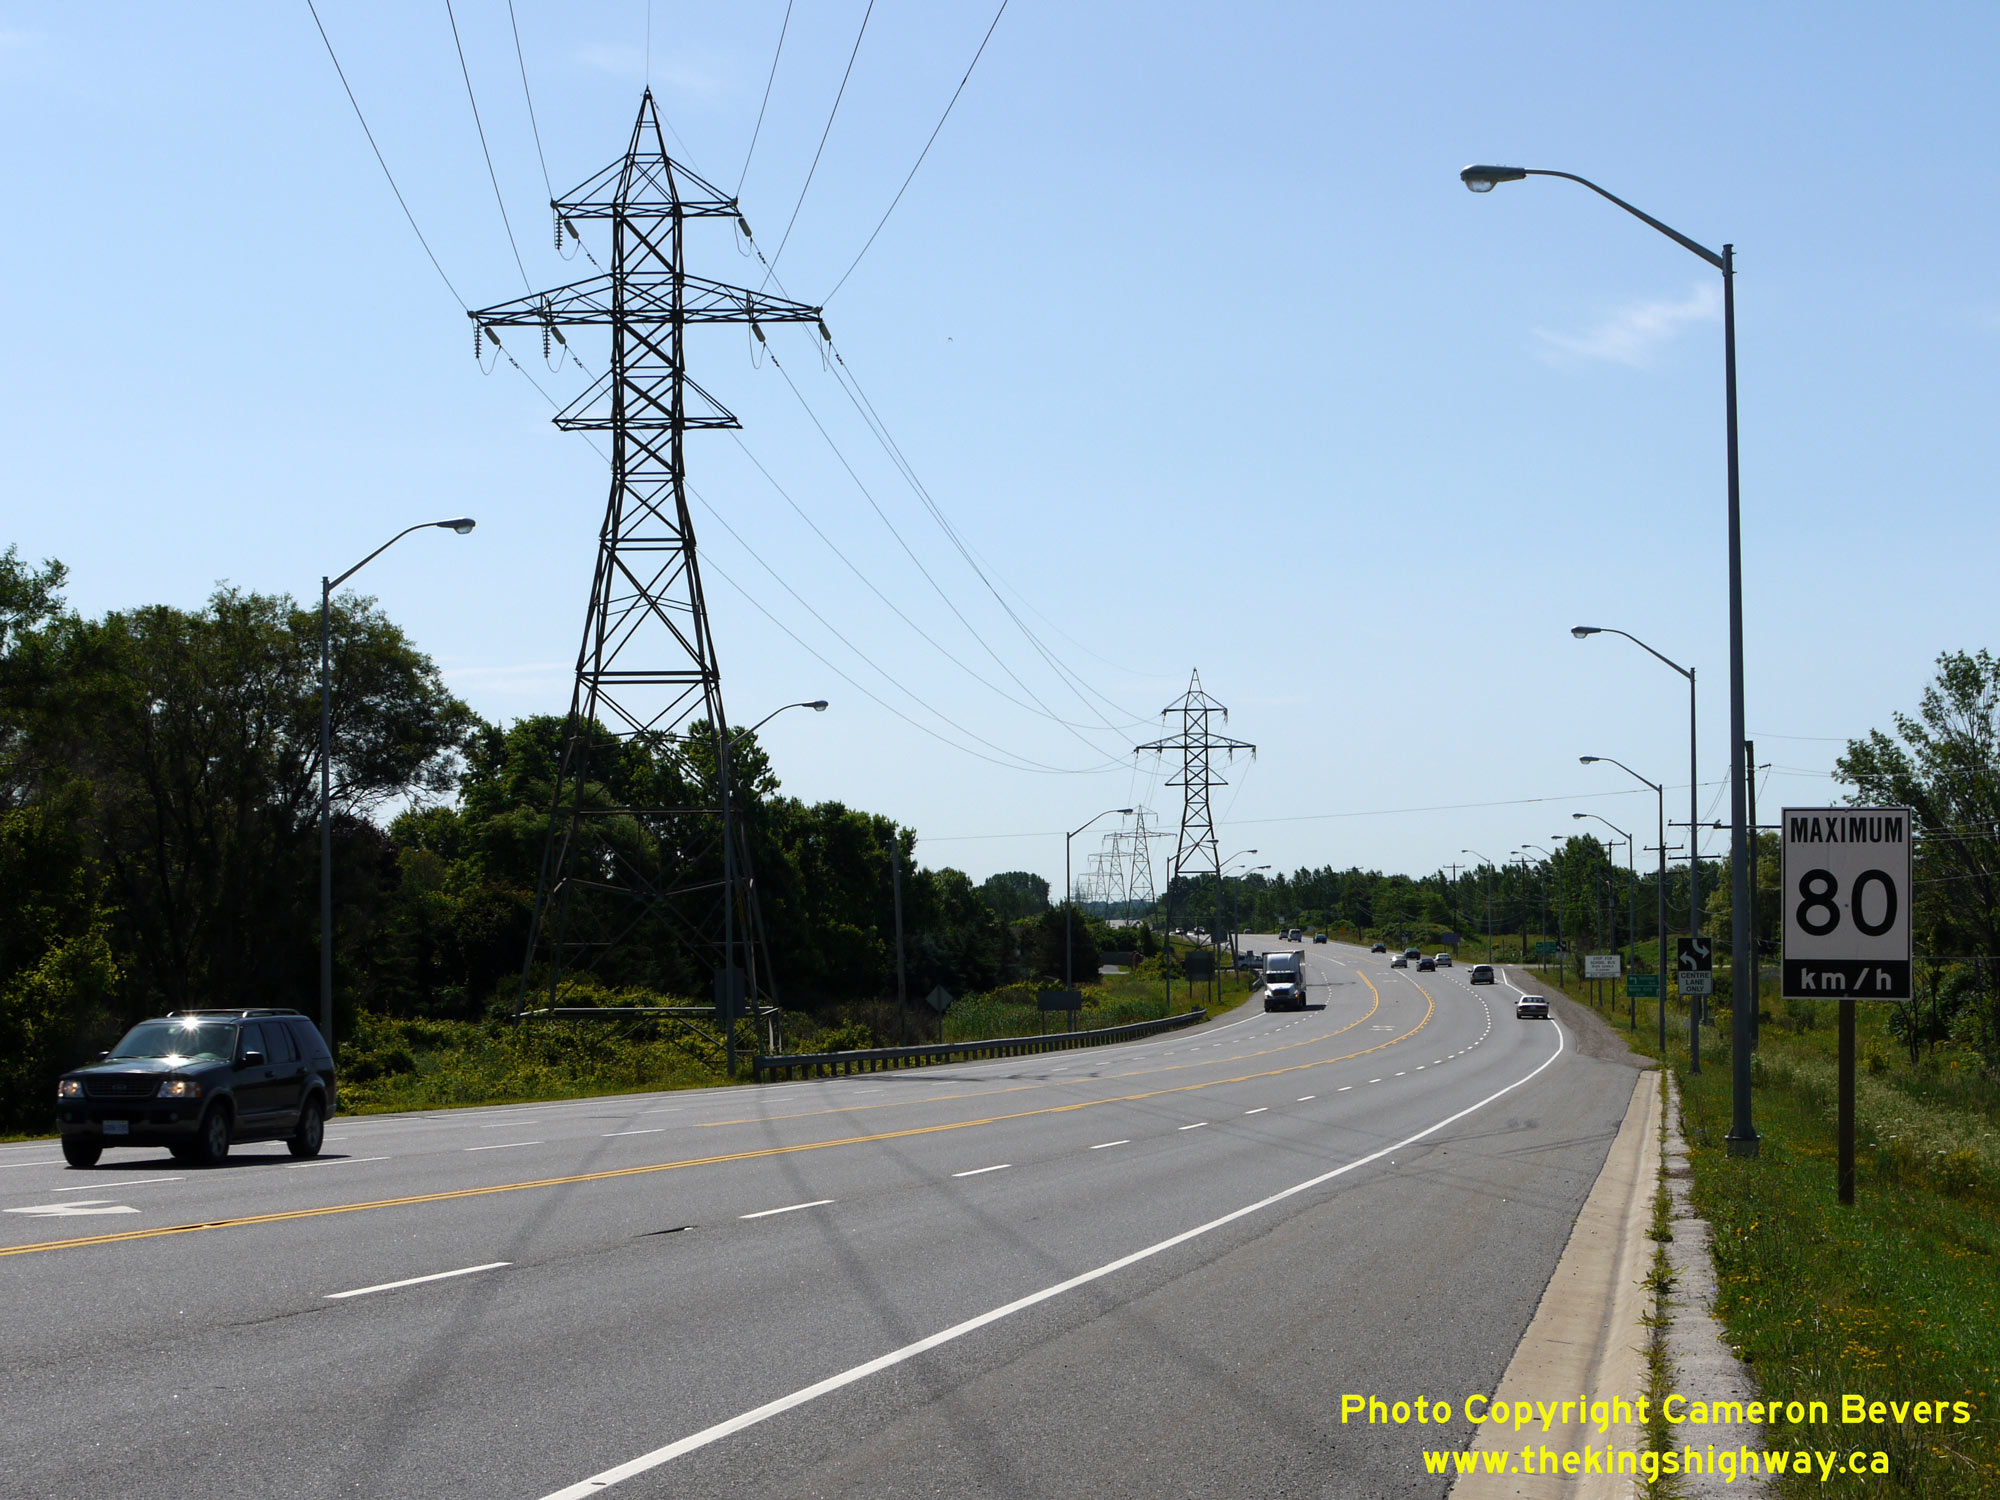
Left - Facing south along Hwy 6 towards Hamilton from Freelton, approaching the Former Hwy 97 Junction. See an
Enlarged Photo Here. (Photograph taken on July 12, 2009 - © Cameron Bevers) Right - Abandoned section of Hwy 6 near the Former Hwy 97 Junction south of Freelton. In the early 1970s, construction began on a new bypass route around the eastern side of Freelton in order to divert through traffic on Hwy 6 away from the village's narrow main street. While most of the old route of Hwy 6 through Freelton remained open to traffic following the completion of the Freelton Bypass, the southern Hwy 6 approach to the village was simply closed off to through traffic and abandoned. Traffic can be seen using the Freelton Bypass at right. See an Enlarged Photo Here. (Photograph taken on July 12, 2009 - © Cameron Bevers) 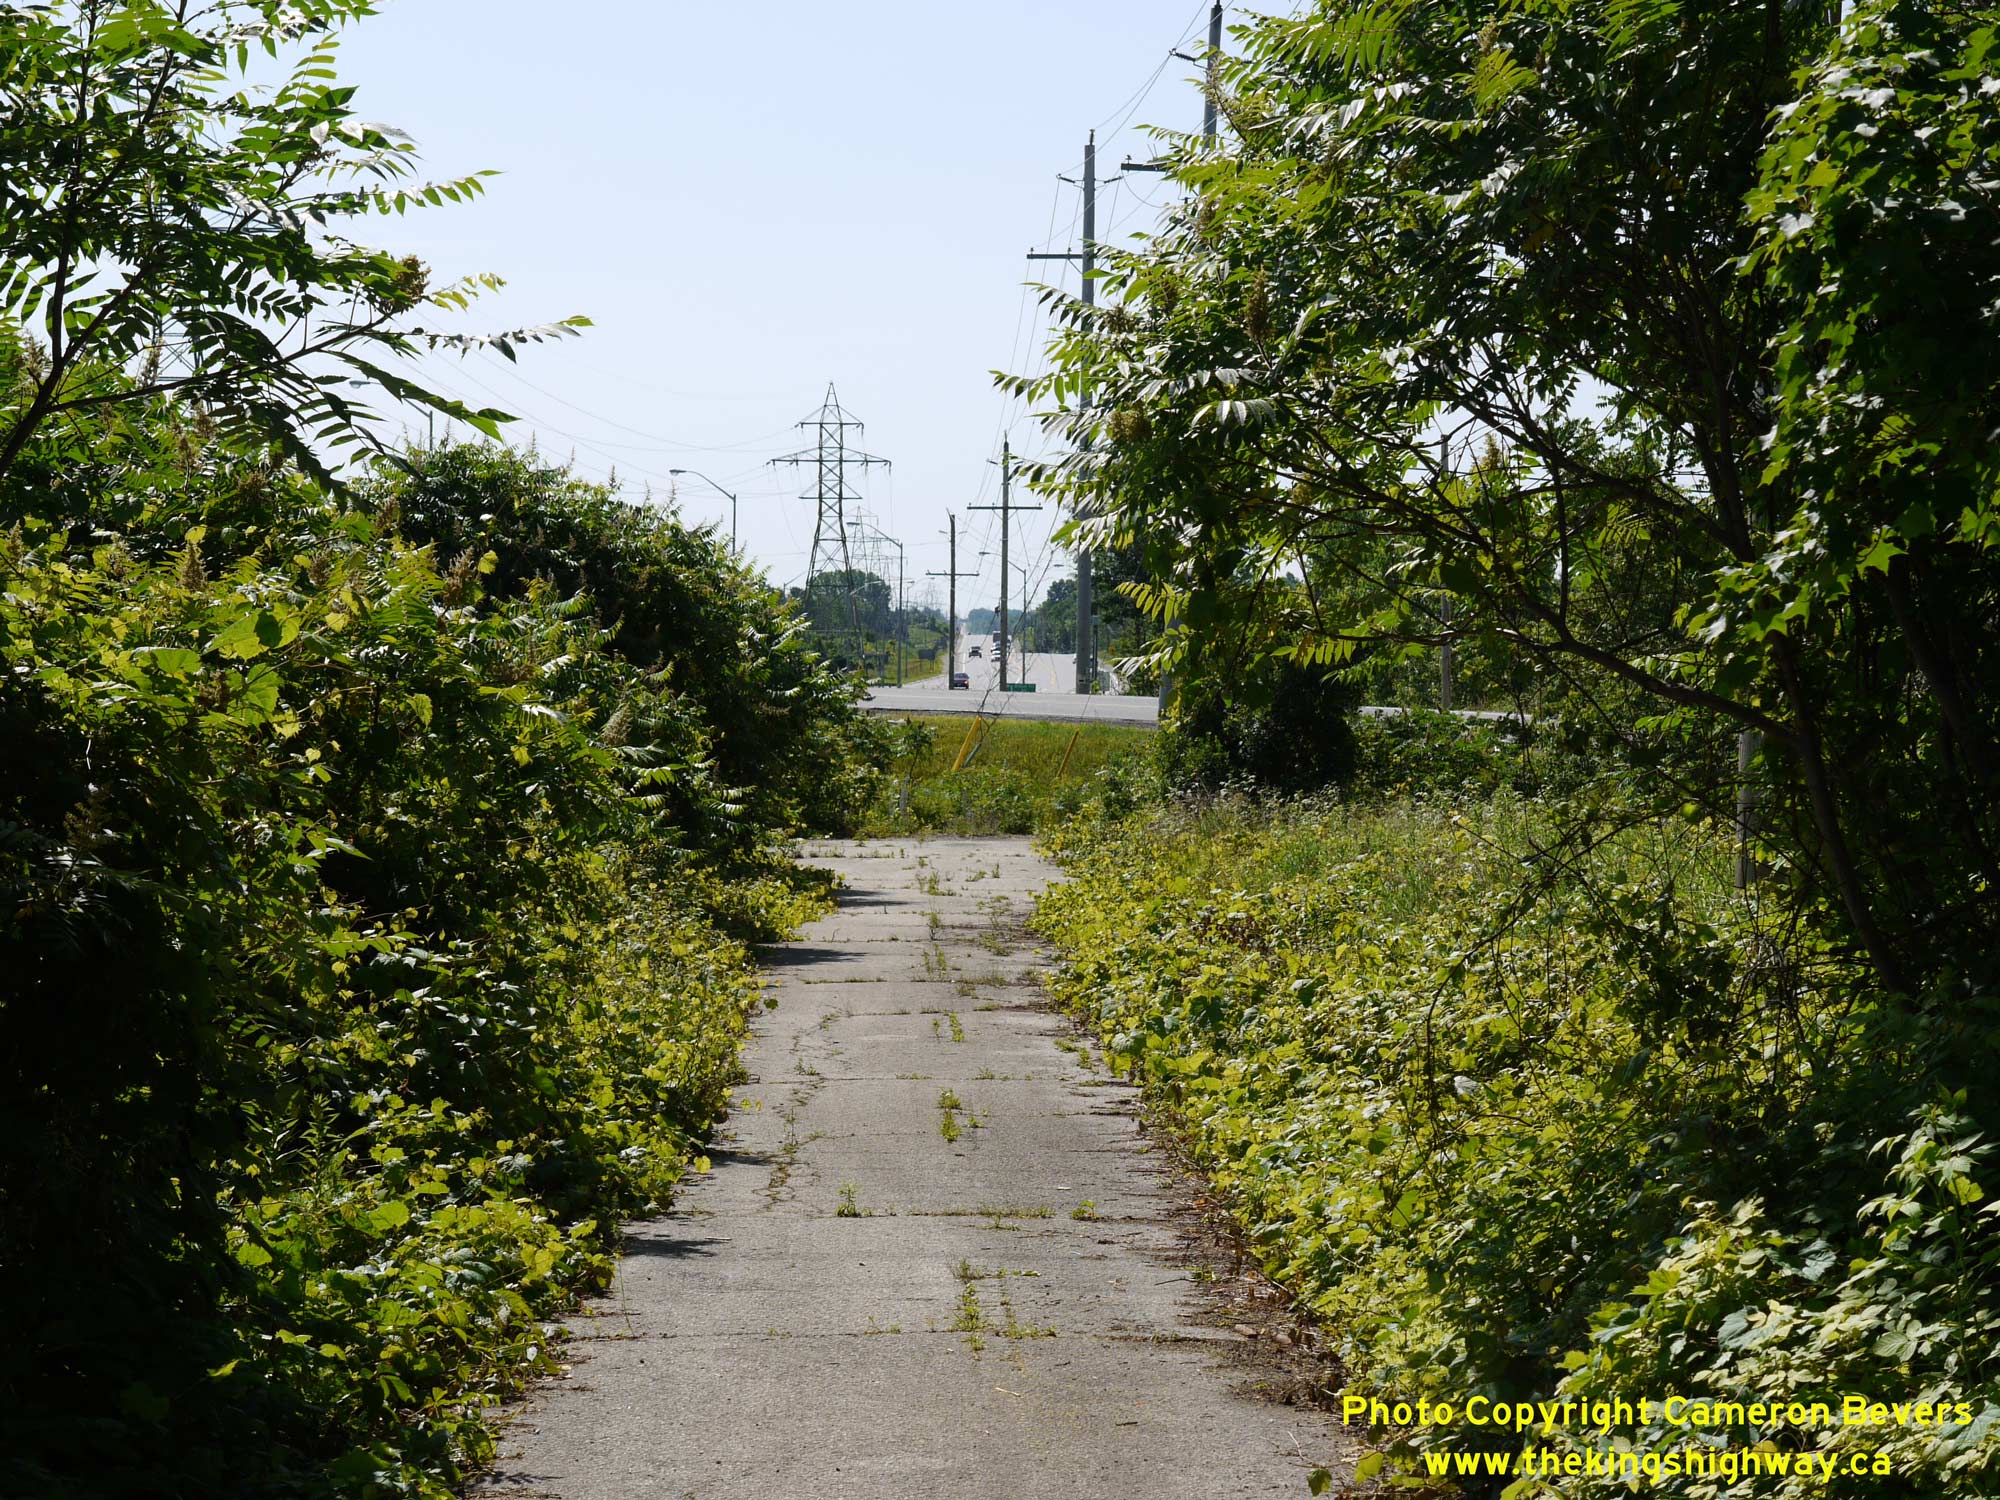
Left - The abandoned section of Hwy 6 at Freelton emerges from the undergrowth immediately west of the Hwy 6 and Hwy 97 Junction. See an
Enlarged Photo Here. (Photograph taken on July 12, 2009 - © Cameron Bevers) Right - Abandoned section of Hwy 6 approaching Freelton, facing north. Traffic on Hwy 6 once had to climb a fairly steep grade when approaching Freelton. When the highway was relocated onto an improved alignment east of the village during the early 1970s, a more gentle grade was provided for Hwy 6 traffic. The Freelton Bypass was constructed under Contract #1970-05, along with various other improvements to Hwy 6 from north of Clappison's Corners to a point north of Freelton. Originally, the Freelton Bypass was only two lanes, but the highway was expanded to four lanes in the late 1990s, under Contract #1998-04. See an Enlarged Photo Here. (Photograph taken on July 12, 2009 - © Cameron Bevers) 
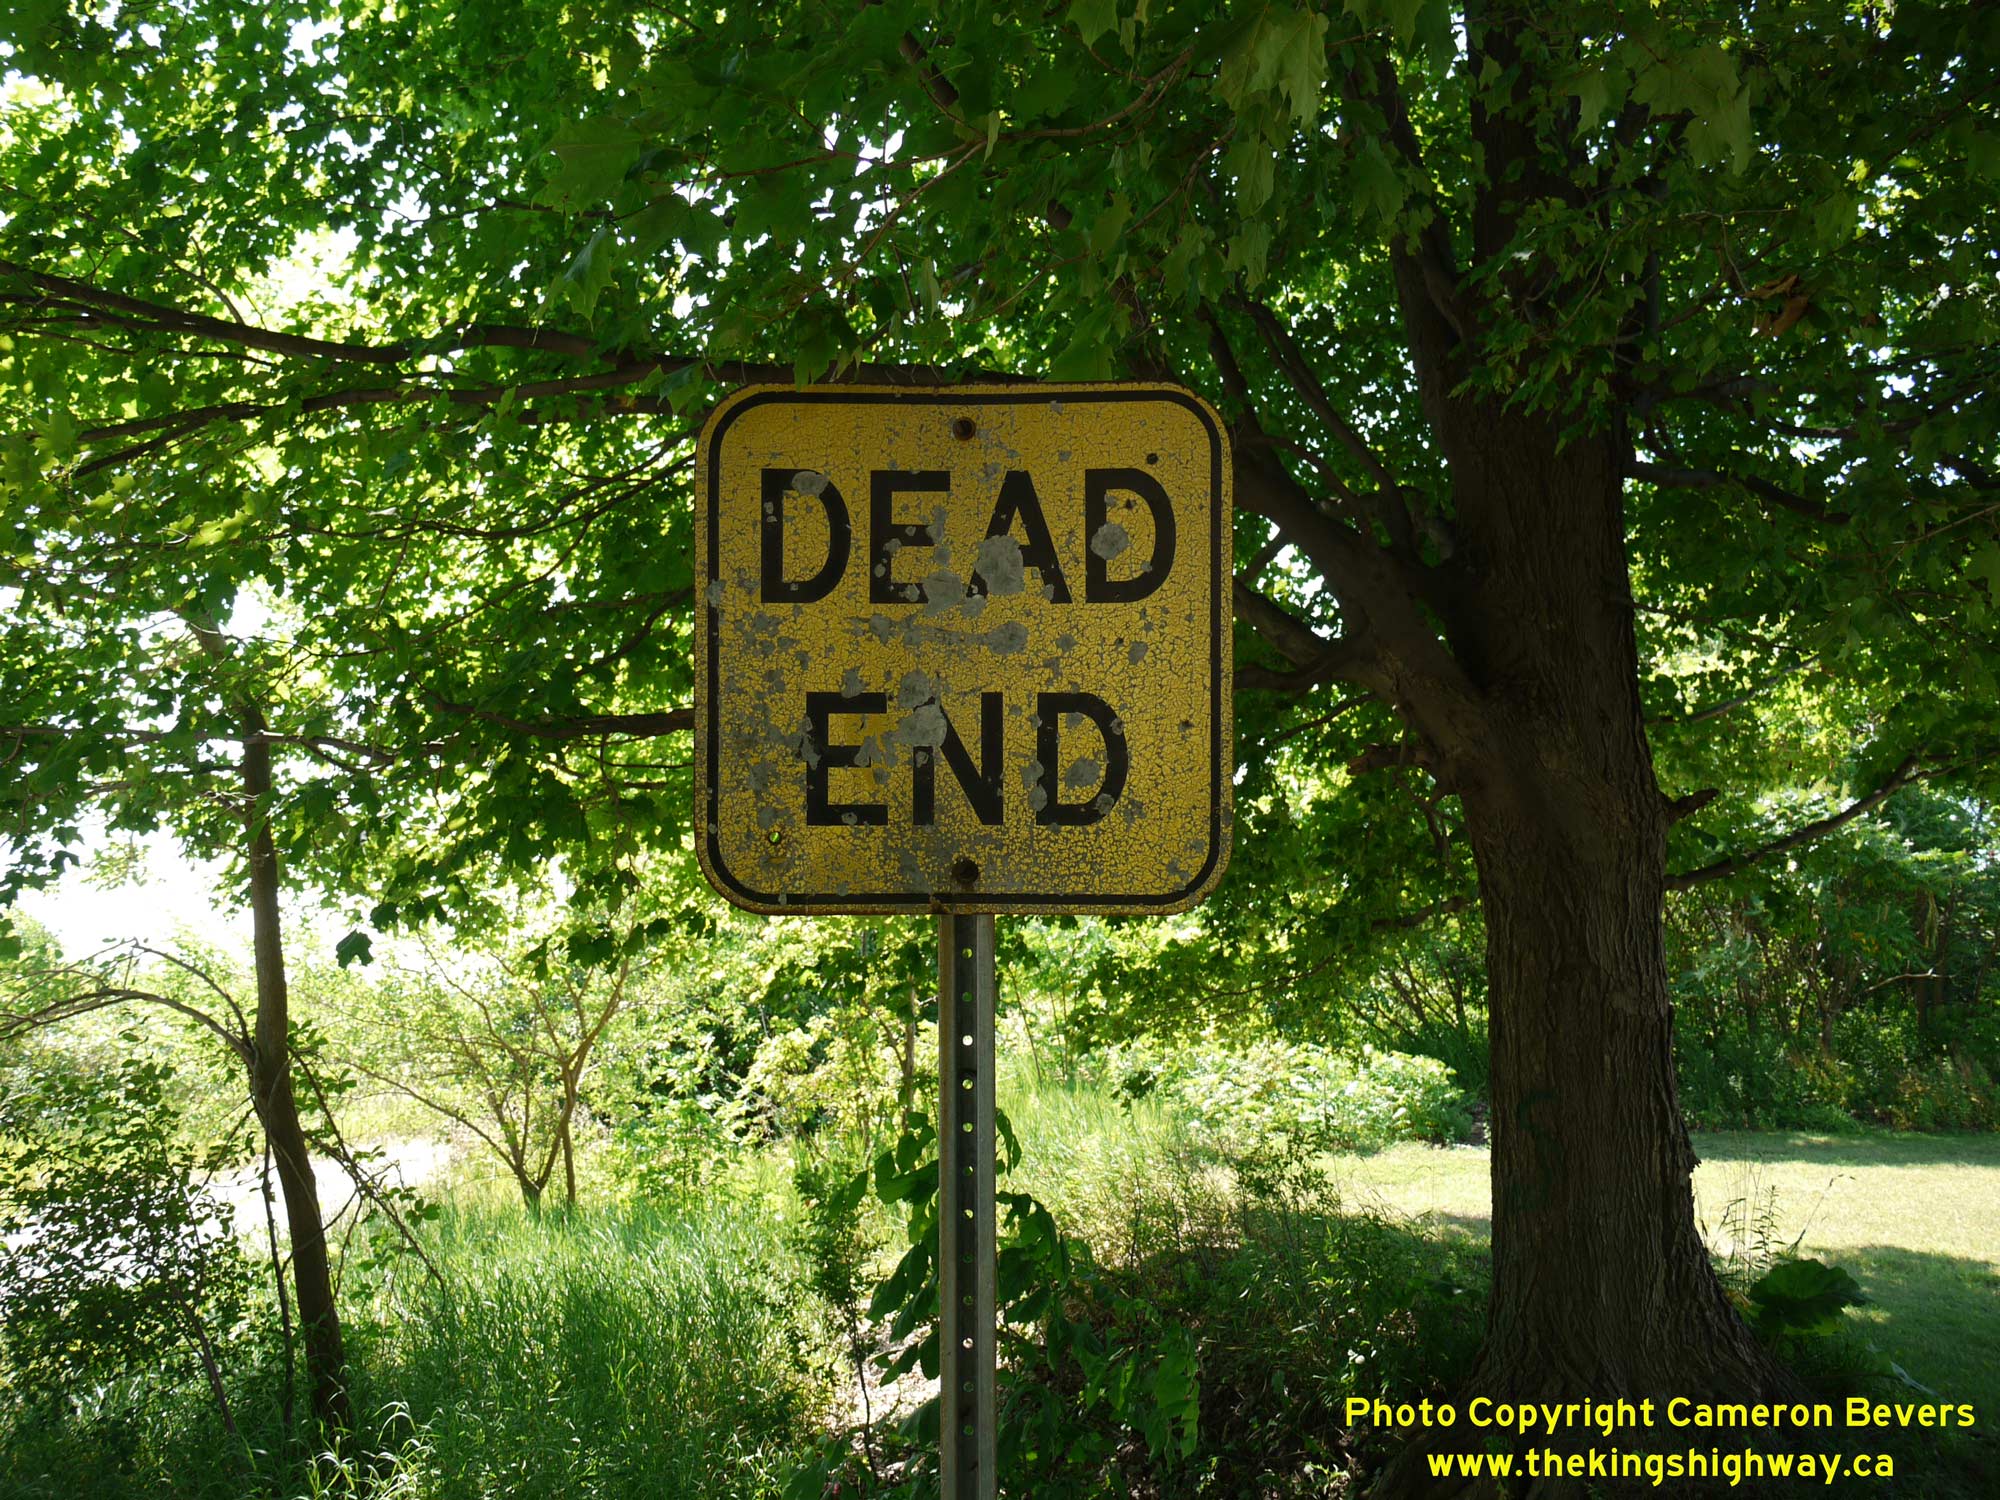
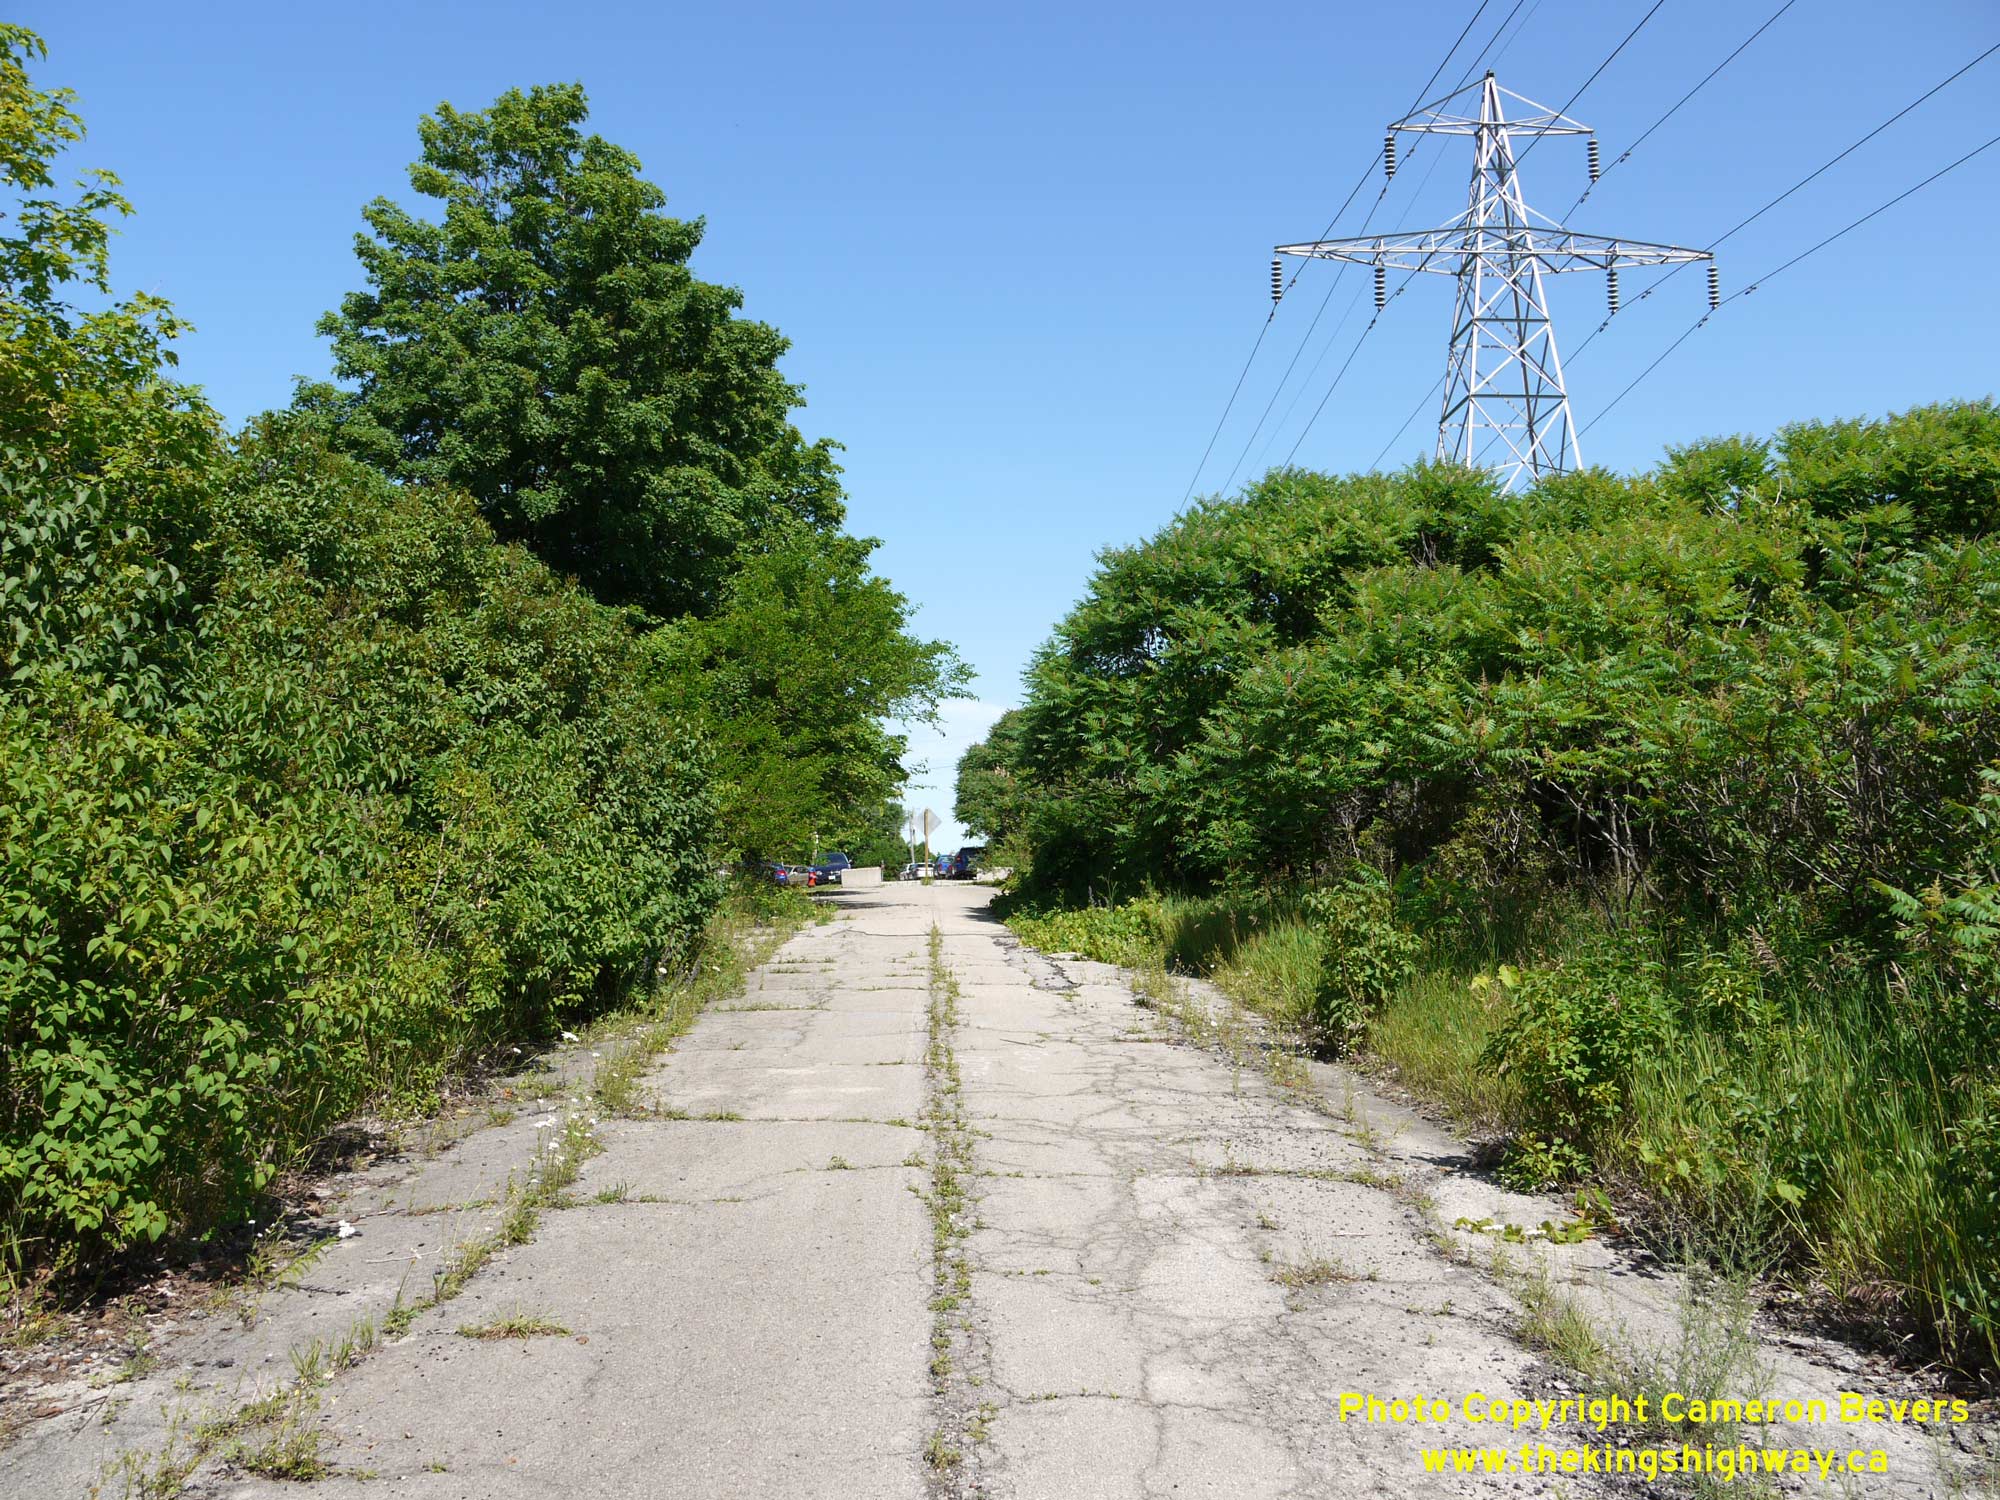
Left - The south end of Old Hwy 6 (Freelton Road) is closed by two large concrete blocks to prevent vehicular access to the old highway. See an
Enlarged Photo Here. (Photograph taken on July 12, 2009 - © Cameron Bevers) Right - This old "Dead End" sign has likely been in place at the end of Old Hwy 6 for decades. See an Enlarged Photo Here. (Photograph taken on July 12, 2009 - © Cameron Bevers) 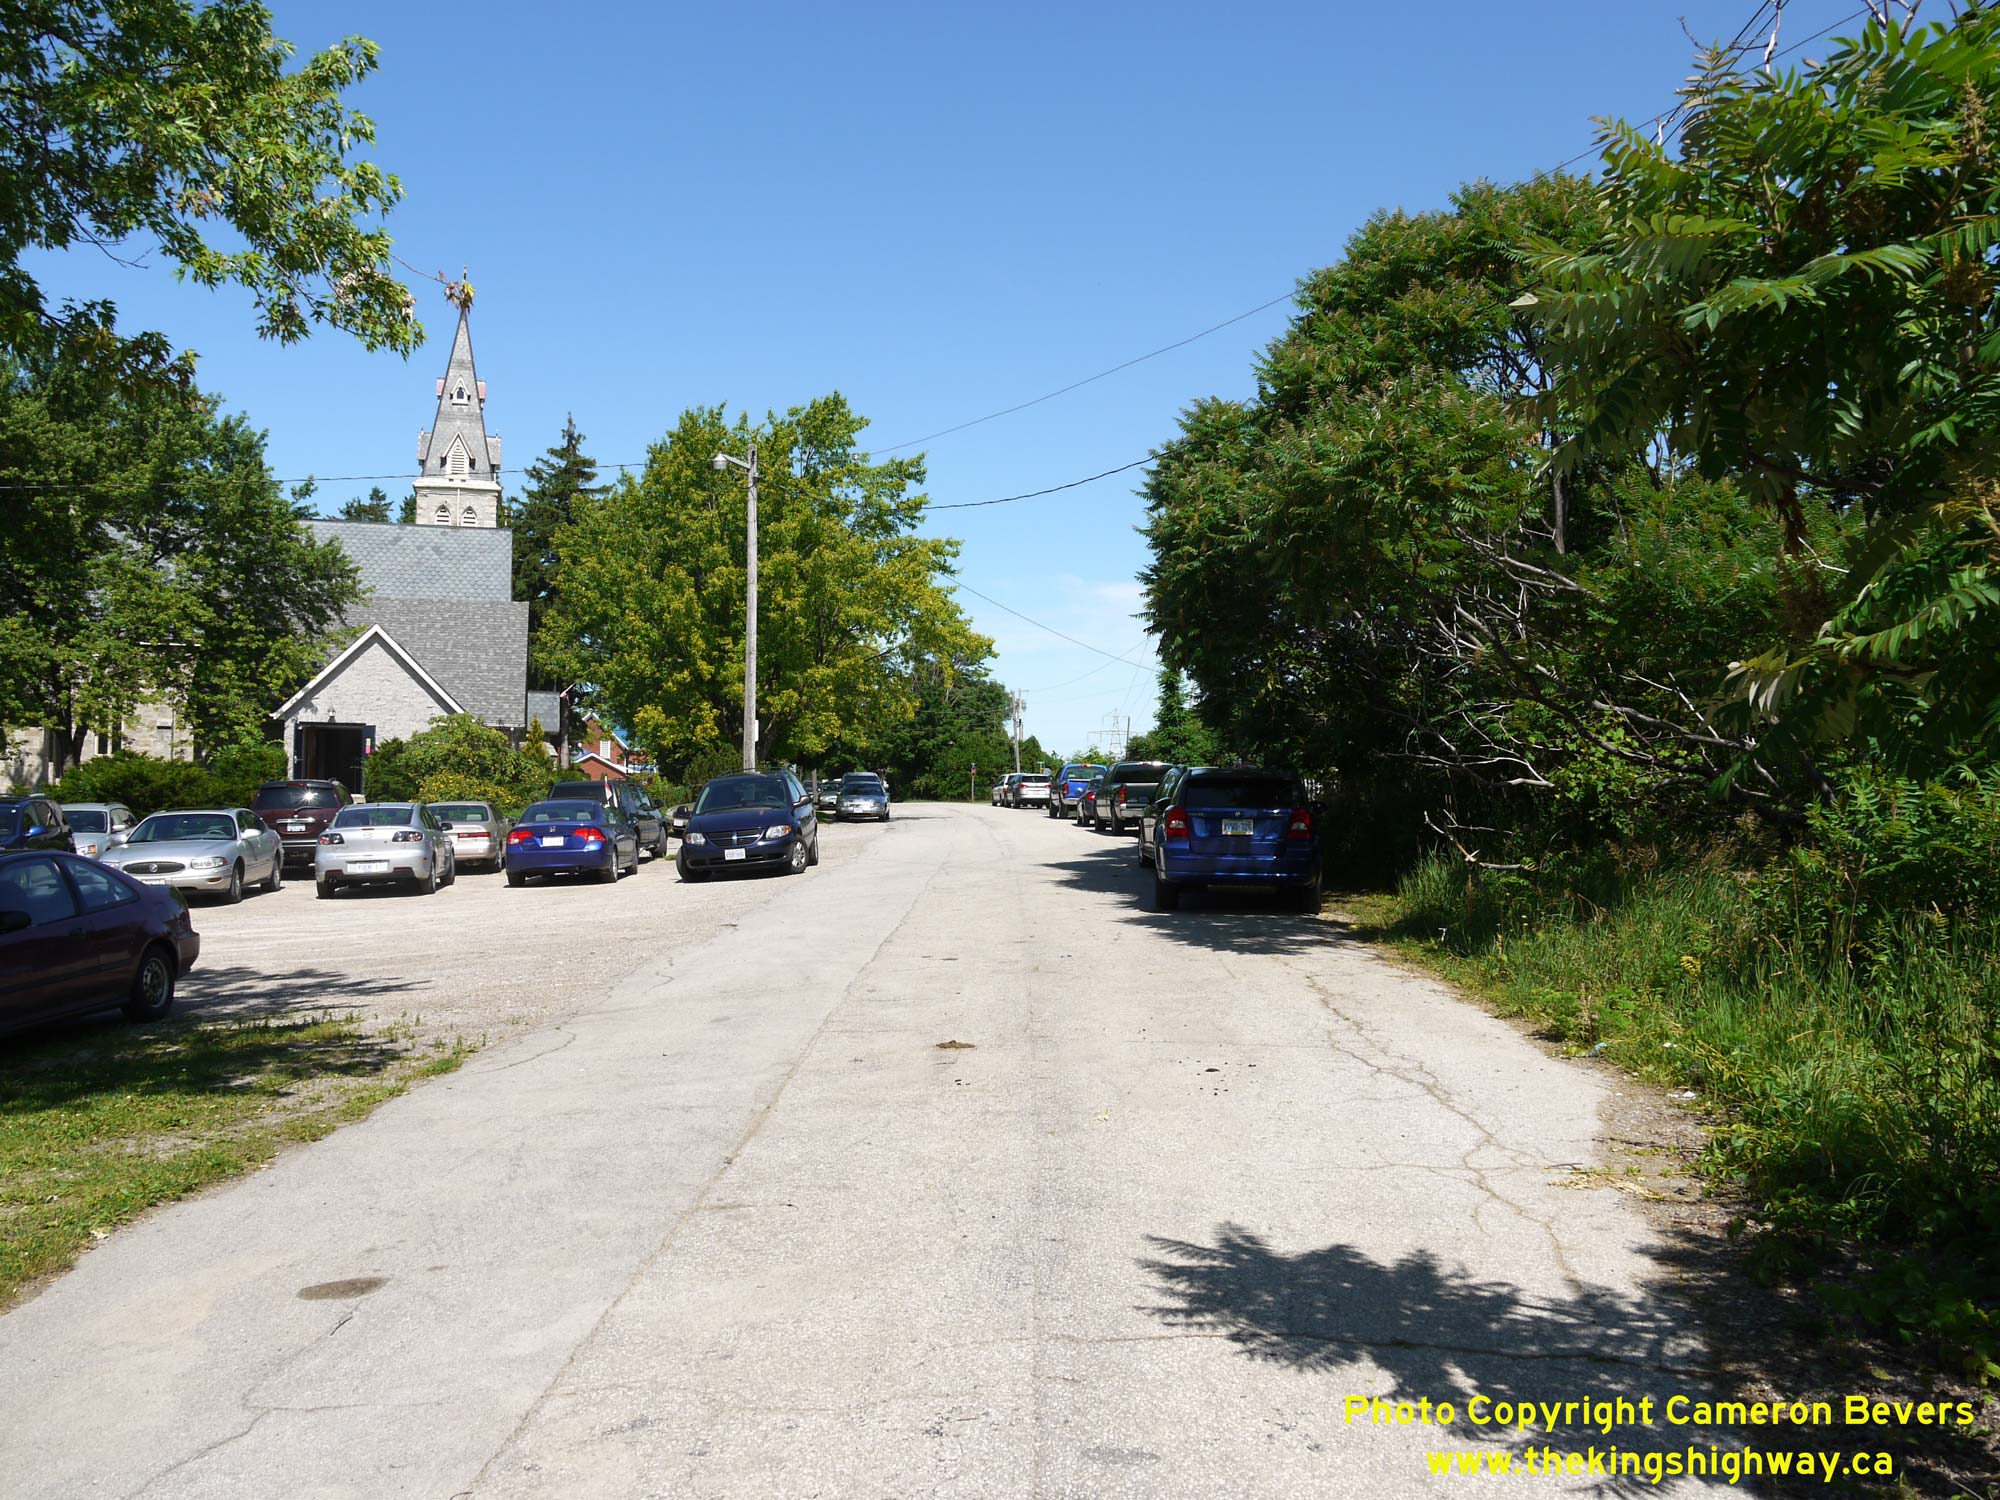
Left - Old Hwy 6 (Freelton Road) was kept open to service the Our Lady of Carmel Church, which lies just north of the old highway's closure point. The old
highway effectively serves as part of the church's parking area on Sundays. See an
Enlarged Photo Here. (Photograph taken on July 12, 2009 - © Cameron Bevers) Right - Facing south along Old Hwy 6 (Freelton Road) from Concession Road 11. For decades, Hwy 6 traffic rounded this curve at the south entrance to Freelton. Following the completion of the Freelton Bypass, Old Hwy 6 was permanently closed off to through traffic by virtue of an Order-in-Council approved in December 1971. Ever since, traffic entering or departing Freelton must access Hwy 6 via Concession Road 11. See an Enlarged Photo Here. (Photograph taken on July 12, 2009 - © Cameron Bevers) 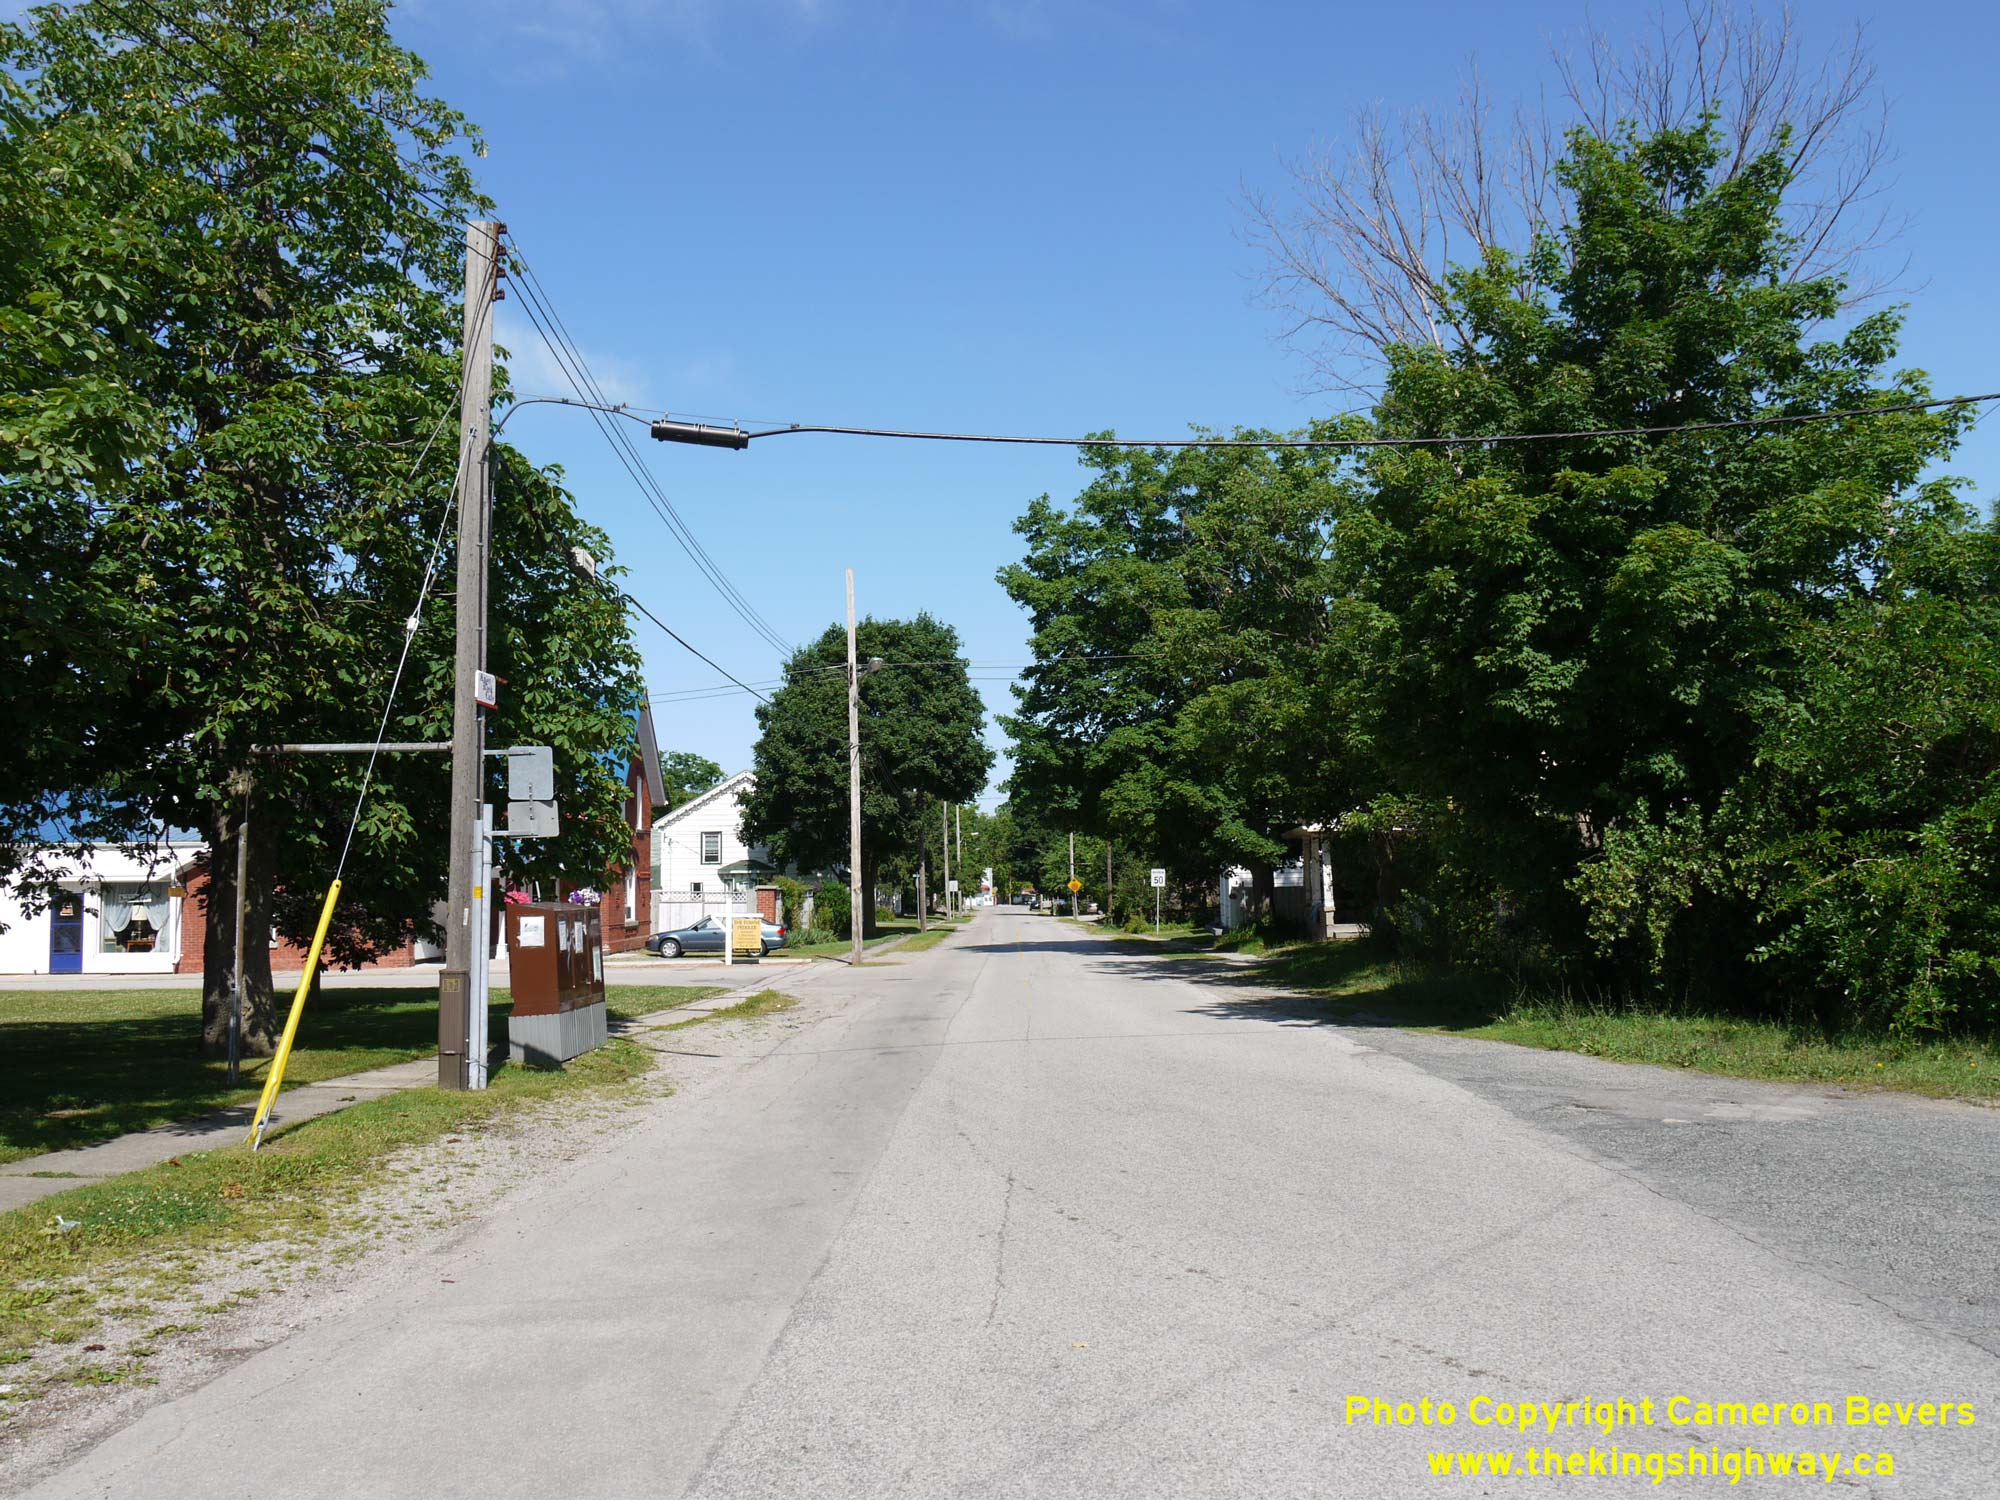
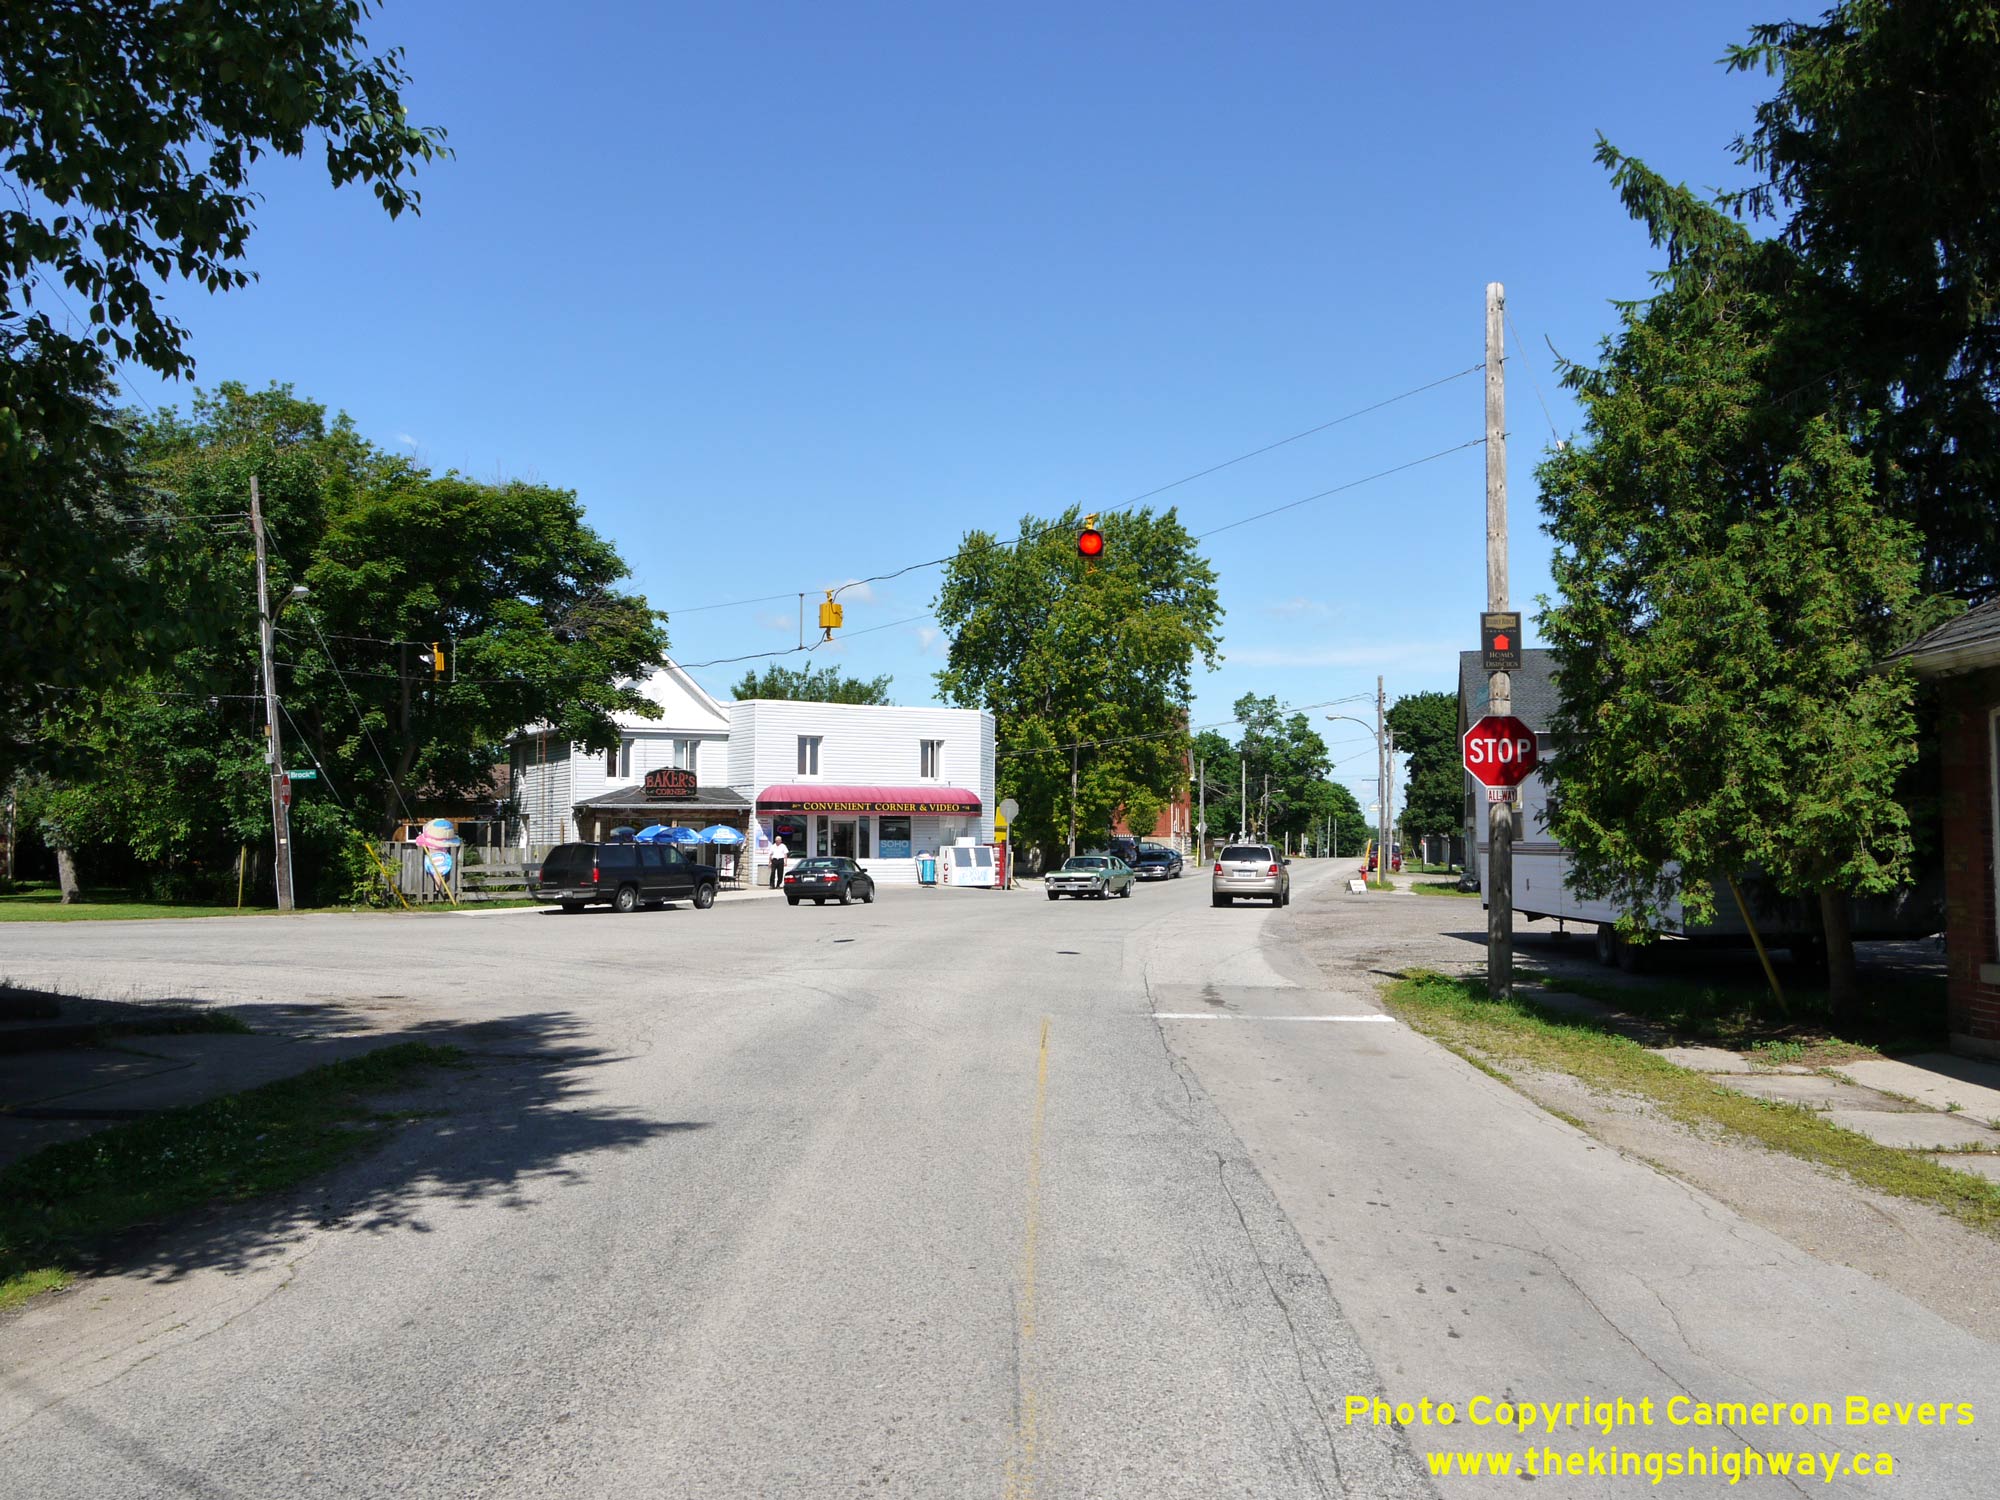
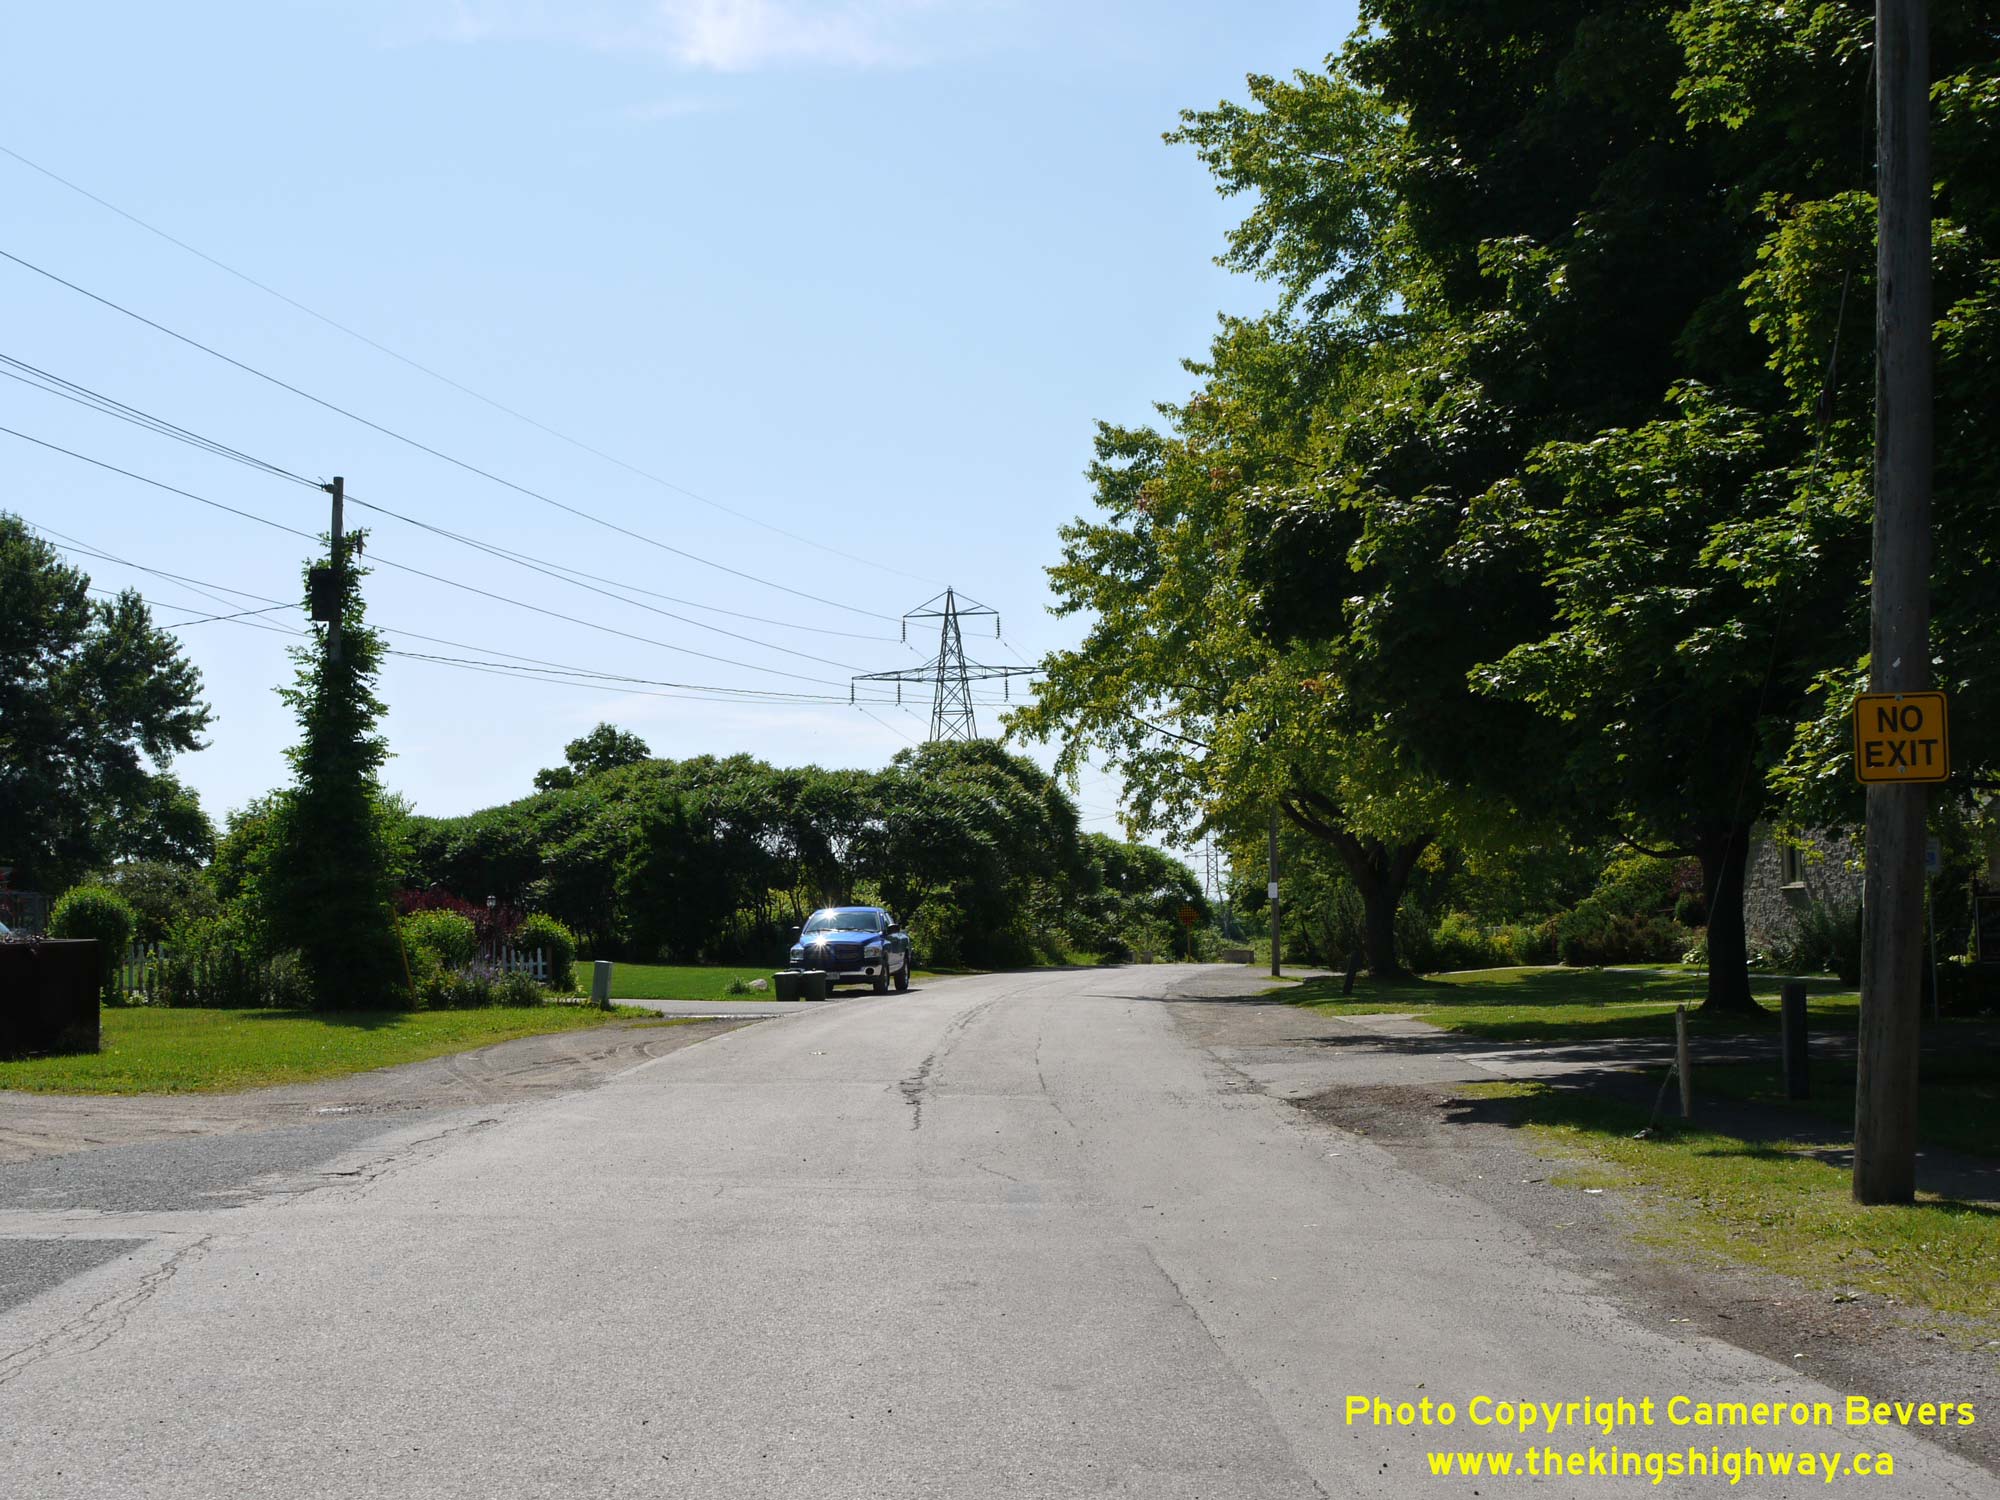
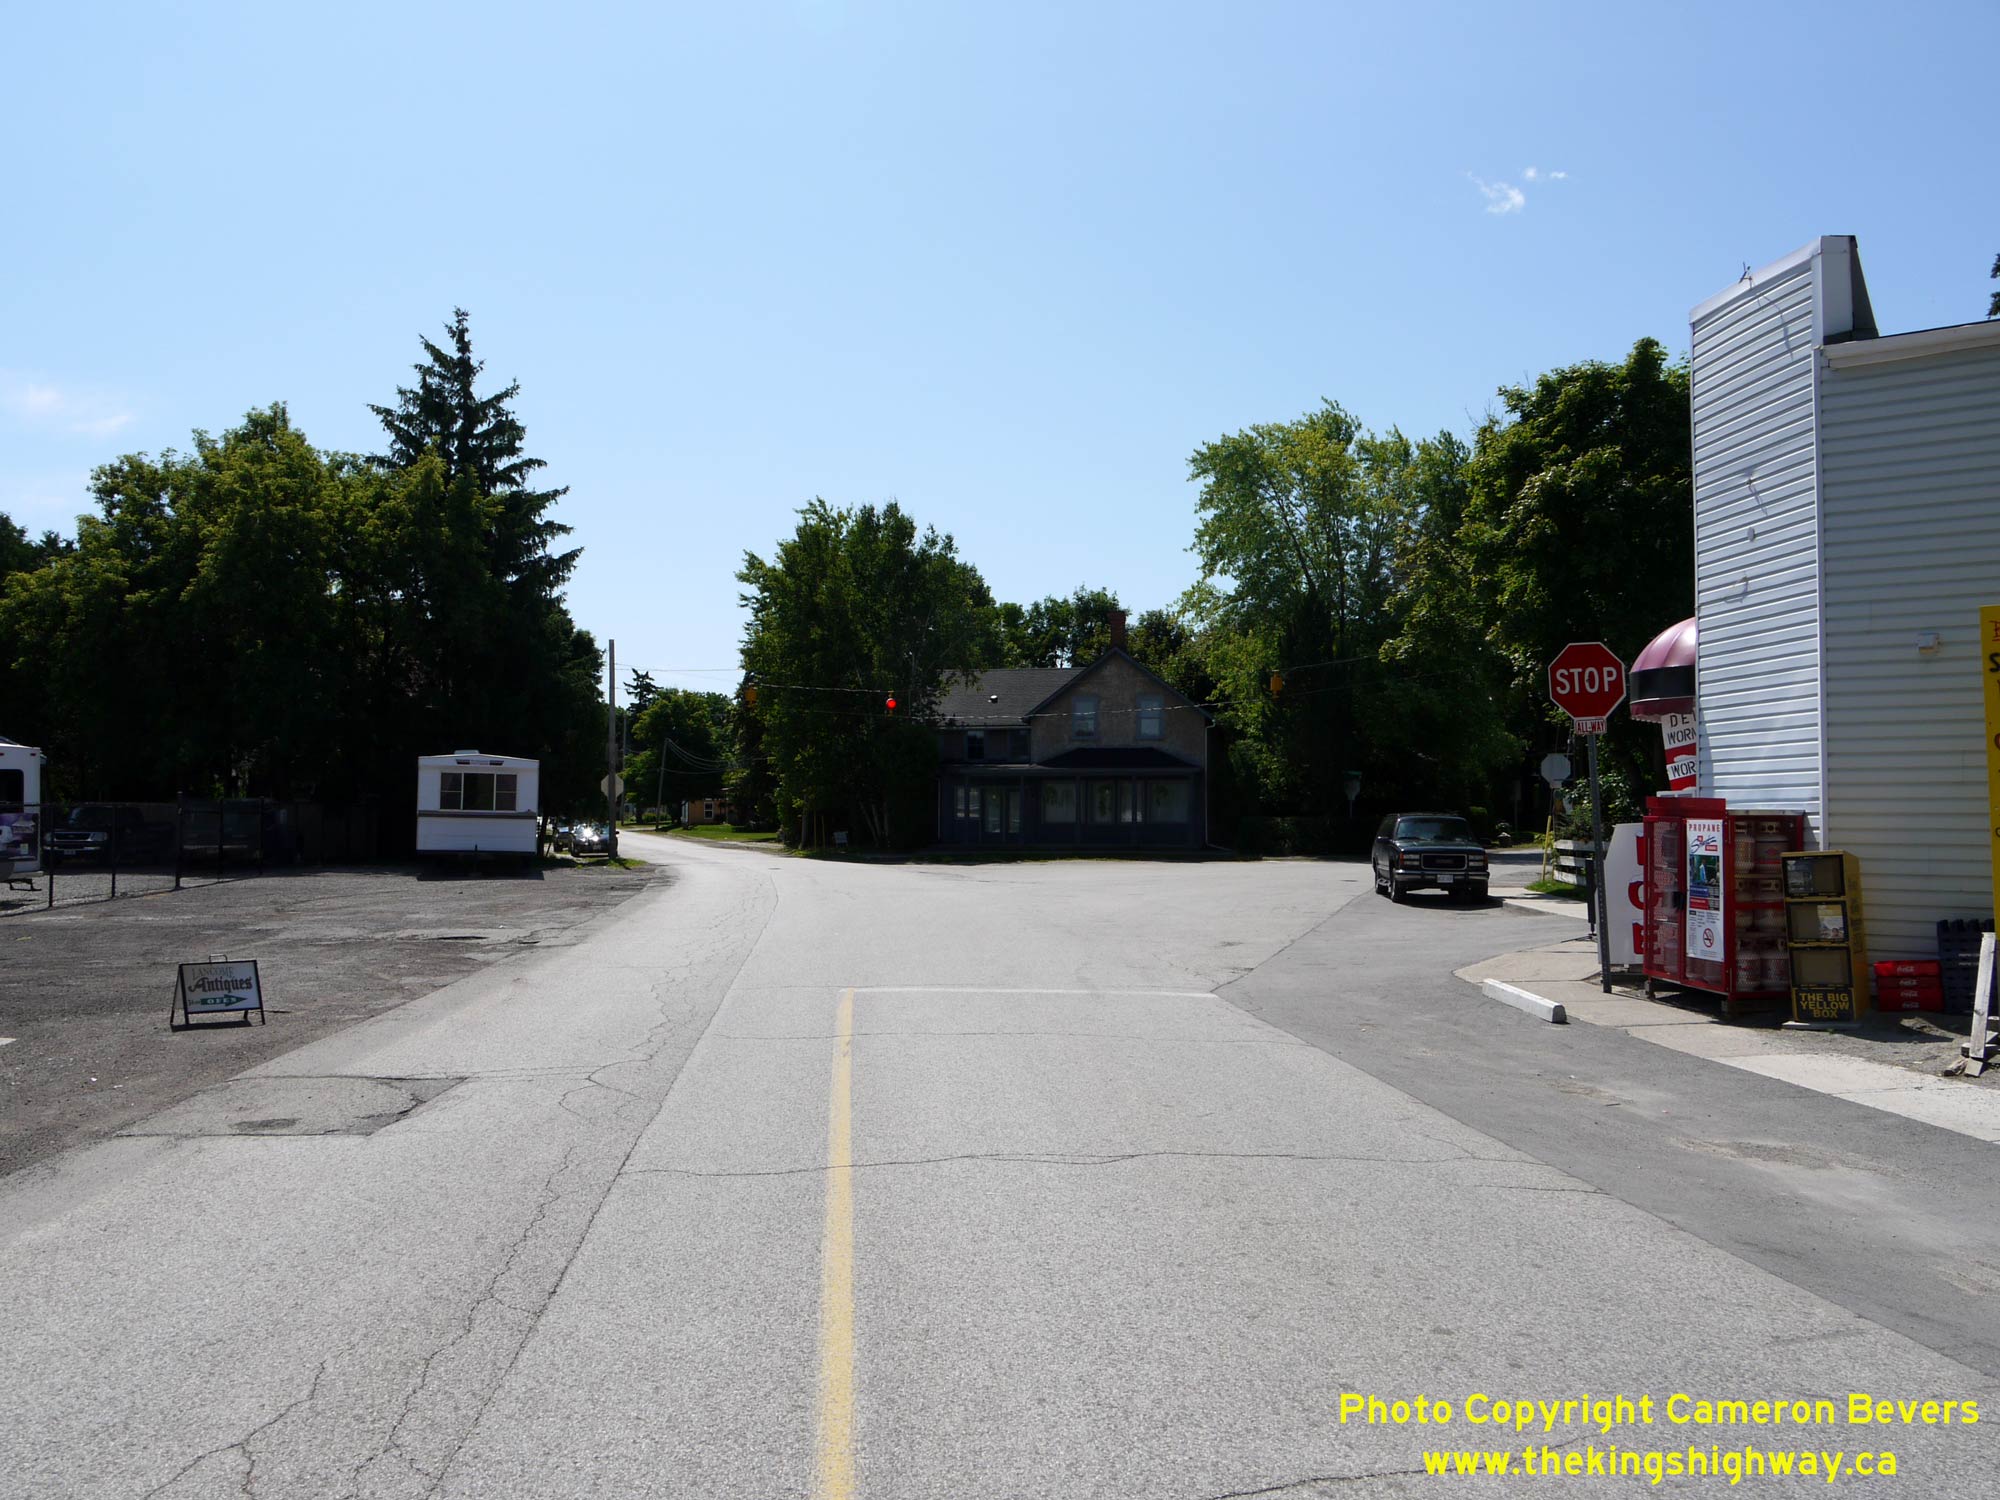
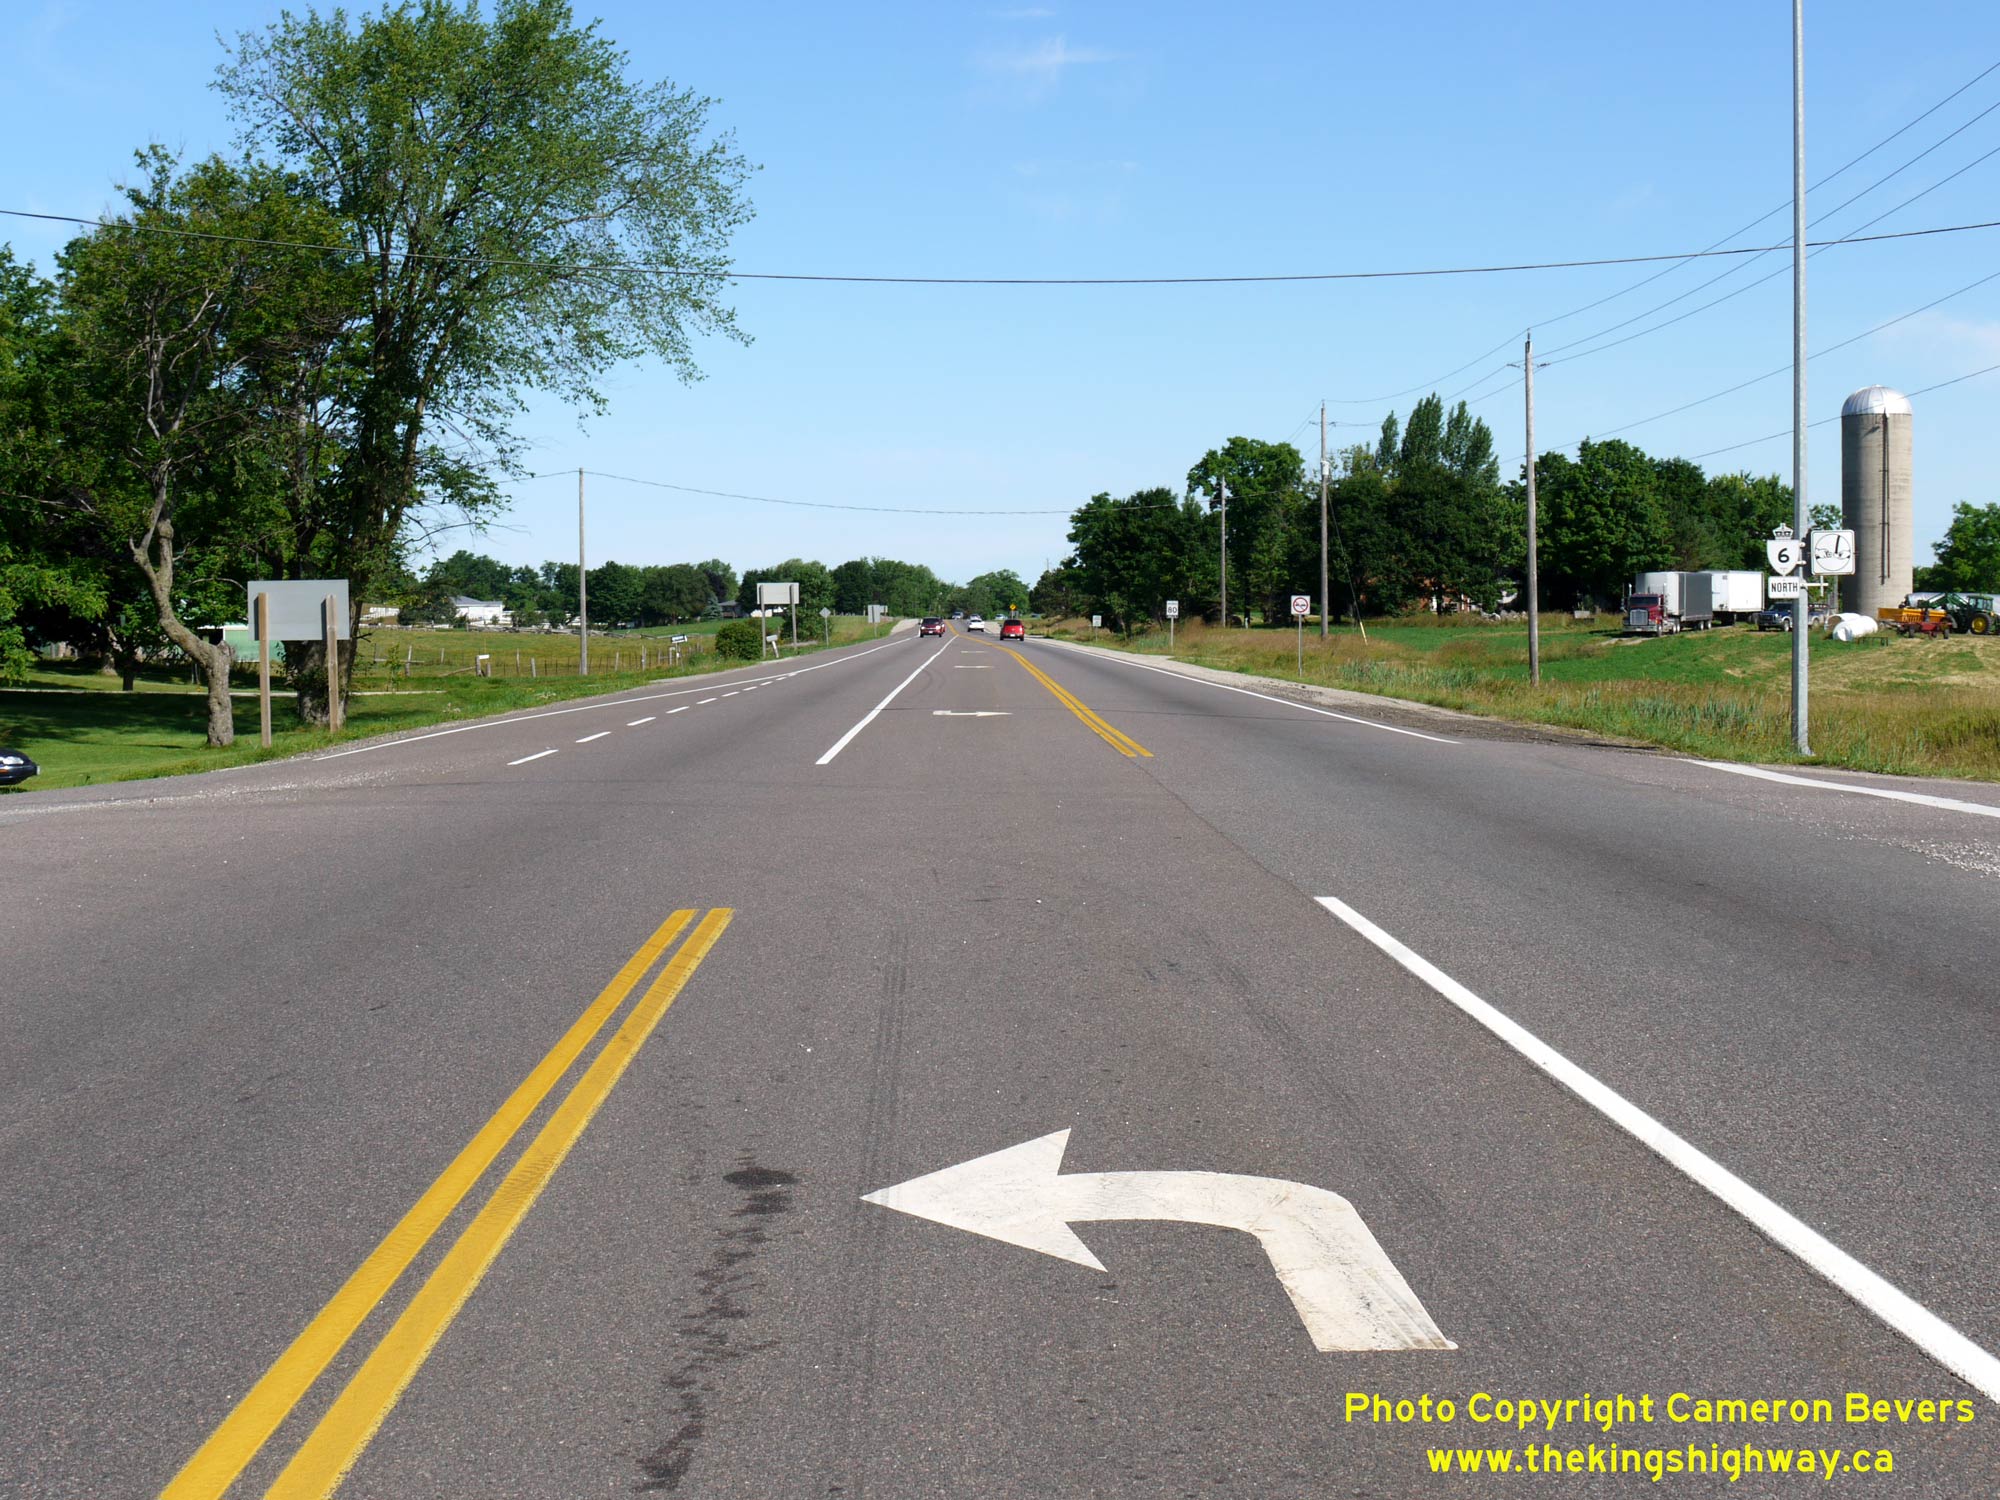
Left - The route of Old Hwy 6 continues north into Freelton's village centre from Concession Road 11. Heading southbound, a green-and-white trailblazer route
marker directs traffic out to Hwy 6 via Concession Road 11. See an Enlarged Photo Here. (Photograph taken on July 12, 2009 - © Cameron Bevers) Right - Facing north along Old Hwy 6 (Freelton Road) at the intersection of Brock Road. Prior to the construction of the Freelton Bypass, Hwy 6 passed through a particularly problematic Y-intersection. At this point, Hwy 6 intersected with Wentworth County Road 4 (known today as Brock Road) which led to Dundas. This elongated Y-intersection had poor sight lines. While this intersection operates under All Way Stop-control today, the intersection would have previously operated with Hwy 6 as the through highway. Traffic waiting to enter Hwy 6 from Wentworth County Road 4 would have had difficulty seeing approaching traffic, due to the intersection's skew. See an Enlarged Photo Here. (Photograph taken on July 12, 2009 - © Cameron Bevers) 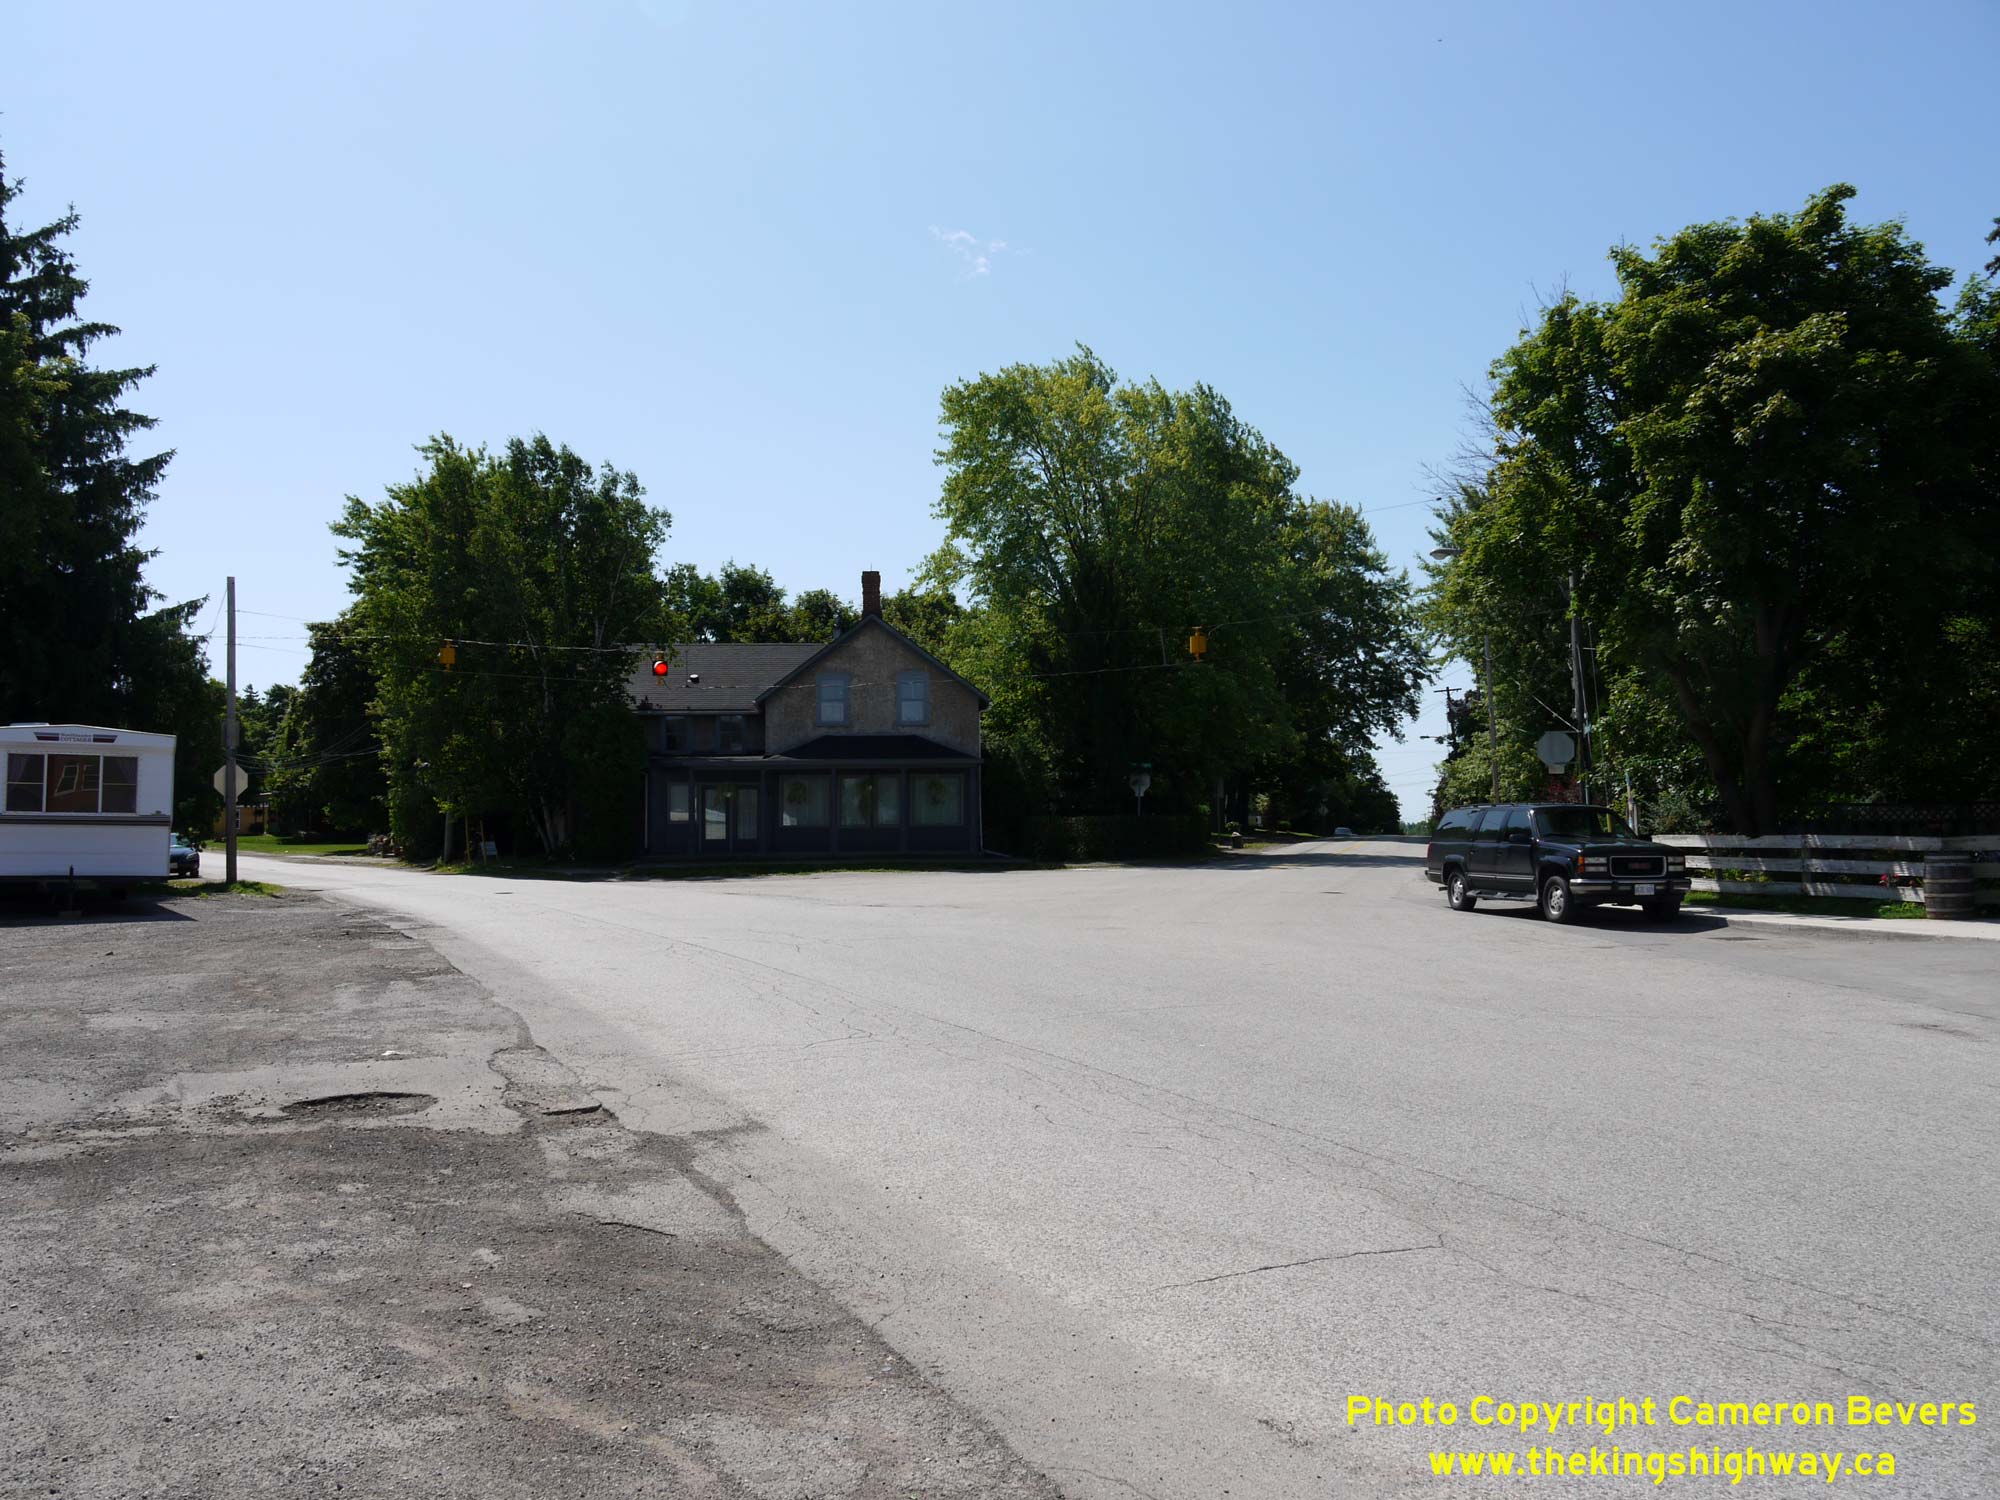
Left - Facing south at Old Hwy 6 (Freelton Road) and Brock Road. The footprint of skewed intersections such as this can become quite large. A consequence of
intersections with this design is that a road user has to travel a greater distance in order to clear a conflict area with intersecting traffic. Visibility is often
inhibited for one or more of the intersection's legs. Accordingly, skewed intersections are typically avoided by designers wherever possible. Today, intersections are
designed so that the intersecting roads meet as close to a right angle as possible in order to minimize the size of the conflict areas. However, there are many
"legacy" intersections out on the road network such as this example, which have been in place for more than a century. In this instance, it was the historical
junction of two 19th-Century wagon trails at this point which was the culprit. See an
Enlarged Photo Here. (Photograph taken on July 12, 2009 - © Cameron Bevers) Right - View of the intersection of Old Hwy 6 (Freelton Road) and Brock Road, facing south. Prior to the completion of the Freelton Bypass in the early 1970s, southbound traffic on Hwy 6 approaching this junction could either curve left and continue down Hwy 6 towards Waterdown or curve right and follow Wentworth County Road 4 to Dundas. The unincorporated Village of Freelton developed around the junction of two 19th-Century wagon trails, which diverged from one another at this point. By the 20th Century, however, this awkward intersection began to pose a traffic hazard. By 1969, almost 6,000 vehicles were flowing through this intersection each day just on Hwy 6, with traffic volumes steadily increasing each year. In the late 1960s, a decision was made to relocate Hwy 6 onto a new alignment, as little could be done to substantially improve the geometry of this intersection without demolishing buildings. Now that the intersection is located on a quiet residential street and operating under All-Way Stop-control, this intersection is much less of a safety concern today. See an Enlarged Photo Here. (Photograph taken on July 12, 2009 - © Cameron Bevers) 
Left - Facing north along Old Hwy 6 (Freelton Road) from the intersection of Brock Road. Following the completion of the Freelton Bypass in 1971, jurisdiction
over the old route of Hwy 6 through Freelton was transferred from the province to the County of Wentworth in March 1972. See an
Enlarged Photo Here. (Photograph taken on July 12, 2009 - © Cameron Bevers) Right - Today, Old Hwy 6 (Freelton Road) is a quiet village street, but it wasn't always like this. By the end of the 1960s, along 6,000 vehicles per day rumbled down this narrow street en route between Hamilton and Guelph. It's almost unthinkable that this narrow street with no sidewalks and minimal shoulders was once one of Ontario's main highways! See an Enlarged Photo Here. (Photograph taken on July 12, 2009 - © Cameron Bevers) 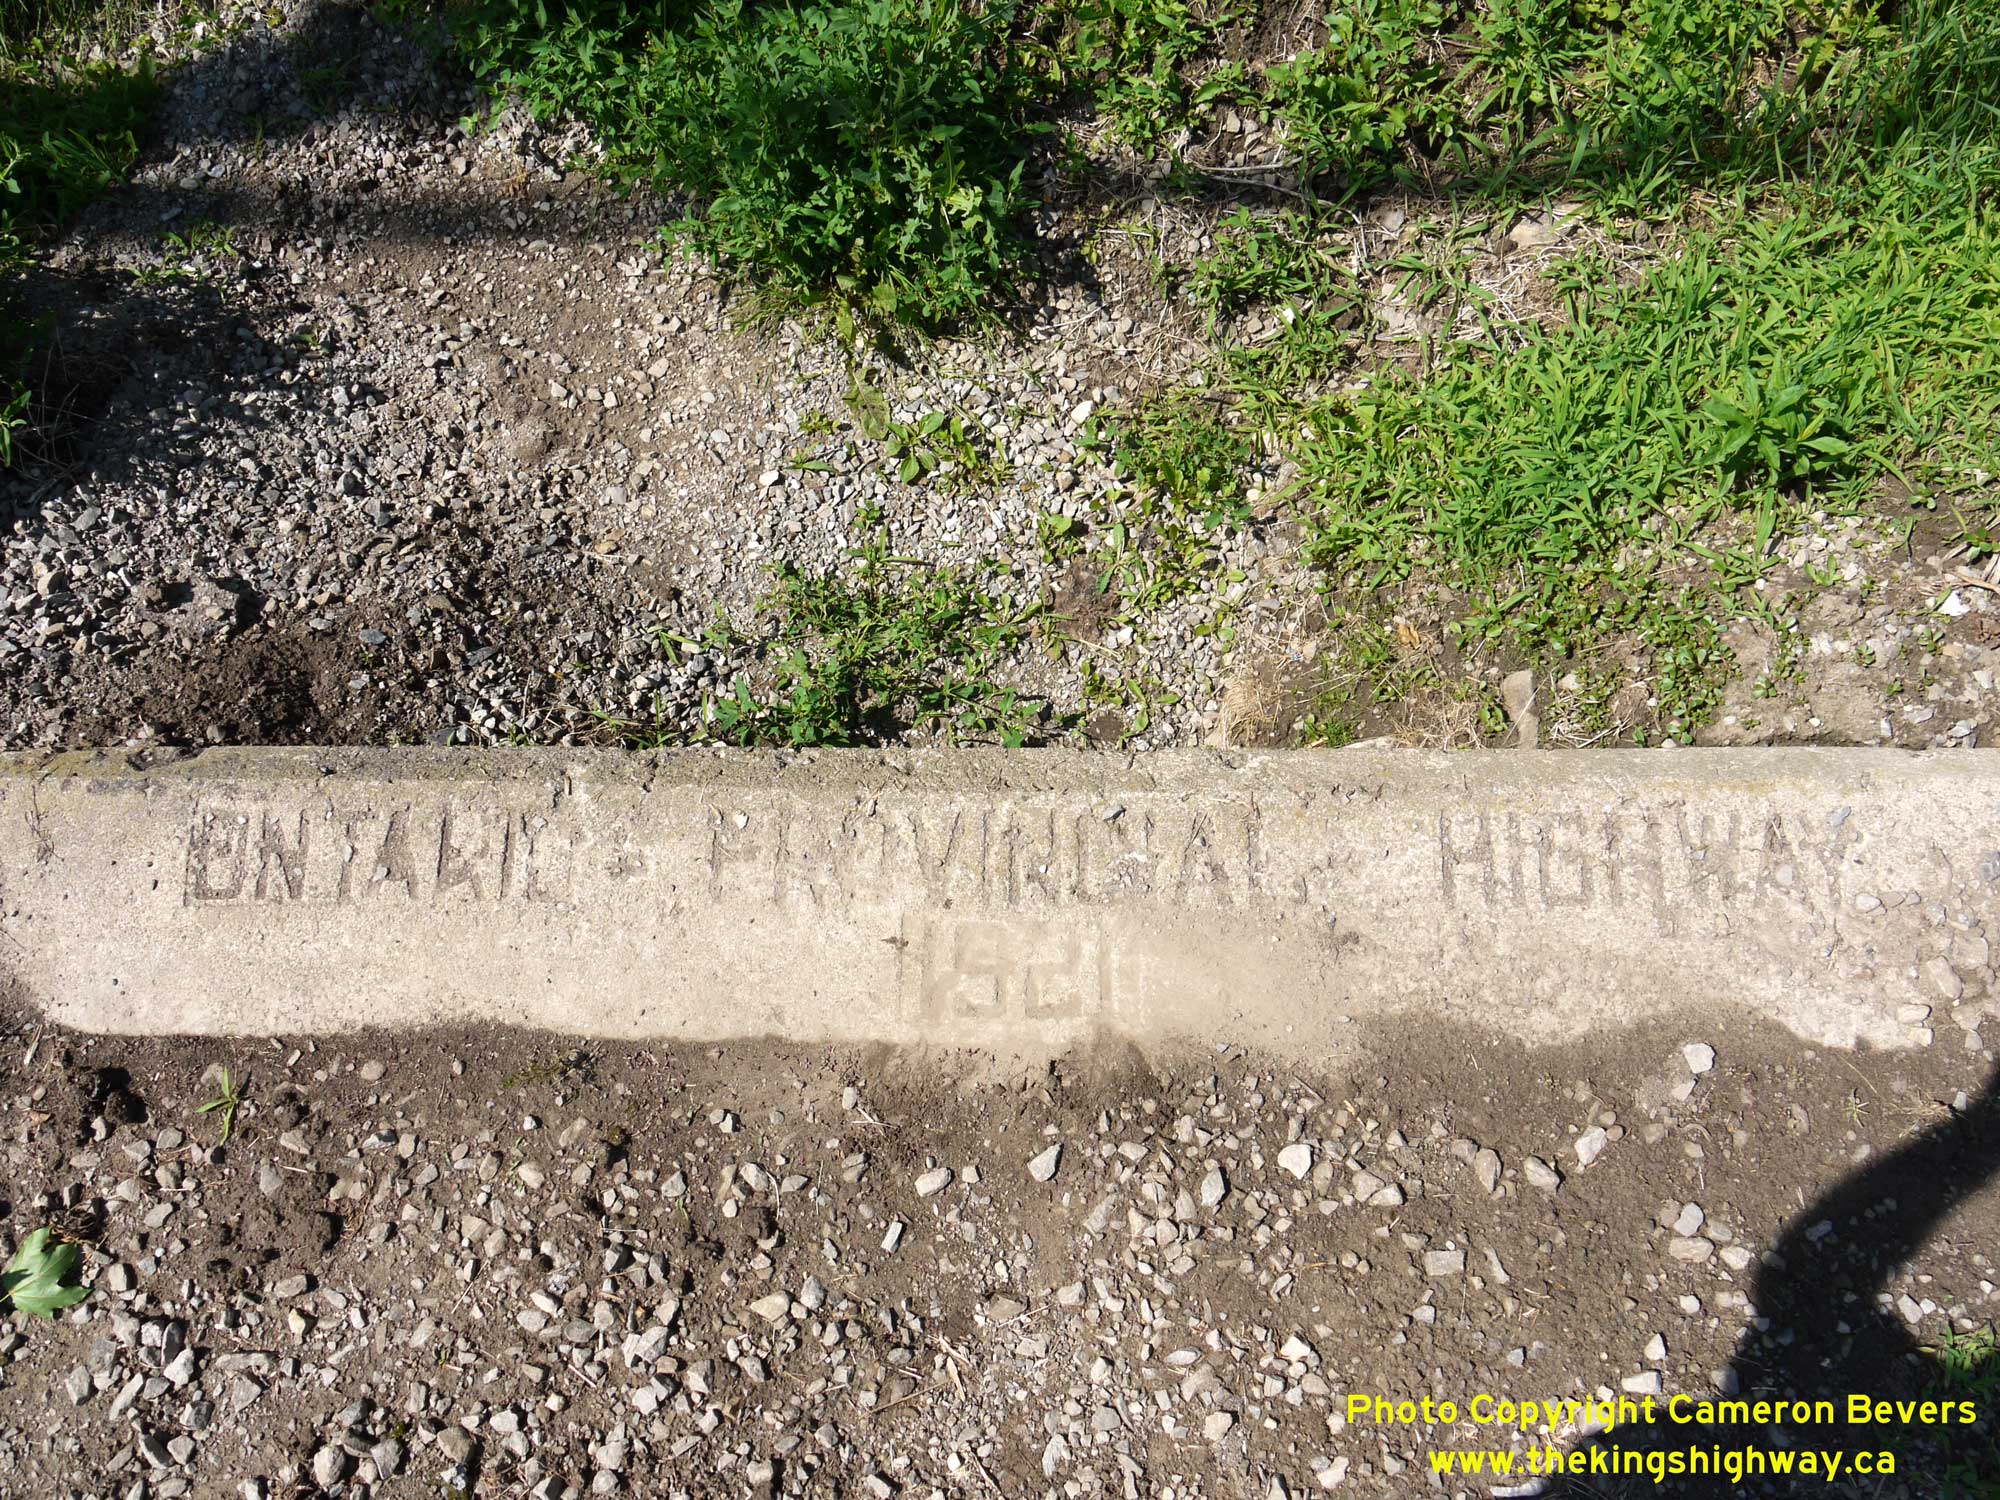
Left - Inscription on a concrete culvert on Old Hwy 6 at the north entrance to Freelton - "ONTARIO PROVINCIAL HIGHWAY 1921".See an
Enlarged Photo Here. (Photograph taken on July 12, 2009 - © Cameron Bevers) Right - Approaching the north entrance to Freelton on Old Hwy 6. Originally, Hwy 6 continued straight ahead on its route north to Guelph. As a result of the construction of the Freelton Bypass, the old highway curved out to a new intersection located along the bypass. See an Enlarged Photo Here. (Photograph taken on July 12, 2009 - © Cameron Bevers) 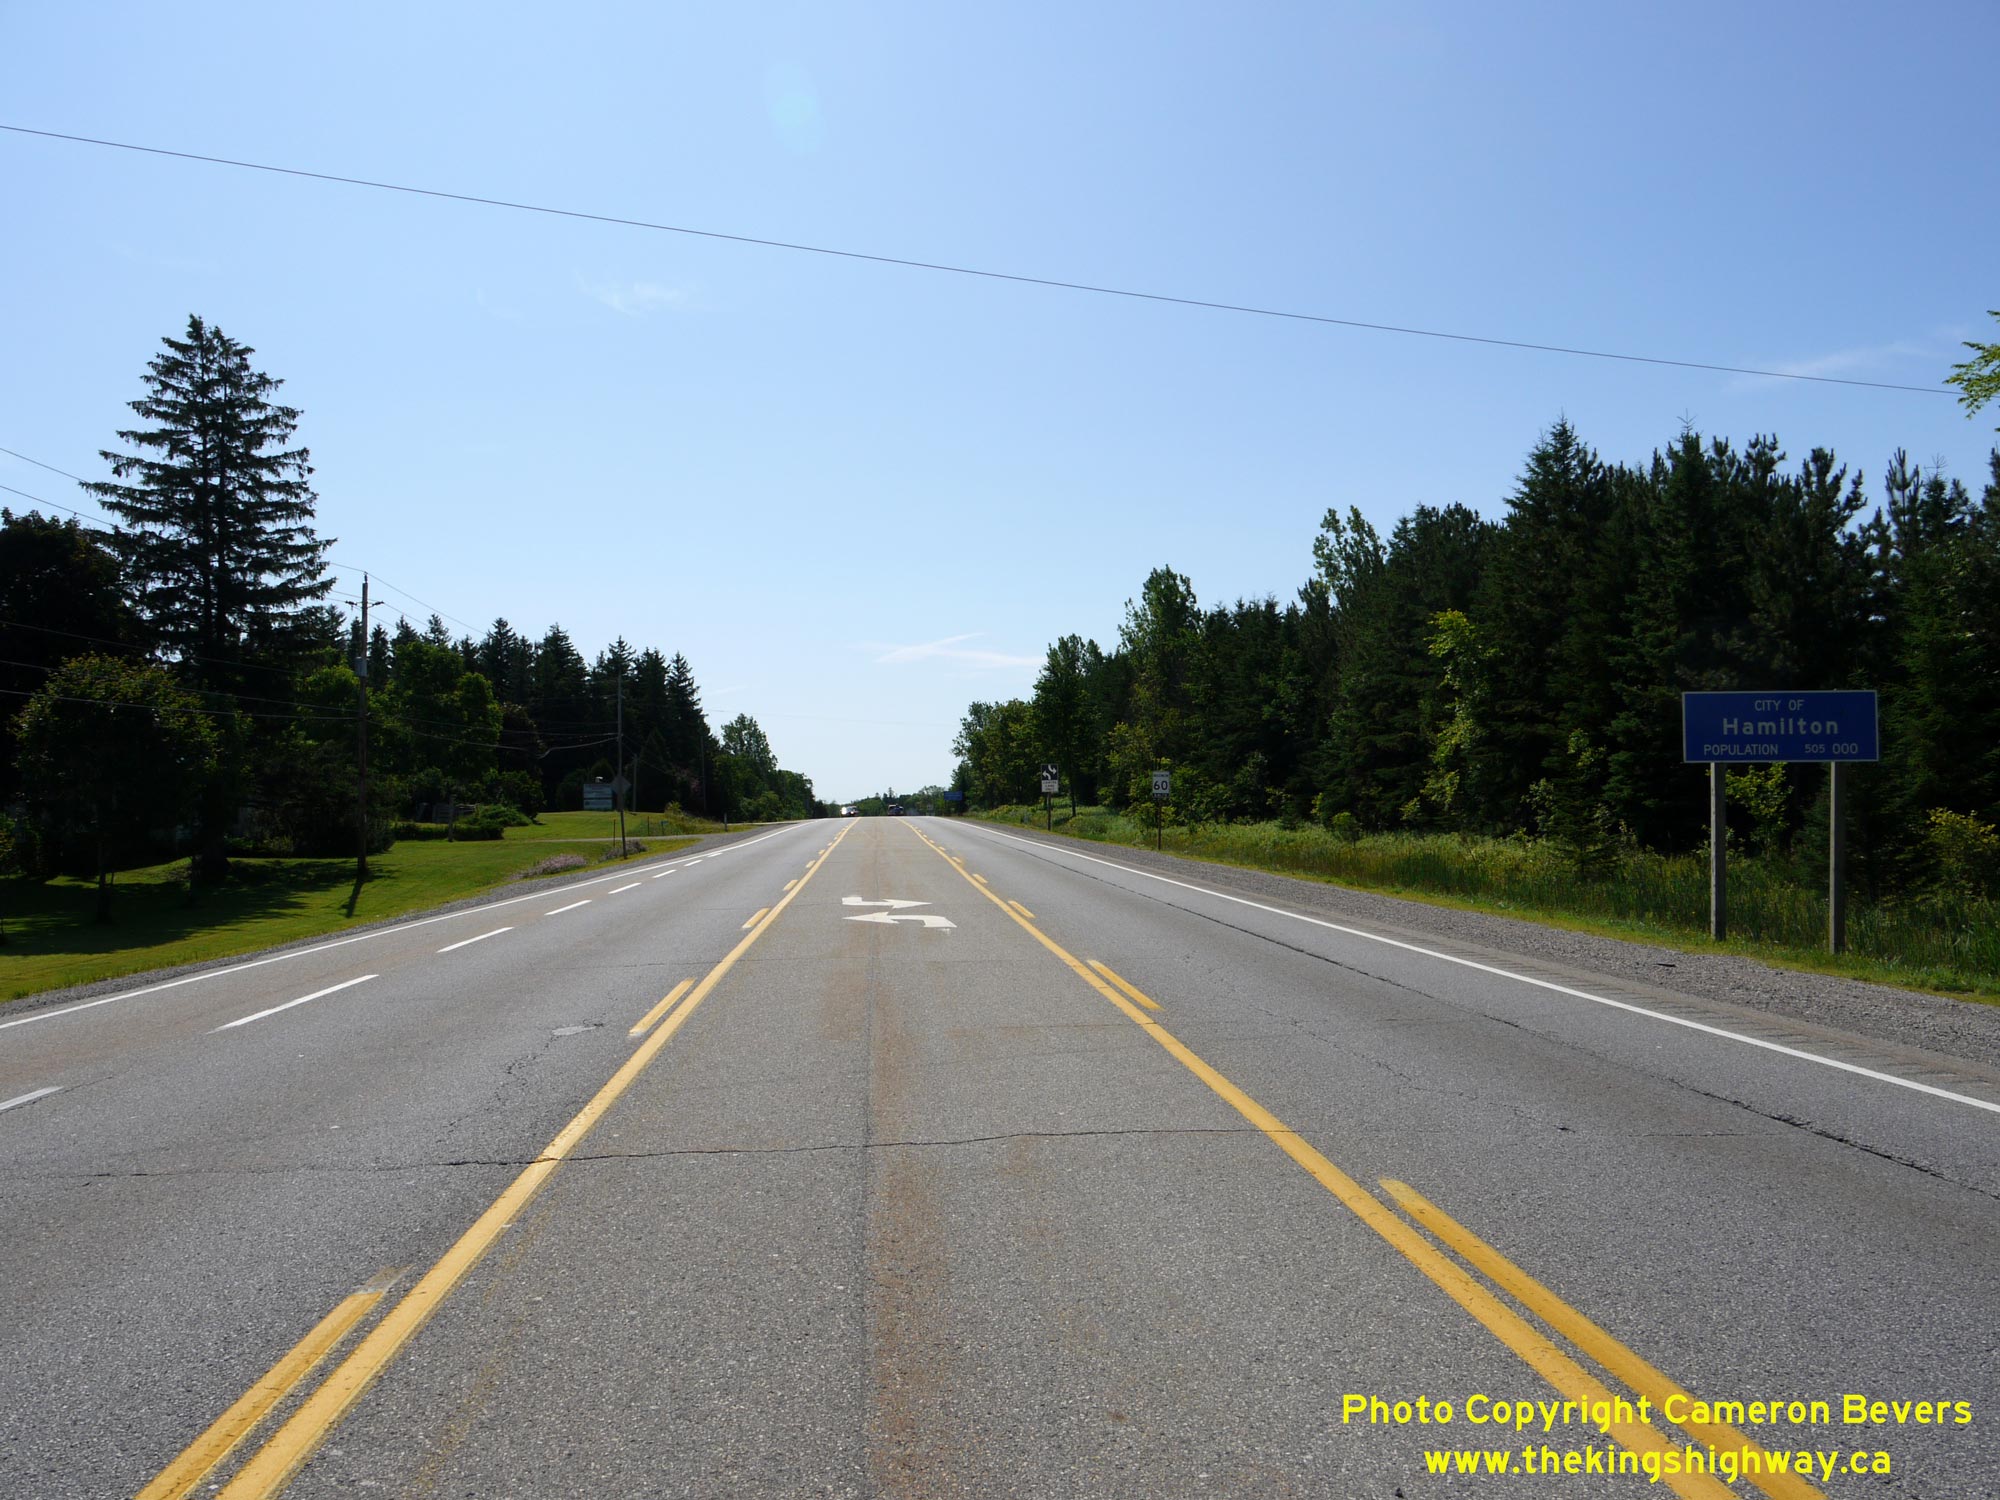
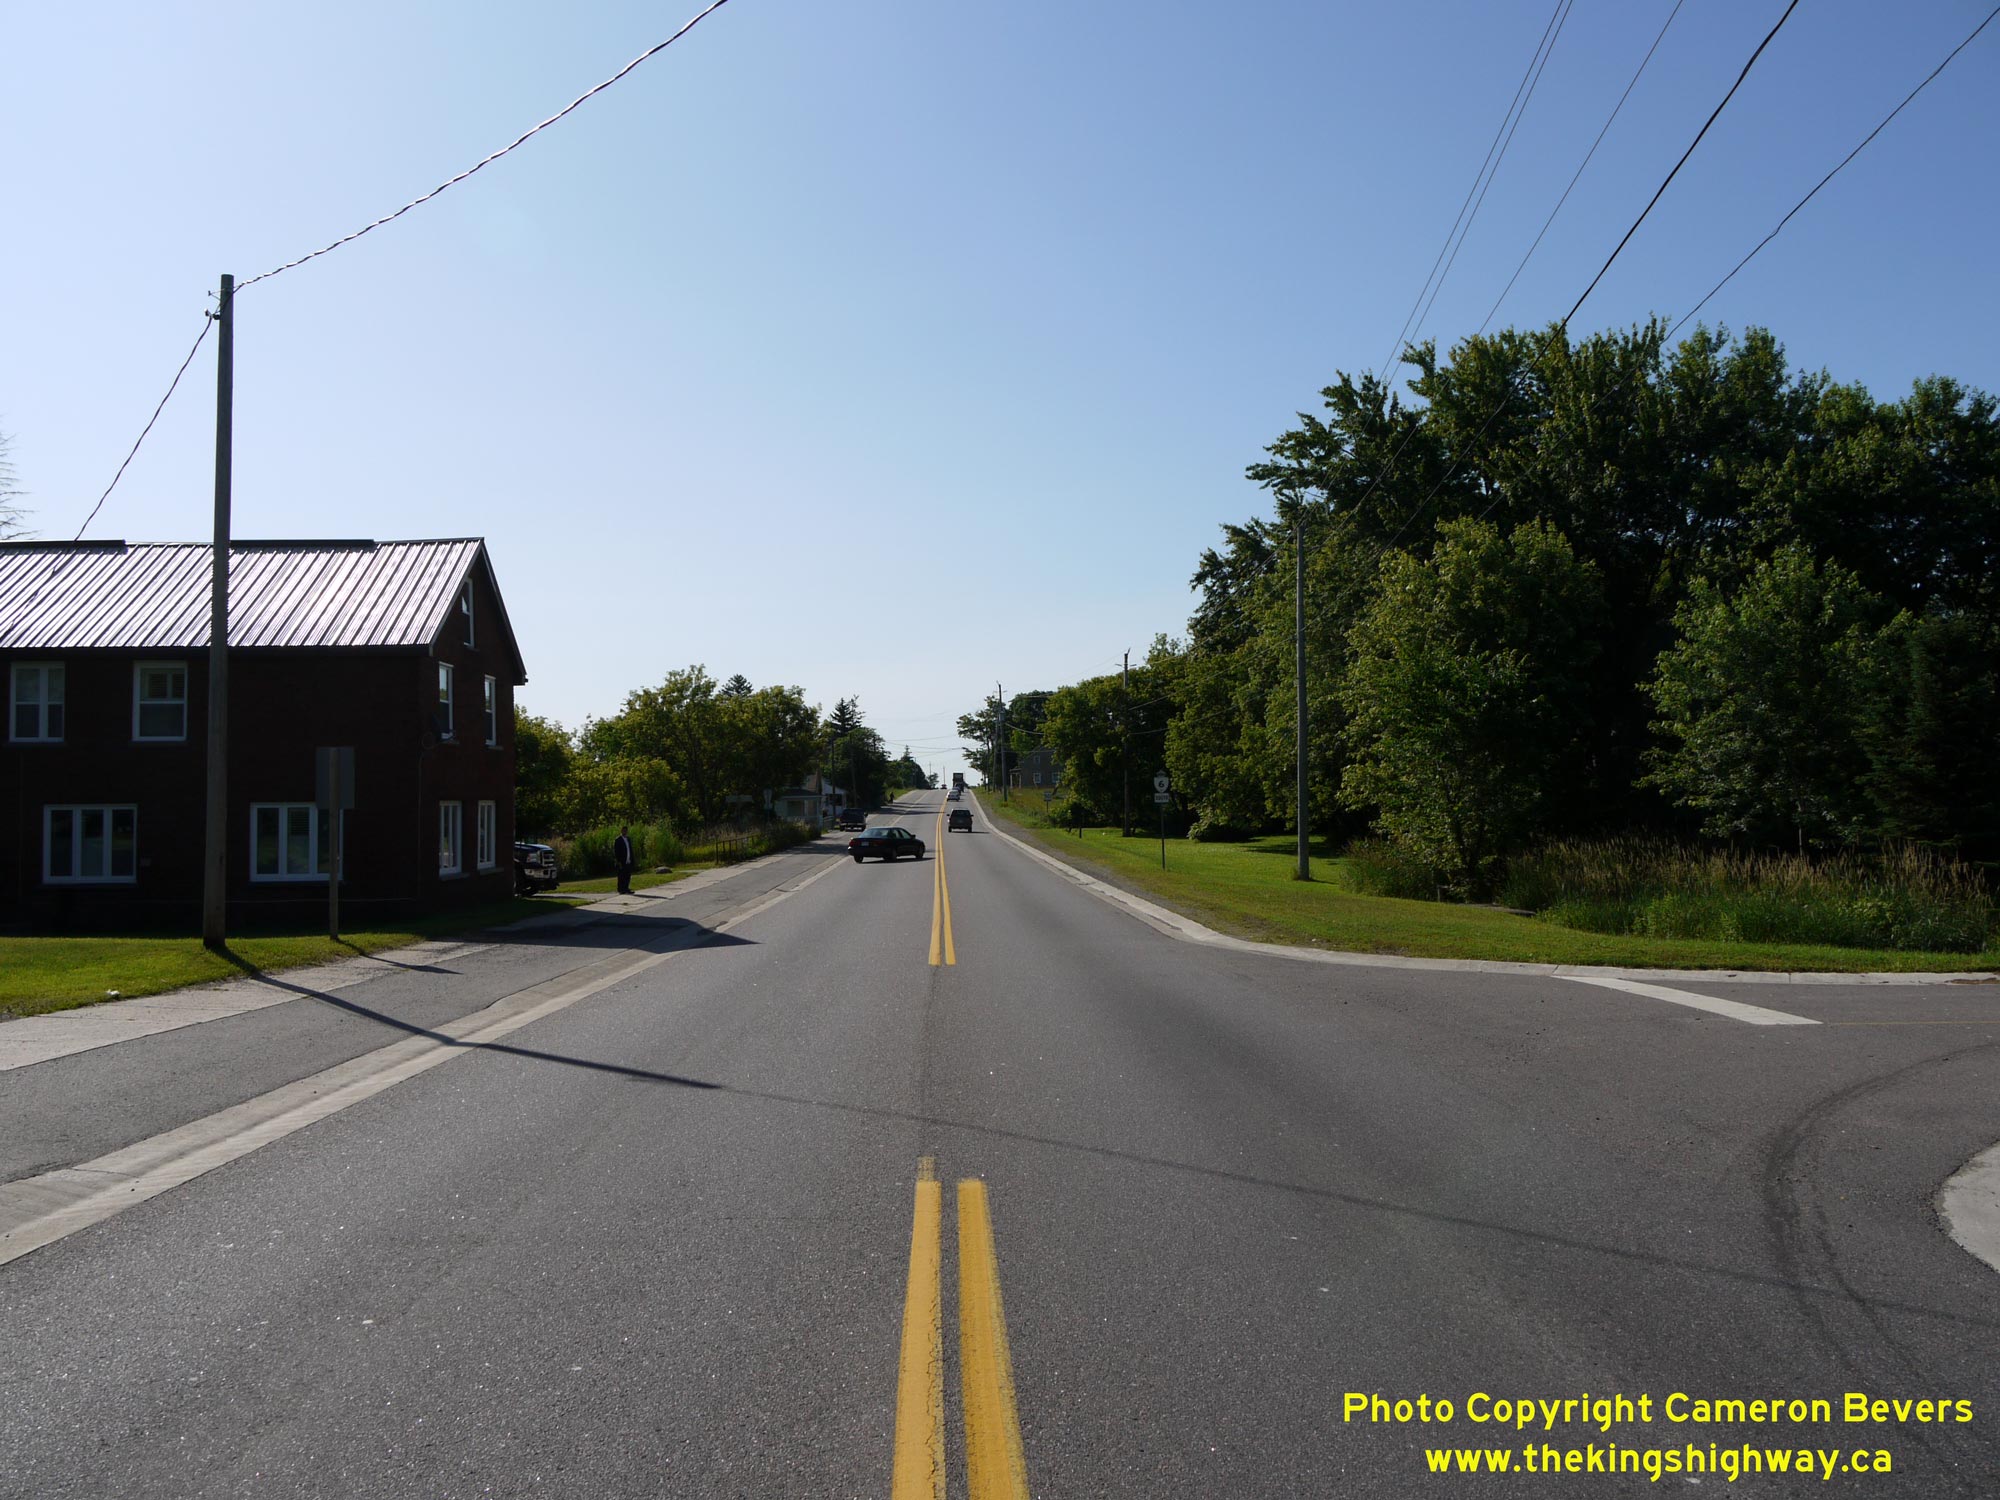
Left - Facing south along Hwy 6 from the Wellington County Boundary. Note the sign at right which marks the entrance to the City of Hamilton on southbound
Hwy 6. In 2001, the new single-tiered City of Hamilton was created out of a municipal restructuring of the former Regional Municipality of Hamilton-Wentworth and all
towns, cities and townships contained within it. As a result, the "New" City of Hamilton has a rather substantial rural fringe. The urban area of Hamilton isn't
reached until motorists arrive at Clappison's Corners, which is located about 18 km to the south. See an
Enlarged Photo Here. (Photograph taken on July 12, 2009 - © Cameron Bevers) Right - View of the City of Hamilton-County of Wellington Boundary, facing north towards Guelph. This point marks the beginning of the proposed Morriston Bypass (Hwy 6 New), which will be built in the future. This proposed highway will divert Hwy 6 traffic away from Morriston and nearby Puslinch and offer improved connections to Hwy 401. The designated route of Hwy 6 New begins at left and will head northwesterly around the western side of Morriston and Puslinch up to Hwy 401. See an Enlarged Photo Here. (Photograph taken on July 12, 2009 - © Cameron Bevers) 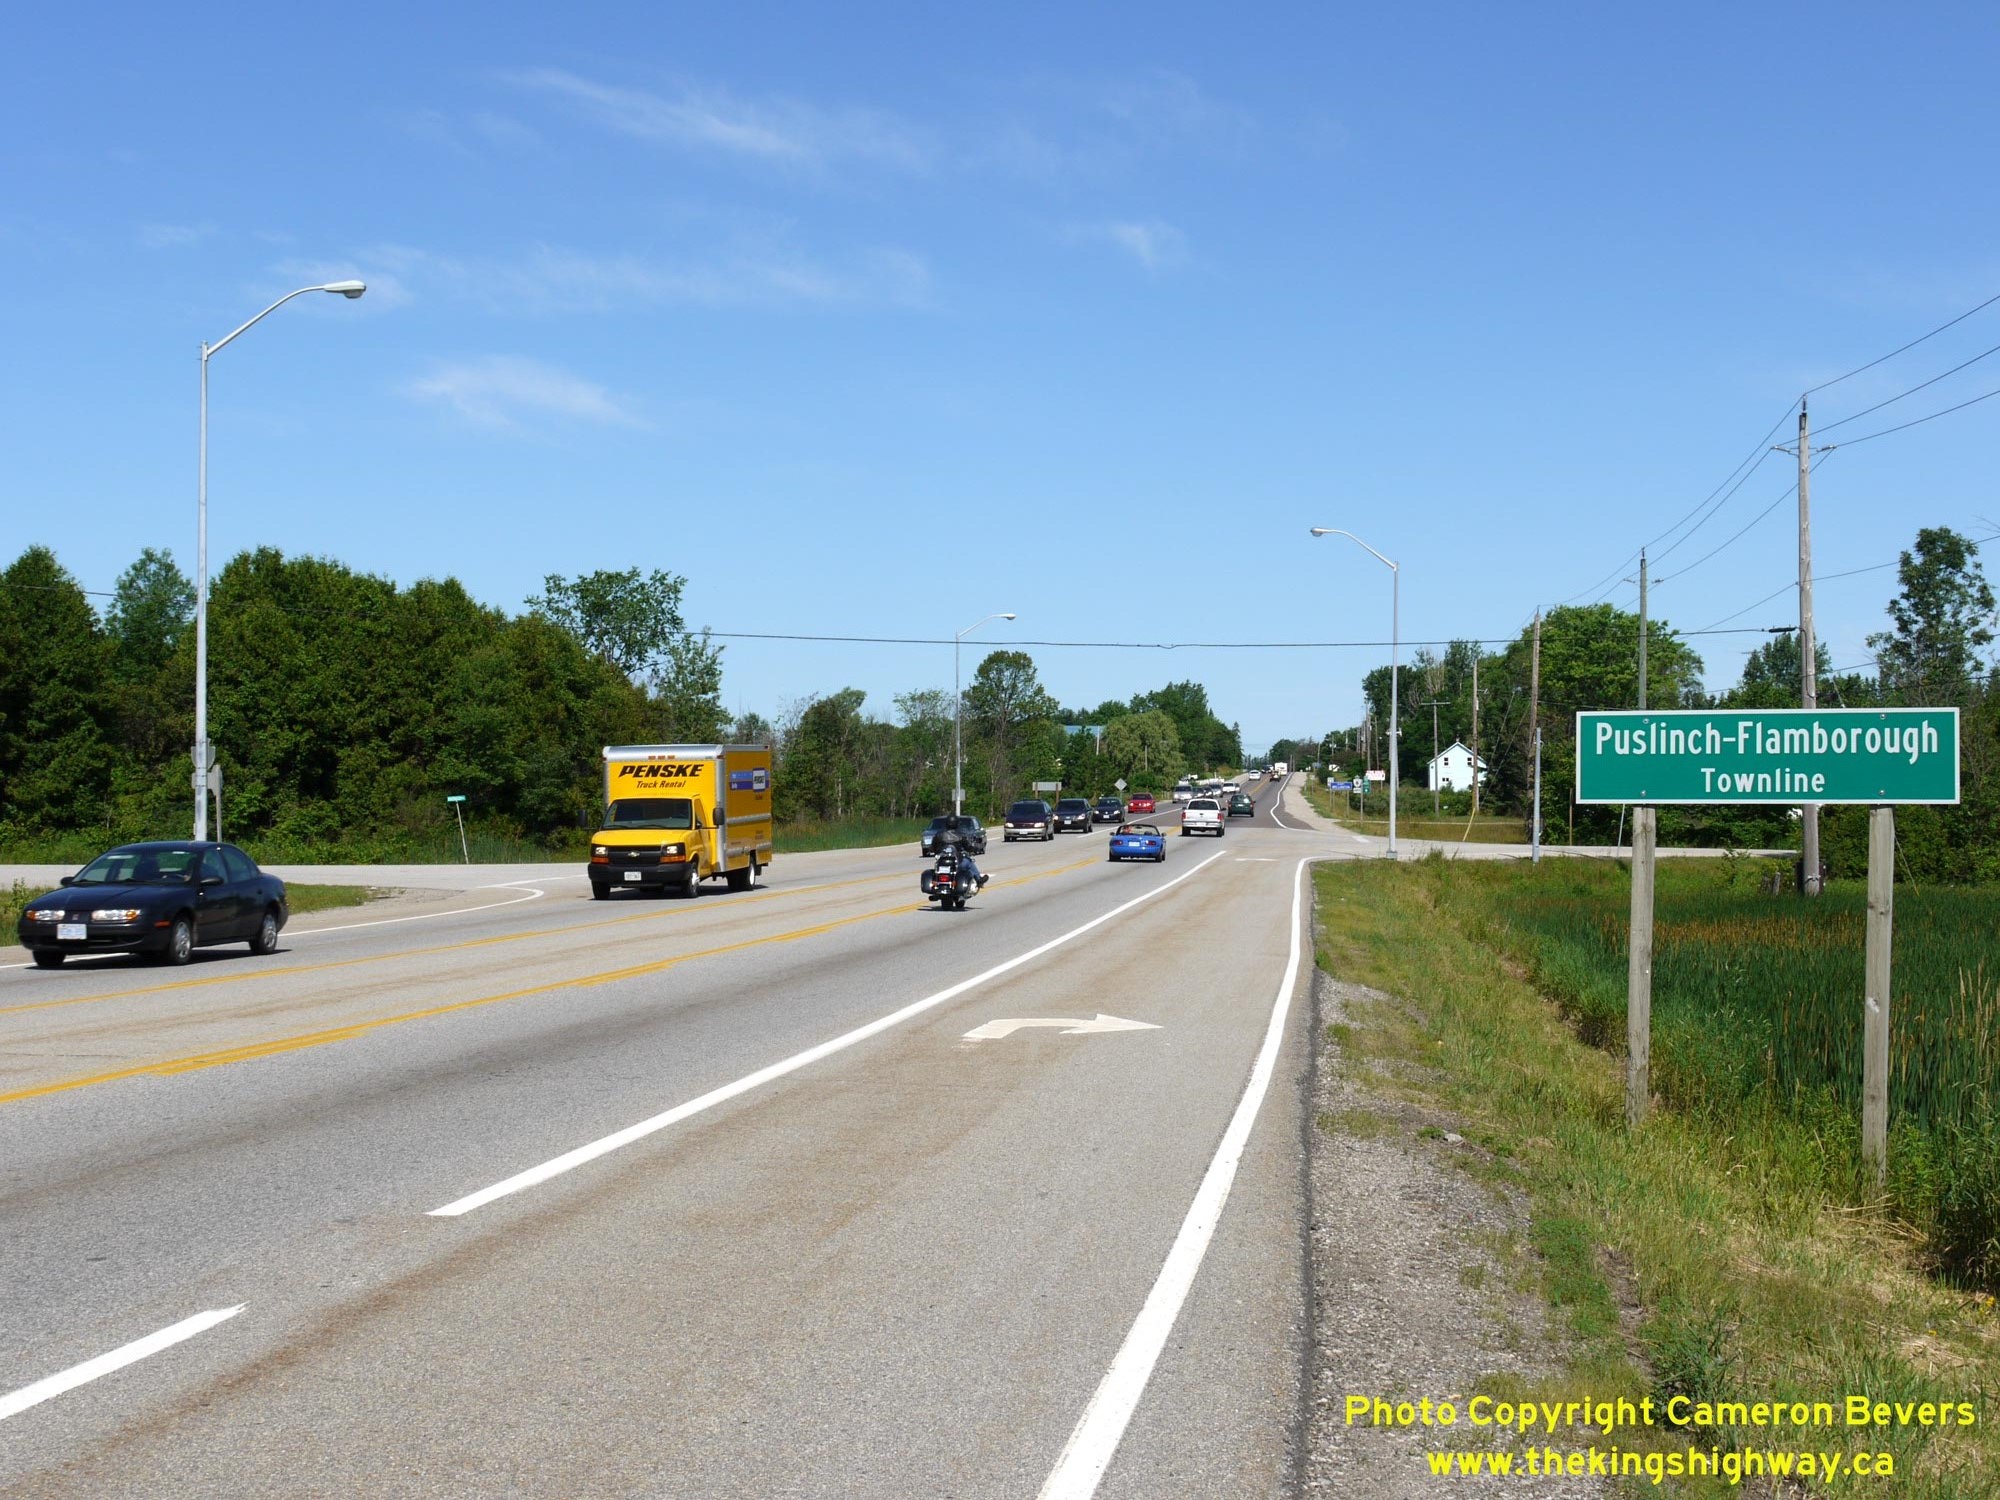
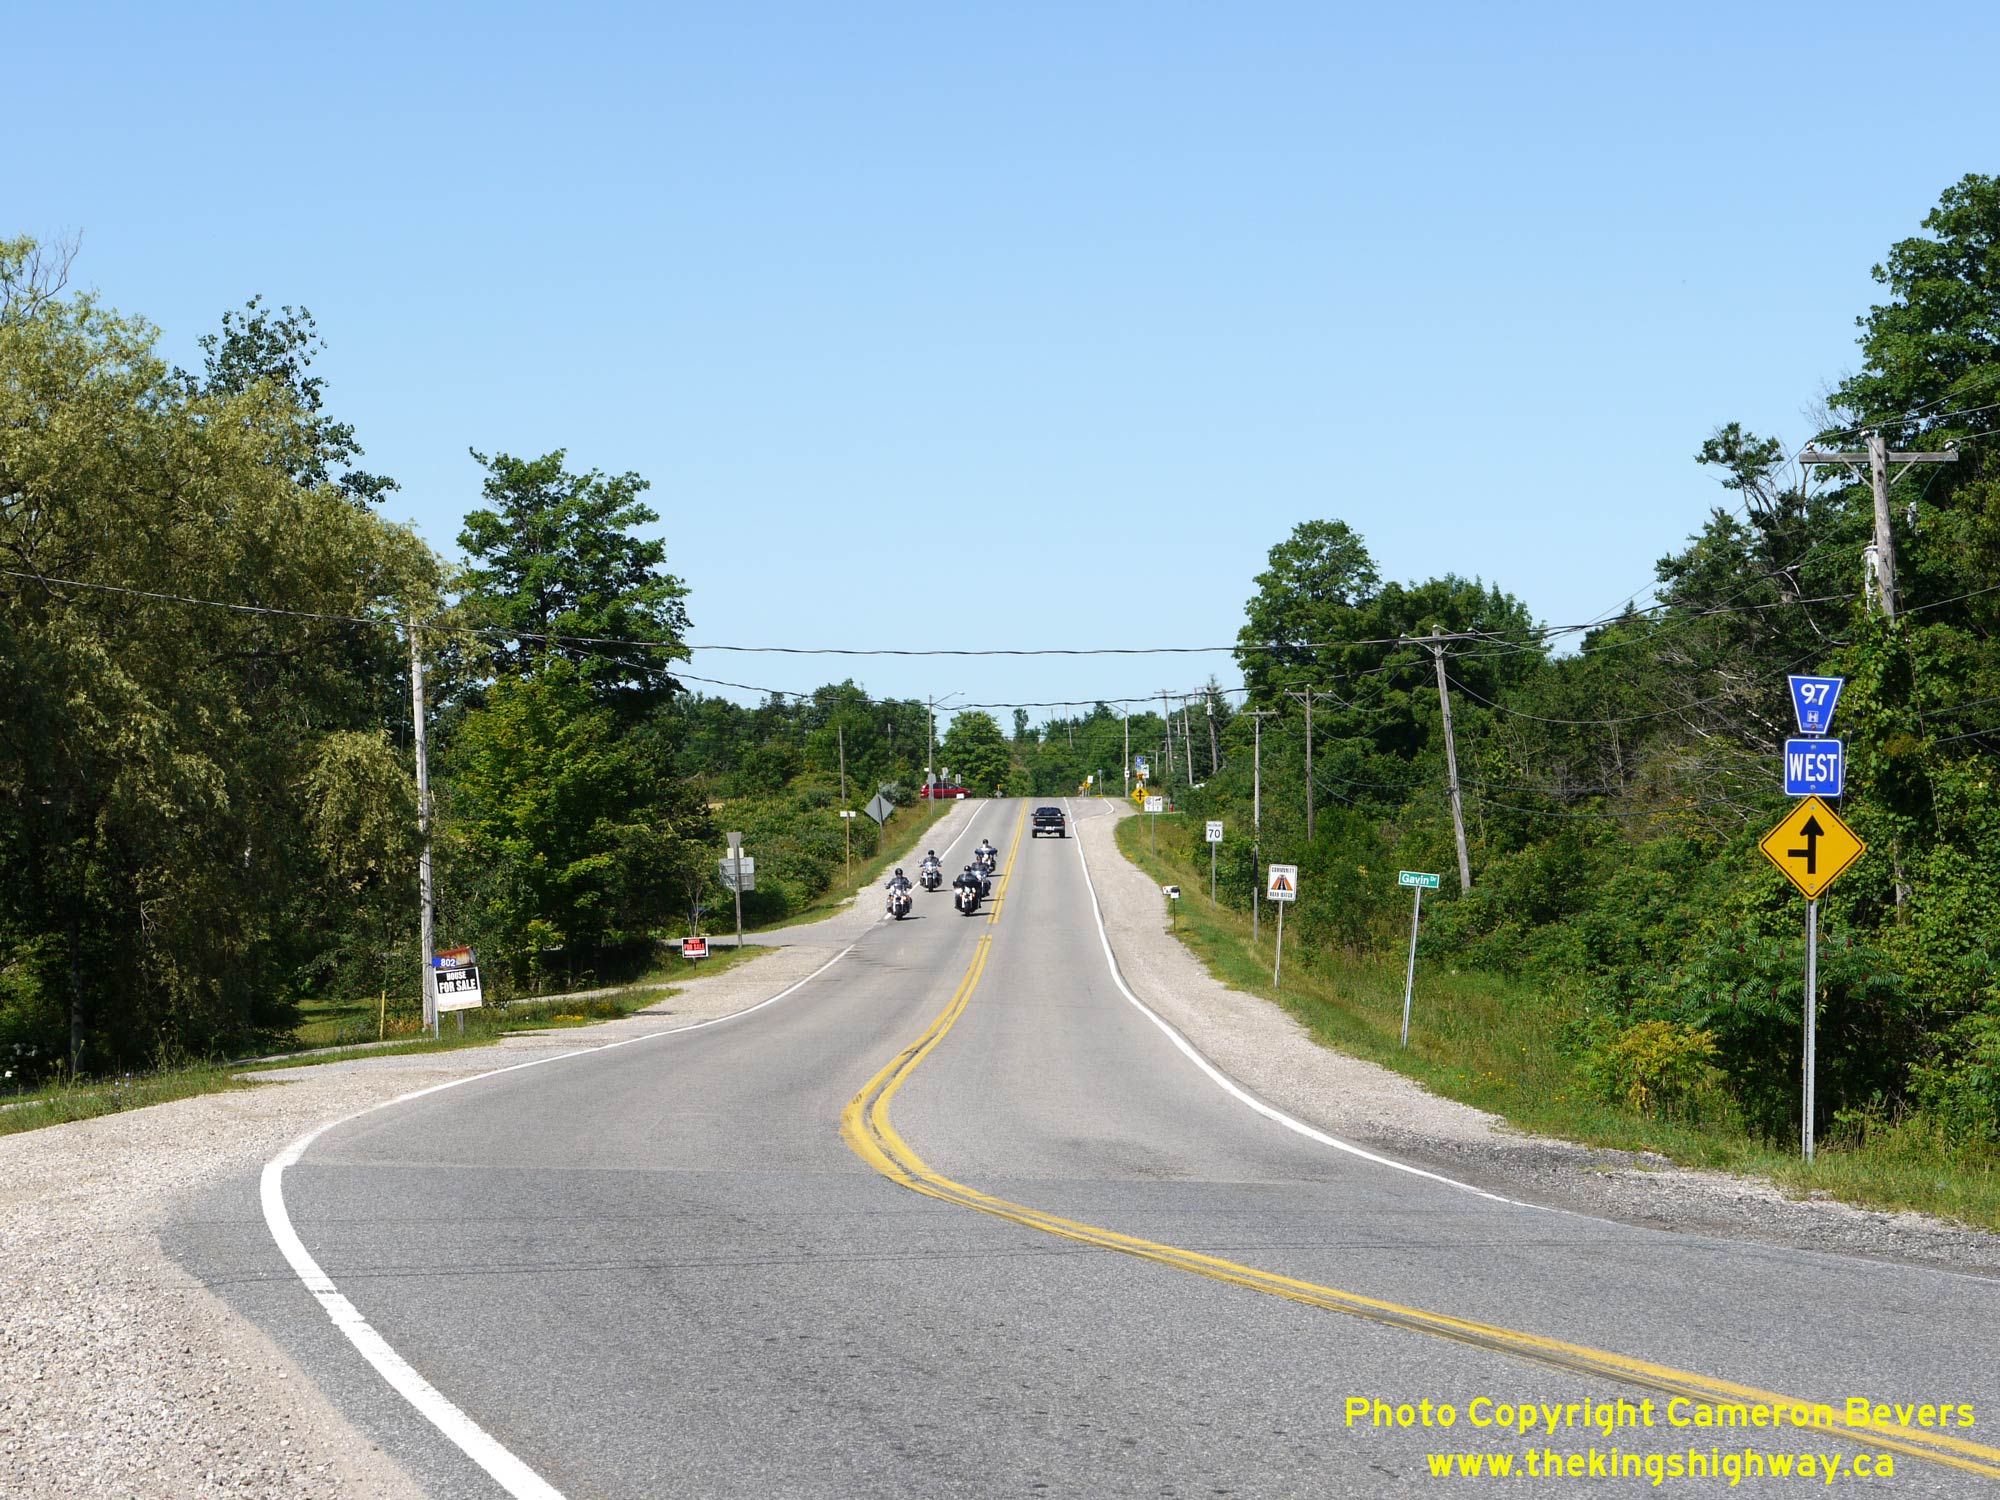
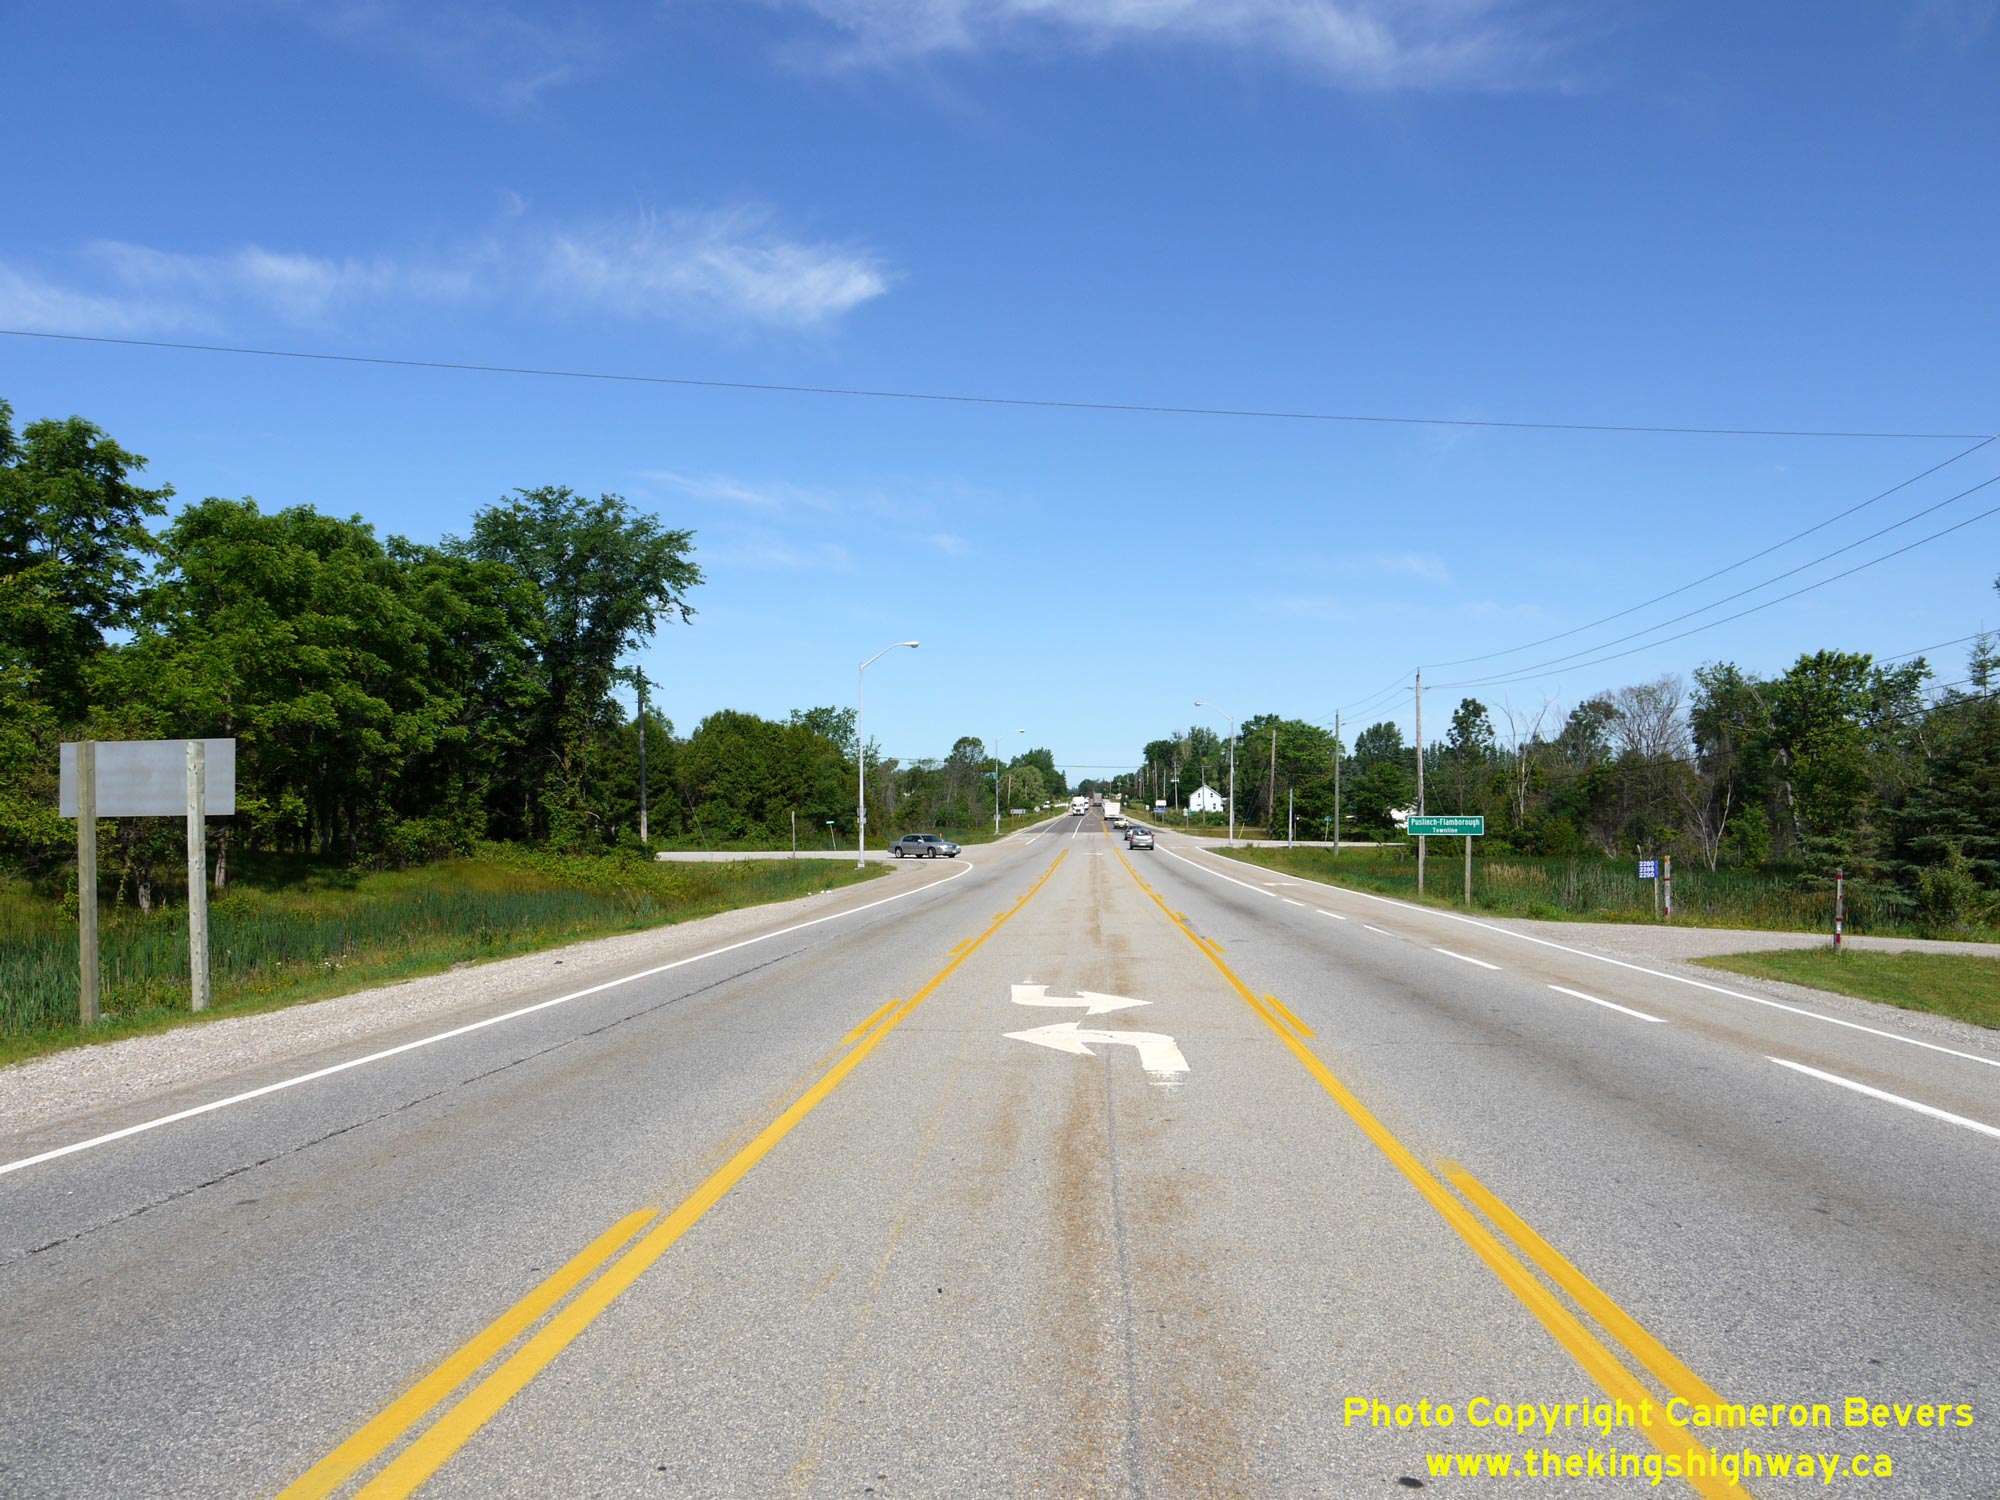
Left - Heavy traffic on Hwy 6 at the Puslinch-Flamborough Townline (Wellington County Boundary). This two-lane section of Hwy 6 is heavily-utilized and is the
only remaining two-lane section of Hwy 6 between Hamilton and Guelph. In 2019, almost 29,000 vehicles per day travelled along this two-lane section of Hwy 6. See an
Enlarged Photo Here. (Photograph taken on July 12, 2009 - © Cameron Bevers) Right - Facing north along Hwy 6 towards Guelph from the Wellington County Boundary. Just north of the boundary, Hwy 6 passes through the small rural community of Puslinch. This unincorporated community is part of the much larger Township of Puslinch. See an Enlarged Photo Here. (Photograph taken on July 12, 2009 - © Cameron Bevers) 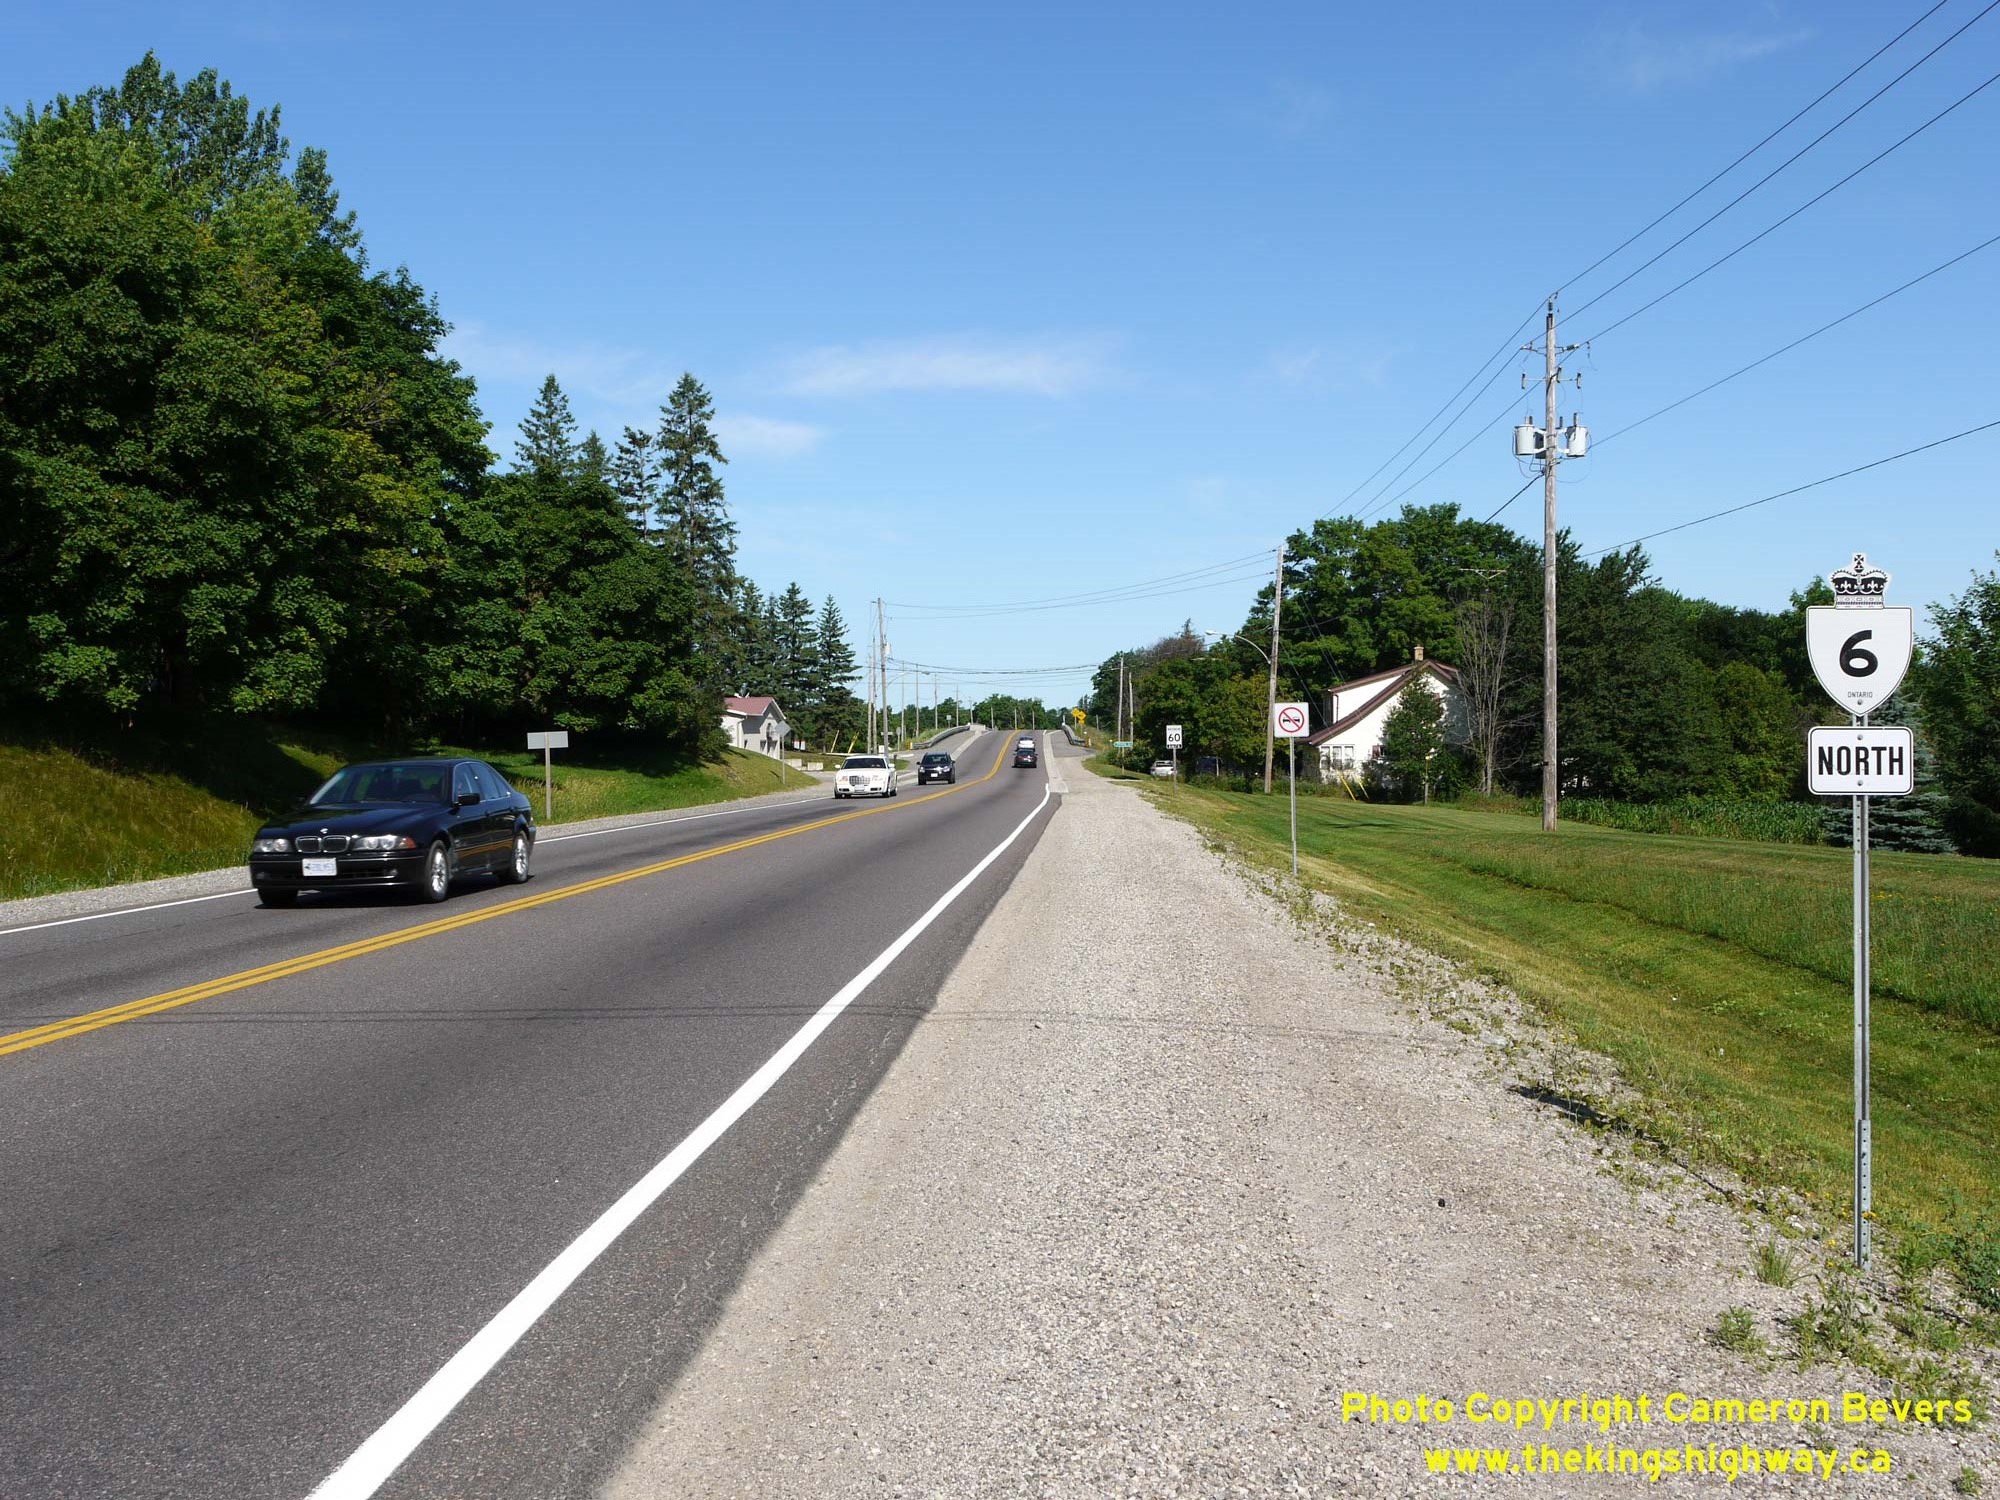
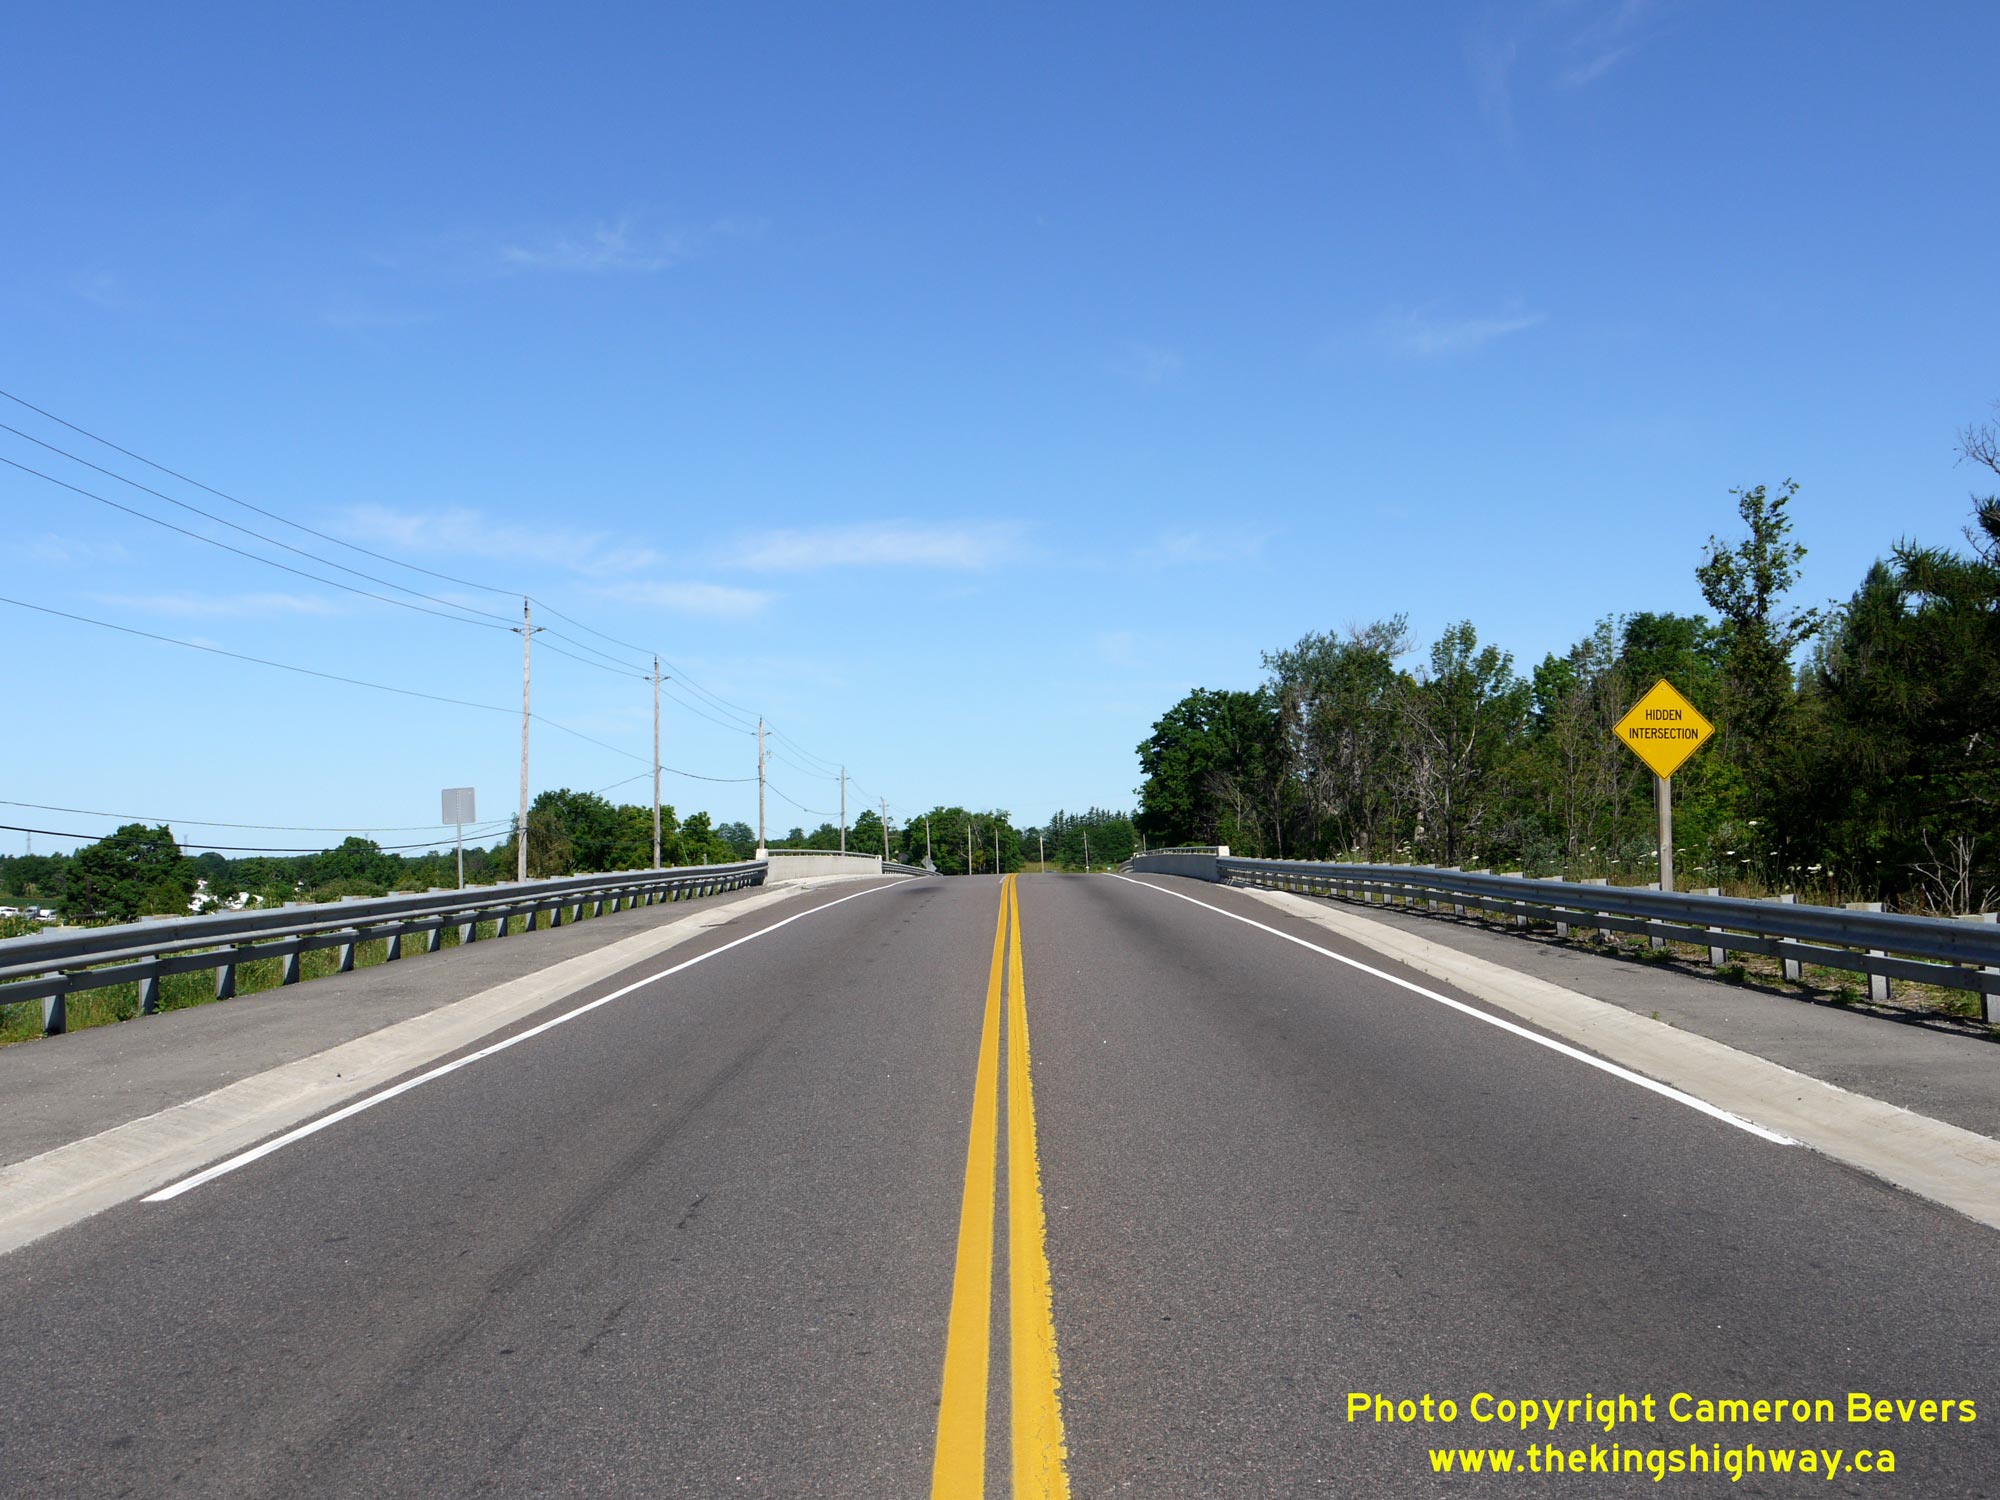
Left - Facing north along Hwy 6 approaching the Puslinch Canadian Pacific Railway (CPR) Overhead. See an
Enlarged Photo Here. (Photograph taken on July 12, 2009 - © Cameron Bevers) Right - Puslinch CPR Overhead on Hwy 6, facing north towards Guelph. This new railway overhead was constructed in 2005-2006. See an Enlarged Photo Here. (Photograph taken on July 12, 2009 - © Cameron Bevers) 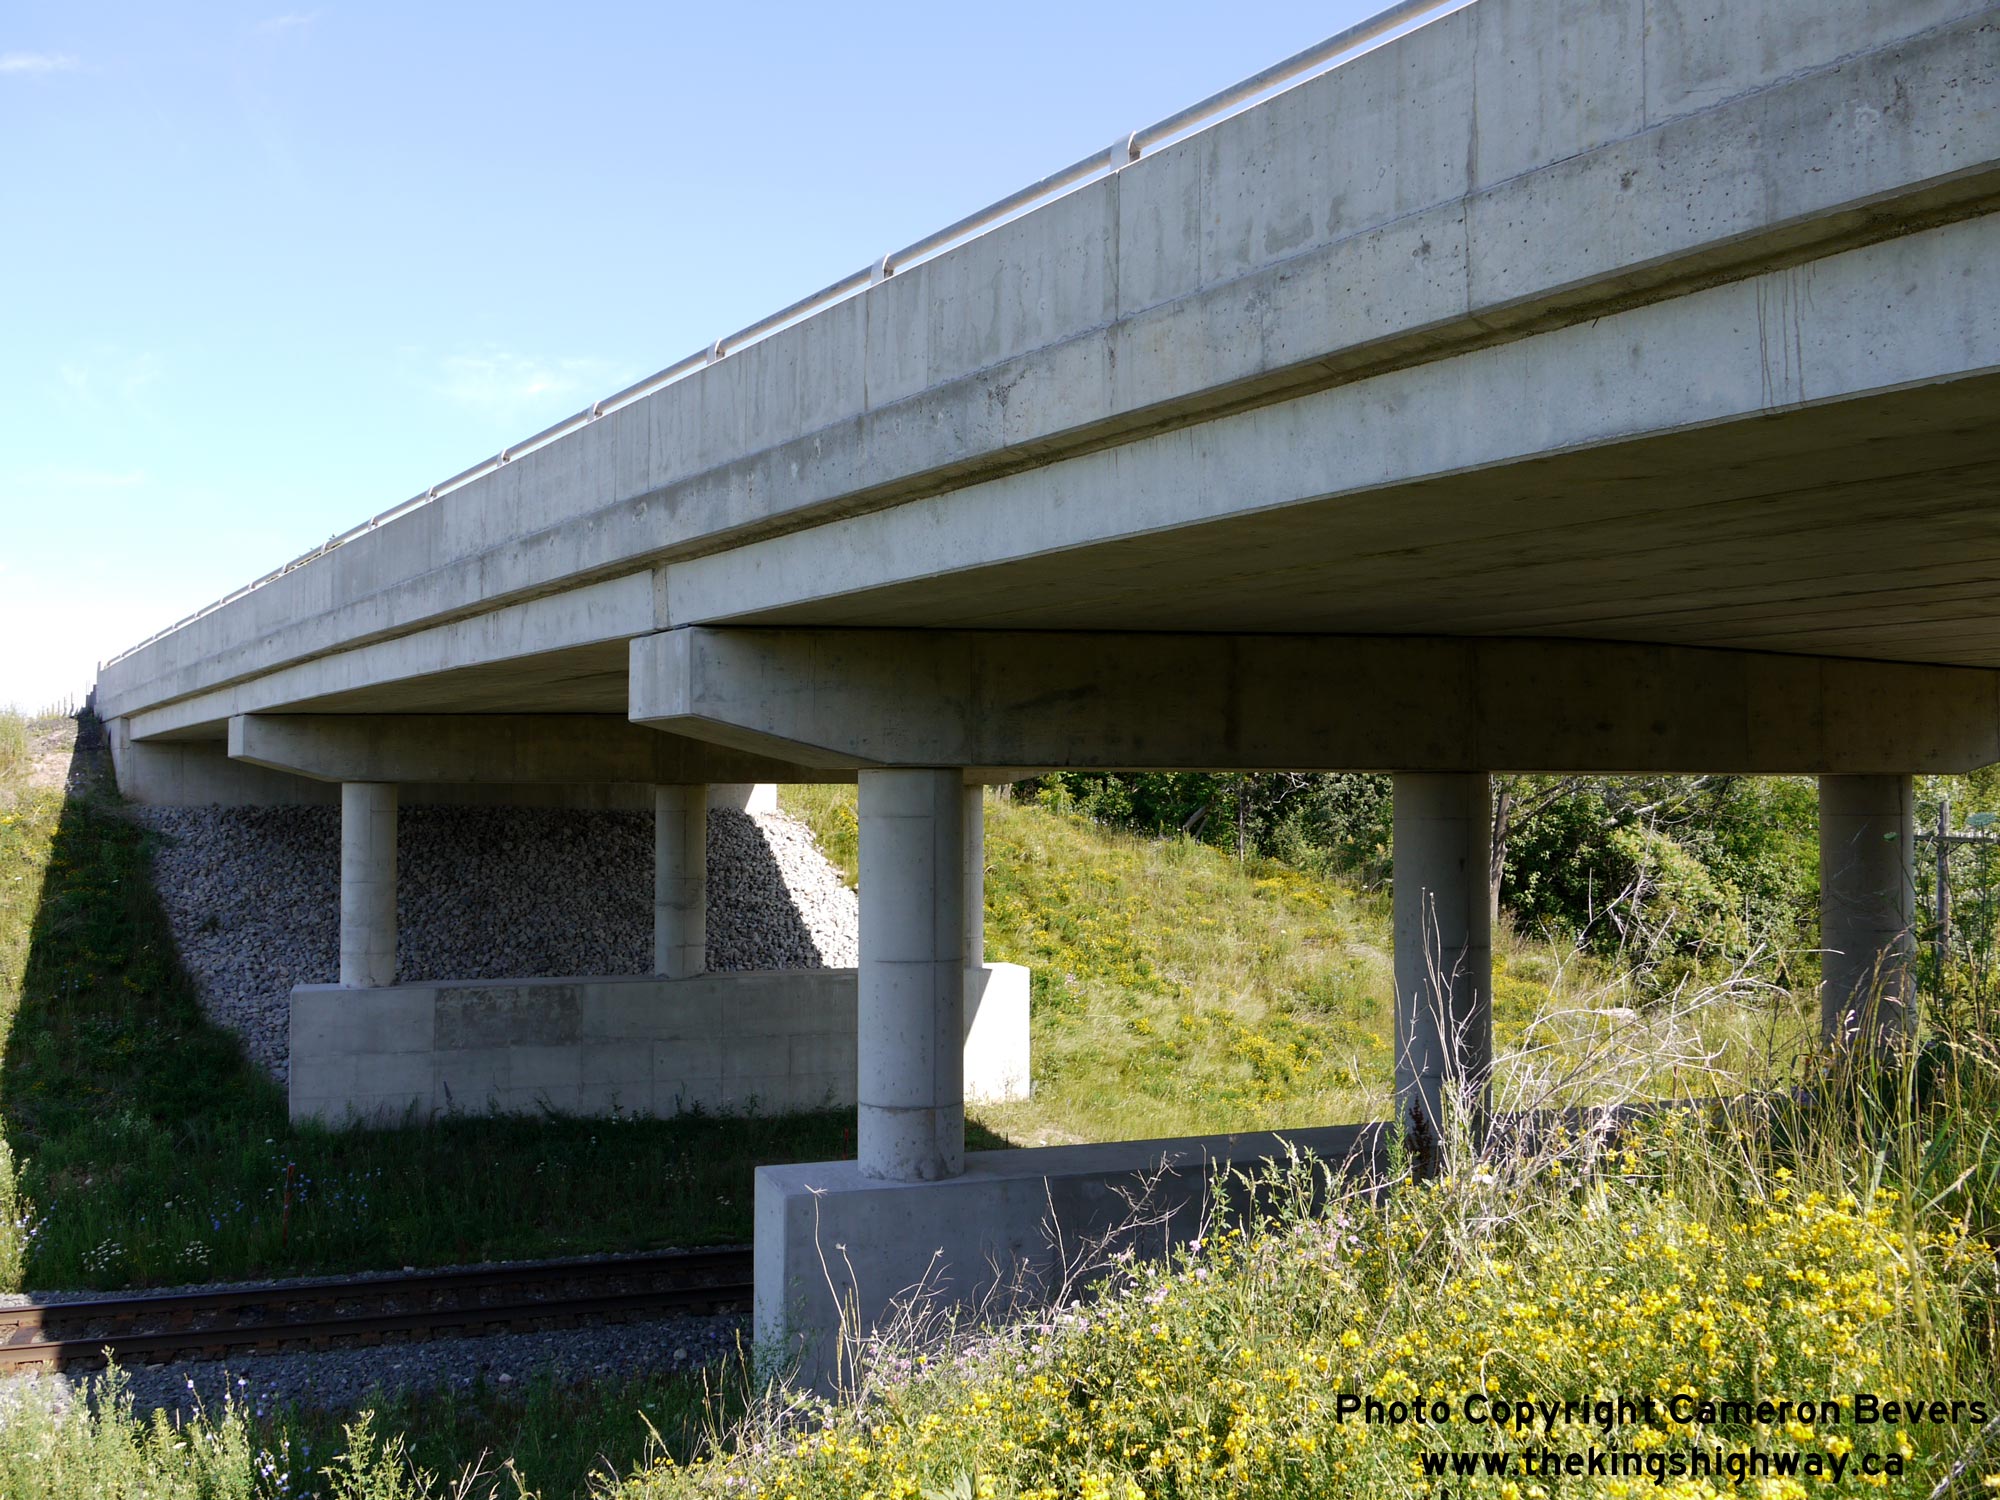
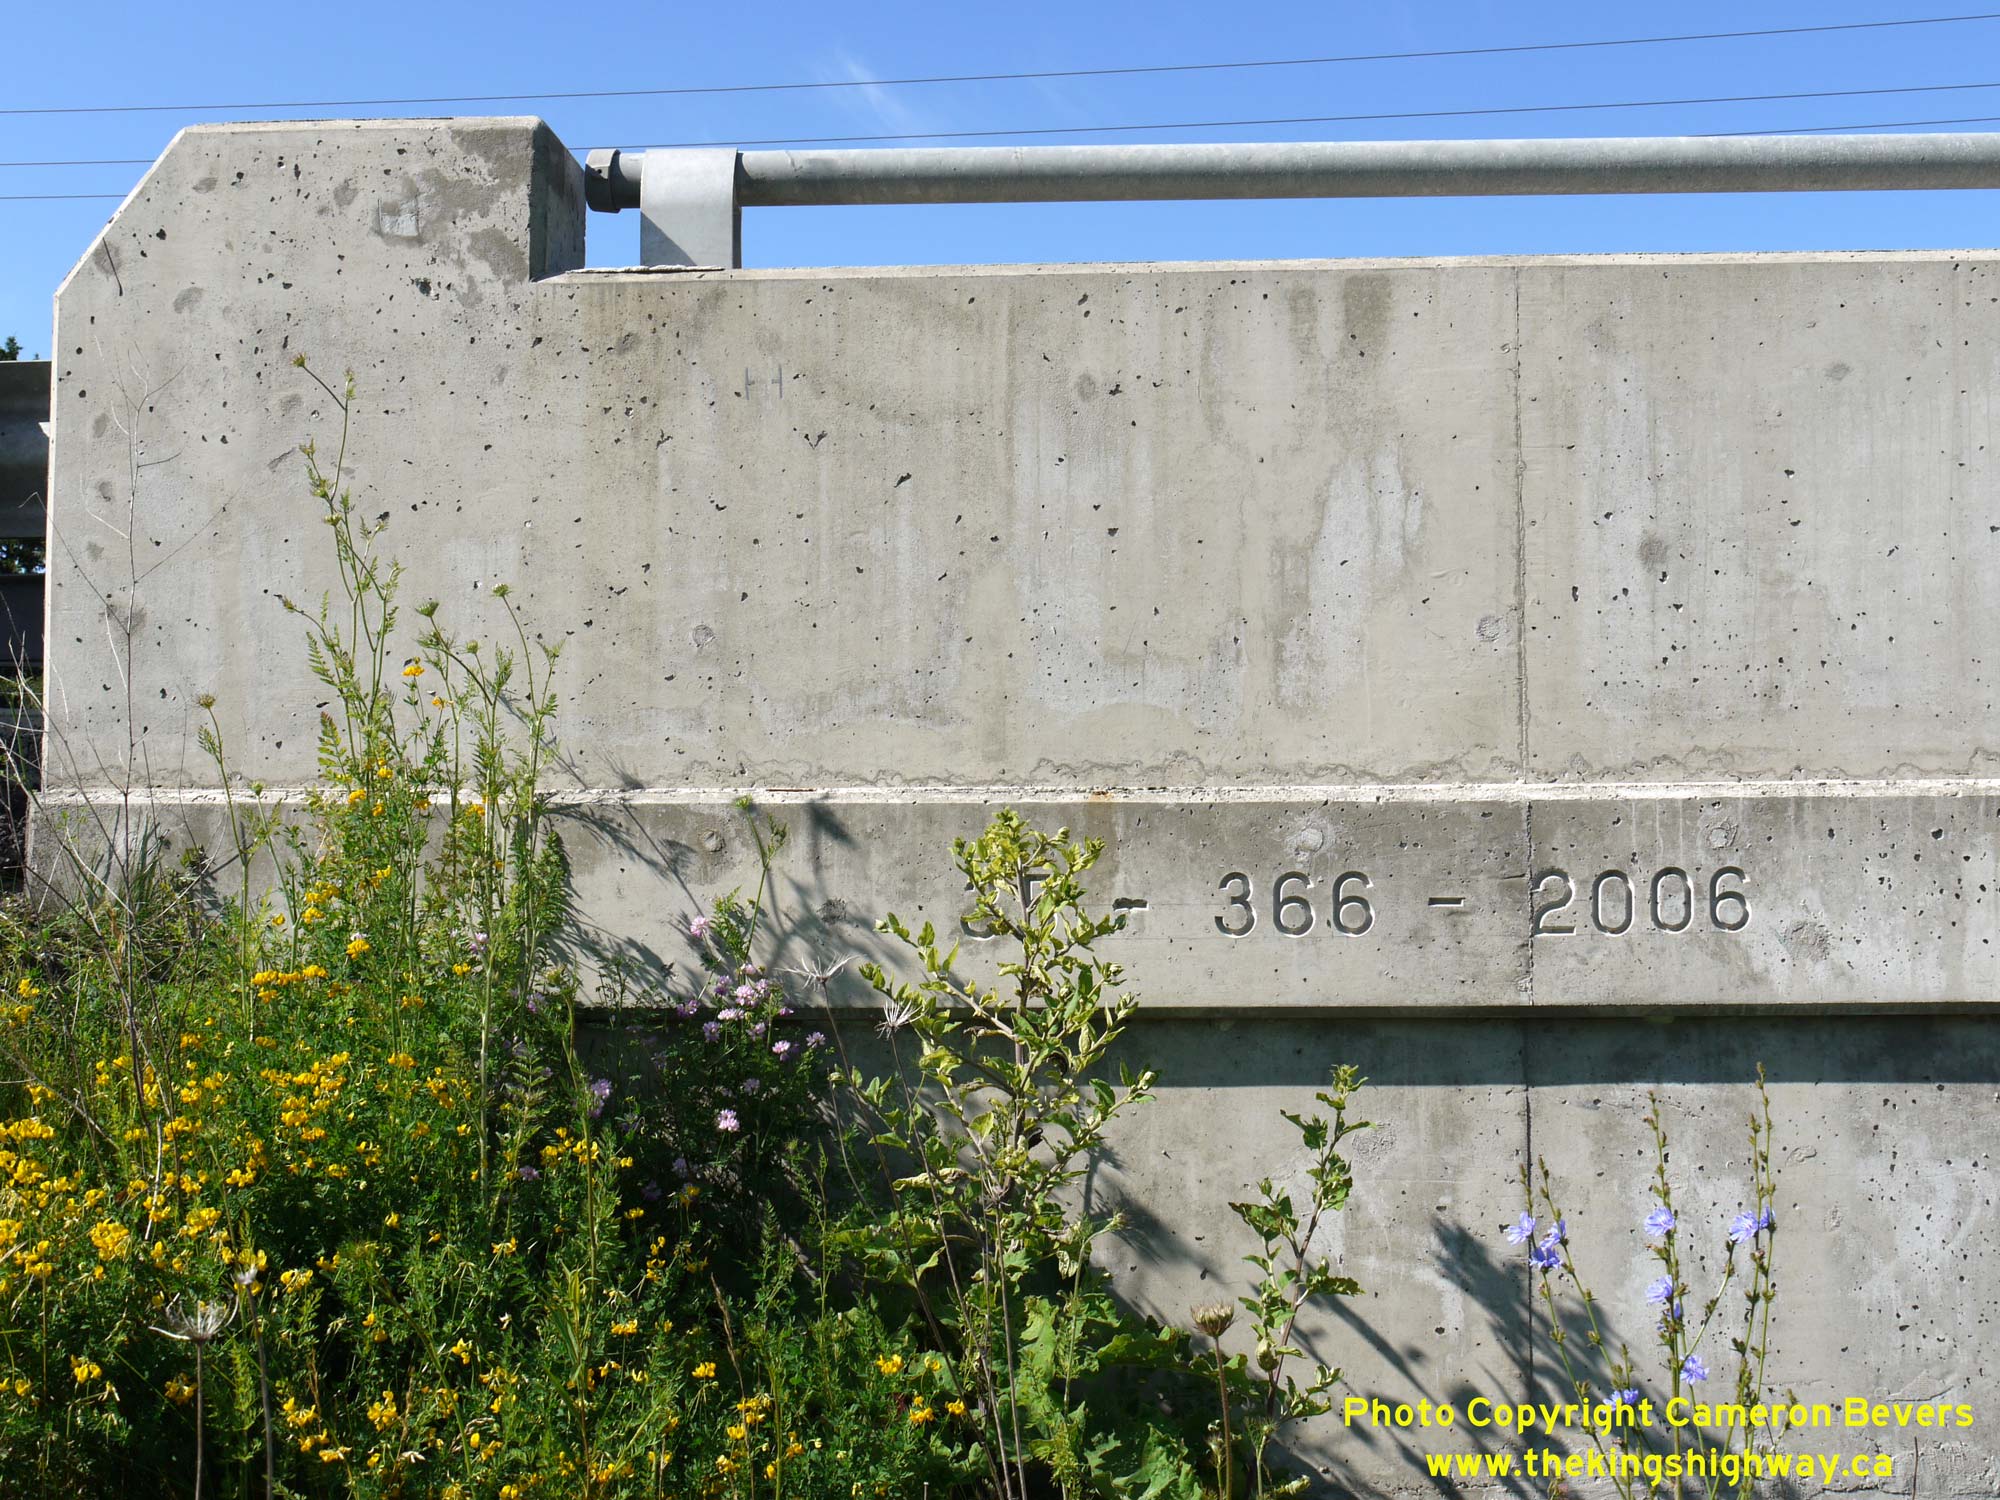
Left - Western side of the new Puslinch CPR Overhead on Hwy 6. This three-span pre-stressed concrete structure was completed in 2006. It replaced a three-span
pre-stressed concrete structure which was built in 1967. See an Enlarged Photo Here. (Photograph taken on July 12, 2009 - © Cameron Bevers) Right - Date stamp (2006) and structure identification number (Site #35-366) on the Puslinch CPR Overhead. See an Enlarged Photo Here. (Photograph taken on July 12, 2009 - © Cameron Bevers) 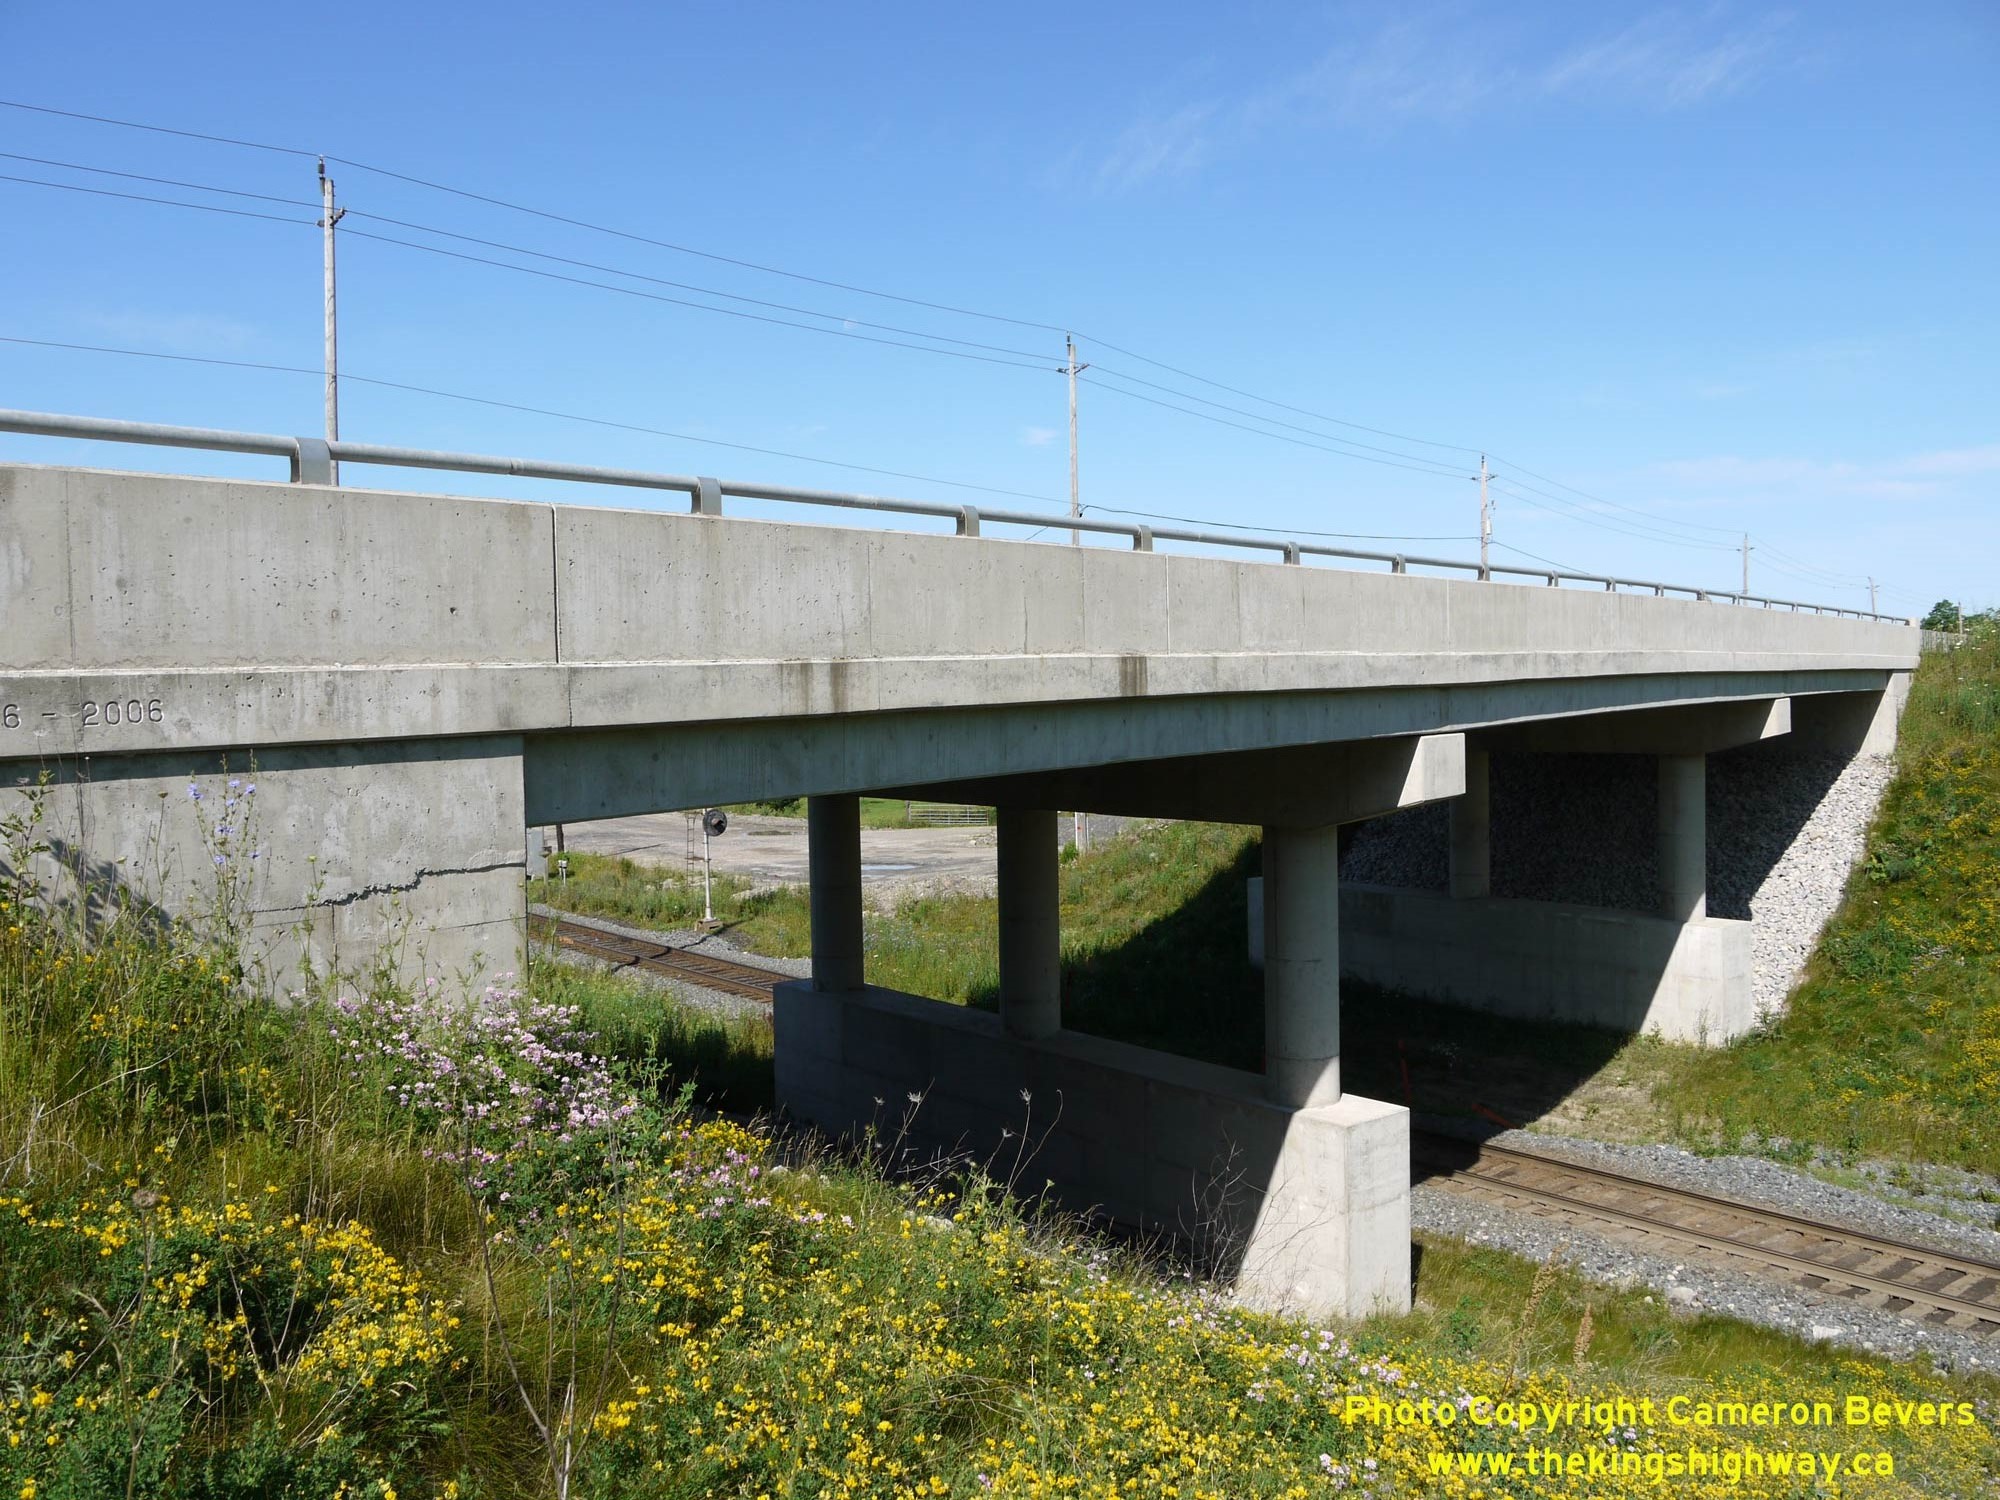

Left - Eastern side of the new Puslinch CPR Overhead on Hwy 6. This structure has very shallow concrete girders, owing to the minimum vertical clearance
requirements over the railway. Advances in concrete girder manufacturing techniques in recent years have allowed bridge designers greater flexibility in terms of
girder type selection. This has been especially beneficial in situations where vertical clearance requirements over a railway, road or waterway pose a constraint to
feasible design alternatives. See an Enlarged Photo Here. (Photograph taken on July 12, 2009 - © Cameron Bevers) Right - When Hwy 6 was first assumed as a Provincial Highway in July 1920, the highway crossed the railway via an at-grade crossing located immediately west of the current railway overhead. Under Contract #1927-88, a grade separation was built by the Department of Public Highways (DHPO) at a cost of $26,000 (in 1928 Dollars), which is roughly the equivalent of $450,000 in 2023 Dollars. The three-span concrete beam-and-slab bridge was completed in 1928. It was 100 feet in length, but unfortunately, it had a roadway width of only 24 feet between curbs with no shoulders. This narrow overhead structure was replaced in 1967 with a new bridge with a widened roadway of 37 feet, under Contract #1966-155. See an Enlarged Photo Here. (Photograph taken on July 12, 2009 - © Cameron Bevers) 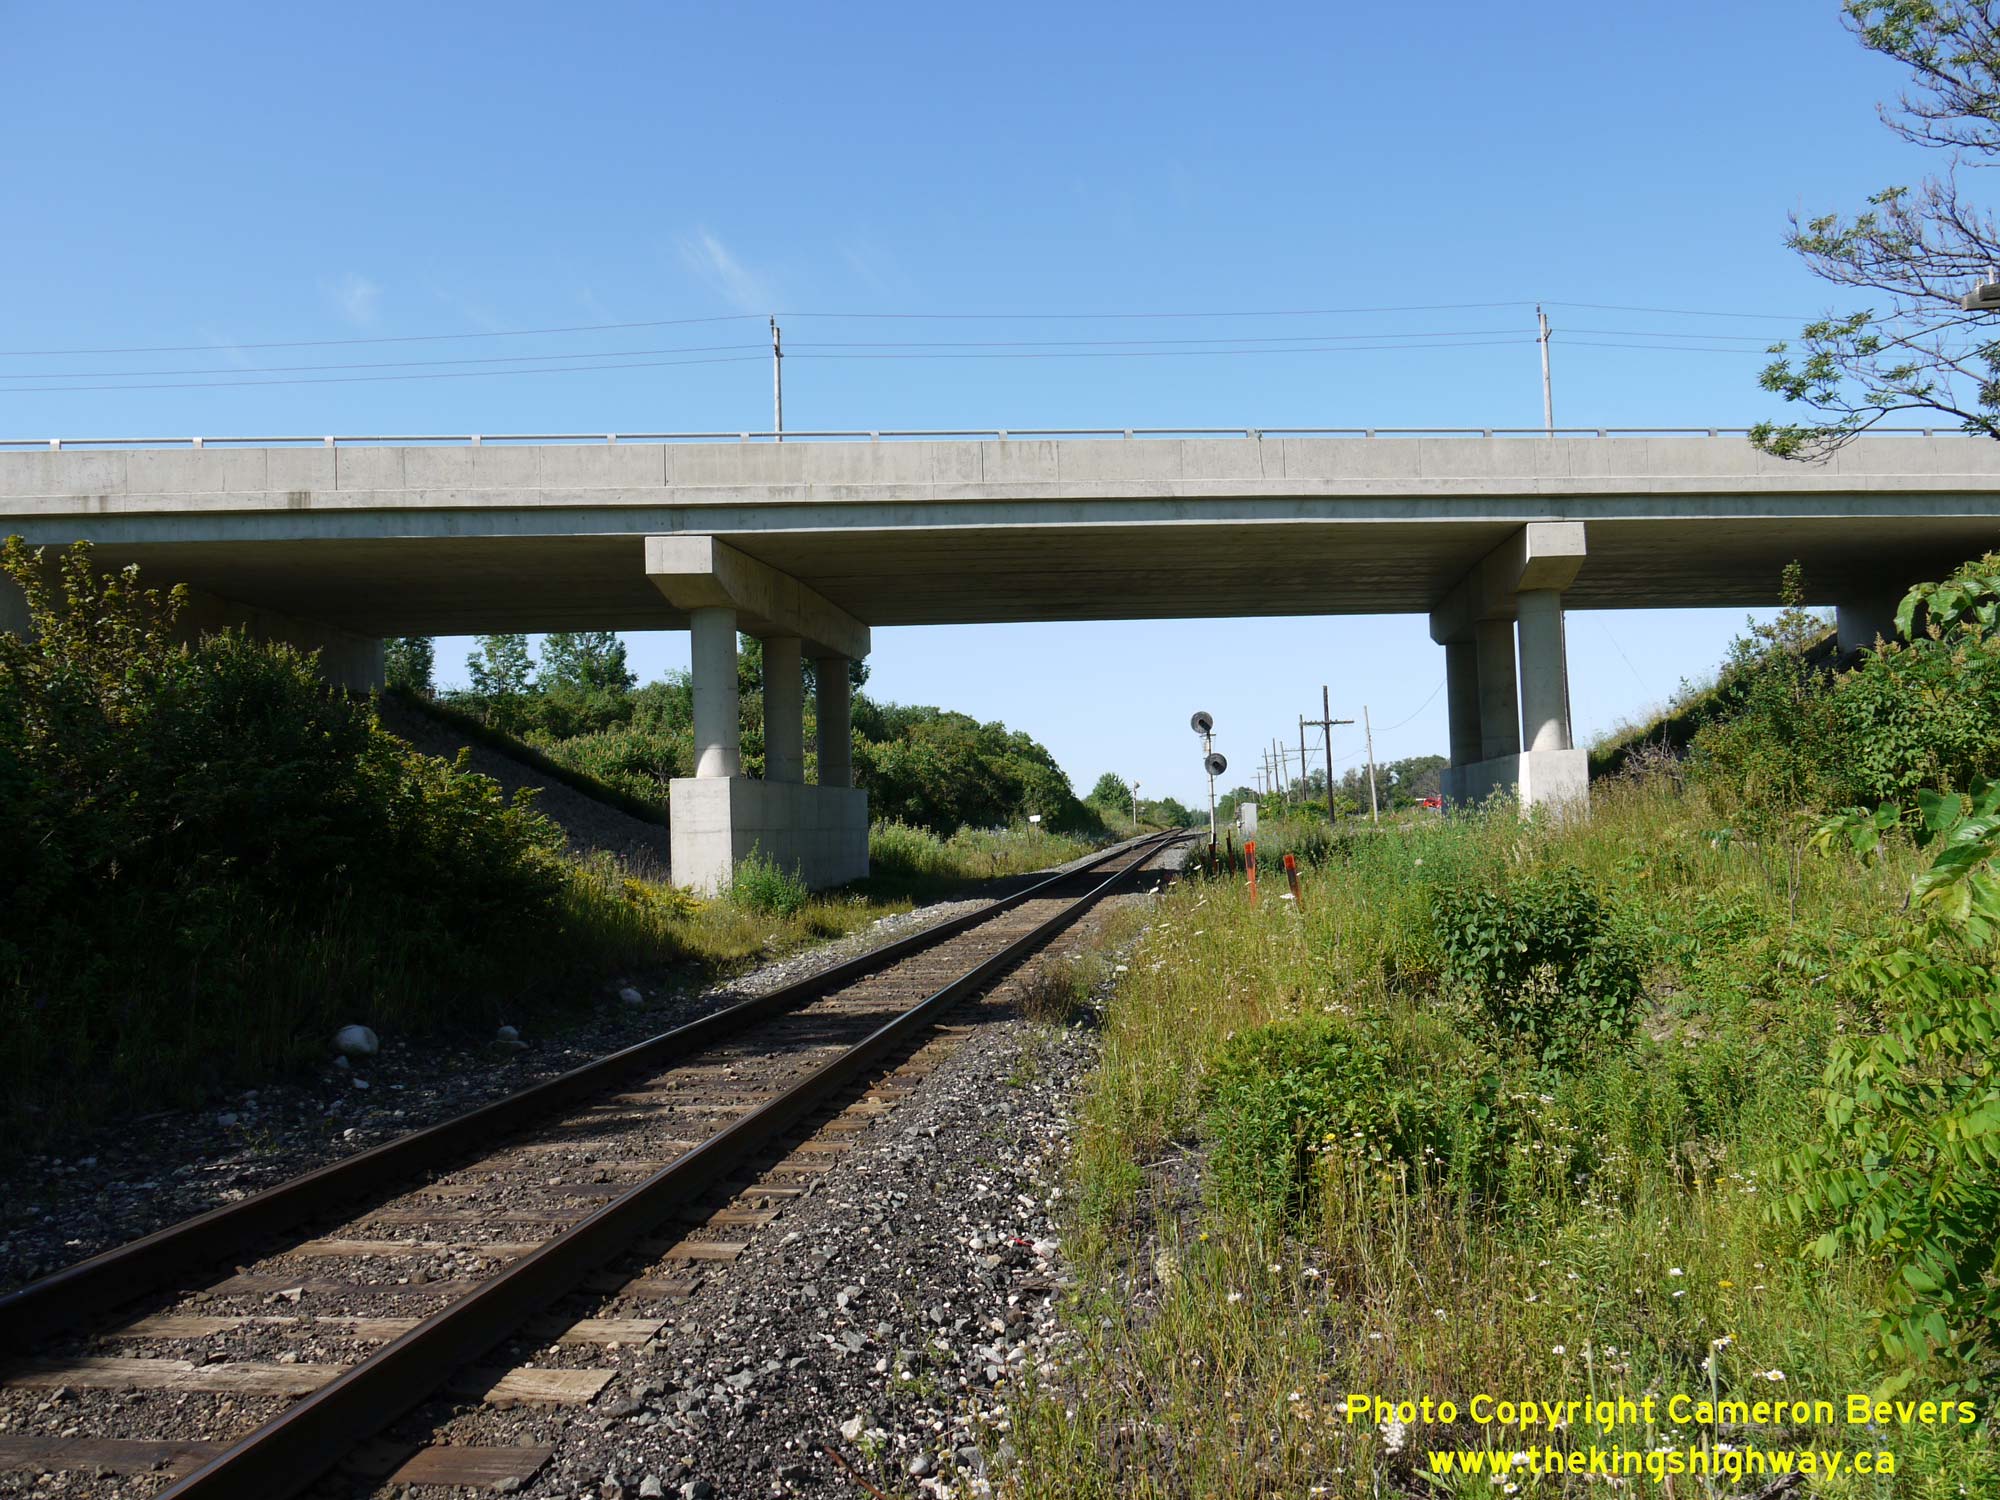
Left - Eastern side of the Puslinch CPR Overhead on Hwy 6. This was the third grade separation built by the province across the CPR at Puslinch. The 2006
structure seen here replaced an earlier bridge, which was completed in 1967. In turn, that structure replaced an even older bridge which was completed back in 1928.
Interestingly, in each case, the railway overheads were designed to accommodate a dual railway line. Even almost a century after the first overhead was built on Hwy 6
at Puslinch in 1928, the dual railway line once envisioned here has still not materialized. See an
Enlarged Photo Here. (Photograph taken on July 12, 2009 - © Cameron Bevers) Right - Facing north along Hwy 6 towards Guelph from the Puslinch CPR Overhead. See an Enlarged Photo Here. (Photograph taken on July 12, 2009 - © Cameron Bevers) 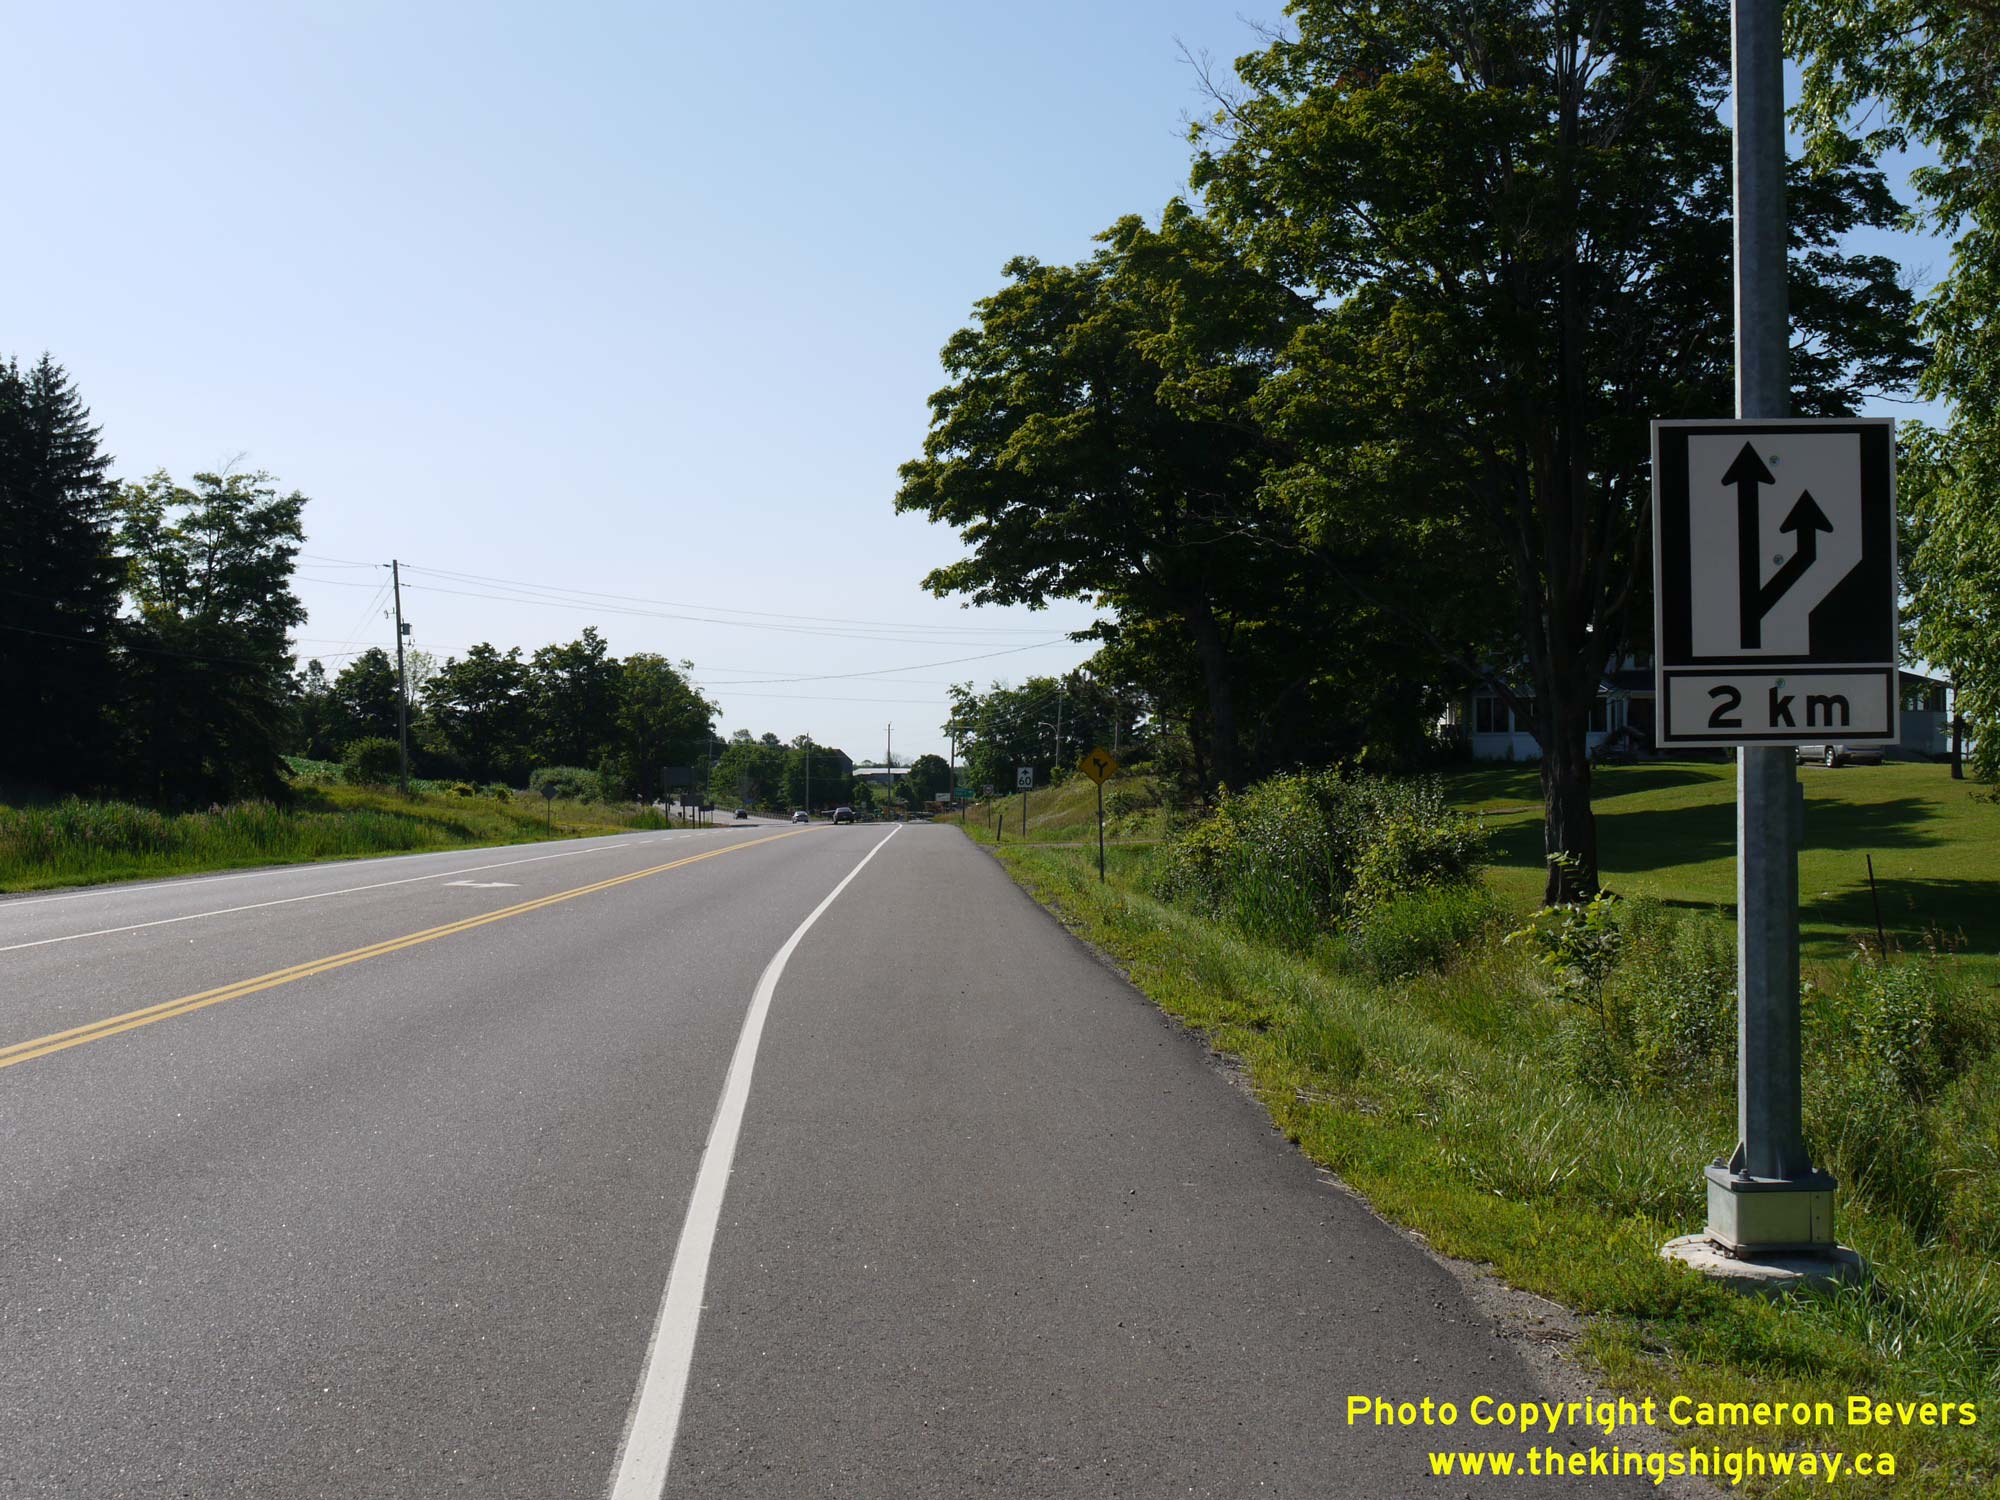
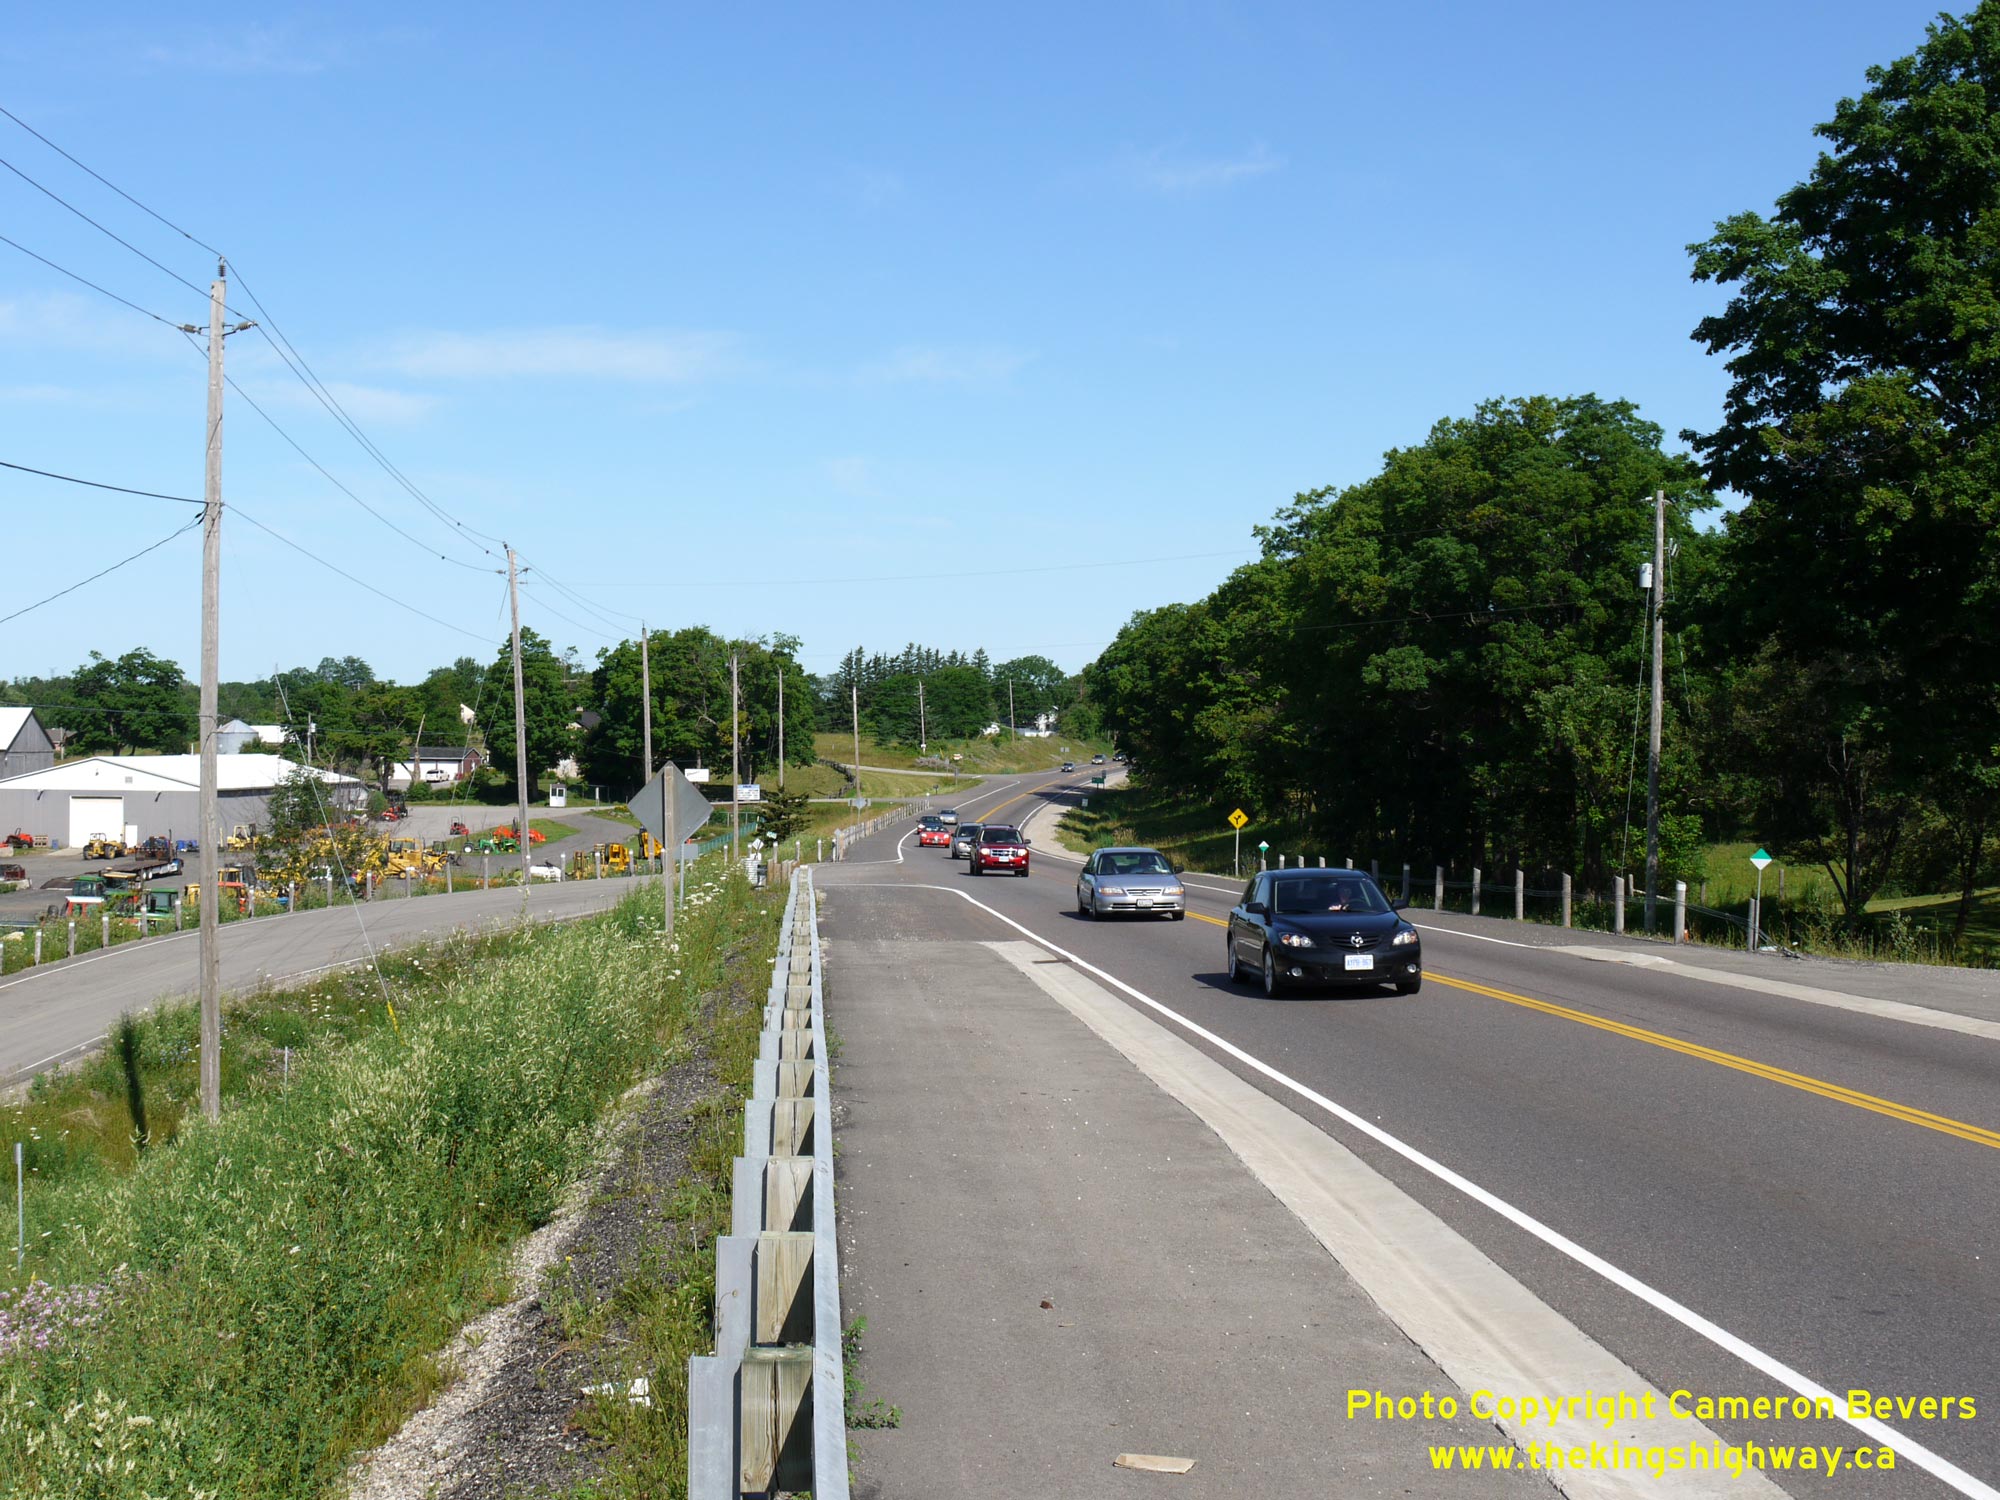
Left - Approaching Puslinch on Hwy 6, facing south. At right, a sign indicates that a passing lane exists 2 km ahead. While this is technically correct, the
passing lane is actually continuous as part of a four-lane highway from that point southerly to Hamilton. Passing is legally prohibited along Hwy 6 between Puslinch
and Morriston. Even in the absence of a regulation, it would be very difficult for motorists to pass on this highway, as there are seldom sufficient gaps in opposing
traffic. See an Enlarged Photo Here. (Photograph taken on July 12, 2009 - © Cameron Bevers) Right - Facing north along Hwy 6 towards Guelph from Leslie Road, located at the northern entrance to Puslinch. See an Enlarged Photo Here. (Photograph taken on July 12, 2009 - © Cameron Bevers) 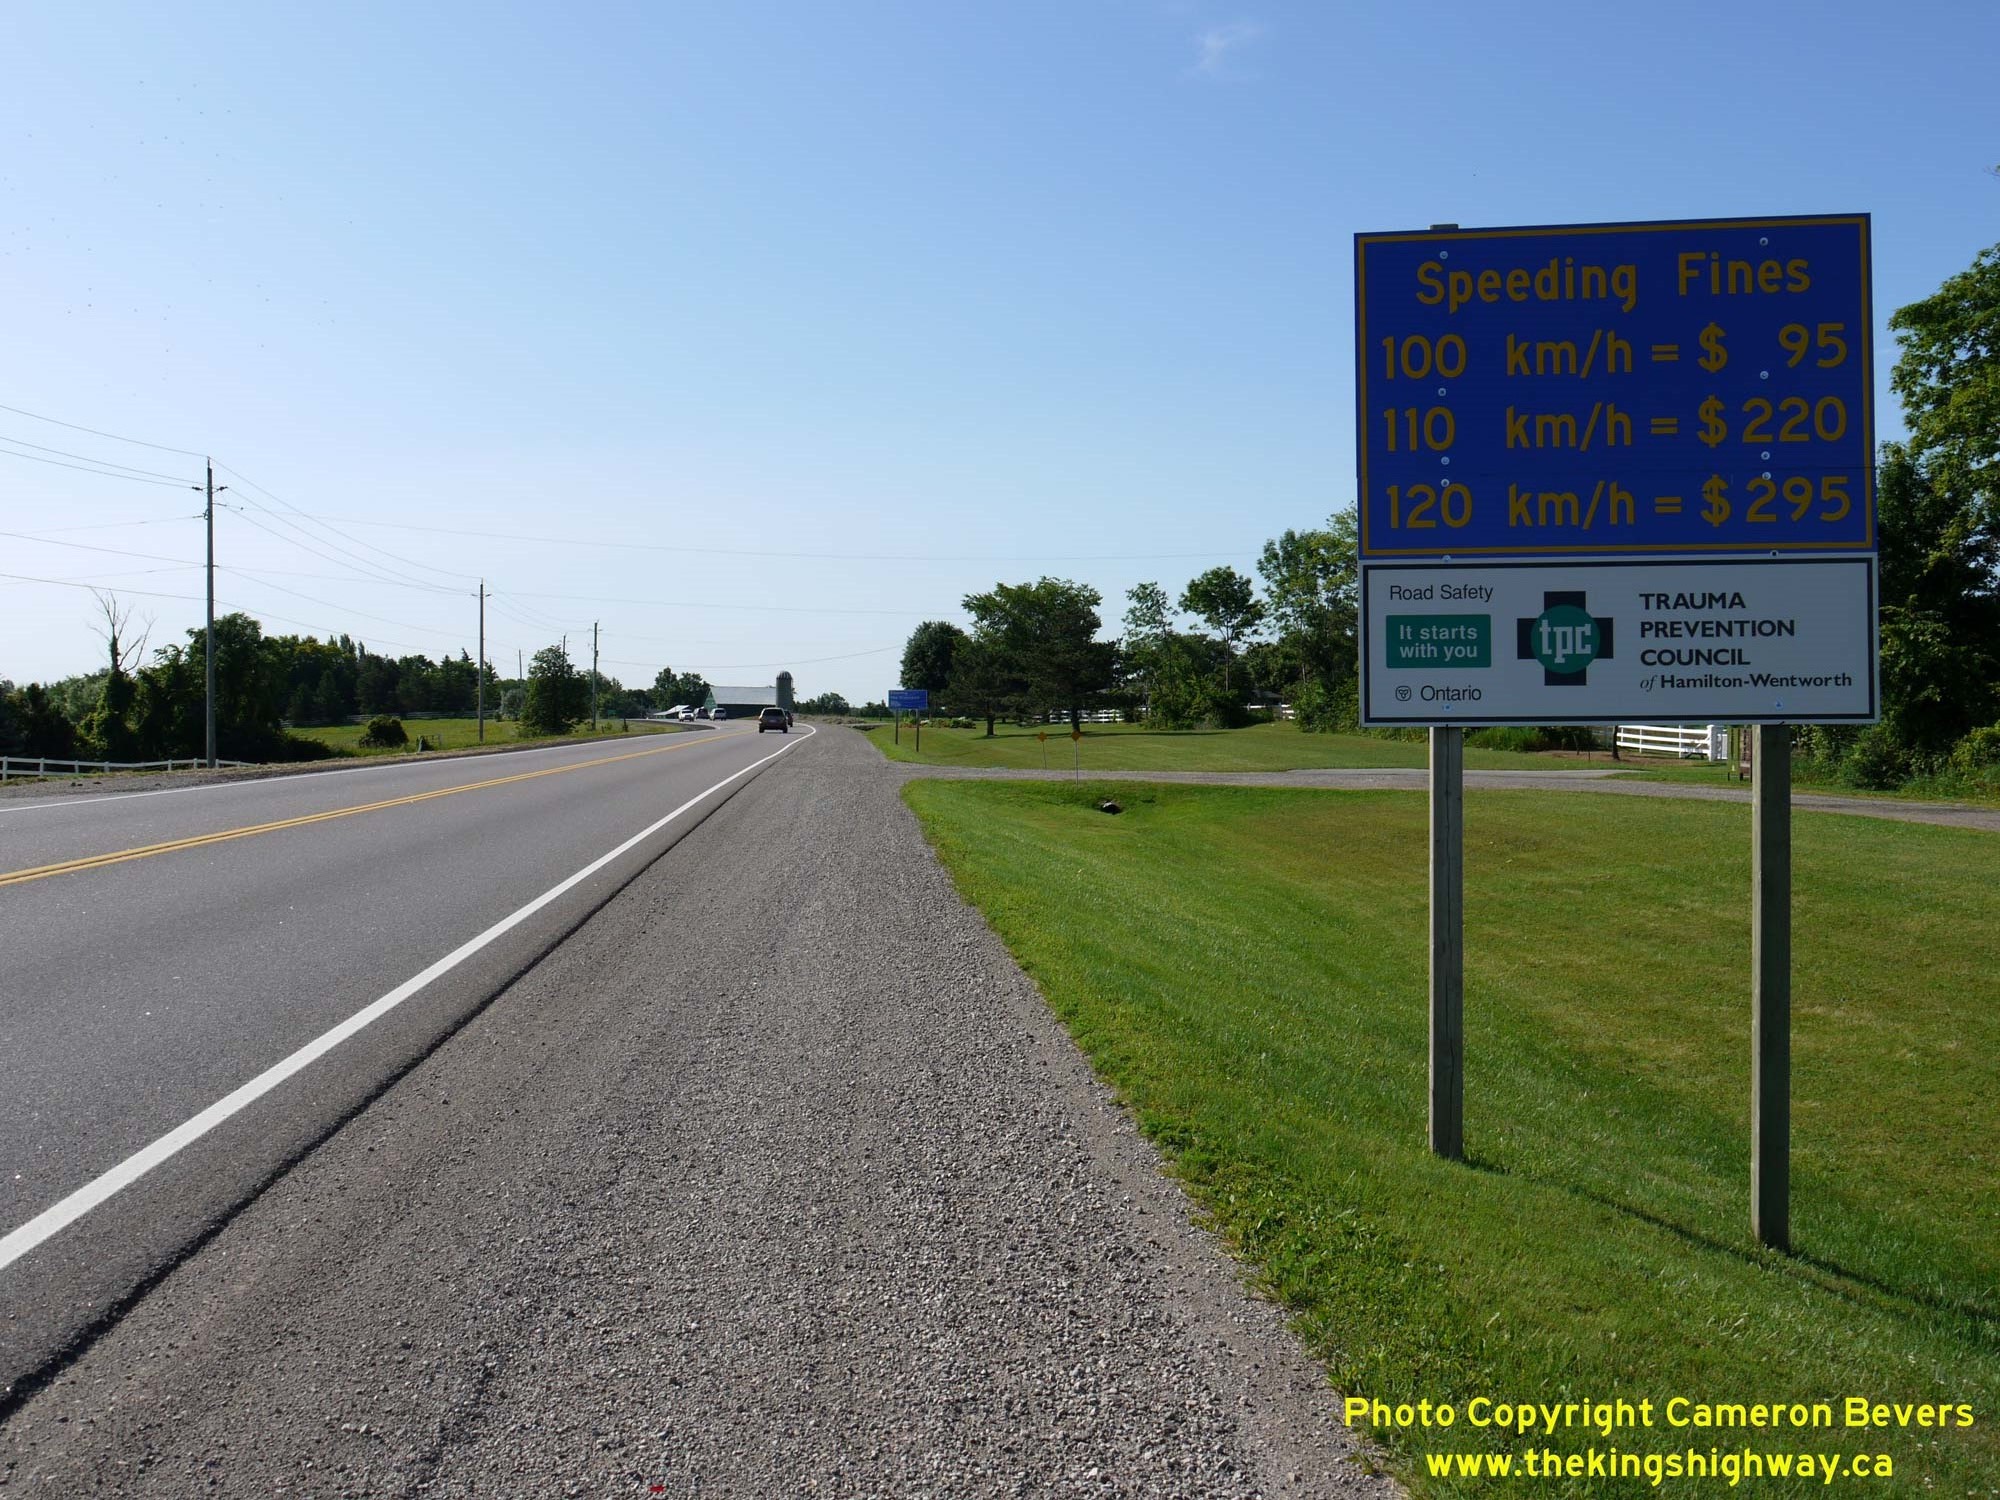
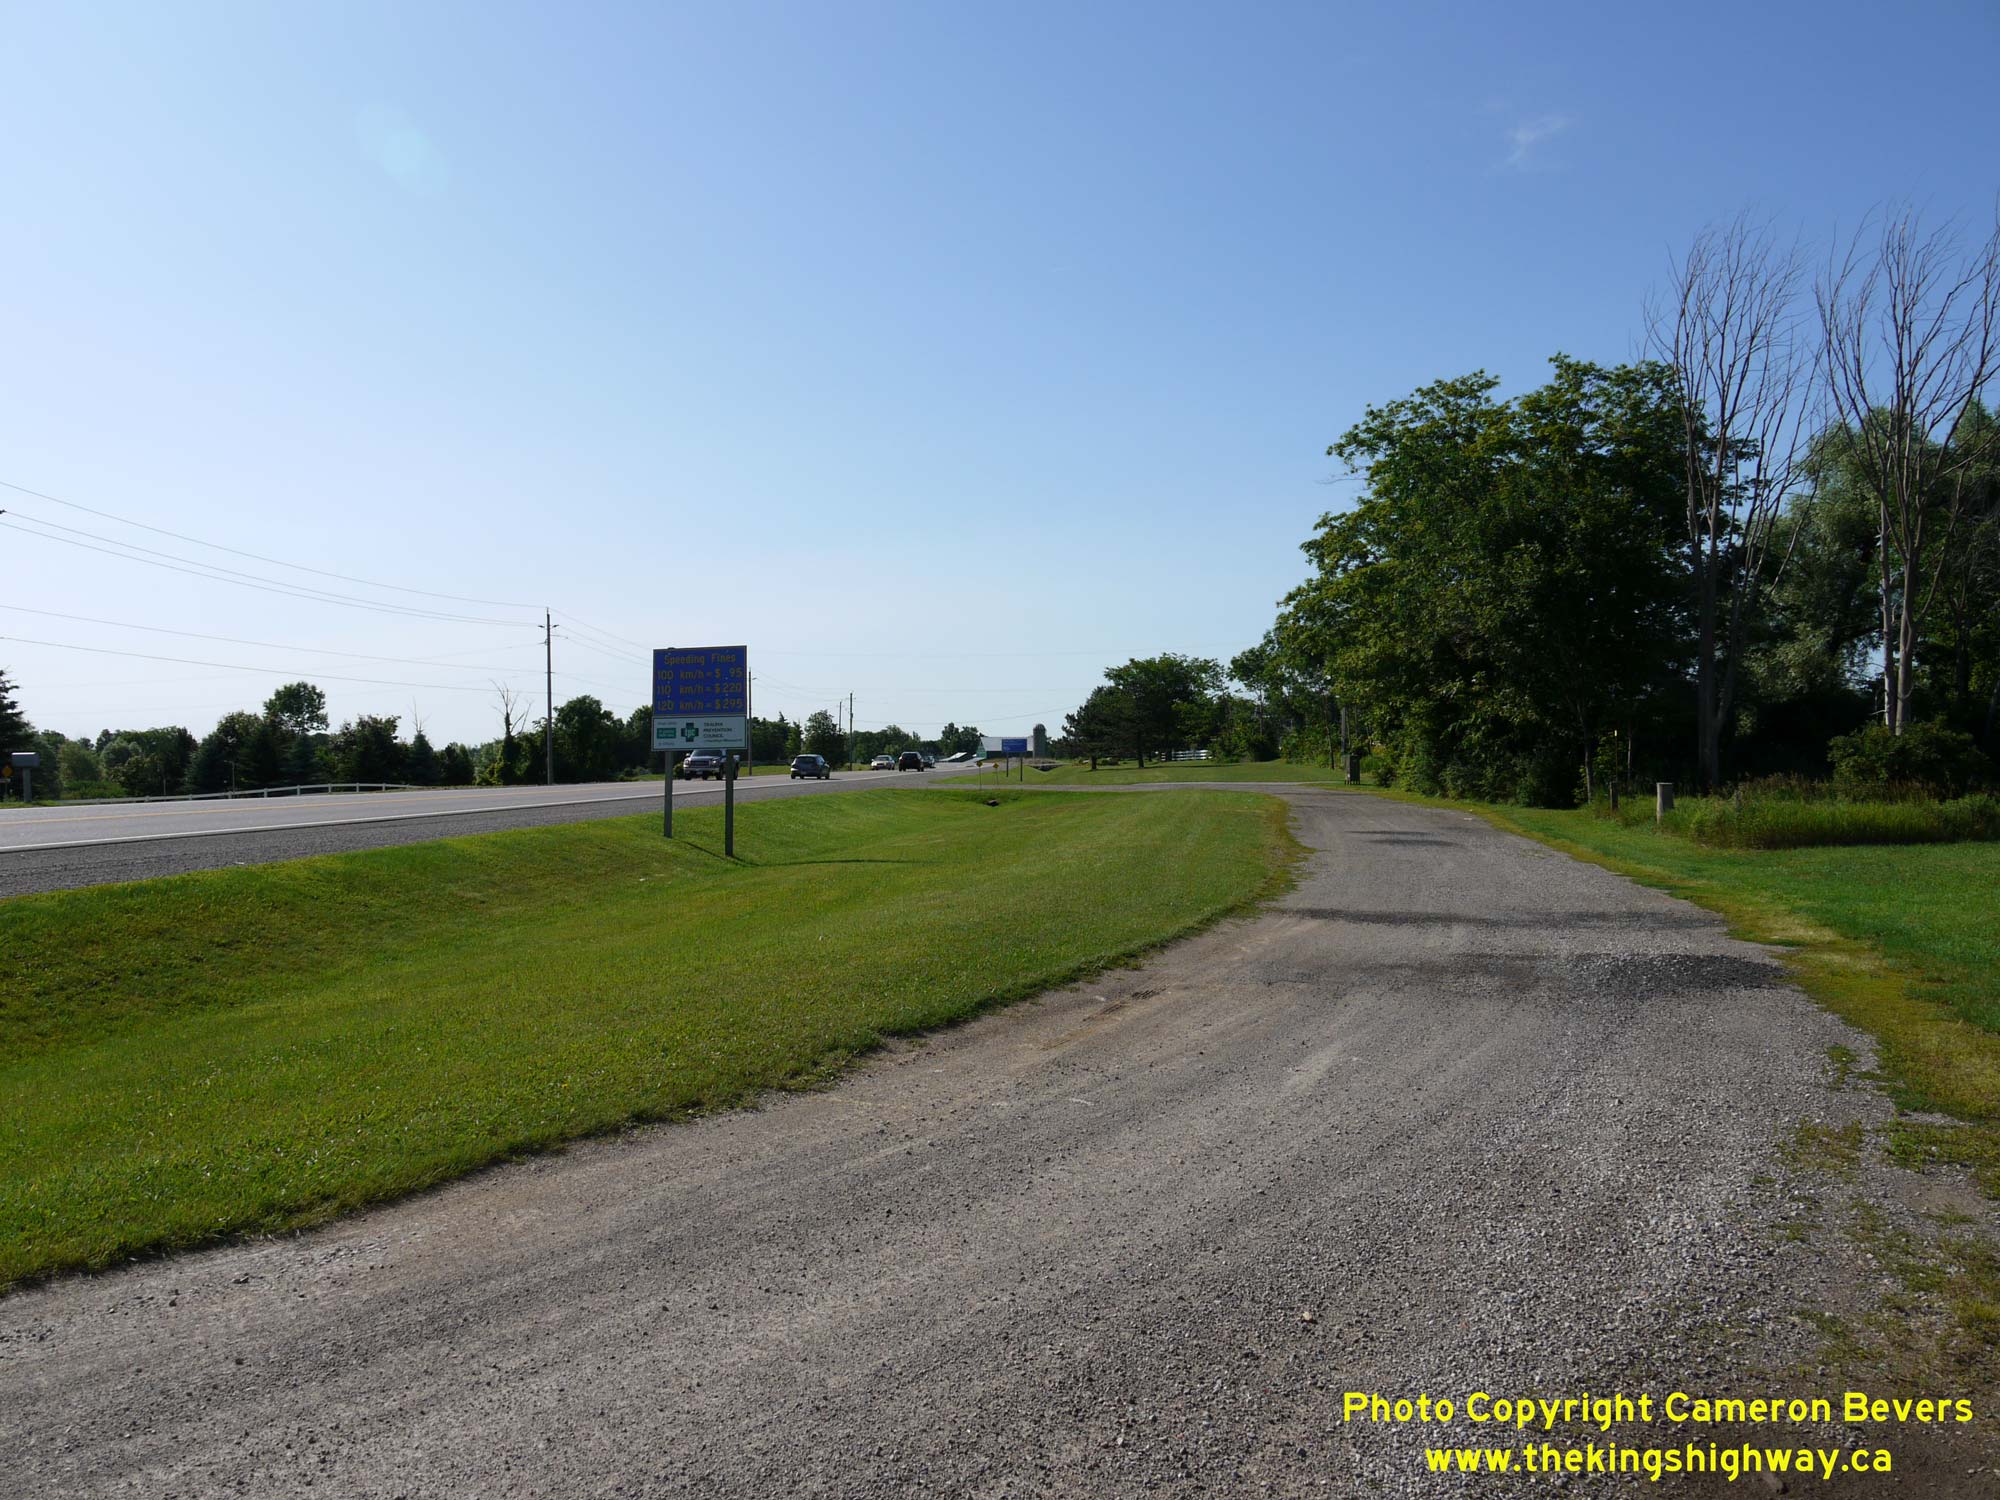
Left - Speeding fines advisory sign on southbound Hwy 6 between Morriston and Puslinch. Note the abandoned highway curve at right, which was left behind after
a curve realignment which took place here many years ago. See an Enlarged Photo Here. (Photograph taken on July 12, 2009 - © Cameron Bevers) Right - Abandoned section of Hwy 6 just south of Morriston. This highway curve was improved in the early 1940s and relocated onto an entirely new alignment at left in 1966. While most of the old alignment of Hwy 6 was grassed over, a small section was left open to serve as an access road to adjacent properties. See an Enlarged Photo Here. (Photograph taken on July 12, 2009 - © Cameron Bevers) 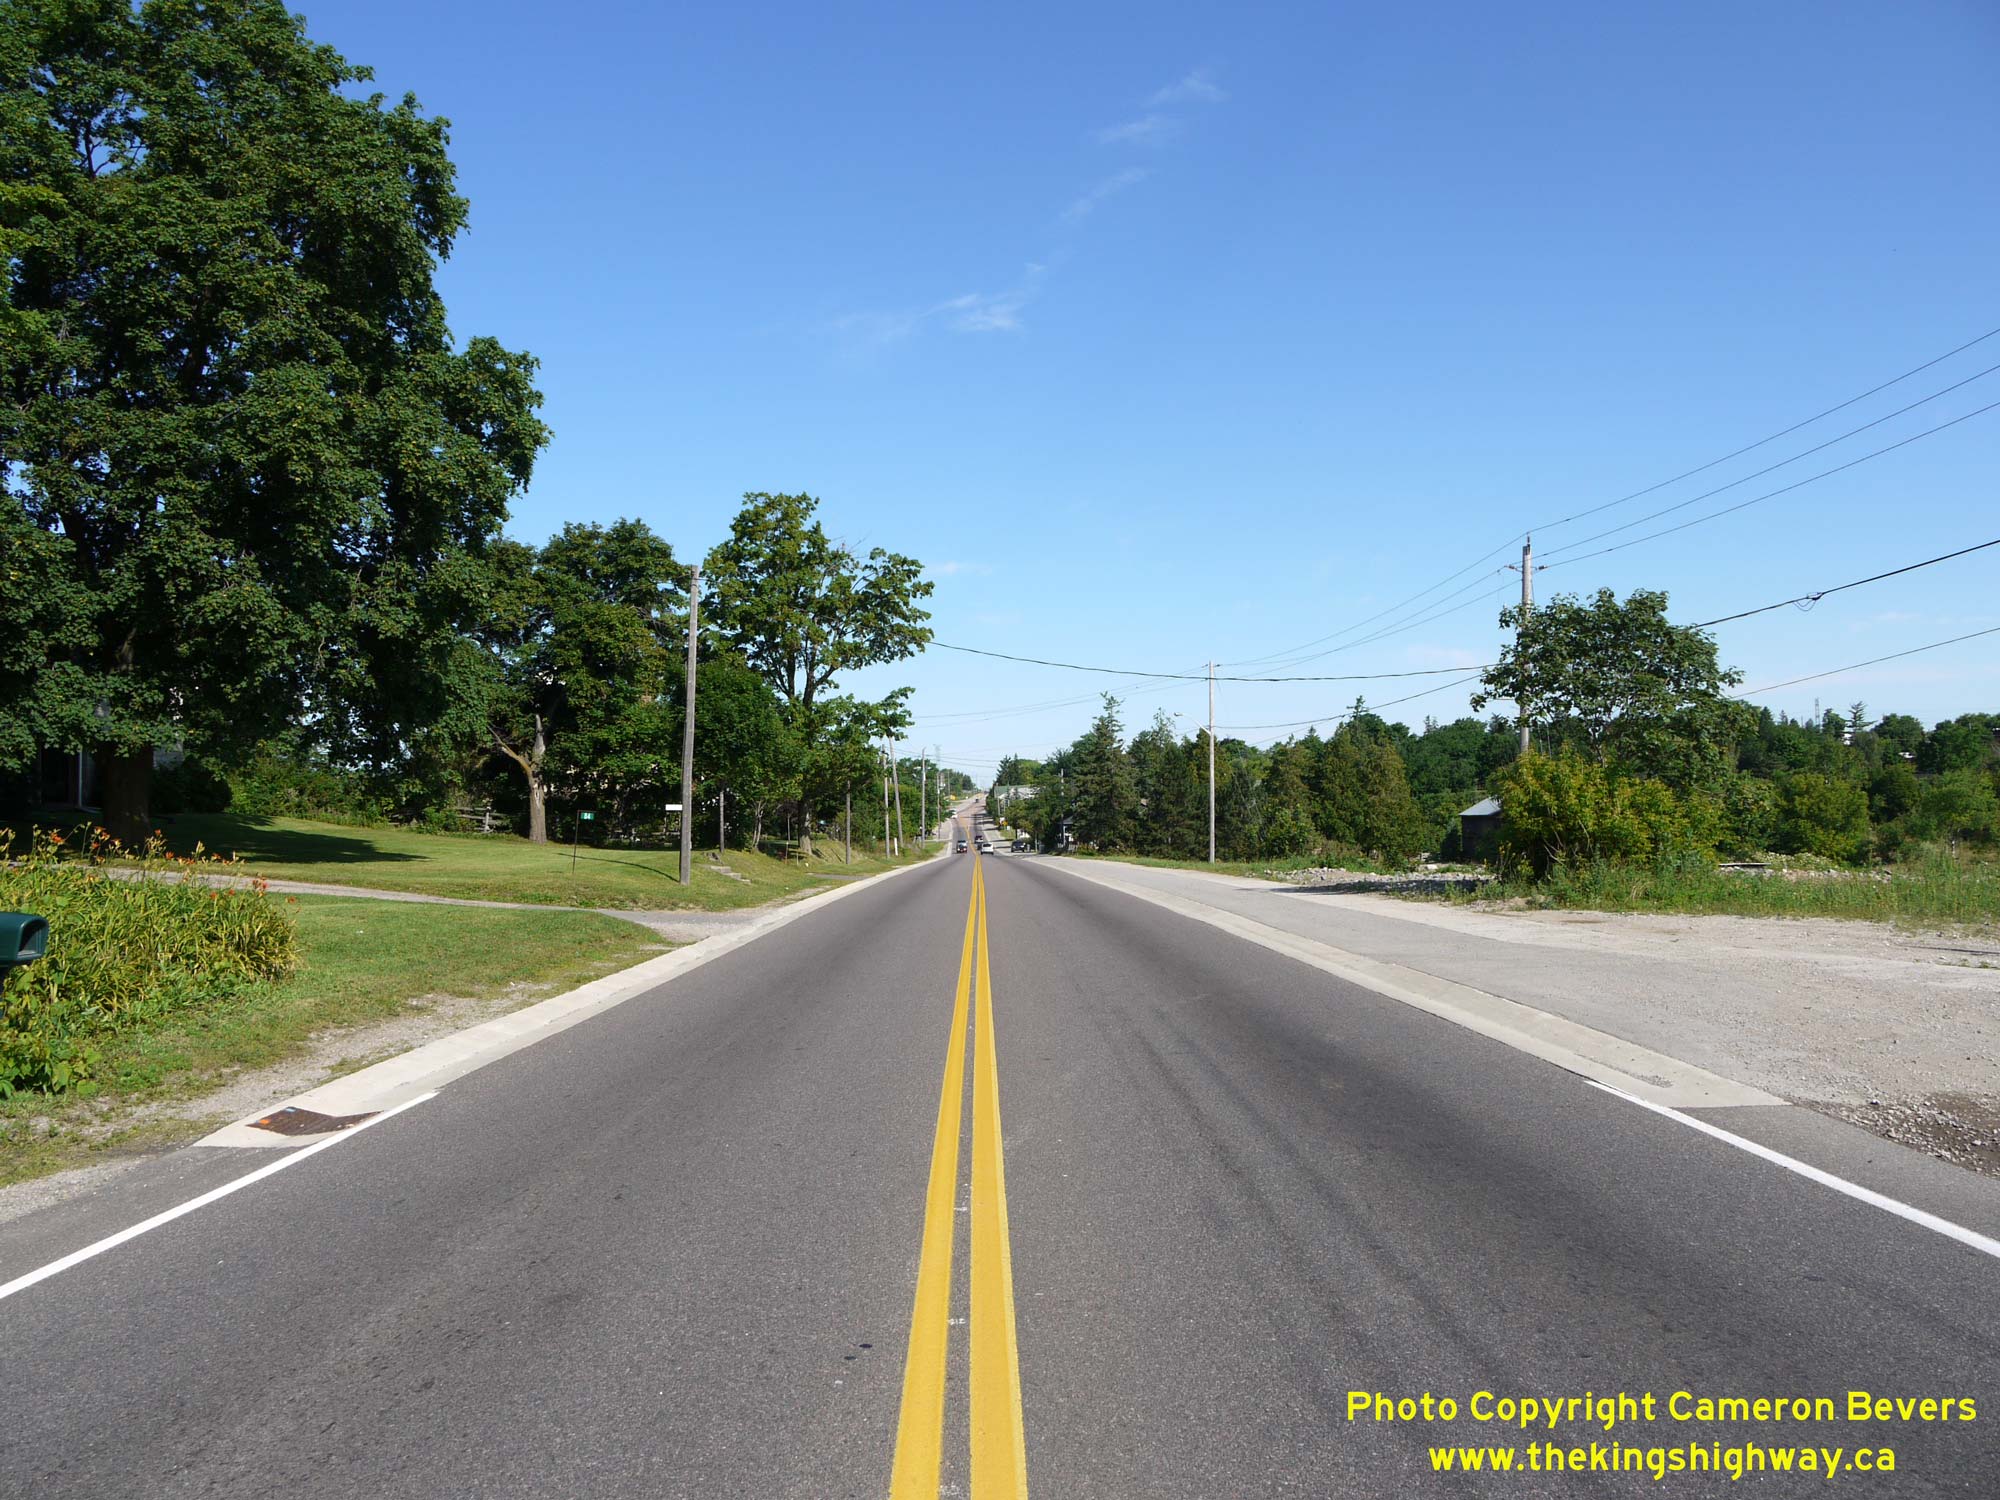
Left - Facing north along Hwy 6 at the southern entrance to Morriston. See an
Enlarged Photo Here. (Photograph taken on July 12, 2009 - © Cameron Bevers) Right - View of Hwy 6 in Morriston, facing south from Church Street. See an Enlarged Photo Here. (Photograph taken on July 12, 2009 - © Cameron Bevers) 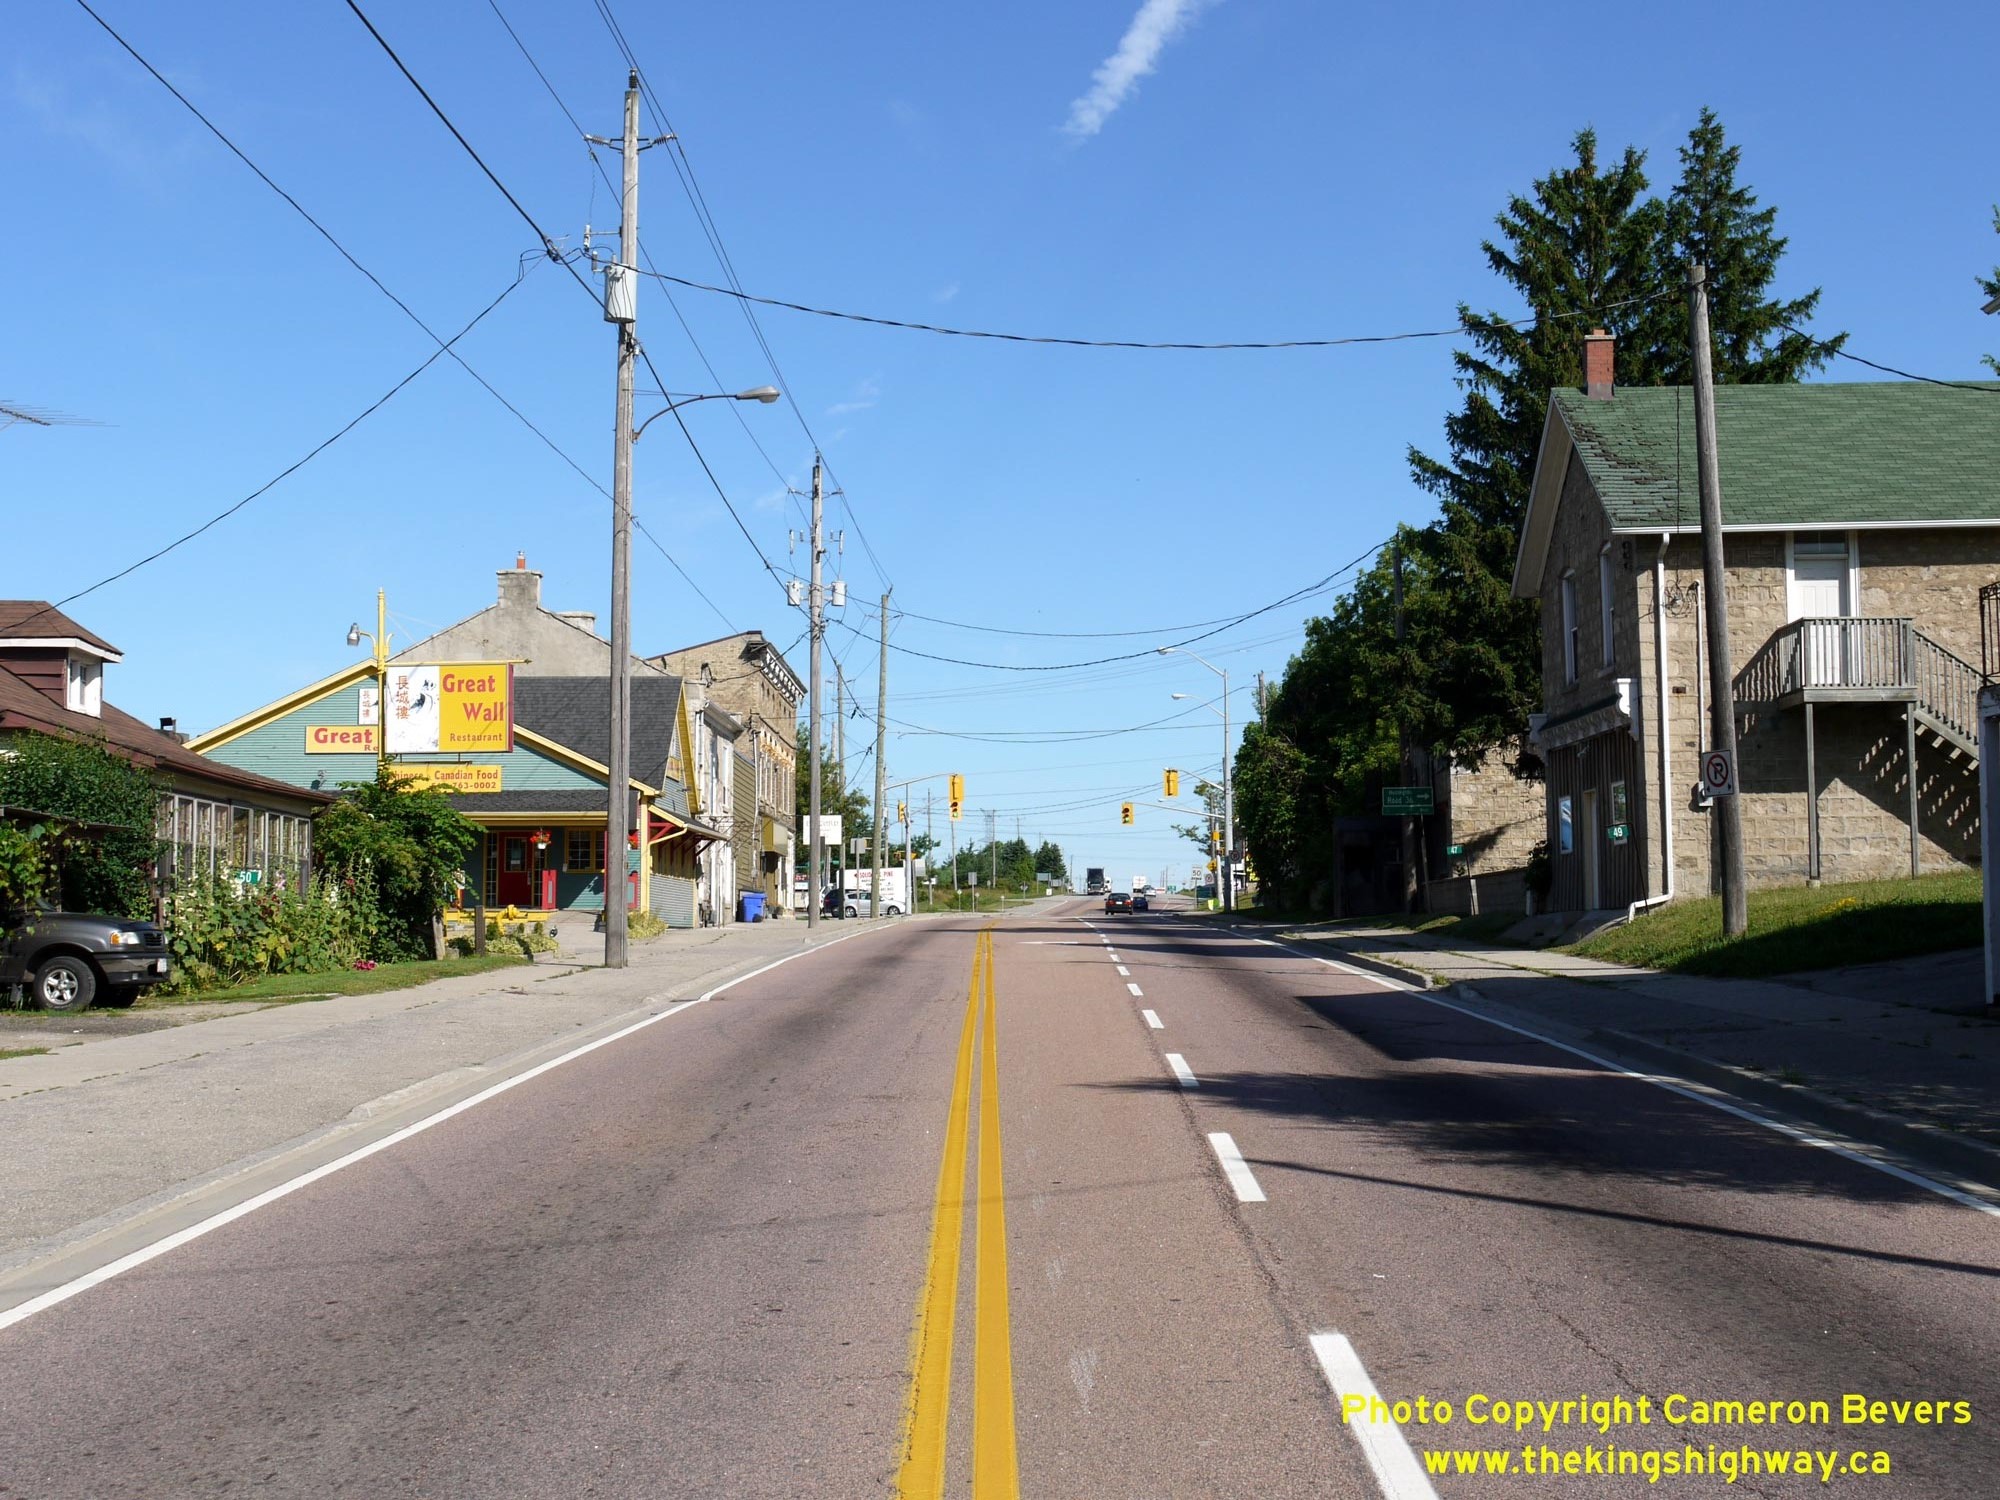
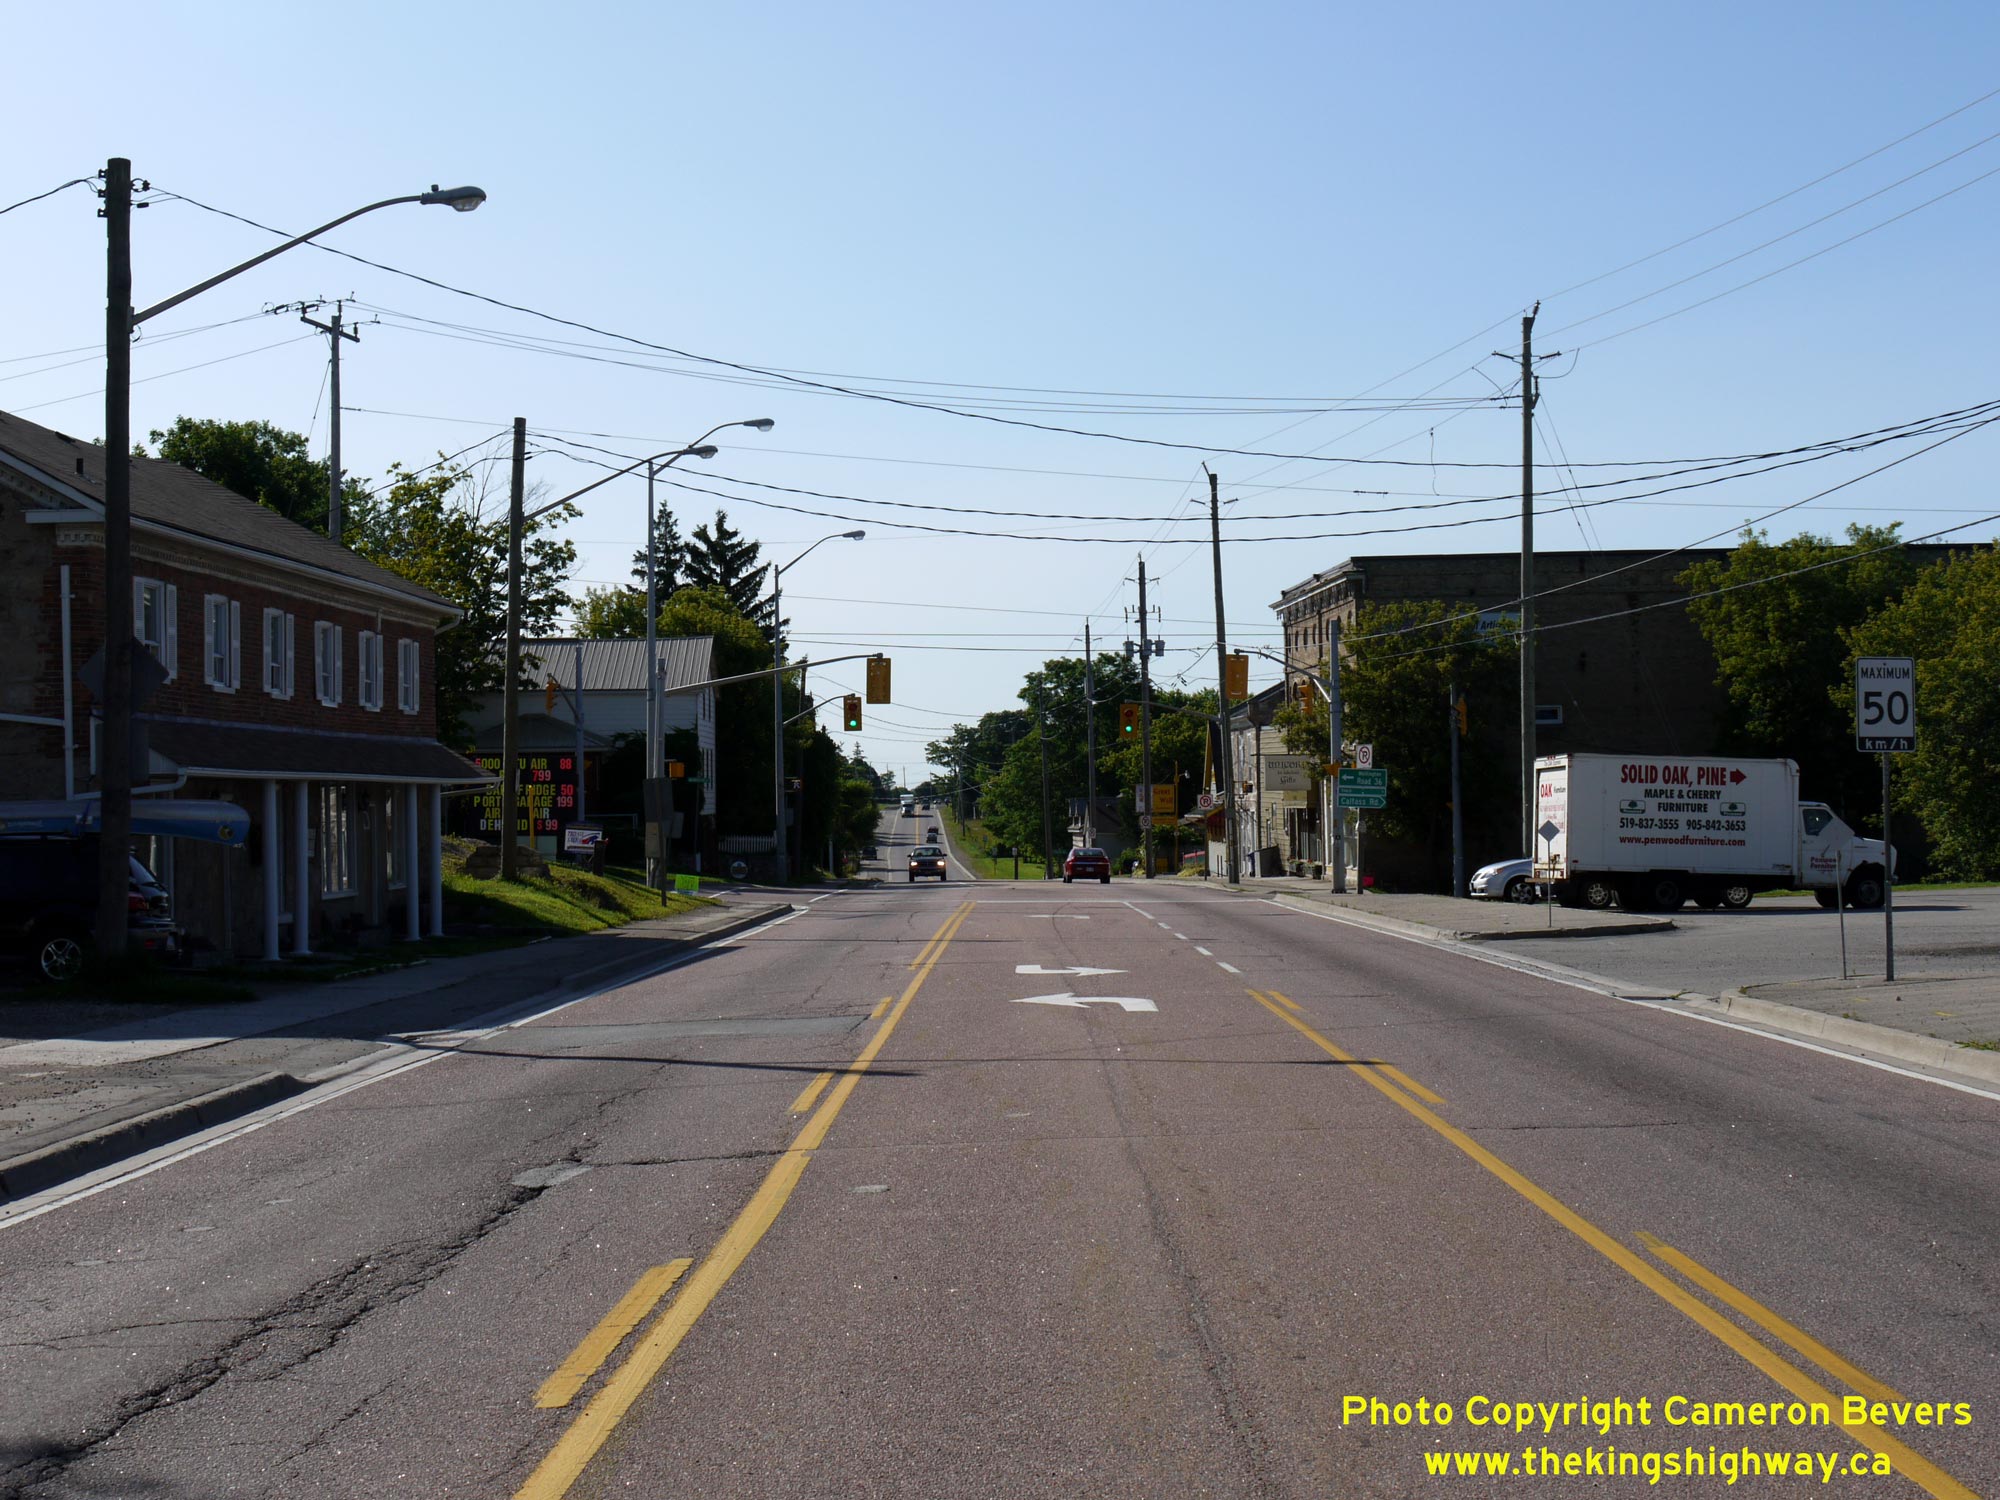
Left - View of Hwy 6 in Morriston, facing north approaching the Wellington Road 36 Junction. See an
Enlarged Photo Here. (Photograph taken on July 12, 2009 - © Cameron Bevers) Right - Facing south along Hwy 6 from the northern entrance to Morriston. See an Enlarged Photo Here. (Photograph taken on July 12, 2009 - © Cameron Bevers) 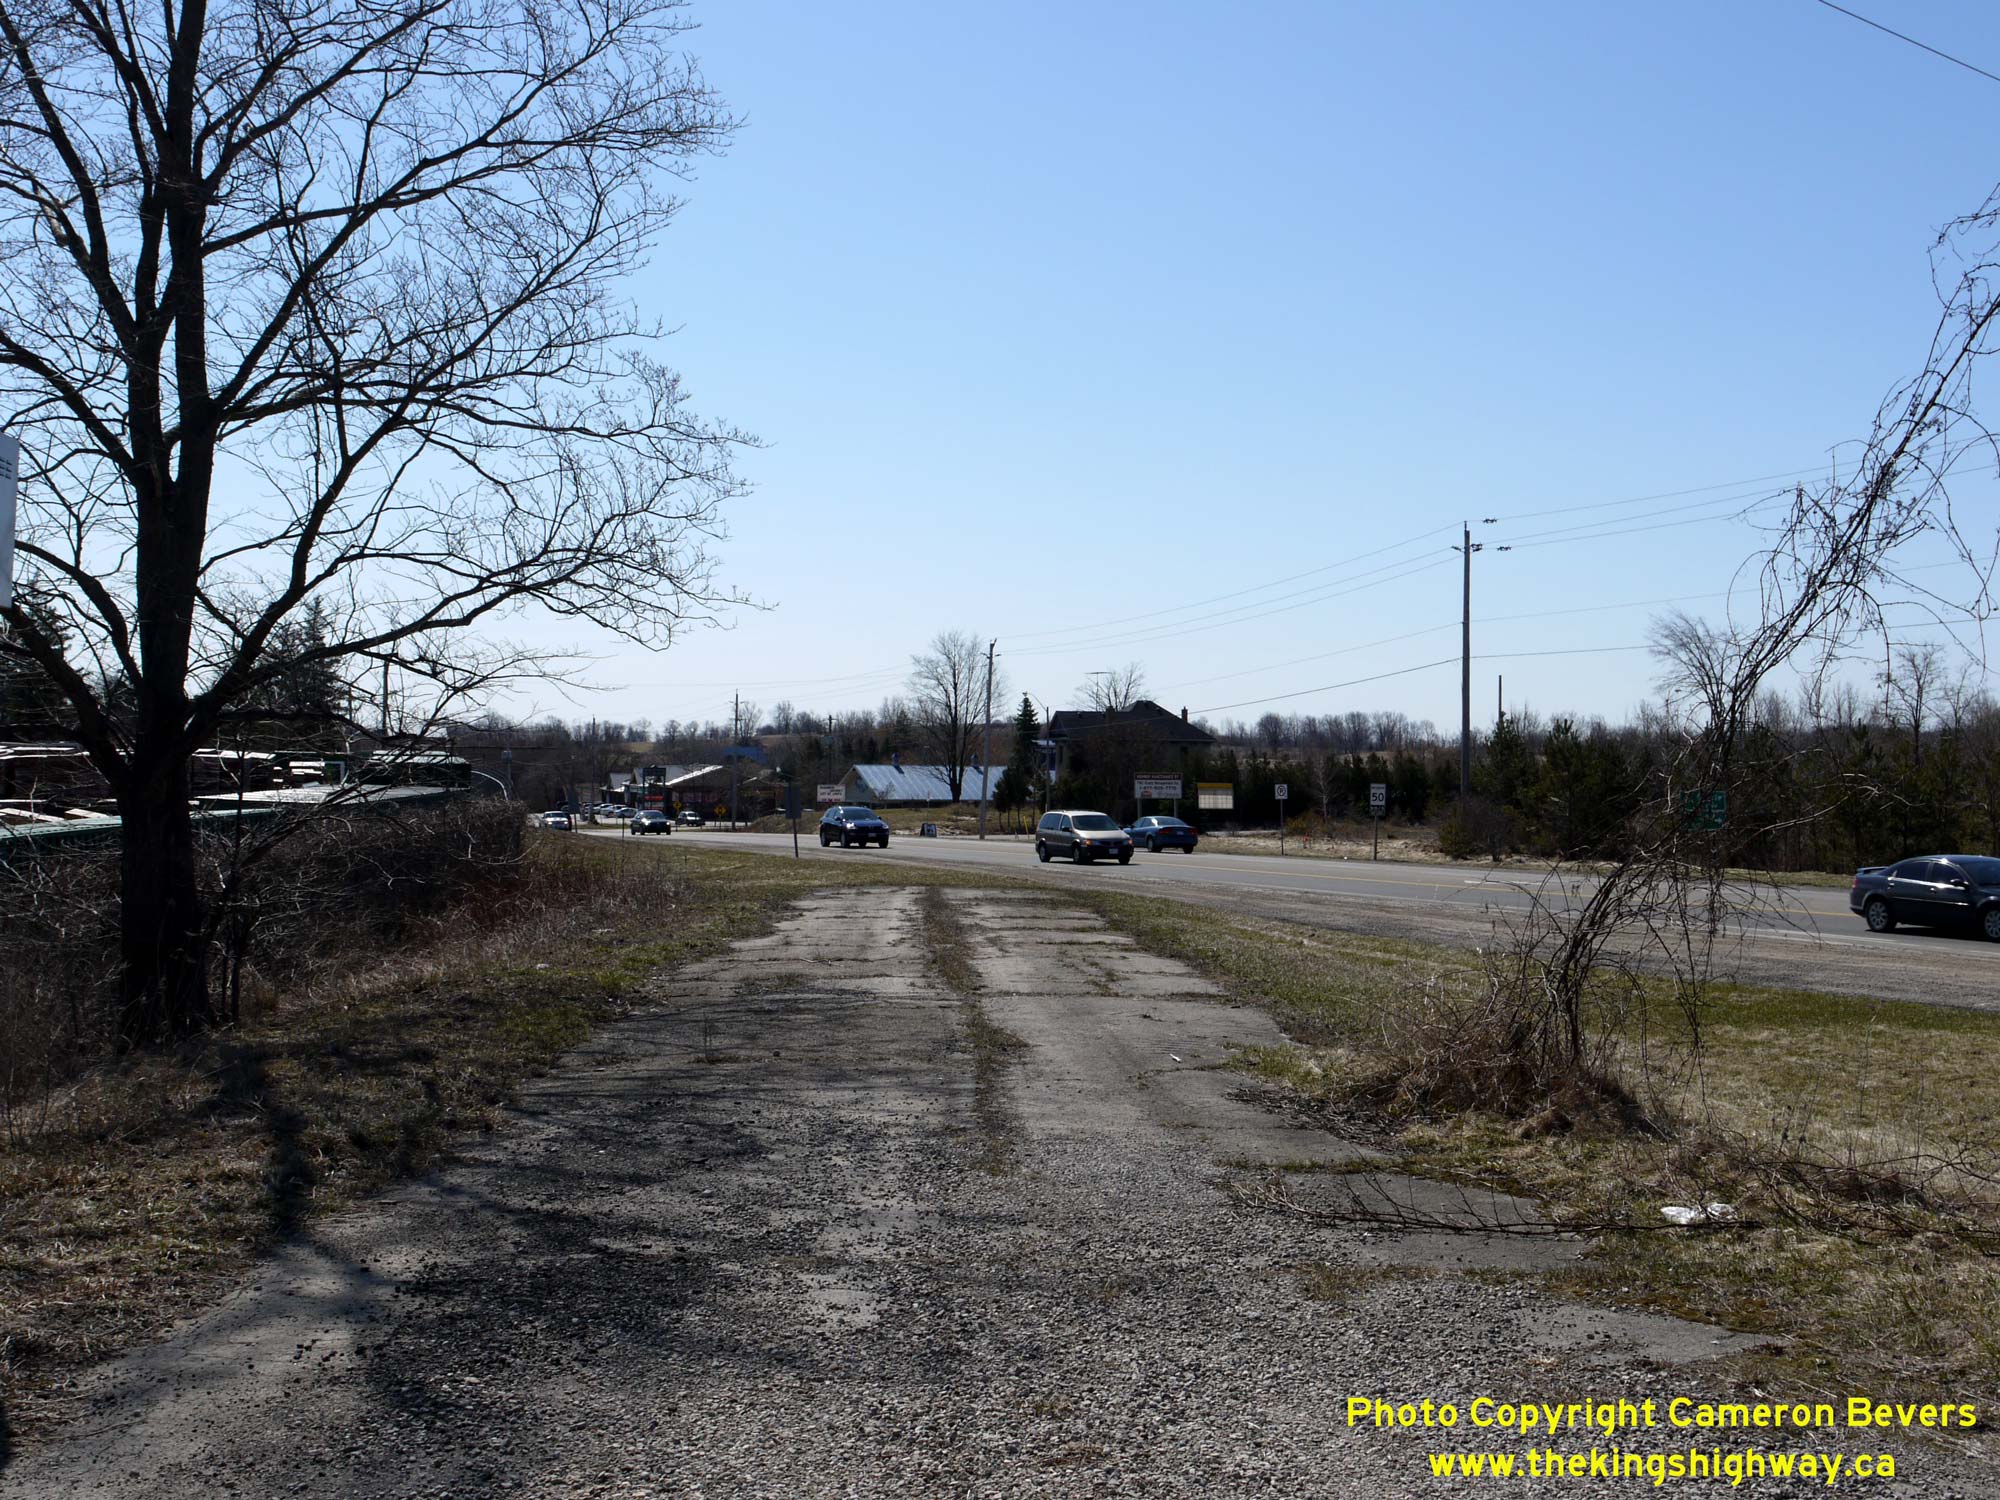

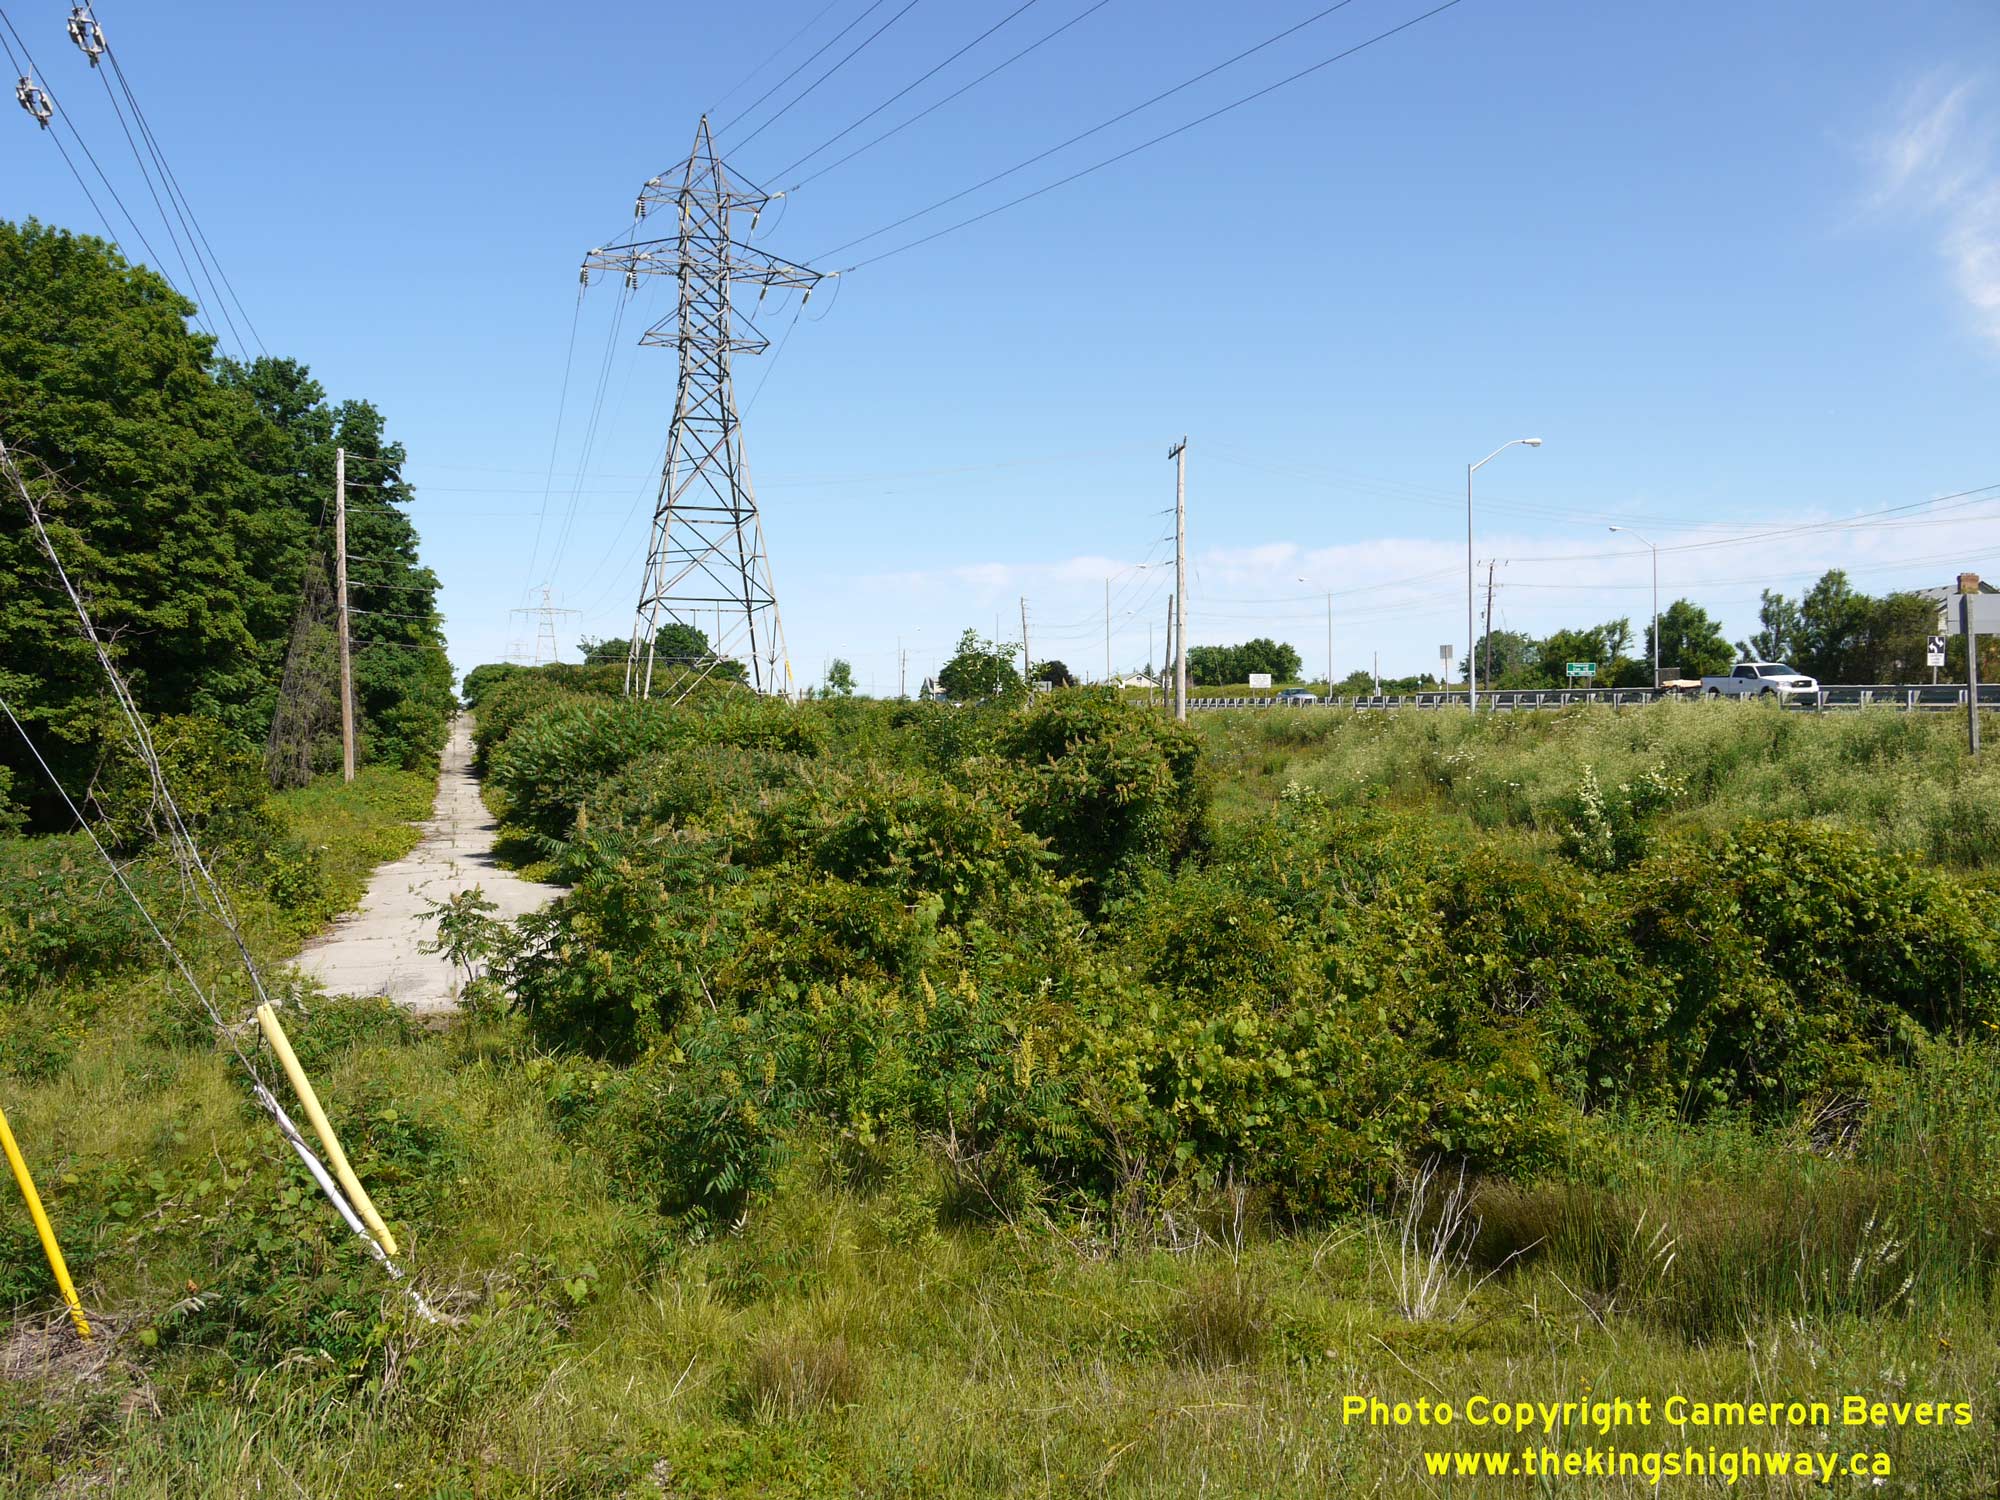
Left - Abandoned alignment of Hwy 6 at the northern entrance to Morriston. This section of the highway was bypassed as part of the construction of a new
interchange at Hwy 6 and the proposed route of Hwy 401 between Milton and Kitchener in 1959-1960. See an
Enlarged Photo Here. (Photograph taken on April 12, 2009 - © Cameron Bevers) Right - This abandoned twin-slab concrete highway pavement at Morriston was constructed in 1925, under Contract #1162. It was surfaced with a thin layer of bituminous material in 1948, in an effort to improve the ride quality of the concrete surface and to help restore pavement friction. The highway was taken out of service and abandoned once the new Hwy 6 & Hwy 401 interchange opened to traffic in 1960. See an Enlarged Photo Here. (Photograph taken on April 12, 2009 - © Cameron Bevers) 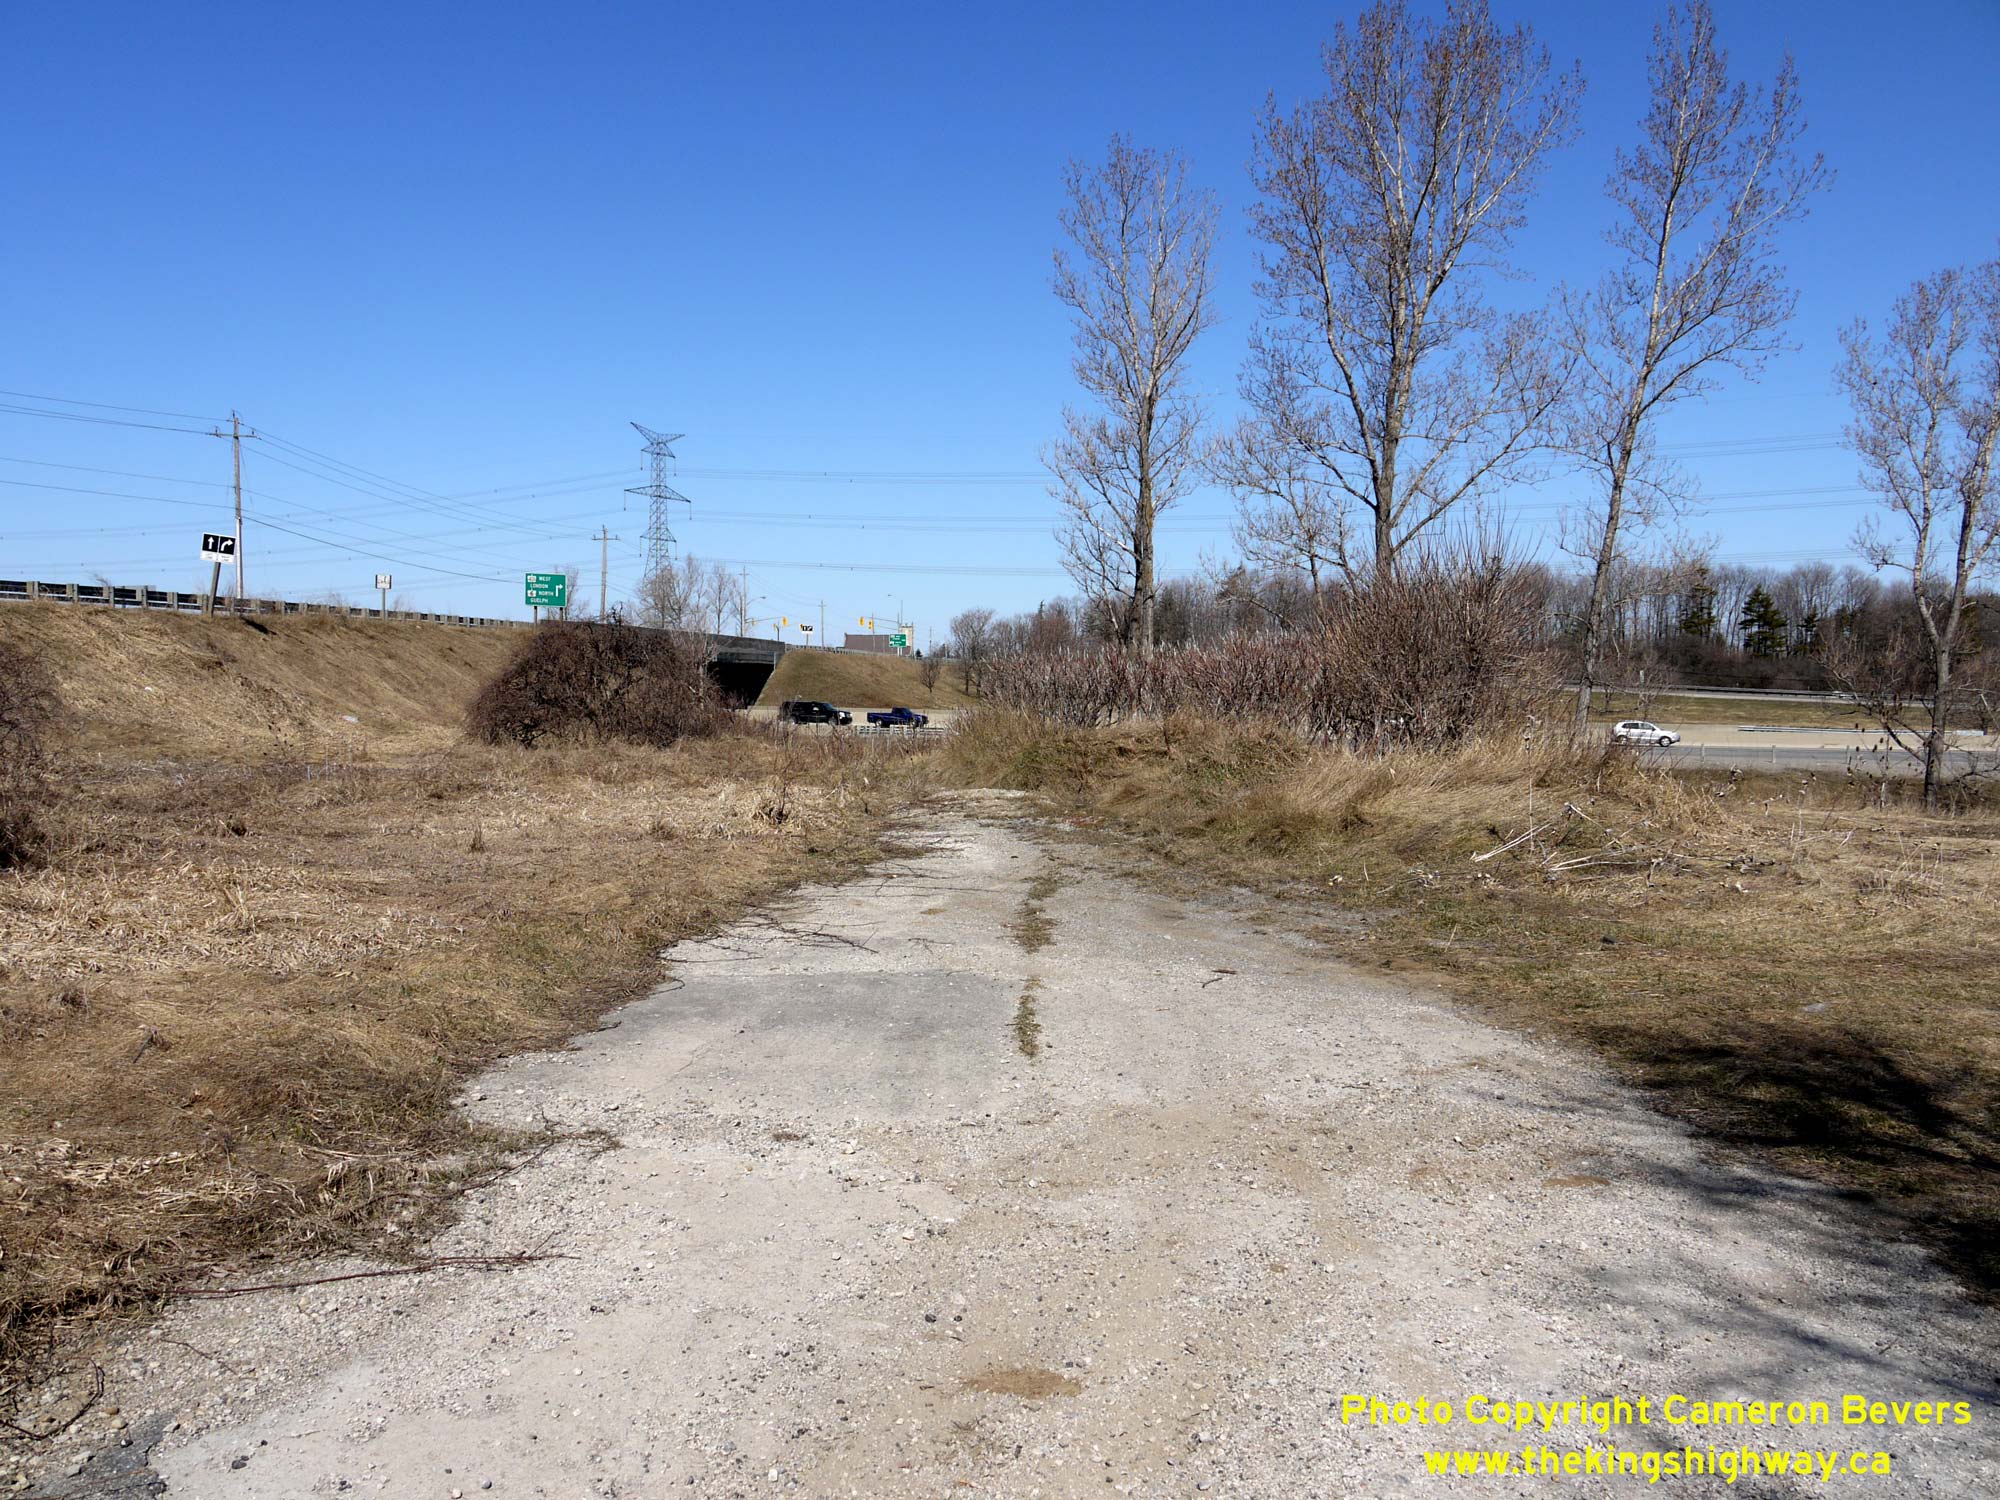

Left - This section of Hwy 6 was abandoned in 1960, when a new overpass and interchange was completed at Hwy 6 and the proposed route of Hwy 401. Once an
important link in the King's Highway System, this abandoned concrete highway lies hidden from Hwy 401 traffic behind an earth berm on the southeast corner of the
interchange. See an Enlarged Photo Here. (Photograph taken on April 12, 2009 - © Cameron Bevers) Right - Hwy 6 South (Brock Road) Overpass (Site #35-352) on Hwy 401 north of Morriston. This four-span concrete box girder structure was completed in 1959. See an Enlarged Photo Here. (Photograph taken on April 12, 2009 - © Cameron Bevers) 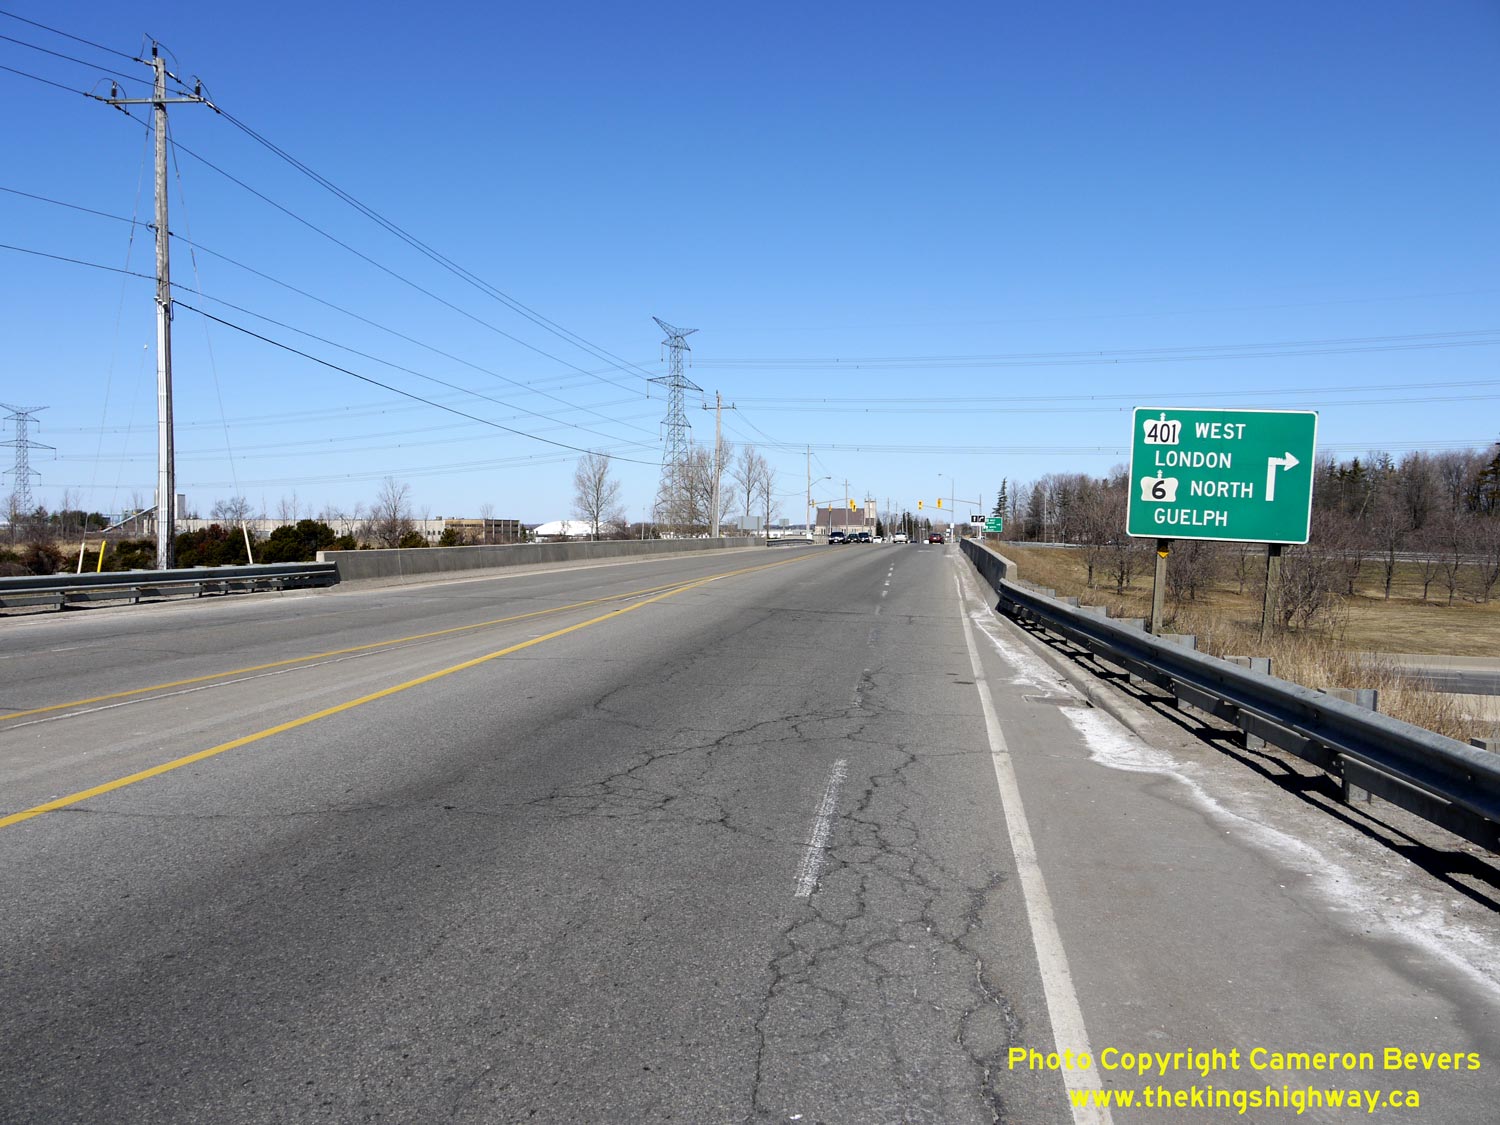

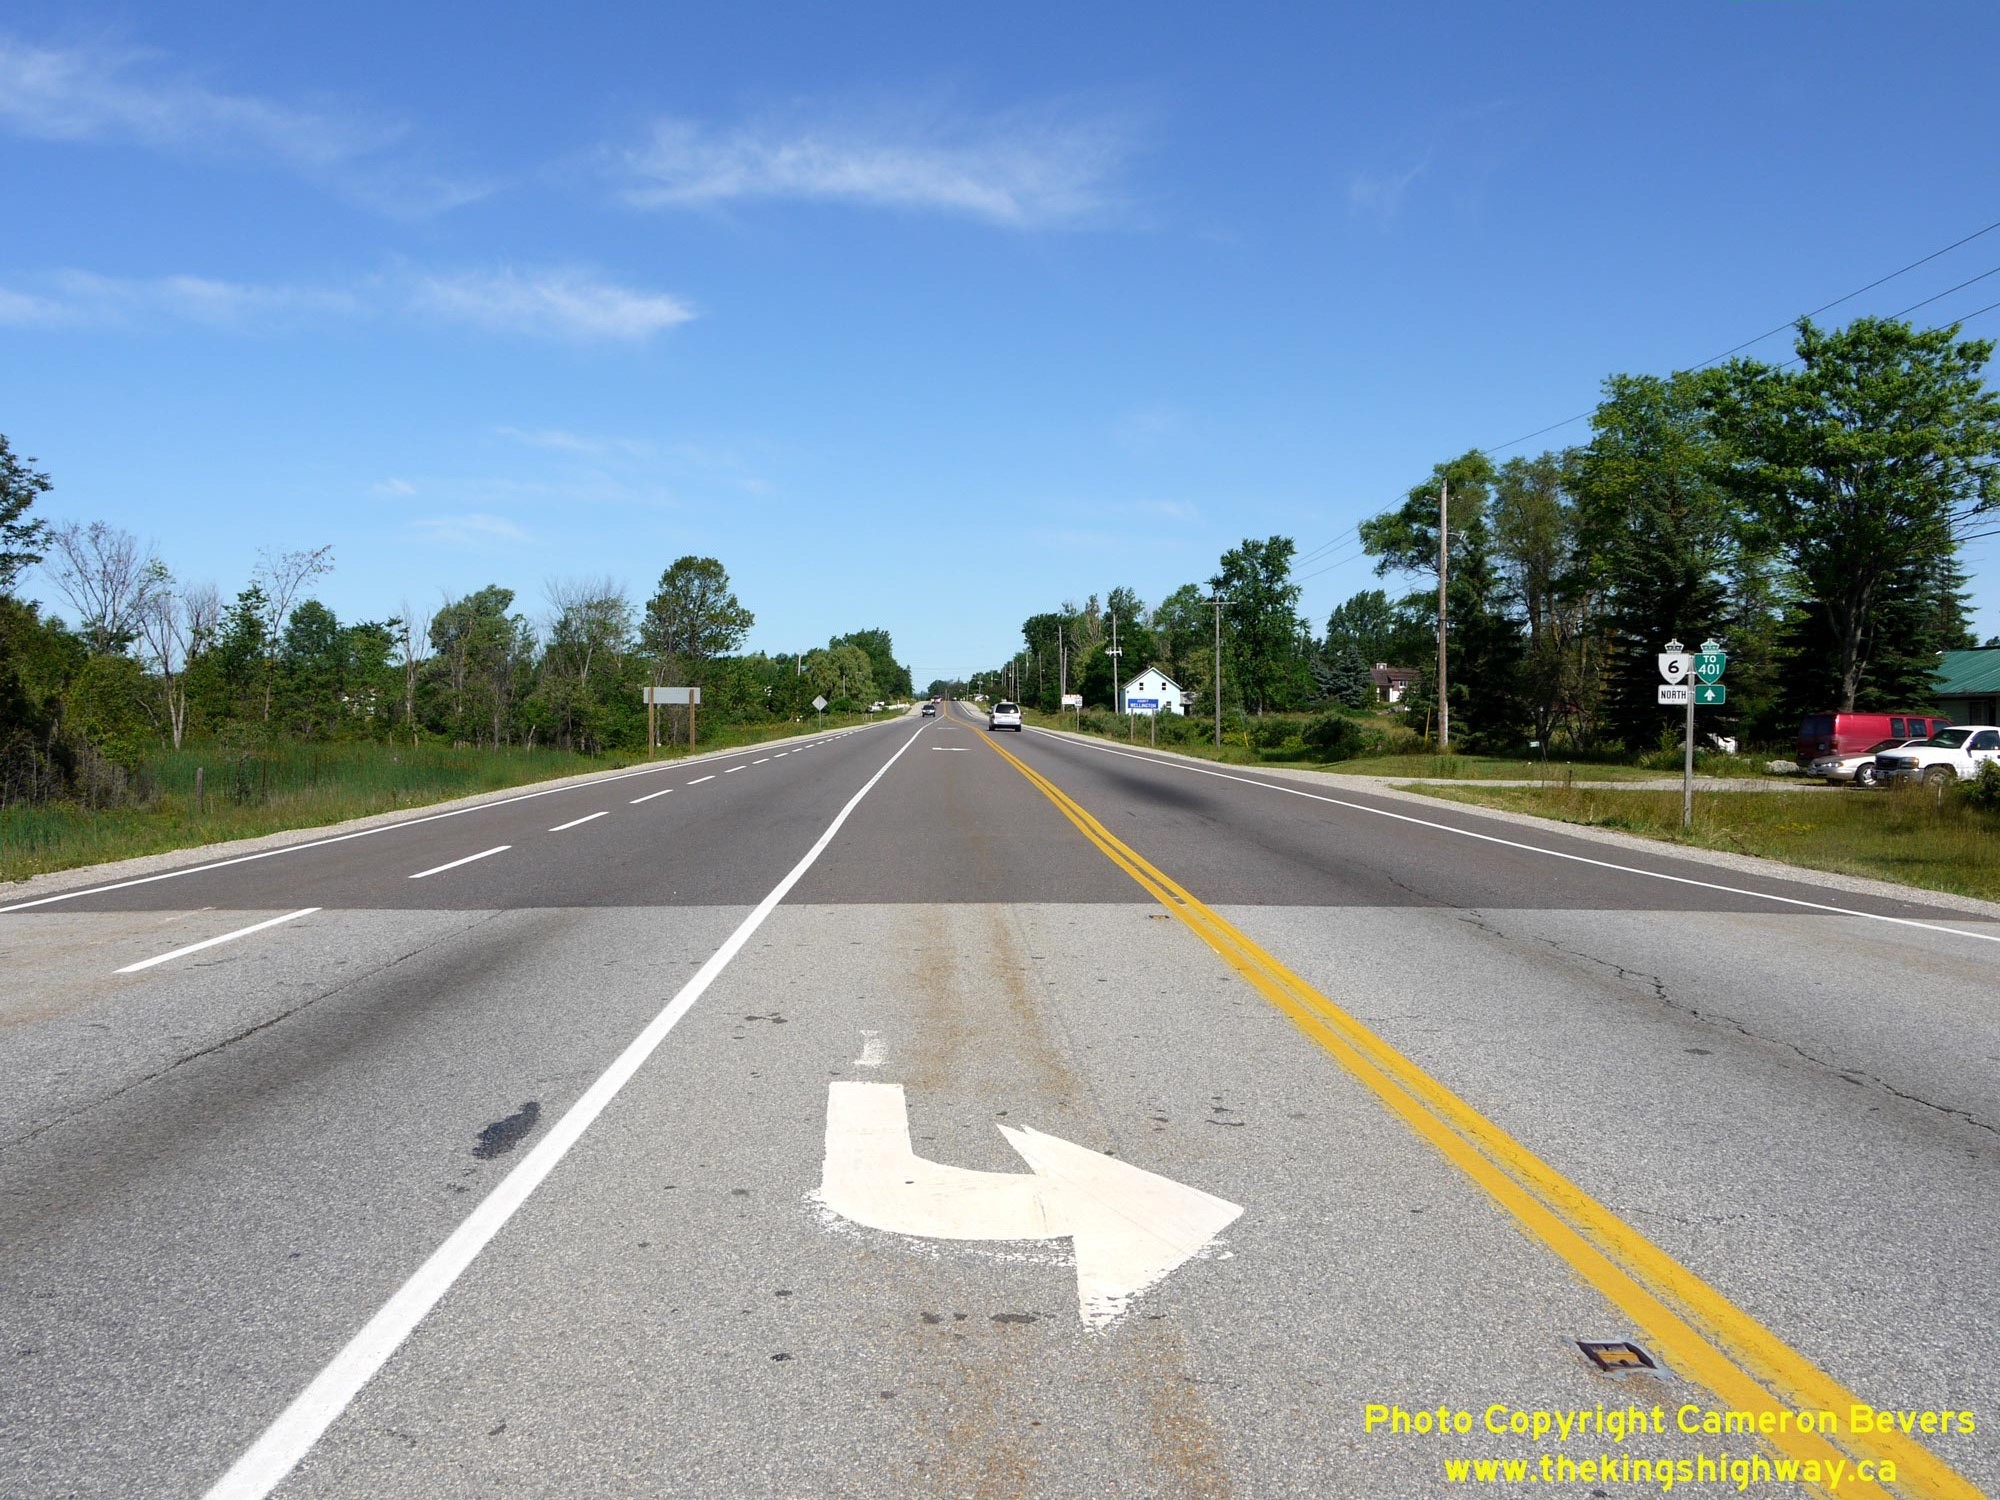
Left - Facing north across the Hwy 6 Overpass on Hwy 401. Heading northbound, Hwy 6 runs concurrently with westbound Hwy 401 for 4 km. The overlapped route of
Hwy 6 & Hwy 401 is marked on Hwy 6 itself as seen here, but is not actually marked along the freeway. Up until the 1970s, Hwy 6 used to continue north from this
interchange towards Guelph via Brock Road. Originally, this was the only interchange for Guelph along Hwy 401. Today, traffic can access Guelph from Hwy 401 via
either Brock Road (Old Hwy 6) or the Hwy 6 Bypass (Hanlon Parkway). See an
Enlarged Photo Here. (Photograph taken on April 12, 2009 - © Cameron Bevers) Right - Sign marking the entrance ramp to westbound Hwy 401. Hwy 6 turns right at the north ramp terminal and follows Hwy 401 along a short concurrent routing between Exit #299 (Hwy 6 South) and the Hanlon Parkway at Exit #295 (Hwy 6 North). The Hanlon Parkway was built in the 1970s to divert through traffic on Hwy 6 around Downtown Guelph. See an Enlarged Photo Here. (Photograph taken on April 12, 2009 - © Cameron Bevers) 

Left - Facing east along Hwy 401 towards Toronto from the Hwy 6 South Overpass near Morriston. The ramps at the Hwy 6 South Interchange are in an "A-2"
partial cloverleaf configuration. This type of interchange ramp configuration is rather uncommon in Ontario. It is rather odd that Hwy 6 was not built with a full
eight-ramp cloverleaf interchange when Hwy 401 was first built, especially considering the important role that Hwy 6 has always played in Ontario's highway network.
The Hwy 6 Interchange was one of the only non-cloverleaf provincial highway interchanges along Hwy 401 between London and Toronto. See an
Enlarged Photo Here. (Photograph taken on April 12, 2009 - © Cameron Bevers) Right - Facing west along Hwy 401 towards Cambridge from the Hwy 6 South Overpass near Morriston. See an Enlarged Photo Here. (Photograph taken on April 12, 2009 - © Cameron Bevers) 
Above - Western side of the Hwy 6 South Overpass on Hwy 401. Built in 1959 under Contract #1959-242, this concrete box girder structure is arguably one of the
least attractive bridges on Hwy 401 between Cambridge and Toronto. The recent bridge rehabilitation project certainly didn't help, when the old steel handrails were
removed and replaced by concrete barriers. See an Enlarged Photo Here. (Photograph taken on April 12, 2009 - © Cameron Bevers)
Continue on to King's Highway 6 Photos: Highway 401 to Guelph
|
|---|
Links to Adjacent King's Highway Photograph Pages:
Back to King's Highway 5 Photos /
King's Highway 6 History /
Back to King's Highway 7 Photos
Ontario Highway History - Main Menu / Back to List of Highways Website contents, photos & text © 2002-2026, Cameron
Bevers (Webmaster) - All Rights Reserved / Contact Me
|
|---|