
| 
| |
|
|
This page contains present day photos (Year 2000 to date) of Ontario's King's Highway 7, arranged by location from Madoc
easterly to Kaladar. All photographs displayed on this page were taken by the Webmaster (Cameron Bevers), unless specifically noted otherwise. Click on any thumbnail
to see a larger image!
Please note that all photographs displayed on this
website are protected by copyright. These photographs must not be reproduced, published,
electronically stored or copied, distributed, or posted onto other websites without
my written permission. If you want to use photos from this website, please
email me first for permission. Thank-you!
|
|---|
|
Page 17: Present Day King's Highway 7 Photographs (Madoc to Kaladar)


Left - Deer Creek Bridge on Old Hwy 7 (now Hwy 62) in Madoc. Structure completed in 1949. (Photograph taken on July 24, 2005 - © Cameron Bevers) Right - Junction of Old Hwy 7 and Hwy 62 at St. Lawrence Street and Durham Street in Downtown Madoc, facing east. Originally, Hwy 7 continued straight through at this intersection on its route towards Ottawa. After the Madoc Bypass was completed in 1967, the old route of Hwy 7 became Hwy 7B. Although Hwy 7B was decommissioned many years ago, this intersection still serves a King's Highway. At this intersection, Hwy 62 turns right and proceeds south towards Belleville. See an Enlarged Photo here. (Photograph taken on July 24, 2005 - © Cameron Bevers) 

Left - Facing north along Hwy 62 (Durham Street) towards the Old Hwy 7 Junction (St. Lawrence Street) in Downtown Madoc. To continue north on Hwy 62,
northbound traffic must turn left at this intersection. For a brief period during the 1960s, Hwy 7 and Hwy 62 shared a short concurrent route through Madoc,
but it was discontinued after the Madoc Bypass was completed and opened to traffic in 1967. St. Lawrence Street was briefly signed as Hwy 7B, until the
business route was decommissioned in 1970. (Photograph taken on July 24, 2005 - © Cameron Bevers) Right - This overhead flashing beacon at Old Hwy 7 and Hwy 62 in Downtown Madoc likely dates from the 1950s. (Photograph taken on July 24, 2005 - © Cameron Bevers) 

Left - Facing south along Hwy 62 from St. Lawrence Street (Old Hwy 7) in Downtown Madoc. See an
Enlarged Photo here. (Photograph taken on August 17, 2008 - © Cameron Bevers) Right - Guide sign marking the Hwy 62 Junction on the Madoc Bypass (Hwy 7). At this junction, motorists can follow Hwy 62 North to Bancroft or Hwy 62 South to Belleville. Continuing straight through on Hwy 7 leads to Peterborough. (Photograph taken on July 10, 2011 - © Cameron Bevers) 

Left - Facing east along Hwy 7 towards Actinolite near Madoc. See an
Enlarged Photo here. (Photograph taken on August 17, 2008 - © Cameron Bevers) Right - Recently-widened section of Hwy 7 near Actinolite. The highway has a four-lane cross section here, due to the presence of concurrent eastbound and westbound passing lanes. See an Enlarged Photo here. (Photograph taken on August 17, 2008 - © Cameron Bevers) 

Left - Passing lanes on Hwy 7 between Actinolite and Madoc, facing east towards the Black River Bridge. (Photograph taken on August 17, 2008 - © Cameron Bevers) Right - Black River Bridge on Hwy 7 between Madoc and Actinolite. Structure completed in 1933. (Photograph taken on August 17, 2008 - © Cameron Bevers) 

Left - Southern side of the Black River Bridge on Hwy 7 near Actinolite. (Photograph taken on August 17, 2008 - © Cameron Bevers) Right - The Black River Bridge on Hwy 7 is a simple two-span concrete slab structure. It was one of two new bridges built along the Actinolite Diversion in 1933, in an effort to improve the alignment of Hwy 7 approaching Actinolite. (Photograph taken on August 17, 2008 - © Cameron Bevers) 

Left - Facing east along Hwy 7 at the Black River Bridge between Madoc and Actinolite. (Photograph taken on August 17, 2008 - © Cameron Bevers) Right - Northern side of the Skootamatta River Bridge on Hwy 7 in Actinolite. Structure completed in 1933. As a result of the economic depression in the 1930s, the Skootamatta River Bridge was one of only four bridges constructed by the Ontario Department of Highways that year. The nearby Black River Bridge was also built in 1933, meaning that half of all DHO-built bridges constructed during the year were located on the Actinolite Diversion, suggesting that this was a high-priority project at the time. (Photograph taken on July 9, 2011 - © Cameron Bevers) 

Left - Facing east along Hwy 7 at the Skootamatta River Bridge in Actinolite. (Photograph taken on July 9, 2011 - © Cameron Bevers) Right - The Skootamatta River on Hwy 7 is a simple but beautifully elegant single-span concrete arch bridge. It is one of the oldest and best surviving examples of a closed-spandrel concrete arch structure on the provincial highway system. The bridge was constructed in 1933 as part of a highway relocation project through Actinolite, which resulted in a section of the original highway being bypassed by a new route for Hwy 7 which utilizes this bridge. See an Enlarged Photo here. (Photograph taken on July 9, 2011 - © Cameron Bevers) 

Left - Facing west along Hwy 7 at the Skootamatta River Bridge in Actinolite. (Photograph taken on July 9, 2011 - © Cameron Bevers) Right - Approaching the Hwy 37 Junction on Hwy 7 in Actinolite, facing east. See an Enlarged Photo here. (Photograph taken on July 9, 2011 - © Cameron Bevers) 

Left - Northern terminus of Hwy 37 at the Hwy 7 Junction in Actinolite. See an Enlarged Photo here. (Photograph taken on July 10, 2011 - © Cameron Bevers) Right - Facing south along Hwy 37 from the Hwy 7 Junction in Actinolite. This route forms an important cut-off between Hwy 401 and Hwy 7, which are two of Central Ontario's busiest highways. Many motorists choose to use Hwy 37 and Hwy 7 instead of Hwy 416 to reach Ottawa from the Toronto area, since it is a considerably shorter route than using the freeway. The route offered by Hwy 37 and Hwy 7 is also quite scenic. (Photograph taken on July 10, 2011 - © Cameron Bevers) 

Left - The junction of Hwy 37 and Hwy 7 at Actinolite is unusual, because it is one of the only places in the southern portion of Ontario where two
King's Highways join together at a stop-controlled intersection. Apart from those found in Northern Ontario, most King's Highway junctions are now
controlled by traffic signals. Signals are not required at this intersection due to the prevailing south-to-east and east-to-south traffic movements here,
which are more or less uninterrupted. (Photograph taken on July 10, 2011 - © Cameron Bevers) Right - Facing west along Hwy 7 towards Madoc from the Hwy 37 Junction in Actinolite. (Photograph taken on July 10, 2011 - © Cameron Bevers) 

Left - Facing east along Hwy 7 at the Hwy 37 Junction in Actinolite. See an
Enlarged Photo here. (Photograph taken on July 10, 2011 - © Cameron Bevers) Right - Facing east along Hwy 7 towards Kaladar from the Hwy 37 Junction in Actinolite. See an Enlarged Photo here. (Photograph taken on July 10, 2011 - © Cameron Bevers) 

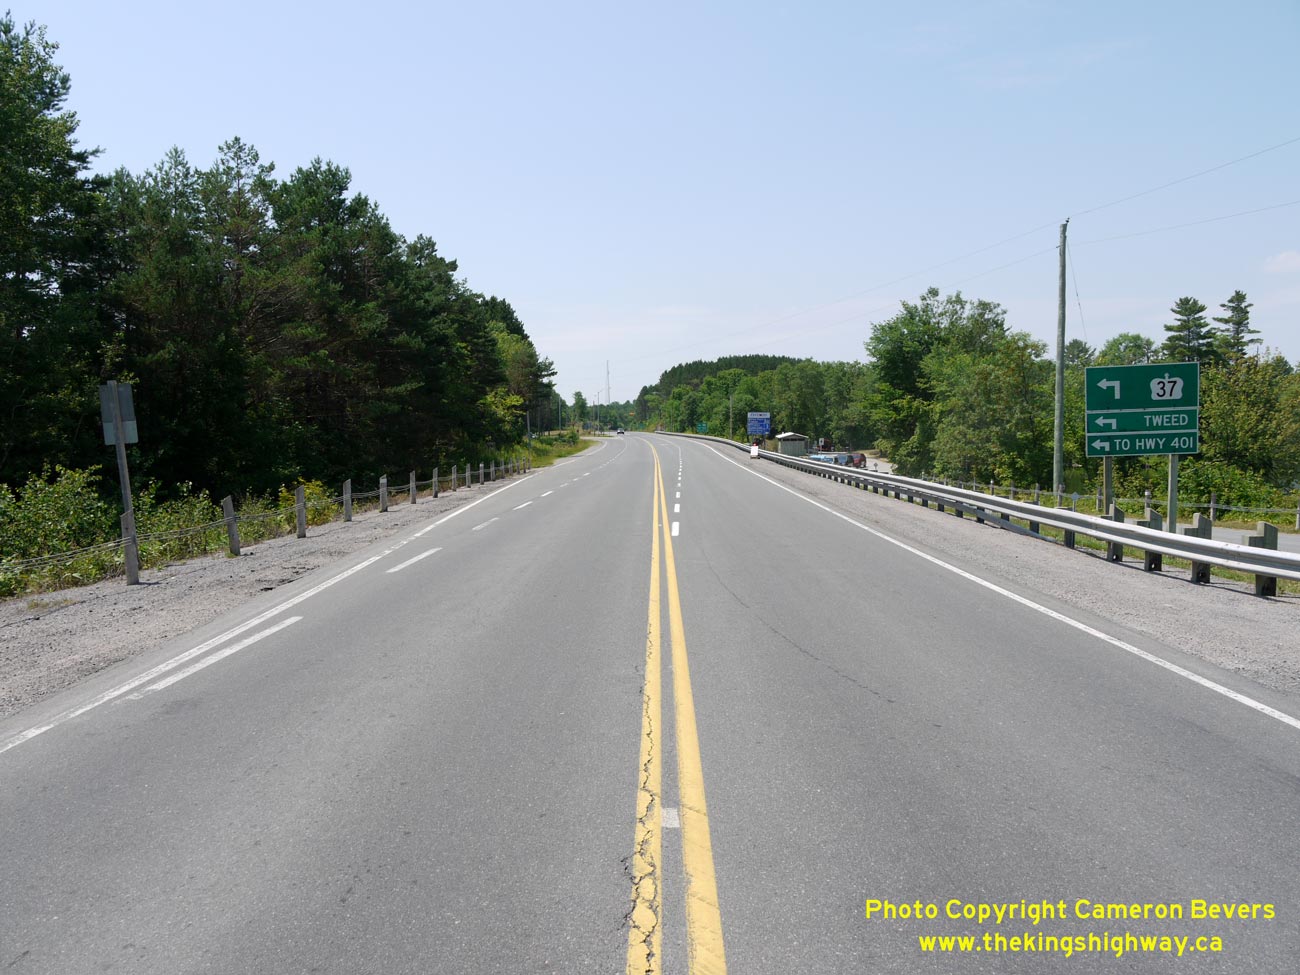
Left - Facing west along Hwy 7 at the Hwy 37 Junction in Actinolite. Motorists turning left here can follow Hwy 37 to Belleville, where the highway
links up with Hwy 401. It is interesting to note that the "control city" on this guide sign is actually Hwy 401, not Belleville. See an
Enlarged Photo here. (Photograph taken on July 10, 2011 - © Cameron Bevers) Right - Approaching the Hwy 37 Junction on Hwy 7 in Actinolite, facing west. See an Enlarged Photo here. (Photograph taken on July 10, 2011 - © Cameron Bevers) 

Left - Green guide sign on Westbound Hwy 7 approaching the Hwy 37 Junction at Actinolite. (Photograph taken on July 10, 2011 - © Cameron Bevers) Right - Facing east along Hwy 7 towards Kaladar from Actinolite. See an Enlarged Photo here. (Photograph taken on July 10, 2011 - © Cameron Bevers) 

Left - Roadside park beside the Skootamatta River on Hwy 7 at Actinolite. This is one of several roadside parks operated by MTO along Hwy 7 between
Peterborough and Ottawa. It is an extremely popular stopping point in the peak summer tourism months. See an
Enlarged Photo here. (Photograph taken on July 10, 2011 - © Cameron Bevers) Right - Former Hwy 7 alignment in Actinolite. This is the point where the former alignment of Hwy 7 passing through Actinolite joins the Actinolite Diversion (current Hwy 7). The Actinolite Diversion was completed in 1933, bypassing this former section of Hwy 7. For many years, this route acted as a short cut-off, carrying traffic from Hwy 37 to Hwy 7. However, the road was closed off at one end when the current junction of Hwy 7 & Hwy 37 was improved several decades ago. (Photograph taken on July 10, 2011 - © Cameron Bevers) 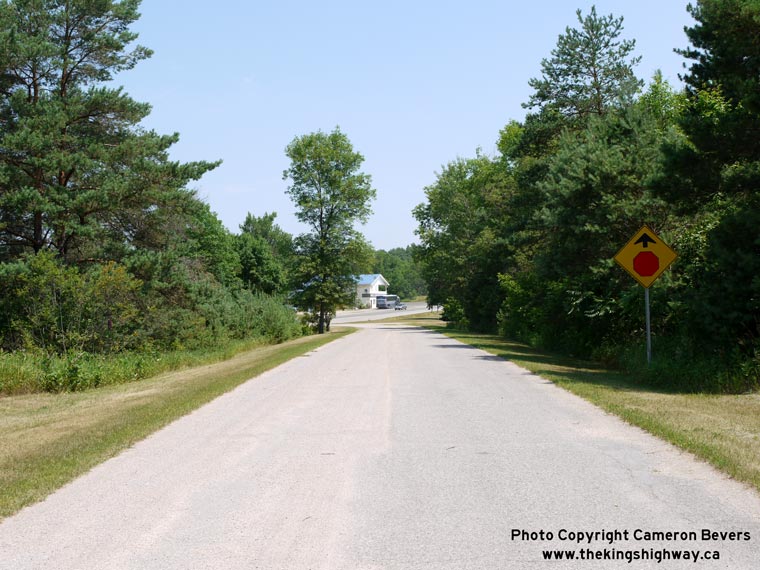

Left - Facing east along the former Hwy 7 alignment in Actinolite. (Photograph taken on July 10, 2011 - © Cameron Bevers) Right - Former alignment of Hwy 7 in Actinolite, facing west towards the road's terminus. Originally, this road continued south towards Belleville as Hwy 37. The former highway alignment new serves as an access road to a cemetery. (Photograph taken on July 10, 2011 - © Cameron Bevers) 

Left - Facing west along Hwy 7 at the Hastings-Lennox & Addington County Boundary east of Actinolite. (Photograph taken on July 10, 2011 - © Cameron Bevers) Right - Facing east along Hwy 7 at the Hastings-Lennox & Addington County Boundary. See an Enlarged Photo here. (Photograph taken on July 10, 2011 - © Cameron Bevers) 

Left - Hastings County Boundary Sign on Hwy 7 between Kaladar and Actinolite. (Photograph taken on July 10, 2011 - © Cameron Bevers) Right - View of Beatty's Curve on Hwy 7 near Kaladar, facing west towards Actinolite. (Photograph taken on July 10, 2011 - © Cameron Bevers) 

Left - Facing east along Hwy 7 towards Kaladar at Beatty's Curve. (Photograph taken on July 10, 2011 - © Cameron Bevers) Right - View of Beatty's Curve on Hwy 7 near Kaladar, facing east. (Photograph taken on July 10, 2011 - © Cameron Bevers) 
Above - Inscription on a concrete culvert on the abandoned Hwy 7 alignment at Beatty's Curve near Kaladar - "THE KING'S HIGHWAY 1932". The old
highway alignment at Beatty's Curve was closed to through traffic when it was bypassed by a new route during a highway improvement project in the 1950s. (Photograph taken in October, 2002 - © Cameron Bevers) 

Left - Unusual warning sign on Hwy 7 approaching Beatty's Curve near Kaladar. This sign warns drivers of a surprisingly persistent curve in the
highway's alignment, which is much longer than it initially appears. (Photograph taken on July 10, 2011 - © Cameron Bevers) Right - View of Hwy 7 approaching Beatty's Curve from the east. The original 1932 highway alignment can be seen at right. See an Enlarged Photo here. (Photograph taken on July 10, 2011 - © Cameron Bevers) 

Left - Facing east along Hwy 7 towards Kaladar, near Beatty's Curve. (Photograph taken on July 10, 2011 - © Cameron Bevers) Right - View of Hwy 7 entering Kaladar, facing east. See an Enlarged Photo here. (Photograph taken on July 10, 2011 - © Cameron Bevers)
Continue on to King's Highway 7 Photos: Kaladar to Perth
|
|---|
Links to Adjacent King's Highway Photograph Pages:
Back to King's Highway 6 Photos /
King's Highway 7 History /
On to King's Highway 8 Photos
Ontario Highway History - Main Menu / Back to List of Highways Website contents, photos & text © 2002-2026 Cameron
Bevers (Webmaster) - All Rights Reserved / Contact Me
|
|---|