
| 
| |
|
|
This page contains present day photos (Year 2000 to date) of Ontario's King's Highway 7, arranged by location from Sarnia
easterly to Elginfield. All photographs displayed on this page were taken by the Webmaster (Cameron Bevers), unless specifically noted otherwise. Click on any
thumbnail to see a larger image!
Please note that all photographs displayed on this
website are protected by copyright. These photographs must not be reproduced, published,
electronically stored or copied, distributed, or posted onto other websites without
my written permission. If you want to use photos from this website, please
email me first for permission. Thank-you!
|
|---|
|
Page 6: Present Day King's Highway 7 Photographs (Sarnia to Elginfield)


Left - Facing west along Hwy 7 towards the Hwy 40 Interchange in Sarnia. Prior to 1997, this interchange at Hwy 40 was the western terminus of Hwy 7. During
the mass highway downloading spree in 1997-1998, more than 100 km of Hwy 7 was transferred from the province to Lambton and Middlesex Counties. Since 1998, the
western terminus of Hwy 7 has been at the Hwy 4 Junction in Elginfield, located north of London. See an
Enlarged Photo Here. (Photograph taken on May 18, 2009 - © Cameron Bevers) Right - Western side of the Northbound Hwy 40 Overpass on Hwy 7 near Sarnia. When this structure was first built in 1964, it carried both northbound and southbound traffic on Hwy 40. The bridge was twinned in 1980, when a second structure was built beside the 1964 structure to carry southbound traffic. The original 1964 structure seen here was then converted to carry northbound Hwy 40 traffic only. See an Enlarged Photo Here. (Photograph taken on May 18, 2009 - © Cameron Bevers) 

Left - Western side of the Southbound Hwy 40 Overpass on Hwy 7 near Sarnia. Structure completed in 1980. The twinned structure over Hwy 7 was part of a project
to widen Hwy 40 to a four-lane divided expressway from nearby Hwy 402 southerly for approximately 1 km. See an
Enlarged Photo Here. (Photograph taken on May 18, 2009 - © Cameron Bevers) Right - Junction assembly on Hwy 7 at the Hwy 40 Interchange in Sarnia. Following the transfer of Hwy 7 to Lambton County in 1997-1998, the road was officially renamed Lambton County Road 22 from Sarnia to the Hwy 79 Junction east of Warwick. See an Enlarged Photo Here. (Photograph taken on May 18, 2009 - © Cameron Bevers) 

Left - Facing east along Hwy 7 towards the Hwy 40 Interchange in Sarnia. See an
Enlarged Photo Here. (Photograph taken on May 18, 2009 - © Cameron Bevers) Right - Facing north along Hwy 40 towards the Hwy 402 Interchange from the Hwy 7 Interchange. The Hwy 7 & Hwy 40 Interchange and Hwy 402 & Hwy 40 Interchange are separated by a distance of only 600 metres. In fact, Hwy 402 and Hwy 7 are never more that 2 km apart along their respective routes from Sarnia to Warwick - the two routes run more or less parallel to each other for over 40 km. See an Enlarged Photo Here. (Photograph taken on May 18, 2009 - © Cameron Bevers) 

Left - Facing north along Hwy 40 towards the Hwy 402 Interchange from the Hwy 7 Interchange. Note the short distance between the ramps at Hwy 402 and Hwy 7.
Closely-spaced interchanges can work quite effectively, provided that there are sufficient gaps in the traffic stream. Fortunately, this interchange doesn't carry
heavy traffic volumes, as is evident in this photo. See an Enlarged Photo Here. (Photograph taken on May 18, 2009 - © Cameron Bevers) Right - Facing north along northbound Hwy 40 from the Hwy 7 Interchange in Sarnia. The on-ramp from Hwy 7 becomes an auxiliary lane between this interchange and the adjacent Hwy 402 Interchange. The opposing southbound off-ramp to Hwy 7 is also an auxiliary lane from Hwy 402. See an Enlarged Photo Here. (Photograph taken on May 18, 2009 - © Cameron Bevers) 

Left - Facing south along Hwy 40 towards Wallaceburg from the Hwy 7 Interchange in Sarnia. The end of the divided highway can be seen in the
distance. See an Enlarged Photo Here. (Photograph taken on May 18, 2009 - © Cameron Bevers) Right - Close-up of the end of the divided section of Hwy 40, as seen from the Hwy 7 Interchange in Sarnia. This point marks the end of the twinned section of the Sarnia Bypass (Hwy 40). The divided highway resumes 6 km to the south, where the Sarnia Bypass intersects Indian Road. When the Sarnia Bypass was first built in the mid-1960s, stuffiest right-of-way was set aside so that Hwy 40 could be converted into a four-lane divided highway from Hwy 7 to Indian Road, if it was needed in the future. See an Enlarged Photo Here. (Photograph taken on May 18, 2009 - © Cameron Bevers) 

Left - Facing east along Hwy 7 towards London from the Hwy 40 Overpass in Sarnia. It may seem hard to believe, but this short section of Hwy 7 was once
Hwy 402. When Hwy 402 was first constructed in the late 1940s, the divided highway merged into existing Hwy 7 (London Road) at the Wawanosh Creek Bridge, just east of
the future Sarnia Bypass. This historical 1962 aerial photo shows the original
eastern terminus of Hwy 402 at Hwy 7 (London Road), prior to the interchange construction at the Sarnia Bypass (Hwy 40). In the mid-1970s, construction began on a
new diversion for Hwy 402 which ultimately bypassed the original section of Hwy 402 approaching Wawanosh Creek seen here. See an
Enlarged Photo Here. (Photograph taken on May 18, 2009 - © Cameron Bevers) Right - East ramp terminal at the Hwy 7 Interchange, as seen from the Hwy 40 Overpass in Sarnia. The original eastern terminus of Hwy 402 lay just a short distance to the east at the Wawanosh Creek Bridge. See an Enlarged Photo Here. (Photograph taken on May 18, 2009 - © Cameron Bevers) 

Left - Facing west along Exmouth Street towards Sarnia from the Hwy 7 & Hwy 40 Interchange. See an
Enlarged Photo Here. (Photograph taken on May 18, 2009 - © Cameron Bevers) Right - Although one would never guess by looking at this photograph, the old Bluewater Bridge Approach (Hwy 402) went straight ahead through the site of the Leon's Store in the background. In the 1970s, Hwy 402 was relocated onto a new alignment to the north of Exmouth Street & Hwy 7. A 1 km section of Hwy 402 connecting the original alignment seen here and the new alignment was closed to traffic and abandoned once the route of Hwy 402 was completed west of Sarnia. It is one of the only instances where a section of a 400-series highway was bypassed and abandoned. Sadly, recent commercial developments around the area have been built on most of the former highway's route, so there is virtually no trace of the abandoned highway left today. See an Enlarged Photo Here. (Photograph taken on May 18, 2009 - © Cameron Bevers) 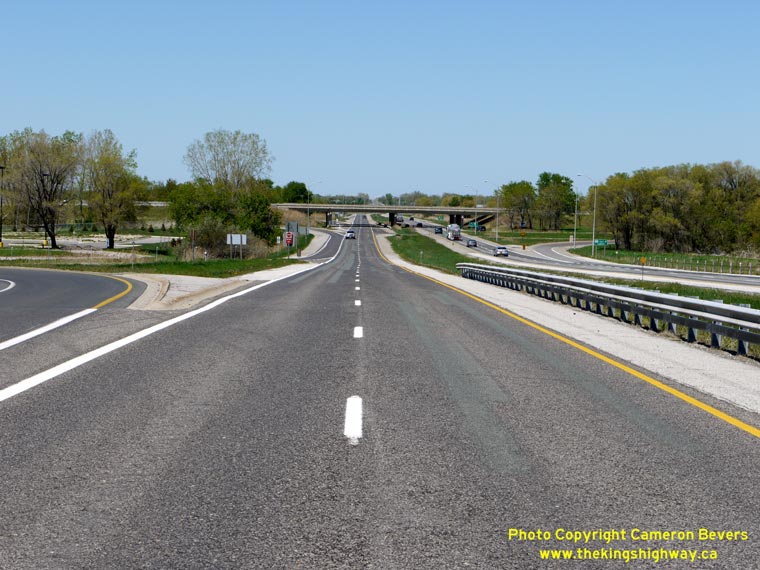

Left - Facing north along the southbound lanes of Hwy 40 from the Hwy 7 Interchange in Sarnia. See an
Enlarged Photo Here. (Photograph taken on May 18, 2009 - © Cameron Bevers) Right - Structure identification number (Site #14-279) and date stamp (1980) on the Southbound Hwy 40 Overpass in Sarnia. See an Enlarged Photo Here. (Photograph taken on May 18, 2009 - © Cameron Bevers) 

Left - Overhead signs marking Exmouth Street and Hwy 40 South at the Hwy 7 Interchange in Sarnia. See an
Enlarged Photo Here. (Photograph taken on May 18, 2009 - © Cameron Bevers) Right - Aerial view of the Hwy 7 & Hwy 40 Interchange in Sarnia, facing east. Note the proximity of this interchange to the adjacent Hwy 402 & Hwy 40 Interchange at left. See an Enlarged Photo Here. (Photograph taken on May 18, 2009 - © Cameron Bevers) 

Left - Aerial view of the Hwy 7 & Hwy 40 Interchange in Sarnia, facing west. The ramps at the Hwy 7 & Hwy 40 Interchange are in a "Parclo A-2"
configuration, with a total of four ramps in diagonally opposing quadrants. The adjacent Hwy 402 & Hwy 40 Interchange ramps are in a "Parclo B-4" configuration.
Six-ramp Parclo B-4 Interchanges such as the one found at Hwy 402 & Hwy 40 are very rare in Ontario. See an
Enlarged Photo Here. (Photograph taken on May 18, 2009 - © Cameron Bevers) Right - Aerial view of the Hwy 7 & Hwy 40 Interchange in Sarnia, facing west. This photo shows the diversion of Hwy 402 (at right) that was constructed in the 1970s, bypassing the former eastern terminus of the highway approaching the Wawanosh Creek Bridge. When the Bluewater Bridge Approach (Hwy 402) was first built in the 1940s, it continued straight ahead through the present-day location of the shopping centres beyond the interchange, while Hwy 7 turned south towards the City Centre. Following the relocation of Hwy 402 in the 1970s, the former eastern end of the highway was diverted so that it became a continuation of Exmouth Street, which runs parallel to Hwy 402 in the background. See an Enlarged Photo Here. (Photograph taken on May 18, 2009 - © Cameron Bevers) 

Left - Aerial view of the "Golden Mile" section of Hwy 7, facing east from the Hwy 7 & Hwy 40 Interchange. See an
Enlarged Photo Here. (Photograph taken on May 18, 2009 - © Cameron Bevers) Right - Aerial view of Hwy 7 and parallel Hwy 402, facing west towards Sarnia. The diversion of Hwy 402 to the north of its original route is very obvious in this photo. See an Enlarged Photo Here. (Photograph taken on May 18, 2009 - © Cameron Bevers) 

Left - Facing east along Hwy 7 towards the Wawanosh Creek Bridge (Site #14-40) near the Hwy 40 Interchange in Sarnia. For many years, this short divided
section of Hwy 7 marked the end of Hwy 402. In the 1970s, Hwy 402 was rerouted onto an entirely new alignment and extended easterly towards London. Wawanosh Creek is
also known as Perch Creek. See an Enlarged Photo Here. (Photograph taken on October 21, 2007 - © Cameron Bevers) Right - Wawanosh Creek Bridge on Hwy 7 near Sarnia. This structure was built in 1947 to accommodate a new four-lane highway approach to the Bluewater Bridge. The Bluewater Bridge Approach was designated as Hwy 402 in 1952. The old two-lane Hwy 7 bridge over Wawanosh Creek was subsequently demolished, but the former bridge abutments are still visible in the bush along the southern side of the existing highway. See an Enlarged Photo Here. (Photograph taken on October 21, 2007 - © Cameron Bevers) 

Left - Facing east towards the Wawanosh Creek Bridge on the westbound lanes of Hwy 7. In 1964, the Wawanosh Creek Bridge was extended in order to provide wider
traffic lanes, a centre median and a sidewalk on the northern side of Hwy 7. The original 1947 structure carried a four-lane undivided roadway with a sidewalk on the
southern side of the highway only. See an Enlarged Photo Here. (Photograph taken on October 21, 2007 - © Cameron Bevers) Right - Side view of the 1947 (Eastbound Hwy 7) span over Wawanosh Creek near Sarnia. See an Enlarged Photo Here. (Photograph taken on October 21, 2007 - © Cameron Bevers) 

Left - View underneath the Wawanosh Creek Bridge on Hwy 7. The original 1947 structure (at right) and the 1964 extension (at left) can be easily distinguished in
this photo. The 1964 span is slightly higher than the 1947 span because of a superelevated curve in the highway immediately adjacent to the bridge. See an
Enlarged Photo Here. (Photograph taken on October 21, 2007 - © Cameron Bevers) Right - Close-up of the concrete and steel handrail design of the Wawanosh Creek Bridge on Hwy 7 near Sarnia. See an Enlarged Photo Here. (Photograph taken on October 21, 2007 - © Cameron Bevers) 

Left - Original sidewalk on the 1947 Wawanosh Creek Bridge on Hwy 7. See an
Enlarged Photo Here. (Photograph taken on May 18, 2009 - © Cameron Bevers) Right - Facing west along Hwy 7 across the Wawanosh Creek Bridge in Sarnia. See an Enlarged Photo Here. (Photograph taken on May 18, 2009 - © Cameron Bevers) 

Left - Start of the divided highway at Wawanosh Creek. The widening of the Wawanosh Creek Bridge in 1964 allowed for an extension of the median island. When
Hwy 402 was first built, the median island ended where the divided highway tied into Hwy 7 at London Road. Originally, Hwy 7 & Hwy 402 met at a junction
immediately west of the Wawanosh Creek Bridge. During construction of the Sarnia Bypass, the intersection of London Road was relocated further to the west. See an
Enlarged Photo Here. (Photograph taken on May 18, 2009 - © Cameron Bevers) Right - Facing east along Hwy 7 from the Wawanosh Creek Bridge, approaching the end of the divided highway. East of this point, Hwy 7 continues as an undivided four-lane highway through Sarnia's "Golden Mile". See an Enlarged Photo Here. (Photograph taken on May 18, 2009 - © Cameron Bevers) 

Left - Approaching the start of the divided highway east of Sarnia, facing west. Note the flush "singing median" approaching the raised grass median island.
Many four-lane highways built in Ontario during the 1960s and 1970s had these concrete rumble strips down the highway's centreline. The concrete strip has a series of
intermittent alternating recessed grooves and raised humps, which provided drivers with an audible warning that their vehicle's tires have encroached over the
centreline of the highway. The singing median is slowly disappearing from the Ontario landscape as older highways are reconstructed. See an
Enlarged Photo Here. (Photograph taken on May 18, 2009 - © Cameron Bevers) Right - View of the singing median on Hwy 7 east of the Wawanosh Creek Bridge. Since the concrete strip is essentially flush with the surrounding pavement, the median is fully traversable. This is an important design consideration in areas such as this one, where there are existing driveways and entrances along the highway which may require access from both directions. See an Enlarged Photo Here. (Photograph taken on May 18, 2009 - © Cameron Bevers) 

Left - Distance guide sign on eastbound Hwy 7 leaving Sarnia. The only destination shown on the sign is "London". Historically, motorists had to follow Hwy 22
to reach London from Hwy 7, since Hwy 7 turned north to Arkona just east of Warwick. See an
Enlarged Photo Here. (Photograph taken on May 18, 2009 - © Cameron Bevers) Right - "Golden Mile" on Hwy 7, facing west towards Sarnia. This strip of highway commercial development along Hwy 7 has greeted motorists entering Sarnia from London and points east since the 1950s. See an Enlarged Photo Here. (Photograph taken on May 18, 2009 - © Cameron Bevers) 

Left - The section of Hwy 7 through the Golden Mile just west of Blackwell Side Road was reconstructed with a two-way centre left turn lane in 2009. This photo
shows the old four-lane cross section just prior to reconstruction, where there was no centre left turn lane. See an
Enlarged Photo Here. (Photograph taken on May 18, 2009 - © Cameron Bevers) Right - Golden Mile on Hwy 7, facing west towards Sarnia near Blackwell Side Road. See an Enlarged Photo Here. (Photograph taken on May 18, 2009 - © Cameron Bevers) 

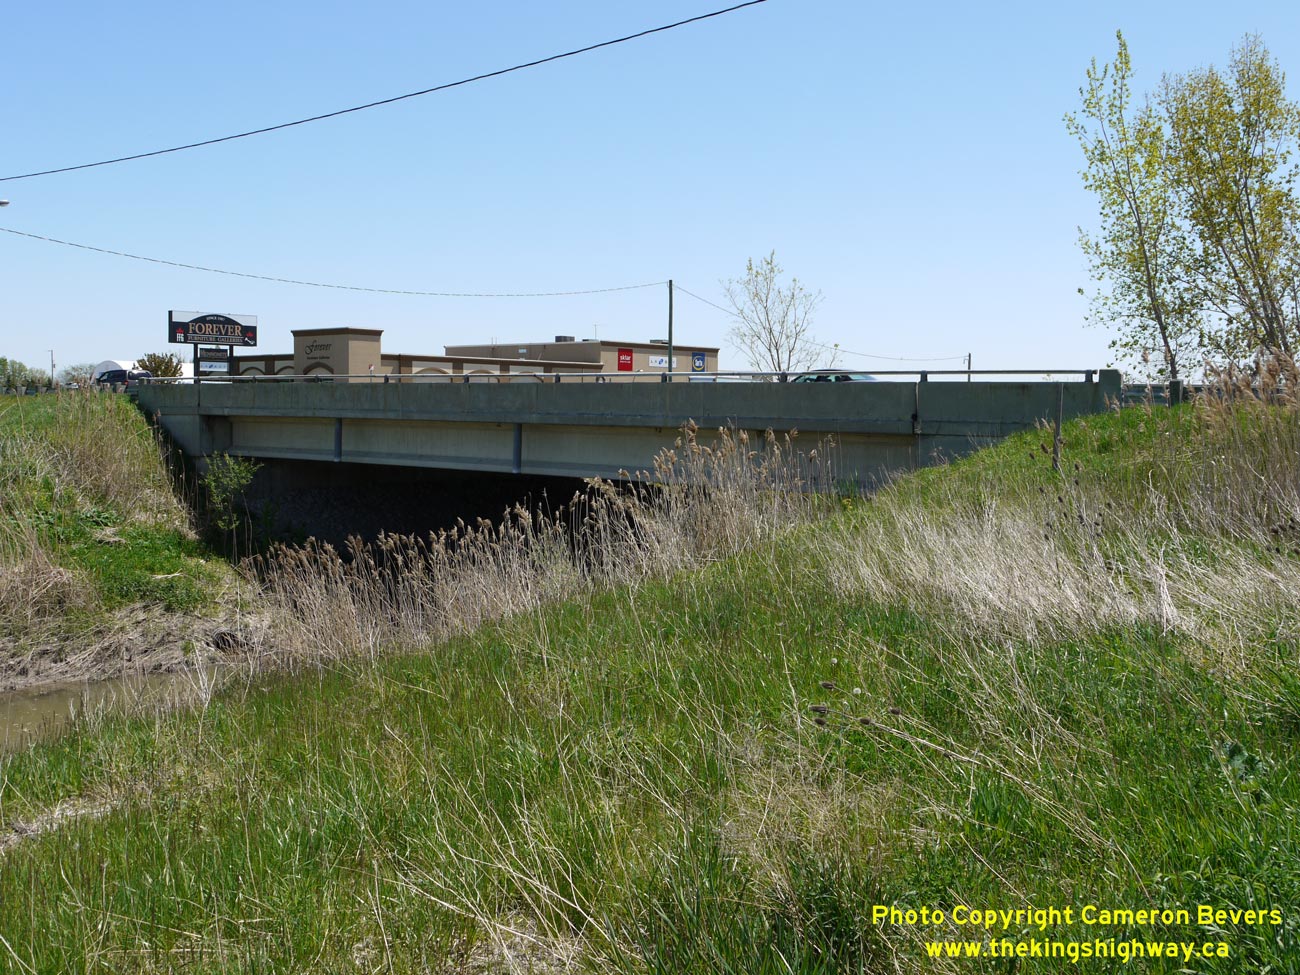
Left - Facing east along Hwy 7 approaching Blackwell Side Road, prior to reconstruction and widening. See an
Enlarged Photo Here. (Photograph taken on May 18, 2009 - © Cameron Bevers) Right - Lambton County Drain Bridge on Hwy 7 east of Blackwell Side Road. Structure completed in 1981. See an Enlarged Photo Here. (Photograph taken on May 18, 2009 - © Cameron Bevers) 

Left - Facing east along Hwy 7 towards London at the Lambton County Drain Bridge, east of Blackwell Side Road. See an
Enlarged Photo Here. (Photograph taken on May 18, 2009 - © Cameron Bevers) Right - Structure identification number (Ste #14-390) and date stamp (1981) on the Lambton County Drain Bridge on Hwy 7. See an Enlarged Photo Here. (Photograph taken on May 18, 2009 - © Cameron Bevers) 

Left - Facing west along Hwy 7 towards Blackwell Side Road east of Sarnia. See an
Enlarged Photo Here. (Photograph taken on May 18, 2009 - © Cameron Bevers) Right - Hwy 7 near Airport Road in Sarnia, facing west. See an Enlarged Photo Here. (Photograph taken on May 18, 2009 - © Cameron Bevers) 
Above - Formerly King's Highway 7 sign assembly in Warwick. Following the mass highway downloading in Ontario during 1997-1998, many municipalities marked
former King's Highways with dual signs, indicating the new county road number and the old King's Highway number together with a "Formerly" tab placed in between. Most
of these dual signs have been replaced over the years with stand-alone county road route markers, but a small number of the old dual signs still exist throughout the
province. See an Enlarged Photo Here. (Photograph taken on June 6, 2004 - © Cameron Bevers) 

Left - Bear Creek Bridge on Hwy 7 in Warwick. This attractive concrete "bowstring" arch structure was completed in 1931. See an
Enlarged Photo Here. (Photograph taken on June 6, 2004 - © Cameron Bevers) Right - Facing east towards London across the Bear Creek Bridge on Hwy 7 in Warwick. See an Enlarged Photo Here. (Photograph taken on June 6, 2004 - © Cameron Bevers) 

Left - Facing west towards Warwick along Hwy 7 at the Bear Creek Bridge (Site #14-73). See an
Enlarged Photo Here. (Photograph taken on June 6, 2004 - © Cameron Bevers) Right - South side of the Bear Creek Bridge on Hwy 7 at Warwick. This concrete bowstring truss was one of the last examples of this bridge design ever constructed in Ontario by the Department of Highways. Only one other concrete bowstring bridge was built in 1931, and that one was located just east of Brantford on Hwy 2 at Fairchild Creek. No more concrete bowstring bridges were ever built on an Ontario King's Highway after 1931, as this bridge type was rendered more or less obsolete with the introduction of the concrete rigid frame bridge design in Ontario. See an Enlarged Photo Here. (Photograph taken on June 6, 2004 - © Cameron Bevers) 
Above - Inscription on a concrete culvert on Hwy 7 & Hwy 79 in Arkona - "THE KING'S HIGHWAY 1937". See an
Enlarged Photo Here. (Photograph taken in March 2003 - © Cameron Bevers) 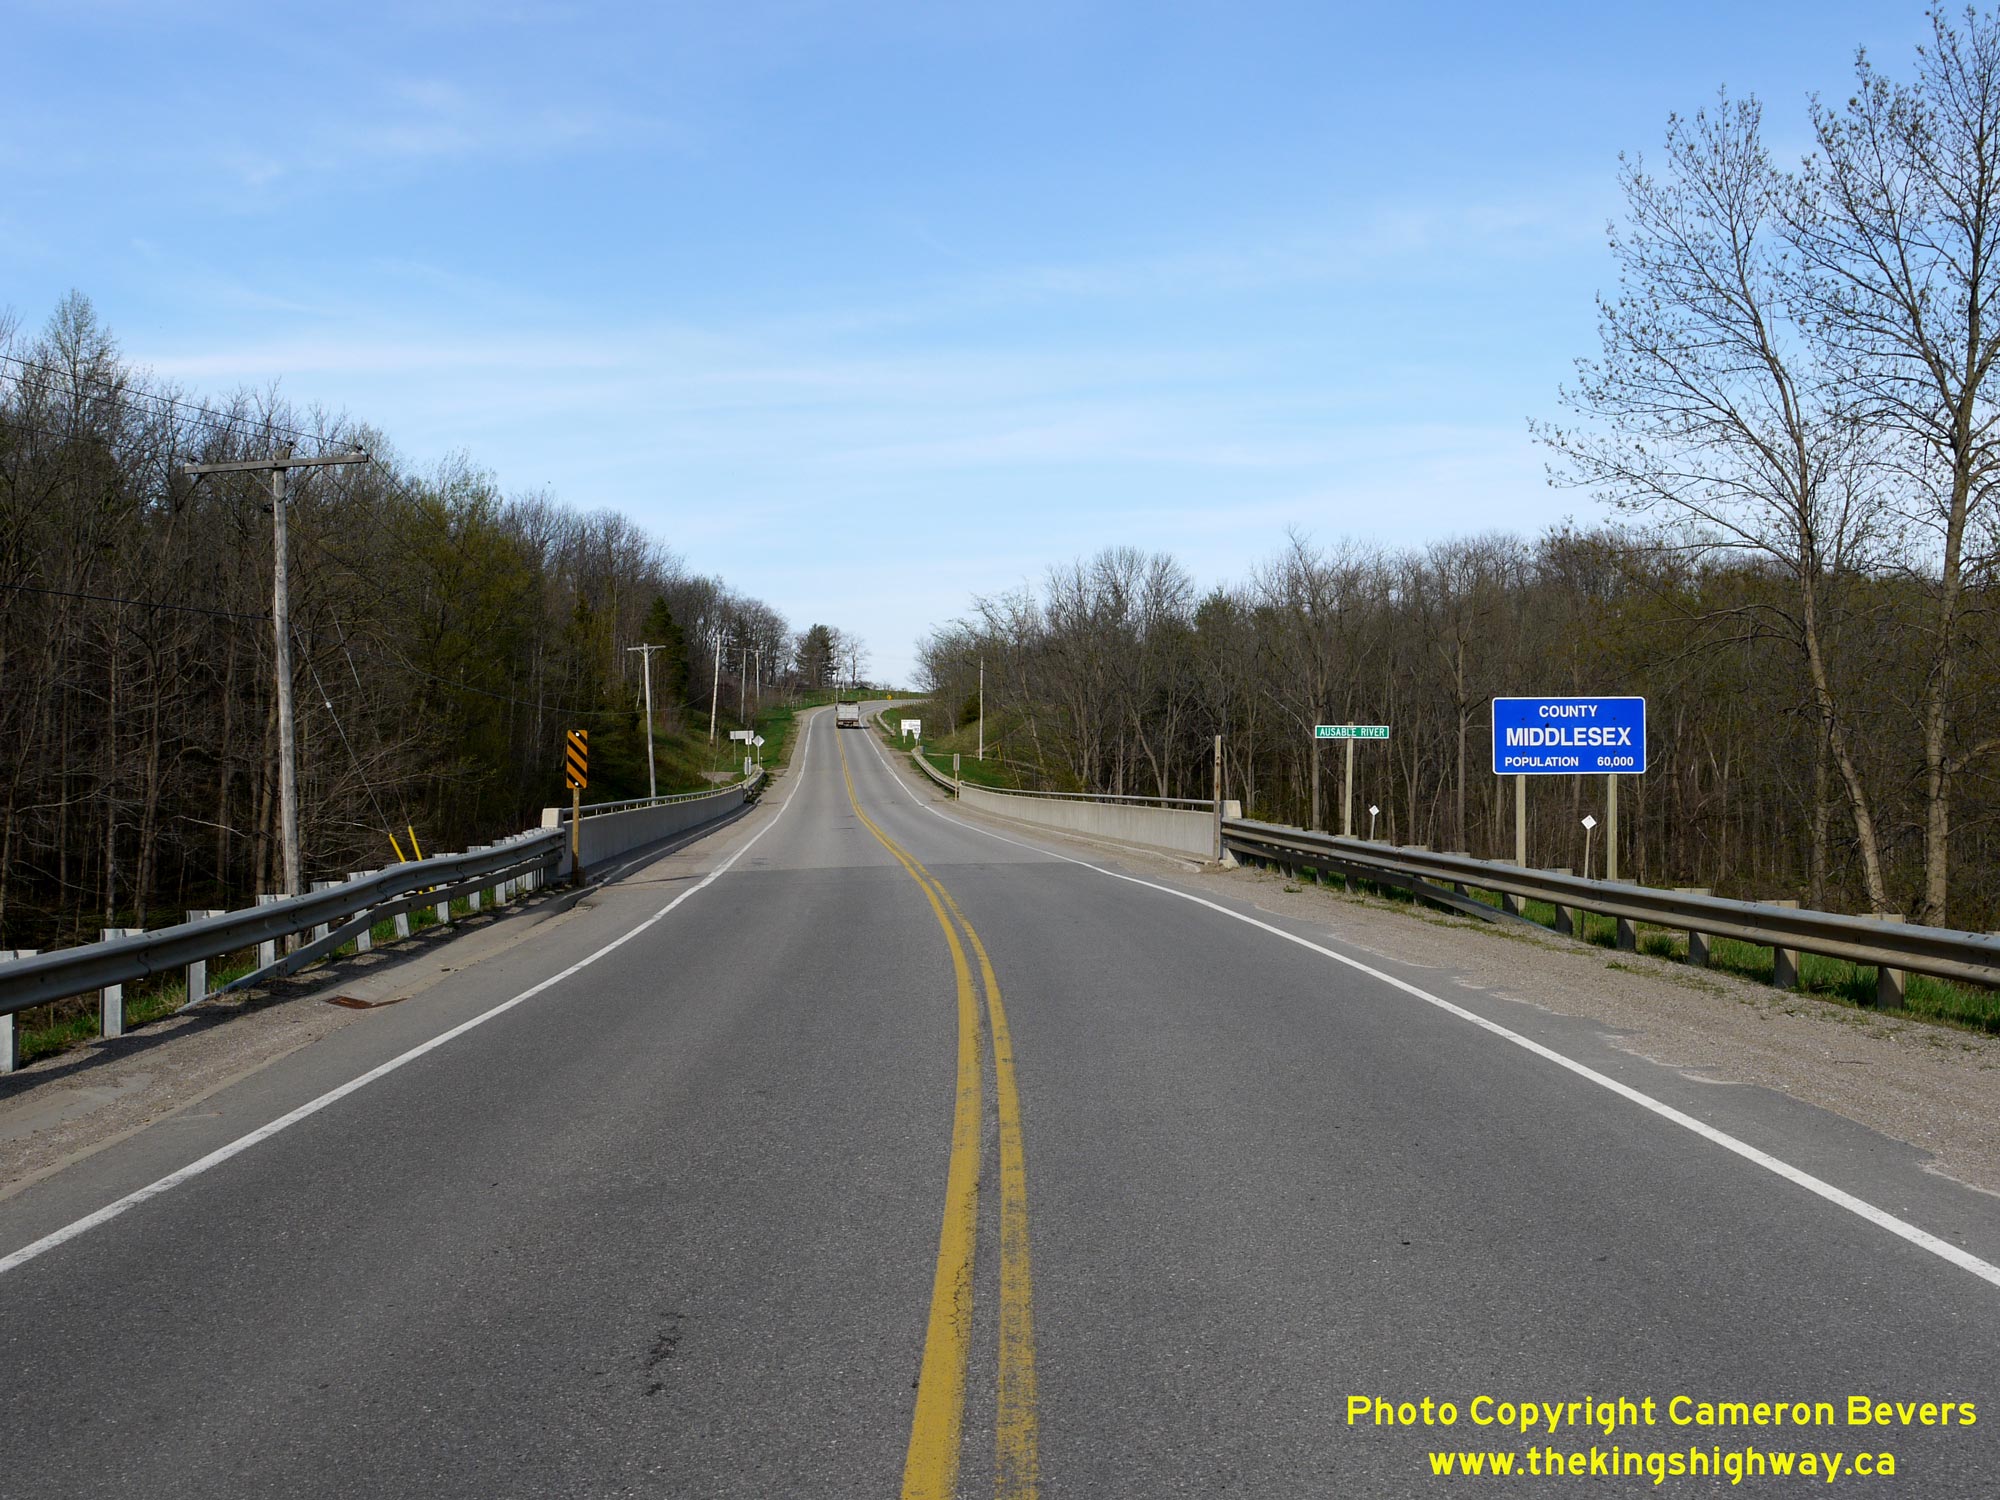
Left - Facing east along Hwy 7 towards Parkhill at the Ausable River Bridge (Site #14-34), located southeast of Thedford. This bridge also marks the boundary
line between Lambton and Middlesex Counties. Up until the late 1990s, Hwy 7 was carried over the Ausable River via a large steel through truss structure. See an
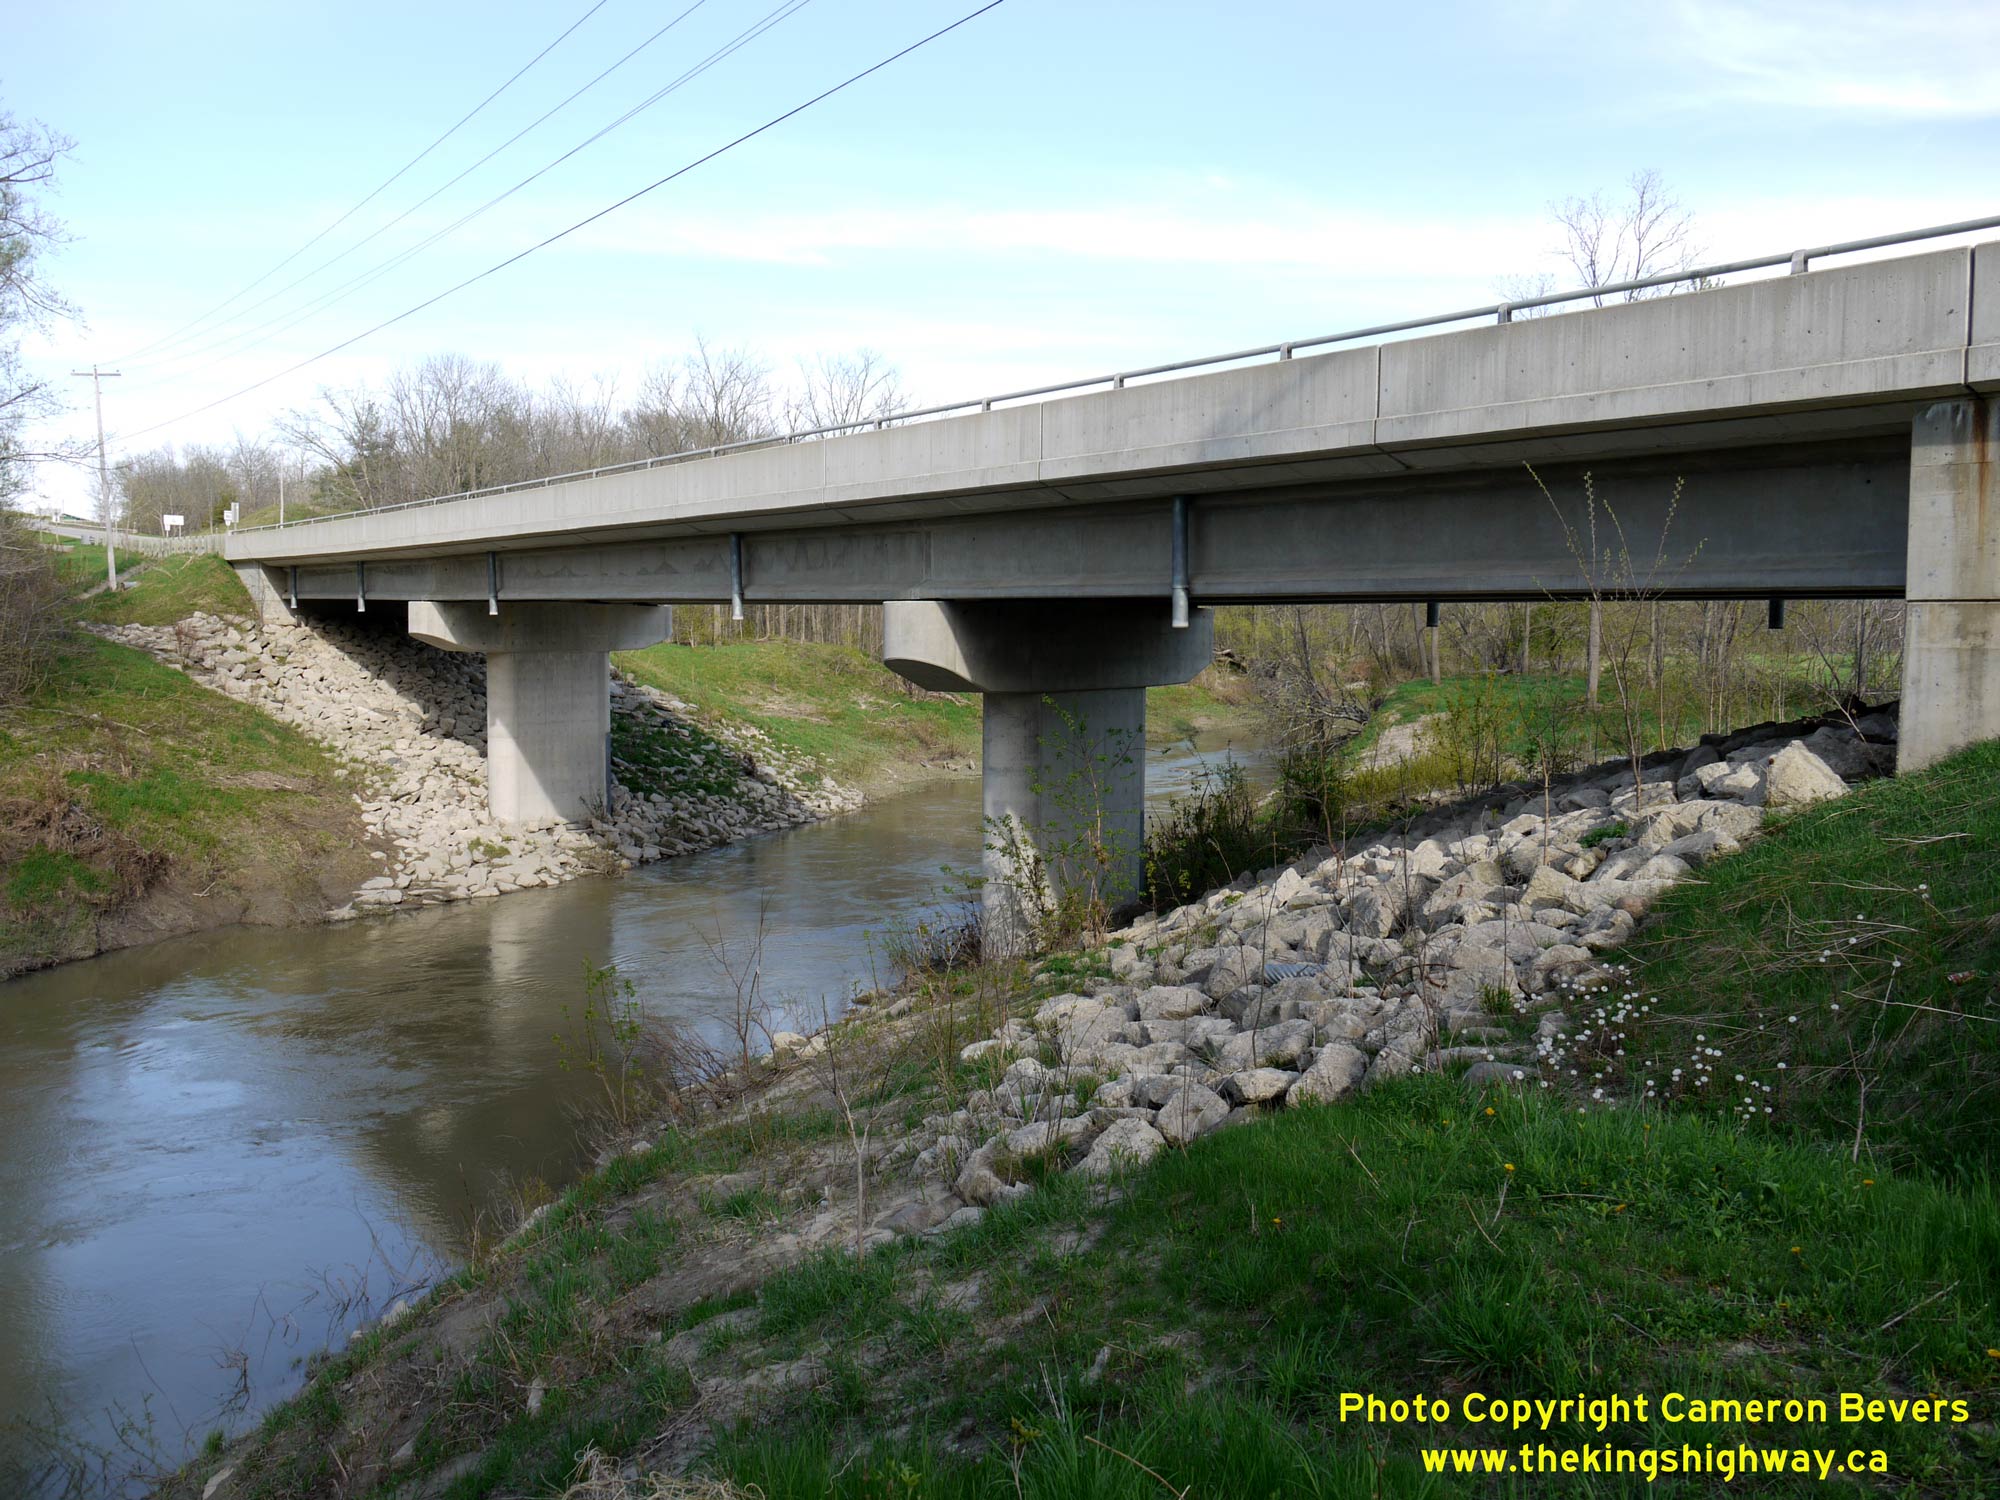
Enlarged Photo Here. (Photograph taken on May 4, 2009 - © Cameron Bevers) Right - Northern side of the Ausable River Bridge on Hwy 7 between Thedford and Parkhill. This three-span concrete girder structure was completed in 1999 by the Counties of Lambton and Middlesex. The new structure replaced a steel through truss bridge which was built at this location in 1924 by the Department of Public Highways of Ontario (DPHO). The previous bridge had a main steel through truss span length of 175 feet and a vertical clearance limit of 15 feet (4.57 m). While the bridge carried two traffic lanes, it had a fairly narrow roadway width of 23 feet (7 metres) between the curbs and did not have any sidewalks. See an Enlarged Photo Here. (Photograph taken on May 4, 2009 - © Cameron Bevers) 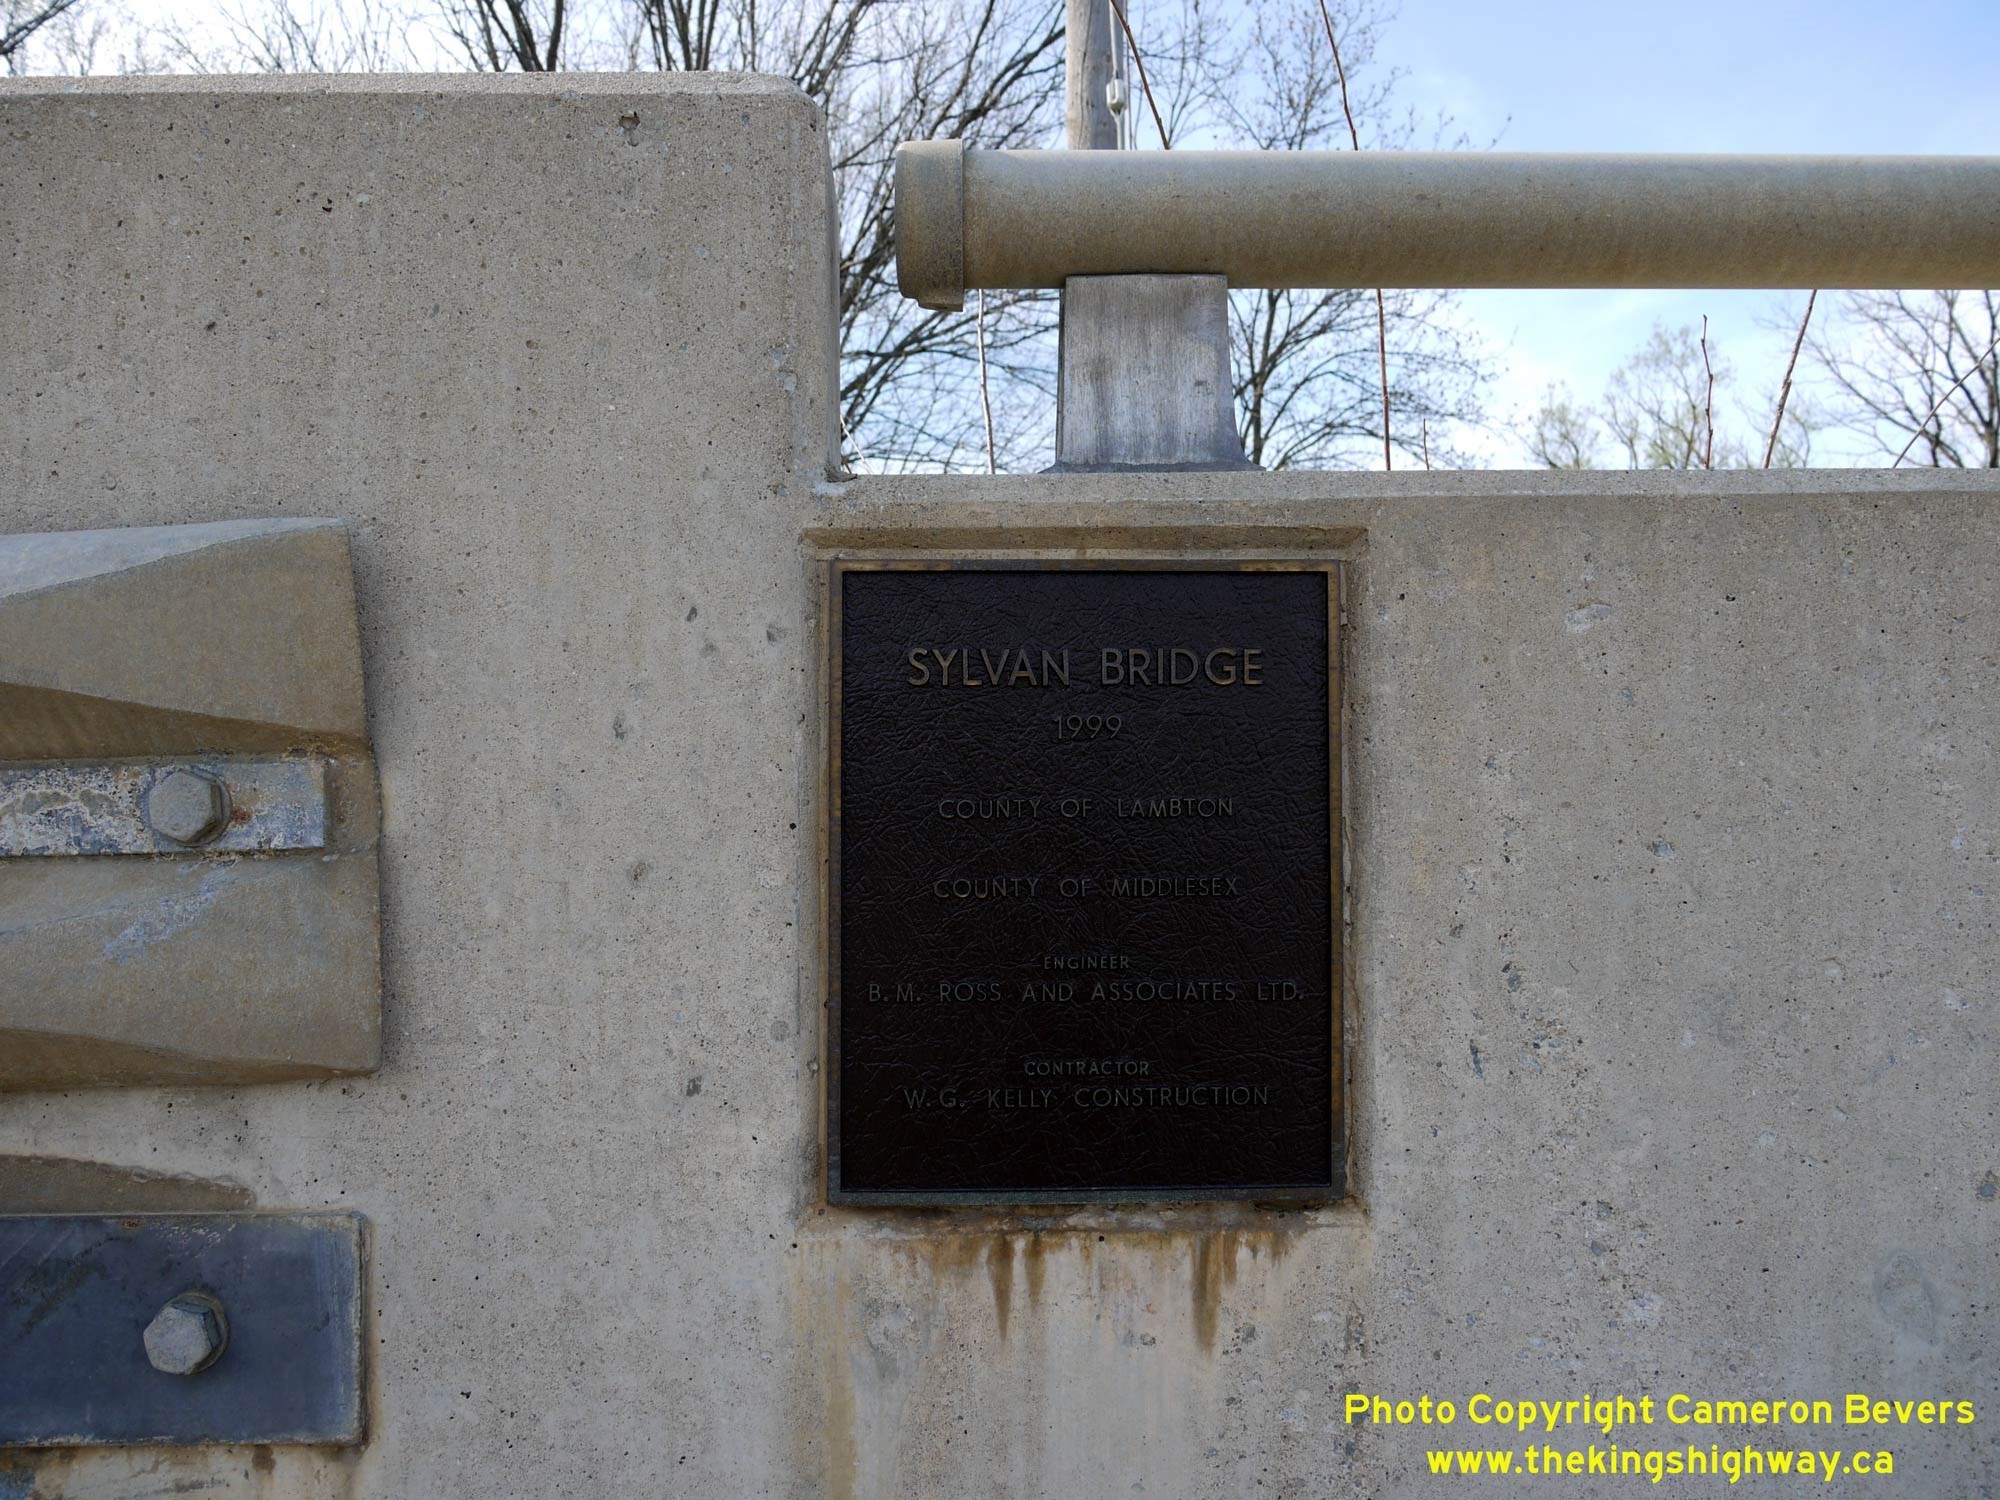
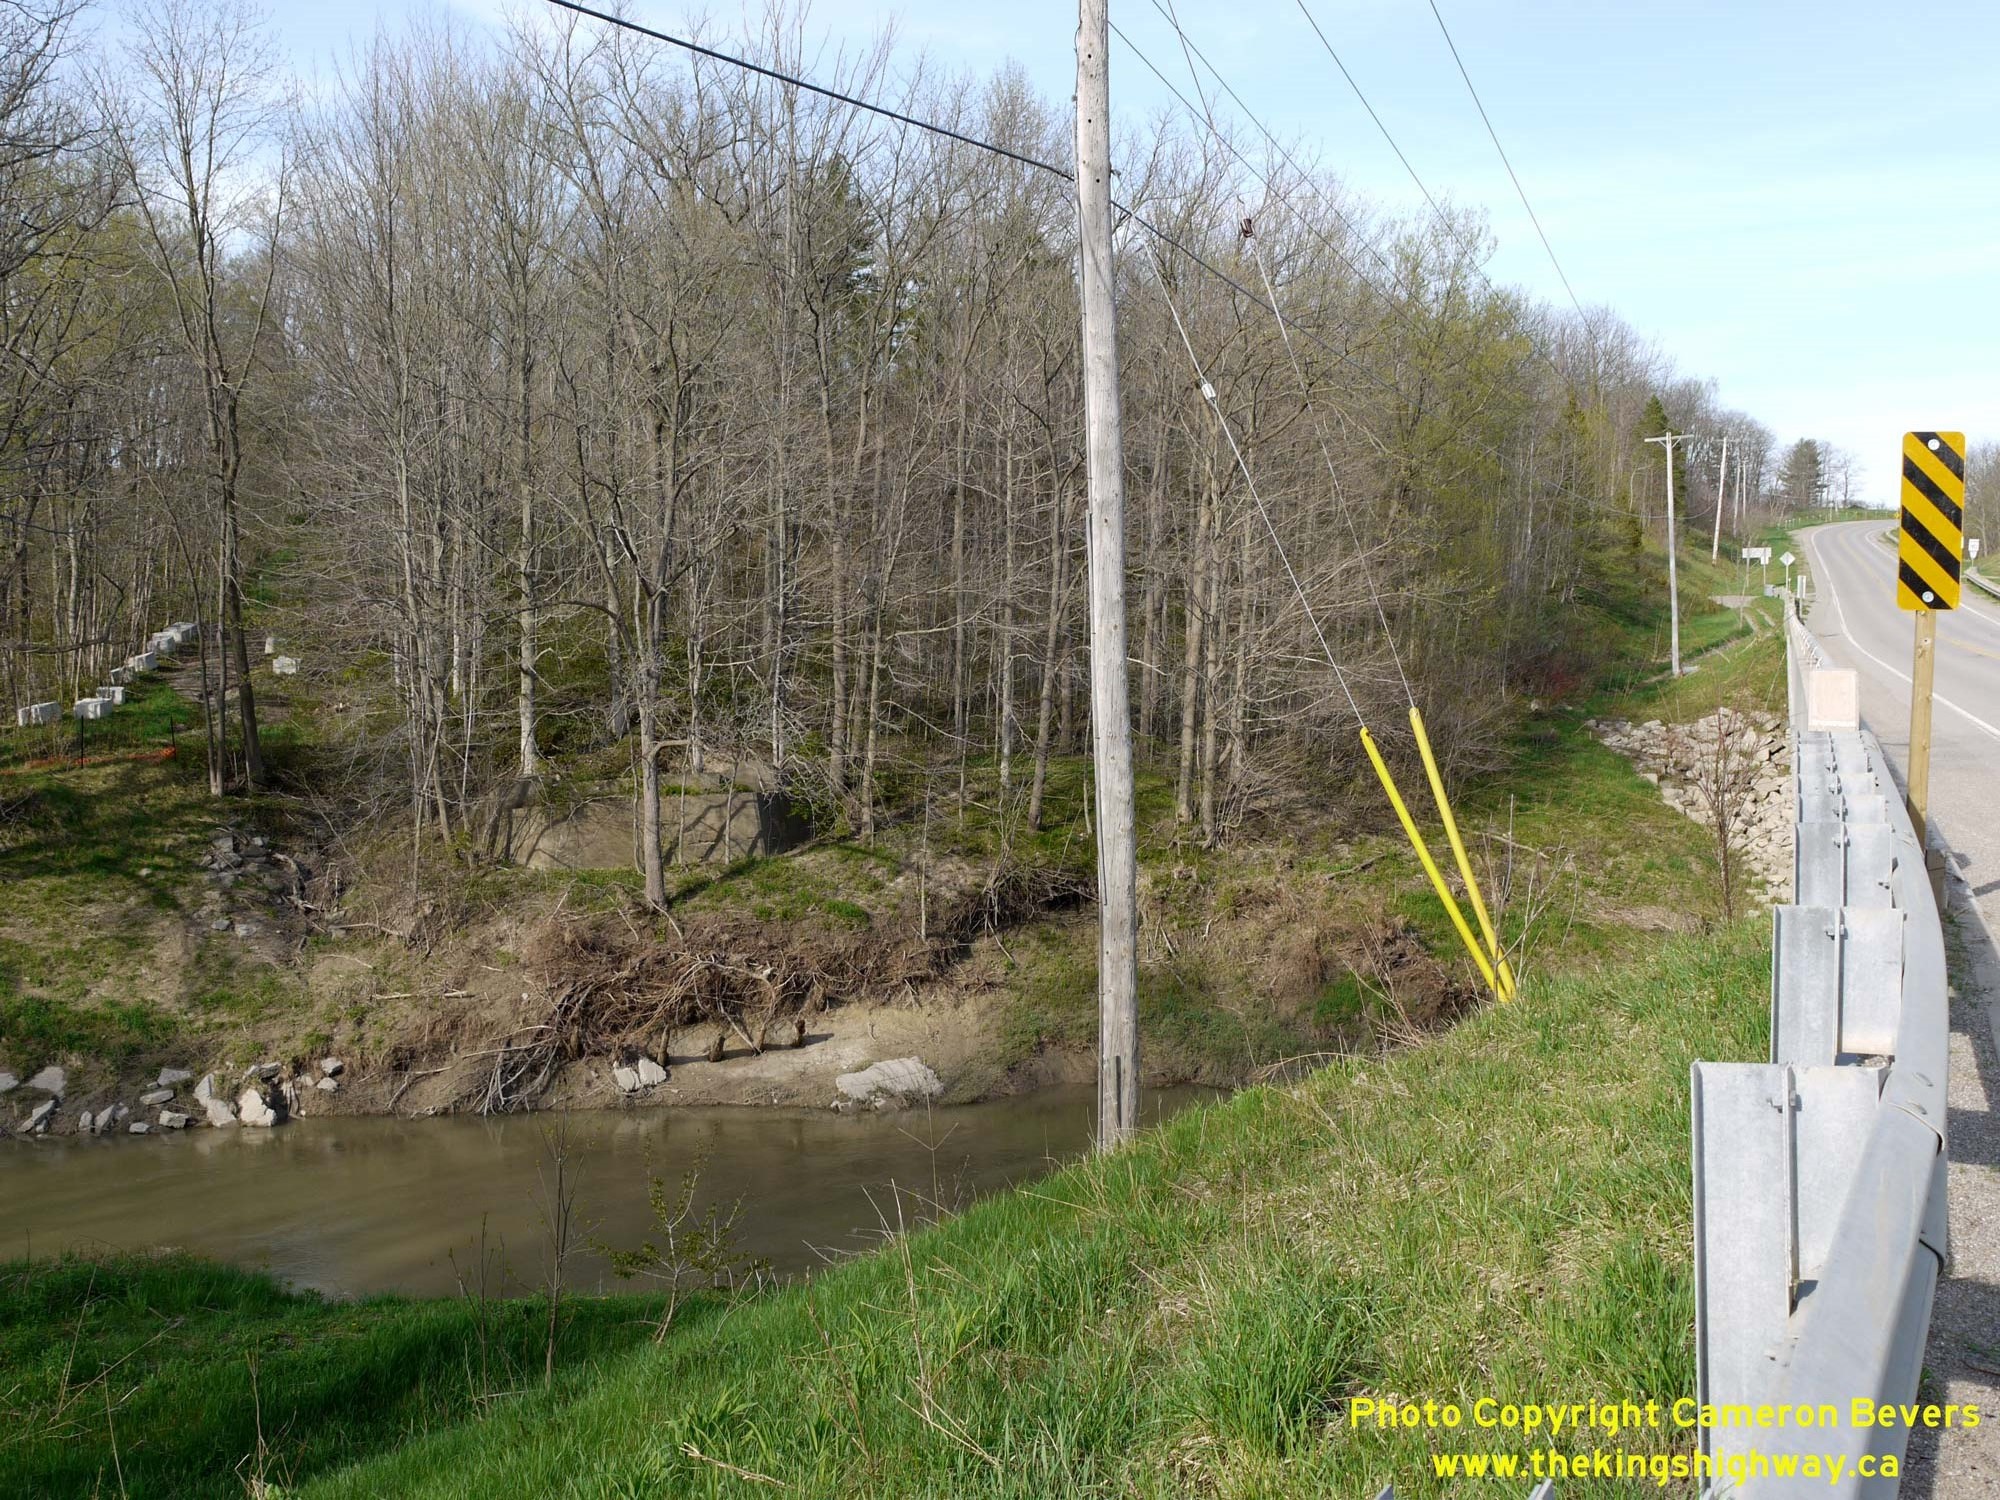
Left - Plaque commemorating the completion of the Ausable River Bridge on Hwy 7 in 1999. This bridge is also known as the Sylvan Bridge. See an
Enlarged Photo Here. (Photograph taken on May 4, 2009 - © Cameron Bevers) Right - An old bridge abutment can be found hidden in the trees just to the north of the Sylvan Bridge. This abutment likely dates from the early 20th Century. This abutment supported a previous bridge at the Ausable River prior to the construction of the new steel through truss bridge by the DPHO during the 1920s. The grade approaching the pre-1924 bridge over the Ausable River was quite severe and was problematic for early vehicles using Hwy 7 to climb. When the new steel truss structure was built in 1924, the highway was realigned through an earth cut on the eastern approach which reduced the highway's approach grade. A series of concrete blocks line the original pre-1924 alignment of Hwy 7 up the hill through the woods. The old route of Hwy 7 was closed and taken out of service once the new bridge was completed. See an Enlarged Photo Here. (Photograph taken on May 4, 2009 - © Cameron Bevers) 
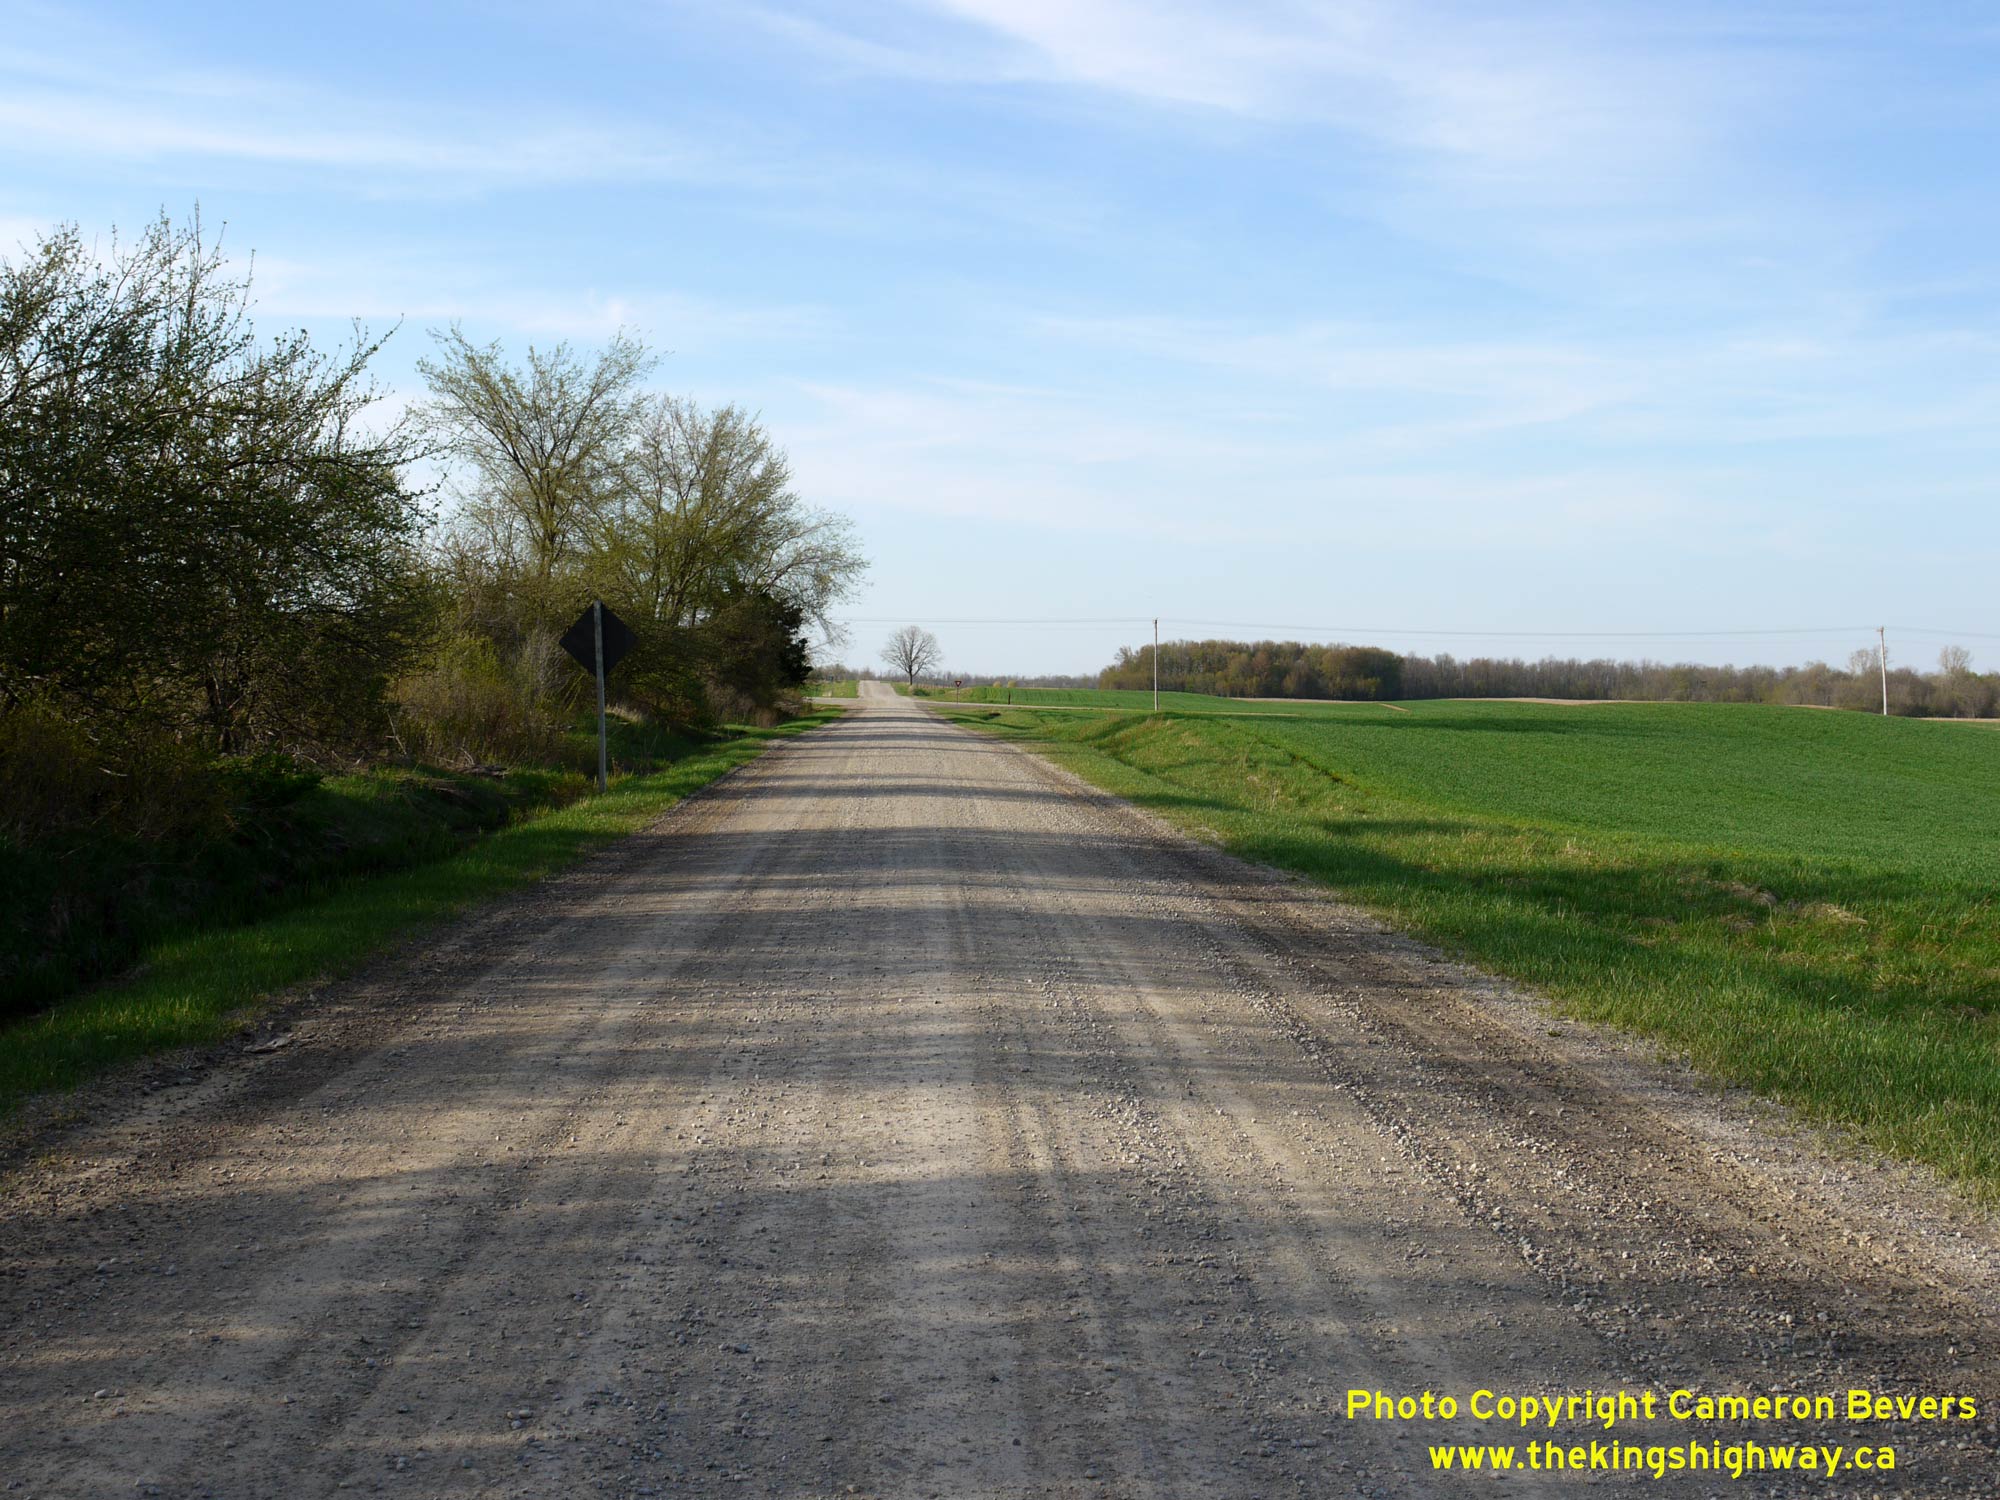
Left - Long-forgotten curved diversion on a former alignment of Hwy 7 (New Ontario Road) west of Ailsa Craig. This tight curve was bypassed by an improved
highway alignment with a larger radius curve during a highway improvement project carried out in 1937. (Photograph taken on May 4, 2003 - © Cameron Bevers) Right - Former alignment of Hwy 7 (Charlton Road) west of Ailsa Craig. This section of Hwy 7 was bypassed in 1937 by one of two improved highway curves built in the area. Previously, Hwy 7 proceeded up to the corners in the background and turned right on its route easterly towards Ailsa Craig and Elginfield. Jurisdiction over this bypassed section of Hwy 7 reverted back to the municipality in August 1939. See an Enlarged Photo Here. (Photograph taken on May 4, 2009 - © Cameron Bevers) 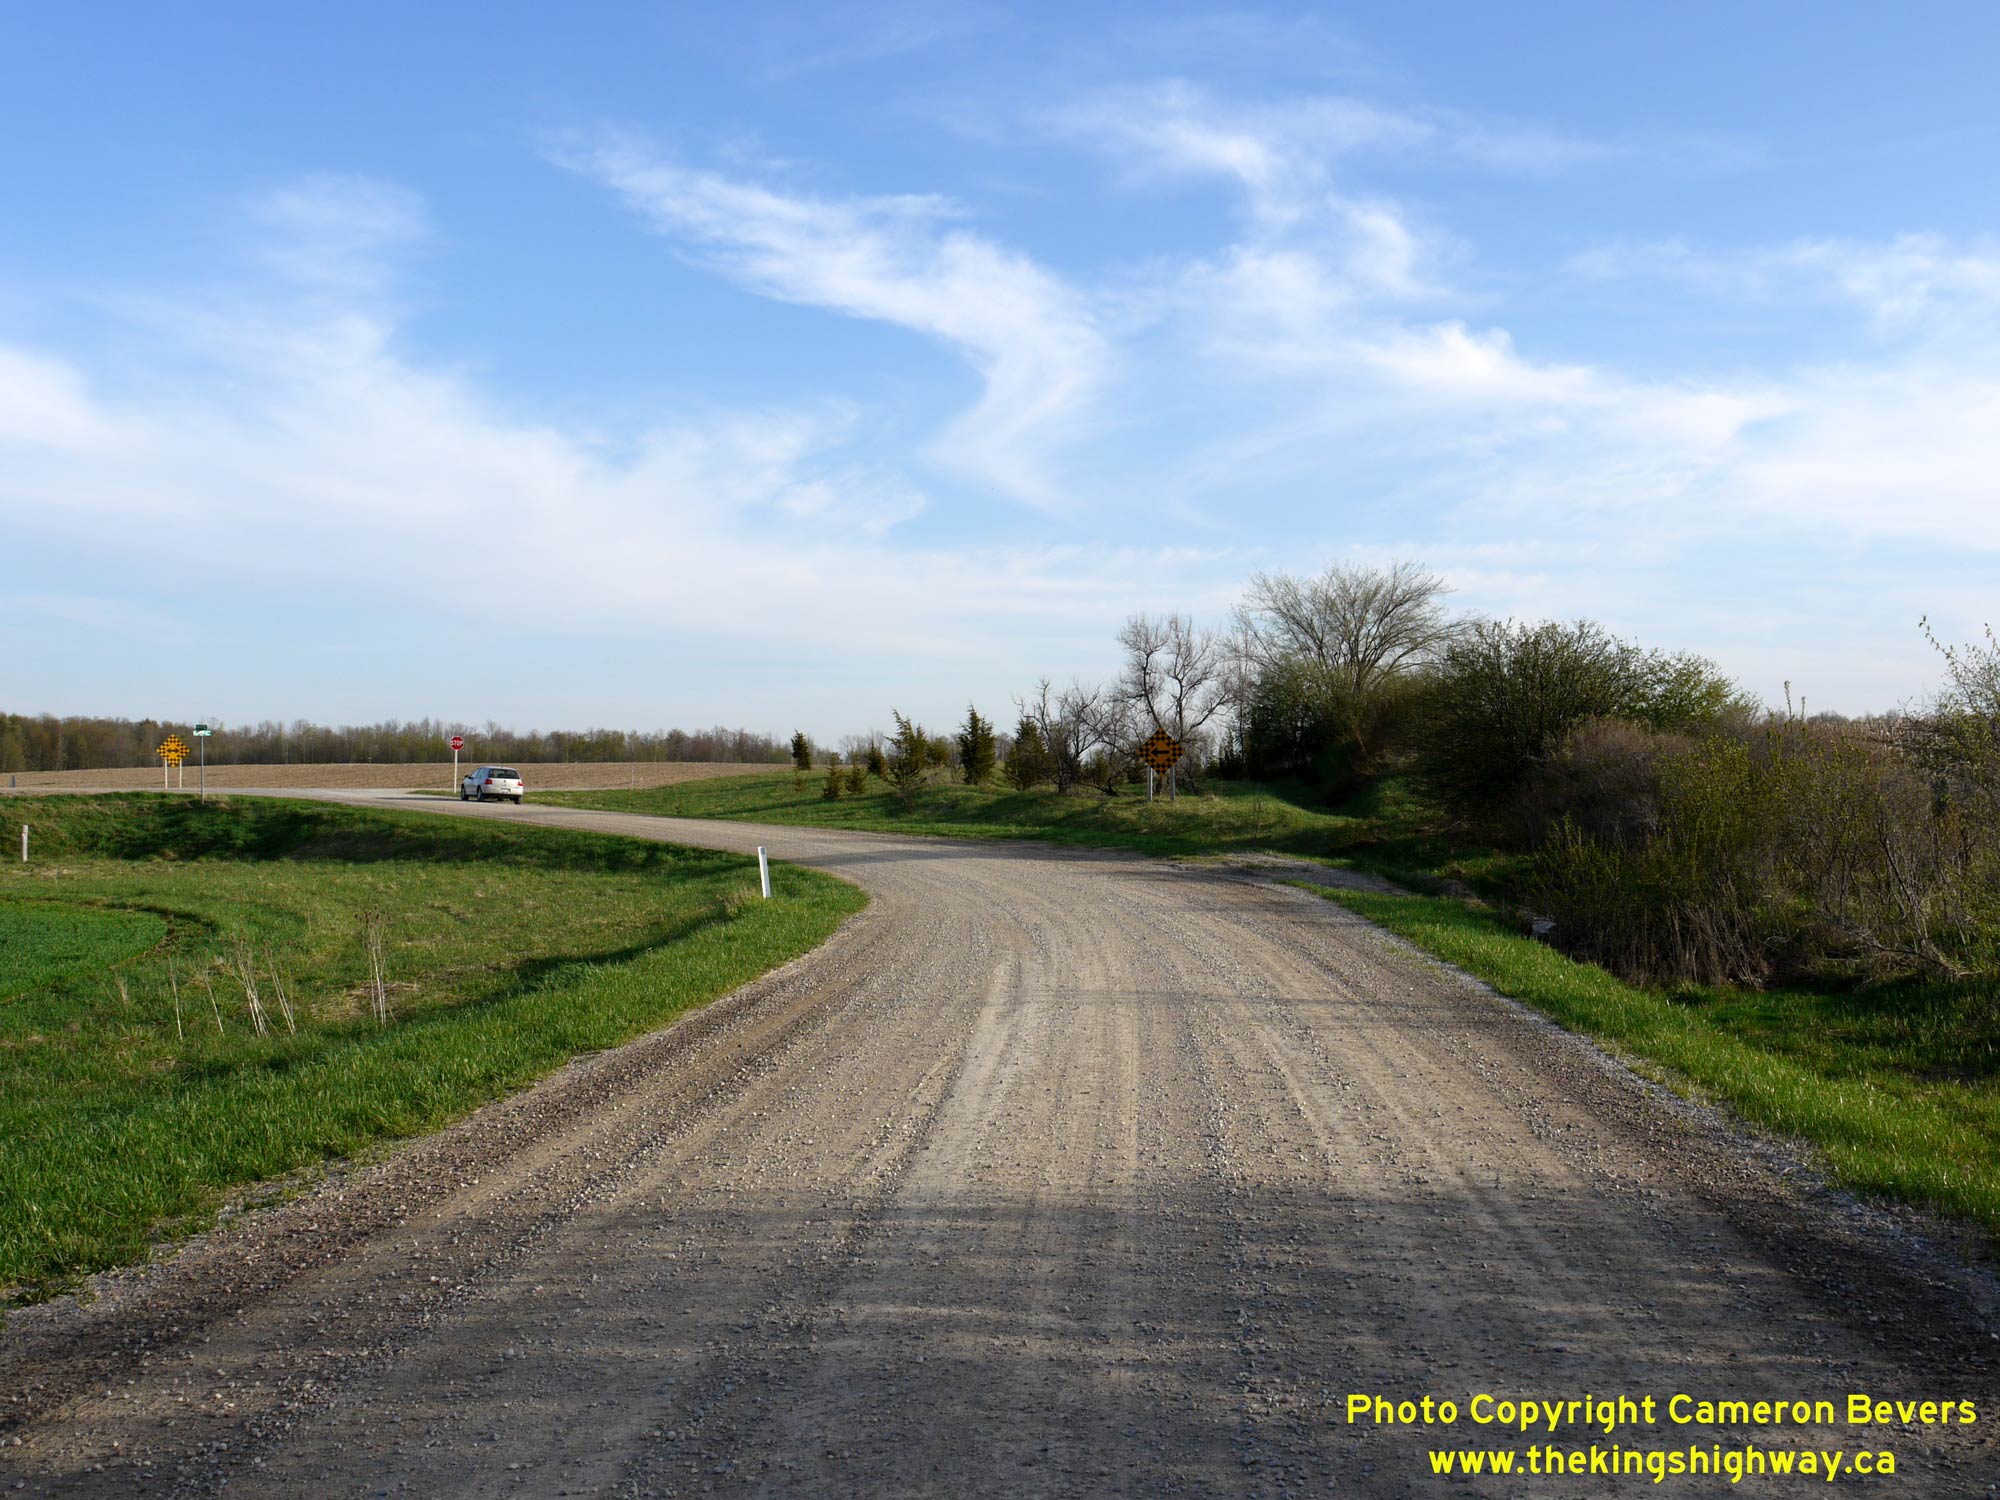
Left - Old Hwy 7 (Charlton Road) approaching the relocated Hwy 7 west of Ailsa Craig. Before the new curved diversion at left was built in the 1930s, Hwy 7
continued straight ahead as it proceeded west towards Parkhill and Sarnia. See an
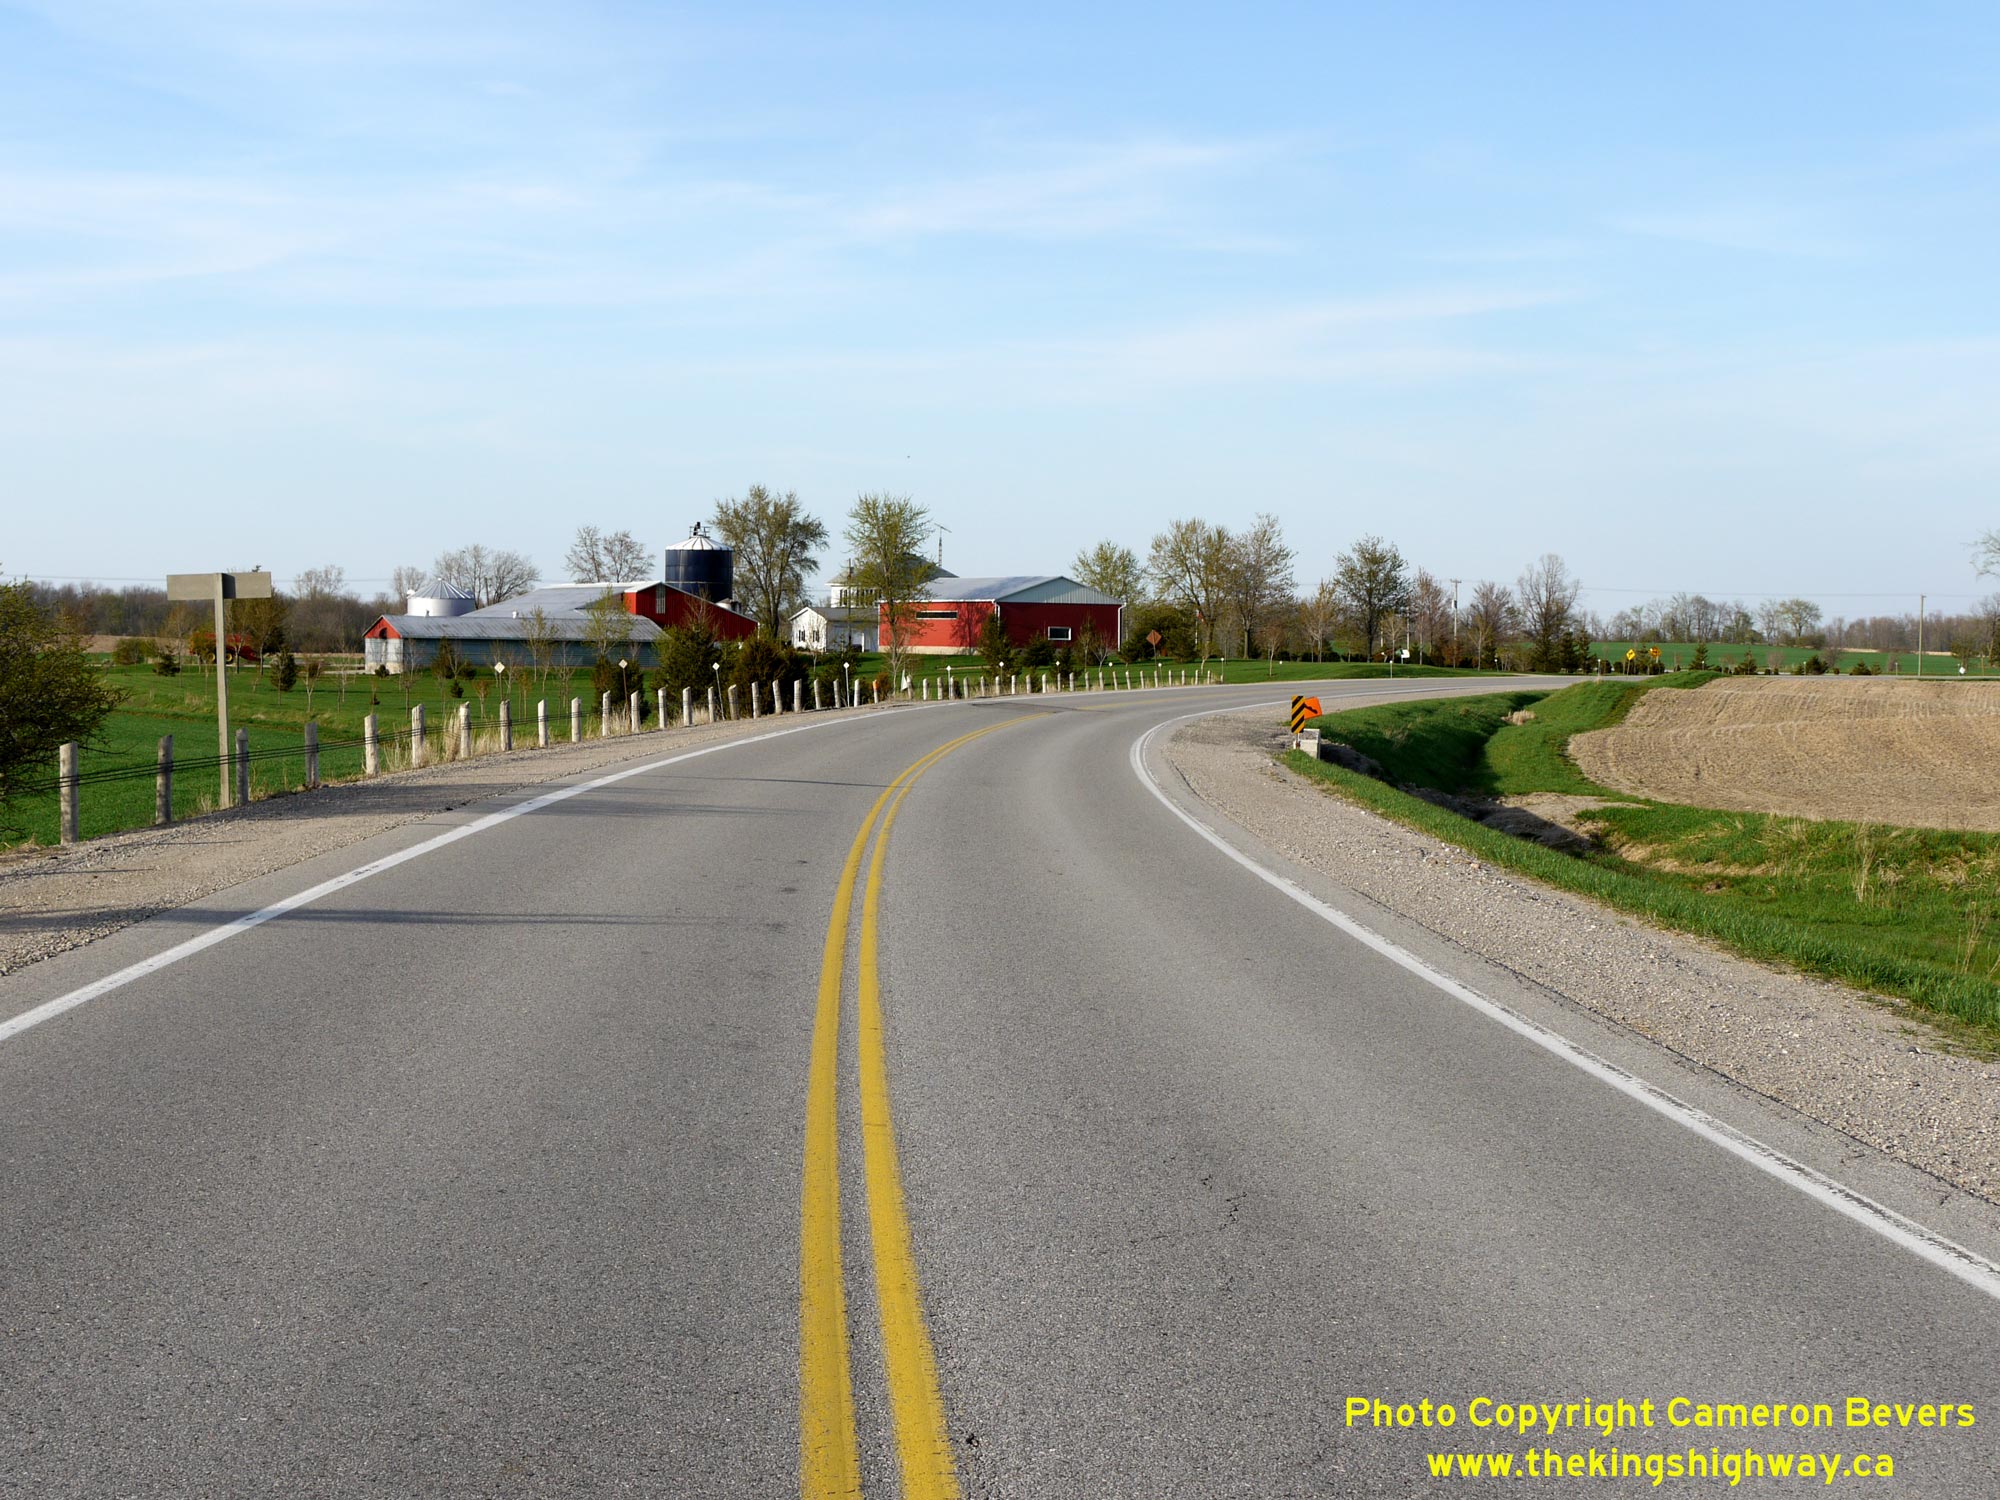
Enlarged Photo Here. (Photograph taken on May 4, 2009 - © Cameron Bevers) Right - View of Hwy 7 about 6 km west of Ailsa Craig, facing east. This curved diversion was constructed in 1937 under Contract #1937-08. It was one of two new highway curves built between Ailsa Craig and Parkhill as part of an effort to reconstruct Hwy 7 to accommodate faster through traffic. As part of this work, a large concrete culvert was constructed across a municipal drain and concrete pavement was laid between Ailsa Craig and Parkhill. Upon completion of this contract in the Summer of 1938, it was possible to travel from Parkhill to London on a paved highway. Paving work along Hwy 7 west of Parkhill was delayed as a result of World War II. This section of Hwy 7 remained gravel-surfaced for a number of years, before paving was completed between Parkhill and Thedford as soon as World War II ended in 1945. See an Enlarged Photo Here. (Photograph taken on May 4, 2009 - © Cameron Bevers) 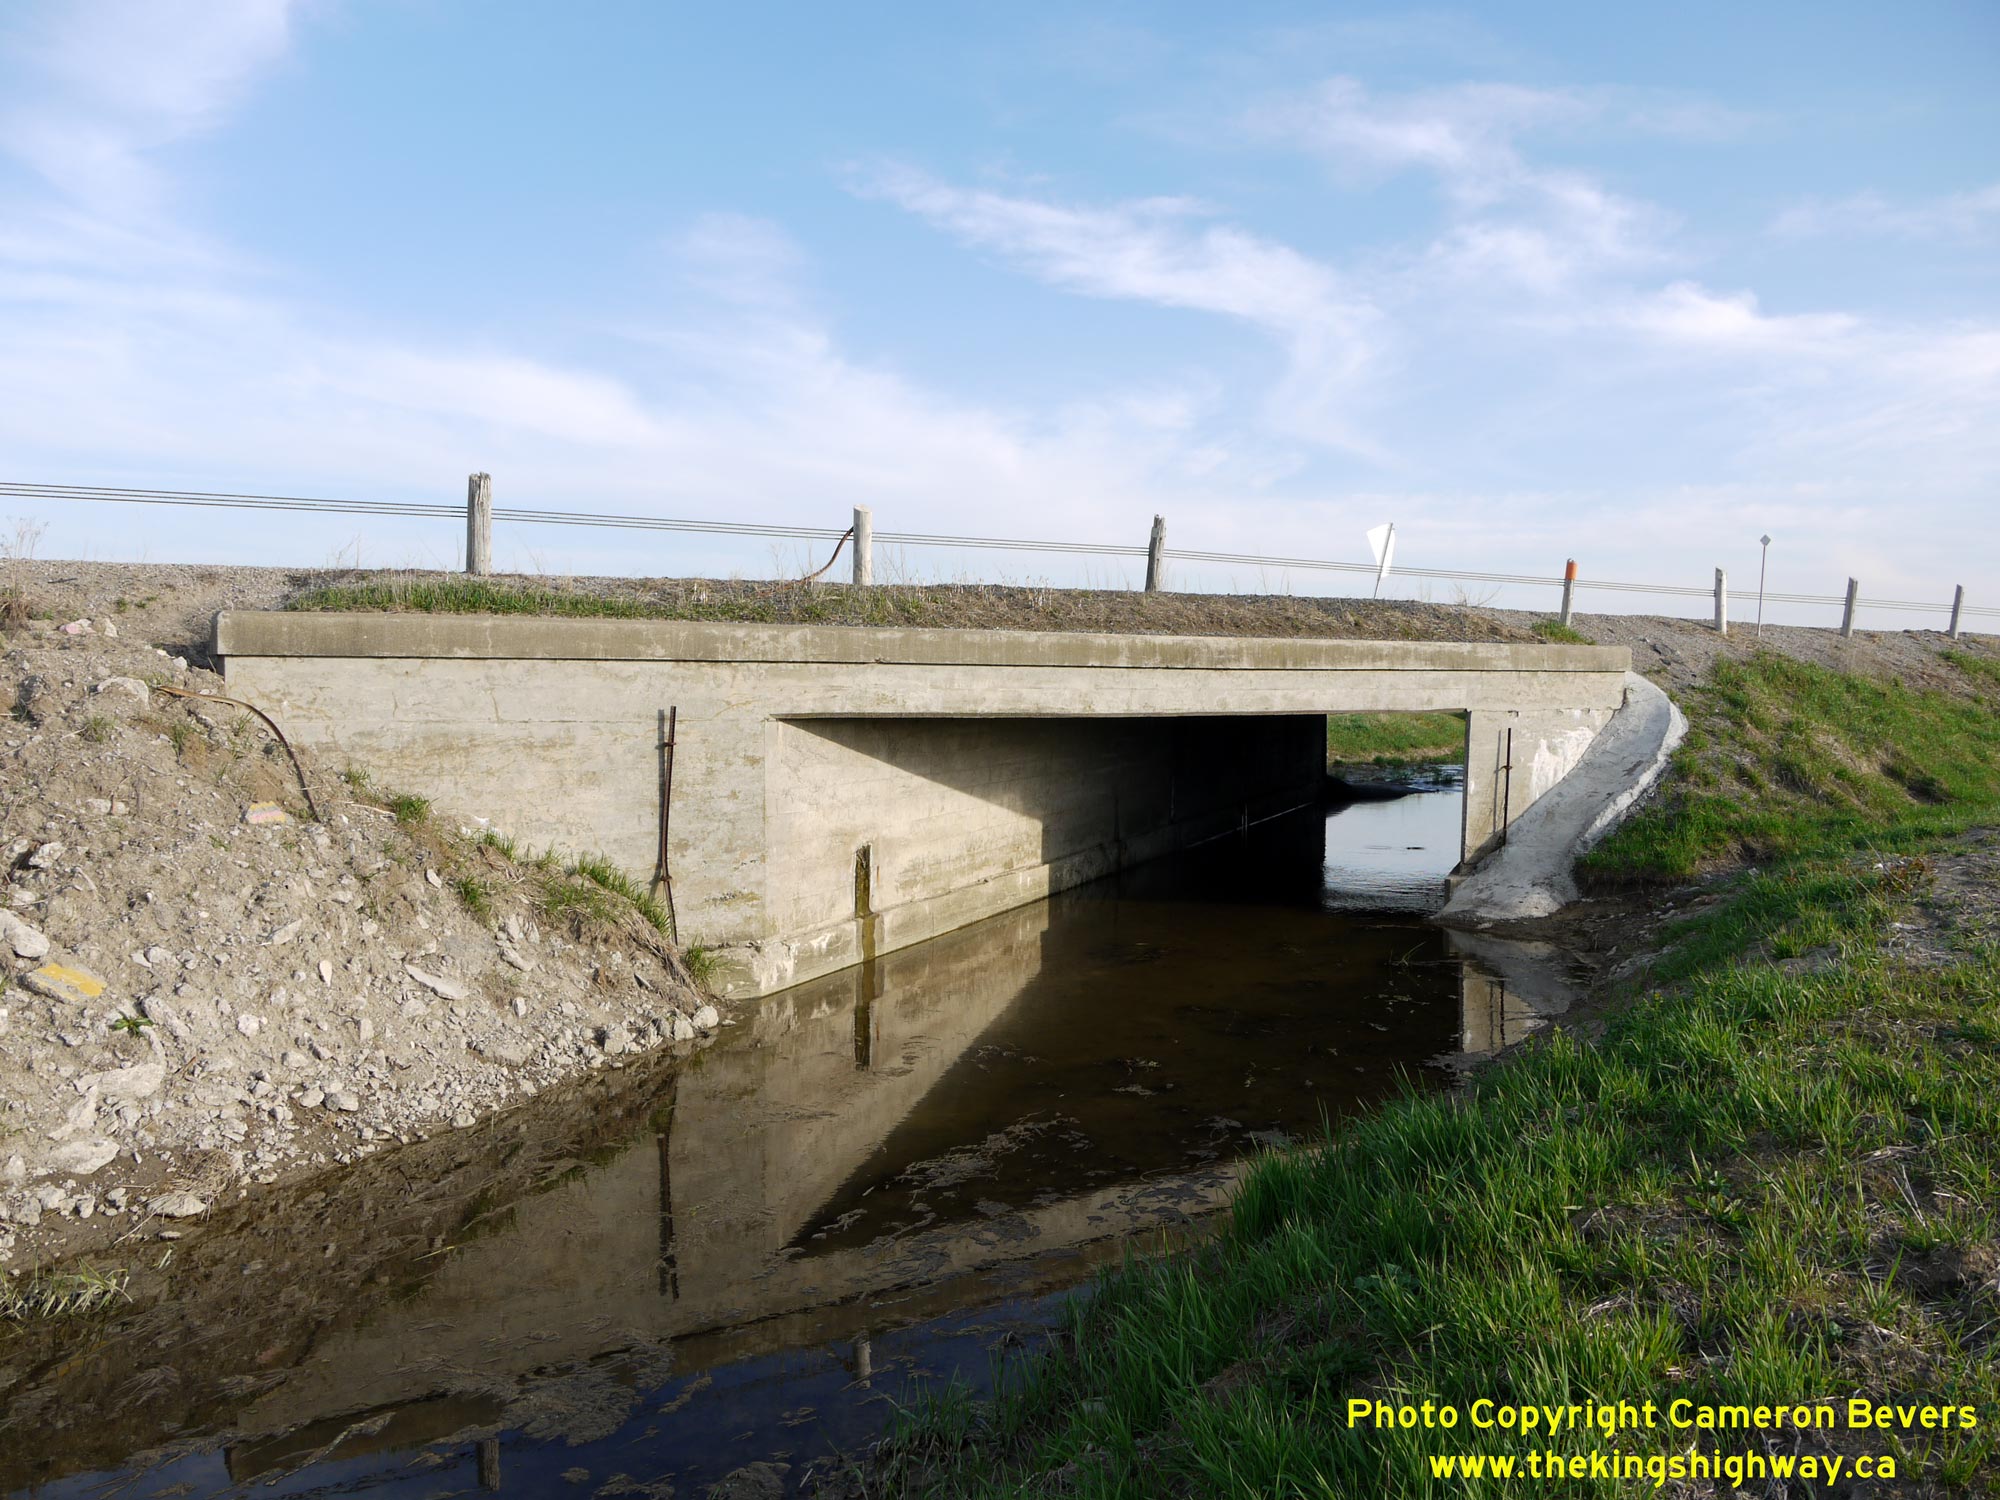
Above - This large concrete culvert from the 1930s spans a municipal drain which crosses Hwy 7 about 6 km west of Ailsa Craig. See an
Enlarged Photo Here. (Photograph taken on May 4, 2009 - © Cameron Bevers)
Continue on to King's Highway 7 Photos: Elginfield to Stratford
|
|---|
Links to Adjacent King's Highway Photograph Pages:
Back to Hwy 7 - Historical Photos (1990-1999)
Hwy 7 Photo Index
On to Hwy 7 - Elginfield to Stratford
Back to King's Highway 6 Photos /
King's Highway 7 History /
On to King's Highway 8 Photos
Ontario Highway History - Main Menu / Back to List of Highways Website contents, photos & text © 2002-2026, Cameron
Bevers (Webmaster) - All Rights Reserved / Contact Me
|
|---|